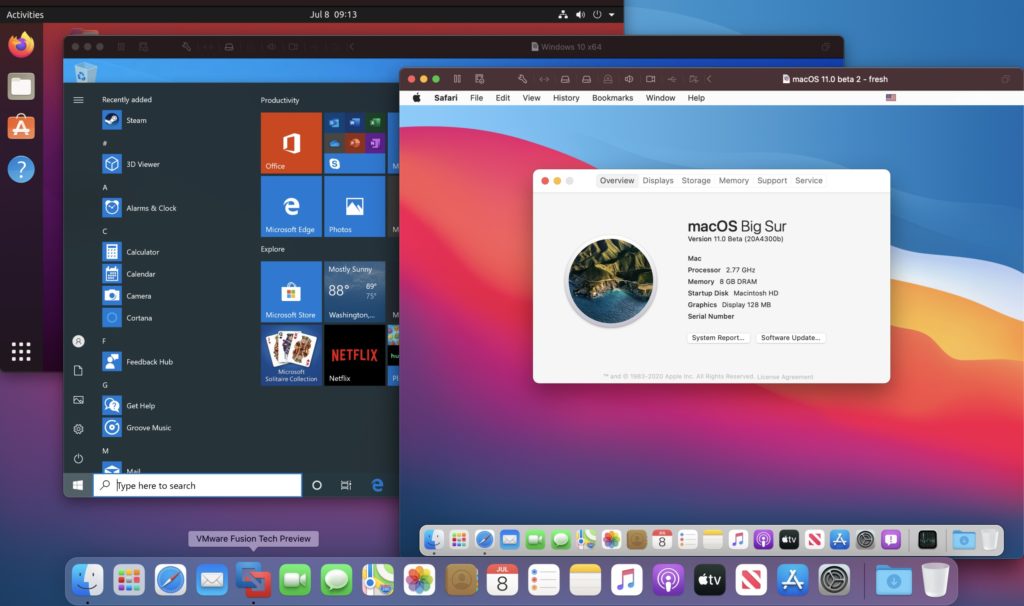
Для чего может понадобиться Windows 10 на Mac? Прежде всего, для программного обеспечения, которого нет на macOS. Конечно, есть и те, кому внешний вид и функционал операционной системы Microsoft просто нравится больше, но таких в рядах пользователей компьютеров Apple все же не так много.
Для установки Windows 10 на Mac используется фирменная платформа под названием Boot Camp. Она дает возможность не только добавить эту операционную систему на свой компьютер, но и просто переключаться между ней и macOS. Сегодня мы установим детище Microsoft на macOS 11 Big Sur и разберем нюансы.
Обратите внимание: пока сложно сказать, как использовать Boot Camp на новых Mac под управлением чипсета M1. В его основе лежит ARM, которая не совместима с базовыми версиями Windows 10. Более того, софта под специальную систему Microsoft на базе этой архитектуры пока почти нет.
В тему:
- 5 нововведений macOS Big Sur, ради которых стоит обновиться
- Подготовьтесь к переходу на macOS 11 Big Sur. Вот что нужно сделать
- Как правильно установить macOS Big Sur, чтобы ничего не сломалось
- 20 важных фишек и советов по новой операционке macOS 11 Big Su
Что нужно для установки Windows 10 на macOS 11 Big Sur

1. Поддерживаемый Mac. Если не учитывать версию macOS, подойдет любая из этих моделей:
- 2012 год и новее: MacBook Air, MacBook Pro, Mac mini, iMac;
- 2013 год и новее: Mac Pro;
- 2015 год и новее: MacBook;
- 2017 год и новее: iMac Pro.
Если Windows 10 хочется использовать вместе с macOS 11 Big Sur, нужны такие компьютеры Apple:
- 2013 год и новее: MacBook Air, MacBook Pro, Mac Pro;
- 2014 год и новее: Mac mini, iMac;
- 2015 год и новее: MacBook;
- 2017 год и новее: iMac Pro.

2. Флешка на 16 ГБ или больше. Она понадобится в процессе установки на всех Mac, кроме этих:
- 2013 год и новее: Mac Pro;
- 2015 год и новее: MacBook, MacBook Pro, iMac;
- 2017 год и новее: MacBook Air, iMac Pro.

3. Последнее обновление macOS. Специалисты Apple настаивают на том, что перед использованием «Ассистента Boot Camp» нужно провести апдейт операционной системы. Это важно с точки зрения закрытия пробелов в ее безопасности — они выпускаются даже для достаточно устаревших Mac.
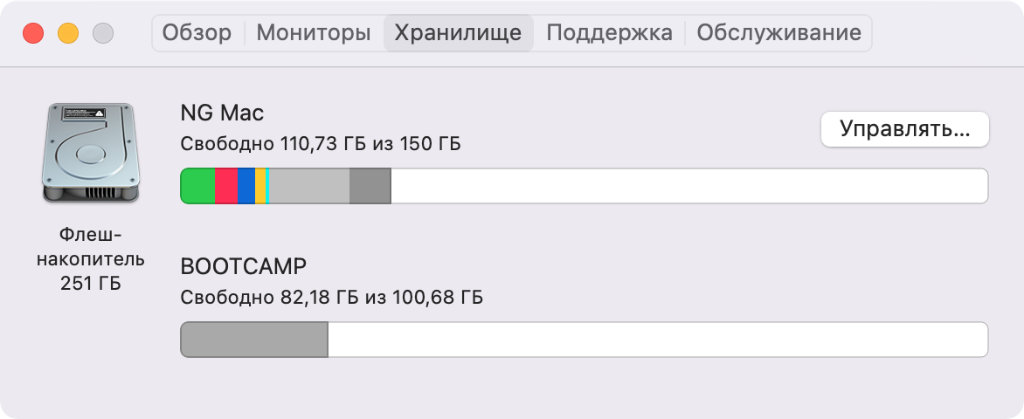
4. Не меньше 64 ГБ свободного места. Лучше использовать 128 ГБ и больше: в этом случае Windows получит необходимое пространство, которое необходимо для автоматических обновлений операционной системы. Если у Mac 128 ГБ ОЗУ или больше, на загрузочном диске должно быть не меньше места.
В Apple вообще настаивают, что Boot Camp — это возможность преимущественно для Mac с накопителем 256 ГБ и больше. Только в данном случае у вас будет возможность использовать не меньше 128 ГБ памяти для нормальной работы операционной системы Windows. Поддерживаю это утверждение.
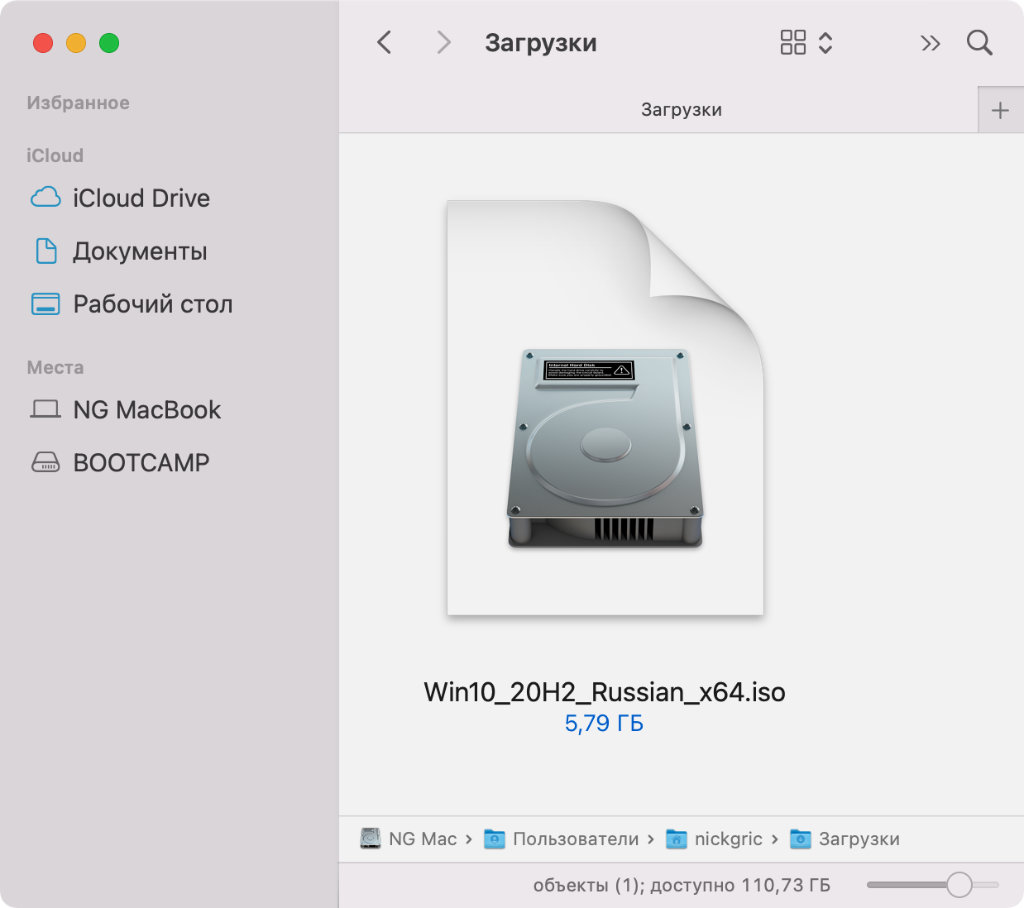
5. Дистрибутив Windows в формате ISO. Важно использовать именно полный образ, а не обновление операционной системы. Подойдет вариант 64-разрядной Windows 10 Home или Windows 10 Pro. Про ключ подумайте сами, а необходимый файл получится бесплатно загрузить на официальном сайте Microsoft.
Как установить Windows 10 на Mac на macOS 11 Big Sur
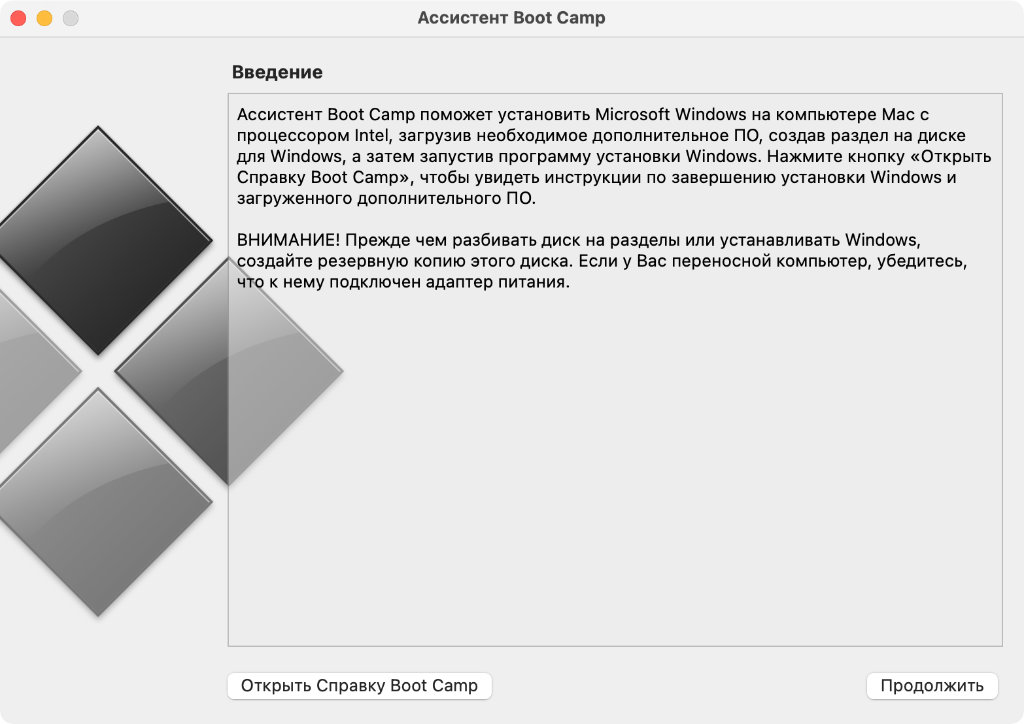
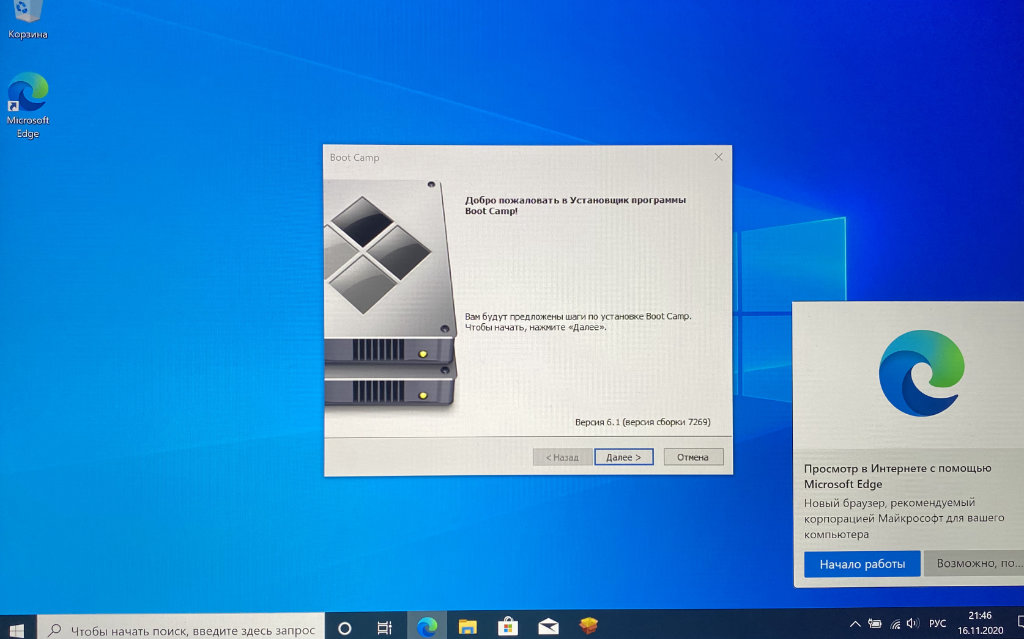
Шаг 1. Откройте приложение «Ассистент Boot Camp».
Шаг 2. Ознакомьтесь с приветственной информацией и нажмите на кнопку «Продолжить».
Если вы используете MacBook любой модели, нужно подключить его к питанию с помощью кабеля.
Если вы используете Mac с чипом T2, «Ассистент Boot Camp» также посоветует определиться с утилитой безопасной загрузки: после установки Windows 10 ее параметры изменить не выйдет. Про этой есть статья на официальном сайте Apple.
Шаг 3. Выберите образ диска (он определится автоматически, если вы недавно его загрузили) и определите пространство, которое будет использоваться для Windows 10.
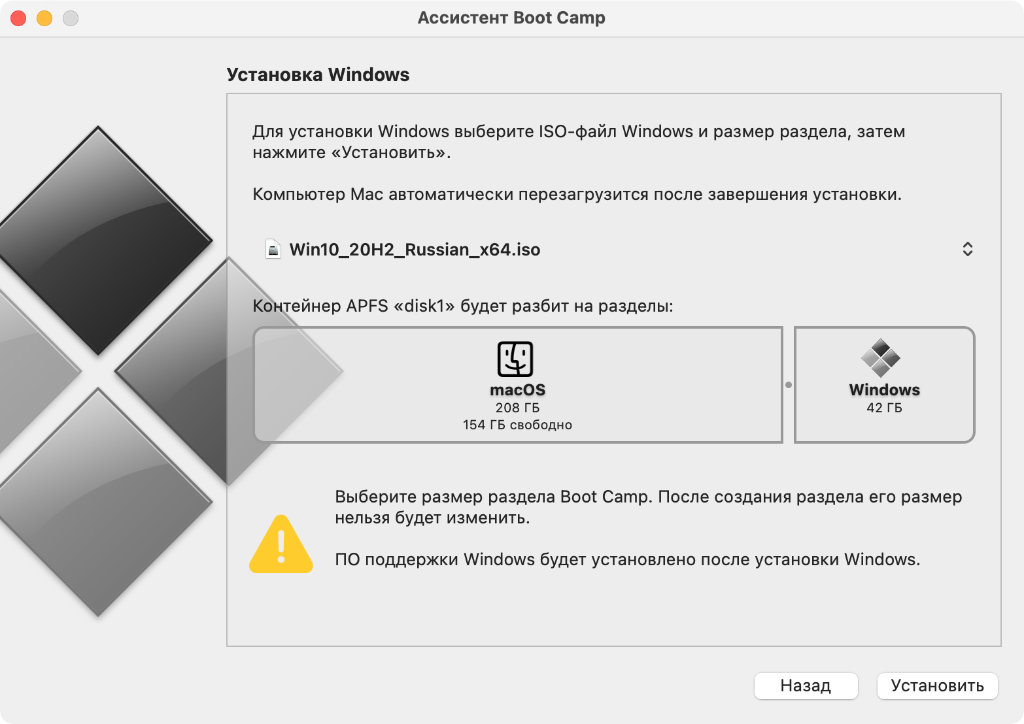
В стандарте «Ассистент Boot Camp» предлагает 42 ГБ, и этого слишком мало для корректной работы системы. Как я уже писал выше, минимальный объем находится на уровне 64 ГБ. Тем не менее, в этом случае могут возникнуть проблемы с автоматическим обновлением: оптимально — 128 ГБ и выше.
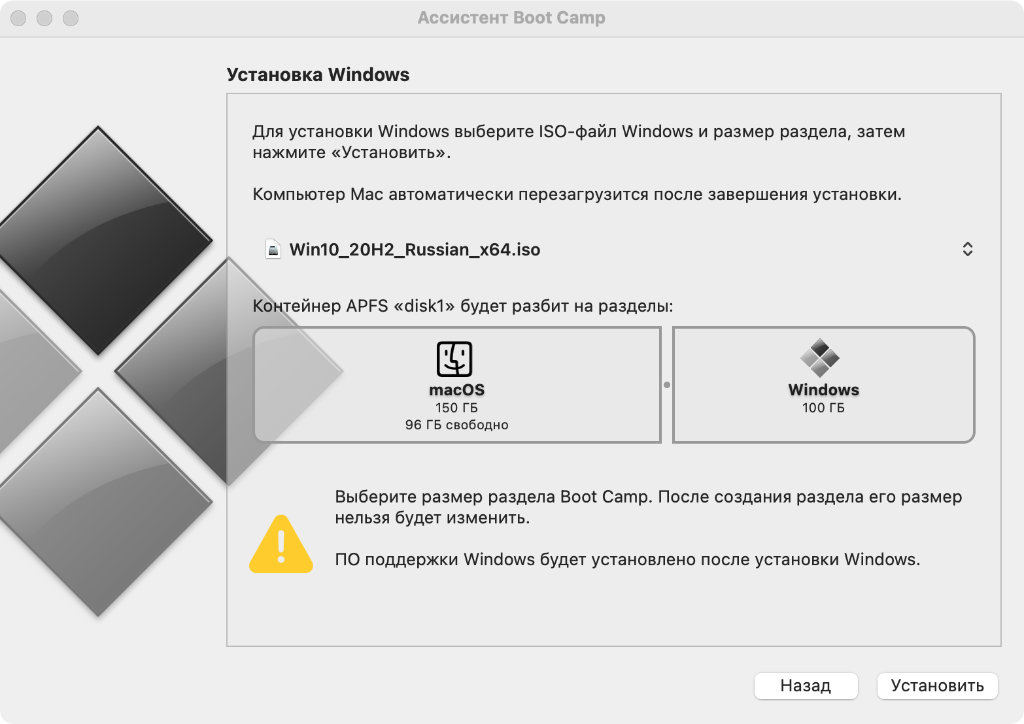
Лично я для Windows 10 обычно использую ровно 100 ГБ. Проблем с обновлениями пока не было.
Изменить объем накопителя после окончания установки уже не получится. Придется удалять Windows 10 со своего Mac и устанавливать заново. Поэтому десять раз подумайте, сколько именно пространства понадобится вам для использования системы, а только потом начинайте инсталляцию.
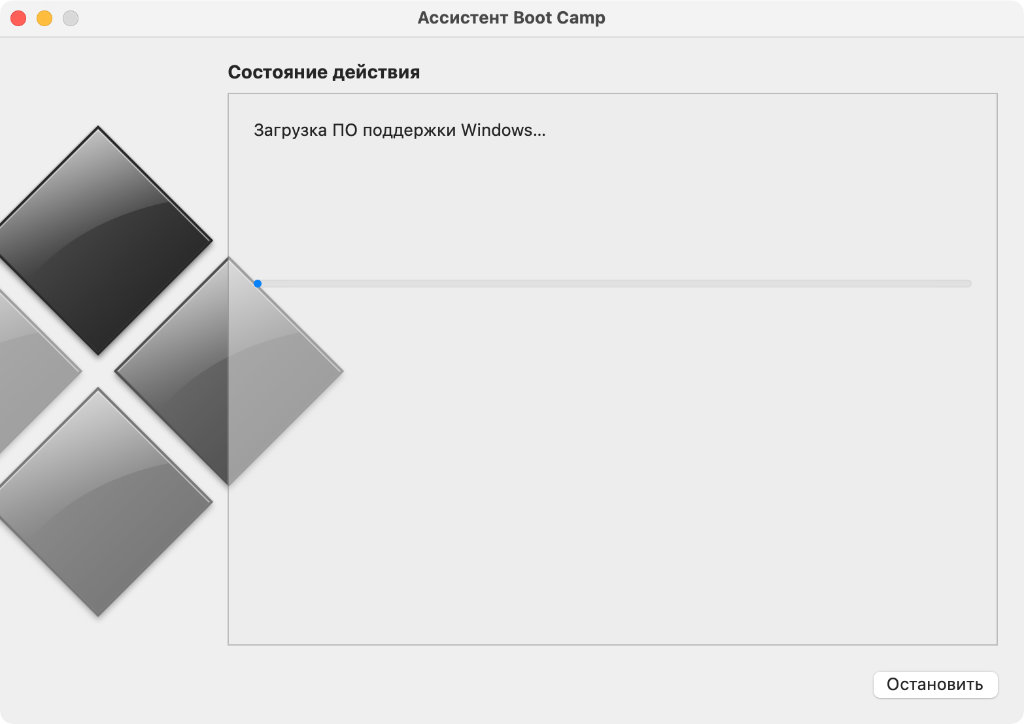
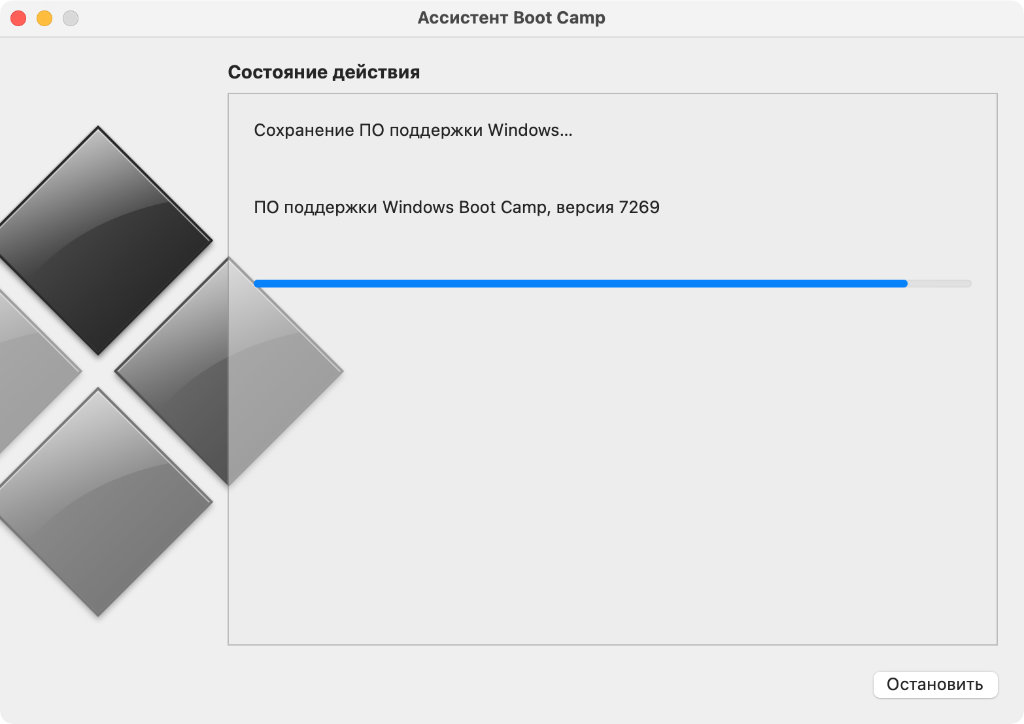
Шаг 4. Нажмите на кнопку «Установить» и ожидайте дальнейших команд от приложения «Ассистент Boot Camp».
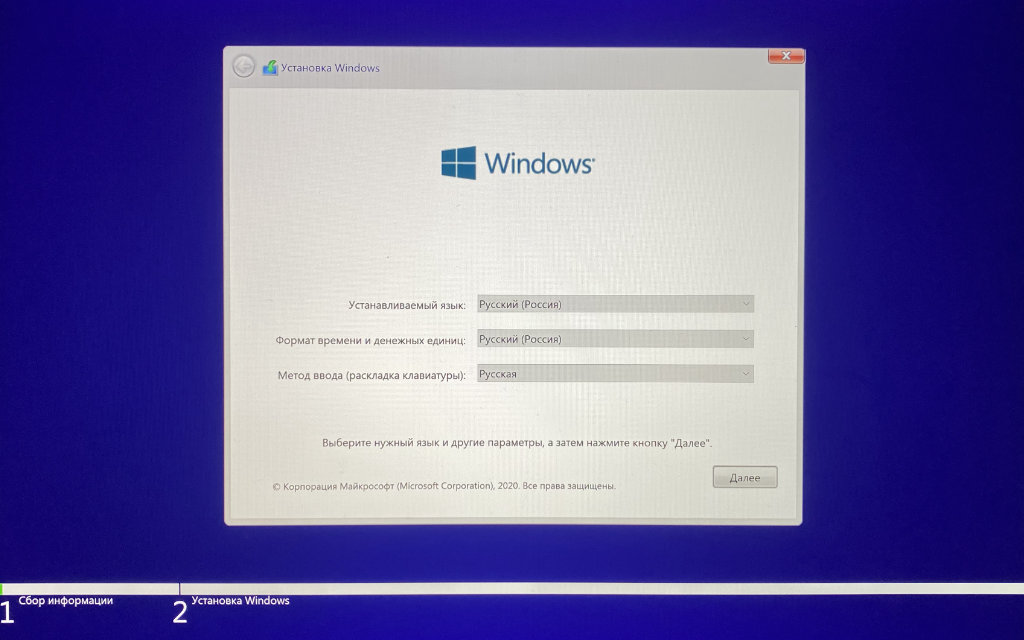
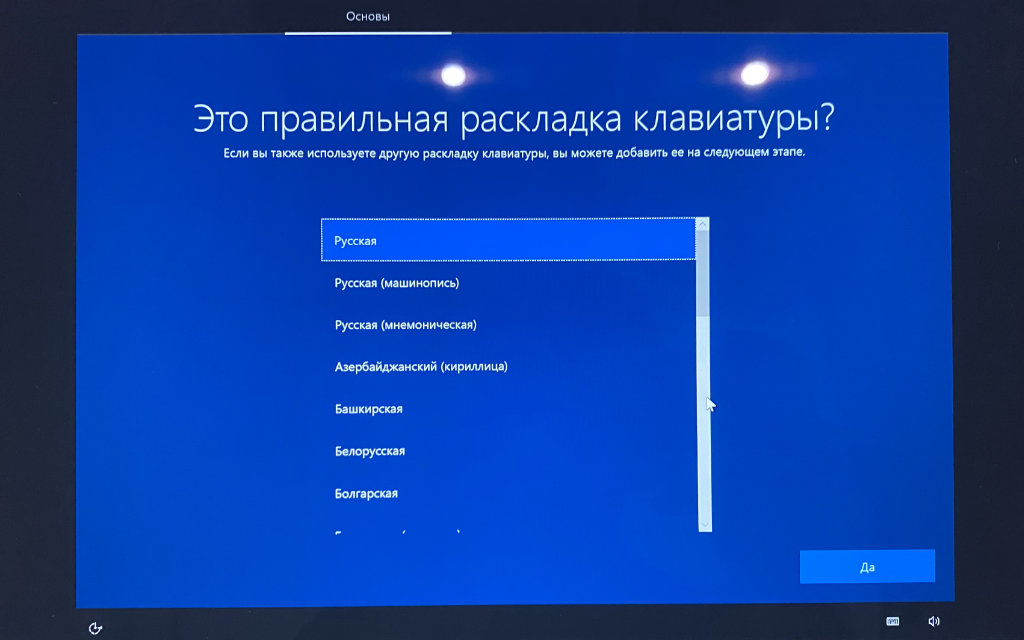
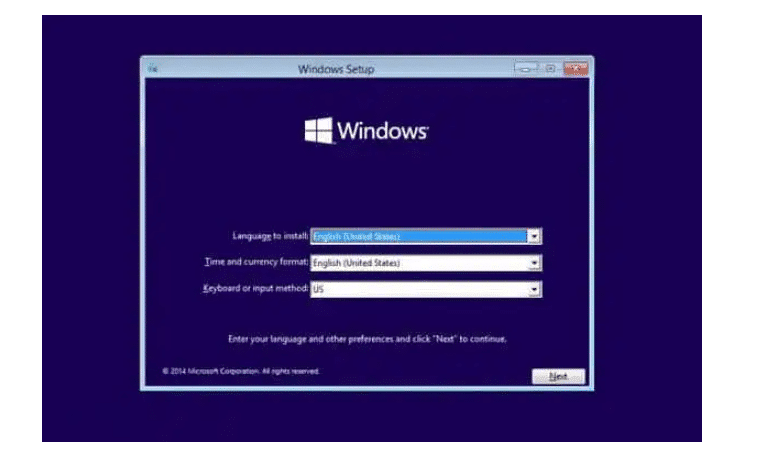
Шаг 5. Определите язык установки.
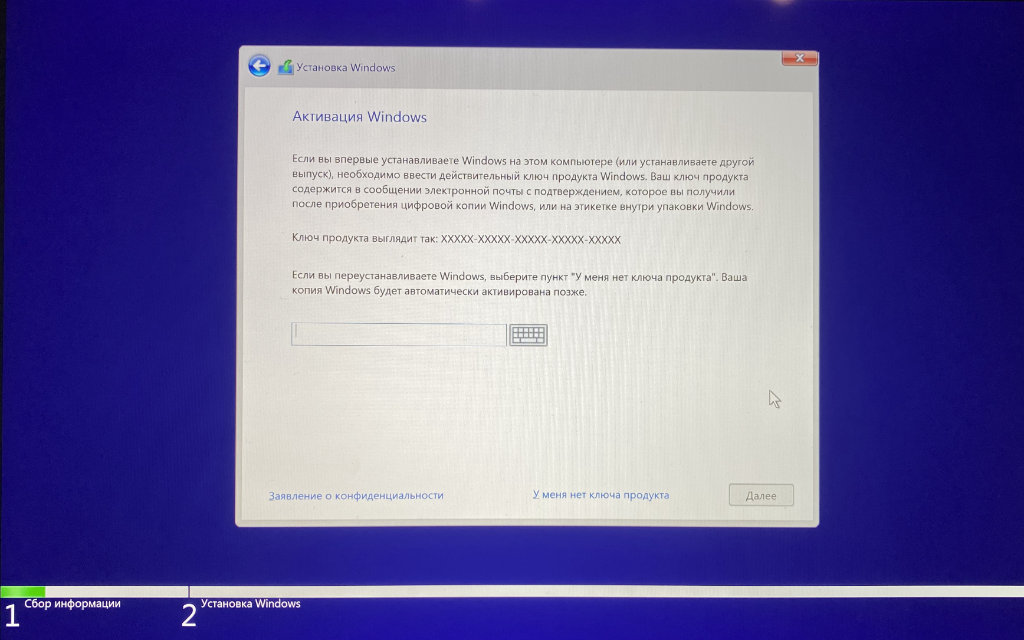
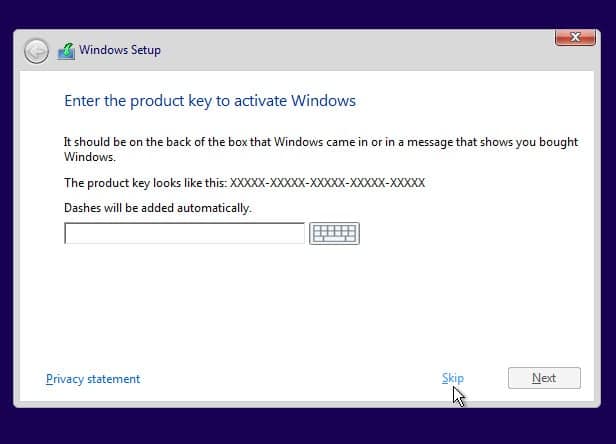
Шаг 6. Введите лицензионный код или отложите это на потом.
Шаг 7. Выберите тип системы, которую хотите установить.
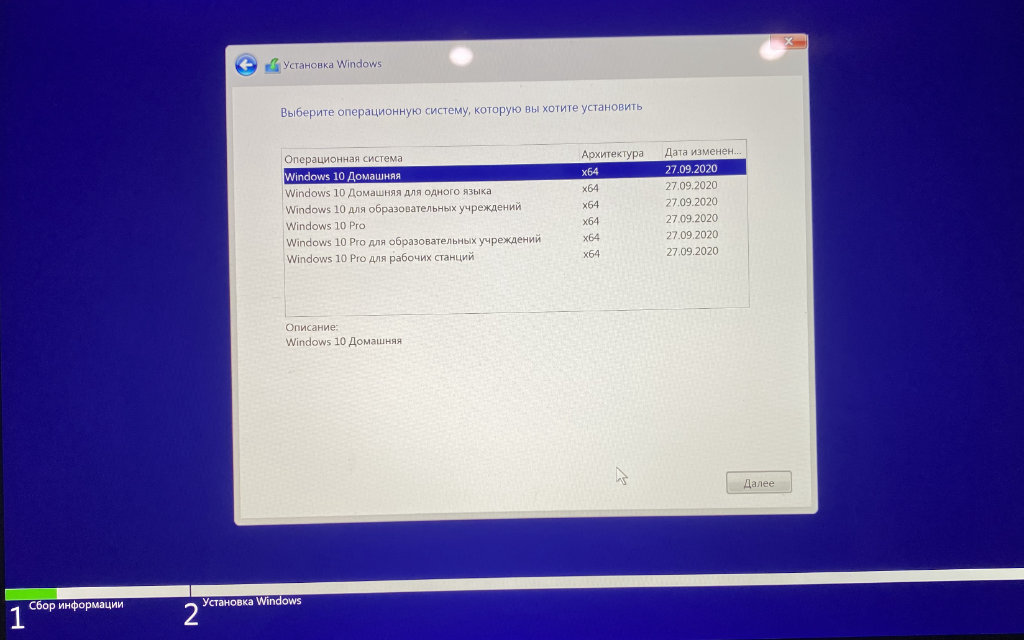
Чтобы получить все возможности и минимизировать ограничения, лучше всего использовать Windows 10 Pro.
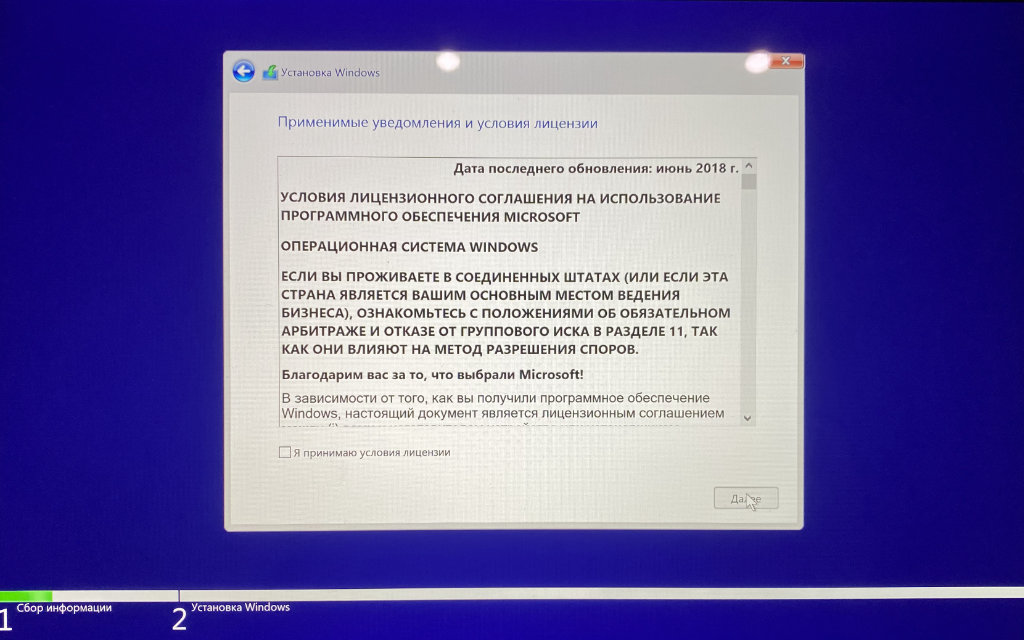
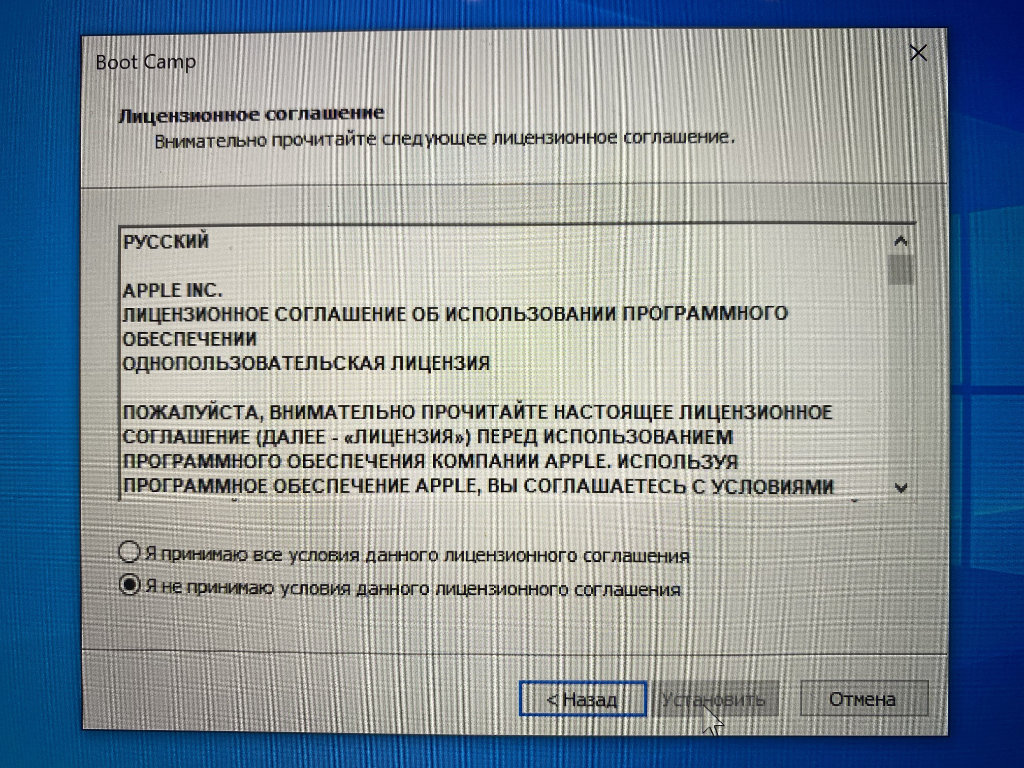
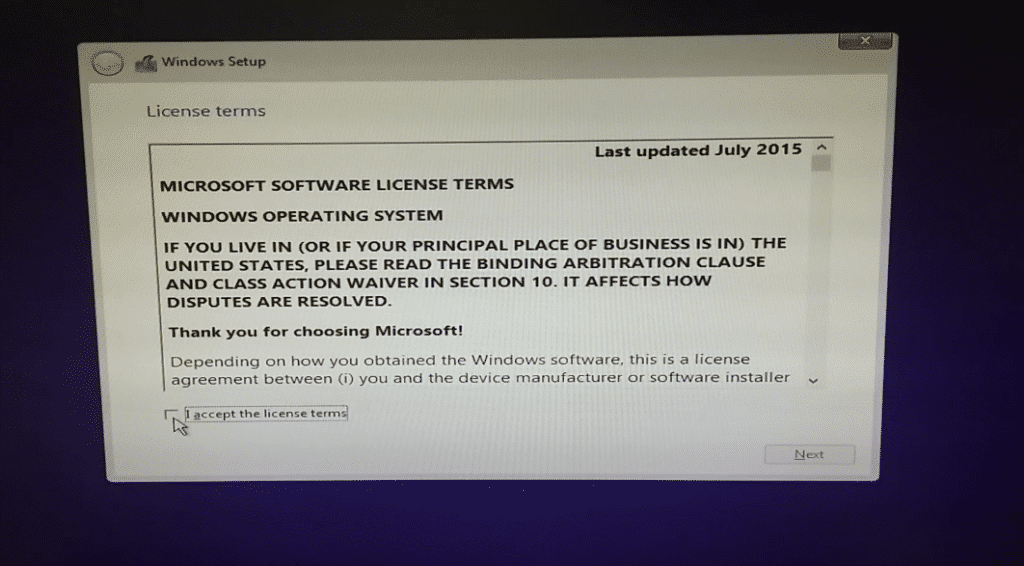
Шаг 8. Ознакомьтесь с лицензионными условиями и нажмите «Далее».
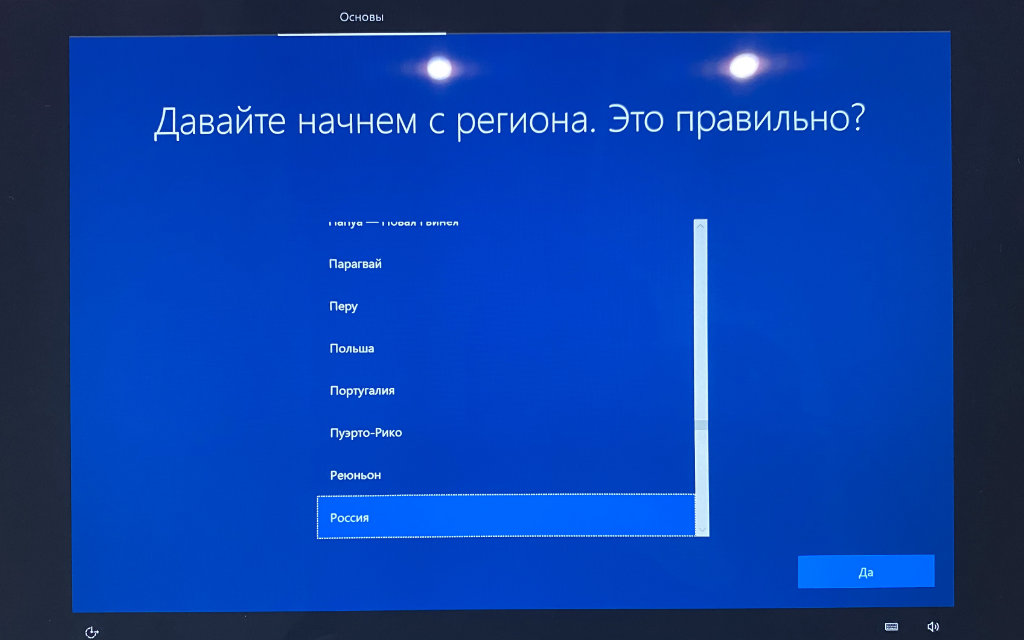
Шаг 9. Определите региональные параметры.
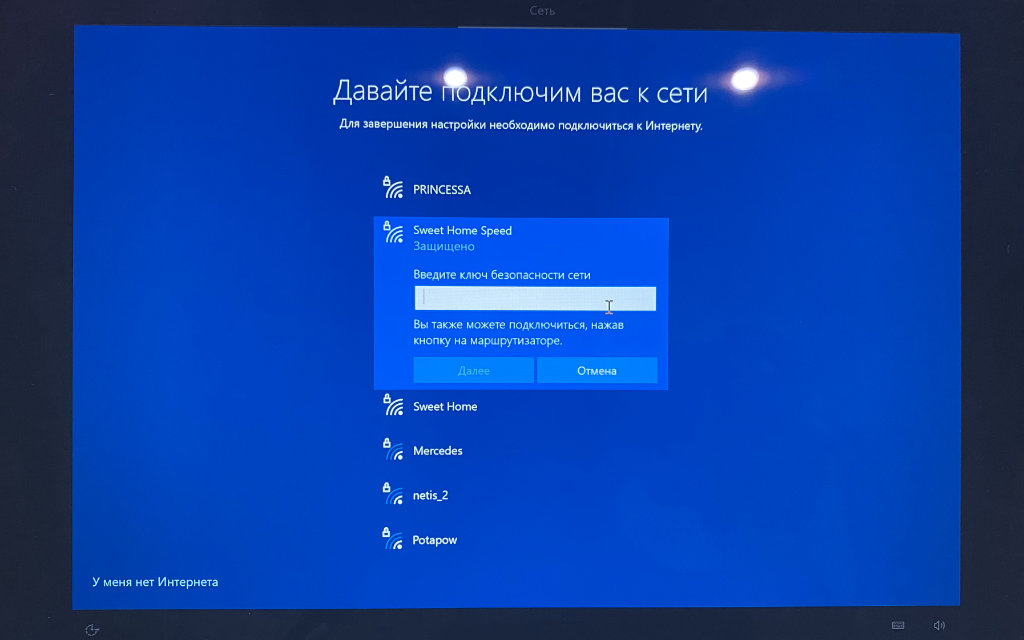
Шаг 10. Подключитесь к сети Wi-Fi.

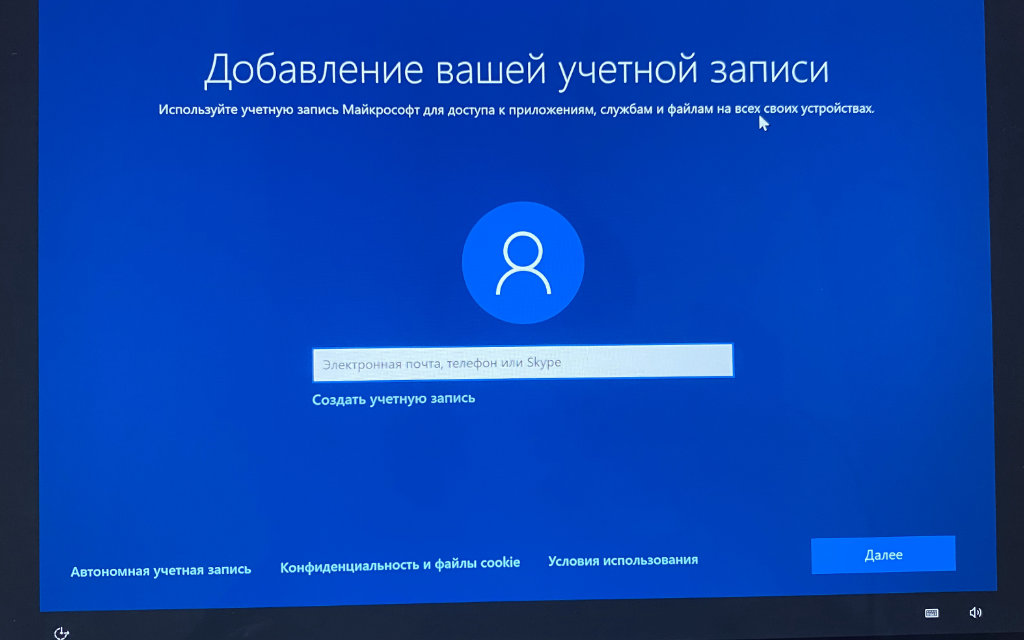
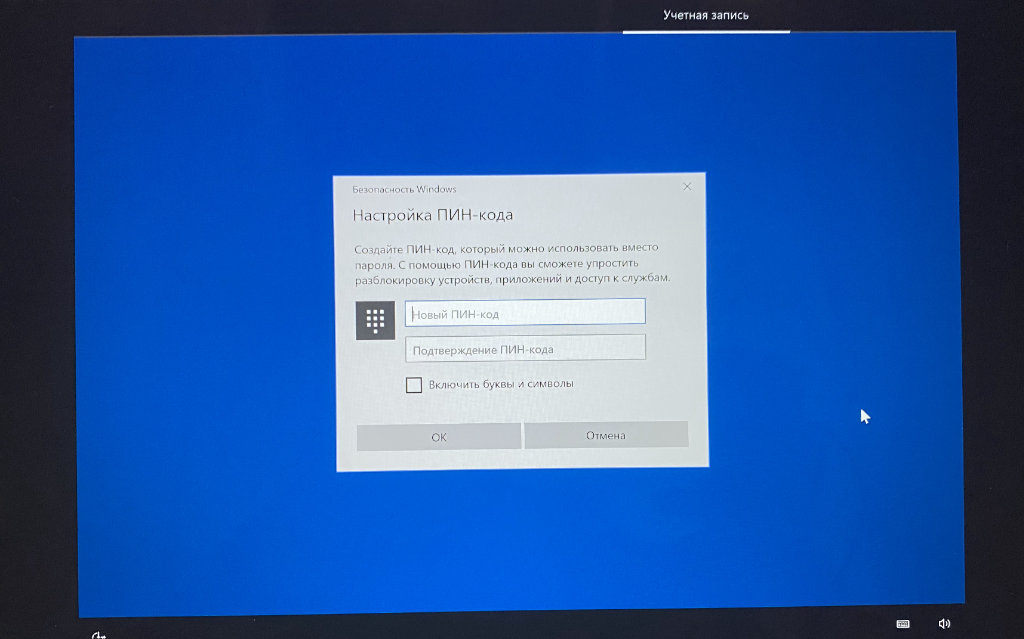
Шаг 11. Добавьте учетную запись и создайте PIN для аутентификации в Windows 10.
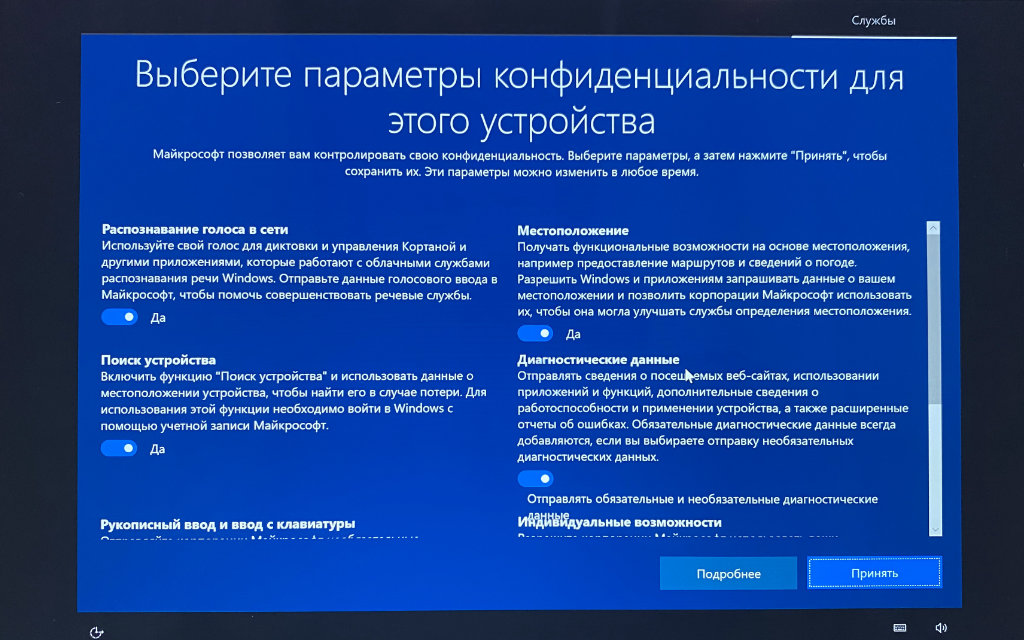
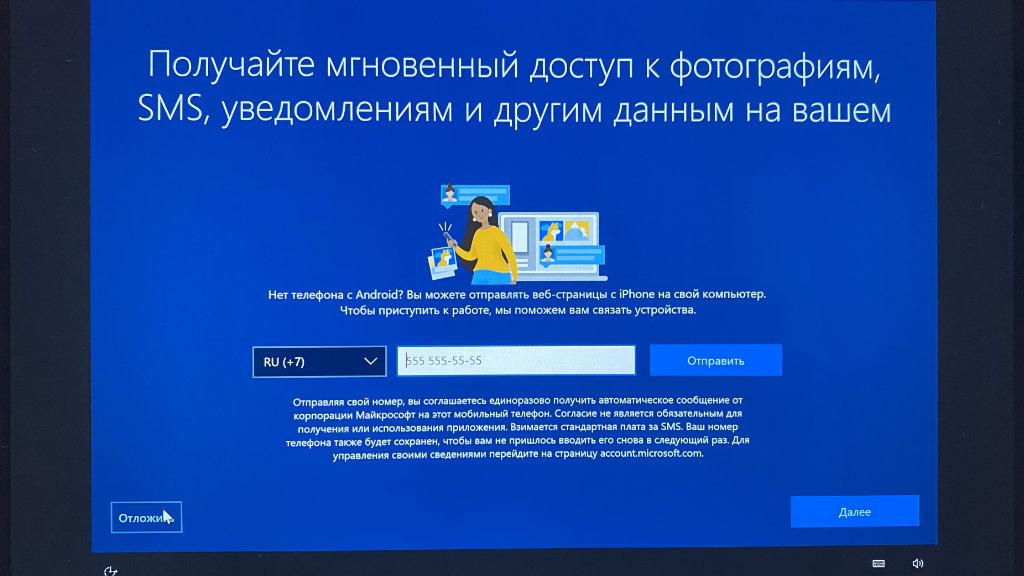
Шаг 12. Задайте параметры конфиденциальности и завершите первоначальную настройку Windows 10.
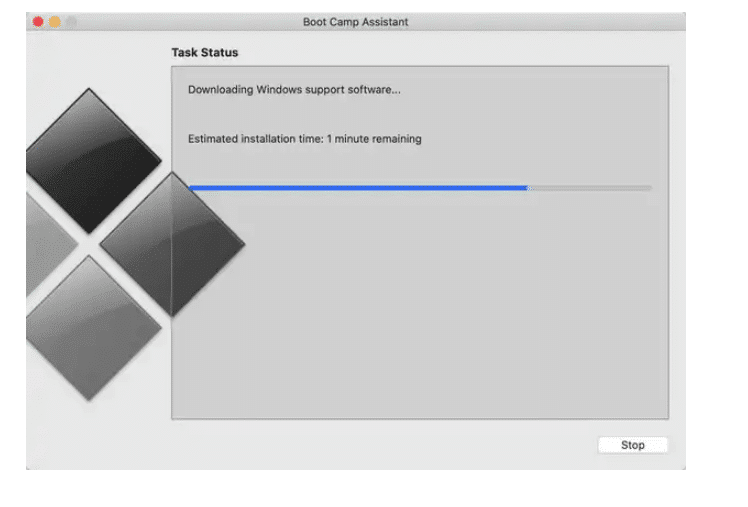
Шаг 13. Установите драйвера для корректной работы Boot Camp — приложение для этого уже должно быть открыто.
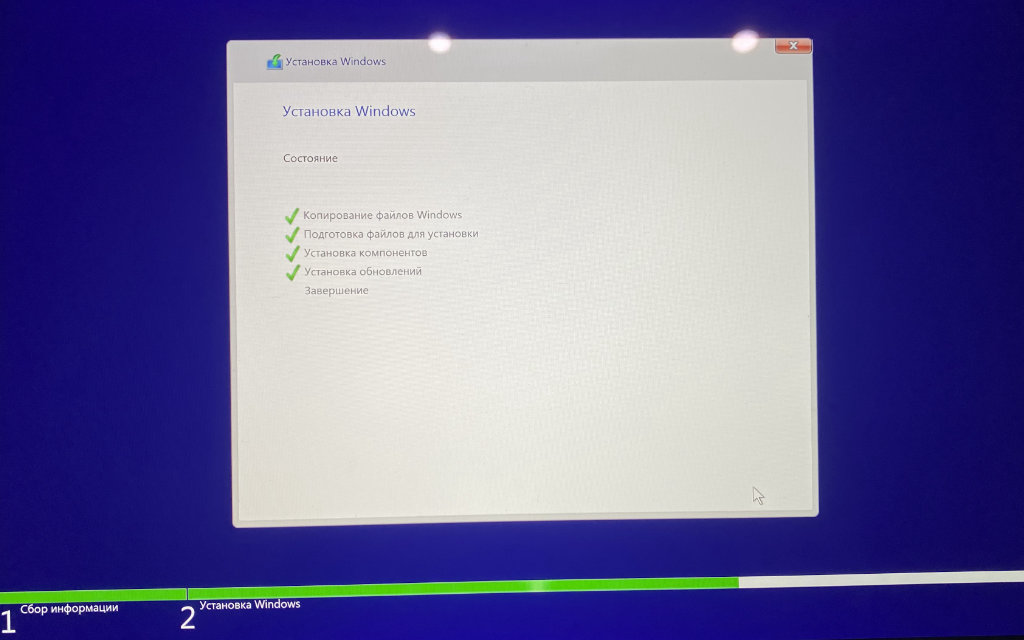
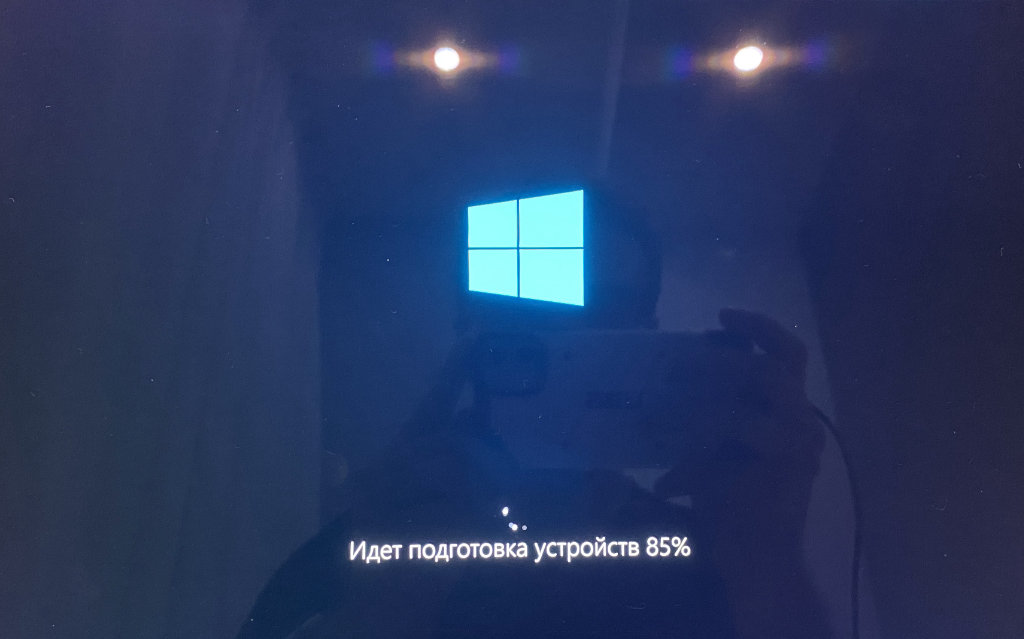
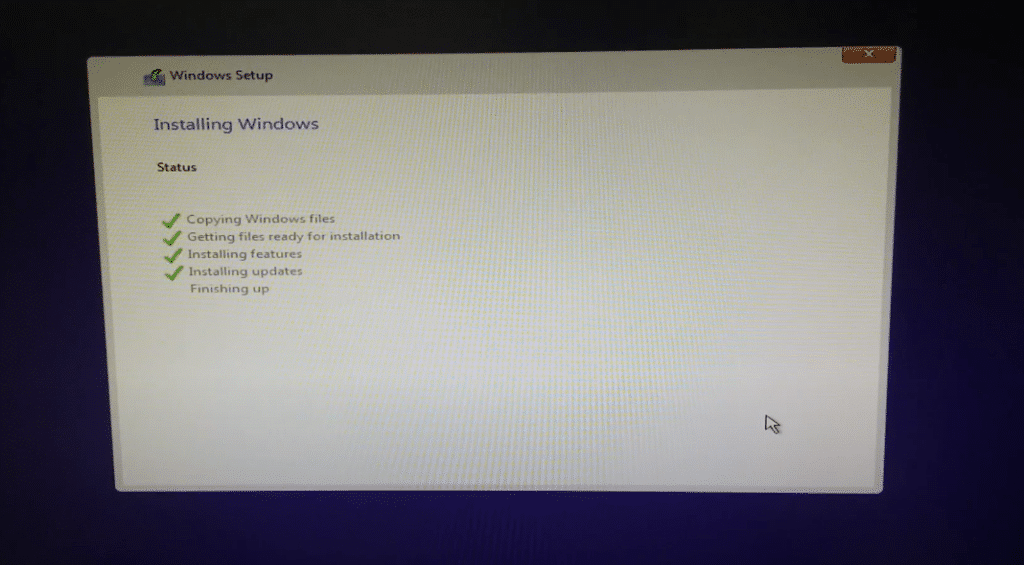
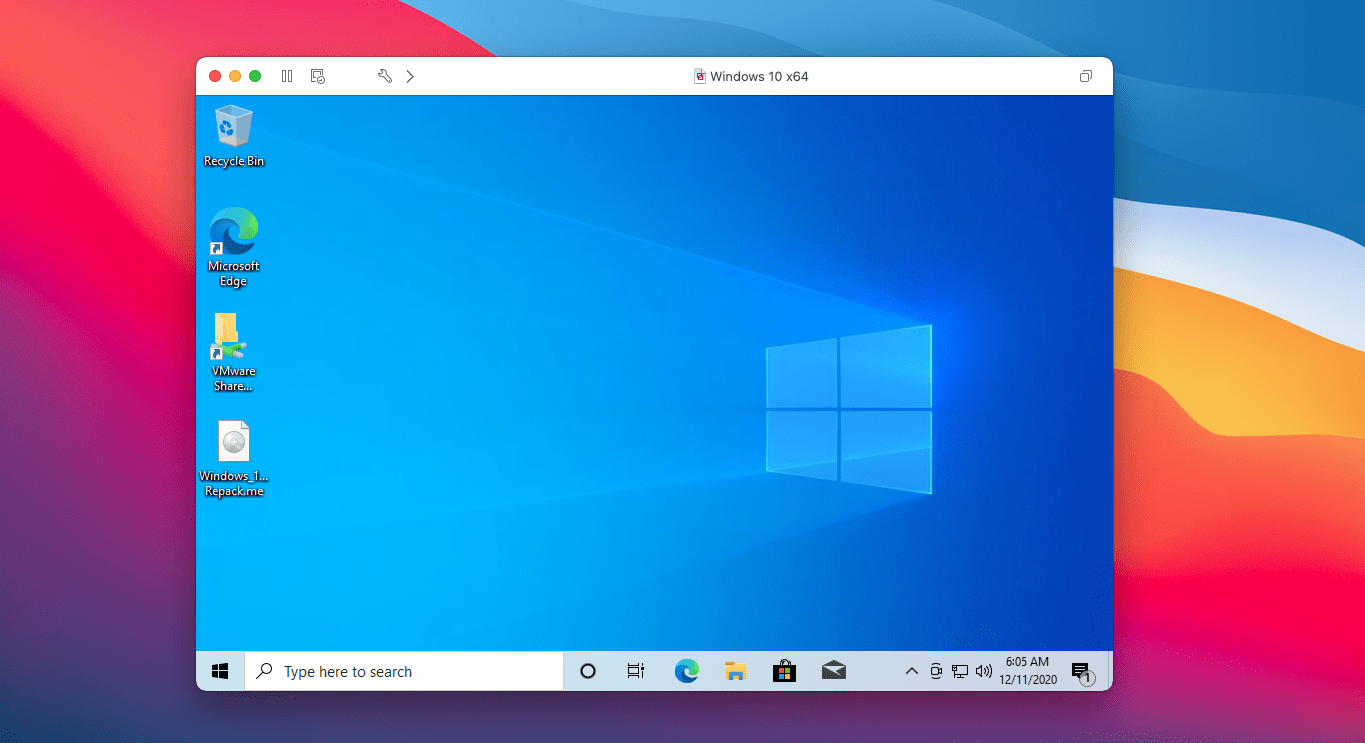
Шаг 14. Наслаждайтесь использованием Windows 10 — на ее установку вряд ли уйдет больше получаса времени.
Когда перезагрузитесь в macOS 11 Big Sur, удалите дистрибутив Windows 10, который использовался для установки. Он больше не нужен, но все еще занимает около 6 ГБ пространства в хранилище. Теперь за данным фактом придется следить более пристально, ведь дополнительная система занимает не мало.
Как переключаться между macOS 11 Big Sur и Windows 10
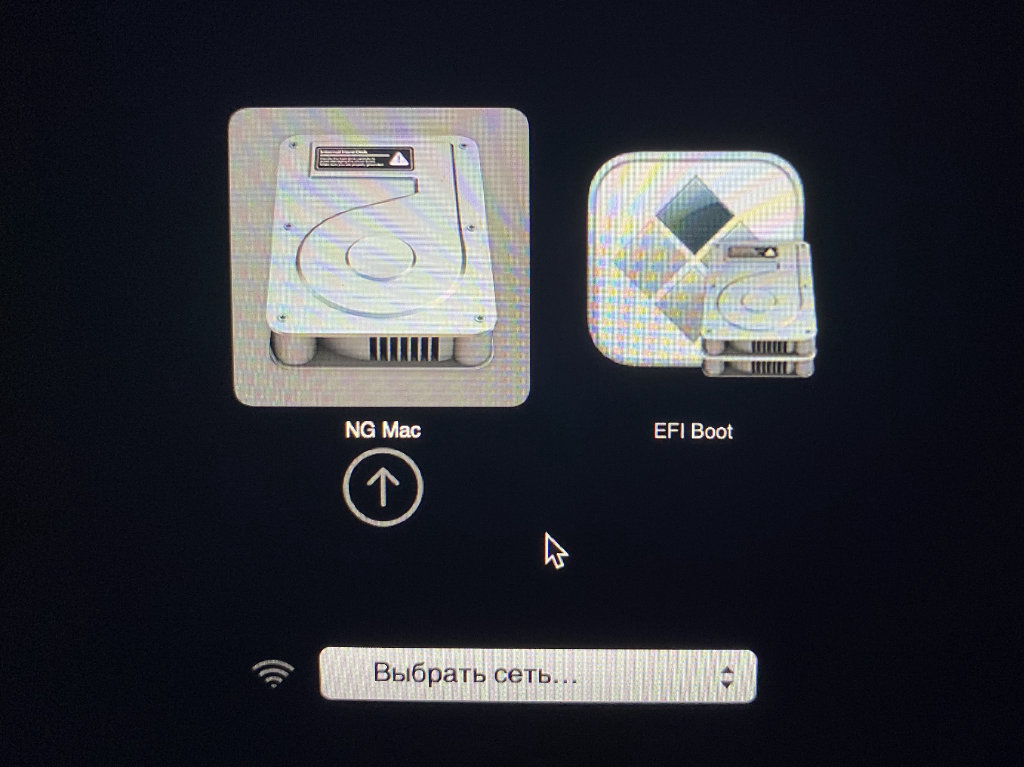
Шаг 1. Активируйте перезагрузку компьютера.
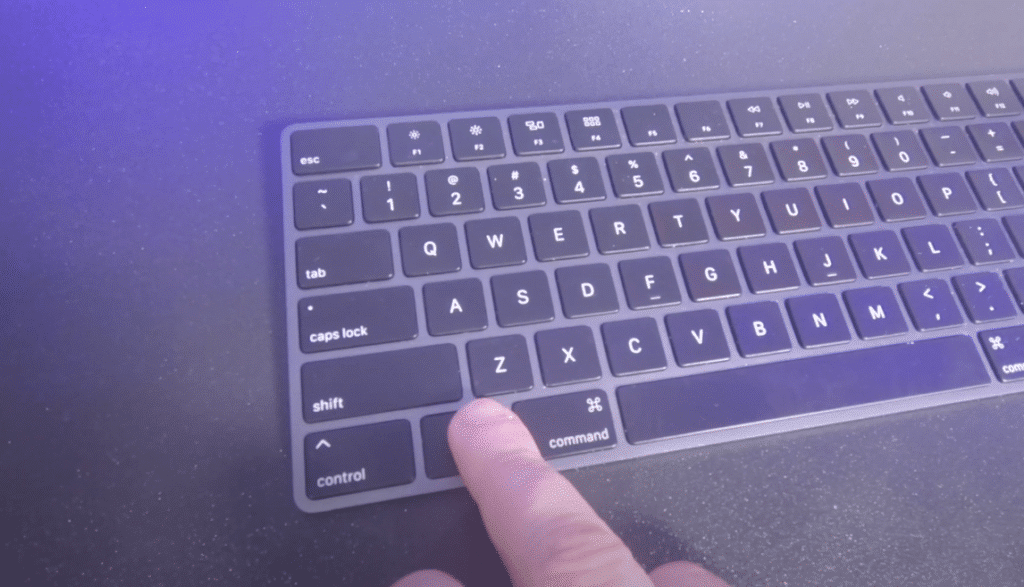
Шаг 2. Зажмите клавишу Option(⌥) и удерживайте до активации меню выбора системы.
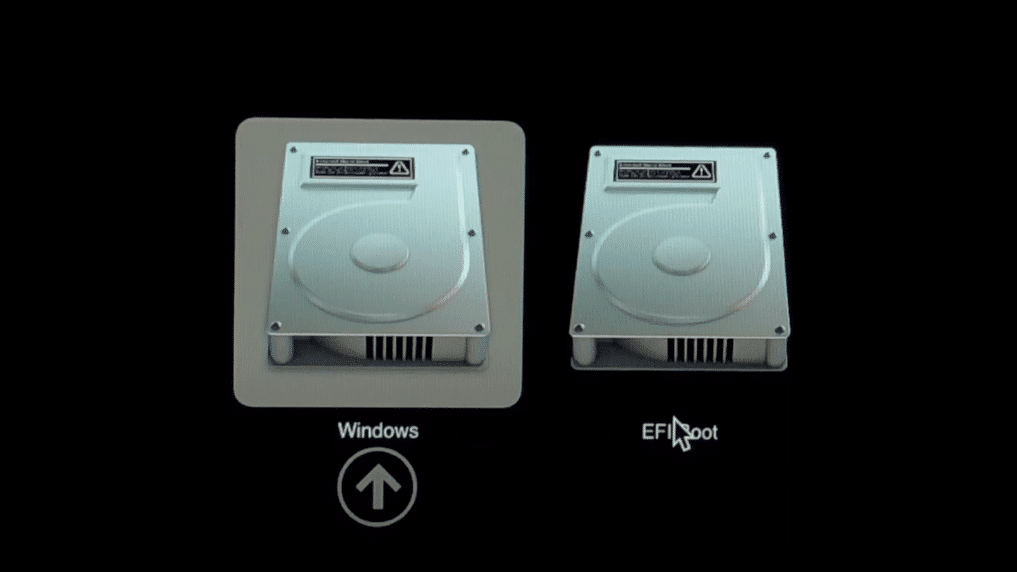
Шаг 3. Выберите систему, которую необходимо запустить.
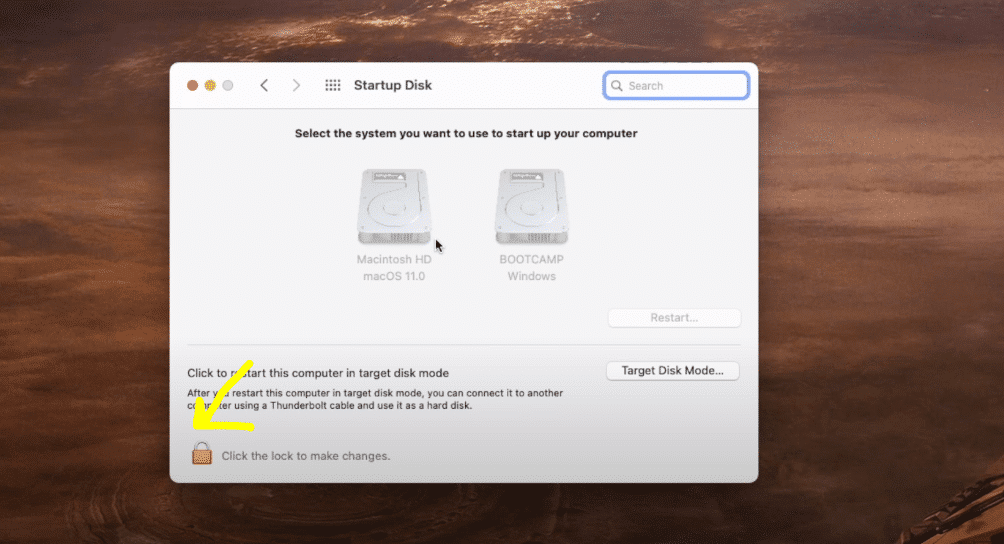
Вы также можете проделать это же из-под macOS с помощью меню «Системные настройки» > «Загрузочный диск». Здесь нужно выбрать диск для дальнейшего использования и нажать на кнопку «Перезагрузить». Тем не менее, из-под Windows придется использовать именно перезагрузку.
Какие нюансы могут возникнуть при установке Windows 10
? Нужна флешка. Если у вас достаточно старый Mac, о чем я уже писал выше, для установки Windows 10 также понадобится флешка. «Ассистент Boot Camp» обязательно сообщит, когда ее нужно вставить в компьютер. Извлечь ее можно будет после запуска новой операционной системы и драйверов для нее.
? Установщик Boot Camp не запускается. Если после первого запуска Windows 10 инсталляция дополнительных драйверов не открывается автоматически, перейдите в диск OSXRESERVED, разверните папку BootCamp и используйте файл Setup.exe. Это нужно для корректной работы системы.
? Подключен дополнительный монитор. Если вы используете вспомогательный экран, он может быть черным во время непосредственной установки Windows 10. В этом нет ничего страшного, и после окончания процедуры он обязательно заработает на 100% корректно.
Как удалить Windows 10 через macOS 11 Big Sur
Шаг 1. Откройте приложение «Ассистент Boot Camp».
Шаг 2. Ознакомьтесь с приветственной информацией и нажмите на кнопку «Продолжить».
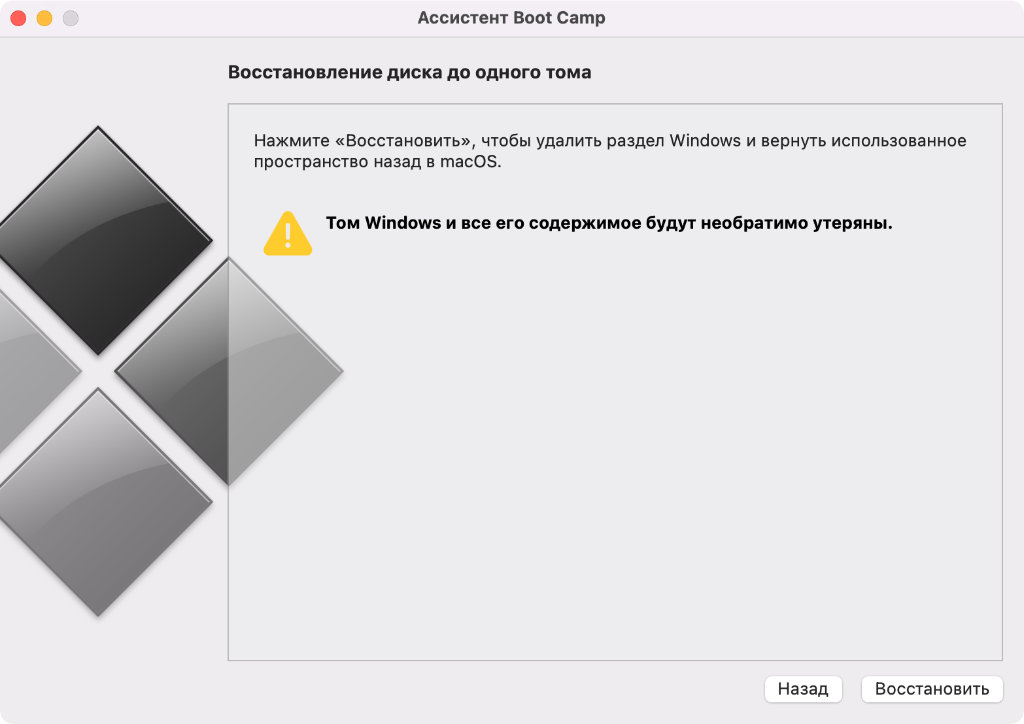
Шаг 3. Нажмите на кнопку «Восстановить», чтобы удалить раздел Windows и вернуть все пространство для использования macOS 11 Big Sur.
Удаление раздел проходит без следа, и освобожденное от него место можно использовать для любых своих нужны уже спустя несколько минут. Тем не менее, если у вас действительно напряжена со свободным пространством в хранилище, лучше попробуйте установить Windows 10 на съемный диск.

 (10 голосов, общий рейтинг: 4.80 из 5)
🤓 Хочешь больше? Подпишись на наш Telegram.
![]()
iPhones.ru
Дополнительная операционная система может понадобиться для специфического программного обеспечения.
- macOS Big Sur,
- Windows 10
![]()
Николай Грицаенко
@nickgric
Кандидат наук в рваных джинсах. Пишу докторскую на Mac, не выпускаю из рук iPhone, рассказываю про технологии и жизнь.
Table of Contents
In this article, we will learn how to install Windows 10 on macOS 11 Big Sur. This guide will be a step-by-step process, so do not miss a single step.
What might Windows 10 be used for on your Mac? First of all, for software that is not available on macOS. Of course, some just like the Microsoft operating system’s look and functionality, but there are not so many of them in Apple computer users’ ranks.
A proprietary platform called Boot Camp is used to install Windows 10 on macOS 11 Big Sur. It allows you to add this operating system to your computer and switch between it and macOS. So, today we will install Windows 10 on macOS 11 Big Sur using BootCamp.
Note: it’s hard to say how to use Boot Camp on the new Mac running the M1 chipset. It is based on ARM, which is not compatible with the basic versions of Windows 10. Moreover, there is almost no software for a special Microsoft system based on this architecture.
You can also read:
How to manage widgets on macOS Big Sur?
How to Speed Up macOS Big Sur? 7 Easy Methods
How to share folders on VirtualBox & Vmware? (Windows-MAC) Step by Step Guide
What do you need to install Windows 10 on macOS 11 Big Sur?
1. Supported Mac to install Windows 10 on macOS 11 Big Sur.
- 2012 and newer: MacBook Air, MacBook Pro, Mac mini, iMac;
- 2013 and newer: Mac Pro;
- 2015 and newer: MacBook;
- 2017 and newer: iMac Pro.
If you want to use Windows 10 with macOS 11 Big Sur, you need these Apple computers:
- 2013 and newer: MacBook Air, MacBook Pro, Mac Pro;
- 2014 and newer: Mac mini, iMac;
- 2015 and newer: MacBook;
- 2017 and newer: iMac Pro.

2. Flash on 16GB or more.
- 2013 and newer: Mac Pro;
- 2015 and newer: MacBook, MacBook Pro, iMac;
- 2017 and newer: MacBook Air, iMac Pro.
3. The latest update to macOS. This is important in closing security gaps – they are released even for somewhat outdated Macs.
4. At least 64GB of free space. If you have 128GB of RAM or more, the boot should have as much space as possible.
Apple generally insists that Boot Camp is a predominantly Mac with 256GB or more. Only in this case will you be able to use at least 128GB of memory for the Windows operating system’s regular operation.
You can also read:
How to Install macOS Big Sur on VMware on Windows? 8 Step Guide
How to Install macOS Big Sur on VirtualBox on Windows? 8 Step Guide
5. ISO is the only thing you need to do to use the full image, not the operating system update. The 64-bit Windows 10 Home or Windows 10 Pro option. Think about the key for yourself, and the necessary file will be downloaded for free on the official website of Microsoft.
How to install Windows 10 on Mac on macOS 11 Big Sur?
Step 1. Open the Boot Camp Assistant app.
Step 2. Check out the welcome information and click on the “Continue” button.
If you’re using a MacBook of any model, connect it to power with a cable.
If you’re using a Mac with a T2 chip, Boot Camp Assistant will advise you to decide on a secure download: once Windows 10 is installed, its settings won’t change. About this, there is an article on apple’s official website.
Step 3. Select the disk image (it will be determined automatically if you’ve recently downloaded it) and identify the space used for Windows 10.
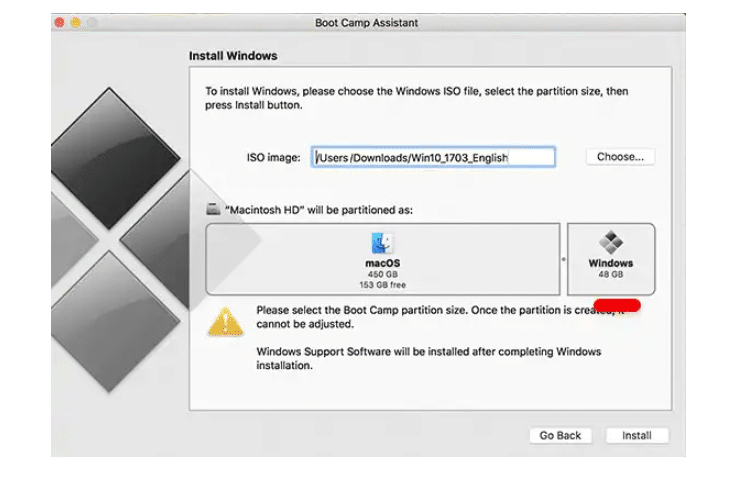
The standard, “Assistant Boot Camp,” offers 42GB, which is too little for the system to work correctly. As I wrote above, the minimum volume is 64GB. However, there may be problems with the automatic update: optimally, 128GB or more.
I usually use 100GB for Windows 10. There have been no problems with updates yet.
You can also read: How to Create macOS Big Sur Bootable Installer for Clean Installation: 2 Easy Steps (MAC only)
You won’t be able to change the drive amount after the installation. You’ll have to remove Windows 10 from your Mac and re-install it. So think ten times how much space you’ll need to use the system, and only then start the installation.
Step 4. Click on the “Install” button and expect further commands from the Boot Camp Assistant app.
Step 5. Identify the installation language.
Step 6. Enter the license code or set it aside for later.
Step 7. Choose the type of system you want to install.
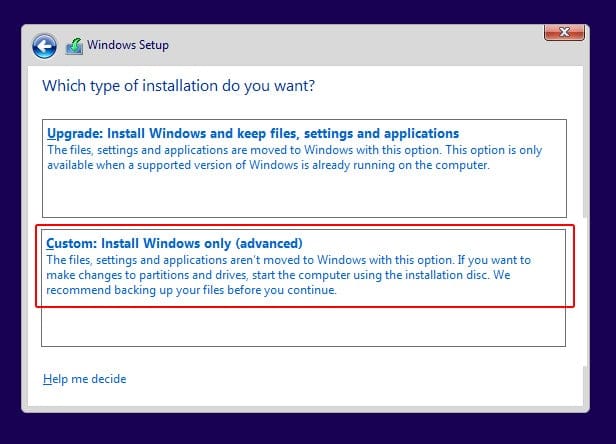
To get all the features and minimize restrictions, it’s best to use Windows 10 Pro.
Step 8. Check out the licensing terms and click Next.
Step 9. Identify regional parameters.
Step 10. Connect to the Wi-Fi network.
Step 11. Add an account and create a PIN for authentication in Windows 10.
Step 12. Set your privacy settings and complete the original Windows 10 setup.
Step 13. Set the driver to work The Boot Camp correctly – this app should already be open.
Step 14. Enjoy using Windows 10 – installing is unlikely to take more than half an hour.
When you reboot in macOS 11 Big Sur, remove the Windows 10 distribution used to install. It is no longer needed but takes up about 6GB of storage space. This fact must be watched more closely because the other system takes a lot.
How to switch between macOS 11 Big Sur and Windows 10?
Step 1. Reboot your system.
Step 2. Press the Option (⌥) key and hold it until the system selection menu is activated.
Step 3. Choose the system you want to run.
You can also do the same from under the macOS with the “System Settings” menu. Select a disk for further use and click on the “Restart” button.

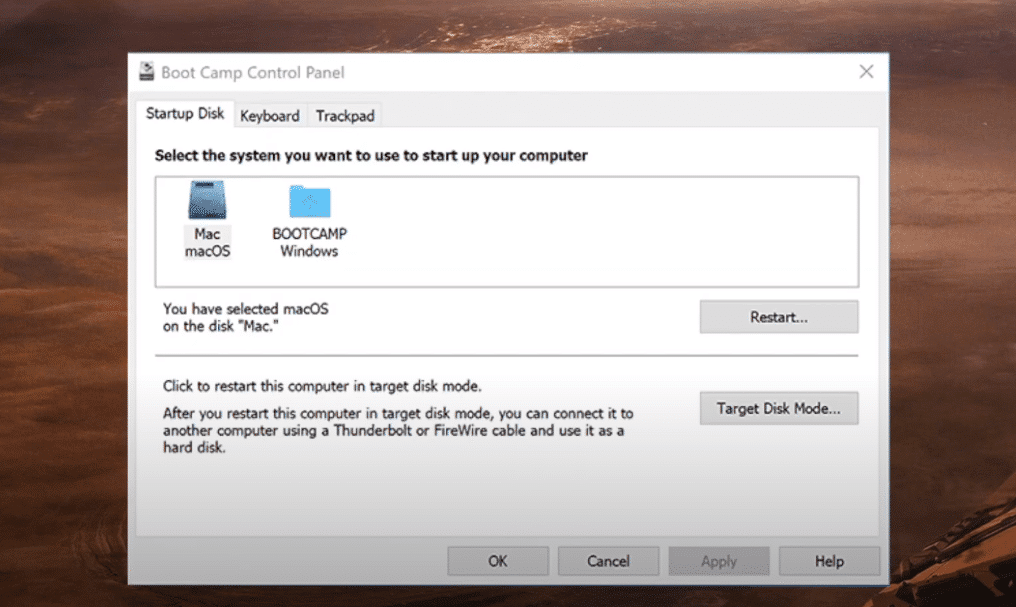
This can be done on the Windows side as well.
How to share folders on VirtualBox & Vmware? (Windows-MAC) Step by Step Guide
Common Issues of Boot Camp Windows 10 Install
1. We need a flash drive.
If you have an old Mac, as I’ve already written about, you’ll also need a flash drive to install Windows 10. “Boot Camp Assistant” will tell you when to insert it into your computer. You can check it out after the launch of the new operating system and the drivers for it.
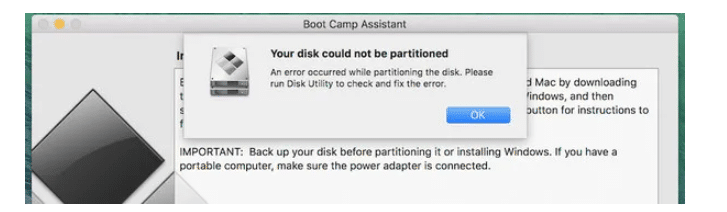
2. Your disk could not be partitioned:
While formatting your drive, ensure your partition is set to MS-DOS (FAT). The default file system for macOS is either HFS+ or APFS. If you get this error, please format the Windows partition to MS-DOS (FAT)
3. The Boot Camp installer does not start.
If you don’t automatically install additional drivers after the first windows of Windows 10, go to OSXRESERVED, unwrap the BootCamp folder, and use the Setup file.exe. This is necessary to install Windows 10 on macOS 11 Big Sur ideally.
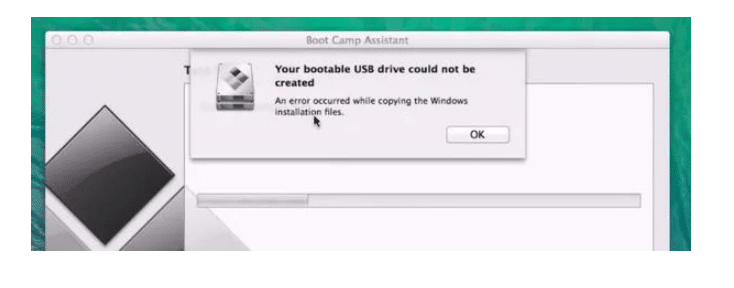
4. An error occurred while copying Windows 10 installation files.
This issue can arise mainly due to 2 reasons-
The Windows 10 Installer ISO that you created is corrupt. So, it would be best to recreate the Windows 10 Installer ISO to install Windows 10 on macOS 11 Big Sur.
The Windows 10 Installer ISO file is more significant than 5GB. The FAT file system can only hold a single file of less than 4GB. So, you need to download an old version of Windows from the Microsoft official website and later update your Windows after the installation of Windows 10 on macOS 11 Big Sur is complete.
5. An additional monitor is connected.
If you use an auxiliary screen, it can be black during the immediate installation of Windows 10. There is nothing wrong with this; after the procedure, it will work 100% correctly.
6. Not enough disk space.
Your windows installation will need around 41 GB of disk space, so you need to ensure you have enough disk space before you start installing Windows 10 on macOS 11 Big Sur. This is a common problem with MACs with 128 GB of SSD drive. Alternatively, you must add a new drive to your MAC and repeat this process.

.
7. Share files between Virtual Machines
Here is a complete guide- How to share folders on VirtualBox & Vmware? (Windows-MAC) Step by Step Guide
How to remove Windows 10 via macOS 11 Big Sur?
After this process of how to install Windows 10 on macOS 11 Big Sur. If you wish to remove Windows 10 from your MAC. You need to follow the below guidelines.
Step 1. Open the Boot Camp Assistant app.
Step 2. Check out the welcome information and click on the “Continue” button.
Step 3. Click the “Restore” button to remove the Windows section and return all space to use macOS 11 Big Sur.
Removing the section goes without a trace, and the space released from it can be used for any of its needs after a few minutes. However, if the free space in the vault stresses you, it’s best to try installing Windows 10 on a removable drive.
Conclusion: How to install Windows 10 on macOS 11 Big Sur
This is the easiest way to install Windows 10 on macOS 11 Big Sur. There are many other alternatives that you can use to install Windows 10 on macOS 11 Big Sur. But I will suggest you go with Boot Camp. If you face any problems with this method, comment down below.
Windows 10 is one of the most suitable operating system for Intel-based computers, Windows 10 is one of the biggest releases of Microsoft that never released like it. When Windows 10 officially released in public the Microsoft put it for free instead of paying money. On the other, hand each of the updates after releasing will be available manually in the update section. Now the latest update of Windows 10 is the 2H2 version, whether you are using the earlier version of Windows, then manually you can update it to the latest version. The 2H2 update brings lots of changes to the features, which have attracted the users which a bunch of changes.
However, Windows 10 comes with different versions for different hardware compatibility. The versions include Windows 10 pro that based on enterprise-grade security and tools with lightweight. Now Windows 10 light is available with ChromOS which is best for Chromebooks. If you are testing Windows 10 Insider then there is a specific tool called Windows 10X Emulator, what is Emulator? It allows the users to test Windows 10 screen on dual-screen for better work.
In October 2020 Microsoft launched the latest update of Windows for the users. Like the other updates this update also known as Windows 10 2H2 version. This version of Windows 10 is completely different from the other versions, with a bunch of changes in its interface look, a bunch of changes in its icons, with a new, included Chromium-based Microsoft-Edge browser. Windows 10 is pre-installed on over a billion devices worldwide. As officially Microsoft announced that there is no more Windows 7, either people should upgrade from Windows 7 to Windows, or either they should upgrade their PC in order to keep their computer more smooth and secure from threats.
- How to Install Windows 10 on macOS Big Sur Via VMware Fusion
- How to Install Windows 10 on macOS Big Sur Via Parallels Desktop
macOS operating system is also one of the most popular operating system developed by Apple to run on different PC’s. Unfortunately, you can’t run macOS on the PC that runs Windows 10, or you can’t run Windows 10 on a PC that runs macOS. But there are tactics that allow you to run it. However, if you are a macOS user then want to run Windows 10 on it, then there are three main options whether you have to use VMware Fusion, VirtualBox, Parallels desktop.
How the Virtualization machines allow the users to test different OS? Virtual machines allow the users to test different OS on the actual operating system as a guest OS but it will not work as an actual operating system. It only acts to be an actual operating system, for this purpose if you are interested to test out Windows 10 on macOS Big Sur then follow the below instructions.
- How to Install macOS 11 Big Sur on VMware on Windows PC
- How to Install macOS 11 Big Sur on VirtualBox on Windows PC
Required Files:
- Download VirtualBox
- Download Windows ISO file
Install VirtualBox & Create a New Virtual Machine
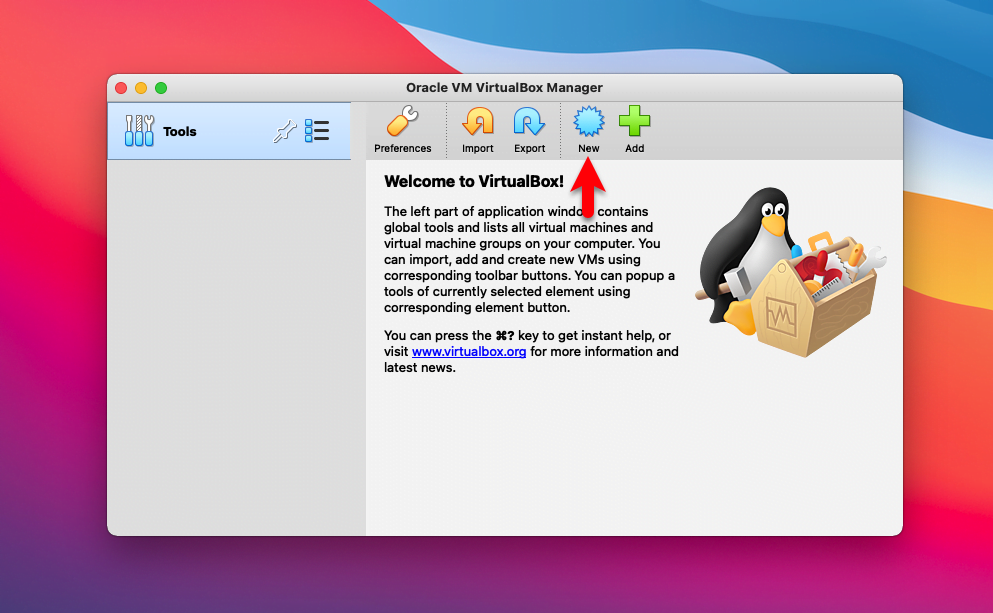
Installing VirtualBox machine on macOS Big Sur is pretty much easy just with few clicks you can up to the installation. Once the installation completed open-up the virtual machine and click on the “New” option.
In this step click on “Export Mode”.
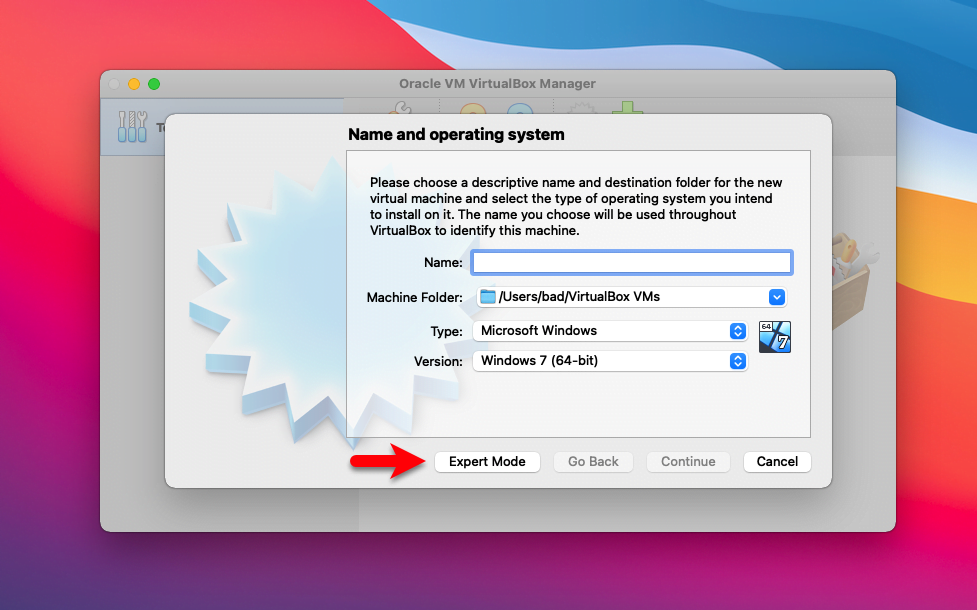
Select a Name, Machine Folder, Type, Version, Increase the Memory Size, and click Create.
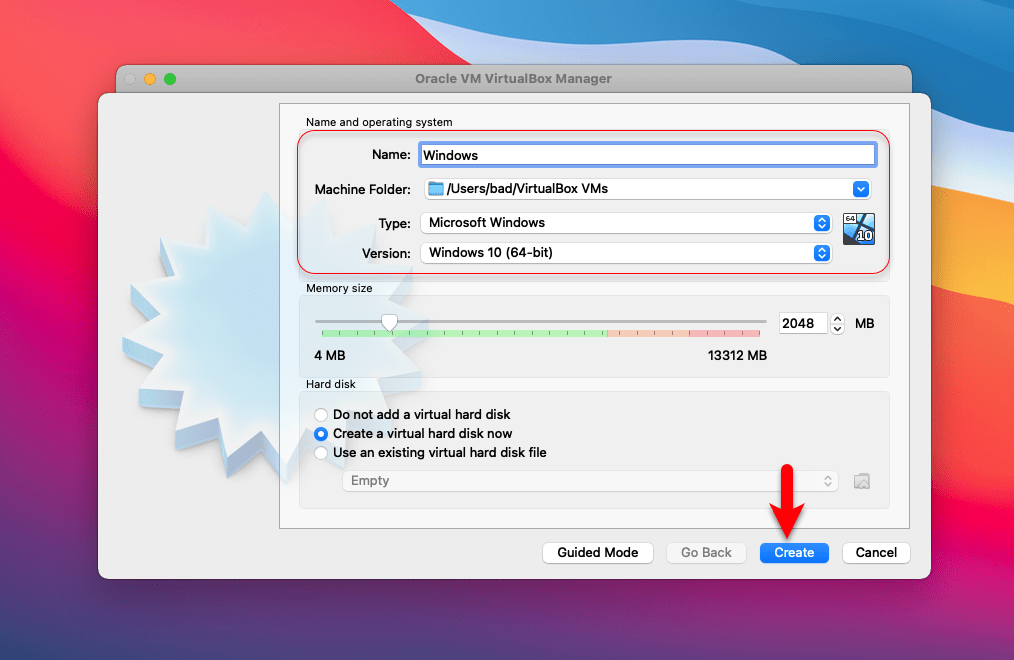
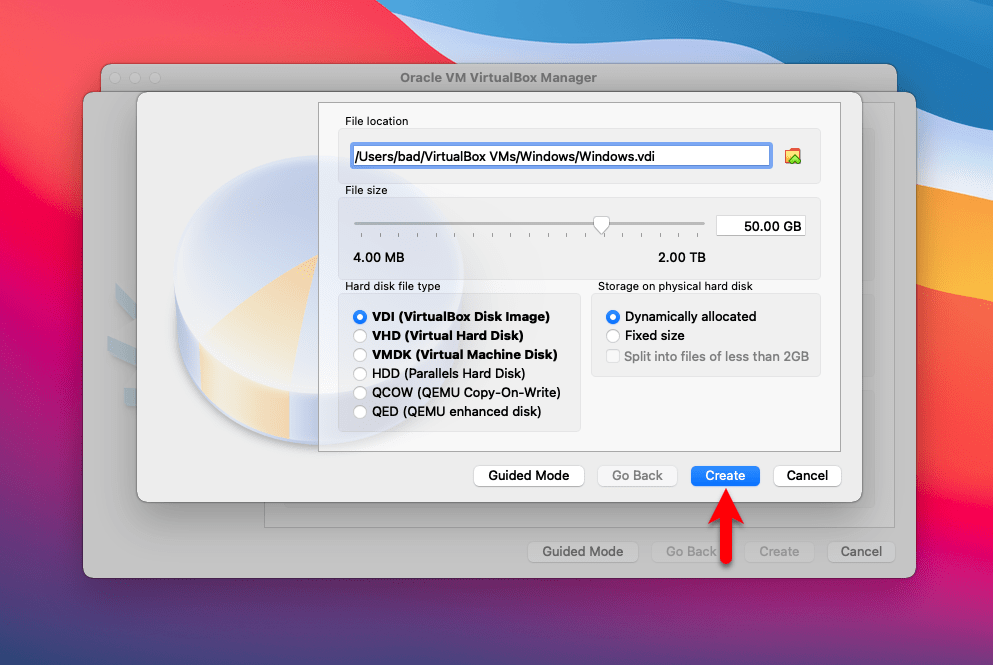
Choose the file location, select the hard disk file type “VDI “Virtual Disk Image”, select “Dynamically Allocated” then click create.
Edit Virtual Machine Settings
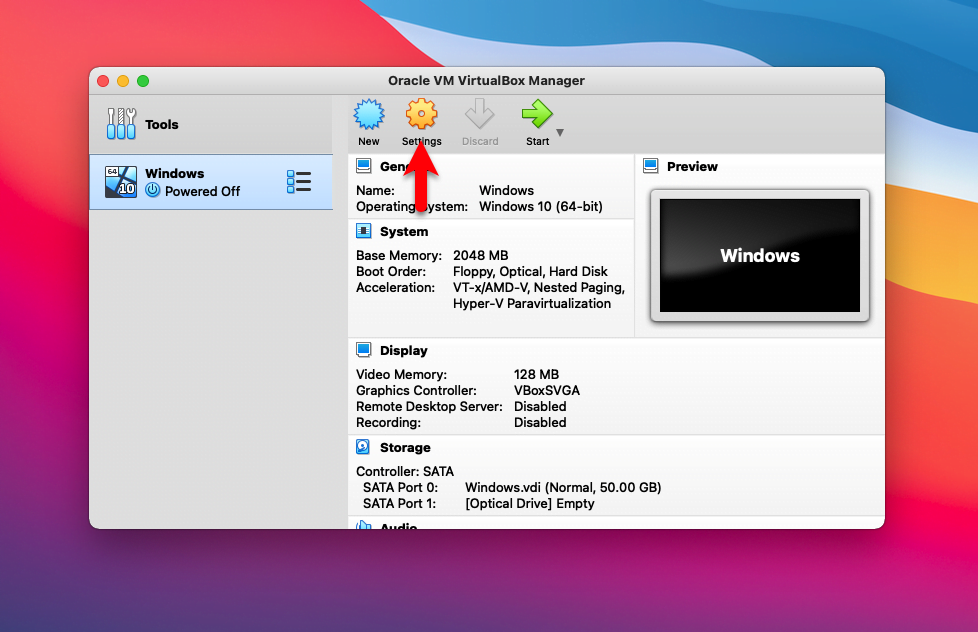
Once the virtual machine created you need to edit a few settings to have better performance. To do that select the created virtual machine and click on settings.
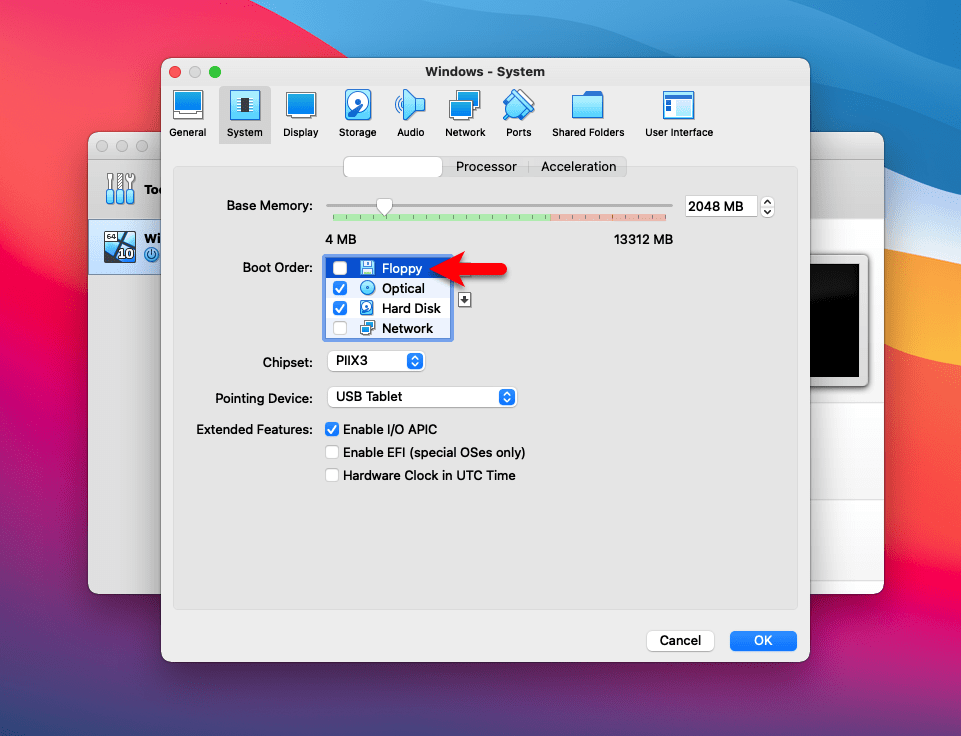
On the settings wizard click on the “System” tab and uncheck the Floppy disk.
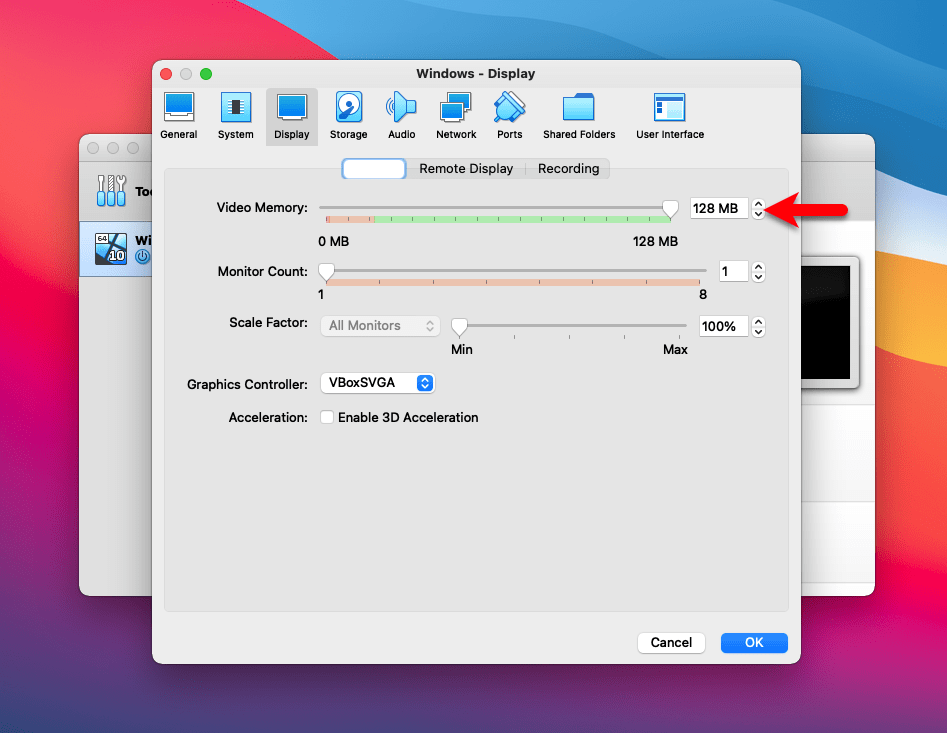
Click on the “Display” tab and increase the Memory size.
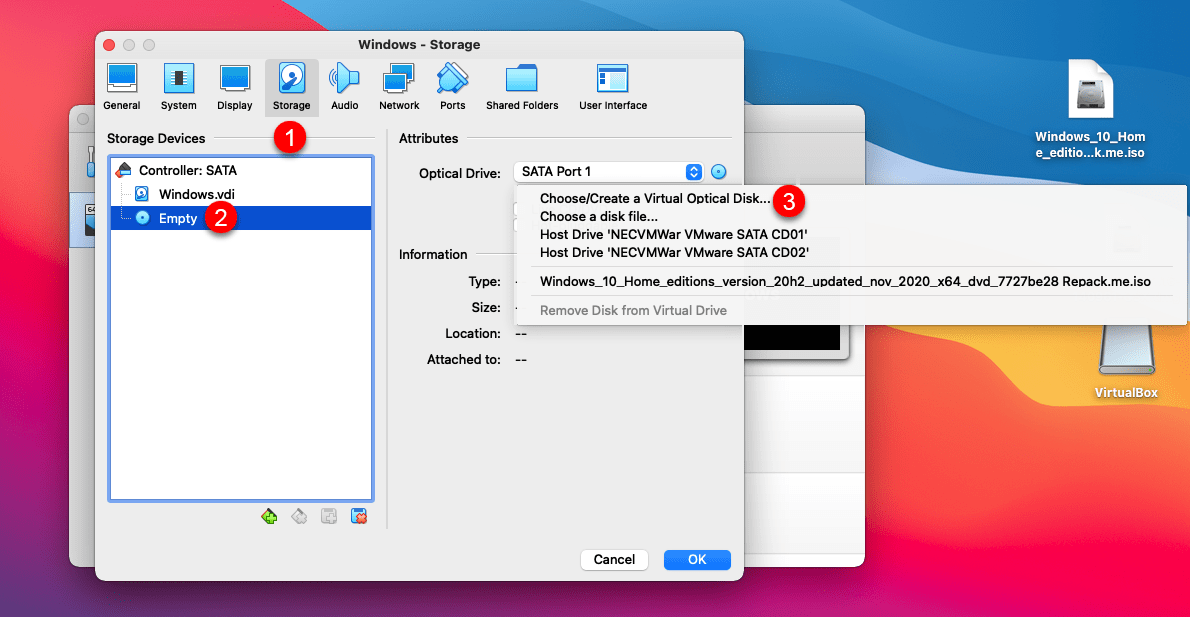
Click the “Storage” tab, click “Empty”, click the “Disk image”, and click on “Choose/Create a Virtual Optical Disk”.
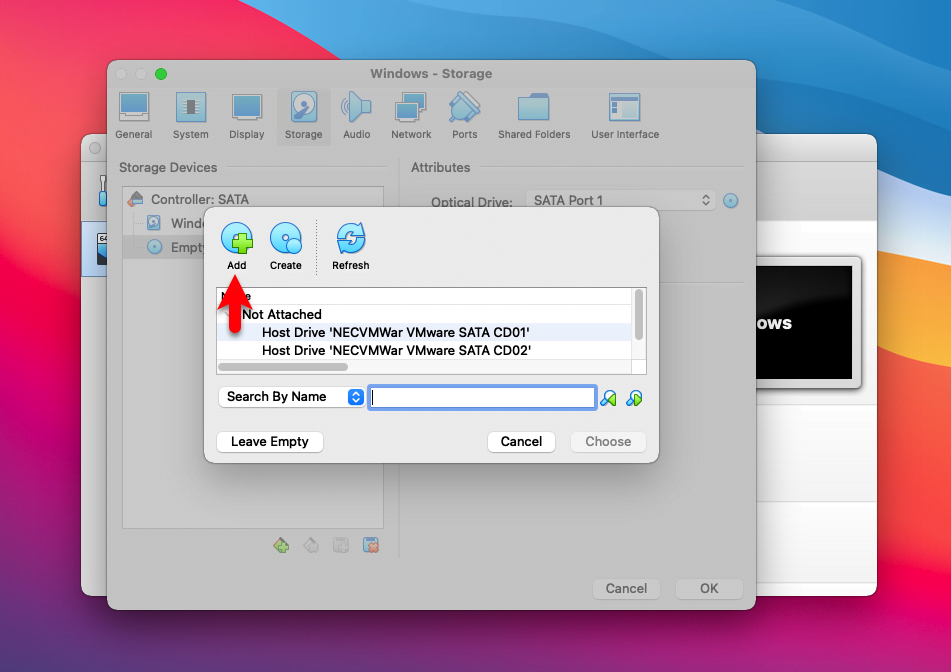
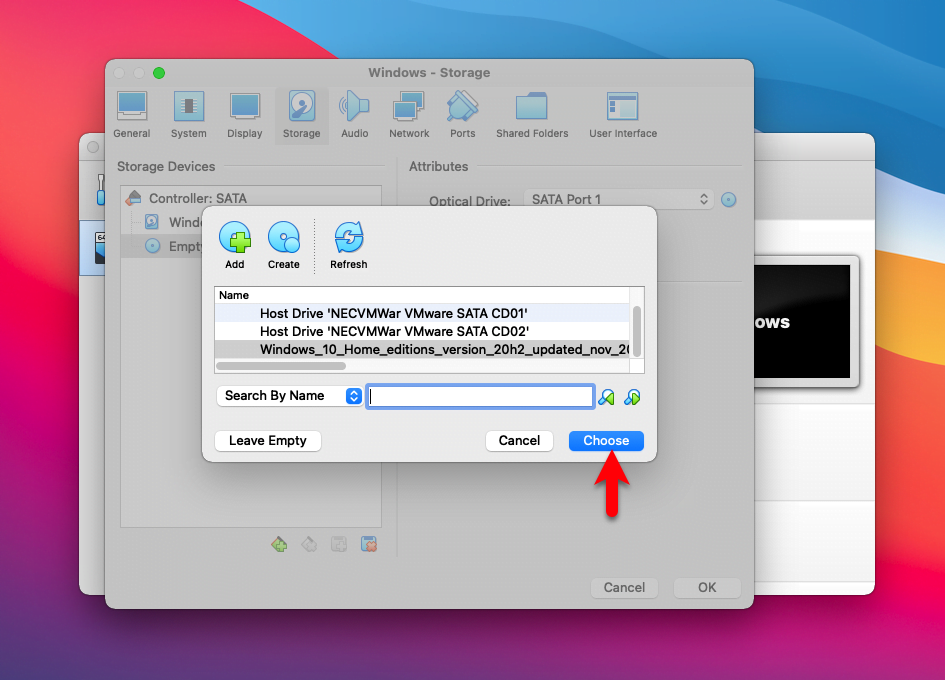
Now click on the Add button.
Select Windows 10 ISO where you have located and click Choose.
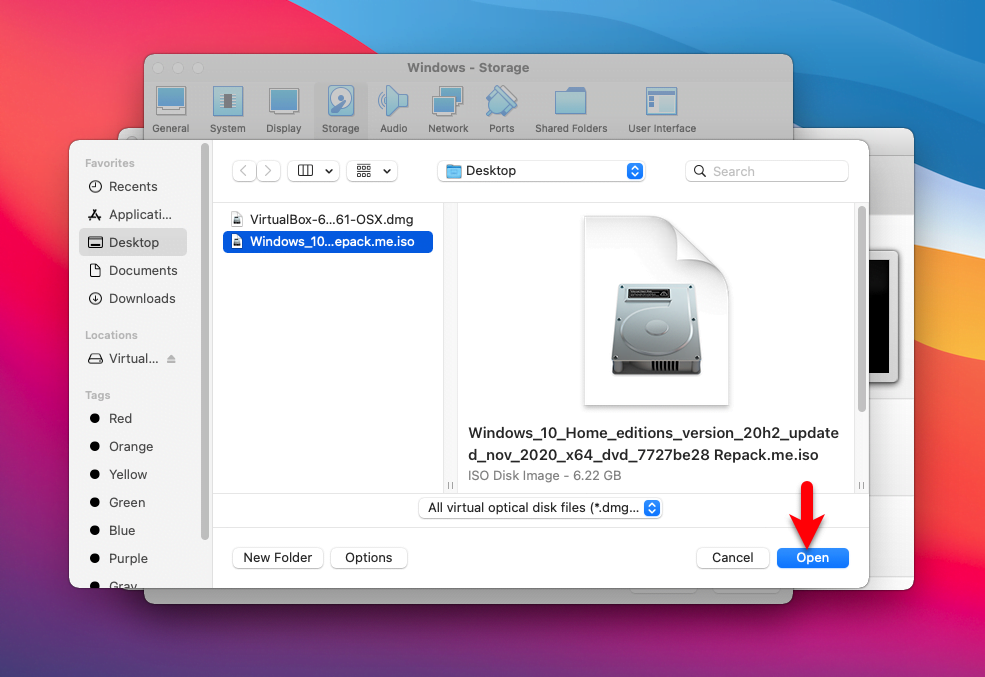
Once Windows 10 inserted into the list click Choose.
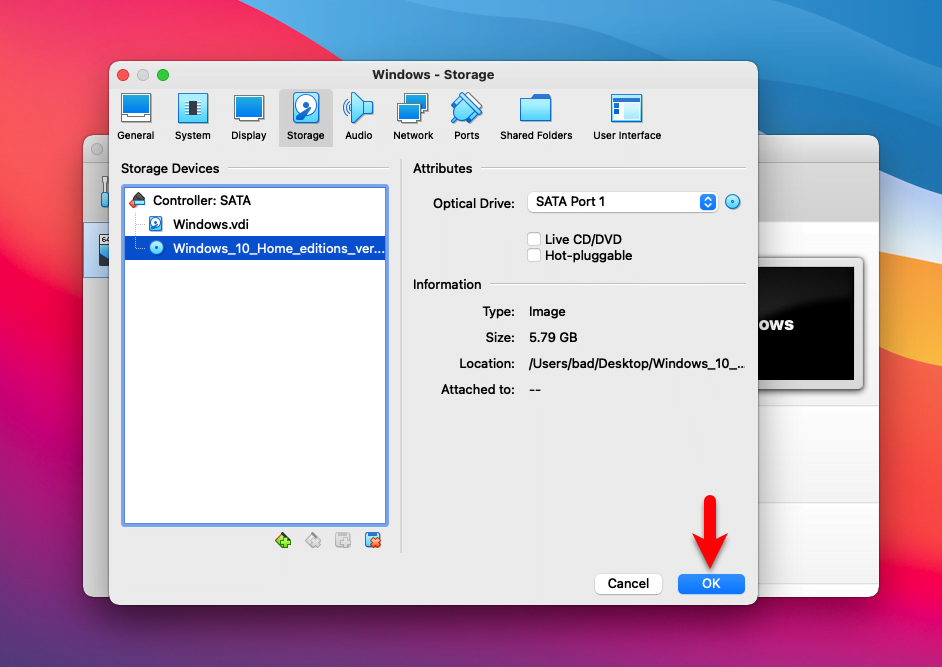
Once everything done perfectly to save changes the virtual machine click OK.
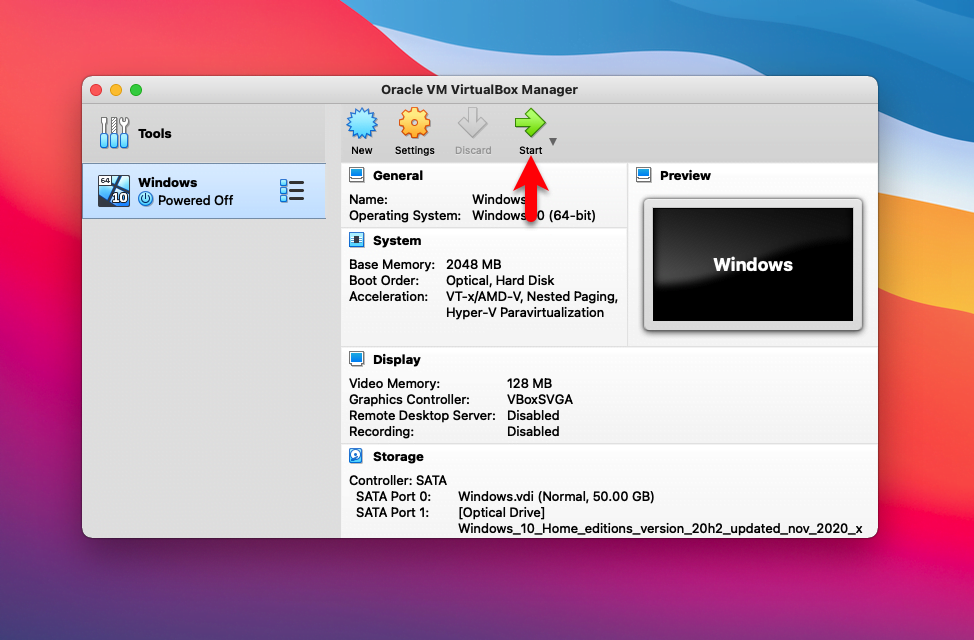
Finally, everything is done for the installation select the created virtual machine and click on Start.
Automatically it will start the installation don’t do anything during installation. While the installation completed automatically the virtual machine will restart.
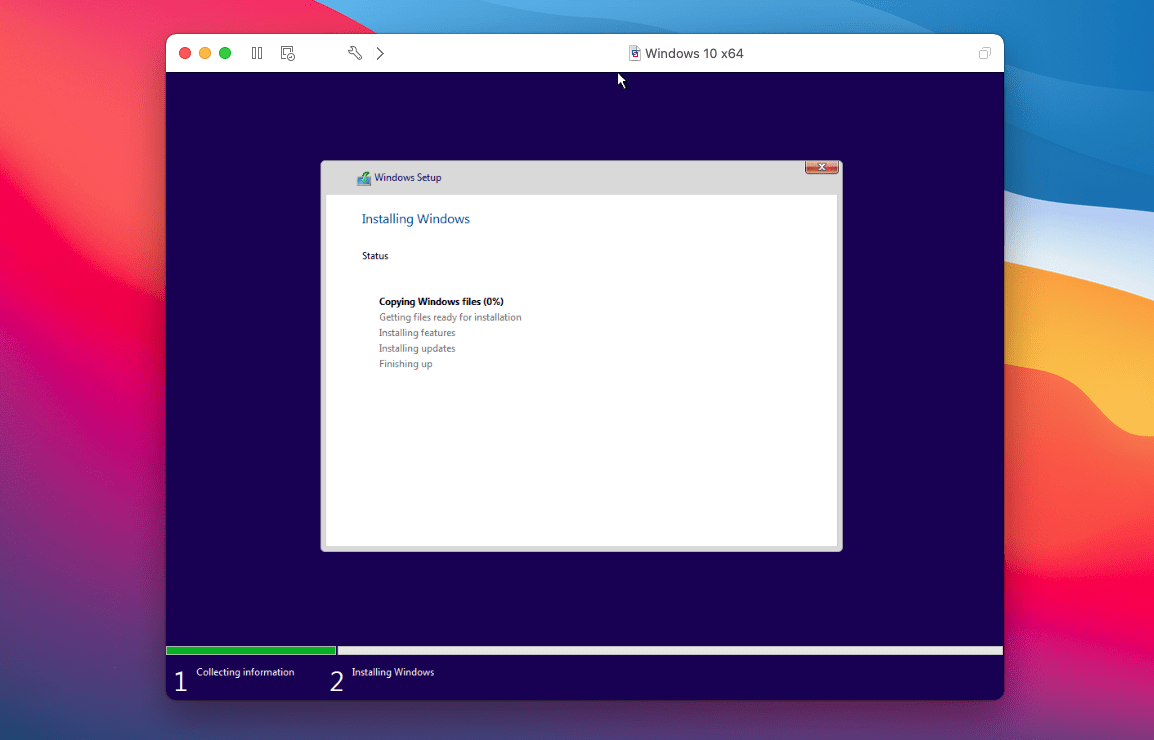
Finally, Windows 10 successfully being installed on macOS Big Sur on VirtualBox. If you faced any kind of problem feel free to contact us via the comment section.
Install Windows 10 on macOS Big Sur- Either it was MacBook or MacBook Pro, most of the Apple systems were based on Intel. With the release of macOS Big Sur, Apple also announced their own silicon-based processor and the discontinuity of Intel processor in near future. While on other hand, there are users who want to install Windows 10 on their Intel-based Mac. So, here will install Windows 10 on macOS Big Sur using Boot Camp.
We are using Boot Camp, as with Boot Camp thing gets easier.
Note: we are not performing any kind of virtualization or running an emulator. In fact, we are dual booting macOS and Windows OS at the same time.
Related: Free Download macOS Big Sur ISO for Virtual Box
Requirements to install Windows 10 on mac
Before you start the installation, make sure you have the thing given below.
You will need to have access to all basic computer hardware that includes keyboard, mouse…
For RAM, 8 is needed a minimum else 16 GB is way better. As for storage, only Windows OS will take about 64 GB of space, you will need at least 128 GB of storage for Windows OS. If you are dual booting both macOS and Windows OS, then you will need at least 250 GB of free storage.
Using 32-bit Windows OS on Mac is an option due to poor compatibility. You will need to download Windows 10 64-bit in ISO Image. I would recommend you to use Windows 10 Home or Windows Pro for this purpose.
In short, Windows 10 is supported on the Mac systems below:
- MacBook introduced in 2015 or later
- MacBook Air and Pro introduced in 2012 or later
- Mac mini introduced in 2012 or later
- iMac introduced in 2012 or later1
- iMac Pro (all models)
- Mac Pro introduced in 2013 or later
Related: Free Download macOS Big Sur ISO Image
Before we start
Before we start the operation make sure to back up all your files. As there is a slight chance that you might lose your data. For backing up your files, you can use the Time Machine feature on your macOS.
Note: Since we are running Boot Camp for the purpose, of earlier systems it will be easy. However, on new Mac, which has an M1 chipset and these chipsets are based on ARM are not quite compatible with Windows 10. So just in case, if you got problems with the OS, then it is probably the new M1 chipset.
Install windows 10 on macOS Big Sur

Here we are installing Windows 10 on macOS Big Sur; however, you can perform the same procedure on other macOS (Mac systems) too.
Check software update
Let’s start by making your system updated. Start your macOS as admin and quit all applications. Go to the Apple menu and there you will find system preferences. Inside you will find Software Update, open it. Then click on Install all available macOS updates.
Once all the updates are downloaded, restart your system. Install all the updates.
Repair mac for Window
We will install Boot Camp first then will configure disks for Windows 10.
You will need to download Boot Camp support software (in most of the systems, the app is already available). The Boot Camp is located in /Applications/Utilities. It is normally found as BootCampAssistant.

If can’t find the boot camp then follow these steps; Go to Finder, navigate on the menu bar, there you will find Utilities in the drop-down menu. As you open the Boot Camp assistant, a new window will pop up.
Note: check your MacBook or the system that you are using is connected to a power source. Also, make sure that you won’t lose power while performing the rest of the operations.

You will be placed into the Welcome window, click on Continue.
Here you will need to create a new partition for Windows 10. Name the new partition as BOOTCAMP. Once the auto-reboot is created, format it. when the disk is ready, select the disk and also select the ISO Image of Windows 10.

Note: Loading will take place. this process will check storage, old-Time Machine snapshots, cached iCloud and will remove them to make space for your OS. if you want to skip the process then you can click on Skip.
Method for 1 internal disk
If you have 1 internal disk then you will need to choose Windows ISO Image, specify partition size and click on Install. Normally 42 GB of Boot Camp is used, 64 GB is a minimum whereas, 128 GB is recommended.
I would recommend you to use the name as Windows OS or Windows 10 partition, whereas for storage at least use 120 GB or more for windows partition.
Note: you can’t resize the disk size later, make sure you have done the partition according to your usage.
Method for multiple internal disk
If you have multiple internal disks, then;
If you select your startup disk: You can create an additional partition for Windows. Specify the partition size by dragging the divider between the macOS and Windows partitions.
If you select an APFS-formatted disk: You can either create an additional partition on the disk for Windows or erase the entire disk and create a partition for Windows. However, if you choose to create an additional partition, specify the partition size by dragging the divider between the macOS and Windows partitions.
If you select a non-APFS-formatted disk: You can erase the entire disk and create a partition for Windows.
Check secure boot settings
The secure boot by default is Full Security. You will need to make sure, it is not in Full Security before you install Windows 10 on your Mac. You will need to change the Full Security to No Security since we are going to install Windows on it and Full Security won’t let us perform the installation.
One more thing that you will need to change will be the External Boot option. Change it Allow booting from external media.
Install windows on macOS Big Sur
Now that you have created the partition and loading is completed, the system will restart. On restarting, your Mac will load Windows 10 setup file. From now on, you will need to install Windows 10.
Windows Setup will appear with Language to install, Time and currency format, and Keyboard or Input Method options. Select options and click on Next.
You will be asked for Windows 10 license key, click on Skip for now.
Select the Custom installation, and accept Windows License.
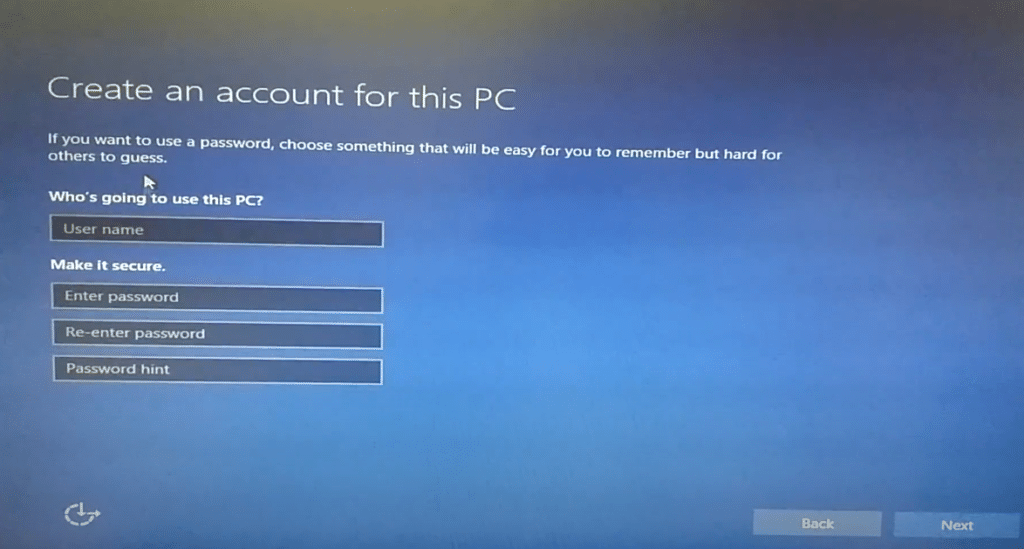
Installation of Windows 10 will take place. once the installation got completed, connect your Wi-Fi, create a user account with password and password hints.
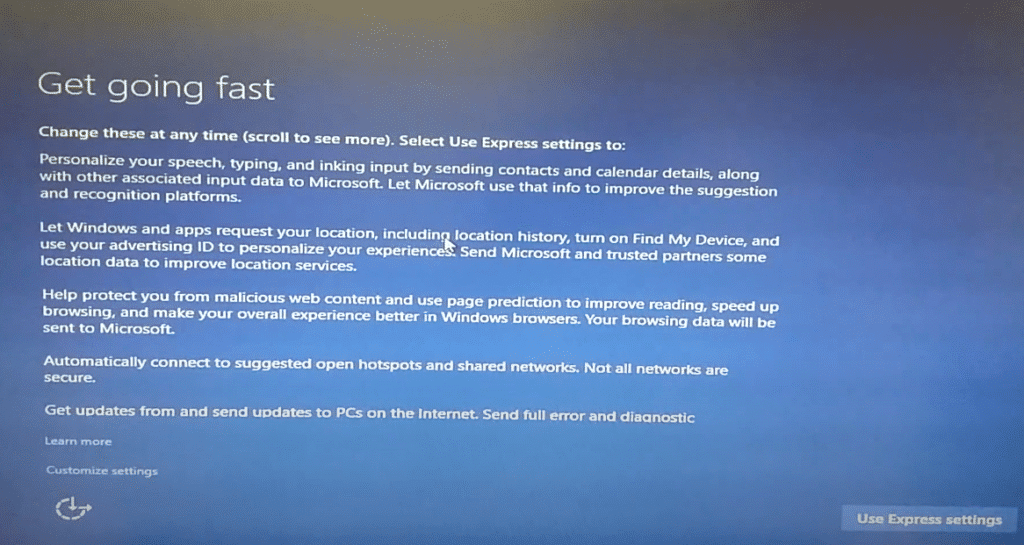
In Get going fast window, use express settings.
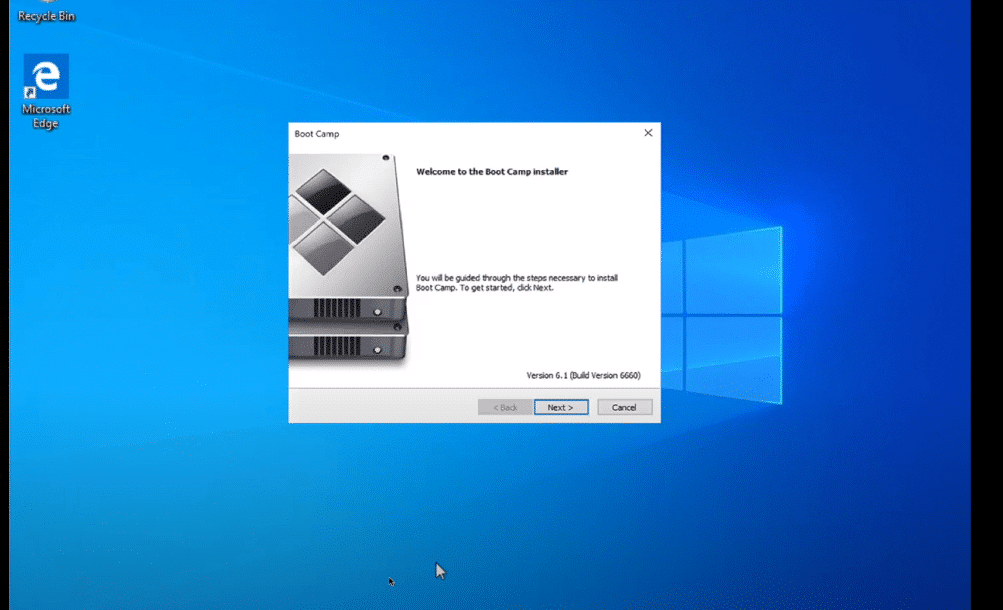
Install boot camp on windows

Now that you have installed Windows 10, it is time to install Boot Camp that supports your Mac hardware installing.
The installation will start automatically, you will need to click on Next, then on Install. Downloading will begin.
Note: if the installation won’t start automatically, then you will need to install it manually.
In the Boot Camp installer in Windows, follow these commands.
- Don’t cancel any installer dialogs that appears on your screen.
- If “the software you’re installing has not passed Windows Logo testing” appears then click on Anyway.
- Try to not to responds to dialogs until asked. If asked to install, then click on Install.
- If nothing happens then look behind windows for tasks running.
When the installation got completed, click on Finish. Soon your Mac will restart and you are ready to go.
Related: How to Install macOS Big Sur on VMware Fusion?
Update windows 10
This is quite optional too. if you want to use the latest version of Windows 10 then you can update it too.
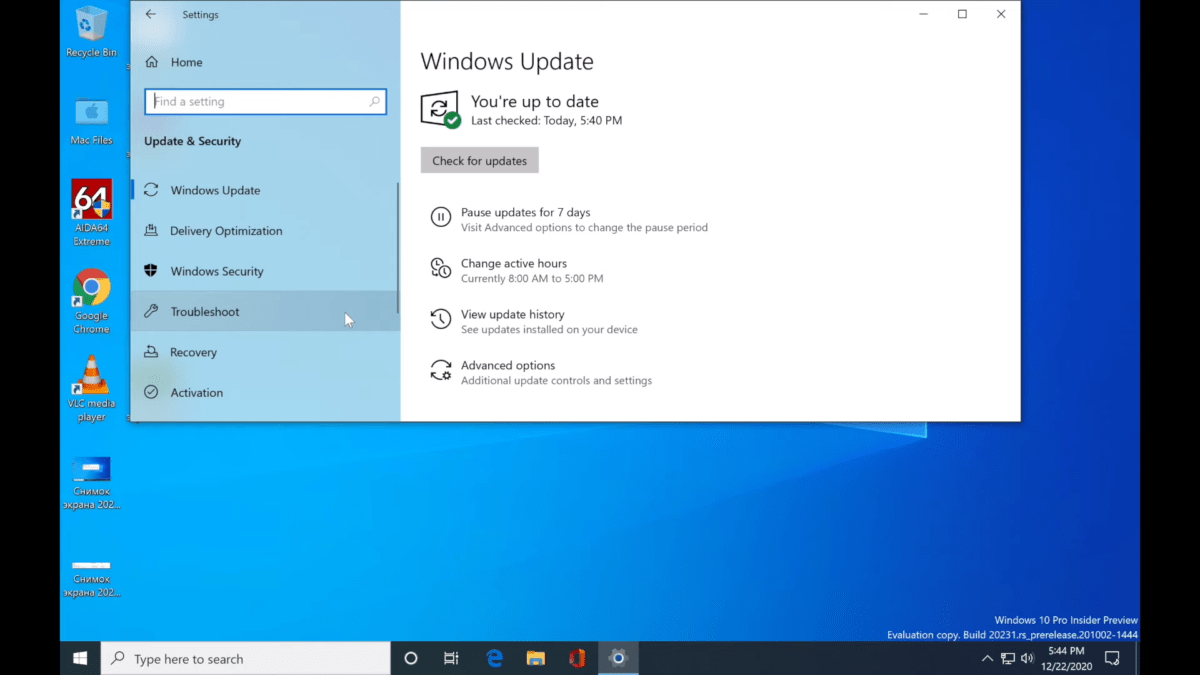
Click on Start and open Settings. There you will find Update & Security.
In Windows Update, you will find Check for updates. Click on Check for updates and the system will update your Windows 10.
Switch between macOS 11 and windows
From the start, I stated that it is not an emulation or virtualization, in fact, it is dual booting. If you want to switch between macOS and Windows OS, then here is how to do it.
Reboot your system.
Press the Option key and go to select menu.

Select the disk you want to run. It can be either Windows or macOS. The selected one will boot, and enjoy the OS.
Change Windows 10 to default boot
To make Windows 10 as default boot on your Mac, follow these steps:
Click on the Gear icon on Dock. Then select System Preferences.

Double click on start disk. Now select the startup disk (the disk where Windows 10 is hosted).
Restart your system.
Common Issues Experienced on Windows 10 on Mac
Here are some of the most common issues that a user could experience after installing Windows 10 on macOS.
The startup disk does not have enough space:
This error is when you don’t have enough space. The Windows alone takes almost 41 GB of storage, if you got this error then you will need to add a new SSD.
Your disk could not be partitioned:

For this error, you will need to format your disk to MS-DOS (FAT). Since in macOS all the disks are formatted as HFS+ or APFS. Go change the format of windows disk to FAT.
An error occurred while copying Windows 10 installation files:
Normally you will experience this error when your ISO Image of Windows 10 is corrupted or is missing important files. The same error can occur when the ISO is larger than 5GB whereas, the FAT can hold only 4GB. Here you will need to download the older version of Windows 10 and upgrade it later.
Conclusion
And that is it, on how to install windows 10 on macOS big sure using Boot Camp application. If you got stuck in any step or got confused then the comment section is all yours.
Здравствуйте, уважаемые читатели сайта Uspei.com. С переходом на собственные процессоры Apple у пользователей отвалились виртуальные машины и главное Boot Camp. Этой утилиты на macOS Big Sur для M1 просто нет.
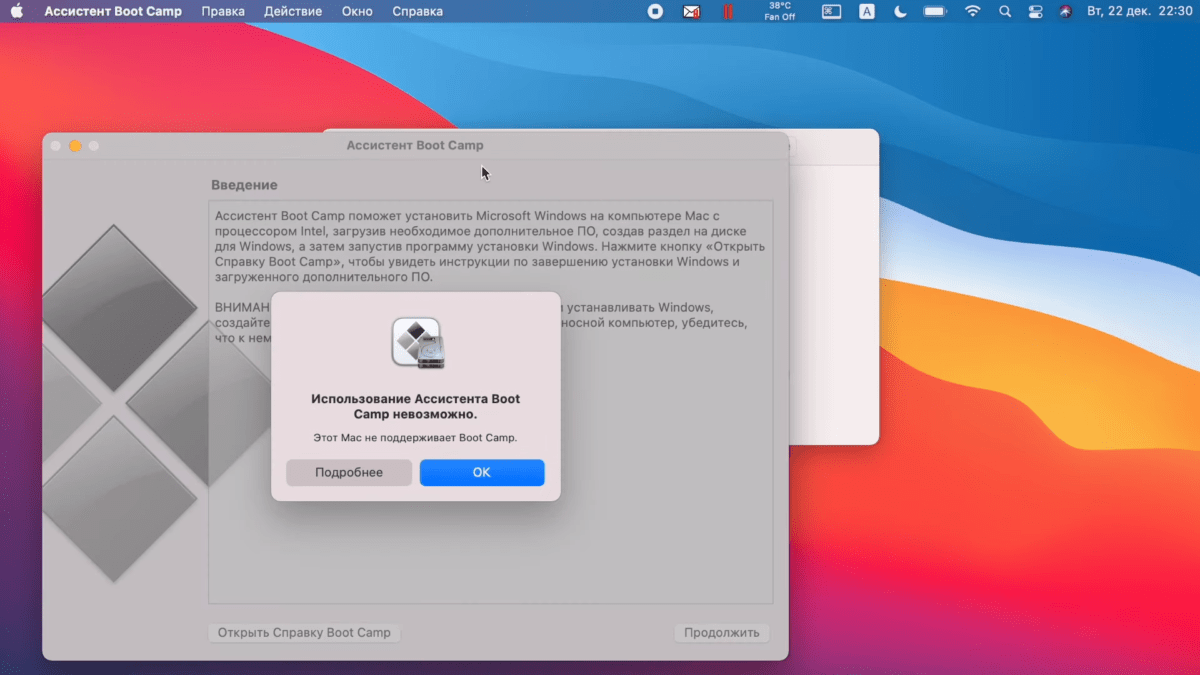
Boot Camp – это утилита для переключения между macOS и Windows, то есть возможность установки операционной системы в качестве второй полноценной и их раздельного запуска. Причем утилита мега крутая, она подтягивает скачанный образ и в пару кликов позволяет накатить Windows, а после установки также в пару кликов позволяет обновить все драйвера.
И если отсутствующий Boot Camp – это вопрос, который относится не к Apple, то вот виртуальные машины начали обновляться. На простом языке, это когда в macOS запускается программа, в которую можно накатить Windows.
К недостаткам такого решения можно отнести существенно снижающуюся производительность. Это логично, ведь помимо винды ресурсы нужно тратить еще и на саму macOS, в которой собственно виртуальная машина запускается. К достоинствам можно отнести возможность работать в двух операционках одновременно, причем практически бесшовно.
Первопроходцем стала компания Parallels, которая теперь позволяет накатить Windows на Mac с процессорами ARM, но есть нюансы, о которых я расскажу в этом обзоре.

Как скачать Windows 10 для ARM
Для начала нужно зарегистрироваться в программе Windows Insider, чтобы вы могли скачивать и устанавливать предварительные версии тестируемых операционок. Для этого необходимо перейти на специальную страничку. Далее войдите в свою учётную запись и согласитесь с условиями программы.
Важный момент: виртуальная машина Parallels не поддерживает обычную версию Windows под архитектуру x86 (то есть для процессоров intel и AMD), а только специальную версию Windows 10 для ARM. Она запускает приложения, разработанные для ARM, то есть под мобильные процессоры, а также запускает через эмулятор только 32-битные программы разработанные под x86.
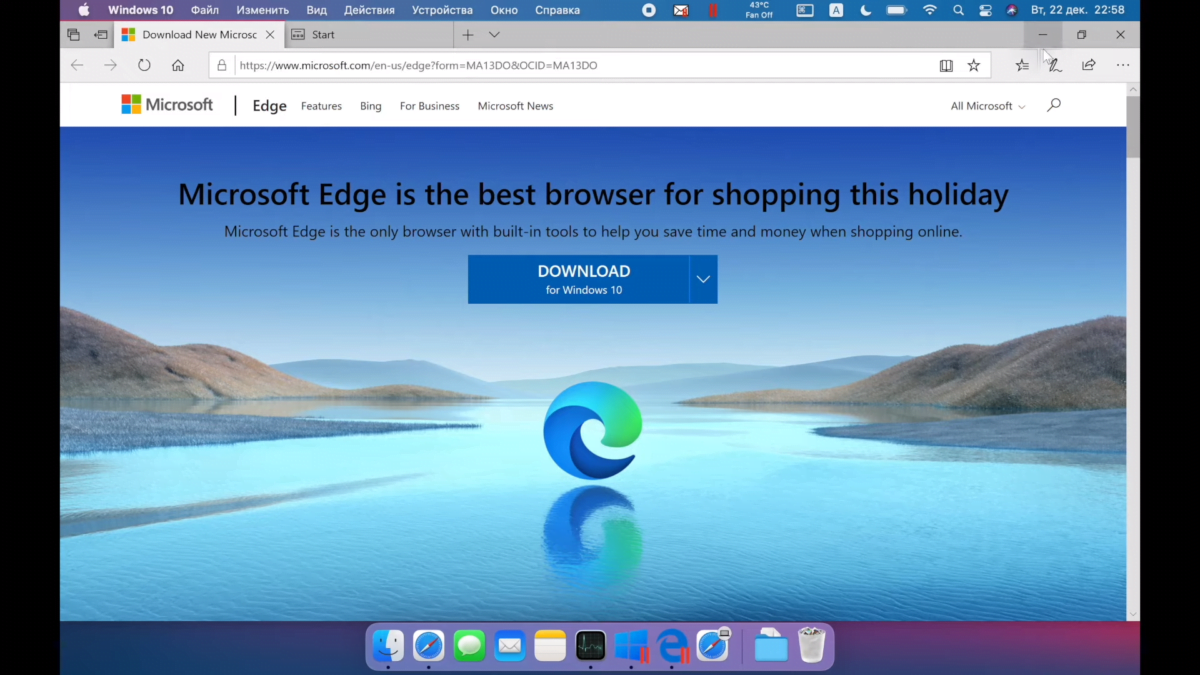
64-битные программы (а их большинство) не работают. То есть тот же VLS плеер с пометкой win64 не запустится, а с win32 пожалуйста.

Но есть и хорошая новость Microsoft уже выпустила свежий билд 21277 Windows 10 для ARM, в котором есть возможность запускать через эмулятор программы разработанные под 64 бита. Если будете качать эту сборку, количество поддерживаемых программ вырастет в разы и в этом обзоре я тоже расскажу как это все дело накатить.

Итак, нам нужна специальная версия Windows 10 для ARM – Insider Preview. После того, как вы залогинились и зарегистрировались в программе Insider Preview у вас не возникнет никаких проблем при скачивании. Образ весит чуть больше 8 Гб.
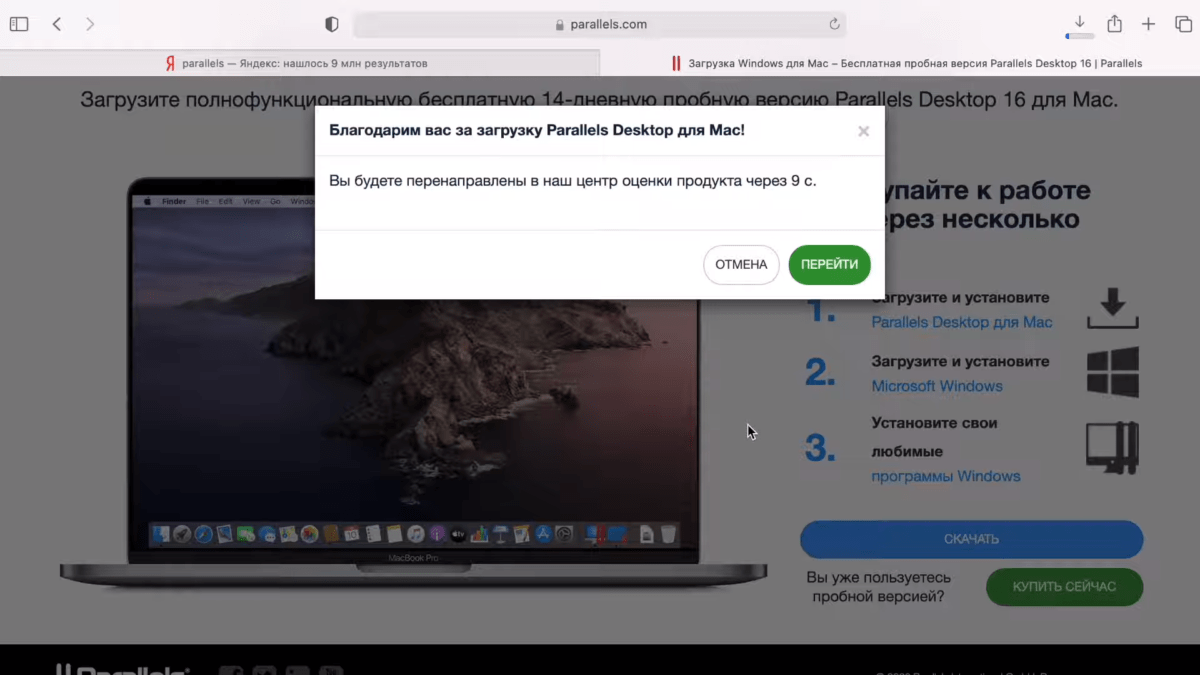
Как скачать Parallels Desktop 16 для Mac на M1 (ARM)
Теперь необходимо скачать виртуальную машину Parallels Desktop 16. Программа платная, но имеет бесплатный 14-дневный триальный период, чтобы вы могли все попробовать и протестировать, чем мы собственно и займемся.

После скачивания установите программу и если во время установки у вас появится сообщение “Эта версия Parallels Desktop не поддерживаться на компьютерах Mac на платформе Apple Silicon” это значит, что разработчики еще не выпустили финальную общедоступную версию для Mac на M1.
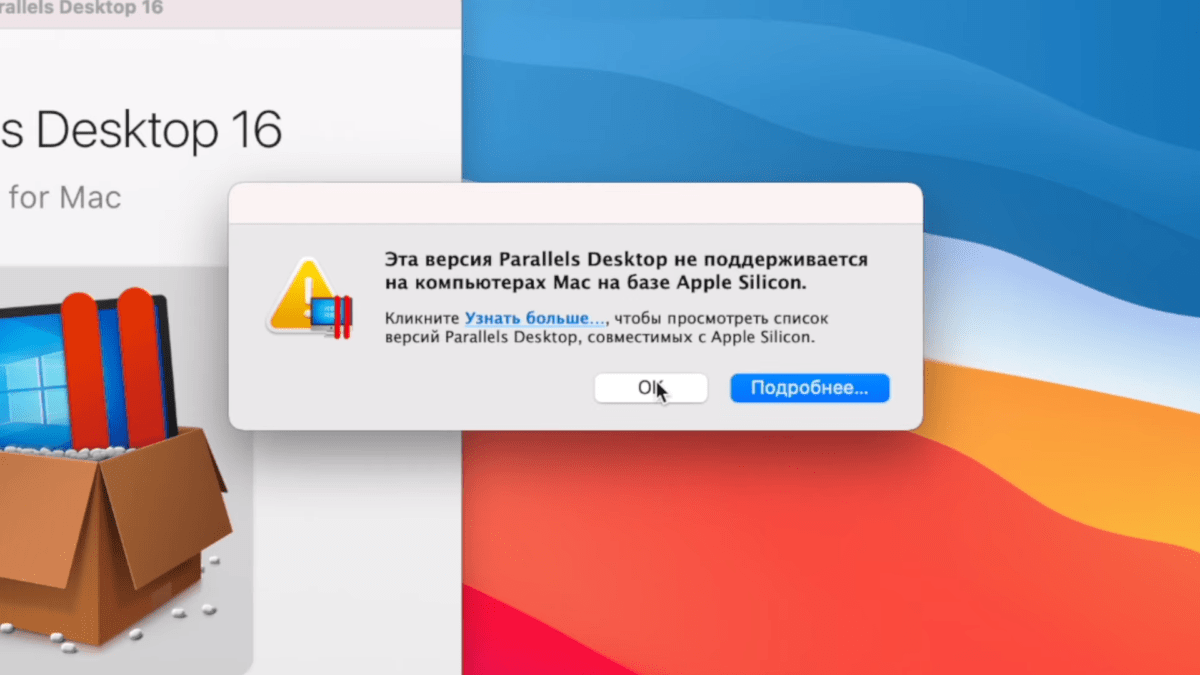
Не беда, есть работающая версия со статусом technical preview, там разработчики оставили и ключик для тестирования. В таком случае во время установки никаких проблем уже быть не должно и вы увидите сообщение о том, что эта версия программы предназначена именно для Mac на платформе Apple Silicon.


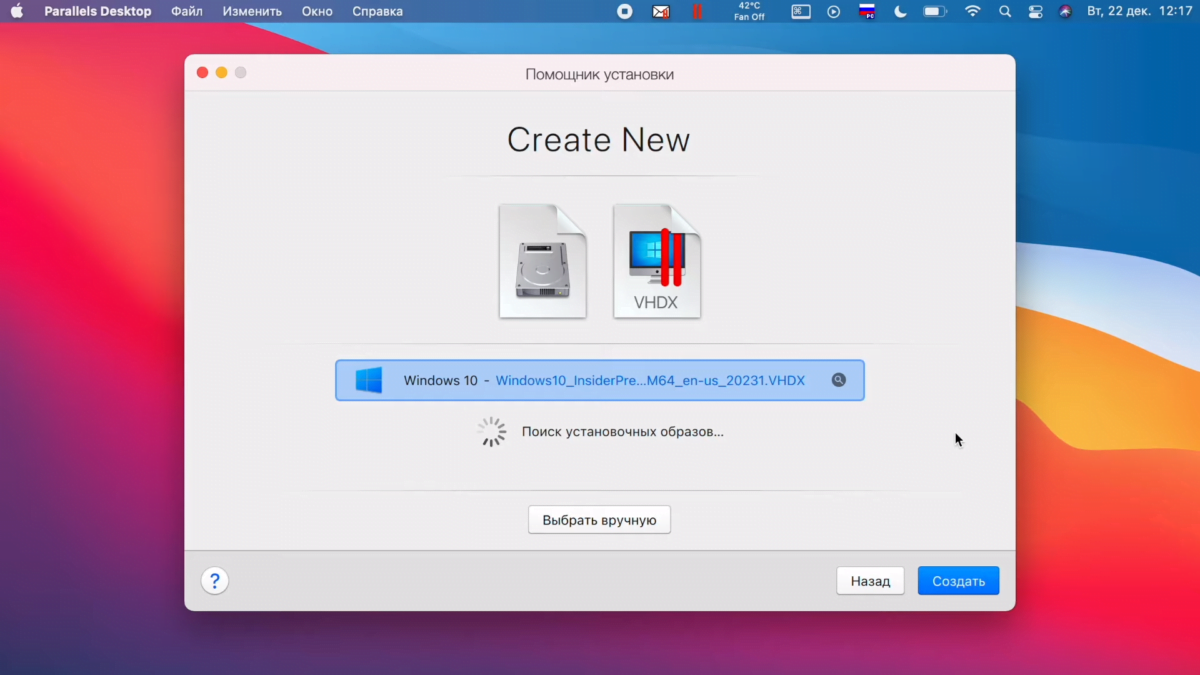
Установка Windows 10 на Mac с М1
После установки Parallels Desktop программа предложит установить виртуальную машину. Обычно образ Windows 10 для ARM подтягивается автоматически, но в случае чего путь к нему можно указать вручную.
Приложение предложит войти в учетную запись Parallels и активироваться. Если вы скачивали тестовую версию Parallels Desktop для M1, то ключ есть на страничке, где вы скачивали программу.

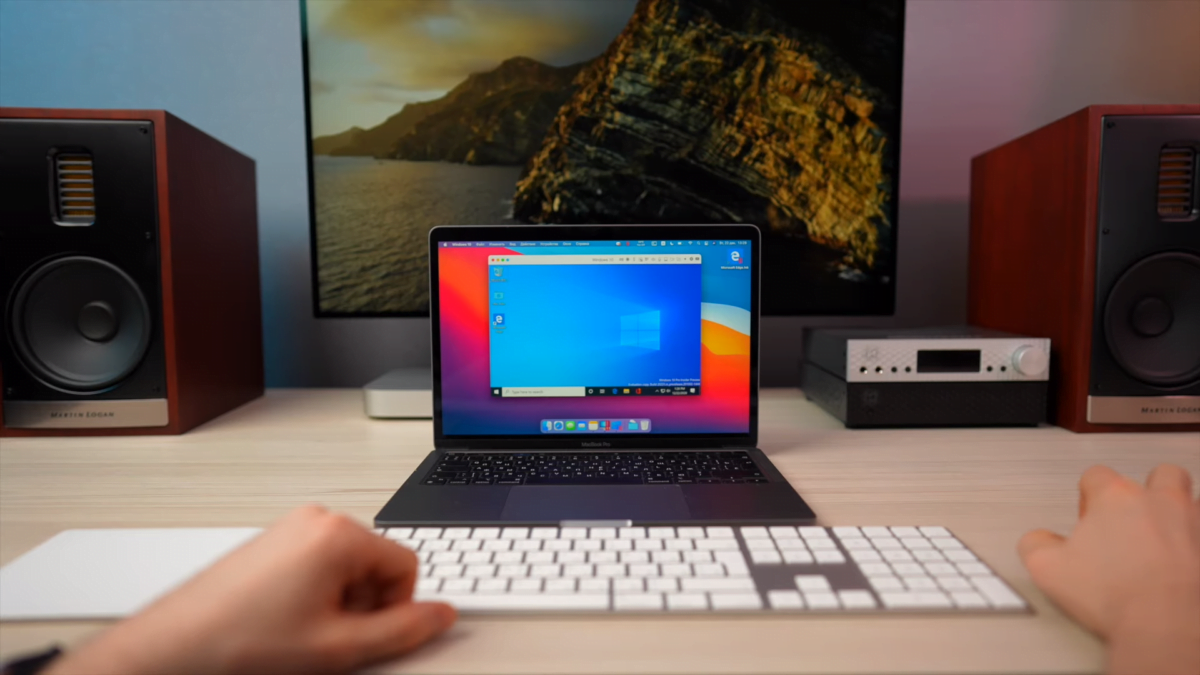
Далее начнется автоматический процесс установки Windows, который у меня занял меньше 10 минут. Драйвера на внешнюю периферию, например, на мышку или клавиатуру, установятся автоматическим и все будет работать без какого-либо участия пользователя.
Как установить (обновиться) до Windows 10 Insider Preview Build 21277
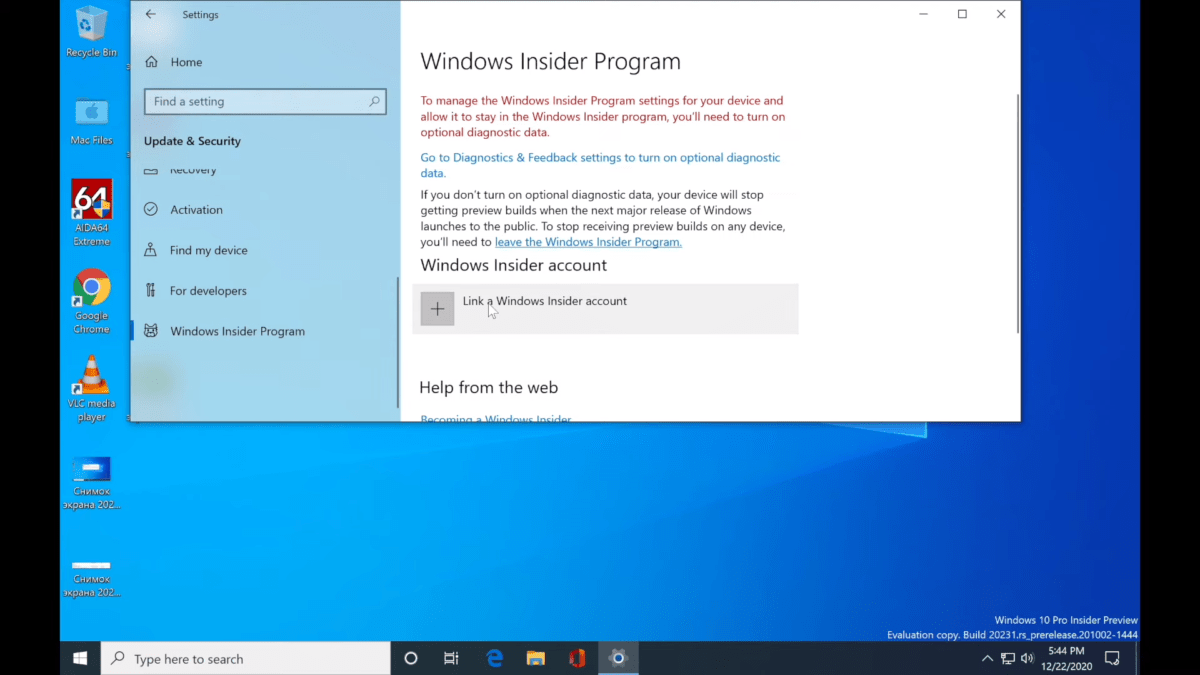
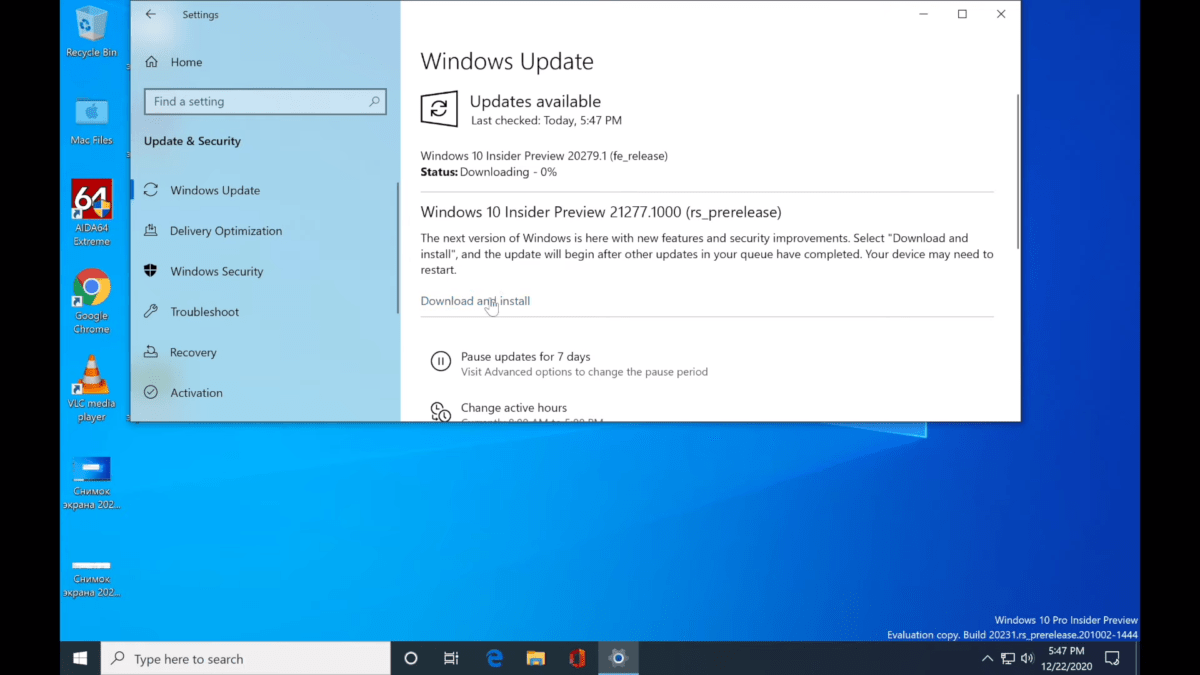
Ну, а для того, чтобы установить самую последнюю сборку, которая поддерживает 64 битные программы (а их сейчас большинство) необходимо выполнить обновление. Пройдя в меню: Пуск-Параметры-Обновление-Безопасность. При проверке обновления сборка 21277 поддерживающая запуск через эмулятор программ разработанных под 64 бита будет недоступна. Идем в раздел Windows Insider Program и добавляем зарегистрированный аккаунт.
Дальше необходимо в разделе диагностика и обратная связь активировать пункт Optional diagnostic data. Остальное можете не включать.

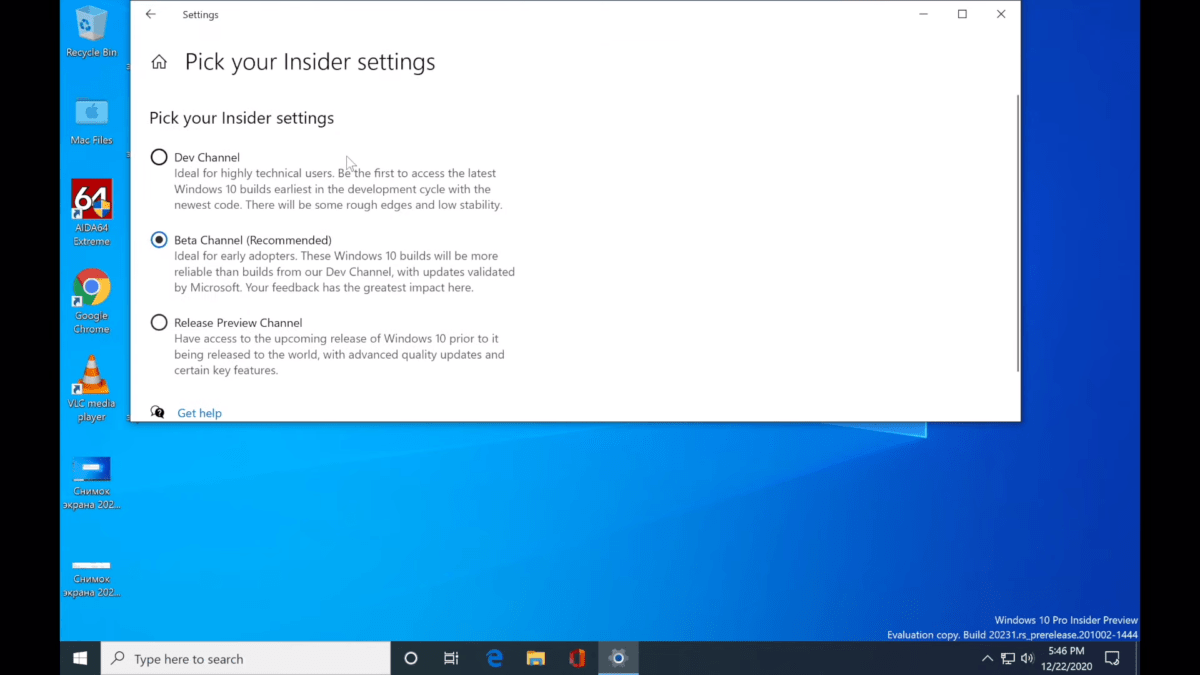
Возвращаемся в раздел Windows Insider Program и меняем beta канал на канал для разработчиков Dev Channel. После этого в разделе Windows Update жмем проверить обновление и скачиваем заветную сборку с поддержкой x64.
Тонкая настройка Parallels Desktop 16 для Mac на М1
Версия Windows 10 под ARM пока доступна только на английском языке, если вам удастся накатить и русский языковой пакет – пишите в комментариях.
Parallels выделила для Windows в автоматическом режиме 2-х ядерный процессор с частотой в 1,5 Ггц, 4 Гб оперативной памяти и 256 Гб пользовательской памяти. Сведений о видюхе нет совсем.

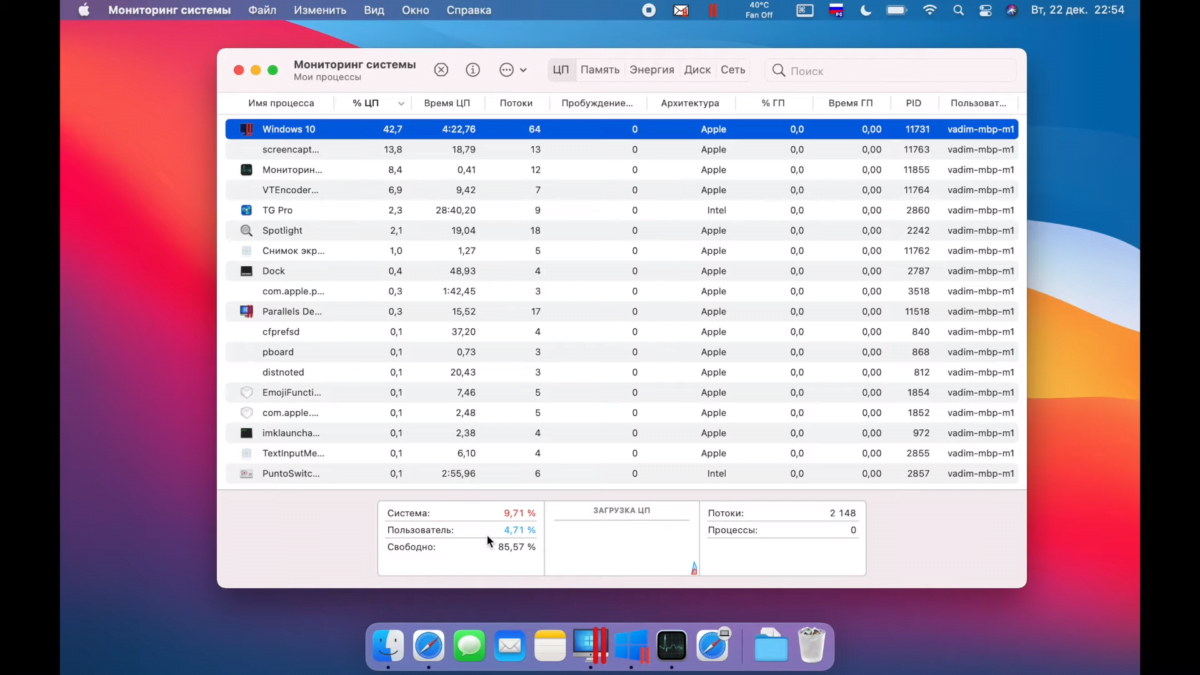
На Macbook Pro 13 дюймов 2020 года на M1 монитор в винде был настроен в нативном разрешении 2560/1600 точек. Windows в виртуальной машине вне режима паузы и без каких-либо запущенных программ практически не сжирает мощность чипа.
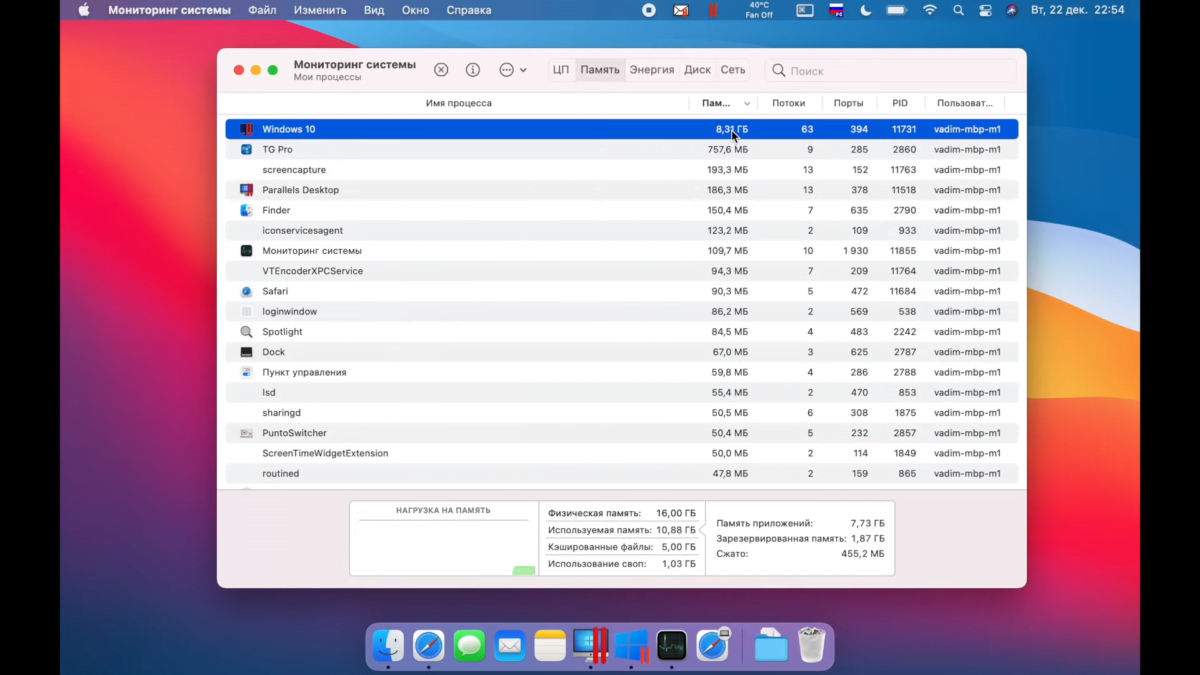
А вот оперативку потребляет будь здоров – больше 8 гигов из 16 доступных, а на версии с 8 гигабайтами оперативки съест больше 6, еще и в своп неплохо залезет. Так что если планируете баловаться с виндой обязательно берите Mac с 16 гигабайтами оперативки.
Если покажется мощности мало, чтобы выделить больше ресурсов необходимо выключить виртуальную машину и перед новым запуском открыть меню “действия” пункт “настроить”. Во вкладке “оборудование” вы сможете самостоятельно увеличивать производительность процессора и графики, которые будут использоваться в Windows.

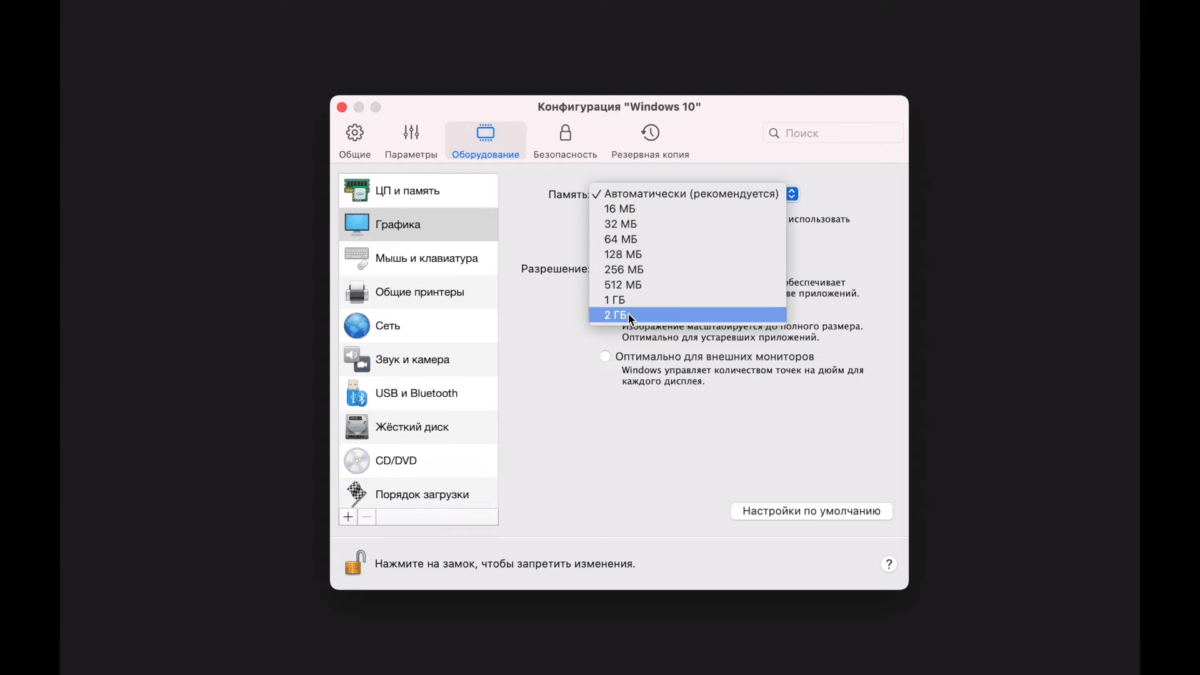
Предупреждаю: некоторые значения могут привести к не запуску винды, придется ставить некоторые параметры по умолчанию.
Как работает Mac на М1 с Windows 10?
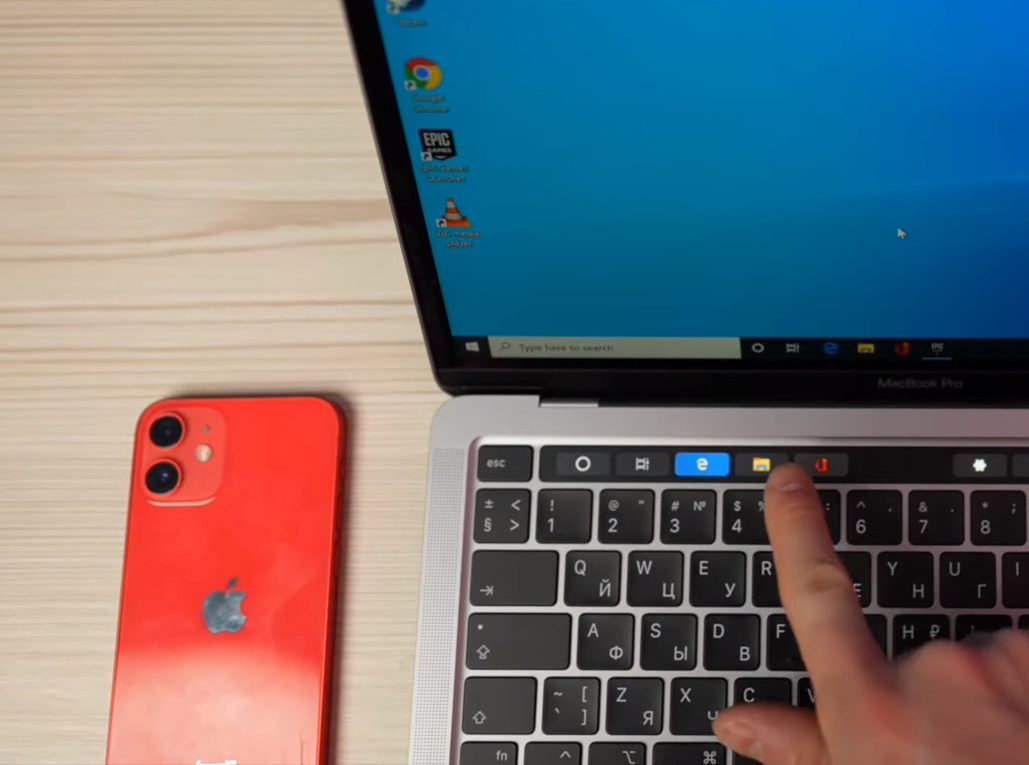
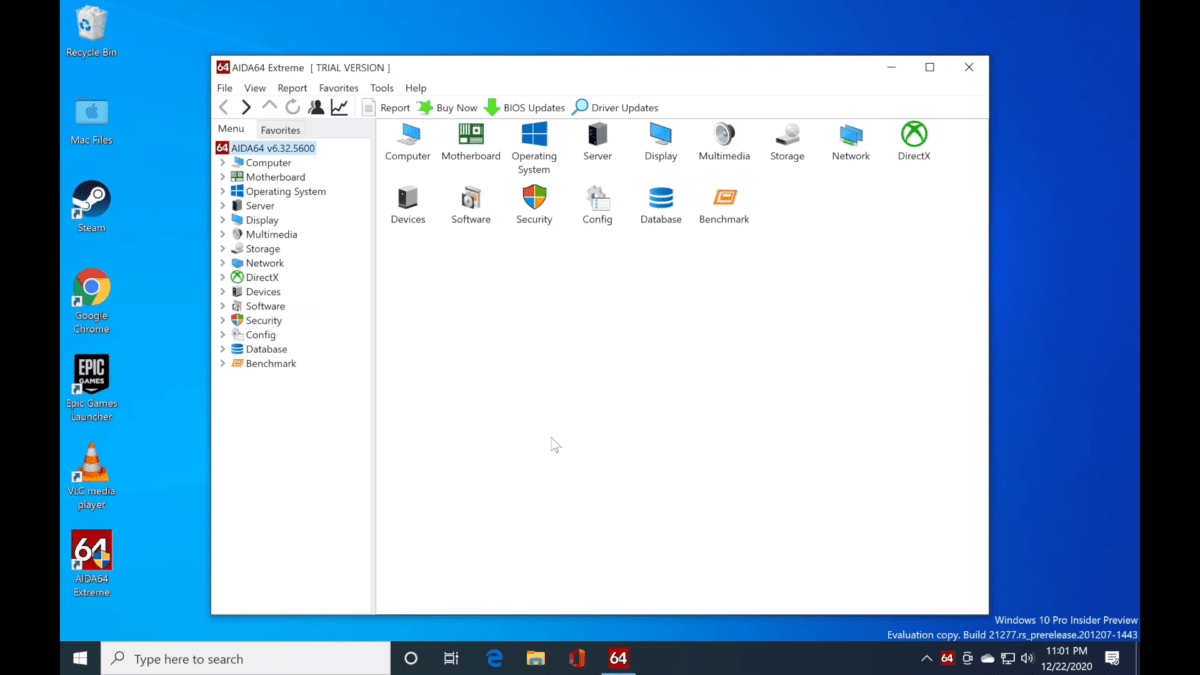
Тачбар в винде запущенный из под спад Parallels выглядит куда лучше, чем на macOS. В него опущена панель задач и как же я там тоже хочу увидеть Doc на macOS. А если запустить программу, то отобразятся классические F1-F12, а также вспомогательные необходимые клавиши, которых нет на клавиатуре макбука. Ну, например, PrtScn.

Парочка советов по работе. Чтобы запустить окно на весь экран, нажмите на зеленую кнопку в левом верхнем углу или сочетание клавиш Ctrl + Cmd + F, таким образом вы сможете быстро переключаться между двумя операционными системами нажатием Cmd + Tab.
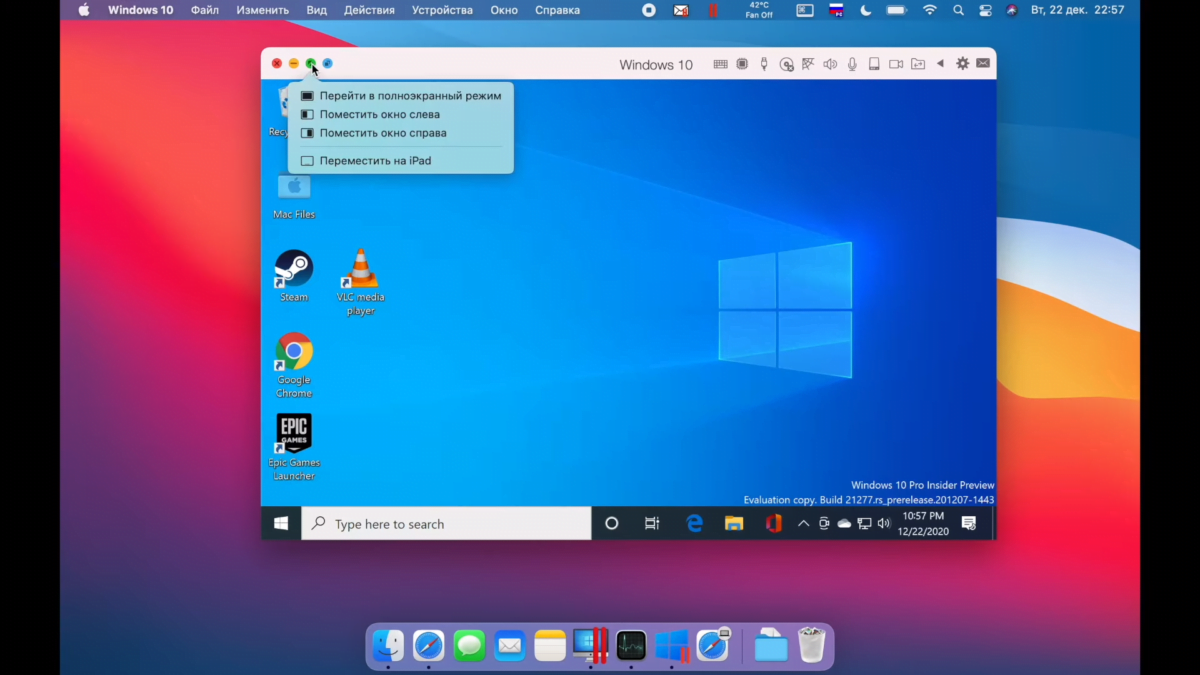
И да, не путайте этот режим с голубой кнопкой переводящий в режим Conference, он позволяет запускать окно приложения Windows в интерфейсе MacOS. Это очень прикольная штука, когда ты одновременно можешь пользоваться программами Mac и Windows. Чтобы выйти из этого режима нажмите “Вид” и “Выйти из conference” или сочетание клавиш Ctrl + Cmd + С.
Если вы временно не пользуйтесь виртуальной машиной вы можете поставить ее на паузу, чтобы она не потребляла ресурсы Mac. Делается это через иконку Parallels в строке меню. Также виртуалка через какой-то период времени бездействия автоматически это сделает. Выключить виртуальную машину можно как через сам Windows, так через строку состояния, но это менее безопасный вариант, чем обычное выключение винды.

На рабочем столе есть папка Mac Files открывающая пользовательскую папку macOS и вы можете иметь доступ ко всем файлам. После установки любых программ на Windows Parallels по умолчанию создает их иконки на рабочем столе macOS.

Правда режим конференции они сразу не запускают, а открывают просто окно виртуальной машины. Суть в том, что рабочий стол виртуальной машины и macOS становится общим и файлы размещенные на рабочем столе Mac будут отображаться и на столе Windows.
В целом операционка работает, но стабильной ее работу назвать нельзя, особенно все, что касается запуска тяжелых 64-битных программ и уж тем более игр – тут все надо индивидуально тестировать. Если с древним GTA: San Andreas проблем не будет, то запустить что-то современное на данный момент не получится.

Это нормально – у нас по сути бета виртуальной машины Parallels, бета винды и все это пока выглядит как дикие костыли. Что же, для старта неплохо, будем следить за развитием событий. В идеале, чтобы Microsoft дала добро на работу полноценного буткемп и начала интенсивно развивать Windows 10 для ARM. А подвижки уже есть, видимо за этим и в правду будущее, что же, поживем увидим.
Не забудьте подписаться на YouTube канал источника!