The OwnCloud server is an open-source cloud storage solution with multimedia playing and file-sharing capabilities. It can be installed on Linux platforms without any problem and has to be for proper performance and stability. However, users familiar with the Windows operating system install the Owncloud server using Windows’s IIS web server or third-party software like XAMMP or WAMP servers. But in this tutorial, we will not use any of them to install the Owncloud server on Windows 10 or any virtual machine software like Virtualbox/Vmware. Instead of the traditional method, we use the Windows Subsystem for Linux (WSL) for better stability and performance. The Linux environment app which we will use for it is Ubuntu. Let’s see how to do this. The latest version of the OwnCloud while this tutorial was Owncloud 10.1.0.
Step 1: Enable the Windows Subsystem for Linux (WSL)
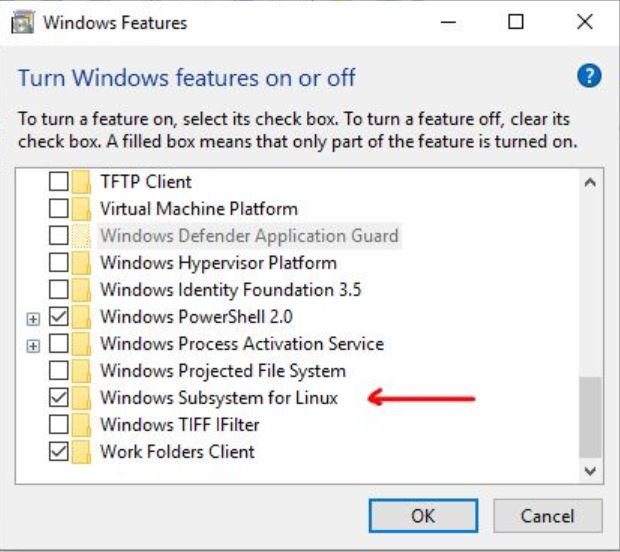
To enable the Windows Subsystem for Linux feature on Windows 10, go to the Search box, type “Turn Windows feature on or off,” click on that as it appears, and enable the WSL (Windows Subsystem for Linux) feature: For more info on this, see: Enable the Windows Subsystem for Linux feature
Step 2: Install Ubuntu 20.04/22.04 Linux App
From Windows 10 search box or the program, list search for the Microsoft store. When the store opens, search for Ubuntu to download and install. After installing, click on the Launch button, which extends the Ubuntu bash or command screen from where we can use all Ubuntu commands except a few directly on Windows 10.
Step 3: Install Apache, MySql/ MariaDB plus PHP on Windows 10
Before installing the Owncloud 10.1.0. we need to set up a web server environment and a LAMP setup. Here is the command which we need to execute for installing Apache+PHP+MariaDB. Copy and paste the below one using the right mouse, click, and then hit the enter button.
sudo apt-get install apache2
sudo apt-get install mariadb-server
sudo apt-get install php libapache2-mod-php php-mysql php-gd php-json php-curl php-xml php-zip php.mb
sudo apt-get -y install libmcrypt-dev
Owncloud also needs one more PHP extension, i.e., the intl extension, so install that too.
sudo apt-get install php-intl
Step 4: Check your Windows 10 Apache installation
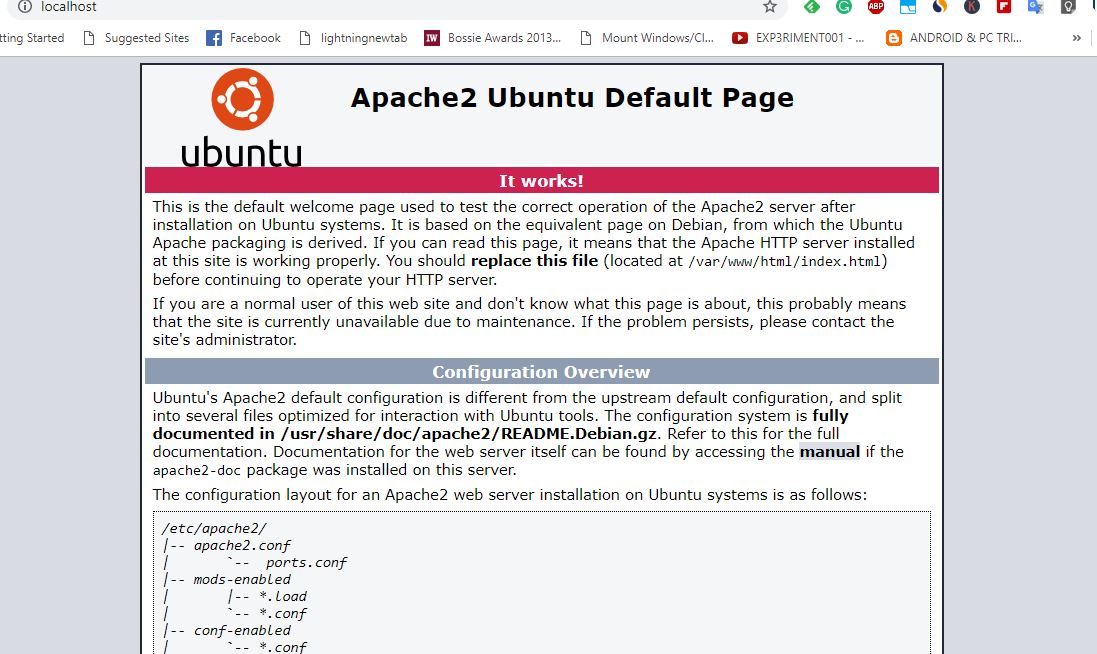
To check whether our Apache server is working, go to your Windows 10 browser and type http://localhost/ or http://127.0.0.1/ or the IP address of your Windows 10 local machine. You can find out the IP address by typing Ip a. As you enter the IP address, the Apache testing page will open, which means everything is fine and time to move to the next step.
Step 5: Download the Owncloud server
Here is the command to get the files required for setting up OwnCloud:
sudo apt install wget unzip
wget https://download.owncloud.com/server/stable/owncloud-complete-latest.zip
unzip owncloud-complete-latest.zip
sudo mv owncloud/ /var/www/
sudo chown -R www-data:www-data /var/www/owncloud/
The above commands automatically download and extract the Owncloud files under the Apache directory.
Step 6: Create an Owncloud configuration file for Apache
Now create an Owncloud configuration file using the below command:
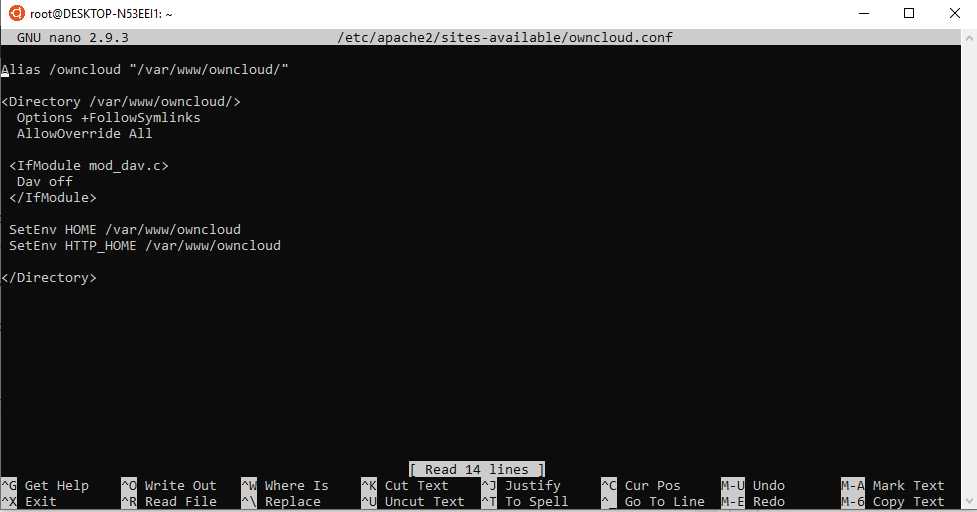
sudo nano /etc/apache2/sites-available/owncloud.conf
And then, add the following lines to point the Apache root directory toward the Owncloud.
Alias /owncloud "/var/www/owncloud/"

<Directory /var/www/owncloud/>
Options +FollowSymlinks
AllowOverride All

<IfModule mod_dav.c>
Dav off
</IfModule>

SetEnv HOME /var/www/owncloud
SetEnv HTTP_HOME /var/www/owncloud

</Directory>
After adding the above lines, press Crtl +O to write the files and CTRL+X to save and exit.
Step 7: Create a symlink for Owncloud
To tell the Apache about the Owncloud configuration, we will create a reference or symlink using the below command:
ln -s /etc/apache2/sites-available/owncloud.conf /etc/apache2/sites-enabled/owncloud.conf
Step 8: Additional modules installation
Add these additional modules for proper Owncloud working.
sudo a2enmod headers env dir mime unique_id
After adding the modules, restart the Apache server using the command:
sudo service apache2 restart
Step 9: Create a MySQL or MariaDB database for Owncloud
First of all, stop and restart the MySQL/MariaDB:
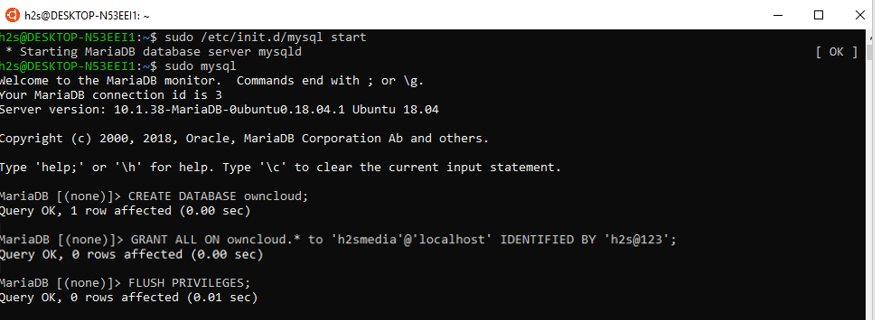
sudo /etc/init.d/mysql stop

sudo /etc/init.d/mysql start
Now let’s create a MySQL user and database for OwnCloud:
sudo mysql
We are building a database with the name owncloud you can use another name if you want.
CREATE DATABASE owncloud;
Now create a user with a password and, at the same time, assign all rights of the above-created database to that. Here we are creating a user with the name h2smedia and a password for the same. You can use your username and password:
CREATE USER 'h2smedia'@'localhost' IDENTIFIED WITH mysql_native_password BY 'my-strong-password-here';
GRANT SELECT, INSERT, UPDATE, DELETE, CREATE, INDEX, DROP, ALTER, CREATE TEMPORARY TABLES, LOCK TABLES ON owncloud.* TO 'h2smedia'@'localhost';
Flush privileges operations:
FLUSH PRIVILEGES;
Exit MySQL using the command:
exit
Step 4 –Install, Setup, and Configuring ownCloud server on Windows 10
After performing all the above steps again go to the browser and type http://localhost/owncloud/ or http://127.0.0.1/owncloud/ or the IP address of your Windows 10 local machine. Just like we did while checking whether the Apache works above in this article.
However, this time you will see the Owncloud server setup and configuration screen rather than the Apache one.
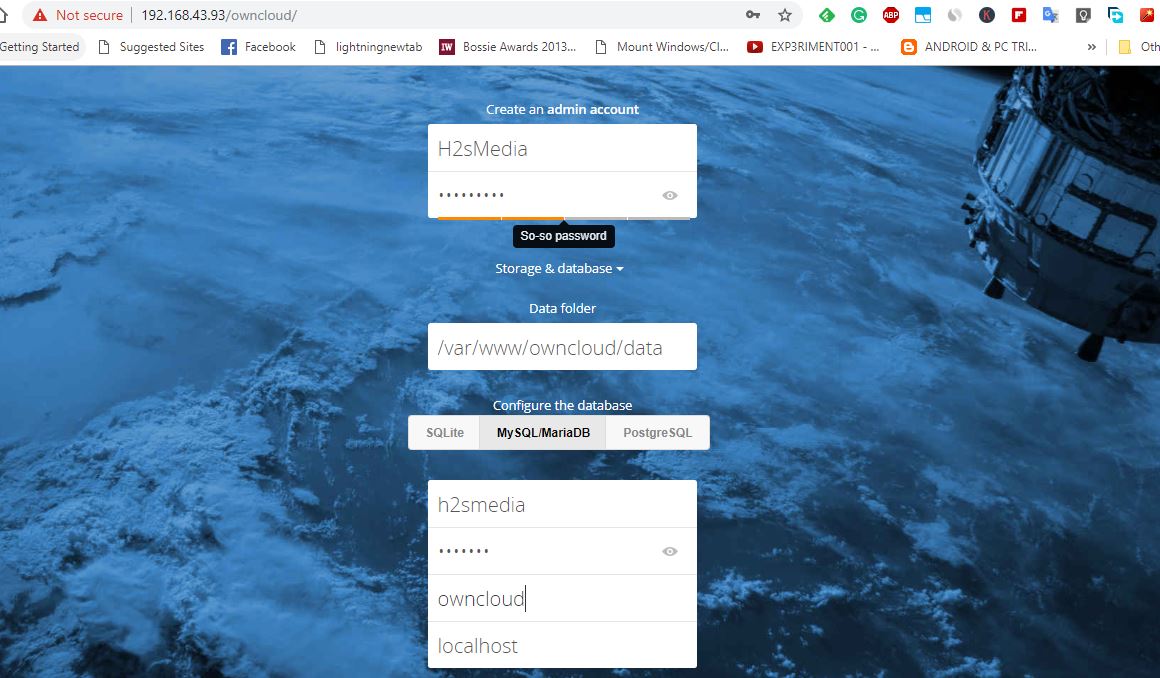
Create an admin account for Windows 10 installed Owncloud. Just enter whatever user name along with a password for the same you want to assign to the Admin account.
After the admin account, you will see a storage and database option; click on that and then MySQL/MariaDB tab. After that, add the MySQL database details we have created above, which means the database username, password, and database name, which is owncloud in our case.
Finally, once you have provided all the information to Owncloud, scroll down and click on the Finish Setup button.
Step 5: Login Owncloud server
When you click the Finish setup button, the Owncloud will take a few seconds to authenticate all provided details and then offer you a login page.
Login with the admin account you have created above.
As we know, Owncloud also offers a client application that one can use on different operating systems to sync the files between a PC/smartphone and the Owncloud server.
The first screen that appears to you is dedicated to the same. Click on the one OS platform you want to download the Owncloud client.

This way, we can easily install the Owncloud server on Windows 10 for high performance and stability without using any XAMMP or WAMP-like software.
If you have difficulty installing Windows 10 OwnCloud server, let us know, and we will try to solve the same as soon as possible.
Other useful resources:
- How to Install Ansible on Windows 10
- Use Virtualbox drag and drop from Windows 10 to Ubuntu 18 VM
- Install OBS Studio 23.0.1 on Ubuntu 18.04
- How to bridge WiFi to Ethernet adapter to share internet
- How to install Owncloud 10 on Ubuntu 16.0.4 Server

ownCloud — это Свободное и открытое веб-приложение для синхронизации данных, расшаривания файлов и удалённого хранения документов в «облаке». Возможности
- Хранение файлов с использованием обычных структур каталогов, или с использованием WebDAV
- Криптография
- Синхронизация между клиентами под управлением Windows (Windows XP, Vista, 7 и 8), Mac OS X (10.6 и новее) или Linux
- Календарь (также как CalDAV)
- Планировщик задач
- Адресная книга (также как CardDAV)
- Потоковое мультимедиа (используется Ampache)
- Администрирование пользователей и групп (с использованием OpenID или LDAP)
- Расшаривание контента между группами или используя публичные URL
- Онлайн текстовый редактор с подсветкой синтаксиса и сворачиванием
- Закладки
- Механизм сокращения URL
- Фотогалерея
- Просмотрщик PDF (используется PDF.js)
- Просмотрщик ODF файлов (.odt, .odp, .ods)
- Модуль логирования
Установка Установку ownCloud я решил сильно упростить, используя готовый дистрибутив от Bitnami, в который интегрированы Apache и PHP. Скачиваем и запускаем установочный файл. 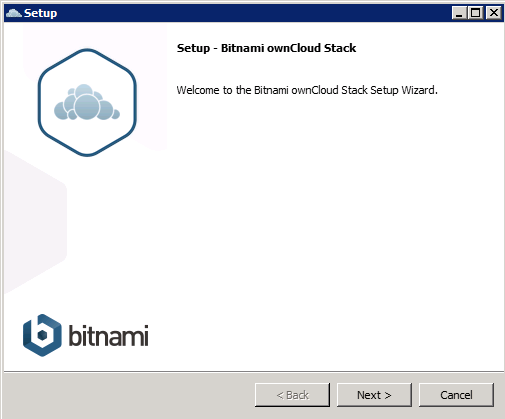 Выбираем папку для установки.
 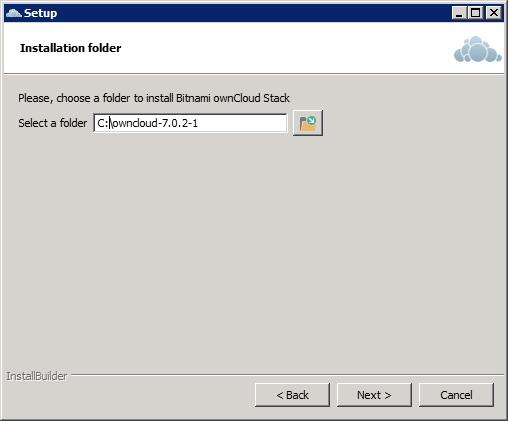 Создаем учетную запись администратора.
 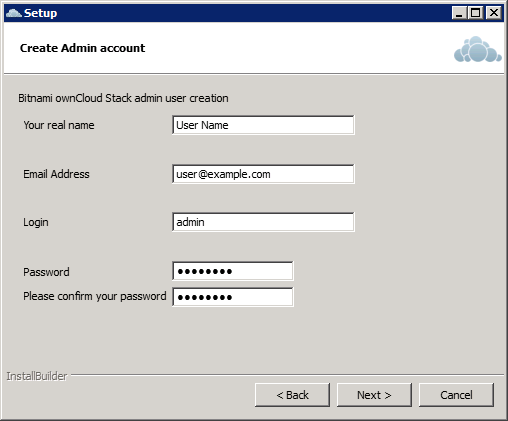 Указываем хост сервера. Я указал IP-адрес.
 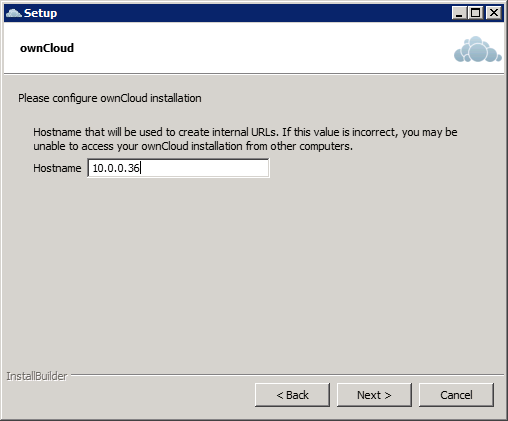 Настраиваем почту.Этот этап можно пропустить и настроить почту позже.
 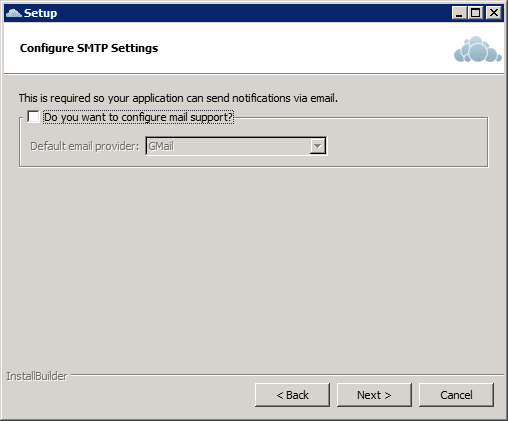 Пропускаем предложение посетить сайт Bitnami.
 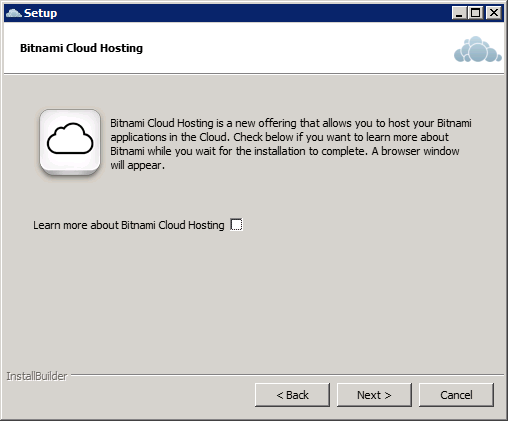 Все готово для установки, жмем Далее.
 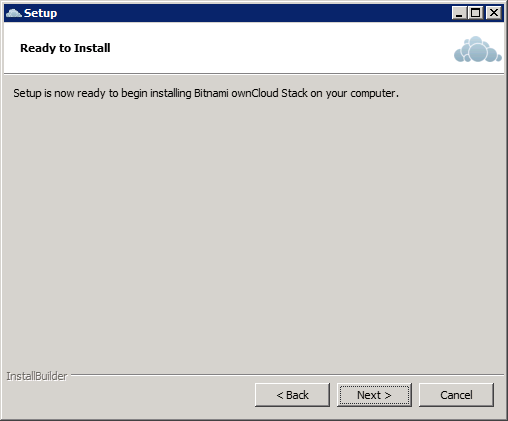 Ждем завершения установки.
 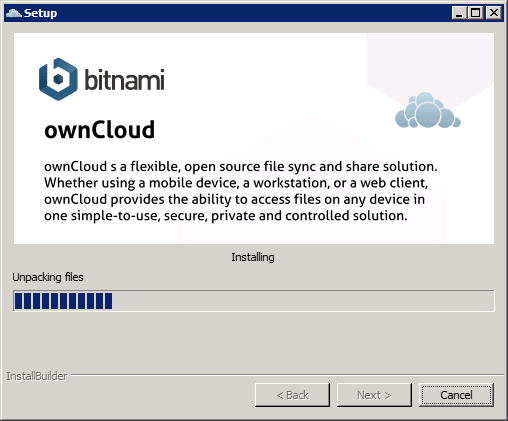 После завершения установки запускаем Bitnami ownCloud Stack.
Настройка ownCloud. В Bitnami ownCloud Stack нажимаем Go To Application, в браузере открывается приветственная страница. Жмем ссылку «Access Bitnami ownCloud Stack». 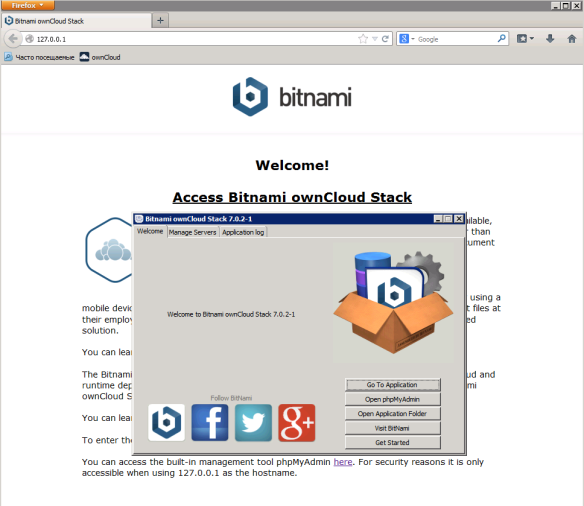 Открывается окно входа в ownCloud.
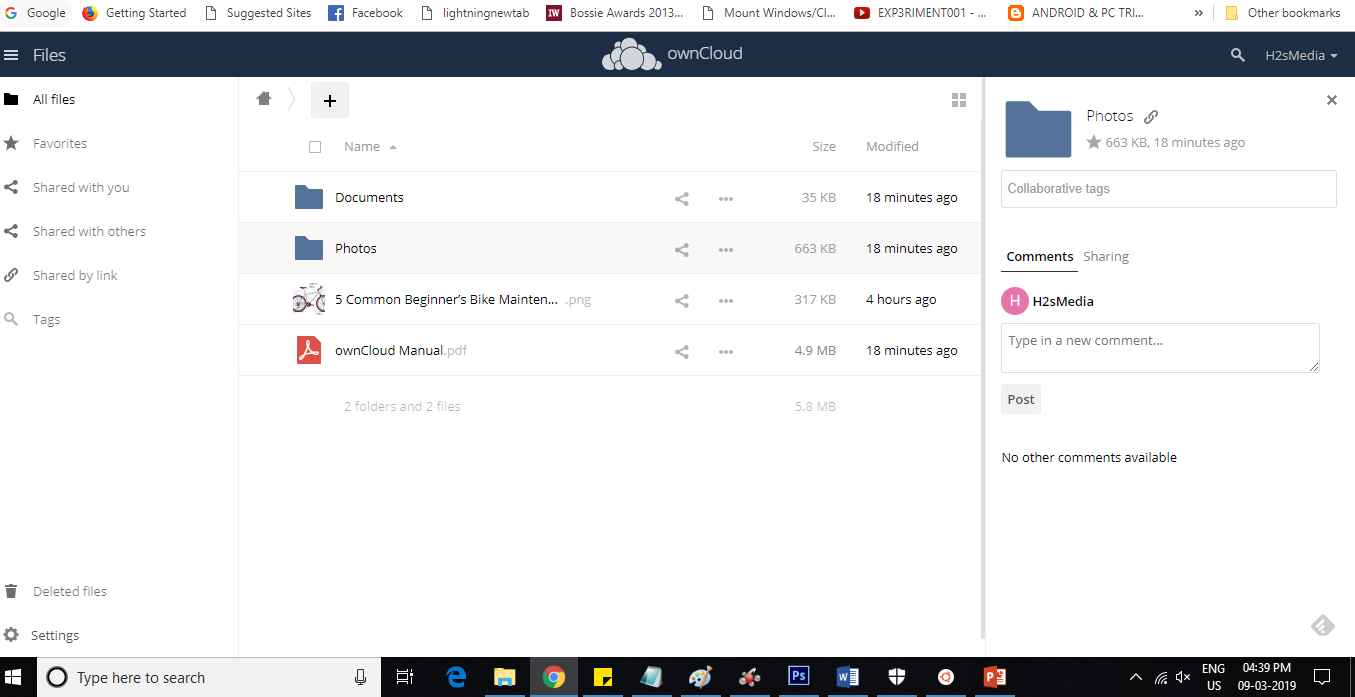
  Вводим регистрационные данные, указанные на этапе установки. Получаем полнофункциональный облачный сервис!
 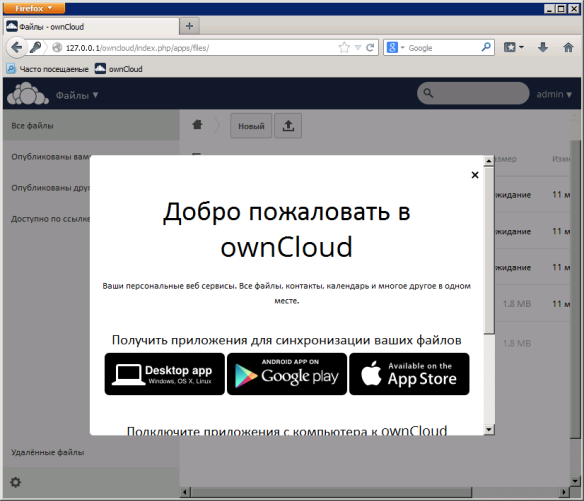 В верхнем меню слева выбираем Приложения.
 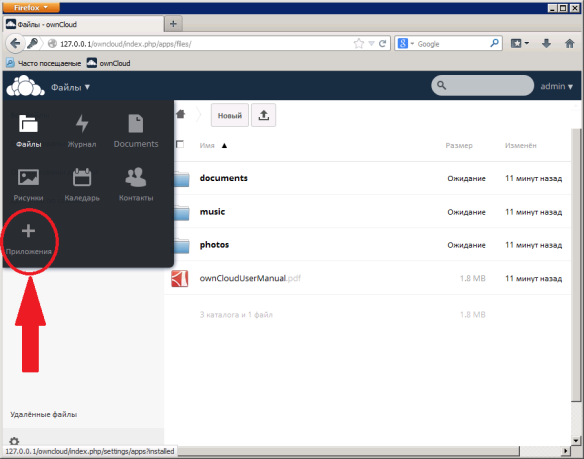 У меня список приложений загружался почему-то очень долго. В нем выбираем LDAP User and Group backend и включаем приложение.
  Далее заходим в Администрирование.
  Опускаемся до LDAP-секции и видим сообщение, что модуль LDAp для PHP не установлен. Включаем (раскомментируем) в php.ini строку extension=php_ldap.dll. Не забываем перезапустить серверы в Bitnami ownCloud Stack на вкладке Manage Servers, чтобы изменения вступили в силу.
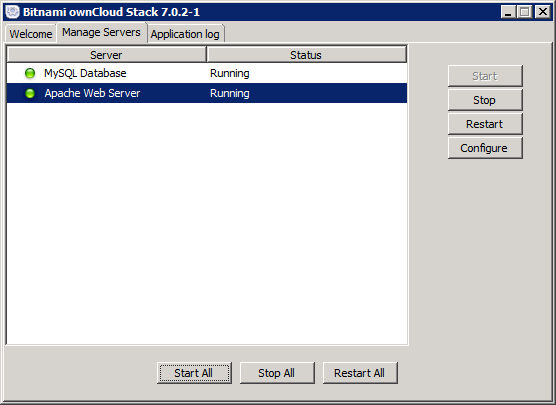
Настройка интеграции ownCloud с LDAP. Заходим под администраторской учетной записью в меню Администрирование. Проматываем вниз и ставим галочку напротив Enable LDAP Backend.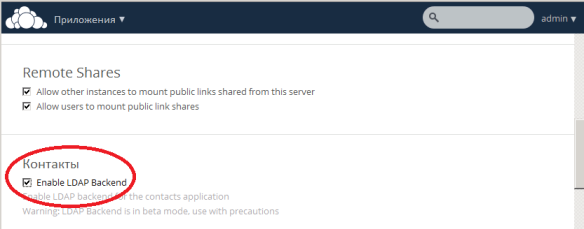 Далее возвращаемся к LDAP-секции и заполняем ее. Предварительно я создал пользователя owncloudaduser в контейнере Users. Ему не нужно членство в каких-то группах корме Domain Users. Пароль сделаем ему бессрочным. Во второе поле пишем содержимое атрибута distinguishedName из влкадки Редактора атрибутов. Она станет доступна в свойствах учетной записи, если в оснастке Active Directory Users and Computers в меню Вид (View) включить Дополнительные компоненты (Advanced Features).
 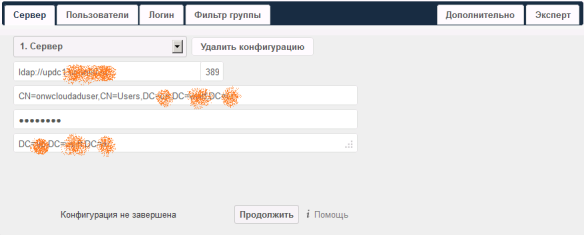 На вкладке Login устанавливаем атрибут для входа. У меня это имя пользователя LDAP.
 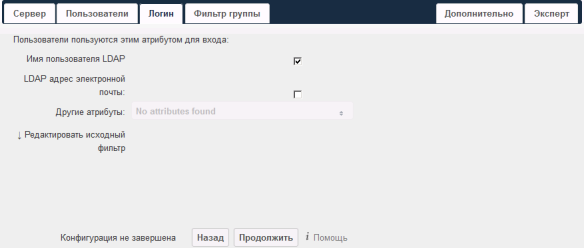 Далее на вкладке Дополнительно устанавливаем параметры подключения. Делаем нашу конфигурацию активной.
  Заполняем настройки каталога.
  Затем Специальные атрибуты. Важно заполнить поле mail, если вы планируете использовать уведомления по почте.
 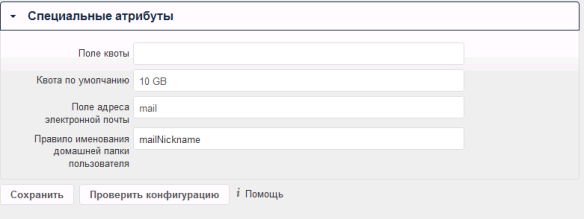 Не забываем Сохранить настройки. Возвращаемся на вкладку Пользователи. В качестве объектов я указал User, и сразу нашлось 1483 пользователя.
 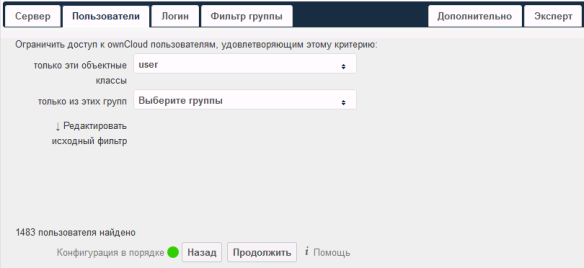 Вот и все, интеграция ownCloud с LDAP завершена.
Настройка почтовых уведомлений. В меню Администрирование устанавливаем следующие параметры. 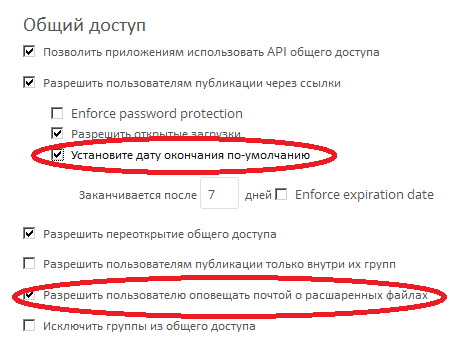 В личных настройках учетной записи администратора указываем почтовый адрес.
  Настраиваем почтовый сервер. Если все правильно, то на адрес администратора придет тестовое сообщение.
 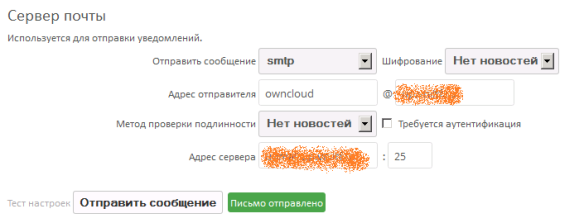 Выбираем пользователя, с которым хотим поделиться файлом, ставим галочку «уведомить по почте». Если все настроили верно, письмо уйдет пользователю от имени учетной записи человека, который делится файлом.
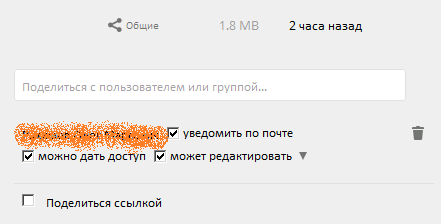
— Advertisement —
Hi. How are you? There are currently a lot of services on the market that offer cloud storage. Some of them are very popular, like Drive, OneDrive and others. However, something that has always been criticized for these applications, is the possible violation of personal data. Moreover, there are also programs for synchronizing files between our computer and a server. Some of them are Nextcloud and Owncloud, and just about this last one we are going to talk about in this tutorial. Let’s explain how to install this server in Windows 10 step by step.
The first thing we need to know is that the owncloud server is only available for Linux operating systems. For that reason, there are no installers for our favorite operating system. However, this does not mean that we cannot install it via Xammp or Wampp. Or using a virtual machine with Hyper V. But this time we are going to install and configure it through the Windows subsystem for Linux (WSL) for better stability and performance. Specifically, the working environment to use will be Ubuntu 18.04 LTS, which we can download from the Windows store. So let’s go for it.
Prerequisites.
For stability effects, it is highly recommended to set the IP address as static. In the same way, we have to enable Windows Subsystem for Linux. If you do not know how to do that, please visit our article about it.

Once this is done, the system will ask to restart. Next, we go to the windows store and download Ubuntu 18.04 LTS

Once it has downloaded, we launch it and wait for the installation process to begin. We must assign a username and password. Now, let’s get to work!

Step 1. Install Apache.
From this moment on, the whole installation will be done by means of commands. Don’t worry if you don’t feel comfortable, you just have to copy textually the commands that we will indicate. In order to install Apache you just type in Ubuntu:
sudo apt-get install apache2
Enter your password and then yes, enter your password and then yes to start and confirm the installation. To ensure the effective functioning of Owncloud, we need to enable the following Apache modules.
sudo a2enmod rewrite
sudo a2enmod headers
sudo a2enmod env
sudo a2enmod dir
sudo a2enmod mime

After adding the modules restart the Apache server using the command:
sudo service apache2 restart

Once the service is restarted, a window with the firewall warning will appear. We need to allow access.

Now let’s test the functioning of apache. In addition, go to the address bar of the browser and type http://localhost/ or our IP address, in my case http://192.168.1.58/

Step 2. Install MySql.
Next, we will install the necessary software to create our database. To do this, type the following command
sudo apt-get install mysql-server mysql-client
Step 3. Create a MySql database for Owncloud.
First, let’s stop and restart MySql.
sudo /etc/init.d/mysql stop
sudo /etc/init.d/mysql start
In like manner, we will create a MySql database and give it a name.
sudo mysql
We will create a database and give it the name we want, in my case I will use googez.
CREATE DATABASE googez;
At this point, we will create a username and password for our database. In this case, I will use rogerjpm as a user, and yo160882 as a password. Remember that you can use the values you want.
GRANT ALL ON googez.* to 'rogerjpm'@'localhost' IDENTIFIED BY 'yo160882';
Immediately, assign flush privileges operations by typing the next command:
FLUSH PRIVILEGES;
Finally, exit the MySql by using the command:
exit
Step 4. Install PHP
Please note that Owncloud is compatible with PHP 7.1. Consequently, we are going to install this version, for that purpose, we will write the following commands:
sudo apt-get install software-properties-common
sudo add-apt-repository ppa:ondrej/php
sudo apt update
sudo apt install php7.1
Step 5. Download and install Owncloud on Windows 10
At this point, we must download and unzip the version of Owncloud that we are going to use. In this case 10.0.03. With this in mind, just run the commands below to download using the command line terminal. and extract Owncloud files into its root directory. Please note, if the unzip command is not installed, the system will ask you to install it.
cd /tmp && wget https://download.owncloud.org/community/owncloud-10.0.3.zip
unzip owncloud-10.0.3.zip
sudo mv owncloud /var/www/html/owncloud/
Once this is done, we have to assign the correct permissions for owncloud to work properly.
sudo chown -R www-data:www-data /var/www/html/owncloud/
sudo chmod -R 755 /var/www/html/owncloud/
Step 6. Configuring Apache by creating a file for Owncloud on Windows 10
Now let’s create a file in Apache that will control the operation of Owncloud. Now let’s create a file in Apache that will control the operation of Owncloud. For practical purposes, we will name it owncloud.conf
sudo nano /etc/apache2/sites-available/owncloud.conf
Add the following lines to the newly created file, place it in the root directory, press Crtl +O to write the files and then CTRL+X to save and exit
Alias /owncloud "/var/www/owncloud/"

<Directory /var/www/owncloud/>
Options +FollowSymlinks AllowOverride All
<IfModule mod_dav.c> Dav off </IfModule>

SetEnv HOME /var/www/owncloud
SetEnv HTTP_HOME /var/www/owncloud

</Directory>

Now, once we have all the services installed, we have to create a symbolic link between Apache and owncloud. To do this, we write:
ln -s /etc/apache2/sites-available/owncloud.conf /etc/apache2/sites-enabled/owncloud.conf
Step 7. Running Owncloud on Windows 10
To start the owncloud server, we write in the browser http://localhost/owncloud. It will open the first configuration, and we must enter our username and password for the site. Also, we must enter the username and password for the database.


Once we have completed the work, we will see a board with the files, and various configurations. And now we’re ready to share files safely.

So, now you know how to install Owncloud on Windows 10. Hope you like it.
ownCloud was developed with Linux and Unix based operating systems in mind so if you are looking to implement ownCloud in a production environment you probably should install it in a Linux server. But installing ownCloud in a Windows server is certainly possible now that PHP is supported in all Windows servers starting from Windows server 2008.In this tutorial we will install ownCloud in a Windows 2016 server.
Prerequisites
[adinserter name=”Block 1″]
In order to finish this guide successfully you need the following:
- A Windows Server 2008 or later installed and fully updated
- IIS with CGI support enabled on the server
- MySQL
- PHP 5.4 or higher
Installing IIS
Login to your Windows server then click on Server Manager in your Start menu, and then click on Add roles and features:

The Add roles and features wizard will come up. click on Next:

On the “Installation Type” Window choose “Role-based or feature-based installation:

Click on Next. on the “Server Selection” screen choose your server from the server pool:

click on Next. on the “Select Server Role” window, check the Web Server (IIS ) role:

the Add roles and features window will pop-up:

Click on Add Features then click Next.

Click Next .

click Next

On the “Role services” window make sure CGI is check under the Application Development group. after you do that, click Next.

Click on Install in the confirmation window.

IIS with CGI support should be now installed in your server.
Installing PHP and MySQL
[adinserter name=”Block 1″]
The easiest way to install PHP and MySQL at once in your Windows server is using the Microsoft Web Platform installer found in this URL https://www.microsoft.com/web/downloads/platform.aspx download and execute the wpiluancher.exe file . select the default settings during the installation until you get to this window:

On that Window click on Products then Frameworks and choose the latest PHP version from the list. the latest PHP version at the time of this writing is version 7.0.

Click on Add then click on Database and add MySQL Windows as well:

Click on Install after you have added both.
Select a password for your MySQL server:

click on I Accept in the following window. and the installation will begin.

MySQL and PHP should be installed on your server now.
Note: if you get any error saying that PHP manager cannot be installed. make sure .NET 3.5 with HTTP Activation is installed on your server. somehow PHP manager needs that.
Create MySQL Database
Login to your MySQL server using CMD. open cmd on your server, and switch to this path cd “C:Program FilesMySQLMySQL Server 5.1bin” then login to your MySQL server
mysql -u root -p

To create the ownCloud database type this:
create database owncloud ;
then type exit. you can also create create a different user to use with your ownCloud database if you don’t want to use the root account. see this section Create new user in MySQL if you want to do that.
Installing ownCloud
From your server download the latest ownCloud zip package from this URL https://owncloud.org/install unzip it and then move it to your C:inetpubwwwroot web directory. type in the name of your site (e.g. localhost/nameofyoursite ) or the IP address of your server in the browser, and the ownCloud installation wizard should come up:

Enter the username, password, and the data folder location. click on Finish setup after you are done entering that information, and ownCloud should get installed on your Windows server!
Conclusion
Installing ownCloud in a Windows server is a lot more involved than installing it on a Linux server, but is not that hard. I hope you found this guide helpful, and please use the comments if you have any question.
More ownCloud Tutorials
ownCloud — это программа, которая позволяет вам создать ваше собственное облачное хранилище. В этом облаке вы можете хранить файлы, заметки, записи в календаре, расписания, списки задач и прочее. Вы являетесь администратором, то есть полностью контролируете облако — никто чужой не может посмотреть в него или что-либо скачать без вашего ведома.
Вы можете приглашать других пользователей, создавать ссылки для распространения отдельных файлов и давать им другим пользователям для скачивания. В ownCloud вы можете настроить права разных пользователей и предоставить им различные полномочия.
OwnCloud — это бесплатная программа с открытым исходным кодом, которая написана на PHP. Следовательно, она работает на веб-сервере Apache.
Давайте разберёмся, возможно ли установить ownCloud на Windows, точнее говоря на веб-сервер Apache запущенный на Windows. Если возможно, то как это сделать, а если невозможно, то какие ещё есть варианты.
В требованиях для работы ownCloud указаны только дистрибутивы Linux, операционной системы Windows нет среди поддерживаемых ownCloud.
В требования к веб-серверу сказано:
Apache 2.4 с prefork Multi-Processing Module (MPM) и mod_php
В документации Apache написаны стандартные MPM для различных операционных систем. То есть будет выбрана эта MPM если вы не сделали другой выбор во время компиляции:
| Netware |
mpm_netware
|
| OS/2 |
mpmt_os2
|
| Unix |
prefork, worker, или event, зависит от возможностей платформы
|
| Windows |
mpm_winnt
|
Источник: https://httpd.apache.org/docs/current/en/mpm.html
Как видим, в Windows по умолчанию используется mpm_winnt и, насколько я понимаю, невозможно выбрать prefork даже при компиляции.
То есть официально Windows не поддерживается и имеются требованиям к веб-серверу, которые в Windows невозможно удовлетворить.
Тем не менее я скачал архив с программой и попробовал запустить, вначале я получил сообщение:
This version of ownCloud is not compatible with PHP 7.3
You are currently running PHP 7.3.2.
Перевод:
Эта версия ownCloud не совместима с PHP 7.3
В настоящее время у вас запущена PHP 7.3.2.
Я не поленился, и откатил PHP до версии 7.2.
Сразу после этого я получил сообщение об ошибке:
ownCloud Server does not support Microsoft Windows.
Перевод:
Сервер ownCloud не поддерживает Microsoft Windows.
Вывод: «просто запустить» ownCloud на Windows не получится.
Возможные варианты:
Патч исходного кода для отключения проверки операционной системы
Можно изучить исходный код сервера ownCloud и пропатчить его таким образом, чтобы отключить проверку на операционную систему, где запущена ownCloud.
В результате можно получить результат в диапазоне от полной неработоспособности ownCloud — до обычной работоспособности.
Для этого вам нужен человек, который:
- разбирается в PHP
- знает чем отличается работа Apache на Windows от работы Apache на Linux.
Это вариант для энтузиастов, кому интересно разбираться в самых основах работы веб приложений и «хакать» их. У этого подхода есть минусы: необходимость всё повторять вновь после каждого обновления ownCloud. И главный минус — могут возникнуть ошибки в работе сервера ownCloud, причём эти ошибки могут быть неявными — проявляться только в определённых обстоятельствах. И что самое неприятное, при стечении неблагоприятных условий, может возникнуть ситуация, когда будут потеряны или не сохранены должным образом хранимые данные.
Установка ownCloud на Linux
Нормальный вариант (если ownCloud нужен в локальной сети): установить на компьютер Linux и туда установить ownCloud.
Если ownCloud нужен с доступом из Глобальной сети Интернет, то тогда лучший вариант это VPS хостинг с Linux на который установлена ownCloud.
К сожалению, приходится констатировать, что Apache на Windows не всегда может полностью заменить веб-сервер на Linux. ownCloud не единственная программа, которая может полноценно работать только на Linux, среди профессиональных, узкоспециальных, серверных и хакерских программ очень много таких, которые работают только в операционной системе Linux. Если вы профессиональный веб-мастер, то вы можете тестировать PHP скрипты и большинство движков в Apache на Windows, но вам также нужно начать знакомиться с Linux хотя бы по двум причинам:
- подавляющее большинство хостингов используют Linux и вам нужно понимать её специфику;
- если ваши сайты становятся популярными и требуют большой нагрузки на сервер, то вам нужно будет переходить с виртуальных хостингов на виртуальные частные сервера (VPS), в которых самым лучшим вариантом для работы является установка одного из дистрибутивов Linux.
Связанные статьи:
- Apache для Windows (50%)
- Как запустить Apache на Windows (50%)
- Документация по Apache на русском языке (50%)
- Как подключить PHP к Apache на Windows (50%)
- Как подключить MySQL к Apache на Windows (50%)
- Как тестировать отправку писем в PHP на Windows (RANDOM — 50%)