With the release of the latest technical preview of Windows Server 2019, we decided to learn how to install and configure Windows Server 2019. The Honolulu project has been officially released as the Windows Admin Center. Microsoft has also released the Honolulu project, which is a new management platform for Windows Server. In this tutorial, we’ll take a look at the Windows Server 2019 installation and configuration and the Henololo project. You can visit the packages available in Eldernode to purchase a Windows VPS server.
Table of Contents
Tutorial install and configure Windows Server 2019
In the first step, you have to download the latest version. In the continuation of this article, join us to learn how to install and configure Windows Server 2019.
Install and Configure Windows Server 2019
Windows Server is one of the server-specific operating systems that users install on their server according to their needs when purchasing a VPS Server or Dedicated Server. Among the different versions of Windows Server, the latest and most recent version is Windows Server 2019, which has better performance than previous versions. It should be noted that this version, despite the time since its introduction by Microsoft, is still not recognized as a completely stable version, and new updates for it are constantly released. Follow us in the continuation of this tutorial.
How to install Windows Server 2019 via ISO file in VMware
To install Windows Server 2019 on VMware, we used the following virtual machine:
– Windows Server 2019 x64 bit
– VMware ESXi version 6.5
In the images below, you can see the Windows Server 2019 installation page, the ISO file of which is in the VMware virtual machine:
On the page above, specify the language and keyboard, and then click Next.
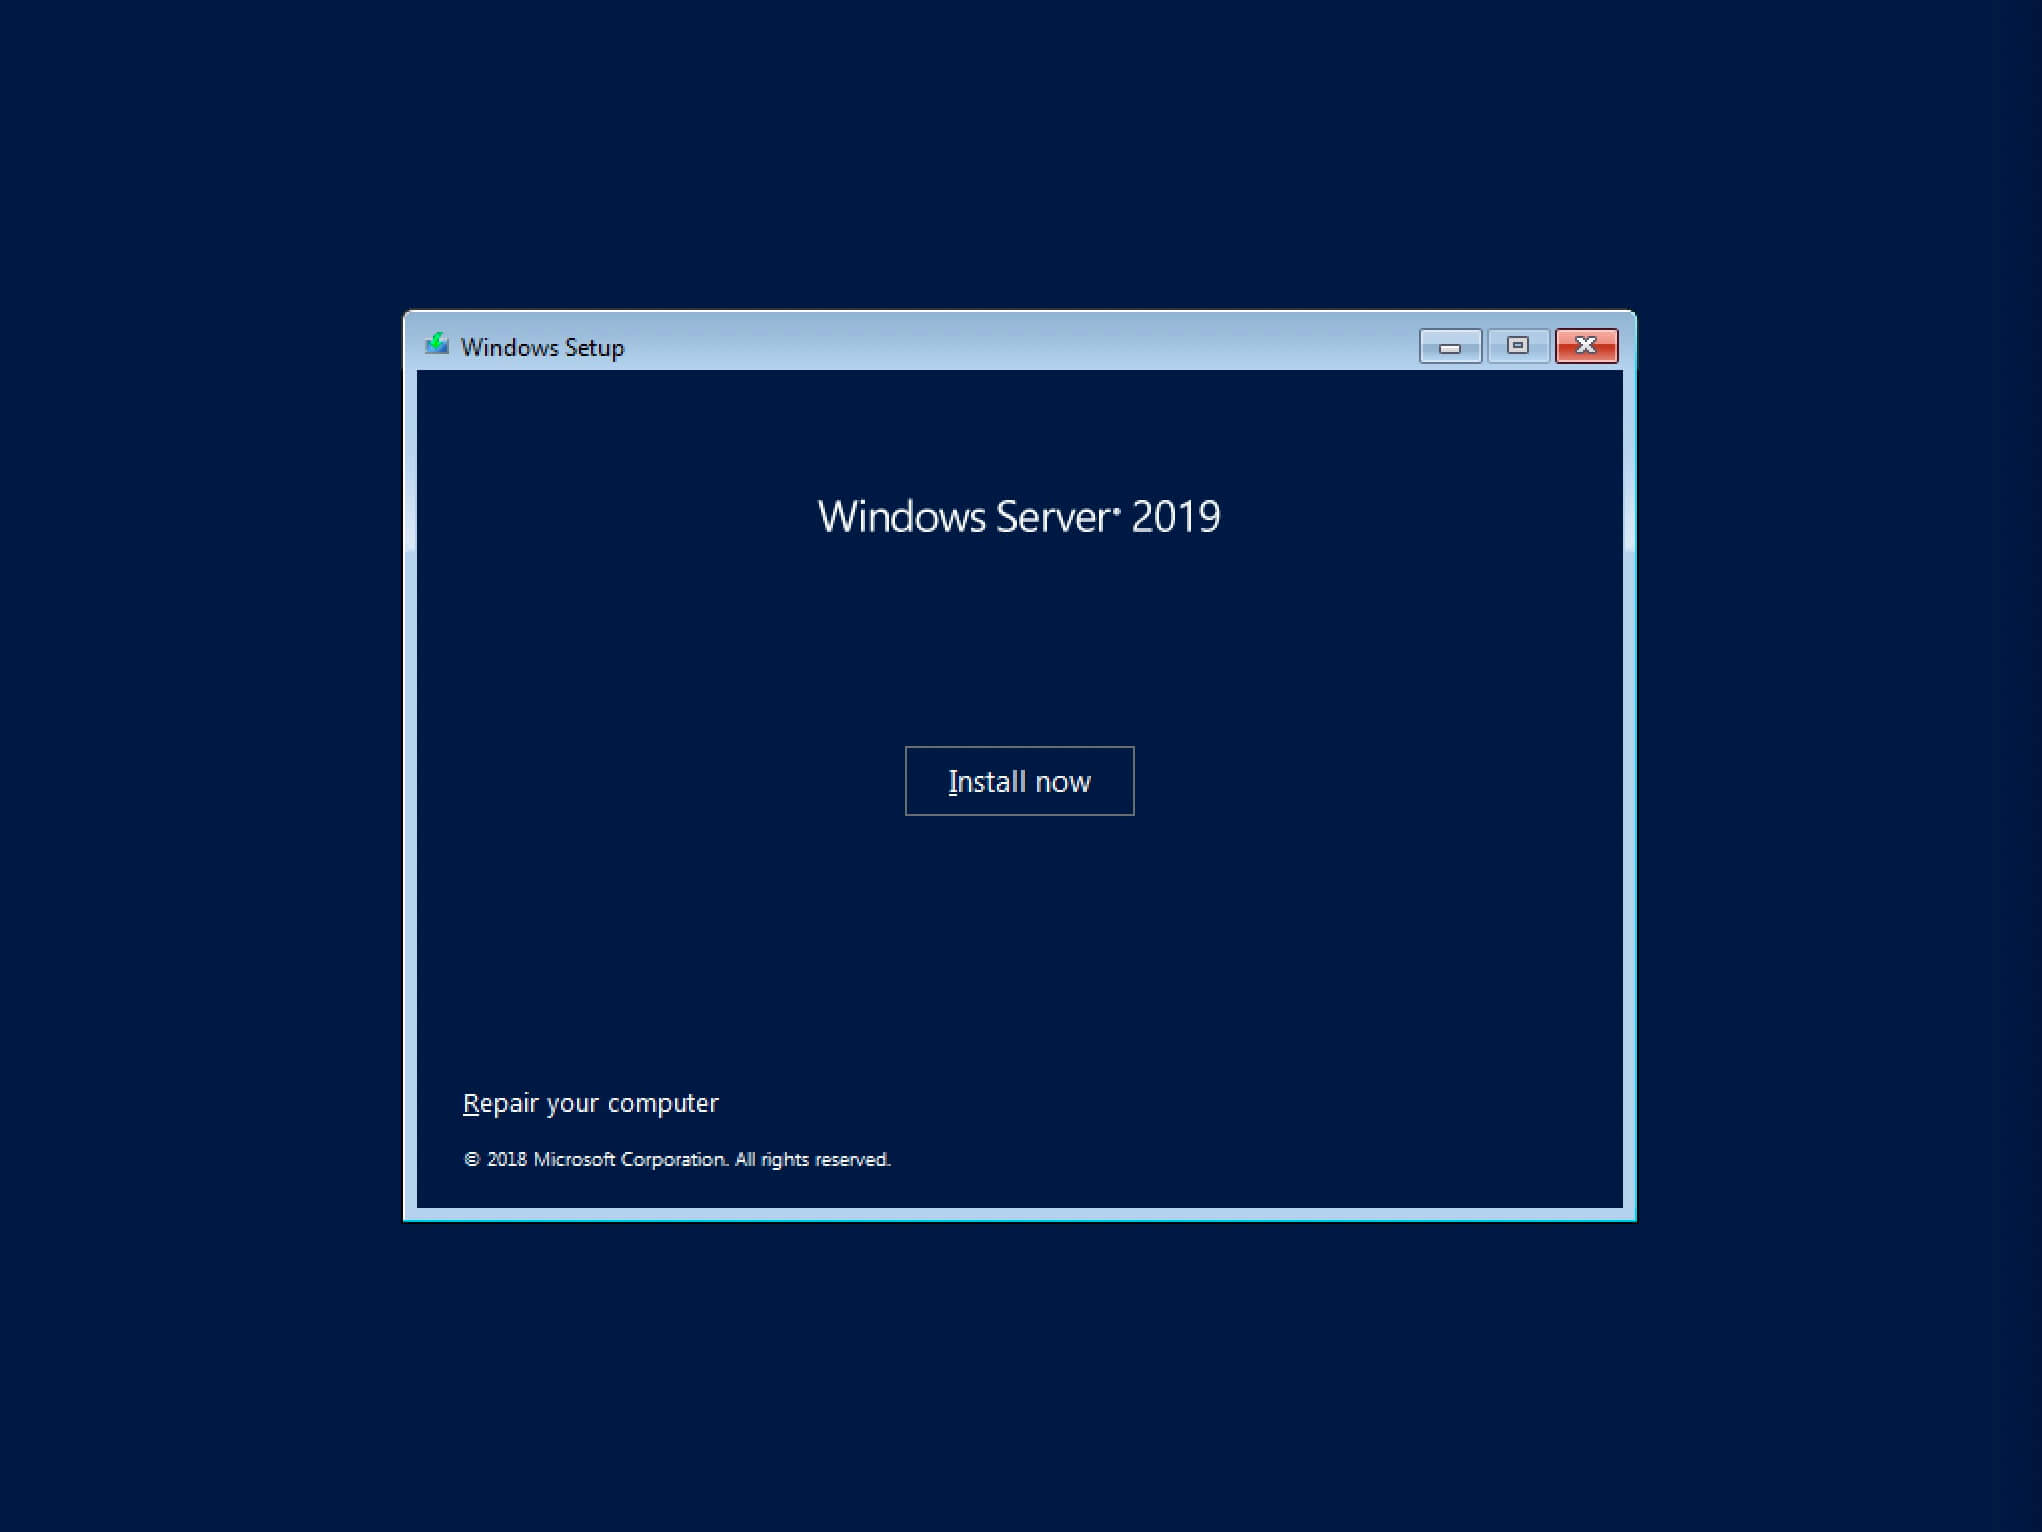
Click Install to begin the installation process.
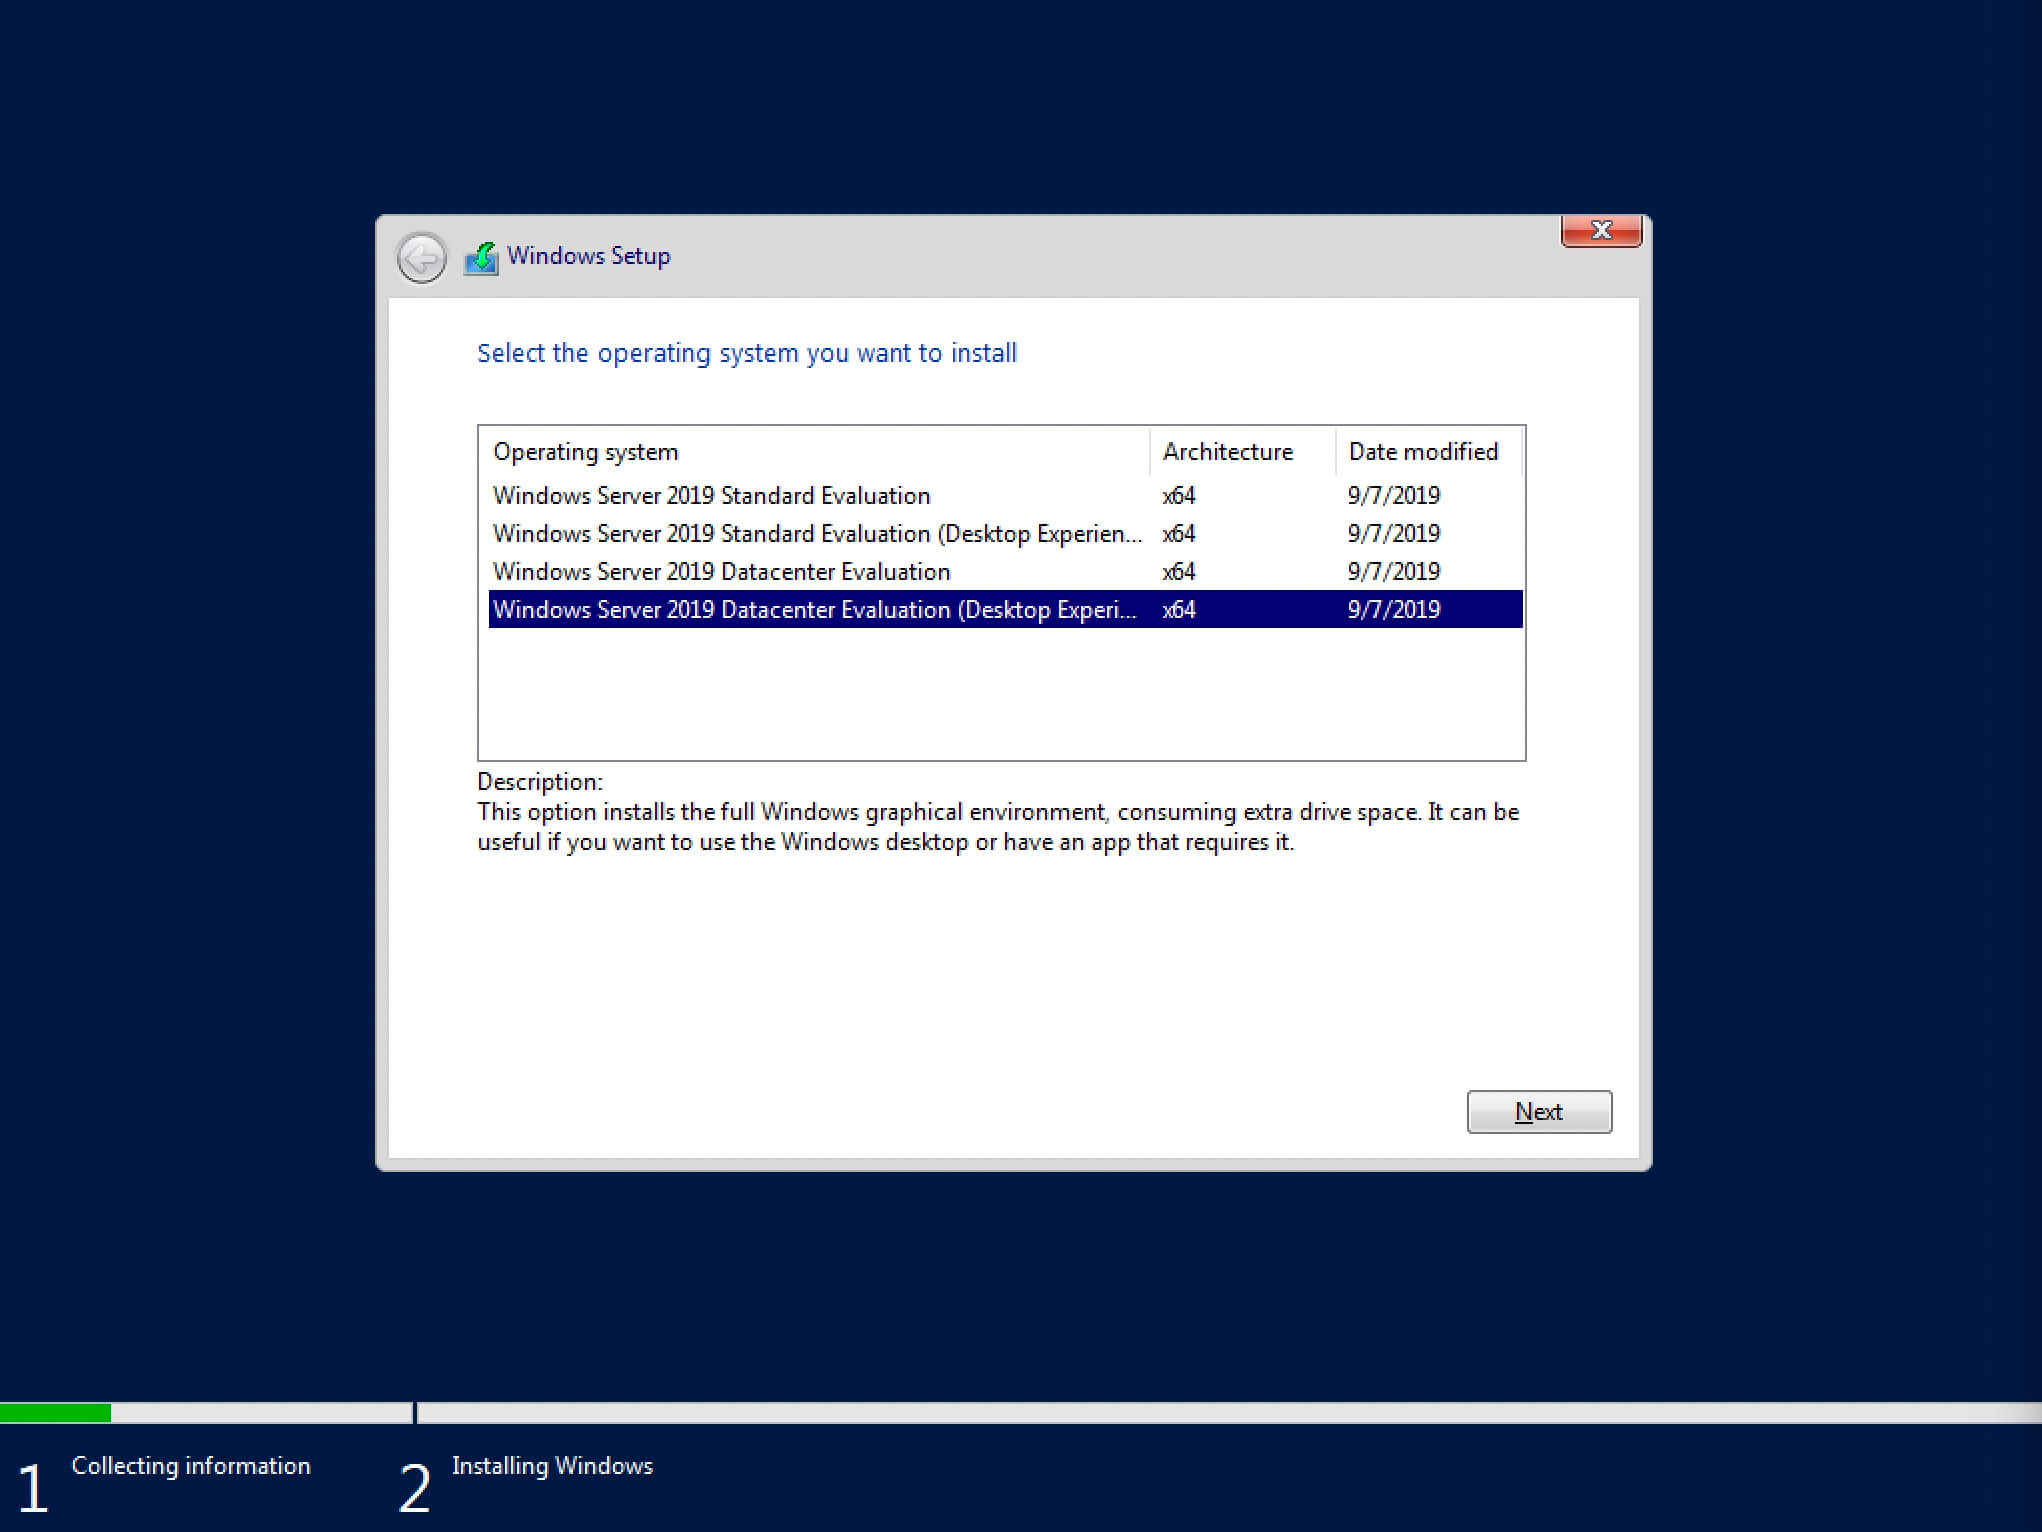
Select the Windows Server version and click Next.
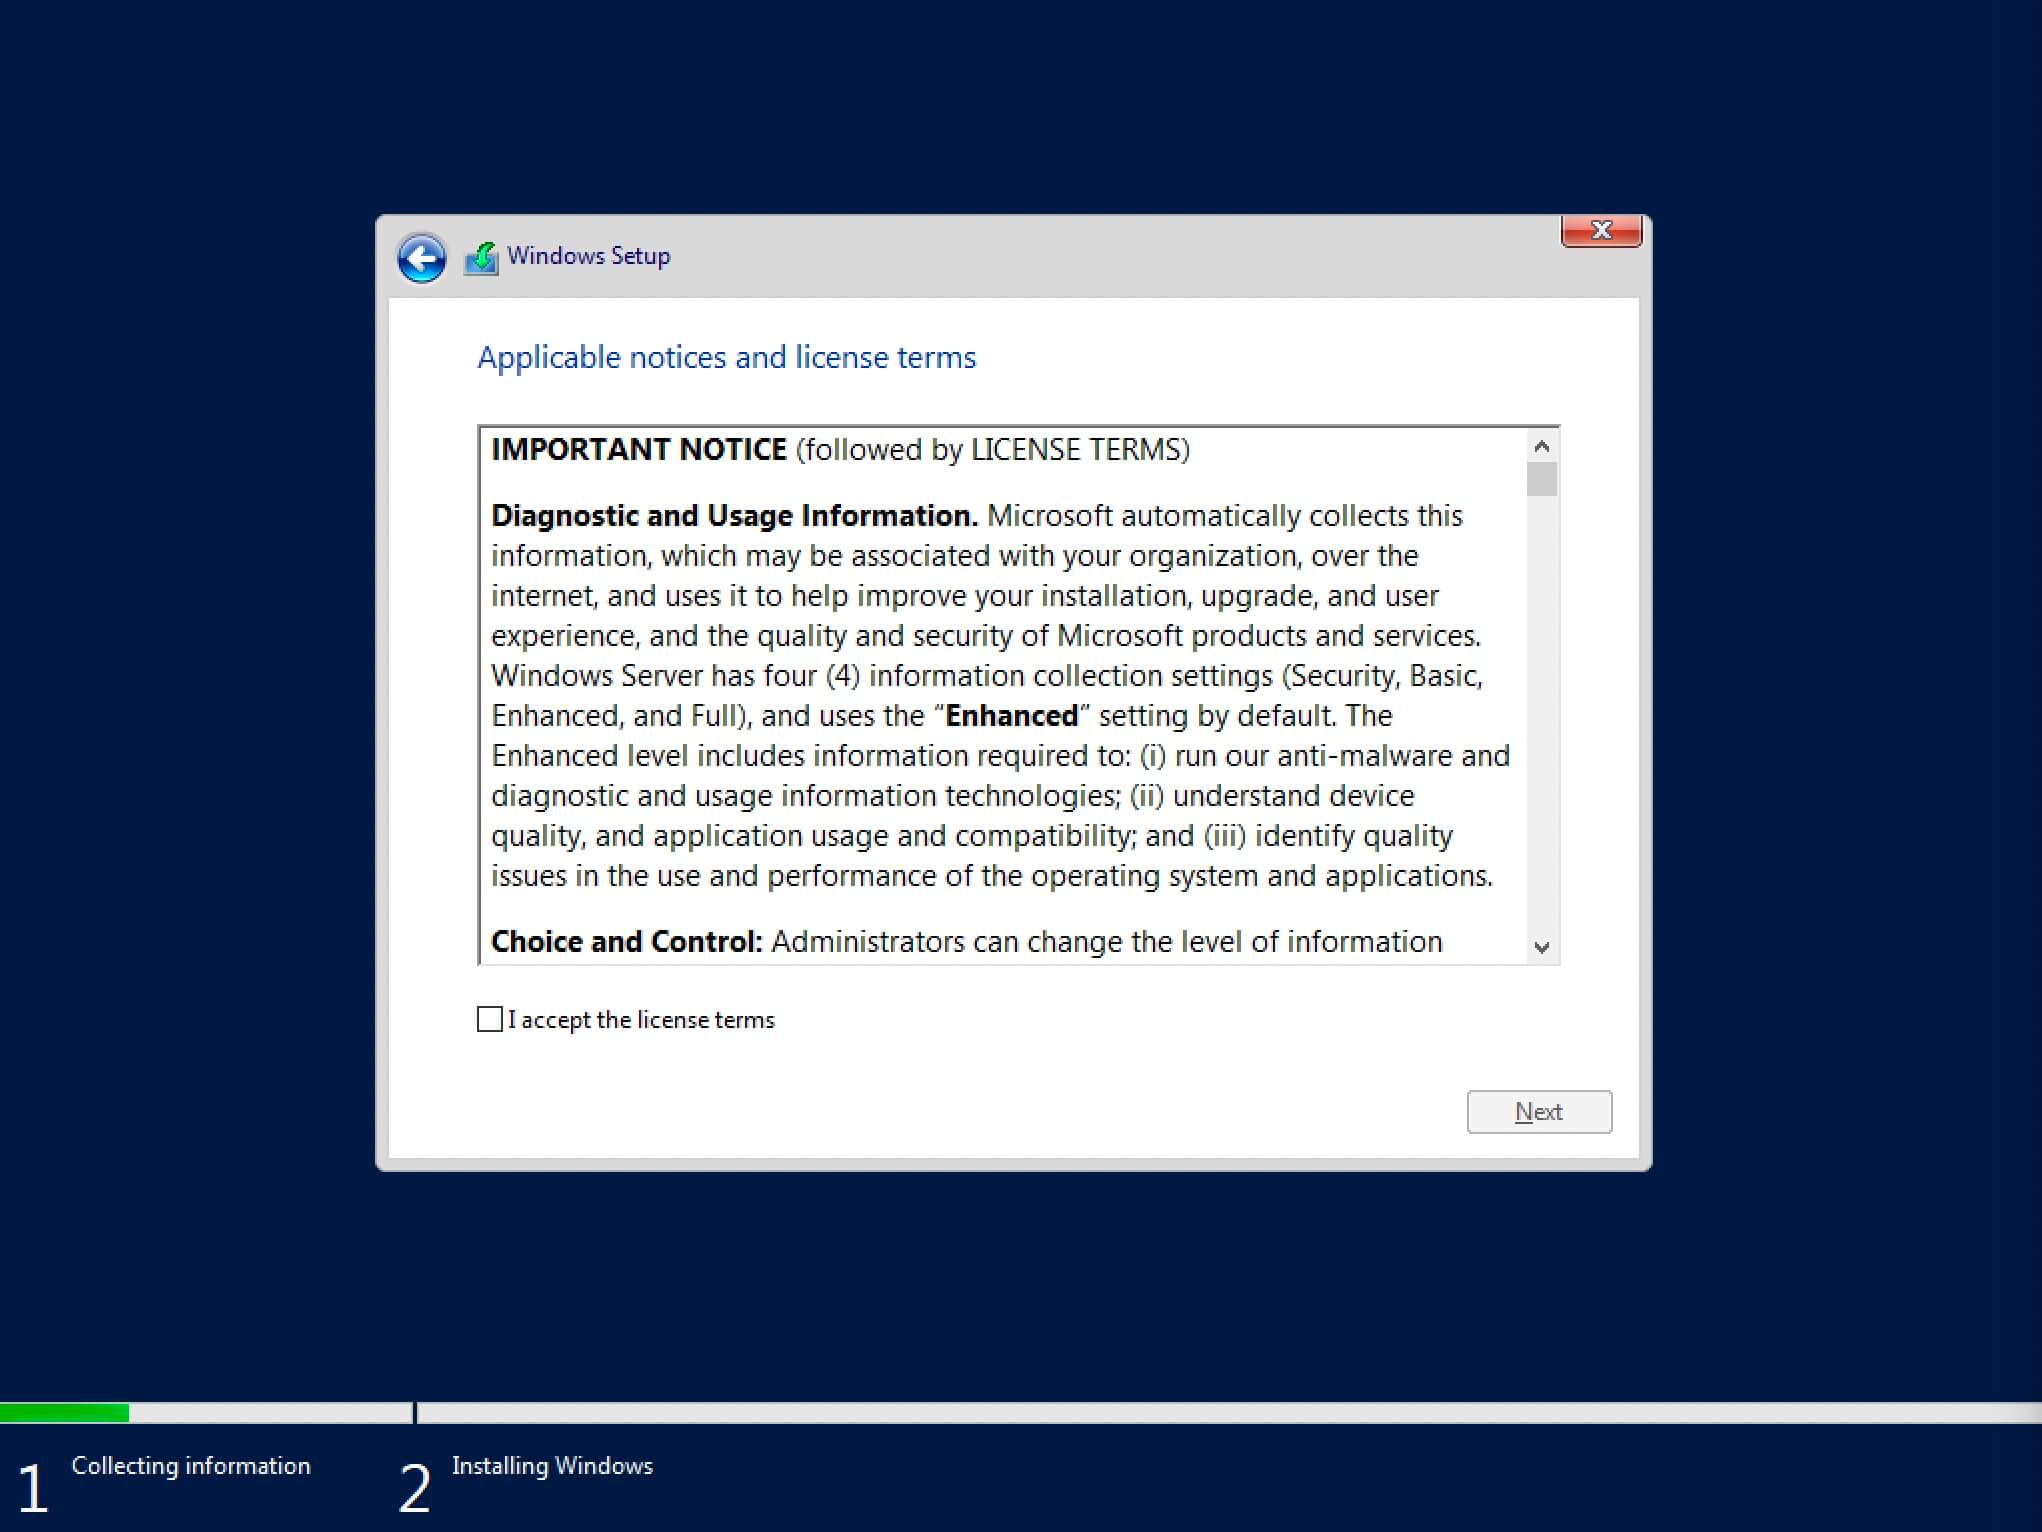
Confirm the agreement (check I accept the license terms).
Select the drive in which you are installing Windows.
As you can see, the installation process is very simple.
How to install Windows Server 2019 on Hyper-V 2016
With Hyper-V, all you have to do is download the VHDX file and copy it to the datastore where you want to run the Hyper-V virtual machine. Details of the Hyper-V environment are as follows:
– Windows Server 2016 Hyper-V
– Windows Server 2016 is installed on VMware ESXi 6.5.
The process of using the downloaded VHDX file is similar to creating other Hyper-V virtual machines. But here we connect the disk to the downloaded Microsoft Insider file.
In the image above, we specify the name and path of the virtual machine storage.
Then select Generation 2 for the Generation version:
In the image below, we allocate only 2 GB of RAM to this virtual machine.
Note: If you do this in operating environments, be aware that high RAM should be allocated to virtual machines, otherwise you will face many problems when loading high.
Then select the network card configuration for the Hyper-V virtual machine in Windows Server 2019.
In the Connect Virtual Hard Disk section, select Use an existing virtual hard disk. Below is the path to the downloaded VHDX file that is attached to the virtual machine.
On the last page, you will see a summary of the status of the virtual machine that you configured. Click Finish to create this machine.
After turning on Hyper-V, you will see that the technical preview is Server Core.
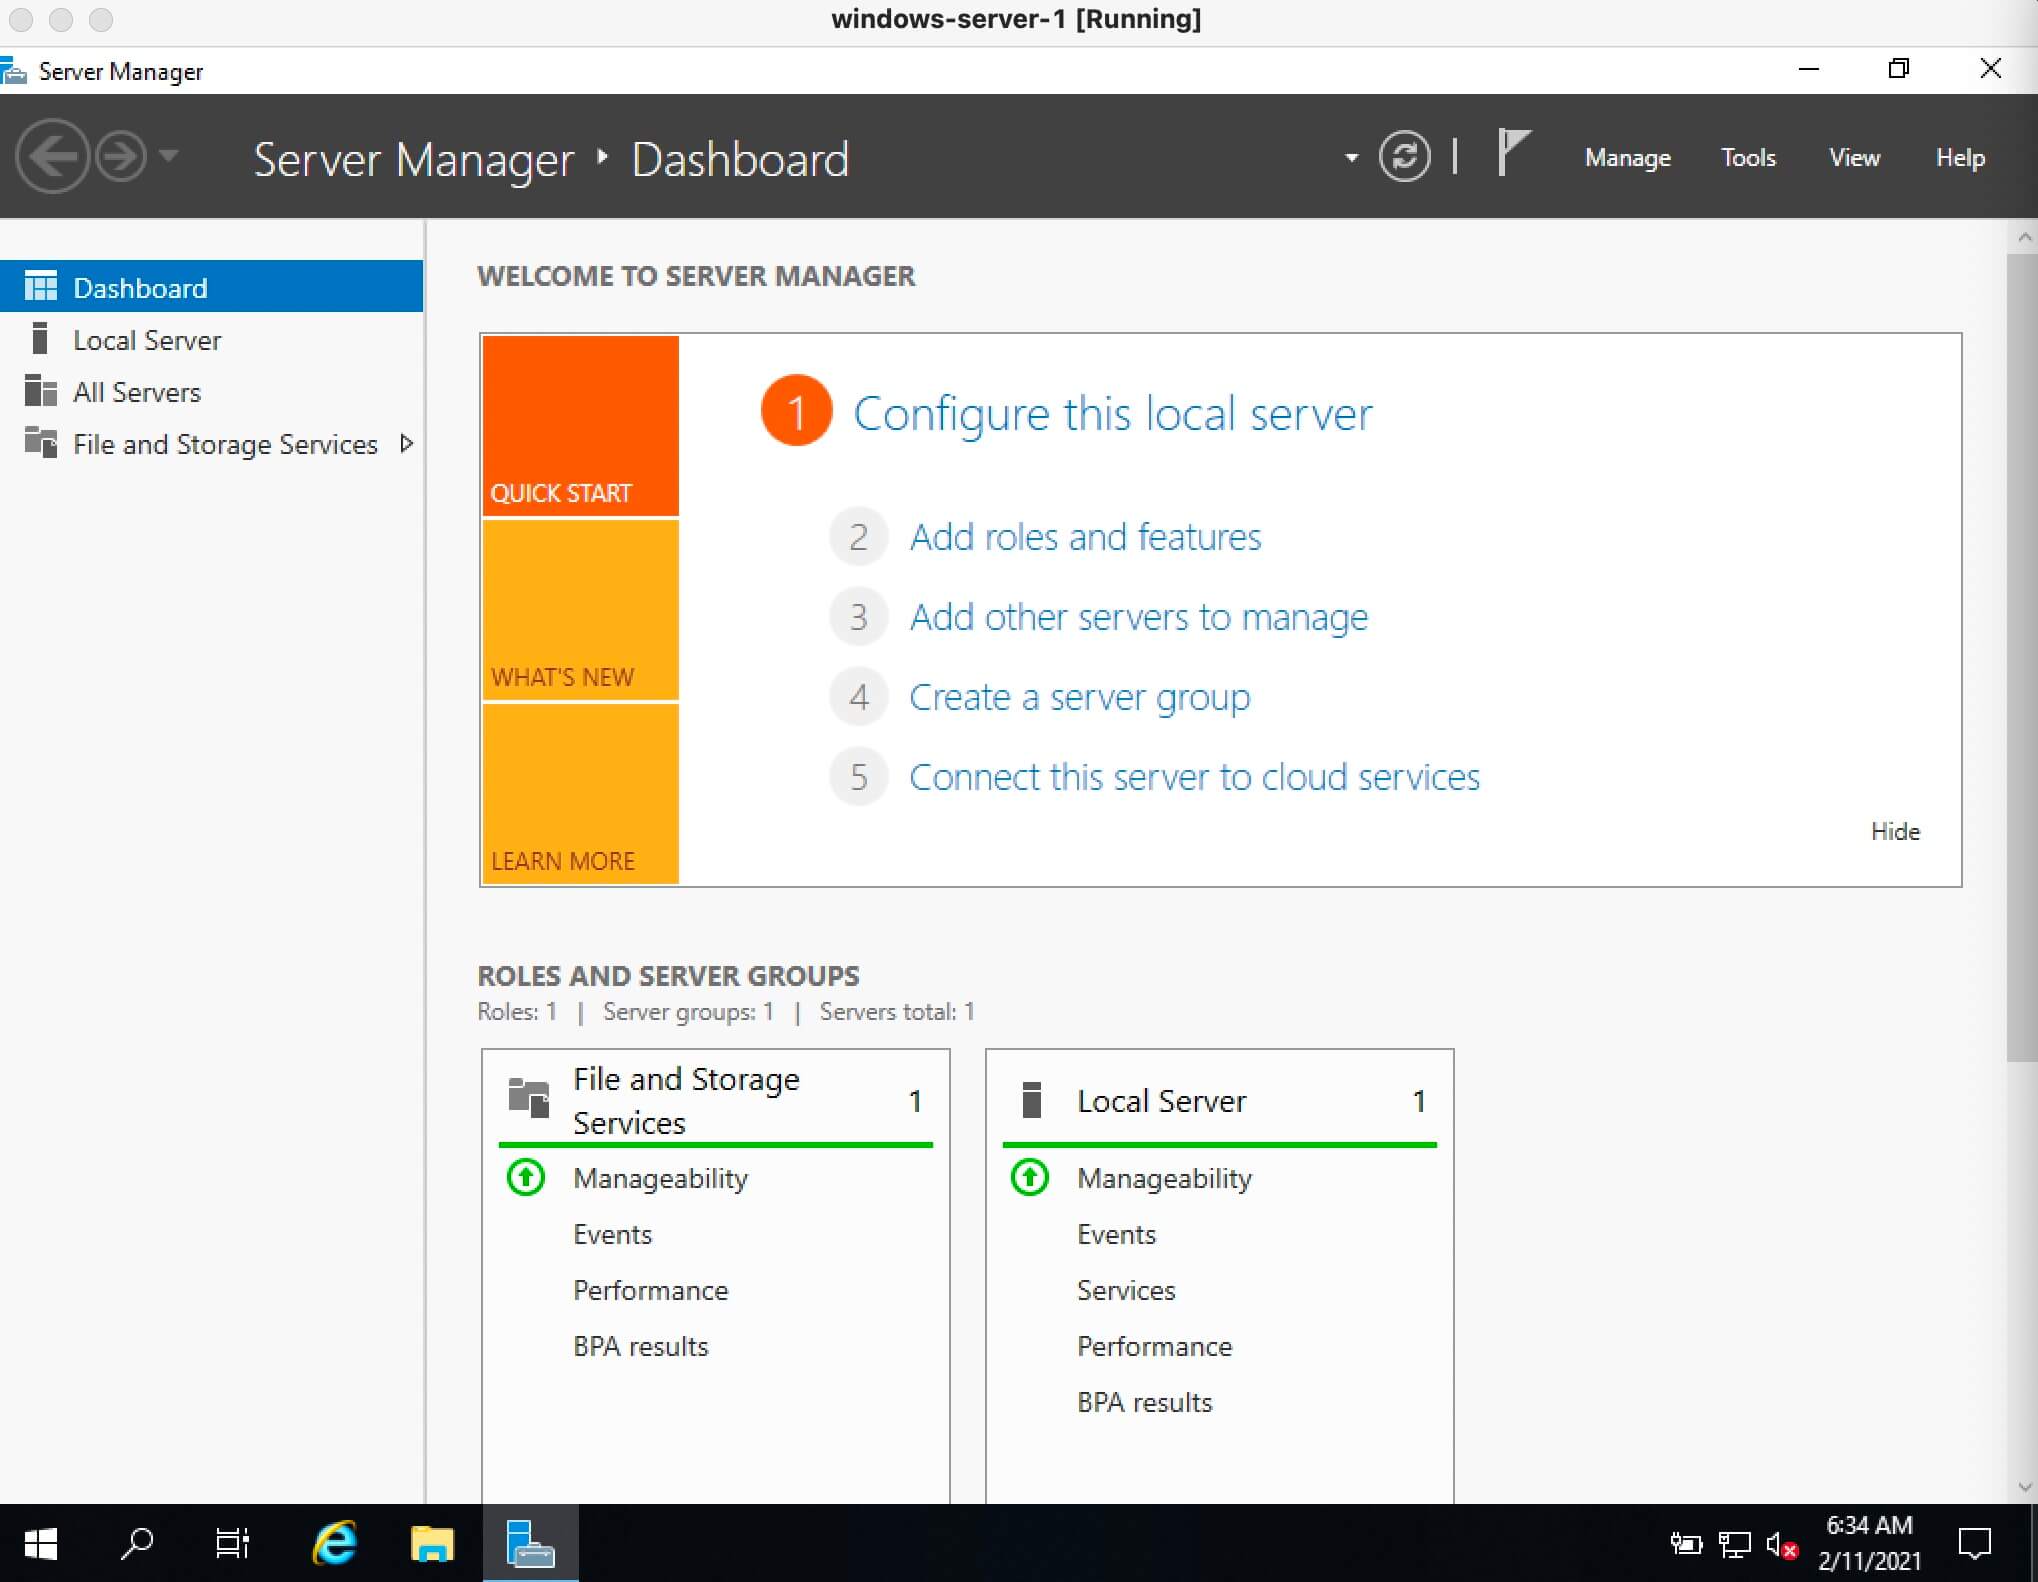
How to install the Honolulu project on Windows Server 2019
Honolulu is a browser-based local tool that allows you to manage Windows Server without the need for Azure or cloud. Honolulu allows IT administrators access to full control of all server structural features. It is generally suitable for management on private networks that are not connected to the Internet.
Honolulu is a modern evolutionary tool for in-box management tools, such as Server Manager or MMC. In fact, the project complements the System Center and Operations Management Suite but has not been created to replace these products and services.
You can install the Honolulu project locally on the Windows Server 2019 Core version. To do this, we need to run and install the MSI package using CMD.
C:\Users\administrator.CLOUD\Downloads>msiexec /i honolulu_install.msi /qn /L*v log2.txt SME_port=6513 SSL_CERTIFICATE_OPTION=generateNote: Instructions for installing the Honolulu project on the Windows Server 2019 can be found on the official Microsoft page.
msiexec /i <HonoluluInstallerName>.msi /qn /L*v log.txt SME_PORT=6513 SSL_CERTIFICATE_OPTION=generateAs you can see in the above command, we also specify the log file. Using the log file to see the installation status and troubleshooting problems during installation is appropriate. At first, the installation of Honolulu was faulty, but after resetting the server and reinstalling it, the problem was solved.
The Honolulu project and its implementation on Windows Server 2019
At first glance, the Honolulu project on Windows Server 2019 was very appealing to us. Microsoft has done an interesting job of designing and adding charm to it. In addition, the dashboard has an interesting search feature that allows you to easily find different items. You can type the letters in it so that the Honolulu project quickly displays the item you were looking for. Of course, the Search feature still needs improvements, which I hope will be improved in future versions.
Below you can see pictures of the Honolulu project on Windows Server 2019.
*
**
***
****
Conclusion
This article is one of the most complete Windows Server 2019 installation and configuration training references. In this tutorial, we tried to fully teach you how to install Windows Server 2019 via ISO file in VMware and Hyper-V 2016. You were also taught how to install the Honolulu project on Windows Server 2019.
В Windows Server 2012R2/2016/2019 вы можете устанавливать и удалять различные роли и компоненты сервера через графический Server Manager. Однако в большинстве случаев эти же самые операции можно выполнить гораздо быстрее из консоли PowerShell. В этой статье мы рассмотрим особенности управления ролями и компонентами в актуальных версиях Windows Server.
Содержание:
- Как вывести все установленные роли и компоненты Windows Server?
- Установка ролей и компонентов Windows Server из PowerShell
- Деплой ролей на множество серверов Windows Server
- Как удалить роль или компонент в Windows Server с помощью PowerShell?
Как вывести все установленные роли и компоненты Windows Server?
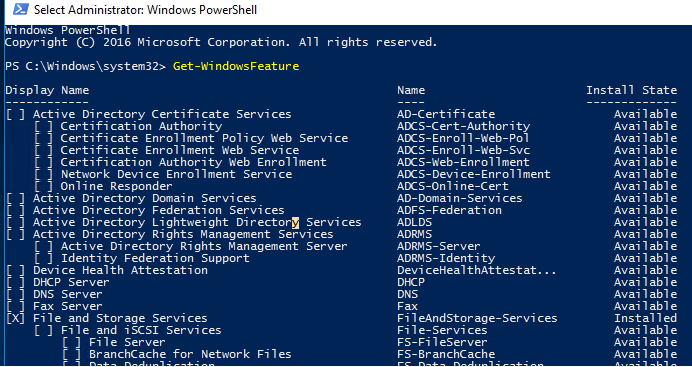
Чтобы вывести список всех доступных ролей и компонентов Windows Server используется командлет
Get-WindowsFeature
. Если выполнить его без параметров, появится информация обо всех компонентах.
Как вы видите, отображается название компонента (Display Name), его системное имя (Name) и состояние (Install State: Installed, Available или Removed). Список ролей и компонентов представляет собой дерево со вложенными ролями, которое напоминает то, которые вы видите при установке ролей через графический Server Manager. Для установки и удаления ролей и компонентов через PowerShell, вам нужно знать их системное имя, которое содержится в столбце Name.
Совет. Если роль или функция находится в состоянии Removed, значит ее установочные файлы удалены из локального репозитария системы (уменьшение размера папки WinSxS) и вы не сможете установить эту роль.
Роли и компоненты удаляются из образа так:
Uninstall-WindowsFeature –Name DHCP –Remove
Чтобы установить удаленную роль, воспользуйтесь командлетом:
Install-WindowsFeature DHCP
(понадобится доступ в Интернет)
Либо вы можете восстановить компоненты их дистрибутива с вашей версией Windows Server. Данная команда установит роль DHCP сервера.
Install-WindowsFeature DHCP -Source E:\sources\sxs
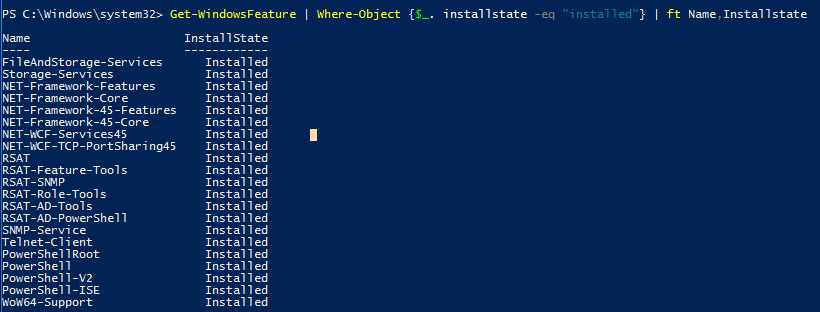
Вы можете вывести список установленных компонентов сервера:
Get-WindowsFeature | Where-Object {$_. installstate -eq "installed"} | ft Name,Installstate
Судя по скриншоту, данный сервер используется как файловый сервер (роли FileAndStorage-Services, Storage-Services). Большинство оставшихся компонентов используются для управления и мониторинга сервера.
Если вы не знаете точно имя роли, можно использовать знаки подстановки. Например, чтобы проверить какие из web компонентов роли IIS установлены, выполните (немного сократим синтаксис):
Get-WindowsFeature -Name web-* | Where installed

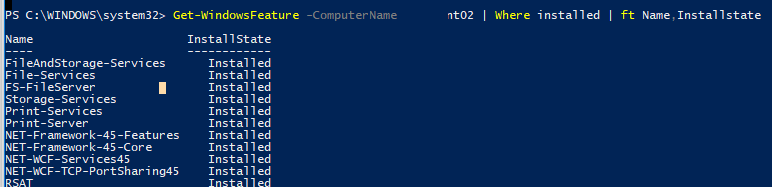
Вы можете получить список установленных компонентов на удаленном Windows Server:
Get-WindowsFeature -ComputerName msk-prnt1 | Where installed | ft Name,Installstate
Судя по установленным ролям Print-Services и Print-Server, этот сервер используется в качестве сервера печати.
Вы можете использовать командлет Get-WindowsFeature для поиска серверов в домене, на которых установлена определенная роль. Вы можете искать на серверах в определенном OU Active Directory с помощью командлета Get-ADComputer из модуля ActiveDirectory for PowerShell, или по указанному списку серверов (
$servers = ('server1', 'server2')
). Например, нам нужно найти все файловые сервера c ролью FileAndStorage-Services в указанном контейнере AD (я использую редактор PS — Visual Studio Code)
import-module activedirectory
$Servers=get-adcomputer -properties * -Filter {Operatingsystem -notlike "*2008*" -and enabled -eq "true" -and Operatingsystem -like "*Windows Server*"} -SearchBase ‘OU=Servers,OU=MSK,DC=winitpro.ru,DC=ru’ |select name
Foreach ($server in $Servers)
{
Get-WindowsFeature -name FileAndStorage-Services -ComputerName $server.Name | Where installed | ft $server.name, Name, Installstate
}
В результате у нас появился список серверов, на которых установлена данная роль.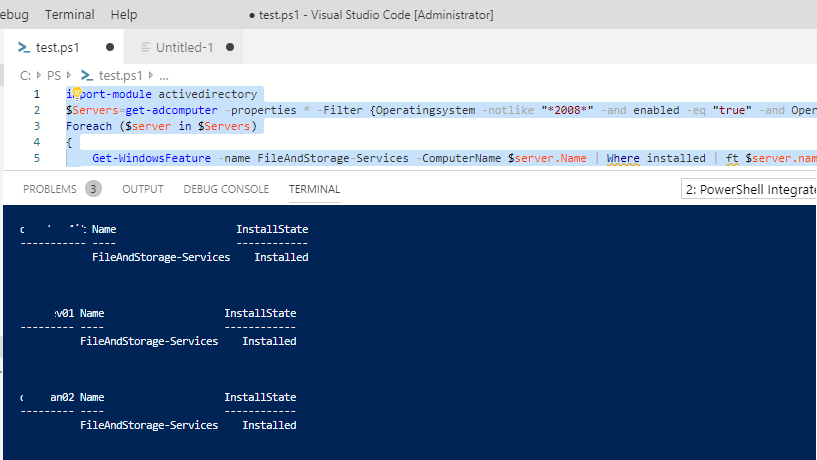
Установка ролей и компонентов Windows Server из PowerShell
Для установки ролей и компонентов в Windows Server используется командлет Install-WindowsFeature.
Чтобы установить роль DNS на текущем сервере и инструменты управления (в том числе модуль Powershell – DNSServer), выполните:
Install-WindowsFeature DNS -IncludeManagementTools
По-умолчанию командлет устаналивает все необходимые зависимые роли и компоненты при установке роли. Чтобы вывести список зависимостей до установки воспользуйтесь параметров.
Install-WindowsFeature -name UpdateServices -whatif
Например, для установки роли сервера обновлений WSUS, необходимо установить некоторые компоненты IIS.
What if: Continue with installation?
What if: Performing installation for "[Windows Server Update Services] Windows Server Update
What if: Performing installation for "[Windows Server Update Services] WID Database".
What if: Performing installation for "[Windows Server Update Services] WSUS Services".
What if: Performing installation for "[Web Server (IIS)] Windows Authentication".
What if: Performing installation for "[Web Server (IIS)] Dynamic Content Compression".
What if: Performing installation for "[Web Server (IIS)] Performance".
What if: Performing installation for "[Web Server (IIS)] Static Content".
What if: Performing installation for "[Windows Internal Database] Windows Internal Database".
What if: The target server may need to be restarted after the installation completes.
Чтобы установить роль Remote Desktop Session Host, службу лицензирования RDS и утилиты управления RDS на удаленном сервере, воспользуйтесь командой:
Install-WindowsFeature -ComputerName msk-rds21 RDS-RD-Server, RDS-Licensing –IncludeAllSubFeature –IncludeManagementTools –Restart

C параметром
–Restart
сервер будет автоматически перезагружен, если установленный компонент это потребует.
Также можно установить компонент такой командой (например роль SMTP сервера):
Get-WindowsFeature -Name SMTP-Server | Install-WindowsFeature
Деплой ролей на множество серверов Windows Server
Еще одна интересная возможность при развертывании однотипных серверов. Вы можете установить необходимые компоненты на эталонном Windows Server и экспортируете список установленных ролей в CSV файл:
Get-WindowsFeature | where{$_.Installed -eq $True} | select name | Export-Csv C:\ps\Roles.csv -NoTypeInformation –Verbose
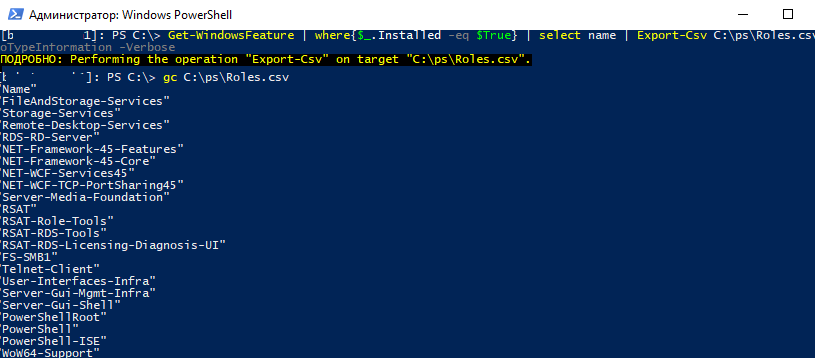
Потом вы можете использовать этот CSV файл для установки такого же набора ролей на других типовых серверах:
Import-Csv C:\PS\Roles.csv | foreach{ Install-WindowsFeature $_.name }

Если роль или компонент уже установлен, команда вернет
NoChangeNeeded
и продолжит установку следующей роли.
Либо для установки одинакового набора ролей сразу на нескольких серверах можно использовать такую команду:
$servers = ('srv1', 'srv2',’srv3’)
foreach ($server in $servers) {Install-WindowsFeature RDS-RD-Server -ComputerName $server}
Как удалить роль или компонент в Windows Server с помощью PowerShell?
Для удаления ролей и компонентов Windows Server используется командлет
Remove-WindowsFeature
.
Например, чтобы удалить роль принт-сервера, выполните команду:
Remove-WindowsFeature Print-Server -Restart
Why start this series in the 2020, when everything is about cloud, and Microsoft is pulling the plug on its “on-premise” certificates including MCSA, MCSE on Windows Server on 31.01.2021. Why even bother?
For a start… This series is obviously aimed at those of you who are just starting in IT, and want to pursue a career in IT infrastructure/services.
Although everything today is about cloud, Windows Server is still everywhere and will be for some time, since not every workload is suited for cloud, be it practical, security or regulatory reasons. That may change in future, but for now it is like that…
Also, I think that mastering Windows Server 2019 will help you understand basic concepts of services and IT infrastructure.
And in the end, Microsoft Azure is built on Windows Server 2019 at the moment, so if you have a chance to work on ASDK (Azure Stack) you will benefit from this knowledge, because you will understand how it is all connected and working.
This “Server Basics” series will not go into details too deep, the goal is to make you act and try technology by doing something practical and simple that works. That way you will quickly get the result which will make you excited about technology and push you to explore more.
Before you start…
Where to get the Windows Server 2019 installation?
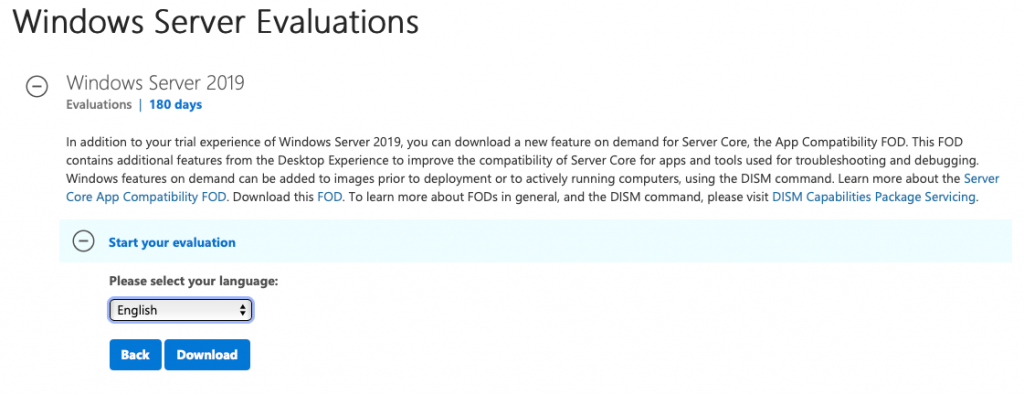
No need for piracy, Microsoft offers trial version of software that will work for 180 days (and more) and is fully functioning.
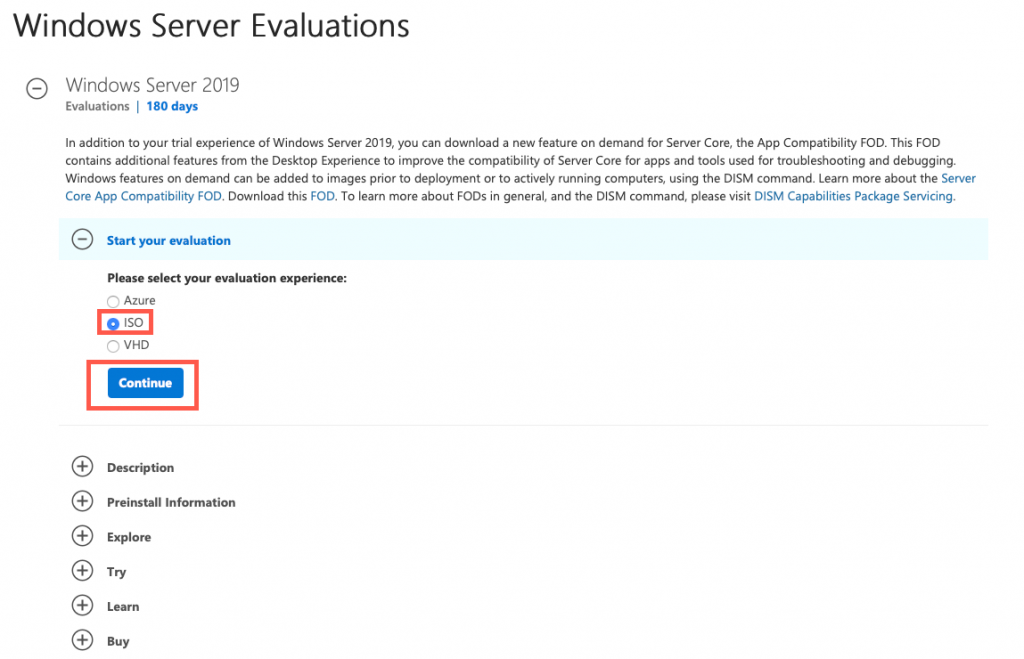
You can get the software here – https://www.microsoft.com/en-us/evalcenter/evaluate-windows-server-2019
Select ISO image and click on Continue
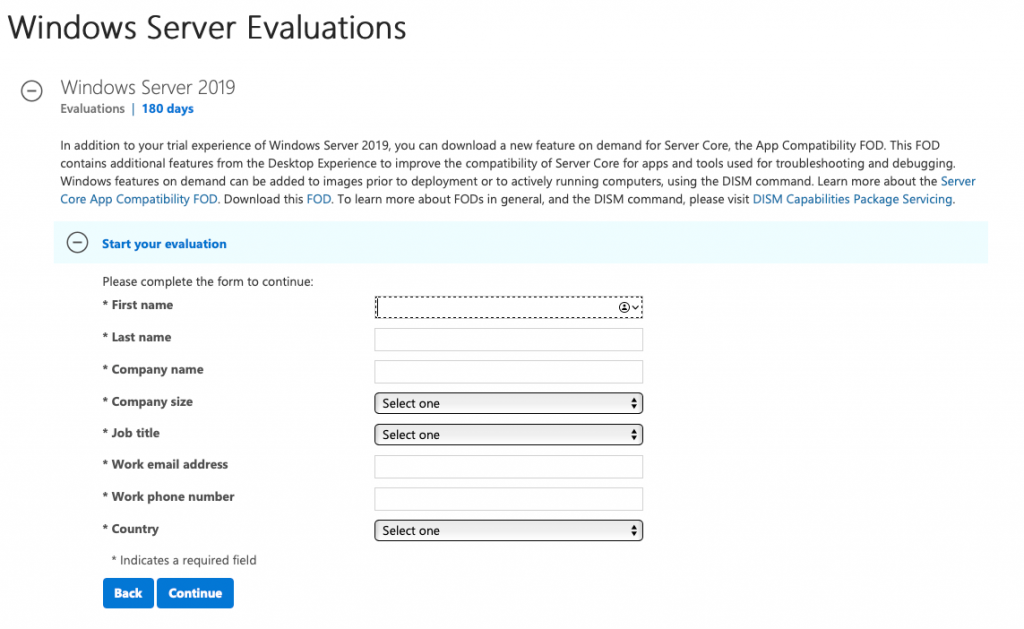
You will be asked for your details, and after you enter everything select Continue
You will then select the language and click on Download…
If you are planing to do Windows Server 2019 installation on physical machine you will have to “burn” ISO image you downloaded to CD or USB stick (USB preferably) – you can do that with a tool called Rufus, you can find it here – https://rufus.ie/
Installation on Hardware or Virtual Machine?
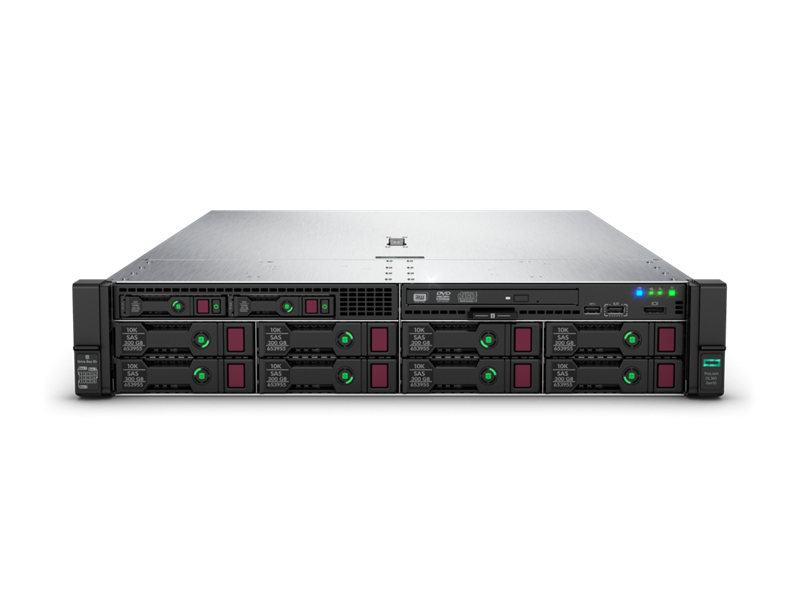
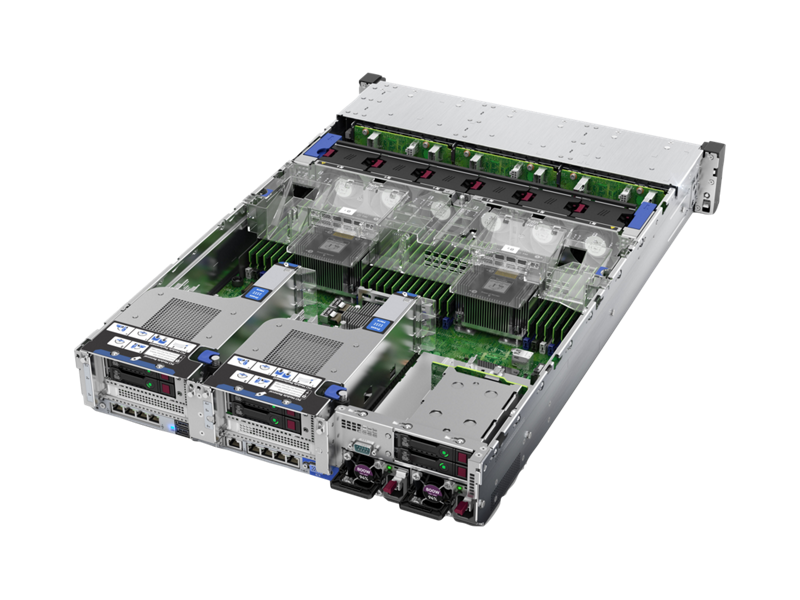
Hardware
If you are installing on a physical machine (bare metal) there are a couple of thing to be aware of:
Minimal requirements are (same goes for virtual machines (VMs)) – 1.4Ghz 64bit CPU (it is very important you have 64bit capable CPU, otherwise this won’t work), 512MB of RAM – 2GB of RAM is minimal for graphic environment (which we will do) and 4GB is optimal in my experience. 32GB of disk space, 1Gbit ethernet, 1024×768 screen resolution, keyboard/mouse.
My advice would be to have CPU with multiple cores (2 or more if you can afford), at least 16GB of RAM (the more the better) 1TB disk drive at minimum for testing, if you plan to do LAB and test Windows Server 2019 and its services.
If you are installing on a server, be sure that you first upgraded all the firmwares on your machine. Also, create RAID field on the server on which you will place your Windows Server 2019 installation.
Make sure you set boot device in BIOS to USB stick (or whatever you burned your Windows Server 2019 installation to)
In the end have storage drivers (raid controller) or motherboard storage drivers at hand – Windows Server recognises a huge variety of storage controllers but you never know… Better to be prepared then to waste time. If you are practicing on Dell, HP, Lenovo server equipment, you are covered out of the box.
If you don’t have a server at hand and you are practicing in home lab on “desktop” grade hardware, no worries, installation should work, just make sure you have minimal requirements covered in your PC or laptop. There may be an odd driver issue to resolve if you have “exotic” configuration, so be aware of that.
Virtualization:
With virtual machines you just need to mount Windows Server 2019 ISO image we downloaded earlier after you created empty VM for your Windows Server 2019 ISO install. Procedure depends on the virtualisation software you are using, I can show you VMware vSphere, but more or less all the virtualisation softwares are same with these options, it just depends how you navigate to the option you need.
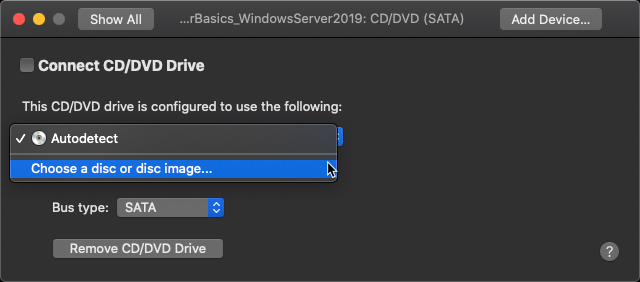
In vSphere you click on settings on virtual machine you created, it is a little wrench on the top of the screen. Under Removable Devices section you will select CD/DVD (SATA)
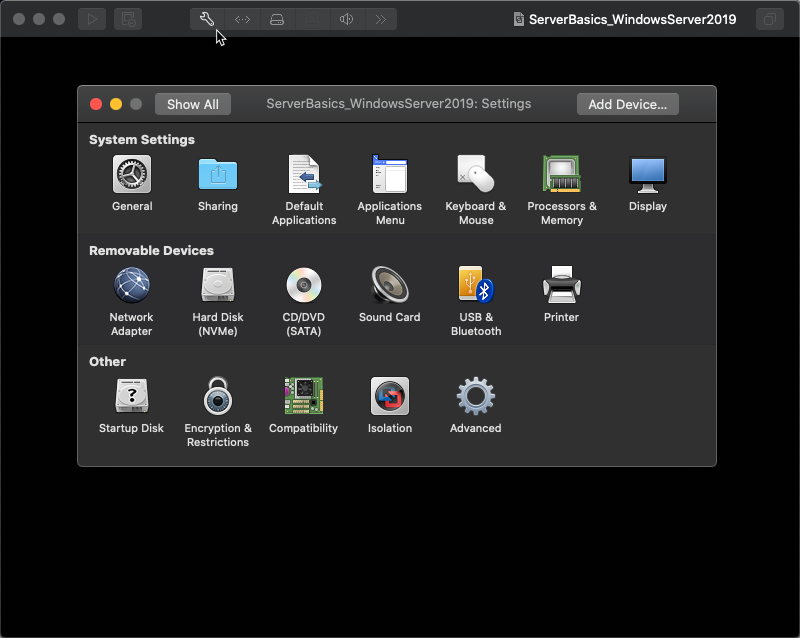
Click on the selection box and select “Choose a disc or disc image…”
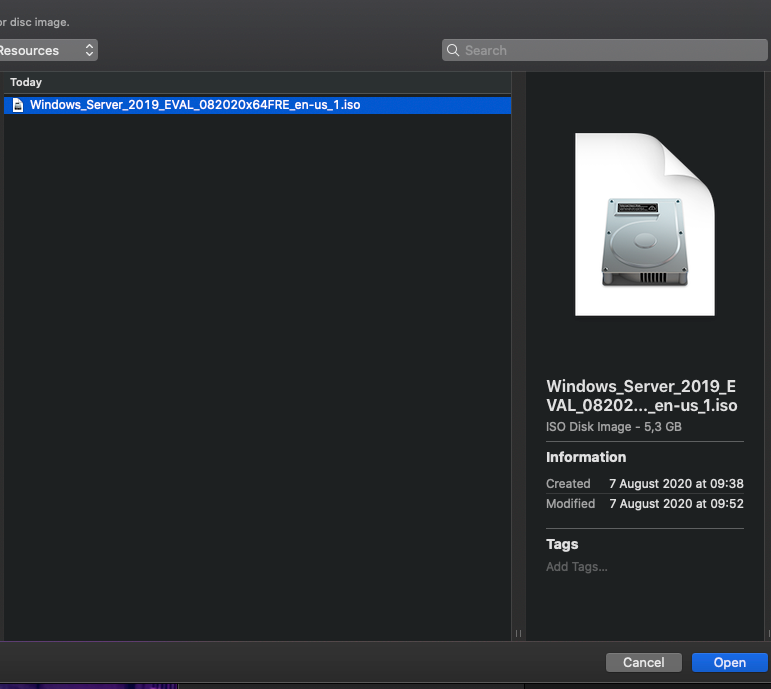
Navigate to the location you downloaded your Windows Server 2019 ISO image and select it.
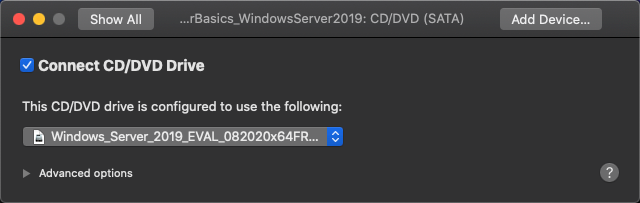
Now that we selected our ISO image, make sure you selected “Connect CD/DVD Drive” checkbox and then back to the main settings screen.
We need to set one more thing so we are sure that we will boot from our ISO image
Under Other Section select “Startup Disk”
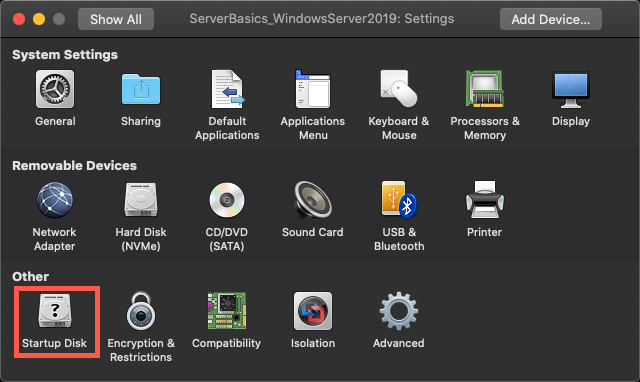
Select CD/DVD as your startup device.
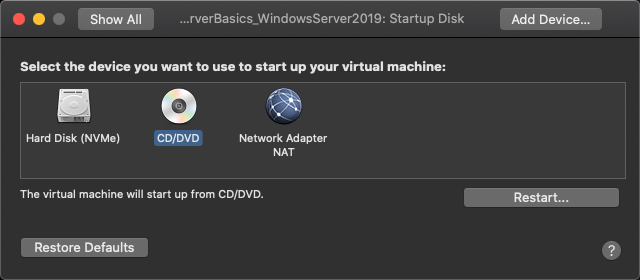
Again, settings in your virtualisation software may differ from this, so explore or Google for the steps you need.
Goal is clear whatever method – hardware or software you are using – mount Windows Server 2019 image we downloaded earlier and select it as bootable device. Also change hardware settings (CPU, RAM, disk) to the settings I mentioned above.
Installation
Now, to the final step, installation of our first Windows Server 2019 machine.
If you are doing it on physical machine be sure you set the USB stick (or CD/DVD if you burned downloaded ISO image to it) as main bootable device in BIOS (probably under boot menu) and in your virtualisation software follow steps I mentioned earlier.
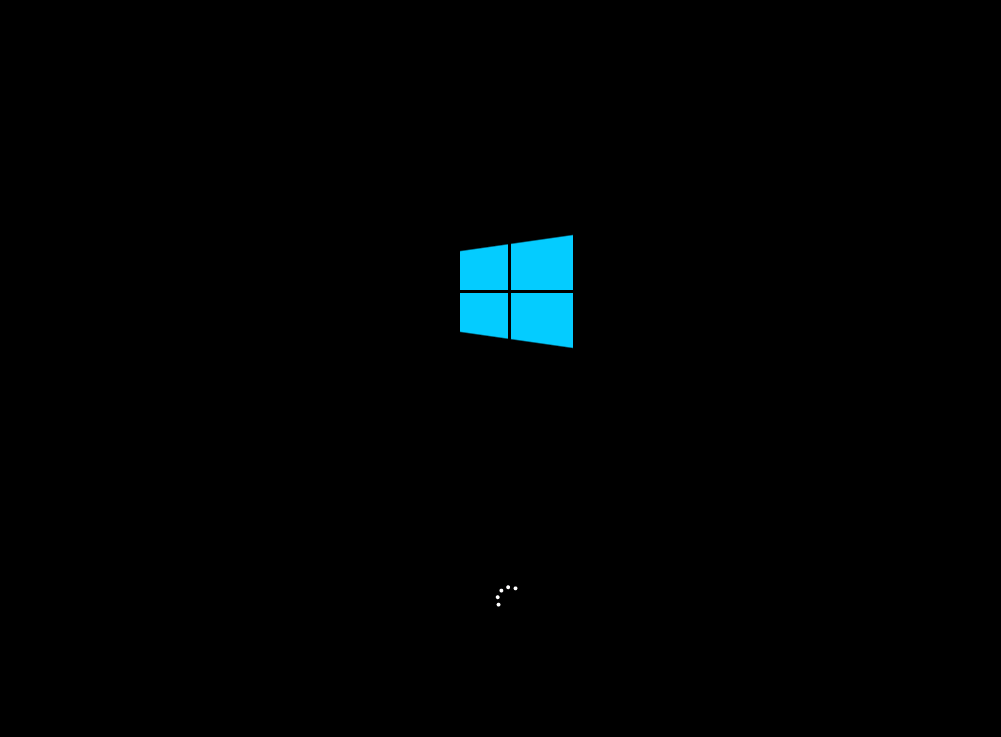
If you did everything correctly, you will be greeted with this screen…
“Press any key to boot from CD or DVD” – press a key on your keyboard to boot from it…

Wait…
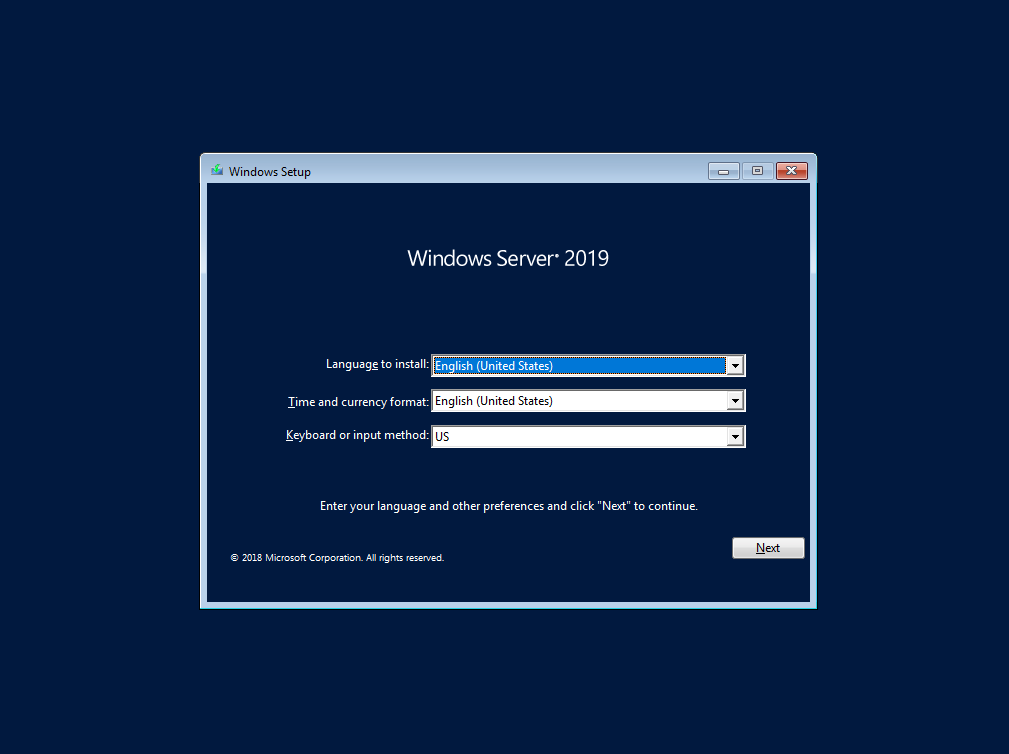
Language to install: Select language you wish your Windows Server installation to be – I will select English
Time and currency format – again, select your local settings
Keyboard or input method – select a keyboard layout, I will select English keyboard layout.
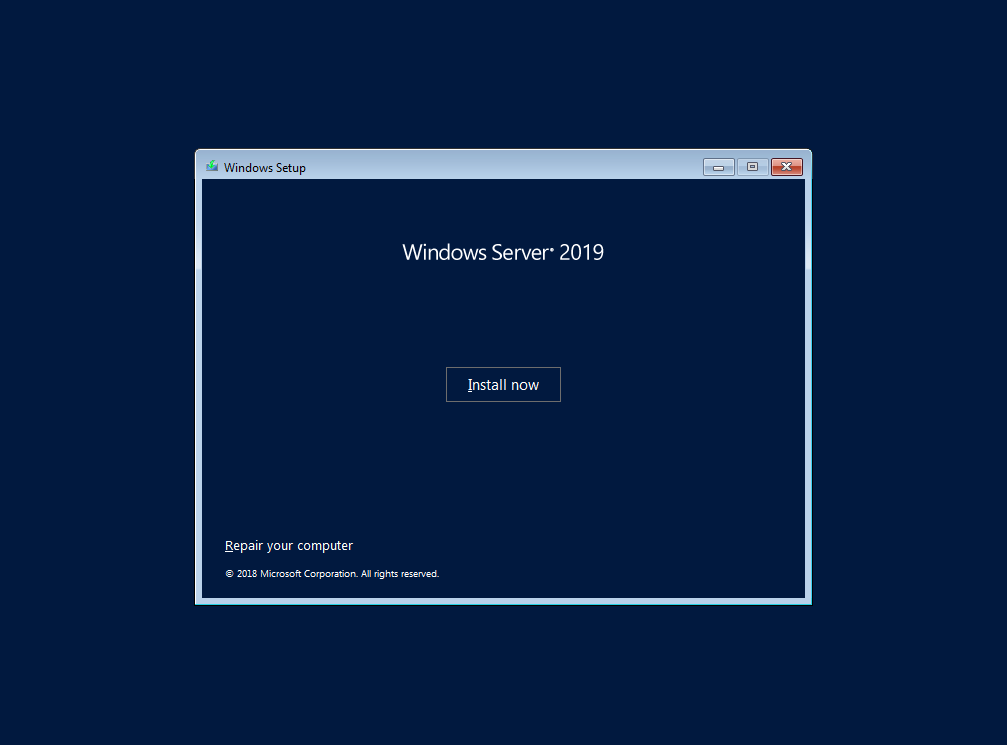
Install now…
…
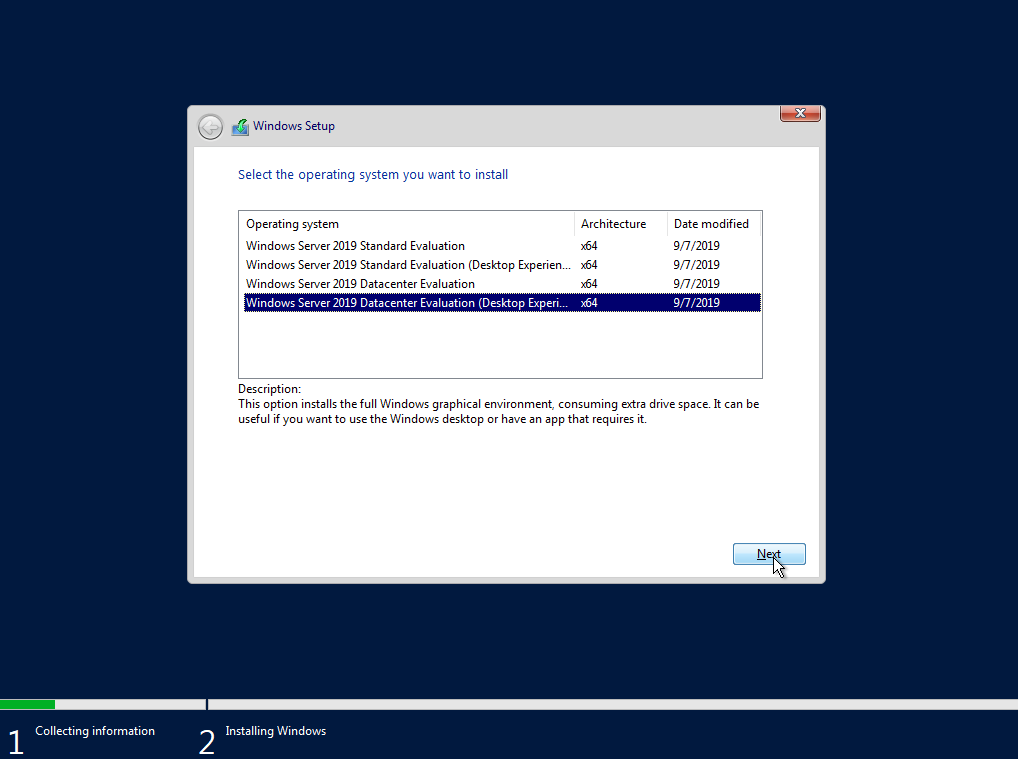
We will select Windows Server 2019 Datacenter Evaluation (Desktop Experience)
Read agreement, select “I accept…” and click on Next

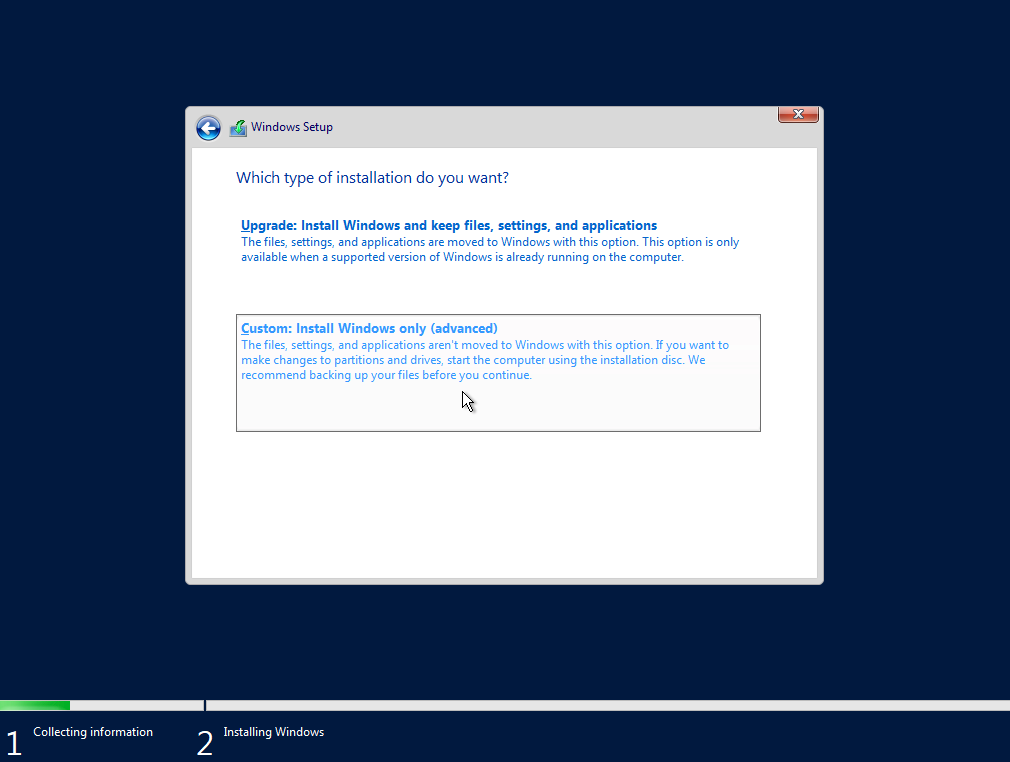
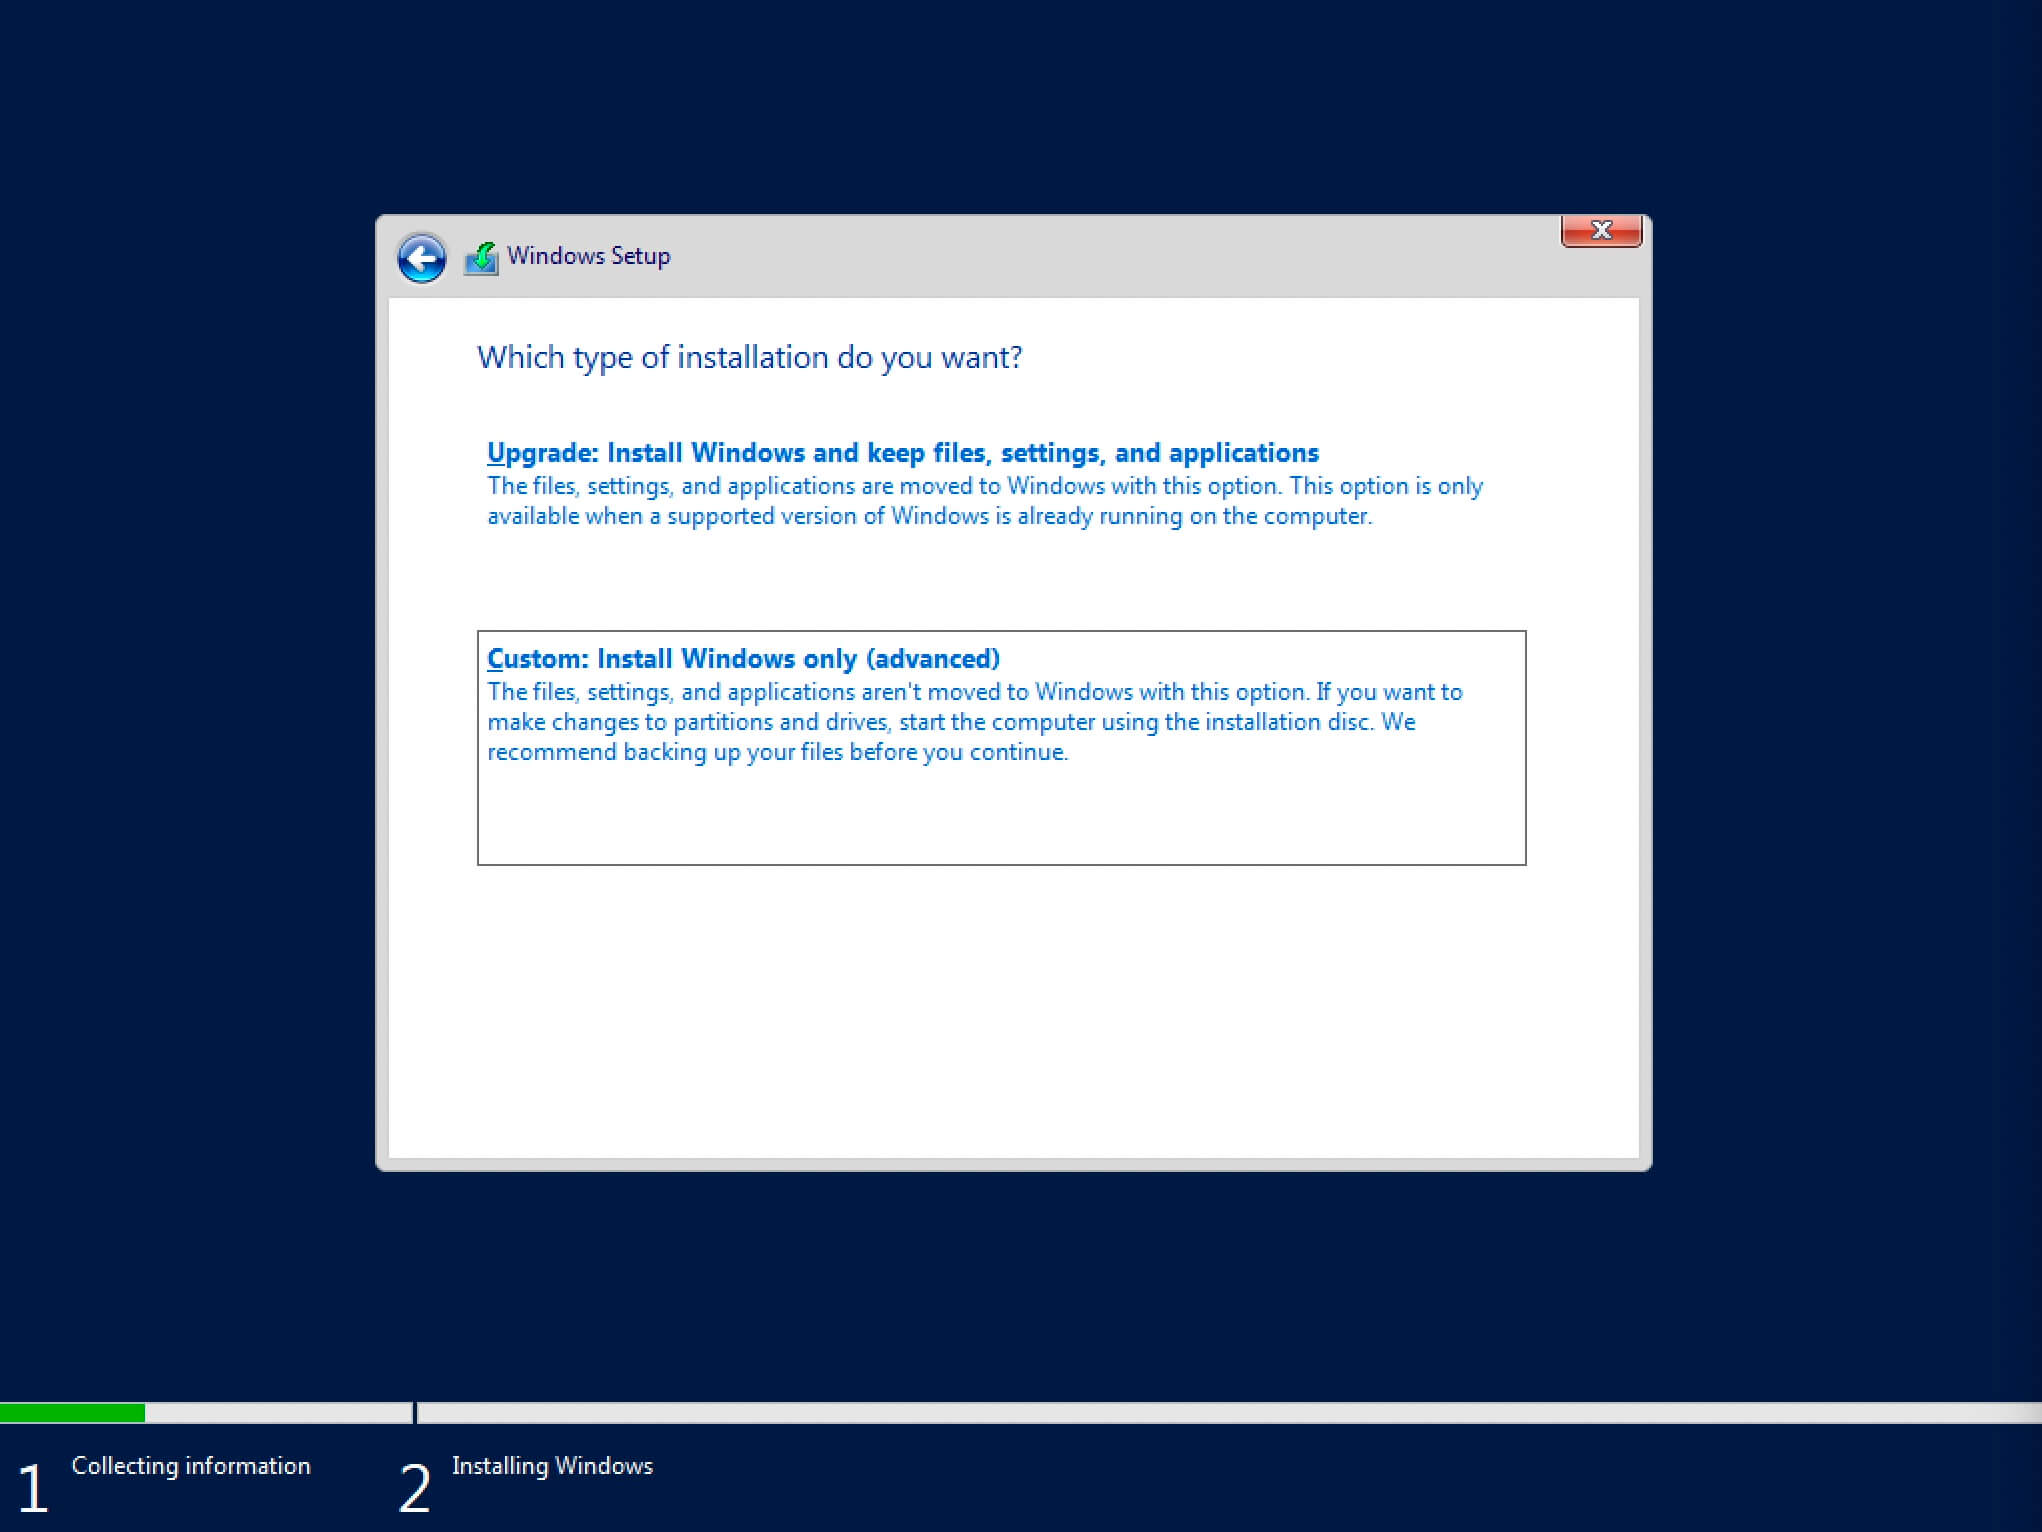
Select “Custom: Install Windows only (advanced) option
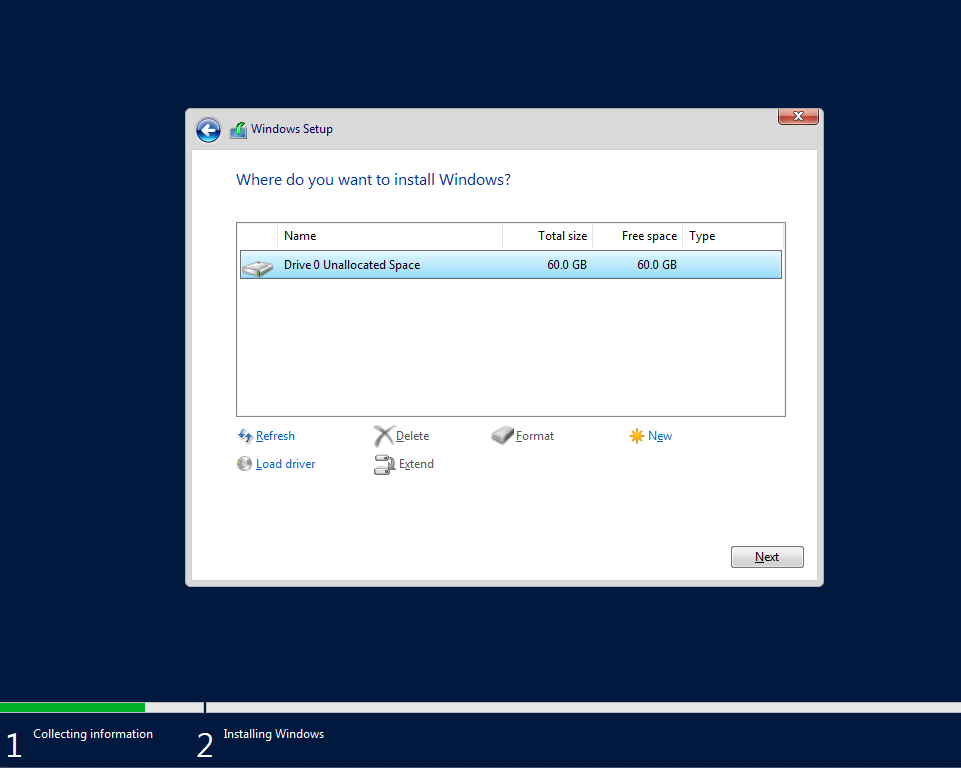
Now, select the disk you prepared for this installation. If this is a blank screen for you, you will need to prepare and load drivers for your storage controller (or RAID controller) I mentioned before. Copy drivers (drivers need to be for the Windows Server 2016/19 or some Windows 10 will even work) to USB, plug it in your machine and click on the Load driver on bottom of the screen. Then browse to your driver, select it and hope for the best.
Also, make sure disk you are installing on is empty with no important data on it, this operation will delete everything on it.
If you can see your disk on the screen below, then select Next and the installation will start…
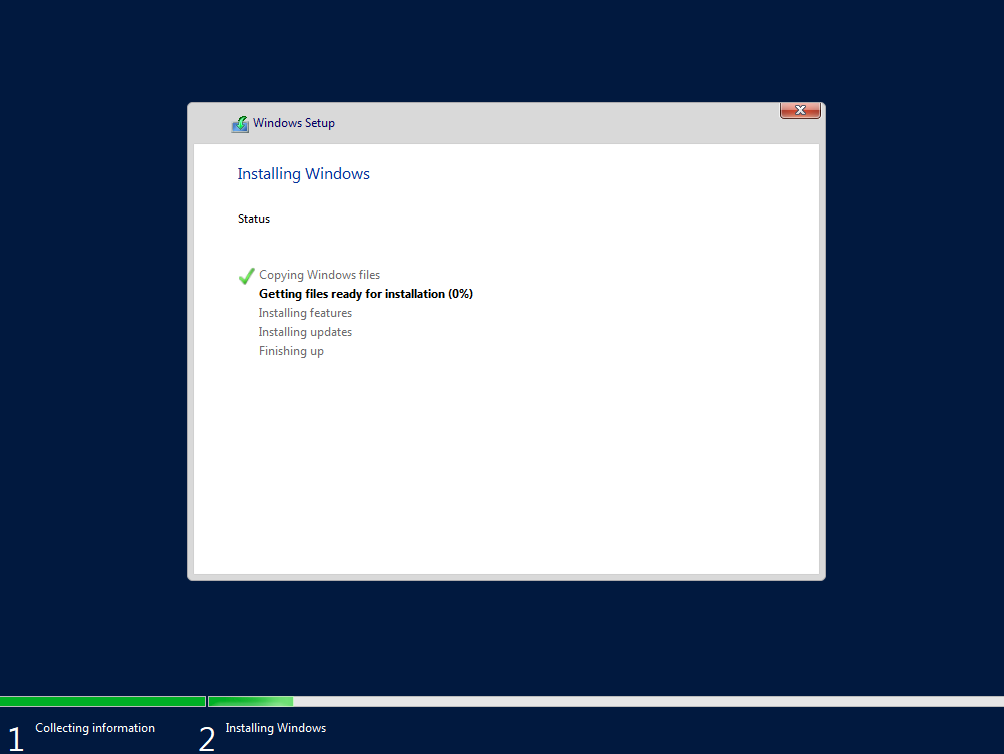
We will now wait a bit… Waiting depends primarily on the speed of your PC, it may take longer on be very quick to install…
After you reached last step you will get restart screen…
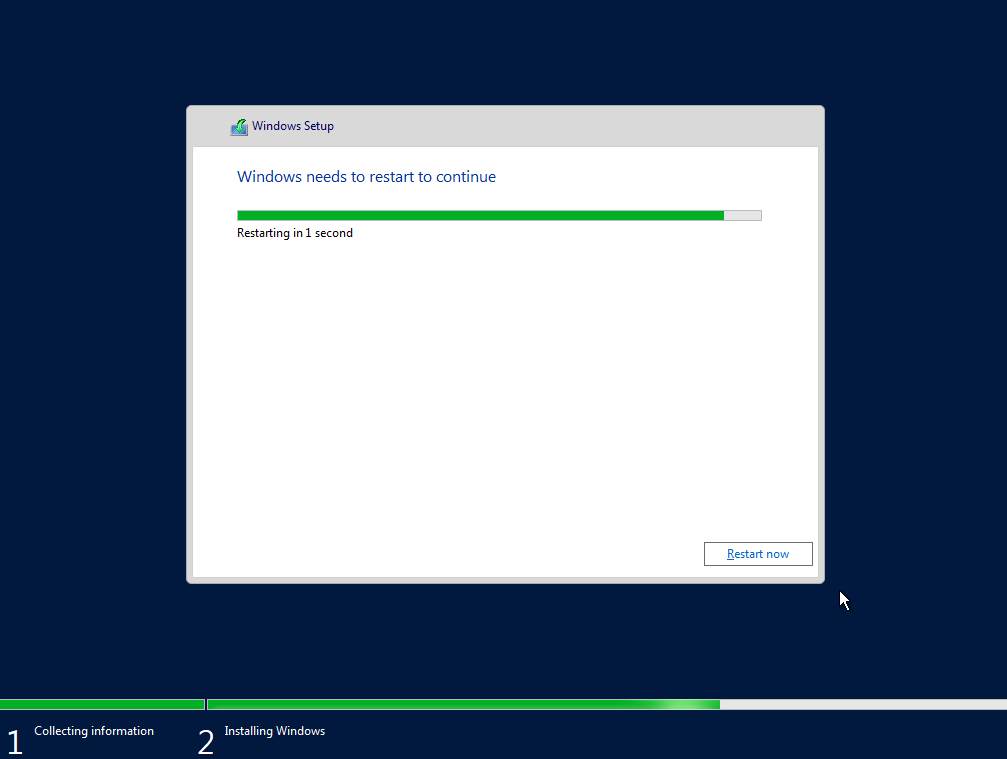
Let the computer/VM restart and this time let it pass “Press any key to boot from CD or DVD” – do not press any key on that screen.
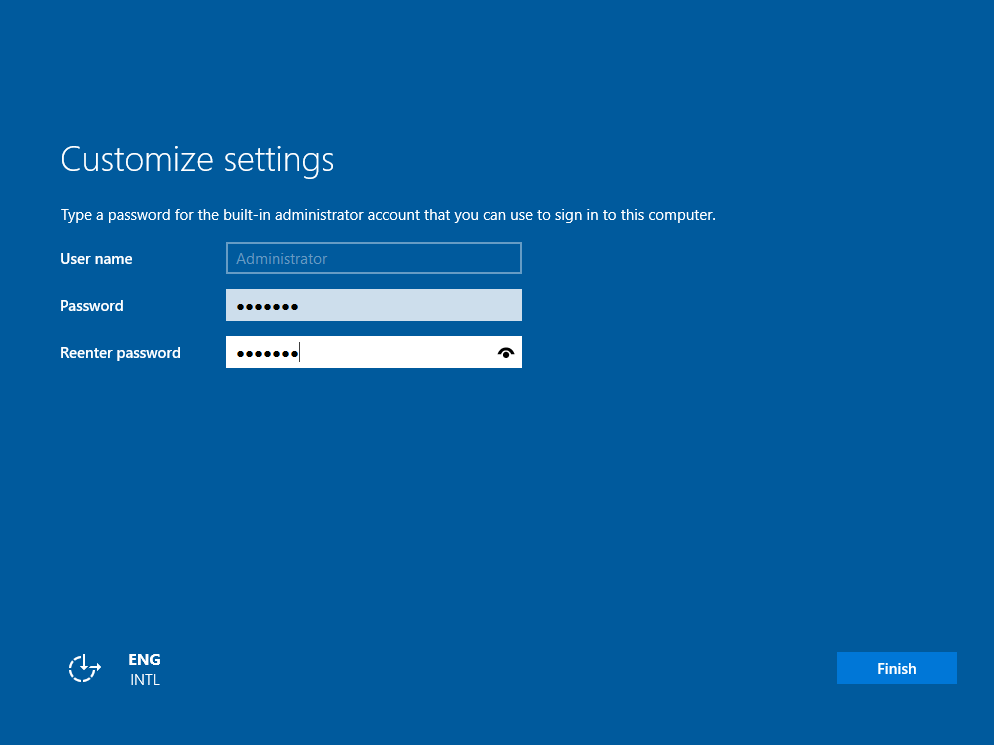
You will be greeted with this screen… Enter password of your selection for your installation. Always make sure you use strong passwords (Minimum 12 signs – combination of letters, numbers, special chars…)
Click on Finish
That is it, you are greeted with lock screen
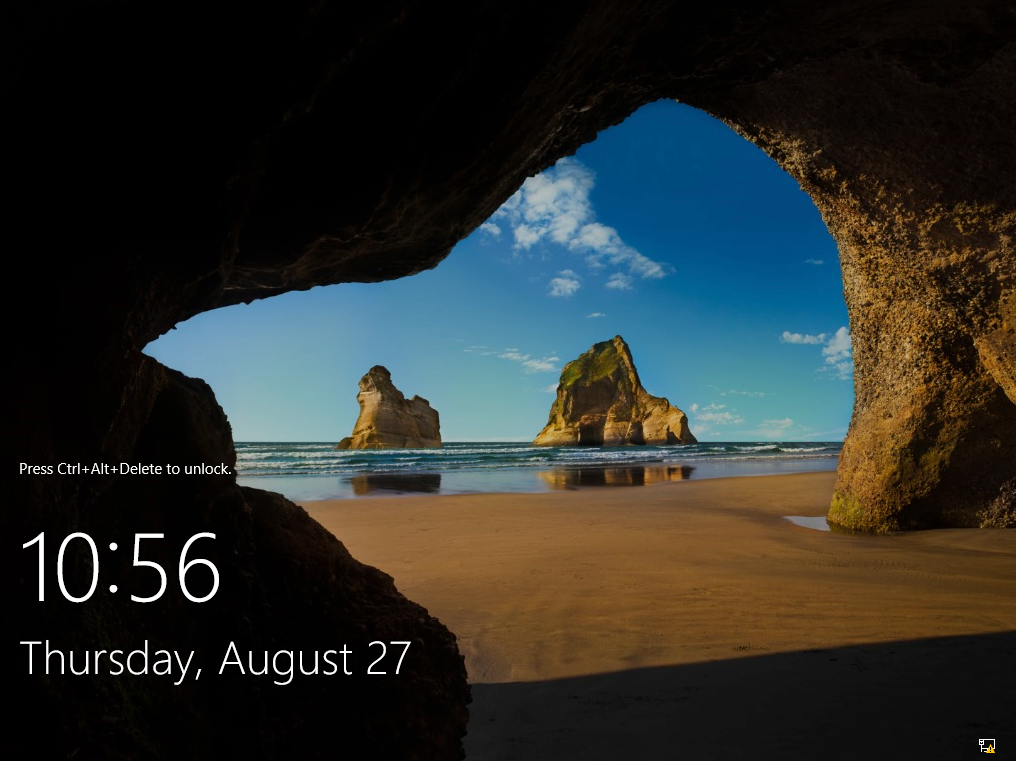
Press CTRL+ALT+DEL if you did install on physical machine, if you done install on a VM, look for a CTRL+ALT+DEL shortcut in a menu.
Enter your password and press enter on a keyboard.
Congratulations, you did your first Windows Server 2019 installation.
In the future I will try to expand this “Server Basics” series with more tutorials on how to configure your Windows Server 2019 installation and set various services on it (DHCP, DNS, file share, failover…)
I have a very busy schedule, so I can’t promise much, but I will try to write as much as time allows.
If you are interested in a video version of this tutorial – here is the video:
Disclaimer
Other tutorials in this series:
Server basics 02: First steps adter Windows Server 2019 install
Server Basics 03: How to install Hyper-V
Server Basics 04: How to create VM on Hyper-V
Server Basics 05: How to create virtual machine template
Server Basics 06: How to create windows domain
Server Basics 07: How to create user in domain, join computer to domain
Server Basics 08: How to create DHCP server
Server Basics 09: How to configure Groupe Policy Part1
Server Basics 10: How to configure Groupe Policy Part2
Server Basics 11: How to create iSCSI Target in Windows Server
Server Basics 12: How to create file server (DFS) in Windows Server
Server Basics 13: How to create Print Server
Установка и настройка DNS-сервера и Active Directory, DHCP-сервера в Windows Server 2019 не отличается от предыдущих выпусков серверов компании Microsoft, таких как Windows Server 2016, 2012. Пройдя несколько шагов несложно устанавить следующие роли: DNS-сервер и Доменные службы Active Directory, DHCP-сервер.
- Переименование сервера
- Настройка сетевого интерфейса
- Установка на сервера ролей: DNS-сервер, Доменные службы Active Directory, DHCP-сервер
- Повышение роли сервера до уровня контроллера домена
- Настройка обратной зоны DNS
- Настройка DHCP-сервера
Переименование сервера
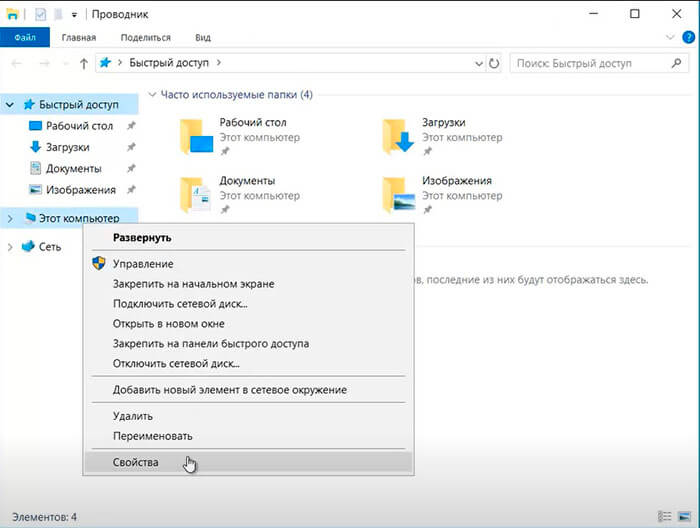
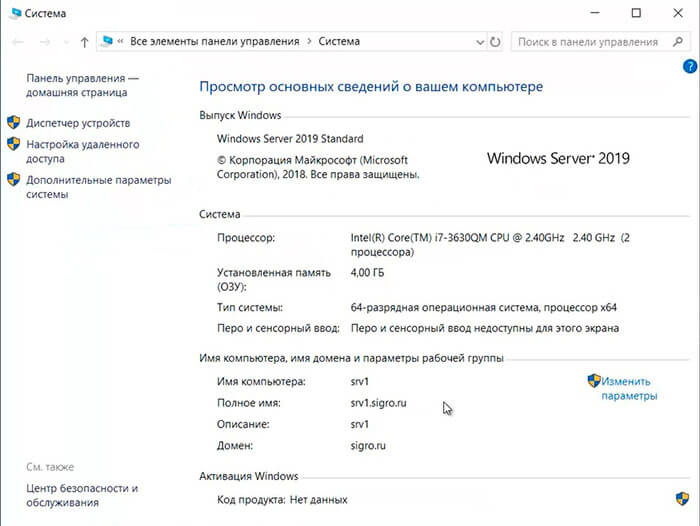
1. Для изменения имени сервера нажимаем правой клавишей мыши на «Этот компьютер«, в появившемся меню выбираем «Свойства«.
2. Далее нажимаем «Изменить параметры«. В открывшемся окне добавляем описание сервера, далее выбираем «Изменить«.
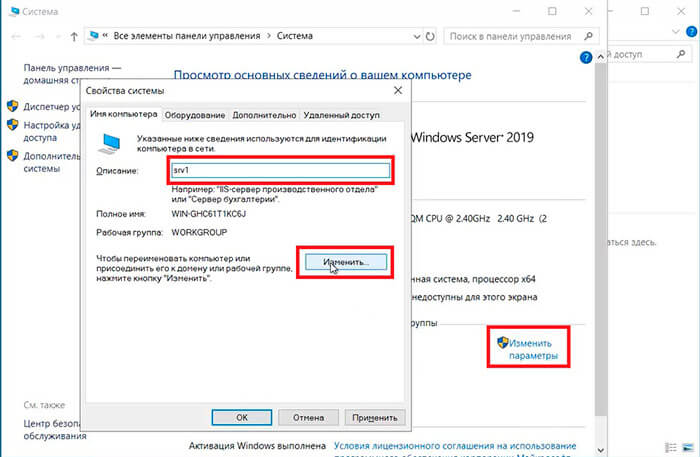
3. Задаём «Имя компьютера«, нажимаем «ОК«. Появится предупреждение о том, что изменения вступят в силу после перезагрузки компьютера. Подтверждаем — «ОК«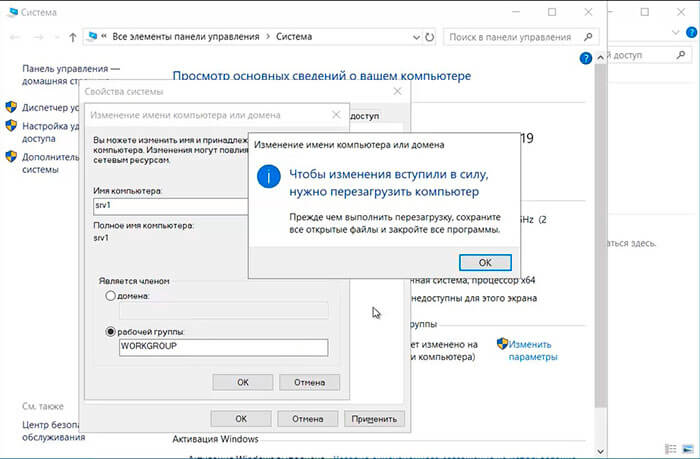
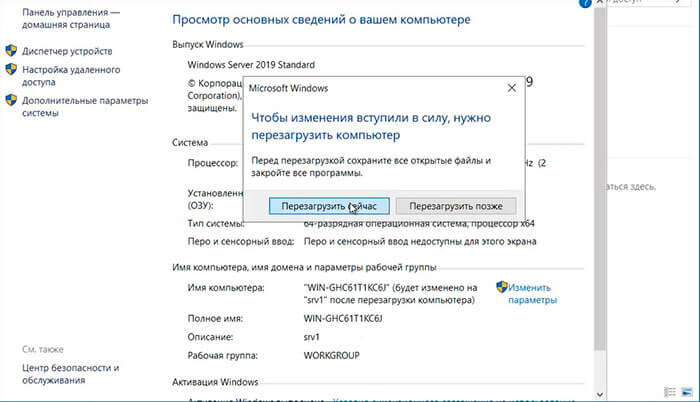
4. Нажимаем «Перезагрузить сейчас» и ожидаем перезагрузки сервера.
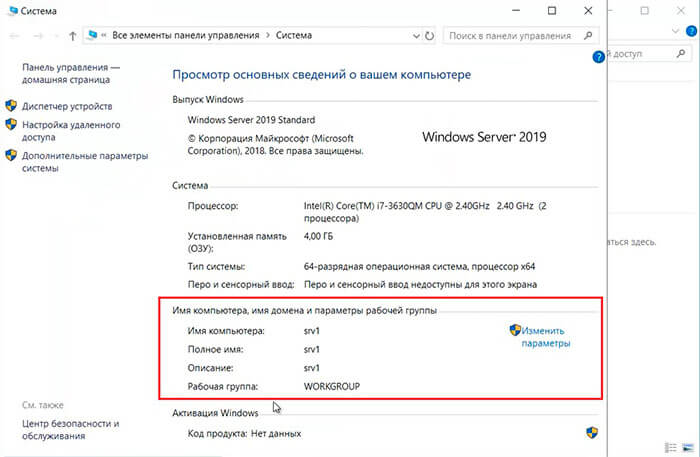
5. После перезагрузки компьютера проверяем имя сервера («Мой компьютер» — правой клавишей мыши — «Свойства«).
Настройка сетевого интерфейса
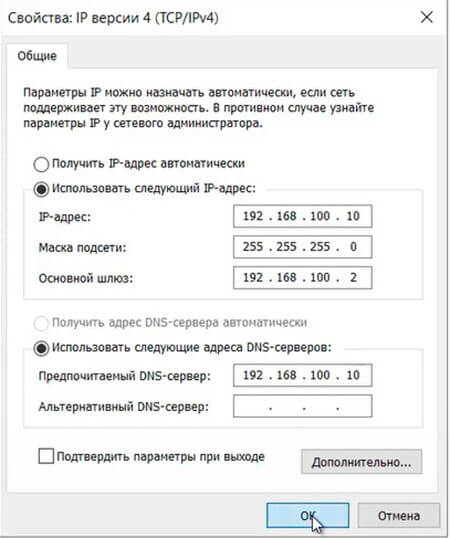
6. Для настройки сетевого интерфейса в поиске набираем ncpa.cpl, далее «Enter«. Снимаем чекбокс «IP версии 6«, далее выбираем «IP версии 4«, далее «Свойства«.
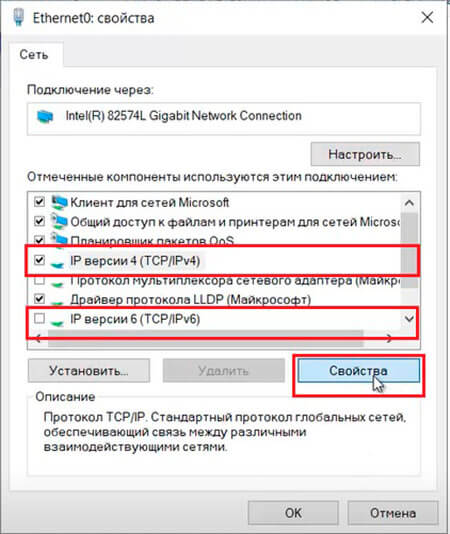
7. Выбираем «Использовать следующий IP-адрес» и задаём статический IP-адрес сервера, маску подсети, основной шлюз (если есть), и предпочитаемый DNS-сервер. Нажимаем «ОК«. На этом настройка сетевого интерфейса закончена.
Установка на сервера ролей: DNS-сервер, Доменные службы Active Directory, DHCP-сервер
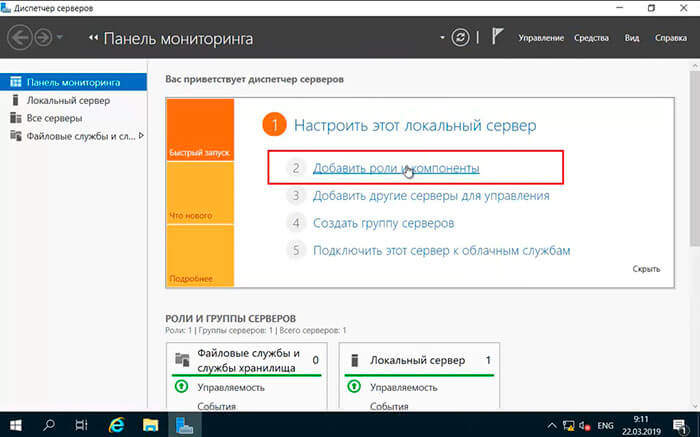
8. Нажимаем «Пуск«, далее «Диспетчер серверов«.

9. В новом окне выбираем «Добавить роли и компоненты«.
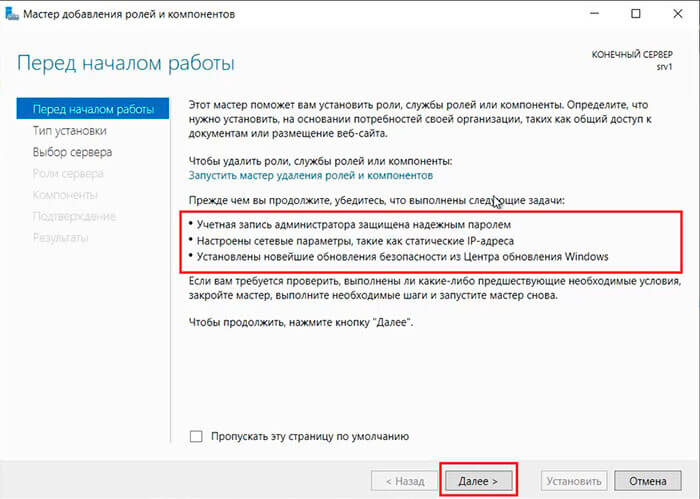
10. Читаем предупреждение сервера «Перед началом работы«, не забываем защитить учетную запись администратора надежным паролем, затем «Далее«.
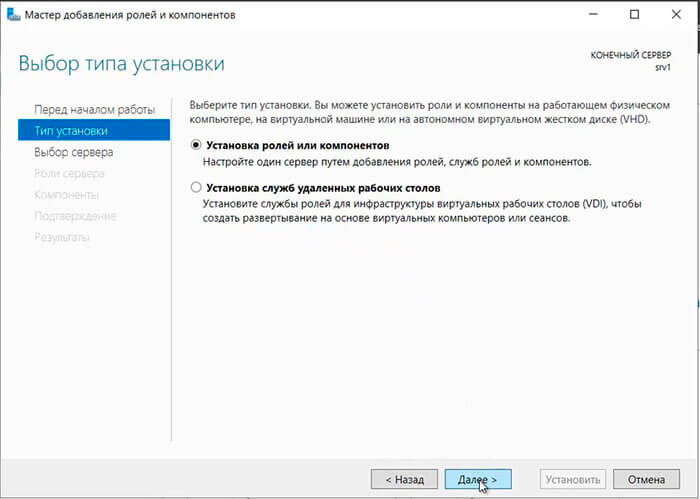
11. Проверяем, что чекбокс стоит на «Установка ролей или компонентов«, затем «Далее«.
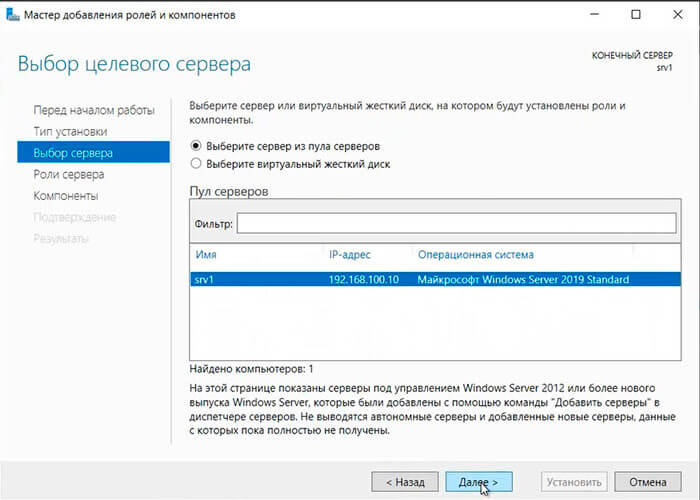
12. Выбираем сервер, на который будут установлены роли и компоненты. Снова «Далее«.
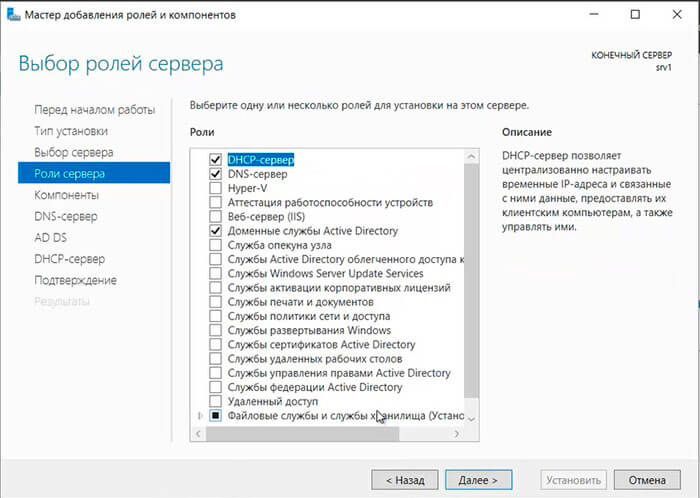
13. Устанавливаем чекбоксы напротив выбранных ролей сервера, в данном случае это DNS-сервер, Доменные службы Active Directory, DHCP-сервер. Нажимаем «Далее«.
14. При каждом выборе роли будет появляться «Мастер добавление ролей и компонентов«, который будет спрашивать о добавлении компонентов для выбранных ролей сервера. Нажимаем «Добавить компоненты«.

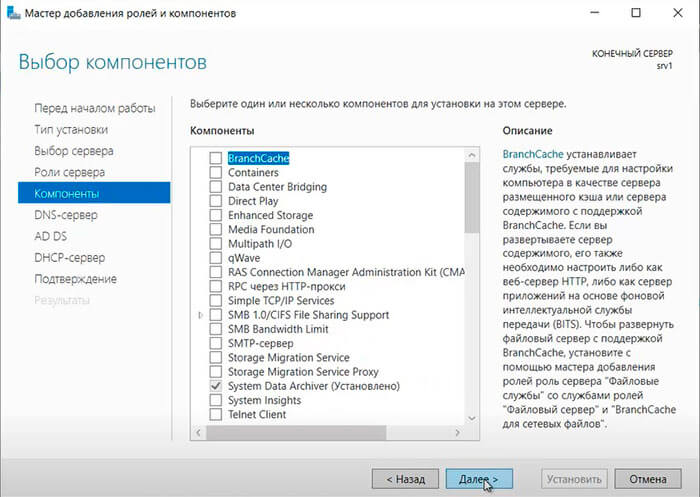
15. Нажимаем «Далее«, необходимые компоненты были выбраны в предыдущем шаге.
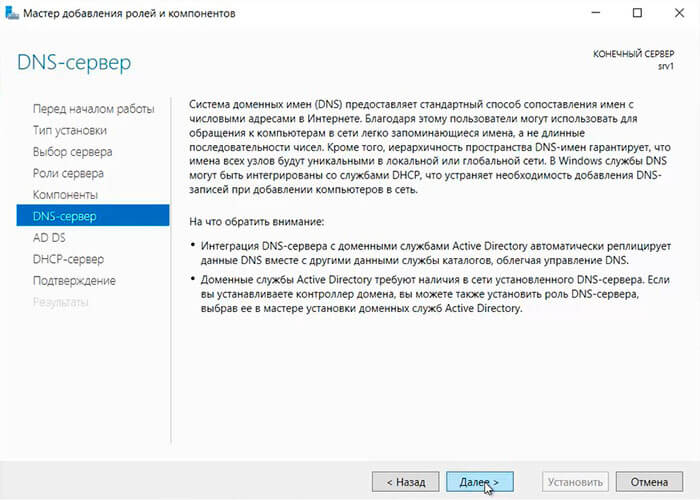
16. Читаем предупреждение DNS-сервера на что обратить внимание, затем «Далее«.
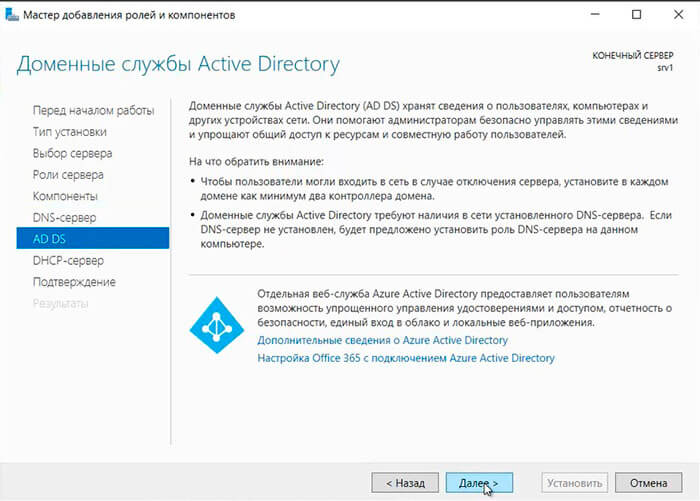
17. Читаем предупреждение AD DS, нажимаем «Далее«.
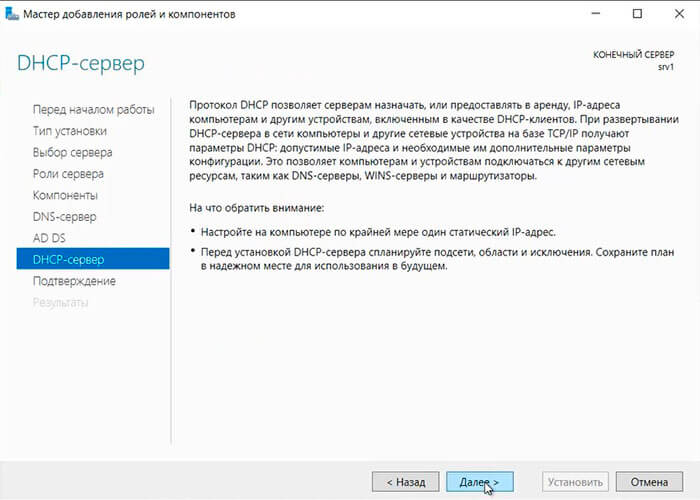
18. Читаем предупреждение DHCP-сервера, снова «Далее«.
19. Ставим «чекбокс» напротив «Автоматический перезапуск конечного сервера, если требуется«, нажимаем «Установить«.
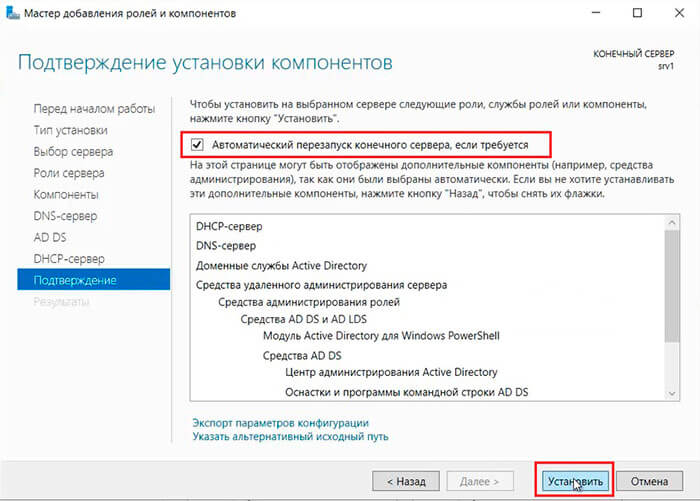
В результате произойдет установка выбранных ролей сервера.
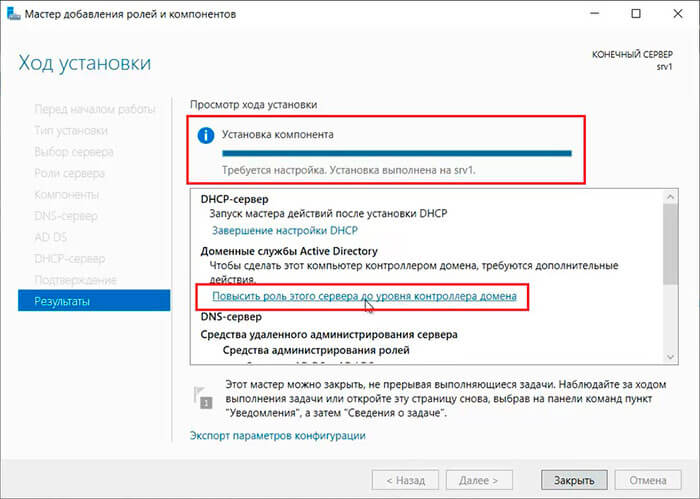
Повышение роли сервера до уровня контроллера домена
20. Нажимаем «Повысить роль этого сервера до уровня контроллера домена«.
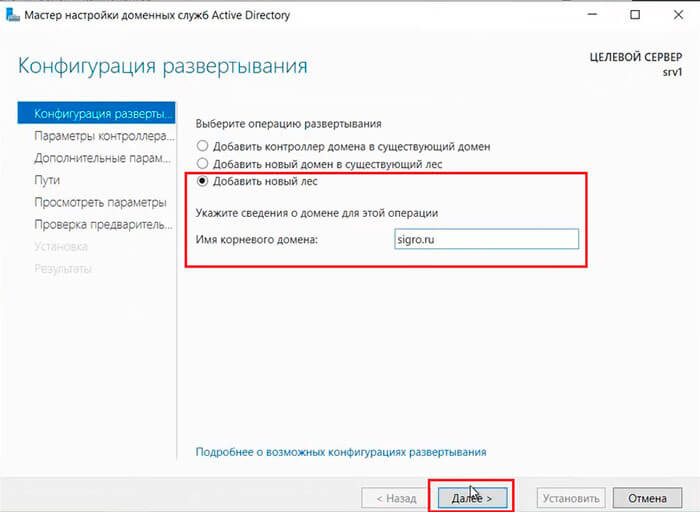
21. Далее выбираем «Добавить новый лес» и задаем «Имя корневого домена«.
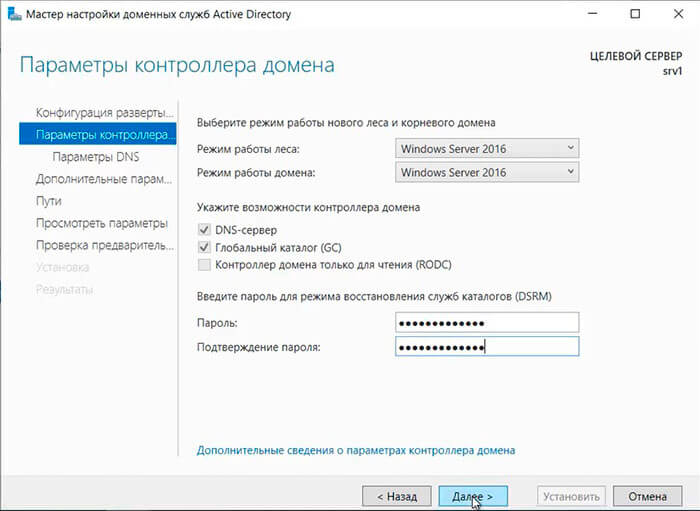
22. В следующем окне дважды вводим пароль для режима восстановления служб каталогов (DSRM), затем «Далее«.
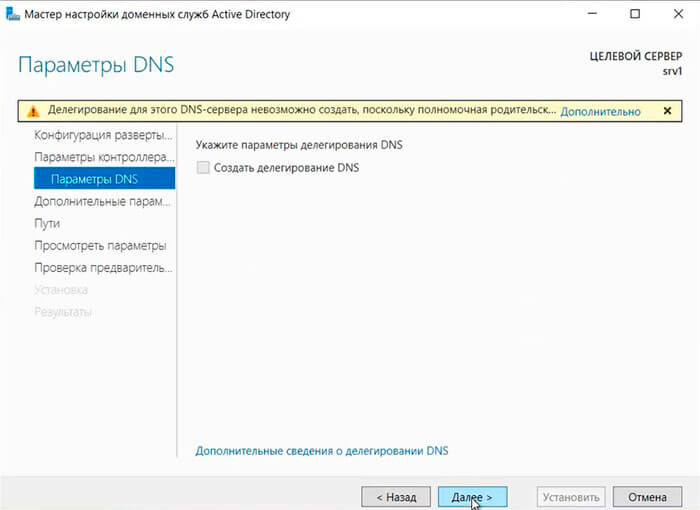
23. В следующем окне снова «Далее«.
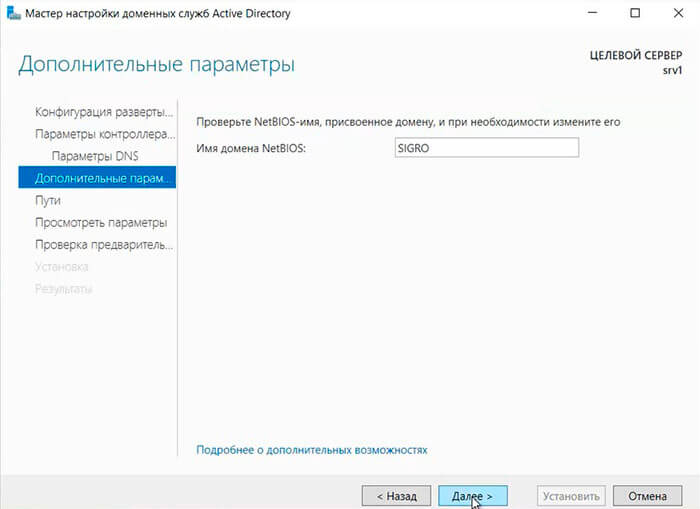
24. Проверяем NetBIOS-имя, присвоенное домену, и при необходимости меняем его. Затем «Далее«.
25. Оставляем по умолчанию расположение базы данных AD DS, файлов журналов и папки SYSVOL, снова «Далее«.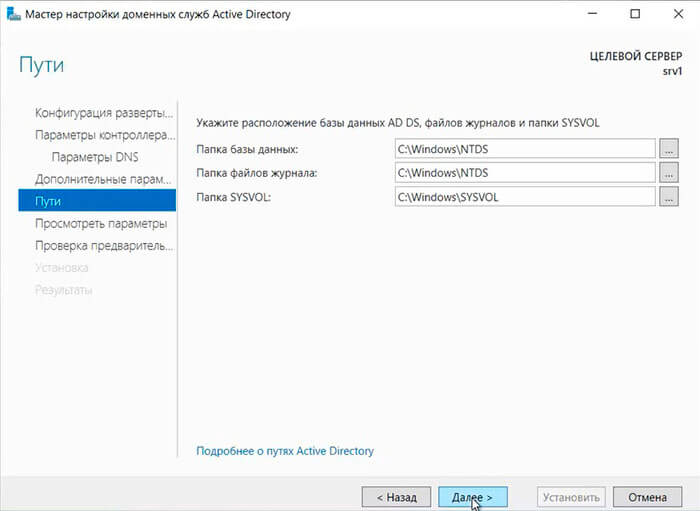
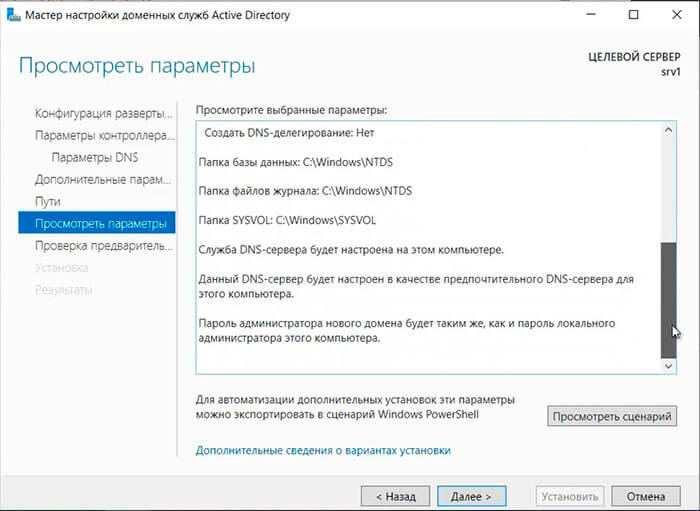
26. После просмотра выбранных параметров и их одобрения нажимаем «Далее«.
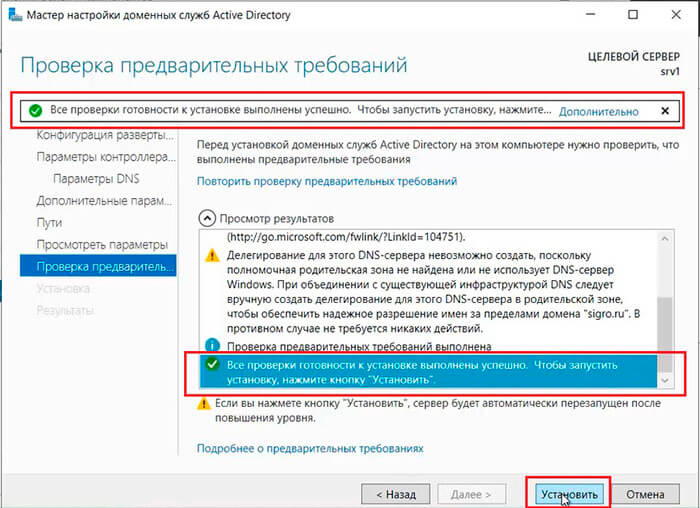
27. Если проверка готовности к установке выполнена успешна, то запускаем установку — «Установить«.
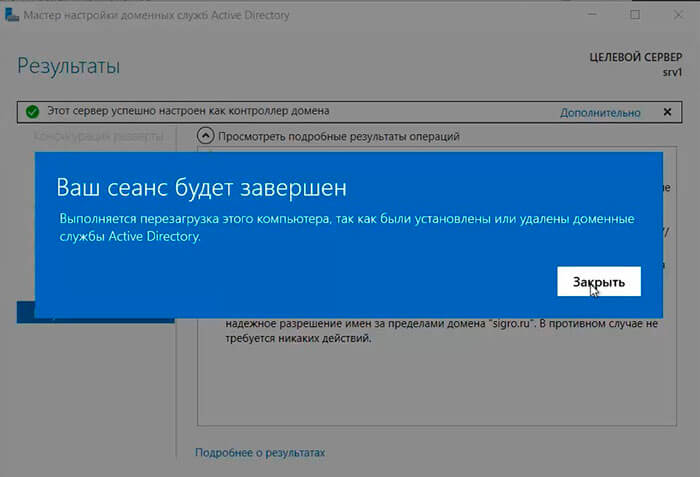
28. По завершению установки произойдет перезагрузка сервера.
29. После перезагрузки полное имя компьютера изменится, к имени сервера добавиться доменное имя. Active Directory можно использовать.
Настройка обратной зоны DNS
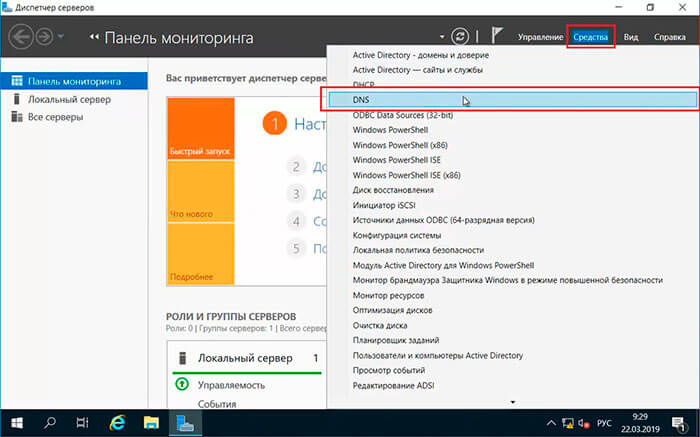
30. Для настройки обратной зоны DNS в Диспетчере серверов выбираем «Средства» — «DNS«
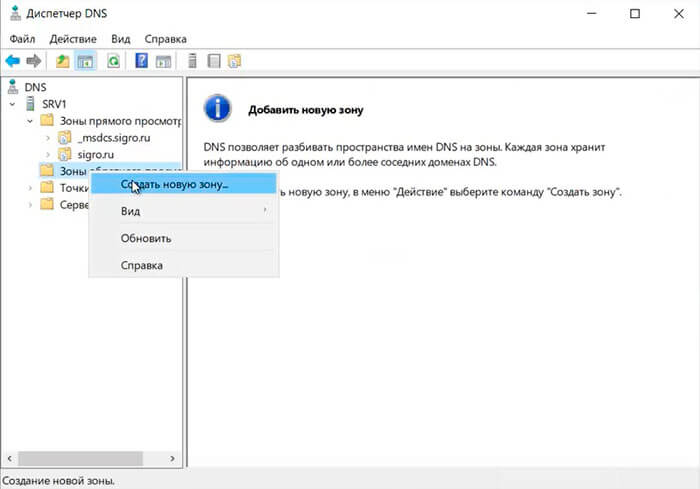
31. Раскрываем дерево DNS, нажимаем правой клавишей мыши на «Зоны обратного просмотра«, в появившемся меню «Создать новую зону…«.
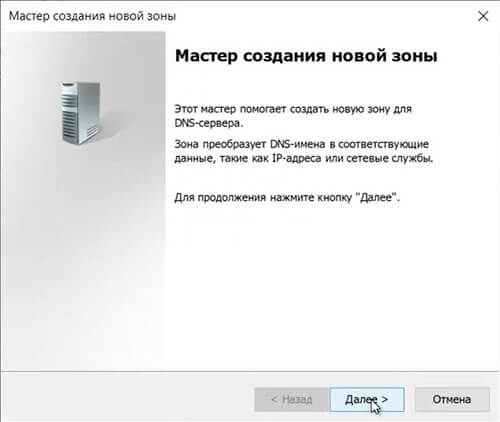
32. В появившемся мастере создания новой зоны нажимаем «Далее«.
33. Выбираем «Основная зона«, затем «Далее«.
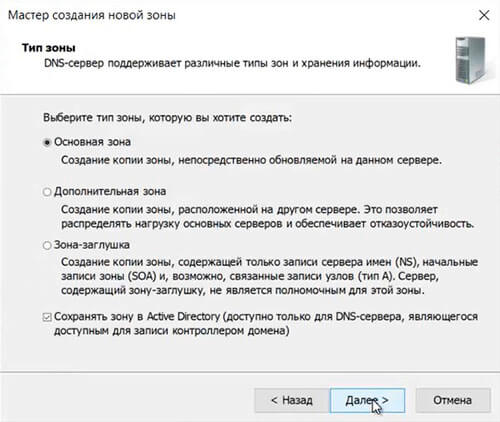
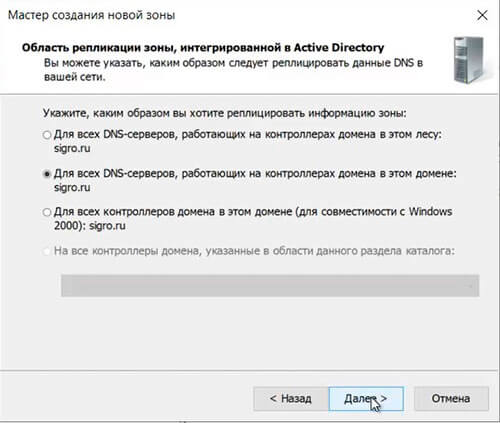
34. Оставляем по умолчанию область репликации зоны, интегрированной в Active Directory, нажимаем «Далее«.
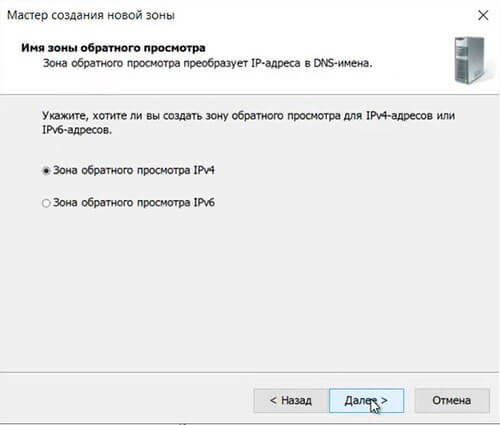
35. Оставляем «Зона обратного просмотра IPv4», просто «Далее«.
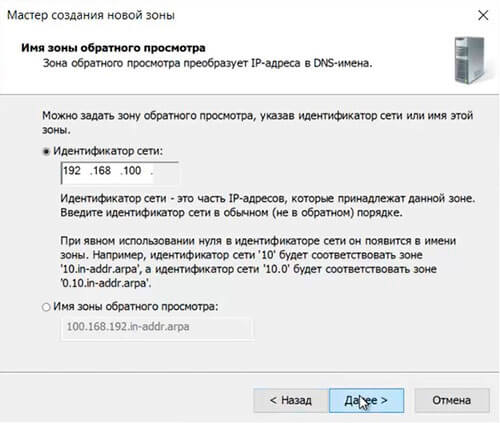
36. В следующем окне задаем Зону обратного просмотра, которая преобразует IP-адреса в DNS-имена. В идентификатор сети забиваем три актета своей сети, затем «Далее«.
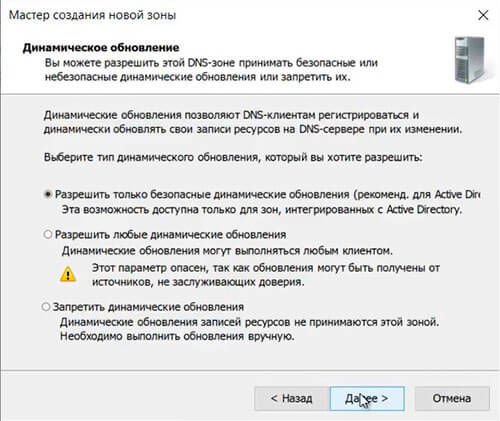
37. Разрешаем только безопасные динамические обновления, снова «Далее«.
38. Зона обратного просмотра создана.

Настройка DHCP-сервера
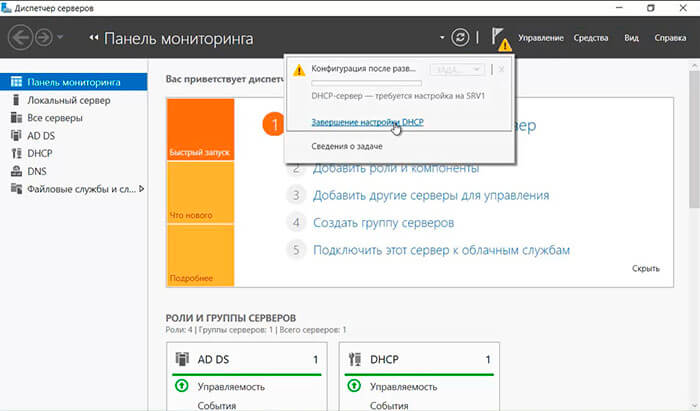
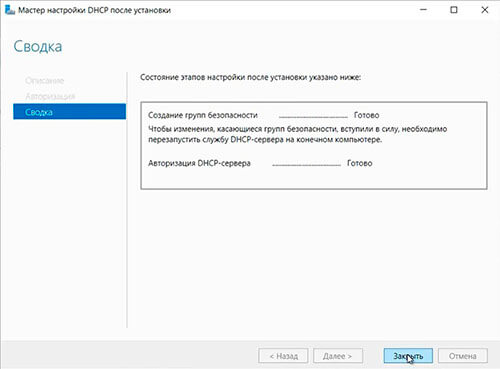
39. После установки роли DHCP-сервера в Диспетчере серверов нажимаем на желтый треугольник, в появившемся окне выбираем «Завершение настройки DHCP«.
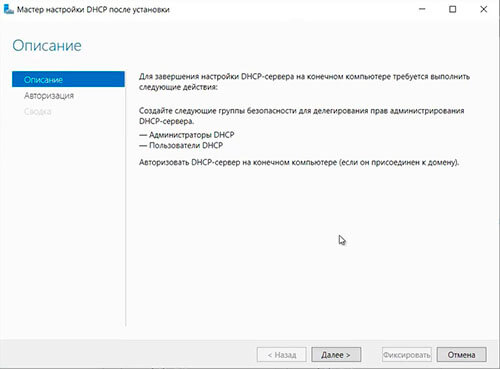
40. В следующем окне читаем описание завершения настройки DHCP-сервера на конечном компьютере, затем «Далее«.
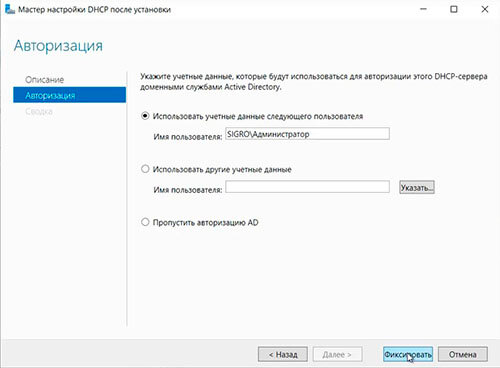
41. Оставляем по умолчанию учетные данные, которые будут использоваться для авторизации DHCP-сервера доменными службами Active Directory. Нажимаем «Фиксировать«.
42. В следующем окне нажимаем «Закрыть«.
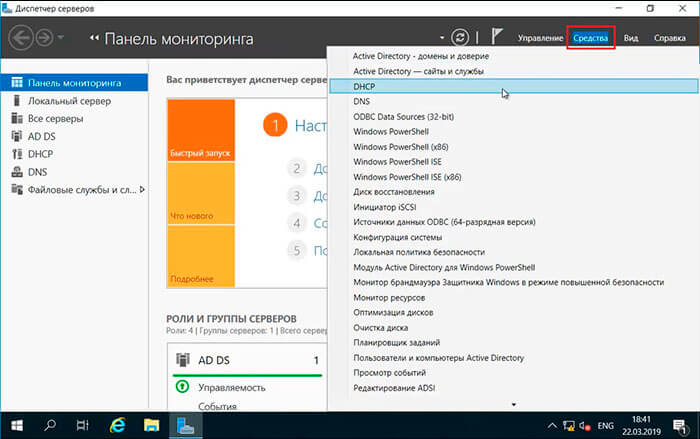
43. В диспетчере серверов нажимаем «Средства» — «DHCP«.
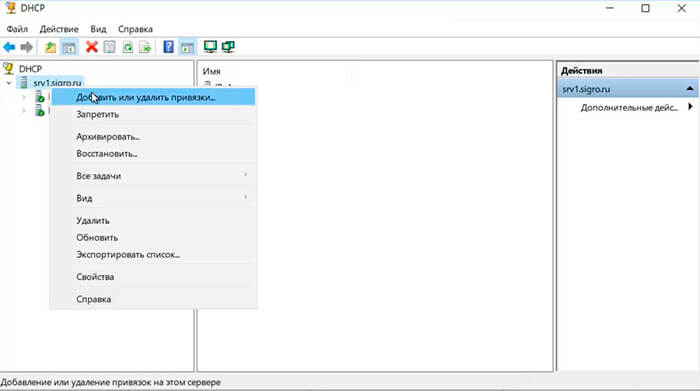
44. В открывшемся окне открываем дерево DHCP. Правой клавишей мыши нажимаем на домен, в появившемся окне выбираем «Добавить или удалить привязки…«.
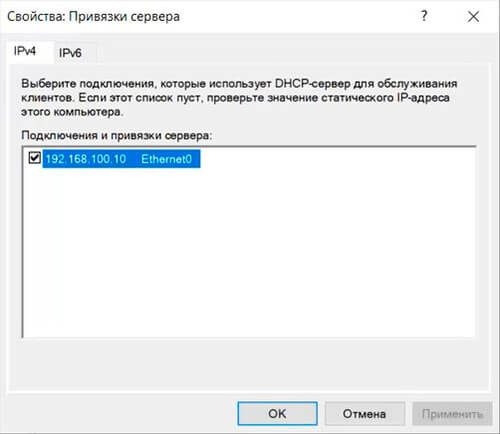
45. Проверяем сетевой интерфейс, который будет использовать DHCP-сервер для обслуживания клиентов. Далее «ОК«.
46. Затем правой клавишей нажимаем на IPv4, в появившемся меню выбираем «Создать область…«.
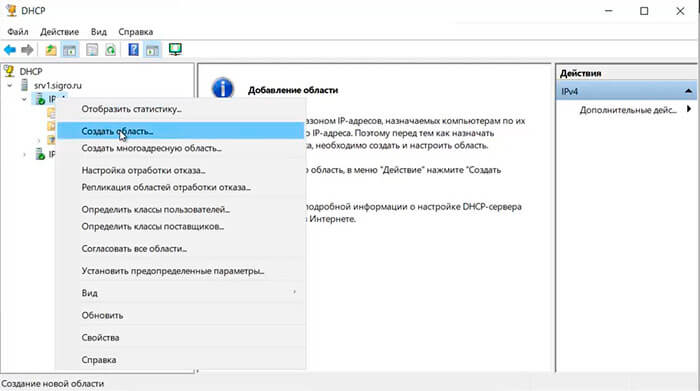
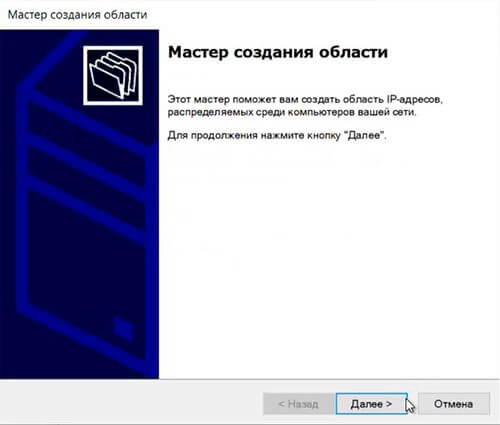
47. Откроется мастер создания область, который помогает создать область IP-адресов, распределяемых среди компьютеров вашей сети. Нажимаем «Далее«.
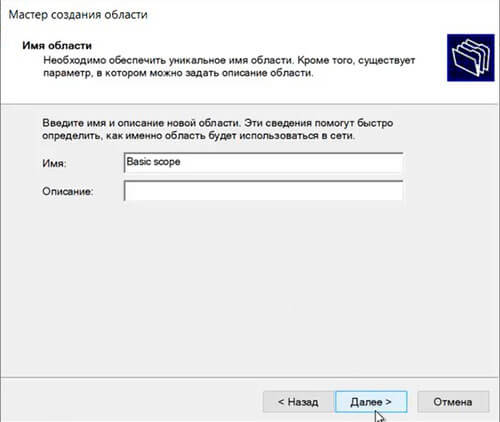
48. Задаем имя новой области, если необходимо, задаем также описание новой области. Снова «Далее«.
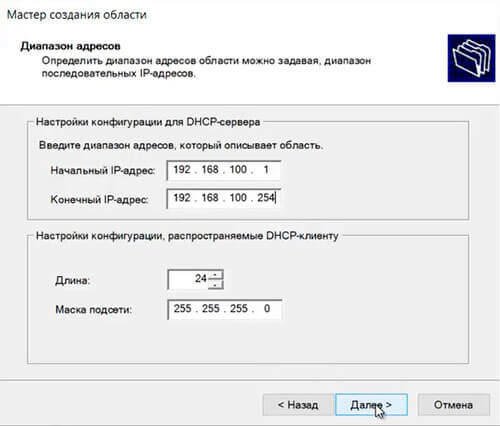
49. Вводим диапазон адресов, который описывает создаваемую область, маску подсети. Нажимаем «Далее«.
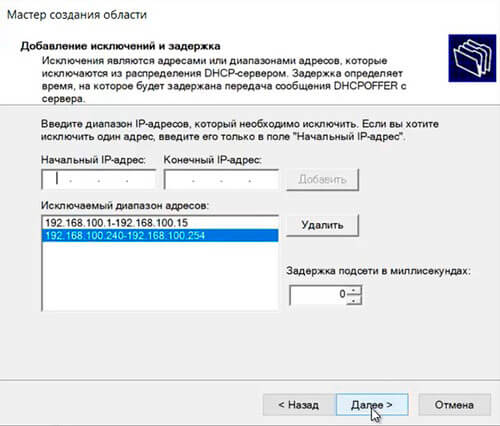
50. В следующем окне вводим с помощью кнопки «Добавить» один адрес или диапазон IP-адресов, который необходимо исключить. После ввода всех адресов или диапазонов нажимаем «Далее«.
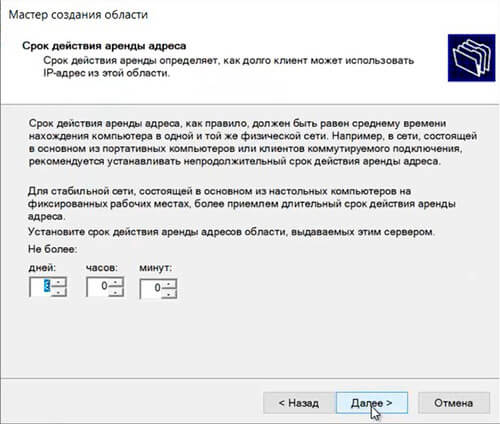
51. Оставляем по умолчанию срок действия аренды адресов области, выдаваемых сервером. Снова «Далее«.
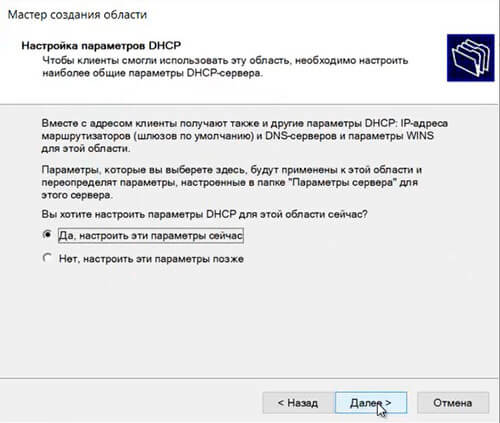
52. Для настройки других параметров DHCP выбираем «Да, настроить эти параметры сейчас«, затем «Далее«.
53. Добавляем с помощью кнопки «Добавить» IP-адрес маршрутизатора, снова «Далее«.

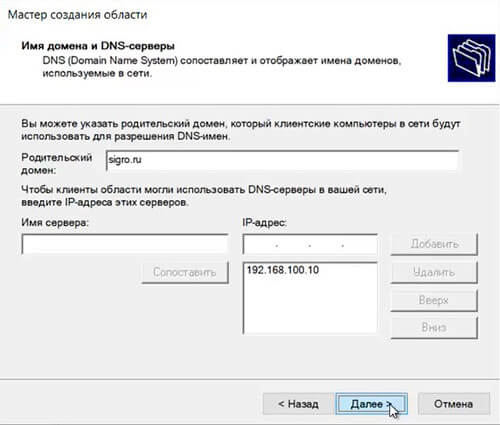
54. Оставляем по умолчанию родительский домен, который клиентские компьютеры в сести будут использовать для разрешения DNS-имен. Затем «Далее«.
55. Вводим IP-адреса WINS-сервера, или нажимаем просто «Далее«.

56. Выбираем «Да, я хочу активировать эту область сейчас«, затем «Далее«.
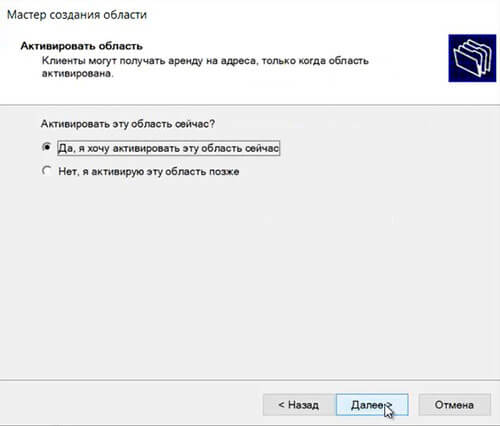
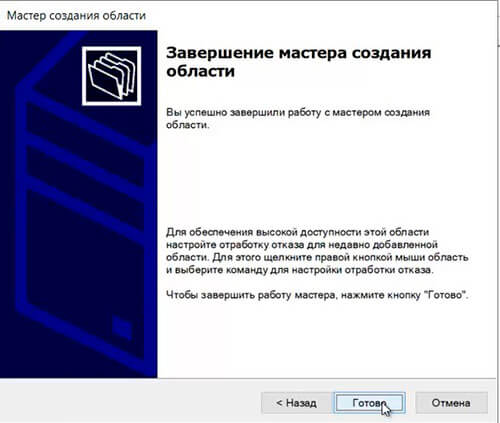
57. В следующем окне появится «Вы успешно завершили работу с мастером создания области», нажимаем «Готово».
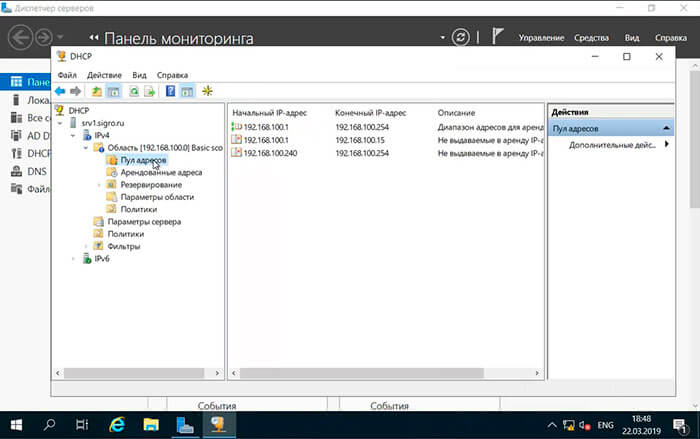
58. Вновь созданный диапазон появится в «Пул адресов«.
Посмотреть видео можно здесь:
Читайте также:
- Windows server 2019 — установка и настройка WSUS, создание и настройка GPO
- Windows server 2019 — добавление и удаление компьютера в домене
- Windows server 2019 — переименование администратора домена, изменение формата выводимого имени пользователя
- Windows server 2019 — создание и удаление пользователя, группы, подразделения в домене
- Windows server 2019 — установка и настройка сервера печати, разворачивание МФУ с помощью GPO
- Windows server 2019 — GPO изменение экранной заставки, отключение монитора, изменение политики паролей
Данная статья предназначена для тех, кто искал подробное и понятное руководство о том, как установить Windows Server 2019.
Настоятельно рекомендую никогда не использовать никаких сторонних сборок Windows. Используйте только оригинальные установочные образы. Это поможет вам избежать множества проблем и получить максимальное быстродействие и стабильность.
Рекомендую всегда использовать англоязычные издания Windows Server. Как показывает практика, оригинальные (английские) версии Windows работают стабильнее, к тому же вам будет проще общаться на одном языке с профессионалами в случае возникновения проблем или при желании обменяться опытом.
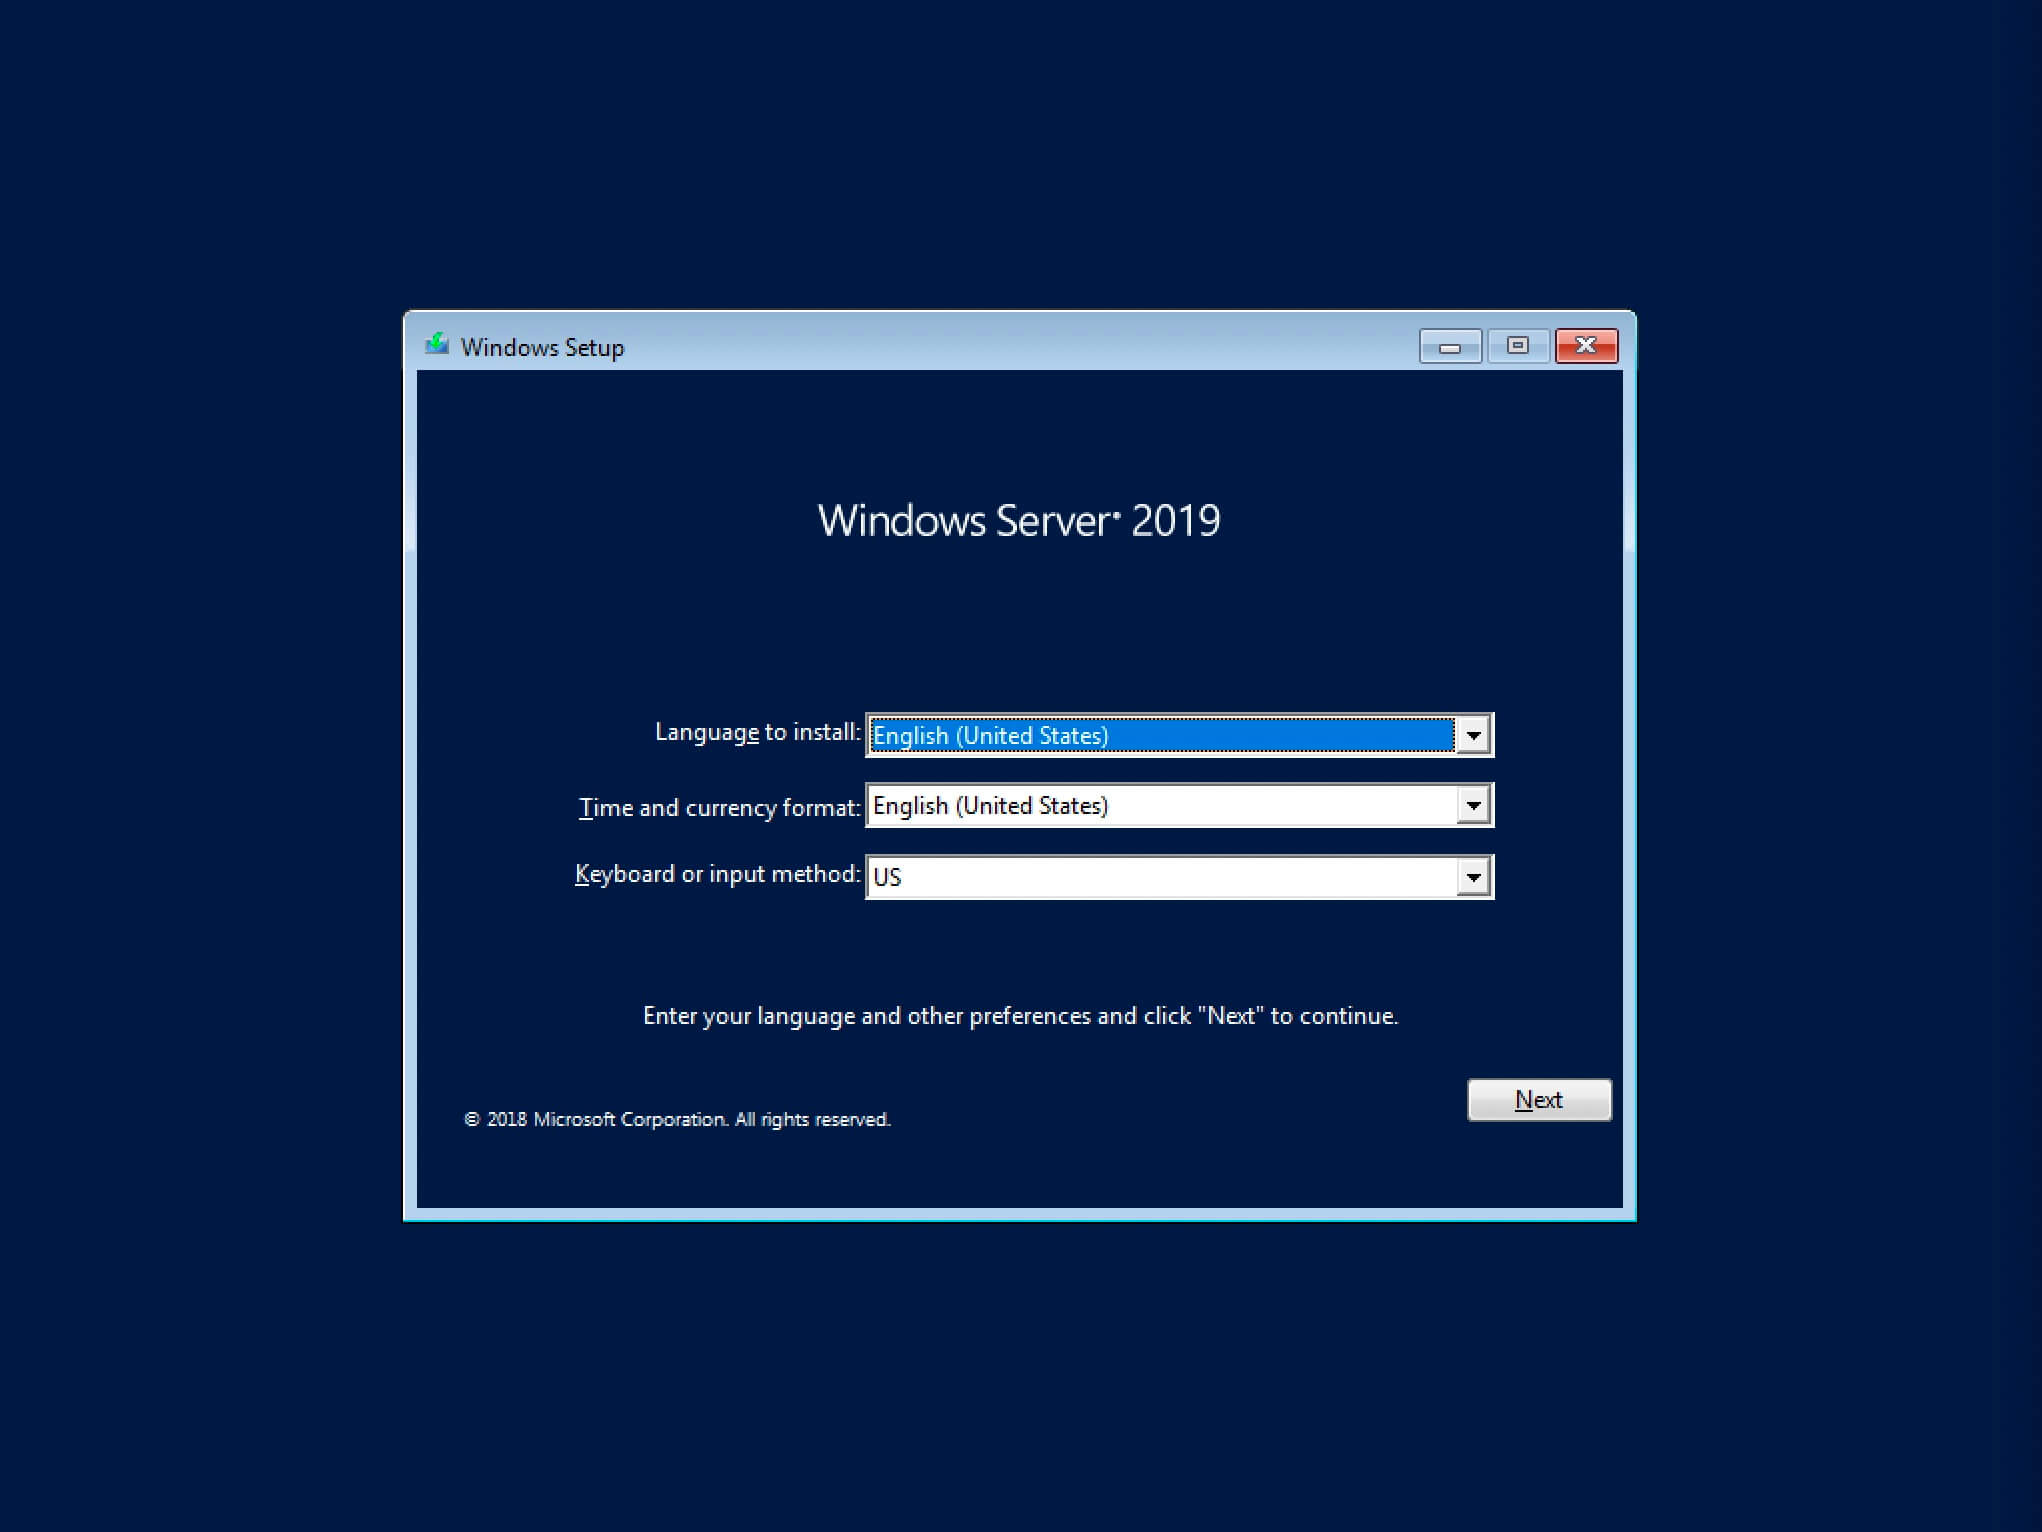
После успешной загрузки с установочной флешки или DVD-диска Windows Server 2019, первым делом необходимо выбрать языковые параметры.
В данном руководстве рассматривается установка Windows Server 2019 на английском языке.
Нажимаем на кнопку “Next”.
Нажимаем на кнопку “Install now”.
Обратите внимание, если вам необходимо установить Windows Server 2019 в режиме Server Core (без GUI), то вам нужно выбрать “Windows Server 2019 Standard Evaluation” или “Windows Server 2019 Datacenter Evaluation”.
В данном примере рассматривается установка Windows Server 2019 Datacenter Evaluation (Desktop Experience).
Выбираем “Windows Server 2019 Datacenter Evaluation (Desktop Experience)” и нажимаем “Next”.
Теперь необходимо принять условия лицензии.
На этом шаге предлагается два варианта установки:
-
“Upgrade”. Это не самый лучший вариант. Как показывает практика, многочисленные программы могут быть не совместимы с новой операционной системой, и после обновления вы не сможете с ними работать, кроме того есть вероятность перетащить проблемы со старой операционной системы в новую, таким, образом потеряв всякую стабильность.
-
“Custom”. Это лучший вариант для установки любой версии операционной системы Windows. Он позволяет начать работу с системой “с чистого листа”, таким образом, после установки вы получите максимальное быстродействие и стабильность. Останется только установить драйвера и привычное для работы программное обеспечение.
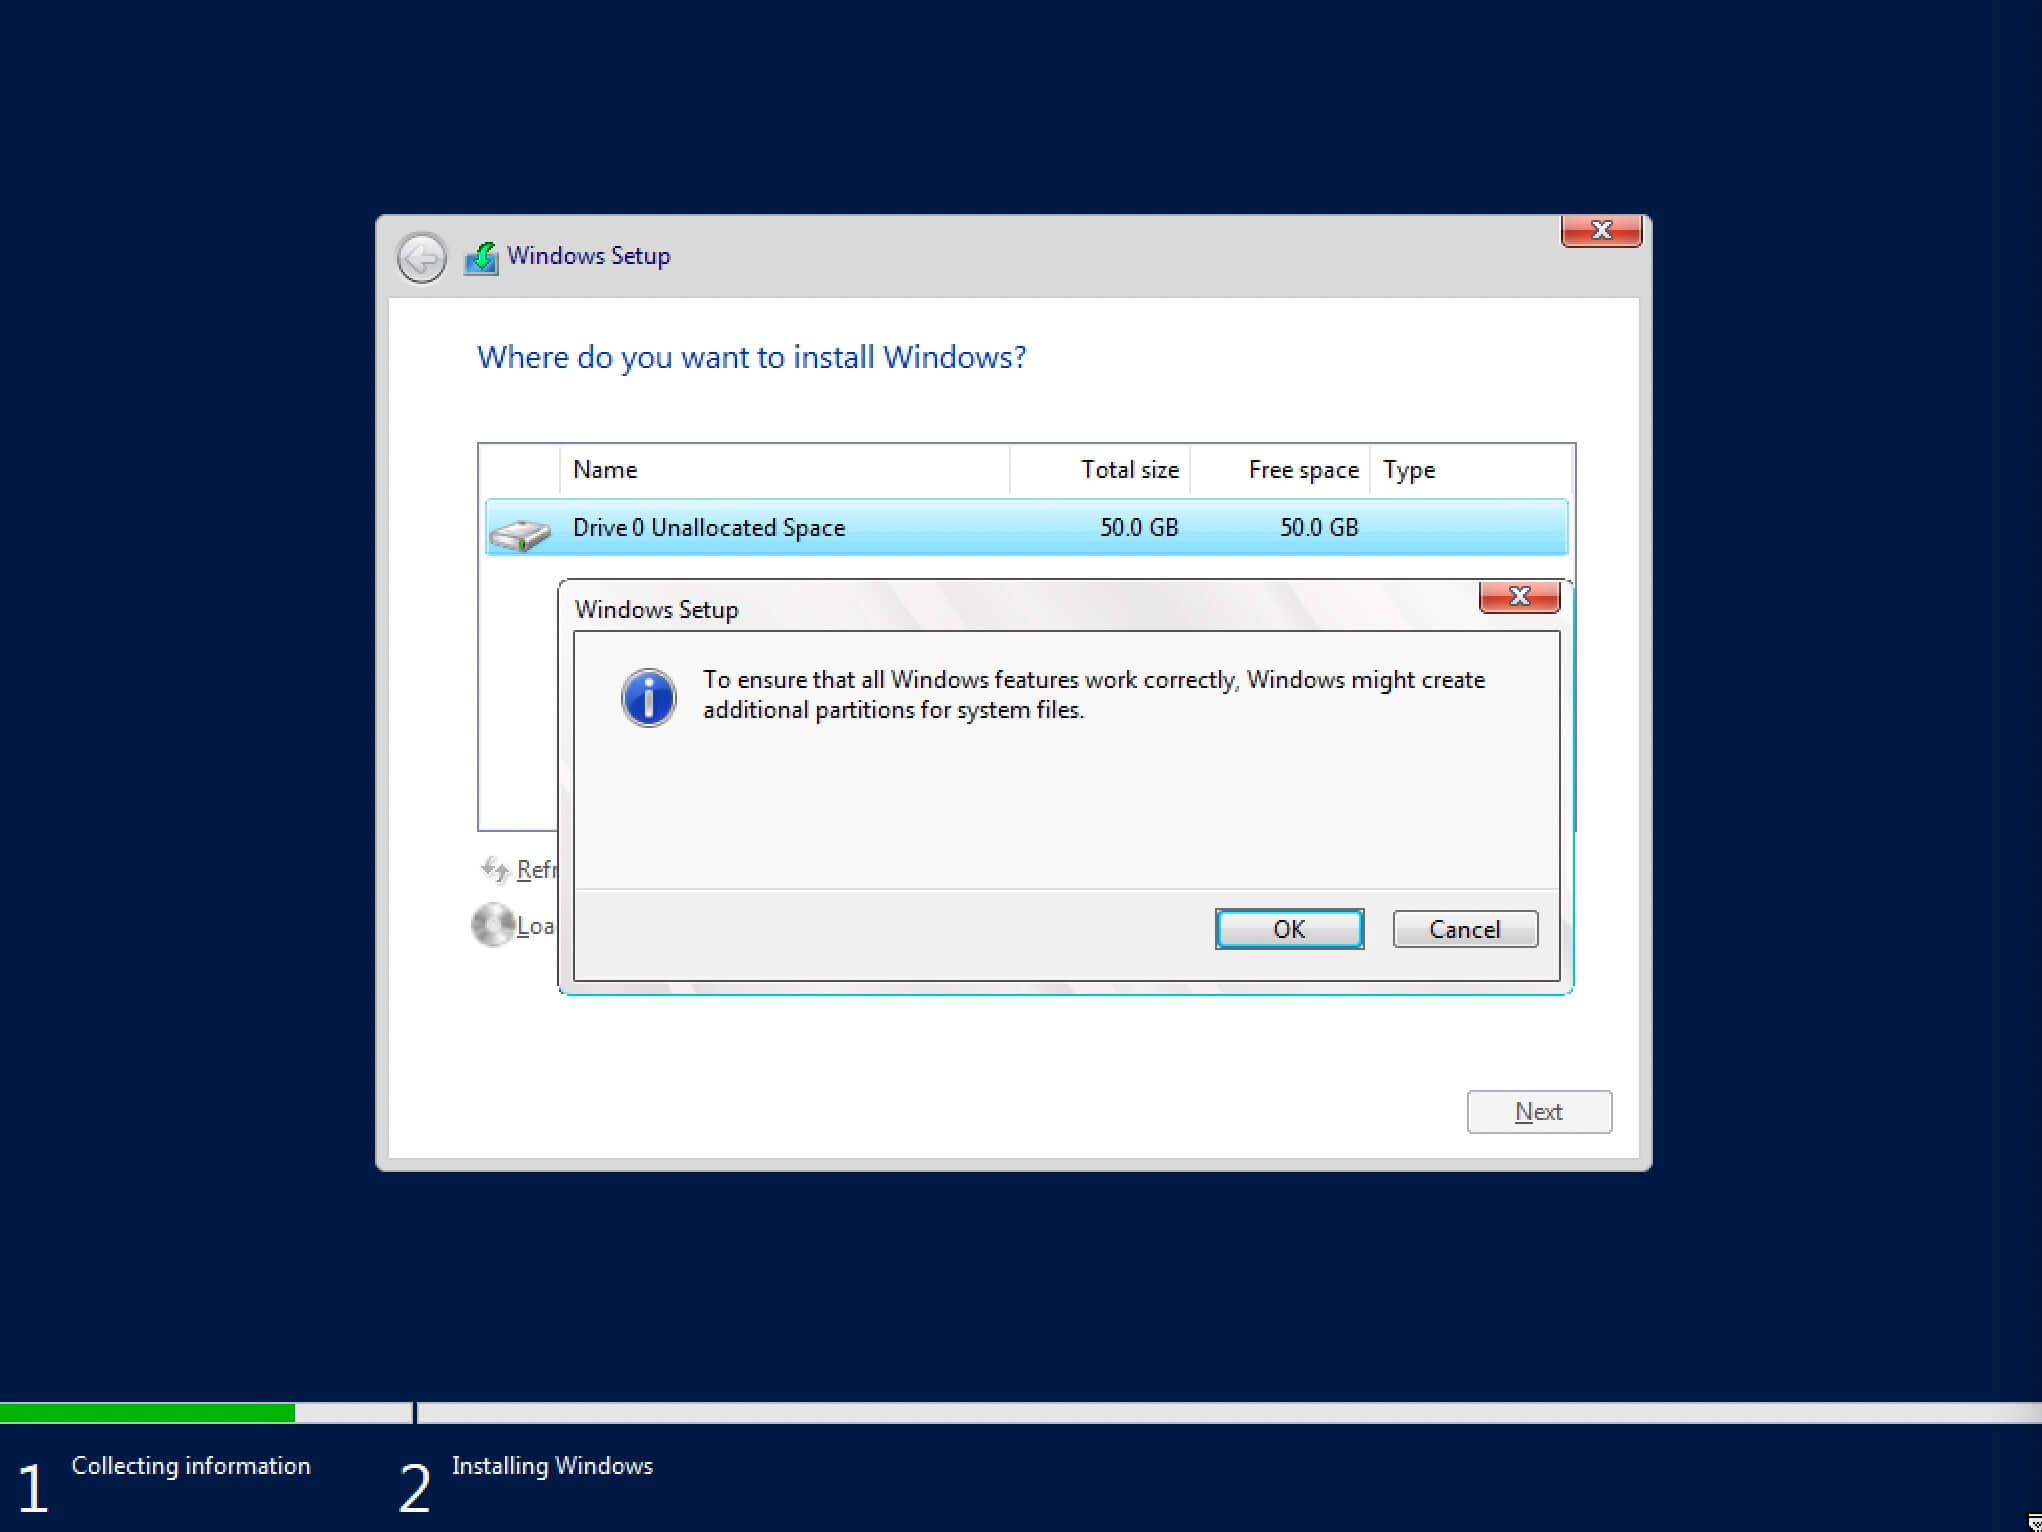
Теперь необходимо выбрать на какой диск будет установлена новая операционная система и выделить место для установки.
В случае если у вас установлено более одного диска или на диске уже имеется несколько разделов, все это будет отображаться на данном этапе. Необходимо соблюдать осторожность и заранее понимать, на какой раздел вы хотите установить операционную систему.
В данном примере установлен один диск объемом 50 GB.
Нажимаем на кнопку “New”.

В данном случае под систему будет выделено все свободное место на диске, поэтому оставляем значение в разделе “Size” по умолчанию.
Нажимаем на кнопку “Apply”.

Операционная система уведомляет о том, что ей может понадобиться создать дополнительные разделы на диске для хранения системных файлов.
Нажимаем на кнопку “OK”.
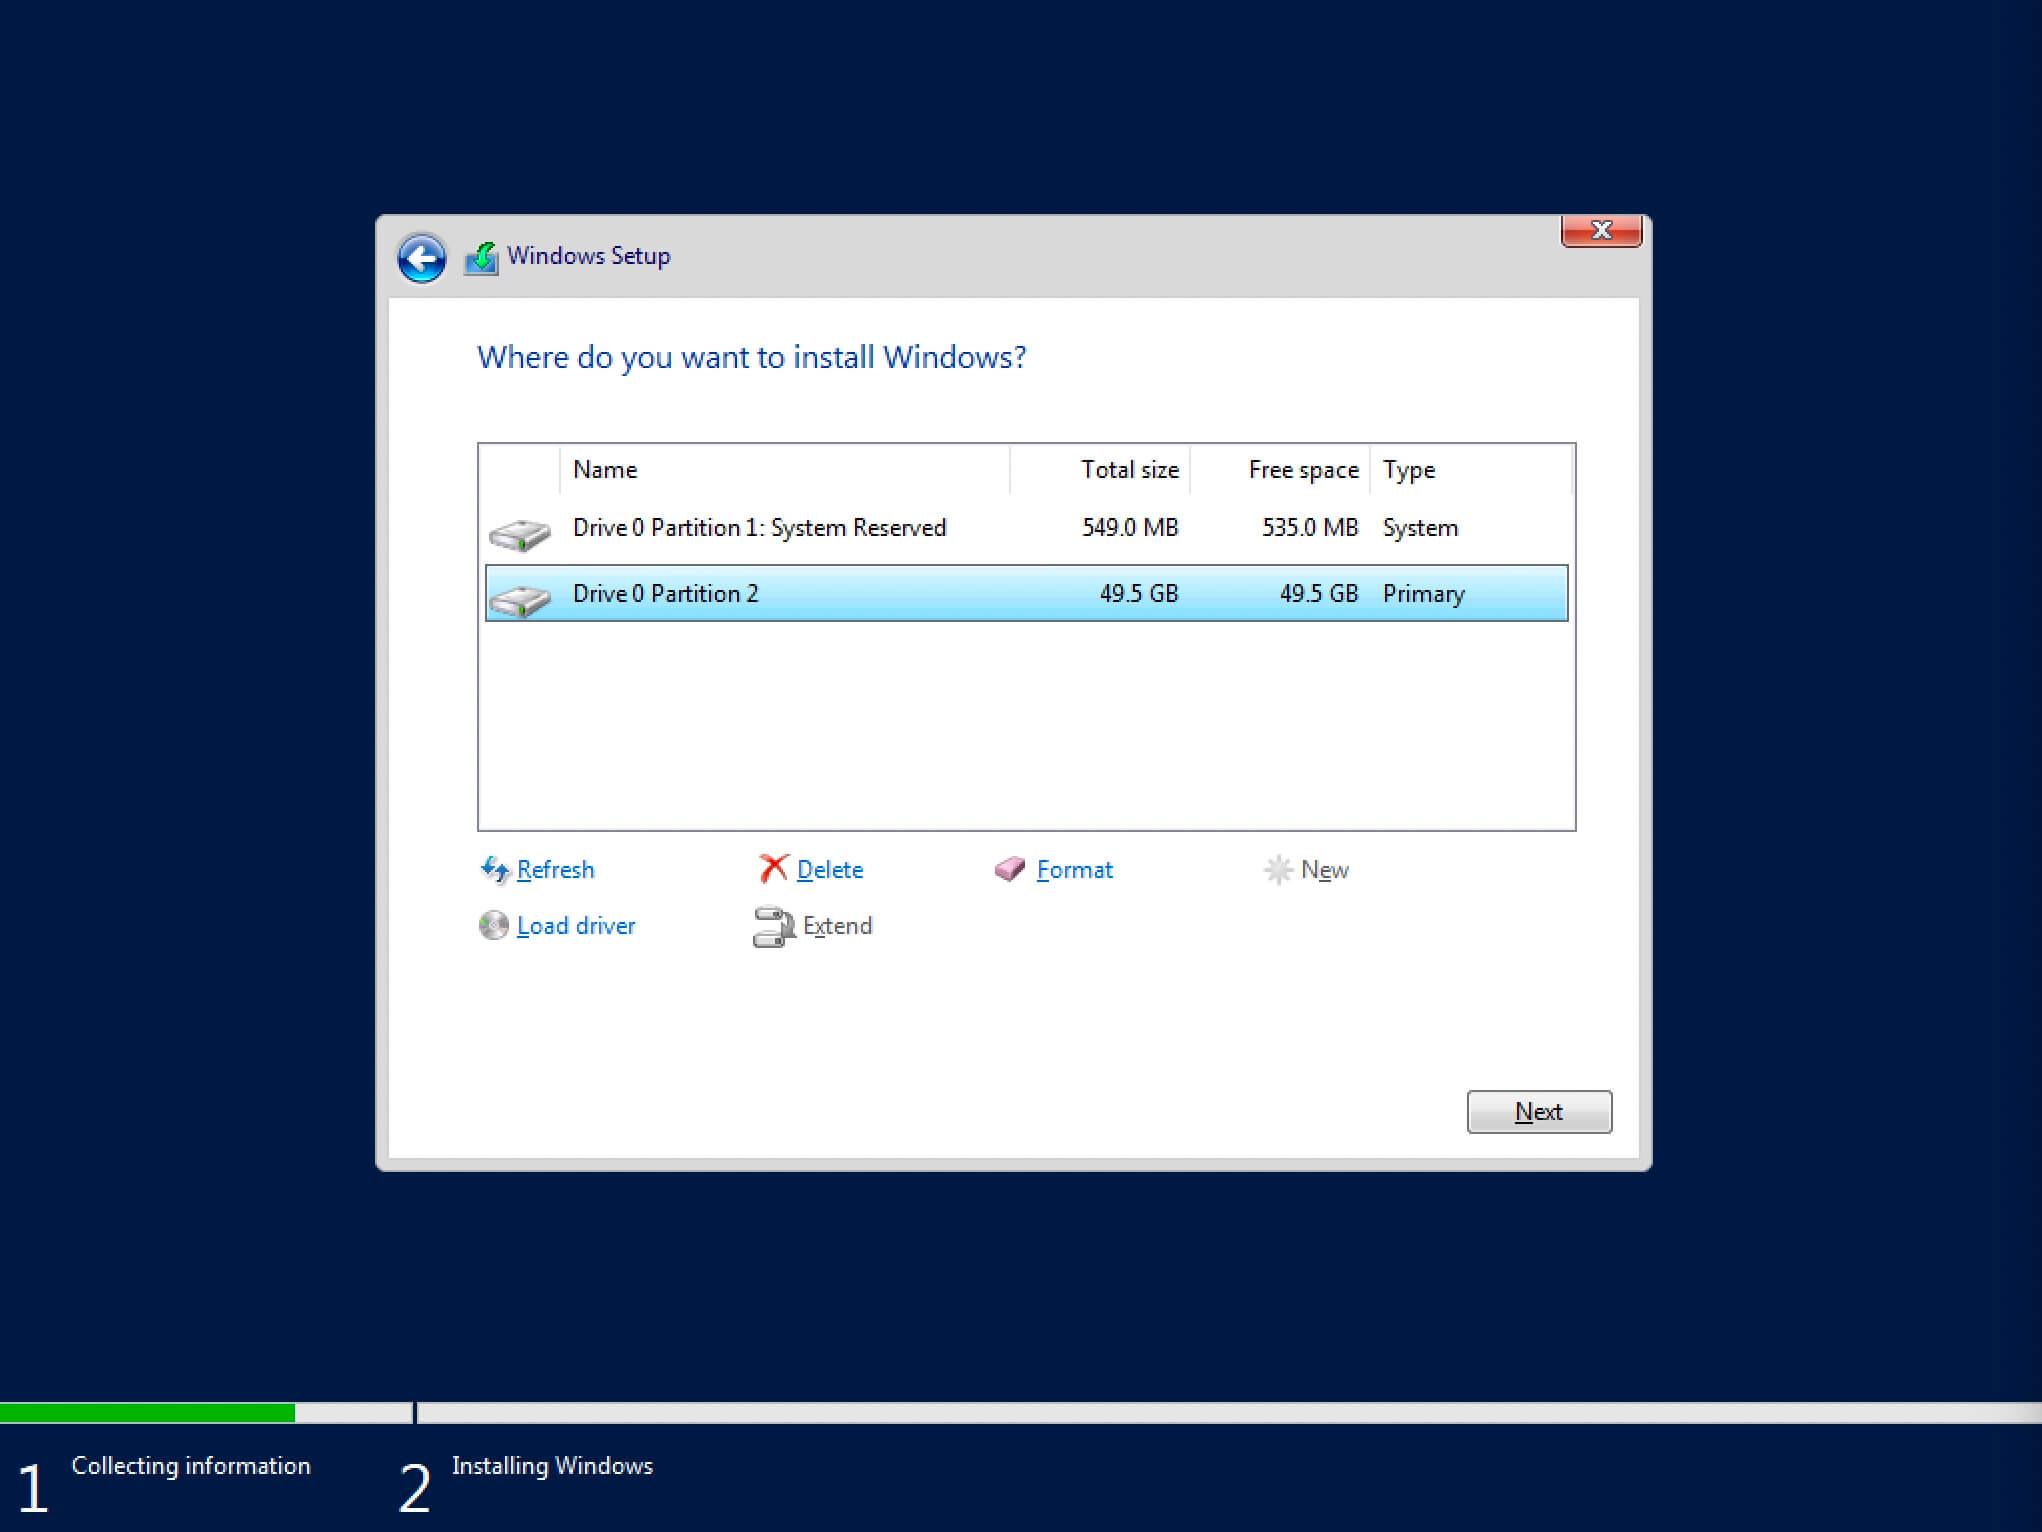
Таким образом, под операционную систему было выделено все свободное место на диске, но в то же время система зарезервировала для себя небольшой раздел.
Теперь необходимо выбрать раздел, на который предполагается установить операционную систему, и нажать на кнопку “Next”.
Начался процесс установки операционной системы.
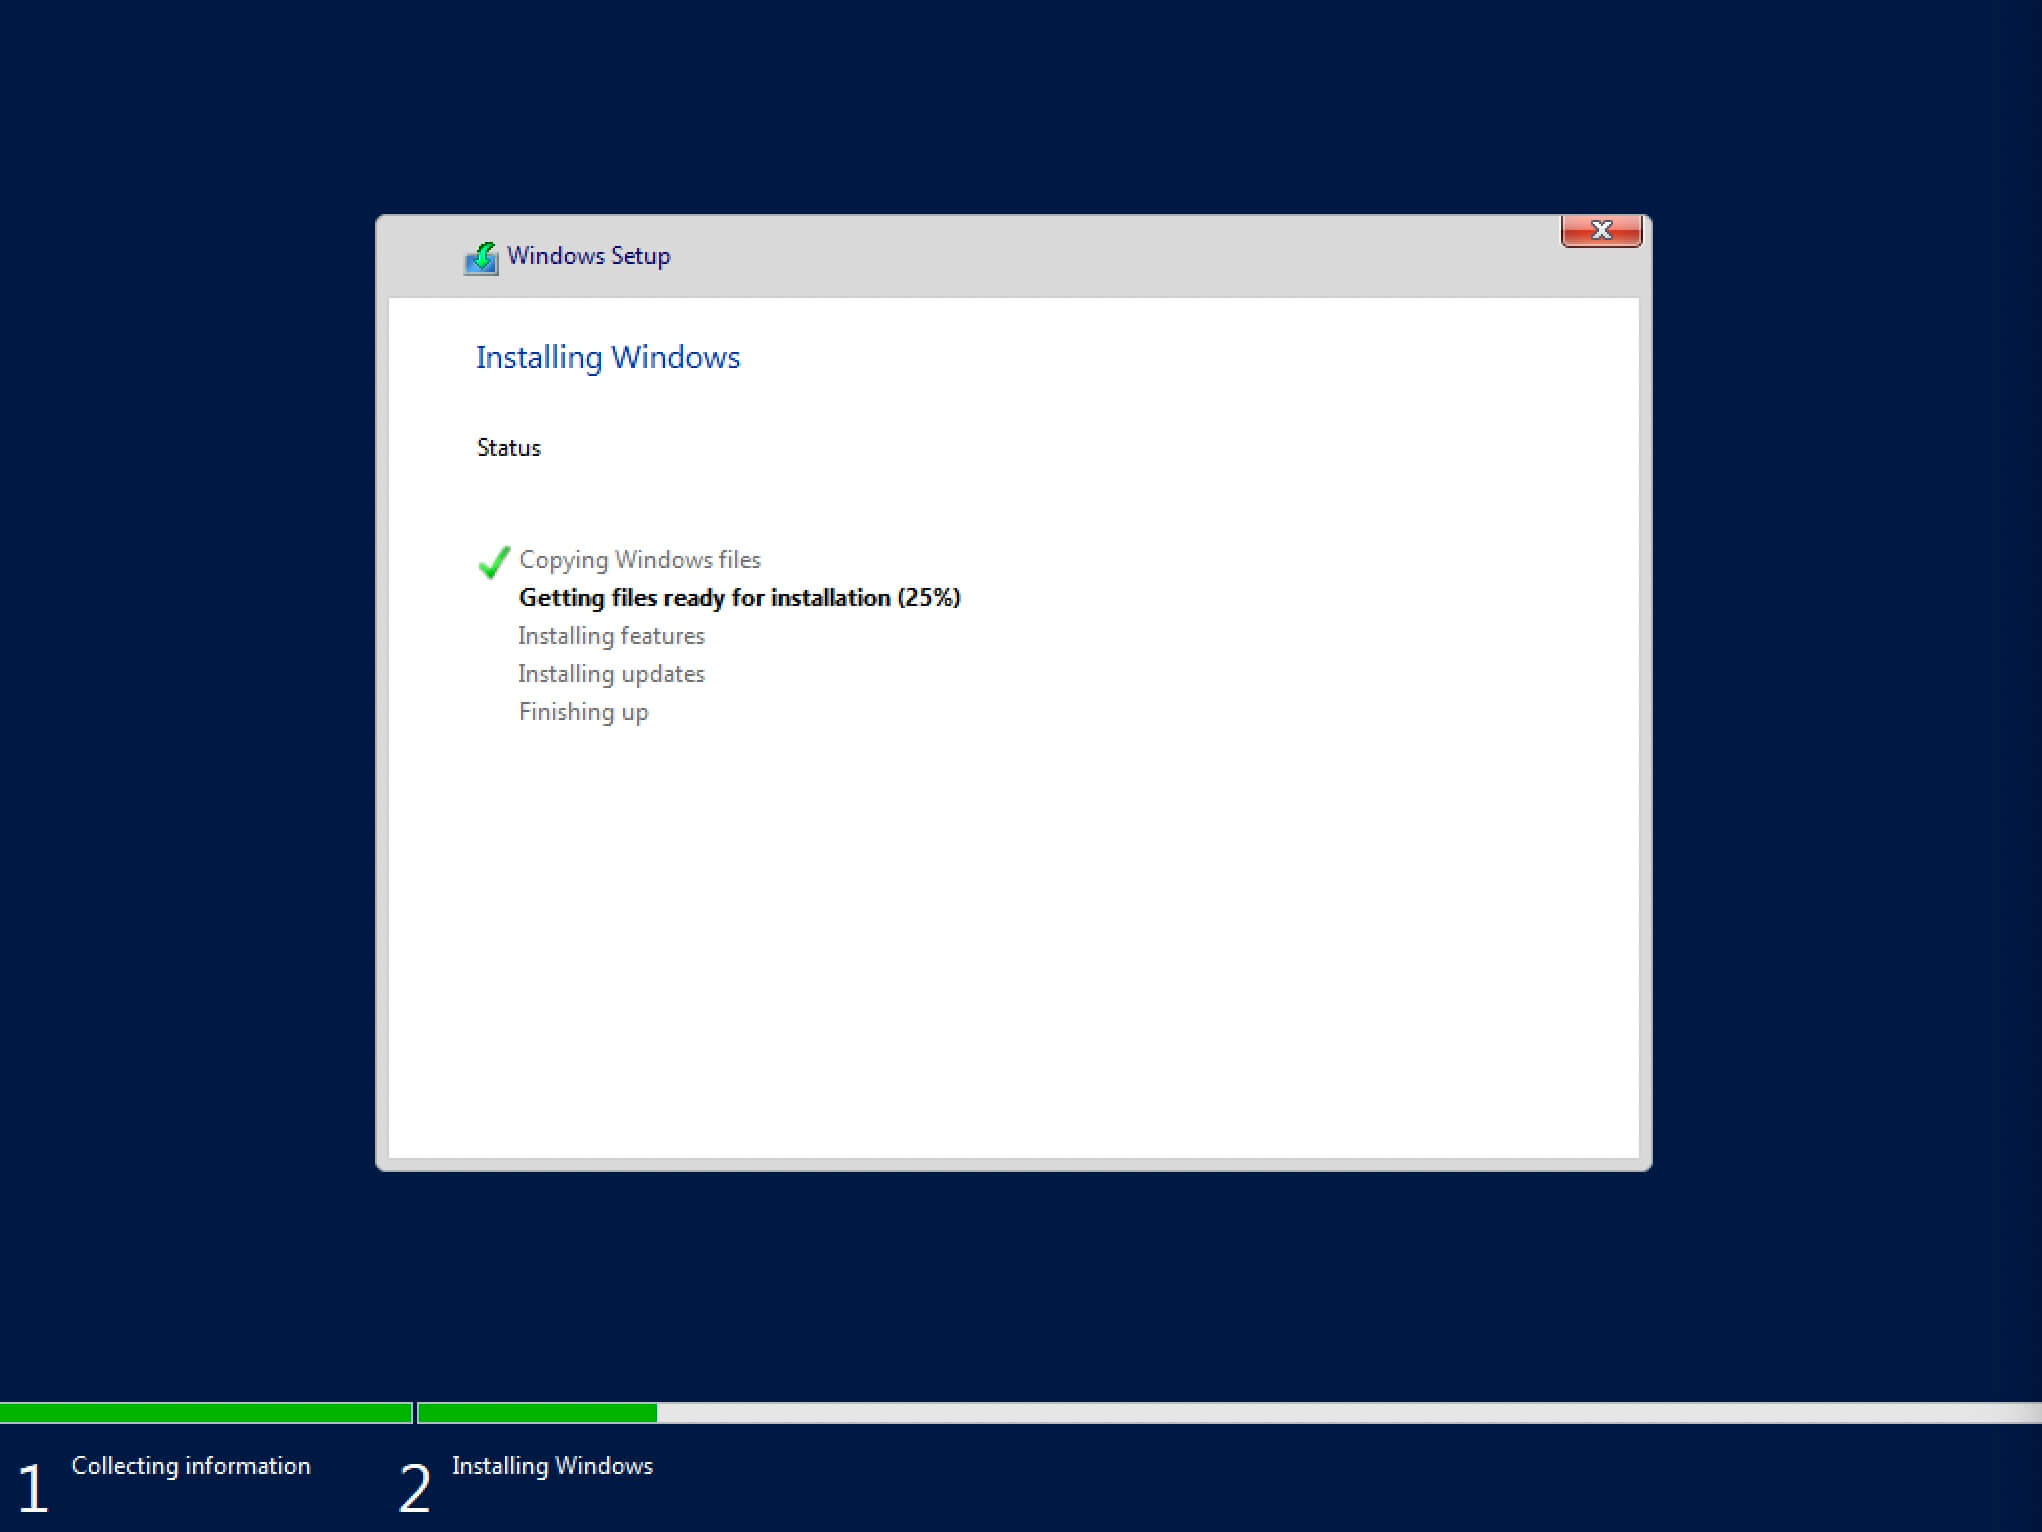
Компьютер автоматически перезагрузится.

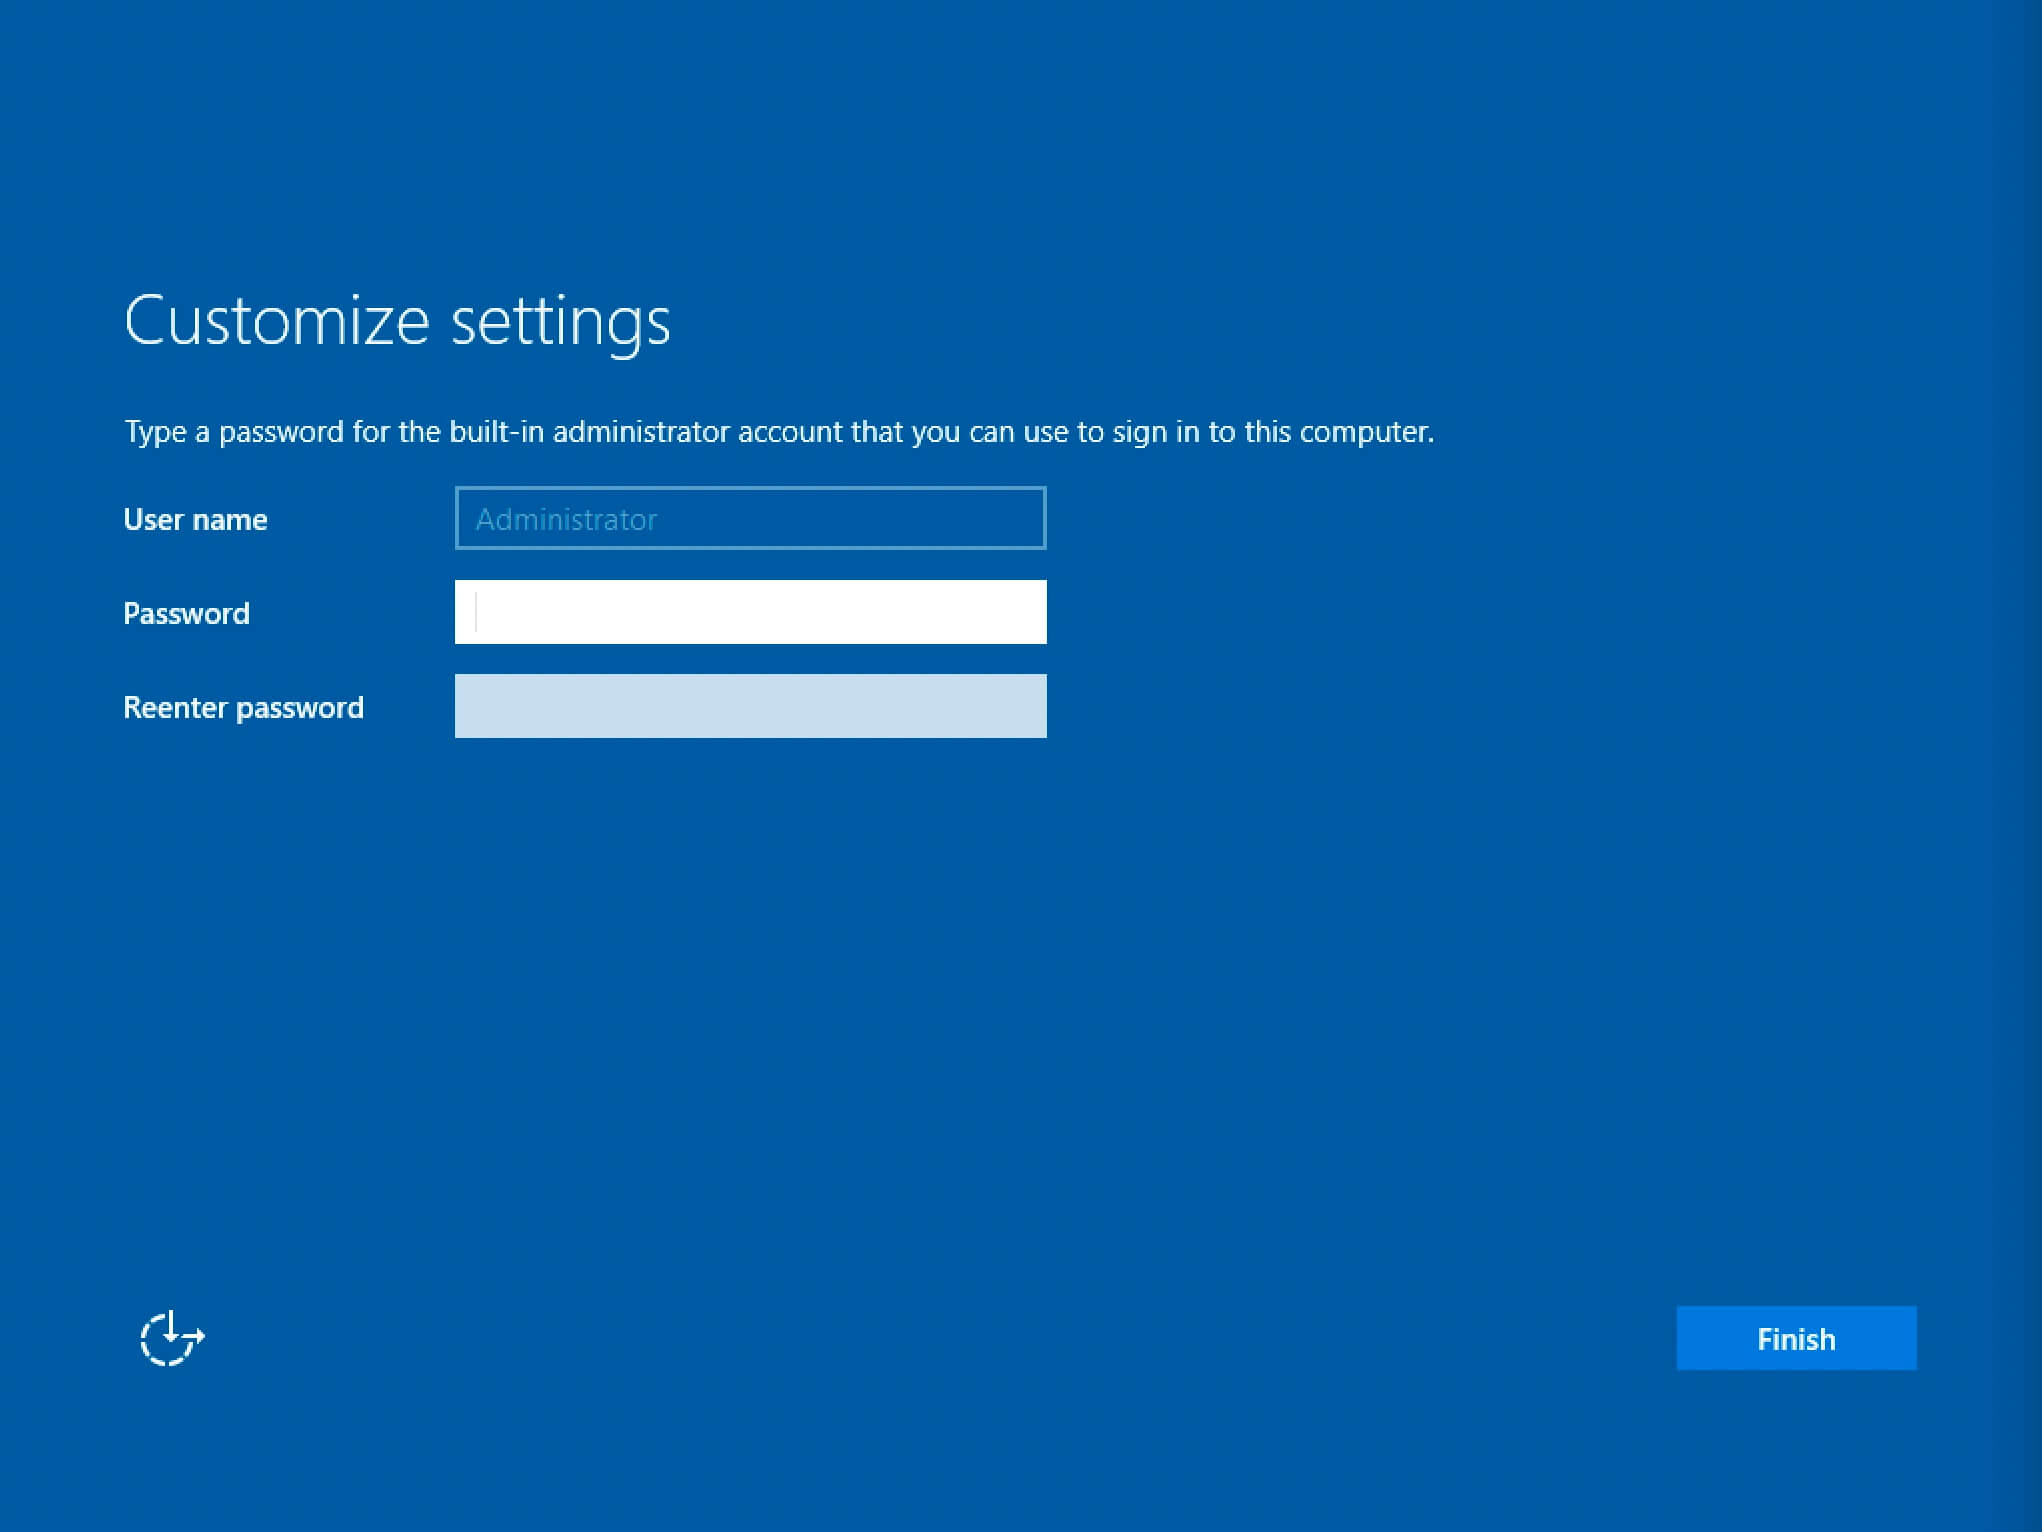
Теперь нужно указать надежный пароль для учетной записи “Administrator”.
Нажимаем на кнопку “Finish”.
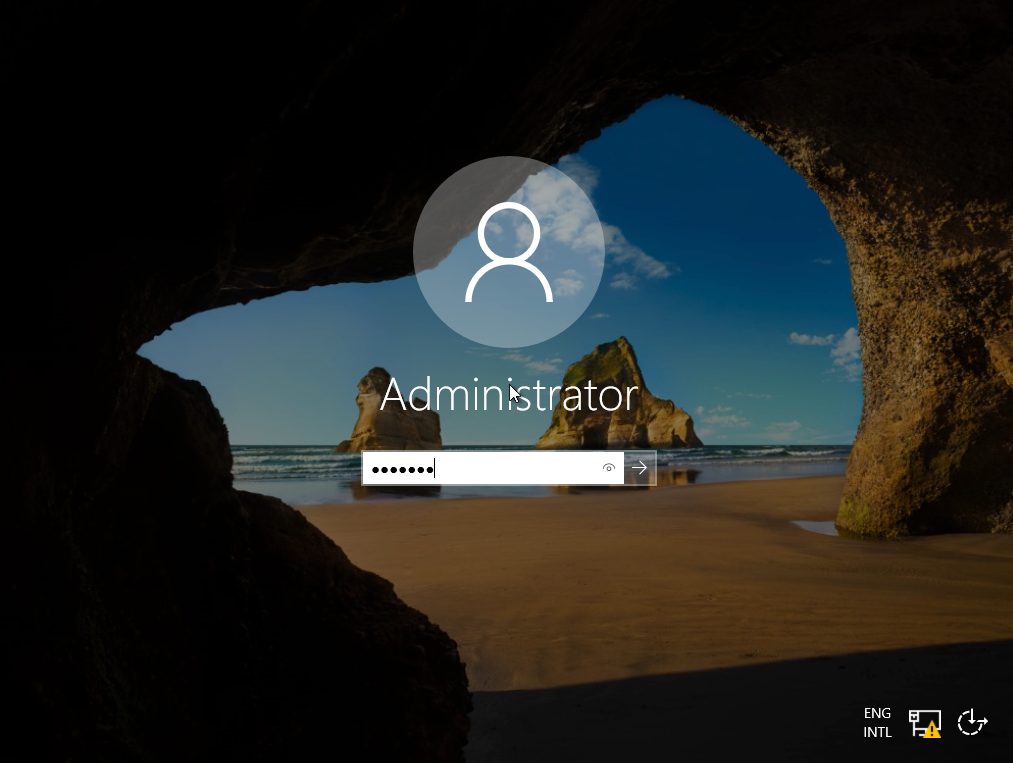
После завершения настроек, вас встретит экран блокировки Windows Server 2019.
Нажимаем “Ctrl+Alt+Delete”.
Далее необходимо войти в систему под учетной записью “Administrator”.
Далее будет возможность включить сетевое обнаружение, чтобы сервер был виден другим компьютерам в сети.
Обратите внимание, сетевое обнаружение не рекомендуется включать в публичных сетях.
Нажимаем на кнопку “Yes”.
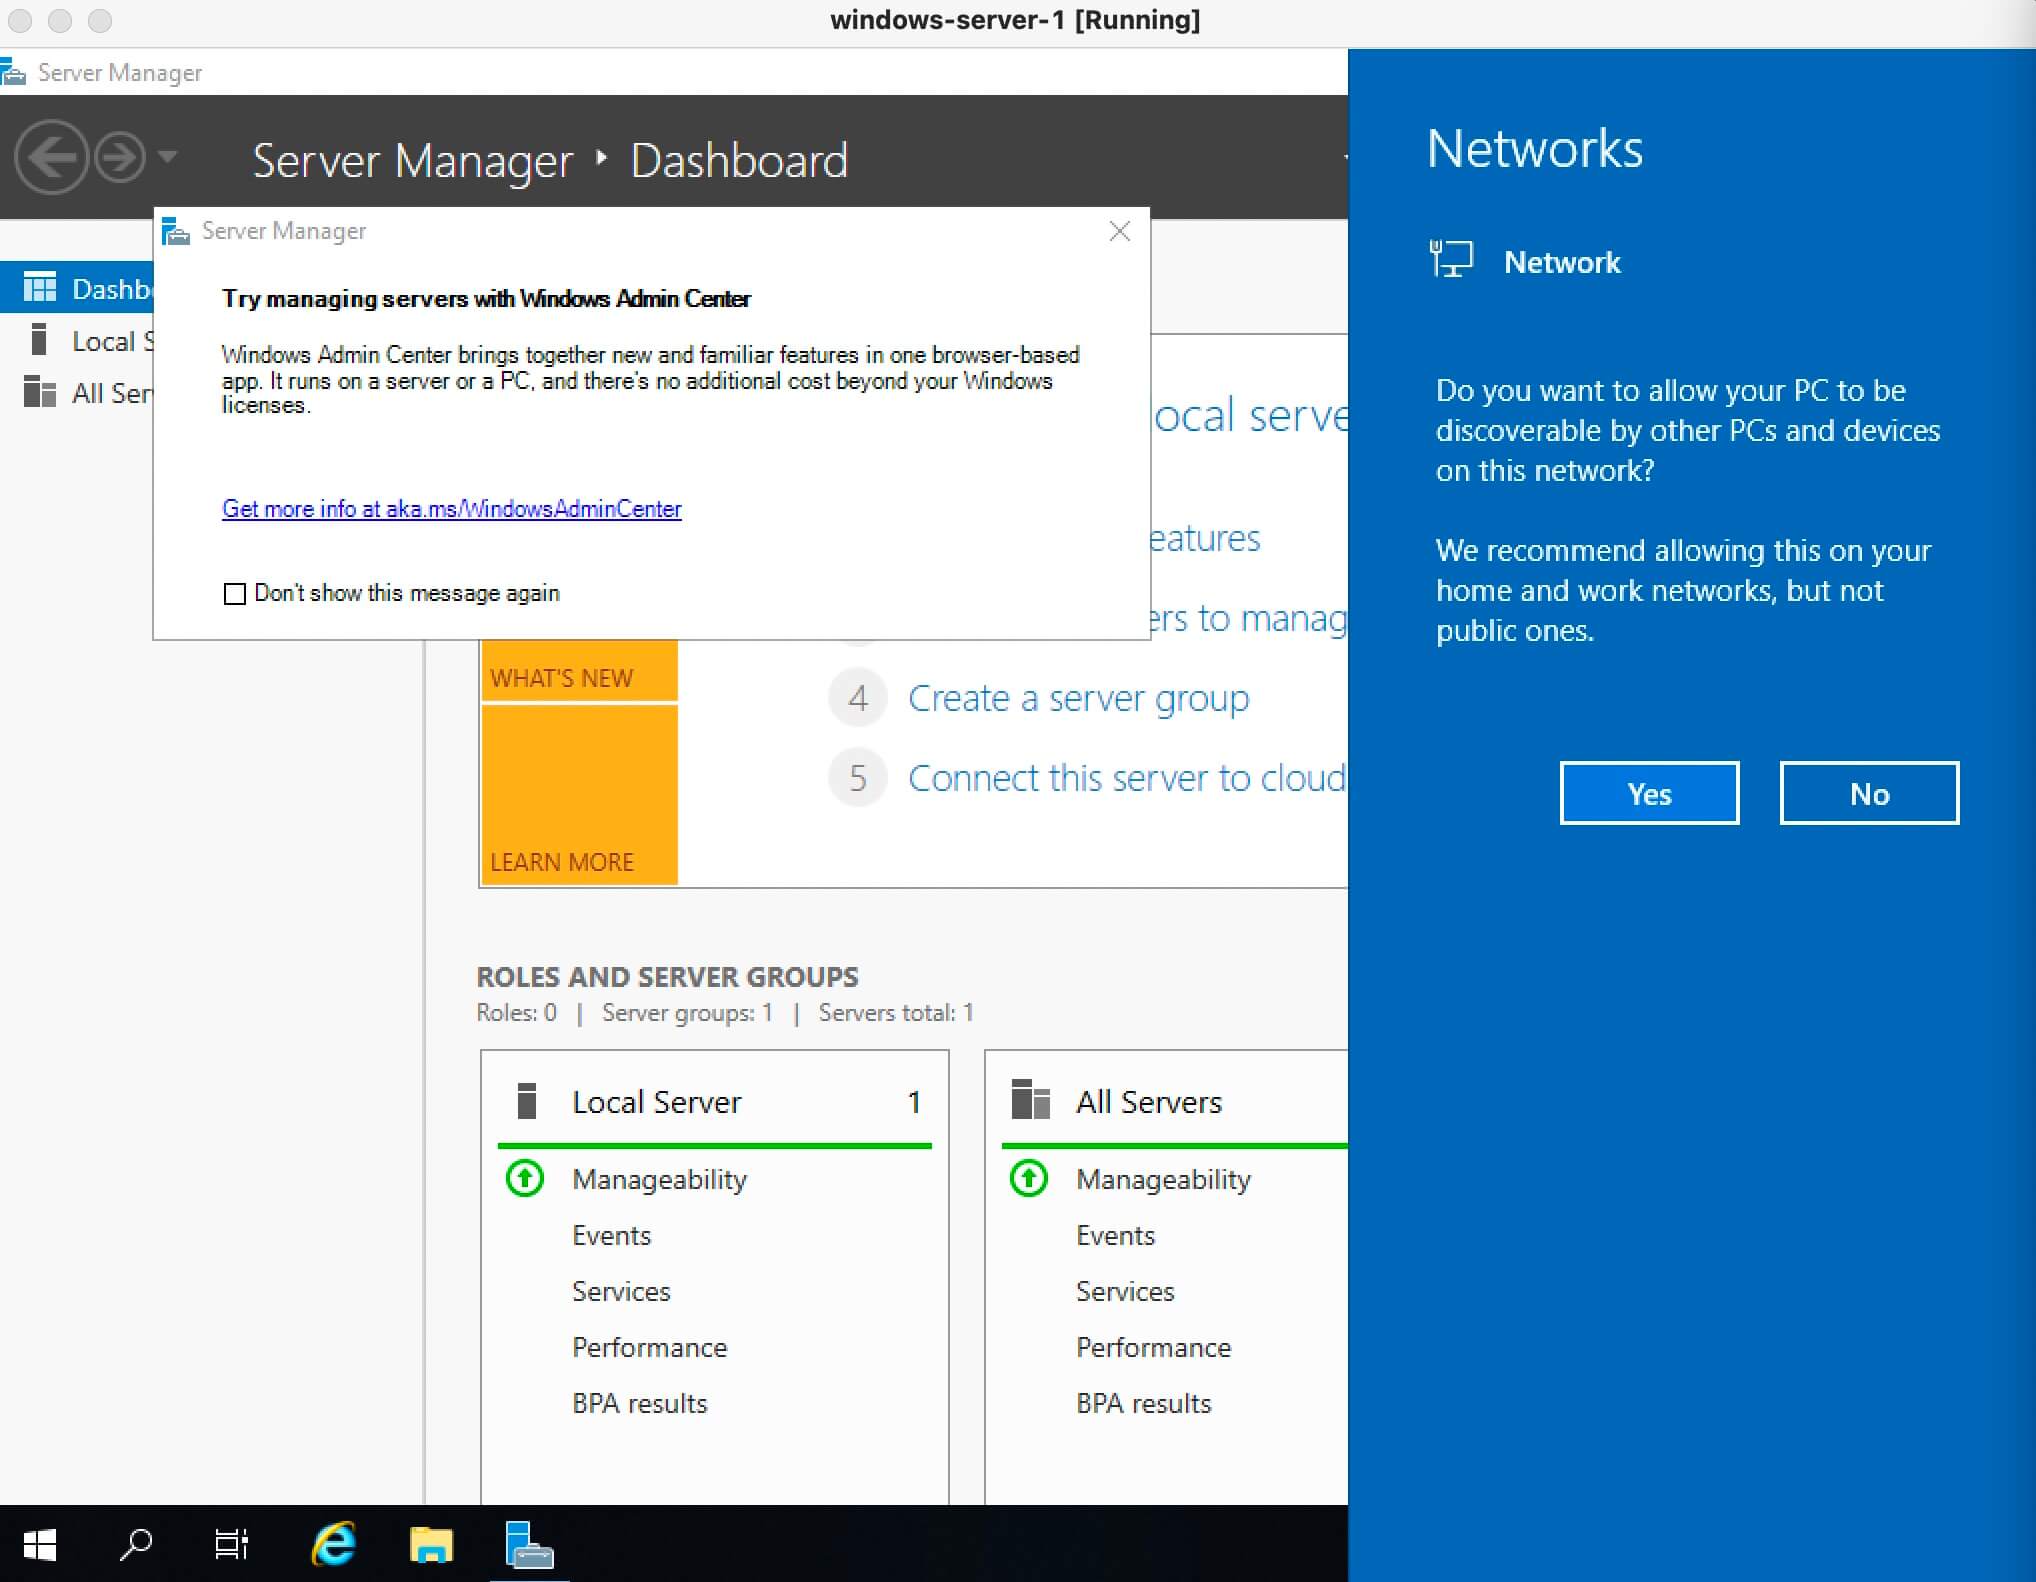
Установка Windows Server 2019 завершена.