In this first post of my series about managing Hyper-V with PowerShell I will outline how to install Hyper-V Server and the Hyper-V role with PowerShell.
- Author
- Recent Posts

Surender Kumar has more than twelve years of experience in server and network administration. His fields of interest are Windows servers, Active directory, PowerShell, web servers, networking, Linux, virtualization, and Kubernetes. He loves writing for his blog.
Every administrator who is not new to the virtualization world has heard about Hyper-V. It is a type 1 (or bare metal) hypervisor from Microsoft that allows the user to create and run virtual machines on a server or computer. For those who don’t know about type 1 and type 2 hypervisors, let me briefly explain both:
- Type 1—A type 1 hypervisor acts like a low-footprint operating system and runs directly on top of the host computer’s hardware. This is why it is also known as a bare metal or native Common examples of type 1 hypervisors are VMware ESXi, Citrix XenServer, and Microsoft Hyper-V. This type of hypervisor is generally used for production-ready virtualization, such as data centers.
- Type 2—A type 2 hypervisor runs as a software layer on an operating system, like other computer programs. It is also known as a «hosted» hypervisor. Common examples of type 2 hypervisors are VMware Player, Oracle VirtualBox, and Parallels Desktop. The type 2 hypervisor allows an end user to run virtual machines on a personal computer, so this type of hypervisor is generally used for training, development, and research.
Many admins are still confused as to whether Hyper-V is a type 1 or type 2 hypervisor. Since it appears to be running on top of the operating system itself, most people think it is a type 2 hypervisor, but in reality, it’s not. Let me tell you why.
When you install or enable the Hyper-V role or feature on a system, the original operating system is converted into a virtual machine, and a layer of Hyper-V hypervisor is added under it. This is why your system is restarted when you install the Hyper-V role or feature. After restart, the original Windows operating system starts working as a virtual machine on top of the Hyper-V hypervisor. In a nutshell, Hyper-V acts as a type 1 or bare metal hypervisor under the hood.
In this article, I will cover how you can manage Hyper-V completely using PowerShell. There are some tools you can use to manage Hyper-V servers using the GUI, but this guide is for the admins who love doing things with PowerShell rather than using the GUI tools.
Hyper-V is available for both server and client operating systems. In server operating systems (Windows Server 2016, Server 2019, Server 2022), it is available as a server role, and on Windows client operating systems (Windows 10 or Windows 11), it is available as an optional feature. Microsoft likes to differentiate between them as Hyper-V on Server and Hyper-V on Windows. So, from here on in, we’ll use the official naming scheme. To install the Hyper-V role or feature, you need to use different PowerShell commands depending upon the operating system type.
Install Hyper-V on a server
To install Hyper-V on Server, you can use the following command in an elevated PowerShell session:
Install-WindowsFeature -Name Hyper-V -IncludeAllSubFeature -IncludeManagementTools

Install Hyper V on Server using PowerShell
This command installs Hyper-V, including all the features and management tools on the Windows Server operating system. If you are trying to install the role on a remote server, you can specify the server name using the -ComputerName parameter. You can also use the -Restart parameter to restart the server automatically to complete the installation.
Install Hyper-V on Windows
To install Hyper-V on Windows, you can use the following command in an elevated PowerShell session:
Enable-WindowsOptionalFeature -Online -FeatureName Microsoft-Hyper-V -All

Install Hyper V on Windows using PowerShell
This command enables the specified optional Hyper-V Windows feature, including all dependencies and management tools. It prompts you to restart the system to complete the installation, where you can type «Y» to reboot straight away or «N» to manually reboot later. To suppress this reboot prompt, use the -NoRestart parameter.
Subscribe to 4sysops newsletter!
In my next article I will explain how to create a virtual Hyper-V switch with PowerShell.
Running virtual machines on your desktop or notebook and be extremely powerful, to test and develop applications or just run an isolated environment. If you just need a quick disposable Windows 10 environment, I recommend that you have a quick look at the Windows 10 feature called Windows Sandbox. Since Windows 8 you can run Hyper-V on your desktop, laptop or Windows tablet and it can virtualize Windows as well as Linux virtual machines. To install or enable Hyper-V on your Windows 10 machine, you just need to have the following requirements:
- Windows 10 Enterprise, Professional, or Education (Home does not have the Hyper-V feature included)
- 64-bit processor with Second Level Address Translation (SLAT)
- CPU support for VM Monitor Mode Extension (VT-c on Intel CPU’s)
- Minimum of 4 GB memory
The easiest way to enable Hyper-V on Windows 10 is to run the following PowerShell command as an administrator. If you want to install it using the GUI, you can also install the Hyper-V feature in the Windows 10 Control Panel.
Enable-WindowsOptionalFeature -Online -FeatureName:Microsoft-Hyper-V -All
or you can use the following CMD DISM command:
DISM /Online /Enable-Feature /All /FeatureName:Microsoft-Hyper-V
If you are looking for installing Hyper-V on Windows Server, check the following blog post: Install Hyper-V on Windows Server using PowerShell. If you want to know more about Hyper-V on Windows 10, check the Microsoft Docs. If you have any questions feel free to leave a comment.
Hyper-V is also used in many other features within Windows. For example in Windows Defender Application Guard, Docker or Windows Sandbox.
Tags: Enable Hyper-V, Hyper-V, Hyper-V Windows 10, Hypervisor, install, Install Hyper-V, Install Hyper-V Windows 10, Microsoft, PowerShell, Virtualization, Windows, Windows 10, Windows Hyper-V Last modified: July 18, 2019
About the Author / Thomas Maurer

Thomas works as a Senior Cloud Advocate at Microsoft. He engages with the community and customers around the world to share his knowledge and collect feedback to improve the Azure cloud platform. Prior joining the Azure engineering team, Thomas was a Lead Architect and Microsoft MVP, to help architect, implement and promote Microsoft cloud technology.
If you want to know more about Thomas, check out his blog: www.thomasmaurer.ch and Twitter: www.twitter.com/thomasmaurer
In this article, I will write about a familiar-sounding tool I regularly use to prepare custom images for Azure amongst other tasks – Hyper-V Windows 10. Windows 10 comes with the Windows Client Version of Hyper-V with it built-in so there is no need to download anything extra! It is the same Hyper-V you use within WindowsServer but with Windows 10 Hyper-V limitations, such as clustering features. We will look at how to enable Hyper-V Windows 10 and configure Hyper-V for Windows 10.
Operating System Prerequisites
First, let us check the prerequisites to install Hyper-V on Windows 10 One of the first considerations is the System Prerequisites, including licensing and supported editions of Windows 10.
Windows 10 Licensing
Not every license of Windows 10 has Hyper-V enabled. Only the following versions are eligible for Windows 10 Hyper-V.
- Windows 10 Professional
- Windows 10 Enterprise
- Windows 10 Education
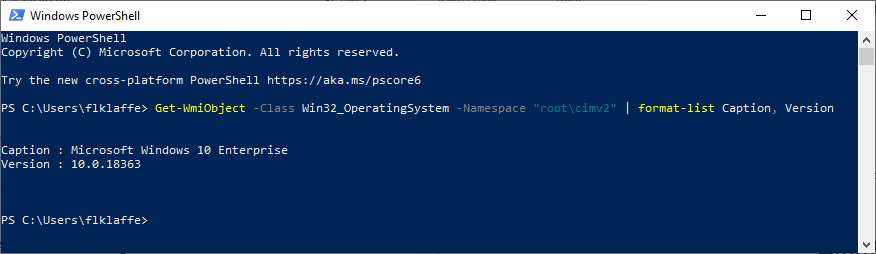
You can find your installed Windows Version when using PowerShell with the following command.
Get-WmiObject -Class Win32_OperatingSystem -Namespace “rootcimv2” | format-list Caption, Version
The screenshot below shows the PowerShell output when determining if you can enable Windows 10 Hyper-V.
While Hyper-V is “free” in Pro, Enterprise, and Education editions, it means that a user who might otherwise be able to purchase Windows 10 Home would need to buy up on the Windows 10 edition to enable the Hyper-V Role. For home users who want to enable Hyper-V Windows 10, this requirement will need considering.
Let us follow up with the hardware prerequisites to install Hyper-V on Windows 10,
Hardware prerequisites
There are two parts to be considered. First the hardware configuration and second the BIOS and UEFI setup.
Hardware configuration
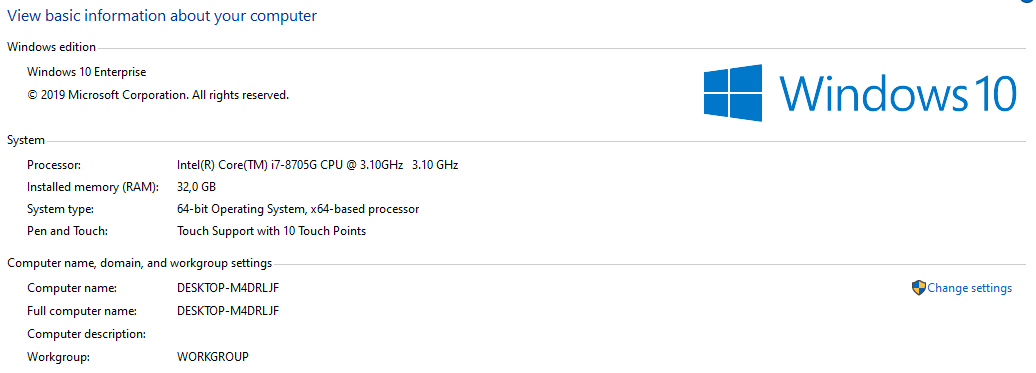
- 64-bit Processor with Second Level Address Translation (SLAT).
- CPU support for VM Monitor Mode Extension (VT-x on Intel CPU’s).
- Minimum of 4 GB memory. As virtual machines share memory with the Hyper-V host, you will need to provide enough memory to handle the expected virtual workload.
The screenshot shows my system as an example.
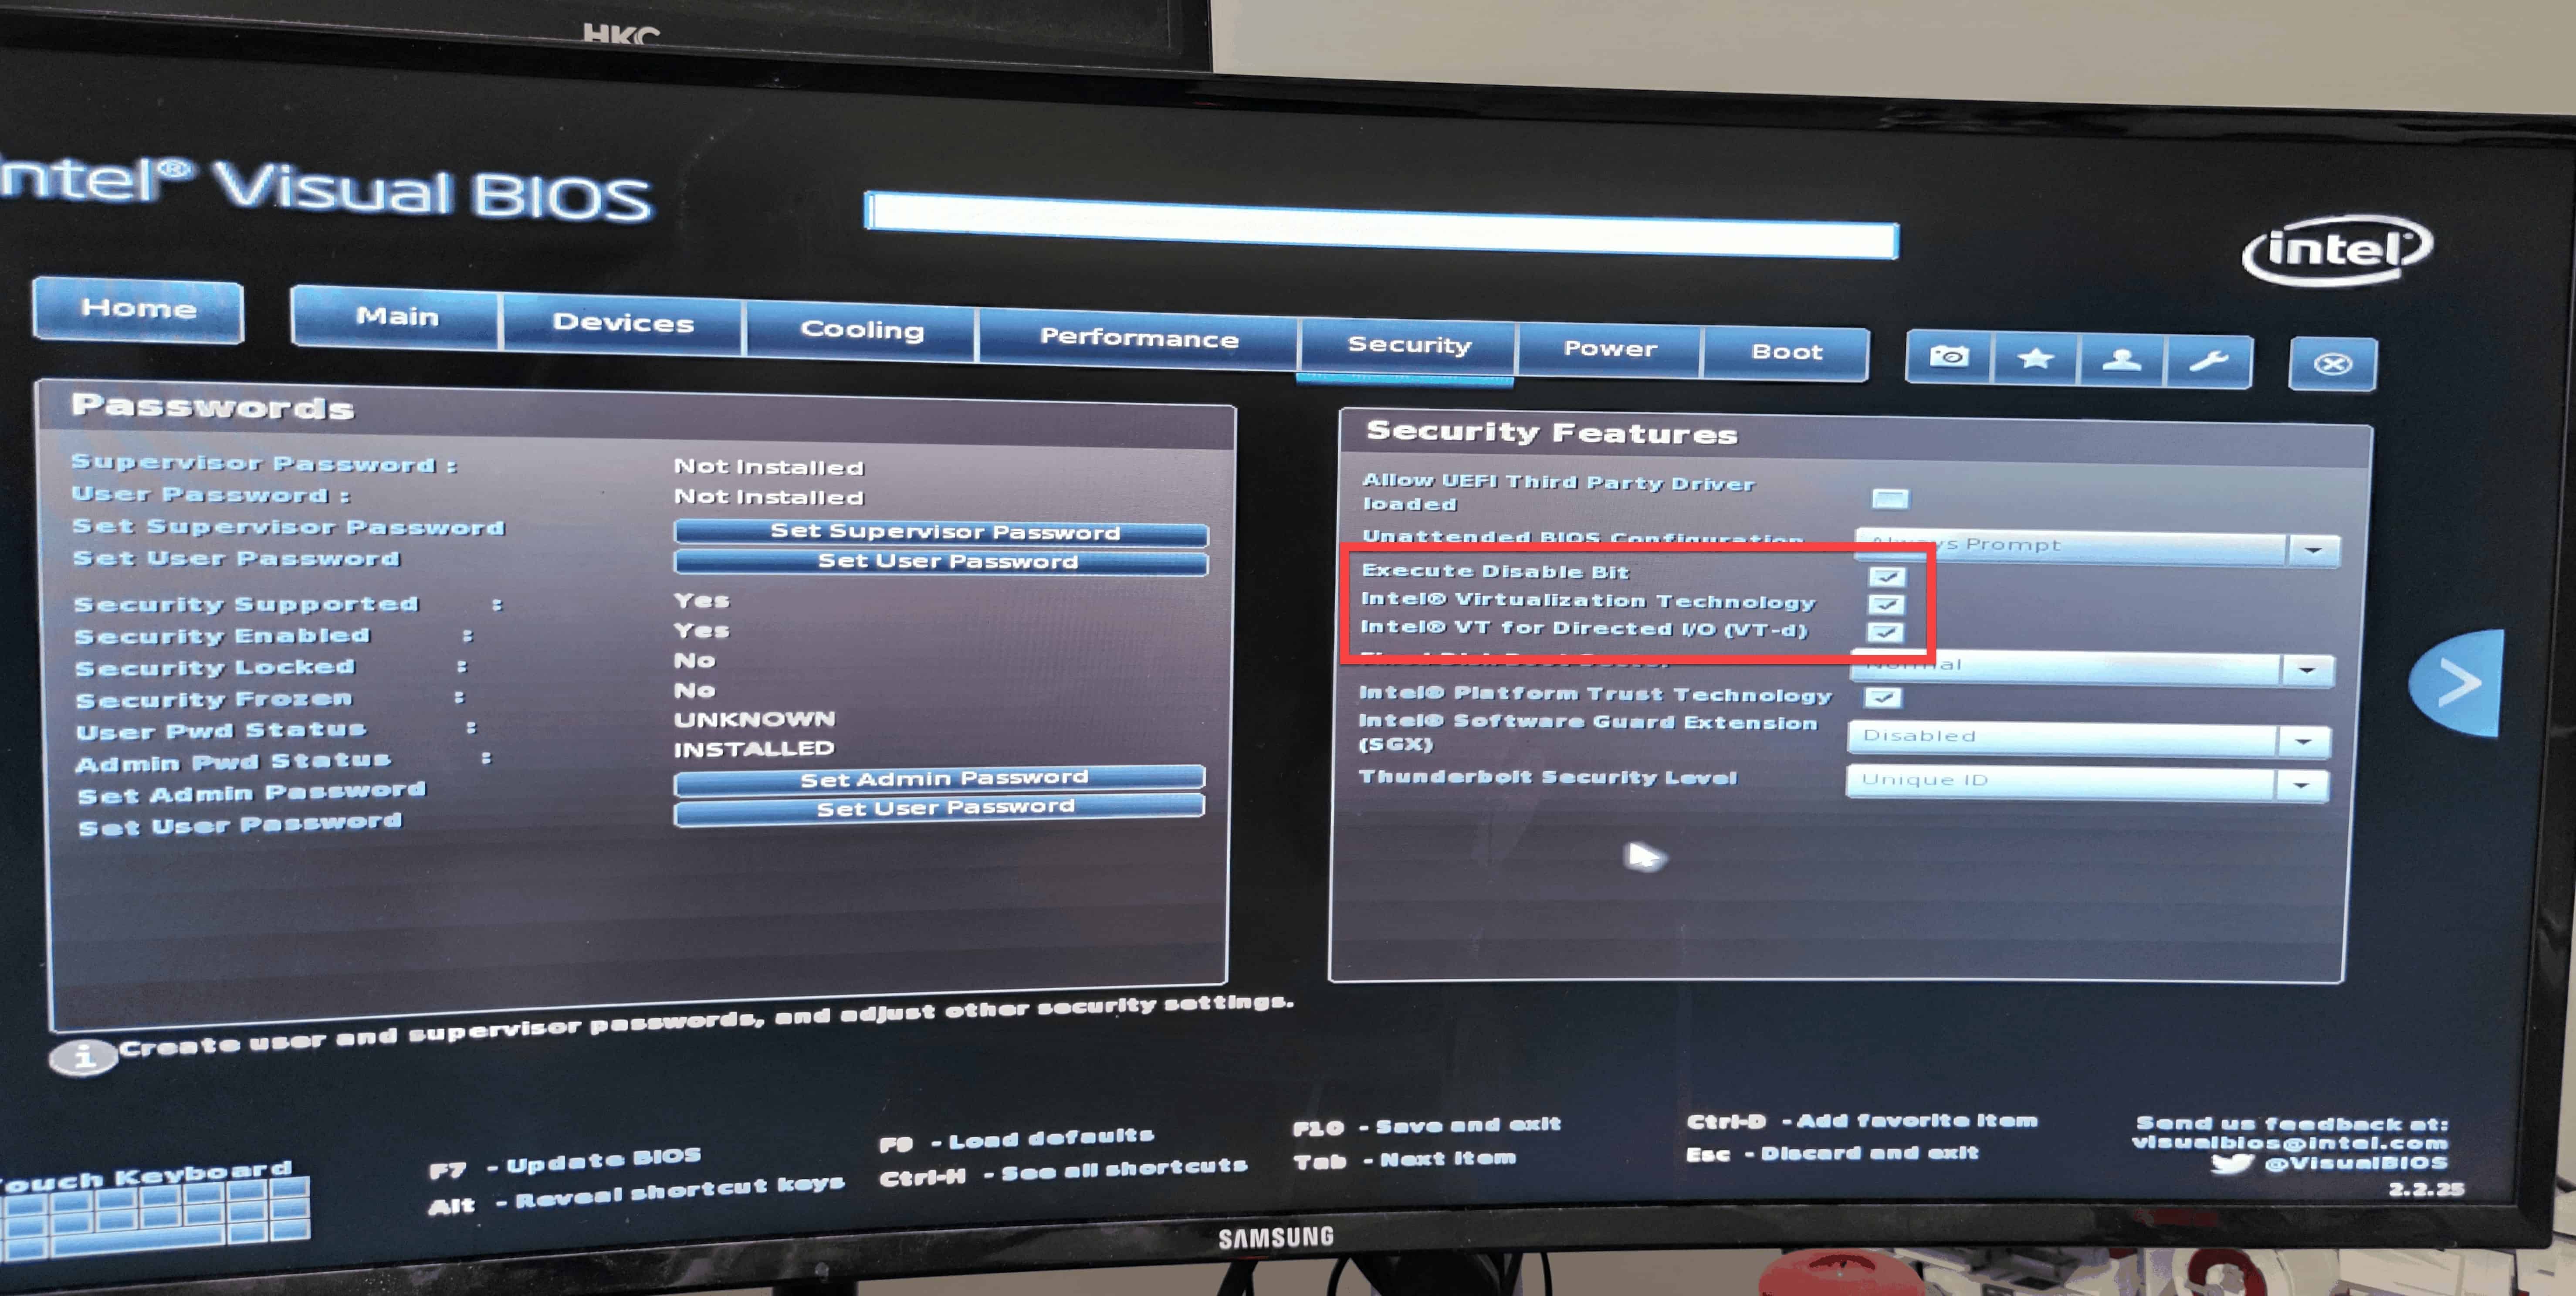
BIOS / UEFI Configuration
You need to enable two Options in your system BIOS / UEFI.
- Virtualization Technology – may have a different label depending on the motherboard manufacturer.
- Hardware Enforced Data Execution Prevention.
You can find these options in the CPU Settings of your system. See the screenshot below as an example.
How to check the hardware compatibility
To verify hardware compatibility in Windows, open the PowerShell and type systeminfo.
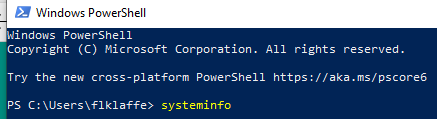
If all listed requirements in the output are showing “yes”, your system is compatible with Hyper-V.

When all hardware and license requirements are met, you can start the installation of Hyper-V in your Windows.
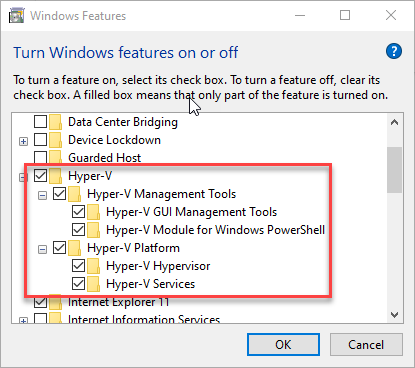
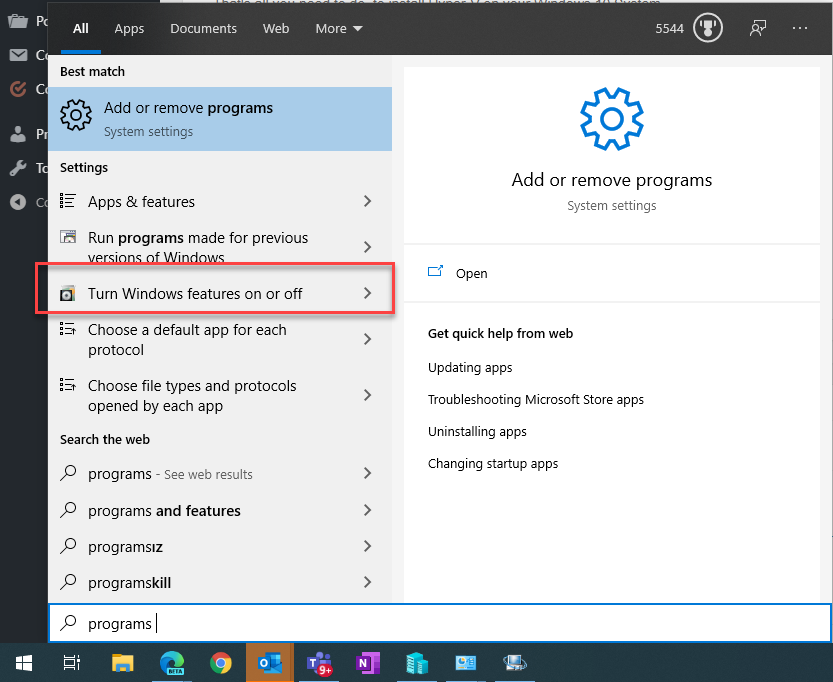
The easiest way is to search for Hyper-V in the Start Menu. It will then point to “Turn On or Off Windows Feature” Window in the Control Panel

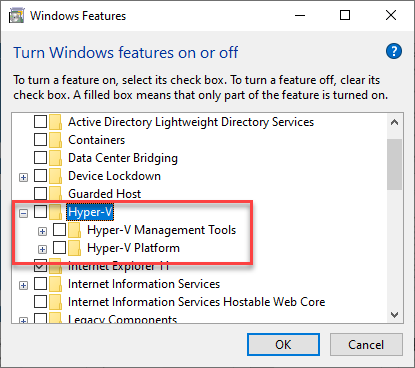
Within the context menu, you enable the Hyper-V feature together with the Platform and Management Tools.
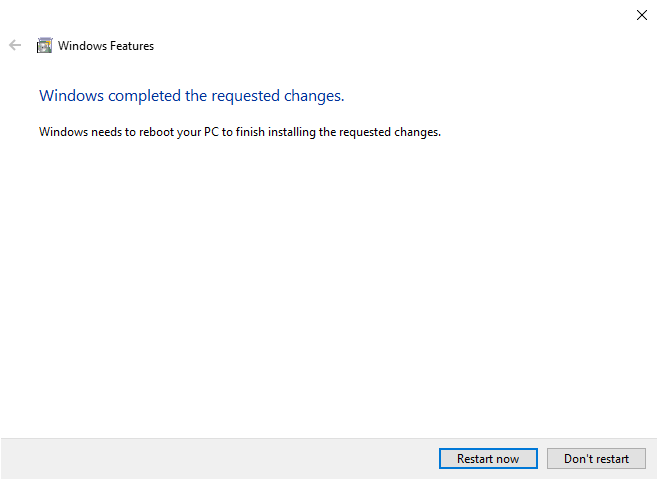
Afterwards, your system will require a reboot.
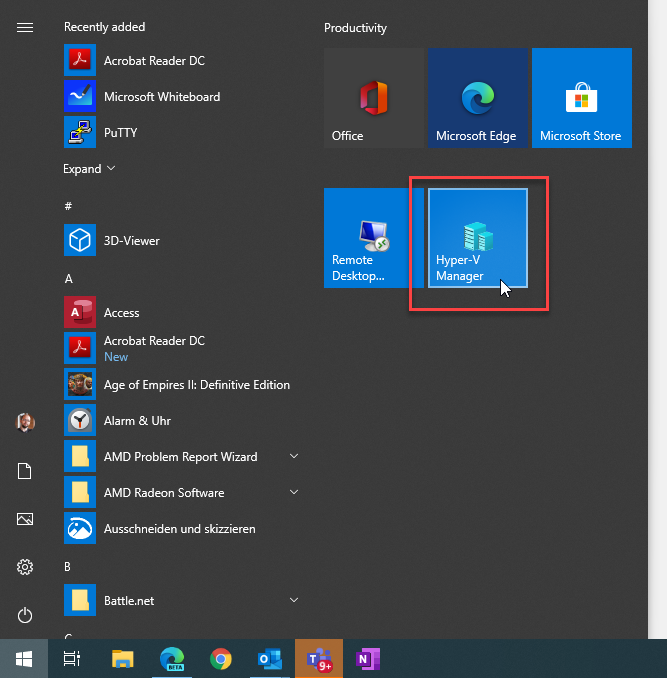
After the reboot, you should be able to open the Hyper-V Manager on your system and start to configure Hyper-V.
How to install Hyper-V on Windows 10 using PowerShell and other CMD utilities
Aside from the GUI method of installing the Hyper-V feature in Windows 10, you can also use PowerShell to enable the optional feature. This provides advantages for the purposes of automation, build processes, and generally seamless ability to enable Hyper-V Windows 10 or disable Hyper-V Windows 10.
To use Powershell to enable Hyper-V Windows 10, you use the following cmdlet:
- Enable-WindowsOptionalFeature -Online -FeatureName Microsoft-Hyper-V -All
In addition to using PowerShell, you can also use the CMD terminal and DISM to install Hyper-V on Windows 10 using the following command:
- DISM /Online /Enable-Feature /All /FeatureName:Microsoft-Hyper-V
Verifying the Hyper-V optional feature was enabled successfully
After you enable Hyper-V Windows 10 optional feature and reboot your system, you can easily verify the process to install Hyper-V on Windows 10 was successful. After installation, you should see the Hyper-V Manager listed.
You can also use PowerShell to verify Hyper-V has been installed. To verify the Hyper-V optional feature is installed, use the following cmdlet:
- Get-WindowsOptionalFeature -Online | Where-Object {$_.State -eq “Enabled” -and $_.FeatureName -like “*Hyper*”} | Format-Table

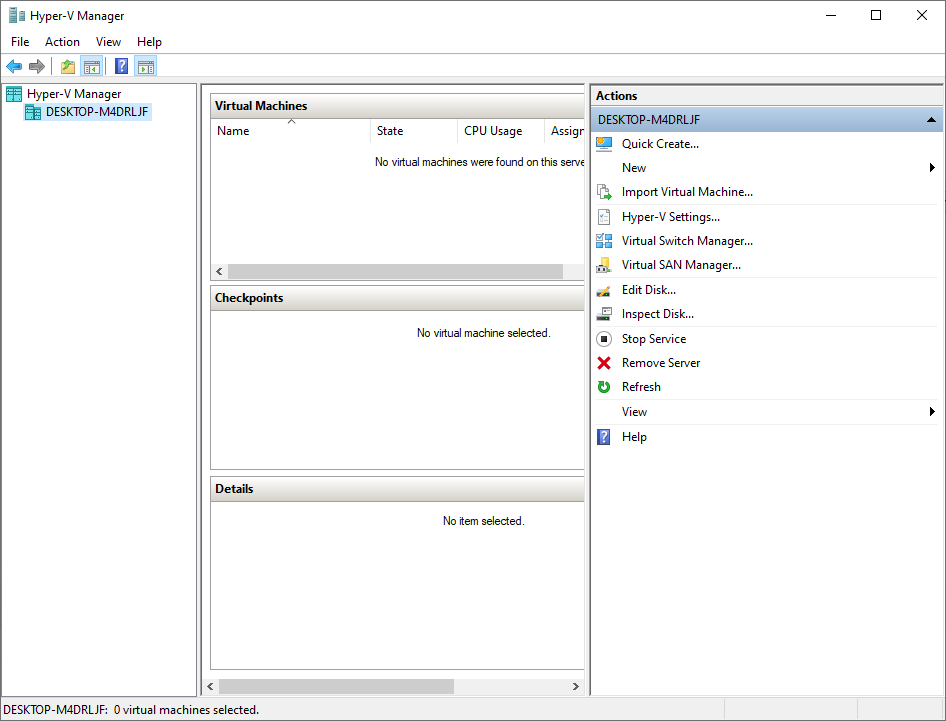
After launching the Hyper-V Manager, you will see the familiar management interface to manage your Hyper-V installation. Hyper-V Manager provides the GUI management tool used to configure and administer your local Hyper-V machines. If you are wondering how to install Windows 10 on a Hyper-V virtual machine, you can do this using the Hyper-V Manager once the Hyper-V role is enabled. You can also perform many different actions, including:
- Creating a virtual machine
- Import Virtual Machine
- Changing Hyper-V Settings
- Managing Hyper-V virtual switches
- Managing and working with VHD and VHDX disks
- Managing the Hyper-V Service
That’s all you need to do in order to install Hyper-V on your Windows 10 system and start to install Windows 10 on Hyper-V virtual machine
How to disable Hyper-V in Windows
Disabling Hyper-V is again pretty simple. You go the back to the “Turn Windows Features on or off” section in the control panel.
Remove the checkmark from the Hyper-V checkbox. This essentially performs a Hyper-V disable task on your Windows 10 host.
Reboot your Windows System and you are done.
How to disable Hyper-V in Windows 10 using command prompt
Again, as mentioned above for installing Hyper-V in Windows 10, you can also disable Hyper-V Windows 10 by using either PowerShell or the CMD terminal and the DISM command once again.
To disable Hyper-V PowerShell, run the following cmdlet:
- Disable-WindowsOptionalFeature -Online -FeatureName Microsoft-Hyper-V-Hypervisor
To disable Hyper-V Windows 10 command line, we can use the DISM tool to do that. Use the following command to disable Hyper-V Windows 10 using DISM:
- DISM /Online /Disable-Feature:Microsoft-Hyper-V
After performing the Hyper-V disable on your Windows 10 host, you will need to reboot for the changes to take effect.
To properly protect your Hyper-V virtual machines, use Altaro VM Backup to securely backup and replicate your virtual machines. We work hard perpetually to give our customers confidence in their Hyper-V backup strategy.
To keep up to date with the latest Hyper-V best practices, become a member of the Altaro DOJO | Hyper-V now (it’s free).
Closing notes
Hyper-V in Windows 10 can be a pretty good tool for some certain administrative or daily task e.g.:
- Spinning up a VM to test certain software
- Using VMs to open suspicious files
- Create an encapsulated work environment on your PC or Notebook when you work from home
- Create custom images for VDI environments like Citrix or Windows Virtual Desktop
- Open backups from VMs and extract certain files
- etc.
I hope the blogpost will help some of you to become familiar with Hyper-V Windows 10 and the management tools. If there is anything you wish to ask regarding Hyper-V Windows 10, let me know in the comments below and I’ll get back to you!
Hyper-V is next to ESX one the most used Hypervisors to run VMs. Hyper-V is available for free, and you can install Hyper-V on Windows Server and on Windows 10 and 11, allowing you to run and manage multiple VMs on your computer.
In this article
In this article, I will explain how to install Hyper-V on Windows Server and Windows 10/11, set it up, and how to create your first VM. I have also included some performance tips to get the most out of your Hyper-V enviroment.
Requirements
To run Hyper-V on your server or computer that are some requirements that you will need:
- 64-bit process with SLAT (second-level address translation, (every i3, i5, i7, and i9 processor supports it, just like most AMD processors these days))
- At least 4 GB of memory. More is better, I recommend getting at least 8Gb
- Virtualization support turned on in the Bios or UEFI
- VM Monitor Mode extensions
- Hardware-enforced Data Execution Prevention (DEP)
You can easily verify if your hardware meets the requirements with a single command in PowerShell. The command systeminfo will show you all the important information about your system. If you scroll all the way down you will find the Hyper-V requirements and if they are met.
systeminfo
Install Hyper-V on Windows Server
To install Hyper-V on a Windows server we will need to add the Hyper-V role to the Windows server. With the Hyper-V role also comes the Hyper-V Manager, which we need to actually create and manage the VMs. We have two options to add the role, we can use the Server Manager or enable the role with PowerShell.
Let’s first take a look at the Server Manager. This is installed by default on all Windows servers. You can find it in the start menu.
- Open the Server Manager
- Click on Manage > Add roles and Features in the top-right corner
- Click 3-times on Next to skip to Server Roles
- Select the Hyper-V role
- Click Add Features to the suggested features that are required for Hyper-V
- Click Next (twice) to Virtual Switches
- Select at least one network adapter to connect your VM’s to your network (internet)
- If you want to do live migrations of VMs between Hyper-V hosts, then enable Virtual Machine Migrations. Otherwise, you can leave this off
- Select the location for your VMs in Defaults stores
- Click on Install to install Hyper-V
It can take a couple of minutes to complete the Hyper-V installation on your server. A restart is required as the final step the complete the installation.
Install Hyper-V with PowerShell
We can also install Hyper-V on a Windows server with PowerShell. Make sure that you have opened PowerShell with admin privileges (elevated) and run the following command to install the Hyper-V role and management tools:
Install-WindowsFeature -Name Hyper-V -IncludeManagementTools -Restart
The PowerShell method won’t create a virtual switch in Hyper-V, which is needed to connect your VM’s to the internet. So we will need this create this later on.
Installing Hyper-V on Windows 10/11
You can also install Hyper-V on a computer with Windows 10 or 11, as long as your device meets the requirements for Hyper-V. To install Hyper-V on Windows we will need to add a Windows Feature:
- Open Start and type “Control Panel” and open it
- Open Programs and Features
- Click on Turn Windows features on or off
- Select Hyper-V
- Click on Ok to install Hyper-V
The computer needs to be restarted to complete the installation. You can also use this method to only install the Hyper-V management tools on your computer. The management tool can be connected to your Hyper-V server, allowing you to manage your VN’s from your own computer.
Setting up Hyper-V
If you have installed Hyper-V using PowerShell then we will need to configure a couple of settings in Hyper-V. Right-click on your Hyper-V server in the Hyper-V Manager and select Hyper-V Settings. Here you probably want to change the location of your Virtual disk and Virtual machines.
Creating a Virtual Switch
Next, we will need to create a virtual switch. There are three types of switches that we can create:
- External – Connects the VMs to the physical adapter of your Hyper-V server and allows the VM’s to connect to other devices in your network and to the internet
- Internal – Allows the VM’s to connect to each other and the Hyper-V server, but doesn’t map to your local network or the internet.
- Private – Creates an internal network only for the VMs.
We are going to create an External switch, so our VMs can also access the internet:
- Right-click on your Hyper-V server and open the Virtual Switch manager
- Choose External
- Click on Create Switch
- Give the switch a name
Installing your first VM
With Hyper-V up and running, we can now install our first VM. To install a virtual machine we will need an ISO file with the OS that you want to install. For Windows Server 2022, you download the ISO files from the Microsoft Evaluation Center.
Open the Hyper-V Manager to create a new VM:
- Right-click on your Hyper-V server and choose New > Virtual Machine
- Click Next and give your VM a name. Check the location of the VM is correct
- Select Generation 2
- Assign Memory, a minimum of 1024MB for Win Server 2022 – If you want to get a decent performance, then assign 4GB of RAM to the server.
- Select your Virtual Switch to connect your VM to the network
- Create a new Virtual Disk. Make it at least 30GB for Windows 11 and Windows Server 2022
- Installation Options (optional) – here you can mount the ISO for the OS that you want to install. You can also do this later.
- Click on Finish to create your new VM
After your VM is created you can start the VM in the Hyper-V manager and use the connect option to open the display of the new VM.
Tips for Hyper-V
To get the best performance out of your Hyper-V server there are a couple of tips when it comes to your Hyper-V server and creating VMs:
1. Optimizing the Host
The first step is to optimize the Hyper-V host. For the host, we want to look mainly at the hardware and how it’s used:
- Use the latest drivers
- Remove unused roles from the Windows server
- Use a separate disk array for your VMs
- Use SSDs or NVMe disks in RAID-10 for the best performance
If you are using an antivirus on your host, then make sure that you exclude the VM files from the AV. Also, make sure that your host is excluded from any inventory tools that regularly scan the server.
2. Optimizing VMs
When creating the VMs keep the following points in mind to get the best performance:
- Generation 2 VMs – The advantage of Gen 2 is that they are based on VMBUS and VPS architecture of the boot level. This increases the performance of the VM. Gen2 also allows the VM to be loaded over the SCSI controller, instead of the IDE controller
- Don’t use VM Encryption – VM encryption decreases the performance of your VM
- Use Static Memory – Make sure that you allocate enough memory and don’t use Dynamic Memory. The problem with dynamic memory is that Hyper-V tends to unallocate the RAM, which doesn’t do the performance any good.
- vCPUs – Start with one vCPU and check the performance and CPU load in the VM. If it’s around 80% or higher, then add a second vCPU and test again. There is no need to assign 4vCPU’s if the VM doesn’t need them.
- Fixed VHD disk – Fixed-size disks are faster than dynamically expanding disks. The problem with the latter is that they get fragmented, resulting in longer read and write times.
Wrapping Up
Installing Hyper-V is pretty straigt-forward these days, because it’s available as feature role in Windows. Make sure that you have enough memory installed in your Hyper-V to get the best performance.
I hope this article helped you installing Hyper-V, if you have any questions, just drop a comment below.
Hyper-V is Microsoft’s virtualization platform. It is available on Windows Server operating systems and Microsoft has also added the Hyper-V functionality to Windows 8.1, Windows 10, and Windows 11.
Unfortunately, the Hyper-V feature is only available in Windows 10 Professional, Enterprise, and Education editions. You can’t install it on Windows 10 Home edition by default.
However, using the steps in this article, we’ll show you how to enable Hyper-V in the Windows 10 Home edition.
Table of contents
- Does Your System Support Virtualization?
- Enable Virtualization in Firmware/BIOS
- Install Hyper-V in Windows 10 Home
- How to Enable Hyper-V on Windows 10 (Pro, Enterprise, Education)
- Enable Hyper-V from Optional Features
- Enable Hyper-V from Command Prompt
- Enable Hyper-V from Windows PowerShell
- How to Disable Hyper-V in Windows 10 (Home, Pro, Enterprise, Education)
- Closing Thoughts
Does Your System Support Virtualization?
Before moving forward, we need to check if our system supports virtualization. Hardware virtualization is required for Hyper-V to function correctly. Otherwise, you can use other virtualization platforms like Virtualbox and VMWare.
There are four basic requirements for Hyper-V to be installed on a Windows 10 computer:
- VM Monitor Mode Extensions
- Virtualization enabled in firmware
- Second Level Address Translation (SLAT)
- Data Execution Prevention
All four of these requirements can be easily checked through a Command Prompt cmdlet. Run the following cmdlet in an elevated Command Prompt and obtain the results on the four requirements:
systeminfoThis will generate a list, and you will find the section “Hyper-V Requirements” at the end of the list containing the details of the 4 requirements, as in the image below:
 1")
If these requirements are met, the results will display “Yes.” However, if you find that “Virtualization Enabled In Firmware” states “No,” you need to enable it using the guide below.
Enable Virtualization in Firmware/BIOS
Most modern computers support all the requirements of Hyper-V. But some systems have virtualization disabled from BIOS. You can go to the BIOS setup computer at the startup and enable Virtualization using the following steps:
-
Restart your computer and enter the BIOS setup using the hotkey.
-
Here, look for the “Virtualization” tab and click on it, or use the arrow keys on the keyboard to highlight it and press Enter.
-
Now enable Virtualization.
 2")
Enable virtualization from BIOS -
Now save the new settings and exit BIOS. The system will now reboot normally.
 2")
When it reboots, continue with the following steps to install and enable Hyper-V.
Install Hyper-V in Windows 10 Home
Note: Since Windows Home edition comes without Hyper-V, you must first install it. If you have the Pro, Education, or Enterprise editions, then you may skip this step and proceed to the next section of this article. To check which edition you have, type in winver in the Run Command box and obtain your operating system’s details.
Follow the steps below to install and enable Hyper-V in Windows 10 Home:
-
Download Hyper-V Installer by clicking on the following link:
Hyper-V installer and enabler for Windows 10 Home (317 bytes, 35,772 hits)
-
Once downloaded, right-click on the file and select Run as Administrator from the context menu. This will trigger the installation script.
 4")
Run as admin -
If prompted with a UAC, click Yes.
Click Yes on User Access Control It may take some time to complete the installation. Please let it complete without interruption.
-
Once complete, press Y to continue.
Press Y to continue The computer will now reboot and update.
 4")
 5")
 6")
Once rebooted, Hyper-V will have installed and automatically enabled on your Windows Home.
How to Enable Hyper-V on Windows 10 (Pro, Enterprise, Education)
The method given above automatically enables Hyper-V as well as installing it on a Windows Home. However, if you are running Windows Pro, Education, or Enterprise edition, then you can enable Hyper-V using any one of the following methods.
Enable Hyper-V from Optional Features
Since Hyper-V is an optional feature that one can enable when needed, you can enable it from the Optional Features applet. Here is how:
-
Open the Optional Features applet by typing in optionalfeatures in the Run Command box.
 7")
Open the Optional Features applet -
Now look for the “Hyper-V” option from the list and check the box next to it. Then click Ok.
 8")
Enable Hyper V from Optional Features -
You will now see a window applying the changes. Click Close when it is done.
 9")
Close installation window
 7")
 8")
 9")
Hyper-V will now be installed and enabled. You can now access the Hyper-V manager by searching for it in the search box in the taskbar or through the Start menu.
 10")
Alternatively, you can also use the other 2 command-line methods to enable Hyper-V on Windows 10.
Enable Hyper-V from Command Prompt
Follow these steps to enable Hyper-V using the DISM command tool in the Command Prompt:
-
Run the following cmdlet in an elevated Command Prompt:
DISM /Online /Enable-Feature /All /FeatureName:Microsoft-Hyper-VEnable Hyper V from Command Prompt -
When asked, enter Y to restart the computer:
Enter Y
 11")
 12")
The computer will now restart, When it does, Hyper-V should be enabled successfully.
Enable Hyper-V from Windows PowerShell
If you’d rather prefer to use Windows PowerShell, here is how to enable Hyper-V:
-
Run the following cmdlet in an elevated PowerShell:
Enable-WindowsOptionalFeature -Online -FeatureName Microsoft-Hyper-V-AllEnable Hyper V using PowerShell -
When asked, enter Y and hit Enter to restart the computer:
Enter Y When the computer reboots, Hyper-V will have installed successfully.
 13")
 14")
These are the 3 methods to enable Hyper-V in Windows 10, provided that the hardware is supported and Hyper-V is installed.
How to Disable Hyper-V in Windows 10 (Home, Pro, Enterprise, Education)
If you don’t want this functionality on your computer, you can always disable it. There are three ways to disable it:
-
From Optional Features
-
Open the Optional Features applet by typing in optionalfeatures in the Run Command box.
Open Optional Features applet -
Uncheck the box next to Hyper-V and click Ok.
 16")
Disable Hyper-V from Optional Features -
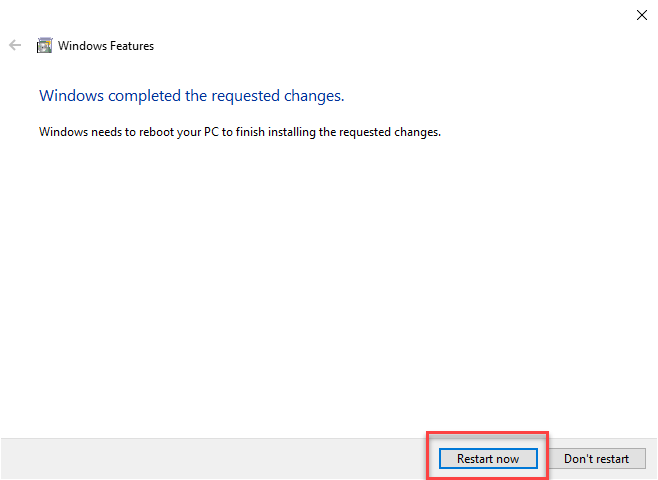
When done, click Restart now to finalize the changes.
Restart PC
-
-
From Command Prompt
Run the following cmdlet in an elevated Command Prompt to disable Hyper-V:
DISM /Online /Disable-Feature /FeatureName:Microsoft-Hyper-V-allIf asked for a reboot, enter Y for Yes.
Disable Hyper V from Command Prompt -
From PowerShell
Run the following cmdlet in an elevated PowerShell to disable Hyper-V:
Disable-WindowsOptionalFeature -Online -FeatureName Microsoft-Hyper-V-AllIf asked for a reboot, enter Y for Yes.
Disable Hyper V from Windows PowerShell
 16")
 17")
 18")
 19")
Closing Thoughts
Sometimes Hyper-V is very useful even for home users. It can be used to test and evaluate new software without hurting the host system. But there are times when enabling virtualization support or installing Hyper-V is not recommended.
Hyper-V requires some system resources to run its virtual machines. For example, if you have 4 GB RAM, you won’t be able to give any resources to the virtual machine. So it would not be wise to enable Hyper-V functionality.
For what purpose do you want to enable Hyper-V functionality on your Windows 10 Home computer? Please share your thoughts in the comments below.