Print Management is an optional feature in Windows
by Matthew Adams
Matthew is a freelancer who has produced a variety of articles on various topics related to technology. His main focus is the Windows OS and all the things… read more
Updated on
Reviewed by
Vlad Turiceanu

Passionate about technology, Windows, and everything that has a power button, he spent most of his time developing new skills and learning more about the tech world. Coming… read more
- Some Windows features can be missing for various reasons, and today we’ll show you how to install Print Management in Windows 10.
- How to go to Print Management in Windows 10? Updating your drivers with specialized software is the fastest way to get access to it.
- Clearing files for certain printer services might also help with printing problems on your PC.
- When the printmanagement.msc download in Windows 10 Pro is missing, you should be able to fix it with built-in system tools.
XINSTALL BY CLICKING THE DOWNLOAD
FILE
Windows Pro and Enterprise editions have a Print Management utility. However, some users have said on Microsoft’s forum that their Print Management tools are missing.
Those users can’t find Print Management in Administrative Tools and open that utility. One user forum post said this:
I just upgraded from Windows 10 Home to Windows 10 Pro and I can’t find Print Management anywhere. Also, printmanagement.msc is not available. I suspect other Windows 10 Pro administration utilities are also missing.
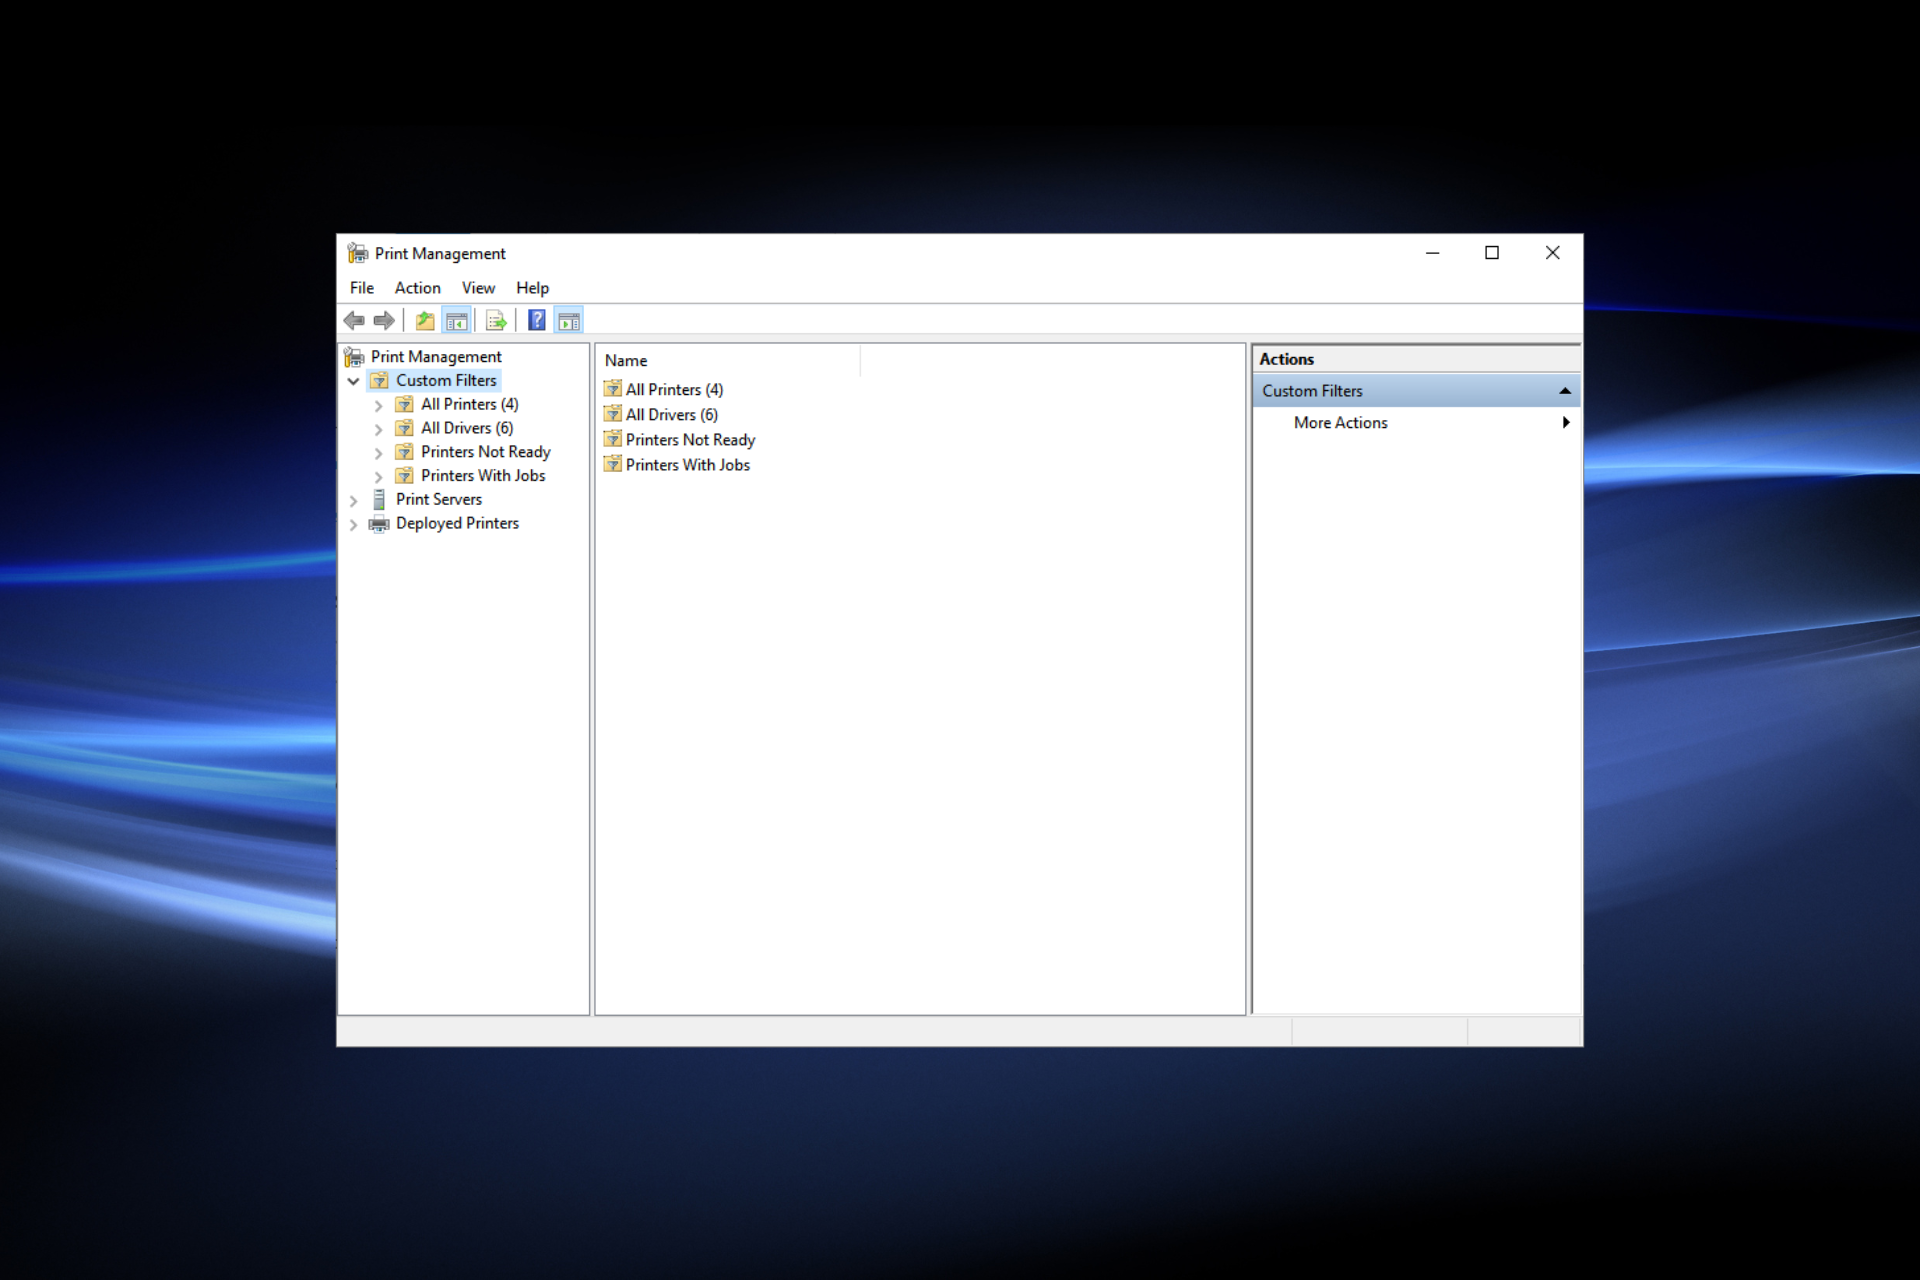
Print Management is a Microsoft Management Console (MMC) that allows users to view, install, access, and manage the various printers on the network through a single device running Windows Server.
It’s an effective way of modifying the various parameters and streamlines the whole process. Without the console, users would have to install and manage the printers individually through the connected computers, which takes considerable time and effort.
Why is Print Management missing?
There are various reasons why Print Management is not showing in Windows 10. It includes issues with the installed driver, corrupt system files, or problems with the relevant service. These issues can also lead to the Print action missing from context menu.
Also, remember that the Print Management Console is only available on Pro and Enterprise editions of Windows. If you are running the Home edition, upgrade or look for other similar third-party software.
Other issues with the Print Management Console in Windows 10 are as follows:
How we test, review and rate?
We have worked for the past 6 months on building a new review system on how we produce content. Using it, we have subsequently redone most of our articles to provide actual hands-on expertise on the guides we made.
For more details you can read how we test, review, and rate at WindowsReport.
- Windows cannot find printmanagement.msc
- Print management console install failed
- Print Management missing from administrative tools
- Windows 10 Print Management not showing printers/all printers missing
- Print Management missing Server 2012 r2/2008 r2
- Print Management Snap In missing
- More Windows versions can be impacted (Print Management missing in Windows 11 or 8.1, but also in Windows 10 Home/Pro 20h2/2004)
- Printmanagement.msc missing or not found Windows 10 Home, 2004, Pro 20H2, 21H1, Windows 11
- Print management not opening
How do I restore Print Management in Windows 10?
- Why is Print Management missing?
- How do I restore Print Management in Windows 10?
- 1. Update the printer driver
- 2. Add the Print Management tool to Windows 10
- 3. Clean the Print Spooler
- 4. Run a system file scan
- 5. Reset or reinstall Windows
- What can I do if Print Management is missing on Windows 11?
- Where is Print Manager in Windows 10?
If printmanagement.msc is not found in Windows when you try accessing it through the Run command, the console has not yet been added.
Print Management Console is an optional feature in Windows that has to be manually downloaded and installed and does not come built in with it. So, installing Printer Management will restore it on your computer.
1. Update the printer driver
Updating the printer driver can help fix a wide range of printer-related issues. You can check if you need to update your printer’s driver with driver updater software.
Driver updater software lists all your PC’s devices with outdated drivers and lets you quickly download and install updated ones.
Most common Windows errors and bugs can result from faulty or incompatible drivers. An outdated system can lead to lags, system issues, or even BSoDs.
You can prevent these problems by using an automatic tool that will search and install the correct drivers on your computer with just a few clicks. That’s why we recommend you use Outbyte Driver Updater.
Here’s how to do it:
- Download and install the Outbyte Driver Updater app.
- Launch the software.
- Wait for the app to detect all incompatible drivers.

- Afterward, it will show you a list of the drivers found to select the ones to Update or Ignore.
- Click on Update & Apply Selected to download and install the newest versions.
- Restart your PC to ensure the applied changes.


Outbyte Driver Updater
Use this software and solve all driver-related issues from your PC.
Disclaimer: You may need to upgrade the app from the free version to perform specific actions.
2. Add the Print Management tool to Windows 10
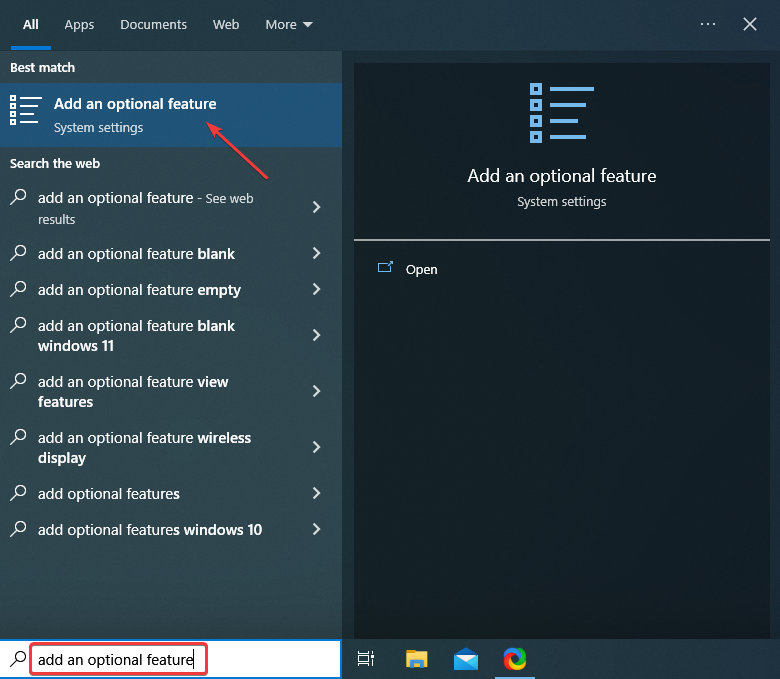
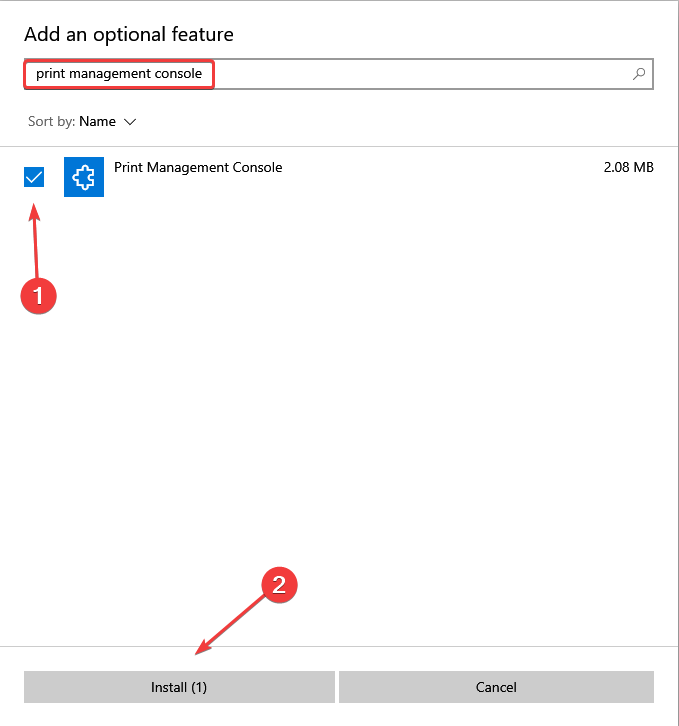
- Add an optional feature in the Search bar at the bottom, and click on the relevant result.

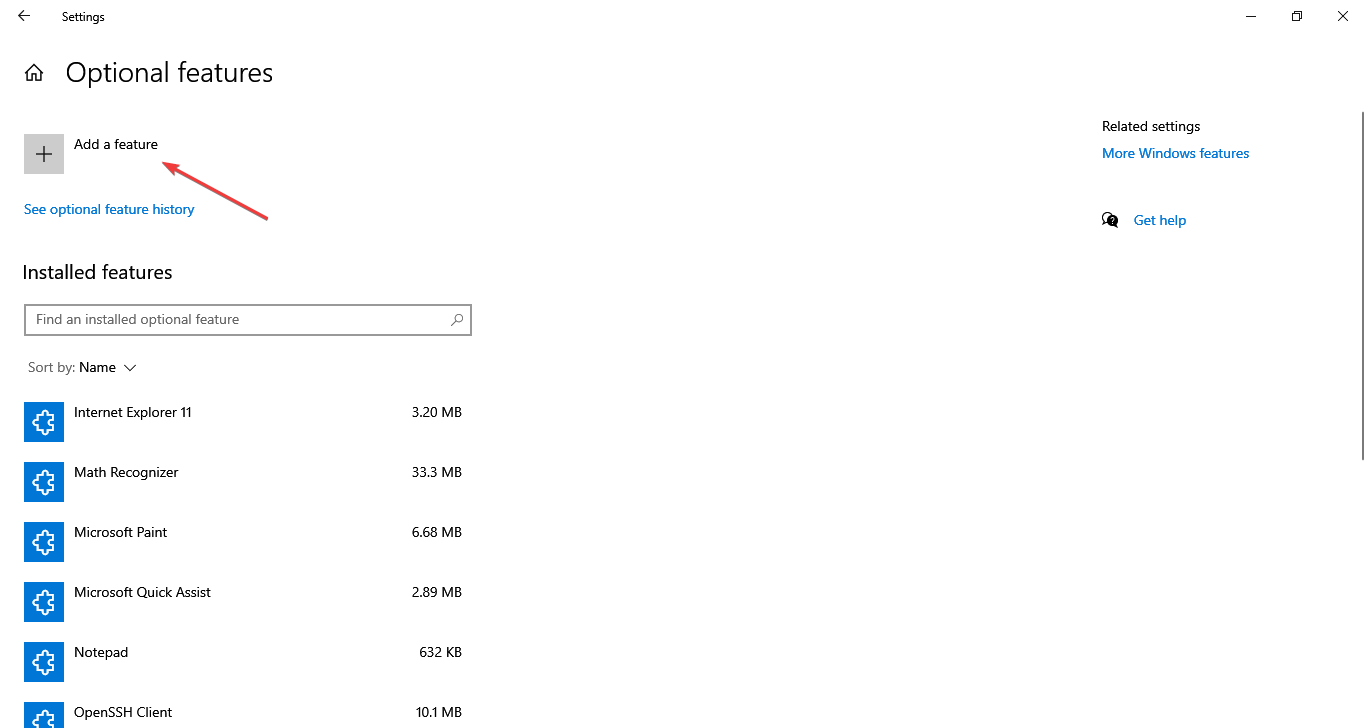
- Click on the Add a feature option at the top.

- Now, search for Print Management Console, tick the entry when it appears, and then click on Install at the bottom.

This simple method can help if Print Management is missing in Windows 10 or 11. This solution can also help if you’re getting the print program error in Photoshop, so be sure to try it out.
3. Clean the Print Spooler
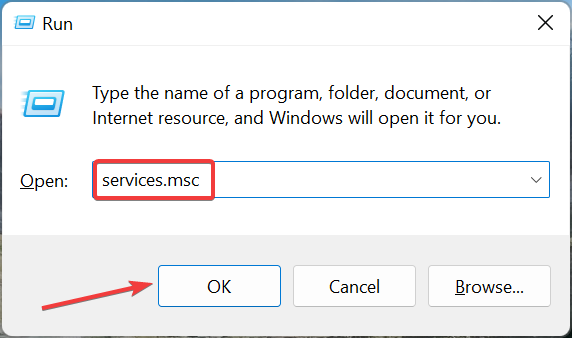
- Press Windows + R to open the Run command, enter services.msc in the text field, and click OK.

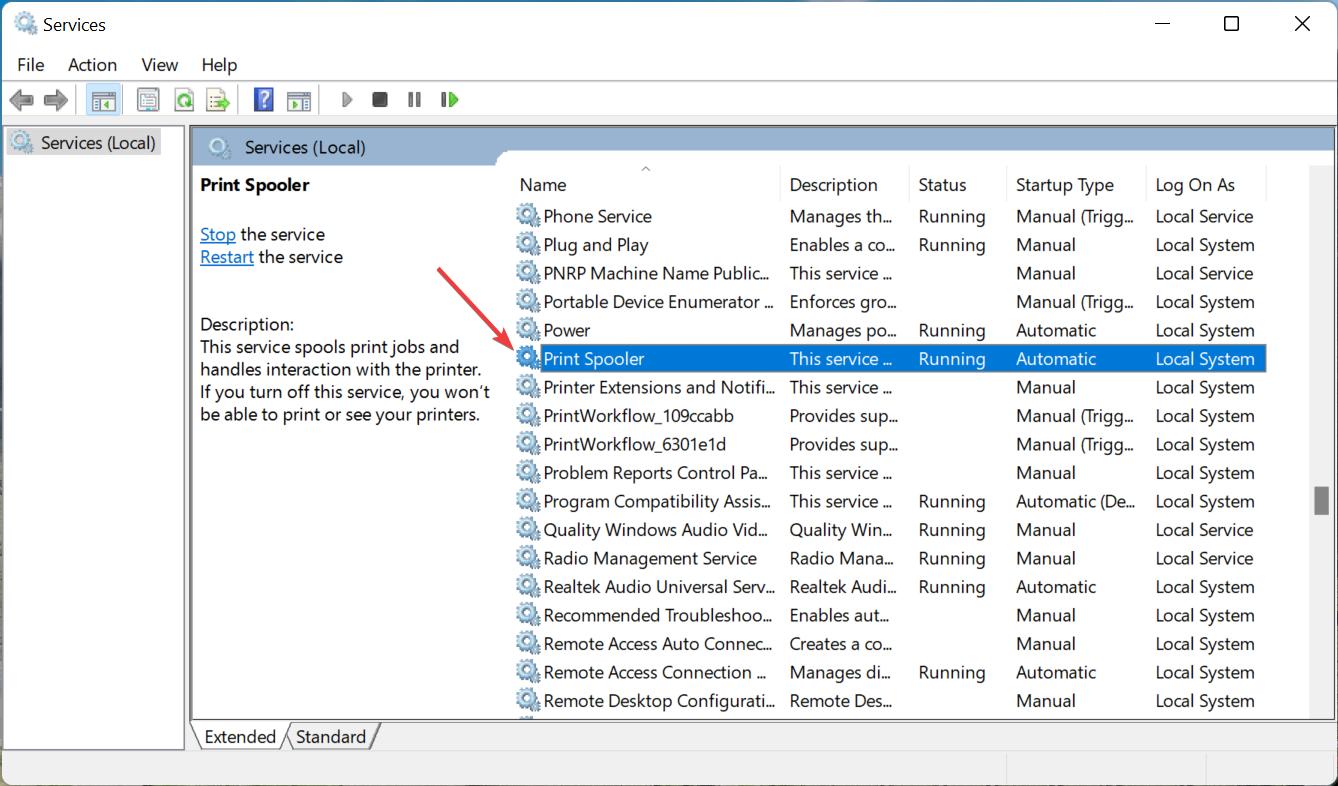
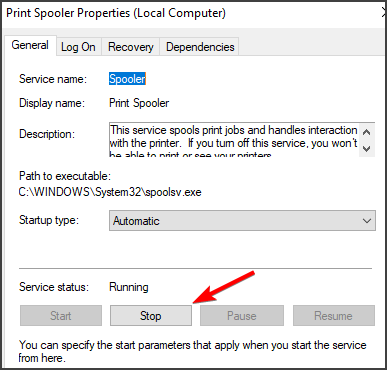
- Double-click Print Spooler to open the properties window for that service.

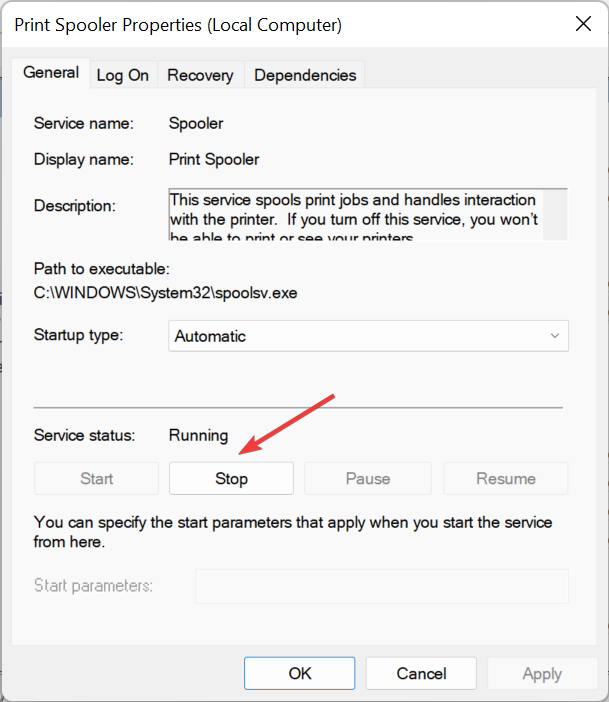
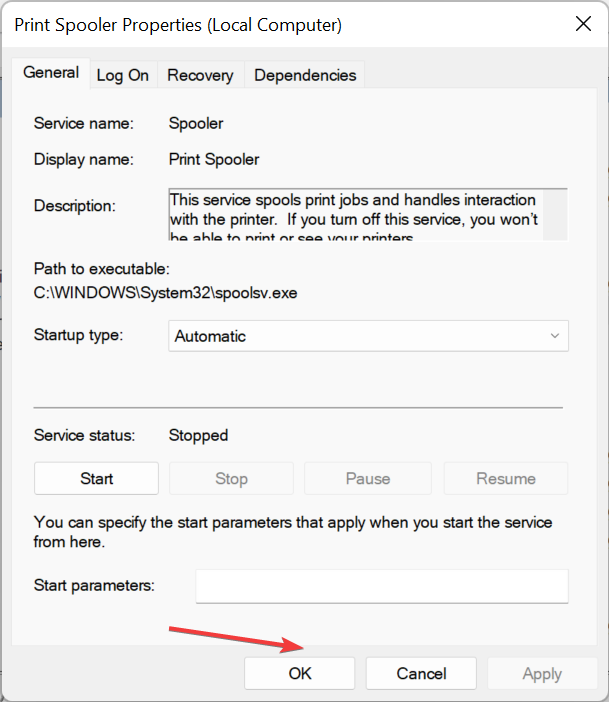
- Click the Stop button under Service status.

- Next, click OK at the bottom to save the changes and close the window.
- Again, press Windows + R to open Run, paste the following path, and click OK:
%WINDIR%\system32\spool\printers - Next, press Ctrl + A to select all the files, and hit the Del key.
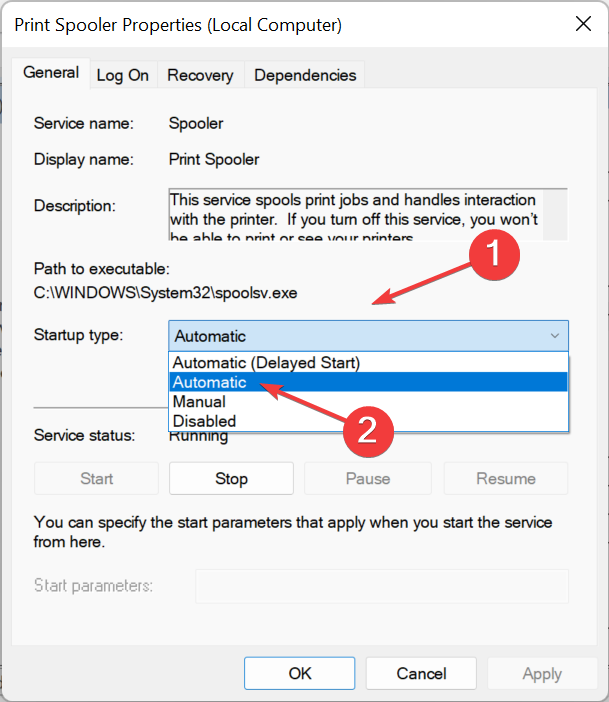
- Now, head back to the Print Spooler Properties window, and click on the Start button to run the service.
- Select the Automatic setting on the Startup type dropdown menu.
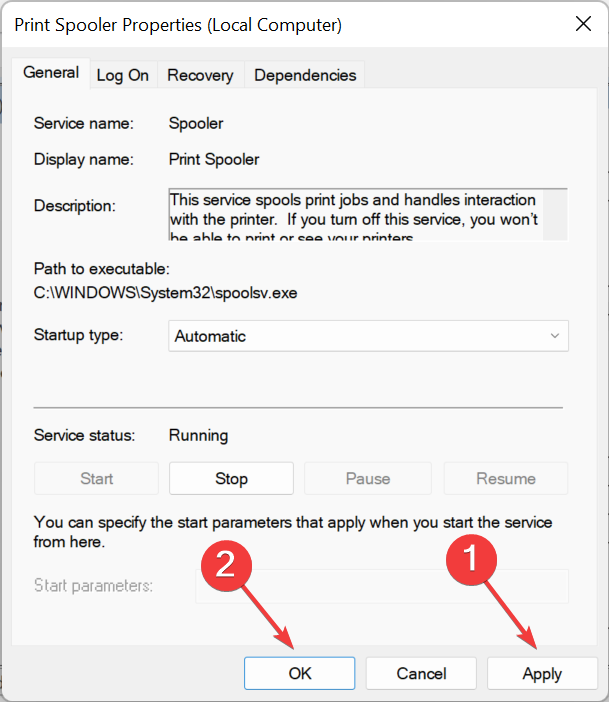
- Don’t forget to click on Apply and OK to save the settings.


This quick fix can fix all problems with printmanagement.msc in Windows 11. If Print Management is still missing in Windows, head to the following method.
- Best printer management software for Windows
- Full Fix: Printer needs user intervention
- Can’t remove the printer in Windows 10/11
- How to fix Print Spooler Service high CPU usage in Windows 10/11
4. Run a system file scan
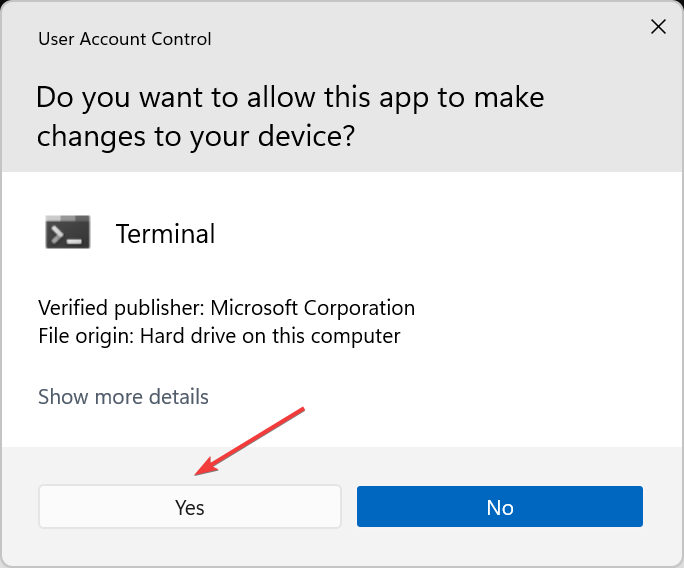
- Press Windows + S to open the Search menu, enter Terminal, right-click on the relevant search result, and select Run as administrator.

- Click Yes in the UAC prompt that appears.

- Press Ctrl + Shift + 2 to open Command Prompt in a new tab.
- First, paste the following command and hit Enter to run the DISM tool:
DISM.exe /Online /Cleanup-image /Restorehealth
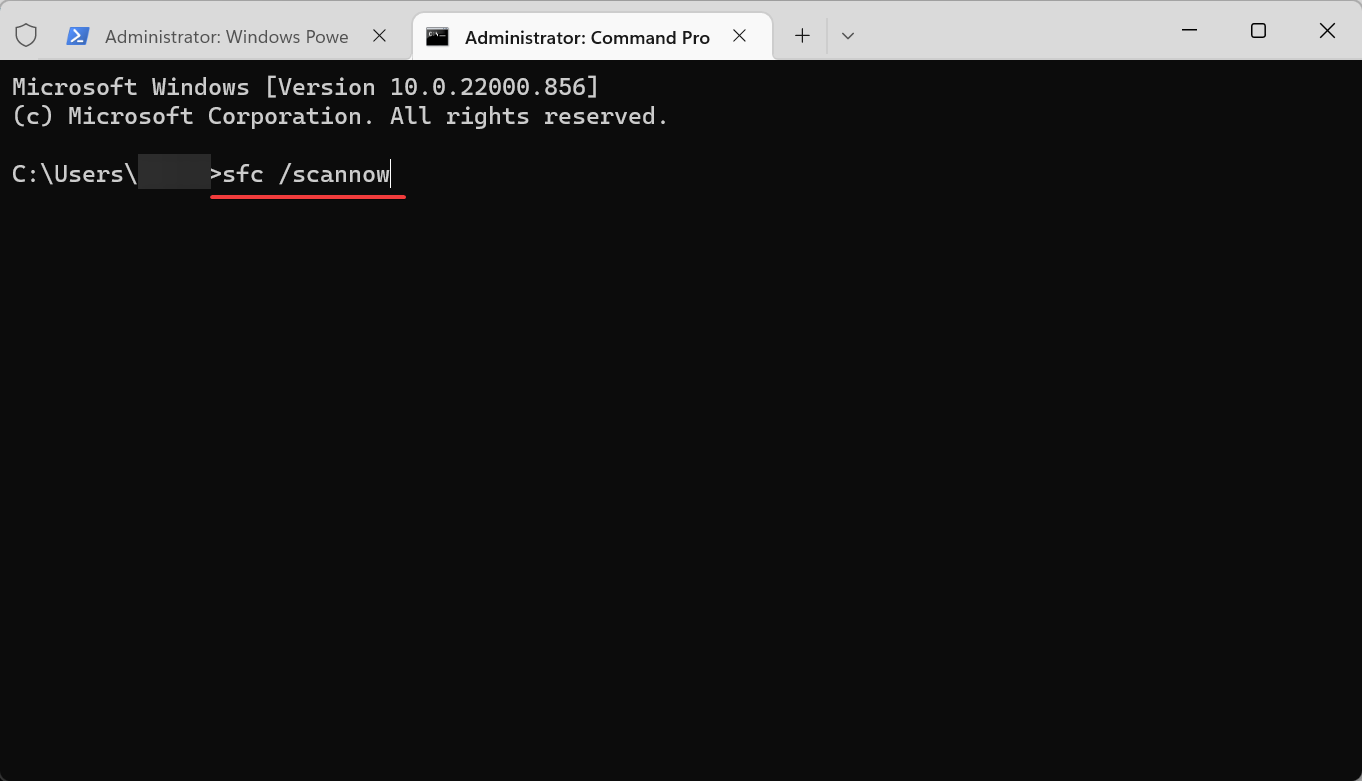
- Once done, execute the following command to run the SFC scan:
sfc/scannow - Wait for the scan to reach 100% verification.
- Then, restart your PC if the scan says Windows Resource Protection repaired corrupt files.

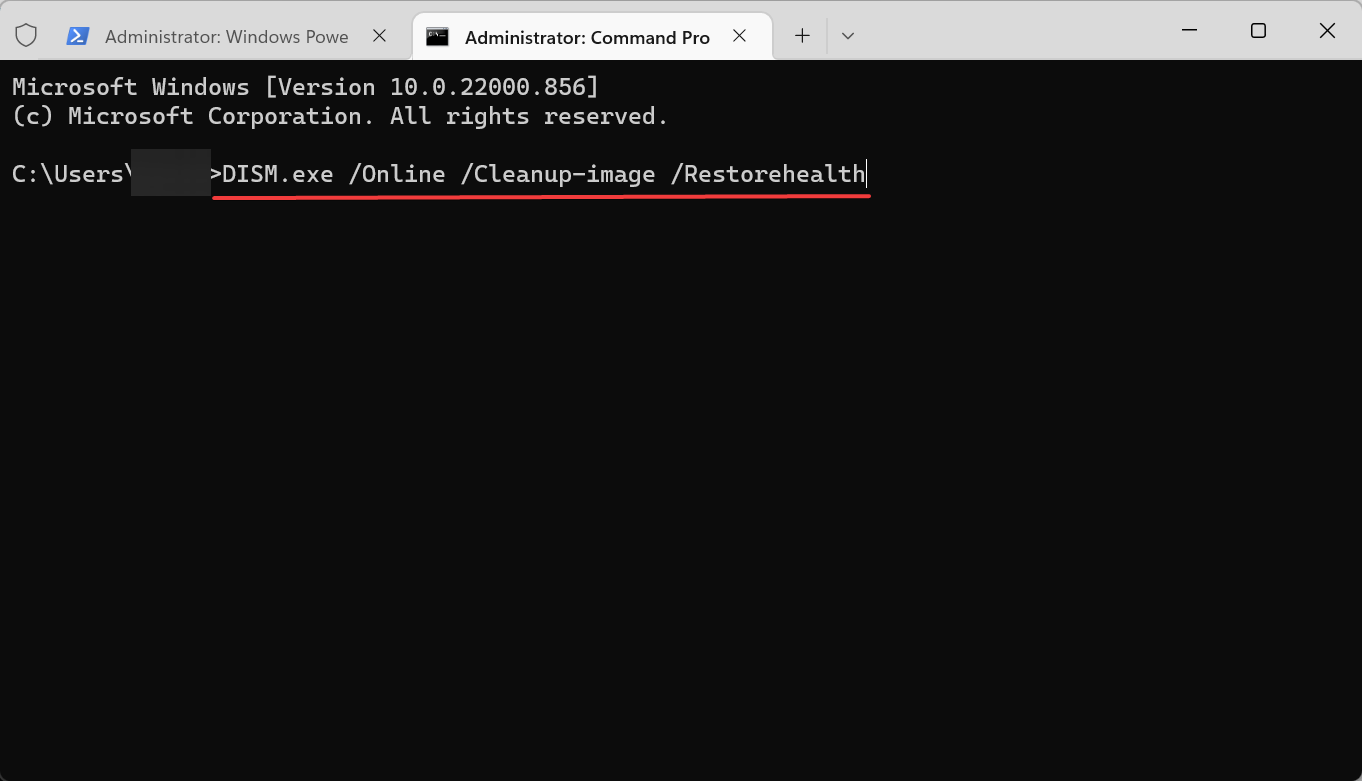
Corruption of system files can cause Print Management to go missing on Windows 10, but you should be able to fix it with the DISM (Deployment Image Servicing and Management) and SFC (System File Checker) scans.
5. Reset or reinstall Windows
If none of the methods listed here have worked, you have no option but to reset Windows to the factory settings. In this case, you will lose all data and installed applications, but it’s one of the most effective troubleshooting methods.
Also, many reported that reinstalling Windows from a USB drive fixed issues with Print Management and made it reappear. In case you run the previous iteration, the Windows 10 reinstall process is very similar.
What can I do if Print Management is missing on Windows 11?
In addition to the methods listed earlier, you can try performing a System Restore if Print Management is missing in Windows 11.
Besides, the problem may arise due to complex or conflicting applications. So look for similar programs or ones known to create conflicts, and uninstall these apps from the device.
Suppose none of the methods listed earlier or the ones here work, and you cannot find the Print Management Console in Optional features. In that case, you are most certainly running the Home edition of Windows 11, in which case upgrading to the Pro or Enterprise edition is the only solution.
Where is Print Manager in Windows 10?
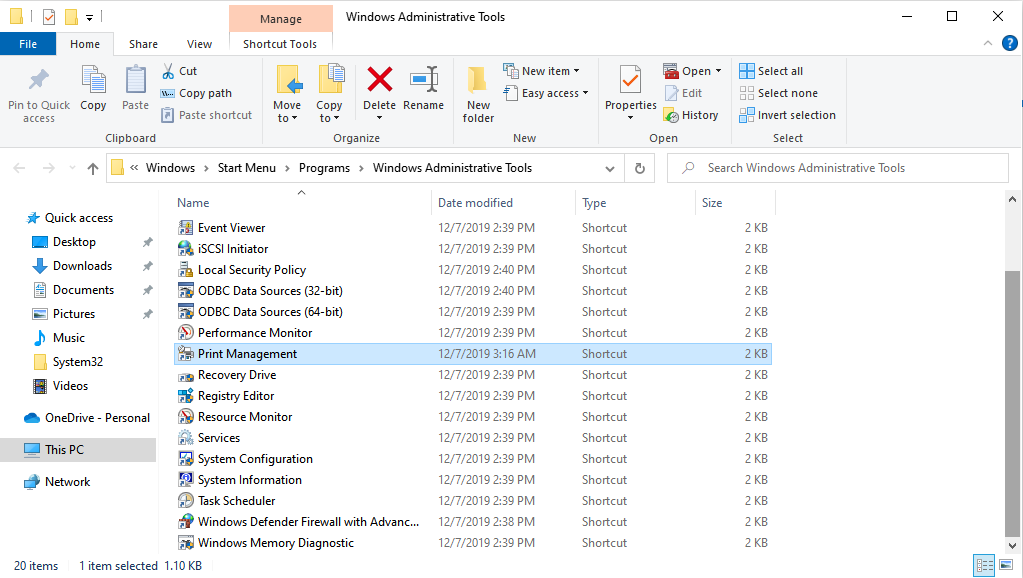
The Print Management Console can be found at the following address in Windows 10: C:\ProgramData\Microsoft\Windows\Start Menu\Programs\Administrative Tools
However, you don’t necessarily need to navigate the path to launch it each time. Instead, simply press Windows + R to open the Run command, paste printmanagement.msc, and hit Enter.
These fixes will likely restore most users’ missing Print Management tools in Windows 10 and 11.
There might be more ways to fix the same issue, and users who have restored a missing Print Management tool with other resolutions are welcome to share their methods in the comment section.
![]()
Содержание
- Способ 1: Службы
- Способ 2: «Командная строка»
- Способ 3: «Конфигурация системы»
- Решение возможных проблем
- Вопросы и ответы
Способ 1: Службы
За управление службами в Windows 10 отвечает специальная утилита, которая так и называется, — «Службы». Чтобы включить «Диспетчер печати», потребуется найти его в списке, после чего открыть свойства и кликнуть по «Запустить», предварительно настроив режим работы.
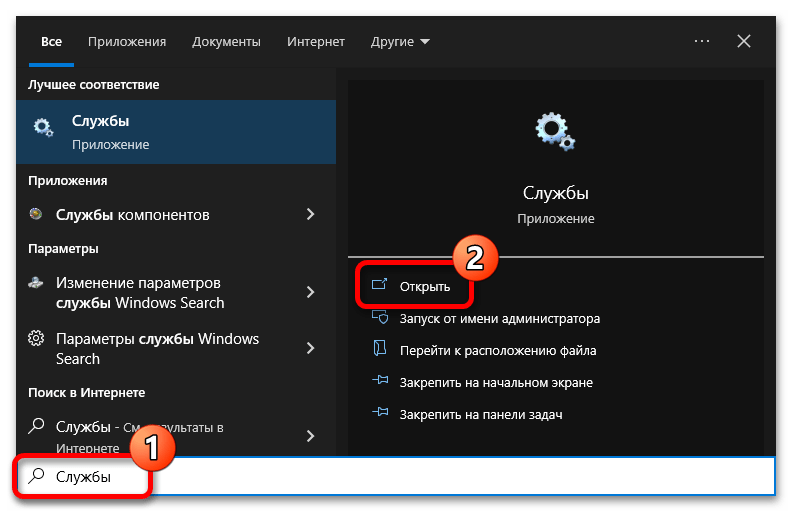
- Откройте утилиту «Службы» любым доступным способом. Например, сделать это можно посредством поискового запроса. Установите курсор в соответствующее поле на панели задач, а затем введите слово «Службы» и кликните по кнопке «Открыть» в результатах.

Читайте также: Как зайти в «Службы» на Windows 10
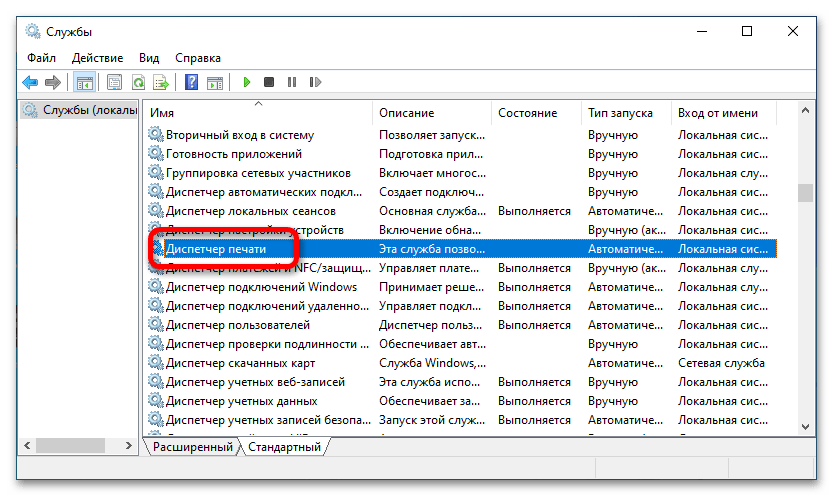
- В появившемся окне найдите службу под названием «Диспетчер печати» и откройте ее свойства, кликнув по названию дважды левой кнопкой мыши.

Обратите внимание! Для удобного поиска рекомендуется в нижней части окна перейти на вкладку «Стандартный» и отсортировать весь список служб по столбцу «Имя». Для этого просто единожды кликните по его заголовку левой кнопкой мыши.
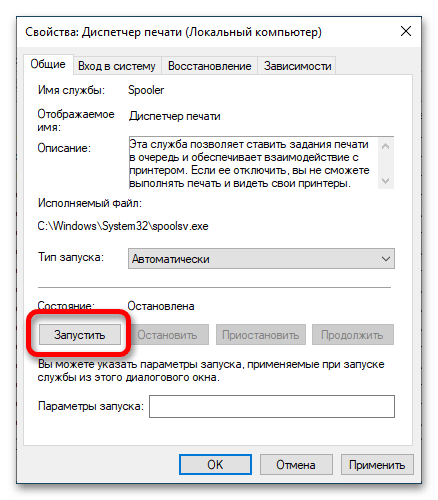
- В свойствах первостепенно измените тип запуска «Диспетчера печати». Для этого раскройте одноименный выпадающий список и выберите значение «Автоматически».
- Активируйте работу службы, щелкнув по «Запустить». Сразу после этого появится дополнительное диалоговое окно, в котором будет отображаться процесс запуска компонента. Дождитесь его завершения.
- Сохраните внесенные изменения и закройте свойства кнопкой «ОК». Сразу после этого служба «Диспетчер печати» будет запущена, и вы сможете пользоваться функцией печати.


Способ 2: «Командная строка»
Включить службу диспетчера печати можно посредством ввода специальной команды в «Командную строку». Чтобы все прошло успешно, ее необходимо будет открыть с повышенными полномочиями. Сделать это можно несколькими способами, проще всего — через системный поиск или «Пуск», где нужно начать набирать запрос «Командная строка» и в результатах кликнуть по пункту «Запуск от имени администратора».

Читайте также: Как запустить «Командную строку» от имени администратора в Windows 10
При появлении окна контроля учетных записей щелкните по «Да», чтобы разрешить запуск консоли с повышенными привилегиями.
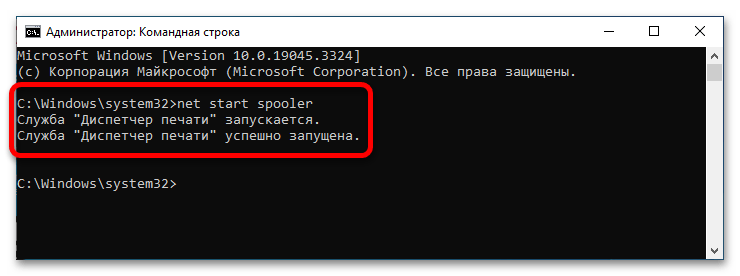
После того как на экране появится «Командная строка», введите представленную ниже команду и нажмите клавишу Enter для ее выполнения. Вы также можете скопировать ее и вставить в консоль, кликнув по полю для ввода правой кнопкой мыши (стандартное сочетание для вставки Ctrl + V в ней не работает).
net start spooler
Способ 3: «Конфигурация системы»
Если после выполнения предыдущих способов служба диспетчера печати у вас не включилась, это свидетельствует о том, что она отключена в специальном меню конфигурации системы. Соответственно, чтобы исправить ситуацию, в нем необходимо выполнить некоторые манипуляции.
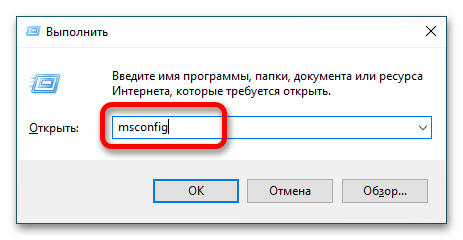
- Откройте меню «Конфигурация системы». Сделать это можно, например, посредством утилиты «Выполнить». Вызовите ее сочетанием клавиш Win + R, а затем впишите в поле «Открыть» команду
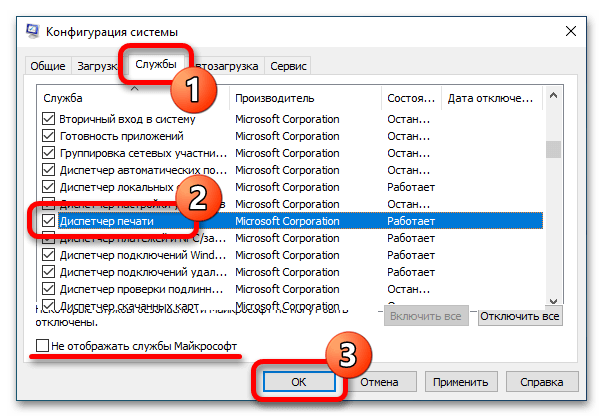
msconfigи нажмите на клавиатуре Enter. - В появившемся окне переключитесь на вкладку «Службы», после чего найдите в списке всех компонентов «Диспетчер печати» и установите напротив него галочку. Если вдруг нужной службы там не оказалось, снимите отметку с пункта «Не отображать службы Майкрософт» и поищите ее снова. В завершение щелкните по «ОК», чтобы сохранить внесенные изменения.
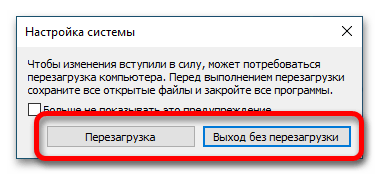
- Для нормальной работы службы требуется перезагрузка операционной системы, поэтому кликните по «Перезагрузка», чтобы выполнить ее немедленно. При необходимости вы можете сделать это самостоятельно позже, в таком случае нажмите по «Выход без перезагрузки».

После того как компьютер будет перезапущен, служба «Диспетчер печати» включится.
Решение возможных проблем
Если ни один из вышеперечисленных методов не помог вам включить службу диспетчера печати, необходимо проверить влияющие на ее работу смежные компоненты операционной системы. Для этого потребуется изменить определенный параметр в системном реестре.
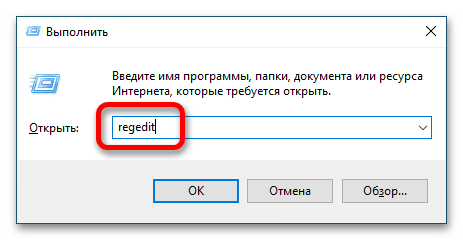
- Откройте «Редактор реестра» любым доступным способом через поиск по названию в «Пуске» или окно «Выполнить» (Win + R), куда впишите команду
regeditи подтвердите ввод на Enter.

Читайте также: Как открыть «Редактор реестра» в Windows 10
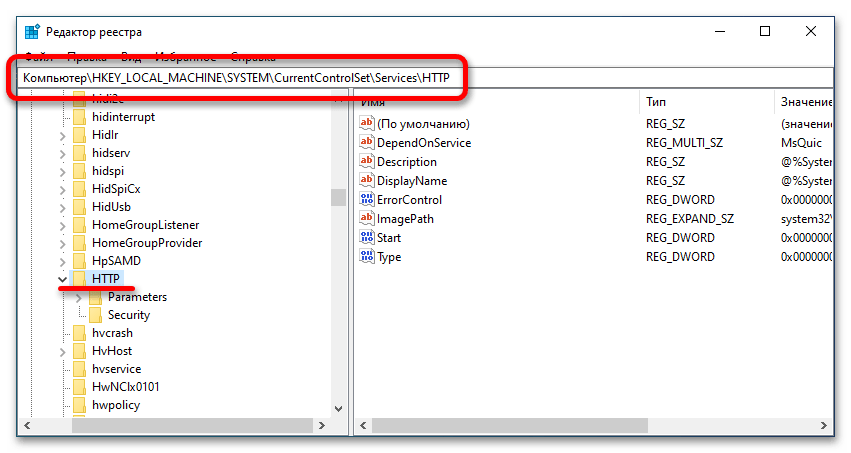
- В «Редакторе реестра» воспользуйтесь навигационной панелью в левой части интерфейса, чтобы проследовать по указанному ниже пути. Также вы можете вставить его в адресную строку, расположенную в верхней части окна, и нажать по клавише Enter. Таким образом осуществится мгновенный переход в целевую директорию.
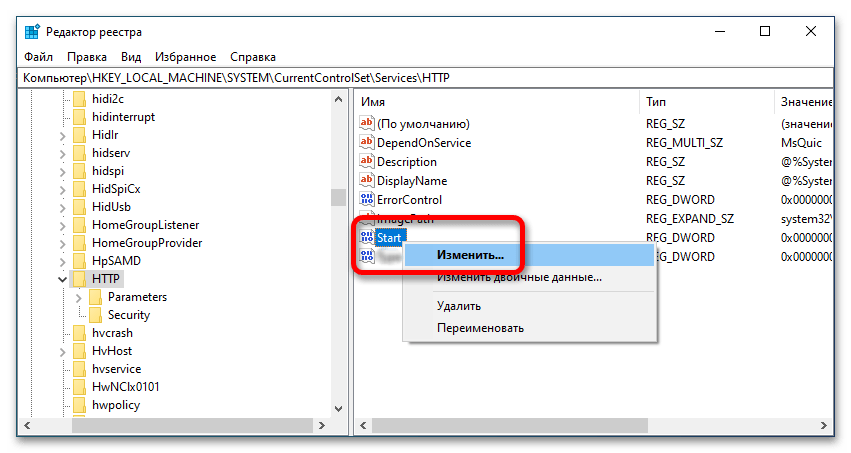
HKEY_LOCAL_MACHINE\SYSTEM\CurrentControlSet\services\HTTP - Находясь в папке «HTTP», найдите параметр под названием «Start» и откройте его свойства. Для этого вызовите контекстное меню правой кнопкой мыши и выберите в нем опцию «Изменить».
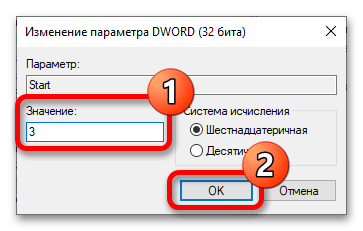
- Впишите в поле «Значение» цифру «3» (без кавычек), а затем щелкните по «ОК», чтобы сохранить изменение.

Важно! После того как все действия из этой инструкции будут выполнены, необходимо закрыть «Редактор реестра» и перезагрузить компьютер. Если даже после этого служба «Диспетчер печати» не включится, попробуйте запустить вручную, воспользовавшись одним из трех способов, описанных в этой статье.
Еще статьи по данной теме:
Помогла ли Вам статья?
В данной статье показаны способы, с помощью которых можно открыть оснастку «Управление печатью» в операционной системе Windows 10.
Управление печатью — оснастка которая позволяет устанавливать, просматривать и управлять локальными принтерами и удаленными серверами печати. С помощью данного инструмента можно просмотреть состояние принтеров, управлять общим доступом к принтеру, а также открыть очередь печати принтера, приостановить печать. Кроме того, при необходимости можно удалить принтер и его драйверы.
Пример папки «Управление печатью» показан на скриншоте ниже.

Содержание
- Как открыть «Управление печатью» в окне «Выполнить»
- Как открыть «Управление печатью» используя «Поиск»
- Как открыть «Управление печатью» используя «Средства администрирования Windows»
Как открыть «Управление печатью» в окне «Выполнить»
Чтобы открыть оснастку «Управление печатью», нажмите сочетание клавиш ![]() + R, в открывшемся окне Выполнить введите (скопируйте и вставьте) printmanagement.msc и нажмите клавишу Enter ↵.
+ R, в открывшемся окне Выполнить введите (скопируйте и вставьте) printmanagement.msc и нажмите клавишу Enter ↵.

Как открыть «Управление печатью» используя «Поиск»
Чтобы открыть оснастку «Управление печатью», используйте «Поиск в Windows», для этого нажмите на значок поиска ![]() в панели задач или нажмите сочетание клавиш
в панели задач или нажмите сочетание клавиш ![]() + S, в строке поиска начните вводить printmanagement и в результатах поиска выберите Управление печатью.
+ S, в строке поиска начните вводить printmanagement и в результатах поиска выберите Управление печатью.

Как открыть «Управление печатью» используя «Средства администрирования Windows»
Откройте «Средства администрирования Windows» любым из способов и в папке «Администрирование» выберите Управление печатью.

.
Используя рассмотренные способы, можно открыть оснастку «Управление печатью» в операционной системе Windows 10.
After installing a Windows 10 Feature update (v2004 or higher) or Windows 11, you may observe that the Print Management MMC console is missing from the system. Print Management is a Microsoft Management Console (MMC) snap-in that lets you install, view, and manage all printers on your local computer or the network. You can add or delete printer driver packages, manage the print queue, and do much more.
This issue can occur in Windows 10/11 Professional or Enterprise edition. Note that the Print Management console is not available on Home editions of Windows. If you’re using Windows Home Edition, this article doesn’t apply to you.
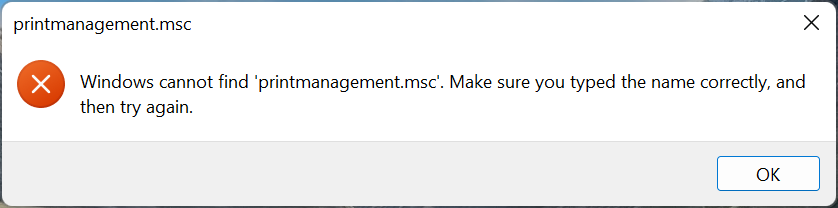
The Print Management shortcut may be missing in the Administrative Tools folder. And, when you attempt to run printmanagement.msc directly, you’ll see the following error:
Windows cannot find 'printmanagement.msc'. Make sure you typed the name correctly, and then try again.
Also, copying the file printmanagement.msc file from another Windows 10 computer and running it would cause the error “couldn’t load the snap-in” since the supporting files are missing from the computer.
Cause
Since Windows 10 v2004, many built-in components have been made into optional features. Microsoft calls this as Feature-on-Demand (FOD). Other programs that were made into optional components are Notepad, Paint, WordPad, etc. This Feature on Demand package includes the Print Management Console, enabling the management of printers, printer drivers, and printer servers.
Feature: Print Management Console

Capability Name: Print.Management.Console~~~~0.0.1.0
Sample package name: Microsoft-Windows-Printing-PMCPPC-FoD-Package~31bf3856ad364e35~amd64~~.cab
Install size: 2.50 MB
Satellites: Yes
Availability: Windows 10, version 2004 and later
It’s straightforward to add or reinstall the optional features (FOD) via the Settings app.
To restore the missing “Print Management” MMC console in Windows 10 or 11, use one of the following methods.
Step 1: Bypass WSUS Server Temporarily
On a computer connected to the domain, the client systems would be configured to use a WSUS server (instead of the public Windows Update server) to install updates. You need to temporarily bypass the WSUS server to install optional features like Print Management Console, RSAT Tools, or .Net Framework.
To bypass the WSUS server for installing features or updates, follow these steps:
- Right-click Start, and click Run
- Type
regedit.exeand click OK - Go to the following registry key:
HKEY_LOCAL_MACHINE\SOFTWARE\Policies\Microsoft\Windows\WindowsUpdate\AU
- On the right pane, if the value named
UseWUServerexists, set its data to0 - Exit the Registry Editor
- Launch
services.mscand restart the Windows Update service.
Important: The above policy setting will be reverted back (set to “1”) by the domain GPO when you restart Windows.
Automate the above, using PowerShell (admin)
Here are the PowerShell commands to automate the following steps:
Set-ItemProperty "REGISTRY::HKLM\Software\Policies\Microsoft\Windows\WindowsUpdate\AU" UseWUserver -value 0
Remove-WindowsCapability –Online -Name Print.Management.Console~~~~0.0.1.0
Get-Service wuauserv | Restart-Service
Add-WindowsCapability –Online -Name Print.Management.Console~~~~0.0.1.0
Set-ItemProperty "REGISTRY::HKLM\Software\Policies\Microsoft\Windows\WindowsUpdate\AU" UseWUserver -value 1
What it does:
- Set “
UseWUServer” registry setting to0. - Remove the Print Management console.
- Restart the Windows Update service
- Install the Print Management console.
- Then, flip “
UseWUServer” back to1.
The above steps prevent the following errors (0x800f081f and 0x800F0954) when installing optional components.
Error: 0x800f081f
The source files could not be found.
Use the "Source" option to specify the location of the files that are required to restore the feature. For more information on specifying a source location, see https://go.microsoft.com/fwlink/?LinkId=243077.
Error: 0x800f0954
DISM failed. No operation was performed.
For more information, review the log file.
If you’re still seeing errors when using DISM or Windows Features, apply the following registry fix and restart the Windows Update service:
Windows Registry Editor Version 5.00

[HKEY_LOCAL_MACHINE\SOFTWARE\Policies\Microsoft\Windows\WindowsUpdate\AU]
"UseWUServer"=dword:00000000

[HKEY_LOCAL_MACHINE\SOFTWARE\Microsoft\Windows\CurrentVersion\Policies\Servicing]
"RepairContentServerSource"=-

[HKEY_LOCAL_MACHINE\SOFTWARE\Policies\Microsoft\Windows\WindowsUpdate]
"DoNotConnectToWindowsUpdateInternetLocations"=-

[HKEY_LOCAL_MACHINE\SOFTWARE\Microsoft\Windows\CurrentVersion\Policies\Servicing]
"LocalSourcePath"=-

[HKEY_LOCAL_MACHINE\SOFTWARE\Microsoft\Windows\CurrentVersion\Policies\Servicing]
"UseWindowsUpdate"=-
Step 2: Install “Print Management Console”
Now, attempt to install the Print Management console using one of these options.
Option 1: Using Windows Features in Settings
- Click Start, Settings, Apps, and click Optional features
- In the Optional Features page, locate Print Management Console from the list. If the list is too lengthy, you can search using the search bar at the top of the page.
- Select Print Management Console, and click Uninstall.

(Note: If “Print Management Console” is missing from the list, then continue from Step 4.)
- Once Print Management Console is uninstalled, click on the Add a feature button at the top of the Optional Features page.
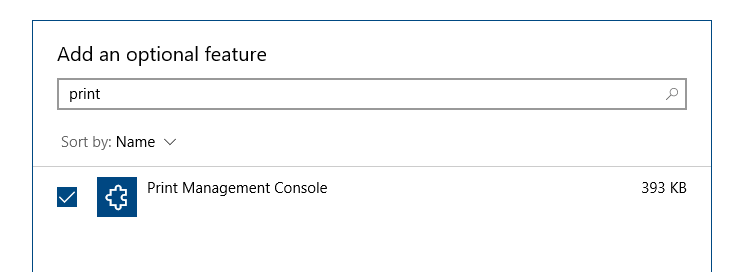
- Type
printin the search bar. Select the Print Management Console checkbox from the list, and click on the Install button.

This procedure reinstalls Print Management.
If “Print Management Console” is not on the list of available features or you prefer a command-line method to install the component, read on.
Option 2: Uninstall & Reinstall Print Management using DISM
Alternatively, you can use the DISM command-line to uninstall and then reinstall Print Management Console.
Open an admin Command Prompt and then run the following commands:
dism /Online /Remove-Capability /CapabilityName:Print.Management.Console~~~~0.0.1.0

dism /Online /add-Capability /CapabilityName:Print.Management.Console~~~~0.0.1.0
(You must run the uninstall command first. Please don’t skip it. Else, the reinstall won’t be clean.)
Note that the above reinstall procedure requires internet connectivity, as the system downloads the package via Windows Update. Running the above commands on an offline system would cause the DISM error 0x8024402c.
Optionally, to verify if the package has been installed correctly, run one of these commands:
dism /Online /get-capabilityinfo /capabilityname:Print.Management.Console~~~~0.0.1.0

(or)

dism /Online /get-capabilities
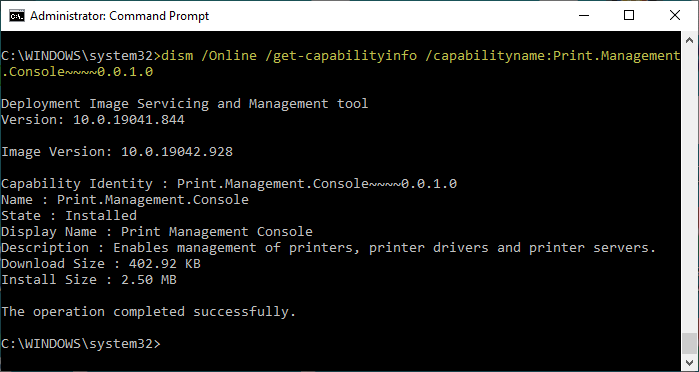
The State field should say Installed.
Capability Identity : Print.Management.Console~~~~0.0.1.0
Name : Print.Management.Console
State : Installed
Display Name : Print Management Console
Description : Enables management of printers, printer drivers and printer servers.
Download Size : 402.92 KB
Install Size : 2.50 MB
Here are some of the files (related to Print Management) that get installed.
C:\ProgramData\Microsoft\Windows\Start Menu\Programs\Administrative Tools\Print Management.lnk
C:\Windows\System32\pmcsnap.dll
C:\Windows\System32\ppcsnap.dll
C:\Windows\System32\printmanagement.msc
C:\Windows\System32\en-US\pmcsnap.dll.mui
C:\Windows\System32\en-US\ppcsnap.dll.mui
C:\Windows\System32\en-US\printmanagement.msc
C:\Windows\servicing\Packages\Microsoft-Windows-Printing-PMCPPC-FoD-Package~31bf3856ad364e35~amd64~~10.0.19041.1.cat
C:\Windows\servicing\Packages\Microsoft-Windows-Printing-PMCPPC-FoD-Package~31bf3856ad364e35~amd64~~10.0.19041.1.mum
C:\Windows\servicing\Packages\Microsoft-Windows-Printing-PMCPPC-FoD-Package~31bf3856ad364e35~amd64~en-GB~10.0.19041.1.cat
C:\Windows\servicing\Packages\Microsoft-Windows-Printing-PMCPPC-FoD-Package~31bf3856ad364e35~amd64~en-GB~10.0.19041.1.mum
C:\Windows\servicing\Packages\Microsoft-Windows-Printing-PMCPPC-FoD-Package~31bf3856ad364e35~amd64~en-US~10.0.19041.1.cat
C:\Windows\servicing\Packages\Microsoft-Windows-Printing-PMCPPC-FoD-Package~31bf3856ad364e35~amd64~en-US~10.0.19041.1.mum
I hope you were able to get back the Print Management console feature in Windows 10.
One small request: If you liked this post, please share this?
One «tiny» share from you would seriously help a lot with the growth of this blog.
Some great suggestions:
- Pin it!
- Share it to your favorite blog + Facebook, Reddit
- Tweet it!
So thank you so much for your support. It won’t take more than 10 seconds of your time. The share buttons are right below. 
- Управление печатью в Windows 10 может отсутствовать по разным причинам, и сегодня мы покажем вам, как это исправить.
- Обновление драйверов с помощью специализированного программного обеспечения — самый быстрый способ решить эту проблему.
- Удаление файлов для определенных служб принтера также может помочь в решении проблем с печатью на вашем компьютере.
- Когда printmanagement.msc в Windows 10 Pro отсутствует, вы сможете исправить его с помощью встроенных системных инструментов.
Для решения различных проблем с ПК мы рекомендуем Restoro PC Repair Tool:Это программное обеспечение исправит распространенные компьютерные ошибки, защитит вас от потери файлов, вредоносных программ, сбоев оборудования и оптимизирует ваш компьютер для максимальной производительности. Исправьте проблемы с ПК и удалите вирусы прямо сейчас, выполнив 3 простых шага:
- Скачать Restoro PC Repair Tool который поставляется с запатентованными технологиями (патент доступен здесь).
- Нажмите Начать сканирование чтобы найти проблемы с Windows, которые могут вызывать проблемы с ПК.
- Нажмите Починить все для устранения проблем, влияющих на безопасность и производительность вашего компьютера
- Restoro был загружен 0 читатели в этом месяце.
В выпусках Windows 10 Pro и Enterprise есть утилита управления печатью. Однако некоторые пользователи заявили на форуме Microsoft, что их инструменты управления печатью отсутствуют.
Эти пользователи не могут найти Управление печатью в Администрировании и открыть эту утилиту. Один пользователь сообщение на форуме сказал это:
Я только что обновил Windows 10 Домашняя до Windows 10 Pro и нигде не могу найти Управление печатью. Также недоступен printmanagement.msc. Я подозреваю, что другие утилиты администрирования Windows 10 Pro также отсутствуют.
Как я могу исправить отсутствующую утилиту управления печатью?
1. Обновите драйвер принтера
Обновление драйвера принтера может помочь исправить широкий спектр проблемы, связанные с принтером. Вы можете проверить, нужно ли обновить драйвер вашего принтера с помощью программы обновления драйверов.
Программа обновления драйверов выведет список всех устройств вашего ПК с устаревшими драйверами и позволит вам быстро загрузить и установить обновления.
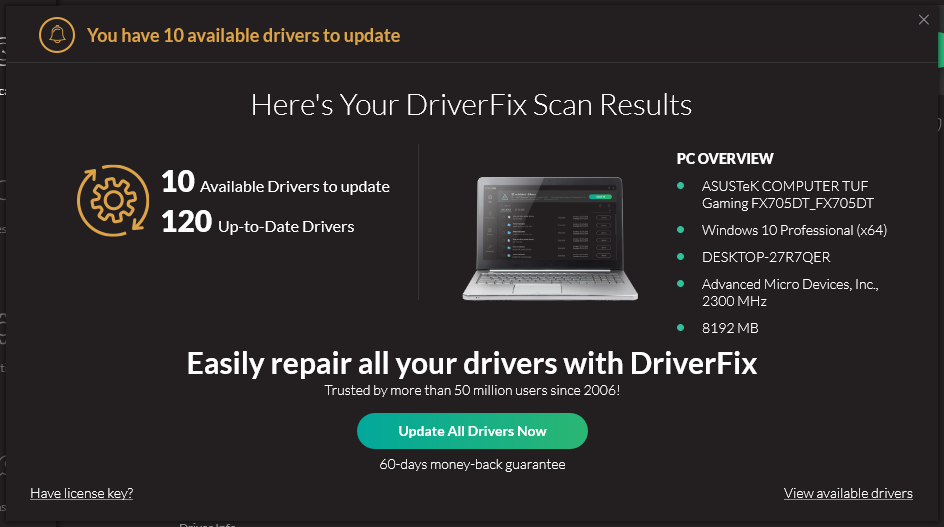 Драйверы необходимы для вашего ПК и всех программ, которые вы используете ежедневно. Если вы хотите избежать сбоев, зависаний, ошибок, задержек или любых других проблем, вам нужно будет постоянно обновлять их.Постоянная проверка обновлений драйверов отнимает много времени. К счастью, вы можете использовать автоматизированное решение, которое безопасно проверяет наличие новых обновлений и с легкостью их применяет, поэтому мы настоятельно рекомендуем DriverFix.Выполните следующие простые шаги, чтобы безопасно обновить драйверы:
- Скачайте и установите DriverFix.
- Запустите приложение.
- Подождите, пока DriverFix обнаружит все неисправные драйверы.
- Теперь программа покажет вам все драйверы, у которых есть проблемы, и вам просто нужно выбрать те, которые вы хотели исправить.
- Подождите, пока DriverFix загрузит и установит новейшие драйверы.
- Запустить снова ваш компьютер, чтобы изменения вступили в силу.

DriverFix
Драйверы больше не будут создавать никаких проблем, если вы загрузите и используете это мощное программное обеспечение сегодня.
Бесплатная пробная версия
Посетить вебсайт
Заявление об отказе от ответственности: эту программу необходимо обновить с бесплатной версии для выполнения некоторых конкретных действий.
2. Добавьте инструмент управления печатью в Windows 10 версии 2004
- Сначала нажмите сочетание клавиш Windows + S, чтобы открыть инструмент поиска.
- Введите ключевое слово Особенности в текстовом поле Введите здесь для поиска.
- Нажмите Добавить дополнительную функцию, чтобы открыть окно, показанное непосредственно ниже.
- Щелкните значок Добавлять функциональная кнопка.
- Тип управление печатью в дополнительном поле поиска функции.
- Выберите утилиту управления печатью и щелкните значок Установить кнопка.

Это простой метод, который может помочь, если Управление печатью отсутствует. Это решение также может помочь, если вы получаете ошибка программы печати в фотошопе так что обязательно попробуйте.
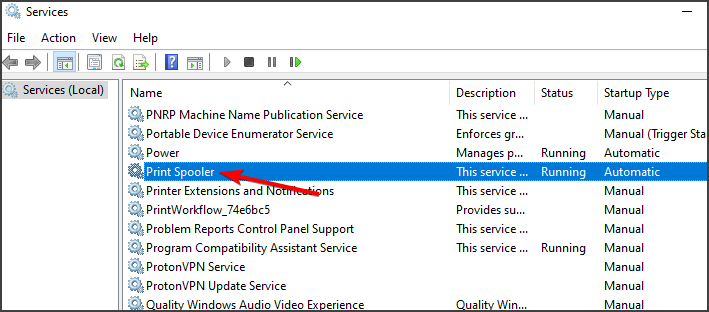
3. Очистите диспетчер очереди печати
- Нажмите сочетание клавиш Windows + R.
- Затем введите эту команду в поле «Выполнить» и нажмите «Открыть». ОК:
services.msc
- Двойной клик Диспетчер очереди печати, чтобы открыть окно свойств для этой службы.
- Щелкните значок Стоп в окне свойств диспетчера очереди печати.
- Затем нажмите кнопку Применять кнопку, чтобы сохранить настройку. Нажмите ОК, чтобы закрыть окно свойств диспетчера очереди печати.
- Снова откройте окно «Выполнить».
- Введите эту команду в Run и нажмите Enter:
% WINDIR% \ system32 \ spool \ printers - Нажмите комбинацию клавиш Ctrl + A, чтобы выбрать все содержимое в открывшейся папке.
- Нажмите Удалить на Дом вкладка, чтобы стереть все выбранные файлы.
- Вернитесь в окно свойств диспетчера очереди печати.
- Нажмите Начинать для реактивации службы.
- Выберите Автоматический установка на Тип запуска выпадающее меню.
- Не забудьте выбрать Применять возможность сохранить настройки.
- Затем нажмите ОК закрыть окно.


Запустите сканирование системы, чтобы обнаружить потенциальные ошибки

Скачать Restoro
Инструмент для ремонта ПК

Нажмите Начать сканирование чтобы найти проблемы с Windows.

Нажмите Починить все для устранения проблем с запатентованными технологиями.
Запустите сканирование ПК с помощью Restoro Repair Tool, чтобы найти ошибки, вызывающие проблемы с безопасностью и замедление. После завершения сканирования в процессе восстановления поврежденные файлы заменяются новыми файлами и компонентами Windows.
Это быстрое решение, которое может решить все проблемы с печатью, и оно может даже помочь, если Firefox печатает пустые страницы.
4. Запустите сканирование системных файлов
- Сначала откройте окно поиска Windows 10.
- Вход cmd в поле поиска.
- Щелкните значок Запустить от имени администратора вариант для результата поиска в командной строке.
- Перед запуском сканирования системных файлов введите эту команду и нажмите Enter:
DISM.exe / Online / Cleanup-image / Restorehealth - После этого введите эту команду и нажмите ОК чтобы запустить сканирование системных файлов:
sfc / scannow
- Подождите, пока сканирование достигнет 100% проверки.
- Перезагрузите компьютер, если в результате сканирования указано, что Windows Resource Protection восстановила поврежденные файлы.


Повреждение системных файлов может привести к отсутствию управления печатью в Windows 10, но вы сможете исправить это, выполнив следующие действия.
5. Сбросить или переустановить Windows 10
- Запустите Настройки с помощью горячей клавиши Windows + I.
- Выбирать Обновление и безопасность, чтобы открыть параметры для Центра обновления Windows.
- Затем нажмите кнопку Восстановление вкладка на скриншоте ниже.
- Нажмите Начать, чтобы открыть инструмент «Сбросить этот компьютер».
- Выберите Храните мои файлы вариант.
- нажмите Следующий кнопку и щелкните Сброс настроек подтвердить.


Примечание: Некоторые пользователи подтвердили, что они исправили отсутствующий инструмент printmanagement.msc, переустановив Windows 10 с USB-накопителя.
Наш Как переустановить Windows 10 руководство предоставляет дополнительные сведения о том, как переустановить платформу с помощью USB-флэш-драйверов.
Эти исправления, вероятно, восстановят отсутствующий инструмент управления печатью в Windows 10 для большинства пользователей.
Однако может быть больше способов исправить ту же проблему; и пользователи, которые восстановили отсутствующий инструмент управления печатью с другими разрешениями, могут поделиться своими методами в разделе комментариев.
 По-прежнему возникают проблемы?Исправьте их с помощью этого инструмента:
- Загрузите этот инструмент для ремонта ПК получил рейтинг «Отлично» на TrustPilot.com (загрузка начинается на этой странице).
- Нажмите Начать сканирование чтобы найти проблемы с Windows, которые могут вызывать проблемы с ПК.
- Нажмите Починить все исправить проблемы с запатентованными технологиями (Эксклюзивная скидка для наших читателей).
Restoro был загружен 0 читатели в этом месяце.