В этой статье я постарался собрать в одном месте основные команды cmd и PowerShell, которые полезны при настройке и управлении Windows Server Core. Думаю, этот гайд будет полезен как новичкам, так и опытным системным администраторам, как справочник по базовым командам Server Core.
Содержание:
- Настройка Windows Server Core с помощью SCONFIG
- Основные команды PowerShell для настройки Server Core
- Установка обновлений в Server Core
- Часто используемые команды в Server Core
Напомним, что Server Core это особый режим установки Windows Server без большинства графических инструментов и оболочек. Управление таким сервером выполняется из командной строки или удаленно.
Преимущества Windows Serve Core:
- Меньшие требования к ресурсам;
- Повышенная стабильность, безопасность, требует установки меньшего количества обновлений (за счет меньшего количества кода и используемых компонентов);
- Идеально подходит для использования в качестве сервера для инфраструктурных ролей (контроллер домена Active Directory, DHCP сервер, Hyper-V сервер, файловый сервер и т.д.).
Server Core лицензируется как обычный физический или виртуальный экземпляр Windows Server (в отличии от Hyper-V Server, который полностью бесплатен).
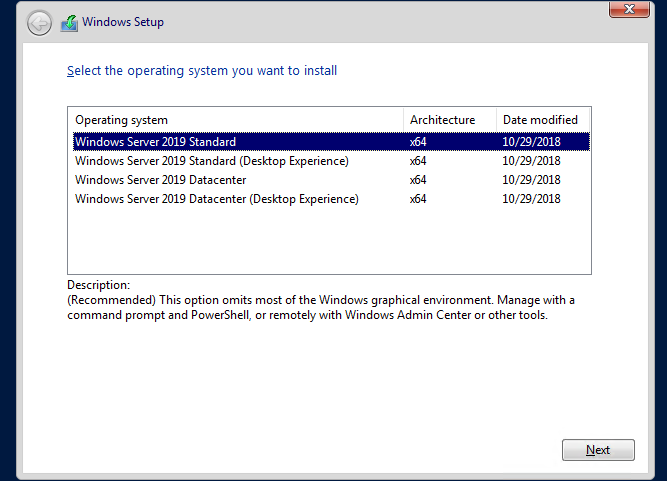
Для установки Windows Server 2016/2019 в режиме Core нужно выбрать обычную установку. Если вы выберите Windows Server (Desktop Experience), будет установлен GUI версия операционной системы (в предыдущих версиях Windows Server она называлась Server with a GUI).
После установки Windows Server Core перед вами появляется командная строка, где нужно задать пароль локального администратора.
При входе на Server Core открывается командная строка (cmd.exe). Чтобы вместо командной строки у вас всегда открывалась консоль PowerShell.exe, нужно внести изменения в реестр. Выполните команды:
Powershell.exe
Set-ItemProperty -Path 'HKLM:\Software\Microsoft\Windows NT\CurrentVersion\WinLogon' -Name Shell -Value 'PowerShell.exe'
И перезагрузите сервер:
Restart-Computer -Force
Если вы случайно закрыли окно командной строки, нажмите сочетание клавиш Ctrl+Alt+Delete, запустите Task Manager -> File -> Run -> выполните
cmd.exe
(или
PowerShell.exe
).
Настройка Windows Server Core с помощью SCONFIG
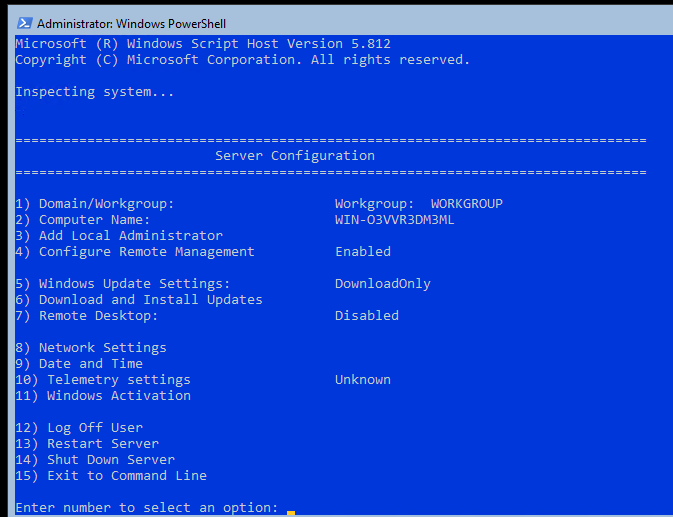
Для базовой настройки Server Core можно использовать встроенный скрипт sconfig. Просто выполните команду sconfig в консоли. Перед вами появиться меню с несколькими пунктами:
С помощью меню Server Configuration можно настроить:
- Добавить компьютер в домен или рабочую группу;
- Изменить имя компьютера (hostname);
- Добавить локального администратора;
- Разрешить/запретить удаленное управления и ответы на icmp;
- Настроить параметры обновления через Windows Update;
- Установить обновления Windows;
- Включить/отключить RDP;
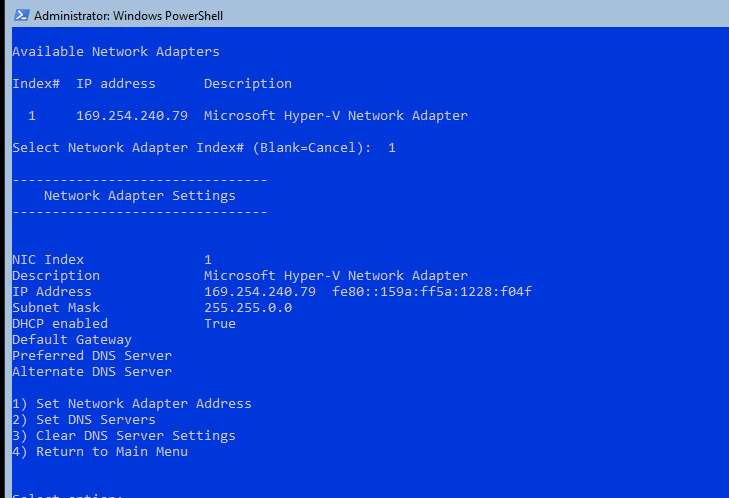
- Настроить параметры сетевых адаптеров (IP адрес, шлюз, DNS сервера);
- Настроить дату и время;
- Изменить параметры телеметрии;
- Выполнить logoff, перезагрузить или выключить сервер.
Все пункт в меню
sconfig
пронумерованы. Чтобы перейти в определенное меню наберите его номер и Enter.
В некоторых пунктах меню настройки sconfig есть вложенные пункты. Там также, чтобы перейти к определенной настройке, нужно сделать выбор цифры пункта меню.
Не будем подробно рассматривать все пункты настройки sconfig, т.к. там все достаточно просто и очевидно. Однако в большинстве случаев администраторы предпочитают использовать для настройки новых хостов с Server Core различные PowerShell скрипты. Это намного проще и быстрее, особенно при массовых развёртываниях.
Основные команды PowerShell для настройки Server Core
Рассмотрим основные команды PowerShell, которые можно использовать для настройки Server Core.
Узнать информацию о версии Windows Server и версии PowerShell:
Get-ComputerInfo | select WindowsProductName, WindowsVersion, OsHardwareAbstractionLayer
$PSVersionTable
Для перезагрузки Server Core нужно выполнить команду PowerShell :
Restart-Computer
Чтобы выполнить выход из консоли Server Core, наберите:
logoff
Настройка параметров сети
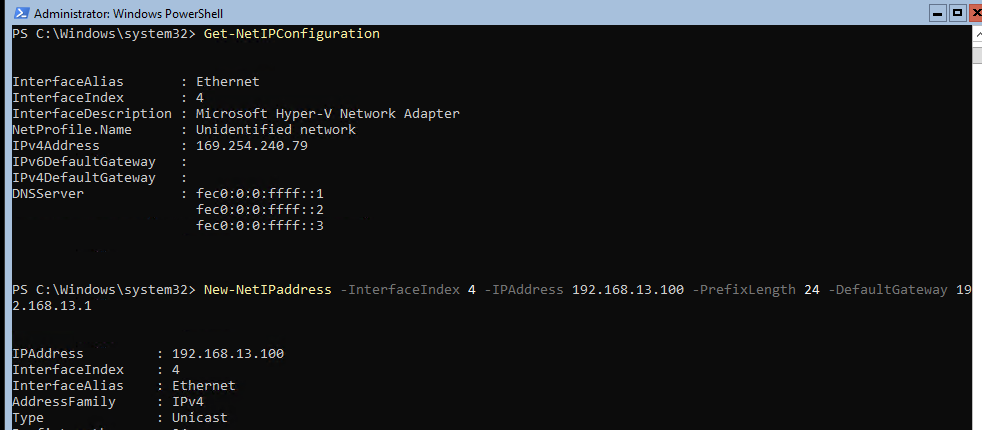
Теперь нужно из PowerShell нужно настроить параметры сети (по умолчанию Windows настроена на получение адреса от DHCP). Выведите список сетевых подключений:
Get-NetIPConfiguration
Теперь укажите индекс интерфейса сетевого адаптера (InterfaceIndex), который нужно изменить и задайте новый IP адрес:
New-NetIPaddress -InterfaceIndex 4 -IPAddress 192.168.13.100 -PrefixLength 24 -DefaultGateway 192.168.13.1
Set-DNSClientServerAddress –InterfaceIndex 4 -ServerAddresses 192.168.13.11,192.168.13.
111
Проверьте текущие настройки:
Get-NetIPConfiguration
Если нужно сбросить IP адрес и вернуться к получению адреса от DHCP, выполните:
Set-DnsClientServerAddress –InterfaceIndex 4 –ResetServerAddresses
Set-NetIPInterface –InterfaceIndex 4 -Dhcp Enabled
Включить/отключить сетевой адаптер:
Disable-NetAdapter -Name “Ethernet0”
Enable-NetAdapter -Name “Ethernet 0”
Включить, отключить, проверить статус поддержки IPv6 для сетевого адаптера:
Disable-NetAdapterBinding -Name "Ethernet0" -ComponentID ms_tcpip6
Enable-NetAdapterBinding -Name "Ethernet0" -ComponentID ms_tcpip6
Get-NetAdapterBinding -ComponentID ms_tcpip6
Настроить winhttp прокси сервер для PowerShell и системных подключений:
netsh Winhttp set proxy <servername>:<port number>
Настройка времени/даты
Вы можете настроить дату, время, часовой пояс с помощью графической утилиты
intl.cpl
или с помощью PowerShell:
Set-Date -Date "09/03/2022 09:00"
Set-TimeZone "Russia Time Zone 3
Задать имя компьютера, добавить в домен, активация
Чтобы изменить имя компьютера:
Rename-Computer -NewName win-srv01 -PassThru
Добавить сервер в домен Active Directory:
Add-Computer -DomainName "corp.winitpro.ru " -Restart
Если нужно добавить дополнительных пользователей в администраторы, можно настроить групповую политику или добавить вручную:
Add-LocalGroupMember -Group "Administrators" -Member "corp\anovikov"
Для активации Windows Server нужно указать ваш ключ:
slmgr.vbs –ipk <productkey>
slmgr.vbs –ato
Или можно активировать хост на KMS сервере (например, для Windows Server 2019):
slmgr /ipk N69G4-B89J2-4G8F4-WWYCC-J464C
slmgr /skms kms-server.winitpro.ru:1688
slmgr /ato
Разрешить удаленный доступ
Разрешить удаленный доступ к Server Core через RDP:
cscript C:\Windows\System32\Scregedit.wsf /ar 0
Разрешить удаленное управление:
Configure-SMRemoting.exe –Enable
Enable-NetFirewallRule -DisplayGroup “Windows Remote Management”
Текущие настройки:
Configure-SMRemoting.exe -Get
Разрешить Win-Rm PowerShell Remoting:
Enable-PSRemoting –force
Сервером с Windows Server можно управлять удаленно c другого сервера (с помощью ServerManager.exe), через браузер с помощью Windows Admin Center (WAC), с любой рабочей станции с помощью инструментов администрирования RSAT, подключаться к нему по RDP, PowerShell Remoting или SSH (в современных версиях Windows есть встроенный SSH сервер).
Настройка Windows Firewall
Информация о настройке Windows Firewall есть в статье по ссылке. Здесь оставлю несколько базовых команд.
Включить Windows Defender Firewall для всех профилей:
Set-NetFirewallProfile -Profile Domain,Public,Private -Enabled True
Изменить тип сети с Public на Private:
Get-NetConnectionProfile | Set-NetConnectionProfile -NetworkCategory Private
Полностью отключить Windows Firewall (не рекомендуется):
Get-NetFirewallProfile | Set-NetFirewallProfile -enabled false
Разрешить подключение через инструменты удаленного управления:
Enable-NetFireWallRule -DisplayName “Windows Management Instrumentation (DCOM-In)”
Enable-NetFireWallRule -DisplayGroup “Remote Event Log Management”
Enable-NetFireWallRule -DisplayGroup “Remote Service Management”
Enable-NetFireWallRule -DisplayGroup “Remote Volume Management”
Enable-NetFireWallRule -DisplayGroup “Remote Scheduled Tasks Management”
Enable-NetFireWallRule -DisplayGroup “Windows Firewall Remote Management”
Enable-NetFirewallRule -DisplayGroup "Remote Administration"
Установка обновлений в Server Core
Для управления параметрами обновлений предпочтительно использовать групповые политики Windows Update, но можно задать параметры и вручную.
Отключить автоматическое обновление:
Set-ItemProperty -Path HKLM:\Software\Policies\Microsoft\Windows\WindowsUpdate\AU -Name AUOptions -Value 1
Автоматически скачивать доступные обновления:
Set-ItemProperty -Path HKLM:\Software\Policies\Microsoft\Windows\WindowsUpdate\AU -Name AUOptions -Value 3
Получить список установленных обновлений:
Get-Hotfix
Или
wmic qfe list
Для ручной установки обновлений Windows можно использовать утилиту wusa:
Wusa update_name.msu /quiet
Также для установки и управления обновлениями из командной строки удобно использовать PowerShell модуль PSWindowsUpdate.
Управление ролями, службами и процессами Windows
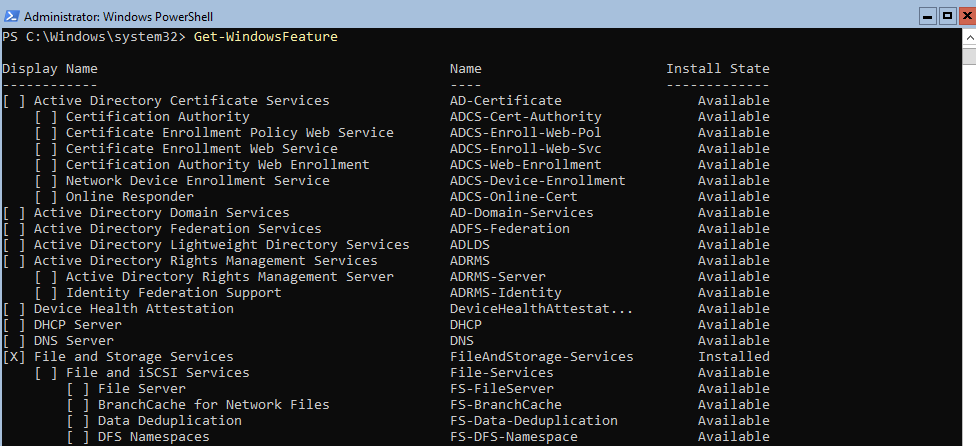
Для получения списка всех доступных ролей в Windows Server Core выполните команду PowerShell:
Get-WindowsFeature
Получить список всех установленных ролей и компонентов в Windows Server(можно быстро понять, для чего используется сервер):
Get-WindowsFeature | Where-Object {$_. installstate -eq "installed"} | ft Name,Installstate
Например, для установки службы DNS воспользуйтесь такой командой:
Install-WindowsFeature DNS -IncludeManagementTools
Список всех служб в Windows:
Get-Service
Список остановленных служб:
Get-Service | Where-Object {$_.status -eq “stopped”}
Перезапустить службу:
Restart-Service -Name spooler
Для управление процессами можно использовать стандартный диспетчер задач (taskmgr.exe) или PowerShell модуль Processes:
Get-Process cmd, proc1* | Select-Object ProcessName, StartTime, MainWindowTitle, Path, Company|ft
Часто используемые команды в Server Core
Ну и наконец, приведу список различных полезных мне команд, которые я периодически использую в Server Core.
Информация о статусе и здоровье физических дисков (используется стандартный модуль управления дисками Storage):
Get-PhysicalDisk | Sort Size | FT FriendlyName, Size, MediaType, SpindleSpeed, HealthStatus, OperationalStatus -AutoSize
Информация о свободном месте на диске:
Get-WmiObject -Class Win32_LogicalDisk |
Select-Object -Property DeviceID, VolumeName, @{Label='FreeSpace (Gb)'; expression={($_.FreeSpace/1GB).ToString('F2')}},
@{Label='Total (Gb)'; expression={($_.Size/1GB).ToString('F2')}},
@{label='FreePercent'; expression={[Math]::Round(($_.freespace / $_.size) * 100, 2)}}|ft
Информация о времени последних 10 перезагрузок сервера:
Get-EventLog system | where-object {$_.eventid -eq 6006} | select -last 10
Список установленных программ:
Get-ItemProperty HKLM:\Software\Wow6432Node\Microsoft\Windows\CurrentVersion\Uninstall\* | Select-Object DisplayName, DisplayVersion, Publisher, InstallDate | Format-Table –AutoSize
Скачать и распаковать zip файл с внешнего сайта:
Invoke-WebRequest https://contoso/test.zip -outfile test.zip
Expand-Archive -path '.\test.zip' -DestinationPath C:\Users\Administrator\Documents\
Чтобы скопировать все файлы из каталога на удаленный компьютер по сети можно использовать Copy-Item:
$session = New-PSSession -ComputerName remotsnode1
Copy-Item -Path "C:\Logs\*" -ToSession $session -Destination "C:\Logs\" -Recurse -Force
Для установки драйвера можно использовать стандартную утилиту:
Pnputil –i –a c:\distr\hpdp.inf
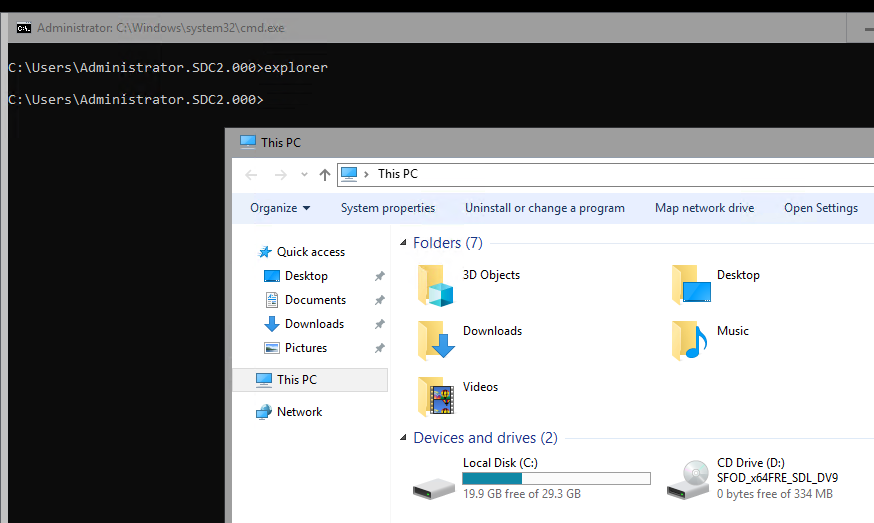
Также Microsoft предлагает специальный пакет Server Core App Compatibility Feature on Demand (FOD), который позволяет установить в Windows Server 2019 некоторые графические инструменты и консоли (MMC, Eventvwr, Hyper-V Manager, PerfMon, Resmon, Explorer.exe, Device Manager, Powershell ISE). Этот FOD доступен для загрузки в виде ISO при наличии активной подписки. Установка выполняется командой:
Add-WindowsCapability -Online -Name ServerCore.AppCompatibility~~~~0.0.1.0
Установка Server Core App Compatibility Feature on Demand будет использовать дополнительно около 200 Мб оперативной памяти в Server Core.
В этой статье я постарался собрать самые нужные команды, которые нужно постоянно держать под рукой при работе с Windows Server Core. Время от времени я буду обновлять статью и добавлять новые команды, которые покажутся мне нужными для повседневной работы.
Устанавливая Server Core — сокращенную версию операционной системы Windows Server 2008, более компактную и менее уязвимую для атак, нельзя не заметить возвращения хорошо всем известной командной строки.
Устанавливая Server Core — сокращенную версию операционной системы Windows Server 2008, более компактную и менее уязвимую для атак, нельзя не заметить возвращения хорошо всем известной командной строки. Я имею в виду не оболочку PowerShell (доступную в Server 2008 R2), а старую cmd.exe. Но, смахивая пыль с руководства по DOS и воскрешая в памяти способы работы с командной строкой, необходимо позаботиться еще о нескольких важных вещах.
Во-первых, необходимо настроить компьютер Server Core: подключить его к домену и, может быть, изменить имена компьютеров, конфигурацию IP-адресов, настройки брандмауэра и Windows Update. Во-вторых, следует активизировать роли и компоненты, которые предстоит запускать с Server Core. Обратите внимание, что в состав Server Core не входит диспетчер сервера, поэтому придется использовать инструменты командной строки OCList и OCSetup. Наконец, нужно будет управлять компьютером Server Core.
Среди пяти представленных в статье методов управления Server Core — один локальный и четыре дистанционных. Лишь в одном из методов используется графическая консоль, поэтому приготовьтесь вернуться к командной строке.
1. Локальная командная строка
Самый простой способ управлять Server Core — из командной строки (cmd.exe). Администраторы, предпочитающие настраивать Server Core с помощью инструментов с графическим интерфейсом, могут загрузить программу Server Core Configurator из Web-узла www.codeplex.com/CoreConfig. Некоторые графические инструменты есть и в Server Core: Notepad, Taskmgr (диспетчер задач), Regedit (редактор реестра), timedate.cpl (настройка времени и даты) и intl.cpl (языки и региональные стандарты).

Дополнительные сведения о настройке Server Core, в том числе командах настройки, приведены в руководстве «Server Core Installation Option of Windows Server 2008 Step-By-Step Guide» компании Microsoft. Информацию об отдельных командах можно найти на справочной странице командной строки Microsoft TechNet. Наконец, видеоуроки об управлении Server Core через службы терминалов, RemoteApp, Windows Remote Shell и оснастки MMC перечислены во врезке «Видеоуроки по Server Core на ittv.net».
2. Службы терминалов
При использовании служб терминалов для управления Server Core фактически выполняется удаленное подключение с административными задачами, поэтому необходимо внести изменения в реестр, включив режим Remote Desktop for Administration. Чтобы сделать это на компьютере Server Core, введите в командной строке
Cscript c:windowssystem32scregedit.wsf/ar 0
После выполнения команды должно быть получено подтверждение, что реестр обновлен.
Если включен брандмауэр, необходимо открыть порт RDP и разрешить подключение. Порт RDP открывается командой
netsh firewall add portopening TCP 3389 RDP
После того как компьютер Server Core настроен, откройте RDP-соединение на другом компьютере. Быстрый способ это сделать — применить команду
mstsc.exe
в панели мгновенного поиска меню Start. Затем нужно ввести IP-адрес (или имя сервера, если настроена служба DNS) и учетные данные для регистрации. Откроется командная строка на удаленном рабочем столе с голубым фоном.
Преимущество подключения такого типа перед соединением RemoteApp (рассматривается ниже) заключается в том, что можно запускать другие приложения вне командной строки на удаленном рабочем столе. Завершив работу, введите команду
logoff
чтобы закрыть соединение.
3. Службы терминалов с RemoteApp
Использование RDP для подключения к целой системе может показаться избыточным, особенно если нужна лишь командная строка. Другой способ — задействовать новый компонент служб терминалов Server 2008, называемый RemoteApp. С его помощью можно организовать RDP-соединение, которое открывает только командную строку, но не весь рабочий стол. Прежде чем начать, следуйте приведенным ниже инструкциям, чтобы активизировать соединения служб терминалов.
Чтобы создать rdp-файл RemoteApp, нужно установить роль Terminal Services на сервере Server 2008, отличном от Server Core. Эту задачу можно выполнить с помощью диспетчера серверов.
После того как роль Terminal Services будет установлена, следует выбрать пункт TS RemoteApp Manager из раздела Administrative Tools, Terminal Services в меню Start. Откроется консоль RemoteApp Manager.
Затем выберите вариант подключения к другому компьютеру и укажите компьютер Server Core. В крайней справа области Actions нажмите кнопку Add RemoteApp Programs и найдите приложение cmd.exe (обычно оно находится в каталоге c$windowssystem32cmd.exe). Из списка Allow выберите Remote cmd.exe. Затем нажмите кнопку Create RDP package в области Actions.
После того как пакет будет создан, можно дважды щелкнуть на нем мышью, чтобы открыть только командную строку в сеансе служб терминалов. Кроме того, можно отправить файл cmd.rdp другим пользователям, нуждающимся в доступе к компьютеру Server Core в командной строке RemoteApp.
4. Оболочка Windows Remote Shell
Windows Remote Management (WinRM) — реализация протокола WS-Management (удобный для работы через брандмауэр протокол на основе SOAP), обеспечивающая взаимодействие между операционной системой и оборудованием различных поставщиков. Кроме того, с помощью WinRM можно подключиться к компьютеру Server Core и работать в командной строке, не создавая соединения служб терминалов. Одно из преимуществ WinRM заключается в использовании HTTP-порта 80 (или HTTPS-порта 443) для подключения. Обычно эти порты в брандмауэрах уже открыты, и организовать соединение просто. Идея метода заключается в том, чтобы создать слушателя WinRM на одной стороне (компьютер Server Core), а затем использовать инструмент WinRS для подключения к компьютеру.
Прежде чем начать, необходимо ввести компьютер Server Core в состав домена и зарегистрироваться в домене, по крайней мере один раз, с правами администратора компьютера Server Core. Обратите внимание, что для организации соединения необходимо использовать Server 2008, Windows 7, Windows Vista или Windows Server 2003 R2.
Перейдите к командной строке на компьютере Server Core, которым предстоит управлять, и введите
WinRM quickconfig
Затем в компьютере, с которого будет выполняться управление, введите нужную команду следующим образом
winrs -r:
Можно запустить любую команду (например, dir, ipconfig), но лучше всего ввести команду cmd.exe, которая полностью связывает командную строку администратора с компьютером Server Core. Затем все вводимые команды будут выполняться на компьютере Server Core, и не нужно повторно вводить команду winrs целиком.
5. Оснастки консоли MMC
Консоль управления MMC обеспечивает графический способ администрирования Server Core. Но прежде чем можно будет воспользоваться обычными консолями, необходимо выполнить некоторые действия из командной строки. Во-первых, следует настроить брандмауэр на компьютере Server Core, чтобы разрешить подключение оснасток MMC.
В командной строке введите
netsh advfirewall firewall set rule group=»remote administration» new enable=yes
Чтобы включить определенные оснастки, введите команду
netsh advfirewall firewall set rule group=»» new enable=yes
Предпочтительно разрешить все оснастки. Если же активизировать лишь необходимые оснастки, нужно знать имена групп правил, соответствующих оснасткам. Информация представлена в таблице. Чтобы использовать оснастки MMC для управления компьютером Server Core, необходимы административные права на этом компьютере.

Нужно учитывать, является ли управляемый компьютер Server Core членом домена. Если компьютер входит в состав домена, просто откройте консоль MMC, щелкните правой кнопкой мыши на дереве в левой панели, выбрав из контекстного меню Connect to another computer, и введите имя компьютера Server Core.
Если компьютер Server Core, которым нужно управлять, не принадлежит домену, необходимо воспользоваться административными учетными данными, чтобы создать соединение с компьютером Server Core из клиентского компьютера. Откройте командную строку на клиентском компьютере и введите
cmdkey/add:/user: /pass:
Затем можно управлять компьютером Server Core как любым другим компьютером в домене.
Разнообразные варианты управления
Освоив несколько подходов, администраторы могут применить знание командной строки, чтобы полностью реализовать преимущества Server Core. В Server 2008 R2 можно будет запускать и PowerShell, что, несомненно, расширит возможности управления Server Core как локально, так и дистанционно.
Дж. Питер Браззис (jpb@cliptraining.com) — инструктор, консультант и технический писатель в компании ClipTraining.com. Имеет сертификаты MCSE 2003/2000/NT, MCT и MCITP Enterprise Messaging
Время на прочтение
7 мин
Количество просмотров 39K
Совсем недавно Microsoft выпустила WebUI для управления Windows Server. Мы поставили его и хотим поделиться впечатлениями.
В этой статье мы рассказали и показали:
- как развернуть Honolulu на Windows Server Core и сделать доступным управление серверным парком через браузер;
- как подключить другие серверы для управления (даже без AD) по виртуальной локальной сети облака (таким же образом можно подключить серверы в локальной сети вашего предприятия к центру управления в облаке, соединив ее по Site-To-Site VPN);
- какие возможности Honolulu доступны уже сейчас и актуальны при использовании в облаке.
Зачем Windows Server веб-интерфейс управления?
В облаке серверы должны работать максимально эффективно для снижения затрат на ИТ-инфраструктуру. Windows Server с графическим интерфейсом создавался еще во времена, когда от единственного сервера требовалось выполнение всех возможных операций, даже если эта функциональность не требовалась в настоящий момент.
Позже в Windows Server были добавлены роли, позволяющие устанавливать только требуемую функциональность. При этом устанавливался графический интерфейс и многочисленные службы, не требующиеся для решения бизнес-задачи. Это порождало накладные расходы вычислительных ресурсов и увеличивало поверхность атаки, делая сервер менее безопасным.
В целях дальнейшей оптимизации серверной ОС Microsoft добавила режим Server Core – минималистичную, эффективную и более безопасную редакцию Windows Server с режимом командной строки по-умолчанию. В этой ОС минимизированы накладные расходы на все, что не связано с выполнением вашей задачи.
Совсем недавно Microsoft представила Windows Server 1709 — ОС рекомендуемую для современных облачных приложений и сервисов. Эта ОС не содержит графического интерфейса, получает существенные обновления раз в полгода развиваясь непрерывно и поставляется только в виде Server Core и Nano Server.
Если вы ранее откладывали изучение и использование Server Core, пришло время. Традиционное управление Windows Server с помощью графического интерфейса Windows постепенно уходит в прошлое. Microsoft оставила ИТ-администраторов не только с Powershell, но и представила новое современное средство управления серверами с помощью веб-интерфейса — Project Honolulu. Следует заметить, что пока это не релиз, а техническое превью. К стабильности доступных возможностей вопросов за время использования не возникало, но очевидно, что в будущем возможностей будет гораздо больше.
Project Honolulu можно использовать не только с Windows Server Core, но и с серверами с графическим интерфейсом (2012, 2012R2, 2016), получив удобный способ управления ИТ-инфраструктурой на Windows.
Установка Project Honolulu на сервер
Project Honolulu можно установить не только на сервер, но и на компьютер IT–администратора с Windows 10. Однако удобнее установить средства управления прямо на сервер в облаке (даже если у вас там только одна виртуальная машина) и управлять серверами через удобный веб-интерфейс с любых устройств из любой точки мира (или откуда разрешают политики безопасности компании). При наличии подключения Site-To-Site VPN из вашего офиса можно работать по безопасному подключению даже не предоставляя доступ серверам из сети Интернет.
Где попробовать Honolulu?
Если вы хотите попробовать проделать все, что описано в статье дальше, настроить Project Honolulu в облаке и самостоятельно посмотреть на его возможности, нет проблем.
Заполните заявку на бесплатное тестирование, выберите платформу Azure Pack Infrastructure, в поле «Комментарий» укажите «С хабра, хочу протестировать Honolulu».
Для вас будет предсоздана бесплатно облачная инфраструктура на 2 недели, в которой вы сможете попробовать новый веб-интерфейс управления Honolulu, а заодно и протестировать высокодоступное облако Azure Pack Infrastructure от InfoboxCloud.
Создание сервера для установки Honolulu (и не только)
В панели управления portal.infoboxcloud.com создадим (если еще не созданы) сеть и сервер с Windows Server 2016 Core (на момент публикации Windows Server 1709 готовится к выходу и будет доступен с конца октября 2017 года).
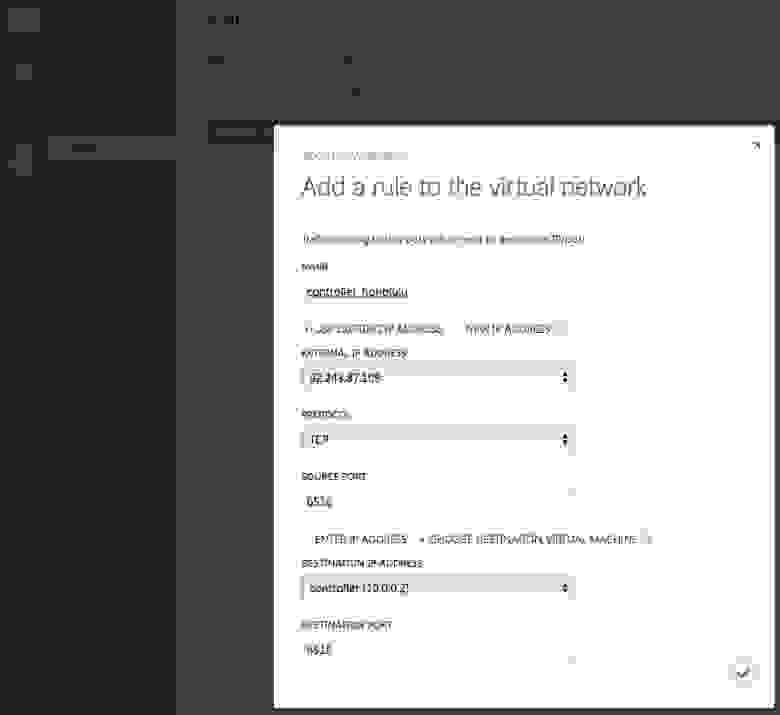
Теперь нужно пробросить порт 3389 для доступа по RDP.
Подключитесь к серверу по RDP, используя выданный ip–адрес при настройке правила проброса.
Запустите
powershellУстановка Project Honolulu
Для использования с Windows Server 2012 и 2012 R2 предварительно нужно установить Windows Management Framework 5.
Скачайте Project Honolulu, выполнив команды:
Import-Module BitsTransfer
Start-BitsTransfer -Source http://download.microsoft.com/download/E/8/A/E8A26016-25A4-49EE-8200-E4BCBF292C4A/HonoluluTechnicalPreview1709-20016.msi -Destination .
Aктуальную ссылку на последнюю версию можно получить зарегистрировавшись тут, рекомендуется подставить ее в параметр -Source.
Запустите установку с самоподписанным сертификатом:
msiexec /i HonoluluTechnicalPreview1709-20016.msi /qn /L*v log.txt SME_PORT=6516 SSL_CERTIFICATE_OPTION=generate, где HonoluluTechnicalPreview1709-20016.msi — имя загруженной версии Honolulu.
или с указанием THUMBPRINT сертификата, если он у вас есть и установлен:
msiexec /i HonoluluTechnicalPreview1709-20016.msi /qn /L*v log.txt SME_PORT=6516 SME_THUMBPRINT=<thumbprint> SSL_CERTIFICATE_OPTION=installed, где HonoluluTechnicalPreview1709-20016.msi — имя загруженной версии Honolulu.
Теперь в настройках сети в portal.infoboxcloud.ru пробросьте порт 6516 на сервер.
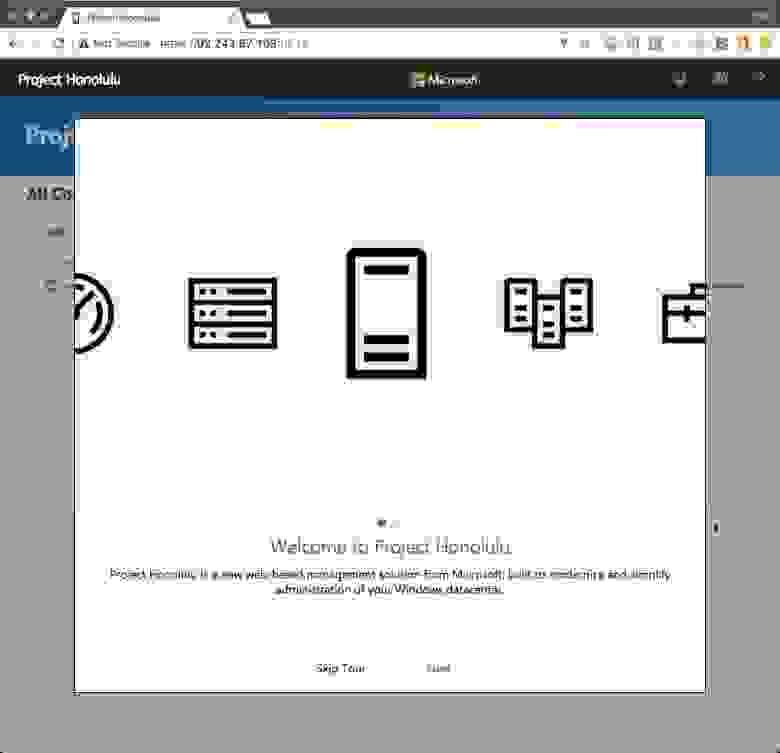
Можем заходить на сервер через веб-интерфейс:
https://ip–адрес-сервера:6516, где ip–адрес-сервера — IP адрес сервера, к которому происходит подключение. Браузер может предупредить о том, что используется самоподписанный сертификат. Следует продолжить вход на страницу.
В качестве логина и пароля указываются данные для доступа к учетной записи на сервере (те же, с которыми подключаетесь по RDP).
Отлично, установка Honolunu выполнена.
Текущий сервер уже добавлен.
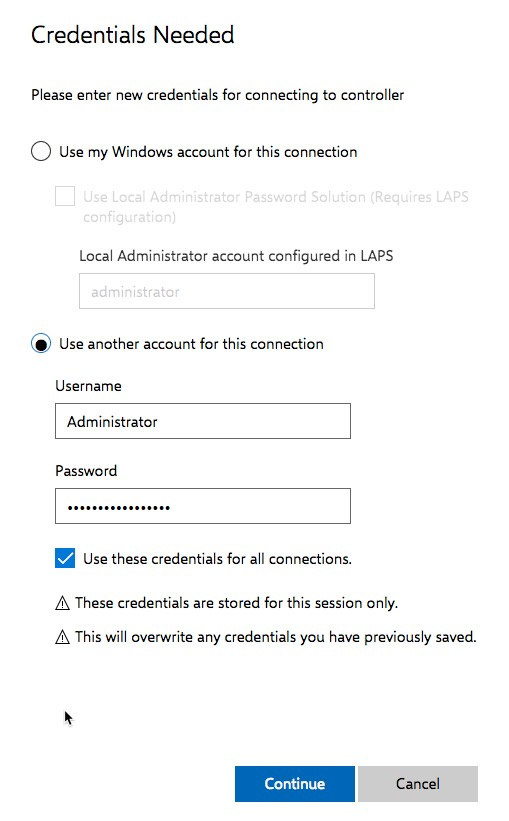
Необходимо нажать на «Credentials Needed» и указать данные администратора для этого сервера:
Сервер доступен для управления.
Подключение дополнительных серверов
Создайте еще сервер в панели управления Azure Pack Infrastructure и пробросьте доступ к нему по RDP в настройках сети.
Подключитесь к новому серверу.
На новом сервере
Запустите:
powershellВыполните настройку удаленного подключения WinRM. Для этого введите
winrm quickconfigзатем нажмите «y» и Enter.
Разрешите доступ к WinRM в файрволле:
Для этого введите команду:
netsh advfirewall firewall add rule name="Open Port Remote Management (5985)" dir=in action=allow protocol=TCP localport=5985
netsh advfirewall firewall add rule name="Open Port Remote Management (5986)" dir=in action=allow protocol=TCP localport=5986
На сервере где установлен Honolulu
В терминале введите команду для добавления управляемого сервера в Trusted Hosts используя его внутренний IP:
winrm s winrm/config/client '@{TrustedHosts="10.0.0.5,containers"}', где containers – имя управляемого сервера.
Если в будущем потребуется добавить еще серверы, их все нужно добавлять в Trusted Hosts, например:
winrm s winrm/config/client '@{TrustedHosts="10.0.0.5,containers,10.0.0.3,web"}'
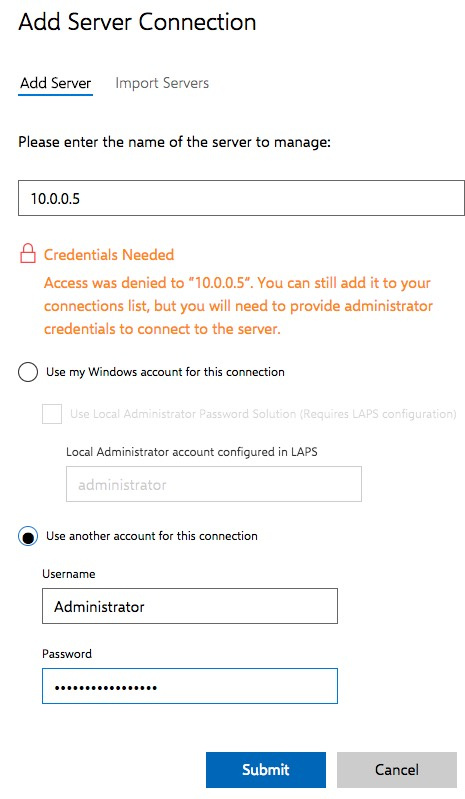
Теперь в веб-интерфейсе Honolulu добавьте сервер:
Укажите внутренний IP (можно посмотреть в настройках сети в панели управления Azure Pack Infrastructure), логин и пароль и нажмите «Submit».
Готово. Сервером можно управлять из единой панели Honolulu.
В случае использования Active Directory в Trusted Hosts добавлять друг друга не требуется, как и постоянно вводить данные для доступа к серверам в Honolulu. Также при добавлении можно использовать имена из DNS. В этом случае они будут отображаться не по IP, а по названию сервера, что удобно.
Возможности Project Honolulu
Цель проекта — заменить GUI средства управления сервером (RSAT) и сделать доступ к управлению группам администраторов более удобным, из любой точки мира. Цель благородна, инфраструктуры заказчиков становятся более гетерогенны, а RSAT был зависим от платформы. Теперь не очень важно какая ОС у ИТ-администратора — управление с альтернативных ОС так же удобно, как и управление из Windows альтернативными платформами (с помощью Linux Subsystem for Windows).
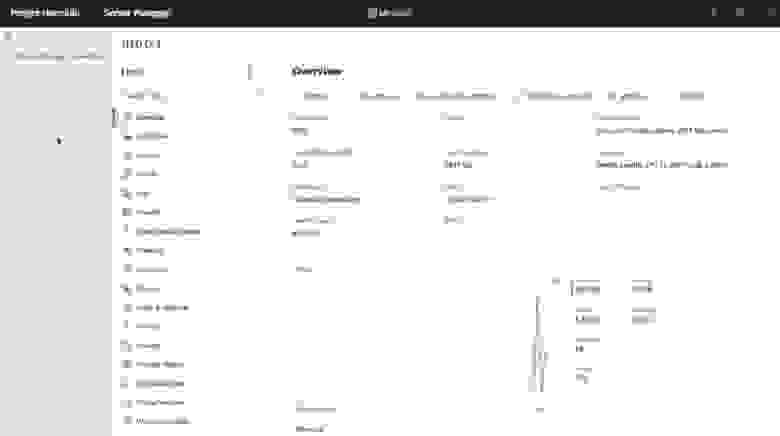
Для управления конкретным сервером нажмите на него:
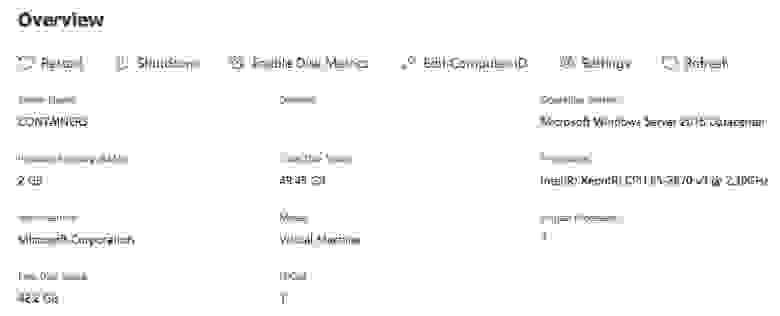
Обзор сервера (Overview)
В этом разделе вы можете:
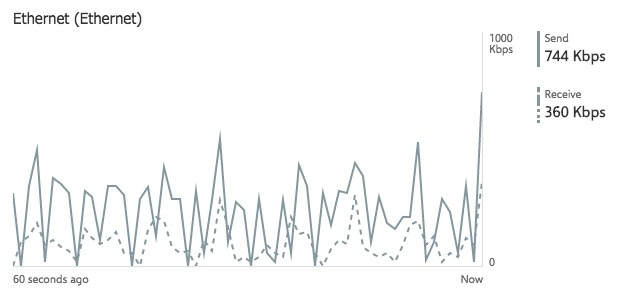
- в режиме онлайн получать информацию о загруженности сервера и сети,
- редактировать имя компьютера,
- вводить его в домен,
- управлять переменными окружения пользователя и системными
- включать и отключать доступ по RDP
Сертификаты (Certificates)
Возможность просмотра и загрузки сертификатов, позволяет своевременно узнать о необходимости обновления сертификатов.
Устройства (Devices)
Можно посмотреть детальную информацию о виртуальном оборудовании и используемых драйверах.
При необходимости можно отключать устройства.
События (Events)
Возможность просмотра и экспорта системных логов и логов приложений. Позволяет своевременно заметить и починить проблему.
Файлы (Files)
Веб-интерфейс проводника. Позволяет скачивать, загружать файлы на сервер, переименовывать и менять их свойства.
Файрвол (Firewall)
Удобный веб-интерфейс для управления Файрволлом Windows Server.
Локальные пользователи и группы (Local Users & Groups)
Все очевидно — возможность добавлять и редактировать пользователей и группы, а также менять пароли.
Сеть (Network)
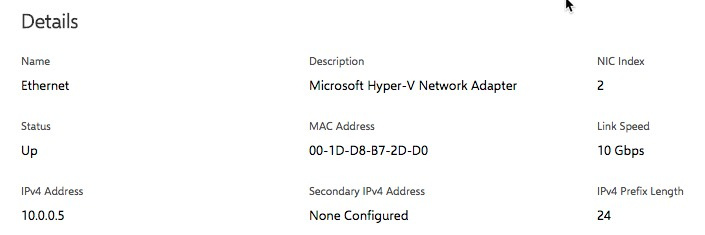
Возможность просмотра и изменения настроек сетевых адаптеров.
Процессы (Processes)
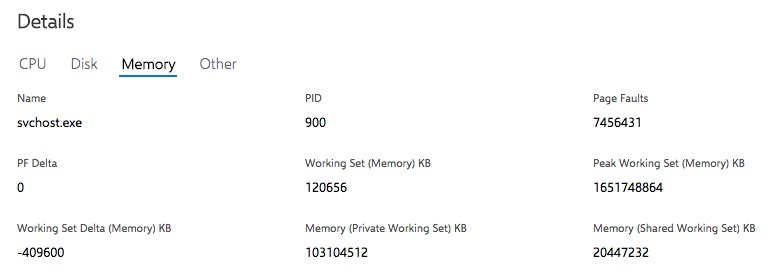
Статистика по запущенным процессам, потреблению ресурсов, возможность убить процесс и собрать дамп для анализа.
Реестр (Registry)
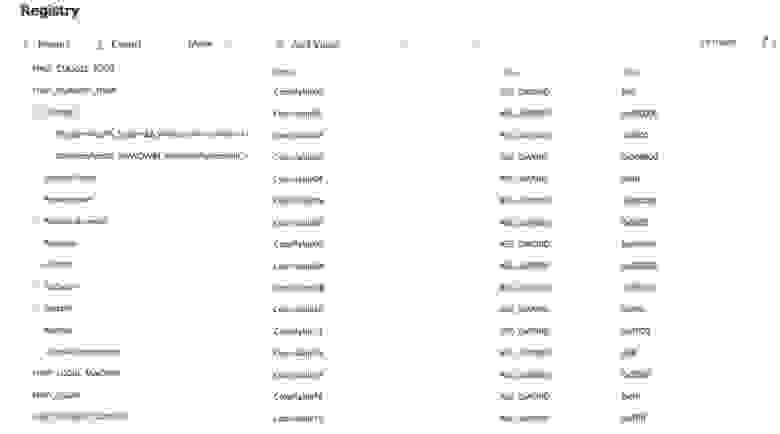
Полноценный редактор реестра с Web–интерфейсом для Windows с возможностью импорта и экспорта ветвей реестра.
Роли и возможности (Roles and Features)
Возможность просмотра установленных ролей и возможностей ОС, установка и настройка новых.
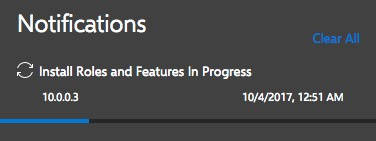
Отмечаем нужную для установки и нажимаем «Install». Процесс установки привычен и понятен.
Сервисы (Services)
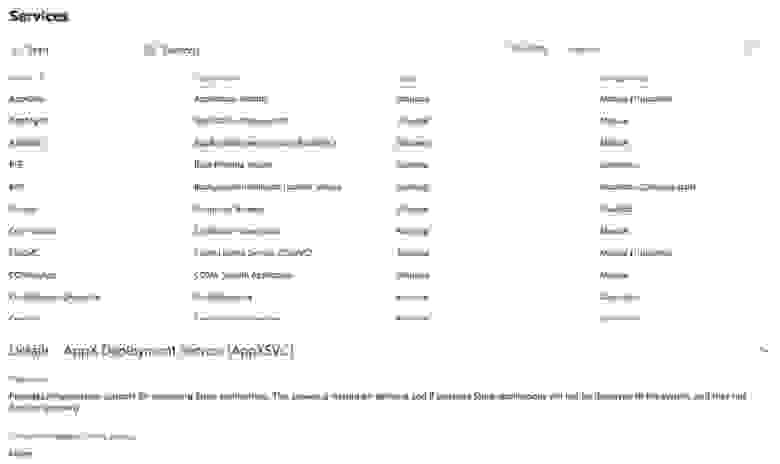
Возможность включить или выключить сервис Windows вручную и настроить правила автозапуска.
Хранилище (Storage)
Возможности разметки дисков, управление разделами и файловыми шарами.
Также присутствует раздел Storage Replica, требующий предварительной настройки SR Namespace.
Windows Update
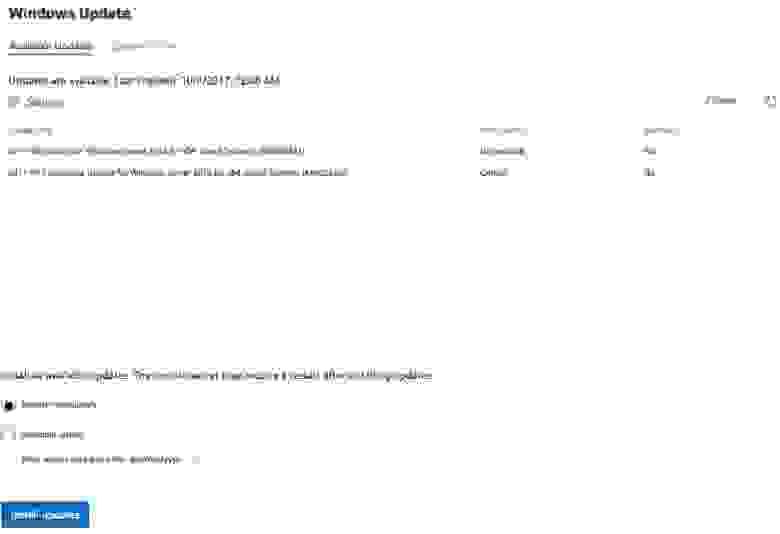
Возможность просмотра и установки доступных обновлений сервера.
Заключение
Project Honolulu – работоспособное техническое превью. Конечно очень не хватает возможности настройки ролей и функций прямо из веб-интерфейса (а не только установки и удаления), не хватает встроенного в панель RDP, возможностей исполнять Powershell команды на серверах из этого же веб-интерфейса и отправки уведомлений на email и/или pushover.
Возможность удаленного управления откуда угодно через Powershell мы рассмотрим в одной из следующих статей.
Тем не менее уже сейчас Project Honolulu – мощное средство управления парком Windows Server в облаке и в локальной сети заказчика (а лучше — в единой гибридной сети), которое значительно упростит работу с Windows Server Core новичкам и подготовит их к новому и прекрасному миру «безголового» Windows Server.
Успехов.
Applies to: Windows Server (Semi-Annual Channel) and Windows Server 2016
Because Server Core doesn’t have a UI, you need to use Windows PowerShell cmdlets, command line tools, or remote tools to perform basic administration tasks. The following sections outline the PowerShell cmdlets and commands used for basic tasks. You can also use Windows Admin Center, a unified management portal currently in public preview, to administer your installation.
First from the cmd prompt start PowerShell
C:\Users\Administrator> powershell

PS C:\Users\Administrator>
Administrative tasks using PowerShell cmdlets
Use the following information to perform basic administrative tasks with Windows PowerShell cmdlets.
Set a static IP address
When you install a Server Core server, by default it has A DHCP address. If you need a static IP address, you can set it using the following steps.
To view your current network configuration, use Get-NetIPConfiguration.
To view the IP addresses you’re already using, use Get-NetIPAddress.
To set a static IP address, do the following:
-
Run Get-NetIPInterface.
-
Note the number in the IfIndex column for your IP interface or the InterfaceDescription string. If you have more than one network adapter, note the number or string corresponding to the interface you want to set the static IP address for.
-
Run the following cmdlet to set the static IP address:
PowerShell
New-NetIPaddress -InterfaceIndex 12 -IPAddress 192.0.2.2 -PrefixLength 24 -DefaultGateway 192.0.2.1where:
- InterfaceIndex is the value of IfIndex from step 2. (In our example, 12)
- IPAddress is the static IP address you want to set. (In our example, 191.0.2.2)
- PrefixLength is the prefix length (another form of subnet mask) for the IP address you’re setting. (For our example, 24)
- DefaultGateway is the IP address to the default gateway. (For our example, 192.0.2.1)
-
Run the following cmdlet to set the DNS client server address:
PowerShell
Set-DNSClientServerAddress –InterfaceIndex 12 -ServerAddresses 192.0.2.4where:
- InterfaceIndex is the value of IfIndex from step 2.
- ServerAddresses is the IP address of your DNS server.
-
To add multiple DNS servers, run the following cmdlet:
PowerShell
Set-DNSClientServerAddress –InterfaceIndex 12 -ServerAddresses 192.0.2.4,192.0.2.5where, in this example, 192.0.2.4 and 192.0.2.5 are both IP addresses of DNS servers.
If you need to switch to using DHCP, run Set-DnsClientServerAddress –InterfaceIndex 12 –ResetServerAddresses.
Join a domain
Use the following cmdlets to join a computer to a domain.
-
Run Add-Computer. You’ll be prompted for both credentials to join the domain and the domain name.
-
If you need to add a domain user account to the local Administrators group, run the following command at a command prompt (not in the PowerShell window):
net localgroup administrators /add <DomainName>\<UserName> -
Restart the computer. You can do this by running Restart-Computer.
Rename the server
Use the following steps to rename the server.
- Determine the current name of the server with the hostname or ipconfig command.
- Run Rename-Computer -ComputerName <new_name>.
- Restart the computer.
Activate the server
Run slmgr.vbs –ipk<productkey>. Then run slmgr.vbs –ato. If activation succeeds, you won’t get a message.
Note
You can also activate the server by phone, using a Key Management Service (KMS) server, or remotely. To activate remotely, run the following cmdlet from a remote computer:
PowerShell
**cscript windows\system32\slmgr.vbs <ServerName> <UserName> <password>:-ato**
Configure Windows Firewall
You can configure Windows Firewall locally on the Server Core computer using Windows PowerShell cmdlets and scripts. See NetSecurity for the cmdlets you can use to configure Windows Firewall.
Enable Windows PowerShell remoting
You can enable Windows PowerShell Remoting, in which commands typed in Windows PowerShell on one computer run on another computer. Enable Windows PowerShell Remoting with Enable-PSRemoting.
For more information, see About Remote FAQ.
Administrative tasks from the command line
Use the following reference information to perform administrative tasks from the command line.
Configuration and installation
| Task | Command |
|---|---|
| Set the local administrative password | net user administrator * |
| Join a computer to a domain | netdom join %computername% /domain:<domain> /userd:<domain\username> /passwordd:* Restart the computer. |
| Confirm that the domain has changed | set |
| Remove a computer from a domain | netdom remove <computername> |
| Add a user to the local Administrators group | net localgroup Administrators /add <domain\username> |
| Remove a user from the local Administrators group | net localgroup Administrators /delete <domain\username> |
| Add a user to the local computer | net user <domain\username> * /add |
| Add a group to the local computer | net localgroup <group name> /add |
| Change the name of a domain-joined computer | netdom renamecomputer %computername% /NewName:<new computer name> /userd:<domain\username> /passwordd: * |
| Confirm the new computer name | set |
| Change the name of a computer in a work group | netdom renamecomputer <currentcomputername> /NewName:<newcomputername> Restart the computer. |
| Disable paging file management | wmic computersystem where name=»<computername>» set AutomaticManagedPagefile=False |
| Configure the paging file | wmic pagefileset where name=”<path/filename>” set InitialSize=<initialsize>,MaximumSize=<maxsize> Where path/filename is the path to and name of the paging file, initialsize is the starting size of the paging file, in bytes, and maxsize is the maximum size of the page file, in bytes. |
| Change to a static IP address | ipconfig /all Record the relevant information or redirect it to a text file (ipconfig /all >ipconfig.txt). netsh interface ipv4 show interfaces Verify that there is an interface list. netsh interface ipv4 set address name <ID from interface list> source=static address=<preferred IP address> gateway=<gateway address> Run ipconfig /all to verify that DHCP enabled is set to No. |
| Set a static DNS address. | netsh interface ipv4 add dnsserver name=<name or ID of the network interface card> address=<IP address of the primary DNS server> index=1 netsh interface ipv4 add dnsserver name=<name of secondary DNS server> address=<IP address of the secondary DNS server> index=2** Repeat as appropriate to add additional servers. Run ipconfig /all to verify that the addresses are correct. |
| Change to a DHCP-provided IP address from a static IP address | netsh interface ipv4 set address name=<IP address of local system> source=DHCP Run ipconfig /all to verify that DCHP enabled is set to Yes. |
| Enter a product key | slmgr.vbs –ipk <product key> |
| Activate the server locally | slmgr.vbs -ato |
| Activate the server remotely | cscript slmgr.vbs –ipk <product key><server name><username><password> cscript slmgr.vbs -ato <servername> <username> <password> Get the GUID of the computer by running cscript slmgr.vbs -did Run cscript slmgr.vbs -dli <GUID> Verify that License status is set to Licensed (activated). |
Networking and firewall
| Task | Command |
|---|---|
| Configure your server to use a proxy server | netsh Winhttp set proxy <servername>:<port number> Note: Server Core installations can’t access the Internet through a proxy that requires a password to allow connections. |
| Configure your server to bypass the proxy for Internet addresses | netsh winttp set proxy <servername>:<port number> bypass-list=»<local>» |
| Display or modify IPSEC configuration | netsh ipsec |
| Display or modify NAP configuration | netsh nap |
| Display or modify IP to physical address translation | arp |
| Display or configure the local routing table | route |
| View or configure DNS server settings | nslookup |
| Display protocol statistics and current TCP/IP network connections | netstat |
| Display protocol statistics and current TCP/IP connections using NetBIOS over TCP/IP (NBT) | nbtstat |
| Display hops for network connections | pathping |
| Trace hops for network connections | tracert |
| Display the configuration of the multicast router | mrinfo |
| Enable remote administration of the firewall | netsh advfirewall firewall set rule group=”Windows Firewall Remote Management” new enable=yes |
Updates, error reporting, and feedback
| Task | Command |
|---|---|
| Install an update | wusa <update>.msu /quiet |
| List installed updates | systeminfo |
| Remove an update | expand /f:* <update>.msu c:\test Navigate to c:\test\ and open <update>.xml in a text editor. Replace Install with Remove and save the file. pkgmgr /n:<update>.xml |
| Configure automatic updates | To verify the current setting: cscript %systemroot%\system32\scregedit.wsf /AU /v ** To enable automatic updates: **cscript scregedit.wsf /AU 4 To disable automatic updates: cscript %systemroot%\system32\scregedit.wsf /AU 1 |
| Enable error reporting | To verify the current setting: serverWerOptin /query To automatically send detailed reports: serverWerOptin /detailed To automatically send summary reports: serverWerOptin /summary To disable error reporting: serverWerOptin /disable |
| Participate in the Customer Experience Improvement Program (CEIP) | To verify the current setting: serverCEIPOptin /query To enable CEIP: serverCEIPOptin /enable To disable CEIP: serverCEIPOptin /disable |
Services, processes, and performance
| Task | Command |
|---|---|
| List the running services | sc query or net start |
| Start a service | sc start <service name> or net start <service name> |
| Stop a service | sc stop <service name> or net stop <service name> |
| Retrieve a list of running applications and associated processes | tasklist |
| Start Task Manager | taskmgr |
| Create and manage event trace session and performance logs | To create a counter, trace, configuration data collection or API: logman ceate To query data collector properties: logman query To start or stop data collection: logman start|stop To delete a collector: logman delete To update the properties of a collector: logman update To import a data collector set from an XML file or export it to an XML file: logman import|export |
Event logs
| Task | Command |
|---|---|
| List event logs | wevtutil el |
| Query events in a specified log | wevtutil qe /f:text <log name> |
| Export an event log | wevtutil epl <log name> |
| Clear an event log | wevtutil cl <log name> |
Disk and file system
| Task | Command |
|---|---|
| Manage disk partitions | For a complete list of commands, run diskpart /? |
| Manage software RAID | For a complete list of commands, run diskraid /? |
| Manage volume mount points | For a complete list of commands, run mountvol /? |
| Defragment a volume | For a complete list of commands, run defrag /? |
| Convert a volume to the NTFS file system | convert <volume letter> /FS:NTFS |
| Compact a file | For a complete list of commands, run compact /? |
| Administer open files | For a complete list of commands, run openfiles /? |
| Administer VSS folders | For a complete list of commands, run vssadmin /? |
| Administer the file system | For a complete list of commands, run fsutil /? |
| Take ownership of a file or folder | For a complete list of commands, run icacls /? |
Hardware
| Task | Command |
|---|---|
| Add a driver for a new hardware device | Copy the driver to a folder at %homedrive%\<driver folder>. Run pnputil -i -a %homedrive%\<driver folder>\<driver>.inf |
| Remove a driver for a hardware device | For a list of loaded drivers, run sc query type= driver. Then run sc delete <service_name> |
You can manage a Server Core server in the following ways:
You can also add hardware and manage drivers locally, as long as you do that from the command line.
There are some important limitations and tips to keep in mind when you work with Server Core:
Managing Server Core with Windows Admin Center
Windows Admin Center is a browser-based management app that enables on-premises administration of Windows Servers with no Azure or cloud dependency. Windows Admin Center gives you full control over all aspects of your server infrastructure and is particularly useful for management on private networks that are not connected to the Internet. You can install Windows Admin Center on Windows 10, on a gateway server, or on an installation of Windows Server with Desktop Experience, and then connect to the Server Core system that you want to manage.
Managing Server Core remotely with Server Manager
Server Manager is a management console in Windows Server that helps you provision and manage both local and remote Windows-based servers from your desktops, without requiring either physical access to servers, or the need to enable Remote Desktop protocol (RDP) connections to each server. Server Manager supports remote, multi-server management.
To enable your local server to be managed by Server Manager running on a remote server, run the Windows PowerShell cmdlet Configure-SMRemoting.exe –Enable.
Managing with Microsoft Management Console
You can use many snap-ins for Microsoft Management Console (MMC) remotely to manage your Server Core server.
To use an MMC snap-in to manage a Server Core server that is a domain member:
To use an MMC snap-in to manage a Server Core server that is not a domain member:
To configure Windows Firewall to allow MMC snap-in(s) to connect
To allow all MMC snap-ins to connect, run the following command:
Enable-NetFirewallRule -DisplayGroup "Remote Administration"
To allow only specific MMC snap-ins to connect, run the following:
Enable-NetFirewallRule -DisplayGroup "<rulegroup>"
Where rulegroup is one of the following, depending on which snap-in you want to connect:
| MMC snap-in | Rule group |
|---|---|
| Event Viewer | Remote Event Log Management |
| Services | Remote Service Management |
| Shared Folders | File and Printer Sharing |
| Task Scheduler | Performance Logs and Alerts, File and Printer Sharing |
| Disk Management | Remote Volume Management |
| Windows Firewall and Advanced Security | Windows Firewall Remote Management |
Note
Some MMC snap-ins don’t have a corresponding rule group that allows them to connect through the firewall. However, enabling the rule groups for Event Viewer, Services, or Shared Folders will allow most other snap-ins to connect.
Additionally, certain snap-ins require further configuration before they can connect through Windows Firewall:
Managing with Remote Desktop Services
You can use Remote Desktop to manage a Server Core server from remote computers.
Before you can access Server Core, you’ll need to run the following command:
cscript C:\Windows\System32\Scregedit.wsf /ar 0
This enables the Remote Desktop for Administration mode to accept connections.
Add hardware and manage drivers locally
To add hardware to a Server Core server, follow the instructions provided by the hardware vendor for installing new hardware.
If the hardware is not plug and play, you’ll need to manually install the driver. To do that, copy the driver files to a temporary location on the server, and then run the following command:
pnputil –i –a <driverinf>
Where driverinf is the file name of the .inf file for the driver.
If prompted, restart the computer.
To see what drivers are installed, run the following command:
sc query type= driver
Note
You must include the space after the equal sign for the command to complete successfully.
To disable a device driver, run the following:
sc delete <service_name>
Where service_name is the name of the service that you got when you ran sc query type= driver.
- Using Windows Admin Center
- Using Remote Server Administration Tools running on Windows 10
- Locally and remotely using Windows PowerShell
- Remotely using Server Manager
- Remotely using an MMC snap-in
- Remotely with Remote Desktop Services
- If you close all command prompt windows and want to open a new Command Prompt window, you can do that from the Task Manager. Press CTRL+ALT+DELETE, click Start Task Manager, click More Details > File > Run, and then type cmd.exe. (Type Powershell.exe to open a PowerShell command windows.) Alternatively, you can sign out and then sign back in.
- Any command or tool that attempts to start Windows Explorer will not work. For example, running start . from a command prompt won’t work.
- There is no support for HTML rendering or HTML help in Server Core.
- Server Core supports Windows Installer in quiet mode so that you can install tools and utilities from Windows Installer files. When installing Windows Installer packages on Server Core, use the /qb option to display the basic user interface.
- To change the time zone, run Set-Date.
- To change international settings, run control intl.cpl.
- Control.exe won’t run on its own. You must run it with either Timedate.cpl or Intl.cpl.
- Winver.exe isn’t available in Server Core. To obtain version information use Systeminfo.exe.
- Start an MMC snap-in, such as Computer Management.
- Right-click the snap-in, and then click Connect to another computer.
- Type the computer name of the Server Core server, and then click OK. You can now use the MMC snap-in to manage the Server Core server as you would any other PC or server.
-
Establish alternate credentials to use to connect to the Server Core computer by typing the following command at a command prompt on the remote computer:
-
cmdkey /add:<ServerName> /user:<UserName> /pass:<password>If you want to be prompted for a password, omit the /pass option.
-
When prompted, type the password for the user name you specified. If the firewall on the Server Core server is not already configured to allow MMC snap-ins to connect, follow the steps below to configure Windows Firewall to allow MMC snap-in. Then continue with step 3.
-
On a different computer, start an MMC snap-in, such as Computer Management.
-
In the left pane, right-click the snap-in, and then click Connect to another computer. (For example, in the Computer Management example, you would right-click Computer Management (Local).)
-
In Another computer, type the computer name of the Server Core server, and then click OK. You can now use the MMC snap-in to manage the Server Core server as you would any other computer running a Windows Server operating system.
- Disk Management. You must first start the Virtual Disk Service (VDS) on the Server Core computer. You must also configure the Disk Management rules appropriately on the computer that is running the MMC snap-in.
- IP Security Monitor. You must first enable remote management of this snap-in. To do this, at a command prompt, type Cscript \windows\system32\scregedit.wsf /im 1
- Reliability and Performance. The snap-in does not require any further configuration, but when you use it to monitor a Server Core computer, you can only monitor performance data. Reliability data is not available.
Patch a Server Core installation
You can patch a server running Server Core installation in the following ways:
View the updates installed on your Server Core server
Before you add a new update to Server Core, it’s a good idea to see what updates have already been installed.
To view updates by using Windows PowerShell, run Get-Hotfix.
To view updates by running a command, run systeminfo.exe. There might be a short delay while the tool inspects your system.
You can also run wmic qfe list from the command line.
Patch Server Core automatically with Windows Update
Use the following steps to patch the server automatically with Windows Update:
If the server is a member of a domain, you can also configure Windows Update using Group Policy. For more information, see https://go.microsoft.com/fwlink/?LinkId=192470. However, when you use this method, only option 4 («Auto download and schedule the install») is relevant to Server Core installations because of the lack of a graphical interface. For more control over which updates are installed and when, you can use a script which provides a command-line equivalent of most of the Windows Update graphical interface. For information about the script, see https://go.microsoft.com/fwlink/?LinkId=192471.
To force Windows Update to immediately detect and install any available updates, run the following command:
Wuauclt /detectnow
Depending on the updates that are installed, you may need to restart the computer, although the system will not notify you of this. To determine if the installation process has completed, use Task Manager to verify that the Wuauclt or Trusted Installerprocesses are not actively running. You can also use the methods in View the updates installed on your Server Core server to check the list of installed updates.
Patch the server with WSUS
If the Server Core server is a member of a domain, you can configure it to use a WSUS server with Group Policy. For more information, download the Group Policy reference information. You can also review Configure Group Policy Settings for Automatic Updates
Patch the server manually
Download the update and make it available to the Server Core installation. At a command prompt, run the following command:
Wusa <update>.msu /quiet
Depending on the updates that are installed, you may need to restart the computer, although the system will not notify you of this.
To uninstall an update manually, run the following command:
Wusa /uninstall <update>.msu /quiet -
Using Windows Update automatically or with Windows Server Update Services (WSUS). By using Windows Update, either automatically or with command-line tools, or Windows Server Update Services (WSUS), you can service servers running a Server Core installation.
-
Manually. Even in organizations that do not use Windows update or WSUS, you can apply updates manually.
-
Verify the current Windows Update setting:
%systemroot%\system32\Cscript scregedit.wsf /AU /v -
To enable automatic updates:
Net stop wuauserv %systemroot%\system32\Cscript scregedit.wsf /AU 4 Net start wuauserv -
To disable automatic updates, run:
Net stop wuauserv
%systemroot%\system32\Cscript scregedit.wsf /AU 1
Net start wuauserv
Server Manager
Server Manager is a management console in Windows Server that helps IT professionals provision and manage both local and remote Windows-based servers from their desktops, without requiring either physical access to servers, or the need to enable Remote Desktop protocol (rdP) connections to each server. Although Server Manager is available in Windows Server 2008 R2 and Windows Server 2008, Server Manager was updated in Windows Server 2012 to support remote, multi-server management, and help increase the number of servers an administrator can manage.
In our tests, Server Manager in Windows Server 2016, Windows Server 2012 R2, and Windows Server 2012 can be used to manage up to 100 servers, depending on the workloads that the servers are running. The number of servers that you can manage by using a single Server Manager console can vary depending on the amount of data that you request from managed servers, and hardware and network resources available to the computer running Server Manager. As the amount of data you want to display approaches that computer’s resource capacity, you can experience slow responses from Server Manager, and delays in the completion of refreshes. To help increase the number of servers that you can manage by using Server Manager, we recommend limiting the event data that Server Manager gets from your managed servers, by using settings in the Configure Event Data dialog box. Configure Event Data can be opened from the Tasks menu in the Events tile. If you need to manage an enterprise-level number of servers in your organization, we recommend evaluating products in the Microsoft System Center suite.
This topic and its subtopics provide information about how to use features in the Server Manager console. This topic contains the following sections.
Review initial considerations and system requirements
The following sections list some initial considerations that you need to review, as well as hardware and software requirements for Server Manager.
Hardware requirements
Server Manager is installed by default with all editions of Windows Server 2016. No additional hardware requirements exist for Server Manager.
Software and configuration requirements
Server Manager is installed by default with all editions of Windows Server 2016. You can use Server Manager in Windows Server 2016 to manage Server Core installation options of Windows Server 2016, Windows Server 2012 , and Windows Server 2008 R2 that are running on remote computers. Server Manager does run on the Server Core installation option of Windows Server 2016.
Server Manager runs in the Minimal Server Graphical Interface; that is, when the Server Graphical Shell feature is not installed. The Server Graphical Shell feature is not installed by default on Windows Server 2016. If you are not running Server Graphical Shell, the Server Manager console runs, but some applications or tools available from the console are not available. Internet browsers cannot run without Server Graphical Shell, so webpages and applications such as HTML help (The mmc F1 help, for example) cannot be opened. You cannot open dialog boxes for configuring Windows automatic updating and feedback when Server Graphical Shell is not installed; commands that open these dialog boxes in the Server Manager console are redirected to run sconfig.cmd.
To manage servers that are running Windows Server releases older than Windows Server 2016, install the following software and updates to make the older releases of Windows Server manageable by using Server Manager in Windows Server 2016.
| Operating System | Required Software |
|---|---|
| Windows Server 2012 R2 or Windows Server 2012 | — .NET Framework 4.6 — Windows Management Framework 5.0. The Windows Management Framework 5.0 download package updates Windows Management Instrumentation (WMI) providers on Windows Server 2012 R2 and Windows Server 2012 . The updated WMI providers let Server Manager collect information about roles and features that are installed on the managed servers. Until the update is applied, servers that are running Windows Server 2012 R2 or Windows Server 2012 have a manageability status of Not accessible. — The performance update associated with Knowledge Base article 2682011 is no longer necessary on servers that are running Windows Server 2012 R2 or Windows Server 2012 . |
| Windows Server 2008 R2 | — .NET Framework 4.5 — Windows Management Framework 4.0. The Windows Management Framework 4.0 download package updates Windows Management Instrumentation (WMI) providers on Windows Server 2008 R2 . The updated WMI providers let Server Manager collect information about roles and features that are installed on the managed servers. Until the update is applied, servers that are running Windows Server 2008 R2 have a manageability status of Not accessible. — The performance update associated with Knowledge Base article 2682011 lets Server Manager collect performance data from Windows Server 2008 R2 . |
| Windows Server 2008 | — .NET Framework 4 — Windows Management Framework 3.0 The Windows Management Framework 3.0 download package updates Windows Management Instrumentation (WMI) providers on Windows Server 2008 . The updated WMI providers let Server Manager collect information about roles and features that are installed on the managed servers. Until the update is applied, servers that are running Windows Server 2008 have a manageability status of Not accessible — verify earlier versions run Windows Management Framework 3.0. — The performance update associated with Knowledge Base article 2682011 lets Server Manager collect performance data from Windows Server 2008 . |
Manage remote computers from a client computer
The Server Manager console is included with Remote Server Administration Tools for Windows 10. Note that when Remote Server Administration Tools is installed on a client computer, you cannot manage the local computer by using Server Manager; Server Manager cannot be used to manage computers or devices that are running a Windows client operating system. You can only use Server Manager to manage Windows-based servers.
| Server Manager Source Operating System | Targeted at Windows Server 2016 | Targeted at Windows Server 2012 R2 | Targeted at Windows Server 2012 | Targeted at Windows Server 2008 R2 or Windows Server 2008 | Targeted at Windows Server 2003 |
|---|---|---|---|---|---|
| Windows 10 or Windows Server 2016 | Full support | Full support | Full support | After Software and configuration requirements are satisfied, can perform most management tasks, but no role or feature installation or uninstallation | Not supported |
| Windows 8.1 or Windows Server 2012 R2 | Not supported | Full support | Full support | After Software and configuration requirements are satisfied, can perform most management tasks, but no role or feature installation or uninstallation | Limited support; online and offline status only |
| Windows 8 or Windows Server 2012 | Not supported | Not supported | Full support | After Software and configuration requirements are satisfied, can perform most management tasks, but no role or feature installation or uninstallation | Limited support; online and offline status only |
To start Server Manager on a client computer
for more information about running Remote Server Administration Tools for Windows 10 to manage remote servers, see Remote Server Administration Tools on the TechNet Wiki.
Configure remote management on servers that you want to manage
Important
By default, Server Manager and Windows PowerShell remote management is enabled in Windows Server 2016.
To perform management tasks on remote servers by using Server Manager, remote servers that you want to manage must be configured to allow remote management by using Server Manager and Windows PowerShell. If remote management has been disabled on Windows Server 2012 R2 or Windows Server 2012 , and you want to enable it again, perform the following steps.
To configure Server Manager remote management on Windows Server 2012 R2 or Windows Server 2012 by using the Windows interface
To enable Server Manager remote management on Windows Server 2012 R2 or Windows Server 2012 by using Windows PowerShell
To enable Server Manager and Windows PowerShell remote management on older operating systems
Tasks that you can perform in Server Manager
Server Manager makes server administration more efficient by allowing administrators to do tasks in the following table by using a single tool. In Windows Server 2012 R2 and Windows Server 2012 , both standard users of a server and members of the Administrators group can perform management tasks in Server Manager, but by default, standard users are prevented from performing some tasks, as shown in the following table.
Administrators can use two Windows PowerShell cmdlets in the Server Manager cmdlet module, Enable-ServerManagerStandardUserremoting and Disable-ServerManagerStandardUserremoting, to further control standard user access to some additional data. The Enable-ServerManagerStandardUserremoting cmdlet can provide one or more standard, non-Administrator users access to event, service, performance counter, and role and feature inventory data.
Important
Server Manager cannot be used to manage a newer release of the Windows Server operating system. Server Manager running on Windows Server 2012 or Windows 8 cannot be used to manage servers that are running Windows Server 2012 R2 .
| Task Description | Administrators (including the built-in Administrator account) | Standard Server Users |
|---|---|---|
| add remote servers to a pool of servers that Server Manager can be used to manage. | Yes | No |
| create and edit custom groups of servers, such as servers that are in a specific geographic location or serve a specific purpose. | Yes | Yes |
| Install or uninstall roles, role services, and features on the local or on remote servers that are running Windows Server 2012 R2 or Windows Server 2012 . For definitions of roles, role services, and features, see Roles, Role Services, and Features. | Yes | No |
| View and make changes to server roles and features that are installed on either local or remote servers. Note: In Server Manager, role and feature data is displayed in the base language of the system, also called the system default GUI language, or the language selected during installation of the operating system. | Yes | Standard users can view and manage roles and features, and perform tasks such as viewing role events, but cannot add or remove role services. |
| start management tools such as Windows PowerShell or mmc snap-ins. You can start a Windows PowerShell session targeted at a remote server by right-clicking the server in the Servers tile, and then clicking Windows PowerShell. You can start mmc snap-ins from the Tools menu of the Server Manager console, and then point the mmc toward a remote computer after the snap-in is open. | Yes | Yes |
| Manage remote servers with different credentials by right-clicking a server in the Servers tile, and then clicking Manage As. You can use Manage As for general server and File and Storage Services management tasks. | Yes | No |
| Perform management tasks associated with the operational lifecycle of servers, such as starting or stopping services; and start other tools that allow you to configure a server’s network settings, users and groups, and Remote Desktop connections. | Yes | Standard users cannot start or stop services. They can change the local server’s name, workgroup, or domain membership and Remote Desktop settings, but are prompted by User Account Control to provide Administrator credentials before they can complete these tasks. They cannot change remote management settings. |
| Perform management tasks associated with the operational lifecycle of roles that are installed on servers, including scanning roles for compliance with best practices. | Yes | Standard users cannot run Best Practices Analyzer scans. |
| Determine server status, identify critical events, and analyze and troubleshoot configuration issues or failures. | Yes | Yes |
| Customize the events, performance data, services, and Best Practices Analyzer results about which you want to be alerted on the Server Manager dashboard. | Yes | Yes |
| Restart servers. | Yes | No |
| Refresh data that is displayed in the Server Manager console about managed servers. | Yes | No |
Note
Server Manager cannot be used to add roles and features to servers that are running Windows Server 2008 R2 or Windows Server 2008 .
start Server Manager
Server Manager starts automatically by default on servers that are running Windows Server 2016 when a member of the Administrators group logs on to a server. If you close Server Manager, restart it in one of the following ways. This section also contains steps for changing the default behavior, and preventing Server Manager from starting automatically.
To start Server Manager from the start screen
To start Server Manager from the Windows desktop
To prevent Server Manager from starting automatically
Restart remote servers
You can restart a remote server from the Servers tile of a role or group page in Server Manager.
Important
Restarting a remote server forces the server to restart, even if users are still logged on to the remote server, and even if programs with unsaved data are still open. This behavior is different from shutting down or restarting the local computer, on which you would be prompted to save unsaved program data, and verify that you wanted to force logged-on users to log off. Be sure that you can force other users to log off of remote servers, and that you can discard unsaved data in programs that are running on the remote servers.
if an automatic refresh occurs in Server Manager while a managed server is shutting down and restarting, refresh and manageability status errors can occur for the managed server, because Server Manager cannot connect to the remote server until it is finished restarting.
To restart remote servers in Server Manager
Export Server Manager settings to other computers
In Server Manager, your list of managed servers, changes to Server Manager console settings, and custom groups that you have created are stored in the following two files. You can reuse these settings on other computers that are running the same release of Server Manager (or Windows 10 with Remote Server Administration Tools installed). Remote Server Administration Tools must be running on Windows client-based computers to export Server Manager settings to those computers.
Note
You can export Server Manager settings, make Server Manager settings portable, or use them on other computers in one of the following two ways.
To export Server Manager settings to other domain-joined computers
To export Server Manager settings to computers in workgroups
-
Review initial considerations and system requirements
-
Tasks that you can perform in Server Manager
-
start Server Manager
-
Restart remote servers
-
Export Server Manager settings to other computers
-
Follow instructions in Remote Server Administration Tools to install Remote Server Administration Tools for Windows 10.
-
On the start screen, click Server Manager. The Server Manager tile is available after you install Remote Server Administration Tools.
-
if neither the Administrative Tools nor the Server Manager tiles are displayed on the start screen after installing Remote Server Administration Tools, and searching for Server Manager on the start screen does not display results, verify that the Show administrative tools setting is turned on. To view this setting, hover the mouse cursor over the upper right corner of the start screen, and then click Settings. If Show administrative tools is turned off, turn the setting on to display tools that you have installed as part of Remote Server Administration Tools.
-
Note
The settings that are controlled by the Configure remote Management dialog box do not affect parts of Server Manager that use DCOM for remote communications.
Do one of the following to open Server Manager if it is not already open.
-
On the Windows taskbar, click the Server Manager button.
-
On the start screen, click Server Manager.
-
-
In the Properties area of the Local Servers page, click the hyperlinked value for the remote management property.
-
Do one of the following, and then click OK.
-
To prevent this computer from being managed remotely by using Server Manager (or Windows PowerShell if it is installed), clear the Enable remote management of this server from other computers check box.
-
To let this computer be managed remotely by using Server Manager or Windows PowerShell, select Enable remote management of this server from other computers.
-
-
Do one of the following.
-
To run Windows PowerShell as an administrator from the start screen, right-click the Windows PowerShell tile, and then click Run as Administrator.
-
To run Windows PowerShell as an administrator from the desktop, right-click the Windows PowerShell shortcut in the taskbar, and then click Run as Administrator.
-
-
type the following, and then press Enter to enable all required firewall rule exceptions.
Configure-SMremoting.exe -Enable
Note
This command also works in a command prompt that has been opened with elevated user rights (Run as Administrator).
if enabling remote management fails, see about_remote_Troubleshooting on Microsoft TechNet for troubleshooting tips and best practices.
-
Do one of the following.
-
To enable remote management on servers that are running Windows Server 2008 R2 , see remote Management with Server Manager in the Windows Server 2008 R2 help.
-
To enable remote management on servers that are running Windows Server 2008 , see Enable and Use remote Commands in Windows PowerShell.
-
- On the Windows start screen, click the Server Manager tile.
- On the Windows taskbar, click Server Manager.
-
In the Server Manager console, on the Manage menu, click Server Manager Properties.
-
In the Server Manager Properties dialog box, fill the check box for Do not start Server Manager automatically at logon. Click OK.
-
Alternatively, you can prevent Server Manager from starting automatically by enabling the Group Policy setting, Do not start Server Manager automatically at logon. The path to this policy setting, in the Local Group Policy editor console, is computer Configuration\Administrative Templates\System\Server Manager.
-
Open a role or server group home page in Server Manager.
-
select one or more remote servers that you have added to Server Manager. Press and hold Ctrl as you click to select multiple servers at one time. For more information about how to add servers to the Server Manager server pool, see add Servers to Server Manager.
-
Right-click selected servers, and then click Restart Server.
-
%appdata%\Microsoft\Windows\ServerManager\Serverlist.xml
-
%appdata%\Local\Microsoft_Corporation\ServerManager.exe_StrongName_GUID\6.2.0.0\user.config
- Manage As (or alternate) credentials for servers in your server pool are not stored in the roaming profile. Server Manager users must add them on each computer from which they want to manage.
- The network share roaming profile is not created until a user logs on to the network, and then logs off for the first time. The Serverlist.xml file is created at this time.
-
To export settings to another domain-joined computer, configure the Server Manager user to have a roaming profile in active directory Users and computers. You must be a Domain Administrator to change user properties in active directory Users and computers.
-
To export settings to another computer in a workgroup, copy the preceding two files to the same location on the computer from which you want to manage by using Server Manager.
-
In active directory Users and computers, open the Properties dialog box for a Server Manager user.
-
On the Profile tab, add a path to a network share to store the user’s profile.
-
Do one of the following.
-
On U.S. English (en-us) builds, changes to the Serverlist.xml file are automatically saved to the profile. Go on to the next step.
-
On other builds, copy the following two files from the computer that is running Server Manager to the network share that is part of the user’s roaming profile.
-
%appdata%\Microsoft\Windows\ServerManager\Serverlist.xml
-
%localappdata%\Microsoft_Corporation\ServerManager.exe_StrongName_GUID\6.2.0.0\user.config
-
-
-
Click OK to save your changes and close the Properties dialog box.
-
On a computer from which you want to manage remote servers, overwrite the following two files with the same files from another computer that is running Server Manager, and that has the settings you want.
-
%appdata%\Microsoft\Windows\ServerManager\Serverlist.xml
-
%localappdata%\Microsoft_Corporation\ServerManager.exe_StrongName_GUID\6.2.0.0\user.config
-
This topic supports Remote Server Administration Tools for Windows 10.
Important
Starting with Windows 10 October 2018 Update, RSAT is included as a set of Features on Demand in Windows 10 itself. See When to use which RSAT version below for installation instructions.
RSAT lets IT admins manage Windows Server roles and features from a Windows 10 PC.
Remote Server Administration Tools includes Server Manager, Microsoft Management Console (mmc) snap-ins, consoles, Windows PowerShell cmdlets and providers, and some command-line tools for managing roles and features that run on Windows Server.
Remote Server Administration Tools includes Windows PowerShell cmdlet modules that can be used to manage roles and features that are running on Remote servers. Although Windows PowerShell remote management is enabled by default on Windows Server 2016, it is not enabled by default on Windows 10. To run cmdlets that are part of Remote Server Administration Tools against a Remote server, run Enable-PSremoting in a Windows PowerShell session that has been opened with elevated user rights (that is, Run as Administrator) on your Windows client computer after installing Remote Server Administration Tools.
Remote Server Administration Tools for Windows 10
Use Remote Server Administration Tools for Windows 10 to manage specific technologies on computers that are running Windows Server 2016, Windows Server 2012 R2, and in limited cases, Windows Server 2012 , or Windows Server 2008 R2 .
Remote Server Administration Tools for Windows 10 includes support for remote management of computers that are running the Server Core installation option or the Minimal Server Interface configuration of Windows Server 2016, Windows Server 2012 R2 , and in limited cases, the Server Core installation options of Windows Server 2012. However, Remote Server Administration Tools for Windows 10 cannot be installed on any versions of the Windows Server operating system.
Tools available in this release
for a list of the tools available in Remote Server Administration Tools for Windows 10, see the table in Remote Server Administration Tools (RSAT) for Windows operating systems.
System requirements
Remote Server Administration Tools for Windows 10 can be installed only on computers that are running Windows 10. Remote Server Administration Tools cannot be installed on computers that are running Windows RT 8.1, or other system-on-chip devices.
Remote Server Administration Tools for Windows 10 runs on both x86-based and x64-based editions of Windows 10.
Important
Remote Server Administration Tools for Windows 10 should not be installed on a computer that is running administration tools packs for Windows 8.1, Windows 8, Windows Server 2008 R2, Windows Server 2008, Windows Server 2003 or Windows 2000 Server. Remove all older versions of Administration Tools Pack or Remote Server Administration Tools, including earlier prerelease versions, and releases of the tools for different languages or locales from the computer before you install Remote Server Administration Tools for Windows 10.
To use this release of Server Manager to access and manage Remote servers that are running Windows Server 2012 R2 , Windows Server 2012 , or Windows Server 2008 R2 , you must install several updates to make the older Windows Server operating systems manageable by using Server Manager. For detailed information about how to prepare Windows Server 2012 R2, Windows Server 2012, and Windows Server 2008 R2 for management by using Server Manager in Remote Server Administration Tools for Windows 10, see Manage Multiple, Remote Servers with Server Manager.
Windows PowerShell and Server Manager remote management must be enabled on remote servers to manage them by using tools that are part of Remote Server Administration Tools for Windows 10. Remote management is enabled by default on servers that are running Windows Server 2016, Windows Server 2012 R2, and Windows Server 2012. For more information about how to enable remote management if it has been disabled, see Manage multiple, remote servers with Server Manager.
Use Features on Demand (FoD) to install specific RSAT tools on Windows 10 October 2018 Update, or later
Starting with Windows 10 October 2018 Update, RSAT is included as a set of Features on Demand right from Windows 10. Now, instead of downloading an RSAT package you can just go to Manage optional features in Settings and click Add a feature to see the list of available RSAT tools. Select and install the specific RSAT tools you need. To see installation progress, click the Back button to view status on the Manage optional features page.
See the list of RSAT tools available via Features on Demand. In addition to installing via the graphical Settings app, you can also install specific RSAT tools via command line or automation using DISM /Add-Capability.
One benefit of Features on Demand is that installed features persist across Windows 10 version upgrades!
To uninstall specific RSAT tools on Windows 10 October 2018 Update or later (after installing with FoD)
On Windows 10, open the Settings app, go to Manage optional features, select and uninstall the specific RSAT tools you wish to remove. Note that in some cases, you will need to manually uninstall dependencies. Specifically, if RSAT tool A is needed by RSAT tool B, then choosing to uninstall RSAT tool A will fail if RSAT tool B is still installed. In this case, uninstall RSAT tool B first, and then uninstall RSAT tool A. Also note that in some cases, uninstalling an RSAT tool may appear to succeed even though the tool is still installed. In this case, restarting the PC will complete the removal of the tool.
See the list of RSAT tools including dependencies. In addition to uninstalling via the graphical Settings app, you can also uninstall specific RSAT tools via command line or automation using DISM /Remove-Capability.
When to use which RSAT version
If you have a version of Windows 10 prior to the October 2018 Update (1809), you will not be able to use Features on Demand. You will need to download and install the RSAT package.
Download the RSAT package to install Remote Server Administration Tools for Windows 10
To uninstall Remote Server Administration Tools for Windows 10 (after RSAT package install)
Run Remote Server Administration Tools
Note
After installing Remote Server Administration Tools for Windows 10, the Administrative Tools folder is displayed on the Start menu. You can access the tools from the following locations.
The tools installed as part of Remote Server Administration Tools for Windows 10 cannot be used to manage the local client computer. Regardless of the tool you run, you must specify a remote server, or multiple remote servers, on which to run the tool. Because most tools are integrated with Server Manager, you add remote servers that you want to manage to the Server Manager server pool before managing the server by using the tools in the Tools menu. For more information about how to add servers to your server pool, and create custom groups of servers, see Add servers to Server Manager and Create and manage server groups.
In Remote Server Administration Tools for Windows 10, all GUI-based server management tools, such as mmc snap-ins and dialog boxes, are accessed from the Tools menu of the Server Manager console. Although the computer that runs Remote Server Administration Tools for Windows 10 runs a client-based operating system, after installing the tools, Server Manager, included with Remote Server Administration Tools for Windows 10, opens automatically by default on the client computer. Note that there is no Local Server page in the Server Manager console that runs on a client computer.
To start Server Manager on a client computer
Although they are not listed in the Server Manager console Tools menu, Windows PowerShell cmdlets and Command prompt management tools are also installed for roles and features as part of Remote Server Administration Tools. For example, if you open a Windows PowerShell session with elevated user rights (Run as Administrator), and run the cmdlet Get-Command -Module RDManagement, the results include a list of remote Desktop Services cmdlets that are now available to run on the local computer after installing Remote Server Administration Tools, as long as the cmdlets are targeted at a remote server that is running all or part of the remote Desktop Services role.
To start Windows PowerShell with elevated user rights (Run as administrator)
Note
You can also start a Windows PowerShell session that is targeted at a specific server by right-clicking a managed server in a role or group page in Server Manager, and then clicking Windows PowerShell.
Known issues
Issue: RSAT FOD installation fails with error code 0x800f0954
Impact: RSAT FODs on Windows 10 1809 (October 2018 Update) in WSUS/SCCM environments
Resolution: To install FODs on a domain-joined PC which receives updates through WSUS or SCCM, you will need to change a Group Policy setting to enable downloading FODs directly from Windows Update or a local share. For more details and instructions on how to change that setting, see How to make Features on Demand and language packs available when you’re using WSUS/SCCM.
-
Install RSAT FODs directly from Windows 10, as outlined above: When installing on Windows 10 October 2018 Update (1809) or later, for managing Windows Server 2019 or previous versions.
-
Download and install WS_1803 RSAT package, as outlined below: When installing on Windows 10 April 2018 Update (1803) or earlier, for managing Windows Server, version 1803 or Windows Server, version 1709.
-
Download and install WS2016 RSAT package, as outlined below: When installing on Windows 10 April 2018 Update (1803) or earlier, for managing Windows Server 2016 or previous versions.
-
Download the Remote Server Administration Tools for Windows 10 package from the Microsoft Download Center. You can either run the installer from the Download Center website, or save the download package to a local computer or share.
Important
You can only install Remote Server Administration Tools for Windows 10 on computers that are running Windows 10. Remote Server Administration Tools cannot be installed on computers that are running Windows RT 8.1 or other system-on-chip devices.
-
If you save the download package to a local computer or share, double-click the installer program, WindowsTH-KB2693643-x64.msu or WindowsTH-KB2693643-x86.msu, depending on the architecture of the computer on which you want to install the tools.
-
When you are prompted by the Windows Update Standalone Installer dialog box to install the update, click Yes.
-
Read and accept the license terms. Click I accept.
-
Installation requires a few minutes to finish.
-
On the desktop, click Start, click All Apps, click Windows System, and then click Control Panel.
-
Under Programs, click Uninstall a program.
-
Click View installed updates.
-
Right-click Update for Microsoft Windows (KB2693643), and then click Uninstall.
-
When you are asked if you are sure you want to uninstall the update, click Yes. S
To turn off specific tools (after RSAT package install)
-
On the desktop, click Start, click All Apps, click Windows System, and then click Control Panel.
-
Click Programs, and then in Programs and Features click Turn Windows features on or off.
-
In the Windows Features dialog box, expand Remote Server Administration Tools, and then expand either Role Administration Tools or Feature Administration Tools.
-
Clear the check boxes for any tools that you want to turn off.
Note
If you turn off Server Manager, the computer must be restarted, and tools that were accessible from the Tools menu of Server Manager must be opened from the Administrative Tools folder.
-
When you are finished turning off tools that you do not want to use, click OK.
- The Tools menu in the Server Manager console.
- Control Panel\System and Security\Administrative Tools.
- A shortcut saved to the desktop from the Administrative Tools folder (to do this, right click the Control Panel\System and Security\Administrative Tools link, and then click Create Shortcut).
-
On the Start menu, click All Apps, and then click Administrative Tools.
-
In the Administrative Tools folder, click Server Manager.
-
On the Start menu, click All Apps, click Windows System, and then click Windows PowerShell.
-
To run Windows PowerShell as an administrator from the desktop, right-click the Windows PowerShell shortcut, and then click Run as Administrator.

Target и source могут входить как в домен, так и в рабочую группу. Source может быть рабочим ПК администратора и работать под управлением Windows 7/8/8.1/10 с установленным пакетом RSAT соответствующей версии.
Рабочий ПК администратора не должен быть единственным местом откуда инфраструктурой можно управлять, его можно дополнить высокодоступным сервером размещенным в Microsoft Azure или Amazon, но их точкой отказа будет Интернет-канал.
Кроме RSAT, управлять серверами можно с помощью PowerShellWebAccess, но это скорее дополнительная возможность на случай недоступность RSAT. О настройке PSWA Вы можете почитать в моей статье “Настройка PowerShell Web Access“.
Перейдем непостредственно к настройке удаленного управления.
Чтобы посмотреть текущее значение удаленного управления на target можно выполнить:
Configure-SMRemoting.exe -get
Для удаленного управления, на целевом сервере должен быть настроен WinRM, его текущую конфигурацию можно запросить так:
winrm get winrm/config
Обратите внимание, Device Manager недоступен для удаленного управления в любых сценариях:
А все дело в том, что Microsoft “выпилила” удаленный доступ к PnP из соображений безопасности – http://support.microsoft.com/kb/2781106/en-us
Вместо этого, предлагается использовать PowerShell – http://blogs.technet.com/b/wincat/archive/2012/09/06/device-management-powershell-cmdlets-sample-an-introduction.aspx
Если Вам все-таки нужнен полноценный Device manager, вам придется установить хотя бы minimal GUI (о том, как это сделать написано выше).
Создадим и распространим на source и на target групповую политику, которой включим правила Firewall Remote Event Log Management, Remote Service Management, Windows Firewall Remote Management, Remote Volume Management:
В кажом правиле можно указать с каких сетей (лучше выделить админов в отдельную сеть, чем указывать список IP админских машин) разрешен этот трафик, на каких профилях и т.д. Хорошим вариантом будет использование IPSec.
Этот вопрос важен и требует индивидуального планирования чтобы, с одной стороны, минимизировать возможности атак, а с другой стороны, обеспечить возможность администрирования из нескольких мест, вт.ч. на случай аварии.
Если вас интересует управление Windows Firewall с помощью PowerShell рекомендую эту статью.
Теперь рассмотрим сценарий когда source находится в домене, а target в рабочей группе. В начале нужно убедится что source и target корректно разрешают fqdn и netbios имена друг друга, если нет – нужно поправить это в DNS. Как и в большинстве случаев, предпочтительно использование fqdn имен.
После этого, на source нужно добавить имя target в TrustedHosts:
Set-Item WSMan:\localhost\Client\TrustedHosts -Value %target_fqdn% -Concatenate -Force
После этого, можно будет использовать PowerShell remote sessions.
Вы можете посмотреть содержимое TrustedHosts:
Get-Item -Path WSMan:\localhost\Client\TrustedHosts | fl Name, Value
.. и очистить его содержимое при необходимости:
Clear-Item -Path WSMan:\localhost\Client\TrustedHosts
Теперь доступ к target есть по PowerShell, bus воспользуемся им чтобы включить на target таке правила firewall:
Set-NetFirewallRule -DisplayGroup "Windows Remote Management" -Enabled True -RemoteAddress "192.168.1.0/24"

Set-NetFirewallRule -DisplayGroup "Remote Event Log Management" -Enabled True -RemoteAddress "192.168.1.0/24"

Set-NetFirewallRule -DisplayGroup "Remote Service Management" -Enabled True -RemoteAddress "192.168.1.0/24"

Set-NetFirewallRule -DisplayGroup "Windows Firewall Remote Management" -Enabled True -RemoteAddress "192.168.1.0/24"

Set-NetFirewallRule -DisplayGroup "Remote Volume Management" -Enabled True -RemoteAddress "192.168.1.0/24"

Set-NetFirewallRule -DisplayGroup "File and Printer Sharing" -Enabled True -RemoteAddress "192.168.1.0/24"
Чтобы снять ограничения которые накладывает UAC на target нужно выполнить:
New-ItemProperty -Name LocalAccountTokenFilterPolicy -path HKLM:\SOFTWARE\Microsoft\Windows\CurrentVersion\Policies\System -propertyType DWord -value 1
Теперь можно добавить target в ServerManager на source и, а затем нужно выбрать опцию “Manage As..” и ввести учетные данные администратора target
Последний сценарий – когда source находится в рабочей группе, а target в домене – аналогичен предыдущему, и не требует дополнительных комментариев.
Если вам нужно управлять старыми версиями Windows Server, это сделать можно, 2012R2 и 2012 добавляются без проблем, а вот на 2008R2 и 2008 нужно будет поставить WMF 3.0 + Hotfix + выполнить:
Set-ExecutionPolicy -ExecutionPolicy RemoteSigned
Enable-PSremoting -Force
После этого (само собой нужно включить правила firewall, о которых выше) серверами 2008 и 2008R2 можно будет ограниченно управлять, но нельзя, например, устанавливать роли и фичи.
Вообще, запускать скрипты без цифровой подписи в рабочей инфраструктуре не очень хорошо, поэтому есть смысл поставить политику AllSigned:
Set-ExecutionPolicy AllSigned
Если серверов больше чем несколько, есть смысл сделать это через групповую политику (Administrative Templates\Windows Components\Windows PowerShell):
Вот еще наглядный пример, почему большинство задач желательно выполнять через Remote Access:
Для подписи скриптов я буду использовать Comodo Code Signing certificate:
Для подписывания используется командлет Set-AuthenticodeSignature :
Подписанный скрипт будет выглядеть следующим образом:
При запуске необходимо будет принять решение по издателю, я обычно использую Run once – работая с большим количеством скриптов от коллег это становится необходимостью.
Если вы используете для подписывания самозаверенный сертификат его нужно будет добавить на все сервера где планируется запуск подписанных им скриптов.
Так что самозаверенные сертификаты, как всегда, лучше не использовать.
Добавление Windows Sever 2003 я не описываю т.к. во-первых в нем потолок PS 2.0, во-вторых его поддержка заканчивается в обозримом будущем, а в-третьих за годы его эксплуатации процессы управления наверняка налажены и менять их нецелесообразно.
Новый Server Manager сделал большой шаг перед на пути к выполнению массовых операций, но на практике PowerShell более функционален.
Команду на удаленном компьютере можно выполнить указав в Invoke-Command -ComputerName (по-умолчанию Invoke-Command добавляется ко всем командлетам выполняемым локально):
Если команду нужно выполнить на нескольких сервера, откроем на них сессии и выполним операции на каждом параллельно:
Можете посмотреть разницу в скорости выполнения командлетов:
Подробнее про управление:
http://technet.microsoft.com/en-us/library/hh831456.aspx
… старыми версиями –
http://blogs.technet.com/b/servermanager/archive/2012/09/10/managing-downlevel-windows-based-servers-from-server-manager-in-windows-server-2012.aspx
Надеюсь озвученная информация будет полезной, а если нужна будет помощь — используйте форму на главной странице моего сайта.
