In this post we will see how to upgrade Windows Server 2008 R2 to Windows Server 2012. It’s been an year that Microsoft has released Windows Server 2012, when Windows Sever 2012 was released the IT professionals were eager to know what’s new in Windows Server 2012 and i was one of them. Microsoft releases all of its operating systems in multiple editions, which provides consumers with varying price points and feature sets. While choosing the edition make sure you choose the edition that suits your requirements. Before we go ahead and deploy Server 2012, let’s take a look at editions of Windows Server 2012.
1) Windows Server 2012 Datacenter Edition – The Datacenter edition is designed for large and powerful servers with up to 64 processors and fault-tolerance features such as hot add processor support. This edition is available only through the Microsoft volume licensing program and from original equipment manufacturers bundled with a server.
2) Windows Server 2012 Standard Edition – This is a fully functional edition of Windows Server 2012. Frankly speaking there is no much difference between Datacenter and Standard Edition of Windows Server 2012. What differentiates these 2 editions is the number of virtual machine instances that is permitted by the license. A Standard edition license will entitle you to run up to two VMs on up to two processors. A Datacenter edition license will entitle you to run an unlimited number of VMs on up to two processors.
3) Windows Server 2012 Essentials – The Essentials edition is suited for small organizations, this edition includes all the features of Standard and Datacenter edition except the Server Core, Hyper-v and ADFS (Active Directory Federation Services).
4) Windows Server 2012 Foundation – This edition is designed for small businesses that require only basic server features such as file and print services and application support. The edition includes no virtualization rights and is limited to 15 users.
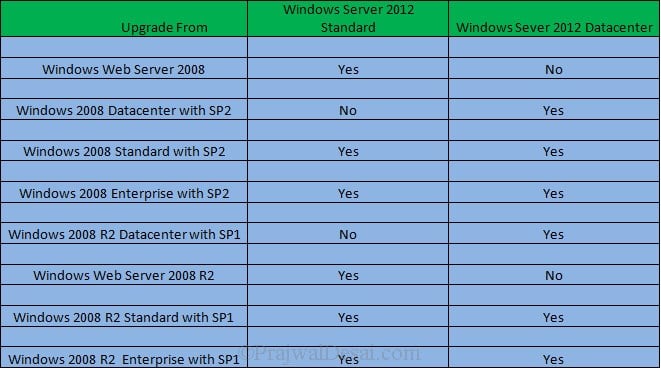
If i were to upgrade my existing windows server 2008 R2 Enterprise server to windows server 2012 i would first choose the edition and then i would check the upgrade paths. I have created a table which shows whether you can upgrade to windows server 2012 with you present operating system.
Lets take a look at hardware requirements for upgrading our server to windows server 2012. Windows Server 2012 requires minimum of 16 GB to 32 GB of disk space. When you install Windows Server 2012 it occupies 15.1 GB of space approximately but its good to allocate at least 32 GB of drive space for Windows Server 2012. You would require 1.4 GHz 64-bit processor, 512 MB of RAM, 32 GB of disk space, DVD Drive, Super VGA (800×600) or higher resolution monitor, keyboard and mouse.
The Windows Server 2012 evaluation software is available in Standard and Datacenter editions, you can download Windows Server 2012 from here :- http://technet.microsoft.com/en-in/evalcenter/hh670538.aspx.
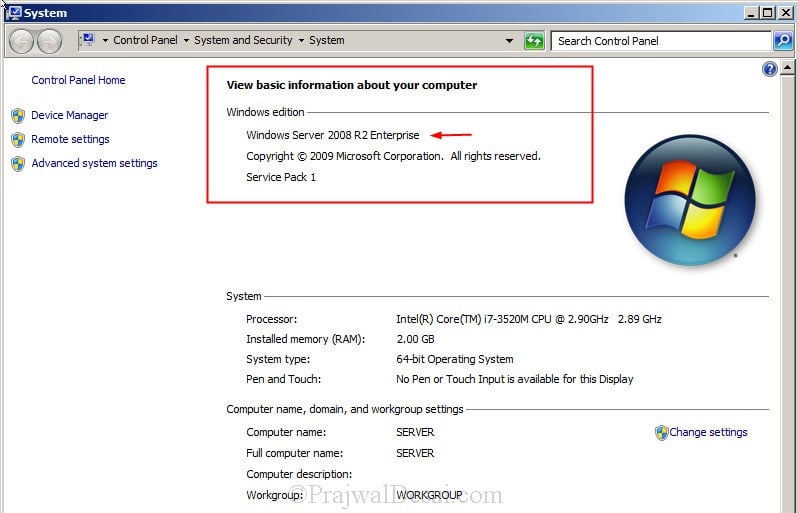
In this post i will be showing you how to upgrade a windows server 2008 R2 Enterprise SP1 to Windows Server 2012 Datacenter. Note that the existing server is in workgroup, do not consider this post to upgrade your domain controller to windows server 2012. I will be creating a separate post to show the upgrade of domain controller running on windows server 2008 r2 to windows server 2012.
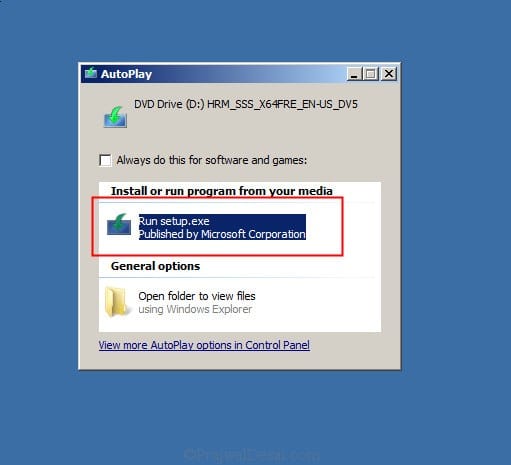
Insert the windows server 2012 DVD into the DVD-ROM and click on Run Setup.exe.
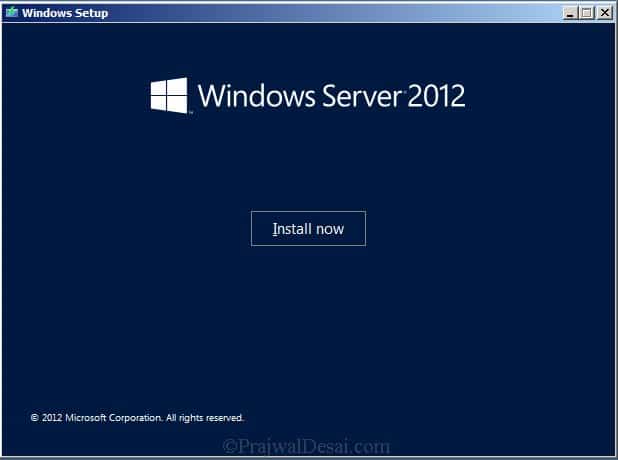
On the Windows Setup screen, click on Install now.
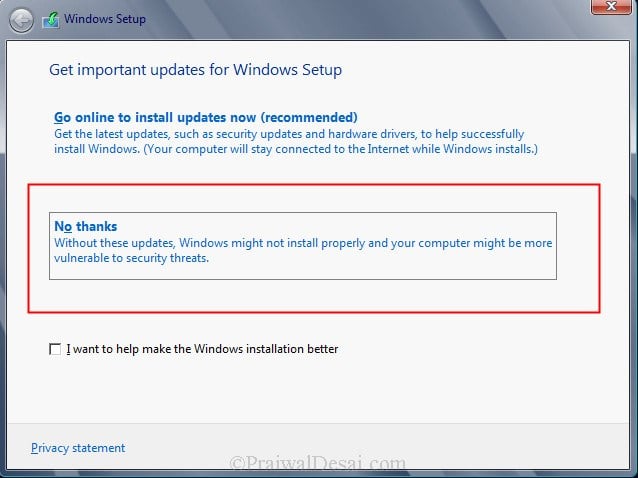
If you want to get security updates and latest drivers for your operating system select Go online to install updates now. We can also do a windows update once the upgrade is completed, so select No, Thanks.
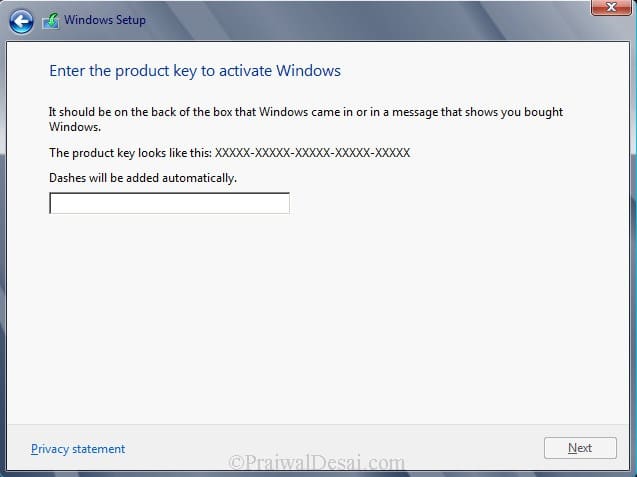
Enter your product key for windows server 2012 and click on Next. In this step i have entered server 2012 Datacenter edition key. Click on Next.
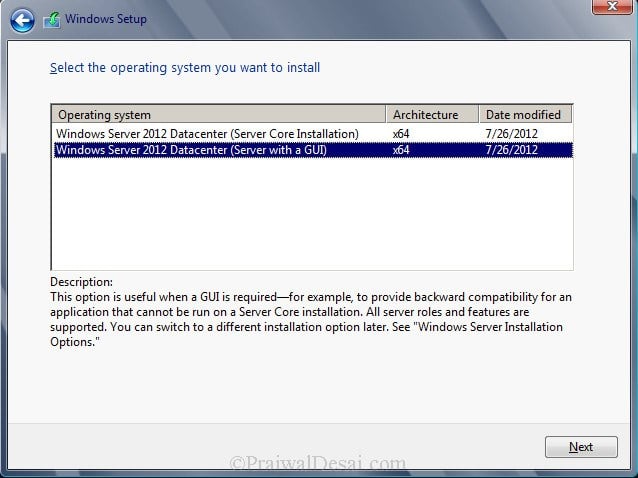
Server core installation has no Server Manager or any other MMCs to manage roles and features. The management must be done either remotely from a client machine or through the command prompt or Powershell at the console. There is no Start menu, no desktop Explorer shell, no Microsoft Management Console, and virtually no graphical applications. All you see when you start the computer is a single window with a command prompt. In this step i will select the second installation mode, Windows Server 2012 Datacenter (Server with a GUI). Click on Next.
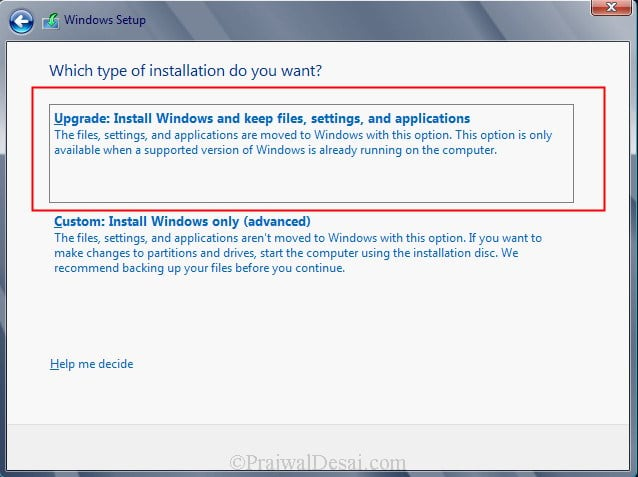
Select Upgrade: Install Windows and Keep files, settings and applications. This will keep existing files, settings and applications and upgrade our server to windows 2012.
The upgrade will take close to 20 minutes. Sit back and relax until the upgrade is complete.
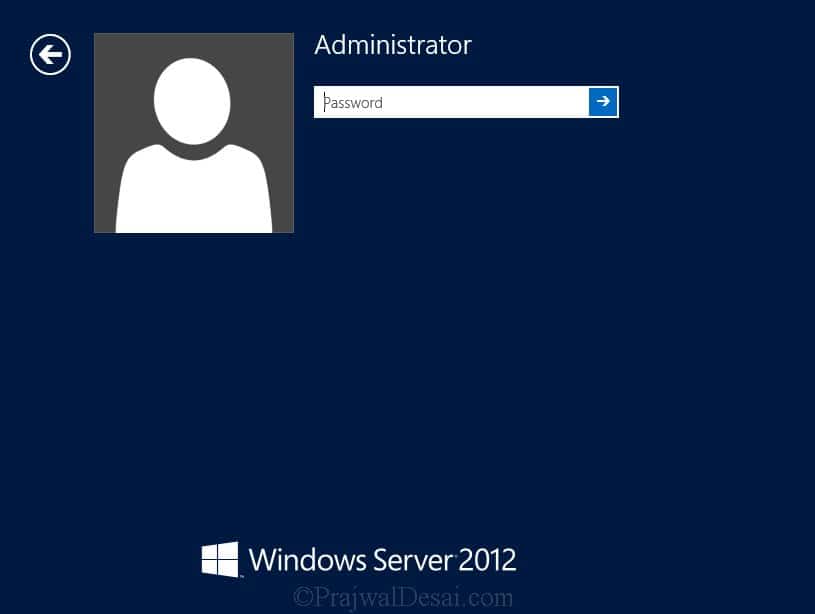
The upgrade from windows server 2008 R2 Enterprise to windows server 2012 Datacenter is complete. Let’s login to the server and check for the edition.
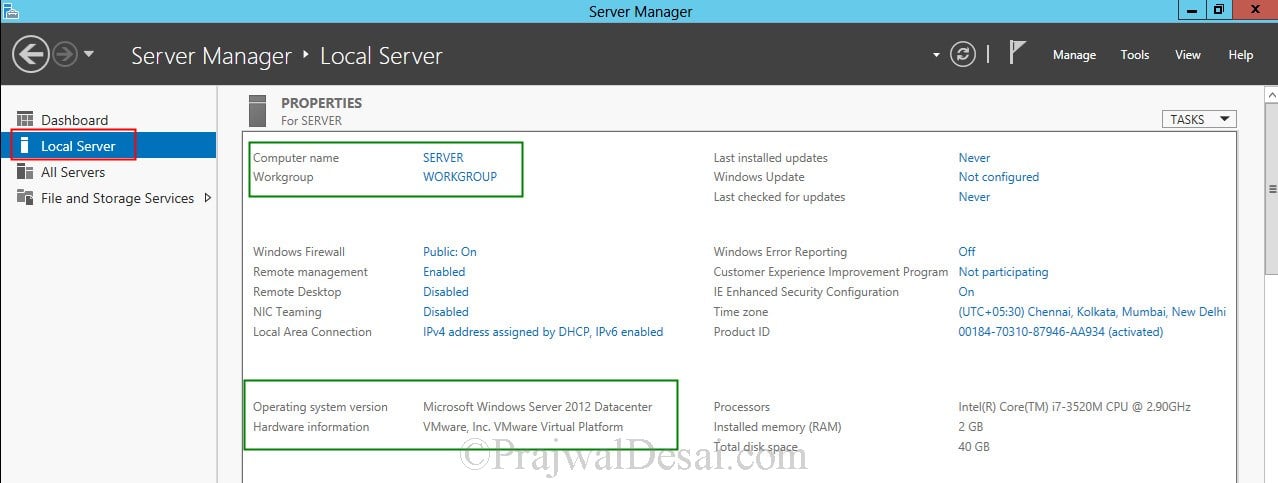
Click on Server Manager, Click on Local Server, check the properties of server. We see that the operating system version is Microsoft Windows Server 2012 Datacenter. The upgrade process has been completed successfully.

Prajwal Desai is a Microsoft MVP in Intune and SCCM. He writes articles on SCCM, Intune, Windows 365, Azure, Windows Server, Windows 11, WordPress and other topics, with the goal of providing people with useful information.
Hello fellow sys admins! In the following article, we will walk through an in-place upgrade from Windows Server 2008 R2 to 2012 R2. So let us dive right in.
The first step in any upgrade is to get the Installation Media. If you are using a Virtual Machine, then it’s as simple as adding the ISO to the Virtual CD-R Drive, either using the Hyper-V machine settings or the VMware console. If you are upgrading a physical server, then just unpack the ISO and copy it to either a secondary drive or flash drive, or you can just run it from a network share.
In our scenario, I am running the installation from a network share. In both cases, the upgrade process is the same; there is no difference between the VM OS or physical server OS as we all know so well.
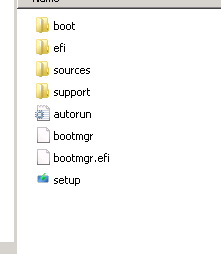
Therefore, as I mentioned before. I have unpacked the ISO using WinRAR.
Afterwards, I just ran the setup.exe from inside the OS. A small tip is to make sure you don’t have any other users logged into the server in any way, RDP or console, since the prerequisite check will fail and you will have to go through the setup again.
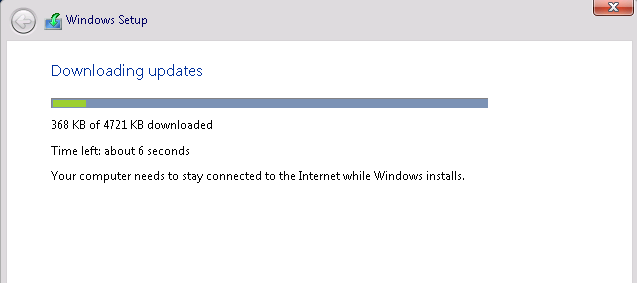
Once in the Setup Wizard, we will download the latest updates, which are required in order to bring the server to the latest compatible state for upgrading to Windows Server 2012 R2. This is a very important step, which most people choose to ignore, but it will save you a lot of hassle after you upgrade.
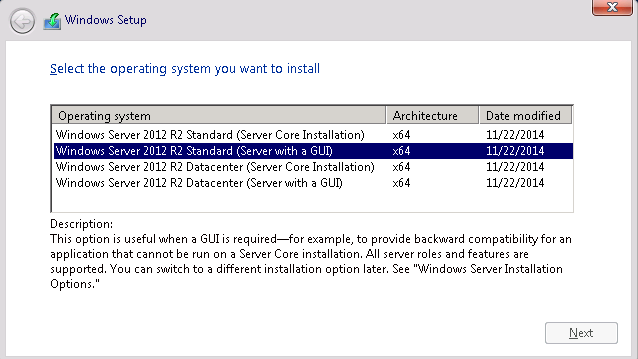
Next, we will choose the version of Windows Server 2012 R2. In our case, we are going from Windows Server 2008 R2 Standard Edition to Windows Server 2012 R2 Standard Edition.
Afterwards, we read the EULA from top to bottom, since it is very important. Hit Next and we then get to the eternal crossroad, where we have to choose whether to upgrade or to format. Since we want to upgrade, we will of course choose Upgrade!
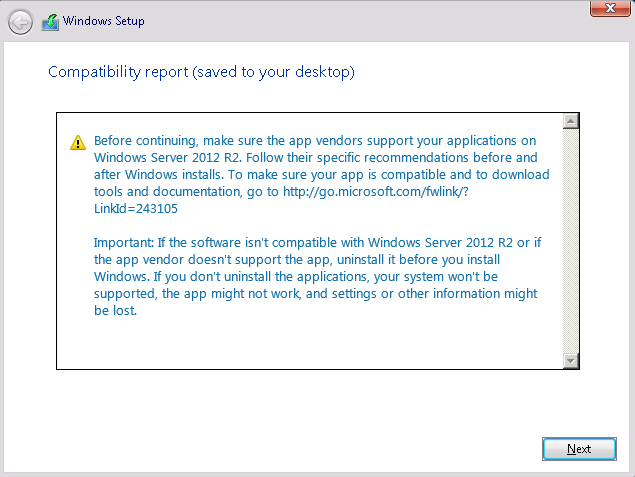
Once Upgrade is selected, there is no going back. The train has left the station. The Upgrade process has commenced. Well, not really. First, it’s going to do the compatibility check, and if all goes well, you will be greeted with the following screen.
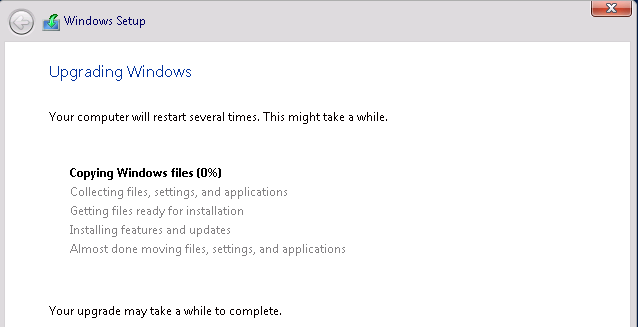
Then we hit Next, take a deep breath and watch and wait as the new version of Windows is being installed on top of our old one.
If everything goes well, we will be greeted with the Windows Server 2012 R2 loading screen and the Finalizing Settings window. This process will take a while, so even if at times it appears to be doing nothing, go take a break, come back later and then login to your new OS.
Thank you for taking this journey with me through the Upgrade of Windows Server 2008 R2 to Windows Server 2012 R2. Until next time! Enjoy!
Если вы используете операционную систему Windows Server 2008 R2 и хотите получить все преимущества Windows Server 2012 R2, то вам потребуется выполнить обновление. Обновление операционной системы поможет вам использовать новейшие функции и получить более надежную и безопасную инфраструктуру. В этом пошаговом руководстве мы расскажем, как произвести обновление вашего сервера.
Прежде чем начать процесс обновления, важно убедиться в том, что ваш сервер соответствует минимальным требованиям для установки Windows Server 2012 R2. Убедитесь, что у вас есть достаточно свободного места на жестком диске, процессор и оперативная память соответствуют требованиям, а также проверьте наличие актуальных драйверов для оборудования сервера.
Перед началом обновления рекомендуется создать резервную копию всех важных данных и настроек. Обновление операционной системы может потребовать перезагрузки сервера и несет потенциальный риск потерять данные. Резервная копия поможет вам восстановить данные в случае непредвиденных ситуаций.
Вам также необходимо проверить, насколько обновление повлияет на работу существующих приложений и сервисов. Некоторые приложения и сервисы могут несовместимы с Windows Server 2012 R2, поэтому убедитесь, что все необходимые обновления и патчи установлены и что нужное программное обеспечение совместимо с новой версией операционной системы.
Обновление Windows Server 2008 R2 до Windows Server 2012 R2
1. Проверьте требования к системе
Перед обновлением убедитесь, что ваш сервер соответствует требованиям для установки Windows Server 2012 R2. Убедитесь, что у вас достаточно свободного пространства на диске, а также проверьте совместимость установленного аппаратного и программного обеспечения.
2. Создайте резервную копию данных
Прежде чем приступить к обновлению, рекомендуется создать полную резервную копию всех данных на сервере. Это позволит вам восстановить систему в случае непредвиденных проблем или ошибок.
3. Загрузите образ установки Windows Server 2012 R2
Скачайте образ установки Windows Server 2012 R2 с официального сайта Microsoft или воспользуйтесь соответствующими установочными носителями.
4. Запустите установку
Запустите установку Windows Server 2012 R2 с помощью загруженного образа. В процессе установки выберите опцию «Обновление», чтобы сохранить все настройки и данные с текущей операционной системы.
5. Следуйте инструкциям установщика
Во время установки внимательно следуйте инструкциям установщика. Выберите желаемые параметры установки и подтвердите свое согласие на обновление операционной системы с Windows Server 2008 R2 до Windows Server 2012 R2.
6. Дождитесь завершения установки
После этого оставьте компьютер на некоторое время, чтобы завершить процесс установки. При необходимости перезагрузитесь, чтобы применить все изменения.
7. Проверьте работу сервера
После успешного обновления, удостоверьтесь, что все службы и приложения работают корректно. Проведите тестирование, чтобы убедиться, что сервер функционирует без проблем после обновления.
Следуя этому пошаговому руководству, вы сможете успешно обновить операционную систему с Windows Server 2008 R2 до Windows Server 2012 R2 и получить все преимущества новой версии сервера.
Подготовка перед обновлением
При обновлении операционной системы Windows Server 2008 R2 до Windows Server 2012 R2 необходимо выполнить ряд подготовительных действий. Это поможет обеспечить безопасность и сохранность данных в процессе обновления.
Перед началом обновления рекомендуется выполнить следующие шаги:
| 1. | Создайте резервную копию всех важных данных, хранящихся на сервере. Обновление может изменить или удалить данные, поэтому имеет смысл предварительно сохранить их. |
| 2. | Убедитесь, что на сервере установлены все необходимые последние обновления и исправления для Windows Server 2008 R2. Это может помочь предотвратить возможные проблемы и ошибки при обновлении. |
| 3. | Проверьте список поддерживаемого оборудования и программного обеспечения для Windows Server 2012 R2. Убедитесь, что все установленное оборудование и программное обеспечение совместимо с новой версией операционной системы. |
| 4. | Определите необходимое количество свободного места на жестком диске для обновления. Учтите, что обновление может потребовать значительный объем дискового пространства. |
| 5. | Подготовьте установочные носители или загрузочный USB-накопитель с Windows Server 2012 R2. Убедитесь, что у вас есть доступ к требуемым носителям перед началом обновления. |
Следуя этим рекомендациям, вы сможете успешно подготовить сервер к обновлению и избежать возможных проблем в процессе. Приступайте к следующему шагу только после завершения всех подготовительных действий.
Windows Server 2008 R2 will reach to end of life on January 14, 2020. It is essential that all users who are using Windows Server 2008 R2 upgrade their server to Windows Server 2012 R2 or migrate to other higher operating system (i.e. Windows Server 2016).
In this knowledgebase article, we will illustrate how can you perform in-place upgrade Windows Server 2008 R2 to Windows Server 2012 R2. Since this is major version upgrade, you have to read and understand the upgrade instructions properly.
Before you start upgrading your server, please ensure that you have necessary license for Windows Server 2012 R2. For more information about license upgrade, you can refer the following URL:
https://docs.microsoft.com/en-us/previous-versions/windows/it-pro/windows-server-2012-R2-and-2012/dn303416(v=ws.11)
It is essential that you have secured full backup of your data and you should be able to perform bare metal restore in case if the upgrade is failed. If upgrade is failed, you will have to restore the server from backup to boot from the old Windows Server 2008 R2. Also, if you have installed third party software or applications, please ensure that they are compatible with Windows Server 2012 R2.
Important Note: We are considering that you do not have any additional server role (i.e. IIS, FTP, DNS, Active Directory etc.) on the server. If you have additional server role, kindly refer their compatibility to perform in-place upgrade.
Upgrade Windows Server 2008 R2 to Windows Server 2012 R2
Before starting upgrade, please ensure that you have installed all pending updates for Windows Server 2008 R2. If there is any pending update, kindly install it first. Once all updates are installed, we are ready to perform this upgrade.
[1] Insert Windows Server 2012 R2 ISO in your server and start the installation. It will ask you to accept license terms. Select “I accept the license terms” and click on Next button as shown in the following image:
[2] On next step, it will ask you which type of installation do you want. You need to select “Upgrade: Install Windows and keep files, settings and applications” option to upgrade the existing operating system as shown in the following image:
[3] Next step will check the compatibility and it will provide you report. Kindly the compatibility report. If it does not report any issue, you can click on Next button as shown in the following image:
If this is Hyper-V virtual machine, you may see the following warning:
Installing Windows will affect these devices:
These devices might not work properly in Windows. We recommend updating the drivers for these devices before you continue. ? System devices: Microsoft Hyper-V S3 Cap
You can ignore this message and continue with upgrade. This will not cause any issue.
[4] Now it will start copying Windows files to upgrade the server’s operating system. During this process your system may restart several times. Please do not interrupt this process.
[5] On last step, you will see a screen with “Finalizing your settings” after reboot. Once again, do no interrupt or reboot your server while it is performing this. It may take some time. Once this step is complete, you should see that login screen.
After login, you should verify your installed software and data to ensure that they are available after upgrade.
- Remove From My Forums
-
Question
-
How do i upgrade windows server 2008 r2 32bit enterprise version to windows server 2012 r2?
Answers
-
Hi,
In my opinion, you can always add additional domain controller. I would highly recommend to switch to x64 version since there is no upgrade path to Windows 2008 R2 x32.
Installing new x64 Windows 2008 R2 machine, promote it to domain controller, then move all AD roles to this new DC, decommission the old x32 one and if you can afford it add another x64 DC for best practice. Never run AD on a single DC except if you are
testing. For production always use 2. If you are going to do as I suggest, please be patient. Add DC, wait for replication to take place, check DNS records and then move on. After each step check your logs.Some related article for your reference:
Upgrading an Active Directory Domain from Windows Server 2008 or Windows Server 2008 R2 to Windows Server 2012 or Windows Server 2012 R2
Best Regards,
Alvin Wang
Please remember to mark the replies as answers if they help and un-mark them if they provide no help. If you have feedback for TechNet Subscriber Support, contact tnmff@microsoft.com.
-
Marked as answer by
Tuesday, May 17, 2016 5:33 AM
-
Marked as answer by

