Режим Ultimate Performance Mode – это план электропитания в Windows 10, выпущенный вместе с Windows 10 v1803, который предназначен для рабочих станций и нацелен на оптимизацию производительности операционной системы. Хотя это и предназначено для повышения производительности, IMO, это очень поможет и геймерам, и тем, кто выполняет какие-либо задачи с высокой интенсивностью. В этом руководстве мы узнаем, как включить Ultimate Performance Power Plan в Windows 10 .
Ultimate Performance Power Plan доступна только для ПК с высокопроизводительной конфигурацией, работающих непосредственно от источника питания, и прямого способа включить это для всех ПК не существует. Тем не менее, я по-прежнему не буду рекомендовать этот режим для ноутбуков, так как он будет потреблять много батареи, но если вы уверены, что хотите его, вы можете использовать его для лучшего игрового опыта.
Содержание
- Максимальная производительность Power Plan в Windows 10
- Включить Ultimate Performance Power Plan
- Отключить режим максимальной производительности
Максимальная производительность Power Plan в Windows 10
Давайте попробуем понять, почему этот режим был построен. На серверах и рабочих станциях, где производительность является приоритетом, Microsoft исключила все факторы, обеспечивающие сбалансированное энергопотребление или что-либо еще, чтобы батарея работала долго. Многие временные компании должны выполнять свою работу и могут выдерживать затраты на энергопотребление, так как результаты необходимы вовремя.
Microsoft создала этот режим, чтобы он мог помочь пользователям получить максимальную производительность от своего оборудования. По умолчанию этот режим доступен только на рабочих станциях. Этот режим недоступен в системах, в которых используется батарея. Но с помощью этого хака вы можете включить его для всех. Но если вы включите его на устройстве с использованием аккумулятора, аккумулятор будет быстро разряжаться. Вы также можете включить его на рабочем столе.
Включить Ultimate Performance Power Plan
Выполните следующие действия, чтобы включить Ultimate Performance Power Plan в Windows 10. В этом режиме приложения будут работать быстрее. Тем не менее, он будет потреблять много батареи, и если вы находитесь на ноутбуке, убедитесь, что он подключен к сети.
Убедитесь, что вы обновили свой компьютер до Windows 10 версии 1803. Это можно проверить в меню «Настройки»> «Система»> «О программе».
Теперь откройте Настройки> Система> Питание и сон> Дополнительные параметры питания.
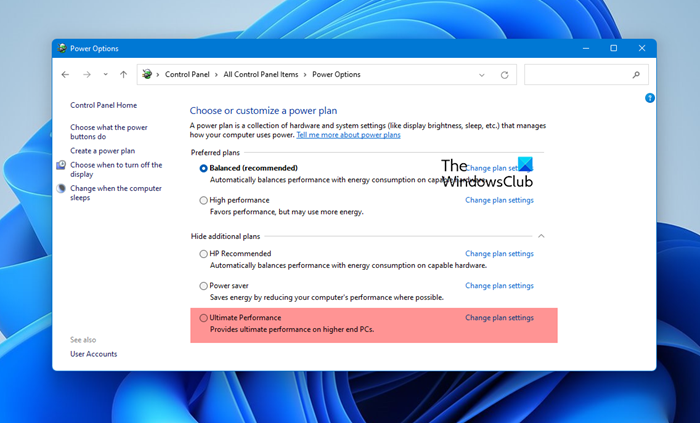
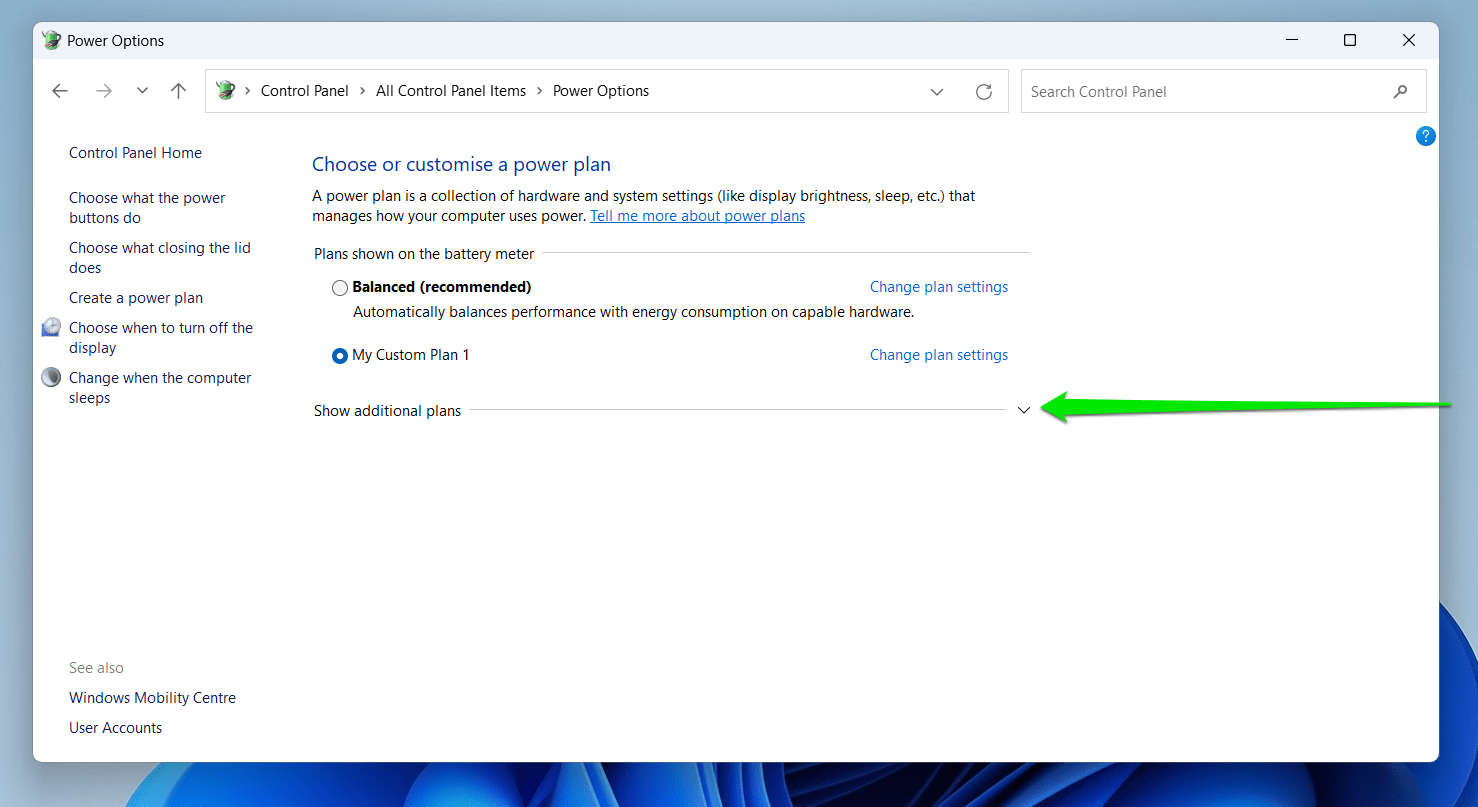
В разделе Выберите, чтобы настроить тарифный план , разверните опцию «Показать дополнительные планы».
Если вы не видите Режим максимальной производительности , выполните следующие действия.
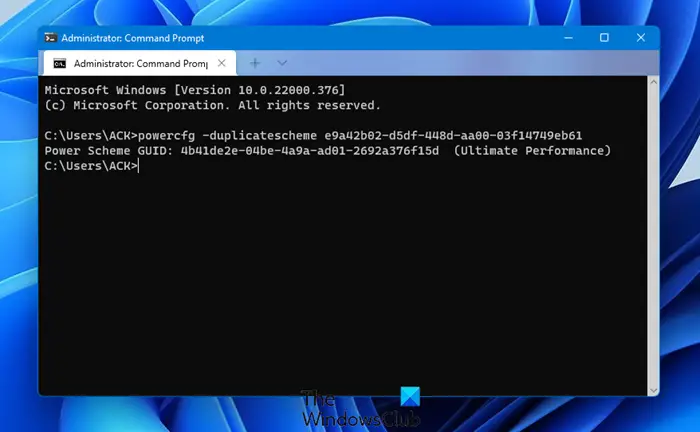
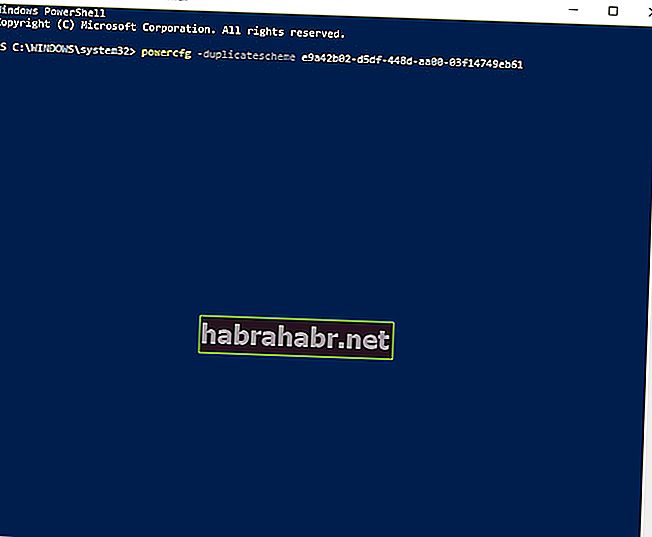
Откройте командную строку от имени администратора.
В командной строке скопируйте следующую команду и нажмите Enter.
powercfg -duplicatescheme e9a42b02-d5df-448d-aa00-03f14749eb61

Сверните командную строку и выберите «Настройки»> «Система»> «Питание и спящий режим»> «Дополнительные параметры питания».
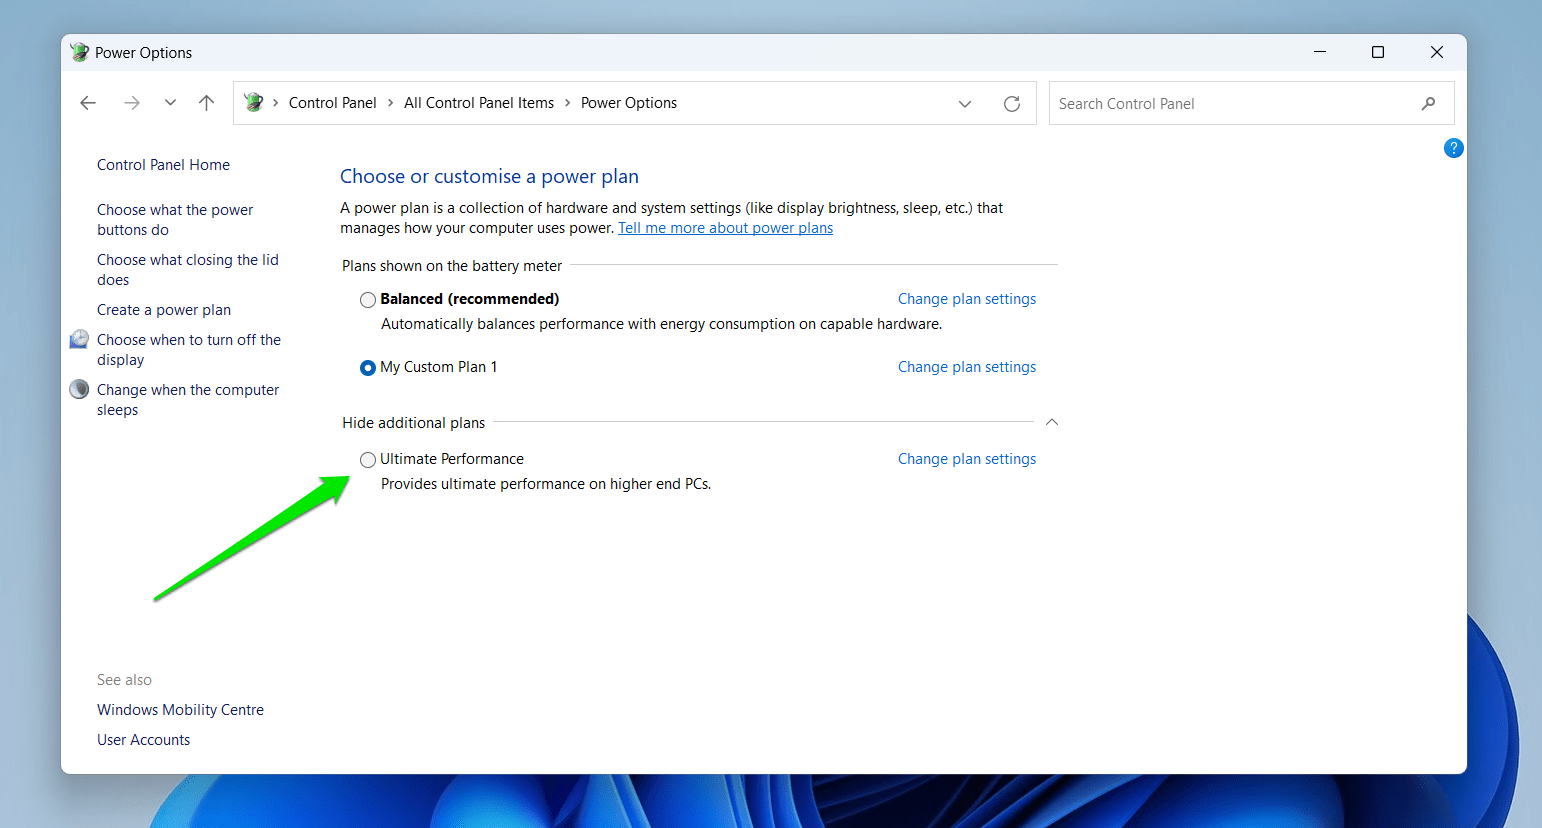
Выберите Ultimate Performance Power Plan.
Вы можете дополнительно настроить план питания.

Режимами по умолчанию в Windows 10 являются Сбалансированный, Энергосбережение и Высокая производительность. Ultimate Performance делает это на шаг впереди.
Основные характеристики режима максимальной производительности:
- Жесткий диск никогда не идет спать
- Частота таймера JavaScript на максимуме.
- Спящий режим и Сон отключены.
- Состояние процессора, политика слияния, максимальная частота процессора максимально.
Отключить режим максимальной производительности
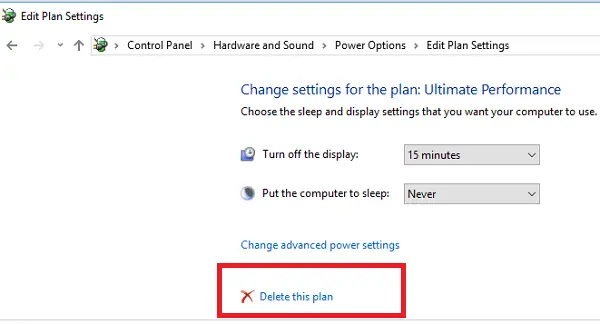
- Вернитесь в Расширенные настройки питания.
- Нажмите Изменить параметры плана рядом с режимом максимальной производительности.
- В следующем окне вы можете удалить его.

Так что если вы не видите его включенным на вашем ноутбуке после использования этой команды, возможно, ваша система не поддерживает его.
Если у вас есть компьютер, который не использует батарею, я настоятельно рекомендую вам использовать его во время игры или когда вы используете программное обеспечение для редактирования видео, которому требуется много ресурсов процессора/графического процессора, чтобы получить лучший результат в гораздо более короткие сроки. время.
Download Windows Speedup Tool to fix errors and make PC run faster
Ultimate Performance Mode is a power plan in Windows, which is designed for Workstations and aims to optimize the performance of the operating system. While it is meant to improve performance, IMO, this is going to help a lot for gamers as well or anyone with any high-intensity task. In this guide, we will learn how to enable Ultimate Performance Power Plan in Windows 11/10.
Ultimate Performance Power Plan is available only with PCs with high-end configuration running directly on power, and there is no direct way to enable this for all PCs. That said, I will not still recommend this mode for Laptops as it will consume a lot of battery, but if you are sure you want it, you can use it for your best gaming experience.
Let’s try to understand why this mode was built. On Servers and Workstation where performance is a priority, Microsoft took out all the factors which made sure of balanced power consumption or anything to keep the battery last long. Many times companies need to get the job done and can sustain the cost of power consumption as the results are needed on time.
Microsoft built this mode so that it can help users get maximum performance from their hardware. By default, this mode is available on workstations only. This mode is not available on systems that use a battery. But using this hack you can enable it for all. But if you enable it on a device using Battery, the battery will be drained fast. You can enable it on your Desktop as well.
Enable Ultimate Performance Power Plan
Follow these steps to enable Ultimate Performance Power Plan in Windows 11/10. This mode will make applications perform faster. However, it will consume a lot of battery, and if you are on a laptop, make sure to keep it connected to the Mains.
Make sure you have updated your PC to Windows 10 version 1803. You can check this in Settings > System > About.
Now, open Settings >System > Power & sleep > Addtional Power Settings.
Under Choose to customize a power plan, expand the option which says “Unhide Additional plans.”
If you do not see Ultimate Performance Mode, then follow the next steps.
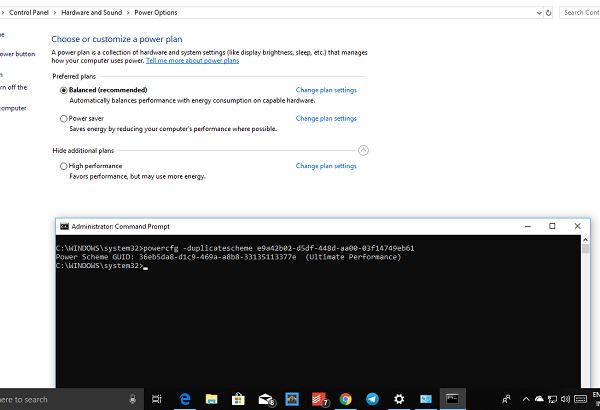
Open a Command Prompt as administrator.
In the command prompt, copy the following command, and hit Enter.
powercfg -duplicatescheme e9a42b02-d5df-448d-aa00-03f14749eb61
Minimize the command prompt, and Settings >System > Power & sleep > Addtional Power Settings.
Select Ultimate Performance Power Plan.
You can further customize the power plan.
The default modes in Windows 11/10 are Balanced, Power Saver, and High Performance. Ultimate Performance takes it one step ahead.
Highlights of Ultimate Performance Mode:
- Hard disk never goes to sleep
- Javascript timer frequency is at maximum.
- Hibernation and Sleep are turned off.
- Processor State, Colling Policy, maximum processor rate are maxed out.
Disable Ultimate Performance Mode
- Go back to Advanced Power Settings.
- Click on Change Plan Settings next to Ultimate Performance Mode.
- In the next window, you can choose to delete it.
So if you don’t see it enabled on your laptop after using this command, maybe your system does not support it.
If you have a PC that doesn’t use the battery, I will strongly suggest you use it when you are gaming, or when you are using a video editing software that needs a lot of CPU/GPU power to get the best result in a much shorter time.
Anand Khanse is the Admin of TheWindowsClub.com, a 10-year Microsoft MVP (2006-16) & a Windows Insider MVP (2016-2022). Please read the entire post & the comments first, create a System Restore Point before making any changes to your system & be careful about any 3rd-party offers while installing freeware.
 Совет включить схему электропитания «Максимальная производительность» можно встретить не только в контексте повышения производительности ноутбука или ПК, но и для решения проблем с отключением каких-либо устройств и иногда это действительно помогает.
В этой простой инструкции о том, как включить эту схему электропитания и как добавить «Максимальная производительность» в список доступных схем электропитания Windows 11 или Windows 10, если она в нём отсутствует.
Включение или добавление схемы электропитания «Максимальная производительность»
Базовые шаги для того, чтобы включить схему электропитания «Максимальная производительность», при условии, что она доступна для выбора, следующий:
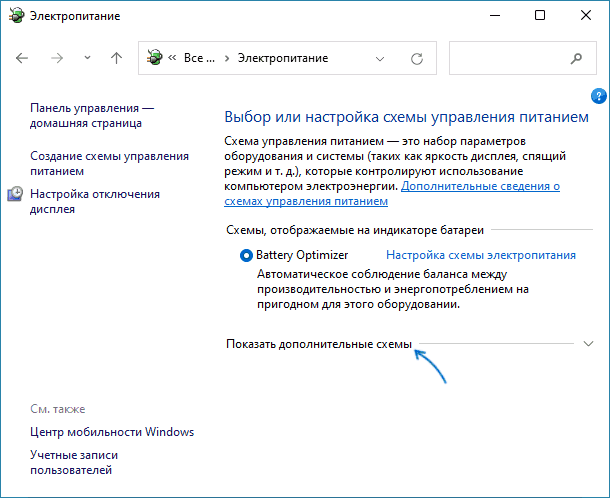
- Откройте панель управления и перейдите в пункт «Электропитание», либо нажмите клавиши Win+R на клавиатуре, введите powercfg.cpl и нажмите Enter.
- Нажмите по «Показать дополнительные схемы».

- Если в списке доступен вариант «Максимальная производительность» — просто выберите его. Если его нет — решение далее в статье.


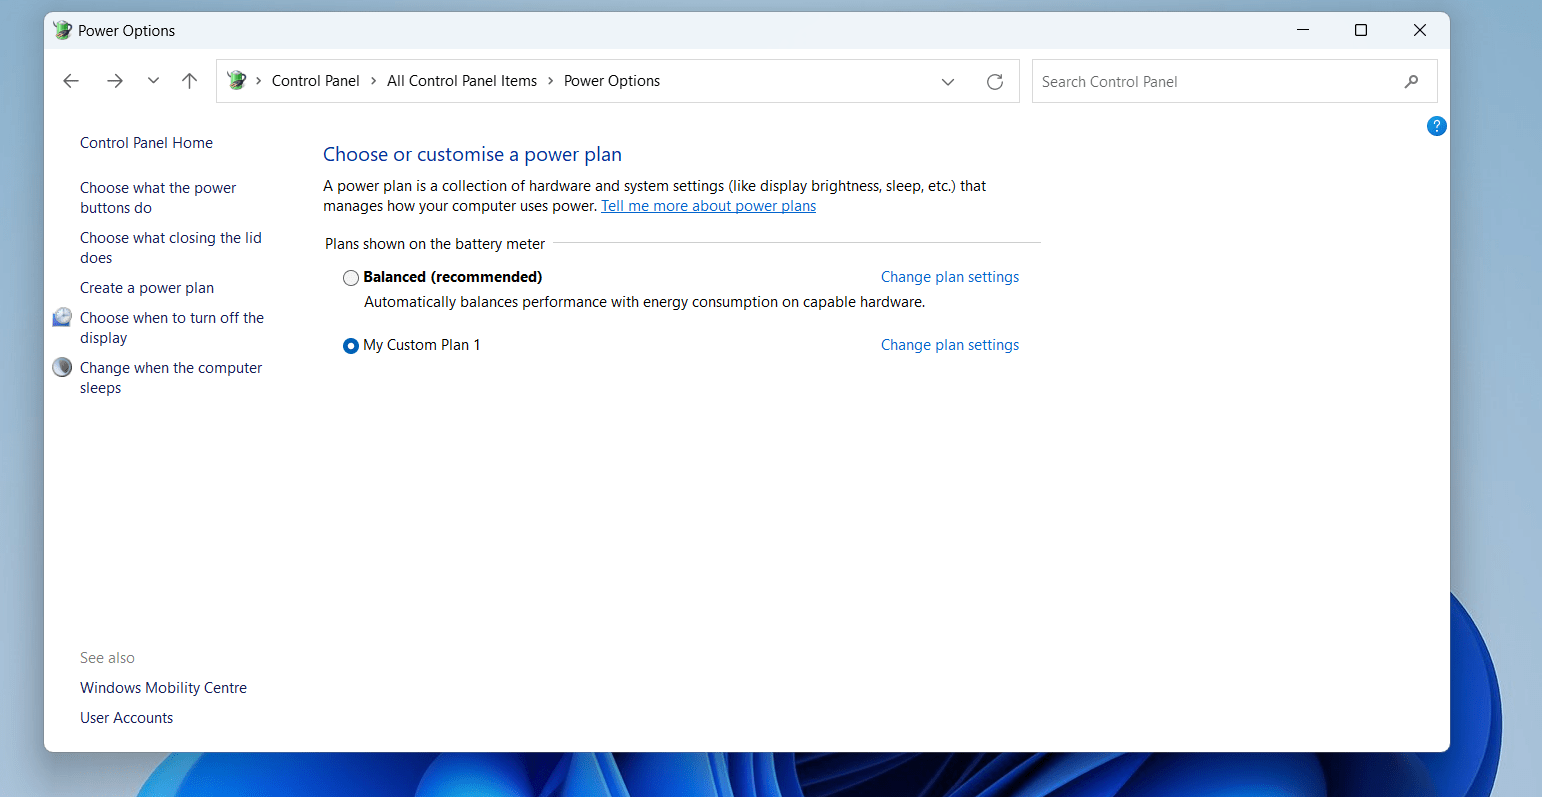
Однако, как можно видеть на скриншоте выше, пункт «Максимальная производительность» может отсутствовать в списке схем электропитания. В этом случае его можно добавить. Для этого:
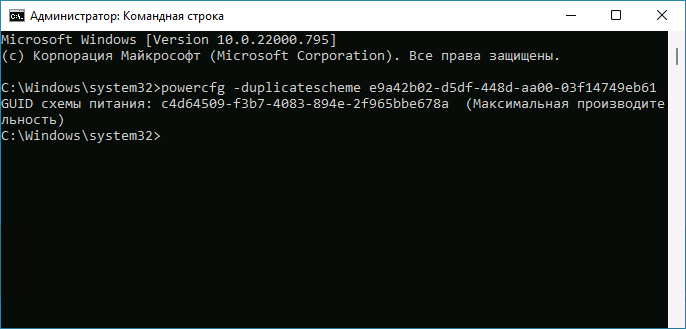
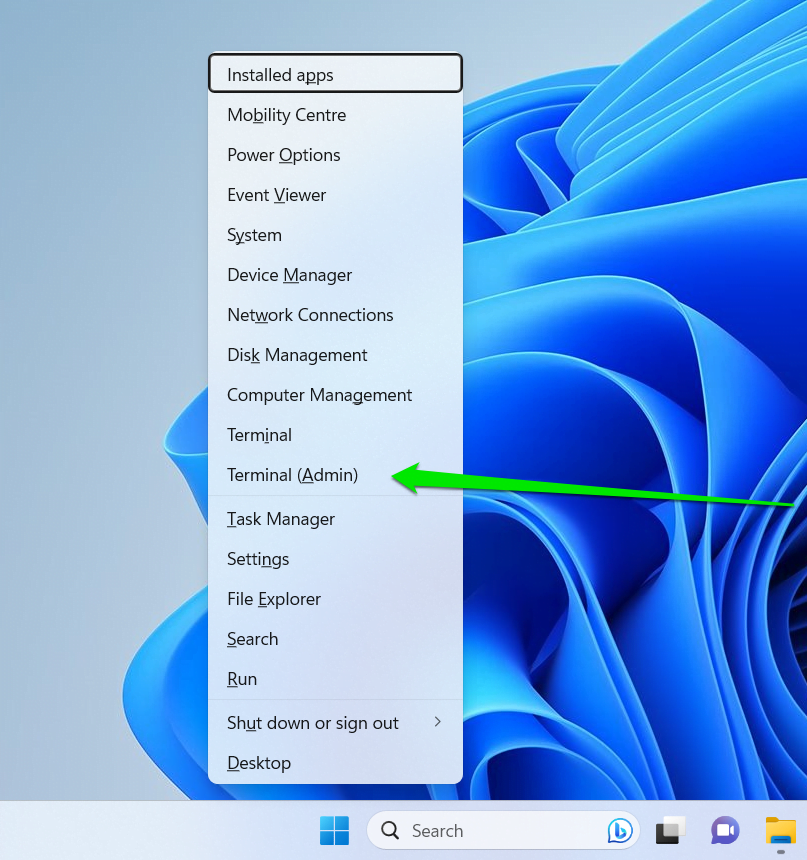
- Запустите командную строку от имени администратора. PowerShell или «Терминал Windows» также подойдет, в Windows 10 и Windows 11 их можно запустить из меню по правому клику на кнопке «Пуск».
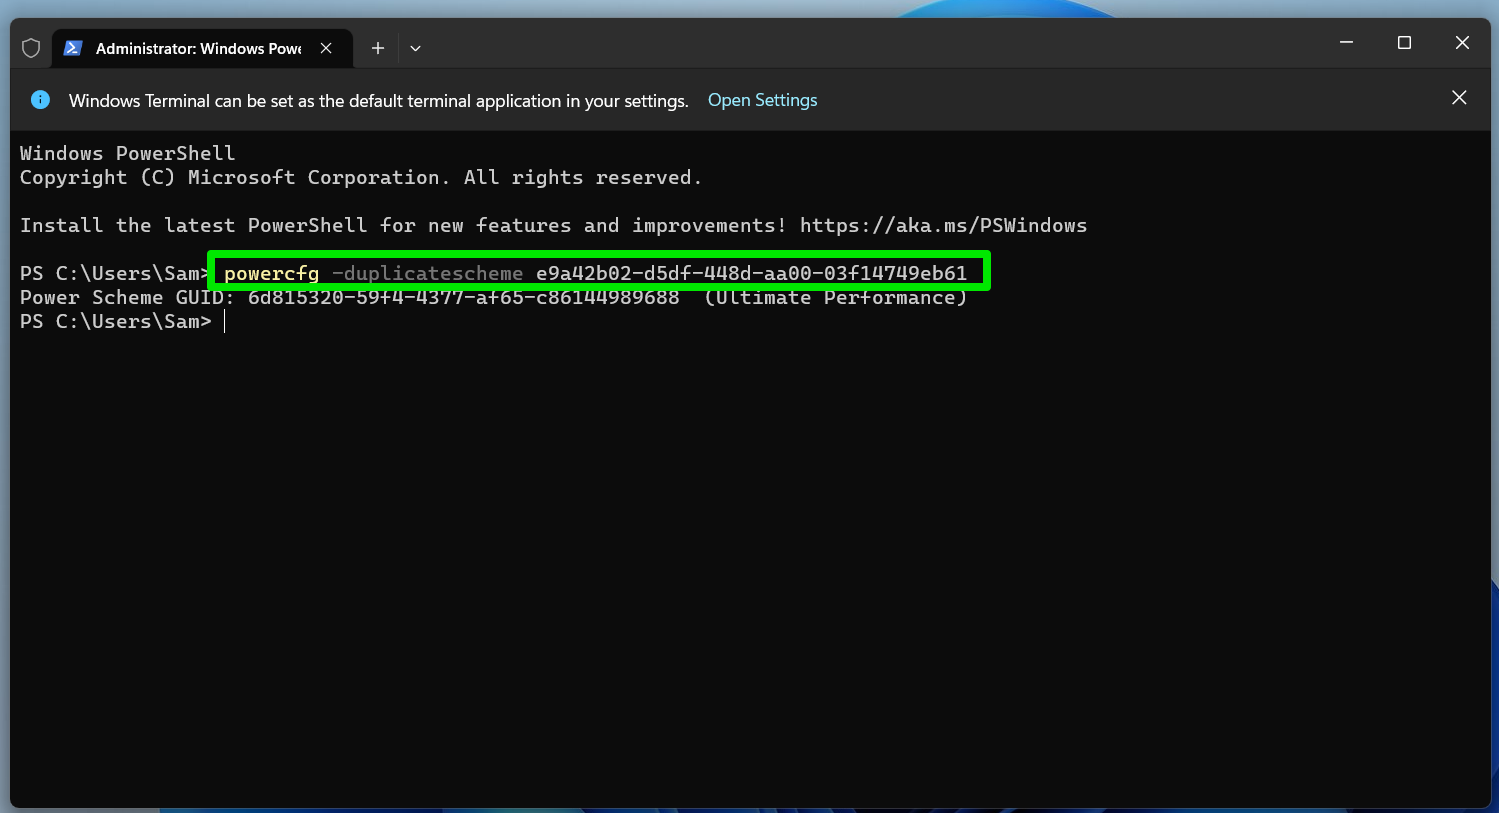
- Введите команду
powercfg -duplicatescheme e9a42b02-d5df-448d-aa00-03f14749eb61
и нажмите Enter.

- После успешного выполнения команды, закройте командную строку.
- Снова зайдите в параметры электропитания и выберите пункт «Максимальная производительность», теперь он должен быть в списке.


Кстати, возможно вам окажутся интересными способы удобного переключения схем электропитания на ноутбуке.
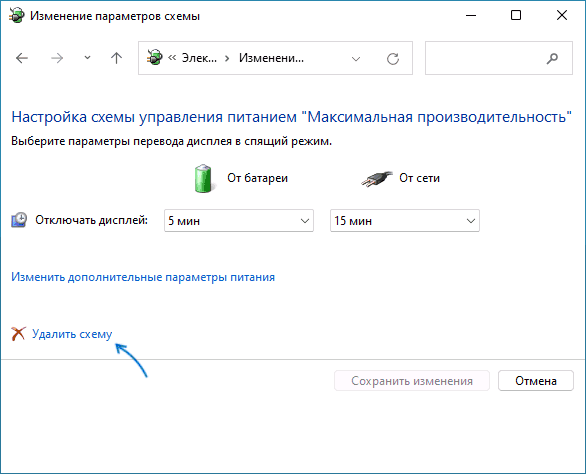
Если в дальнейшем вам потребуется удалить эту или любую другую схему электропитания, зайдите в окно «Электропитание» и нажмите «Настройка схемы электропитания» справа от схемы, которую нужно удалить.
В следующем окне останется выбрать «Удалить схему».
Если у вас остаются вопросы на тему схем электропитания в Windows — задавайте их в комментариях, постараемся разобраться.
Microsoft использует обновления для выпуска новых функций, которые сделают повседневные вычислительные задачи более удобными. Например, техническая компания включила схему электропитания Ultimate Performance в обновление Windows 10 April 2018 Update, чтобы оптимизировать производительность системы. В этой статье мы собираемся обсудить, что делает эта функция. Мы также покажем вам, как включить схему управления питанием Ultimate Performance в Windows 10, чтобы вы могли пользоваться ее преимуществами.
Схема управления питанием Ultimate Performance повышает производительность мощных систем. Он разработан для уменьшения или устранения микрозадержек, связанных с детализированными методами управления питанием. Если вы замечаете небольшую задержку между моментом, когда ваша ОС распознает, что часть оборудования требует больше энергии, и временем, когда оно фактически доставлено, вы испытываете микрозадержку. Независимо от того, насколько коротка задержка, она все равно может иметь значение.
План Ultimate Performance разработан для того, чтобы избавиться от опроса оборудования, позволяя оборудованию или периферийным устройствам потреблять всю необходимую мощность. Более того, он отключает любые функции энергосбережения для повышения производительности. Тем не менее, если устройство работает от батареи, по умолчанию у него нет этой опции. В конце концов, эта функция потребляет больше энергии, значительно быстрее убивая батарею.
Стоит отметить, что план Ultimate Performance лучше всего подходит для систем с оборудованием, которое постоянно переходит в состояние ожидания и обратно. Однако, если вы запускаете игру, все оборудование, скорее всего, работает вместе, чтобы создать среду вокруг вас. Таким образом, единственное улучшение, которое вы увидите, — это небольшое увеличение количества кадров в секунду при первоначальном запуске. С другой стороны, если вы используете программу 3D-дизайна или видеоредактор, который иногда сильно нагружает ваше оборудование, улучшение будет очевидным.
Еще одна важная вещь, о которой следует помнить, — это тот факт, что план управления питанием Ultimate Performance увеличивает количество энергии, потребляемой вашей операционной системой. Итак, если вы планируете включить эту функцию на своем ноутбуке, вам необходимо постоянно держать устройство подключенным.
Как включить Ultimate Performance Power Plan в Windows 10
- На панели задач щелкните значок Windows.
- Нажмите кнопку «Настройки», которая выглядит как значок шестеренки.
- Когда приложение настроек открыто, выберите Система.
- Перейдите в меню на левой панели, затем выберите в списке параметров «Питание и спящий режим».
- В разделе «Связанные параметры» щелкните «Дополнительные параметры питания».
- Появится новое окно. Нажмите «Показать дополнительные планы» и выберите «Максимальная производительность».
Примечание. Этот параметр может не отображаться в этом разделе, если вы используете ноутбук.
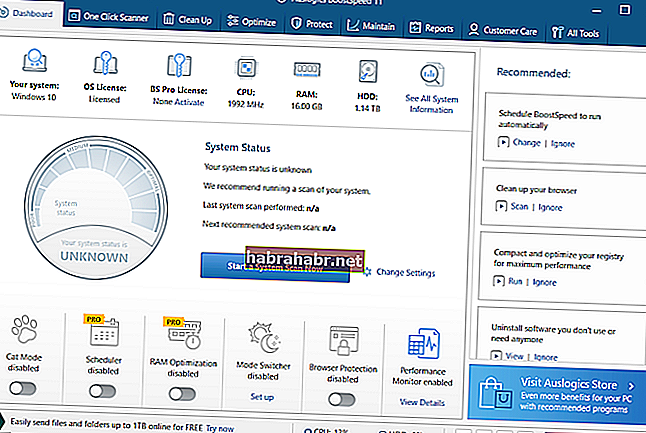
Быстрое решение Чтобы быстро включить «Максимальную производительность в Win 10» , используйте безопасный БЕСПЛАТНЫЙ инструмент, разработанный командой экспертов Auslogics.
Приложение не содержит вредоносных программ и разработано специально для решения проблемы, описанной в этой статье. Просто скачайте и запустите его на своем ПК. бесплатная загрузка
Разработано Auslogics

Auslogics является сертифицированным разработчиком приложений Microsoft® Silver. Microsoft подтверждает высокий опыт Auslogics в разработке качественного программного обеспечения, отвечающего растущим требованиям пользователей ПК.
Что делать, если план питания Ultimate Performance Power Plan недоступен
Как мы уже упоминали, вариант схемы электропитания Ultimate Performance может быть недоступен в некоторых системах, особенно если вы используете ноутбук. Однако вы все равно можете включить эту функцию через командную строку или PowerShell. Для этого вам необходимо выполнить следующие инструкции:
- Щелкните правой кнопкой мыши значок Windows на панели задач.
- Выберите из списка командную строку (администратор) или Windows PowerShell (администратор).
- Если будет предложено предоставить разрешение приложению, нажмите Да.
- Теперь скопируйте приведенную ниже команду и запустите ее через командную строку или Windows PowerShell:
powercfg -duplicatescheme e9a42b02-d5df-448d-aa00-03f14749eb61
Как только вы откроете окно параметров электропитания, вы сможете увидеть вариант схемы электропитания Ultimate Performance. С другой стороны, если вы решите отключить эту функцию, вы всегда можете удалить ее в приложении «Настройки». Однако не забудьте перед этим переключиться на другой план. В противном случае вы можете столкнуться с ошибками.
Совет для профессионалов: чтобы оптимизировать скорость и производительность вашего компьютера, мы рекомендуем установить Auslogics BoostSpeed. Нежелательные файлы и другие ненужные элементы на вашем устройстве также могут вызывать микрозадержки в вашей системе. Auslogics BoostSpeed обнаружит все элементы, которые могут вызывать сбои и проблемы со снижением скорости. Он решит эти проблемы, позволяя вам работать быстрее и эффективнее.
Что вы думаете о схеме электропитания Ultimate Performance?
Мы будем рады услышать ваши мысли!
Contents
- What is the Ultimate Performance Plan?
- What are the Advantages of the Ultimate Performance Power Plan?
- Should You Use the Ultimate Performance Mode?
- How to Enable Ultimate Performance in Windows
- How to Add the Ultimate Performance Plan if it Is Unavailable
- Customizing the Ultimate Performance Plan
- Deleting the Ultimate Performance Plan
- Conclusion
- FAQ
- What Does the Ultimate Performance Power Plan Do?
- How to Restore Missing Power Plan Options on Windows 10?
- Is the Ultimate Performance Power plan safe?

Many users get frustrated when their supposedly powerful computers fail to consistently hit expected speed levels. This let-down is mostly the cause of restrictive power and performance settings imposed on PC owners by manufacturers and software companies.
Windows users had to resort to alternative methods to get the best out of their PCs. That’s because even the High-Performance power option couldn’t always push high-end computers to their maximum speeds.
Microsoft decided to change things when it introduced the Windows 10 Ultimate Performance mode in its April 2018 Update. It is a power policy setting that takes the pre-existing High-Performance mode to a new level by removing every performance-related restriction imposed on every piece of hardware on your PC, from your CPU to your screen.
In this article, we’ll talk about the Ultimate Performance power plan, whether you need it, and how to enable it.
What is the Ultimate Performance Plan?
The Ultimate Performance power plan is a Windows Operating system power scheme that is designed to allow computer devices to maintain maximum performance by using all the power they need. It is Microsoft’s answer to users who were constantly looking for ways to speed up their Windows 10 and Windows 11 computers.
Performance is tied to power because every component on a computer requires more electrical juice to perform at the highest level. That is why the operating system’s power schemes are designed to regulate how each hardware device receives power to prolong battery life or maintain a balance between performance and energy efficiency.
With the Ultimate Performance plan Windows 11 and Windows 10 removes every restriction and allows every computer component to take as much power as they need to boost performance.
It means CPUs and GPUs are allowed to use their maximum clock speeds and even engage in aggressive multithreading to utilize all their cores at once. The system memory will be allowed to provide every available space, and the hard drive will always be powered to standby for instant data access.
Also Read: Do more CPU cores mean better performance?
What are the Advantages of the Ultimate Performance Power Plan?
The obvious advantage of the performance plan is better performance. You’ll be able to experience your computer work using its full capabilities, especially when you want to get through heavy tasks such as video editing and complex computational calculations in excel.
Here’s how Microsoft’s approach to ultimate performance helps users:
- Reduced/Eliminated Micro-Latency: Micro-latency refers to extremely small delays or lag that occur in various computing processes. These delays might be measured in microseconds or milliseconds, but they can have a significant impact on work performance and productivity. With high-end computers, the ultimate performance plan will eliminate micro-latency and ensure smooth operation.
- Optimized Background Processes: While the plan prioritizes foreground tasks, it still ensures that background processes receive adequate resources, guaranteeing smooth operations.
- Fast Storage Access: Other power plans often restrict power access to hard drives while the ultimate power plan allows drives to consistently draw power, which means they are always available for data access. This can lead to faster loading times for applications and files, contributing to a smoother user experience.
- Customization: You can always tweak the Ultimate Performance power plan to suit your specific needs. This way, they can strike the preferred balance between performance and power consumption.
Should You Use the Ultimate Performance Mode?
The power plan is best suited for users who engage in tasks and activities that demand maximum computational power, consistent high performance, and high-level reliability from their hardware.
You will benefit from the plan if you do 3D designs, edit videos, design graphics and animations, run scientific simulations, run high-end CAD software, and do demanding programming work. Most of these tasks require different pieces of hardware to be at maximum performance, and with other power settings, they might be restricted.
However, running a game might be a different scenario. Every hardware likely works together to render a game, especially if your gaming PC game mode activates. As such, you may only see slight FPS and startup improvements.
On the flip side, the ultimate performance mode stands against everything you believe if you’re an advocate of conserving power and energy efficiency. Your system’s battery will die faster in this mode, and your computer will likely drive up your energy bill. You will also experience overheating, especially during long hours of gaming.
So, you have to weigh the benefits and cons as they apply to you before deciding if you should activate the plan.
How to Enable Ultimate Performance in Windows
As mentioned earlier, the Ultimate Performance mode is a step up from the High-Performance option that shows up whenever you try to create a new power plan. The former is a preconfigured plan that you can select and edit.
The following steps will show you how to get ultimate performance on your PC:
- Right-click the Start button on your Windows 10 or Windows 11 computer and select Run.
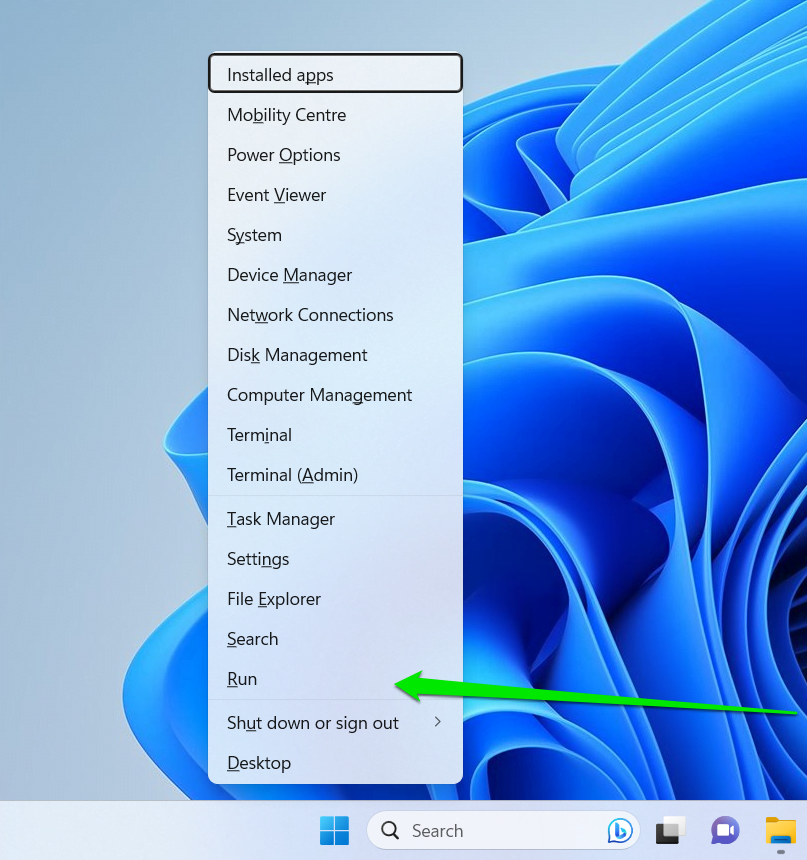
- Type Control Panel into the Run dialog’s text box and press Enter.
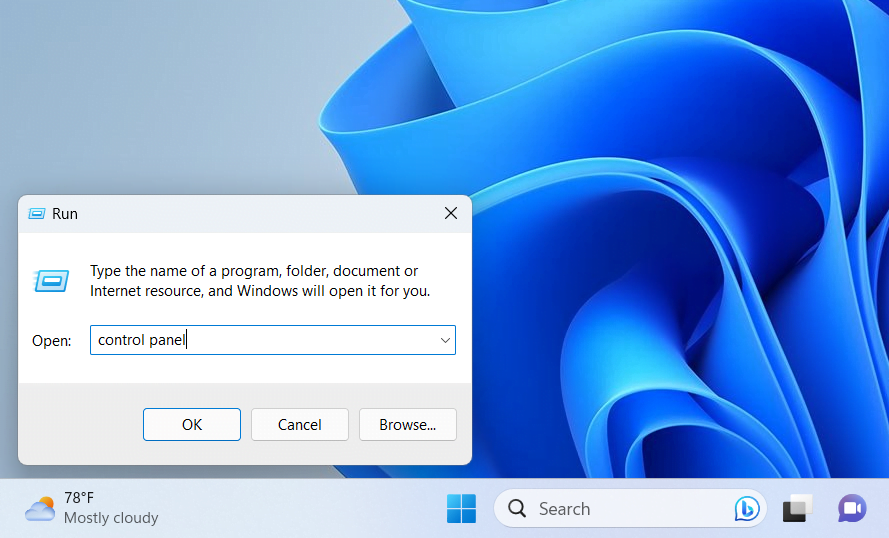
- When the Control Panel window appears, go to the top-right corner, expand the “View by” drop-down menu, and click on Large Icons.
![]()
- Select Power Options once the large icons show up.
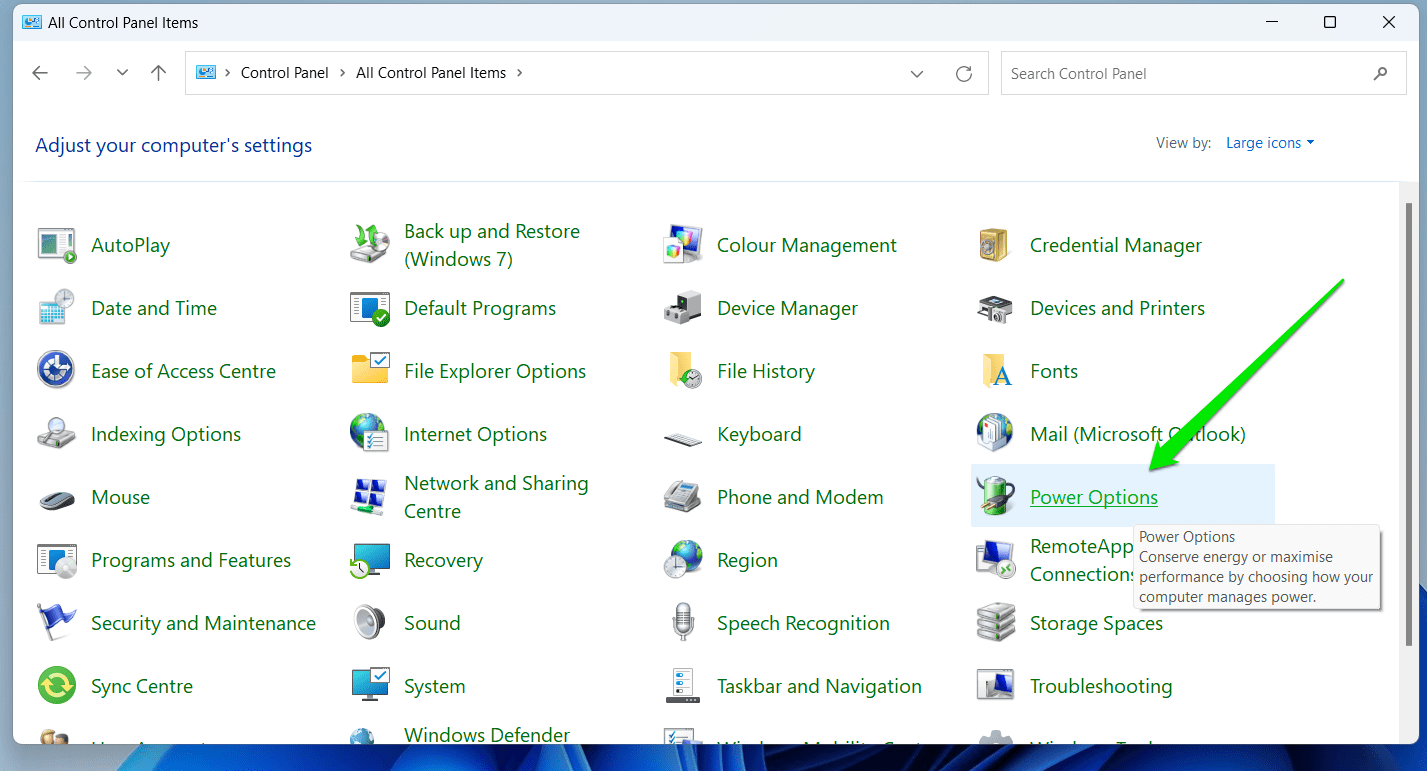
- You can also select Hardware & Sound in the default Control Panel home screen and then select Power Options. Another alternative is to open Settings (press Windows + I) go to System > Power & Sleep and select “Additional power settings.”
- Click on the Show Additional Plans arrow (go to the next section if you don’t see this option) once the Power Options screen appears.
- Now, select Ultimate Performance.
How to Add the Ultimate Performance Plan if it Is Unavailable
While the ultimate power plan is available to every Windows computer, the option to enable it may not be available for laptops (and some desktops) by default. In such a scenario, you may not see the “Show additional plans” option on the Power Plans page.
The good news is that you can activate the option by entering the ultimate performance power plan command in Microsoft PowerShell. The
These steps will show you how:
- Right-click the Windows Start menu on your Windows 10 or Windows 11 computer.
- Select Windows PowerShell (Admin) on Windows 10 or Terminal (Admin) on Windows 11.
- Once the Administrator: Windows PowerShell screen appears, type or copy and paste the following and press Enter:
powercfg -duplicatescheme e9a42b02-d5df-448d-aa00-03f14749eb61
- Once the ultimate performance command runs, head to the Power Options page.
- If the page is still open, you will likely not see the ultimate performance plan until you close it and open it again.
Note that you can also run the ultimate power plan command in the Command Prompt as the ultimate performance CMD line is the same as the PowerShell/Terminal code.
To use CMD, open the Start menu and type “command prompt,” click on Run as Administrator, then select Yes in the UAC prompt. Enter the line provided above and hit the Enter key after the Command Prompt window shows up.
Customizing the Ultimate Performance Plan
If you want some level of control and don’t want your computer burning through your battery or using up your power you can change some settings to make the ultimate performance plan a custom power plan.
To do that, go to the Power Options page and click on the Change Plan Settings option beside Ultimate Performance.
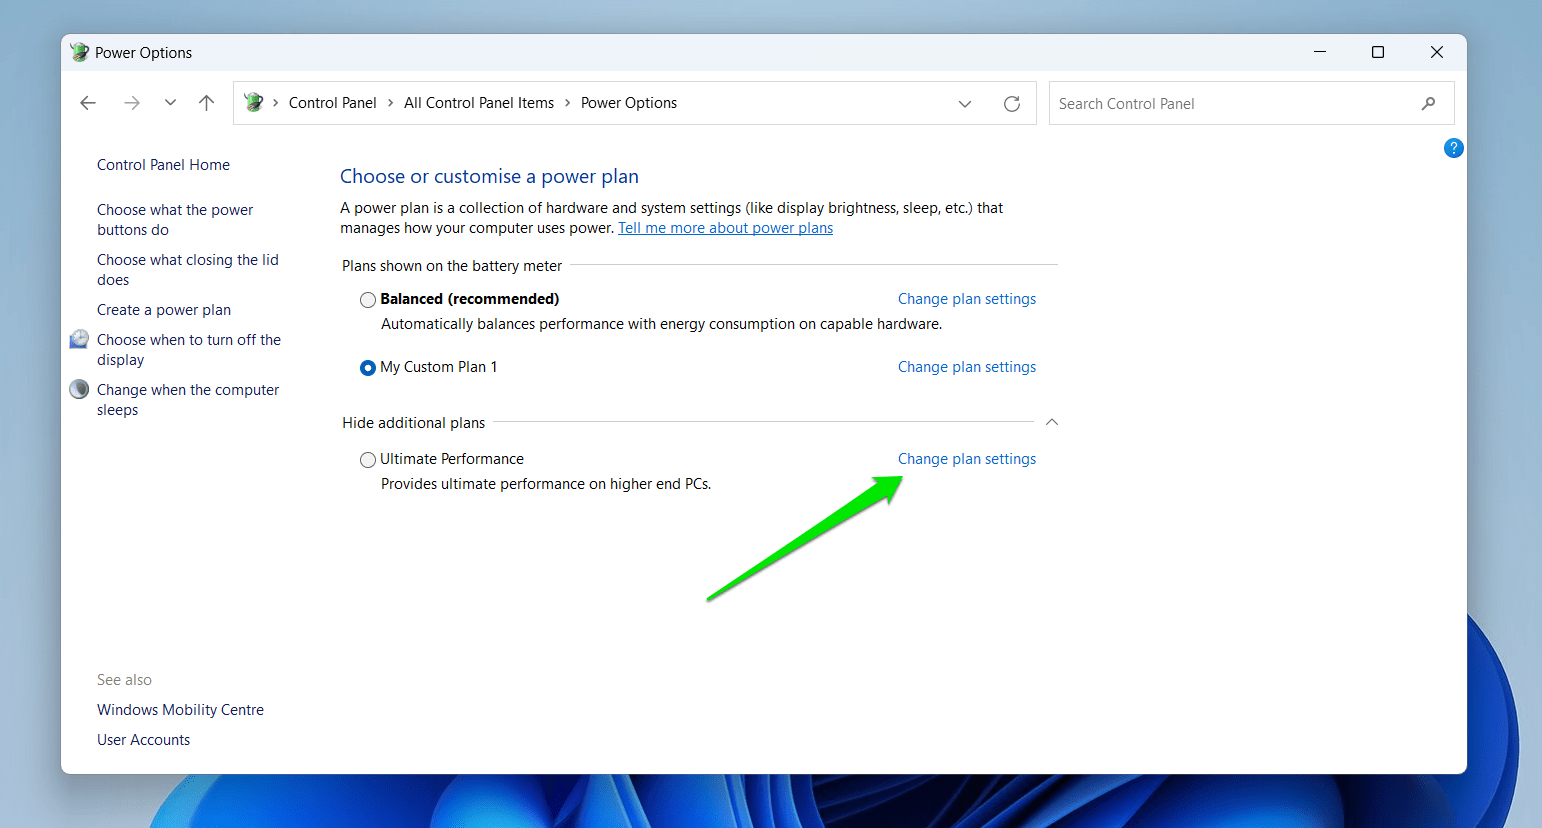
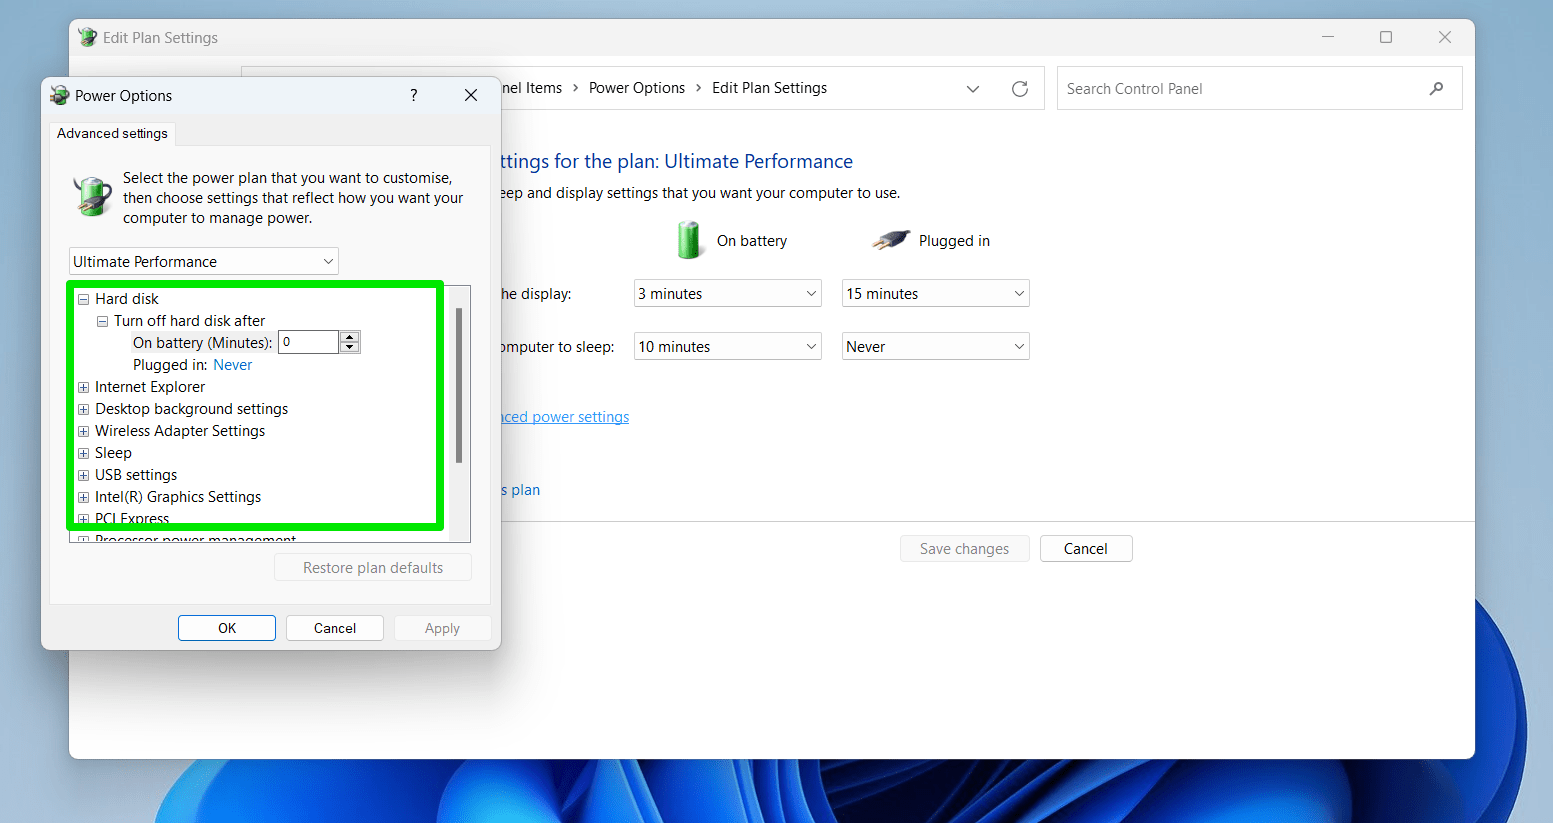
The Edit Plan Settings page will allow you to change when the display can be turned off and when the computer can automatically go to sleep.
For additional options, click on “Change advanced settings.” The dialog will allow you to change the performance settings of specific device components from your hard drive to your display.

Deleting the Ultimate Performance Plan
If you ever get to the point where you believe you no longer need the ultimate performance plan, you can get rid of it. Of course, choosing another power plan will get you back to normal and the ultimate power option wouldn’t ever activate itself.
However, if you no longer want to see it in your power options, you can delete it. To do that, you should ideally choose and enable a different plan.
After choosing another power plan, click on the Change Plan Settings link beside the Ultimate Power Plan option. Next, select Delete this Plan.
You can always return to this guide whenever you want to reactivate the plan.
Conclusion
Once you activate ultimate performance Windows 10 and Windows 11 allows you to experience a different level of smooth PC operation and your computer’s true capabilities.
It is important to note that you will be sacrificing power efficiency for speed and performance. You can always customize the power plan to conserve as much energy as you can, especially if you’re running on your laptop’s battery.
Pro Tip: Your computer could be capable of handling your day to day tasks and might not need the ultimate performance plan. You may be experiencing slow speeds and sub-par performance because junk and other elements are burdening the system. Instead of going full-throttle with the power plan, you can use Auslogics BoostSpeed to clear the junk and boost your system speed. This way, you can enjoy optimum performance without sacrificing so much battery life and power.
FAQ
What Does the Ultimate Performance Power Plan Do?
The ultimate performance power plan allows all your computer’s hardware components to draw as much power as they need to reach maximum performance.
How to Restore Missing Power Plan Options on Windows 10?
If you can’t find a power plan in your Power Options page when you try to create a new power plan, there are different methods you can use to fix the problem, such as using a command code as we explained above.
Is the Ultimate Performance Power plan safe?
Yes, the Ultimate Performance power plan is generally considered safe to use on your Windows computer. However, it has the potential to increase power consumption and cause overheating, especially if you use it consistently and your computer does not have an adequate cooling system.