Here you will learn how to install Ubuntu 23.04 on VirtualBox with a step-by-step guide from enabling virtualization technology to installing the operating system.
Undoubtedly, Ubuntu will be the first Linux distribution for most people who have started Linux for the first time, and it will certainly be the most familiar distribution.
For this reason, we will cover the step-by-step process of downloading, installing, and setting up the latest Ubuntu operating system using VirtualBox running on your Windows 10 or 11 64-bit computer.
This is a very beginner’s guide
So it will be useful for a lot of new starters who want to try Ubuntu for the first time, and once you get familiar with Ubuntu, you can follow the same steps to install it on physical hardware.
Prerequisite
The basic requirements for following this guide are to have Oracle VirtualBox and Ubuntu 23.04 ISO images.
For any reason, if you do not have both of the following items, it is not an issue because we will show you how to get Oracle VirtualBox and the ISO image of Ubuntu 23.04.
More importantly, you should enable “Virtualization Technology” from the UEFI/BIOS settings to avoid interruptions during installation. If you are not sure about it, then you should check out the below article.
And those who already have VirtualBox, ISO Image, and Virtual Technology enabled in their UEFI/BIOS can directly jump into the installation part.
Enable Virtualization Technology
At the time of installation, if you have not enabled “Virtualization Technology”, you may face the problem of starting a virtual instance.
To avoid this, you need to enable “Virtualization Technology” in UEFI/BIOS.
Instead of booting your system into BIOS, first check whether the virtualization option is enabled or not by using the command prompt, which will show the Virtualization Enabled in Firmware status as “Yes” or “No”.
So, to find that information first, open your command prompt and enter the below command:
systeminfo.exe
At the bottom, you will find the text “Virtualization Enabled In Firmware”.
If it is “Yes”, then you don’t need to enable it, and you can directly jump to the installation part. Those who get the output “No” need to restart their system into BIOS/UEFI mode.
To get into BIOS, press the respective button if you are aware of it.
You can try the following keys: “ESC or F2 or F10 or F12 with FN or without FN key”; or else you can refer to the vendor’s manual to find the exact key.
On my HP laptop, the BIOS mode can be accessed by pressing the F10 key, and once you get into the BIOS mode, you will find the option to enable “Virtualization Technology” in the System Configuration menu.

Once you enable virtualization, save the changes and restart your system.
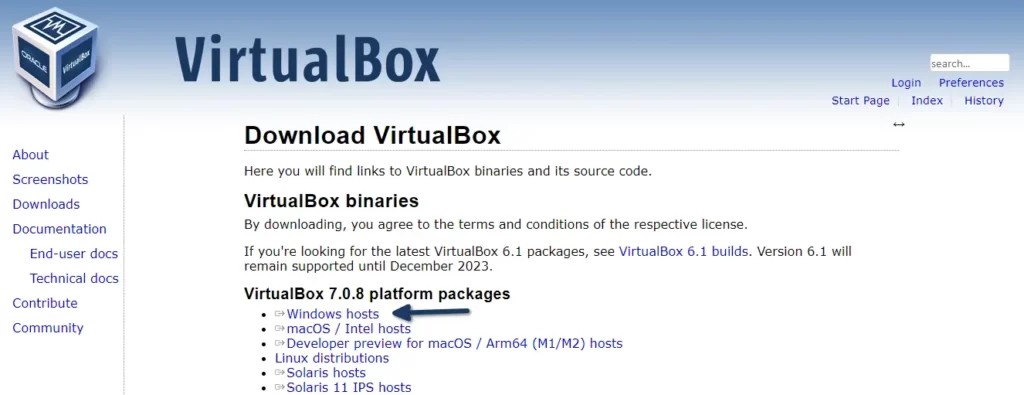
Download VirtualBox
To get the latest version of VirtualBox, click on the below button, which will redirect you to the official download page, from where you can choose VirtualBox as per your operating system.
This guide is basically for Windows users, so I’ll select the first option.
If you are following this guide on any other operating system, then you should choose VirtualBox as per your running operating system.
After getting the installation file, I believe you will be able to install it on your system without any difficulty.
If you want to know how to install VirtualBox on Linux, then check out this article.
Download Ubuntu 23.04 ISO
Ubuntu 23.04, a.k.a Lunar Lobester is the latest version of Ubuntu, which you can download from the button below:
The file size is approximately 4.60GB, so it may take a while to complete the download.
Ubuntu 23.04 is very easy to install on VirtualBox. It will just ask you a couple of questions on the basis of your preferences, and it is very simple compared to Windows installation.
So let’s see the installation of Ubuntu 23.04 on your VirtualBox.
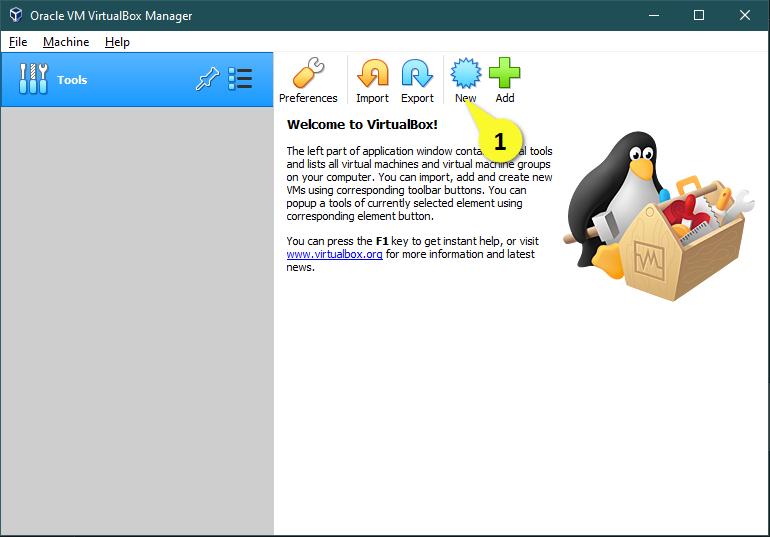
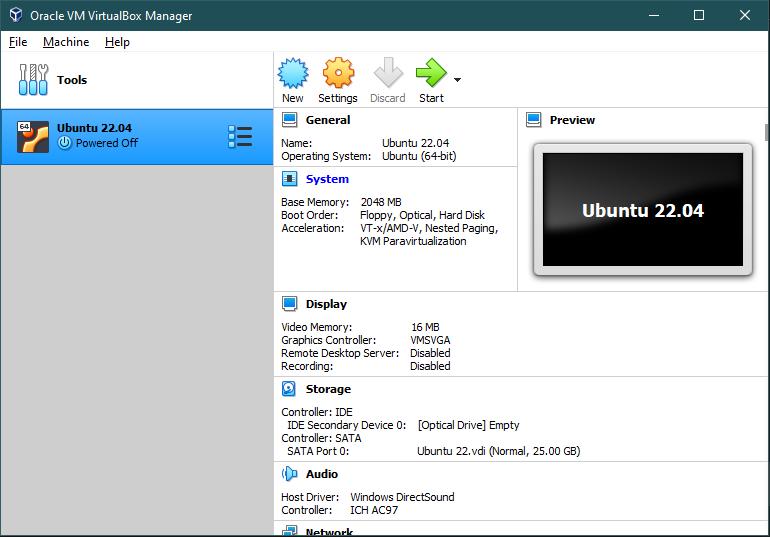
Step 1: Open Oracle VM VirtualBox
Once you complete the above prerequisites, then you are ready to install Ubuntu 22.04 on Windows VirtualBox, so first open your VirtualBox from the Start menu.
For the first time, your screen will look like mine, so to change your current interface, move your eye to the right side of the screen, and you will find multiple options like Preferences, Import, Export, New, and Add.
From this list of options, place your cursor on “New” to create a new Virtual Machine.
Step 2: Create Virtual Machine
There will be a couple of screens which will come in a series where you need to configure your virtual machine as per your requirements.
On the first screen you will be asked to enter your machine name, so simply ignore it and click on “Expert mode”, which is more convenient than “Guided mode”.
In the first block, enter your virtual machine name. I would suggest you put Ubuntu 22.04, which will automatically select the type of operating system to Linux, and also the version will be highlighted to 64bit.
I’m good with the default machine folder location. If you want to change it, then click on the drop-down button and choose the path where you want to store the file.
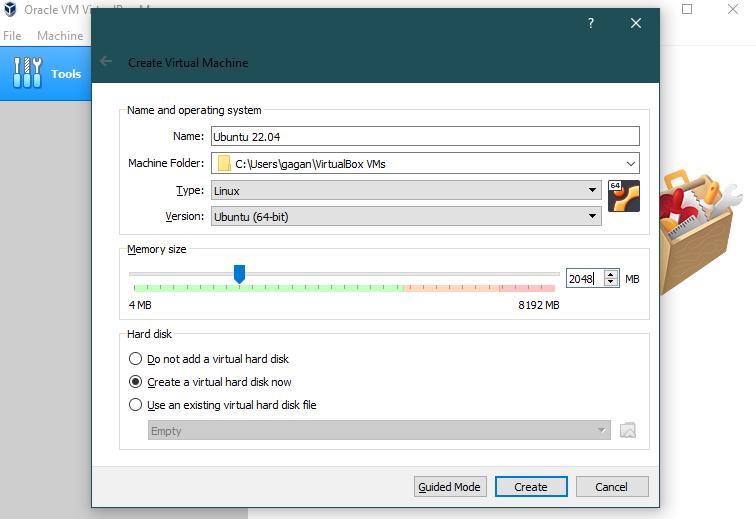
You can drag the slider back and forth to change the memory size, or else you can just put the memory size into the box.
And keep the rest of the options as they are and click on “Create.”
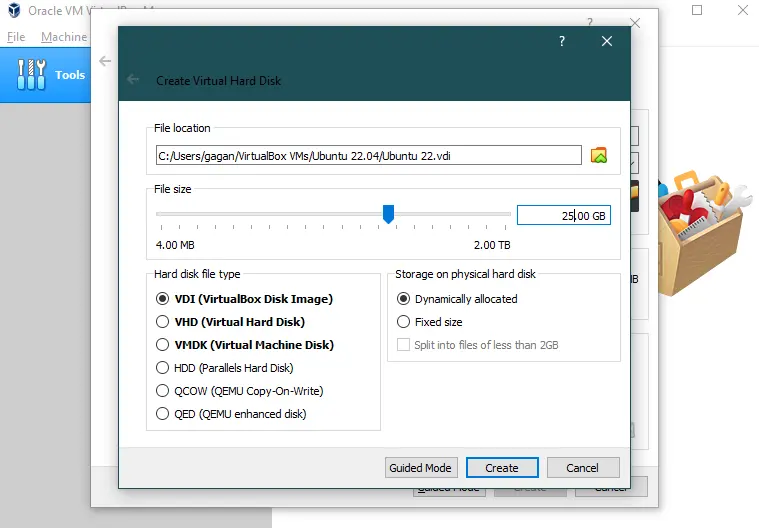
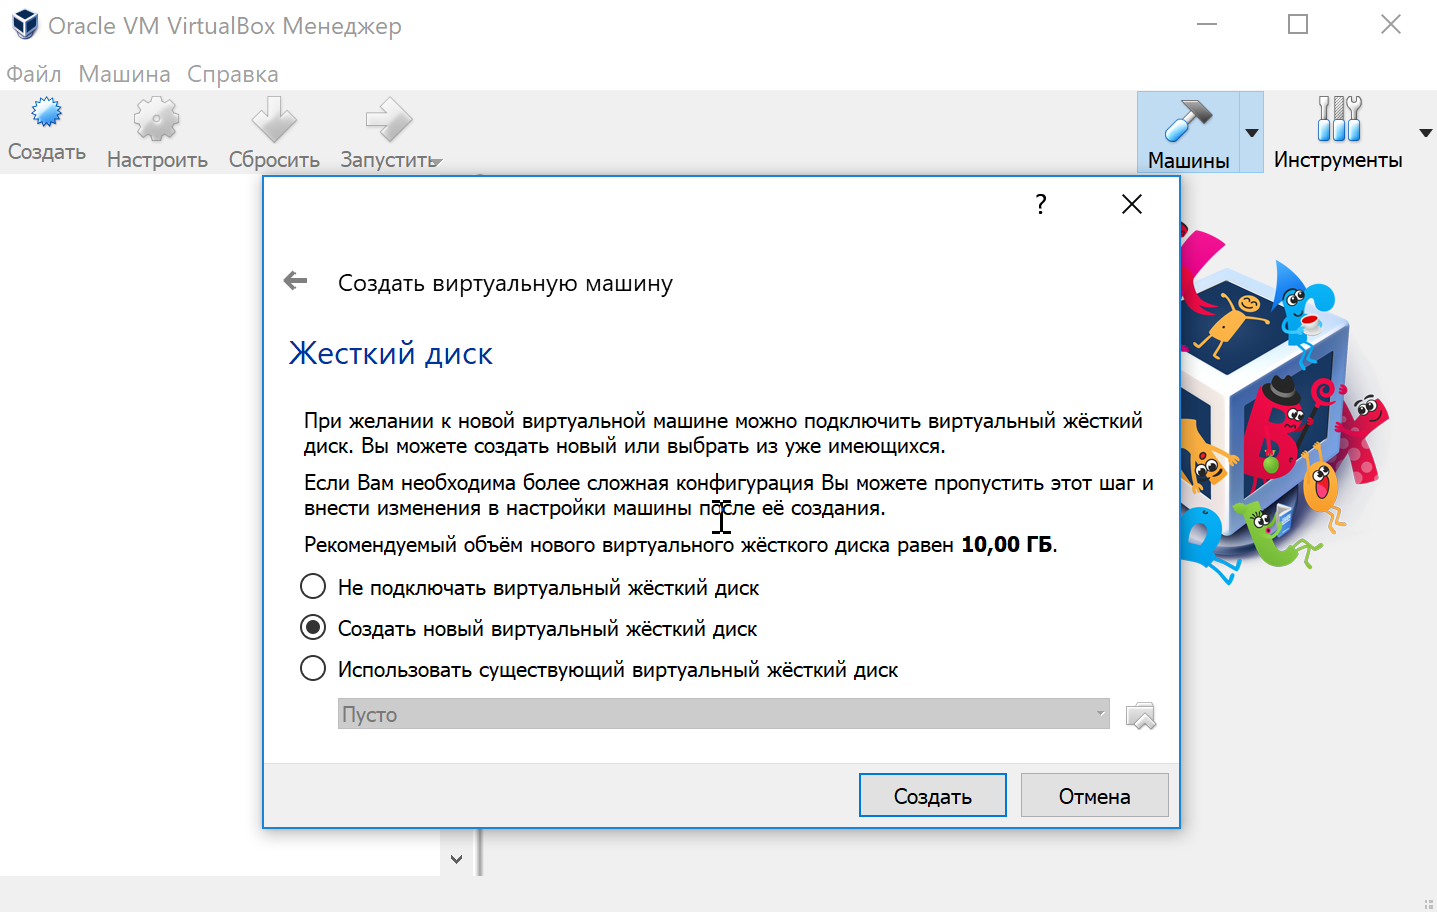
On the next screen, you will be asked to “Create Virtual Hard Disk”.
So simply put the size of the virtual hard disk size on the right side of the box, or else you can adjust the size using a slider, but make sure the file size should be more than 10 GB.
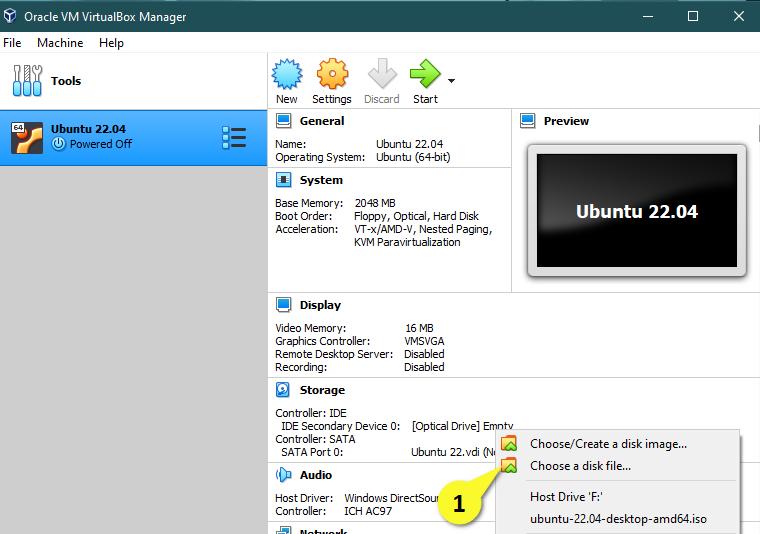
Step 3: Attach Ubuntu 22.04 ISO
You are almost done with the configuration. You just need to follow two more steps after that. You can start the virtual machine. Before that, let’s attach the ISO file to VirtualBox.
I think you are able to get a screen like mine on your end too, and as you can see, “[Optical drive] Empty”, so you need to click on “[Optical Drive] Empty” and select the ISO image.
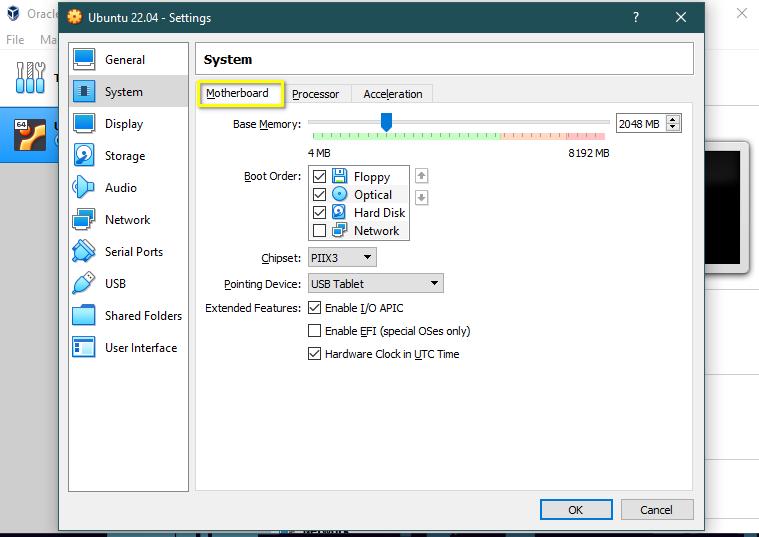
After that, click on the “Settings” gear to finalize our virtual configuration. If anything is left to do, then you can easily do it from here.
Under the Settings option, change your tab to “System”.
Here you will find the option to change the memory size. If you haven’t changed it yet, then do it now.
Next, go to “Processor” tab, which is next to “Motherboard”, and change the processor core according to your usage. In my case, I do have a 4 core, so I’ll select 2 cores.
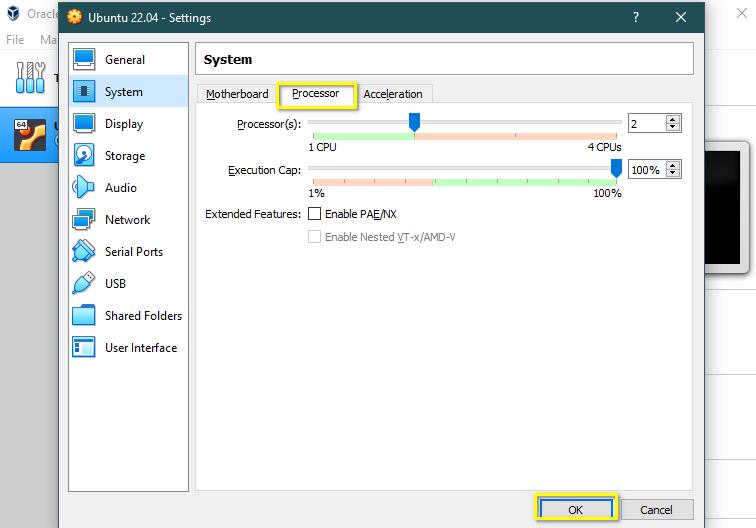
And keep the rest of the settings as it is. After that, click on “OK” to save the changes.
Step 4: Boot Virtual Machine
After following the above procedure, click on ![]() start button to power on the machine. Once you start the machine, you will be prompted with a mouse integration message. Simply click on “continue”.
start button to power on the machine. Once you start the machine, you will be prompted with a mouse integration message. Simply click on “continue”.
Basically, it instructs you to get out of the machine using the “Right Ctrl” key.
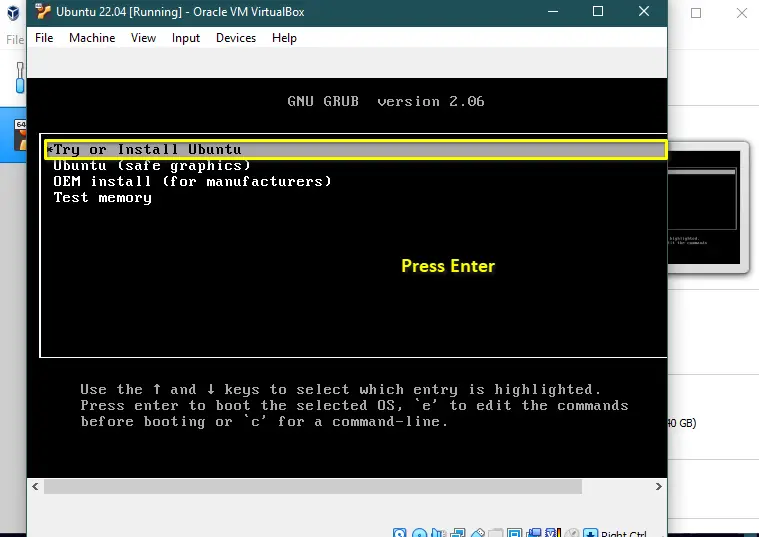
Next, you will find the boot option. Simply press enter on “Try or Install Ubuntu”.

Step 5: Select Language and Install Prompt
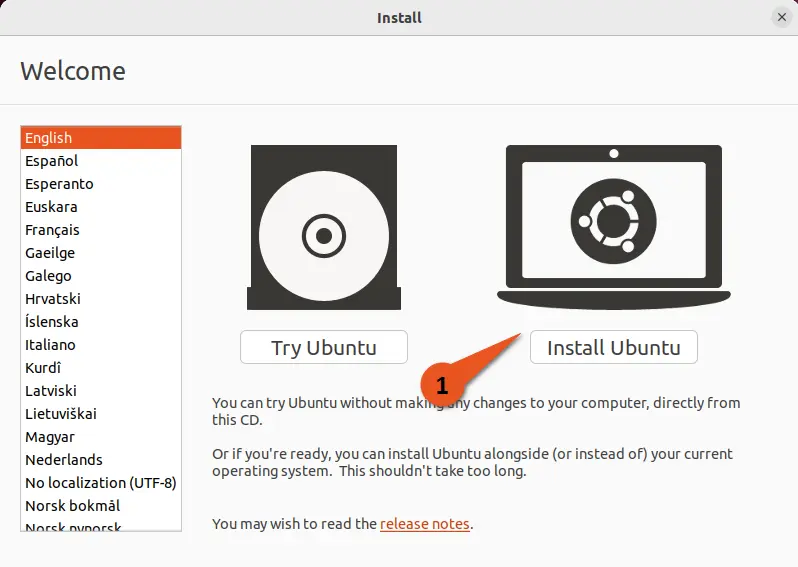
Once the boot is completed, you will be prompted to choose a language. Along with that, you need to select an option like how you want to install Ubuntu. If you want to first use Ubuntu and later decide whether you want to install it or not, then you can click on “Try Ubuntu”, or else you can directly jump to the installation part by choosing “Install Ubuntu”.
Even if you select “Try Ubuntu”, you will get the desktop icon on the Ubuntu screen to proceed with the installation.
If you want to follow this guide with me, you should click “Install Ubuntu”.
Step 5: Select Keyboard layout
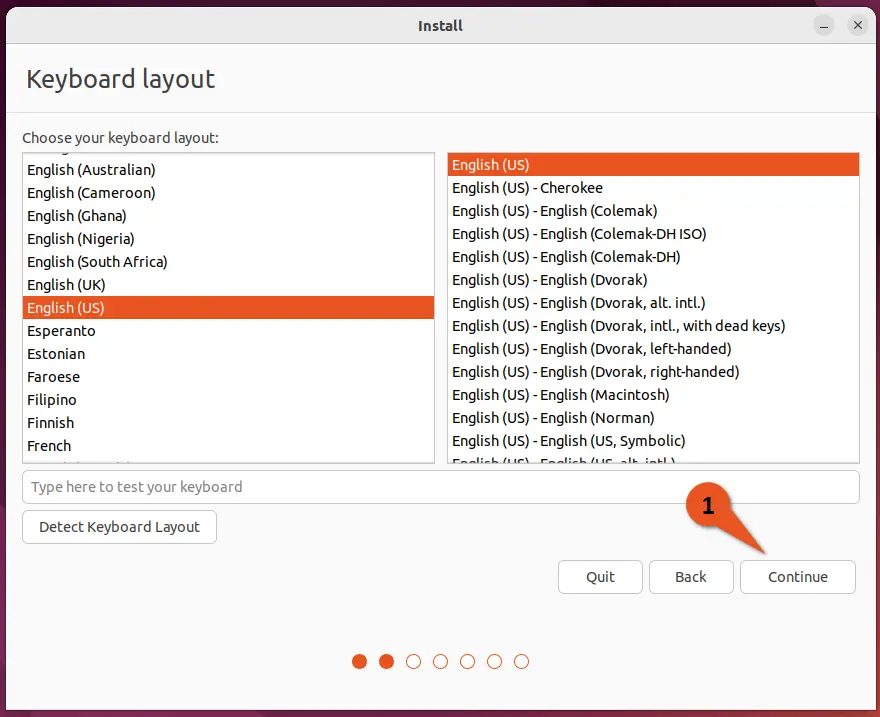
On this screen, you can choose your keyboard layout as per your locale. If you are not able to find your keyboard layout on this list, then you can click on “Detect Keyboard Layout”.
I’m good with the default settings, so without thinking much, I will click on Continue.
Step 6: Update and other software
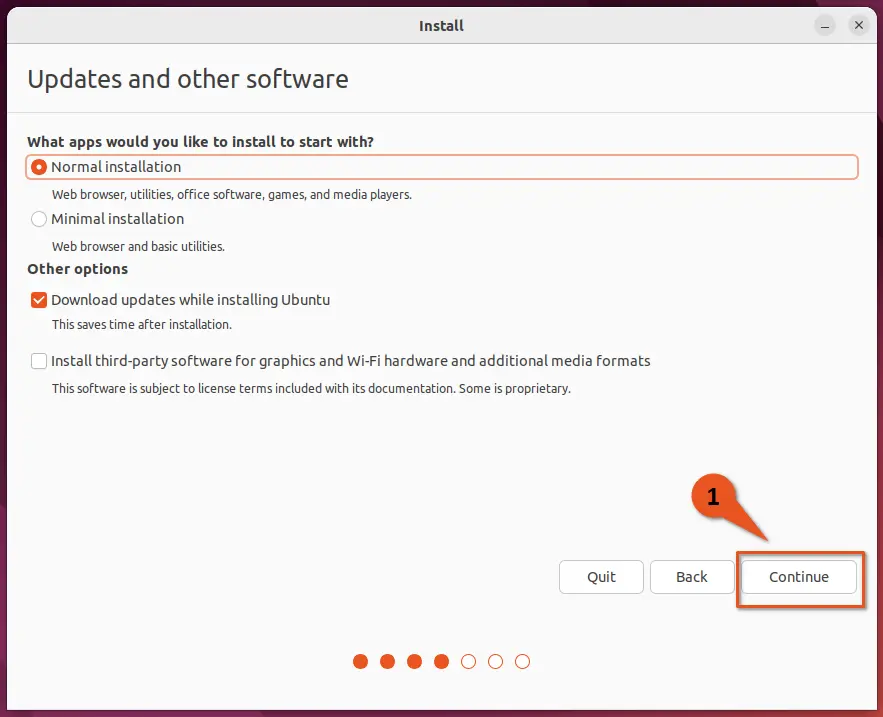
I believe you are new to Ubuntu, so I would suggest you choose “Normal installation” over “Minimal installation” because minimal installation ships with a small number of utilities, and as a beginner, you may find it difficult to find a package if it is required in the future.
Do check on “Download updates while installing Ubuntu”, which will ensure you get the latest version of packages.
If you are following this guide to install Ubuntu on hardware, then I would suggest you check “Install third-party software for graphics and Wi-Fi hardware and additional media formats”, which ensures you have the third-party drivers installed for proprietary hardware like Realtek, Nvidia, etc.
Keep it unchecked if you are following this guide on virtual systems, and click on Continue to switch to the next screen.
Step 7: Installation Type
You can choose how you want to install Ubuntu 22.04 on your virtual hard disk, which you have created initially. The first option you do have is to “Erase disk and install Ubuntu”, and the second is “Something else”.
As a starter, I would suggest you go with the first option, “Erase disk and install Ubuntu”.
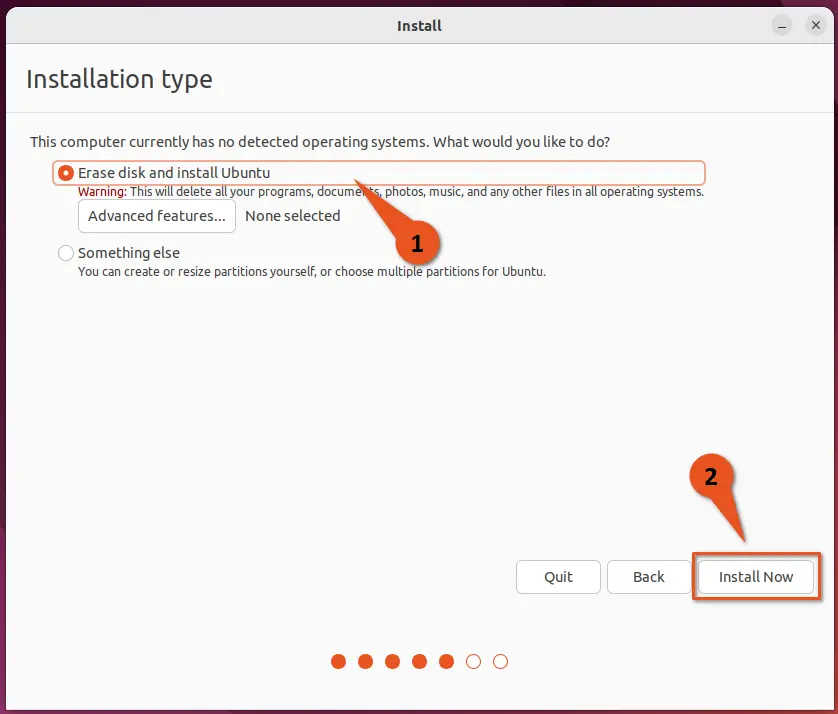
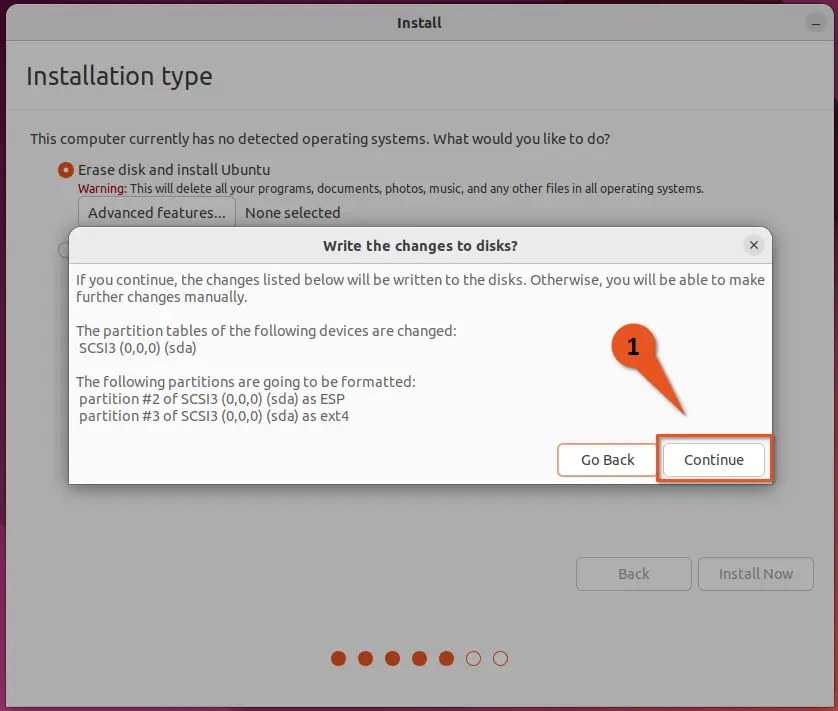
And click on “Install Now”, which will prompt you to verify the changes, so simply click on “Continue”.
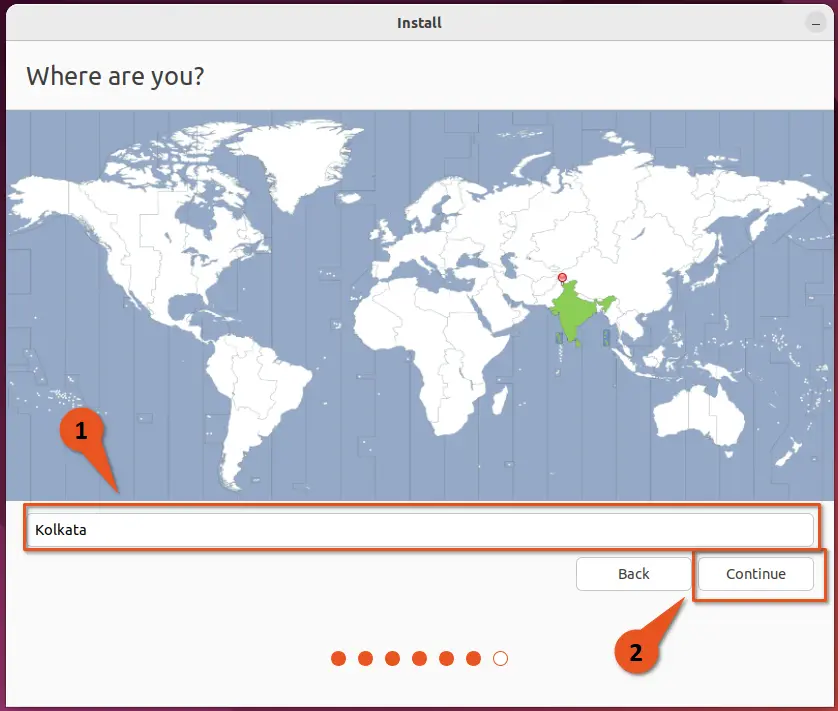
Step 8: Set your location
If your system is connected to the Internet, then the system will automatically fetch your region. If it is not the case, or you want to improve accuracy, then click on the drop-down menu and enter your location manually.
After that, click on “Continue”.
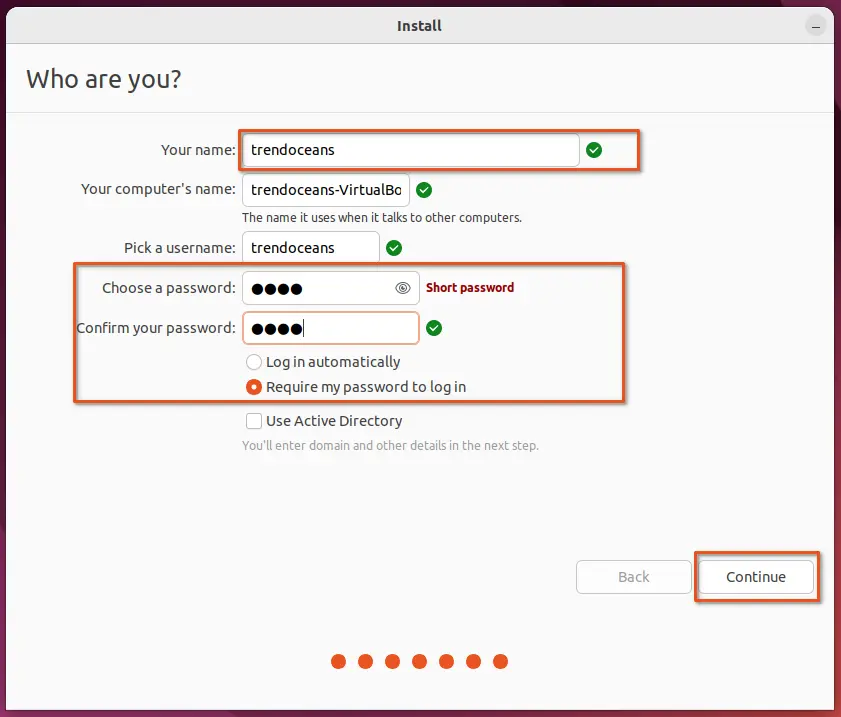
Step 9: Who are you
You are very close to experiencing Ubuntu 22.04 on your virtual machine, so let’s complete the installation by filling in a few details about the user.
First, start with your name, which will automatically feed details to the computer’s name and username. If you want to change those details, you can easily do so.
Make sure to check on “Require my password to log in” to secure your command, and don’t forget to set the password.
Once all is done, you can click on “Continue”, which will start the installation process.
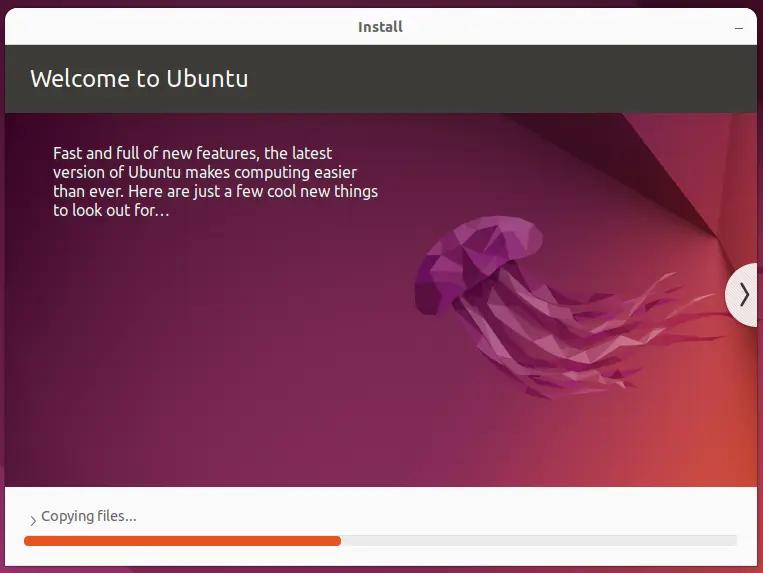
Step 10: Installation Progress
Installation takes some time to finish, and it varies from hardware to hardware, so wait for the process to complete and, once the process is complete, restart your system.
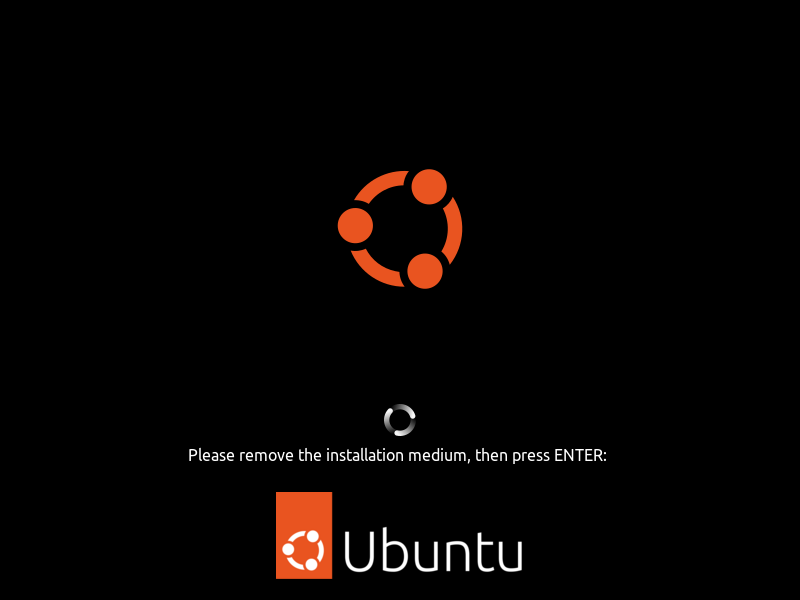
You will be asked to “Please remove the installation medium, then press Enter”, so simply press the ENTER key and wait for the system to get started.
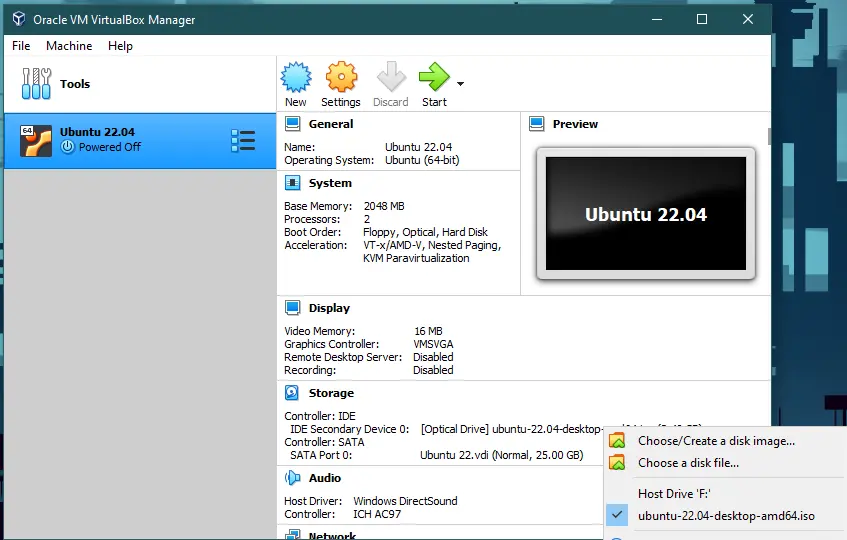
If you are getting the boot options menu again and again after the restart, then you need to remove the ISO image from the “Optical Drive” section.
The optical drive is the same option where you have attached the ISO image. Simply click on the optical drive, uncheck the options, and restart the machine.
Wrap up
That’s all to install Ubuntu 22.04 on VirtualBox.
You can also follow this guide on a physical machine. The only difference will be that you’ll need to create a bootable drive, which you can learn how to do by following this article: Creating a Bootable USB using Rufus for Linux Distributions

A man with a tech effusive who has explored some of the amazing technology stuff and is exploring more. While moving towards, I had a chance to work on Android development, Linux, AWS, and DevOps with several open-source tools.
If you work on Windows and want to use Ubuntu without switching the system then it can be done. All you need to do is install Ubuntu on Windows. The good thing about the OS is it will run when it is asked to and it doesn’t require any special partitioning of your disks.
In this post, we will guide you through steps to install Ubuntu on Windows 10 using Virtualbox
Before going further, you need to make sure that you have downloaded three applications
- Oracle Virtualbox
- Ubuntu
- Virtualbox Guest Additions
Steps To Run Ubuntu Linux On Windows 10
1. Download Virtualbox:

First step is to download Virtualbox. You can download it from the link below.
Download
2. Check Whether The System Is Of 32 Bit Or 64 Bit:
Before downloading and installing any of the application. You should know whether the system is 32 bit or 64 bit.
To check, follow the steps:
- Open Settings on your Windows 10 PC( Press Windows and I key together

2. Go to System-> About

3. Here, you can check if the system is 32 bit or 64 bit.

4. Download Ubuntu
Currently, there are two versions of Ubuntu:
- Ubuntu 14.04.3 LTS
- Ubuntu 15.04
You can download any of them. But downloading the older version will provide you longer support and downloading the new version will provide you with new features added.
3. Download Virtualbox Guest Additions

Guest Additions are used to make the Ubuntu virtual machine to work in full-screen mode at an appropriate resolution. To download it, click on the link below. Once you click the link, you will be directed to a page with a lot of links. Click on the link which matches with the version of Virtualbox you downloaded.
Download
4. Install Virtualbox
To install Virtualbox, follow these steps:

Image source: Lifewire.com
- Go to Start and search for Downloads.
- Once the Downloads folder is open, click on the Virtualbox application file.
- Once the Virtualbox setup wizard comes up, click on Next to begin the installation.
- On the next screen, you can choose the Virtualbox installation options.
- You can choose the location where you want to install the file if not default.
- Before finishing up, you can choose if you want to have a shortcut icon.

Image source: Lifewire.com
- Now click on Install once the interface provides with the option.
- Note: Before getting the option to install, a warning will appear stating that your network connection will temporarily be reset. If you don’t want that to happen, click “No” or if this is ok for you then click “Yes”.

Image source: Lifewire.com

Image source: Lifewire.com
- Once it is installed, you can start Virtualbox simply by leaving the “Start Oracle VM Virtualbox after installation” checked and clicking “Finish”.
- To add Ubuntu, click on the “New” icon on the taskbar.

Image source: Lifewire.com
- You will be asked to name the virtual machine for your convenience.

Image source: Lifewire.com
- Note: Select “Linux” as the type and “Ubuntu” as the version. Choose the correct version for it based on whether your machine is a 32-bit or 64-bit.
- Next step would be choosing computer memory that you want to assign to the virtual memory. To do so, drag the slider to the amount you want to assign and click “Next”.

Image source: Lifewire.com
5. Create a Ubuntu virtual machine
- Now you will get an option to create Virtual Machine. Among three options to choose from, checkmark beside the option Create a virtual hard disk now and click on Create.

Image source: Lifewire.com
- Next screen would ask you to set the space you wish to give to Ubuntu. Minimum space given is 10 GB. Choose the amount of space and click Continue.

Image source: Lifewire.com
- With this step, the virtual machine is created but it has no OS.

Image source: Lifewire.com
6. Install Ubuntu

Now that Virtual machine has been created, you need to boot into Ubuntu. To do so, follow the steps:
- Click on Start button and locate the Ubuntu ISO file and click on the folder icon next to the “Host Drive” drop-down.

Image source: Lifewire.com
- Navigate to the download folder and click on the Ubuntu disc image and click “Open”.
- Now you will get the Ubuntu installer interface, click on Start to begin the process.
- You will get options: Try Ubuntu or Install Ubuntu, click on the Install Ubuntu.
- Next screen will show you the prerequisites like make sure that your machine has enough power or your laptop is plugged into power, system is connected to the internet, system should have over 6.6 gigabytes of disk space

Image source: Lifewire.com
- Now, you will be asked to choose the option to install. As you are using a virtual machine, select the “Erase disk and install Ubuntu” option. Click Install and then click on Continue on the next page.
Note: This act will not delete your hard disk but install Ubuntu in your Virtual hard drive.

Image source: Lifewire.com
- You will get an option to choose the location where you reside, you can choose it on Map or type it in manually. Once done click on Next.

Image source: Lifewire.com
- The last and final step is to create a user. Enter the name in to give your virtual machine a name. After that choose a username and enter a password to associate with that user.
- Click Continue and it is done.

Image source: Lifewire.com
7. Install Virtualbox Guest Additions

The last task is to install the guest additions. To do so, please follow these steps:
- Click the settings icon on the VirtualBox toolbar.
- Click storage option and then click on IDE

Image source: Lifewire.com
- Now choose the small circle with plus sign in it to add a new optical drive.
- You will get a prompt asking you to choose which disk to insert into the optical drive, “Choose disk” button.
- Locate the folder, where you have downloaded “VBoxGuestAdditions” disc image and select Open. and then click OK to close the settings window.

Image source: Lifewire.com
- Once you are back to the desktop, click on Start. Ubuntu will boot for the first time.
- Note: You won’t be able to use the virtual machine in full screen until the guest additions are installed properly
- Click on the CD icon which is located at the bottom of the launcher panel on the left side and be sure that files are for VirtualBox Guest Additions.
- Right click on an empty space where the list of files are and choose open in terminal.

Image source: Lifewire.com
- Type the following into the terminal window:
sudo sh ./VBoxLinuxAdditions.run
- After running the command, you have to reboot the virtual machine.
- Locate the little cog symbol in the top right-hand corner and click shutdown. You will get two options, shutdown & Choose “Restart”.
- As the virtual machine restarts choose the “View” menu and select “Full-Screen Mode”.
- Click “Switch” to continue.
Now, you are all set to use Ubuntu on your Windows 10 in full mode. Try it and let us know if you face difficulty while performing the steps.
Я регулярно призываю людей использовать Linux, и когда я даю им повод переключиться, я всегда упоминаю, что они могут использовать Windows и Linux вместе, если они пока «боятся Linux».
Один из способов использовать две системы вместе — это двойная загрузка Windows и Linux. Этот способ хорошо работает, за исключением того, что нужно переключаться между операционными системами путем перезагрузки системы, что несколько неудобно.
Если, как и я, вы редко пользуетесь Windows и не хотите беспокоить себя двойной загрузкой Ubuntu и Windows 10, я предлагаю установить Windows 10 внутри Linux, создав виртуальную машину. В одном из предыдущих учебников я показывал вам, как устанавливать VMWare на Ubuntu, но в данном случае мы будем использовать Oracle VirtualBox для создания виртуальных машин и установки на них Windows 10.
Что такое VirtualBox и каковы его преимущества?
VirtualBox — это программное обеспечение с открытым исходным кодом от Oracle для создания виртуальных машин. С помощью виртуальной машины Вы можете запустить операционную систему, подобно приложению, внутри текущей операционной системы. Это как компьютер внутри компьютера.
Они называются виртуальными машинами, потому что в основном эмулируют другие операционные системы, но на самом деле они не взаимодействуют с компьютерной системой, как это делала бы настоящая операционная система.
Суть в том, что с программным обеспечением для виртуальных машин вы можете использовать Windows как приложение внутри Linux. В отличие от обычных приложений, она будет потреблять много оперативной памяти. Но таким образом, вы можете использовать Windows-специфическое программное обеспечение и программы внутри Linux без необходимости полной установки Windows.
Установка Windows 10 в VirtualBox в системах Ubuntu и Linux Mint

Перед установкой Windows 10 в VirtualBox посмотрим, что вам нужно:
- Интернет-соединение с хорошей скоростью или Windows 10 ISO, который вы уже скачали.
- Минимум 4 ГБ оперативной памяти. Чем больше у вас оперативной памяти, тем лучше.
- Около 20 ГБ бесплатной памяти для установки Windows 10.
После того, как вы убедились, что у вас есть все необходимые условия, давайте посмотрим, как это сделать.
Шаг 1: Загрузка Windows 10 ISO
Прежде всего, вам нужно загрузить Windows 10 ISO. Вы можете загрузить Windows 10 32-битной или 64-битной версии, в зависимости от вашей системы. Перейдите по ссылке ниже и выберите, какую версию Windows 10 вы хотите загрузить:
Скачать Windows 10 ISO
Перед загрузкой ISO вам нужно будет выбрать редакцию и язык, а затем выбрать 32-битную или 64-битную систему.
Шаг 2: установка VirtualBox на Ubuntu и Linux Mint
Установить VirtualBox на Ubuntu очень просто. Все, что вам нужно сделать, это воспользоваться командой, приведенной ниже:
sudo apt install virtualboxШаг 3: Установка Windows 10 в VirtualBox
Запустите VirtualBox. Вы должны увидеть экран, как показано ниже.

Можете назвать виртуальную машину как пожелаете. Также выберите операционную систему и версию. В данном случае я выбрал Windows 10 64-битную версию.

Выберите размер оперативной памяти. Рекомендуемый объем оперативной памяти для 64-битной Windows 10 — 2 ГБ, для 32-битной Windows 10 — 1 ГБ. Но я предлагаю использовать немного больше для более плавной работы.

Далее размер виртуальной машины. Если у вас есть свободное место, выберите рекомендуемый размер, в противном случае сделайте его немного больше, чем рекомендуемый размер.

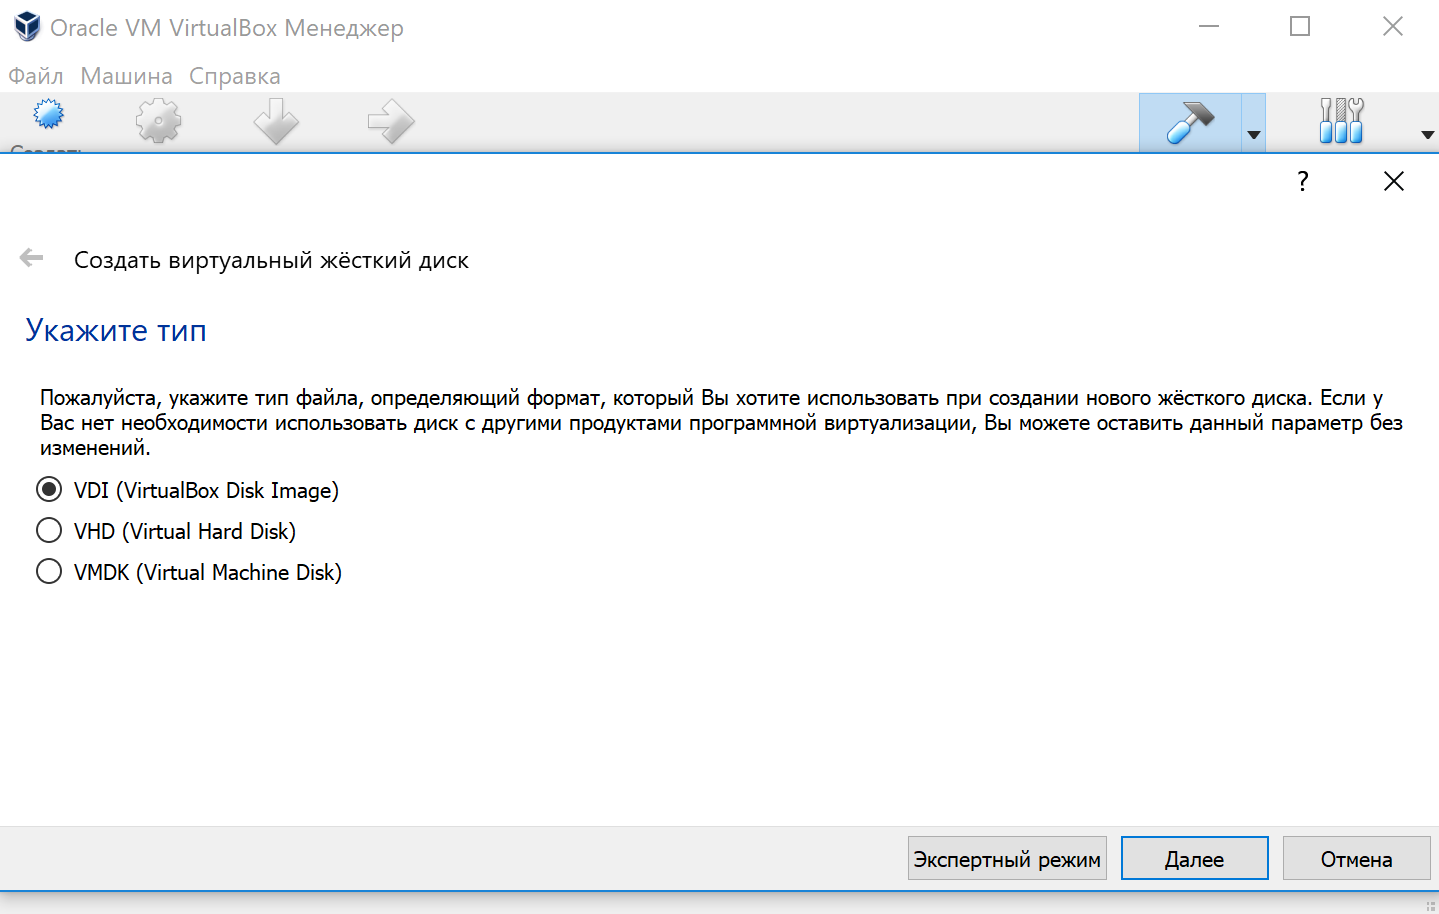
Для форматирования, выберите формат диска VDI.

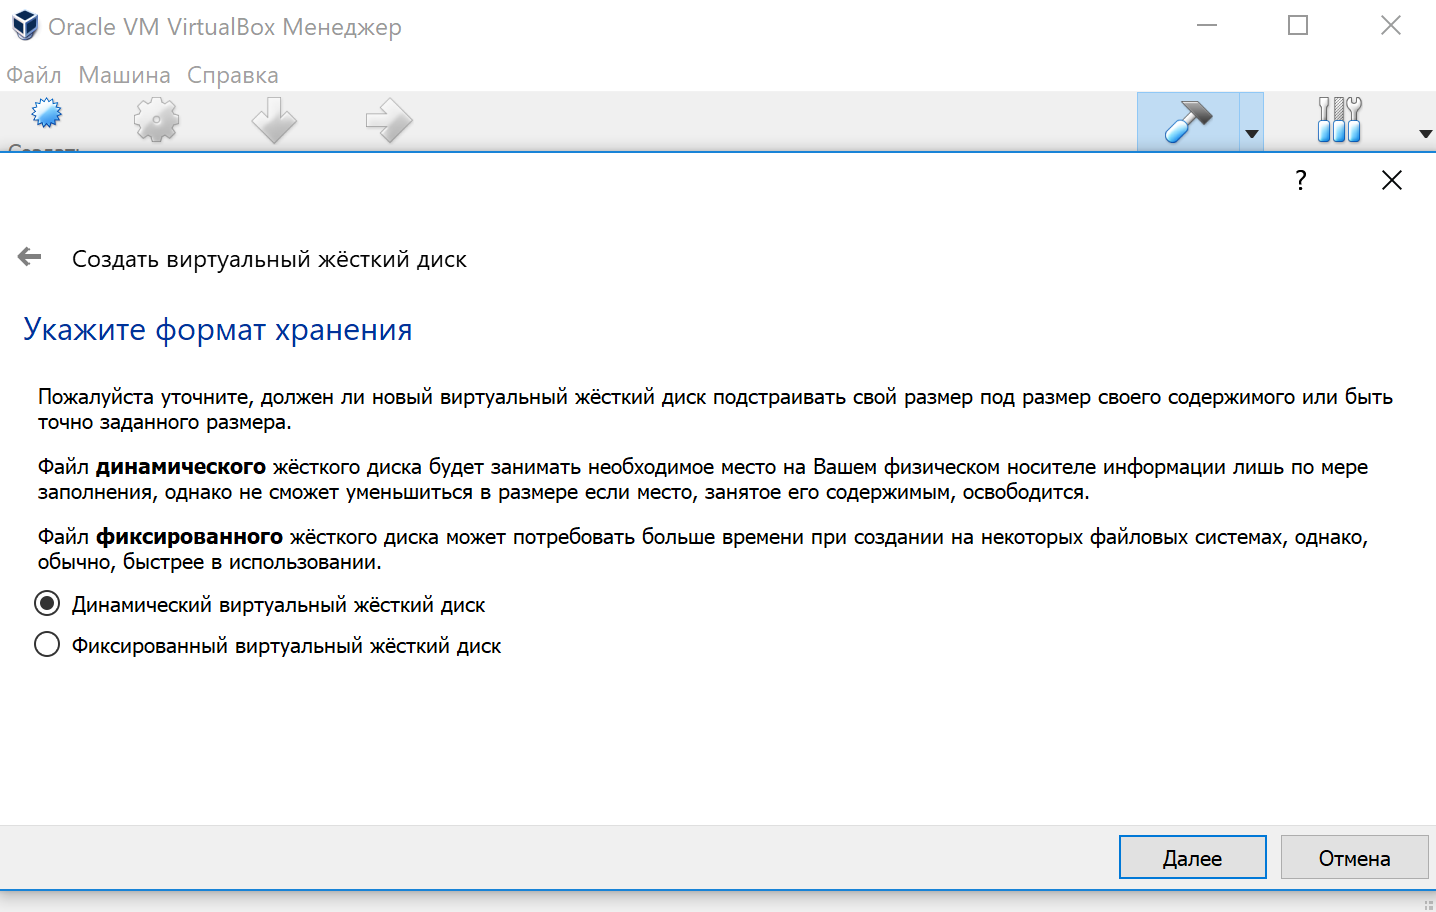
Смущаетесь по поводу динамического или фиксированного размера? Если вы выберете динамический, то установленная ВМ вырастет за пределы выделенного ей размера со временем. Если вы не собираетесь широко использовать Windows, я предлагаю использовать фиксированный размер.

Теперь пришло время закончить с натройкой. Вы можете выбрать, где создать виртуальный диск. Местоположение по умолчанию (домашний каталог) работает нормально.

Теперь вы должны вернуться к начальному экрану. Но подождите, мы ведь еще не использовали наш Windows 10 ISO, не так ли? Пришло время использовать образ ISO. Нажмите «Настройки».

Здесь, перейдите в Storage и добавьте новый оптический привод. Я добавил этот скриншот позже, потому что некоторым читателям было трудно его найти.

Нажмите кнопку Выбор диска и укажите на Windows 10 ISO.

Теперь вы должны увидеть Windows 10 ISO в списке в разделе Хранилище. Нажмите OK.

Теперь Вы должны вернуться к главному экрану Oracle VirtualBox. Теперь все готово. Следующий шаг — установка Windows 10. Нажмите на кнопку Начать с главного экрана:

Вуаля! Теперь вы должны увидеть знакомый экран загрузки Windows:

Через пару секунд вы должны увидеть опцию установки Windows:

Примечание: В этот момент, если вы видите логотип Windows на черном фоне и он никогда не начинает установку, вам, возможно, придется немного подправить настройки.
Как отмечает Ларри из редакции FOSS: «Похоже, что существует несовместимость между Virtualbox и Windows 10 1703. Виртуальная машина, которая прекрасно работает под управлением Windows 10 1607, не сможет загрузить Windows 10 1703 -UNLESS — задан следующий параметр: В разделе System — Acceleration вы должны установить параметр Paravirtualization в None и затем перезагрузить».
Думаю, дальше вы сможете справиться со всем, поскольку установка Windows — это всего лишь вопрос нескольких щелчков мыши. Для вашего удобства я добавил скриншоты в галерею. Нажмите на изображения, чтобы увеличить их, если вам что-то не видно.


После успешной установки Windows 10 вы обнаружите, что подключение к Интернету также используется совместно с виртуальной Windows: нет необходимости в дальнейшей настройке. Вот он — FOSS в браузере Edge в Windows 10 внутри вашей виртуальной машины.

Когда вы закончите использовать виртуальную Windows, вы можете вернуться к главному экрану и отключить ее оттуда:

Чтобы снова запустить виртуальную ОС, просто щелкните Start (зеленая стрелка) на главном экране VirtualBox еще раз. Вот так. Подробнее об использовании виртуальных операционных систем позже. Я думаю, что для начала это руководство даст вам хорошее представление о том, как установить Windows в Ubuntu или Linux Mint  .
.
Как вам?
Помогло ли это учебное пособие по установке Windows в системах Linux с помощью VirtualBox? Если у Вас есть вопросы или предложения, не стесняйтесь оставлять комментарии.
Если вы работаете на Windows версии ниже 10 или хотите получить изолированную операционную систему Linux, да ещё и с графическим окружением, то можно воспользоваться сторонним бесплатным программным продуктом под названием VirtualBox.
Общая информация о технологии виртуализации
Вам потребуется:
-
Инсталлятор Oracle VM VirtualBox для Windows Hosts
Ссылка на скачивание: Download Oracle VM VirtualBox -
Образ операционной системы Ubuntu Linux в формате ISO
Ссылка на скачивание: Download Ubuntu Desktop
Для начала необходимо установить и запустить приложение VirtualBox.

Нажимаем кнопку «Создать», выбираем из списка тип операционной системы «Linux», если нет своих предпочтений по дистрибутиву, то выбираем версию «Ubuntu» 32 или 64 битной архитектуры, а название можно ввести любое.

Указываем объём оперативной памяти выделенной под виртуальную систему. Рекомендованный объём составляет 1024 MB.

Указываем объём дискового пространства выделенного под виртуальную систему. Рекомендованный объём составляет 10 GB.
Тип виртуального жёсткого диска можно оставить как есть — VDI (VirtualBox Disk Image).
Формат хранения данных выберите исходя из личных предпочтений. Динамический виртуальный жёсткий диск растёт по мере заполнения, а фиксированный создаётся сразу того размера, который был указан на предыдущем шаге.
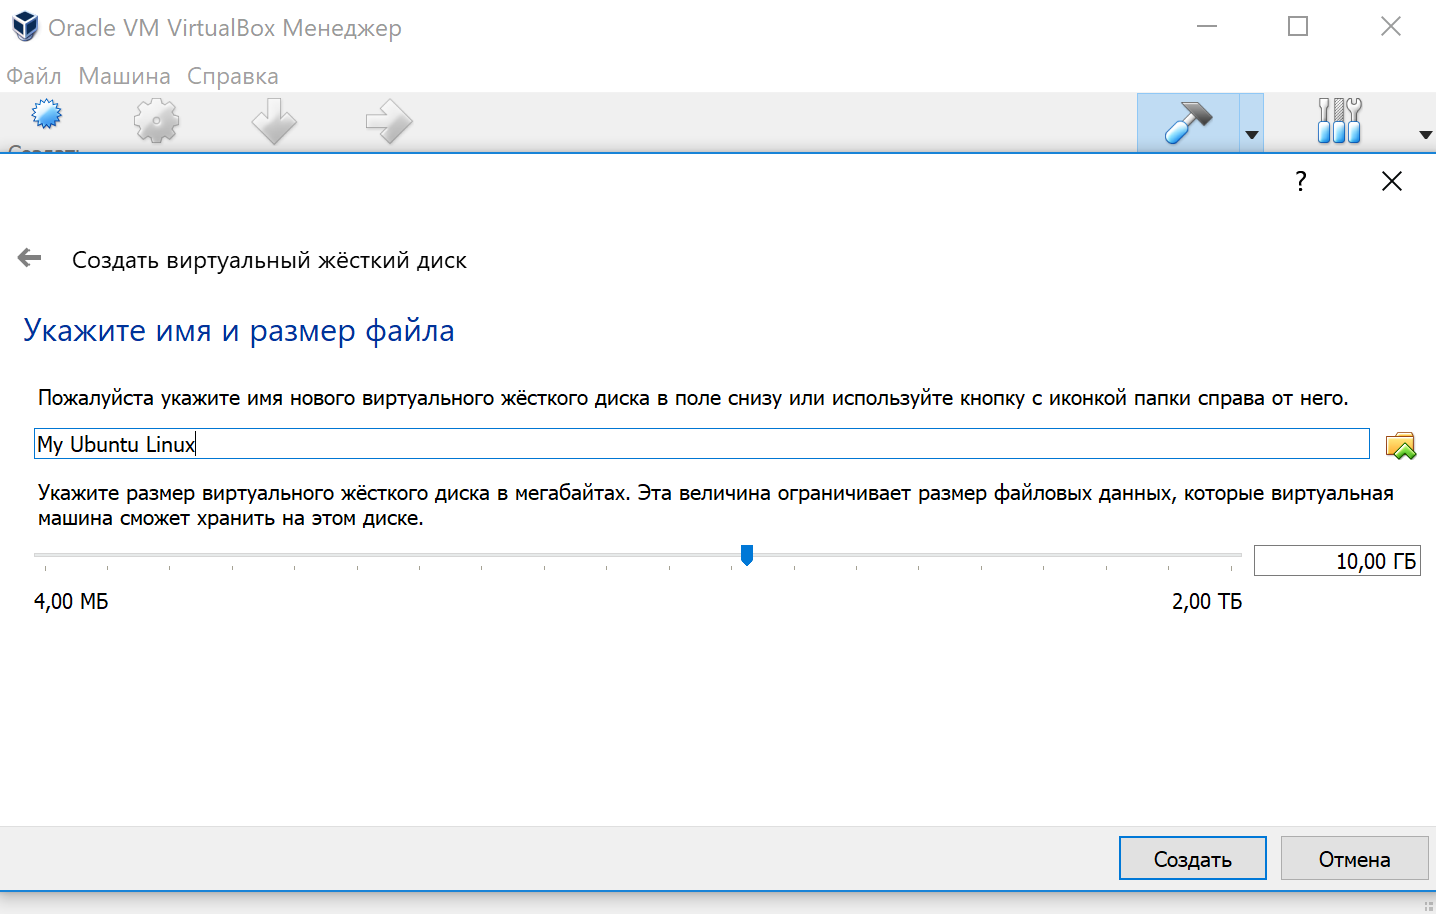
Имя и размер файла можно оставить без изменений и сразу нажать на кнопку «Создать».
По завершению у вас будет создана виртуальная машина, но она пока без операционной системы. Для того чтобы её установить, нужно скачать Ubuntu Linux (32-bit или 64-bit, в зависимости от того, что было выбрано на шаге, где мы указывали тип ОС).
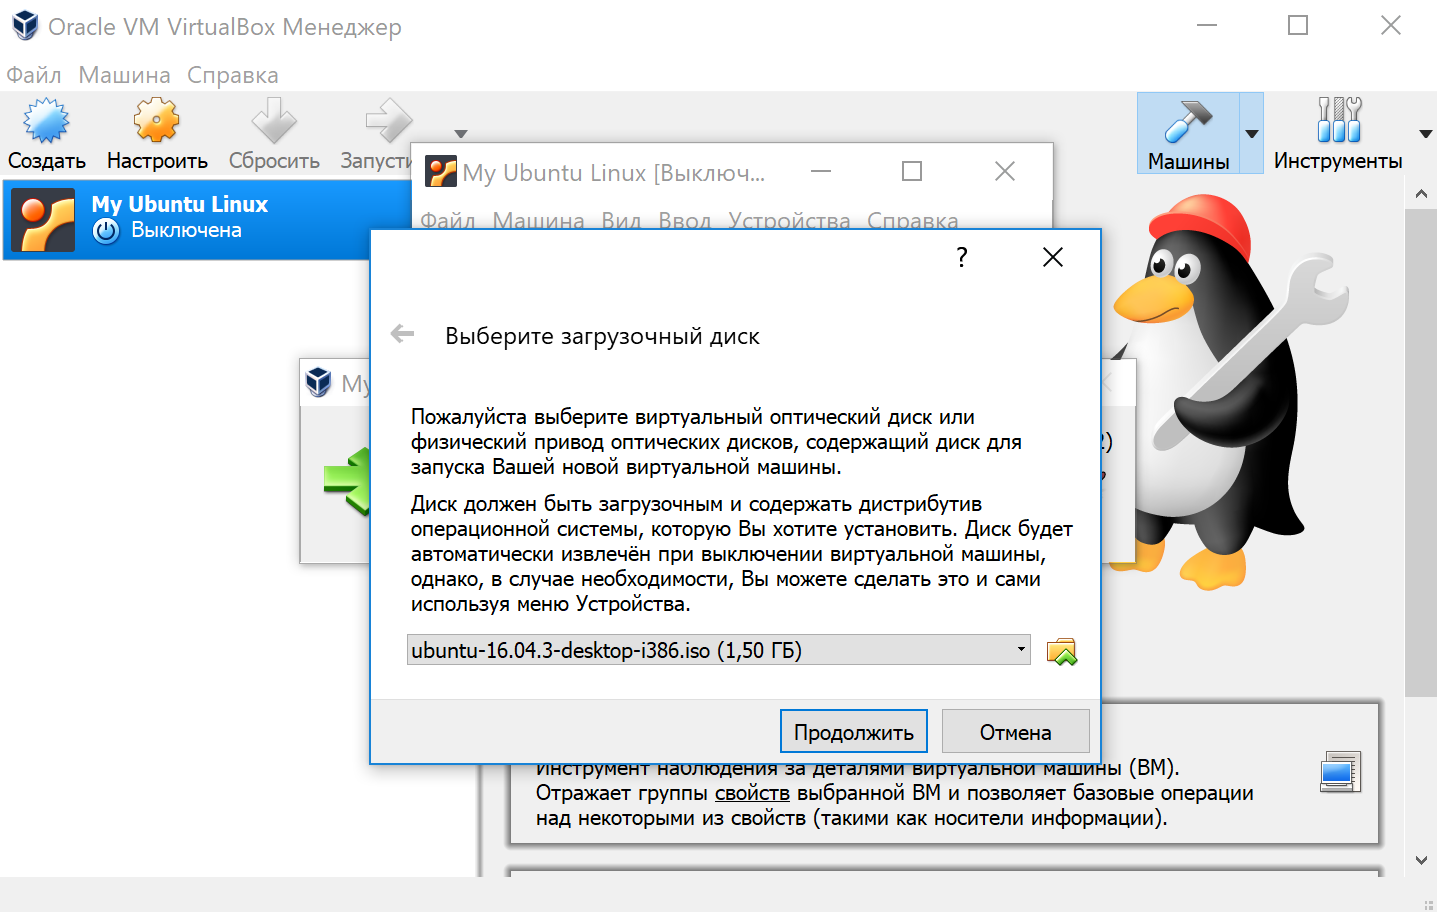
Нажатие на кнопку «Запустить» должно привести к появлению диалогового окна с предложением указать путь до скаченного ISO образа. Сделайте этого и нажмите кнопку «Продолжить»
Виртуальная машина автоматически будет выполнять часть процессов, но в некоторых операциях всё же потребуется участие пользователя.
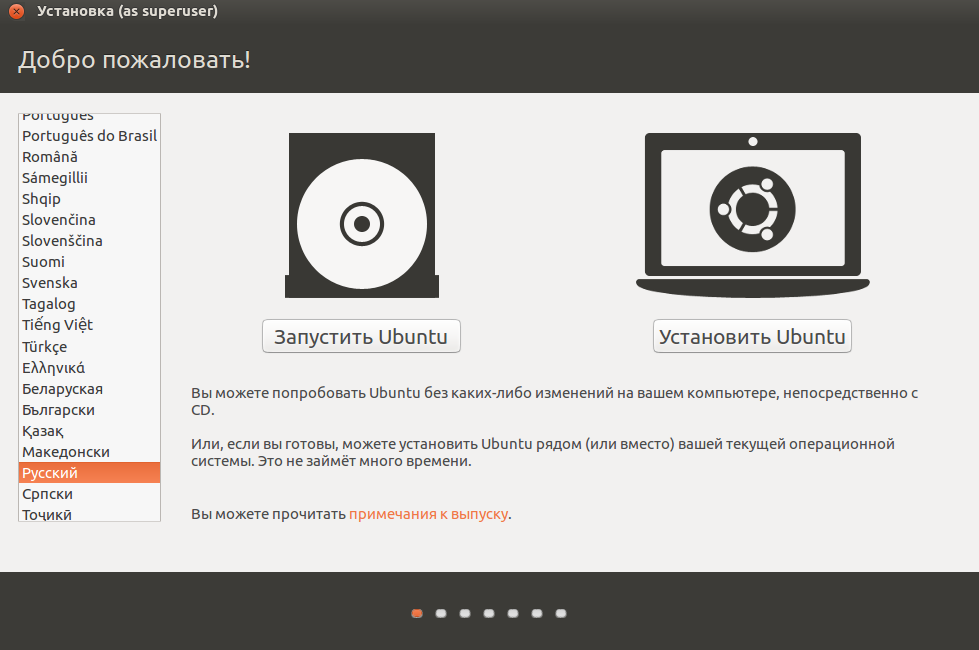
Выберите языковую поддержку в списке слева и нажмите «Установить Ubuntu».
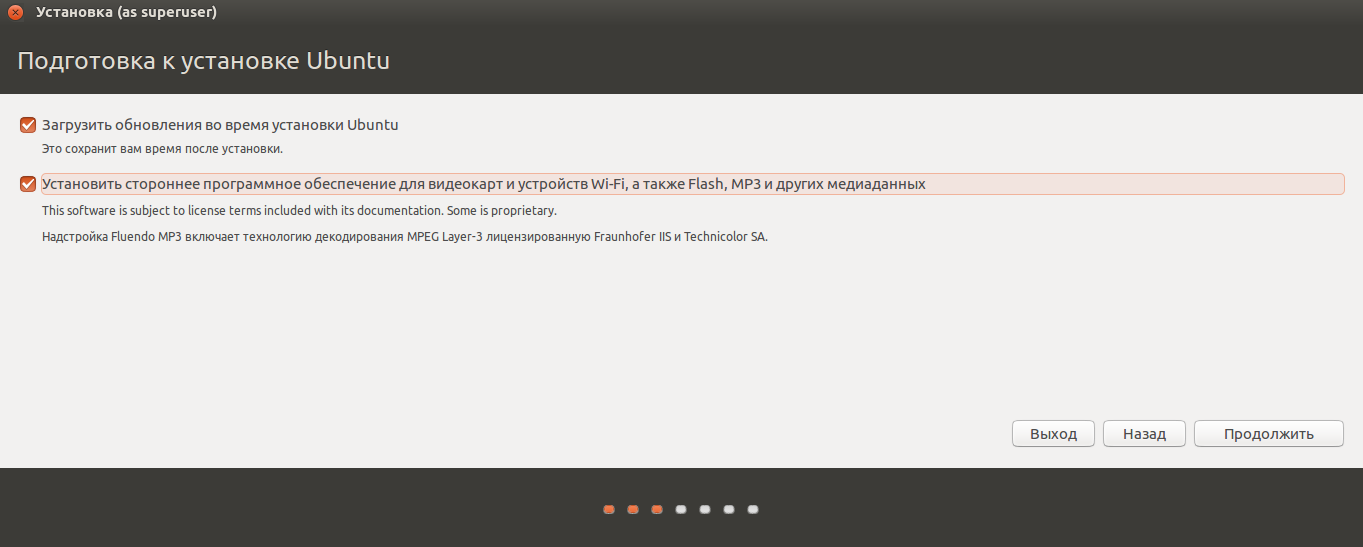
Можно загрузить обновления сразу на этапе установки.
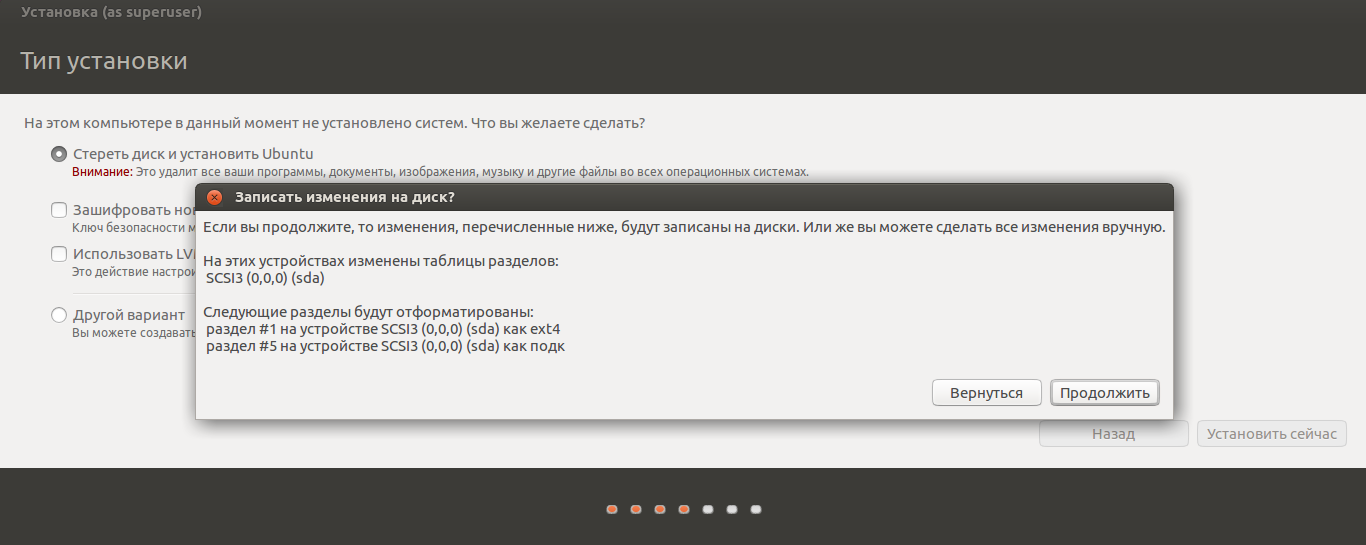
Без особых опасений выбираем пункт «Стереть диск и установить Ubuntu» и двигаемся дальше.
Если вы выбрали русский язык на первом этапе установки, то вам предложат русскую раскладку клавиатуры в качестве дополнительной.
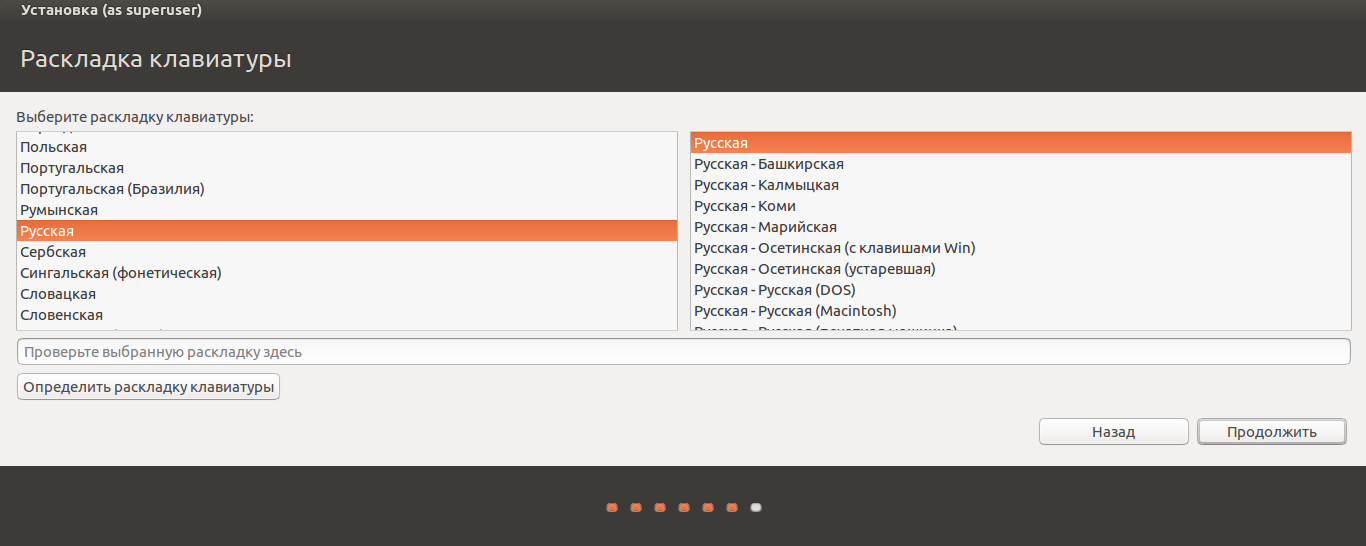
Заполните поля и выберите режим входа в систему.
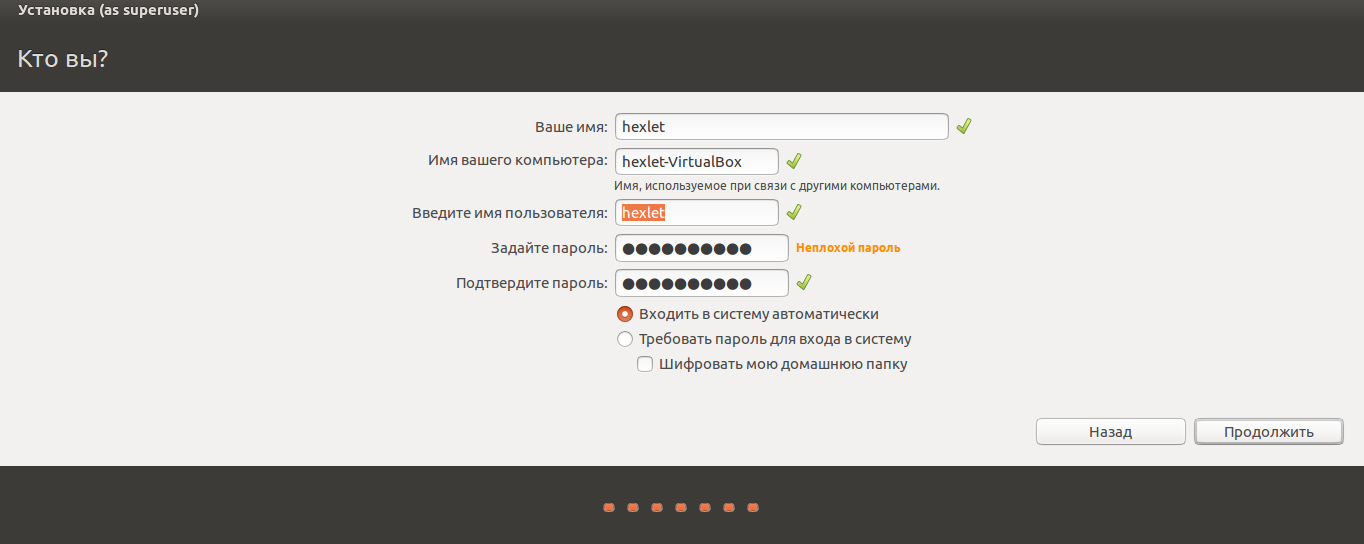
Далее начнётся процедура разметки диска, переноса файлов, установка обновлений и другие процессы, которые не потребуют прямого участия пользователя.
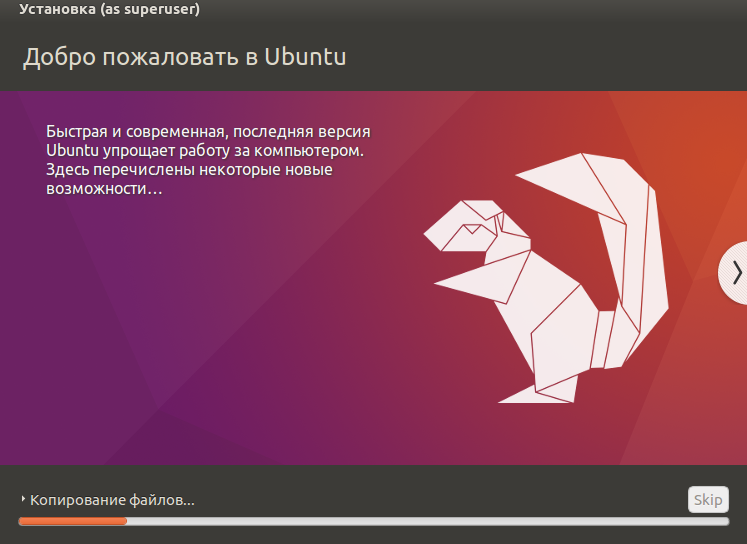
По завершению виртуальный компьютер перезагрузится и вы попадёте в уже установленную среду Ubuntu Linux.
Но это ещё не всё. Весьма желательно установить так называемые «Дополнения гостевой ОС». Они содержат драйверы и прочие системные файлы, необходимые для наилучшей производительности и обеспечения дополнительных функциональных возможностей между виртуальной и гостевой операционными системами.
Выберите пункт меню «Устройства» программы VirtualBox, подпункт «Подключить образ диска Дополнений гостевой ОС…» и дождитесь предложение запустить приложение для автоматического запуска с виртуального привода.
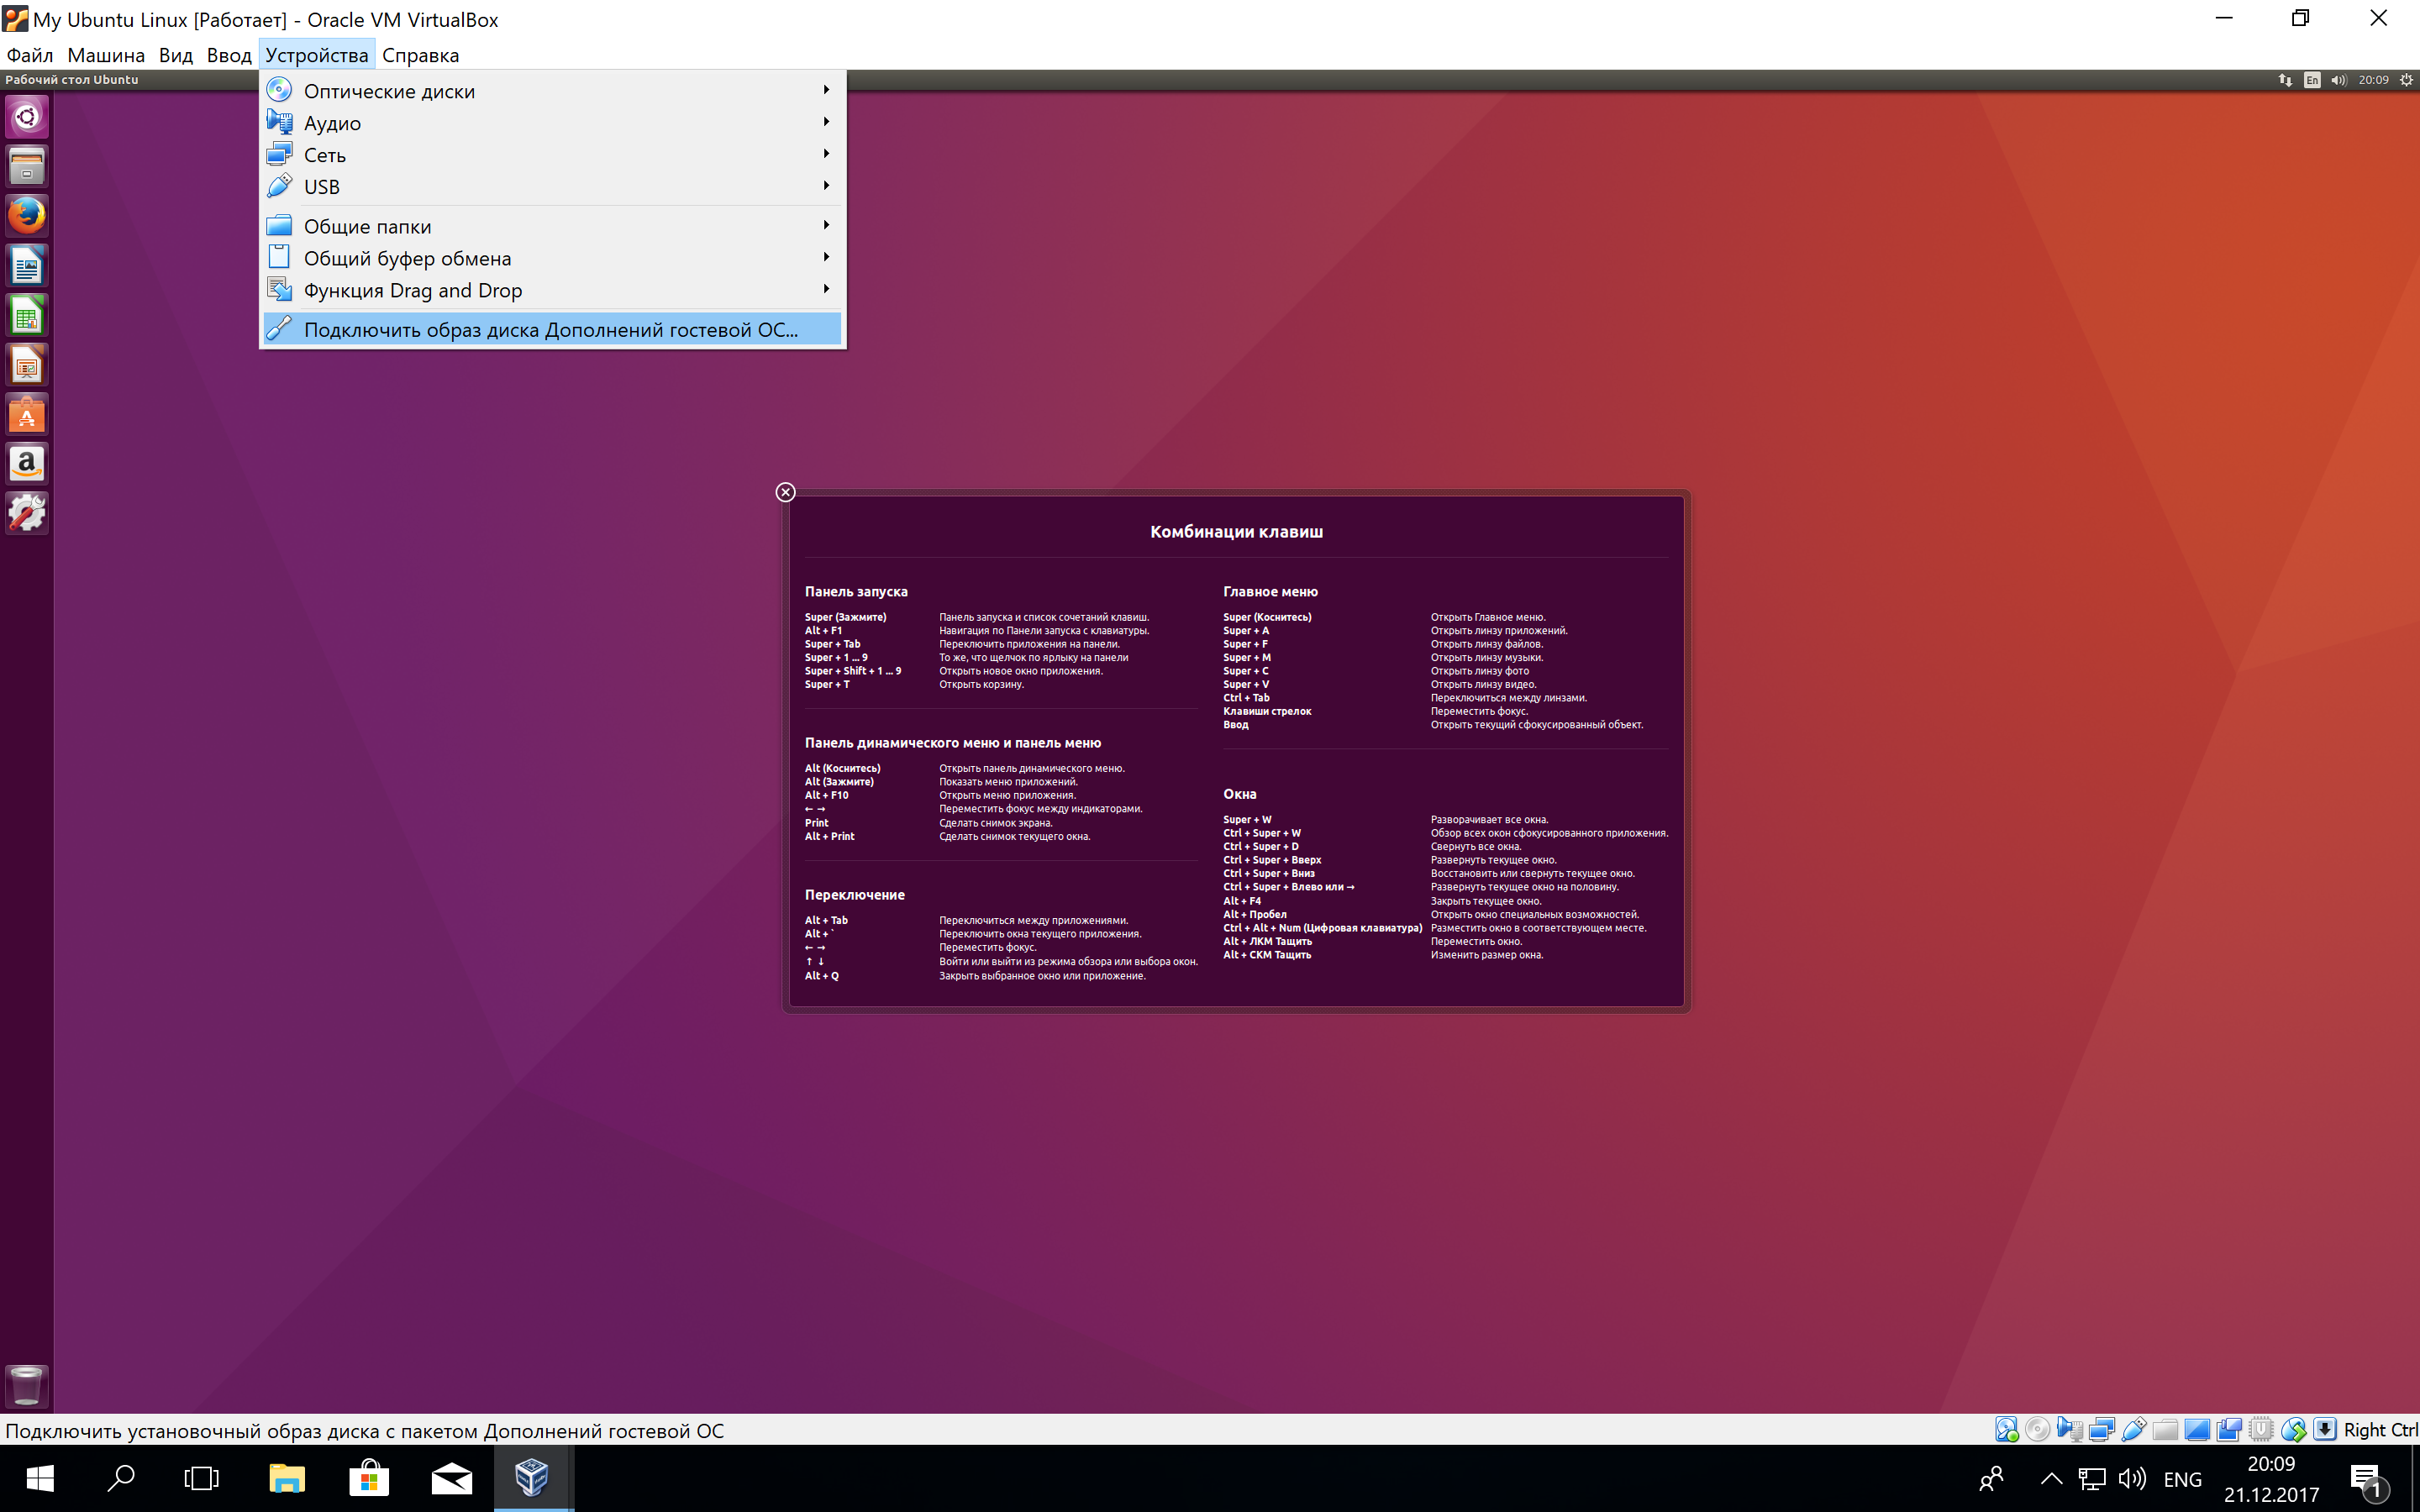
Виртуальная ОС Ubuntu Linux установлена и готова к работе.
Ссылка на официальную документацию: Oracle VM VirtualBox User Manual
Ubuntu is a popular Linux distribution that offers users a wide range of features and applications. Ubuntu is a great choice for those new to Linux who want to explore its capabilities. However, it can be difficult to set up and configure on a Windows desktop.
Fortunately, there is a way to get Ubuntu up and running quickly and easily with VirtualBox and Vagrant. This tutorial will guide you through setting up Ubuntu with VirtualBox and Vagrant on a Windows desktop, creating a secure and isolated virtual environment for testing and experimenting.
What is Vagrant?
Vagrant is an open-source software for building and managing virtual machine environments in a single workflow. With Vagrant, you can define a configuration file that specifies the details of the virtual machine you want to create and then use a single command to create and configure the virtual machine. This makes it easy to set up and maintain a consistent development environment across multiple machines and to share that environment with others.
Vagrant works with various virtualization software, including VirtualBox, VMware, and Hyper-V, and can manage both Linux and Windows virtual machines.
What is VirtualBox?
VirtualBox is a free, open-source virtualization software platform developed by Oracle that allows you to run multiple operating systems on a single physical machine. With VirtualBox, you can create and run virtual machines (VMs) on your computer, each of which runs a separate operating system and can be configured with its virtual hardware.
VirtualBox is designed to be easy to use, with a simple graphical user interface (GUI) that allows you to create and manage virtual machines. It supports a wide range of operating systems, including Windows, Linux, macOS, and many others, and can be used for various purposes, such as testing software, running legacy applications, and more.
How would Vagrant and VirtualBox work?
When you use Vagrant with VirtualBox, Vagrant creates and manages virtual machines in the VirtualBox environment. You define the operating system type, the amount of memory, and other resources the virtual machine should have in the Vagrant configuration file. Vagrant then uses this configuration to create and configure the virtual machine in VirtualBox.
Once the virtual machine is up and running, you can use Vagrant to manage it by SSHing into it or running provisioning scripts to set up the environment.
Prerequisite
To follow along with this article, you need to have the following:
- A computer with
- at least 8 GB RAM
- Windows 10 x64-bit operating system (OS)
- A modern multi-core Intel/AMD CPU
- Virtualization is enabled in its BIOS settings. Find out how to here.
- Have a basic knowledge of Powershell or Gitbash.
Installing VirtualBox
To install VirtualBox, you will need to follow these steps:
Step 1: Visit the VirtualBox website using this link, and you will see a page similar to the one below.

Step 2: Click on “Download VirtualBox” and then on Windows hosts to download VirtualBox and its extension pack.

Step 3: After downloading it, click on the “New” icon in the top right-hand corner to create a new virtual machine.

You would see a prompt like this.

Step 4: Name the new machine you want to create and choose the type and version that suits your taste.

Step 5: Click next and assign the memory size you want to allocate to the virtual machine using the up and down arrow keys.

Step 6: Click Next, select “Create a virtual hard disk now”, and create.

Step 7: Choose the hard disk file type (using the default setting is recommended except there are other preferences).

Step 8: Next is to allocate storage space for your hard disk. Choose if you want a flexible or fixed space.

Step 9: Choose the file location and size and create.

Step 10: Click Create, and you’ve successfully set up your virtual machine…
Installing Vagrant
To install Vagrant using a graphical user interface (GUI), you will need to download the Vagrant installer from the Vagrant website and then run it. Here are the steps:
Step 1: Go to the Vagrant download page at https://www.vagrantup.com/downloads.html, and under the «Operating System» heading, click on the appropriate “Binary” for your computer. The installer will be downloaded to your computer.

Step 2: Locate the installer file on your computer and double-click it to start the installation process.

Step 3: Follow the prompts in the installer to complete the installation.
Step 2: Once the installation is complete, you can start using Vagrant by opening a terminal or command prompt and typing vagrant.
Setting up the Ubuntu machine
After downloading Vagrant, to confirm that it was successfully installed, open the terminal/cmd of your choice and head to the home directory using the $ c``d ~ as in the image below.

Note: ~ is used to move into the home directory in the command line.
List out the files in that directory using the ls command to check if Vagrant was successfully installed.
$ ls

After confirming the installation, create a directory for the Ubuntu setup using the mkdir command below.
$ mkdir Ubuntu_20.04

Change into the directory that you created using the following command:
$ cd Ubuntu_20.04

Run vagrant init ubuntu/focal64 command. Running this command automatically places a Vagrantfile in the directory created above. A Vagrantfile is a file that instructs Vagrant to create new Vagrant machines or boxes. ubuntu/focal64 is an existing Vagrant box for the Linux Ubuntu distribution.
$ vagrant init ubuntu/focal64

Start the Virtual Machine using vagrant up and watch it spin up the Virtual machine.
$ vagrant up

Ensure your VirtualBox looks like this:

Connect to the VM using vagrant ssh
$ vagrant ssh

Conclusion
This tutorial has shown you how to set up your Linux OS (Ubuntu) on Windows using Vagrant and VirtualBox. Vagrant is a great tool and a very easy way of using Ubuntu on Windows rather than having to dual boot. To learn more about Vagrant and VirtualBox, Check out these resources :
- Vagrant and VirtualBox Simplified
- Vagrant and VirtualBox Tutorial
- Automating Linux Installation using Vagrant and VirtualBox