OneDrive makes it easy to transfer your files from PC to PC
With internet access and a few clicks, you can back up your files online. When you’re ready, sync them onto a new PC—or you can leave them in the cloud without having to download them. This saves space on your new PC’s hard drive and leaves your files and photos easily accessible from any of your devices, anywhere.1
Copy your files and folders to a secure location in the cloud then get up and running quickly so you can get back to doing what you love.

Set up OneDrive
Install the OneDrive sync app on your Windows 7 PC and get started. If you don’t have a Microsoft account, sign up for one here: https://account.microsoft.com/. It’s free and comes with 5 GB of OneDrive storage.

Bring your files and favorites with you
There’s no need to leave your photos, files, or browser favorites behind when you transfer files from PC to PC or from a Mac to PC. Bring them with you to your new computer.

Install what you love
When you start up your new PC, you may want to install additional apps. The Microsoft Store has many popular apps available to download or you can check with the publisher of your software for more information.
Check the table below to see what makes the most sense for your move.
|
| Solutions | OneDrive | USB/external drive |
|---|---|---|
| Details |
If you’ve been using your PC for a few years, you probably have some files that you want to move to the new PC. By using OneDrive, you can quickly transfer files from PC to PC or Mac to PC, so your files are organized like they were on your old computer and you can get right back to work. |
You can use an external storage device such as a USB drive, SD card, or external hard drive to help you move all your favorite files off a Windows 7 PC and onto a Windows 10 PC. |
| Benefits |
|
|
| Cost |
A Microsoft account comes with 5 GB of OneDrive storage. You can buy more storage if you want it. Compare plans. |
Shop your local retailer for hard drives and USB drives. |
There are a couple of ways to get your files and photos onto a new PC. With OneDrive you can quickly transfer files from PC to PC or Mac to PC, so your files are organized like they were on your old computer and you can get right back to work. Or you can use an external storage device such as a USB drive, SD card, or external hard drive to help you make the move.
OneDrive is a Microsoft cloud storage service that lets you store your personal files in one place, share them with others, and get to them from any device connected to the Internet.
Learn more about OneDrive
A free OneDrive basic account offers 5 GB of storage. Need more space? No problem, see available options.
Yes. If OneDrive is not the best fit for you, there are other options available. For example, you can use an external hard drive along with the Windows Backup & Restore feature. There are also other programs designed to help with backing up your files and data and some retailers have service desks that will do the work for you.
Learn how
If you are upgrading an existing Windows 10 PC to Windows 11, your apps will remain on the PC and they should continue to work. However, if you purchase a new Windows 11 PC, you will need to reinstall your apps on the new PC.
Yes, you can drag whole folders from File Explorer to your OneDrive folder.
With the broadest choice of devices—across style, features, and form factors—we and our ecosystem of partners can help ensure that you will find the right fit with Windows.
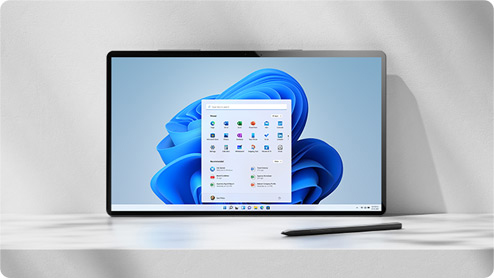
PCs preloaded with Windows 11
Out of the box, get up and running with a new Windows experience that brings you closer to the people and things you love.

Thin, light laptops
It’s everything you love and more—portability, power, and the latest in processors.
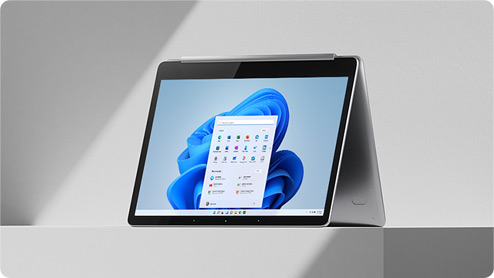
Versatile 2-in-1s
2-in-1s provide power and flexibility. Touch, type, click, or pen—choose whatever fits your style.
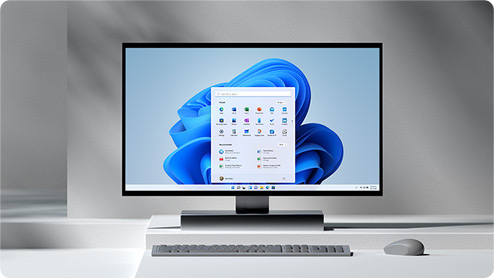
Desktops & All-in-Ones
The power of a desktop computer in a variety of shapes and sizes. Perfect for your home office or a computer for the family to share.
-
Screens simulated. Features and app availability may vary by region.
-
1
Internet access required. Fees may apply. -
2
Windows 11 Home edition requires internet connectivity and a Microsoft Account to complete device setup on first use.
Windows 11 is just around the corner and will be on most PCs by the end of 2022. If you upgrade from a Windows 10 machine, downloading and installing the Windows 11 version should not be a huge issue. You can retain all your files and documents as they were on your previous software version.
However, what if your current laptop or PC does not support Windows 11, and you are forced to upgrade your device to a new PC? How to transfer files from Windows 10 to Windows 11?
Let us check out the steps and tools involved in transferring your files to your new Windows 11 device:
| ⏱️Duration |
3-5 minutes (depending on the data size and the transfer method) |
| ✂️Tools to Transfer Files |
|
| 💻Supported Systems |
Windows 10 and Windows 11 |
| ✍️Operations to Transfer Files |
|
Can I Share Files Between Windows 10 and Windows 11?
Yes, Microsoft does let you transfer files from Windows 10 to Windows 11 without hassles and complications. However, if you have opted for a new PC and need to set it up completely from scratch, it may be essential to check out a few extra steps for setting up and transferring your Windows 10 files to Windows 11.
You can utilize a software solution to simplify the transfer with a one-click migration. You may also check out the other manual methods, such as using a USB transfer cable or an external hard drive to transfer your files.
One of the best methods that can be utilized for transferring your content between Windows 10 and Windows 11 computers would be to make use of the network. You can connect the two devices to a safe Wi-Fi network (or even wired connectivity) and use additional tools to transfer files between the two PCs.
1. Use EaseUS Todo PCTrans Free
If you have chosen the free option to transfer files from Windows 10 to Windows 11 using a network connection, standalone software such as EaseUS Todo PCTrans Free can be a great option. The software comes with stunning options that you can make use of.
The free software assists you in transferring the entire content of the old computer onto the new computer. You can easily transfer practically all your apps, settings, preferences, images, documents, and other important data. The software can also be used for transferring an entire disk image. Of course, choosing the files and services you want to migrate would make it one of the most formidable options.
The one-click auto-transfer mode can be a great option if you want to transfer all the data from the old PC to the new one. The Pro version is free to transfer unlimited files and apps. Check out the free version before you can opt for the Pro version. That can give you an insight into the basic features of the software.
Step 1. Launch EaseUS Todo PCTrans on both old and new computers. Click the «PC to PC» on the main screen to continue.

Step 2. Choose the right transfer direction.
«New»: Transfer data from old PC to current new PC.
«Old»: Transfer data from current old PC to remote PC.
Step 3. Connect the two PCs on the same LAN by entering the password or verification code of the target PC. Choose the right transmission direction and click «Connect» to continue.
The verification code is on the right top of the «PC to PC» main screen on the target computer. Turn on button behind Connection Verification.

Step 4. Go to «Files» section, select the individual files you need to move.
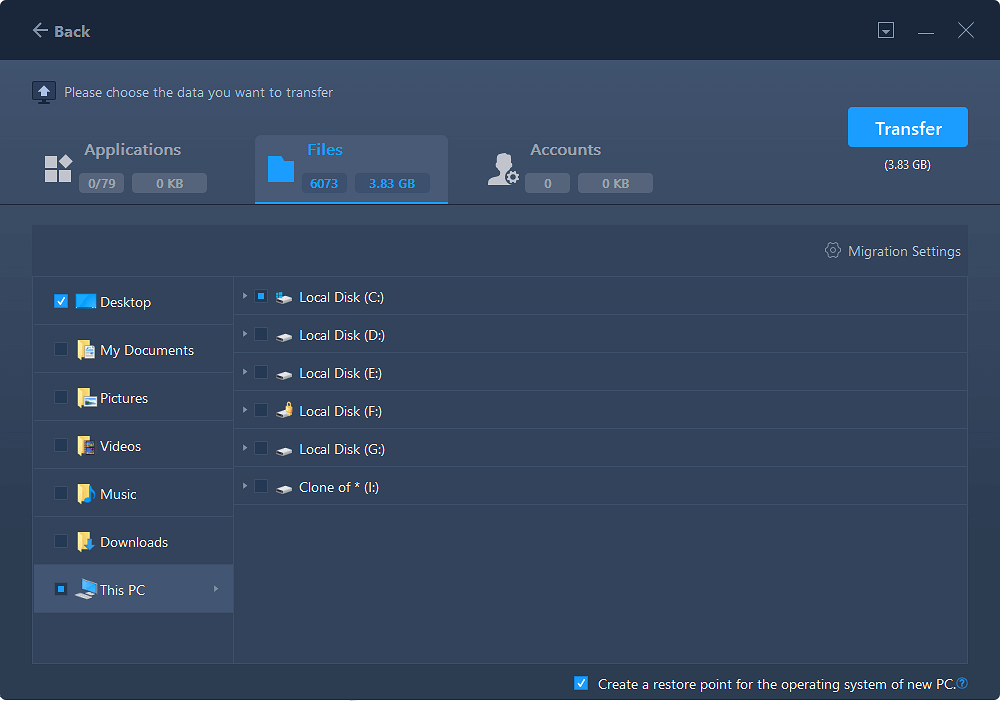
Step 5. And, click the «Transfer» button to begin the data migration. Wait for the transferring finishes. The time of the process varies based on the size of the files.

2. Share Files via OneDrive
If you are moving onto a new PC, OneDrive should be the perfect choice for meeting most of the expectations that you may have. The cloud storage option from Microsoft can help you transfer all your data, including files, photos, and videos, onto your new PC.
Here is how you can go with it –
- Install and set up OneDrive on your current PC. Since you plan to migrate all the content from your old PC to your new PC, you may need to opt for a subscription plan on OneDrive.
- Sync all the files you want to migrate with OneDrive. You can either do it on the OneDrive website or the OneDrive app. Select the option for Upload and add up all the files you want to migrate.
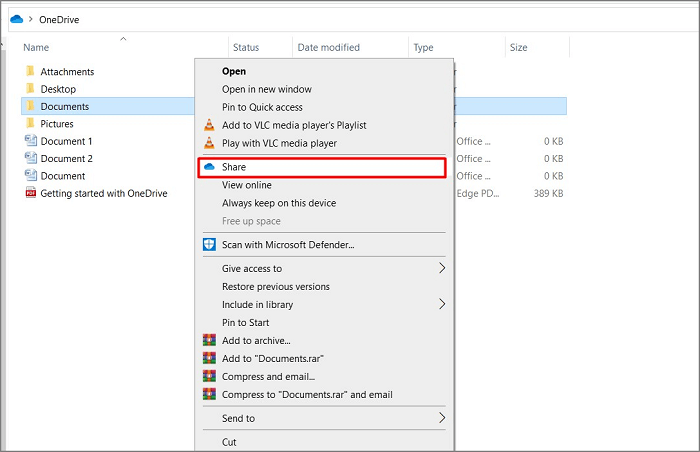
- You can even use File Explorer to move the files onto OneDrive
- Install and set up OneDrive on the new Windows 11 PC. Make sure that you have signed in to the same OneDrive account on your Windows 11 PC
- Select the files and download them onto your Windows 11.
-
That does it. The method lets you select the files you want to migrate to the new PC.
3. Use Email
If you are not sending the whole bunch of files from the old Windows 10 PC to the new Windows 11 PC, email can be one of the easiest and simplest options that you can utilize for an effective file transfer. Email has been considered one of the most secure and safe options for transferring files from one device to another.
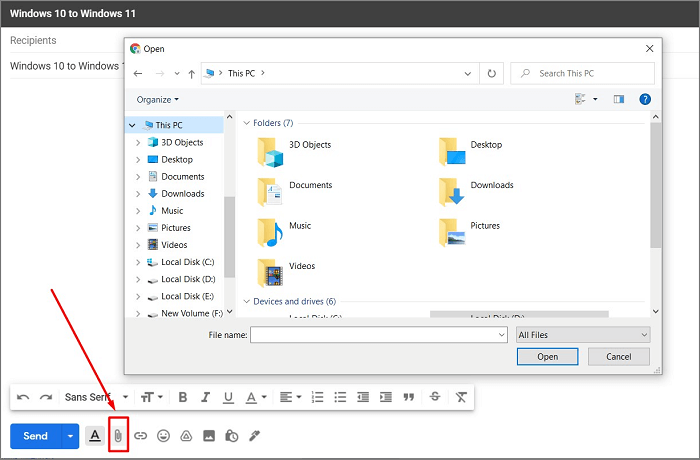
However, the file transfer using email can pose a few issues. None of the information transferred through email comes with any encryption option. Moreover, there may be a limitation on the attachment’s file size that can be sent with an email. Most email service providers restrict the size to 10 MB. That may be a truly lower value for a PC-to-PC data transfer.
If you think this passage is helpful for you to transfer files from Windows 10 to Windows 11, you can also share it with other people in need!
Transfer Files from Windows 10 to Windows 11 without Network
If you do not have network connectivity to assist you in transferring files from Windows 10 to Windows 11, you need not fret. Several other options can be helpful enough in transferring the files without hassles of any nature whatsoever.
1. Copy and move files via external hard drive
Flash drives and external hard drives can be one of the prime options for transferring files in a highly comfortable manner. You can simply connect your external hard drive to your Windows 10 PC and copy all the files you want to transfer to Windows 11.
Once that is done, you can connect the external hard drive to your Windows 11. Then, copy the content from the external hard drive onto your new Windows 11 PC. Isn’t that quite simple and easy enough to opt for? The external drive method would be helpful enough to provide you with a great degree of experience in a backup of your files, just in case something goes wrong.
2. Backup and restore files via EaseUS Todo PCTrans
EaseUS Todo PCTrans software can also be a great option for providing an enhanced file transfer experience. The Backup and Restore functionality on the software can be helpful in providing you with outstanding functionality in transferring your files from Windows 10 to Windows 11.
The software lets you back up the files on Windows 10, and then you can transfer the files onto your new PC. The software offers access to various advanced functionalities, making it one of the most rewarding experiences ever. You can even opt for recovering the data from a dead computer.
Step 1. Create a backup file to transfer
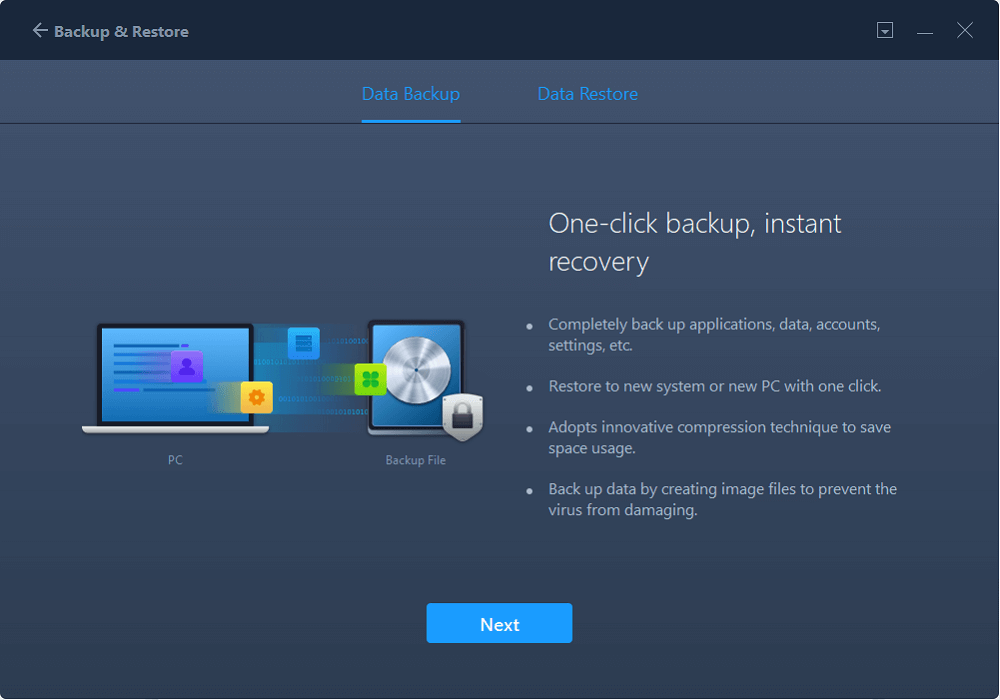
- Launch EaseUS Todo PCTrans on the source PC. Click «Backup & Restore» and click «Start» to go on.
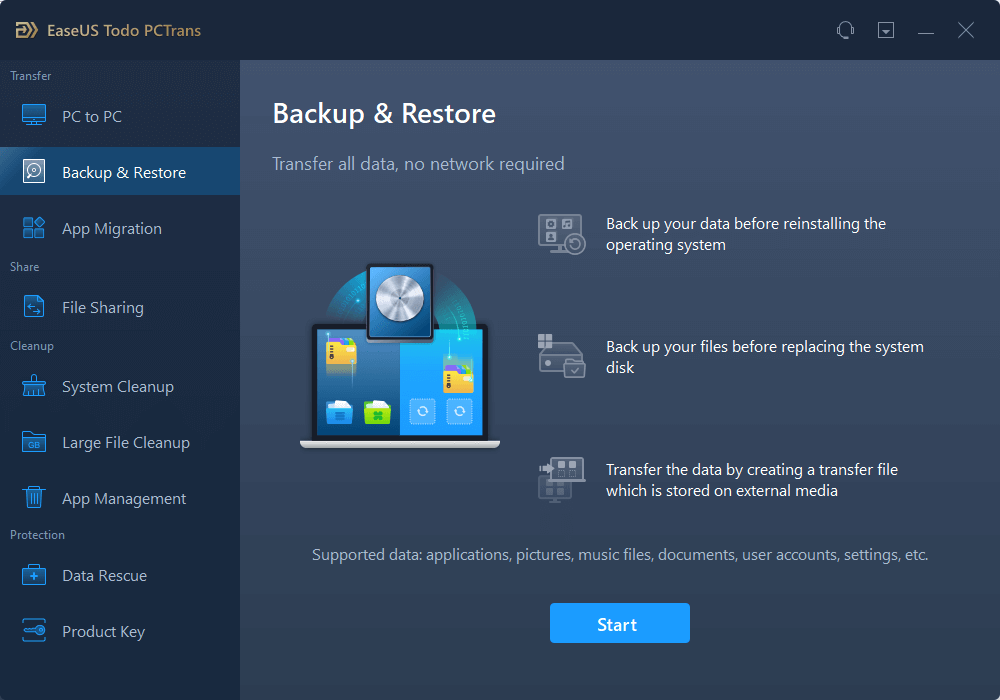
- Choose «Data Backup» and click «Next». Name the backup file, and set the external USB drive as the backup location.
- Click the «Files» section to choose files. Then, click «Backup» to wait for the process to complete.

When the creating process has completed, click «OK» to confirm. Safely eject the USB drive and connect it to the target PC. Move to recover the backup of files to the new PC using USB.
Step 2. Restore and transfer backup files to PC without network
- Connect the external USB drive with the file created from the source PC to the target PC. Launch PCTrans, click «Backup & Restore» > «Start» > «Data Restore» > «Next».
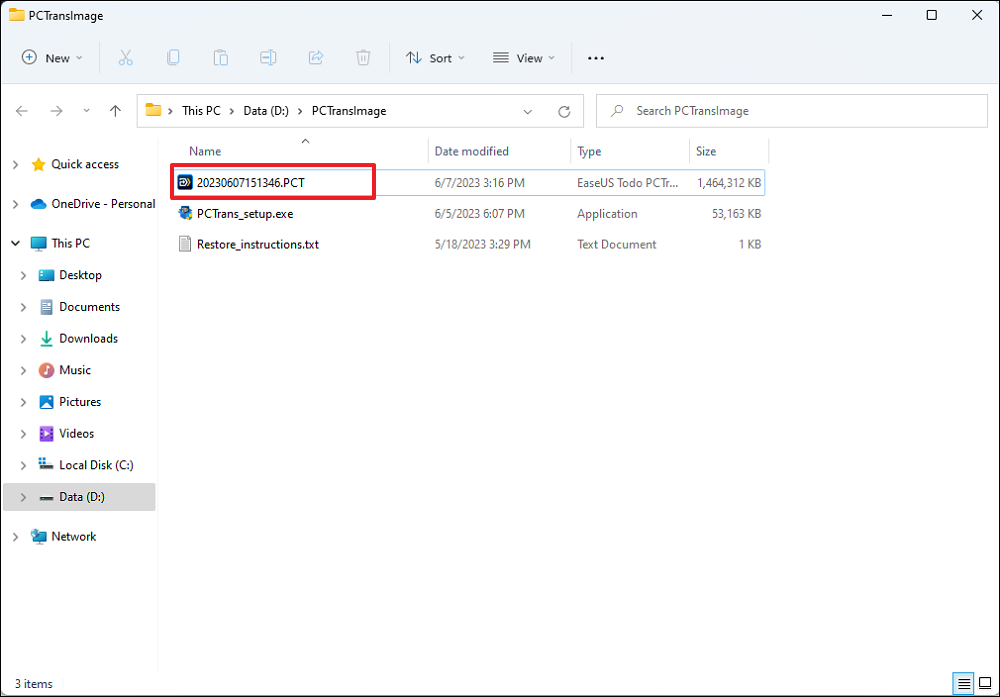
- Click «Browse» to find the image file in your USB drive. Then, choose the correct backup file and click «Restore» to continue.
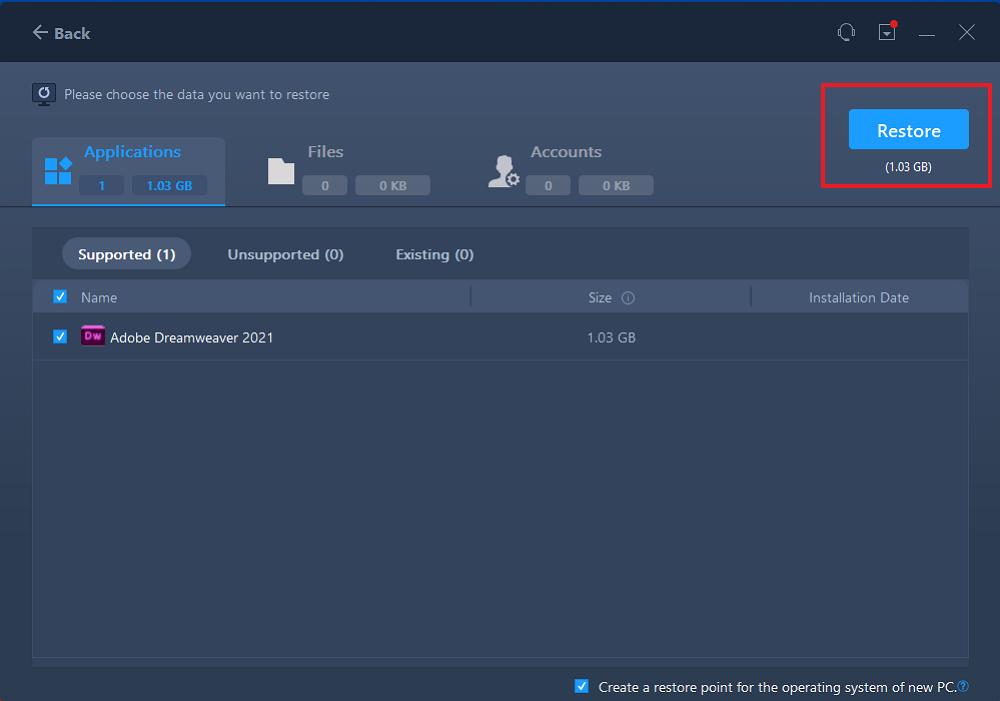
- Choose specific files and click «Restore».
These are the solutions to transfer files. We highly recommend you use EaseUS Todo PCTrans to enjoy the journey. If you think this guide is useful, you can share this tool to your social media and help more people.
The Final Wrap Up
With the launch of Windows 11 just around the corner, it should not take a huge effort to transfer the files on your old device onto the new Windows 11 PC. The steps and tutorials outlined here should be very helpful in achieving the goal.
The standalone software option should be an excellent choice in this context, and we would treat EaseUS Todo PCTrans as something you would find quite interesting in every aspect.
How to Transfer Files from Windows 10 to Windows 11 FAQs
Transferring files from Windows 10 to Windows 11 is not difficult on this page. And this part will give more related questions and answers about today’s topic. Keep reading, and hope it can be helpful to you.
1. How do you transfer everything from the old computer to the new computer?
Various ways allow you to transfer everything from your old computer to the new one, such as using PC data transfer software, external storage devices, cloud storage tools, etc. The most convenient and effective way is to use a PC migration tool, EaseUS Todo PCTrans, which allows you to transfer all your content with just a few clicks:
Step 1. Launch EaseUS Todo PCTrans on your old computer and click on PC to PC.
Step 2. Select the correct transfer direction.
Step 3. Enter the password or authentication code to connect the two PCs.
Step 4. Select the file and start the Transfer.
2. How to transfer programs to New PC?
EaseUS Todo PCTrans is a reliable free PC transfer tool. You can quickly transfer programs to another computer whether you have Internet access. The following is a step-by-step guide:
Step 1. Run EaseUS Todo PCTrans on both computers and select PC to PC.
Step 2. Select the transfer direction and connect the two computers by IP address or device name.
Step 3. Select the program to be transferred and click Transfer.
3. What is the best Windows 11 migration tool?
EaseUS Todo PCTrans is a Windows migration tool that I highly recommend. The best Windows 11 migration tool should satisfy your programs, data, settings, files, and system migration. It can quickly help you migrate your target files to another drive or computer.
How to transfer files from Windows 10 to Windows 11 if you get a new Windows 11 PC? This is not an easy task but you can follow the 6 methods mentioned in this post on the MiniTool website to finish data migration from PC to PC. Go on reading to know some details.
It’s Important to Move Data from Windows 10 to Windows 11
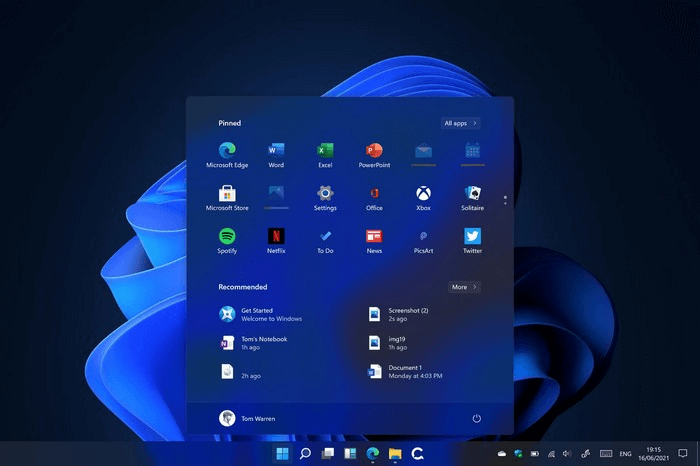
After Windows 11 is released to the public, many users choose to upgrade Windows 10 to this new operating system to enjoy its brand new settings, taskbar, start menu, and user interface, and new & improved features. Before the update, you need to run a compatibility test to check if the PC is compatible with Windows 11 with the PC Health Check app.
If your computer cannot meet the minimum system requirements of Windows 11 and the PC is too old, you may choose to purchase a new PC that is compatible with the new OS. Most of the familiar files are on the old PC and you are unwilling to take a start from the head. You may wish to take all your files to the new PC.
This is possible for data migration from PC to PC. And it is the topic that we will talk about today. Let’s see how to transfer files from Windows 10 to Windows 11.
How to Transfer Data from Windows 10 to Windows 11
The ways to transfer Windows 10 files to Windows 11 are various, including using OneDrive, an external hard drive (copy & paste, file sync), PC to PC file transfer software, LAN cable, and USB cable. Now, let’s go to see the detailed operations.
How to Move Files via OneDrive
In Windows 10 and Windows 11, the system offers you OneDrive that can be used to transfer data from PC to PC.
With OneDrive, you can back up the important folders on the current computer including Desktop, Documents, and Pictures online. If you use the same account to sign in OneDrive, you can transfer the data to all the devices.
That is, you can back up important files in Windows 10 and sign in to the same account on the Windows 11 PC, then all the files can be synced to Windows 11. Note that OneDrive only supports 5GB of free space. To get more space, you need to pay some money.
Here is how to transfer files from Windows 10 to Windows 11 via OneDrive:
Step 1: In Windows 10, search for OneDrive via the search bar. If you use it for the first time, you need to set up OneDrive using an email address and password.
Step 2: By default, OneDrive can automatically sync Desktop, Documents, and Pictures folder. If you want to transfer files outside of these folders, launch File Explorer and drag the files you want to sync to OneDrive.
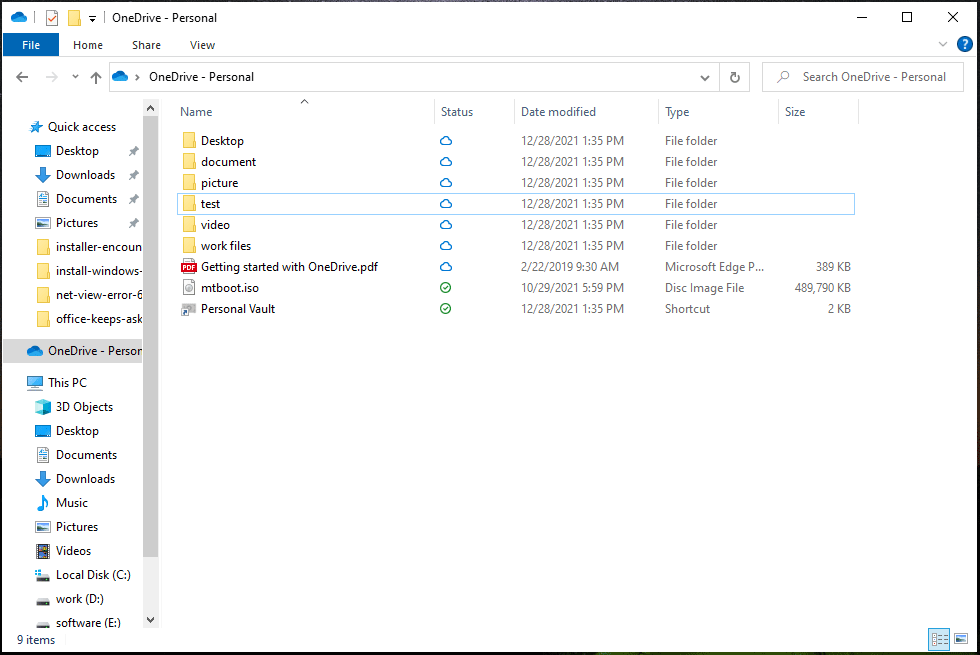
Step 3: Open your Windows 11 PC, set up OneDrive, and sign in it with the same account. Then, you can access the OneDrive folder and view the files you have synced.
Tip: In addition to OneDrive, you can sync data to the cloud with other cloud storage, for example, Google Drive, Dropbox, etc. In this post – 10 Best Free Cloud Storage Services to Back up Photos/Videos, you can find some.
OneDrive is a useful way to transfer data from Windows 10 to Windows 11 but the limit is that you can only free sync 5GB of data.
Copy & Paste via an External Hard Drive or USB Drive
Using OneDrive for data transfer requires internet and if you don’t have internet but have an external hard drive or a big USB flash drive, you can still transfer files from PC to PC. And the way is to use the copy & paste feature.
Tip: Make sure the external drive or USB drive is big enough to hold all the data you want to transfer.
Step 1: Connect your USB or external drive to the Windows 10 PC.
Step 2: In File Explorer, open a drive, and copy the items you want to transfer to Windows 11.
Step 3: Open your USB drive or external hard disk and paste the files you have copied.
Step 4: Disconnect the device from your Windows 10 PC and connect it to your Windows 11 PC.
Step 5: Go to File Explorer, open the external drive or USB drive, and copy & paste the data to the current computer.
This is an easy way to transfer data from Windows 10 to Windows 11. But, you need to transfer files twice, which is time-consuming and boring. If there are big files, the speed may be slow and the time is longer.
Move Files from Windows 10 to Windows 11 via File Sync
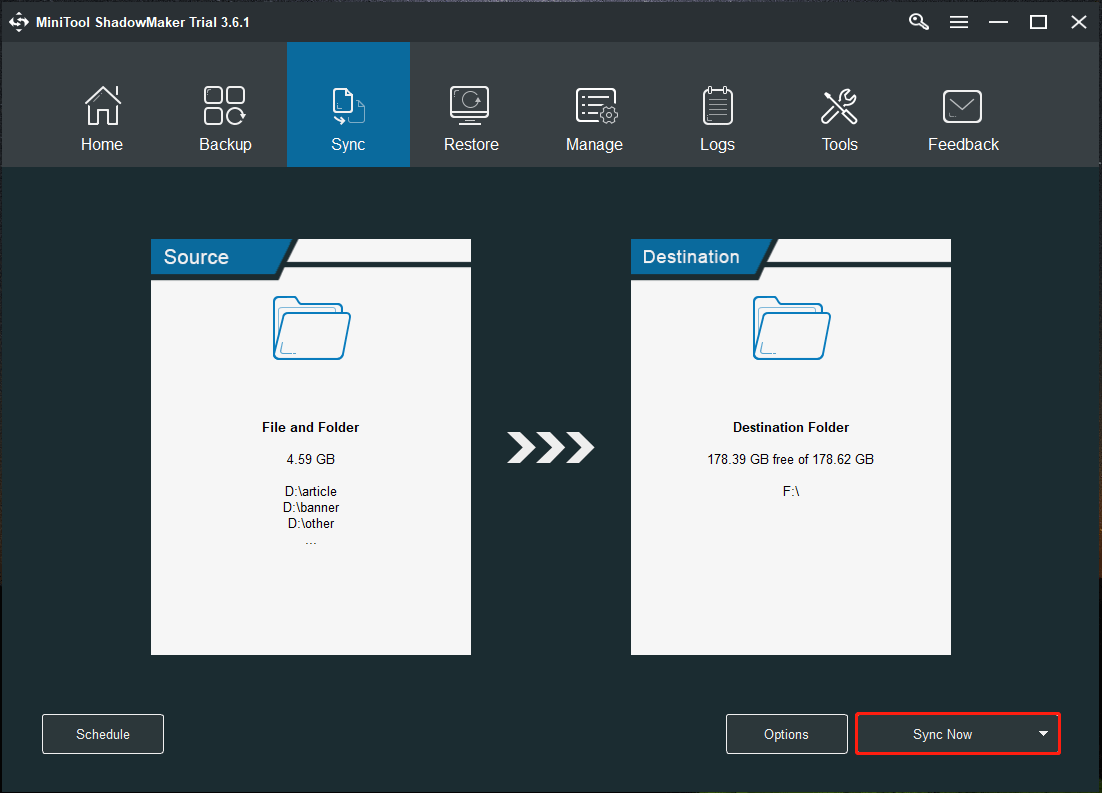
Besides copy & paste, you can perform data migration via file sync with MiniTool ShadowMaker. This file sync software is compatible with Windows 11/10/8/7 and supports multiple devices including a USB drive, external hard drive, NAS, and more. Its sync feature allows you to sync files and folders to the supported device.
To transfer files from Windows 10 to Windows 11, you can sync files to the external hard drive in Windows 10 and then go to the Windows 11 PC to locate the folder to access data.
Step 1: Download MiniTool ShadowMaker by clicking the following button.
Step 2: Launch this sync software in Windows 10 and go to the Sync interface.
Step 3: Click Source to choose items that you want to transfer and click OK.
Step 4: Click Destination to choose your external hard drive or USB drive as the target path.
Step 5: Click Sync Now to start synchronization. This will take a few minutes.
After that, disconnect the drive from the Windows 10 PC and open your Windows 11 PC. Open the drive in File Explorer to locate the synced data and you can move them to the current PC.
Tip: In addition, you can choose to clone the data partition to your external hard drive and then clone the partition on the external drive to the Windows 11 PC with another MiniTool software – MiniTool Partition Wizard. To know more information, refer to the help document – Copy Partition Wizard | MiniTool Partition Wizard Tutorial.
Use PC to PC File Transfer Software for Data Migration
On the market, there are some PC to PC transfer software that can be used for Windows 11 easy transfer. Before Windows 10, the Windows Easy Transfer app developed by Microsoft can be used to transfer personal files and settings from a computer to another computer. But in Windows 10, this program is not available but Microsoft has partnered with Laplink to bring you PCmover.
PCmover is compatible with Windows 11/10/8/7 and you can use it to transfer settings, user profiles, files, and applications from an old PC to a new one at a fast transfer speed. And you are required to install PCmover and then follow the simple setup to begin transferring everything you select. Note that this software is paid and you need to go to Laplink to buy one.
The following are simple instructions about how to transfer data from Windows 10 to Windows 11 via PCmover. To know much information, refer to the PDF document.
Step 1: Run PCmover on both PCs including your Windows 10 and Windows 11 PC.
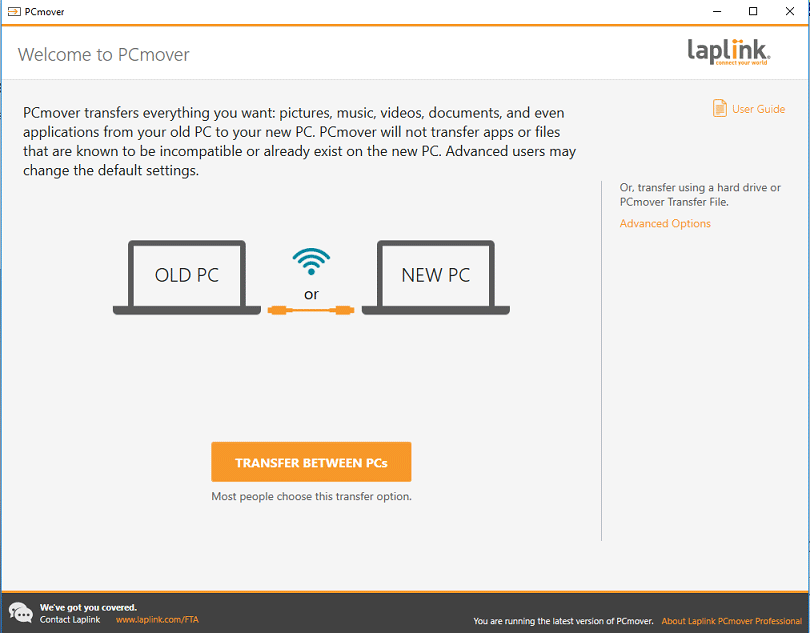
Step 2: Choose a proper way to connect your old and new PCs, for example, via a Wi-Fi or wired network.
Step 3: Go to the new PC to finish setting up the transfer and choose what to transfer.
Step 4: Start transfer. The transfer time may vary depending on the speed of hardware configuration, your connection, and other factors.
Transfer Files from PC to PC over Network (LAN)
If your PCs are in the same network, you can transfer Windows 10 files to Windows 11 via a LAN cable and a big shared folder. The operations are not easy and you should follow the steps below for data transfer.
Step 1: Use a LAN cable or Ethernet crossover cable to connect your two PCs.
Step 2: Enable Network Sharing on Both PCs for Data Transmission.
1. Go to search for control panel to open this app.
2. View the items by Category and click Network and Internet.
3. Click Network and Sharing Center.
4. Choose Change advanced sharing settings.

5. Expand All Networks, turn on public folder sharing and turn off password protected sharing.
Step 3: Set a Static IP Address
After enabling network sharing, it’s time to bring two computers onto the same network by setting a static IP address of the same class.
1. In the Network and Sharing Center interface, click the Ethernet link.
2. Click Properties in the new dialogue.
3. Choose Internet Protocol Version 4 (TCP/IPv4) and click Properties.

5. Configure the two PCs with different IP settings.
On PC 1, set the following values:
IP Address: 192.168.1.1
Subnet mask: 255.255.255.0
Default gateway: 192.168.1.2
On PC 2, set the following values:
IP address: 192.168.1.2
Subnet mask: 255.255.255.0
Default gateway: 192.168.1.1
After setting up everything, you can go to File Explorer and click Network, two PCs can be listed here.
Step 4: Share a Folder
1. Create a folder on the desktop and move all the files you want to transfer to Windows 11 to that folder.
2. Right-click on that folder and choose Give access to > Specific people.
3. Choose Everyone from the drop-down menu and click Add > Share.
After all the operations, you can go to your Windows 11 PC and open Network in File Explorer. Then, click another computer to see the folder you have shared.
How to Transfer Files from PC to PC Using USB Cable
In addition, there is another way for you to move data from Windows 10 to Windows 11 and that is to use a USB cable. It can save much time since you don’t need to use an external device to upload the data. And here are the detailed operations:
Step 1: Download and install the drivers offered by the manufacturer of the USB bridge cable on both PCs.
Step 2: Connect the USB cable to each USB port of the two PCs.
Step 3: Turn on your 2 PCs and let them recognize the USB cable. This can start an installation wizard.
Step 4: Choose USB Super link adapter for the installation.
Step 5: Select High-Speed Data Bridge.
Step 6: Open Device Manager, expand System devices and make sure the USB cable is listed as High-Speed USB Bridge Cable. The name of the cable may be different based on the vendors.
Step 7: Insert the installation disk that was provided with the package of the USB cable into your CD/DVD-ROM drive. Then, install the data transfer software. Do the same thing for the second PC.
Step 8: Launch this program on your two PCs and you can see a window – your computer will be shown on the left side and the new computer where you want to transfer the data will be shown on the right side.
Step 9: Open a drive and drag the folders & files you want to move and drop them to the desired location.
Bottom Line
These are all the common ways to transfer files from Windows 10 to Windows 11. Just try one for data transmission when there is a need. Of course, if you have any other ideas, you can tell us by leaving a comment in the following section.
- The easiest way to transfer files to your new Windows 11 computer is to connect an external drive to your old device. Using File Explorer, copy all your files to transfer. Finally, connect the drive to the new computer, and copy the files to the new destination folder.
- Another way to transfer files from an old to a new computer is using a network share or cloud storage like OneDrive.
On Windows 11, you have many ways to transfer files from an old to your new computer, and in this guide, you will learn the three best ways to complete this task. If you have recently upgraded to a new Windows 11 laptop or desktop, you may have to transfer your files from your old computer to the new one. Usually, this is not a difficult process, but the method you choose will depend on the number of files and the equipment you may have at hand.
For example, if you have only a few gigabytes worth of data, you could move the files quickly to the new computer by uploading and then downloading the files through OneDrive (or another online storage service). You could transfer up to 1TB if you have a Microsoft 365 subscription.
If you have several gigabytes of files and a wired network connection, perhaps using the file-sharing feature available with the operating system may help you transfer the files to your new laptop or desktop computer. On the other hand, if you have a lot of files and don’t want to deal with network transfers, exporting the files to an external drive and then importing them to the new computer may be the best solution.
This guide will teach you three easy ways to transfer files from an old to a new device on Windows 11.
- Transfer files from old to new computer from OneDrive
- Transfer files from old to new computer from network
- Transfer files from old to new computer from USB drive
Transfer files from old to new computer from OneDrive
If you don’t have a large set of files to transfer files to your new computer, you can use OneDrive to upload and download the files quickly.
From old computer
To transfer your files to OneDrive and then make them available on your new Windows 11 computer, use these steps:
-
Open File Explorer on Windows 11 (or 10).
-
Copy and paste the following path to the address bar and press Enter:
%HOMEPATH%

Quick note: This guide assumes that your files are stored in the default profile’s folders. If you’re storing files in another location, you’ll have to copy the files from that location.
-
Open each of the folders (Documents, Downloads, Desktop, Music, and Videos) to confirm where your files are stored.
-
Select a folder and click the Copy button from the command bar.

Quick tip: You can press and hold the “Ctrl” key, click each of the folders, and click the “Copy” button from the command bar.
-
Open the OneDrive folder.
-
Create a new folder (“Ctrl + Shift + N” keyboard shortcut) and confirm a name, such as “Old_PC_Files.”

-
Open the newly created folder.
-
Click the Paste button from the command bar.

-
Repeat steps 4, 5, and 7 to upload the remaining folders to OneDrive.


Once you complete the steps, OneDrive will sync the files to your online account. (The upload process can take a while if you have a lot of files.)
To new computer
Since your files are now in the cloud, you can always access them from the OneDrive folder. However, if you want to make them available in your local profile, you will have to move the files manually.
To transfer files from OneDrive to your new Windows 11 device, use these steps:
-
Open File Explorer on the new device.
-
Click on OneDrive from the left navigation pane.
-
Open the “Old_PC_Files” folder.
-
Open one of the folders, such as “Downloads.”
-
Select everything using the “Ctrl + A” keyboard shortcut.
-
Click the Copy button from the command bar (or use the “Ctrl + C” keyboard shortcut).
-
Copy and paste the following path to the address bar and press Enter:
%HOMEPATH%
Quick tip: You can use the “Windows key + E” keyboard shortcut to open another instance of File Explorer since you will be going back and forth between folders.
-
Open the folder where to restore the files, such as “Downloads.”
-
Click the Paste button from the command bar.
-
Repeat steps 4 through 9 to restore the files from the remaining folders.


After you complete the steps, the files from the old device will be available on the new Windows 11 computer.
Transfer files from old to new computer from network
Alternatively, you can share the folder containing the files you want to transfer, and you can simply access and copy the files from the old to the new device.
From old computer
To share a folder in the local network to transfer your files to a new Windows 11 computer, use these steps:
-
Open File Explorer.
-
Open the location with the folder with the files to transfer.
-
Right-click the item and select the Properties option.

-
Click on the Sharing tab.
-
Click the Share button.

-
Select the user or group to share the folder using the drop-down menu – for example, the Everyone group.
-
Click the Add button.
-
Under the “Permission Level” section, select the “Read/Write” option.

-
Click the Share button.
-
Click the “No, make the network that I am connected to a private network” option (if applicable).
-
Confirm the folder’s network path that other users need to access the network’s content.
-
Click the Done button.
-
Click the Close button.


After you complete the steps, you should now be able to access the files using your account credentials available on the old computer.
If you cannot sign in with your Microsoft account to access the shared folder from the new computer, you may have to use a local account.
From new computer
To transfer the files from your old computer to the new one over the network, use these steps:
-
Open File Explorer.
-
Click on Network from the left navigation pane.
-
Double-click to open the old computer from the right side.
Quick note: If the computer doesn’t appear on the list, you may need to turn on network discovery. Alternatively, you can type the path of the share in the address bar and press Enter to continue.
-
Confirm the account credential to access the shared folder.
-
Select everything using the “Ctrl + A” keyboard shortcut.
-
Click the Copy button in the command bar.
Quick note: If you have a large number of files, it’s a good idea to transfer the data to a few folders at a time.
-
Open the destination folder.
-
Click the Paste button.


Once you complete the steps, the files from the old computer will transfer to the new device. If you are moving a few files and folders at a time, you may have to repeat the steps to transfer the remaining content.
It’s also possible to perform this task even faster with the Robocopy command-line tool.
Transfer files from old to new computer from USB drive
Another easy way to move your files from an old laptop or desktop to a new Windows 11 device is to export the files to a USB flash drive or external hard drive and connect the storage on the new computer to import the data.
From old computer
To export your files to a USB hard drive on Windows 11, use these steps:
-
Connect the USB hard drive to the old computer.
-
Open File Explorer.
-
Copy and paste the following path to the address bar and press Enter:
%HOMEPATH%
-
Open each of the folders (Documents, Downloads, Desktop, Music, and Videos) to confirm where your files are stored.
-
Select a folder and click the Copy button from the command bar.
-
Open the USB hard drive.
-
Create a new folder (“Ctrl + Shift + N” keyboard shortcut) and confirm a name, such as “Old_PC_Files.”
-
Open the newly created folder.
-
Click the Paste button from the command bar.
-
Disconnect the USB hard drive from the computer.

After you complete the steps, you can connect the external storage on the new computer to restore the files.
From new computer
To import your old files from an external USB drive to your new Windows 11 computer, use these steps:
-
Connect the USB hard drive to the new computer.
-
Open File Explorer.
-
Click on This PC from the left navigation pane.
-
Under the “Devices and drives” section, double-click to open the USB storage with the files to transfer.
-
Open the “Old_PC_files folder” with the files to transfer to the new computer.
-
Open one of the user folders, such as “Downloads.”
Quick note: You could copy, paste, and replace the user folders with the ones from the backup, but it’s a good idea only to copy the contents of these folders to the same folder on the new device to minimize errors.
-
Select everything using the “Ctrl + A” keyboard shortcut.
-
Click the Copy button in the command bar.
-
Open the destination folder, such as the “Downloads” folder, on the new device.
-
Click the Paste button in the command bar.


Once you complete the steps, the files from your old computer will transfer to your account on Windows 11.
I’m looking for the best way to transfer files from my computer to another person’s computer.
We both use Windows and I can use some external programs like TeamViewer for file transfers but I found the speed lacking. So I tried to find some other means of transferring the data. On Linux this is so simple since you have scp and ftp and all that. But on Windows, there’s no such support; at least not natively.
So I tried TeamViewer (but slow speeds), then there’s WinSCP but we would need to set up a server of some sort (ssh daemon?).
PSCP doesn’t work either, it just gives me the error:
local to local transfer not supported.
FTP needs an FTP server too.
What other options are there? What’s a preferred method of transferring files?
I guess I could use BitTorrent technology but I would need tracker addresses. Of course, these aren’t that hard to find but is there really an equivalent for the Linux way of transferring files using command line options or something that allows client to client transfer of data easily and fast?