Sign in with Microsoft
Sign in or create an account.
You have multiple accounts
Choose the account you want to sign in with.
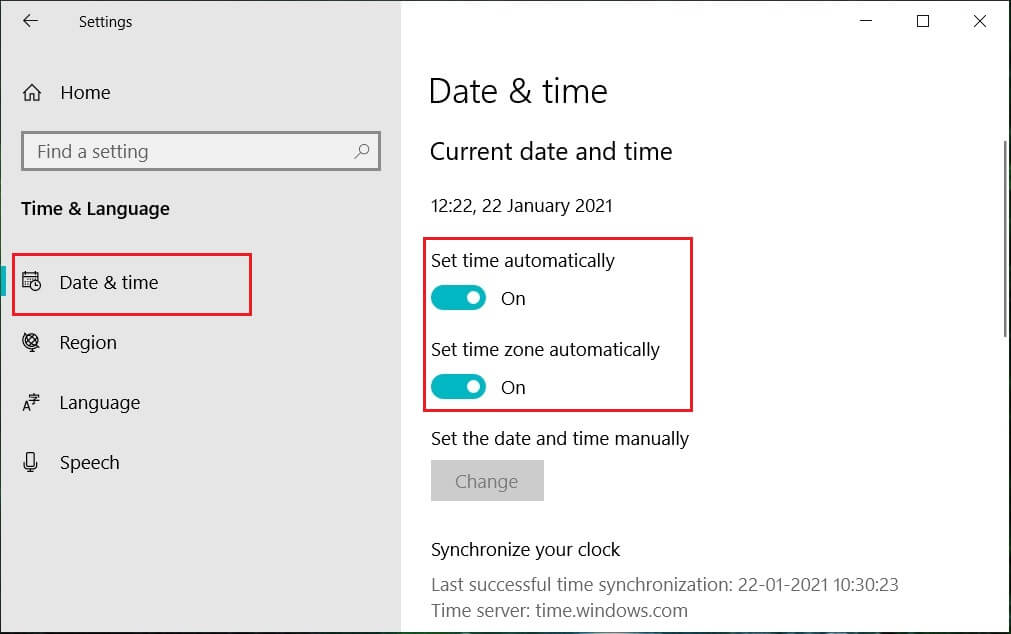
In Date & time, you can choose to let Windows 10 set your time and time zone automatically, or you can set them manually.
To set your time and time zone in Windows 10, go to Start > Settings > Time & language > Date & time.
Open Date & time settings
Need more help?
Want more options?
Explore subscription benefits, browse training courses, learn how to secure your device, and more.
Communities help you ask and answer questions, give feedback, and hear from experts with rich knowledge.
Thank you for your feedback!
×
An incorrect clock in Windows can lead to system-wide anomalies and break apps that rely on internet connectivity. We will show you how to set it to the correct date and time again.
By default, Windows keeps the system clock in sync with Microsoft’s time servers. If that fails, you must manually change the time and date or forcibly synchronize the clock with a local time server. This tutorial will help you learn how to change the time, date, and region in Windows 11 and 10.

The default date and time configuration in Windows keep the system time in sync with an internet time server. It could also use location services to set your region when traveling between different time zones. However, you can always manually adjust the time, date, and region if the clock is incorrect or you want to advance or roll back it for another reason.
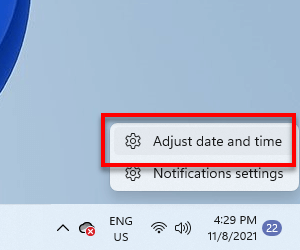
1. Right-click the Clock on the taskbar and select Adjust date and time. Or, open the Start menu and select Settings > Time & language > Date & time.

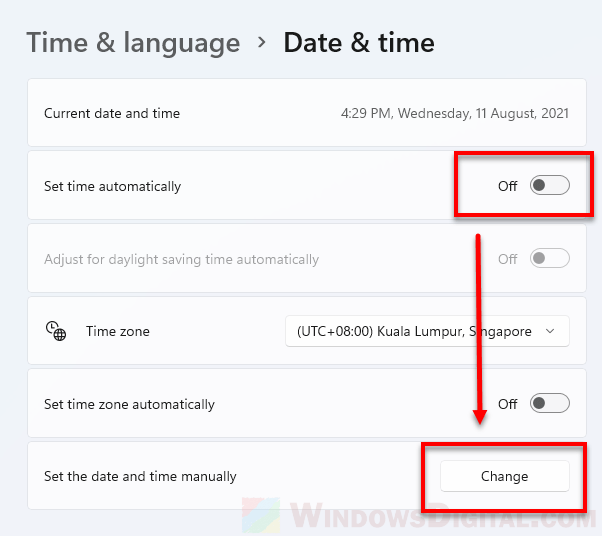
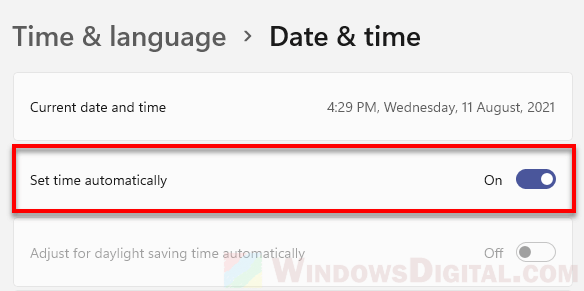
2. On the Settings window that launches, disable the switch next to Set time automatically. Also, turn off the Set time zone automatically setting (if active).
3. Select the drop-down menu next to Time zone and set the correct region.
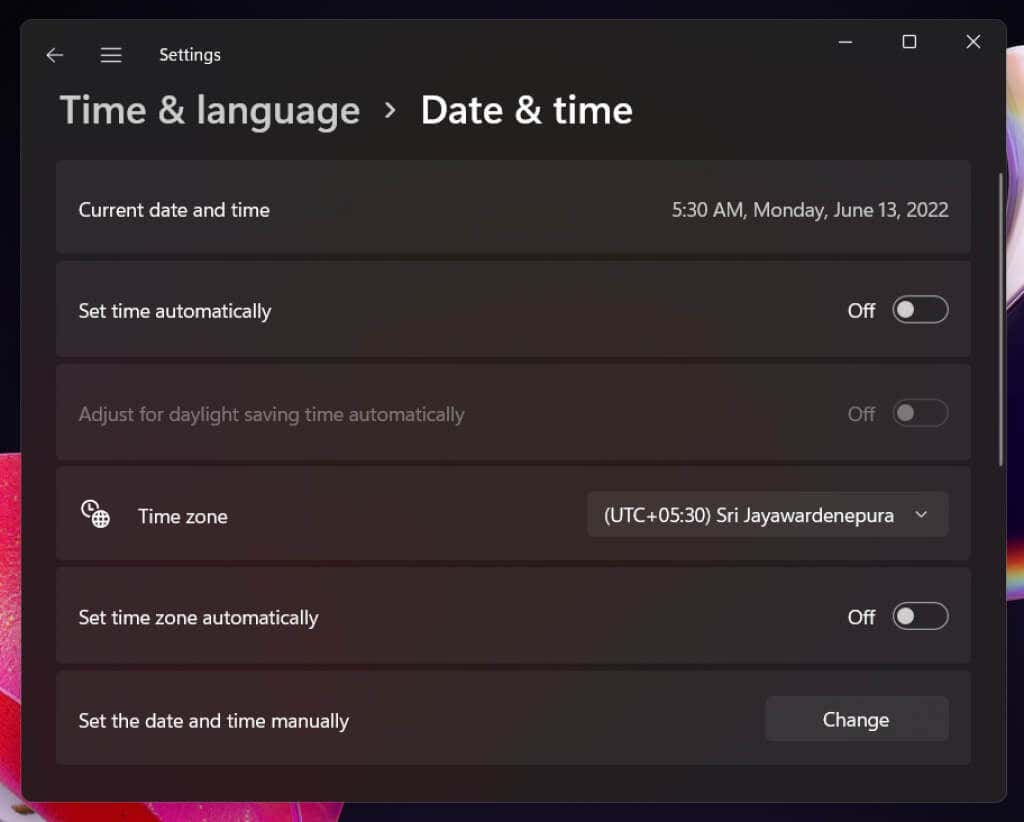
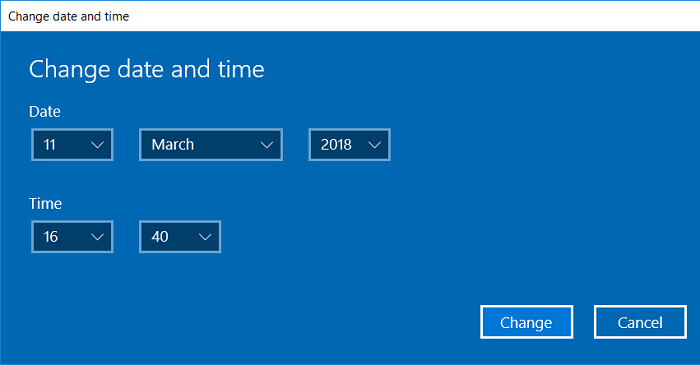
4. Select the Change button next to Set date and time manually.
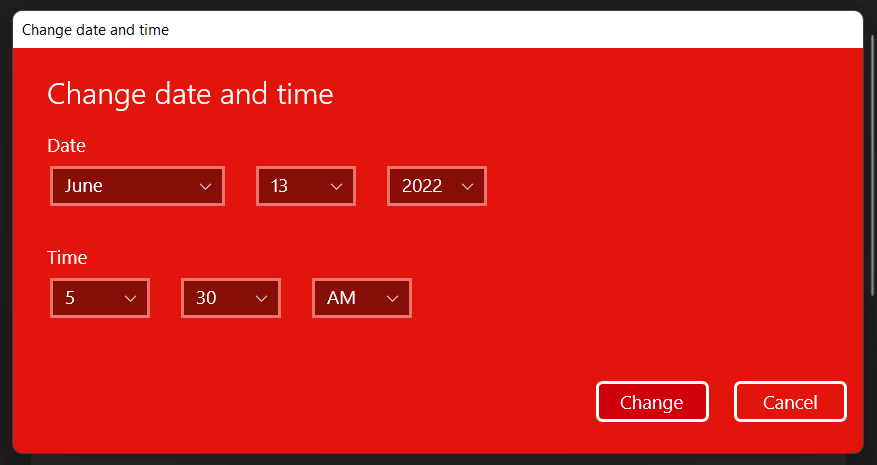
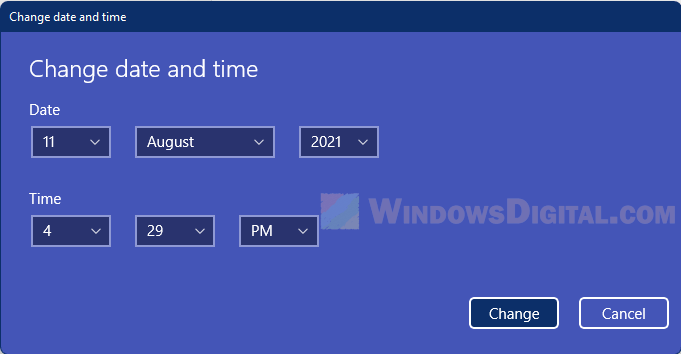
5. Adjust the Date and Time fields as needed and select Change.
Note: If you live in a region with daylight savings time, you can disable the Adjust for daylight saving time automatically setting if you don’t mind making the adjustments yourself.
Automatically Set Time and Date in Windows
Despite being able to set the time and date on your own, letting Windows sync the date and time with an internet time server is the best way to ensure the accuracy of the system clock. When automatic time-syncing fails, the following actions might get it working again.
1. Right-click the Clock on the taskbar and select Adjust date and time.

2. Disable the switch next to Set time automatically. Then, wait for a couple of seconds and turn it on again. That should prompt Windows to pull the correct time again.
Note: If the time zone always appears incorrectly, make sure to disable the switch next to Set time zone automatically, select your region manually, and then toggle the Set time zone automatically switch off, then on.

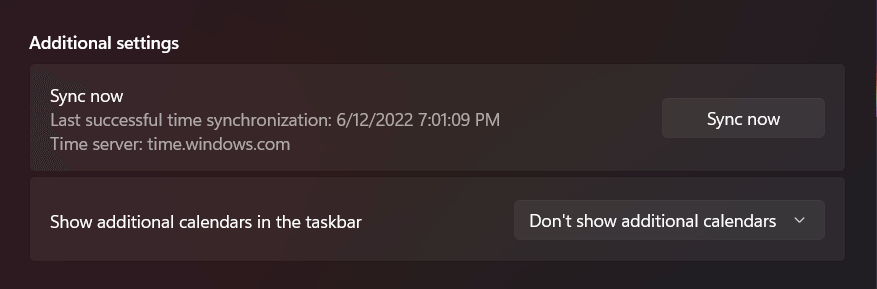
3. If the issue persists, scroll down to Additional settings (Windows 11) or Synchronize your clock (Windows 10) and select the Sync now button That will forcibly sync the time and date with Microsoft’s time server.
Other Ways to Change Windows’ Date and Time
You’ve got a couple of alternative ways to change the time and date on your PC. One method involves the traditional Date and Time Control Panel applet, and the other is Command Prompt-based. Use them if you have trouble accessing the Settings app in Windows.
Date and Time Applet
You can set the PC time and date manually or automatically using the Date and Time applet. To access and use it:
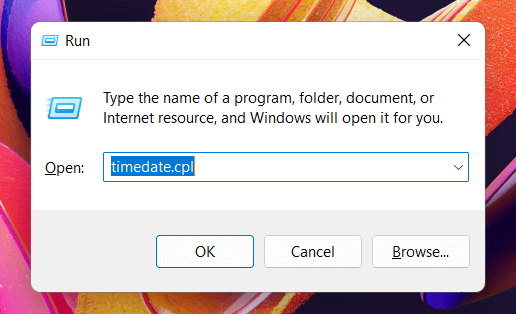
1. Press Windows Key + R, type timedate.cpl, and press Enter.
2. Use the Change date and time and Change time zone buttons to set the correct date and time.
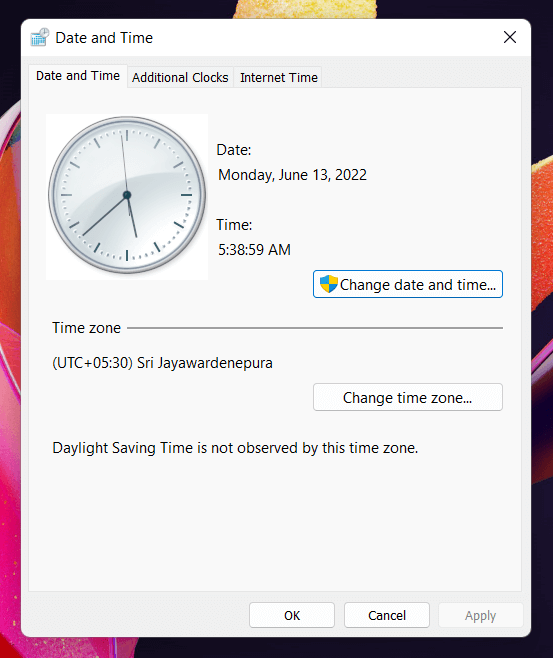
3. Select the Internet Time tab on the top of the Date and Time window and select Change settings. If you want Windows to set the correct time automatically, make sure that the box next to Synchronize with an Internet time server is active.
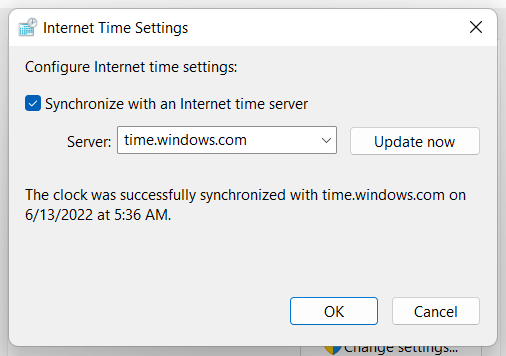
Note: If Microsoft’s time server always sets the wrong time, open the menu next to Server, select the server from the National Institute of Standards and Technology—time.nist.gov—and select Update now.
Command Prompt Console
Surprisingly, setting the time and date using the Command Prompt console is relatively straightforward. To do that:
1. Open the Start menu, type cmd, and select Run as administrator.
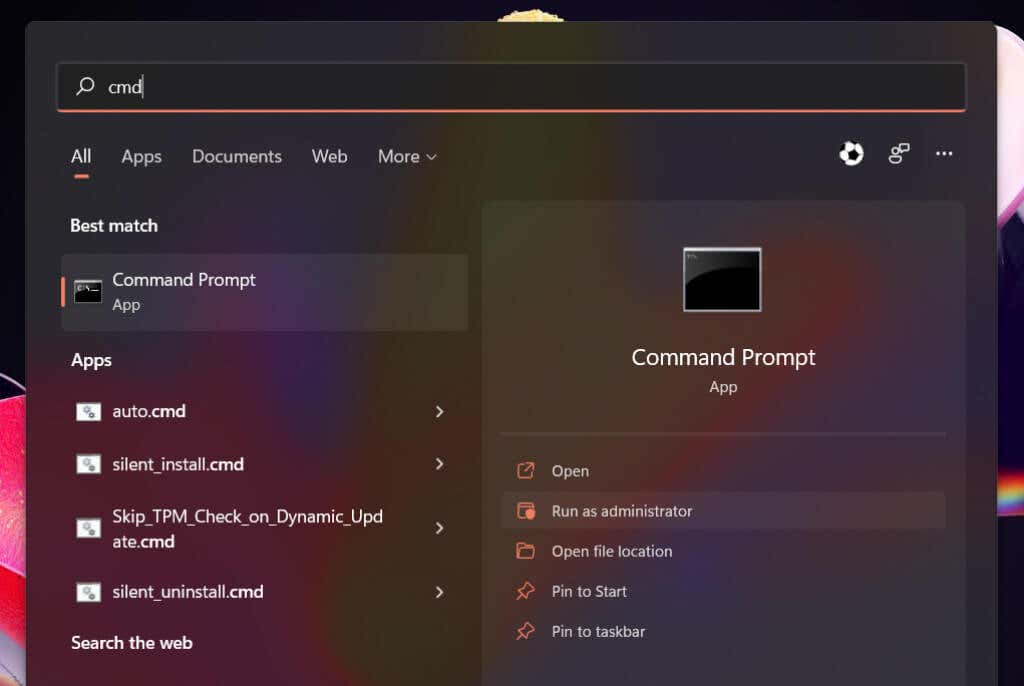
2. Select Yes on the User Account Control pop-up.

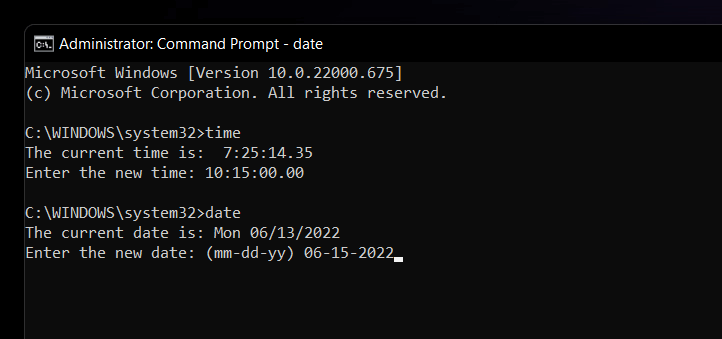
3. Type time and press Enter. Then, enter the correct time in the hh:mm:ss.ms format and press Enter. Next, run the date command and set the correct date in the mm-dd-yy format.
Note: Disable automatic time-syncing via the Settings app or the Date and Time applet if you want to prevent Windows from adjusting your changes afterward.
The Correct Time and Date Matters
Many Windows issues stem from incorrectly setting the time and date, so don’t forget to manually adjust or force-sync the clock periodically with Microsoft’s time servers. Even if you intentionally change the time and date (such as to get an old program to work or speed up the in-game clock in a video game), it’s best to change that back quickly once you’re done.
However, if the time and date in Windows continue to appear wrong, it could be due to several reasons. For example, you might be dealing with a malware infection, an outdated operating system or BIOS/UEFI, or a dead CMOS battery. Check our complete guide to fixing the system clock in Windows to troubleshoot the issue.
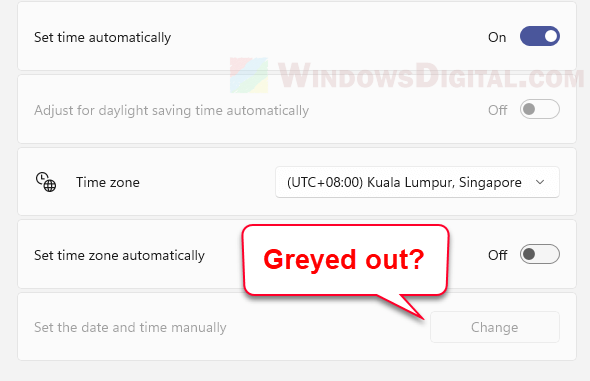
In Windows 11, the date and time are automatically set as “Set time automatically” by default. When this option is turned on, users cannot manually change the date and time. Windows 11 will always try to synchronize the date and time of your PC with the time server (time.windows.com) at a set interval.
If you want to change the date and time in Windows 11 manually only to find that the “Change” button for the “Set the date and time manually” option greyed out in the time settings, here’s why and how you can manually set the date and time in Windows 11.
If your PC’s date and time is wrong and not syncing automatically, this guide will also show you how to manually sync your computer’s date and time with the time server, and how to make sure the date and time settings are set correctly so that it will sync automatically with the time server in the future.
Set Windows 11 date and time manually
If you want to manually set the date and time in Windows 11, you need to first disable the Windows automatic date and time syncing in order for the “set date and time manually” option to be available to you. Follow the steps to mnually change the date and time in Windows 11.
- On Windows 11 desktop screen, right-click on the date and time on the taskbar.
- Then, select Adjust date and time.

- Under Date & Time settings, turn off the “Set time automatically” option.
- The “Change” button for the “Set the date and time manually” option will now be clickable. Click on the “Change” button.

- Adjust the date and time to your preference. Once done, click “Change” to confirm the changes.

The “set the date and time manually” option will be greyed out if the “set time automatically” option is turned on. Thus, in order to change date and time manually, you need to disable the “set time automatically” option first.
Another method to manually change the date and time is to change it via the old Control Panel date and time settings (requires administrative privileges).
- In Windows 11, click on Start menu.
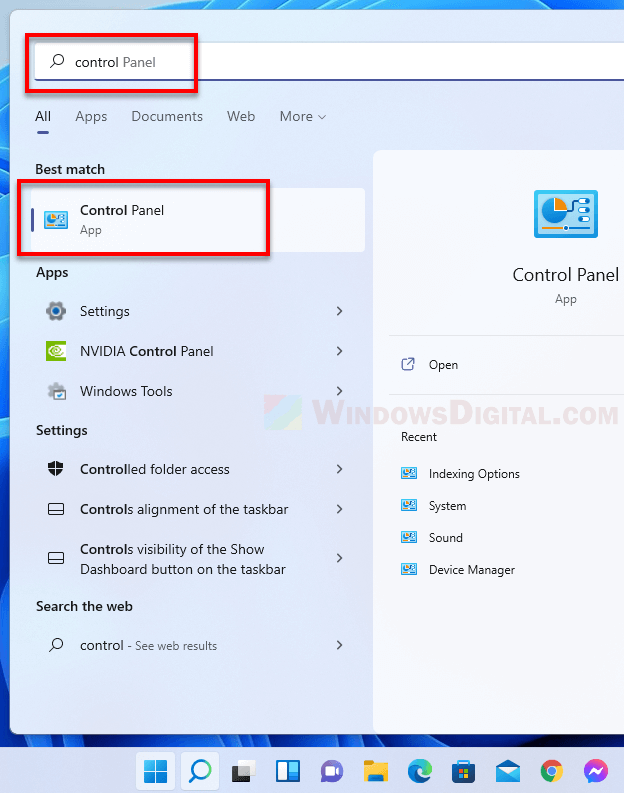
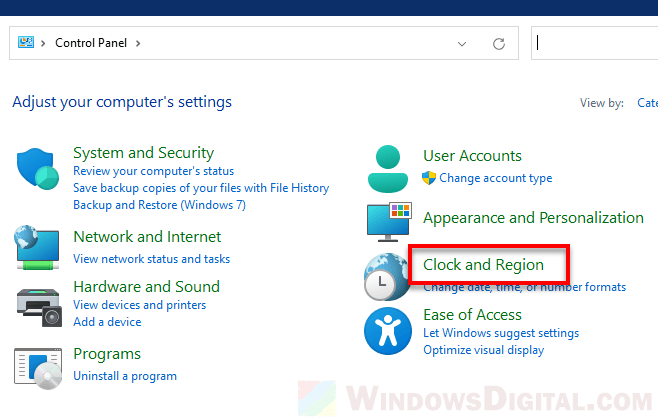
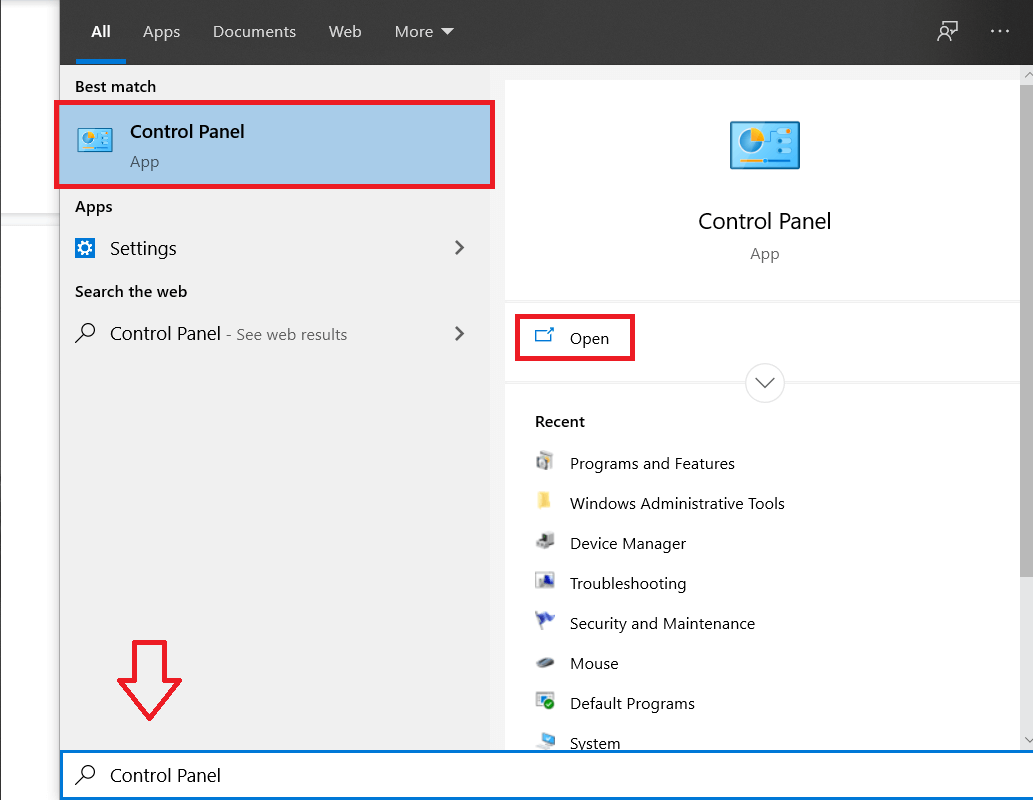
- Search for and open Control Panel.

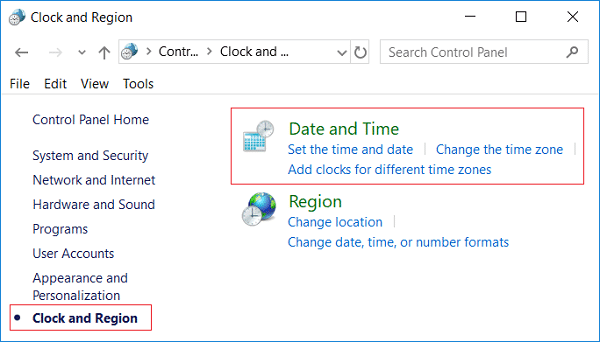
- Next, select Clock and Region.

- Click on Date and Time or Set the time and date.
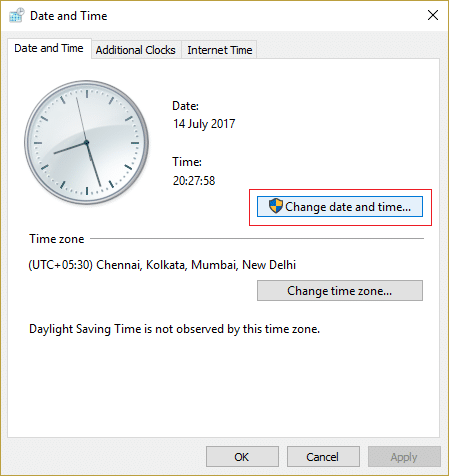
- Then, click on Change date and time.

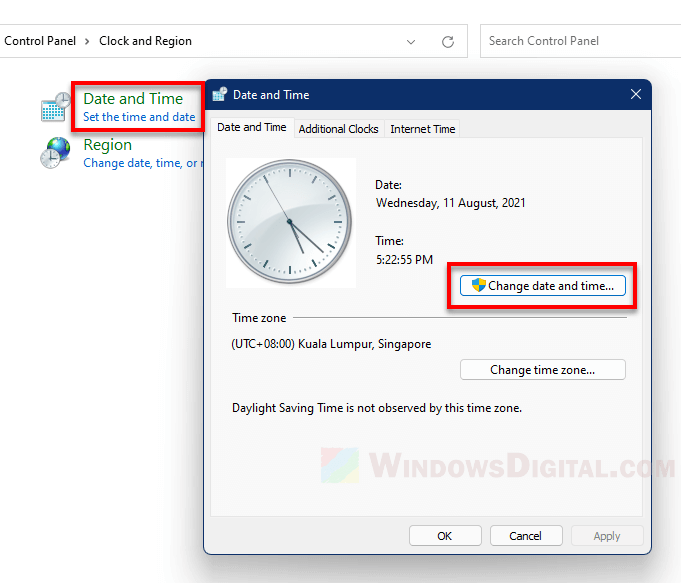
If UAC prompt for administrative access confirmation, click OK to proceed. This is where you can change the date and time manually. Once done, click OK to save the changes. You can also change the time zone from the same settings window under “Time zone”.
Sync date and time automatically in Windows 11
If the date and time in Windows 11 happens to be incorrect, here’s how to manually re-sync it with the Windows time server.
- Right-click on the date and time on your taskbar in Windows 11, then select Adjust date and time.
- Under “Additional settings”, click on the Sync now button.

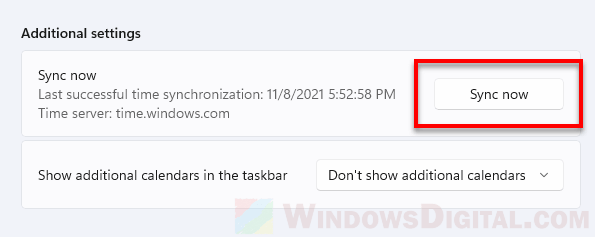
Doing so will force sync the date and time with the Windows time server (time.windows.com) immediately.
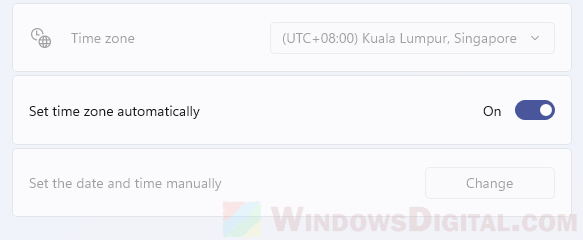
Also, make sure the time zone is set correctly to your actual time zone so that
Windows can show the correct date and time according to your time zone. Alternatively, you can turn on the “Set time zone automatically” option to allow Windows to automatically set your PC’s time zone according to your current location.
If you want Windows to automatically sync the date and time every now and then, make sure the “Set time automatically” option is enabled.
If you have recently updated your Windows 10 or have just upgraded to Windows 10, you may experience that the time is slightly incorrect and you need to configure the date & time in Windows 10. But don’t worry, there are many ways to Change Date and Time in Windows 10 easily. You can configure the date and time via Control Panel or in Windows 10 Settings, but you must be signed in as Administrator to configure these settings. So without wasting any time, let’s see How to Change Date and Time in Windows 10 using the below-listed tutorial.

Table of Contents
Make sure to create a restore point just in case something goes wrong.
Method 1: How to Change Date and Time in Windows 10 using Control Panel
1. Type control in Windows 10 Search then clicks on Control Panel from the search result.
2. Now click on “Clock and Region” then click “Date and Time“.
3. Under Date and Time window, click “Change date and time“.
4. This will open the Date and Time Settings window, so configure the date and time accordingly and click OK.
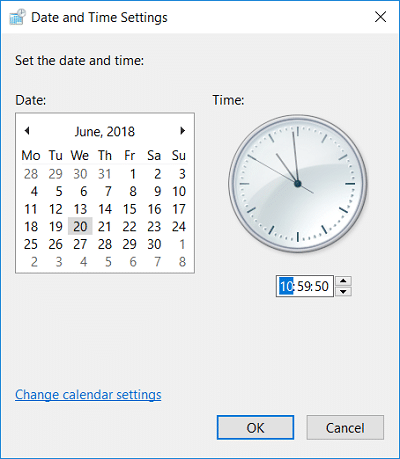
Note: You could change the current hour, minute, seconds and AM/PM for time settings. And as far as the date is considered you could change the month, year, and current date.
5. Click Apply, followed by OK.
Method 2: How to Change Date and Time in Windows 10 Settings
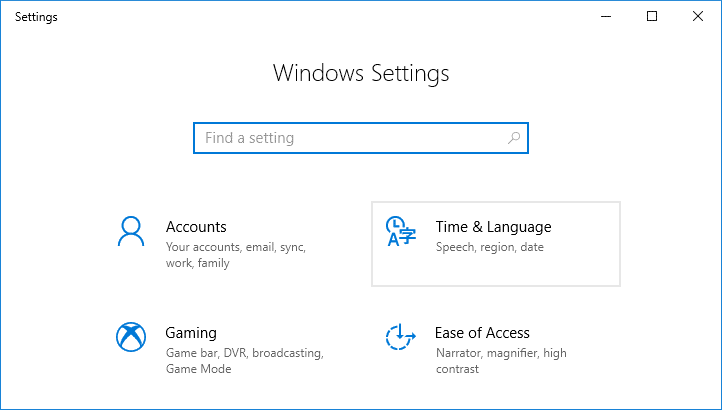
1. Press Windows Key + I to open Settings then click Time & Language.
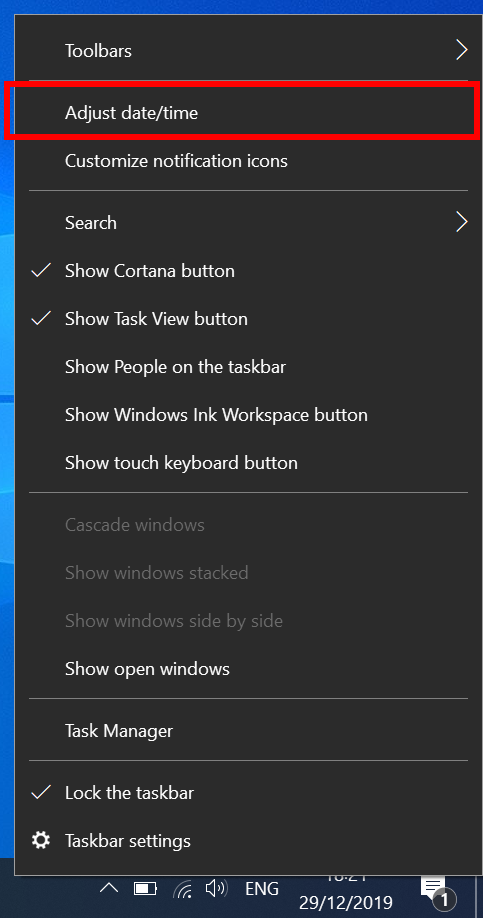
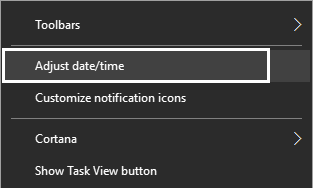
Note: Or you could right-click on Date & Time on the taskbar then select Adjust date/time.
2. Make sure to select Date & time in the left-hand menu.
3. Now to change date & time, turn off the toggle which says “Set time automatically“.
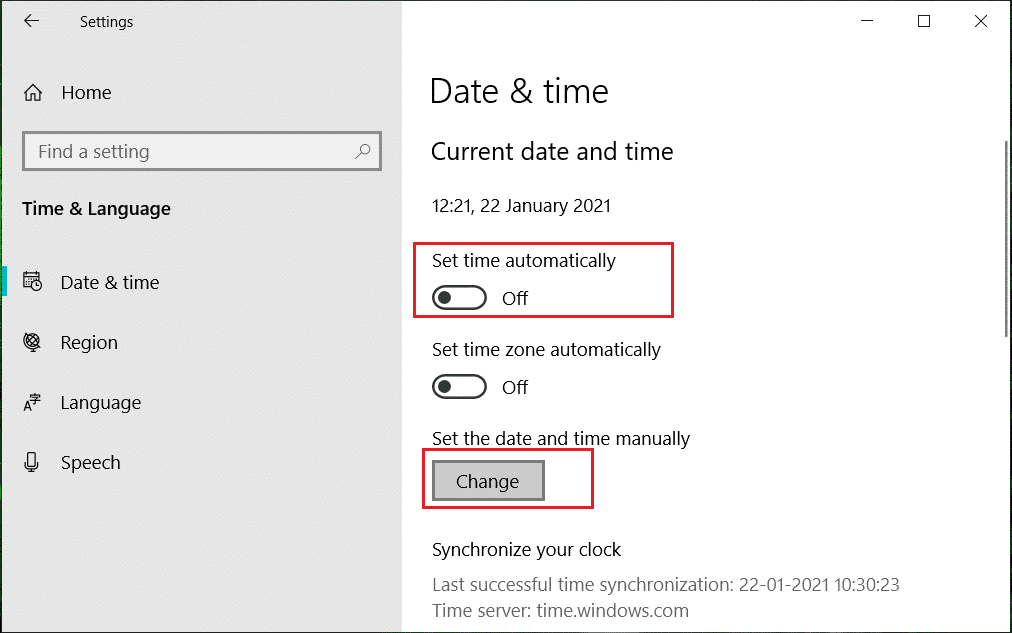
4. Then click on “Change” under Change date and time.
5. Next, change the date, month, and year to correct number. Similarly set the time to the correct, current hour, minute, and AM/PM then click Change.
6. If you like Windows to automatically synchronize the system clock time with internet time servers, then again turn ON the “Set time automatically” toggle.
Method 3: How to Change Date and Time in Windows 10 using Command Prompt
1. Open Command Prompt. The user can perform this step by searching for ‘cmd’ and then press Enter.

2. Type the following command into cmd and hit Enter:
To see the current date: date /t
To Change the current date: date MM/DD/YYYY
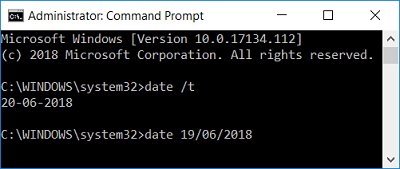
Note: MM is the month of the year, DD is the day of the month, and YYYY is the year. So if you want to change the date to 15th March 2018, then you need to enter: date 03/15/2018
3. Type the following command into cmd and hit Enter:
To see the current time: time /t
To Change the current date: time HH:MM

Note: HH are the hours, and MM are the minutes. So if you want to change the time to 10:15 AM then you need to use the command: time 10:15, similarly if you want to change the time to 11:00 PM then enter: time 23:00
4. Close Command Prompt and reboot your PC to save changes.
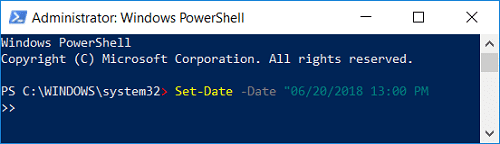
Method 4: How to Change Date and Time in Windows 10 using PowerShell
1. Type PowerShell in Windows Search then right-click on PowerShell from the search result and select Run as Administrator.
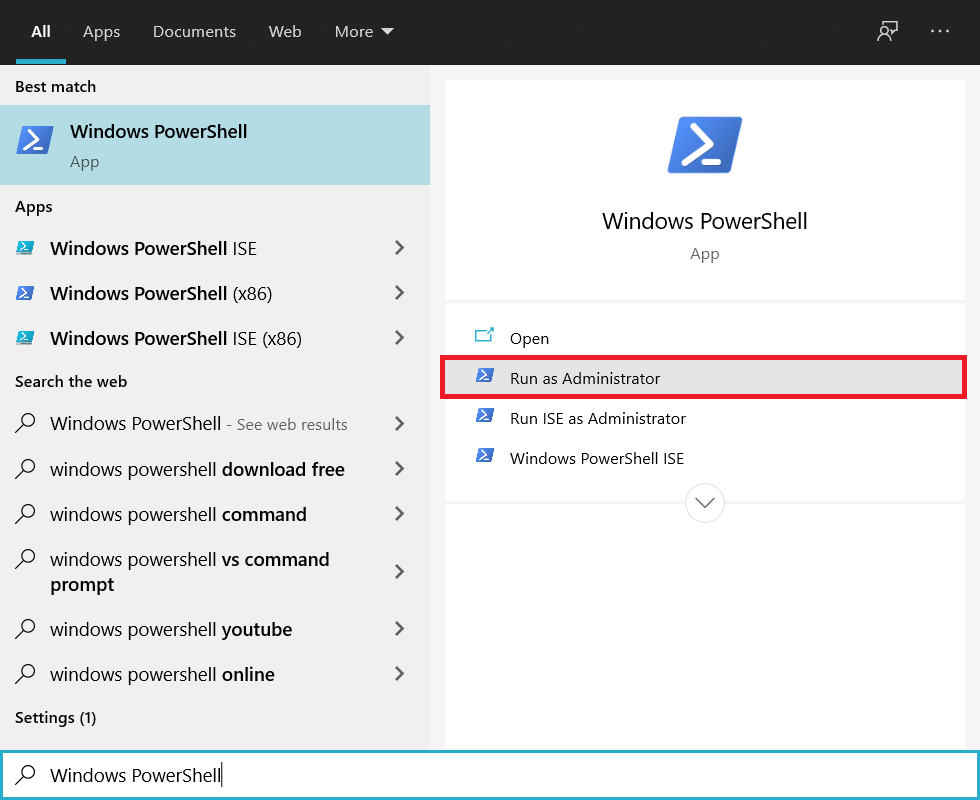
2. Now type the following command and hit Enter:
To Change date and time using the 24-hour format: Set-Date -Date “MM/DD/YYYY HH:MM
To Change date and time in AM: Set-Date -Date “MM/DD/YYYY HH:MM AM
To Change date and time in PM: Set-Date -Date “MM/DD/YYYY HH:MM PM
Note: Replace MM with the actual month of the year, DD with the day of the month, and YYYY with the year. Similarly, replace HH with the hours and MM with the minutes. Let’s see an example of each one of the above command:
To Change date and time using the 24-hour format: Set-Date -Date “03/15/2018 21:00
To Change date and time in AM: Set-Date -Date “03/15/2018 06:31 AM
To Change date and time in PM: Set-Date -Date “03/15/2018 11:05 PM
3. Close PowerShell when finished and reboot your PC to save changes.
Recommended:
- Clean Disk using Diskpart Clean Command in Windows 10
- How To Cancel a Scheduled Chkdsk in Windows 10
- Fix Click here to enter your most recent credential Notification
- Back-Up And Restore Your Bookmarks in Google Chrome
That’s it you have successfully learned How to Change Date and Time in Windows 10 but if you still have any questions regarding this tutorial then feel free to ask them in the comment’s section.

The steps below show how to change the Windows 10 clock to 24-hour format.
How to change Windows 10 time to 24-hour format
-
- Right-click on the clock at the bottom right of your screen then click on ‘Adjust date/time’

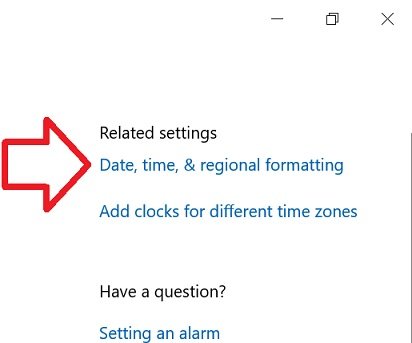
- In the right side of the window, click on ‘Date, time, & regional formatting’

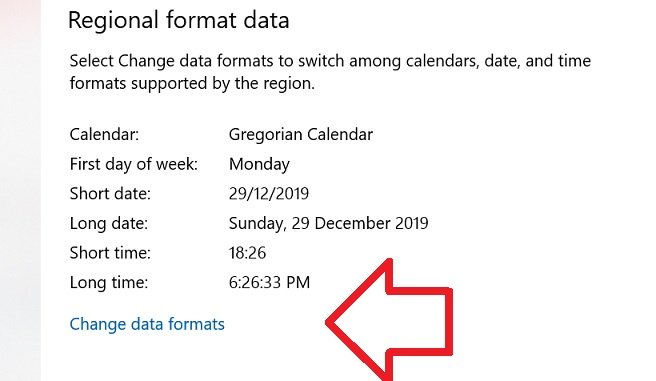
- Scroll down to the bottom of ‘Regional format data’
- Click on ‘Change data formats’

- Under ‘Short time’ select ‘9:40’

- Close the window
- Your time will now be in 24-hour format