In this article, we will discuss different methods to resolve the “This build of Windows will expire soon” error, which occurs on Windows 10 and 11 insider builds. This issue can be resolved by updating from an expired Insider Preview build, and there are several methods for doing so.
The Windows Insider Program lets you test the latest Windows 11 updates and features before they’re made available to the public. In our earlier guide, we demonstrated how to join the Windows Insider build on a Windows 11 PC.
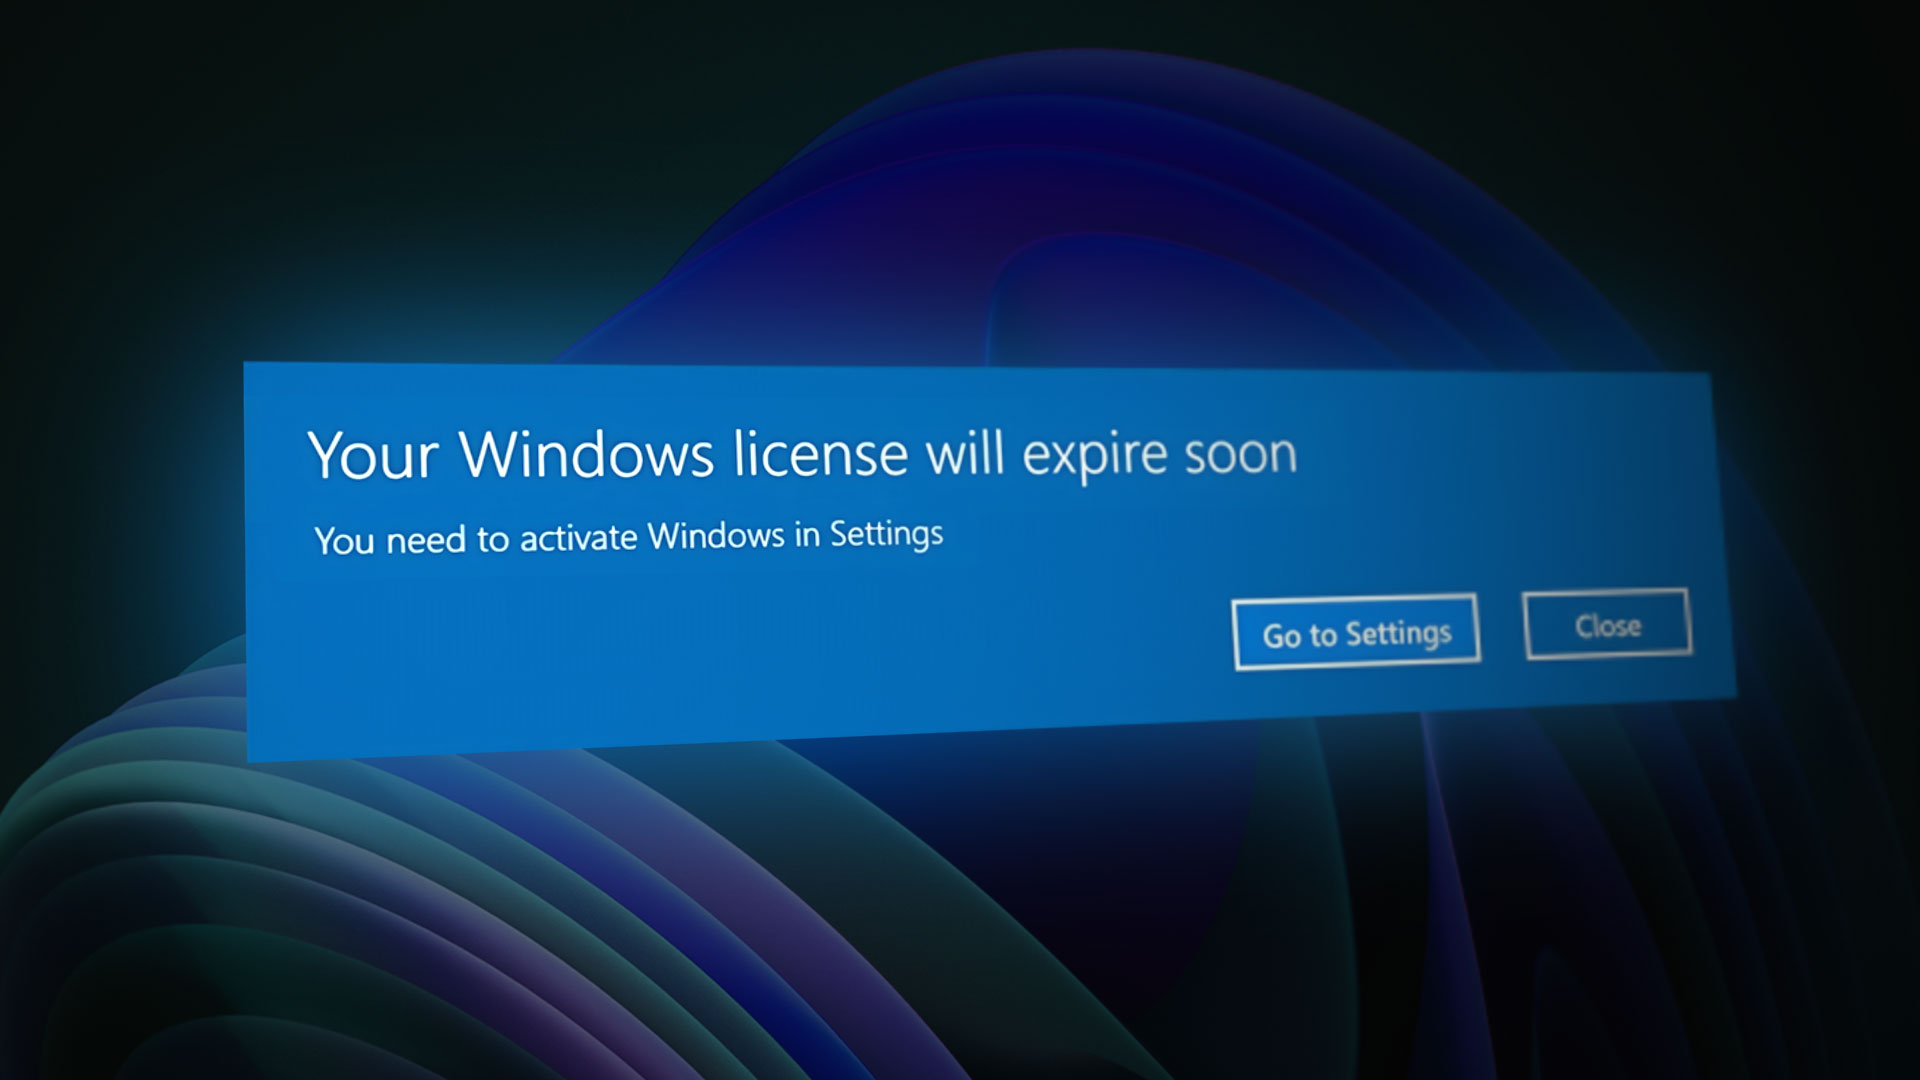
If you have been using Windows Insider Preview, at some point you may get a pop-up on login that says, “This build of Windows will expire soon. Your build of Windows will expire on a specific date. You should move to a new build as soon as possible. Go online for more information.”
You typically get the above error on Windows Insider builds. This error is annoying because you don’t get to upgrade to the next Insider build. Furthermore, the error appears every time you log in to an insider PC. There are many ways you can solve this problem, and we will go over them here.

When your Windows Insider preview build expires, you encounter the error This Build of Windows will expire soon. This problem occurs if your computer running an insider build of Windows is turned off for an extended period of time without being updated.
According to Microsoft, both Windows 10 and Windows 11 Insider Preview Builds do expire eventually, and you must keep updating the builds to ensure this doesn’t happen.
The below screenshot is an example of what you see when a Windows Insider build expires. There are two buttons that you see: More Info and Close. Clicking the More Info button will take you to the following article by Microsoft: Updating from an expiring Insider Preview build. The article discusses various approaches to resolving the Windows Insider Build Expired issue.

It should be noted that once you see the Windows Insider build expired, checking for updates does not resolve the issue because it shows you are up-to-date.
We see many instances where users report that their Windows Insider build expired. So how do you fix this error? There are three ways to resolve the issue “This Build of Windows will expire soon,” and they are described below.
- Get Insider Preview Builds in the Dev Channel
- Reinstall Windows with a Windows Insider Beta Channel ISO
- Start fresh with a clean installation of Windows 11/Windows 10
We will discuss each of these methods in detail now.
Method 1: Get Insider Preview Builds in the Dev Channel
If your Windows Insider build has expired, the simplest way to fix it is to switch to the Dev channel. You can accomplish that using the following steps:
- Go to Settings > Windows Update > Windows Insider Programme.
- Under Choose your Insider Settings, select Dev Channel.

You must restart your computer after you change your Insider Preview path settings to the Dev channel. Log in back to the Insider PC and now check for the latest updates. The latest updates are now downloaded to your PC, and the insider build update is downloaded and installed on your PC. This will also resolve the error “This build of Windows will expire soon”.

Note: After the above issue is resolved, you don’t have to stay on the Dev channel forever. You can switch from the Dev channel to the Beta channel at any time and update to the most recent available build.
Method 2: Reinstall Windows using a Windows Insider Beta Channel ISO
If you don’t want to change the insider preview channels, you can reinstall Windows from an insider beta channel ISO. This method is time-consuming and requires a few steps before you can resolve the error. Refer to the detailed guide on how to download and install Windows Insider Preview using the ISO file.
Step 1: Download the latest Windows Insider Beta channel ISO from the Windows Insider Preview downloads page. On this page, you’ll need to select the edition and product language before you download the ISO. Most insiders would choose a beta build with English as the product language. Download the latest Beta Channel ISO from the Windows Insider ISO page by saving it to a location on your PC or creating a bootable USB.

Step 2: You must back up all your files and applications on the insider preview build PC. Reinstalling the OS normally cleans up your files, settings, and applications. If you haven’t saved any critical data on the PC or your data is already synced to OneDrive, proceed to the next step.
Step 3: On the Insider PC, launch File Explorer and navigate to the folder where you saved the ISO. Open the ISO file to allow Windows to mount the image, so you can access it.
Step 4: Run Setup.exe to launch the Windows install process. On the Setup screen, you will first see the Choose what to keep page. On this page, choose the option “Nothing“, which deletes all your files, settings, and apps and does a clean installation of Windows Insider beta.
Step 5: Wait for the installation to complete, and expect a couple of reboots. Once it’s finished installing, go to Settings > Windows Update > Windows Insider Programme to set up Insider Preview builds in the Beta Channel.
If the steps above are followed and implemented correctly, the error “This Build of Windows will expire soon” should be resolved.
Method 3: Start fresh with a clean installation of Windows 11/Windows 10
In this final method, you exit the insider program on your PC that’s causing the build expiration issue and simply start fresh with a clean installation of Windows. After you install Windows, you manually opt in for the insider preview program. This will resolve the error “This build of Windows will expire soon” permanently.
A clean installation of Windows will remove everything on your Insider PC, including apps, files, settings, etc. Therefore, we recommend you back up all the critical data on the insider PC before reinstalling the OS.
Microsoft recommends downloading the latest version of Windows 11/10 ISO from its official download site. You may also create installation media for the latest version of Windows 10 or 11. This media could be a USB drive that you connect to your device to reinstall the operating system. You can use the Windows 7 USB tool to create a bootable USB containing Windows 10 or 11 files.
Launch the Setup.exe file to launch the install process. On the Setup screen, you will first see the Choose what to keep page. On this page, choose the option “Nothing“, which deletes all your files, settings, and apps and does a clean installation of Windows I0/11.
Finally, once Windows has been installed, you can enroll your device in the Insider Preview program. This can be done by going to Settings > Windows Update > Windows Insider Programme and selecting the Insider Preview builds in the Beta Channel.

Prajwal Desai is a Microsoft MVP in Intune and SCCM. He writes articles on SCCM, Intune, Windows 365, Azure, Windows Server, Windows 11, WordPress and other topics, with the goal of providing people with useful information.
If you didn’t know any better, you’d assume that Windows telling you that ‘Windows license will expire soon‘ is just a message giving you a heads-up before your current license will expire. But in reality, this can also be caused by a few different system errors – especially if you’re using an Insider build of Windows 11.
After investigating this issue thoroughly, we discovered that there are several different underlying causes that might ultimately be responsible for this error message on Windows 11. Here’s a list of potential culprits:
- The pop-up message is genuine – Of course, the origin of this error might very well be genuine. If this is the case, you have two ways forward – you can either look to renew your Windows 11 license or you can use a method that will ‘freeze’ the availability of your license (but this comes with other consequences as you’ll see below)
- Current Insider Build is about to expire – It’s not uncommon to see this error message occurring when your insider build (most likely developer build) is about to expire. In case this error message shows because of an expiring build (not license), you can fix it by forcing Windows Update to install the latest available build.
- VLK license needs to be reactivated – If you’re using a Volume License Key license that’s part of a bigger business or organization, your PC needs to regularly connect to your organization server in order to prologue the availability of the license automatically. But if that’s not an option, you can do it yourself from an elevated Command Prompt.
- Development Build glitch – As reported by some users, you can also expect to see this issue due to a glitch that only affects a handful of Developer Windows 11 insider builds. In this case, there is no other resolution than clean installing a public release version of Windows 11.
Update to latest Windows 11 Insider Build (if applicable)
Keep in mind that every Insider Build (including Windows 11 Dev builds) will have an expiration date, except for the builds that Microsoft deems to be eligible for Public Release.
In case you see the ‘Windows license will expire soon‘ on a Windows 11 Development build, the first thing you should do is check the expiration date of the build that you’re currently using.
Note: The expiration date of your current Windows 11 build is not an issue unless you have disabled automated Windows Updates – unless the WU function is disabled, the expiring build will be replaced with a new one and you won’t have to deal with this error message.
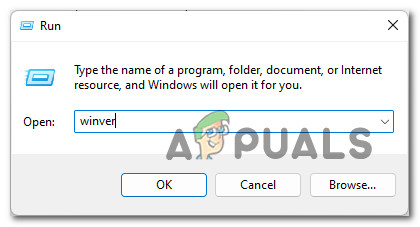
To check the expiration date of your current Windows 11 build, Press Windows key + R to open a Run prompt. Inside, type winver and press Enter to open up the About Windows screen.
Once you’re inside the About Windows tab, check the expiration date of your current build.
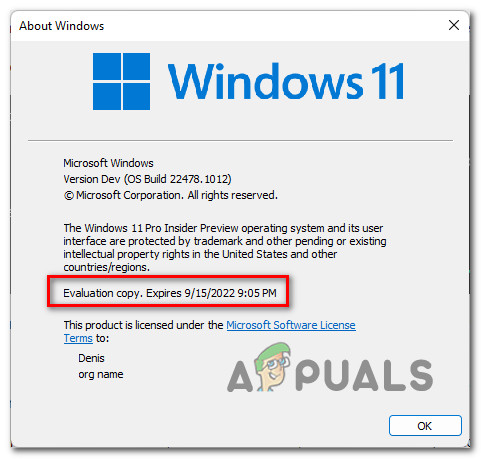
If your current insider build is about to expire, chances are the reason you’re getting ‘Windows license will expire soon‘ error message constantly is because the insider builds that you’re using are expiring along with the license.
In this case, the only way to resolve the issue is by enabling Windows Updates once again and installing every pending Windows Update until you bring your Windows to build to the latest available.
Follow the instructions below to ensure that you’re running on the latest Windows 11 insider build available:
Important: If you have previously taken any steps to prevent your OS from installer new builds, take the time to revert those changes. Otherwise, the instructions below won’t have any effect.
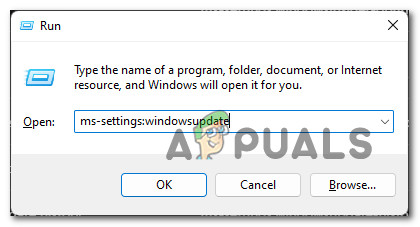
- Press Windows key + R to open up a Run dialog box. Next, type ‘ms-settings:windowsupdate’ inside the text box, then press Enter to open up the Windows Update tab of the Settings app.

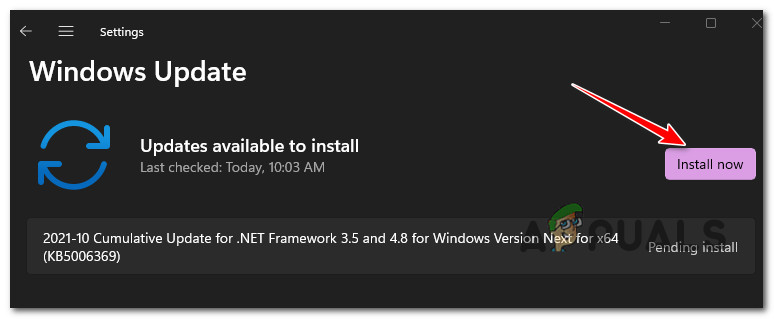
Opening up the Windows Update screen - Once you’re inside the Windows Update screen, move over to the right-hand side section of the screen and click on Check for Updates to see if a new Windows build is available.

Check for Updates on Windows 11 - If newly available updates are available, click on the Install button and wait until every available update is installed.

Install every available Windows 11 update Note: If there are a lot of updates waiting to be installed, you will be asked to restart before your OS gets the chance to install every update. Do so as instructed until you bring your Windows 11 build to the latest.
- Once you’re finally on the latest build available, check to see if the ‘Windows license will expire soon‘ error is still popping up irregularly.

If the problem is still not resolved or this method was not applicable to your scenario, move down to the next potential fix below.
Re-Activate your VLK license
Keep in mind that in most cases, this error message occurs when a Windows user activates Windows 11 with a Volume License Key (VLK) that is only meant for businesses or organizations that activate a large number of PCs at the same time.
The way this works is, the Windows 11 PC will have to check on the organization’s server regularly to automatically re-activate the license.
If you recently activated an insider build of Windows 11 with a VLK, you can sometimes use the Slmr commands in order to re-arm the activation times and prologue the availability of the license key that you’re currently using.
There are multiple ways that will allow you to do this, but the most effective method is to use an elevated CMD prompt.
Here’s what you need to do:
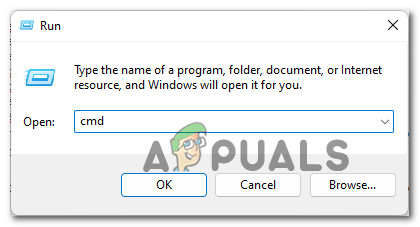
- Press Windows key + R to open up a Run dialog box. Next, type ‘cmd’ inside the text box and press Ctrl + Shift + Enter to open up an elevated Command Prompt window.
Opening up a CMD prompt - At the User Account Control prompt, click Yes to grant administrative privileges.
- Once you’re inside the elevated CMD prompt, type the following command and press Enter to deploy it:
slmgr –rearm
- After the command is processed successfully, reboot your PC and wait until the next startup is complete.
- As soon as your PC boots back up, open another elevated CMD prompt interface with admin access (by following step 1 once again).
- Once you’re back inside CMD, type the following command and press Enter to run it:
slmgr /upk
- After the command is processed successfully, reboot your PC and see if the problem is now fixed.
Important: Keep in mind that even if this method is effective, you will likely need to perform this method regularly in order to re-activate your license key whenever the error message resourfaces.
If this method was not applicable to your particular scenario, move down to the next potential fix below.
Disable WU + Windows License Manager
If you are aware that your Windows license is indeed expiring (the error message is legitimate), the best course of action would be to purchase a different license from an authorized reseller.
However, if that’s not an option, what you can do is disable the main Windows License Manager service along with the main Windows Update service.
Doing this will have the effect of ‘freezing’ the availability of the license key – as long as you keep these services disabled, your license will not expire in the eyes of Microsoft.
Important: Of course, this doesn’t come without consequences. Firstly, you do this means that you will stop receiving feature and security updates, your computer will become vulnerable to security exploits and won’t benefit from the latest features that Microsoft releases for Windows 11.
However, if you’re only looking to use this method temporarily, the instructions below can serve as a great way to ensure that your Windows 11 license doesn’t expire while you’re in the middle of an important project with no means of getting another license.
Follow the instructions below to stop the “Windows license will expire soon” error from appearing:
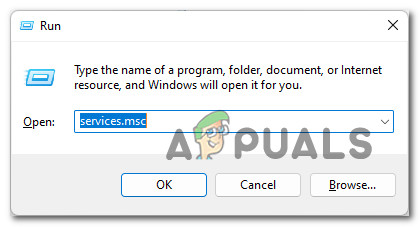
- Press Windows key + R to open up a Run dialog box. Next, type ‘services.msc’ and press Ctrl + Shift + Enter to open up the Services utility with admin access.
Opening up the Services screen - When you’re prompted by the User Account Control prompt, click Yes to grant admin access.
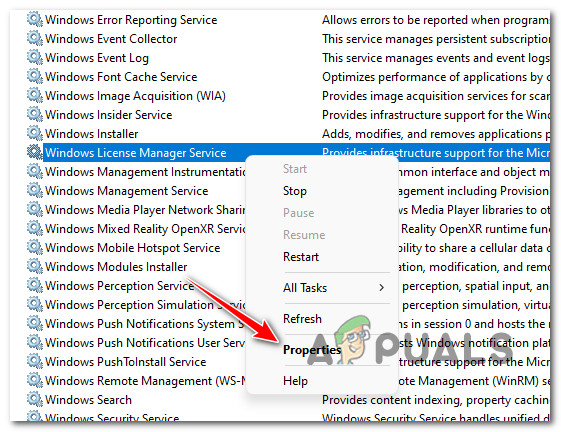
- Once you’re inside the Services screen, move over to the right-hand side section, then scroll down through the list of services and locate the entry named Windows License Manager.
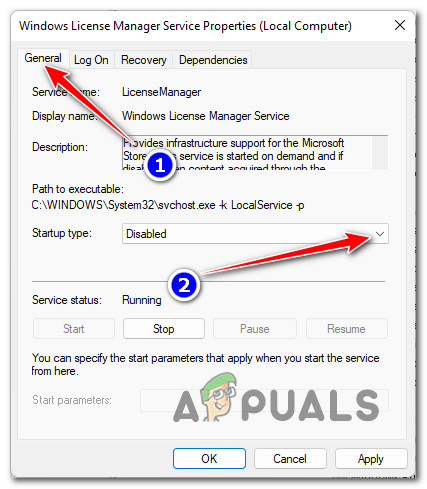
- After you locate the entry named Windows License Manager Service, right-click on it and choose Properties from the context menu that just appeared.

Accessing the Windows License Manager Service properties - Once you’re inside the properties screen of Windows License Manager Service, access the General tab from the ribbon menu at the top, then change the Startup type drop-down menu to Disabled.

Disable the Startup type of Windows License Manager Service - Click Apply to make the changes permanent.
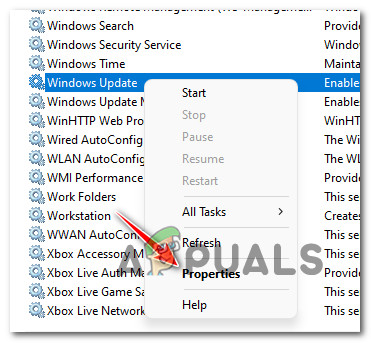
- Next, return to root directories of the Services screen, then use the list of services to locate Windows Update.
- After you locate Windows Update, right-click on the service and choose Properties from the context menu.

Accessing the Properties screen - Once you’re inside the Properties screen of Windows Update, access the General tab from the menu.
- Next, once you’re inside the Properties screen of Windows Update, access the General tab, then change the Startup type to Disabled, then click Apply, then save the changes.
Disable the Windows License

Once you’ve got this far, it means that both the Windows Update and the Windows License Manager services are disabled – this means that Windows 11 won’t be able to check if your license has expired or not and display the ‘Windows license will expire soon‘ error as a result.
If this method is not suitable for your particular scenario, move down to the next potential fix below.
Clean install a Public Release version
In case you come this far and none of the methods have worked for you, and you’re certain that your license is genuine, there is nothing else you can try other than moving towards a Public Release version of Windows 11.
Keep in mind that if you’re using an Insider Development Windows 11 build, you will not be able to revert to a public build (or a Beta build for that matter) without clean installing.
I know this might seem like an inconvenience, but it’s the only way. In case you find yourself in this scenario, take the time to backup your data in advance before going for a Windows 11 clean install procedure – make sure to install a Public Release to prevent this issue from occurring again in the future.
I get this warning each time I login to Windows 10:
This build of Windows will expire soon
Your build of Windows will expire on 31/07/2020. You should move to a new build as soon as possible. Go online for more information.
Build 20152 was released on June 24th 2020 the current build for the Dev channel was released on July 22nd 2020. There were 2 additional builds released between June 22nd 2020 and July 22nd 2020.
Based on my research it does not appear that the Beta channel has received what potentially will become the 21H1 release at this time. Build 20152 at this time is one of those builds. This means that until 20H2 is release the Beta channel WILL NOT have any builds that will potentially become 21H1 at this time.
I’m in the Windows Insider Program (to use WSL 2), and have recently switched from the Dev channel to the Beta channel, because the Dev channel is not needed anymore for WSL 2 support. It is my guess that switching WIP channels lead to this ‘Windows will expire soon’ warning.
At this time you will have to switch back to the Dev channel in order to receive new builds of Windows 10. You will have to stay on this channel until after 20H2 is released. You must make the switch from the Dev channel to the Beta channel before development of 22H1 is started.
My priorities are a) have a working operating system on July 31th, and b) move from the WIP Dev channel to the Beta channel (or maybe RC or turn of WIP entirely, depending on WSL 2 support). What are my options?
Once a build expires you will be unable to boot into Windows. This means you must install the current Dev channel build before July 31st 2020. In order to receive that build you must do the following actions as an Administrator.
1. Open the Start Menu.
2. In the search box, type CMD.exe.
3. On the right menu under Command Prompt, select Run as administrator.
4. If prompted by UAC, choose Yes.
5. From the elevated prompt, enter this command, then hit enter: `net stop wuauserv`
6. Enter this command, then hit enter: `rmdir /s /q C:\Windows\SoftwareDistribution\SLS`
7. Finally, enter this command, then hit enter: `net start wuauserv`
8. Close the Command Prompt window.
9. Open Settings > Update & Security > Windows Update and check for updates.
Once you have completed all the actions required to solve this problem you should be offered the current Dev channel build. Windows 10 does not allow you to go backwards to a past build. This means it’s not possible, at this current time, to install a Beta channel build.
I’ll repeat this procedure each time I’m close to the expiration date. Hopefully this will get me to a Beta build at some point. But I’m a bit afraid that Dev will have moved some versions by the time an earlier build has been deemed stable enough for Beta. Then I might never get out of Dev… E.g. Beta 19042.421 was released 2 days after Dev 20175. So seems I’m stuck.
You encountered an issue that impacted Intel and AMD machines on earlier builds. Due to the changes to the Insider Preview channels, until there is an overlap between the Dev channel and Beta channel you won’t be able to switch channels, the earliest this would happen is after 20H2 is released. You will have to postpone updates before the Dev channel build is higher than the expected build for 21H1.
I use this website to determine what release a build belongs to exactly.
switching from Dev to Beta is exactly what got me into this situation.
It was actually an issue, that was fixed back on July 22nd 2020, but prevented your machine from being offered a more recent build. Switching the Insider Preview channels didn’t have anything to do with your problem.
Maybe this is one of the few times that ‘typically’ does not apply, and for some reason they expired Dev releases before there is a suitable Beta release to upgrade to.
The Beta channel is actually targeting the next feature update 20H2. The build you had installed was a preview build for 21H1.
Source:
- Announcing Windows 10 Insider Preview Build 20175
- IMPORTANT!! Please read if you are not seeing build 20175!
Download Windows Speedup Tool to fix errors and make PC run faster
If you have enlisted in the Windows Insider Program to get an Insider preview build of Windows well ahead of any standard users, then it is possible that you may encounter this error message This build of Windows will expire soon. In this post, we will identify the possible causes as well as provide the most appropriate solutions you can try to help you resolve this anomaly.

Normally, whenever you install the new builds, you get information about when the build will expire. If you don’t update the Windows 10 build before its expiration, then Windows will start restarting every few hours. So, if you’re receiving this notification out of the blue then it’s an issue.
Users that are reporting this issue on their system, made known that once they check under Settings > Update & Security for newer builds, they couldn’t find any update or builds.
If you’re faced with this Windows 11/10 Insider build issue, you can try our recommended solutions below in no particular order and see if that helps to resolve the issue.
- Check the Date & Time settings
- Check for Updates Manually
- Run Automatic Repair
- Activate your Windows Build
- Check the Account linked with the Windows Insider program
Let’s take a look at the description of the process involved concerning each of the listed solutions.
1] Check the Date & Time settings
This solution entails you try setting the time and date on your computer properly and see if the This build of Windows will expire soon issue will be resolved.
Here’s how:
- Press Windows key + I key combination to launch the Settings app.
- Click to open the Time & Language section.
- Navigate to the Date & time tab at the left-side navigation menu.
- In the Date & Time tab, make sure that your computer’s date and time are set up correctly. If the time is not correct, you can try turning the Set time automatically option on or off, depending on the current state.
- To change the date, under Date, click the dropdown menu button to find the current month in the calendar, and then click the current date.
- To change the time, under Time, click the hour, minutes, or seconds that you want to change, and then slide the values until you settle for the one correct according to your time zone.
- When you have finished changing the time settings, click OK.
2] Check for Updates Manually
In case you have missed an update to the Insider build, you might want to try and check for updates manually. This method is helpful in a situation where you have reached the end of life for an Insider build before upgrading to a newer one.
3] Run Automatic Repair
If one of the system files is corrupted then it might be causing the notification pop-up, in which case you may need to run Automatic Repair.
4] Activate your Windows Build
If you do not have a license key for Windows or if the Windows is not activated, it may cause the Insider build to expire, hence the notification pop-up.
To make sure your build is activated, do the following:
- Press the Windows key + I to open Settings.
- Click on Updates and Security.
- In the left navigation pane, click on Activation.
- Then click on Change key or Activate Windows using a key.
Read: What happens when Windows 10 Build reaches expiration date?
5] Check the Account linked with the Windows Insider program
Although this is highly unlikely, but sometimes the account you registered with the Windows Insider Program gets unliked from the device, it may lead to the issue.
To check the account linked with the WIP, do the following:
- Open the Settings app.
- Go to Updates and Security.
- Click on Windows Insider Program in the left navigation pane.
- Check if the Microsoft account registered with the Insider program is correct, and if it isn’t, switch accounts or log in.
Hope this helps!
Anand Khanse is the Admin of TheWindowsClub.com, a 10-year Microsoft MVP (2006-16) & a Windows Insider MVP (2016-2022). Please read the entire post & the comments first, create a System Restore Point before making any changes to your system & be careful about any 3rd-party offers while installing freeware.
Most Windows enthusiasts install Insider Build of Windows 10 operating system to keep up to date with the latest development. Anyone can join the Microsoft Insider program as it is publicly available. Windows insider program is an excellent way to test new features from Microsoft’s perspective.
Now users are reporting that out of nowhere, Windows started displaying the message “This Build of Windows will expire soon” on their system. But once they check under Settings > Update & Security for newer builds, they couldn’t find any update or builds.

If you are a member of the insider team, you get access to the latest updates through the Windows 10 insider builds. However, whenever you install the new builds, you get information about when the build will expire. If you don’t update the Windows 10 build before its expiration, then Windows will start restarting every few hours. But if the message “This Build of Windows Will Expire Soon” starts appearing out of nowhere then it might an issue.
But if you don’t know why Windows 10 insider builds displays This Build of Windows Will Expire Soon notification as you did not expect it, here are some things you can try.
Table of Contents
Method 1: Check the Date & Time settings
If the System date & time is tampered by a corrupt third-party program then it might be possible that the date now set is outside the testing duration of the current insider build.
In such cases, you should enter the correct date manually in Windows Settings or BIOS firmware of your device. To do so,
1. Right-click on Time displayed at the bottom right corner of your screen. Then click on Adjust Date/Time.

2. Make sure that both options labeled Set the time automatically and Set the time zone automatically have been disabled. Click on Change.

3. Enter the correct date and time and then click on Change to apply changes.

4. See if you’re able to fix This Build of Windows Will Expire Soon error.
Also Read: Windows 10 Clock Time Wrong? Here is how to fix it!
Method 2: Check for Updates Manually
In case you have missed an update to the Insider build, you might want to try and check for updates manually. This method is helpful in a situation where you have reached the end of life for an Insider build before upgrading to a newer one.
1. Press Windows key + I to open Settings then click on Updates and Security.
![]()
3. In the left navigation pane, click on the Windows Insider Programme.

4. Here, make sure that you have installed the latest build available to users in the Insider Programme.
Method 3: Run Automatic Repair
If one of the system files is corrupted then it might be causing the “This Build of Windows Will Expire” soon pop-up, in such case you may need to run Automatic Repair.
1. Insert the Windows 10 bootable installation DVD and restart your PC.
2. When prompted to Press any key to boot from CD or DVD, press any key to continue.

3.Select your language preferences, and click Next. Click Repair your computer in the bottom-left.

4. On choose an option screen, click Troubleshoot.

5. On Troubleshoot screen, click Advanced option.

6. On the Advanced options screen, click Automatic Repair or Startup Repair.

7. Wait till the Windows Automatic/Startup Repairs complete.
8. Restart and you have successfully Fix This Build of Windows Will Expire Soon error.
Also Read: Fix No Bootable Device Error on Windows 10
Method 4: Activate Your Windows Build
If you do not have a license key for Windows or if the Windows is not activated due to error code 0x80072ee7, it may cause the Insider build to expire. To activate Windows or to change key,
1. Press Windows key + I to open Settings then click on Updates and Security.
![]()
3. In the left navigation pane, click on Activation. Then click on Change key or Activate Windows using a Key.
Recommended: 3 Ways to Check if Windows 10 is Activated

Method 5: Check the Account linked with the Windows Insider program
Although this is highly unlikely but sometimes the account you registered with the Windows Insider Programme gets unliked from the device, it may lead to This Build of Windows Will Expire Soon error.
1. Open the Settings app by pressing Windows Key + I.
2. Go to Updates and Security.
![]()
3. Click on Windows Insider Programme in the left navigation pane.

4. Check if the Microsoft account registered with the Insider program is correct, and if it isn’t, switch accounts or log in.
Also Read: Allow or Prevent Users from Changing the Date and Time in Windows 10
I hope the above methods were able to help you fix This Build of Windows will expire soon error. If none of them worked for you, you might have to opt-out of the Windows Insider Programme and get a stable build, or do a clean install of Windows 10.