Начиная с незначительных сторонних инструментов и заканчивая сложными играми и приложениями, одно можно сказать наверняка: вам необходимо установить программу, чтобы использовать ее. В Windows 10 существует множество ошибок установщика Windows, и ошибка «Существует проблема с пакетом установщика Windows» является одной из наиболее устойчивых.
Несмотря на то, что Microsoft хочет, чтобы приложения Windows Metro играли эту роль, стандартные сторонние программы по-прежнему остаются фаворитами. Тем не менее, случайные ошибки установщика Windows действительно сбивают с толку, и вам потребуется некоторое время и усилия для их устранения.
Поэтому, если вы застряли с этой ошибкой и не знаете, как с ней справиться, мы рекомендуем выполнить следующие шаги.
Решение 1. Убедитесь, что у вас есть права администратора
Как вы уже знаете, для установки любого приложения из стороннего источника вам потребуется разрешение администратора. На сегодняшний день это стандартная мера безопасности, присутствующая на всех платформах Windows, и она крайне важна для предотвращения установки сторонних программ в фоновом режиме. В основном, большой знак Стоп для вредоносных программ и вредоносных программ.
Таким образом, вам необходимо войти в систему с учетной записью администратора или иметь разрешение на внесение системных изменений в альтернативную учетную запись. Отсутствие надлежащего разрешения может привести к ошибкам при установке, в том числе той, о которой мы сегодня говорим. Также вы можете попробовать щелкнуть правой кнопкой мыши установщик и запустить его от имени администратора.

С другой стороны, если вы запустили установку от имени администратора и эта неприятная ошибка продолжает появляться, продолжайте устранение неполадок, следуя приведенным ниже инструкциям.
Решение 2. Проверьте установщик и установочные файлы
Существуют различные формы установки для различных приложений. Иногда установка происходит в виде одного сжатого EXE-файла, в то время как, с другой стороны, вы можете иметь множество доступных файлов (например, DLL), сопровождающих установщик. В любом случае, если хотя бы один вспомогательный файл поврежден или не завершен, установка завершится неудачно.
Следовательно, вам необходимо убедиться, что установочные файлы правильно загружены и не подвержены воздействию вируса (или антивируса в этом отношении). Лучший способ преодолеть это — повторно загрузить исходную настройку, отключить антивирус (или добавить исключение) и выполнить установку еще одного снимка. Имейте в виду, что это рискованно, и делайте это только в том случае, если вы уверены, что приложение на 100% надежное и чистое.
Кроме того, убедитесь, что установщик соответствует вашей системной архитектуре. Например, если вы используете Windows 10 с архитектурой x86 (32-разрядная версия), вы не сможете запустить установочный пакет x64 (64-разрядная версия).
Решение 3 — Запустите программу установки и удаления устранения неполадок
Большинство инструментов для устранения неполадок уже описаны в Windows 10. Тем не менее, даже несмотря на то, что существует целый ряд специальных средств для устранения неполадок с определенной целью, вам потребуется загружаемый инструмент для устранения проблем, связанных с установкой / удалением. После того, как вы запустите его, программа установки и удаления неполадок будет проверять и устранять ошибки, связанные с установкой. Стоит также упомянуть, что этот инструмент предоставляется Microsoft, поэтому вам не нужно рисковать с помощью подозрительных сторонних решений.
Следуйте приведенным ниже инструкциям, чтобы загрузить и использовать Устранение неполадок при установке и удалении программы:
- Загрузите специализированное средство устранения неполадок здесь.
- Запустите средство устранения неполадок.

- Следуйте инструкциям, пока специалист по устранению неполадок не решит проблему.
- Попробуйте установить проблемную программу еще раз и ищите изменения.

Решение 4. Проверьте установщик Windows на наличие ошибок
В такой сложной системе, как Windows, у вас есть различные сервисы, которые участвуют во всем, что вы делаете. MSI Engine Foundation отвечает за установку, обслуживание и удаление сторонних программ. Вам не нужно быть техническим энтузиастом, чтобы понять, куда это идет. Если движок MSI (установщик Windows) не работает, поврежден или отключен по ошибке, вам будет сложно установить что-либо.
Во-первых, давайте удостоверимся, что установщик Windows работает так, как задумано.
- Щелкните правой кнопкой мыши меню « Пуск» и в меню «Питание» выберите « Командная строка» («Администратор»).
- Введите следующую команду в командной строке и нажмите Enter:
- MSIExec
- Если все в порядке, вы увидите всплывающее окно с информацией об установщике Windows.
- Если вы видите сообщение об ошибке, вам необходимо перерегистрировать установщик Windows.

Решение 5 — Перерегистрировать установщик Windows
Как вы, возможно, знаете, невозможно переустановить встроенные функции Windows. Вы вряд ли сможете что-либо сделать в отношении расширенных функций и сервисов системы. Тем не менее, вы можете перезапустить большинство из них, используя несколько продвинутых решений. При неправильном использовании эти обходные пути могут привести к большим неприятностям, поэтому действуйте с осторожностью. Это, конечно, включает и установщик Windows. Итак, если вы столкнулись с ошибкой после предыдущего шага, обязательно внимательно следуйте этим инструкциям, и мы должны быть готовы
- Щелкните правой кнопкой мыши «Пуск» и выберите « Командная строка» («Администратор»).
- В командной строке введите следующие команды и нажмите Enter после каждого:
- msiexec.exe / отменить регистрацию
- msiexec.exe / regserver
- Закройте командную строку и найдите изменения. Если проблема все еще существует, перейдите к шагу 4.
- В поиске Windows введите Services.msc и нажмите Enter.
- Найдите установщик Windows. Это должно быть внизу списка.
- Щелкните правой кнопкой мыши службу установщика Windows и остановите ее.
- Снова щелкните правой кнопкой мыши и выберите «Пуск».
- Перезагрузите компьютер.

Этого должно быть достаточно, чтобы избавить вас от ошибки установки «Есть проблема с этим пакетом установщика Windows». Если у вас есть альтернативное решение или вопрос относительно представленных решений, обязательно сообщите нам об этом в разделе комментариев ниже.
Download Windows Speedup Tool to fix errors and make PC run faster
If you are getting There is a problem with this Windows Installer package error while installing a software on your Windows 11 and Windows 10 computer, these troubleshooting tips and tricks could help you fix the issue. It may happen with any program you might want to install on your PC.
Most programs can be installed on a Windows computer normally. Only a few require the administrator’s permission. In normal situations installation proceeds, smoothly without encountering issues – but unstable network access can cause problems. Also, sometimes, the error might appear if you fail to uninstall a program successfully. At times, you may even see a There is a problem with this Windows Installer package message when you go on to install a program along with an error 1720, 1721, 1722, etc.
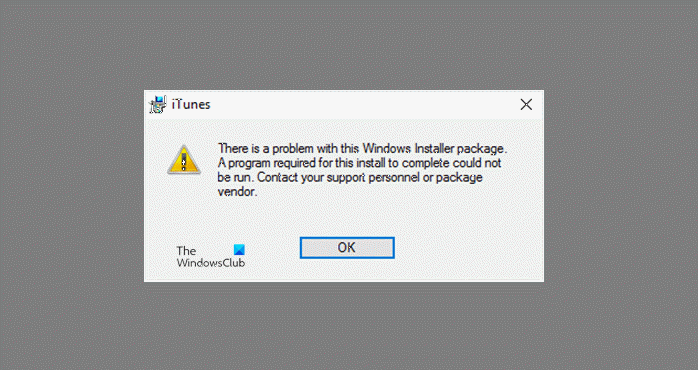
There is a problem with this Windows Installer package. A program required for this install to complete could not be run. Contact your support personnel or package vendor.
It could happen for any program – but has been known to commonly happen with Apple iTunes, Java, etc.
To fix this problem, here are a few things you could try:
- Outdated or a damaged setup file
- Check x86 or x64
- Clear Temp files and download again
- See if you can Repair it
- Run Program Install and Uninstall Troubleshooter
Let’s check out these solutions in detail.
1] Outdated or a damaged setup file
The most common cause of the error is an outdated or a damaged version of the program’s setup file. Users can even face this problem when they try to uninstall a program. In such a case it could be that the program’s uninstaller function has become corrupted.
2] Check x86 or x64
Check if you are using the correct package – a x86 installer for a Windows x86 OS and likewise for x64. At times, some installer might not work if the system architecture doesn’t match the app’s architecture.
3] Clear Temp files and download again
Delete the installer file, clear your temporary internet files as well as the temporary files folder. Now download the setup file again, this time to a different location. Now try to run it and see.
4] See if you can Repair it
Open Control Panel in Windows and click “Uninstall a Program” link. Select the program that you want to remove and hit the ‘Repair’ button. If it does not have a Repair option, then you can skip this suggestion.
5] Run Program Install and Uninstall Troubleshooter
Run the Program Install and Uninstall Troubleshooter. After that, see if it makes the problem go away. However, if you are using Windows 11, you may not find this Troubleshooter in the Windows Settings panel.
6] Additional suggestions
If for some reason you are unable to uninstall programs in Windows 11/10/8/7, you may find the following links helpful:
- How to uninstall programs in Safe Mode
- Uninstall programs using Registry
- Free Uninstallers for Windows.
How do you fix There is a problem with this Windows Installer package?
To fix There is a problem with this Windows Installer package error in Windows 11/10; you need to check if the installer is outdated or not. If it is outdated or you downloaded the installer a long time ago, it is recommended to download the latest installer. Apart from that, you can check if the installer is compatible with your system architecture or not. For example, some old x64 apps may not work on x86 architecture.
How do I fix Windows installer package problem MSI?
You need to start the troubleshooting by checking if the selected installer is compatible with your system or not. For example, if the system architectures do not match your system, you might get this error. On the other hand, if your MSI package is outdated, you might encounter the same issue on your Windows 11/10 PC.
All the best!
Related reads:
- InstallShield Error code 1722 while installing MSI program
- Another installation is already in progress
- Access is Denied error while installing software
- The Windows Installer Service Could Not Be Accessed
- Please wait until the current program is finished uninstalling or being changed.
Anand Khanse is the Admin of TheWindowsClub.com, a 10-year Microsoft MVP (2006-16) & a Windows Insider MVP (2016-2022). Please read the entire post & the comments first, create a System Restore Point before making any changes to your system & be careful about any 3rd-party offers while installing freeware.
-
Home
-
News
- [3+ Ways] How to Fix Error 1721 Installer Problem Windows 10/11?
By Helen | Follow |
Last Updated
This article described by MiniTool Software mainly discusses the Windows Installer error 1721 as well as its solutions. Generally, you can try to restart/update the service, run the target program in compatible mode, troubleshoot installation and uninstallation, etc. to fix the issue.
Error 1721. There is a problem with this Windows installer package. A program required for this install to complete could not be run. Contact your support personnel or package vendor.
Have you ever encountered such a Windows installation issue? How did you fix it? If you are still suffering from this bug, just refer to the following methods to deal with it!
The following methods apply to Windows 11/10/8.1/8/7.
Solution 1. Restart Windows Installer Service
Since this problem is related to the Windows installer, you can try to solve it by restarting its service.
- Open Windows Run command.
- Input msc and click OK to open the Services tool.
- Scroll down to find the Windows Installer Right-click on it and click Stop.
- Then, right-click on Windows Installer again and select Start.

Besides, make sure both Remote Procedure Call and DCOM Server Process Launcher services should be started and set to automatic. Just double-click to launch Windows Installer properties. Go to its Dependencies tab to see whether Remote Procedure Call and DCOM Server Process Launcher is listed there or not.

Sometimes, upgrading your Windows Installer to the latest version is the fix.
Solution 2. Install App in Compatibility Mode
The error 1721 may be caused due to the incompatibility of the target application and current Windows 11 or 10. If so, just try the below steps to handle the problem.
- Right-click on the setup file of the software and choose Properties.
- Navigate to the Compatibility tab.
- Check Run this program in compatibility mode and select Windows 8 in the dropdown menu.
- Click Apply > OK to save the changes.

Solution 3. Run Program Install and Uninstall Troubleshooter (for Windows 10)
If you come across error 1721 Windows 10 while trying to install Windows programs, you can rely on Program Install and Uninstall troubleshooter to fix it. The troubleshooter assists you to repair issues automatically when you are blocked from app installation or uninstallation. It also fixes corrupted registry keys.
1. Download Program Install and Uninstall troubleshooter.
2. Double-click the downloaded meta.diagcab file to open the Program Install and Uninstall troubleshooter.

3. Click on the Advanced option to Apply repairs automatically and click Next.
4. Select Installing or Uninstalling.

5. Select the program you are trying to install but fail. If you do not see your program, select Not Listed.

6. Then, make your decision, either uninstall the programmatic program or try other fixes.

If a program is not listed in the uninstall options, you will be asked for that program’s product code. To access the code, you’ll need a tool for reading MSI files for its properties. The Program Install and Uninstall troubleshooter can help you fix the following issues:
- Corrupted registry keys on the 64-bit operating system.
- Corrupted registry keys that control the update data.
- Unable to install new programs.
- Unable to completely uninstall or update existing programs.
- Unable to uninstall programs via Control Panel.
If you encounter error 1721 Windows installer when installing apps from Microsoft Store, you can try this way to solve the problem.
- Sign in to your Microsoft account.
- Update Windows to the latest version.
- Make sure the target app applies to Windows 10/11.
- Update your Microsoft Store.
- If you are trying to install a game, just troubleshoot the game installation.
- Repair or reset your app.
- Troubleshoot Windows Store apps in Settings.

Other Windows Installer Error 1721 Fixes
Besides, there are some other ways that may solve the error.
- In computer safe mode, run msiexec /unregister in Run command to unregister Windows Installer and run msiexec /regserver to re-register Windows Installer. Then, restart the PC.
- Temporarily disable any firewall or antivirus during the installation of the target program. Or, configure the firewall and security software to allow the installation.
- Check if any malware or virus (including entry or add-on) installed on your computer prevent the installation.
- Remove any damaged files with Windows Installer cleanup utility.
- Use a registry cleanup tool to delete corrupted registry files.
- Type net localgroup to see whether there is the “Power Users” item in the list. If not, type net localgroup “Power Users” /add to add Power Users.
- Run SFC scan.
- Perform a system restore.
Windows 11 Assistant Software Recommended
The new and powerful Windows 11 will bring you many benefits. At the same time, it will also bring you some unexpected damages such as data loss. Thus, it is strongly recommended that you back up your crucial files before or after upgrading to Win11 with a robust and reliable program like MiniTool ShadowMaker, which will assist you to protect your increasing data automatically on schedules!
MiniTool ShadowMaker TrialClick to Download100%Clean & Safe
About The Author

Position: Columnist
Helen Graduated from university in 2014 and started working as a tech editor in the same year. Her articles focus on video creation, editing, and conversion. She also has a good knowledge of disk management and data backup & recovery. Through an in-depth exploration of computer technology, Helen has successfully helped thousands of users solve their annoying problems.
Sometimes, you can encounter the “There is a problem with this Windows Installer package” error while trying to install an application through an MSI installer. This error occurs if your system can’t run a script, program, or DLL file necessary for such operations. You will also encounter corresponding error messages in each case:
- Error 1720: There is a problem with this Windows Installer package. A script required for this install to complete could not be run.
- Error 1721: There is a problem with this Windows Installer package. A program required for this install to complete could not be run.
- Error 1722: There is a problem with this Windows Installer package. A program run as part of the setup did not finish as expected.
- Error 1723: There is a problem with this Windows Installer package. A DLL required for this install to complete could not be run.
Even if they are different errors, you need similar solutions to resolve all of them. First, make sure to log in with an admin account and run the program as an administrator. Some installers require admin privileges to run properly. Also, make sure that there is enough space to install the application.
Table of Contents
Re-register Windows Installer
Windows uses the MSIExec engine to run the MSI installer. If the registration of this engine becomes corrupt, you can’t run such installers. To resolve this issue, you need to unregister and then re-register the engine.
- Open Run.
- Type
cmdand press Ctrl + Shift + Enter to open the Elevated Command Prompt. - Enter the following commands:
MSIExec /unregisterMSIExec /regserver

Restart Windows Installer Service
You will also get this error if the Windows Installer service is not running properly or another instance of the installer engine is already running. We recommend checking for both issues at the same time.
- Open Run by pressing Win + R.
- Type
msconfigand press Enter to launch the System Configuration. - Go to the Services tab and search for Windows Installer.
- Make sure the box next to it is checked and press OK.

- Now, press Ctrl + Shift + Esc to open the Task Manager.
- Go to the Details tab.
- Look for
msiexec.exe. If it’s there, select it and click End Task.
- Then, open Run again.
- Type
services.mscand press Enter to open Window Services. - Look for Windows Installer and check its Startup Type.

- If it shows Disabled, double-click on it and set the Startup type drop-down list to Manual.
- Click on Start if the Service status indicates Stopped. Otherwise, click Stop and then Start to restart the service.


Restart your computer and check if the issue persists.
Re-register Some DLL Files
Like with the MSIExec engine, your system uses many DLL files while running the MSI installers. You can similarly re-register them to resolve any potential registration issues.
- Open the Elevated Command Prompt.
- Enter the following commands:
regsvr32 Actxprxy.dllregsvr32 Browseui.dllregsvr32 Mshtml.dllregsvr32 ole32.dllregsvr32 Oleaut32.dllregsvr32 Scrrun.dllregsvr32 Shdocvw.dllregsvr32 Shell32.dllregsvr32 urlmon.dll
- Don’t worry if you get a “The module was loaded but the entry point DllRegisterServer was not found” error, simply move on to the next command.

Troubleshoot Compatibility
If the error has the code 1721, it might be because the installer is for a previous version of Windows and therefore is not compatible with your current system. In such cases, you need to troubleshoot for program compatibility.
- Right-click on the installer and select Troubleshoot Compatibility or Show more options > Troubleshoot Compatibility.

- Select Try Recommended Settings.
- Then, click on Test the program.

- If the error doesn’t occur this time, go back to the Troubleshooter and select Next > Yes, save these settings for this program.


Install Necessary Windows Features and Updates
The installation of several programs on your system requires certain supporting software components and features. We recommend installing all such programs to prevent suffering from different installation errors. Even if you already have these components, they might have become corrupt, so it’s worth reinstalling them.
- All available Microsoft Visual C++ Runtime Packages
- Windows Management Framework
- Latest .NET Framework
You should also make sure to have the latest version of your Operating System. The newer applications require the most updated OS versions to be able to provide better features.
- Open Run.
- Type
ms-settings:windowsupdateand press Enter to open Windows Update Settings. - Click on Check for Updates to scan for and download available updates or Install now if your computer has already downloaded them.


Re-download the Installer
It is also possible that the installer you downloaded or transferred is not complete. You can check for such issues by checking its properties.
Select the installer and press Alt + Enter to open its Properties and compare the Size and Size on the disk from the General tab. If the Size on disk is much lower than the Size, the file is not complete.
In such cases, you need to download it again. Also, we recommend you ensure that the installer you download matches the system architecture of your computer while doing so.
Take Ownership of the Temp Folder
Many programs including installers make use of the Temp folder inside AppData to store temporary files. By default, each user accounts have the ownership and permissions of the Temp folder for that account. However, if this setting gets changed somehow, you will encounter many issues, including the above.
In such a scenario, you should see the error code 1723 in the error message, so it’s easier to recognize. You need to take ownership and provide permissions to this folder to resolve the issue.
- Open the Elevated Command Prompt.
- Enter the following commands:
takeown /F %Temp%icacls %Temp% /Grant %userdomain%\%username%:F

Uninstall Application Before Reinstalling
Sometimes the previous software of an application can also interfere with the new installation. In such cases, you need to uninstall the previous application first.
- Open Run.
- Type
appwiz.cpland press Enter to open Programs and Features. - Look for and select your application.
- Click on Uninstall or Uninstall/Change > Uninstall.

- Confirm with Yes and follow the on-screen instructions.

Then, update/reinstall the app again by launching a complete installer. If you can’t uninstall the applications, there may be some app-specific reasons causing such errors. You need to check official websites for what to do in such scenarios.
Remove Pending Installations Using Registry Editor
You will also get this error if you try running an installer when another one is already running on your system. Windows will usually warn you if something like this happens, but it can’t do so if the previous instance of installers is stuck. In such a case, you need to remove all pending installations first.
- Open Run.
- Type
regeditand press Enter to open the Registry Editor. - Navigate to
Computer\HKEY_LOCAL_MACHINE\Software\Microsoft\Windows\CurrentVersion\Installer
- If the InProgress key is present, delete all the entries inside it.
- Then go to Computer
HKEY_LOCAL_MACHINE\System\CurrentControlSet\Control\Session Manager - If PendingFileRenameOperations is there, delete all of its entries as well.

Install a Different Version of Application
Sometimes, the latest version of the application or its installer may have some bugs that are responsible for such issues. In such cases, you will only encounter the above error while trying to install one application but can successfully install other programs through MSI installers. You need to try installing a previous or different version of the app instead to resolve the issue.
«There is a problem with this Windows Installer package …» error messages when installing iTunes for Windows
Last modified: Dec 4, 2013 11:17 AM
Rating: 5 out of 5
25
7 likes
123,240 views
Last modified Dec 4, 2013 11:17 AM
When updating or installing iTunes for Windows, you may receive one of the following error messages:
There is a problem with this Windows Installer package. A program required for this install to complete could not be run. Contact your support personnel or package vendor.
There is a problem with this Windows Installer package. A program run as part of the setup did not finish as expected. Contact your support personnel or package vendor.
The most common cause of the errors is an out-of-date or damaged version of Apple Software Update for Windows on the PC. If that’s what is afoot, updating or repairing your Apple Software Update for Windows should get you past the errors.
First, check to see if your Apple Software Update for Windows is up to date
In your Start Menu, click All Programs and then click Apple Software Update.
In Apple Software Update, check to see if you are being offered a new version of Apple Software Update. If there’s a new version of Apple Software Update showing in the list of available updates, select the Apple Software Update update and deselect any other software that may also be being offered to you at the same time. Now install the new version of Apple Software Update.
If the new version of Apple Software Update for Windows installs properly, now try another iTunes for Windows update or install.
If Apple Software Update does not appear under «All Programs» or no newer version of Apple Software Update appears in Apple Software Update, do a repair install of your Apple Software Update for Windows
First, restart your PC.
If you’re using Windows XP, go into your «Add or Remove programs» control panel. Select Apple Software Update, click «Change» and then click «Repair».
If you’re using Vista or Windows 7, go into your «Uninstall a program» control panel. Select Apple Software Update and click «Repair».
If the repair install goes through properly, now try another iTunes for Windows update or install.
If you receive the following very-similar error message:
There is a problem with this Windows Installer package. A DLL required for this install to complete could not be run. Contact your support personnel or package vendor.
… instead apply the procedure from the Resolution section of the following user tip:
«The administrator has set policies to prevent this installation» error messages when installing iTunes for Windows on Windows Vista and Windows 7 systems
See also:
» … A DLL required for this installation to complete could not be run …» error messages when installing iTunes for Windows