Easily enable the Windows Subsystem for Linux
by Hasibul Kabir
Hasibul Kabir is a Tech-Enthusiast Blogger, Web Developer & Hobbyist Game Developer. Writing about Technology, mainly Windows, Mac, iOS, etc., is his main focus, besides doing some computer… read more
Updated on
- When you try to launch something that requires Windows Subsystem for Linux, you may get an error indicating that this optional feature is not enabled.
- Enabling this feature can be necessary and will not slow down your PC’s performance.
- To turn on this feature on Windows, you can use PowerShell and another method described in this article.
XINSTALL BY CLICKING THE DOWNLOAD
FILE
Usually, when you try to run any software, service, or app that requires the Linux environment, you may get an error.
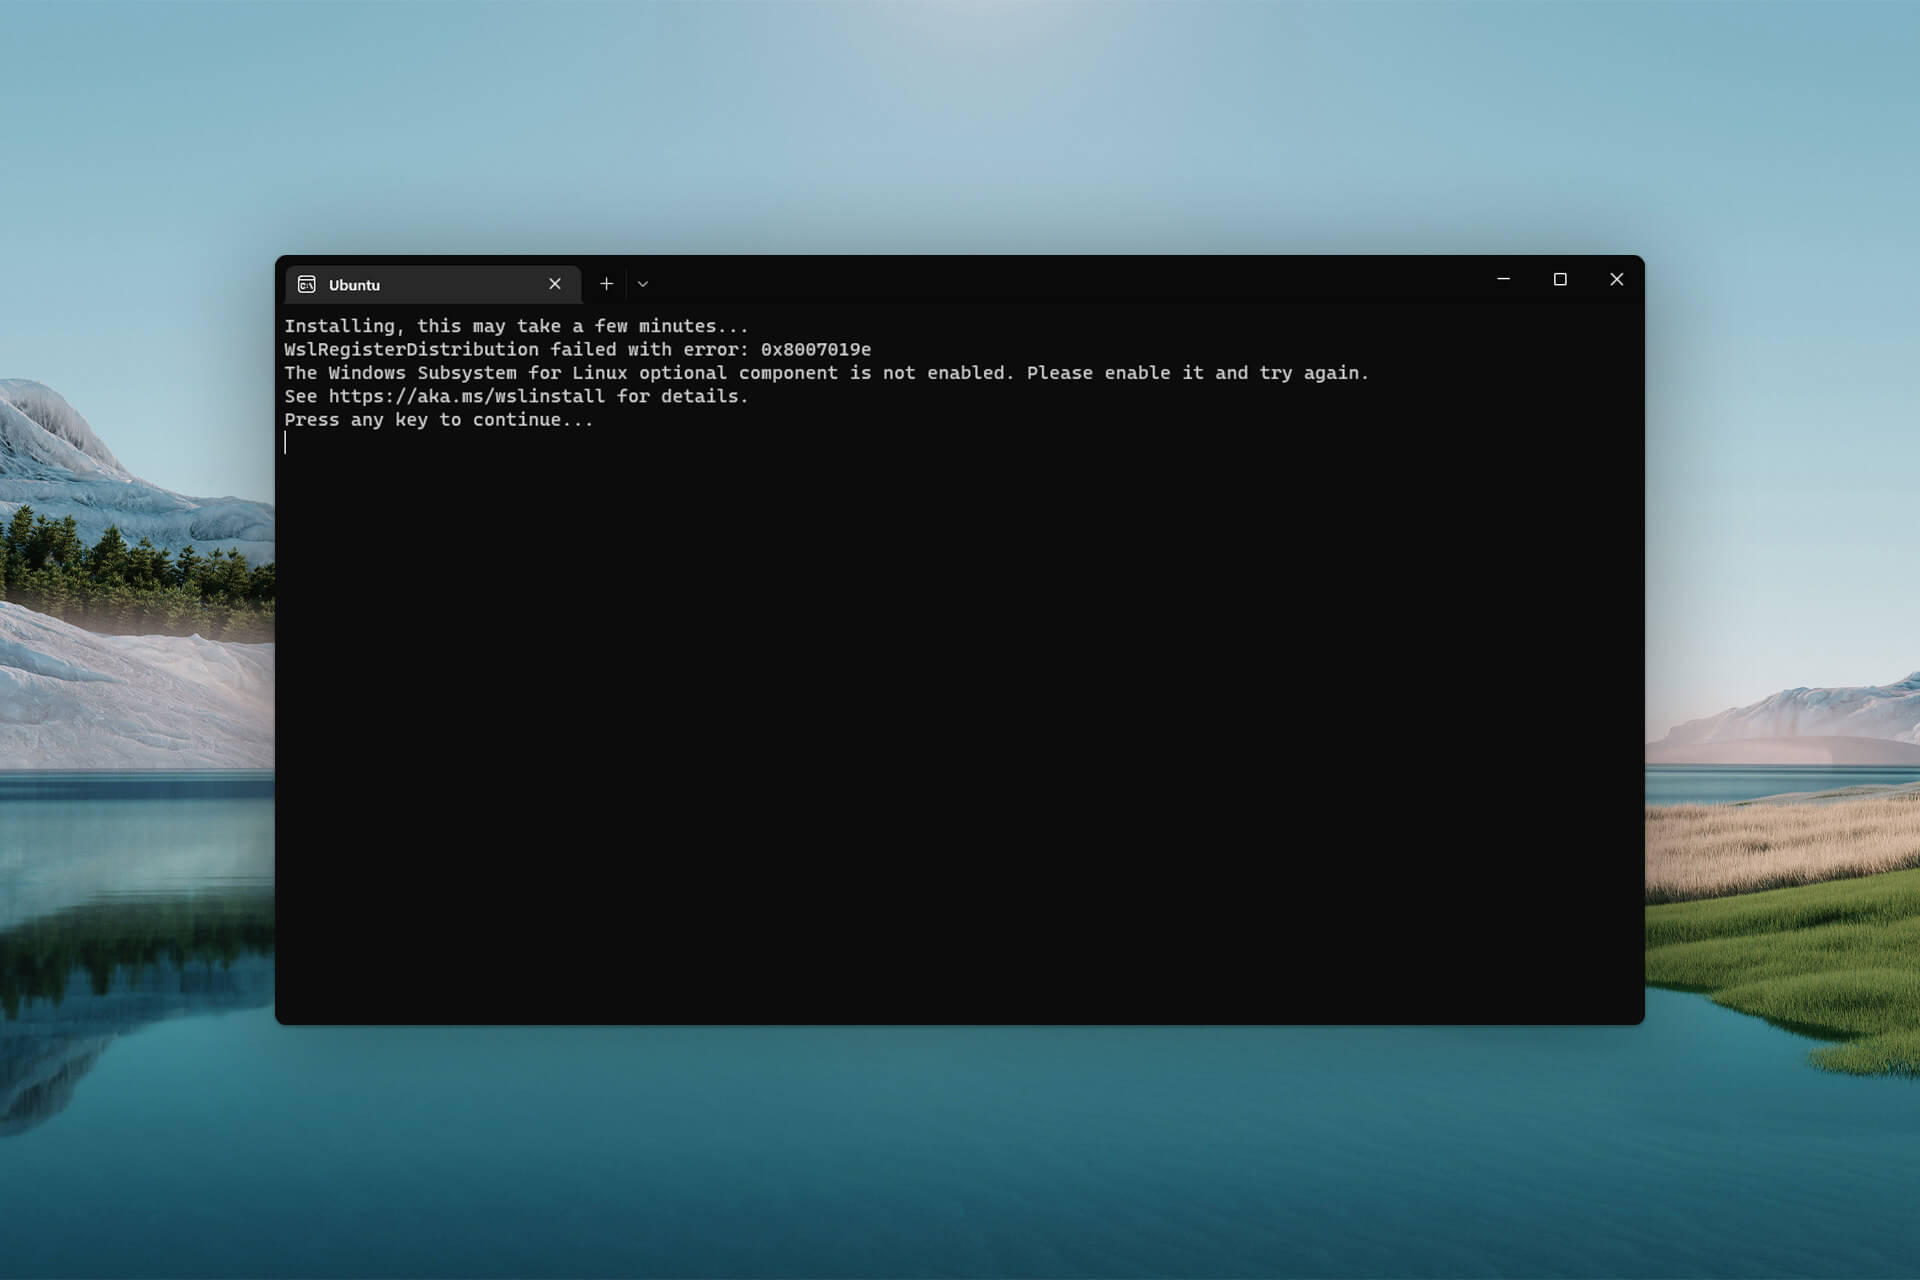
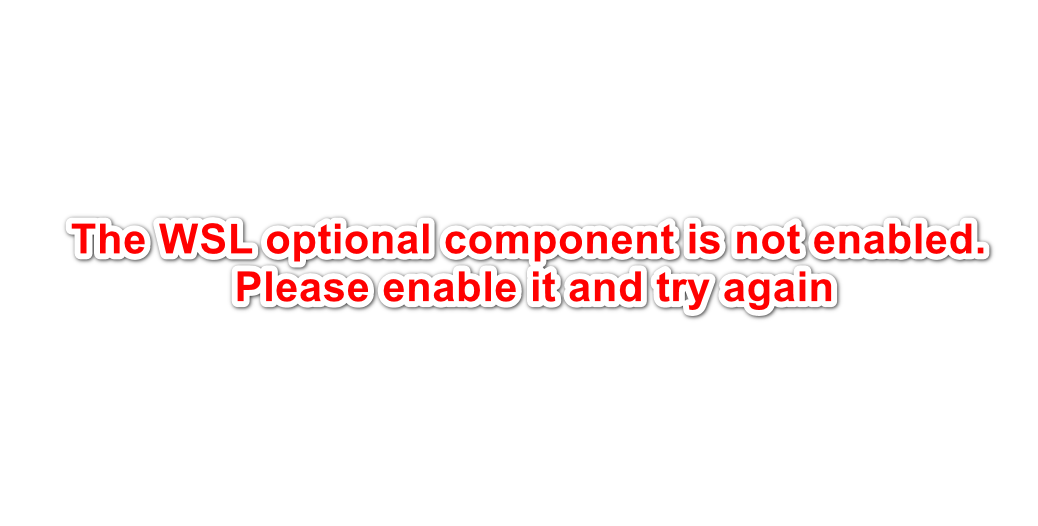
In most cases, if you install the Ubuntu app from the Microsoft Store and open it, this problem will appear. When it occurs, you get the following message: The Windows Subsystem for Linux optional component is not enabled. Please enable it and try again.
It also may show an error code 0x8007019e. But don’t worry, you can easily fix this problem if you take the proper steps.
Does the Windows Subsystem for Linux slow down a PC?
To make your development work much more pleasant, you may enable WSL. It does not hurt Windows performance.
How we test, review and rate?
We have worked for the past 6 months on building a new review system on how we produce content. Using it, we have subsequently redone most of our articles to provide actual hands-on expertise on the guides we made.
For more details you can read how we test, review, and rate at WindowsReport.
Any services in the background take a few computing resources. The WSL is not different. However, according to the users, it doesn’t slow down the PC.
We have tested it by ourselves. Our research also has found that modern computers can easily handle Windows Subsystem for Linux without negatively affecting performance.
Moreover, it can be an essential feature for some users. So, you may need to turn it on, particularly when you face the error mentioned in this article.
How do I enable Windows Subsystem for Linux on Windows?
If you want to enable WSL on your PC, you can easily do it. But, before that, we suggest you do the following things:
- Update Windows to the latest version.
- Ensure you are using Windows 11 or 10, as other versions don’t support this feature.
Now, you can follow the methods mentioned below to enable Windows Subsystem for Linux.
1. Install the optional feature
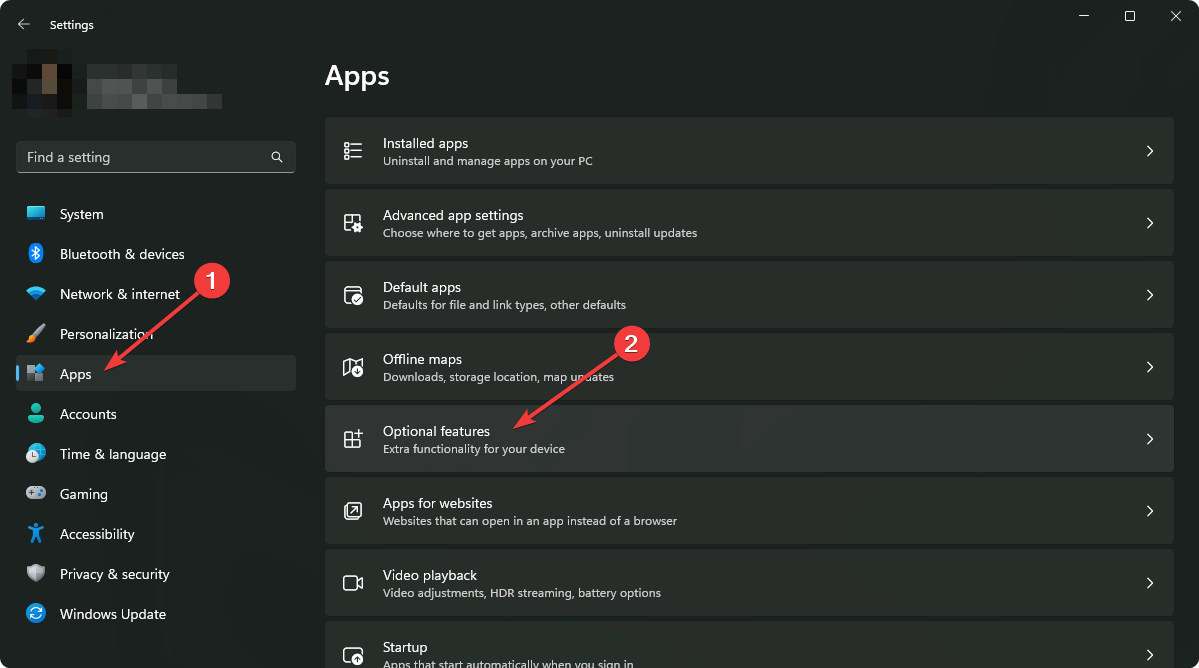
- Press Win + I on the keyboard to open Windows Settings.
- Go to Apps and click on Optional features.

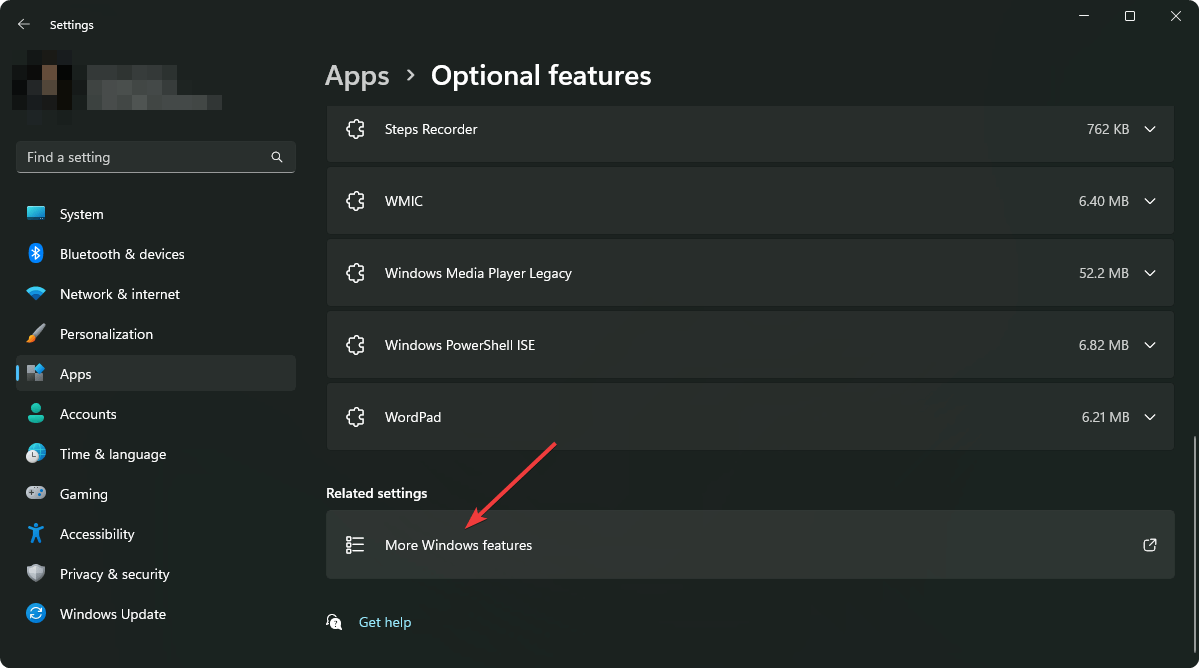
- Click on More Windows features to open the Windows Features window.
- Tick Windows Subsystem for Linux and click on OK.

- It will install the required components.
- Restart your PC after completing the process.

Alternatively, you also can search for the optionalfeatures on the Start Menu to find and open the Windows Features window. It can be necessary if you don’t find the exact options shown in the above steps.
After enabling the WSL, you can try to open the Ubuntu terminal or any other app or service that was showing the error. Hopefully, you will not see the same again.
2. Use the PowerShell command
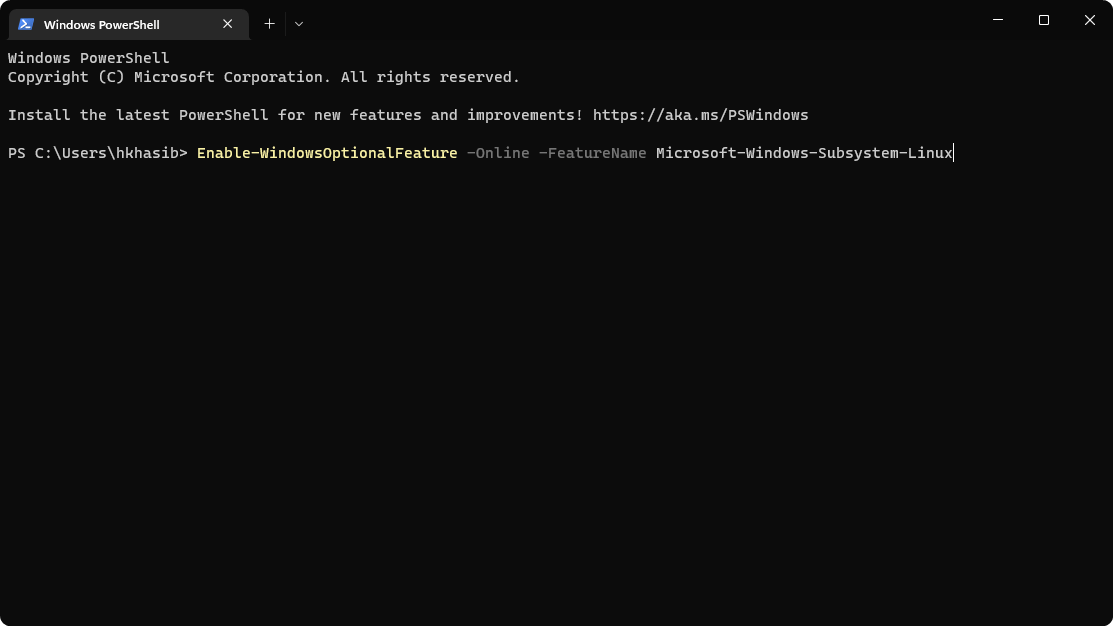
- Open the Start Menu, type PowerShell, and hit Enter.
- Now, type the following command and press Enter to execute it:
Enable-WindowsOptionalFeature -Online -FeatureName Microsoft-Windows-Subsystem-Linux
- Wait for a while.
- Restart your PC after PowerShell installs the required features.
Now, verify if it has solved the problem or not. If PowerShell can successfully enable this optional feature, you can use the Ubuntu terminal or any other app that requires WSL without any error.
- Fix: Set Time Zone Automatically Defaults to Wrong Time Zone
- 0X8007013 Install Error: How to Quickly Fix it
- Fix: Internet Keeps Disconnecting When Playing Games on Windows 11
3. Enable Developer Mode

NOTE
If you are using the latest builds, enabling Developer Mode is no longer necessary. In case you are running an older build, perform the steps below to enable it.
- Open Windows Settings.
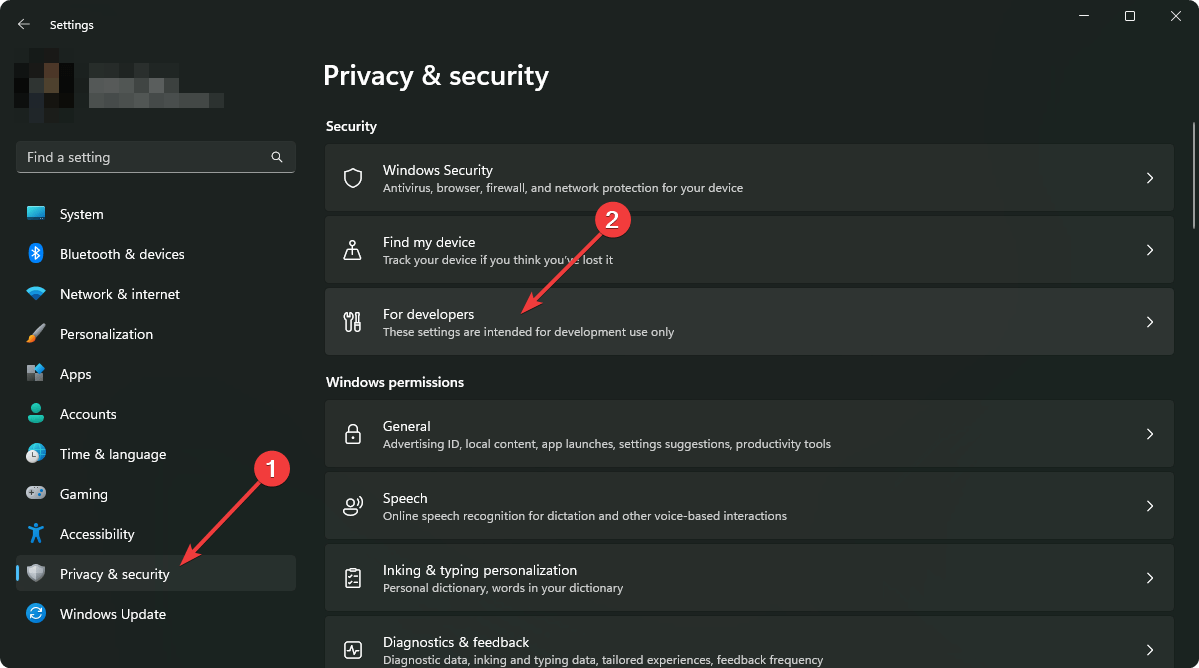
- Go to Privacy & security and click on For developers.
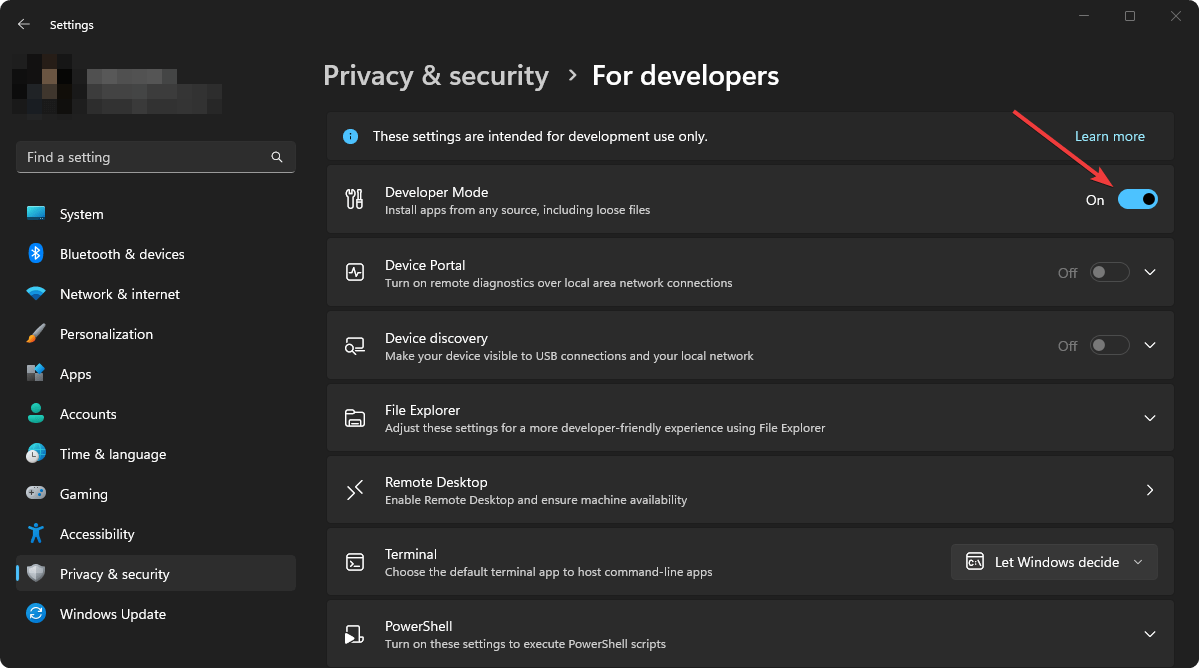
- Turn the Developer Mode by tweaking the appropriate switch.
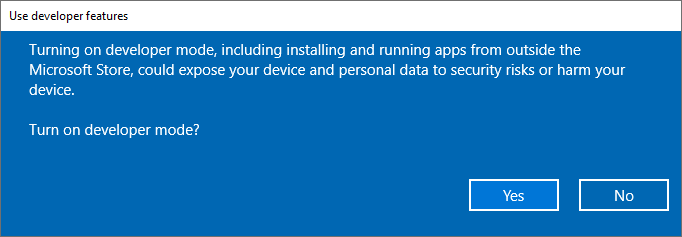
- Click on Yes on the popup window.
- Restart your PC.
For more detailed steps, learn how to enable Windows 11 Developer Mode. If the Developer Mode is a requirement, try to enable the latest WSL again and see if it works.
This article has explained how to fix Windows Subsystem for Linux is not enabled. If you have any opinions or suggestions, feel free to let us know in the comments box.
![]()
Ubuntu is a Linux based distribution that is totally free and open source. The program also provides support for Windows 10 and is used by a lot of people for software developing purposes. However, quite recently a lot of reports have been coming in where users are unable to use it and the Error “The WSL Optional Component is not Enabled. Please Enable it and Try Again” is seen while trying to do so.
What Causes “The WSL Optional Component is Not Enabled. Please Enable it and Try Again” Error on Ubuntu?
After receiving numerous reports from multiple users, we decided to investigate the issue and devised a set of solutions to fix eradicate it completely. Also, we looked into the reason due to which this issue is triggered and listed it as follows.
- Disabled Component: As the error message indicates, the error is triggered if the Windows Subsystem for Linux is disabled. Windows Subsystem for Linux is a very important feature and needs to be enabled in order for Ubuntu to work properly on Windows 10 because it provides all the important configurations and distributions needed for Ubuntu to run correctly.
Now that you have a basic understanding of the nature of the problem, we will move on towards the solutions. Make sure to implement the solutions carefully, in order to avoid conflict.
Method 1: Turning WSL ON Through Control Panel
There are a couple of methods which we can apply to rectify the problem. However, in this step, we will be taking the easiest route and enable WSL through the Control Panel. For that:
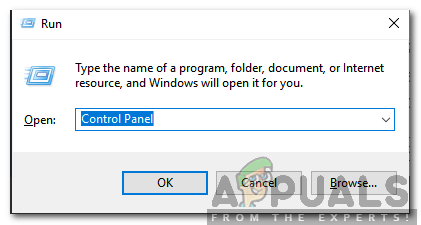
- Press “Windows” + “R” keys simultaneously to open the Run prompt.
- Type in “Control Panel” and press “Shift” + “Ctrl” + “Enter” to provide administrative privileges.

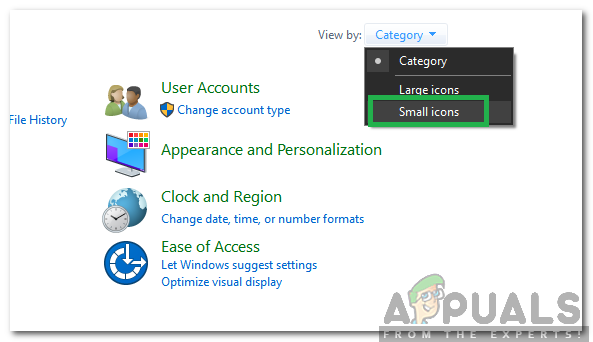
Typing in “Control Panel” and pressing “Shift” + “Ctrl” + “Enter” to provide administrative privileges - Click on the “View By” option and select “Small Icons“.

Clicking on “View By” and selecting “Small Icons” - Click on the “Programs and Features” option.
- Select the “Turn Windows Features On or OFF” option in the left pane.
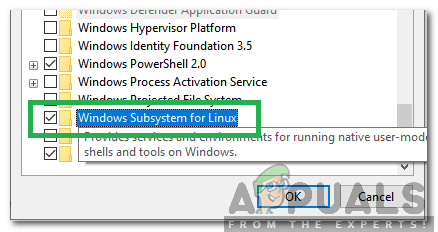
- Scroll down and select “Windows Subsystem for Linux“.

Checking the “Windows Subsystem for Linux” option” - Click on “OK” to enable the feature.
- Check to see if the issue persists.
Solution 2: Turning WSL ON Through PowerShell
We can also enable the WSL Feature by using the Command Prompt. Therefore, in this step, we will be implementing a command in the command prompt to enable the WSL Feature. For that:
- Press “Windows” + “R” keys simultaneously to open the Run prompt.
- Type in “Powershell” and press “Shift“+ “Ctrl” + “Enter” to provide administrative privileges.
- Type in the following command and press “Enter“.
Enable-WindowsOptionalFeature -Online -FeatureName Microsoft-Windows-Subsystem-Linux
- Wait for the command to be executed and check to see if the issue persists.

Enabling WSL


Kevin Arrows
Kevin Arrows is a highly experienced and knowledgeable technology specialist with over a decade of industry experience. He holds a Microsoft Certified Technology Specialist (MCTS) certification and has a deep passion for staying up-to-date on the latest tech developments. Kevin has written extensively on a wide range of tech-related topics, showcasing his expertise and knowledge in areas such as software development, cybersecurity, and cloud computing. His contributions to the tech field have been widely recognized and respected by his peers, and he is highly regarded for his ability to explain complex technical concepts in a clear and concise manner.
Back to top button
- How do you fix the Windows Subsystem for Linux optional component is not enabled please enable it and try again?
- How do I enable the Windows Subsystem for Linux optional component?
- How do I enable the Windows Subsystem for Linux optional feature before installing any Linux distributions in Windows?
- How do I fix error 0x8007019e?
- How do I enable WSL2?
- Should I enable Windows Subsystem for Linux?
- What is the use of Windows Subsystem for Linux?
- How do I know if WSL is installed?
- How do I run bash on Windows?
- Can I replace Windows 10 with Linux?
- How do I run a Linux command in Windows?
- Is WSL full Linux?
How do you fix the Windows Subsystem for Linux optional component is not enabled please enable it and try again?
The Windows Subsystem for Linux optional component is not enabled: Open Control Panel -> Programs and Features -> Turn Windows Feature on or off -> Check Windows Subsystem for Linux or using the PowerShell cmdlet mentioned at the beginning of this article.
How do I enable the Windows Subsystem for Linux optional component?
Begin typing “Turn Windows features on and off” into the Start Menu search field, then select the control panel when it appears. Scroll down to Windows Subsystem for Linux, check the box, and then click the OK button. Wait for your changes to be applied, then click the Restart now button to restart your computer.
How do I enable the Windows Subsystem for Linux optional feature before installing any Linux distributions in Windows?
To enable the Windows Subsystem for Linux (Beta), open the Control Panel, click Programs and Features, and click Turn Windows Features On or Off in left side bar under Programs and Features. Enable the Windows Subsystem for Linux (Beta) option in the list here and click OK.
How do I fix error 0x8007019e?
Solution 2: Restart the LxssManager Service
- Press Windows + R keys to bring out the Run command box.
- Now type Services.msc and then click on OK. Type “services.msc” into the Run dialog and press Enter.
- Now find and restart the LxssManager service. …
- Then relaunch the terminal to check if it is clear of the error.
How do I enable WSL2?
Install WSL2 on Windows 10
- Open Start on Windows 10.
- Search for Turn Windows features on or off and click the top result to open the experience.
- Check the “Windows Subsystem for Linux” option. Enable WSL 1 on Windows 10.
- Click the OK button.
- Click the Restart button.
Should I enable Windows Subsystem for Linux?
If you want to run distros of Linux on Windows 10, you must first enable the Windows Subsystem for Linux feature before you can download and install the flavor of Linux that you want to use.
What is the use of Windows Subsystem for Linux?
Why would I use WSL rather than Linux in a VM? WSL requires fewer resources (CPU, memory, and storage) than a full virtual machine. WSL also allows you to run Linux command-line tools and apps alongside your Windows command-line, desktop and store apps, and to access your Windows files from within Linux.
How do I know if WSL is installed?
Check WSL#
After restarting Windows, you can check that you have WSL enabled by opening a Command Prompt and typing ‘wsl’. WSL is enabled, but you haven’t installed a Linux distribution yet.
How do I run bash on Windows?
How to Enable the Linux Bash Shell in Windows 10
- Navigate to Settings. …
- Click Update & security.
- Navigate to the Control Panel (the old Windows control panel). …
- Select Programs and Features. …
- Toggle «Windows Subsystem for Linux» to on and click Ok.
- Click the Restart Now button.
- Search for Bash in the Cortana / Search box and click its icon.
Can I replace Windows 10 with Linux?
While there really isn’t anything you can do about #1, taking care of #2 is easy. Replace your Windows installation with Linux! … Windows programs typically will not run on a Linux machine, and even the ones that will run using an emulator such as WINE will run slower than they do under native Windows.
How do I run a Linux command in Windows?
If you are just looking to practice Linux to pass your exams, you can use one of these methods for running Bash commands on Windows.
- Use Linux Bash Shell on Windows 10. …
- Use Git Bash to run Bash commands on Windows. …
- Using Linux commands in Windows with Cygwin. …
- Use Linux in virtual machine.
Is WSL full Linux?
You get all benefits from WSL 2 like a full Linux kernel. Your projects live inside a portable and controllable VHD.

WSL is a tool for Windows programmers that provides access to Linux and other Unix-like systems. Several useful command-line utilities have recently been made available for Windows users.
But until WSL came along, anyone who wanted to run Linux on Windows had to resort to using virtual machines.
The enabling error of WSL may appear during the configuration of WSL to run a Linux distribution on Windows. This tutorial was written to help with the following issues:
It’s possible that failing to activate Windows Subsystem for Linux is the cause of your difficulties installing the Linux bash shell on Windows 10.
In that scenario, you’ll come across a mistake: “The Windows Subsystem for Linux Optional Component is Not Enabled. Please Enable it and Try Again..”
Method 1 : Enable WSL on Windows using GUI
Follow these instructions to activate the WSL in Windows. Developers working on open-source projects are the primary users of the WSL.
Step 1: This means that the first thing you need to do is switch on Windows’ development mode.
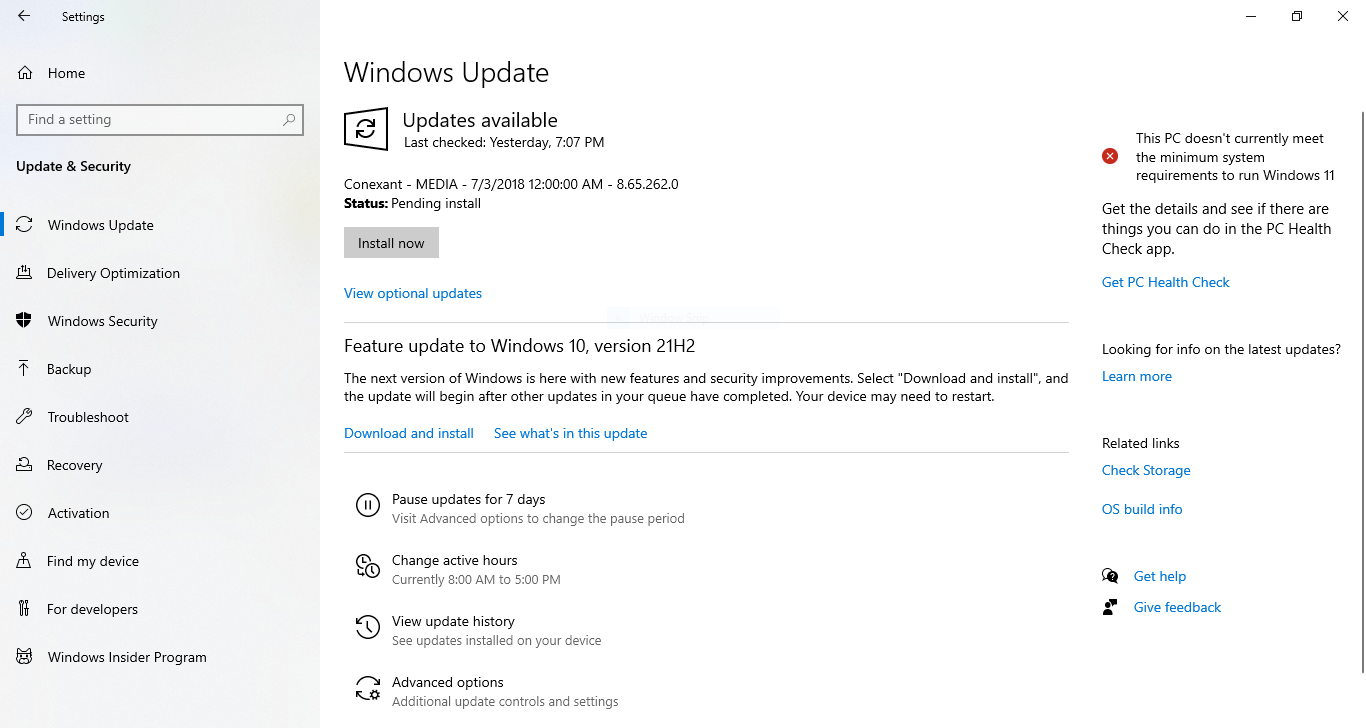
Step 2: Launch Settings by typing its name into the taskbar’s search field, then select “Updates and Security.”
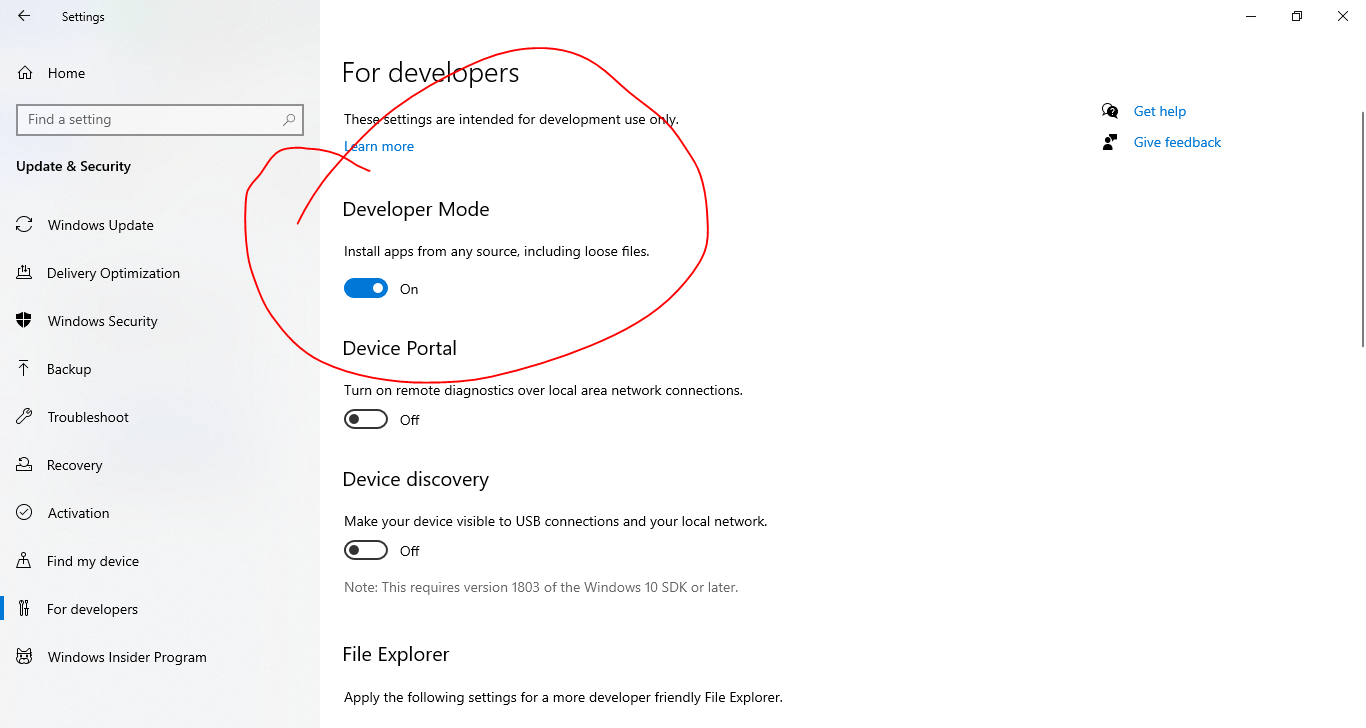
Step 2: Find the “For Developers” section toward the bottom of the left sidebar and select it. A confirmation prompt will show once you turn on the “Developer Mode” toggle button.
Step 3: Once developer mode has been activated, you can access the run box and use the supplementary features by using the “Windows Key + R.” exe:
Method 2. Install the Optional Feature
Step 1: To access the Windows Settings menu, press the Win + I keys.
Step 2: Click Apps, then Extras.
Step 3: To access the Windows Features window, select the More Windows features link.
Step 4: Select the Windows Subsystem for Linux checkbox, and then press OK.
Step 5: The necessary parts will be set up automatically.
Step 6: Once you’re done, restart your computer.
Method 3. Use the PowerShell Command
Step 1: To launch PowerShell, select the Start menu and type “PowerShell” followed by pressing the Enter key.
Step 2: Now, press Enter to run the following command:
Enable-WindowsOptionalFeature -Online -FeatureName Microsoft-Windows-Subsystem-Linux
Step 3: Wait after a while.
Step 4: After PowerShell completes the necessary feature installations, you will need to restart your computer.
Test to see if this has resolved the issue. If PowerShell is able to activate this capability, you will have error-free usage of the Ubuntu terminal and any other software that necessitates WSL.
In order to utilize WSL on some versions of Windows, you must enable developer mode. While it is not required in the most recent releases, some users may like to know how to enable it nevertheless. These instructions should be used in that event:
Step 1: Launch the Windows System Preferences utility.
Step 2: For developers, please visit Privacy & security.
Step 3: To activate Developer Mode, simply toggle the corresponding switch.
Step 4: Choose the Yes option in the prompt that appears.
Step 5: To restart your computer, click here.
Learn how to activate Windows 11 Developer Mode for in-depth instructions. You can try re-enabling the most recent version of WSL if you absolutely need Developer Mode.
In this article, we’ve shown you how to disable Windows Subsystem for Linux and fix the problem. Please use the comment section to share your thoughts and ideas with us.
Conclusion
Using the Windows Subsystem for Linux, you can run a Linux terminal within Windows. The setup process is straightforward, and you may begin issuing commands almost immediately. However, the Windows Subsystem for Linux must be enabled first (WSL).
In order to install a Linux bash shell on Windows, you will need to enable Windows Subsystem for Linux, which is described in detail in this post. There’s no need for a virtual machine, and you may skip the complicated steps of dual booting altogether. This will help you to fix the windows subsystem for linux optional component is not enabled. please enable it and try again.
Sometimes, Windows is not enough. Well, a lot of times, actually, especially if you’re a developer. But dual-booting your computer or turning to virtual machines can be both intimidating and a headache, not to mention hell on older systems. So, the next best thing? Not WSL, as you would think — I’ll reveal the next best thing at the end of this article, so make sure to read through if you want a better solution. The next-next-best thing? The Windows Subsystem for Linux. Whether you need WSL to get rid of the WSL error (“the windows subsystem for Linux optional component is not enabled”) or for some other reason, you need to enable it first.
What is WSL?
WSL is a hybrid, strangely half-functional way to use some Linux commands and applications inside Windows, using PowerShell. Naturally, the whole Windows vs Linux debate is not just solved by using WSL, but it is at least a temporary solution. It’s faster than a full-scale Virtual Machine (VM) and will produce less overhead. Still, neither does it guarantee functionality nor support all commands or applications. So, all in all, it’s a halfway measure that I can only recommend if you’re planning to do some cross-platform coding and compilation.
What is WSL2?
The new and improved Windows Subsystem for Linux, codenamed WSL2, is now installed by default when you go through the steps I’ve outlined here. WSL2 comes with major upgrades, including major support for Docker and Kubernetes containers and their deployment. Of course, it was high time for Microsoft to do something about making containers more accessible. Still, even WSL2 is far from perfect when it comes to containerization and code deployment.
For now, let’s say you need to install WSL anyway; this is where this guide comes in. I’ve included all the necessary steps to enable WSL, even if you’re using an older Windows 10 Build. So, make sure to follow the instructions and read through for that much-more-awesome solution I promised.
Also Read: How to Install Docker on VPS (Step by Step Guide)
Facing Down the Error: “the windows subsystem for Linux optional component is not enabled”
One of the main reasons users usually discover WSL and try to install it is running into a certain error message in Windows. Of course, there’s nothing new about seeing errors pop up in Windows, but this one is slightly more exotic than the others. The error message is usually something like “the windows subsystem for Linux optional component is not enabled.”
The only way you can get rid of this error is by enabling the Windows Subsystem for Linux, and the instructions in this article help you do just that. So, let’s get started.
How to Enable Windows Subsystem for Linux?
To enhance your Windows with some Linux functionality, you need to enable the Windows Subsystem for Linux. You may also need to do it to get rid of the annoying “the windows subsystem for Linux optional component is not enabled” error) Despite the name sounding so technical, installing it is very simple.
Basically, you have two ways of enabling WSL: the Control Panel and the PowerShell. Using the Control Panel is more straightforward and user-friendly. Still, sometimes it fails to do the job (for some unknown reason — cough cough Microsoft). Using PowerShell involves entering some commands into a command-line interface, which can be a bit intimidating to most casual users. But you will have all the commands you need right here, ready to be copied and pasted into PowerShell.
However, before going through with any of these methods, you need to know your Windows version and build. The Windows Subsystem for Linux is only available for Windows 10 version 2004 and later. Also, if your Windows 10 has a Build number before 16215, you will need to enable Developer Mode before you can start enabling WSL.
How to Find your Windows Version?
We have already dedicated another how-to article on finding the version of all types of operating systems, so I’ll keep this short and to the point. To find your Windows 10 version and Build number, follow these three simple steps:
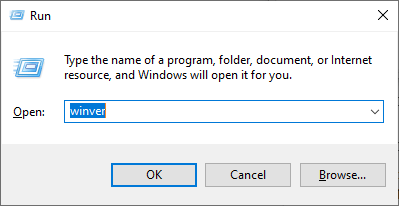
Step1: Run the Application Launcher by pressing Windows Key + R
![[Application Launcher]](https://cloudzy.com/wp-content/uploads/image1-4.png)
Step 2: Enter <winver> into the launch box
Step 3: Find your Windows version and Build number from the About Windows screen.
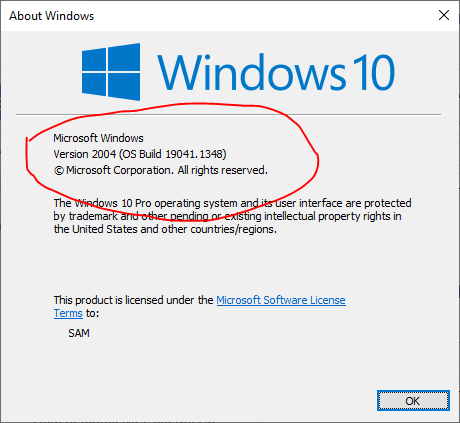
As you can see in the screenshot above, my Windows 10 meets both criteria (Version 2004, Build > 16215). If your Build number is less than 16215, you need to enable developer mode first.
How to Enable Developer Mode (for Windows 10 builds before 16215)
Developer Mode is a Windows feature that lets you install applications that aren’t Microsoft-approved or still in their beta stage. Enabling developer mode can also come in handy in other contexts, like when you’re trying to install some 3rd party application that’s not precisely Microsoft-approved. To enable Developer Mode, you have to follow these simple instructions:
Step 1: Open Settings
Step 2: Click on Updates and Security

Step 4: Click on the On/Off toggle button to turn Developer Mode on.
Step 5: On the “Use developer features” dialog box, click on Yes
You are now in developer mode, meaning you will have permission to install non-standard software, including WSL, which was presented in Beta mode until Build 16215. With all the requirements now in place, it’s time to enable the Windows Subsystem for Linux.
How to Enable WSL via the Control Panel
Before running any Linux distros on Windows 10, you first need to enable the Windows Subsystem for Linux (WSL); you can follow these steps to do so:
Step 1: Open the Control Panel
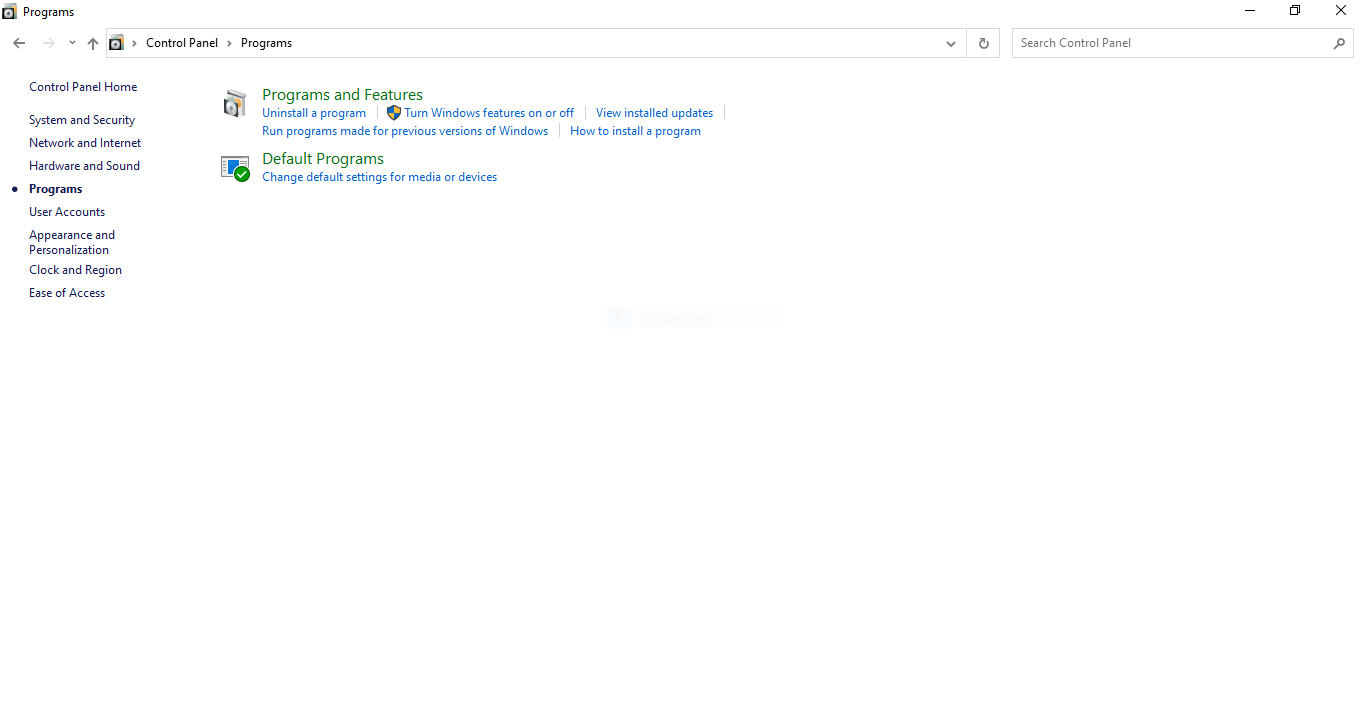
Step 2: Click on Programs
![[Windows 10 Control Panel Screen]](https://cloudzy.com/wp-content/uploads/image8-2.png)
Step 3: Click on Turn Windows Features on or off
Step 4: Find and select the Windows Subsystem for Linux box.
![[List of Windows Features to turn on or off]](https://cloudzy.com/wp-content/uploads/image2-5.png)
Step 5: Check the OK button
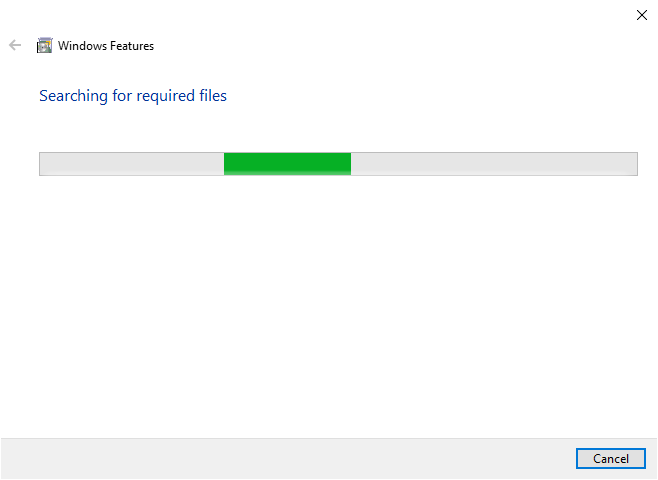
Step 6: Wait for the Installation Wizard to finish configuring your Windows.
Step 7: Next, click on Restart now in the next screen

Once your Windows boots back up, WSL is enabled and ready for use. By default, the Windows Subsystem for Linux runs an Ubuntu terminal. If you need another distro, you can download it from the Microsoft Store and install it using these steps (or you can use the PowerShell method):
- Open Microsoft Store
- Search for Linux distros (Ubuntu, Debian, Kali Linux, etc.)
- Select the distros you want
- Click on the Get or Install button
- Click on the Launch button
- Create a username for your distros and press Enter
- Create a password for your distros and press Enter
- Repeat the password and press Enter to confirm
Now, your favorite distro will be up and running on WSL.
How to install WSL via PowerShell?
You can also use PowerShell to enable the Windows subsystem for Linux, especially if you enjoy using the command lines.
To Install the WSL using PowerShell, follow these steps:
- Open Start and search for PowerShell
- Right-click on the result and choose Run as administrator
- Type the following command to enable the Linux Subsystem and press Enter
Enable-WindowsOptionalFeature -Online -FeatureName Microsoft-Windows-Subsystem-Linux
- Open Start and Search for PowerShell
- Type Y and press Enter to confirm and restart your computer.
Your Windows 10 is now ready for you to download. To install the distros, follow these steps:
- Open Start and Search for PowerShell
- Right-click on the result and choose Run as administrator
- Type in the following command and press Enter; this command will select and the download folder
cd c:\PATH\TO\DESTINATION-FOLDER
Note: write the path, as the download file path, for example, c:\data
- Type in the following command to download Ubuntu and press Enter
Invoke-WebRequest -Uri https://wsldownload.azureedge.net/Ubuntu_1604.2019.523.0_x64.appx -OutFile Ubuntu.appx -UseBasicParsing
Note: this command will download Ubuntu 16.04. To download the distros you want, simply type in the name and version you want.
- Type dir and press Enter to view the actual name of the installer
- Type the following command and press Enter to install the distros. In the APP-NAME section, type in the distro’s name
Add-AppxPackage .\APP-NAME.appx
- Open Start
- Search for the distros and click the top result to launch the experience
- Create a username for your distros and press Enter
- Create a password for your distros and press Enter
- Repeat the password and press Enter to confirm
A Better Solution?
If you’re installing WSL not because you’re getting the error (“the windows subsystem for Linux optional component is not enabled”) but because you want to use Linux, then I think I can show you a better solution.
As I said at the beginning of this article, migrating from Windows to Linux is not exactly easy for most users. Saying goodbye to a familiar OS and entering the alien world of Linux is not an inviting prospect. So, most starting developers or web admins tend to either dual-boot their computer, which will put a lot of strain on your hardware and risk breaking everything, or use a VM. Virtual Machines have a very high overhead, however, and running two full operating systems at the same time (which is what running a VM does) will mean a considerable drop in performance for both. So, unless you have a super-expensive gaming rig at home, you need to find a better alternative.
That’s usually the part where users turn to the Windows Subsystem for Linux, which, as I explained, is like a halfway measure that lets you use only some of the commands and applications. Is it the best option if you don’t want to migrate, dual-boot, or use VMs? Not really.

Linux Hosting Simplified
Want a better way to host your websites and web apps? Developing something new? Simply don’t like Windows? That’s why we have Linux VPS.
Get your Linux VPS
I recommend getting a Linux VPS plan and using it as a remote computer. Our Linux VPS offerings are distro-optimized hosting solutions featuring top-tier hardware, so you won’t have to worry about overhead at all. We also offer our VPS plans in more than 14 locations worldwide, so you’ll be able to set up a low-latency connection to your server wherever you are.