Get the fix to the 0xc0000098: The Windows Boot Configuration Data file does not contain a valid OS entry boot error message affecting Windows Vista, Windows 7, Windows 8, Windows 8.1 and Windows 10.
About the “0xc0000098” error
The following information on this error has been compiled by NeoSmart Technologies, based on the information gathered and reported by our global network of engineers, developers, and technicians or partner organizations.
Description and Symptoms
The error messages, alerts, warnings, and symptoms below are tied to this error.
Symptom 1: 0xc0000098 error screen on startup
As a part of the system startup procedure, the BOOTMGR bootloader introduced in Windows Vista and subsequently used in Windows 7, Windows 8(.1), and Windows 10 uses a database of entries and configuration options known as the BCD1, which acts as a global store for all boot-related options and settings on newer Windows PCs. However, if the BCD file has no operating system entries, then the following error message will appear:
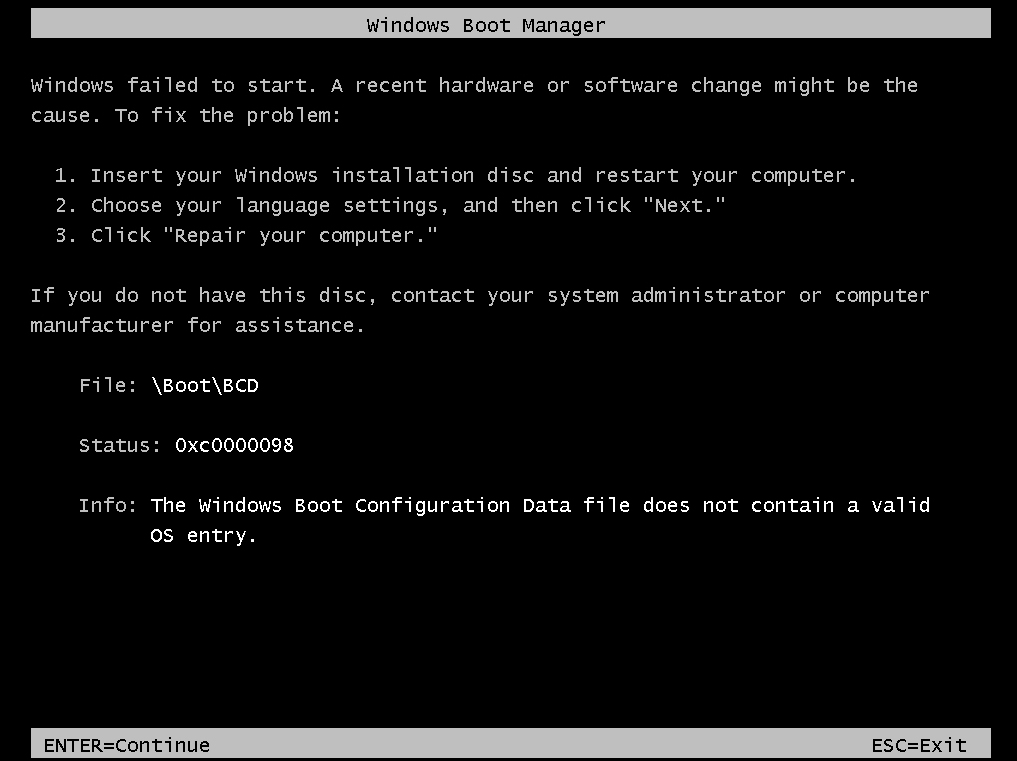
Windows failed to start. A recent hardware or software change might be the
cause. To fix the problem:

  1. Insert your Windows installation disc and restart your computer.
  2. Choose your language settings, and then click "Next."
  3. Click "Repair your computer."

If you do not have this disc, contact your system administrator or computer
manufacturer for assistance.

  File: \Boot\BCD

  Status: 0xc0000098

  Info: The Windows Boot Configuration Data file does not contain a valid
        OS entry.
On newer Windows systems, the error screen looks a little different:

Recovery

Your PC/Device needs to be repaired

The Boot Configuration Data file doesn't contain valid information for an operating system.

File: \Boot\BCD
Error code: 0xc0000098

You'll need to use recovery tools. If you don't have any installation media(like a disc or USB device), contact your PC administrator or PC/Device manufacturer.
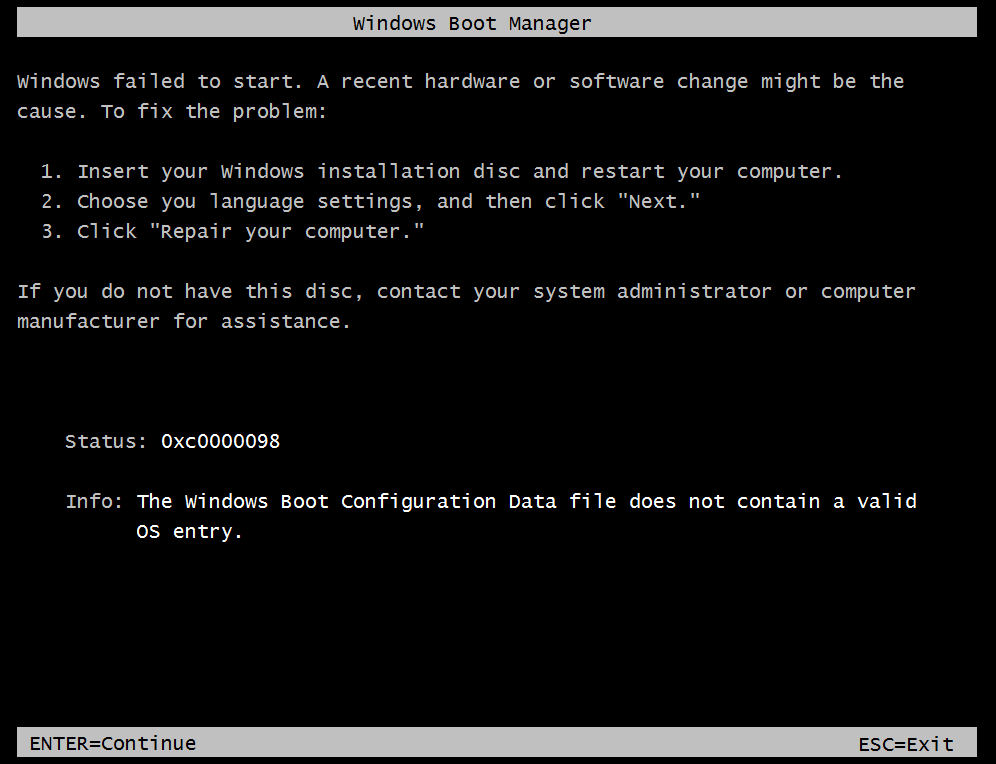
A device driver that’s incompatible with your Windows system can cause this error too. In this kind of example, the error text can mention a specific file at the File row:
Windows failed to start. A recent hardware or software change might be the
cause. To fix the problem:

  1. Insert your Windows installation disc and restart your computer.
  2. Choose your language settings, and then click "Next."
  3. Click "Repair your computer."

If you do not have this disc, contact your system administrator or computer
manufacturer for assistance.

  File: \Windows\System32\Drivers\aswVmm.sys

  Status: 0xc0000098

  Info: Windows failed to load because a critical system driver
        is missing, or corrupt.
Causes of this Error
This error has been known to occur as a result of one or more of the following:
Cause 1: BCD has no OS entries
One of the most common causes of this error is the BCD that has no entries in it. That could happen because of disk write errors, power outages, boot sector viruses, or errors made while configuring the BCD manually.
Cause 2: An incompatible hard drive driver is installed
Another possible cause of this error is a device driver that is incompatible with the current hard drive. That could occur after a system update, or a service pack installation.
Fixing “0xc0000098” on Windows
Windows Setup CD/DVD Required!
Some of the solutions below require the use of the Microsoft Windows setup CD or DVD. If your PC did not come with a Windows installation disc or if you no longer have your Windows setup media, you can use Easy Recovery Essentials for Windows instead. EasyRE will automatically find and fix many problems, and can also be used to solve this problem with the directions below.
Fix #1: Rebuild BCD via Easy Recovery Essentials
Easy Recovery Essentials’ one-click automated system repair feature incorporates full repair and reconstruction of the BCD to resolve the “0xc0000098” error, even in cases where Windows won’t boot as a result of the error.
Easy Recovery Essentials is guaranteed to fix the “0xc0000098” error automatically using its built-in Automated Repair option. EasyRE is currently available for Windows XP, Vista, 7, 8, Windows 10, and Windows 11 and can be downloaded and created on any PC.
- Download Easy Recovery Essentials. Make sure to note your Windows version (XP, Vista, 7, 8, 10, or Windows 11) before you download EasyRE. This guide can help you identify what version of Windows you have installed.
- Burn the image. Follow these instructions on how to burn the bootable ISO image very carefully, as making a bootable CD can be tricky! Alternatively, these instructions explain how to create a bootable EasyRE recovery USB stick/drive.
- Boot up your PC from the Easy Recovery Essentials CD or USB you created.
- Once EasyRE is running, choose the “Automated Repair” option and click Continue.

Choose “Automated Repair” in Easy Recovery Essentials
- After EasyRE scans your computer’s drives, identify and select the drive letter for your Windows installation from the list, and then click on the Automated Repair button to begin.
Choose the drive associated with the Windows installation you’re trying to repair.
- Easy Recovery Essentials will start analyzing the selected drive for problems. EasyRE will test for and attempt to automatically correct errors with the disk, partition, bootsector, filesystem, bootloader, and registry. No intervention is required, as EasyRE’s repair is fully automated:
Easy Recovery Essentials searches for errors and makes corrections to the selected Windows installation.
- Once the process is complete, EasyRE will report its findings. Click on the Restart button to reboot your PC and test the changes.
- The “0xc0000098” error should now be fixed as your PC begins to load:


You can download Easy Recovery Essentials from here.
Fix #2: Run Startup Repair
On Windows Vista, Windows 7, Windows 8 and Windows 8.1, Startup Repair can be used to scan the system for damaged or missing system files to replace the BCD file if it has no entries.
Windows Setup CD/DVD Required!
Some of the solutions below require the use of the Microsoft Windows setup CD or DVD. If your PC did not come with a Windows installation disc or if you no longer have your Windows setup media, you can use Easy Recovery Essentials for Windows instead. EasyRE will automatically find and fix many problems, and can also be used to solve this problem with the directions below.
Startup Repair is an automated diagnosis and repair tool that is available from the Windows setup disc and can be used to find and repair some common problems. More information about how Startup Repair operates and what it does can be found in our knowledgebase. The following steps will initiate Startup Repair from the Windows setup disc:
Unable to boot into the Windows setup CD?
See our guide on setting up a PC to boot from the CD or DVD for troubleshooting and more detailed instructions.
- Insert your Windows installation DVD into your PC’s CD-ROM drive,
- Fully power down your PC, and make sure it has fully shut off,
- Power up your PC,
- Press any key when you see “Press any key to boot from CD or DVD..”
- Click the link titled “Repair your computer” in the bottom-lefthand corner, after first selecting your language and keyboard options.

- Wait for Startup Repair to scan your PC for Windows installations, then select your install from the list it shows:

- Choose “Startup Repair” from the list of available recovery options to begin:

- Startup Repair will begin scanning your installation for known issues and will attempt a repair, if possible.


Here is an example of what the PC’s startup repair should look like once the BCD file is properly restored:

Empty BCD file restored by Startup Repair
Fix #3: Rebuild the BCD manually
Since the boot error is often caused by an empty BCD file, rebuilding it is often a good solution.
Here are the steps to rebuild the BCD:
- Boot from the Windows install disc
- Click on Repair your computer after selecting proper language, time and keyboard input.
- Select the Windows installation drive, which is usually
C:\, and click Next - Choose Command Prompt when the System Recovery Options box appears
- Write the following command and press Enter afterwards:
bootrec /rebuildbcd
- If the program finds a Windows installation and asks whether it should add it to the boot list, press Y
Here is an example screenshot of what the PC’s console output should look like once Bootrec is done rebuilding the BCD.

Bootrec utility results screen
Fix #4: Run sfc utility
On Windows Vista and Windows 7, it is possible to use the built-in Windows SFC(system file checker) tool to automatically scan a computer’s system files and repair them if necessary.
Here are the steps to run SFC:
- Boot from your Windows install disc
- Click on Repair your computer after selecting proper language, time and keyboard input.
- Select the Windows installation drive, which is usually
C:\, and click Next - Choose Command Prompt when the System Recovery Options box appears
- Write the following command and press Enter afterwards:
sfc /scannow /offbootdir=D:\ /offwindir=D:\Windows\
Replace D: with the letter of the driver where Windows is installed, and D:\Windows with the Windows folder location.
Here is an example of what the PC’s console output should look like once the sfc.exe scan is complete and missing files are successfully restored:

System files restored by the SFC utility
Fix #5: Check your disk with CHKDSK utility
If the hard drive has its file integrity compromised, it is possible to use built-in Windows CHKDSK utility to scan the disk and fix the file system errors.
Here are the steps to run CHKDSK:
- Boot from your Windows install disc
- Click on Repair your computer after selecting proper language, time and keyboard input.
- Select the Windows installation drive, which is usually
C:\, and click Next - Choose Command Prompt when the System Recovery Options box appears
- Write the following command and press Enter afterwards:
chkdsk C: /f
Replace C: with the letter of the driver where Windows is installed.
Here is an example of what the PC’s console output should look like once the chkdsk.exe is complete:

Chkdsk utility results screen
More Information
Linked Entries
- bootcfg
- bootrec
- chkdsk
- sfc
- Fix MBR
Support Links
- Easy Recovery Essentials for Windows – our repair and recovery disk.
It’s an easy-to-use and automated diagnostics disk. It’s available for Windows 8, Windows 7 and Windows Vista. It’s also available for Windows XP and Windows Server.
Read more at Windows Recovery Disks.
- The NeoSmart Support Forums, member-to-member technical support and troubleshooting.
- Get a discounted price on replacement setup and installation discs: Windows Vista, Windows 7, Windows 8, Windows 10.
Applicable Systems
This Windows-related knowledgebase article applies to the following operating systems:
- Windows Vista (all editions)
- Windows 7 (all editions)
- Windows 8 (all editions)
- Windows 8.1 (all editions)
- Windows 10 (all editions)
Propose an edit
-
BCD is an abbreviation of Boot Configuration Database. ↩
В статье описывается общий случай возникновения ошибок типа «file: \boot\bcd» и «The Windows Boot Configuration Data file is missing required information» или «The Windows Boot Configuration Data file does not contain a valid OS entry»с номером ошибки «status 0xC00000XX», из-за чего Windows 7/8/10 просто не загружается. Рассмотрим общие варианты как выявить причину незагрузки ОС или невозможности её установить, и как положение исправить.

ТЕОРИЯ
Для того, чтобы понять причину появления ошибок в загрузочном процессе системы, выдаваемых на экран статусом 0xC0000XXX, нужно уяснить общий процесс загрузки операционных систем Windows версий от 7 до 10. Итак, рабочий экран системы появится, если в следующей цепочке не будет никаких ошибок:

Дословно же ошибка Windows Boot Configuration Data file is missing required information означает, что «в файле Windows BCD не хватает для корректной загрузки информации». И если продолжить блоковую интерпретацию принципа загрузки Windows в современных её версиях, то оно уже примет такой вид:

Причины ошибки Windows Boot Configuration Data file is missing required information
Статус возвращаемого состояния (кода ошибки) здесь в принципе уже неважен — система пытается дать понять, какая часть информации потеряна. Смысла в этом для пользователя информация много не несёт. Но уяснить нужно следующее — причиной появления ошибки на 99% вероятности является то, что в загрузочной записи жёсткого диска потеряны сектора. И загрузчик не способен считать оттуда информацию, либо необходимые для и во время установки системы файлы не могут туда быть корректно скопированы и там разместиться. Если плохие секторы жёсткого диска не вызваны физическими повреждениями, а имеют «программную» природу, то всё абсолютно поправимо.
Приступаем к работе
Предлагаю исправить ошибку, разбив работу на несколько этапов:
- «чиним» жёсткий диск, избавляя его от бэд-секторов командой chkdsk.exe
- перезаписываем BCD с помощью Bootrec.exe
- перезапишем базу BCD
- проверяем целостность файлов Windows sfc /scannow
Во первых, проверьте жёсткий диск на наличие ошибок. Утилит для затирания бэд-секторов или записи нулей, немало. Одна из них Check Disk или chkdsk.exe давно сидит в Windows, но без интерфейса Windows она пока недосягаема. Так что нам придётся воспользоваться либо загрузочным носителем (флешка или диск) с вашей версией операционной системы, либо живым LiveCD/DVD диском на примере Hiren’s BootCD, куда утилита входит в состав сборки. В любом случае эта программа самодостаточна, и потому её запуск решит большинство проблем с побитыми кластерами HDD. О её работе у меня написано много, но сейчас посмотрим процесс запуска ещё раз.
Где взять диск с Windows? Скачать утилиту для загрузки любой версии Windows бесплатно.
Для загрузочного диска (флешки) с Windows
Выставите загрузку с диска (флешки) через BIOS и загрузитесь с нужного носителя. Если BIOS не поддерживает загрузку с USB, воспользуйтесь возможностями расширить меню BIOS и принудительно заставить загрузиться с устройства с USB интерфейсом. Читайте статью Как заставить BIOS загрузиться с флешки.
Пропустим установку Windows, добравшись до Восстановления системы:

Пусть средство восстановления найдёт операционную систему

на этом фото установщик нашёл систему на диске D
Не важно, каким путём вы пойдёте: вам нужна командная строка окна Параметры восстановления системы:

В командной строке последовательно записываем команды (первая команда буква диска — C или D):
С:
chkdsk /r
где chkdsk — утилита, С: — диск с системой, /r — флаг команде на ремонт секторов:

Будем надеяться, утилита справится с вашими проблемами.
Однако помните.
Если на вашем диске было или сейчас находятся несколько операционных систем на разных локальных томах и разделах, советую провести операцию проверки и восстановления ВСЕХ ДИСКОВ. Загрузочные файлы системы могут находится именно там.
Для загрузочного диска (флешки) с Hiren’s BootCD
Всё также, выставляем загрузку с диска, выберем в меню MiniXP, дождёмся запуска системы и найдём утилиту прямо в меню Windows XP PE:

Запускаем и ищем наш диск:

и здесь тоже система находится на диске D
Windows Boot Configuration Data file is missing required information — перезапишем BCD
Предположим, что Check Disk сделала своё дело и привела диск в порядок. Однако побитые файлы она восстанавливать не умеет. Теоретически одна из кнопок окна в предыдущем абзаце смогла бы помочь справиться с ошибками загрузки Windows. Встроенный инструмент, запускаемый по кнопке Восстановление системы с последующей перезагрузкой последовательно запускает большое количество ремонтных утилит (в том числе и Bootrec.exe). Однако, если перезагрузка системы ни к чему не привела, файлы с загрузочной информацией придётся перекомпоновать вручную.
И снова напоминаю — интересующий нас файл \boot\bcd может находиться НЕ НА ДИСКЕ С: !
Для перезаписи мы будем пользоваться теми же дисками. Наша задача — перезаписать указанный выше файл. Bootrec.exe иногда не может этого сделать автоматически. Но существуют три готовые и применимые на большинстве машин команды, вводимые в консоли команд загрузочного и Live дисков. Введите их последовательно в консоли, нажимая после каждой клавишу ввода:
Bcdedit /export C:\BCD_Backup
ren c:\boot\bcd bcd.old
Bootrec /rebuildbcd
С их помощью помощью на диске С: создаётся база замены файла, старый файл переименовывается и даётся команда на запись на диске С: нового файла \boot\bcd.
Операция элементарна, если система одна, и файл находится на том диске. Однако если система была мультизагрузочной, вам нужно выцепить тот раздел, который отвечает за загрузку. Ну, не десятки же их, в конце концов… Так что, если описание проблемы попадает под вашу ситуацию, вам лучше убедиться, что буква диска (в данном случае С:) указывается в команде правильно. Иными словами, нужно найти активный диск.
А как узнать какой диск активный?
Сначала нам нужен список всех разделов на диске (я покажу, как это сделать на другом HDD). Это может показать команда diskpart. Так и делаем. Всё в той же командной консоли:

…запускаем diskpart . Теперь поочерёдно вводим команды на «показать все диски», «выбрать нужный диск», «показать на нём все разделы», «выбрать какой-то из разделов» и «рассказать о разделе». В консоли команд эти команды выглядят так (Х — порядковый номер диска и раздела); после каждой из команд — ввод клавишей Enter:
diskpart
list disk
select disk Х
list partition
select partition Х
detail partition
У меня команды выглядят так:

А вот информацию, которую мы ищем я пометил красным. Повторите команды, пока не вычлените тот единственный диск, который утилита в консоли пометит ответом Активный: Да. Смотрим, что у меня дальше:

То есть именно с диска С объёмом 100 Гб ОС Windows 7/8/10 и загружается (точнее, пока не загружается). Вам остаётся вписать правильную букву диска в командах, что указаны выше, и необходимый файл будет воссоздан известными вам уже командами:
Bcdedit /export C:\BCD_Backup

 ren Partition:\boot\bcd bcd.old

Bootrec /rebuildbcd
Если ничего не помогло… Ошибка Windows Boot Configuration Data file is missing required information продолжает мешать загрузке
Если вышеприведённые манипуляции не дали положительного результата — ничего страшного. Вы на верном пути — просто системный сбой вызвал повреждение куда большего количества файлов. Вам придётся переформировать уже хранилище BCD. Никаких дополнительных инструментов не понадобится. Однако Live CD нам уже не в помощь. Используем знакомую вам консоль, но при вводе команд следите за моими пояснениями. Итак…
- ставим загрузку с диска
- следуем вышеописанному принципу, пока не найдём консоль:
-
cd /d X:
где Х — буква тома, куда Windows установлена, и где располагаются её системные файлы. И, опять же, это НЕ ОБЯЗАТЕЛЬНО Активный диск! Запутались? Ничего трудного, просто повторите все команды с утилитой diskpart и обратите внимание на информацию по разделам, но уже в другом столбце:

Столбец Сведения возвращает флаг Системный. Это и есть системный раздел диска — Windows лежит там. Часто буква С диска совпадает с информацией о том, что диск является системным и активным.
Но если что-то у вас не получилось, и Windows не загружаясь, возвращает ошибку Windows Boot Configuration Data file is missing required information, вам просто нужно обратить внимание на буквы разделов, в которых вы проводите операции.
С помощью следующих команд скопируем файл и импортируем его в активный раздел жёсткого диска:
bcdedit /createstore bcd
bcdedit /import bcd
Если первая из команд выдаст ошибку, мол, есть такой файл, удалите его не сомневаясь командой
del bcd
Создаём диспетчер загрузки для файла командой:
bcdedit /create {bootmgr}
Далее указываем активный раздел и время на выбор пользователем записи в списке загрузочного меню (у меня 15 сек.):
bcdedit /set {bootmgr} device boot
bcdedit /timeout 15
Создаём элемент списка загрузки систем (в кавычках укажите любое имя системы, например, WINDOWS):
bcdedit /create /d "имя_системы"/application osloader
По нажатии клавиши ввода утилита bcdedit вернёт уникальный идентификатор GUID, который нужно потом вставить в фигурные скобки в следующей команде
bcdedit /default {GUID}
Посмотрите:

Осталось немного — присвоить параметры конфигурации файла, которые у всех Windows одинаковые. Их можно легко скачать в сети, но я сделал это за вас (следите за буквой диска — у вас может быть свой; у меня — С:):
bcdedit/set {default} device partition=c:
bcdedit/set {default} path\windows\system32\boot\winload.exe
bcdedit/set {default} osdevice partition=c:
bcdedit/set {default} systemroot\Windows
bcdedit/set {default} detecthal yes

bcdedit/displayorder {default}/addlast
Последняя из команд заставляет Windows корректно заметить вход для загрузки. Ошибки Windows Boot Configuration Data file is missing required information больше не будет.
Всем успехов
- Remove From My Forums
-
Question
-
Hello,
investigate the problem and I too have read. but did not find a solution
I set out from your article. i want to do the vista deployment.
i am using vmware workstation. ( network settings — Bridged )
installed server 2008 + sp2 / sql server 2008 / sccm 2007 sp1 / DHCP / DNS
1. installed WDS and configured
2. added pxe service point in sccm console
3. Configured pxe WDS filter and configmgr integration
4. dhcp and sccm same computer.
5. advertised task sequence
6. start client computer
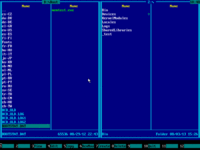
7. client computer error: PXE-E55 Proxy DHCP Service did not reply to request on port 4011my configuration like the following
http://img9.imageshack.us/img9/3860/70340499.jpg
http://img9.imageshack.us/img9/6660/39218651.jpg
http://img9.imageshack.us/img9/1262/51573223.jpg
http://img9.imageshack.us/img9/9086/34266215.jpg
http://img33.imageshack.us/img33/3459/43578278.jpg
http://img33.imageshack.us/img33/4668/81341392.jpgWhere is my fault? i very wonder..
thanks
-
Edited by
Monday, August 17, 2009 7:55 PM
-
Edited by
Answers
-
hi to get rid of abortpxe.com you should right click the computer in the deployment Collection and choose ‘clear last PXE boot’
if that doesnt help then read this http://www.windows-noob.com/forums/index.php?/topic/669-how-to-get-rid-of-abortpxe-com/
and please consider raising a new post for each problem that you encounter that way the thread doesn’t get too confusing
cheers
niall
my SCCM step by step Guides >
http://www.windows-noob.com/forums/index.php?showtopic=1064-
Marked as answer by
AliKemal
Wednesday, August 19, 2009 11:03 AM
-
Marked as answer by
-
PXE-E55 ProxyDHCP: No reply to request on port 4011
try this, create the X86 Windows PE boot environment for SCCM boot image and create a new DP and update the DP,
in other words, make sure your server has BOTH X64 and X86 boot images even if you are only deploying X64 computers…
via > http://www.windows-noob.com/forums/index.php?/topic/546-how-can-i-troubleshoot-windows-pe-booting-in-sccm/page__view__findpost__p__1354
my SCCM step by step Guides > http://www.windows-noob.com/forums/index.php?showtopic=1064
-
Marked as answer by
AliKemal
Monday, August 17, 2009 7:54 PM
-
Marked as answer by
-
Before the client gets into the Task Sequence it already boots into WinPE. At this point it picks its own bootimage based on its architecture. So if the architecture of your client is x64 and you use x86 in your Task Sequence, then you need to have them both available on your DP.
My Blog: http://www.petervanderwoude.nl/
-
Marked as answer by
AliKemal
Wednesday, August 19, 2009 11:03 AM
-
Marked as answer by

All the latest versions of windows operating system comes with boot configuration options
which contains operating system entries. If the operating system entries goes missing for some reason then this error will appear.
‘‘ The Windows Boot Configuration data file does not contain a valid OS entry »
What happens during this error is that it prevents your computer from booting. Most often this issue is caused due to the corruption of BCD registry. Although this error looks complex, it comes with several solutions in which one of them might surely work for you.
In this article, I will be covering about Fixing The Windows Boot Configuration Data File does not Contain a Valid OS Entry. From this post, you will learn how to eliminate this error from the scratch.
Let’s get started,
1. Perform Startup Repair
Windows operating system comes with a recovery tool known as the Startup repair which repairs corrupted system files. Meaning if the BCD files face issues with OS entries, startup repair essentially replaces files with new ones.
To perform Startup repair,
- Insert the installation media
- Restart the PC
- Boot from the installation media
- Choose your language
- Select troubleshoot
- Select Automatic Repair
This process will repair your operating system.
2. Run SFC Scan
Another method to repair the system files is using SFC scan. System File Checker (SFC) scans the computer for corrupted system files. And if possible it repairs them too.
To run SFC Scan,
- Insert the installation media
- Restart the PC
- Boot from the installation media
- Choose your language
- Press Shift + F10
- Type and press Enter after the command
» SFC/Scannow »
3. Run CHKDSK
Sometimes the hard disk drive on which the operating system is installed could face problems such as file system errors and bad sectors. Running Check Disk Utility (CHKDSK) not only fixes disk errors, it also repairs BCD files. Hence, in order to fix this you need to run CHKDSK.
To run CHKDSK,
- Insert the installation media
- Restart the PC
- Boot from the installation media
- Choose your language
- Press Shift + F10
- Type and press Enter after the command
CHKDSK x : / f / r (x stands for the respective drive)
4. Rebuild BCD
As you all know the boot configuration data file does not contain a valid OS entry is as a result of corrupted BCD files. Therefore, to fix this problem you need to rebuild BCD.
To Rebuild BCD,
- Insert the installation media
- Restart the PC
- Boot from the installation media
- Choose your language
- Press Shift + F10
- Type the commands (Press Enter after each command)
bootrec.exe /Rebuildbcd
bootrec.exe /Fixmbr
bootrec.exe /Fixboot
Once typed restart the PC.
5. Restore PC
If the above mentioned solutions does not work, as a last resort you can try restoring the PC. Restoring the PC reverts your computer to a working state so that all of the computer problems including the boot configuration data file does not contain a valid OS entry is fixed.
To Restore System,
- Insert the installation media
- Restart the PC
- Boot from the installation media
- Choose your language
- Select troubleshoot
- Select » System Restore »
Boot Boot Error 0xC0000098 (Windows Boot Configuration Data file does not contain a valid OS entry) is caused by incomplete or corrupt configuration in the BCD registry hive.
Learn how to fix error 0xC0000098 (status 0xC0000098) by recreating BCD from scratch, using Emergency Boot Kit.
| Contents |
|
1. Symptoms of the problem
When computer is powered up, an error message «Status: 0xc0000098
Info:
The Windows Boot Configuration Data file does not contain a valid OS entry» appears:
2. Normal boot sequence
The rest of this article refers to Windows 7, but all information below applies to
Windows 10 and Windows 11 as well.
Normally Windows 7 boots as shown below:

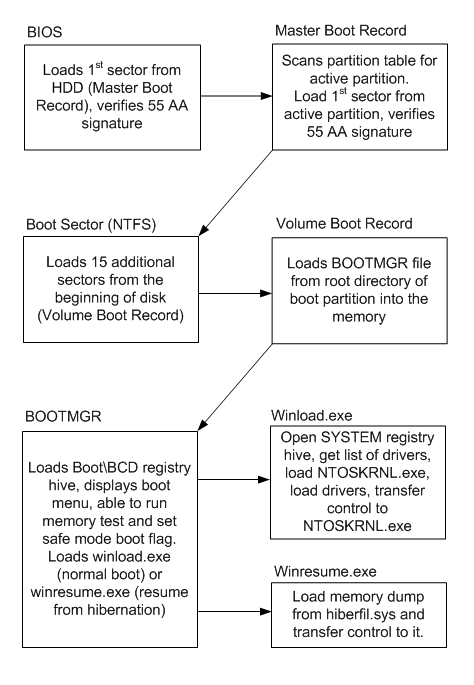
- BIOS loads 1st sector from HDD (Master Boot Record), verifies 55 AA signature
and transfers control to Master Boot Record. - Master Boot Record scans partition table for active partition, then it loads 1st sector
from active partition, verifies 55 AA signature, and transfers control to Boot Sector. - Boot Sector loads 15 additional sectors from the beginning of disk (Volume Boot Record)
and transfers control to first additional sector of VBR. - Volume Boot Record loads BOOTMGR file from root directory of boot partition into
the memory and transfers control to it. - BOOTMGR loads Boot\BCD registry hive and displays boot menu. BOOTMGR is able to run memory test
and set safe mode boot flag per explicit user request. But normally, it loads winload.exe
when computer boots normally (cold startup) or winresume.exe (when computer resumes from
hibernation). - Winload.exe opens SYSTEM registry hive, gets list of drivers, loads NTOSKRNL.exe, loads
drivers (*.SYS files) and transfers control to NTOSKRNL.exe. - Winresume.exe loads memory dump from hiberfil.sys and transfers control to it.
3. Defect in the boot sequence which leads to ‘status 0xC0000098’ boot error
Defect in the boot sequence which is a reason for ‘status 0xC0000098’ error
is shown below:

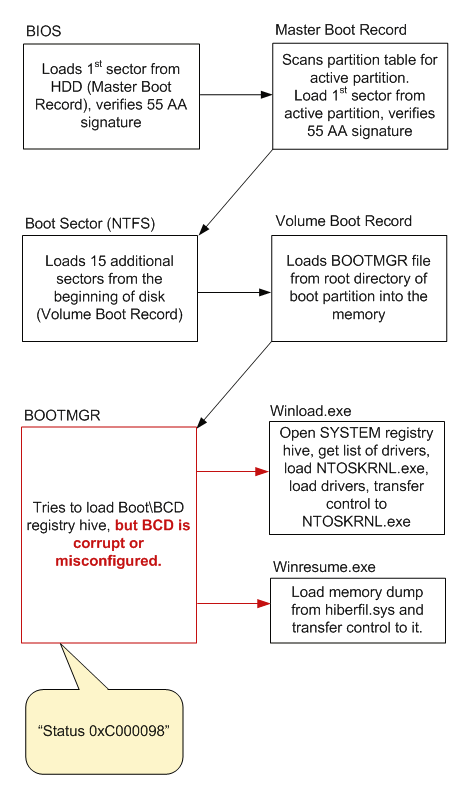
- BIOS loads 1st sector from HDD (Master Boot Record), verifies 55 AA signature
and transfers control to Master Boot Record. - Master Boot Record scans partition table for active partition. There is one
active partition, so Master Boot Record loads 1st sector from active partition (Boot Sector),
and transfers control to it. - Boot Sector loads 15 additional sectors from the beginning of disk (Volume Boot Record)
and transfers control to first additional sector of VBR. - Volume Boot Record loads BOOTMGR file from root directory of boot partition into
the memory and transfers control to it. - BOOTMGR tries to load Boot\BCD registry hive, but BCD is corrupt or misconfigured.
- The rest of usual boot events do not happen.
4. How to fix status 0xC0000098
1) Download Emergency Boot Kit and
deploy it to USB thumbdrive according to the instructions,
then set up your BIOS to boot from USB thumbdrive. You need full version of Emergency Boot Kit
to actually write changes to the disk, but it’s recommended to try demo version to make
sure there are no hardware incompatibilities.
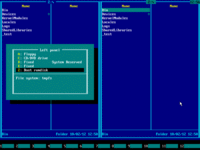
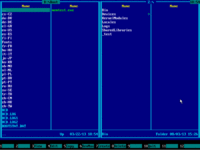
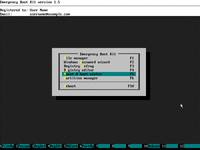
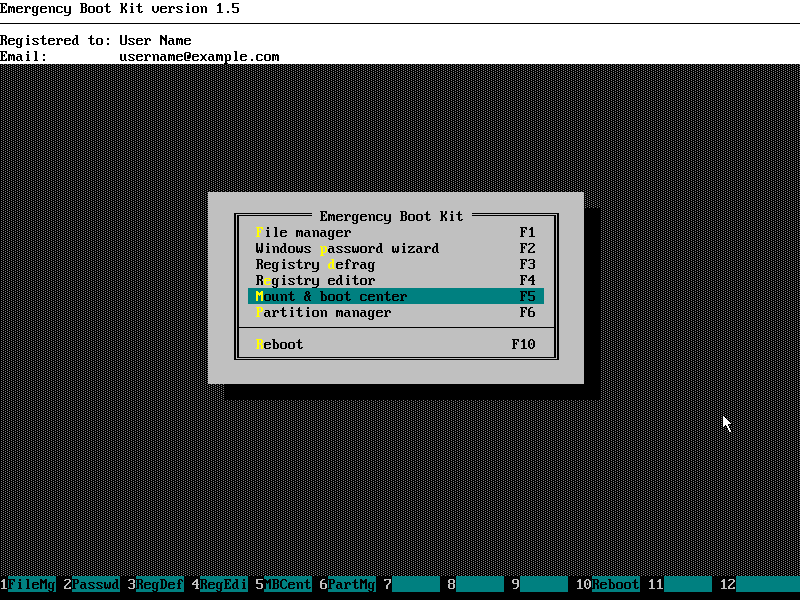
2) Boot into Emergency Boot Kit:
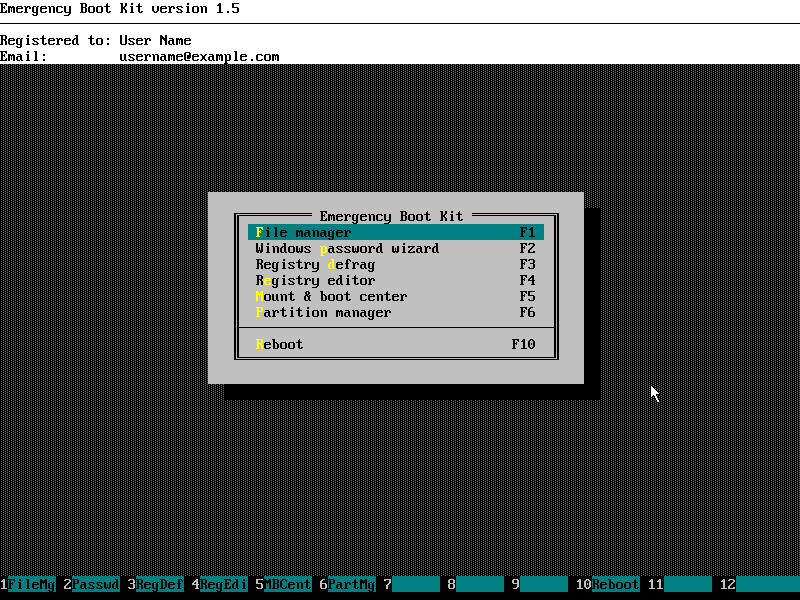
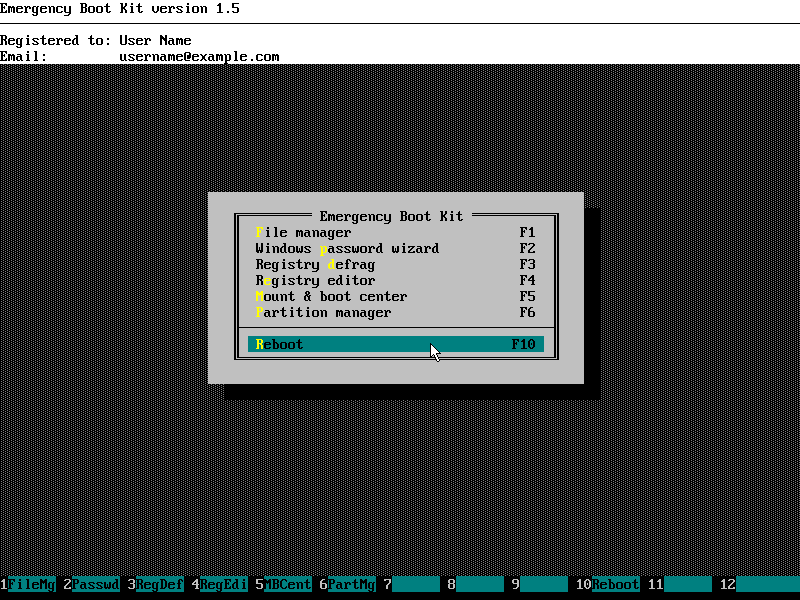
3) Run File Manager from the main menu:
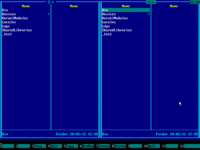

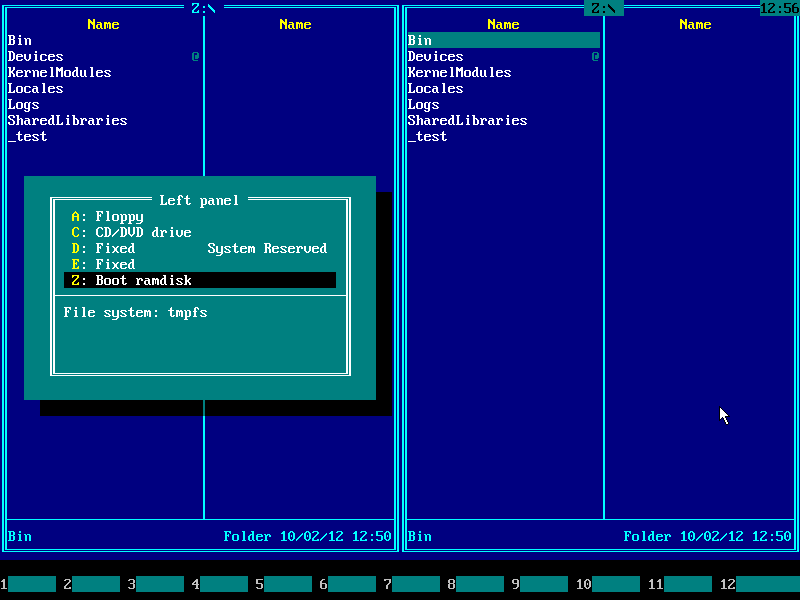
4) Press Alt+F1 and choose your boot partition from the menu. In Windows 7 and Windows 8 boot
partition has size about 100MB in size and «System Reserved» volume label. In Windows Vista
separate boot partition does not exist, computer boots from system disk where Windows OS
files are installed (use UP and DOWN arrow keys and ENTER to navigate the menu):
5) Now you need to enter either Boot folder (on BIOS-based computers)
or EFI\Microsoft\Boot (on UEFI-based computers). Only one of these
folders exists on any particular computer, so choose whatever exists.
Press TAB to switch input focus to the left panel, then navigate folders using arrow keys UP
and DOWN and ENTER. (This example shows entering Boot folder.)
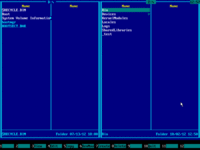
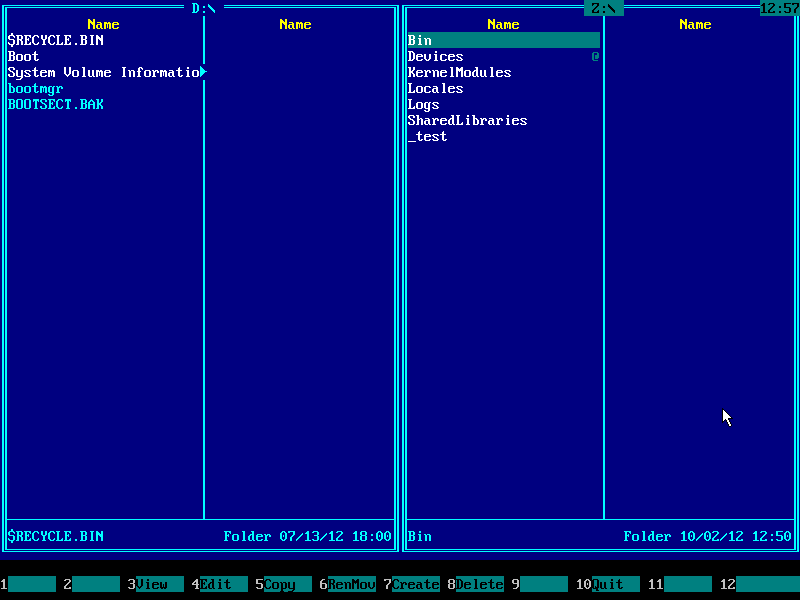
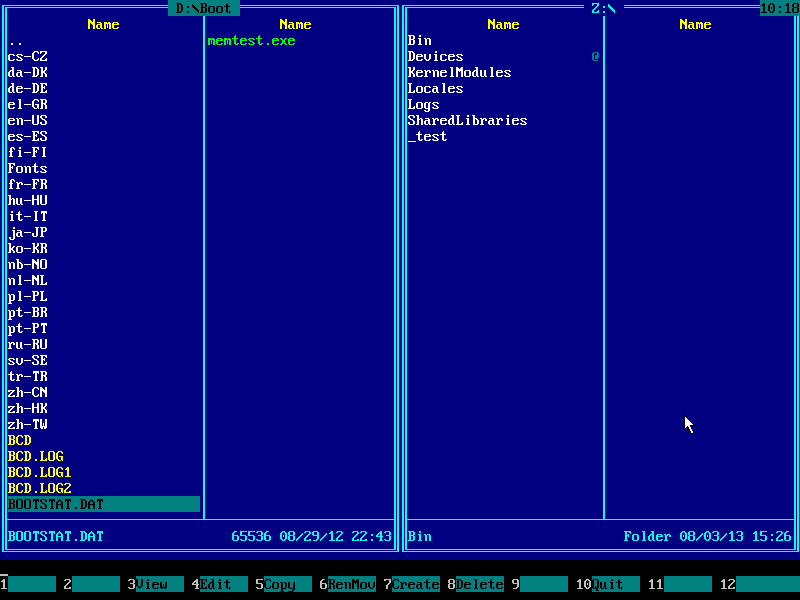
6) List of files should appear on the left panel. BCD file should be
in the list, BCD.LOG, BCD.LOG1 and
BCD.LOG2 may also appear in the list. Navigate to those files
using arrow keys, then select them INSERT key:

7) After selection:

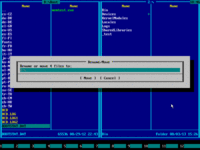
 Press F6. File rename dialog will pop up:
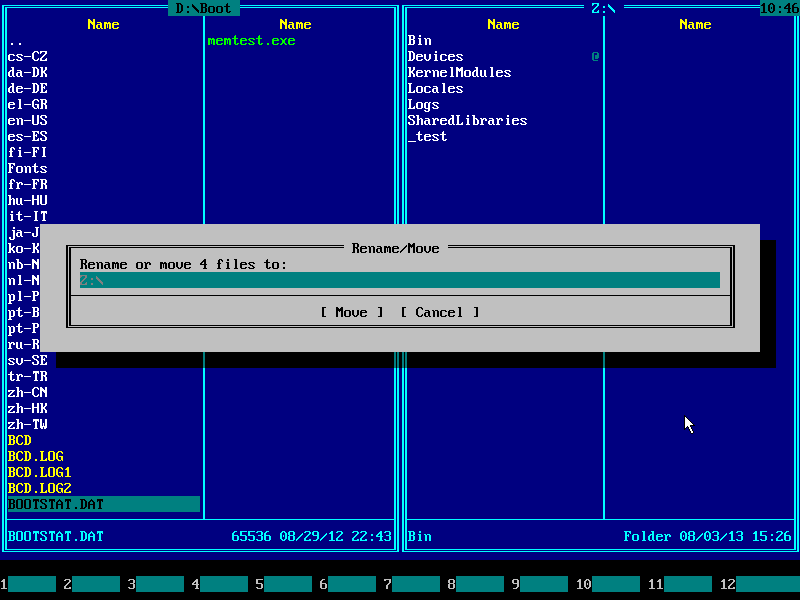
9) Type BCD_OLD.* on keyboard and press ENTER:


10) Make sure BCD files were renamed successfully to
BCD_OLD files, then press F10 and ENTER keys to exit
the Emergency Boot Kit File Manager:

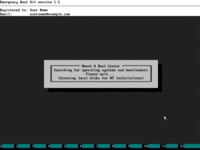
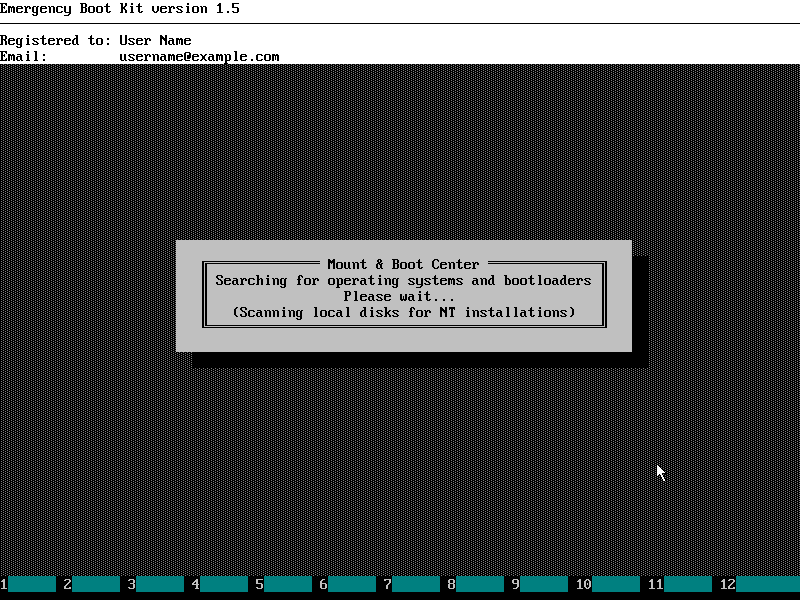
11) Choose Mount & Boot Center in the main menu:
12) Wait:
13) Enable checkbox (checkboxes) on the intersection of the bootloader and operating system
(operating systems) it should load:

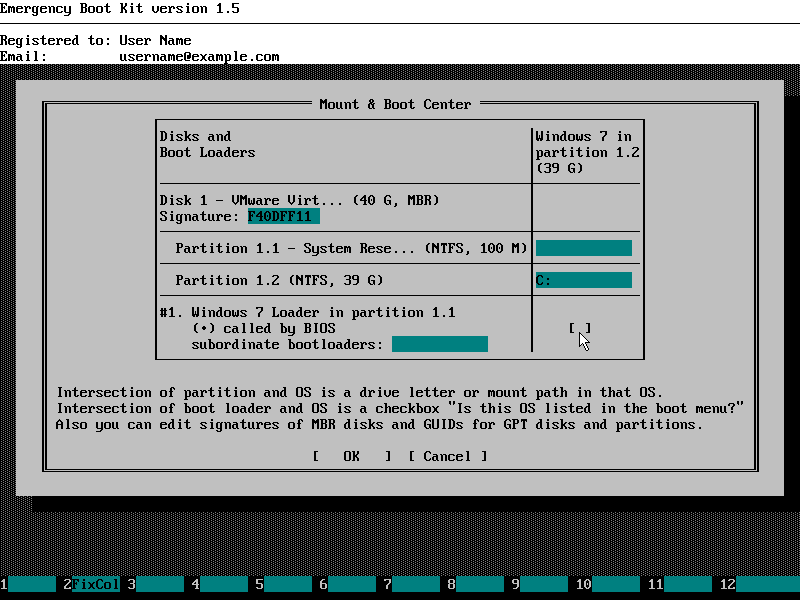
14) Mount & Boot Center should look like below. Press OK to commit changes
(BCD registry hive and corresponding log will be created from scratch at this point):

15) «Status 0xC0000098» boot problem should be fixed now. Choose ‘Reboot’ in the main menu of Emergency Boot Kit:

Please note: Because BCD (Boot Configuration Data) was recreated from scratch, you may need
to adjust boot timeout, menu order etc from within Windows when it boots successfully.