How to open terminal on macOS: 4 different ways
If you want to open Terminal on Mac then you should be aware that it can be done the same way as you open any other programs and in different ways. Below you can find the detailed list of how to open Terminal on your Mac computer.
1. By using Finder
The most direct way is to open Mac Terminal from a general list of programs. To do this, open Finder, select Applications and find the Utilities folder in the list of all programs that will open. Here you will find Terminal.app application. Double-click to open it.
2. By using the Spotlight search bar
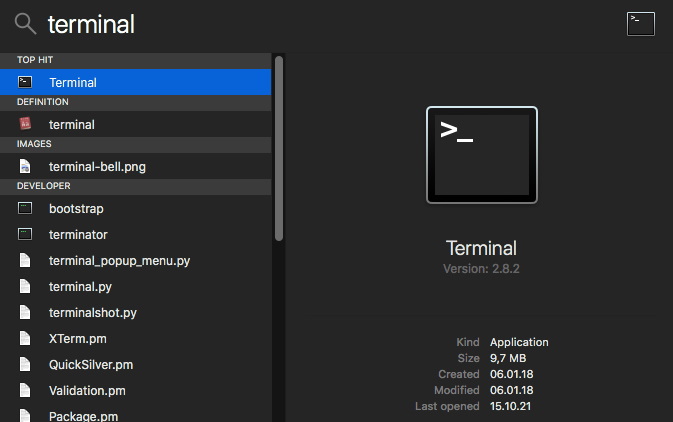
Launch Spotlight by holding down the Command + Space bar shortcut at the same time, and in the pop-up window, start typing the word «Terminal». You will see the application you need, just click on it to make Terminal open.
3. By using Launchpad
Open Launchpad from the Dock and go to the “Others” folder. Here you will find the Terminal.app. Click it to open.
4. By using Siri
Another easiest way to open Terminal on Mac is of course by using Siri. Select the Siri icon on the menu bar or open Siri from the Applications folder. Here you need just to say: “Open Terminal”. That’s it.

Terminal is an application that gives you access to the inner workings of a Mac through a command-line interface (CLI). Using this application gives you the ability to make any changes to the operating system that are not available from the graphical user interface (GUI). When launching the Terminal, you will open the Unix command-line environment (shell). Apple uses one of them in its system, called Bash. Using the Terminal is very simple. You enter a command in the command line and hit the Return enter key to execute it.
However, in order to use the Terminal, you need to understand its basic commands and functions, and, of course, how to open it on macOS. Also, keep in mind that the built-in Terminal on a Mac is not a panacea, and there are many alternatives, which will be discussed further and you can decide whether to use the built-in one or choose your best Terminal for Mac.
How to Open Terminal on macOS: Different Ways
To start getting to know the Terminal or just execute any commands, you need to open it. There are several ways to launch Mac Terminal.
Option 1. Open Terminal using Spotlight search
Launch Spotlight by clicking on the magnifying glass or by using the Ctrl + Space keyboard shortcut. In the Spotlight search bar, type the word Terminal and press Enter.
Option 2. Launch Terminal in Finder
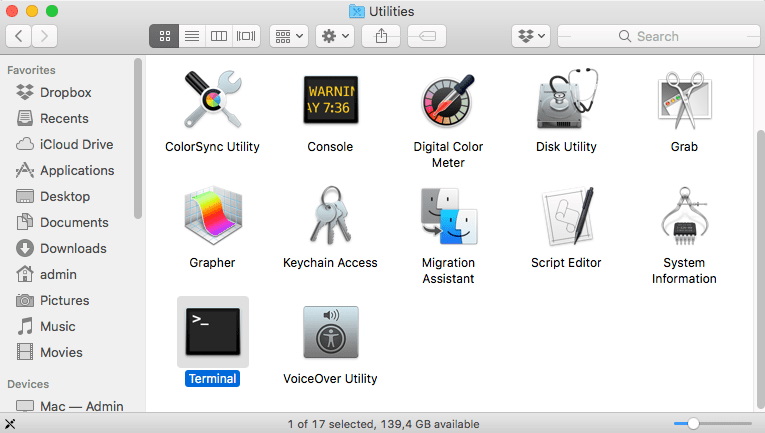
If the first way to launch the Terminal for some reason did not suit you, there is another way. Open Finder and select Applications – Utilities. Find Terminal among the Utilities and run it.
Option 3. Open Terminal using Launchpad
Find the Launchpad icon on the Dock station and open it. Go to the Others folder. Find the Terminal application and launch it.
Option 4. Open Terminal via Siri

You can also open Terminal by using voice command via Siri. To do this, click the Siri icon and say “Open Terminal”.
List of the Most Popular Mac Terminal Emulators
For your convenience, we have gathered a list of the top 9 Mac Terminal emulators with the pros and cons of each software.
1. Commander One
The first place on our list of the best Terminal for Mac emulators goes to Commander One. It is worth noting, that the app, first of all, is a convenient and super-fast file manager and also works as a Mac Terminal emulator, as it is. Commander One works perfectly with top FTP clients for Mac.
The great thing in Commander One is the fact that you can invoke Terminal with the help of hotkeys and execute commands without leaving the app’s interface. Besides that, Commander One offers a highly configurable dual-panel interface for the most convenient workflow with support for various features.
Pros:
- Support for FTP/SFTP/FTPS
- Support for cloud storages
- Work with iOS/Android/MTP devices
- Unlimited tabs
Cons:
- No comparison/directory synchronization
- Doesn’t support a multi-rename feature
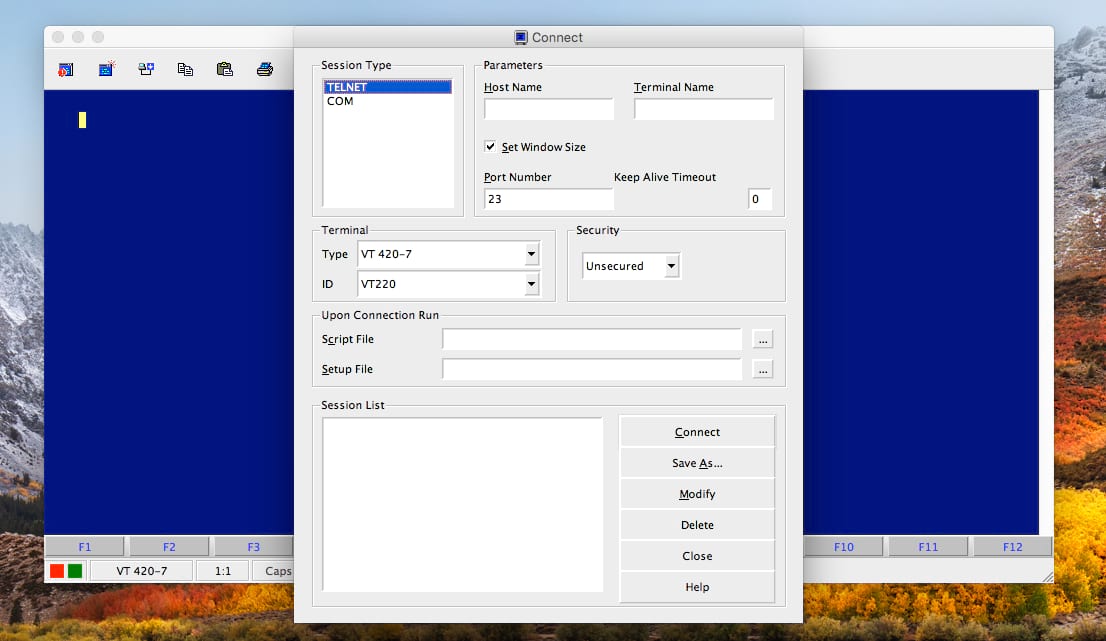
2. ZOC
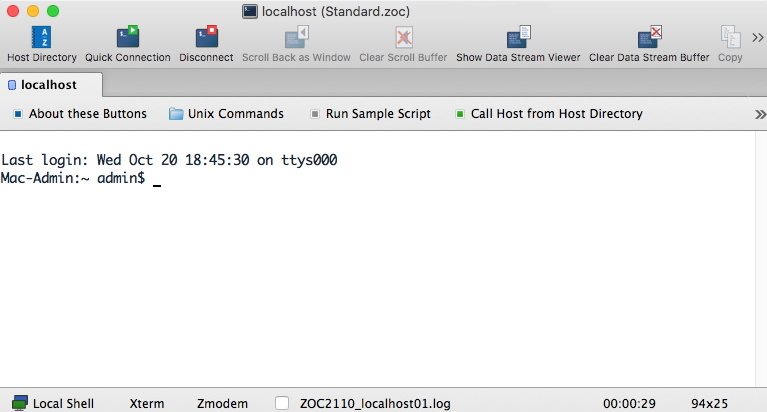
ZOC Terminal is a great option for more advanced users. One of its key benefits is support for tabs, so you can run multiple terminal sessions at the same time via SSH, telnet, QNX, and other terminals. This Terminal emulator Mac is packed with commands and is highly customizable to suit your personal terminal style. Its emulations are robust and complete, offering features such as mouse and keyboard support, pass-through, and line graphics.
Pros:
- Support for Rexx
- Automatic highlight feature
- Convenient interface
Cons:
- High price for the app
3. MacTerm

MacTerm for Mac is a very powerful application with tons of features, customization options and a great interface. This Mac Terminal emulator offers the best interface available, including full keyboard access, speech context menu commands, Unicode core, advanced emulation, terminal search, and more. Convenient and easy to use the app provides you with the best possible management. In addition, MacTerm offers free and freemium pricing plans.
Pros:
- Support for macros
- Floating command line window
Cons:
- Sometimes doesn’t respond to the actions
4. PowerTerm InterConnect
PowerTerm InterConnect is considered the best Terminal program for Mac with the minimum required space on your Mac computer. The app offers a wide range of supported hosts and is aimed to facilitate and extend the outdated access functions. PowerTerm InterConnect is a great alternative to the built-in macOS Terminal, as the app offers an impressive set of features.
Pros:
- Offers free trial
- Supports over 30 languages
- Simultaneous sessions
- Scripts
- SSH and SSL security
Cons:
- Supported platforms macOS10.11-10.15
- The last update was in 2019
5. iTerm
iTerm is one more best Terminal emulator for Mac and is suitable for both advanced users and beginners, but keep in mind that you will need to spend time learning it. The app offers convenient work with many tabs, routine commands automatization, and finding regular expressions. The terminal offers programmable hotkeys to speed up your working routine. Among other functions, you can find search with highlight in the console, split panels, copy without using a mouse, and way more.
Pros:
- Instant playback (you can “rewind” the session if you forgot to record/copy something)
- Growl support
Cons:
- Requires macOS 10.14 or higher
- No RTL support
- Requires time to learn all features
6. Kitty
Kitty has a feature that is quite rare among Mac Terminal emulators, namely – OpenGL rendering. Instead of overloading the processor, it uses the graphics card for faster and smoother performance. Kitty supports tiling mode in any layout across multiple terminal windows, without the need for additional applications. “Launch sessions” are supported, allowing you to specify the window layout, working directories, startup applications, and more.
Pros:
- Ability to create individual commands
- Support for hotkeys
- Support for ligatures in code
Cons:
- Sometimes it gets slow with multiple large files open
- No configuration reload
7. Hyper
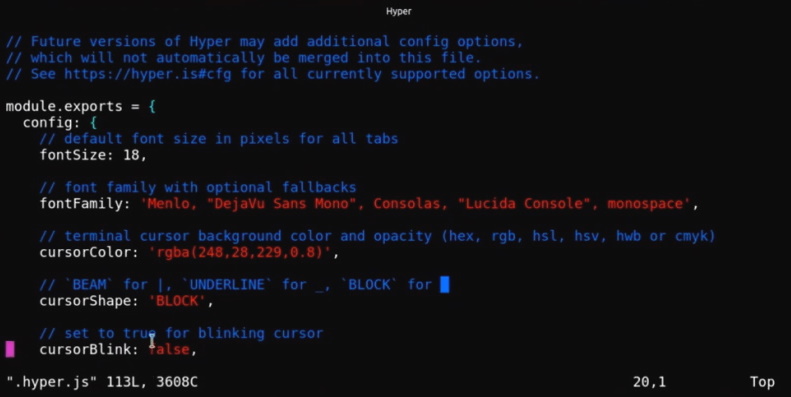
If you are looking for a terminal emulator with a lot of settings that you can configure right from the command line then you should take a look at Hyper. This Terminal emulator for Mac is built using HTML, CSS, and JavaScript and has plugin support to increase the productivity of the app. Its developers wrote it to create a great experience for command-line users on top of open web standards.
Pros:
- Ability to open multiple tabs
- Lots of shortcuts
- You can split the terminal
- Add your own CSS
Cons:
- Resource-intensive
- Sometimes affects system performance
8. MacWise

MacWise is a multifunctional Mac Terminal emulator that can emulate plenty of terminals including the ADDS Viewpoint, Wyse 50, Wyse 60, Wyse 370, Televideo TV 925, DEC VT100, VT220, and Prism terminals. The app allows connection via modem, direct serial, SSH, or Telnet. MacWise makes it possible to perform various actions via the Terminal, for instance, sending specific commands, transferring files, running scripts, etc.
Pros:
- Support for a large number of different protocols, connection modes
- Ability to log into Mac Unix Shell
Cons:
- Сonfusing, non-mac-like interface
- Costs a fortune
9. Byobu
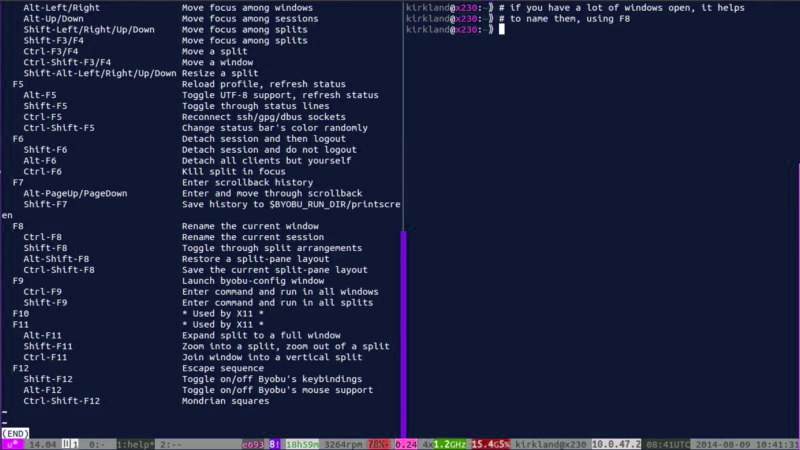
Last but not least on our best Terminal for macOS emulators list is Byobu. It is a handy shell for GNU Screen that allows you to run multiple programs in the background within a single console session and reconnect to the same session when disconnected. The app allows opening a large number of windows and run multiple commands within a single connection. It includes advanced profiles, handy keyboard shortcuts, configuration utilities, and works on most Linux, BSD, and Mac distributions.
Pros:
- Multi-window mode
- Saves windows and running scripts on the server after disconnecting or terminating ssh session
- Splitting the screen with several tabs
Cons:
- A bit confusing to use
Basic macOS Terminal Commands
Knowing these commands should help you get the most out of the Terminal application on your Mac:
- Show hidden files and folders. This command allows Finder to show hidden files and folders on your Mac:
defaults write com.apple.finder AppleShowAllFiles -bool true - View the contents of any file. To access the contents of any corrupted or damaged file, you can force the Terminal emulator for Mac to open it with this command:
cat ~ / enter / file / path - Copying the contents of a folder from one place to another. Copying content from one location to another is quite easy using the Terminal, enter the following command:
ditto -V ~ / original / folder / ~ / new / folder / - Download a file without a browser. If you want to download a file without using Safari, Firefox, or Chrome then you should execute the following command:
cd ~ / Downloads /
curl -O http://www.thefilename.com/thefile/url.mp3 - View all active processes. This command displays complete information about the system in real-time (list of processes, CPU load, memory, etc.):
top - Automatic check for updates. If you want your computer to check for updates automatically use the following command:
defaults write com.apple.SoftwareUpdate ScheduleFrequency -int 1 - Prevent sleep mode. To keep your Mac from falling asleep, open your Mac Terminal emulator and execute this command:
caffeinate
Why Is It Worth Using an Alternative to the Default macOS Terminal?
A large number of macOS users rather rarely open or even use the Terminal application. To an ordinary user, it seems to be something incomprehensible and unnecessary. While the default Terminal is powerful and works just fine, it is with noting that it lacks some useful features. It’s good that the default Terminal app is not the only option available and you can find the one that you can find your best Terminal for Mac solution.
Whether you are looking for something with a wider range of features, something even more customizable, or just something that looks cool? Then you have many options to find your best Terminal app for Mac.
Conclusion
As you can see, each Mac Terminal emulator has both advantages and disadvantages. Some of the features are better implemented in one of the apps whereas they are missing other functionality found in others. That’s why before making your mind, we recommend you to try, analyze them all, and after that choose your best Terminal for Mac.
FAQ
Terminal, or console, is a special window into which you enter special commands to communicate with your computer’s operating system directly without a mouse or windows.
The best Terminal emulator for Mac you can choose from our list:
- Commander One
- ZOC
- MacTerm
- PowerTerm InterConnect
- iTerm
- Kitty
- Hyper
- MacWise
- Byobu
You need to insert the desired command into the command line and press the Return button to execute it.
The fastest terminal emulator is Commander One, in our opinion. The app is convenient, super-fast and highly customizable.
Macs now use Zsh as the default shell. But you can choose another command processor to handle new Terminal windows and tabs.
I found that GNU screen does exactly what I want (just type screen in terminal), but only after I spent a few minutes learning some basics. Here is the jump start I needed on key bindings (straight from the man page) — note that you need to install the GNU version for vertical splits (listed after the FAU version that was in my Mavericks).
Screen version 4.00.03 (FAU) 23-Oct-06
(included in Mavericks and likely similar in earlier)
       The following table shows the default key bindings:

       C-a '       (select)      Prompt for a window name or number to switch to.

       C-a "       (windowlist -b)
                                 Present a list of all windows for selection.

       C-a 0       (select 0)
        a|            a|
       C-a 9       (select 9)
       C-a -       (select -)    Switch to window number 0 - 9, or to the blank window.

       C-a tab     (focus)       Switch the input focus to the next region.  See also split, remove, only.

       C-a C-a     (other)       Toggle to the window displayed previously.  Note that this binding defaults
                                 to  the command character typed twice, unless overridden.  For instance, if
                                 you use the option "-e]x", this command becomes "]]".
…
C-a S (split) Split the current region into two new ones.
…
       C-a ?       (help)        Show key bindings.

       C-a \       (quit)        Kill all windows and terminate screen.
…
C-a * (displays) Show a listing of all currently attached displays.
Additional items with ‘Screen version 4.02.01 (GNU) 28-Apr-14’
(installed using sudo port install screen just now)
All of the items listed above in the 4.00.02 (FAU) version, as well as:
      C-a S       (split)       Split the current region horizontally into two new ones.   See  also  only,
                                 remove, focus.
Same above, but this clarifies that it is horizontal.
…
C-a | (split -v) Split the current region vertically into two new ones.
Note: I tried searching the web for this, but words such as ‘screen’, ‘terminal’, and ‘split’ are so common as to make the man pages easier for me.
Terminal
This script (terminal.py) allows you to open a new terminal window and execute
some commands on Windows, Cygwin, Ubuntu and OS X. And prompts you «press any key to continue …» before exit.
Programming in desktop text editors (atom, gvim, sublime and gedit) always requires executing your code in a new interactive shell window. But a lot of editors is lack of such feature, the only thing they can do is executing shell commands in their bottom panel, or in a silent background job.
Opening a new terminal window to execute commands in different operating systems is a tricky thing: arguments must be carefully escaped and passed in the correct way, intermediate script (shell script, AppleScript or batch script) must be carefully generated and passed through pipe, and different terminal in all systems must be invoked in different methods.
Therefor, terminal.py is created to get these dirty stuff down, in a single script file and provide a unique interface for all operating systems.
Calling it in your favorite editor to open a new window and execute your programs just like running a command line application in visual studio.
Features
- Windows:
- Open a new
cmdwindow to execute Windows commands. - Open a new
cygwinbash/mintty window to execute Cygwin commands. - Run
cygwincommands directly in the current Windows shell (without open a new window). - Open a new
WSL(Windows Subsystem for Linux) bash window to execute linux commands. - Run
WSLbash commands directly in the current Windows shell (without open a new window).
- Open a new
- Cygwin:
- Open a new cygwin
bashwindow to execute cygwin commands. - Open a new cygwin
minttywindow to execute cygwin commands. - Open a new
cmdwindow to execute Windows commands.
- Open a new cygwin
- Linux / Ubuntu:
- Open a new
xtermwindow to execute commands on Linux Desktop. - Open a new
gnome-terminalwindow to execute commands on Linux Desktop.
- Open a new
- Mac OS X:
- Open a new
Terminalwindow to execute commands in Mac OS X - Open a new
iTerm2window to execute commands in Mac OS X - Open a new
xtermwindow to execute commands in Mac os x (require xquartz)
- Open a new
- Misc:
- After commands finished, prompts user to press any key to quit (optional).
- Specify initial working directory (optional).
- Read commands from both arguments or stdin.
- Run some other commands before quit (after waiting user pressing key).
- Set terminal profile (only enabled in Terminal/iTerm/gnome-terminal).
- Set the title of the terminal window (not available in some terminal).
Manual
$ python terminal.py
Usage: terminal.py [options] command [args ...]

Execute program in a new terminal window

Options:
  --version             show program's version number and exit
  -h, --help            show this help message and exit
  -t TITLE, --title=TITLE
                        title of new window
  -m TERMINAL, --terminal=TERMINAL
                        available terminals: terminal (default), iterm
  -p PROFILE, --profile=PROFILE
                        terminal profile
  -d CWD, --cwd=CWD     working directory
  -w, --wait            wait before exit
  -o POST, --post=POST  post action
  -s, --stdin           read commands from stdin
Windows
Open a new cmd window to execute command:
python terminal.py d:\hello.exe
Open a new cmd window to execute command and pause after finish:
python terminal.py --wait d:\hello.exe
Open a new cmd window and set title:
python terminal.py --wait -t mytitle d:\hello.exe
Open a new cmd window to execute command in a given working directory:
python terminal.py --wait -d d:\ dir
Open a new cmd window and execute commands which is passed from stdin:
python terminal.py --wait --stdin
dir c:\
echo Hello from a new cmd window !!
^Z
Linux (ubuntu)
Open a new window (xterm by default) to execute command:
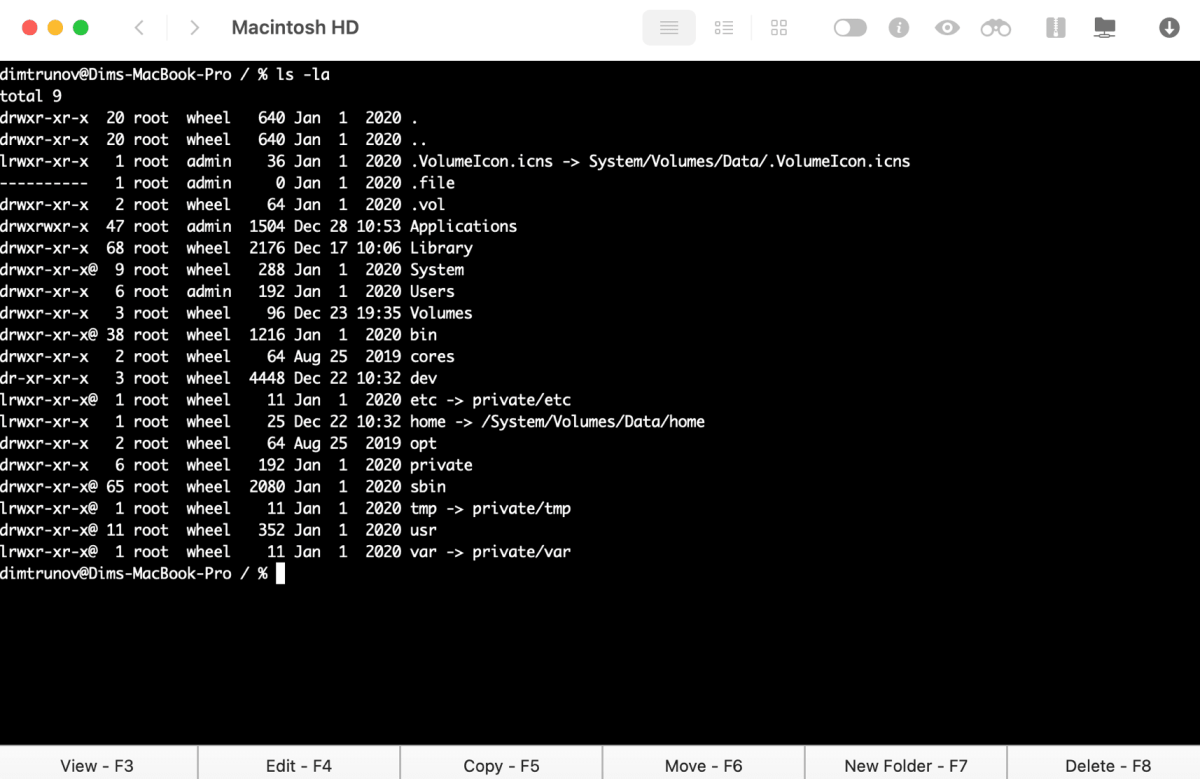
python terminal.py --wait ls -la
Open a new gnome-terminal to execute command:
python terminal.py -m gnome-terminal --wait ls -la
Open gnome-terminal in given profile (create a new profile in gnome-terminal’s settings):
python terminal.py -m gnome-terminal -p myprofile --wait ls -la
Open a new window to execute command in a given working directory:
python terminal.py --wait -d /tmp ls -la
Open a new gnome-terminal and execute commands which is passed from stdin:
python terminal.py --wait -m gnome-terminal --stdin
ls -la
echo "Hello from a new gnome-terminal"
^D
Mac OS X
Open a new Terminal window to execute command:
python terminal.py --wait ls -la
Open Terminal in given profile (create a new profile in Terminal’s preferences):
python terminal.py --wait -p DevelopProfile ls -la
Open a new window to execute command in a given working directory:
python terminal.py --wait -d /tmp ls -la
Open Terminal and execute commands which is passed from stdin:
python terminal.py --wait --stdin
ls -la
echo "Hello from a new Terminal window"
^D
Open iTerm and execute command:
python terminal.py --wait -m iterm ls -la
Open Terminal window in a given profile and activate MacVim after exit:
python terminal.py --wait -o "open /Applications/MacVim.app" -p myprofile ls -la
This is very useful when you are executing terminal.py inside MacVim, because after
terminal window closed OS X will not bring MacVim to the front. And you need a new
terminal profile because you can enable «Close window when shell exists» in myprofile
to avoid closing window manually after exists.
You can use Terminal or iTerm2 in Mac OS X as you like.
Run Cygwin commands from Win32
Open cygwin bash window in win32:
python terminal.py --wait -c c:\cygwin -m bash ls -la
Open cygwin mintty window in win32:
python terminal.py --wait -c c:\cygwin -m mintty ls -la
Run cygwin commands in the same terminal without creating a new window by using cygwinx option:
python terminal.py -c c:\cygwin -m cygwinx ls -la
Open cygwin mintty window in win32 from given working directory:
python terminal.py --wait -c c:\cygwin -m mintty -d d:\ ls -la
Inside Cygwin
Open cmd window to run win32 command from cygwin:
python terminal.py --wait -m cmd dir
Open mintty window to run cygwin shell command from cygwin:
python terminal.py --wait -m mintty ls -la
Open bash window to run cygwin shell command from cygwin:
python terminal.py --wait -m bash ls -la
Run WSL Linux commands on Windows
Open a new bash window to run linux commands:
python terminal.py --wait -m wsl ls -la
Run linux commands in the current windows shell window:
python terminal.py -m wslx ls -la
Run debian and ubuntu1804 via wsl:
python terminal.py -m wslx -p debian ls -la
python terminal.py -m wslx -p ubuntu1804 ls -la
Credit
……
![]()
Download Article
![]()
Download Article
This wikiHow teaches you how to open the Terminal utility on Mac, which provides Mac users with a way to access and adjust settings of the operating system with text-based commands.
-

1
Click the Finder icon in your dock. It’s a square icon with a half-light blue and half-dark blue smiley face.
- Alternatively, simply click on your desktop wallpaper.
-
2
Click Go in the menu bar. It’s at the top of the screen.
Advertisement
-
3
Click Utilities.
- Alternatively, you can press ⇧ Shift+⌘+U.
-
4
Scroll down and double-click Terminal in the Utilities window. A terminal window will open.


Advertisement
-
1
Click the Spotlight icon. It’s the magnifying glass in the upper-right corner of the screen.
- Alternatively, you can press ⌘+space.
-
2
Start typing terminal in the search field. Do so until the Terminal icon appears.
-
3
Double-click Terminal. A terminal window will open.


Advertisement
Add New Question
-
Question
What’s the use for spotlight?

Nuclearblowout
Community Answer
Spotlight is used mainly for finding apps quickly. It is much faster then the dock and to use it, just press command and space.
-
Question
How do you find uninstalled apps?
You can find uninstalled apps that you purchased from the App Store by going clicking on your profile picture in the bottom left corner of the App Store and then by seeing purchases.
-
Question
Terminal opens at login, how do I change this to make it stop?
It looks like you have it in Login items to startup on boot. To fix this, open System Preferences, then Users, then choose the User you log into, then Login items. It will display a bunch of apps. To change it, first click on bottom left padlock and enter password to be able to edit settings. Next, select Terminal and/or other apps and press the «-» sign just below the box. That’s it. Try restarting and check.
See more answers
Ask a Question
200 characters left
Include your email address to get a message when this question is answered.
Submit
Advertisement
About This Article
Article SummaryX
1. Click the Finder icon in your dock.
2. Click Go.
3. Click Utilities.
4. Double-click Terminal.
Did this summary help you?
Thanks to all authors for creating a page that has been read 271,198 times.