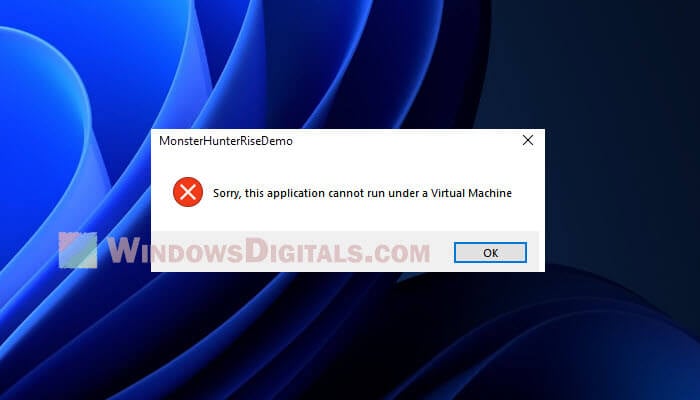
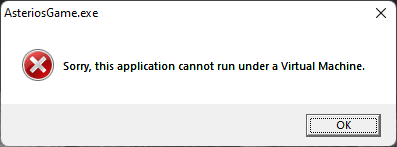
The “Sorry, this application cannot run under a Virtual Machine” error message in Windows 11 can be quite frustrating for users who encounter it. While the error typically occurs when running a game that does not support a virtual machine environment, it can also appear in other situations. This article provides a comprehensive look at the causes of this error and offers detailed solutions to resolve it.
Also see: Force App or Game to Use Dedicated GPU or Integrated Graphics
Understanding the “Sorry, this application cannot run under a Virtual Machine” error
When an application or game detects virtualization technologies on your computer, it may refuse to run and display the “this application cannot run under a virtual machine” error message. This is often because the application is designed to protect its intellectual property or ensure optimal performance by preventing users from running it in a virtual machine.
Virtualization can be provided by various features and programs, including:
- Hyper-V, a Windows-native virtualization technology
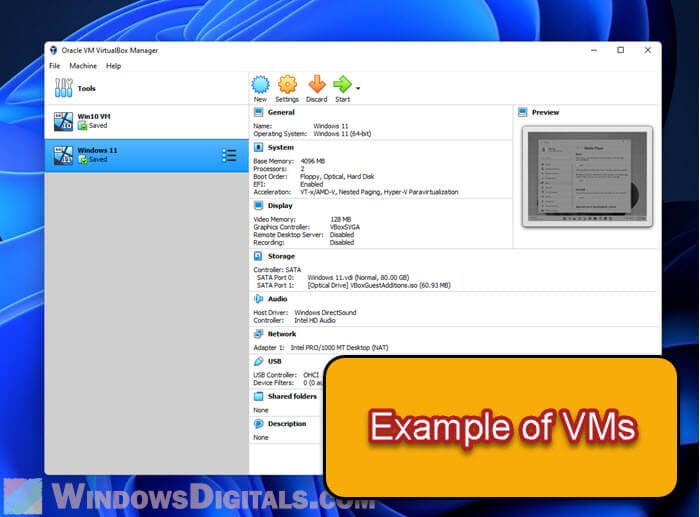
- Third-party virtualization programs like VMware or VirtualBox
- Antivirus software that utilizes virtualization to protect the system
Related resource: How to Close Virtual Desktop in Windows 11
Troubleshooting and resolving the error
To resolve the “Sorry, this application cannot run under a Virtual Machine” error in Windows 11, follow these detailed steps:
Check for running virtual machines
Before disabling any virtualization features, make sure no virtual machines are currently running on your computer. Close any active instances of VMware, VirtualBox, or other virtualization software.
Disable third-party antivirus software
Some antivirus programs use virtualization technologies that may cause the error. Temporarily disable your antivirus software to see if it resolves the issue. If the problem persists, proceed to the next steps.
Investigate Hyper-V status
Open the Command Prompt as administrator by clicking the Start button, typing “cmd” in the search bar, and right-clicking on the “Command Prompt” search result. Choose “Run as administrator.” Click “Yes” when prompted by the User Account Control dialog.

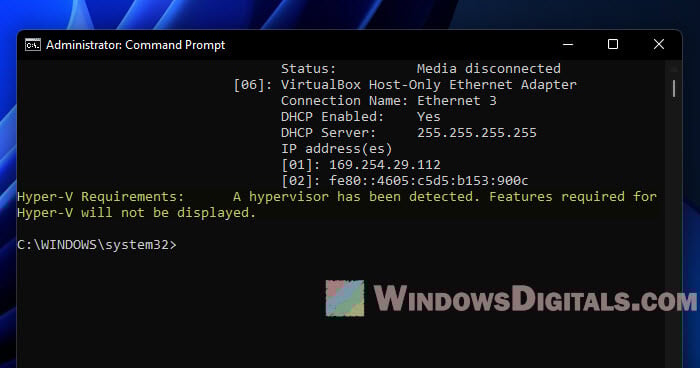
Type systeminfo in the Command Prompt and press Enter. Scroll down to the “Hyper-V Requirements” section to see if a hypervisor is detected.
Disable Hyper-V
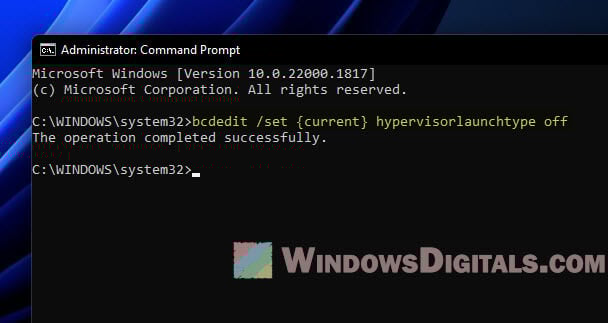
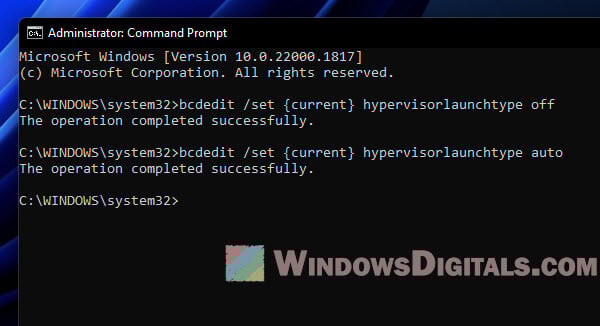
If a hypervisor is detected, enter the command bcdedit /set {current} hypervisorlaunchtype off and press Enter to disable Hyper-V. Restart your computer for the changes to take effect.
Disable additional virtualization features
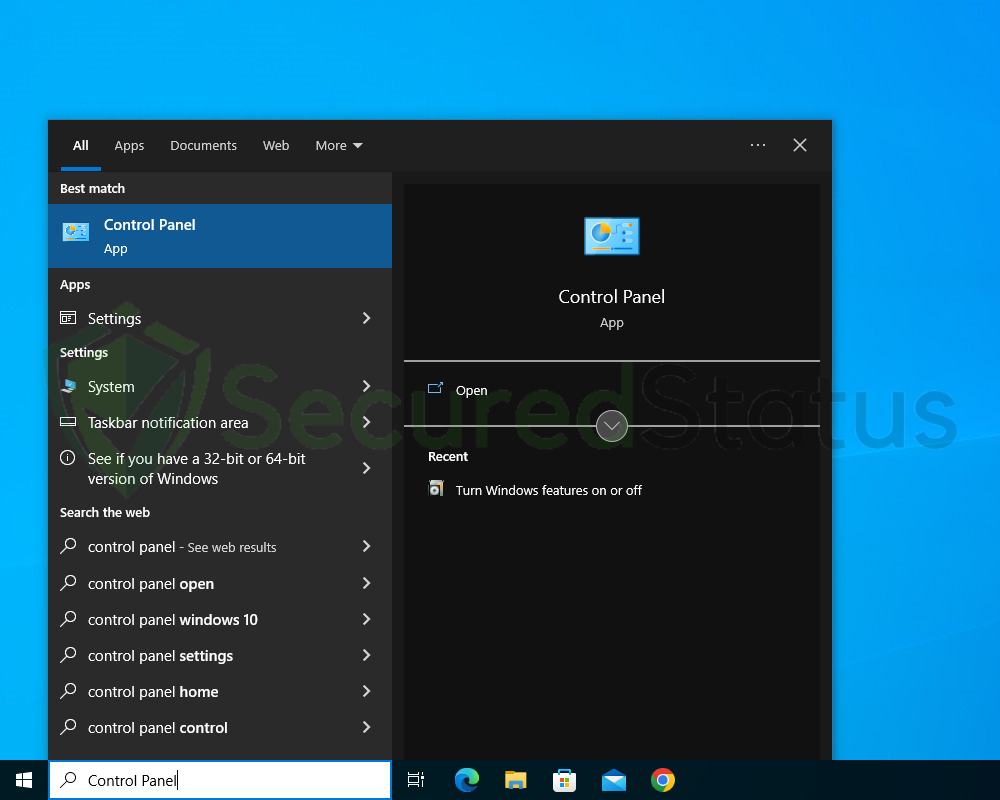
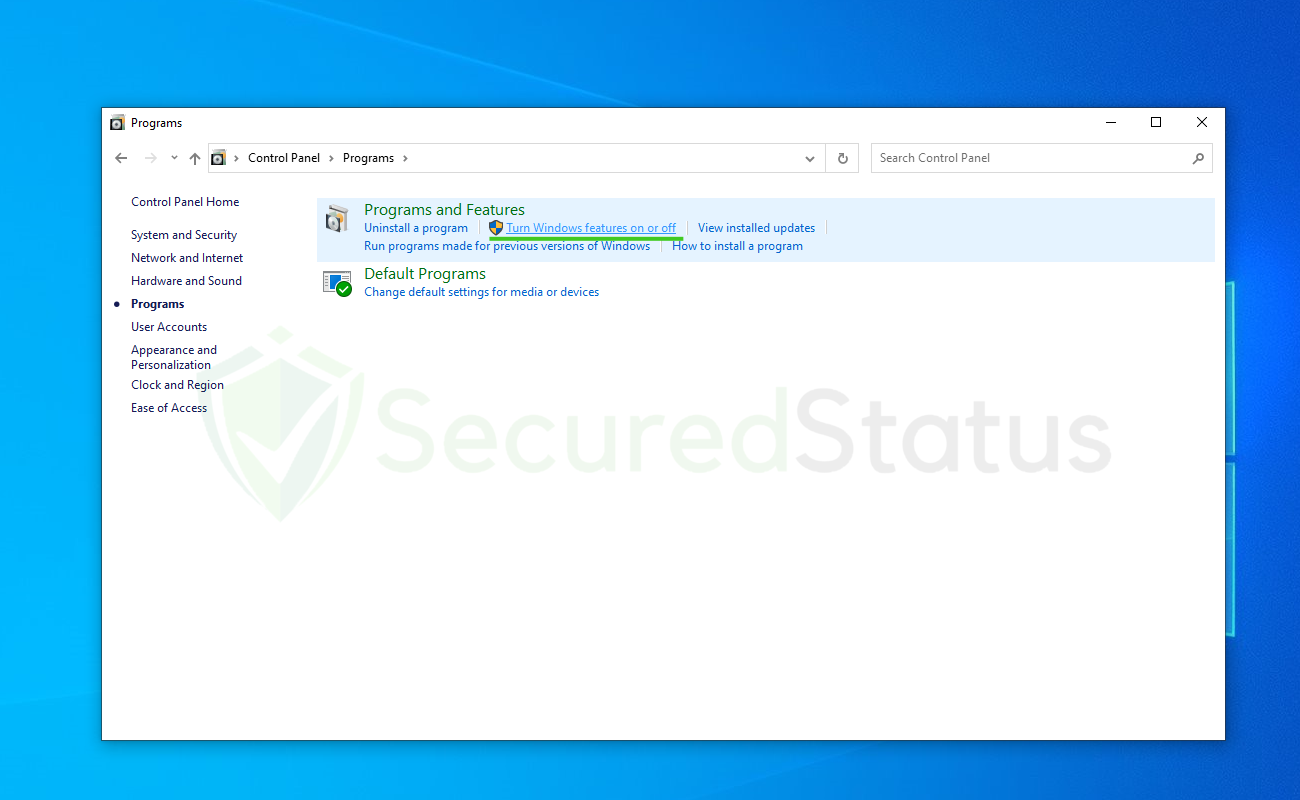
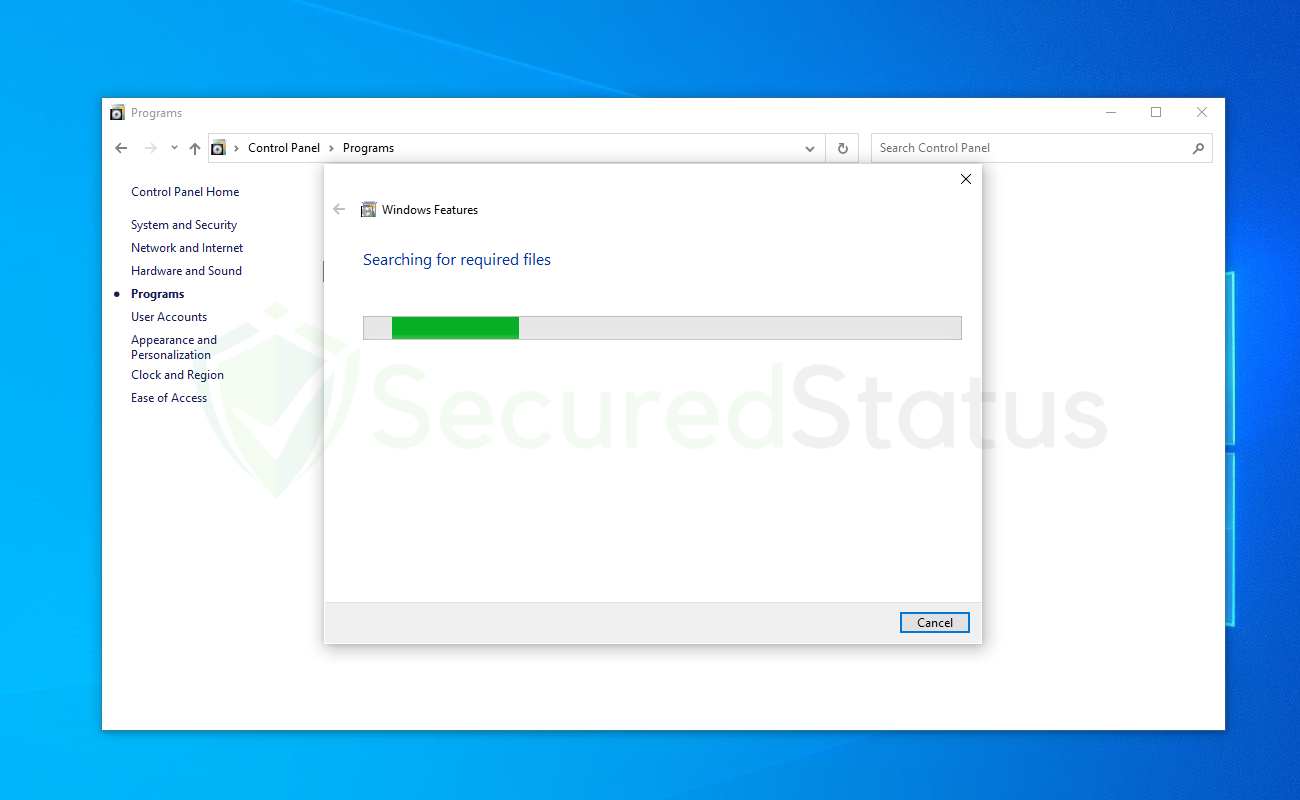
If the error persists, open the Control Panel by typing “Control Panel” in the search bar and selecting it. Navigate to Programs and Features > Turn Windows features on or off.
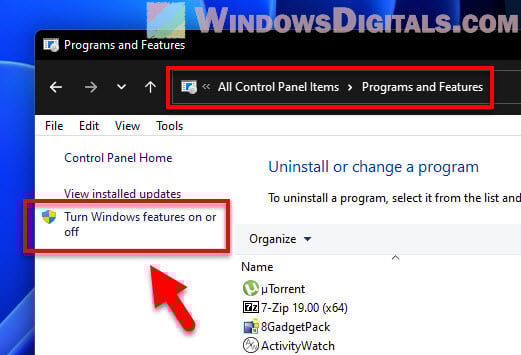
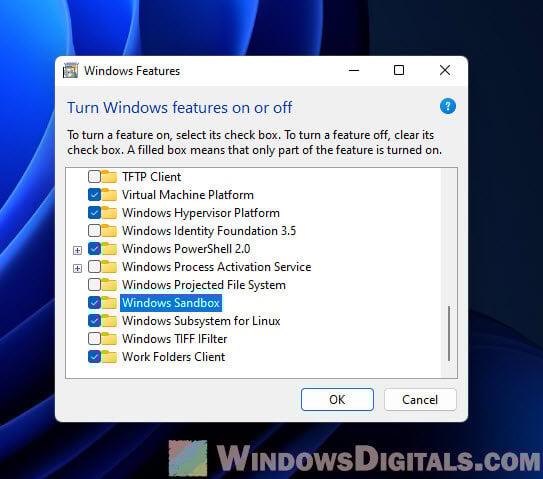
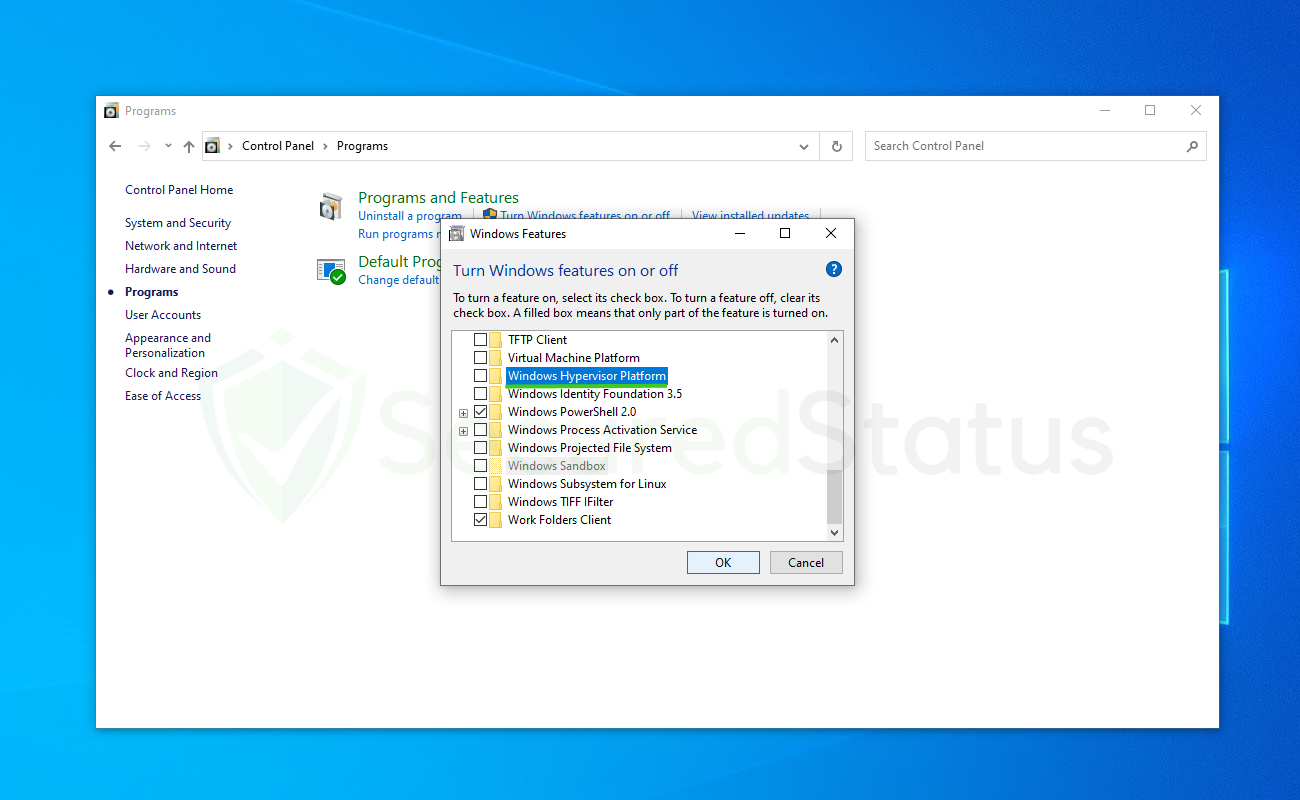
Uncheck any features related to virtualization, such as “Windows Sandbox,” “Windows Hypervisor Platform,” or “Virtual Machine Platform.” Restart your computer again for the changes to take effect.
Linked issue: Turn Windows Features On or Off: “Please wait…”

Re-enabling Virtualization Features
If you need to re-enable virtualization features after resolving the error, follow these steps:
Enable Hyper-V
Open the Command Prompt as administrator by pressing Win + X and choosing Windows Terminal (Admin). Click “Yes” when prompted by the User Account Control dialog. Enter the command bcdedit /set {current} hypervisorlaunchtype auto and press Enter to enable Hyper-V.
Restart your computer
Reboot your computer for the changes to take effect.
Useful tip: How to Allocate More RAM to a Game in Windows 11 or 10
Enable additional virtualization features
If you disabled other virtualization features, open the Control Panel, navigate to Programs and Features > Turn Windows features on or off, and re-enable the features you disabled earlier.
Re-enable antivirus software
If you disabled your antivirus software earlier, remember to re-enable it to ensure your system remains protected against potential threats. If the antivirus software was the cause of the issue, consider looking for an alternative solution that does not use virtualization technologies or contact the software vendor for support.
Alternative solutions
If the aforementioned steps do not resolve the issue, you can try the following alternative solutions:
Run the application in compatibility mode
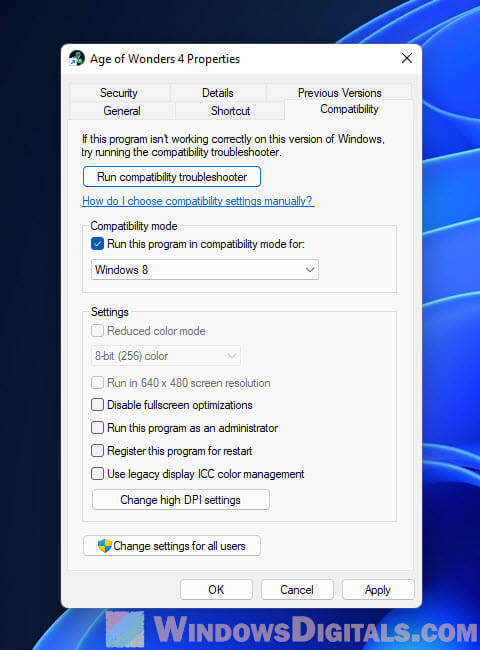
Some applications may have compatibility issues with Windows 11. To run the application in compatibility mode, right-click on the application’s executable file or shortcut, select “Properties,” and switch to the “Compatibility” tab. Check the box next to “Run this program in compatibility mode for,” and select a previous version of Windows, such as Windows 10 or Windows 8. Apply the changes and try running the application again.
Update graphics drivers
Outdated or incompatible graphics drivers can cause issues with certain applications. Ensure that your graphics drivers are up to date by visiting your graphics card manufacturer’s website or using the built-in Windows Update feature.
Contact the application’s or game’s support team
If none of the suggested solutions work, consider reaching out to the application’s support team for assistance. They may be aware of the issue and can provide you with a fix or workaround specific to the application.
Key takeaways
The “Sorry, this application cannot run under a Virtual Machine” error in Windows 11 can be a challenging issue to resolve, as it involves various virtualization technologies and potential compatibility issues. By carefully following the troubleshooting steps and alternative solutions provided in this article, users should be able to identify the root cause of the problem and implement a suitable solution.
It is important to keep in mind that virtualization technologies are continuously evolving and becoming more integrated with modern operating systems. As a result, developers may need to adapt their applications to better accommodate these changes, while users should stay informed about the latest advancements in virtualization and compatibility of games and applications.
Sorry, This Application cannot run under a Virtual Machine is an error message that means the program has identified your machine as a Windows system emulator.
Virtual Machine: It is an isolated computer environment that is made possible by removing resources from a physical machine. While it is part of another machine, it is presented to the user as if it were standalone.
If users do launch certain apps inside of a virtualized environment, they typically get this problem. However, there have been instances where people have experienced this problem while using physical computers.

To distinguish a virtual machine from a real computer system, an application must take into account a variety of variables such as:
Device Name: You should check to see if you have personalized your computer’s name or if you haven’t changed it yet since you purchased it. If the device is named too generically and by default, such as “Computer” or “Device,” it may be identified as a virtual machine.
Files and Processes: Applications may check to verify if the system’s currently active processes and services are the default Windows system and if any new/third-party apps are installed. Whether you have fewer apps, the system can be mistakenly identified as a virtual machine because there aren’t as many processes, therefore you should check if that’s the case.
Previously Installed a Virtual Machine: The possibility that you have installed a virtual machine in the past could potentially affect whether or not your device is identified as one. Anything that has the words “Virtual” or “Machine” in it could be mistaken for one. If you had previously installed a VM application, you should examine your system for anything with the associated phrase because often VM apps create a registry containing such terms.
Using an Illegitimate/Cracked Windows Copy: A cracked version of Windows is one that has been altered to run on a computer without going through Microsoft’s product activation process. Processes and system files that have been altered can cause the machine to differ from a genuine copy. A nulled or pirated copy of the operating system may be to blame if a program notices something different on the system.
The instructions below will assist you to resolve the VM problem and eventually start the application, regardless of whether you are using a virtual environment or on an actual Windows PC.
Our team has tried and tested each of the methods listed below; if one doesn’t work for you, try the next one until the issue is resolved.
Method 1: Modify SystemBiosVersion in Regedit
Note: Before proceeding with the steps, make sure you are using the administrator account of the computer.
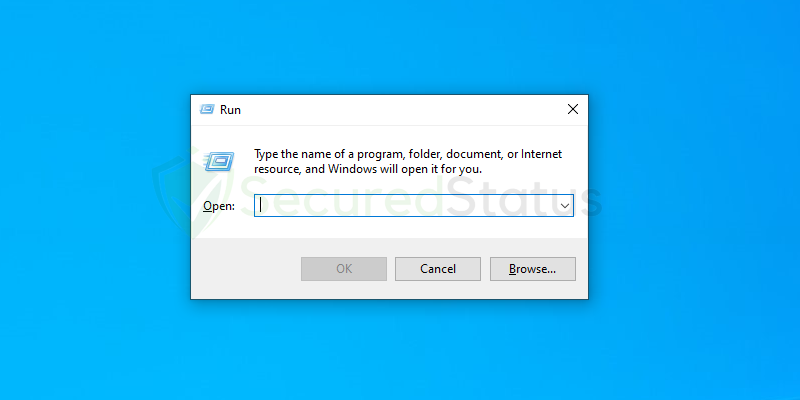
1 Type the Windows Key and R at the same time to open the Run application.
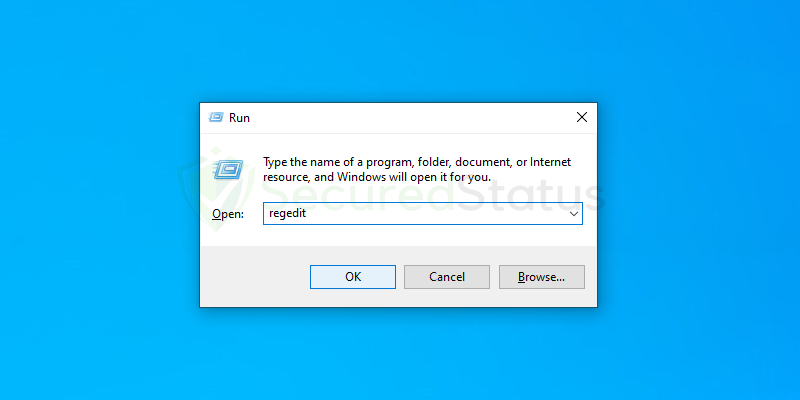
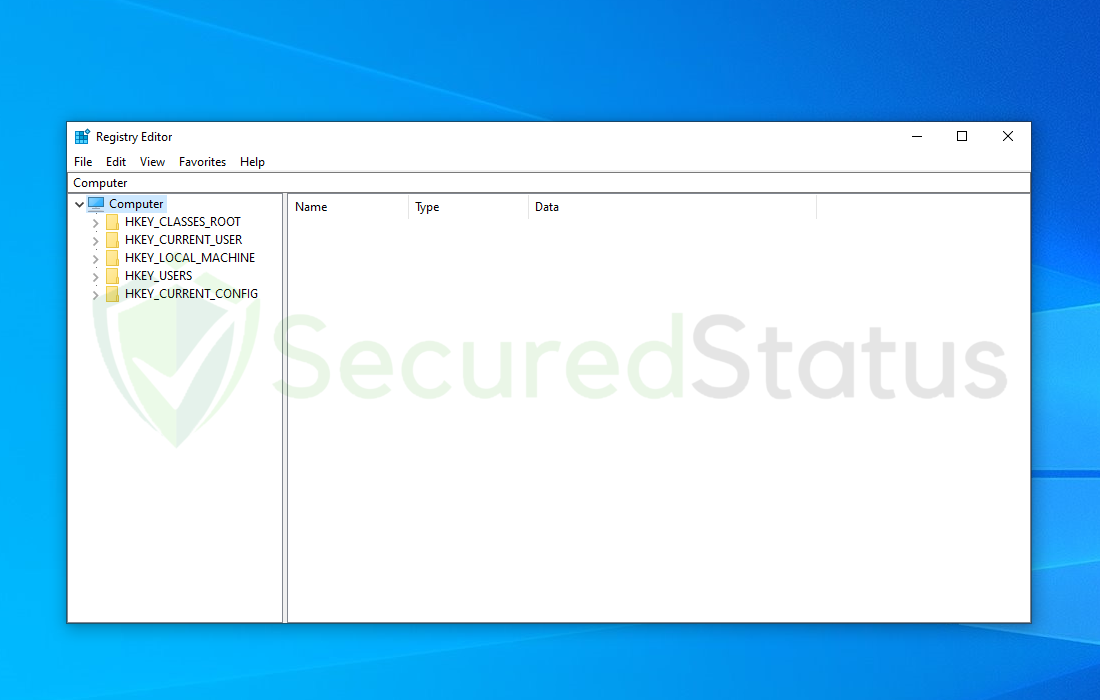
2 Once the Run terminal has opened, type regedit and click OK.
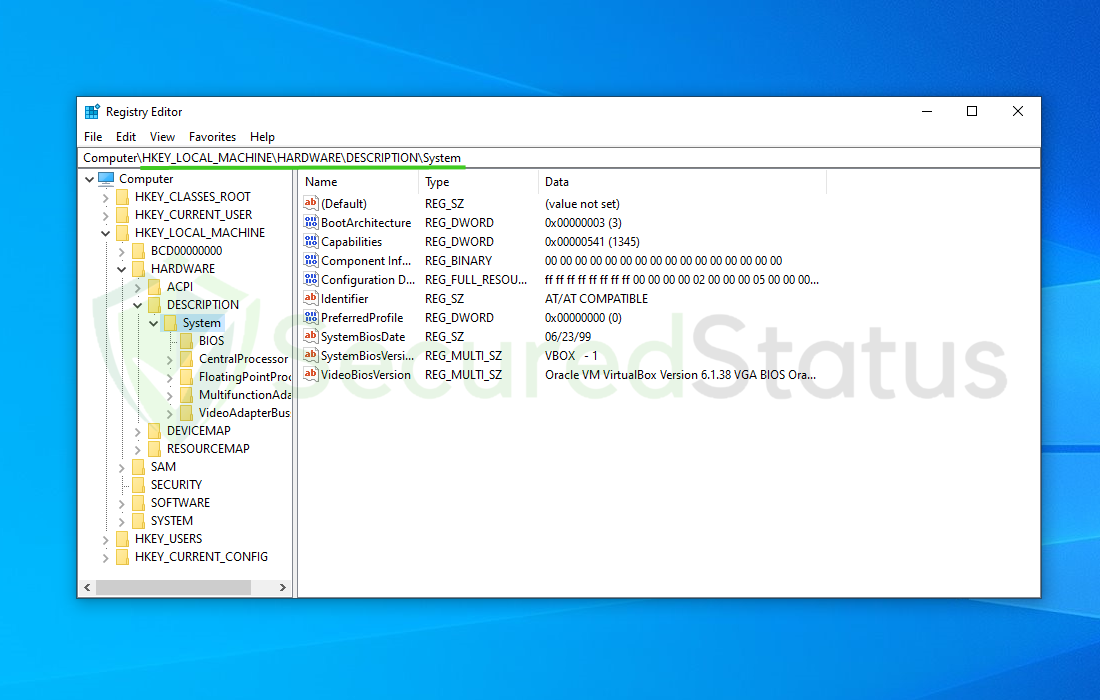
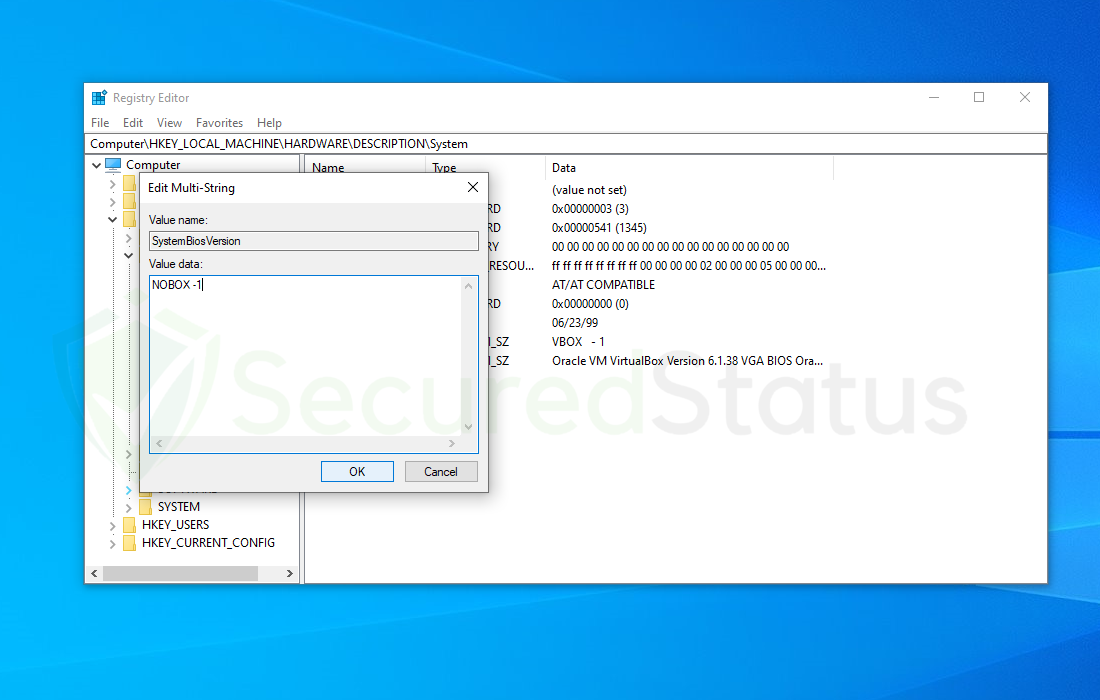
3 When the Registry Editor application launches, hover to the following directory: HKEY_LOCAL_MACHINE\HARDWARE\DESCRIPTION\System
4 Right-click the SystemBiosVersion and select Modify.
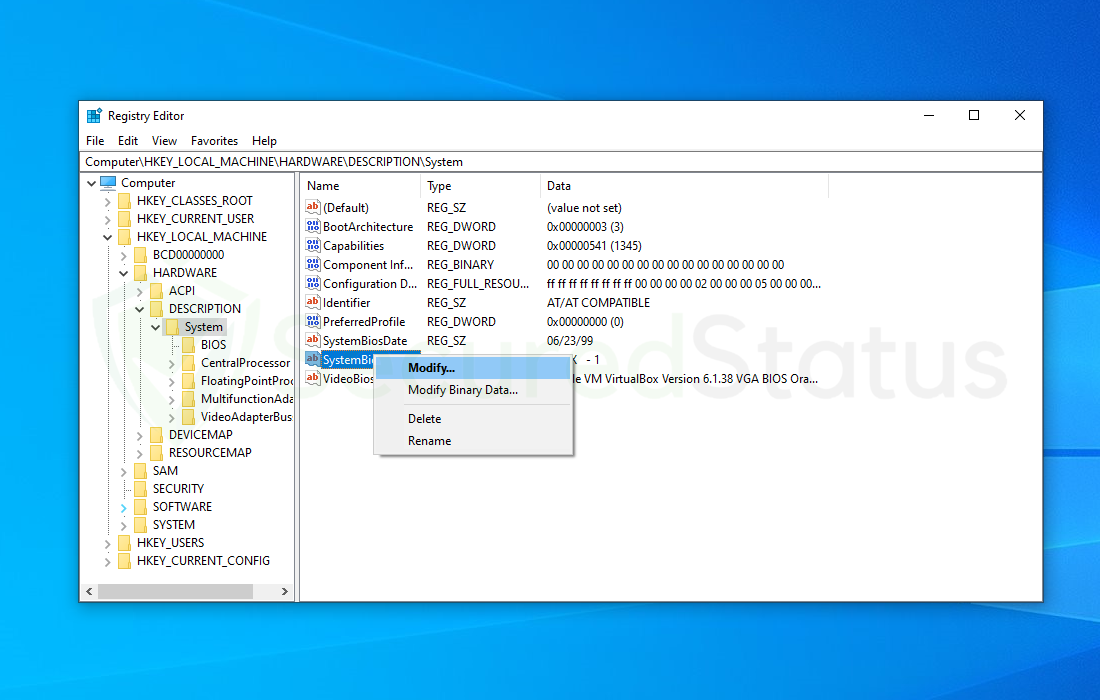
5 Change the Value data from whatever is written into NOBOX -1 then click OK.
As stated earlier, make sure you are modifying the registry while in the administrator account otherwise the changes you made will be reverted once the system is rebooted.
Method 2: Turn Off the Windows Hypervisor Platform
1 Type Control Panel in the Windows search bar and open the program.
2 Once Control Panel opens up, click Programs and select Turn Windows features on or off under the Programs and Features option.
3 Scroll down and find Windows Hypervisor Platform, uncheck the said feature, and hit OK.
4 Wait for the changes to apply and once it is complete, restart the computer and the application should finally run.
If you tried this and it did not work for you, you can try the other methods listed below. The next approach also needs administrator access to ensure that modifications are retained even after a reboot.
Method 3: Modify Driver Description in the Registry Editor
1 Open Registry Editor once again by clicking Windows Button + R at the same time. Then type regedit and hit OK.
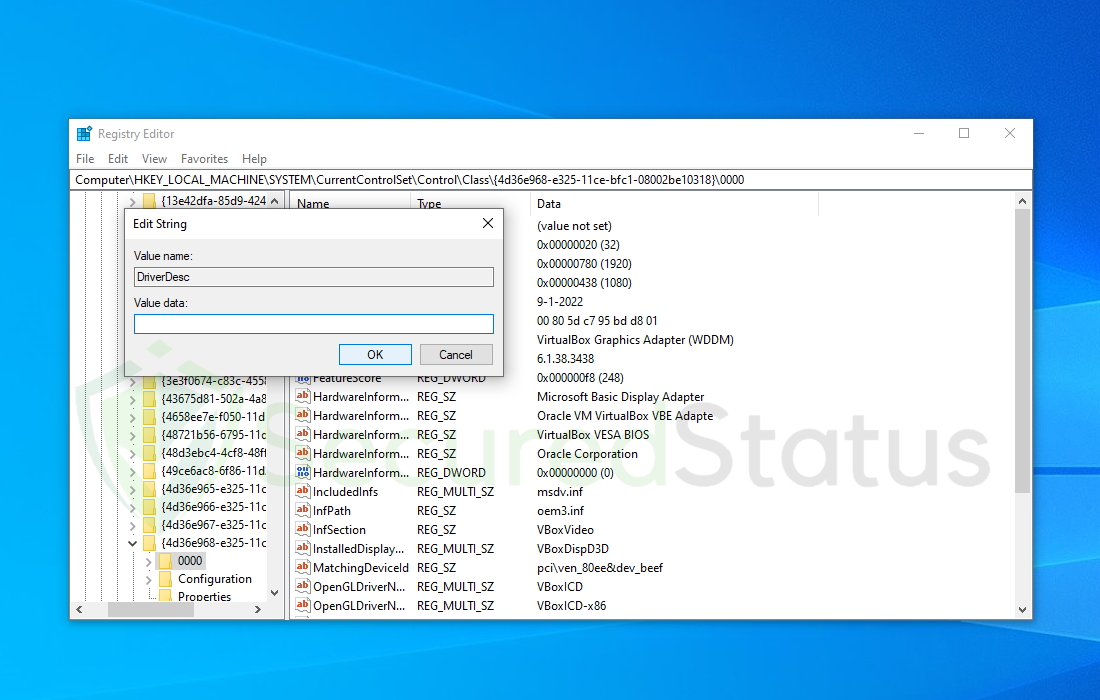
2 Open the directory HKEY_LOCAL_MACHINE\SYSTEM\CurrentControlSet\Control\Class\{4d36e968-e325-11ce-bfc1-08002be10318}\0000

3 Right-click DriverDesc from the following registries and select Modify. (If you cannot find it, search different folders such as 0001, 0002, etc.)

4 Delete everything inside the Value data and click OK.
Method 4: Scan for Malicious Viruses (For Physical Machine Only)
Although it may appear unnecessary, malware in the system can alter system files and the registry, which can lead to malfunctions.
They can insert themselves into crucial system processes that could result in an error. It could be beneficial to periodically scan your system for malware if you are seeing the VM error on a physical Windows PC.
We recommend using Malwarebytes Anti-malware because we have determined that it can remove most types of malicious threats when we conducted malware tests.

Malwarebytes also offers a free 14-day trial when you download it for the first time, so you might want to use the remaining time of the trial to test out the premium features.
Download Malwarebytes
1 Click the button above to download the latest version of Malwarebytes Anti-malware.

2 Open the installation file after the download and follow the procedure shown.
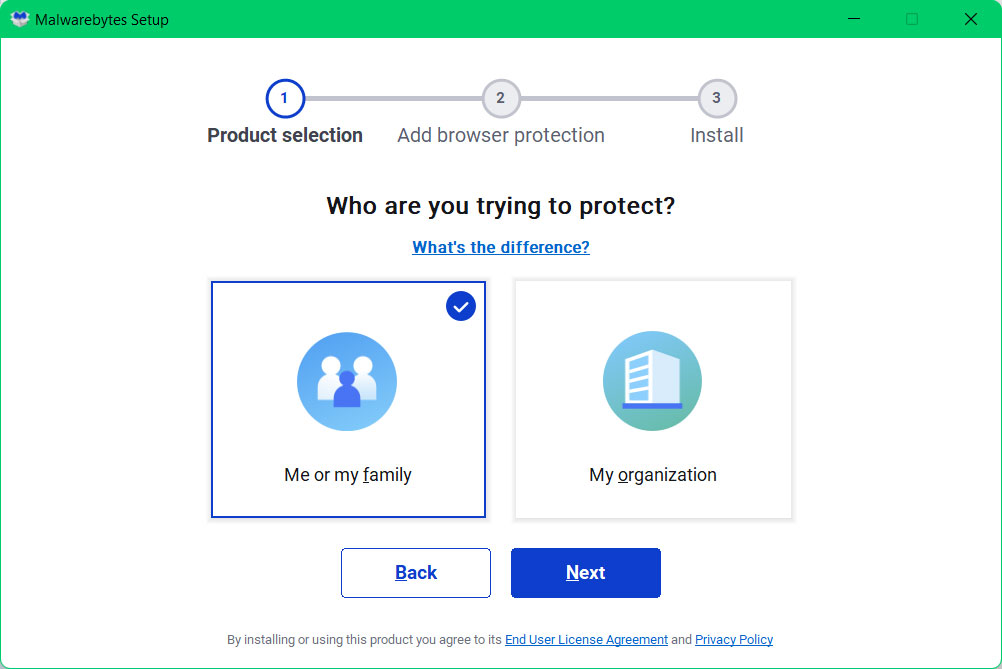
3 After following the software setup instructions, wait for the application to finish installing.

4 Once the application is installed, you may now run your first computer scan and wait for it to finish.
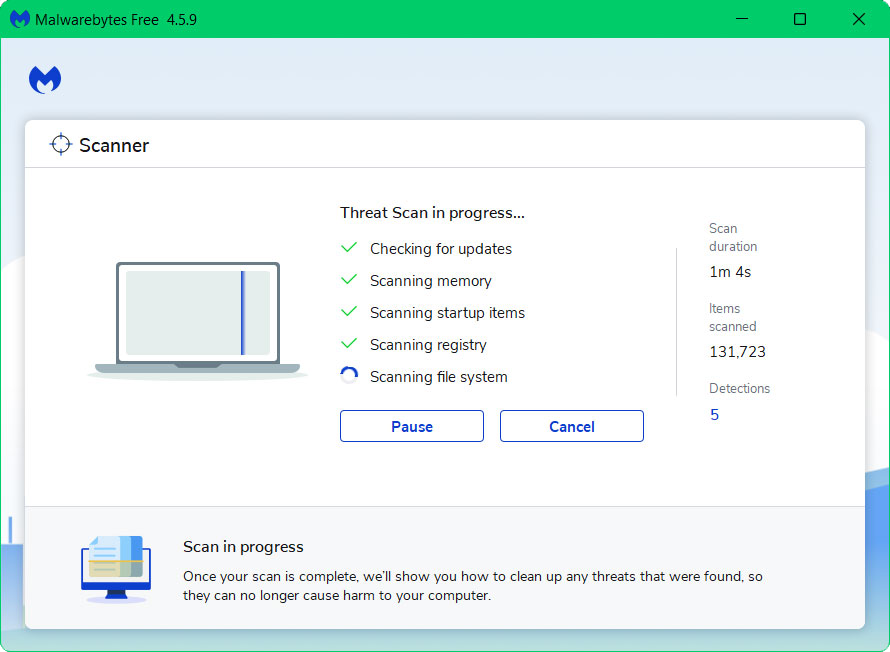
5 All discovered malware on the computer will be displayed on the screen, and you can eliminate them by pressing the “quarantine” button.

Any potential malware that may have been hiding on your system has now been eliminated, and the modifications it made to the system have been undone. You can check if the “application cannot run under a virtual machine” error is now resolved.
Download Windows Speedup Tool to fix errors and make PC run faster
Some PC users have reported they received the error message Sorry, this application cannot run under a Virtual Machine when trying to run certain apps using virtualization software like VMware Fusion 7, Hyper-V et al on their Windows 11 or Windows 10 computer. This post provides the most applicable fixes to the issue.

If you get the error prompt stating Sorry, this application cannot run under a Virtual Machine when you run certain apps on your Windows 11/10 host machine, then the fixes we have presented below in no particular order can be easily applied to resolve the issue on your system.
- Initial checklist
- Disable Windows Hypervisor Platform
- Modify the DriverDesc registry key
- Edit the .vmx file
- Modify the SystemBiosVersion registry key
Let’s see these fixes in detail.
1] Initial checklist
Our investigations also revealed that the Sorry, this application cannot run under a Virtual Machine and can also be triggered on a physical machine. In this case, you can perform the following prechecks. Otherwise, you can continue with the rest of the solutions presented below.
- Check your device name for generic names like “Computer” or “Device,” as in some cases, these names by default may be identified as a virtual machine.
- Check files and processes: The system can be mistakenly identified as a virtual machine as applications may check to verify if the system’s currently active processes and services are the default Windows system and if any new/third-party apps are installed.
- Check for previously installed Virtual Machine: If you had previously installed a VM application, you should examine your system for anything with the associated phrase because often VM apps create a registry containing such terms. If that’s the case, you can use a third-party Uninstaller Software to completely uninstall the virtualization software from your Windows 11/10 computer.
- Make sure you’re running a genuine copy of Windows as the processes and system files that have been altered can cause the machine to differ from a genuine copy which can cause programs to not run as intended and throw errors.
- Run AV scan: You should consider running a full system AV scan on your system for malware if you are seeing the VM error on a physical Windows PC.
2] Disable the Windows Hypervisor Platform

This fix requires you to disable Hyper-V assuming you’re running the app on a third-party virtualization software.
Read: How to enable Hyper-V on Windows 365 Cloud PC
3] Modify the DriverDesc registry key

Since this is a registry operation, it is recommended that you back up the registry or create a system restore point as necessary precautionary measures. Once done, you can proceed as follows:
- Press Windows key + R to invoke the Run dialog.
- In the Run dialog box, type regedit and hit Enter to open Registry Editor.
- Navigate or jump to the registry key path below:
HKEY_LOCAL_MACHINE\SYSTEM\CurrentControlSet\Control\Class\{4d36e968-e325-11ce-bfc1-08002be10318}\0000
- At the location, on the right pane, right-click the DriverDesc registry key (If you cannot find it, search different folders such as 0001, 0002, etc) to edit its properties.
- Select Modify.
- Now, delete the data inside the Value data field.
- Click OK to save changes.
- Exit registry.
4] Edit the .vmx file
- Shut down your virtual machine completely.
- Open the virtual machine folder in ~/Documents/Virtual Machines/.
- Right-click on your virtual machine and select Show Package Contents.
- Next, find the file with the .vmx file extension and open the file with a text editor.
- Now, scroll to the bottom of the file and write the following on a new line:
monitor_control.restrict_backdoor = "true"
- Save the file
- Launch your virtual machine
- Run the app again.
5] Modify the SystemBiosVersion registry key

- Open Registry Editor.
- Navigate or jump to the registry path below:
HKEY_LOCAL_MACHINE\HARDWARE\DESCRIPTION\System
- At the location, on the right pane, double-click the SystemBiosVersion entry to edit its properties.
- Now, change the Value data from whatever is written into NOBOX -1.
- Click OK to save changes.
- Exit Registry Editor.
We hope this helps!
Read next: BlueStacks cannot start when Hyper-V is enabled
How to solve this application cannot run under a virtual machine?
You may experience these errors on Windows 11 with certain Windows features enabled. To resolve the issue, amongst other solutions as outlined in this post above, you can try going to Turn Windows features on or off the Control Panel applet and turning off: the Hyper-V Virtual Machine Platform.
How do I run an application on a virtual machine?
You can apply the /appvpid:<PID> switch to any command, which enables that command to run within a virtual process that you select by specifying its process ID (PID). Using this method launches the new executable in the same App-V environment as an executable that is already running.
Read: Not enough memory in the system to start the virtual machine.
Obinna has completed B.Tech in Information & Communication Technology. He has worked as a System Support Engineer, primarily on User Endpoint Administration, as well as a Technical Analyst, primarily on Server/System Administration. He also has experience as a Network and Communications Officer. He has been a Windows Insider MVP (2020) and currently owns and runs a Computer Clinic.
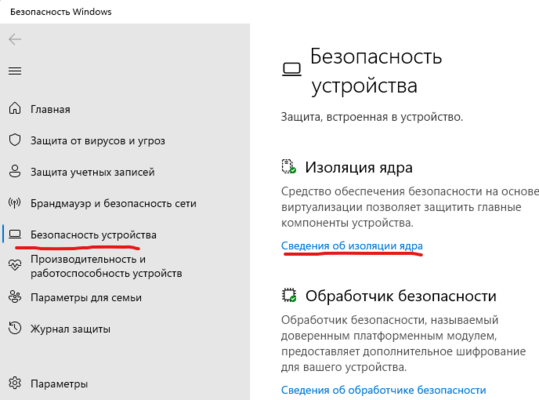
Встроенный механизм защиты ОС, который не позволяет запуститься клиенту — это изоляция ядра (Core isolation).
Если изоляция ядра включена, то защита клиента реагирует многим знакомой нотификацией «Sorry, this application cannot run under a Virtual Machine».
Spoiler
Чтобы отключить изоляцию ядра достаточно перейти в безопасности устройства в раздел Изоляция ядра (Сведения об изоляции ядра).
Spoiler
И отключить целостность памяти.
Spoiler
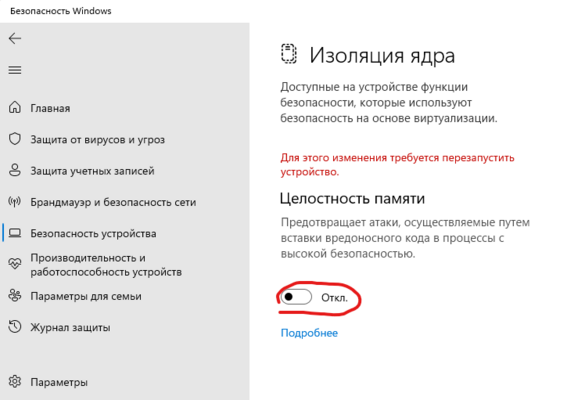
После перезагрузки устройства игра запустится.
Проверено на Win 11 без дополнительного софта, работающего с виртуализацией.
Изменено пользователем HawkC4
Skip to content
Часто случается, что при запуске какого-либо вин-приложения из-под виртуальной машины приложение мгновенно закрывается с такой вот ошибкой:

Sorry, this application cannot run under a Virtual Machine
Это в основном означает, что разработчики данного приложения пожелали не давать ему возможности запускаться из-под виртуалок.
Исследовав проблему, нашел её решение для VMWare — оно состоит в том что необходимо подправить конфиг файла с расширением .vmx, дописав туда несколько строчек:
isolation.tools.getPtrLocation.disable = "TRUE"
isolation.tools.setPtrLocation.disable = "TRUE"
isolation.tools.setVersion.disable = "TRUE"
isolation.tools.getVersion.disable = "TRUE"
monitor_control.disable_directexec = "TRUE"
monitor_control.disable_chksimd = "TRUE"
monitor_control.disable_ntreloc = "TRUE"
monitor_control.disable_selfmod = "TRUE"
monitor_control.disable_reloc = "TRUE"
monitor_control.disable_btinout = "TRUE"
monitor_control.disable_btmemspace = "TRUE"
monitor_control.disable_btpriv = "TRUE"
monitor_control.disable_btseg = "TRUE"
А кто-то советует дописать чуть другое:
monitor_control.virtual_rdtsc = "false"
monitor_control.restrict_backdoor = "true"
isolation.tools.getPtrLocation.disable = "true"
isolation.tools.setPtrLocation.disable = "true"
isolation.tools.setVersion.disable = "true"
isolation.tools.getVersion.disable = "true"
monitor_control.disable_directexec = "true"
В обоих случаях мне удалось обойти защиту приложений и запустить их из под виртуальной машины! 
UPD: Для смены мака и других свойств виртуальной машины — пробуем также VmTweaker — http://sourceforge.net/projects/vmtweaker/
Некоторые советуют ставить VirtualBox вроде в нем с этим нет проблем. Я лично не пробовал.