Как сделать скриншот (screenshot) в операционной системе Windows, который запускается на компьютерах mac (Macbook Pro, iMac).
Работа в Windows на компьютерах Mac имеет свои особенности. В частности это касается особенностей клавиатуры, на которой отсутствуют привычные windows клавиши.
Аналог клавиши с логотипом Windows (Win) на компьютерах Mac является клавиша Command.
Делаем скриншот в Windows 10 на Bootcamp
Сочетание клавиш для создания скриншота:
Сочетание клавиш для записи и остановки видео:
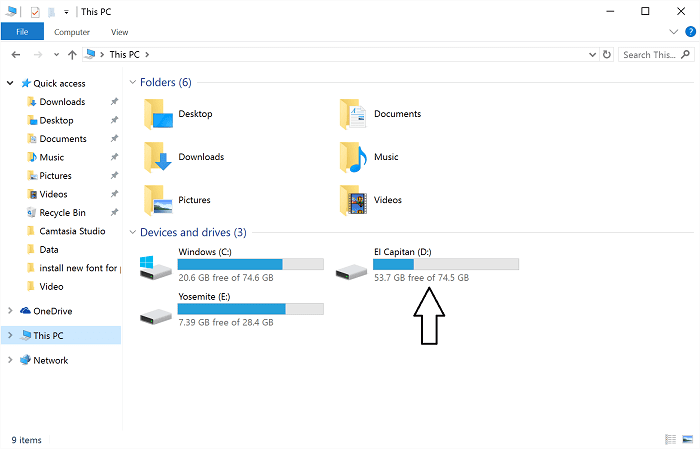
Запись видео происходит через приложение Xbox, которое установлено в Windows 10. Изображения и видео при этом не сохраняются в папке Изображения, а сохраняются по такому пути:
C:\Users\user_name\Videos\Captures
In this page, you will be informed how to print screen on a Mac running Windows or Windows with a Mac keyboard. For those who are running Windows 10 on a Mac through Bootcamp or Parallels, then you are able to print screen on Mac by following these following steps.
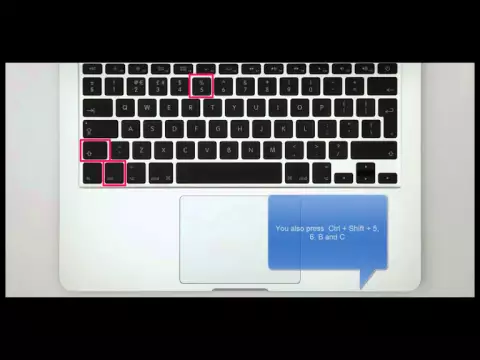
- Function (fn) + Shift + F11: This key combination can be pressed if you want to take a Mac print screen of the whole screen.
- Option (alt) + Function (fn) + Shift + F11: This key combination can be pressed if you want to take a Mac print screen of the front most window.
After you have taken the screenshot, you will need to open Paint, Microsoft Word, or any other apps and do the paste action in order to paste the screen in the document. Please take a note that on the Touch Bar equipped MacBooks, the on screen F11 key will become visible when you press the fn key.
For everyone who is a long time user of Mac, you might be confused by the term “print screen Mac”. In fact, there is nothing to be confused as it is just another term used to call a screenshot on Mac.
Aside from the method to print screen on Mac running Windows or Windows with a Mac keyboard, you will also be informed some other ways to print screen on Mac and some different kinds of keyboards that you might be using, including the normal Mac keyboards, Touch Bar equipped Mac keyboards, and Windows keyboards that being used on Mac.
Print screening on Mac with normal keyboard
Print screen Mac function is really easy to do. Each screenshot taken by using this method is placed on the desktop by default.
- Command + Shift + 3: This key combination can be used to take a screenshot of the entire screen if you have multiple monitors attached to your Mac. This step will take a screenshot on all of them.
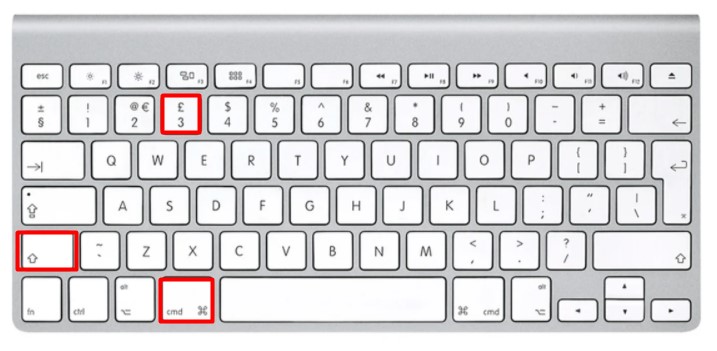
- Command + shift + 4: This key combination can be used to take a screenshot of a specific portion of the screen. After pressing the key combination, then you will need to use the mouse or trackpad in order to choose the portion of the screen that you want to include in the screenshot.

- Command + shift + 5: This key combination can be used to take a screenshot of a specific screen. Once you have pressed all the keys you will get a camera cursor on the screen. Feel free to move the cursor to the screen that you want to take the screenshot of and then left click.

- Command + shift + 4 + Space bar: This key combination can be used to take a screenshot of a specific app or window. Keep in mind that the space bar should be pressed separately from the Command + Shift + 4. After that, click on the app or window that you want to take the screenshot of.

Print screening on Mac with Touch Bar keyboard
If you have a MacBook Pro that comes with a Touch Bar, then you have the special print screen Mac functions that makes it easier for you to print the screen on Mac. With the MacBook Pro that has a Touch Bar, you are able to take a screenshot simply by pressing the Command + Shift + 4 key combination. Your Mac will show the special screenshot buttons on the Touch Bar as soon as you press this key combination.
Then, you can tap on the first button in order to take the screenshot of the full screen or tap on the second one to choose the certain screen or the app on the screen for the screenshot. Apart from that, there is also the third button that allows you to choose the portion of the screen for the screenshot.
In addition, there is a special print screen option on Mac that is exclusively available on Touch Bar keyboard. This one allows you to select the location to store the screenshot. From the Touch Bar of the Mac, you can tap on the option named “Desktop” which is able to be found next to the “Save to” text and from the screen select the folder that you want to save the screenshot in.
Besides, you can also choose the Clipboard option if you want the next screenshot to only be saved to the clipboard. You are then able to paste the screenshot wherever you want. On top of that you can also directly save the screenshot in the Preview app, Messages app, and Mail app.
Print screening on Windows with Mac with keyboard
For those who have Pc running Windows 10 but you are using a Mac keyboard, then you are able to print screen on Windows with Mac keyboard using these following actions.
- Function (fn) + Shift + F11: This key combination can be used if you want to take a print screen of the whole screen.

- Option (alt) + Function (fn) + shift + F11: This key combination can be used if you want to take a print screen of the front most window.

Once you have taken the screenshot, you will have to open Microsoft Word or Paint and do the paste action in order to paste the print screen in the document.
The term “print screen” is normally used in the Windows environment in order to describe and give the power for you to capture the content that you are able to see on the screen. On the Windows compatible keyboards, in particular, you will be able to see that Print Screen is an actual button. On Mac, there is no button named that way. Fortunately, there is a series of keystrokes that you are able to perform if you want to print screen. Basically, they have the same function as Print Screen of Windows. Instead of “print screen”, you might hear the term “capture” or “screenshot” on Mac.

AUTHOR BIO
On my daily job, I am a software engineer, programmer & computer technician. My passion is assembling PC hardware, studying Operating System and all things related to computers technology. I also love to make short films for YouTube as a producer. More at about me…
I have an old bluetooth Model A1016 that looks just like the above keyboard sans cord and F13 invokes printscreen thru my RDP session on the Windows7 PC I’m controlling via my old Macbook Air 11
I just found this forum cause I needed to do this and I just happened to try F13 after something I read here inspired me to do so. Attached is the cmd-shift-4 screen cap of the RDP session showing «Greenshot» just after it was invoked thru the RDP session via F13 from the Mac’s wireless keyboard (I emailed the Mac screen cap to the work PC).
Greenshot’s defaults are set to use the PC’s print-screen key…
I needed this because I do A LOT of screen caps for work and the «snipping tool» sucks rocks… The PC belongs to my customer so I don’t want to buy Snag-it for it… I was unaware of Greenshot until a few days ago
Print Screen Section From Greenshot showing me writing this on the PC invoked from the Mac’s F13 thru RDP
I downloaded Greenshot a couple days ago, so I’ve used it exactly 3 times so far and those 3 screen caps are uploaded here. After I installed Greenshot and went to do a screen cap I thought «oh &%#@ ! Because I don’t have a ‘print-screen’ key and that’s what lead me here. It appears that Greenshot hot-key combo’s are configurable but all those key combo’s work for me because my F13 invokes the PC’s ‘Prt-scrn’ key
This full screen cap invoked from the Mac thru RDP via the Mac Option/Alt key + F13 key
And finally a couple of Mac full screen caps (emailed to PC again) showing the Mac’s whole screen with the Greenshot cross hairs waiting for me to select a screen section on the PC as I finished writing this. This would have been way cooler if I could have easily recorded it in video… 
Mac’s full screen as I work
RDP window center stage
Thanks to the peeps that were discussing the function keys!
Maybe this only works for me because my customer’s laptop has a double «insert/prt sc» right next to it’s F12 directly above the it’s delete key and that just happens to map to my F13… If Greenshot really is as configurable as that menu suggests then I would expect anyone to be able to map a hot-key combo that would suite them.
I hope Greenshot isn’t keysrtoke logging spyware 
I hope this is helpful to someone…
-Richard
Taking a screenshot is among the essential features which we perform on your computer or laptop. MacBook Pro Retina or MacBook Air hasn’t been provided a “Print Screen” key by Apple, which is similar to the Windows PC keyboard.

However, you can easily take screenshots when running Windows (Windows 7, Windows 8.1, or Windows 10) on your MacBook. Here’s a detailed guide for taking a screenshot in Windows 10 with an Apple Keyboard
The video below will show you how to do this step by step. You’ll be taking screenshots in Windows in no time using an Apple keyboard.
1. Using A Combination Keyboards on Macbook
To Take a Whole Screen
If you have an Apple Pro keyboard, you need to press the F14 key to take screenshots of the whole screen, or if you’re using an Apple Wireless keyboard or MacBook keyboard (including Macbook Pro, Air), press “Fn + Shift + F11” keys combinations.
To Take an Active Window
Press the “Option + F14” keys to take a screenshot of an active window when using the Apple Pro keyboard, and press the “Fn + Shift + Option + F11” to capture the screenshot from the Apple Wireless keyboard or MacBook keyboard.
[amazon box=”B071ZZTNBM” template=”list”]
2. Using Snipping Tool – A Windows Built-in Tool
Snipping Tool is one more way to take screenshots in Windows on Mac by using BootCamp. It provides several screenshots ways including Free-form Snip, Rectangular Snip, Window Snip, and Full-screen Snip.

To open this application, just click on the Start button >> Accessories >> Snipping Tool, or you also type “Snipping” into the search box and open it from the list of results.
3. Using Third-party programs – Skitch or Lightshot
Evernote Corp, the service company behind the popular note-taking application Evernote, creates Skitch. Skitch is another essential screenshot-taking software. Its function list includes:
- Capturing rectangle-shaped part on the screen
- Standard annotation functions
- Mobile App is also offered (Android/iOS).
- Support hotkeys shortcuts.
Lightshot is also a great tool for taking a screenshot on Windows.
YOU MAY ALSO LIKE:
- How to Take a Screenshot in Windows 10
- How to Take a Screenshot on a Dell
- How to Take Screenshots on Windows 11
Conclusion
This article provides you with a few appropriate methods to take a screenshot in Windows with an Apple Keyboard.
In case you need to upload the screenshot online and get the link in order to post it on your blog, forum, as well as Facebook, Twitter, etc. The best tool for this is Lightshot, you can upload the screenshot right away, and it will provide you with a link to the image so that you can share it with others.
Looks like no one’s replied in a while. To start the conversation again, simply
ask a new question.
Print Screen key in Windows 10 for Macbook Pro with Touch Bar
Hi there,
I’ve just bought a MacBook Pro with Touch bar and installed Windows 10 using bootcamp. Everything works fine as in my previous generation Macbook Pro apart from taking screenshots using what it would be in a Windows Laptop the Print Screen key
In my old Macbook Pro I used to press Fn + Shift + F11 to take a screenshot of the window, this is no longer working in the new Macbook Pro with Touch Bar.
Any idea if this is even possible/configurable?
Thanks
Juan
MacBook Pro TouchBar and Touch ID,
Windows 10
Posted on Jul 2, 2017 4:00 AM
In Windows:
Windows > Accessories > Snipping Tool > Mode > Select from the drop down menu the mode you want including full screen.
Posted on Jul 2, 2017 8:04 AM
Print Screen key in Windows 10 for Macbook Pro with Touch Bar