Small HTTP server
Copyright (C) 1999-2023 Maksim Feoktistov.
It is not only a web server, it is also Mail servers, DNS, FTP, Proxy, DHCP … All in one!
Detail description: descu.htm
Detail description of version for Windows: desc.htm
Build requirments:
To build this project required Perl, gcc, g++, binutils, make, standart C/C++ headers and libraries.
For SSL/TLS support also required OpenSSL 1.0/1.1.1 or GnuTLS libraries.
Build Linux version:
For Debian-style distribution, you may prepare the system with the command:
apt install gcc g++ make libc6-dev libc6-dev-i386 gcc-multilib g++-multilib gnutls-dev libssl-dev
For another cases install the same package with way recomendet for your distribution.
libc6-dev-i386 required to build 32-bit version under 64-bit system
For OpenSSL 1.1.1 required openssl-1.1.1-dev
32-bit:
./Configure --target=i32  --withoutfakelibs
make
make o/libsec111.so
make o/libsecgnutls.so
Result will be o/httpd.exe o/libsec111.so o/libsecgnutls.so
64-bit:
./Configure --target=i64  --withoutfakelibs
make
make o64/libsec111.so
make o64/libsecgnutls.so
Result will be o64/httpd.exe o64/libsec111.so o64/libsecgnutls.so
libsec111.so — for OpenSSL 1.1.1
libsecgnutls.so — for GnuTLS
required one of them.
If you just run
./Configure
without any keys, it tries to create a Makefile for all available targets.
If you plan to copy the binary executable to another PC with a different Linux, do not use the —withoutfakelibs key.
Build Linux version for ARM CPU:
./Configure --target=arm  --armgcc="arm-linux-gnueabi-gcc"  \
            --arminclude="/usr/src/crossarm/include" \
            --armlib="/usr/src/crossarm/lib"
make
Direct your pathes instead /usr/src/crossarm/…
Build Windows version under Linux:
Required i686-w64-mingw32 or x86_64-w64-mingw32
For Debian style distribution you may prepare the system with the command:
apt install i686-w64-mingw32
For TLS/SSL also required headers for openssl 1.1.1 or for GnuTLS libararies.
For GnuTLS you may try to download binaies .dll and headers
from www.gnupg.org.
For openssl — required to build its from sources, to get .a libraries.
The sources available at openssl.org
Run the commands:
./Configure --target=win \
            --winsslinclude="/usr/src/openssl/include" --winssllib="/usr/src/openssl/lib" \
            --wingnutlsinclude="/usr/src/gnutls/include" --wingnutlslib="/usr/src/gnutls/lib"
make
make wo/libsec111.so
make wo/libsecgnutls.so
Direct your pathes to Windows libraries instead /usr/src/…
libsec.so — for OpenSSL
libsecgnutls.so — for GnuTLS
required one of them.
Build Windows version under Windows or withhelp Wine:
Required MinGW and Perl for Windows
./Configure    --wingcc="c:\\MINGW\\bin\\gcc.exe" \
               --windir="c:\\MINGW" \
               --target=win \
               --winsslinclude="c:\\openssl\\include"  --winssllib="c:\\openssl\\lib" \
               --wingnutlsinclude="c:\\gnutls\\include" --wingnutlslib="c:\\gnutls\\lib"
make
make wo/libsec111.so
make wo/libsecgnutls.so
Direct your pathes instead c:\…
Build Windows version with DJGPP GCC/G++
It is tested and optimised for DJGPP 2.95 only. Also required Windows libraries that can be generated withhelp Utilites
If your DJGGP ready to build Windows PE you may just use makefile.dj. Fix the pathes in this file and then run:
make -f makefile.dj
Otherwise you may edit files ‘ya’, ‘yc’ for your pathes and try to run
c1.bat
This DGPP build will be using precompiled binary make_pe.exe, bin2c.exe, copyres.exe. Sources of them present here, you may rebuild it yourself.
 В этой статье я хочу рассказать, как создать http сервер. Http сервер можно использовать под разные задачи, я хочу рассказать, как с помощью этого сервера предоставить доступ на определенные файлы расположенные у вас на компьютере.
Есть множество способов передачи файлов другим пользователям. Хорошо, если файл нужно передать одному пользователю, а если их много… Представим, что вам нужно передать файл сразу двадцати пользователям, и после этого сразу закрыть доступ к этому файлу, если у вас есть «Яндекс диск», то это не проблема, а если нет… Сегодня я вам расскажу о замечательной программе «smallsrv», с помощью которой можно с легкостью поднять http server для передачи данных.
Установка small http server
Сначала нам понадобится сама программа, её качаем здесь.

Внимание:
Антивирус может ругнуться на неё, не обращаем внимание, вредоносного кода там нет.
После того, как вы скачали файл «shttp3.exe», запускаем его, появится окно:

Ставим галочку, что вы согласны с лицензионным соглашением, эта программа распространяется бесплатно, если её использовать дома, а если хотите её использовать в коммерческих целях, то нужно заплатить, хотя кто вам может запретить =)
Оставляем путь по умолчанию, ставить программу будем в корень диска «С» в папку «shttps».
Дальше можно ввести логин и пароль, нет никого смысла в этом, мы использовать её будем в течение непродолжительного времени. Нам же только отдать файл и сразу закрыть доступ.
Нажимаем кнопку «Install». Все, на этом процесс установки окончен.
Настройка small hhtp server
Заходим на диск «С» ищем там папку «shttps», заходим в неё и запускаем исполняющий файл «http.exe».

В появившемся окне будет показываться информация, работает ли домашний http сервер и кто к нему подключен. Там, где часики появилась иконка, нажимаем на неё правой кнопкой мыши, и появится контекстное меню, в котором нажимаем на пункт «settings…».

В появившемся окне нужно нажать на кнопку «HTTP».

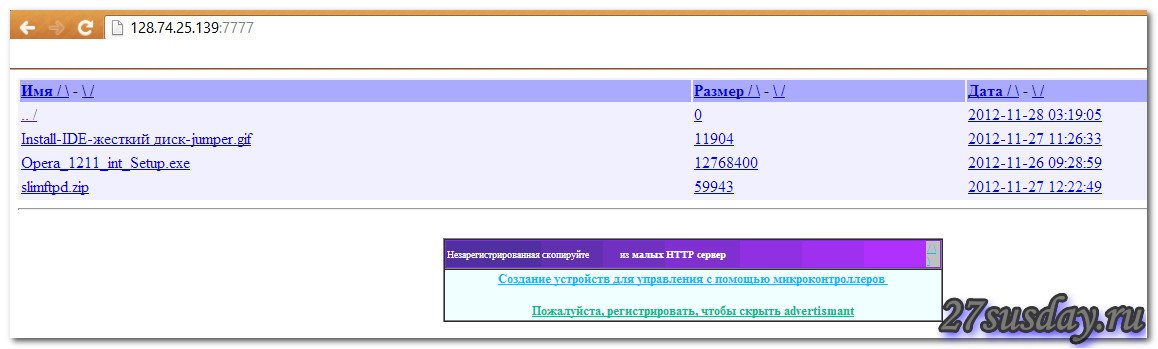
Порт, по которому будет разрешен доступ на ваш сервер – я указываю обычно другой порт, для того, чтобы себя обезопасить, и избежать недоразумений, по умолчанию стоит порт 80, меняем его на порт «7777». В правом верхнем углу окна, есть две кнопки «Оk» и «Cancel», нажимаем «Ок», окно закроется после этого. Теперь давайте проверим, работает ли ваш сервер. Открываем браузер и пишем в вдресной строке: http//127.0.0.1:7777 нажимаем Enter, должно открыться такое вот окно.

После чего, нужно проверить, доступен ли наш сервер из интернета, для этого заходим на сайт http://2ip.ru и узнаем ваш внешний ip адрес.

Там будет написано: Ваш IP адрес: х.х.х.х, копируем его и вставляем в адресную строку вашего браузера, либо просто набираем и на конце добавляем после двоеточия порт, к примеру: «http://128.74.25.136:7777».
Проброс порта на d-link dir-300
У меня дома интернет раздает роутер dir -300, поэтому если я укажу восьмидесятый порт, то пользователи при заходе на мой сервер, попадут в админку моего роутера, поэтому я меняю порт на 7777, чтобы этого избежать.
Если у вас тоже стоит роутер, вам нужно пробросить этот порт, иначе ваш сервер из интернета не будет доступен.
Заходим по адресу http://192.168.0.1 – на ваш роутер, вводим логин и пароль и попадаем в административную панель роутера.

- Расширенные настройки.
- Перенаправление портов.
- Дальше чуть ниже будут правила, на самом первом ставим галочку и приступаем к заполнению остальных полей.
- Имя – любое имя на свой вкус.
- IP – адрес – нужно ввести ип адрес вашего компьютер, его можно посмотреть следующим образом.
Нажимаем сочетание клавиш Win+R, в появившемся окне вводим «cmd», жмем кнопку «Ок».

У вас откроется командная строка, набираем там команду: «ipconfig», и нажимаем интер.

Вы можете наблюдать ваш ip адрес.
6. Внешний порт – указываем 7777
7. Внешний порт – указываем 7777
8. Внутренний порт – указываем 7777
9. Тип трафика – выбираем «любой»
10. Жмем кнопку «Сохранить настройки»
На этом проброс порта на роутере d-link dir-300 окончен. Теперь ваш сервер доступен из интернета.
Выкладываем файл для скачивания
Зайти пользователи на ваш сервер могут, но как мы можем наблюдать там пусто.

Для того, чтобы выложить какой-либо файл, нужно зайди на диск «С» в папку «shttps», и там будет папка «www», в неё то и надо положить файл, который вы хотите раздать сразу большому количеству людей.

В итоге вот, что получится.
Закрываем доступ
Чтобы закрыть доступ на те файлы, которые вы выложили на всеобщее обозрение, нужно просто там, где часики есть иконка с названием “Small server”, нажимаем на неё правой кнопкой мыши, появится контекстное меню, в котором нажимаем на пункт «Exit».
Предыдущая
ПрограммыBad сектора на HDD
Следующая
WindowsКак подключить компьютер к интернету
Помогла статья? Оцените её
![]() Загрузка…
Загрузка…
Small HTTP server — небольшая программа, представляющая собой полнофункциональный HTTP-сервер. Кроме этого, программа может работать почтовым сервером, FTP-сервером, прокси сервером и DNS-сервером. Small HTTP server не требователен к системным ресурсам и может работать в локальных сетях или даже через диал-ап соединение. Это приложение может использоваться для тестирования и отладки сайтов и веб-приложений на локальном компьютере, для раздачи доступа в интернет, работы с электронной почтой и т.д. Имеется поддержка GZip, SSI, CGI (включая интерпретаторы PHP, Perl и др.), виртуальных хостов и директорий, POP3, SMTP, почтовых антиспам фильтров. Также поддерживаются протоколы FTP, HTTPS. В процессе работы сервера ведётся подробная статистика, есть возможность администрирования через веб или локально.
-
Overview


Simple, minimalist web server for testing and debugging purposes. Runs as a Windows application only.
It’s free for commercial and non-commercial use.
The server is extremely simple to use. Just unpack the ZIP file, run the executable, and that’s all. You can tweak the configuration later if needed.
Download — Tiny Web Server Application »
- Download and unpack the ZIP package.
- Optional: edit RebexTinyWebServer.exe.config.
- Run RebexTinyWebServer.exe
- Press Start button to begin serving files via HTTP/HTTPS.
- Accessible via HTTP and HTTPS protocols.
- TLS 1.3/1.2 support and up-to-date TLS cipher support.
- Legacy TLS 1.1/1.0 supported as well.
- Detailed activity log (optional raw communication logging).
- Free to use, even for commercial purposes.
- Runs on any Windows OS with .NET 4.6 or higher.
- No setup needed. Just unpack the ZIP file and run.
When to use Rebex Tiny Web Server
-
Local web development and testing
Need to test your web page now? Not willing to wait days or weeks
for your tech-support department to install a testing web server?
Don’t want to spend hours learning how to configure a full-features web
server yourself?Get Tiny Web Server and start testing your HTML pages over HTTPS in minutes.
-
Need temporary local web server for connectivity testing
Install Tiny Web Server, run it and try connecting from your devices.
When NOT to use Rebex Tiny Web Server
-
Need a production web server
Tiny Web Server is meant for testing and debugging purposes only.
It is not intended for Internet-facing endpoints.
Compatibility
Tiny Web Server runs on:
- Windows 11, 10, 8.1, 7.
- Windows Server 2019, 2016, or 2012.
- Windows Vista, Server 2008. You might have to install .NET 4.6 first when using the server on these legacy systems.
Configuration
The server can be configured using RebexTinyWebServer.exe.config file.
This configuration file must be placed in the same folder as the executable file.
httpPort-
TCP port on which the server listens for HTTP connections.
If not specified, the HTTP is disabled. httpsPort-
TCP port on which the server listens for HTTPS connections.
If not specified, the HTTPS is disabled. webRootDir-
Root data folder. If the folder does not exist,
the server creates it and puts some test data there.
Default is./wwwroot. defaultFile-
Default file to be sent if the request URL points to a directory.
Default isindex.html. serverCertificateFile-
Path to the server certificate with associated private key.
PKCS #12 (.pfx file extension) format is supported.
A new self-signed certificate is generated if it does not exist:.pfxfile is intended to be used on the server..cerfile is intended to be installed on the client into
the «Trusted Root Certification Authorities» store.
For more information, read our
Introduction to Public Key Certificates.
Default isserver-certificate.pfx. serverCertificatePassword- Password for the server certificate.
autoStart-
If set to
true, the server starts when application is started.
No need to press the button.
Default isfalse.
Note:
To minimize possible «port in use» conflict, the initial values of ports are assigned to 1180 for HTTP and 11443 for HTTPS.
If you need to test your web client with standard ports, please modify httpPort and httpsPort
in the configuration file to 80 for HTTP and 443 for HTTPS and make sure there is no other service using those ports.
Version history
1.0.0 (2022-02-22)
- First version.
Contact
Have a feature request or a question? Contact us or ask
at Rebex Q&A Forum.
Small HTTP server
Copyright (C) 1999-2023 Maksim Feoktistov.
It is not only a web server, it is also Mail servers, DNS, FTP, Proxy, DHCP … All in one!
Detail description: descu.htm
Detail description of version for Windows: desc.htm
Build requirments:
To build this project required Perl, gcc, g++, binutils, make, standart C/C++ headers and libraries.
For SSL/TLS support also required OpenSSL 1.0/1.1.1 or GnuTLS libraries.
Build Linux version:
For Debian-style distribution, you may prepare the system with the command:
apt install gcc g++ make libc6-dev libc6-dev-i386 gcc-multilib g++-multilib gnutls-dev libssl-dev
For another cases install the same package with way recomendet for your distribution.
libc6-dev-i386 required to build 32-bit version under 64-bit system
For OpenSSL 1.1.1 required openssl-1.1.1-dev
32-bit:
./Configure --target=i32  --withoutfakelibs
make
make o/libsec111.so
make o/libsecgnutls.so
Result will be o/httpd.exe o/libsec111.so o/libsecgnutls.so
64-bit:
./Configure --target=i64  --withoutfakelibs
make
make o64/libsec111.so
make o64/libsecgnutls.so
Result will be o64/httpd.exe o64/libsec111.so o64/libsecgnutls.so
libsec111.so — for OpenSSL 1.1.1
libsecgnutls.so — for GnuTLS
required one of them.
If you just run
without any keys, it tries to create a Makefile for all available targets.
If you plan to copy the binary executable to another PC with a different Linux, do not use the —withoutfakelibs key.
Build Linux version for ARM CPU:
./Configure --target=arm  --armgcc="arm-linux-gnueabi-gcc"  \
            --arminclude="/usr/src/crossarm/include" \
            --armlib="/usr/src/crossarm/lib"
make
Direct your pathes instead /usr/src/crossarm/…
Build Windows version under Linux:
Required i686-w64-mingw32 or x86_64-w64-mingw32
For Debian style distribution you may prepare the system with the command:
apt install i686-w64-mingw32
For TLS/SSL also required headers for openssl 1.1.1 or for GnuTLS libararies.
For GnuTLS you may try to download binaies .dll and headers
from www.gnupg.org.
For openssl — required to build its from sources, to get .a libraries.
The sources available at openssl.org
Run the commands:
./Configure --target=win \
            --winsslinclude="/usr/src/openssl/include" --winssllib="/usr/src/openssl/lib" \
            --wingnutlsinclude="/usr/src/gnutls/include" --wingnutlslib="/usr/src/gnutls/lib"
make
make wo/libsec111.so
make wo/libsecgnutls.so
Direct your pathes to Windows libraries instead /usr/src/…
libsec.so — for OpenSSL
libsecgnutls.so — for GnuTLS
required one of them.
Build Windows version under Windows or withhelp Wine:
Required MinGW and Perl for Windows
./Configure    --wingcc="c:\\MINGW\\bin\\gcc.exe" \
               --windir="c:\\MINGW" \
               --target=win \
               --winsslinclude="c:\\openssl\\include"  --winssllib="c:\\openssl\\lib" \
               --wingnutlsinclude="c:\\gnutls\\include" --wingnutlslib="c:\\gnutls\\lib"
make
make wo/libsec111.so
make wo/libsecgnutls.so
Direct your pathes instead c:\…
Build Windows version with DJGPP GCC/G++
It is tested and optimised for DJGPP 2.95 only. Also required Windows libraries that can be generated withhelp Utilites
If your DJGGP ready to build Windows PE you may just use makefile.dj. Fix the pathes in this file and then run:
Otherwise you may edit files ‘ya’, ‘yc’ for your pathes and try to run
This DGPP build will be using precompiled binary make_pe.exe, bin2c.exe, copyres.exe. Sources of them present here, you may rebuild it yourself.