Здарова, щеглы, сегодня мы своими руками будем писать скрипт на Python. Нам понадобятся: интерпретатор Python 3 под «какая-там-у-вас-ОС», текстовый редактор с подсветкой синтаксиса, например, Sublime Text, Google, упаковка прамирацетама, бутылка минеральной воды и 60 минут свободного времени.
Перед тем как писать скрипт, мы должны определиться, что он вообще будет делать. Делать он будет следующее: получив на вход домен и диапазон IP-адресов, многопоточно проходить список этих адресов, совершать HTTP-запрос к каждому, в попытках понять, на каком же из них размещен искомый домен. Зачем это нужно? Бывают ситуации, когда IP-адрес домена закрыт Cloudflare, или Stormwall, или Incapsula, или еще чем-нибудь, WHOIS история не выдает ничего интересного, в DNS-записях такая же канитель, а, внезапно, один из поддоменов ресолвится в адрес из некоторой подсети, которая не принадлежит сервису защиты. И в этот момент нам становится интересно, вдруг и основной домен размещен в той же самой подсети.
Погнали, сразу выпиваем половину бутылки воды, и пишем следующий код:
|
1 2 3 4 5 6 7 8 9 10 11 12 13 14 15 16 17 18 19 20 21 22 23 24 25 26 27 28 29 30 31 32 33 34 35 36 37 38 39 40 41 42 43 44 45 46 47 48 49 50 51 52 53 54 55 56 57 58 59 60 61 62 63 64 65 66 67 68 69 70 71 72 73 74 75 76 77 78 79 80 81 82 83 84 85 86 87 88 89 90 91 92 93 94 95 96 97 98 99 100 |
import argparse import logging import coloredlogs import ssl import concurrent.futures import urllib.request from netaddr import IPNetwork from collections import deque VERSION = 0.1 def setup_args(): parser = argparse.ArgumentParser( description = ‘Domain Seeker v’ + str(VERSION) + ‘ (c) Kaimi (kaimi.io)’, epilog = », formatter_class = argparse.ArgumentDefaultsHelpFormatter ) parser.add_argument( ‘-d’, ‘—domains’, help = ‘Domain list to discover’, type = str, required = True ) parser.add_argument( ‘-i’, ‘—ips’, help = ‘IP list (ranges) to scan for domains’, type = str, required = True ) parser.add_argument( ‘—https’, help = ‘Check HTTPS in addition to HTTP’, action = ‘store_true’ ) parser.add_argument( ‘—codes’, help = ‘HTTP-codes list that will be considered as good’, type = str, default = ‘200,301,302,401,403’ ) parser.add_argument( ‘—separator’, help = ‘IP/Domain/HTTP-codes list separator’, type = str, default = ‘,’ ) parser.add_argument( ‘—include’, help = ‘Show results containing provided string’, type = str ) parser.add_argument( ‘—exclude’, help = ‘Hide results containing provided string’, type = str ) parser.add_argument( ‘—agent’, help = ‘User-Agent value for HTTP-requests’, type = str, default = ‘Mozilla/5.0 (Windows NT 6.1; WOW64; rv:40.0) Gecko/20100101 Firefox/40.1’ ) parser.add_argument( ‘—http-port’, help = ‘HTTP port’, type = int, default = 80 ) parser.add_argument( ‘—https-port’, help = ‘HTTPS port’, type = int, default = 443 ) parser.add_argument( ‘—timeout’, help = ‘HTTP-request timeout’, type = int, default = 5 ) parser.add_argument( ‘—threads’, help = ‘Number of threads’, type = int, default = 2 ) args = parser.parse_args() return args if __name__ == ‘__main__’: main() |
Ни одного комментария, какие-то import, непонятные аргументы командной строки и еще эти две последние строчки… Но будьте спокойны, все нормально, это я вам как мастер программирования на Python с 30-минутным стажем говорю. Тем более, как известно, Google не врет, а официальная документация по Python — это вообще неоспоримая истина.
Так что же мы все-таки сделали в вышеописанном фрагменте кода? Мы подключили модули для работы с аргументами коммандной строки, модули для логирования (потокобезопасные между прочим!), модуль для работы с SSL (для одной мелочи, связанной с HTTPS-запросами), модуль для создания пула потоков, и, наконец, модули для совершения HTTP-запросов, работы с IP-адресами и двухсторонней очередью (по поводу различных типов импорта можно почитать здесь).
После этого мы, в соответствии с документацией по модулю argparse, создали вспомогательную функцию, которая будет обрабатывать аргументы, переданные скрипту при запуске из командной строки. Как видите, в скрипте будет предусмотрена работа со списком доменов/IP-диапазонов, а также возможность фильтрации результатов по ключевым словам и по кодам состояния HTTP и еще пара мелочей, как, например, смена User-Agent и опциональная проверка HTTPS-версии искомого ресурса. Последние две строки в основном используются для разделения кода, который будет выполнен при запуске самого скрипта и при импортировании в другой скрипт. В общем тут все сложно, все так пишут. Мы тоже так будем писать. Можно было бы немного модифицировать этот код, например, добавив возврат разных статусов системе в зависимости от того, как отработала функция main, добавить argv в качестве аргумента, и так далее, но мы изучаем Python только 10 минут и ленимся вчитываться в документацию.
Делаем перерыв и выпиваем глоток освежающей минеральной воды.
Поехали дальше.
|
1 2 3 4 5 6 7 8 9 10 11 12 13 14 15 16 17 18 19 20 21 22 23 24 25 26 27 28 29 30 31 32 33 34 35 36 37 38 39 40 41 42 43 44 45 46 47 48 49 50 51 |
def main(): # Обрабатываем аргументы и инициализируем логирование # с блекджеком и цветными записями args = setup_args() coloredlogs.install() # Сообщаем бесполезную информацию, а также запускаем цикл проверки logging.info(«Starting…») try: check_loop(args) except Exception as exception: logging.error(exception) logging.info(«Finished») def check_loop(args): # Создаем пул потоков, еще немного обрабатываем переданные аргументы # и формируем очередь заданий with concurrent.futures.ThreadPoolExecutor(max_workers = args.threads) as pool: domains = args.domains.split(args.separator) ips = args.ips.split(args.separator) codes = args.codes.split(args.separator) tasks = deque([]) for entry in ips: ip_list = IPNetwork(entry) for ip in ip_list: for domain in domains: tasks.append( pool.submit( check_ip, domain, ip, args, codes ) ) # Обрабатываем результаты и выводим найденные пары домен-IP for task in concurrent.futures.as_completed(tasks): try: result = task.result() except Exception as exception: logging.error(exception) else: if result != None: data = str(result[0]) if( ( args.exclude == None and args.include == None ) or ( args.exclude and args.exclude not in data ) or ( args.include and args.include in data ) ): logging.critical(«[+] « + args.separator.join(result[1:])) |
В коде появился минимум комментариев. Это прогресс. Надо войти в кураж (не зря мы заготовили прамирацетам) и дописать одну единственную функцию, которая будет осуществлять, непосредственно, проверку. Ее имя уже упомянуто в коде выше: check_ip.
30 минут спустя
Хорошо-то как. Не зря я говорил, что понадобится час времени. Продолжим.
|
1 2 3 4 5 6 7 8 9 10 11 12 13 14 15 16 17 18 19 20 21 22 23 24 25 26 27 28 29 30 31 32 33 34 35 36 37 38 39 40 41 42 43 44 45 |
def check_ip(domain, ip, args, codes): # Преобразуем IP из числа в строку # Магическая code-flow переменная для совершения двух проверок # И бесполезное логирование ip = str(ip) check_https = False logging.info(«Checking « + args.separator.join([ip, domain])) while True: # Задаем порт и схему для запроса в зависимости от магической переменной schema = ‘https://’ if check_https else ‘http://’; port = str(args.https_port) if check_https else str(args.http_port) request = urllib.request.Request( schema + ip + ‘:’ + port + ‘/’, data = None, headers = { ‘User-Agent’: args.agent, ‘Host’: domain } ) # Совершаем запрос, и если получаем удовлетворительный код состояни HTTP, # то возвращаем содержимое ответа сервера, а также домен и IP try: response = urllib.request.urlopen( request, data = None, timeout = args.timeout, context = ssl._create_unverified_context() ) data = response.read() return [data, ip, domain] except urllib.error.HTTPError as exception: if str(exception.code) in codes: data = exception.fp.read() return [data, ip, domain] except Exception: pass if args.https and not check_https: check_https = True continue return None |
В общем-то весь наш скрипт готов. Приступаем к тестированию.
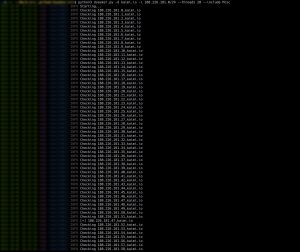
Неожиданно узнаем, что у блога есть альтернативный IP-адрес. И действительно:
|
curl —i ‘http://188.226.181.47/’ —header ‘Host: kaimi.io’ |
|
HTTP/1.1 301 Moved Permanently Server: nginx/1.4.6 (Ubuntu) Date: Sun, 02 Oct 2016 13:52:43 GMT Content—Type: text/html Content—Length: 193 Connection: keep—alive Location: https://kaimi.io/ <html> <head><title>301 Moved Permanently</title></head> <body bgcolor=«white»> <center><h1>301 Moved Permanently</h1></center> <hr><center>nginx/1.4.6 (Ubuntu)</center> </body> </html> |
Однако:
|
curl —i ‘https://188.226.181.47/’ —header ‘Host: kaimi.io’ |
|
curl: (51) SSL: certificate subject name (*.polygraph.io) does not match target host name ‘188.226.181.47’ |
Какой-то левый хост обрабатывает запросы. Почему? Потому что это прокси, который реагирует на содержимое заголовка Host. В общем скрипт готов, по крайней мере альфа-версия скрипта. Если вам понравилось — подписывайтесь, ставьте лайки, шлите pull-реквесты на github.
7 июня 2023
4 013
0
Время чтения ≈ 34 минуты

Надоело бегать по кругу, ежедневно выполняя один и тот же набор скучных задач? Просто вооружитесь средствами автоматизации из арсенала «змеиного языка» и позвольте компьютеру сделать всю работу за вас.
«Автоматизация — не враг, а союзник человека. Она освобождает работника от тяжелого труда, давая возможность заниматься более творческими и вдохновляющими делами»
— Роберт Нойс, американский инженер, основатель компании Intel.
Python — это мощный и универсальный язык разработки, который отлично подходит для автоматизации различных задач. Многочисленные скрипты (готовые к исполнению элементы кода), написанные для «змеиного языка» могут помочь любому пользователю, знакомому с основами программирования на Python, высвободить рабочее время от рутины.
Содержание:
- Передача файлов
- Мониторинг системы
- Парсинг веб-страниц
- Скрапинг изображений
- Электронная почта
- Конвертация текста в речь
- Чтение и изменение CSV-файла
- Конвертация PDF в CSV
- Сжатие изображений
- Конвертация из JSON в YAML и обратно
- Извлечение текста из PDF
- Обработка аудиофайлов
- Воспроизведение музыки в случайном порядке
- Фильтрация текста
- Сопоставление с образцом при помощи регулярных выражений
- Анализ данных
- Задачи компьютерного зрения
- Шифрование данных
- Тестирование и отладка
- Прогнозирование временных рядов
Здесь собраны примеры встроенных модулей и библиотек Python для автоматизации ряда популярных повторяющихся задач разной сложности — от конвертации файлов до анализа больших массивов данных. Этот обзор пригодиться всем, кто устал тратить время на утомительные задачи или хочет повысить свою эффективность (или хотя бы еще несколько часов в сутках, чтобы всласть прокрастинировать). Да начнется автоматизация с Python!
Передача файлов

Python предоставляет немало библиотек и модулей, которые можно использовать для создания сценария автоматической передачи файлов по сети или между компьютерами. В их число входят, такие инструменты, как socket, ftplib, smtplib и paramiko.
Ниже приведен пример простого скрипта Python, который использует модуль «socket» для передачи файла по сети:
import socket

# create socket
s = socket.socket()

# bind socket to a address and port
s.bind(('localhost', 12345))

# put the socket into listening mode
s.listen(5)

print('Server listening...')

# forever loop to keep server running
while True:
   # establish connection with client
   client, addr = s.accept()
   print(f'Got connection from {addr}')

   # receive the file name
   file_name = client.recv(1024).decode()

   try:
       # open the file for reading in binary
       with open(file_name, 'rb') as file:
           # read the file in chunks
           while True:
               chunk = file.read(1024)
               if not chunk:
                   break
               # send the chunk to the client
               client.sendall(chunk)

       print(f'File {file_name} sent successfully')
   except FileNotFoundError:
       # if file not found, send appropriate message
       client.sendall(b'File not found')
       print(f'File {file_name} not found')

   # close the client connection
   client.close()
Выполнение скрипта
Этот сценарий запускает сервер, который прослушивает входящие соединения по адресу «localhost» и порту «12345». Когда клиент подключается, сервер получает имя файла от клиента, а затем считывает и отправляет содержимое файла фрагментами клиенту. Если файл не найден, сервер отправляет клиенту соответствующее сообщение.
Как упоминалось выше, существуют другие библиотеки и модули, которые можно использовать для создания сценария передачи файлов на python, например, ftplib для подключения и передачи файла с использованием протокола ftp и paramiko для передачи по протоколу SFTP (протокол передачи файлов SSH). Сценарий может быть адаптирован в соответствии с конкретными требованиями или сценариями.
Мониторинг системы
Скрипты Python часто используется для мониторинга производительности и состояния компьютера или сети. Например, с их помощью можно отслеживать такие показатели, как загрузка ЦП, использование памяти, дискового пространства, сетевой трафик и время безотказной работы системы. Скрипт также можно использовать для отслеживания определенных событий или условий, таких как возникновение ошибки или доступность определенной службы.
Выполнение скрипта
import psutil

# Get the current CPU usage
cpu_usage = psutil.cpu_percent()

# Get the current memory usage
memory_usage = psutil.virtual_memory().percent

# Get the current disk usage
disk_usage = psutil.disk_usage("/").percent

# Print the collected data
print(f"CPU usage: {cpu_usage}%")
print(f"Memory usage: {memory_usage}%")
print(f"Disk usage: {disk_usage}%")
Приведенный выше скрипт использует функции «cpu_percent», «virtual_memory» и «disk_usage» из модуля «psutil» для получения данных о текущем использовании ЦП, памяти и жесткого диска соответственно.
Функция «virtual_memory» возвращает объект с различными свойствами, такими как общий объем памяти и объем используемой и свободной памяти. Функция «disk_usage» принимает в качестве аргумента путь и возвращает объект с такими свойствами, как общий объем места на диске и количество используемого и свободного места.
Клиенты не могут войти на сайт из-за DDoS? Хватит терпеть убытки!
Подключите интеллектуальную DDoS-защиту CyberFlow и забудьте о проблемах!
Парсинг веб-страниц

Автоматизация веб-скрапинга — одна из самых популярных областей применения скриптов Python. Пакеты таких библиотек, как selenium и beautifulsoup4 широко используются для извлечения данных с веб-сайтов и их хранения в структурированном формате. Например, в виде электронной таблицы или базы данных. Подобная автоматизация облегчает регулярный сбор данных для их анализа или отслеживания изменений на веб-сайте.
Выполнение скрипта
В приведенном ниже примере представлены возможности пакета BeautifulSoup:
import requests
from bs4 import BeautifulSoup

# Fetch a web page
page = requests.get("http://www.example.com")

# Parse the HTML content
soup = BeautifulSoup(page.content, "html.parser")

# Find all the links on the page
links = soup.find_all("a")

# Print the links
for link in links:
   print(link.get("href"))
Используя этот инструмент, можно найти все ссылки на странице. Метод «find» позволит найти первый элемент, а метод «find_all» находит все элементы. Также можно изменить скрипт, чтобы очищать другие типы данных или переходить на разные страницы сайта.
Скрапинг изображений
Этот скрипт Python пригодится, если нужно автоматизировать «сканирование» и выгрузку не веб-страниц целиком, а только изображений с указанных сайтов. Для его работы потребуются пакеты библиотек selenium и beautifulsoup4, которые нужно будет предварительно установить с помощью диспетчера пакетов pip следующим образом:
pip install selenium beautifulsoup4
Кроме того, потребуется загрузить драйвер Chrome, в соответствии с версией используемого браузера Chrome и ОС. В дальнейшем нужно будет ввести путь к файлу «chromedriver», который запрашивает программа.
Выполнение скрипта
Чтобы запустить скрипт, нужно открыть терминал в корневом каталоге скрипта и ввести команду:
python3 scrap-img.py
Скрипт запросит:
- путь к драйверу Chrome, который был загружен на подготовительном шаге;
- URL-адрес, с которого нужно загрузить изображения.
from selenium import webdriver
import requests as rq
import os
from bs4 import BeautifulSoup
import time

# path= E:\web scraping\chromedriver_win32\chromedriver.exe
path = input("Enter Path : ")

url = input("Enter URL : ")

output = "output"

def get_url(path, url):
    driver = webdriver.Chrome(executable_path=r"{}".format(path))
    driver.get(url)
    print("loading.....")
    res = driver.execute_script("return document.documentElement.outerHTML")

    return res

def get_img_links(res):
    soup = BeautifulSoup(res, "lxml")
    imglinks = soup.find_all("img", src=True)
    return imglinks

def download_img(img_link, index):
    try:
        extensions = [".jpeg", ".jpg", ".png", ".gif"]
        extension = ".jpg"
        for exe in extensions:
            if img_link.find(exe) > 0:
                extension = exe
                break

        img_data = rq.get(img_link).content
        with open(output + "\\" + str(index + 1) + extension, "wb+") as f:
            f.write(img_data)

        f.close()
    except Exception:
        pass

result = get_url(path, url)
time.sleep(60)
img_links = get_img_links(result)
if not os.path.isdir(output):
    os.mkdir(output)

for index, img_link in enumerate(img_links):
    img_link = img_link["src"]
    print("Downloading...")
    if img_link:
        download_img(img_link, index)
print("Download Complete!!")
Электронная почта

Упомянутый выше скрипт smtplib можно использовать для автоматической отправки электронных писем на основе определенных условий. Например, он подойдет для отправки ежедневного отчета своей команде или напоминания самому себе, когда приближается важный срок.
Выполнение скрипта
Ниже приведен пример того, как отправить электронное письмо с помощью «питоновского» модуля smtplib, клиента электронной почты и протокола SMTP (Simple Mail Transfer Protocol):
import smtplib
from email.mime.text import MIMEText

# Set the SMTP server and login credentials
smtp_server = "smtp.gmail.com"
smtp_port = 587
username = "your@email.com"
password = "yourpassword"

# Set the email parameters
recipient = "recipient@email.com"
subject = "Test email from Python"
body = "This is a test email sent from Python."

# Create the email message
msg = MIMEText(body)
msg["Subject"] = subject
msg["To"] = recipient
msg["From"] = username

# Send the email
server = smtplib.SMTP(smtp_server, smtp_port)
server.starttls()
server.login(username, password)
server.send_message(msg)
server.quit()
Класс «SMTP» из примера используется для создания SMTP-клиента, методы «starttls» и «login» для установки безопасного соединения, а класс «MIMEText» из модуля электронной почты для создания сообщения электронной почты в формате MIME (Multipurpose Internet Mail Extensions).
После создания сообщения электронной почты метод «send_message» объекта «SMTP» используется для отправки сообщения. Затем вызывается метод «quit», чтобы закрыть соединение с SMTP-сервером.
Конвертация текста в речь
Для этого скрипта можно использовать API облачного сервиса Text-to-Speech от Google, который позволяет разработчикам генерировать человеческую речь. API преобразует текст в аудиоформаты, например, WAV, MP3 или Ogg Opus. Он также поддерживает входные данные языка разметки синтеза речи (SSML) для указания пауз, чисел, форматирования даты и времени и других инструкций по произношению.
from pygame import mixer
from gtts import gTTS
def main():
   tts = gTTS('Like This Article')
   tts.save('output.mp3')
   mixer.init()
   mixer.music.load('output.mp3')
   mixer.music.play()
if __name__ == "__main__":
   main()
Чтение и изменение CSV-файлов

CSV (Comma Separated Values, «значения, разделенные запятыми») — распространенный формат для импорта и экспорта электронных таблиц из таких программ, как Excel. Python может читать CSV, а это означает, что он может копировать и сохранять его содержимое для выполнения других задач.
Выполнение скрипта
Приведенный ниже сценарий использования модуля csv позволит читать и распечатывать содержимое CSV-файла «customers.csv», добавляя запятые между элементами.
import csv
#replace 'customers.csv' with your filename or path to file (i.e. /Desktop/folder/file.csv)
with open('customers.csv', newline='') as csvfile:
    cust_reader = csv.reader(csvfile, delimiter=' ', quotechar='|')
    for row in cust_reader:
        print(', '.join(row))
Также можно автоматически дополнять содержимое CSV-файла без необходимости ввода новых данных вручную.
import csv
Row = ['James Smith', 'james@smith.com', 200000]
# Make sure 'customers.csv' is in your root directory, or provide path to open() method.
# pass in 'a' to append new row or 'w' to overwrite CSV file
with open('customers.csv', 'a', newline='') as csvfile:
    cust_writer = csv.writer(csvfile, delimiter=',',
                            quotechar='|', quoting=csv.QUOTE_MINIMAL)
    cust_writer.writerow(Row)
Конвертация PDF в CSV
Этот скрипт может пригодиться в случаях, когда нужно преобразовать данные PDF в формат CSV, чтобы использовать их для дальнейшего анализа.
Выполнение скрипта
Для начала нужно будет установить библиотеку tabula-py с помощью системы управления программными пакетами PIP. После установки, можно передать файл в свой проект.
import tabula

filename = input("Enter File Path: ")
df = tabula.read_pdf(filename, encoding='utf-8', spreadsheet=True, pages='1')

df.to_csv('output.csv')
Библиотека имеет функцию «read_pdf()», которая считывает PDF-файлы. Завершающим этапом автоматизации станет использование функции «to_csv()» для сохранения вывода с PDF в CSV.
Сжатие изображений
Этот скрипт позволяет уменьшить размер изображения, сохранив при этом его качество. Для этого можно использовать специализированную библиотеку PIL (Python Imaging Library). В ее функциональность входит управление изображениями, добавление фильтров, размытие, повышение резкости, сглаживание, обнаружение краев, сжатие изображений и многое другое.
import PIL
from PIL import Image
from tkinter.filedialog import *

fl=askopenfilenames()
img = Image.open(fl[0])
img.save("output.jpg", "JPEG", optimize = True, quality = 10)
Конвертация из JSON в YAML и обратно
Эти скрипты пригодятся тем, кто работает с файлами конфигурации обоих форматов, но предпочитает один из них.
JSON в YAML — выполнение скрипта
import json
import os
import sys
import yaml

# Checking there is a file name passed
if len(sys.argv) > 1:
    # Opening the file
    if os.path.exists(sys.argv[1]):
        source_file = open(sys.argv[1], "r")
        source_content = json.load(source_file)
        source_file.close()
    # Failing if the file isn't found
    else:
        print("ERROR: " + sys.argv[1] + " not found")
        exit(1)
# No file, no usage
else:
    print("Usage: json2yaml.py <source_file.json> [target_file.yaml]")

# Processing the conversion
output = yaml.dump(source_content)

# If no target file send to stdout
if len(sys.argv) < 3:
    print(output)
# If the target file already exists exit
elif os.path.exists(sys.argv[2]):
    print("ERROR: " + sys.argv[2] + " already exists")
    exit(1)
# Otherwise write to the specified file
else:
    target_file = open(sys.argv[2], "w")
    target_file.write(output)
    target_file.close()
Результат может быть отправлен на стандартный вывод или в указанный файл.
$ json2yaml.py input_file.json output_file.yaml
Но что, если нужно пойти в противоположном направлении? Не проблема — приведенный ниже скрипт преобразует файл из YAML в JSON.
YAML в JSON — выполнение скрипта
import json
import os
import sys
import yaml

# Checking there is a file name passed
if len(sys.argv) > 1:
    # Opening the file
    if os.path.exists(sys.argv[1]):
        source_file = open(sys.argv[1], "r")
        source_content = yaml.safe_load(source_file)
        source_file.close()
    # Failikng if the file isn't found
    else:
        print("ERROR: " + sys.argv[1] + " not found")
        exit(1)
# No file, no usage
else:
    print("Usage: yaml2json.py <source_file.yaml> [target_file.json]")

# Processing the conversion
output = json.dumps(source_content)

# If no target file send to stdout
if len(sys.argv) < 3:
    print(output)
# If the target file already exists exit
elif os.path.exists(sys.argv[2]):
    print("ERROR: " + sys.argv[2] + " already exists")
    exit(1)
# Otherwise write to the specified file
else:
    target_file = open(sys.argv[2], "w")
    target_file.write(output)
    target_file.close()
Результат может быть отправлен на стандартный вывод или в указанный файл.
$ yaml2json.py input_file.yaml output_file.json
Извлечение текста из PDF-файла
Python предоставляет простой способ извлечения текста из PDF-файлов с помощью опенсорсной библиотеки PyPDF2. Этот способ будет полезен для интеллектуального анализа данных, сверки счетов или создания отчетов, а процесс извлечения можно автоматизировать всего несколькими строками кода.
Выполнение скрипта
Установить пакет можно, запустив следующую команду в терминале:
pip install PyPDF2
Ниже приведены несколько примеров практического применения Py2PDF2.
Например, имеется многостраничный PDF, из которого нужна только первая страница. Приведенный ниже скрипт позволяет извлечь текст с первой страницы PDF-документа:
# import module PyPDF2
import PyPDF2
# put 'example.pdf' in working directory
# and open it in read binary mode
pdfFileObj = open('example.pdf', 'rb')
# call and store PdfFileReader
# object in pdfReader
pdfReader = PyPDF2.PdfFileReader(pdfFileObj)
# to print the total number of pages in pdf
# print(pdfReader.numPages)
# get specific page of pdf by passing
# number since it stores pages in list
# to access first page pass 0
pageObj = pdfReader.getPage(0)
# extract the page object
# by extractText() function
texts = pageObj.extractText()
# print the extracted texts
print(texts)
Объединение двух файлов в один
Другой вариант — нужно скопировать текст из двух PDF-файлов и объединить его в новый PDF-файл. Для этого можно использовать приведенный ниже код:
import PyPDF2
# open two pdfs
pdf1File = open('example.pdf', 'rb')
pdf2File = open('example2.pdf', 'rb')
# read first pdf
pdf1Reader = PyPDF2.PdfFileReader(pdf1File)
# read second pdf
pdf2Reader = PyPDF2.PdfFileReader(pdf2File)
# for writing in new pdf file
pdfWriter = PyPDF2.PdfFileWriter()
for pageNum in range(pdf1Reader.numPages):
    pageObj = pdf1Reader.getPage(pageNum)
    pdfWriter.addPage(pageObj)
for pageNum in range(pdf2Reader.numPages):
    pageObj = pdf2Reader.getPage(pageNum)
    pdfWriter.addPage(pageObj)
# create new pdf 'example3.pdf'
pdfOutputFile = open('example3.pdf', 'wb')
pdfWriter.write(pdfOutputFile)
pdfOutputFile.close()
pdf1File.close()
pdf2File.close()
Обработка аудиофайлов

Pydub — пакет Python, который позволяет совершать разнообразные манипуляции со звуком, включая преобразование в различные форматы (например, wav или mp3) или выборочное увеличение/уменьшение громкости на одном аудиотреке. Pydub может сегментировать аудиофайл на миллисекундные сэмплы, что может быть особенно полезно для задач машинного обучения.
Выполнение скрипта
Pydub можно установить, введя в терминале команду Python:
pip install pydub
Допустим, при работе со звуком, нужно убедиться, что каждый файл имеет правильную громкость. Для автоматизации этой задачи можно использовать приведенный ниже скрипт:
from pydub import AudioSegment

audio_file = AudioSegment.from_mp3("example.mp3")
louder_audio_file = audio_file + 18
louder_audio_file.export("example_louder.mp3", format="mp3")
Воспроизведение музыки в случайном порядке
Этот скрипт будет полезен для меломанов, не представляющих работы за компьютером без любимой музыкальной коллекции. Он случайным образом выбирает трек из папки с альбомами или сборниками, а затем воспроизводит ее с помощью модуля «os».
Выполнение скрипта
Скрипт переходит в музыкальный каталог, содержащий все песни, которые нужно воспроизвести, и помещает их в список.
import random, os
music_dir = 'E:\\music diretory'
songs = os.listdir(music_dir)

song = random.randint(0,len(songs))

# Prints The Song Name
print(songs[song])

os.startfile(os.path.join(music_dir, songs[0]))
Затем функция «startfile()» модуля «os» запускает в случайном порядке файлы треков с помощью связанного с ним приложения на основе расширения.
Фильтрация текста
Сопоставлять и фильтровать текст с помощью регулярных выражений в Python довольно просто, что может дать существенное преимущество в устранении рутинных операций.
Выполнение скрипта
Для примера возьмем систему для пакетной обработки сообщений с подтверждением продажи, для работы которой нужно наладить автоматическое вычленение номера кредитной карты из массива текста сообщения электронной почты.
Приведенный ниже скрипт может быстро найти любой номер кредитной карты, соответствующий шаблону, что позволяет легко отфильтровать эту информацию из любого текстового содержимого:
# Filter Text
# Import re module
import re
# Take any string data
string = """a string we are using to filter specific items.
perhaps we would like to match credit card numbers
mistakenly entered into the user input. 4444 3232 1010 8989
and perhaps another? 9191 0232 9999 1111"""

# Define the searching pattern
pattern = '(([0-9](\s+)?){4}){4}'

# match the pattern with input value
found = re.search(pattern, string)
print(found)
# Print message based on the return value
if found:
  print("Found a credit card number!")
else:
  print("No credit card numbers present in input")
Сопоставление с образцом при помощи регулярных выражений
Сбор данных из неструктурированных источников может быть очень утомительным процессом. Как и в предыдущем примере с фильтрацией, Python позволяет выполнять более детальное сопоставление с образцом с помощью регулярных выражений. Это полезно для категоризации текстовой информации в процессе регулярной обработки данных или поиска определенных ключевых слов в пользовательском контенте.
В Python есть встроенная библиотека регулярных выражений re, для использования которой достаточно просто освоить синтаксис регулярных выражений. С ее помощью можно автоматизировать практически любой скрипт сопоставления с образцом.
Например, этот скрипт позволит автоматически сопоставить любые адреса электронной почты, найденные в обрабатываемом тексте:
import re
emailRegex = re.compile(r'''(
    [a-zA-Z0-9._%+-]+     # username
    @                               # @ symbol
     [a-zA-Z0-9.-]+           # domain name
     (\.[a-zA-Z]{2,4})         # dot-something
  )''', re.VERBOSE)

# store matched addresses in an array called "matches"
matches = []
text = """
An example text containing an email address, such as user@example.com or something like hello@example.com
"""

# search the text and append matched addresses to the "matches" array
for groups in emailRegex.findall(text):
    matches.append(groups[0])

# matches => ['user@example.com', 'hello@example.com']
print(matches)
А этот скрипт Python поможет сопоставить номера телефонов в тексте:
import re

text = """
Here is an example string containing various numbers, some
of which are not phone numbers.

Business Address
4553-A First Street
Washington, DC 20001

202-555-6473
301-555-8118
"""

phoneRegex = re.compile(r'''(
    (\d{3}|\(\d{3}\))?                 # area code
    (\s|-|\.)?                             # separator
    (\d{3})                               # first 3 digits
    (\s|-|\.)                               # separator
    (\d{4})                               # last 4 digits
    (\s*(ext|x|ext.)\s*(\d{2,5}))?    # extension
    )''', re.VERBOSE)

matches = []
for numbers in phoneRegex.findall(text):
  matches.append(numbers[0])

# matches => ['202-555-6473', '301-555-8118']
print(matches)
Анализ данных

Открытая библиотека Pandas — мощный инструмент для анализа и обработки данных на Python.
Выполнение скрипта
Следующий сценарий демонстрирует, как использовать ее для автоматизации процесса очистки, преобразования и анализа набора данных:
import pandas as pd

# Reading a CSV file
df = pd.read_csv("data.csv")

# Cleaning data
df.dropna(inplace=True) # Dropping missing values
df = df[df["column_name"] != "some_value"] # Removing specific rows

# Transforming data
df["column_name"] = df["column_name"].str.lower() # Changing string to lowercase
df["column_name"] = df["column_name"].astype(int) # Changing column datatype

# Analyzing data
print(df["column_name"].value_counts()) # Prints the frequency of unique values in the column

# Saving the cleaned and transformed data to a new CSV file
df.to_csv("cleaned_data.csv", index=False)
Это достаточно простой пример использования библиотеки, служащий для демонстрации ее базовых возможностей. В реальных сценариях набор данных может быть намного больше, а операции очистки, преобразования и анализа, вероятно, будут более сложными.
Задачи компьютерного зрения
Python и его библиотеки с успехом применяются для автоматического выполнения различных операций обработки изображений и компьютерного зрения. Один из самых популярных инструментов для подобных целей — OpenCV.
Это очень мощная библиотека, основная специализация которой — реализация функций компьютерного зрения в реальном времени. Она предоставляет широкую функциональность, включая ввод-вывод изображений и видео, обработку изображений, анализ видео, обнаружение и распознавание объектов и многое другое.
Выполнение скрипта
Приведенный ниже скрипт обнаруживает лица на изображении:
import cv2

# Load the cascade classifier for face detection
face_cascade = cv2.CascadeClassifier("haarcascade_frontalface_default.xml")

# Load the image
img = cv2.imread("image.jpg")
gray = cv2.cvtColor(img, cv2.COLOR_BGR2GRAY)

# Detect faces
faces = face_cascade.detectMultiScale(gray, scaleFactor=1.1, minNeighbors=5)

# Draw rectangles around the faces
for (x, y, w, h) in faces:
   cv2.rectangle(img, (x, y), (x+w, y+h), (255, 0, 0), 2)

# Show the image

cv2.imshow("Faces", img)
cv2.waitKey(0)
cv2.destroyAllWindows()
Он начинается с загрузки каскадного классификатора детекции «face_cascade», представляющего собой предварительно обученную модель, которая может распознавать лица на изображении. Затем загружает изображение и преобразует его в оттенки серого с помощью метода «cv2.cvtColor()». Далее изображение передается методу классификатора «detectMultiScale()», который обнаруживает лица на изображении. Метод возвращает список координат обнаруженных лиц.
Затем скрипт перебирает список координат и рисует прямоугольники баундинг-боксов вокруг обнаруженных лиц, используя метод «cv2.rectangle()». Наконец, изображение отображается на экране с помощью метода «cv2.imshow()».
Это всего лишь базовый пример того, чего можно достичь с помощью OpenCV, и существует множество других функций, которые можно автоматизировать. Например, обнаружение и отслеживание объектов, обработка изображений, анализ видео.
Шифрование данных
Одним самых популярных инструментов для шифрования данных в Python является библиотека cryptography. Она включает в себя как рецепты высокого уровня, так и низкоуровневые интерфейсы для общих криптографических алгоритмов, таких как симметричные шифры, дайджесты сообщений и функции получения ключей. Выполнение скрипта
Следующий пример демонстрирует, как можно зашифровать файл с помощью библиотеки cryptography:
import os
from cryptography.fernet import Fernet
from cryptography.hazmat.backends import default_backend
from cryptography.hazmat.primitives import hashes
from cryptography.hazmat.primitives.kdf.pbkdf2 import PBKDF2HMAC

password = b"super_secret_password"
salt = os.urandom(16)
kdf = PBKDF2HMAC(
   algorithm=hashes.SHA256,
   iterations=100000,
   length=32,
   salt=salt,
   backend=default_backend()
)
key = base64.urlsafe_b64encode(kdf.derive(password))
cipher = Fernet(key)

# Encrypt the file
with open("file.txt", "rb") as f:
   data = f.read()

cipher_text = cipher.encrypt(data)

with open("file.txt", "wb") as f:
   f.write(cipher_text)
Скрипт начинается с создания ключа с помощью функцию получения ключа на основе пароля «PBKDF2HMAC». Функция использует алгоритм безопасного хэширования (SHA-256) и значение «соли» (salt value), генерируемое с помощью функции «os.urandom()».
Затем скрипт создает объект «Fernet», который представляет собой реализацию симметричной аутентифицированной криптографии, также известной как «секретный ключ» (secret key). После чего, cryptography считывает открытый текстовый файл, шифрует его с помощью метода «encrypt()» объекта «Fernet» и записывает зашифрованные данные в файл.
Важно! Ключ, используемый для шифрования файла, должен размещаться в надежном и защищенном от проникновения хранилище. Если ключ утерян или скомпрометирован, зашифрованные данные станут нечитаемыми.
Тестирование и отладка

В Python существует несколько популярных библиотек и фреймворков для автоматизации тестирования и отладки, например, unittest, pytest, nose и doctest.
Выполнение скрипта
Ниже приведен пример использования библиотеки unittest для автоматизации тестирования функции Python, которая находит самую длинную палиндромную подстроку в заданной строке:
def longest_palindrome(s):
   n = len(s)
   ans = ""
   for i in range(n):
       for j in range(i+1, n+1):
           substring = s[i:j]
           if substring == substring[::-1] and len(substring) > len(ans):
               ans = substring
   return ans

class TestLongestPalindrome(unittest.TestCase):
   def test_longest_palindrome(self):
       self.assertEqual(longest_palindrome("babad"), "bab")
       self.assertEqual(longest_palindrome("cbbd"), "bb")
       self.assertEqual(longest_palindrome("a"), "a")
       self.assertEqual(longest_palindrome(""), "")

if __name__ == '__main__':
   unittest.main()
Функция «longest_palindrome» принимает строку в качестве входных данных и возвращает самую длинную палиндромную подстроку, перебирая все возможные подстроки и проверяя:
- является ли она палиндромом;
- больше ли ее длина, чем у предыдущей.
Скрипт определил класс «TestLongestPalindrome», который наследуется от «unittest.TestCase» и содержит несколько тестовых методов. Каждый тестовый метод использует метод «assertEqual()», чтобы проверить, равен ли вывод функции «longest_palindrome()» ожидаемому результату.
При запуске сценария вызывается функция «unittest.main()», которая запускает все методы тестирования в классе «TestLongestPalindrome». Если какой-либо из тестов не пройден (т. е. вывод функции «longest_palindrome()» не будет равен ожидаемому результату), выводится сообщение об ошибке. В нем указывается, какой тест не пройден, а также каковы были ожидаемые и фактические результаты.
Прогнозирование временных рядов
В число популярных средств для автоматизации прогнозирования будущих значений данных временных рядов в Python входят библиотеки statsmodels и prophet.
Prophet основана на аддитивной модели, в которой нелинейные тренды соответствуют годовой, еженедельной и ежедневной сезонности, а также праздничным эффектам. Она лучше всего работает с временными рядами, которые имеют сильные сезонные эффекты и несколько сезонов исторических данных.
Выполнение скрипта
Ниже дан пример использования библиотеки prophet для прогнозирования временных рядов при обработке ежедневных данных о продажах:
import pandas as pd
from fbprophet import Prophet

# Read in data
df = pd.read_csv("sales_data.csv")

# Create prophet model
model = Prophet()

# Fit model to data
model.fit(df)

# Create future dataframe
future_data = model.make_future_dataframe(periods=365)

# Make predictions
forecast = model.predict(future_data)

# Print forecast dataframe
print(forecast[['ds', 'yhat', 'yhat_lower', 'yhat_upper']])
Можно также включить визуальные эффекты для прогнозируемых продаж, добавив следующие строки кода:
# Import visualization library
import matplotlib.pyplot as plt

# Plot predicted values
model.plot(forecast)
plt.show()

# Plot predicted values with uncertainty intervals
model.plot(forecast)
plt.fill_between(forecast['ds'], forecast['yhat_lower'], forecast['yhat_upper'], color='pink')
plt.show()

# Plot component of the forecast
model.plot_components(forecast)
plt.show()
В выводе:
- Первая визуализация — «model.plot(forecast)» показывает прогнозируемые значения и исторические данные. Она дает общее представление о том, насколько хорошо модель соответствует данным.
- Вторая визуализация — «plt.fill_between(forecast[‘ds’], forecast[‘yhat_lower’], forecast[‘yhat_upper’], color=’pink’)» показывает прогнозируемые значения с интервалами неопределенности. Это позволит увидеть, как много в предсказаниях неопределенности.
- Третья визуализация — «model.plot_components(forecast)» показывает компоненты прогноза, такие как тенденция, сезонность и праздничные дни.
Заключение
Конечно перечисленные в обзоре скрипты Python дают лишь первоначальное представление о возможностях автоматизации «змеиного языка». Новые фреймворки и библиотеки для таких задач появляются почти каждый день. Для более глубокого погружения в тему, мы рекомендуем самостоятельно изучать официальную документацию к инструментам, а также специализированные источники, такие как шикарное руководство «Automate the Boring Stuff with Python».
А у вас есть любимые скрипты для автоматизации на Python?
Оцените материал:
[Всего голосов: 0 Средний: 0/5]
Python-tutorial
Writing a Script in Python
So far, we have covered the main programming structures used in Python. We will now put that together in a script which can be run on demand.
Using Spyder which is part of the Anaconda suite
Spyder is an application where you can edit and run your Python scripts. As part of Anaconda, there are a large number of scientific packages which come pre-installed, to make it easier for scientists getting started in programming.
- Open Anaconda Navigator and launch Spyder.
We will run through a brief overview of the panels:
- Left panel: Editor
- this is a special type of editor which understands python
- as you type, possible options may appear to assist you
- key words are highlighted to help readability and understanding
- Top Right panel: Help
- Variable explorer: as a program runs, variables are loaded here with their values
- File explorer: list of files in the current working directory
- Help: documentation and tutorials
- Bottom Right panel: Console
- Python console: standard python command-line (like typing
pythonin a terminal window) - IPython console: interactive python (like Jupyter cells)
- Python console: standard python command-line (like typing
Organizing your code to run as a script
In Spyder, a new file is created when you first open the application. This is called temp.py.
- Create a new project under Projects -> New Project in your required directory
- Save the temp file to hello.py
- Type the following (the HelloWorld mantra):
- Click on the green arrow in the top toolbar. A popup window may appear which allows you to change a few things. Accept the defaults and click
OK - Have a look in the IPython console window and you should see the output similar to:
runfile('D:/Projects/Python-tutorial/examples/hello.py', wdir='D:/Projects/Python-tutorial/examples')
Hello World
Methods
Recall that it is useful to group code into methods so replace the code with:
def hello():
    """Print "Hello World" and return None"""
    print("Hello World")

# main program starts here
hello()
- Run again as before and the same output will appear in the console window.
- As we have run the output in the IPython console window and we have defined a method called
hello(), what will happen if we just typehello()in the console?
Libraries
We will now use a library as we did in previous lessons. Take note of the order.
- The
importstatement goes at the top - The methods should come next but should be before the instructions (main body)
- The instructions for running the methods go at the end
try this example:
import math

def hello():
    """Print "Hello World" and return None"""
    print("Hello World")

def get_pi():
    """Get value of pi"""
    return math.pi

# main program starts here
hello()
print('pi is', get_pi())
After running this script, you can type
help(math)in the IPython console — just as we did in Jupyter but it has to be loaded withimport mathfirst
External
Before we move on, there is an extra line recommended when running the script from outside this environment:
if __name__ == '__main__':
Insert this line above hello() then indent the following code:
# main program starts here
if __name__ == '__main__':
    hello()
    print('pi is', get_pi())
This allows us to run from a terminal window:
python hello.py
Flexible code — running with arguments
So how would we make this script more dynamic?
We will change the hello() method to take a variable name.
def hello(name):
  """Print "Hello " and a name and return None"""
  print("Hello", name)

...

hello("Josephine")
After running the script, in the IPython console, type
hello("Napoleon")or any other name
Challenge
Change the call function to loop over a few names (your first spamming script!).
External Arguments
But these are still variables defined in the script, how do we pass variables in from the command line?
There is a library called sys which allows your script to read from the system in which it is running. Variables passed in are called arguments and are strings which are stored in a list called sys.argv
In a new script called sysargs.py, type:
import sys
# main program starts here
if __name__ == '__main__':
  program = sys.argv[0]
  print("Program running is:", program)
Only one argument is present and that is the name of the program which is running — this will always be the case.
We will now include two extra arguments so add some extra lines to the code:
import sys
# main program starts here
if __name__ == '__main__':
    program = sys.argv[0]
    print("Program running is:", program)
    #Now check for extra arguments
    if (len(sys.argv) == 3):
        argument1 = sys.argv[1]
        argument2 = sys.argv[2]
        print("Arguments:", argument1, argument2)
- In Spyder, we can add the extra arguments by:
- Run -> Configure
- Check Command line options then enter “hello world” in the text field
- Click on OK
- OR you can run directly from the terminal window as
python sysargs.py hello world - Now run the script and you will see the arguments have been passed into your script.
Challenge
Return to your hello.py script and allow the name to be entered as an argument
import sys
import re

def hello(name):
  """Print "Hello " and a name and return None"""
  print("Hello", name)

def valid(name):
    '''Only words with characters, underscores or hyphens are valid'''
    # Provide a validity check to ensure bad stuff is not passed in
    # Introducing a new library called `re`
    match = re.match(r'^[A-Za-z0-9_\-]+$', name)
    if (match):
        isvalid = True
    else:
        isvalid = False
    return isvalid


# main program starts here
if __name__ == '__main__':
    randomname = None           #ensure that this variable is clean to start
    if (len(sys.argv) > 1):     #test whether any arguments have been passed in
        randomname = sys.argv[1]
    # Check that name is a valid string
    if (randomname is not None and valid(randomname)):
        hello(randomname)
    else:
        print("No name passed in")
WARNING!! Allowing information to be passed into your script this way can be DANGEROUS. The
argvarray should never be read directly without checking the validity of the contents first.
ArgParse: Safe use of external arguments
To help you with checking that nothing malicious is passed into your script, use a library called argparse.
The argparse module makes it easy to write user-friendly command-line interfaces. The program defines what arguments it requires, and argparse will figure out how to parse those out of sys.argv. The argparse module also automatically generates help and usage messages and issues errors when users give the program invalid arguments.
We will update the previous script:
import argparse
import re

def hello(name):
  """Print "Hello " and a name and return None"""
  print("Hello", name)

def valid(name):
    '''Only words with characters, underscores or hyphens are valid'''
    # Provide a validity check to ensure bad stuff is not passed in
    # Introducing a new library called `re`
    match = re.match(r'^[A-Za-z0-9_\-]+$', name)
    if (match):
        isvalid = True
    else:
        isvalid = False
    return isvalid


# main program starts here
if __name__ == '__main__':
    #Setup the argument parser class
    parser = argparse.ArgumentParser(prog='Hello program',
                                     description='''\
            Reads a name and says hello

             ''')
    #We use the optional switch -- otherwise it is mandatory
    parser.add_argument('--randomname', action='store', help='A name', default="Josephine")
    #Run the argument parser
    args = parser.parse_args()
    #Extract our value or default
    randomname = args.randomname

    # Check that name is a valid string
    if (randomname is not None and valid(randomname)):
        hello(randomname)
    else:
        print("No name passed in")
- As before, use the Run -> Configure to add Command-line options
--randomname Napoleon, ‘OK’ - Now Run
We will now move onto the next lesson Handling errors
Время на прочтение
10 мин
Количество просмотров 66K
Python — это язык программирования, который отлично подходит для разработки самостоятельных скриптов. Для того чтобы добиться с помощью подобного скрипта желаемого результата, нужно написать несколько десятков или сотен строк кода. А после того, как дело сделано, можно просто забыть о написанном коде и перейти к решению следующей задачи.
Если, скажем, через полгода после того, как был написан некий «одноразовый» скрипт, кто-то спросит его автора о том, почему этот скрипт даёт сбои, об этом может не знать и автор скрипта. Происходит подобное из-за того, что к такому скрипту не была написана документация, из-за использования параметров, жёстко заданных в коде, из-за того, что скрипт ничего не логирует в ходе работы, и из-за отсутствия тестов, которые позволили бы быстро понять причину проблемы.

При этом надо отметить, что превратить скрипт, написанный на скорую руку, в нечто гораздо более качественное, не так уж и сложно. А именно, такой скрипт довольно легко превратить в надёжный и понятный код, которым удобно пользоваться, в код, который просто поддерживать как его автору, так и другим программистам.
Автор материала, перевод которого мы сегодня публикуем, собирается продемонстрировать подобное «превращение» на примере классической задачи «Fizz Buzz Test». Эта задача заключается в том, чтобы вывести список чисел от 1 до 100, заменив некоторые из них особыми строками. Так, если число кратно 3 — вместо него нужно вывести строку Fizz, если число кратно 5 — строку Buzz, а если соблюдаются оба этих условия — FizzBuzz.
Исходный код
Вот исходный код Python-скрипта, который позволяет решить задачу:
import sys
for n in range(int(sys.argv[1]), int(sys.argv[2])):
    if n % 3 == 0 and n % 5 == 0:
        print("fizzbuzz")
    elif n % 3 == 0:
        print("fizz")
    elif n % 5 == 0:
        print("buzz")
    else:
        print(n)
Поговорим о том, как его улучшить.
Документация
Я считаю, что полезно писать документацию до написания кода. Это упрощает работу и помогает не затягивать создание документации до бесконечности. Документацию к скрипту можно поместить в его верхнюю часть. Например, она может выглядеть так:
#!/usr/bin/env python3

"""Simple fizzbuzz generator.

This script prints out a sequence of numbers from a provided range
with the following restrictions:

 - if the number is divisible by 3, then print out "fizz",
 - if the number is divisible by 5, then print out "buzz",
 - if the number is divisible by 3 and 5, then print out "fizzbuzz".
"""
В первой строке даётся краткое описание цели скрипта. В оставшихся абзацах содержатся дополнительные сведения о том, что именно делает скрипт.
Аргументы командной строки
Следующей задачей по улучшению скрипта станет замена значений, жёстко заданных в коде, на документированные значения, передаваемые скрипту через аргументы командной строки. Реализовать это можно с использованием модуля argparse. В нашем примере мы предлагаем пользователю указать диапазон чисел и указать значения для «fizz» и «buzz», используемые при проверке чисел из указанного диапазона.
import argparse
import sys


class CustomFormatter(argparse.RawDescriptionHelpFormatter,
                      argparse.ArgumentDefaultsHelpFormatter):
    pass


def parse_args(args=sys.argv[1:]):
    """Parse arguments."""
    parser = argparse.ArgumentParser(
        description=sys.modules[__name__].__doc__,
        formatter_class=CustomFormatter)

    g = parser.add_argument_group("fizzbuzz settings")
    g.add_argument("--fizz", metavar="N",
                   default=3,
                   type=int,
                   help="Modulo value for fizz")
    g.add_argument("--buzz", metavar="N",
                   default=5,
                   type=int,
                   help="Modulo value for buzz")

    parser.add_argument("start", type=int, help="Start value")
    parser.add_argument("end", type=int, help="End value")

    return parser.parse_args(args)


options = parse_args()
for n in range(options.start, options.end + 1):
    # ...
Эти изменения приносят скрипту огромную пользу. А именно, параметры теперь надлежащим образом документированы, выяснить их предназначение можно с помощью флага --help. Более того, по соответствующей команде выводится и документация, которую мы написали в предыдущем разделе:
$ ./fizzbuzz.py --help
usage: fizzbuzz.py [-h] [--fizz N] [--buzz N] start end

Simple fizzbuzz generator.

This script prints out a sequence of numbers from a provided range
with the following restrictions:

 - if the number is divisible by 3, then print out "fizz",
 - if the number is divisible by 5, then print out "buzz",
 - if the number is divisible by 3 and 5, then print out "fizzbuzz".

positional arguments:
  start         Start value
  end           End value

optional arguments:
  -h, --help    show this help message and exit

fizzbuzz settings:
  --fizz N      Modulo value for fizz (default: 3)
  --buzz N      Modulo value for buzz (default: 5)
Модуль argparse — это весьма мощный инструмент. Если вы с ним не знакомы — вам полезно будет просмотреть документацию по нему. Мне, в частности, нравятся его возможности по определению подкоманд и групп аргументов.
Логирование
Если оснастить скрипт возможностями по выводу некоей информации в ходе его выполнения — это окажется приятным дополнением к его функционалу. Для этой цели хорошо подходит модуль logging. Для начала опишем объект, реализующий логирование:
import logging
import logging.handlers
import os
import sys

logger = logging.getLogger(os.path.splitext(os.path.basename(sys.argv[0]))[0])
Затем сделаем так, чтобы подробностью сведений, выводимых при логировании, можно было бы управлять. Так, команда logger.debug() должна выводить что-то только в том случае, если скрипт запускают с ключом --debug. Если же скрипт запускают с ключом --silent — скрипт не должен выводить ничего кроме сообщений об исключениях. Для реализации этих возможностей добавим в parse_args() следующий код:
# В parse_args()
g = parser.add_mutually_exclusive_group()
g.add_argument("--debug", "-d", action="store_true",
               default=False,
               help="enable debugging")
g.add_argument("--silent", "-s", action="store_true",
               default=False,
               help="don't log to console")
Добавим в код проекта следующую функцию для настройки логирования:
def setup_logging(options):
    """Configure logging."""
    root = logging.getLogger("")
    root.setLevel(logging.WARNING)
    logger.setLevel(options.debug and logging.DEBUG or logging.INFO)
    if not options.silent:
        ch = logging.StreamHandler()
        ch.setFormatter(logging.Formatter(
            "%(levelname)s[%(name)s] %(message)s"))
        root.addHandler(ch)
Основной код скрипта при этом изменится так:
if __name__ == "__main__":
    options = parse_args()
    setup_logging(options)

    try:
        logger.debug("compute fizzbuzz from {} to {}".format(options.start,
                                                             options.end))
        for n in range(options.start, options.end + 1):
            # ..
    except Exception as e:
        logger.exception("%s", e)
        sys.exit(1)
    sys.exit(0)
Если скрипт планируется запускать без прямого участия пользователя, например, с помощью crontab, можно сделать так, чтобы его вывод поступал бы в syslog:
def setup_logging(options):
    """Configure logging."""
    root = logging.getLogger("")
    root.setLevel(logging.WARNING)
    logger.setLevel(options.debug and logging.DEBUG or logging.INFO)
    if not options.silent:
        if not sys.stderr.isatty():
            facility = logging.handlers.SysLogHandler.LOG_DAEMON
            sh = logging.handlers.SysLogHandler(address='/dev/log',
                                                facility=facility)
            sh.setFormatter(logging.Formatter(
                "{0}[{1}]: %(message)s".format(
                    logger.name,
                    os.getpid())))
            root.addHandler(sh)
        else:
            ch = logging.StreamHandler()
            ch.setFormatter(logging.Formatter(
                "%(levelname)s[%(name)s] %(message)s"))
            root.addHandler(ch)
В нашем небольшом скрипте неоправданно большим кажется подобный объём кода, нужный только для того, чтобы воспользоваться командой logger.debug(). Но в реальных скриптах этот код уже таким не покажется и на первый план выйдет польза от него, заключающаяся в том, что с его помощью пользователи смогут узнавать о ходе решения задачи.
$ ./fizzbuzz.py --debug 1 3
DEBUG[fizzbuzz] compute fizzbuzz from 1 to 3
1
2
fizz
Тесты
Модульные тесты — это полезнейшее средство для проверки того, ведёт ли себя приложения так, как нужно. В скриптах модульные тесты используют нечасто, но их включение в скрипты значительно улучшает надёжность кода. Преобразуем код, находящийся внутри цикла, в функцию, и опишем несколько интерактивных примеров её использования в её документации:
def fizzbuzz(n, fizz, buzz):
    """Compute fizzbuzz nth item given modulo values for fizz and buzz.

    >>> fizzbuzz(5, fizz=3, buzz=5)
    'buzz'
    >>> fizzbuzz(3, fizz=3, buzz=5)
    'fizz'
    >>> fizzbuzz(15, fizz=3, buzz=5)
    'fizzbuzz'
    >>> fizzbuzz(4, fizz=3, buzz=5)
    4
    >>> fizzbuzz(4, fizz=4, buzz=6)
    'fizz'

    """
    if n % fizz == 0 and n % buzz == 0:
        return "fizzbuzz"
    if n % fizz == 0:
        return "fizz"
    if n % buzz == 0:
        return "buzz"
    return n
Проверить правильность работы функции можно с помощью pytest:
$ python3 -m pytest -v --doctest-modules ./fizzbuzz.py
============================ test session starts =============================
platform linux -- Python 3.7.4, pytest-3.10.1, py-1.8.0, pluggy-0.8.0 -- /usr/bin/python3
cachedir: .pytest_cache
rootdir: /home/bernat/code/perso/python-script, inifile:
plugins: xdist-1.26.1, timeout-1.3.3, forked-1.0.2, cov-2.6.0
collected 1 item

fizzbuzz.py::fizzbuzz.fizzbuzz PASSED                                  [100%]

========================== 1 passed in 0.05 seconds ==========================
Для того чтобы всё это заработало, нужно, чтобы после имени скрипта шло бы расширение .py. Мне не нравится добавлять расширения к именам скриптов: язык — это лишь техническая деталь, которую не нужно демонстрировать пользователю. Однако возникает такое ощущение, что оснащение имени скрипта расширением — это самый простой способ позволить системам для запуска тестов, вроде pytest, находить тесты, включённые в код.
В случае возникновения ошибки pytest выведет сообщение, указывающее на расположение соответствующего кода и на суть проблемы:
$ python3 -m pytest -v --doctest-modules ./fizzbuzz.py -k fizzbuzz.fizzbuzz
============================ test session starts =============================
platform linux -- Python 3.7.4, pytest-3.10.1, py-1.8.0, pluggy-0.8.0 -- /usr/bin/python3
cachedir: .pytest_cache
rootdir: /home/bernat/code/perso/python-script, inifile:
plugins: xdist-1.26.1, timeout-1.3.3, forked-1.0.2, cov-2.6.0
collected 1 item

fizzbuzz.py::fizzbuzz.fizzbuzz FAILED                                  [100%]

================================== FAILURES ==================================
________________________ [doctest] fizzbuzz.fizzbuzz _________________________
100
101     >>> fizzbuzz(5, fizz=3, buzz=5)
102     'buzz'
103     >>> fizzbuzz(3, fizz=3, buzz=5)
104     'fizz'
105     >>> fizzbuzz(15, fizz=3, buzz=5)
106     'fizzbuzz'
107     >>> fizzbuzz(4, fizz=3, buzz=5)
108     4
109     >>> fizzbuzz(4, fizz=4, buzz=6)
Expected:
    fizz
Got:
    4

/home/bernat/code/perso/python-script/fizzbuzz.py:109: DocTestFailure
========================== 1 failed in 0.02 seconds ==========================
Модульные тесты можно писать и в виде обычного кода. Представим, что нам нужно протестировать следующую функцию:
def main(options):
    """Compute a fizzbuzz set of strings and return them as an array."""
    logger.debug("compute fizzbuzz from {} to {}".format(options.start,
                                                         options.end))
    return [str(fizzbuzz(i, options.fizz, options.buzz))
            for i in range(options.start, options.end+1)]
В конце скрипта добавим следующие модульные тесты, использующие возможности pytest по использованию параметризованных тестовых функций:
# Модульные тесты
import pytest                   # noqa: E402
import shlex                    # noqa: E402


@pytest.mark.parametrize("args, expected", [
    ("0 0", ["fizzbuzz"]),
    ("3 5", ["fizz", "4", "buzz"]),
    ("9 12", ["fizz", "buzz", "11", "fizz"]),
    ("14 17", ["14", "fizzbuzz", "16", "17"]),
    ("14 17 --fizz=2", ["fizz", "buzz", "fizz", "17"]),
    ("17 20 --buzz=10", ["17", "fizz", "19", "buzz"]),
])
def test_main(args, expected):
    options = parse_args(shlex.split(args))
    options.debug = True
    options.silent = True
    setup_logging(options)
    assert main(options) == expected
Обратите внимание на то, что, так как код скрипта завершается вызовом sys.exit(), при его обычном вызове тесты выполняться не будут. Благодаря этому pytest для запуска скрипта не нужен.
Тестовая функция будет вызвана по одному разу для каждой группы параметров. Сущность args используется в качестве входных данных для функции parse_args(). Благодаря этому механизму мы получаем то, что нужно передать функции main(). Сущность expected сравнивается с тем, что выдаёт main(). Вот что сообщит нам pytest в том случае, если всё работает так, как ожидается:
$ python3 -m pytest -v --doctest-modules ./fizzbuzz.py
============================ test session starts =============================
platform linux -- Python 3.7.4, pytest-3.10.1, py-1.8.0, pluggy-0.8.0 -- /usr/bin/python3
cachedir: .pytest_cache
rootdir: /home/bernat/code/perso/python-script, inifile:
plugins: xdist-1.26.1, timeout-1.3.3, forked-1.0.2, cov-2.6.0
collected 7 items

fizzbuzz.py::fizzbuzz.fizzbuzz PASSED                                  [ 14%]
fizzbuzz.py::test_main[0 0-expected0] PASSED                           [ 28%]
fizzbuzz.py::test_main[3 5-expected1] PASSED                           [ 42%]
fizzbuzz.py::test_main[9 12-expected2] PASSED                          [ 57%]
fizzbuzz.py::test_main[14 17-expected3] PASSED                         [ 71%]
fizzbuzz.py::test_main[14 17 --fizz=2-expected4] PASSED                [ 85%]
fizzbuzz.py::test_main[17 20 --buzz=10-expected5] PASSED               [100%]

========================== 7 passed in 0.03 seconds ==========================
Если произойдёт ошибка — pytest даст полезные сведения о том, что случилось:
$ python3 -m pytest -v --doctest-modules ./fizzbuzz.py
[...]
================================== FAILURES ==================================
__________________________ test_main[0 0-expected0] __________________________

args = '0 0', expected = ['0']

    @pytest.mark.parametrize("args, expected", [
        ("0 0", ["0"]),
        ("3 5", ["fizz", "4", "buzz"]),
        ("9 12", ["fizz", "buzz", "11", "fizz"]),
        ("14 17", ["14", "fizzbuzz", "16", "17"]),
        ("14 17 --fizz=2", ["fizz", "buzz", "fizz", "17"]),
        ("17 20 --buzz=10", ["17", "fizz", "19", "buzz"]),
    ])
    def test_main(args, expected):
        options = parse_args(shlex.split(args))
        options.debug = True
        options.silent = True
        setup_logging(options)
       assert main(options) == expected
E       AssertionError: assert ['fizzbuzz'] == ['0']
E         At index 0 diff: 'fizzbuzz' != '0'
E         Full diff:
E         - ['fizzbuzz']
E         + ['0']

fizzbuzz.py:160: AssertionError
----------------------------- Captured log call ------------------------------
fizzbuzz.py                125 DEBUG    compute fizzbuzz from 0 to 0
===================== 1 failed, 6 passed in 0.05 seconds =====================
В эти выходные данные включён и вывод команды logger.debug(). Это — ещё одна веская причина для использования в скриптах механизмов логирования. Если вы хотите узнать подробности о замечательных возможностях pytest — взгляните на этот материал.
Итоги
Сделать Python-скрипты надёжнее можно, выполнив следующие четыре шага:
- Оснастить скрипт документацией, размещаемой в верхней части файла.
- Использовать модуль
argparseдля документирования параметров, с которыми можно вызывать скрипт. - Использовать модуль
loggingдля вывода сведений о процессе работы скрипта. - Написать модульные тесты.
Вот полный код рассмотренного здесь примера. Вы можете использовать его в качестве шаблона для собственных скриптов.
Вокруг этого материала развернулись интересные обсуждения — найти их можно здесь и здесь. Аудитория, как кажется, хорошо восприняла рекомендации по документации и по аргументам командной строки, а вот то, что касается логирования и тестов, показалось некоторым читателям «пальбой из пушки по воробьям». Вот материал, который был написан в ответ на данную статью.
Уважаемые читатели! Планируете ли вы применять рекомендации по написанию Python-скриптов, данные в этой публикации?

Python is a widely used high-level, general-purpose programming language. This language can be used in web development, machine learning applications, and all cutting-edge software technology and is preferred for both beginners as well as experienced software developers. Developers spent most of their time developing or working with scripts. Python Scripts are a set of python programs that are developed to perform a specific task.

Working with these scripts offer a convenient and efficient way to automate repetitive tasks, process large amounts of data, and perform complex computations. As Python is a high-level programming language, which means that it abstracts away many of the low-level details that are involved in writing code, which makes the Scripts easier to write and maintain. With this being said let’s continue the article on the best Python Scripts to assist you to have a much easier time learning & building with Python.
Top 12 Python Scripts for Developers to Implement
1. Password Checker
The below script checks whether the provided password is weak or strong based on the predefined constraints.
Python
import re
def check_password(password):
if len(password) < 8:
return False
elif re.search('[0-9]',password) is None:
return False
elif re.search('[a-z]',password) is None:
return False
elif re.search('[A-Z]',password) is None:
return False
elif re.search('[@#$^&]',password) is None:
return False
return True
for password in ["12345678", "Abcd@1234"]:
if(check_password(password)):
print(password, " is a strong password.")
else:
print(password, "is a weak password.")
Output:
12345678 is a weak password.
Abcd@1234  is a strong password.
In the above implementation, the Scripts evaluates the password as strong only if:
- length of the password is greater than 8.
- password has at least 1 digit.
- password has at least 1 upper case & lower case character.
- password has at least 1 special character from ” @#$^&“.
Must Read: Regex in Python
2. Password encryption & decryption
The below script performs encryption and decryption of text using the cryptography package.
Python
from cryptography.fernet import Fernet
def encrypt(text, key):
f = Fernet(key)
encrypted_text = f.encrypt(text.encode())
return encrypted_text
def decrypt(encrypted_text, key):
f = Fernet(key)
decrypted_text = f.decrypt(encrypted_text).decode()
return decrypted_text
text = "user_text"
key = Fernet.generate_key()
encrypted_text = encrypt(text, key)
print("Encrypted text: ", encrypted_text)
decrypted_text = decrypt(encrypted_text, key)
print("Decrypted text: ", decrypted_text)
Output:
Encrypted text:  b'gAAAAABj61UjSdV92kh_ahTNK_dKgpcWHyHpAKVtbR05UWnMEE-pbYGI2E_tkDG2LOPPEt4kksfsTpXFwquVPBrETYy1foFGEg=='
Decrypted text:  user_text
In the above implementation, the encryption key is generated using the Fernet.generate_key() method and is stored in a file for future use. The encryption and decryption of text are done using the Fernet class from the cryptography package, where the text is encrypted using the encrypt() method and decrypted using the decrypt() method.
Must Read: Encryption & Decryption | python
3. Fetching current news
The below script fetches the current news from NewsAPI. Implementation can be modified depending on the use case.
Python
from newsapi import NewsApiClient
newsapi = NewsApiClient(api_key='API_KEY')
top_headlines = newsapi.get_top_headlines(language='en', country='in')
for article in top_headlines["articles"]:
title = article["title"]
print(f"Title: {title}\n")
Output:
Title: I-T teams at BBC's Delhi, Mumbai offices for survey as part of tax evasion investigation -
 India Today

Title: "Smriti Mandhana's Salary More Than Babar Azam's":
WPL Auction Sees Memes Galore On Social Media - NDTV Sports

Title: Male Infertility: Can Lifestyle Changes Boost Fertility? - NDTV

Title: BREAKING| Congress Leader Moves Supreme Court For Investigation
Against Adani Group Based On Hindenburg... - Live Law - Indian Legal News

Title: WPI inflation cools to 24-month low of 4.73% in January | Mint - Mint
In the above implementation, the script makes use of newsapi-python package to fetch the current news. The script loops through each article in the response and prints the title of each article. Note that you will need to obtain an API key from the News API website in order to use the API.
4. Sending Emails
The below script uses the `SMTP library` to send an email to the provided receiver/’s. Implementation can be modified depending on the use case.
Python
import smtplib
def send_email(sender, receiver, password, subject, message):
server = smtplib.SMTP('smtp.gmail.com', 587)
server.ehlo()
server.starttls()
server.ehlo()
server.login(sender, password)
message = f"Subject: {subject}\n\n{message}"
server.sendmail(sender, receiver, message)
print("Email sent!")
server.quit()
sender = "SENDER_ADDRESS"
receiver = "RECEIVER_ADDRESS"
password = "APP_PASSWORD"
subject = "Hello From GFG"
message = "Message Body"
In the above implementation, the script takes the sender and the receiver’s details as well as the message subject and body. The script then connects to Gmail’s SMTP server, formats the message, and sends it via the sendmail() method. Finally, the script prints a message indicating that the email was successfully sent and disconnects from the SMTP server.
Must Read: smtplib in Python
5. URL Shortener
The below script uses ‘TinyURL API’ to shorten the provided URL.
Python3
Output:
The shortened URL is: https://tinyurl.com/2bqwr25r
In the above implementation, the shorten_url() function takes the URL that is to be shortened and returns the shortened URL. Inside the shorten_url() function requests library is used to make a GET request to the TinyURL API. The ‘response.text’ attribute from the response received by the API contains the shortened URL.
Must Read: URL shortener in Python
6. Generating a QR code for the data
The below script uses ‘qrcode’ library in Python, to generate the QR code of the provided data.
Python3
import qrcode
def generate_qr_code(data):
qr = qrcode.QRCode(version=1, box_size=10, border=5)
qr.add_data(data)
qr.make(fit=True)
img = qr.make_image(fill_color="black", back_color="white")
img.save("qr_code.png")
print("QR code generated!")
data = 'Data to be encoded'
generate_qr_code(data)
Output:

In the above implementation, the generate_qr_code() function generates and saves the QR code for the provided data. Inside the generate_qr_code() function, it first creates a QRCode object, adds data to it, and then generated the image for the QRCode using make_image() method. The image is then saved by the name of “qr_code.png”. Finally “QR code generated!” message is printed, indicating the successful execution of the script.
Must Read: QRCode in Python
7. Text to Speech
The below script uses the ‘gTTg’ library in python, is to convert the provided text into a speech format.
Python3
from gtts import gTTS
import os
def say(text):
tts = gTTS(text=text, lang='en')
tts.save("geeks.mp3")
os.system("mpg321 geeks.mp3")
say("Hello, Geeks for Geeks!")
In the above implementation, the say() function takes in the text to be converted and input. The text and language of the text are then passed as parameters to the gTTS() function. The resulting speech is then saved to an mp3 file “geeks.mp3“. Finally, using the mpg321 command line tool, the os.system() function is used to play the mp3 file.
Must Read: Text to Speech in Python
8. Convert jpg to png (and vice-versa)
The below script uses the ‘pillow’ library in python, to convert an Image (.jpg) file to .png file ( and vice-versa ) in Python.
Python3
from PIL import Image
def jpg_to_png(IMG_PATH):
img = Image.open(IMG_PATH).convert('RGB')
img.save("Image_1.png", "PNG")
def png_to_img(PNG_PATH):
img = Image.open(PNG_PATH).convert('RGB')
img.save("Image_1.jpg", "JPEG")
png_to_img("file.png")
jpg_to_png("Image.jpg")
Output:

In the above implementation, the script defines 2 functions one for converting jpg to png and another one for converting png to jpg. Initially, the Image class from the PIL library is imported, then 2 functions are defined which tend to follow a similar approach wherein firstly, the image file (IMG_PATH) is opened using the Image.open() method. The resulting image object is then saved as a PNG/JPG file using the img.save() method. The method also has a second parameter as “PNG”/”JPEG” to specify the format.
Must Read: PIL in Python
9. Convert CSV to excel
The below script uses the ‘pandas’ library in python, to convert a CSV to an Excel file in Python.
Python3
import pandas as pd
def csv_to_excel(FILE_PATH):
df = pd.read_csv(FILE_PATH)
df.to_excel("file.xlsx", index=False)
try:
csv_to_excel("disk_usage.csv")
print("File Created")
except:
print("Something wrong")
Output:
File Created
In the above implementation, after importing the pandas library, the csv_to_excel() function is defined which takes in the CSV file path as the input. The CSV file (“gfg.csv”) is read into a pandas DataFrame using the read_csv() method. The resulting DataFrame is then saved to an Excel file using the to_excel() method, which takes “file.xlsx” as the first argument to specify the name of the Excel file, and index=False to exclude the DataFrame index from the output.
Must Read: CSV to Excel in Python
10. Extracting data from phone number
The below script uses the ‘phonenumbers’ library in python, to extract details about the phone number in Python.
Python3
import phonenumbers
from phonenumbers import timezone, geocoder, carrier
def get_phone_data(number):
phoneNumber = phonenumbers.parse(number)
return {
"baisc-data": phoneNumber,
"time-zone": timezone.time_zones_for_number(phoneNumber),
"career": carrier.name_for_number(phoneNumber, 'en'),
"is_valid": phonenumbers.is_valid_number(phoneNumber),
"is_possible": phonenumbers.is_possible_number(phoneNumber)
}
print(get_phone_data("+91XXXXXXXXXX"))
Output:
{'baisc-data': PhoneNumber(country_code=91, national_number=9********, extension=None,
italian_leading_zero=None, number_of_leading_zeros=None, country_code_source=0,
preferred_domestic_carrier_code=None), 'time-zone': ('Asia/Calcutta',),
 'career': 'Aircel', 'is_valid': True, 'is_possible': True
In the above implementation, the script first imports all the necessary libraries and classes required to extract the data. The function get_phone_data() takes a phone number as an argument and uses the parse() method from the phonenumbers library to parse the phone number into a phoneNumber object. The function returns an object which contains basic details like country code and extracted national number, the time zone to which the number belongs, the career name of the number, a boolean value that indicates if the number is valid, and another boolean value that indicates if the number is possible.
Must Read: Phonenumbers Module in Python
11. Fetching Crypto Currency Price
The below script uses ‘Alpha Vantage’ API to fetch the data about the current Crypto price in python. The implementation can be modified to get information about stocks, forensics as well as cryptocurrencies
Python3
import requests
API_KEY = "YOUR_API_KEY"
def get_current_price(SYMBOL):
response = requests.get(url)
data = response.json()
return float(data["Realtime Currency Exchange Rate"]["5. Exchange Rate"])
symbol = "BTC"
print("The current price of",symbol,"is",get_current_price("BTC"))
Output:
The current price of BTC is 21804.17
In the above implementation, the script defines a function get_current_price() that takes a cryptocurrency symbol (i.e. “BTC”) as an input and returns its current price in US dollars. The function starts by constructing an API URL for the Alpha Vantage API, which includes the cryptocurrency SYMBOL, and an API key stored as the API_KEY constant. After making an API request to the Alpha Vantage API, the response from the API is stored in the response variable, which is then converted to a Python dictionary using the json() method. The cryptocurrency price is then extracted from the dictionary using keys such as “Realtime Currency Exchange Rate” and “5. Exchange Rate”, and returned by the get_current_price function.
12. GeoCoding and Reverse GeoCoding
The following script performs geocoding and reverse-geocoding with the help of the geopy library in python.
Python3
from geopy.geocoders import Nominatim
def print_data(location):
print("Address: ",location.address)
print("Latitude: ", location.latitude)
print("Longitude: ",location.longitude)
geolocator = Nominatim(user_agent="gfg_app")
def geocoding(address):
location = geolocator.geocode(address)
print_data(location)
def rev_geocoding(latitude_longitude):
location = geolocator.reverse(latitude_longitude)
print_data(location)
geocoding("175 5th Avenue NYC")
rev_geocoding("52.509669, 13.376294")
Output:
Address:  Flatiron Building, 175, 5th Avenue, Manhattan Community Board 5,
         Manhattan, New York County, City of New York, New York, 10010, United States
Latitude:  40.741059199999995
Longitude:  -73.98964162240998
Address:  Steinecke, Potsdamer Platz, Tiergarten, Mitte, Berlin, 10785, Deutschland
Latitude:  52.5098134
Longitude:  13.37631790998454
In the above implementation, the script uses the geopy library to perform geocoding and reverse geocoding operations. The script defines two functions geocoding() and rev_geocoding() to perform these two operations. The geocoding() function takes an address as an input and uses the Nominatim class from the geopy library to perform geocoding. The rev_geocoding() function takes latitude and longitude coordinates as input and performs reverse geocoding. Both functions use the print_data() function to display the results of the geocoding/reverse geocoding operations, including the address, latitude, and longitude.
Must Read: geopy in Python
Conclusion
Python is a versatile and widely-used programming language, making it a great choice for developers to implement scripts for a variety of purposes. This article highlights some of the most useful and practical scripts that developers can use to automate tasks, process data, and perform various functions. Whether you are a beginner or an experienced developer, these scripts provide a good starting point for leveraging the power of Python. Finally, the best script for a specific task will depend on the project’s specific requirements and goals, so it’s critical to evaluate and customize these scripts as needed to fit your needs.
FAQs
1. What is Python and what is it used for?
Python is a high-level, interpreted programming language that was first released in 1991. It’s used for a variety of tasks, including web development, data analysis, machine learning, scientific computing, and more.
2. What is a Python Script?
Python scripts are programs written in Python. The Python interpreter runs it line by line and can be used to automate tasks, process data, and perform various functions.
3. How to run a Python script?
You can run a Python Script by opening the terminal or command prompt, navigating to the directory where the script is located, and typing “python script.py” (where “script.py” is the name of your script).