Project Jupyter’s tools are available for installation via the Python Package Index, the leading repository of software created for the Python programming language.
This page uses instructions with pip, the recommended installation tool for Python. If you require environment management as opposed to just installation, look into conda, mamba, pipenv, and Homebrew.
JupyterLab
Install JupyterLab with pip:
Note: If you install JupyterLab with conda or mamba, we recommend using the conda-forge channel.
Once installed, launch JupyterLab with:
Jupyter Notebook
Install the classic Jupyter Notebook with:
To run the notebook:
Voilà
Install Voilà with:
Once installed, launch Voilà with:
Homebrew
Homebrew is a package manager for macOS and Linux.
You can use it to install Jupyter by running:
Jupyter Notebook


The Jupyter notebook is a web-based notebook environment for interactive
computing.

Maintained versions
We maintain the two most recently released major versions of Jupyter Notebook, Notebook v5 and Classic Notebook v6. After Notebook v7.0 is released, we will no longer maintain Notebook v5. All Notebook v5 users are strongly advised to upgrade to Classic Notebook v6 as soon as possible.
The Jupyter Notebook project is currently undertaking a transition to a more modern code base built from the ground-up using JupyterLab components and extensions.
There is new stream of work which was submitted and then accepted as a Jupyter Enhancement Proposal (JEP) as part of the next version (v7): https://jupyter.org/enhancement-proposals/79-notebook-v7/notebook-v7.html
There is also a plan to continue maintaining Notebook v6 with bug and security fixes only, to ease the transition to Notebook v7: https://github.com/jupyter/notebook-team-compass/issues/5#issuecomment-1085254000
Notebook v7
The newest major version of Notebook is based on:
- JupyterLab components for the frontend
- Jupyter Server for the Python server
This represents a significant change to the jupyter/notebook code base.
To learn more about Notebook v7: https://jupyter.org/enhancement-proposals/79-notebook-v7/notebook-v7.html
Classic Notebook v6
Maintenance and security-related issues are now being addressed in the 6.4.x branch.
A 6.5.x branch will be soon created and will depend on nbclassic for the HTML/JavaScript/CSS assets.
New features and continuous improvement is now focused on Notebook v7 (see section above).
If you have an open pull request with a new feature or if you were planning to open one, we encourage switching over to the Jupyter Server and JupyterLab architecture, and distribute it as a server extension and / or JupyterLab prebuilt extension. That way your new feature will also be compatible with the new Notebook v7.
Jupyter notebook, the language-agnostic evolution of IPython notebook
Jupyter notebook is a language-agnostic HTML notebook application for
Project Jupyter. In 2015, Jupyter notebook was released as a part of
The Big Split™ of the IPython codebase. IPython 3 was the last major monolithic
release containing both language-agnostic code, such as the IPython notebook,
and language specific code, such as the IPython kernel for Python. As
computing spans across many languages, Project Jupyter will continue to develop the
language-agnostic Jupyter notebook in this repo and with the help of the
community develop language specific kernels which are found in their own
discrete repos.
- The Big Split™ announcement
- Jupyter Ascending blog post
Installation
You can find the installation documentation for the
Jupyter platform, on ReadTheDocs.
The documentation for advanced usage of Jupyter notebook can be found
here.
For a local installation, make sure you have
pip installed and run:
pip install notebook
Usage — Running Jupyter notebook
Running in a local installation
Launch with:
jupyter notebook
Running in a remote installation
You need some configuration before starting Jupyter notebook remotely. See Running a notebook server.
Development Installation
See CONTRIBUTING.md for how to set up a local development installation.
Contributing
If you are interested in contributing to the project, see CONTRIBUTING.md.
Community Guidelines and Code of Conduct
This repository is a Jupyter project and follows the Jupyter
Community Guides and Code of Conduct.
Resources
- Project Jupyter website
- Online Demo at jupyter.org/try
- Documentation for Jupyter notebook
- Korean Version of Installation
- Documentation for Project Jupyter [PDF]
- Issues
- Technical support — Jupyter Google Group
About the Jupyter Development Team
The Jupyter Development Team is the set of all contributors to the Jupyter project.
This includes all of the Jupyter subprojects.
The core team that coordinates development on GitHub can be found here:
https://github.com/jupyter/.
Our Copyright Policy
Jupyter uses a shared copyright model. Each contributor maintains copyright
over their contributions to Jupyter. But, it is important to note that these
contributions are typically only changes to the repositories. Thus, the Jupyter
source code, in its entirety is not the copyright of any single person or
institution. Instead, it is the collective copyright of the entire Jupyter
Development Team. If individual contributors want to maintain a record of what
changes/contributions they have specific copyright on, they should indicate
their copyright in the commit message of the change, when they commit the
change to one of the Jupyter repositories.
With this in mind, the following banner should be used in any source code file
to indicate the copyright and license terms:
# Copyright (c) Jupyter Development Team.
# Distributed under the terms of the Modified BSD License.
The notebook extends the console-based approach to interactive computing in a qualitatively new direction, providing a web-based application suitable for capturing the whole computation process: developing, documenting, and executing code, as well as communicating the results. The Jupyter notebook combines two components. A web application, which is a browser-based tool for interactive authoring of documents which combine explanatory text, mathematics, computations and their rich media output. And Notebook documents, which are a representation of all content visible in the web application, including inputs and outputs of the computations, explanatory text, mathematics, images, and rich media representations of objects. Notebook documents contain the inputs and outputs of a interactive session as well as additional text that accompanies the code but is not meant for execution.
Features
- In-browser editing for code, with automatic syntax highlighting, indentation, and tab completion/introspection
- The ability to execute code from the browser, with the results of computations attached to the code which generated them
- Displaying the result of computation using rich media representations, such as HTML, LaTeX, PNG, SVG, etc.
- In-browser editing for rich text using the Markdown markup language, which can provide commentary for the code, is not limited to plain text
- The ability to easily include mathematical notation within markdown cells using LaTeX, and rendered natively by MathJax
- Notebook files can serve as a complete computational record of a session, interleaving executable code with explanatory text, mathematics, and rich representations of resulting objects
Project Samples
License
BSD License

VetBadger Veterinary Software
VetBadger comes with features like a fully-integrated QuickBooks, chart-centric email, referral tracking, email and SMS text reminders, and more.
VetBadger is a cloud-based practice management system that enables users to practice better veterinary medicine and unlock the full potential of the team.
User Reviews
Jupyter Notebook
![]()
The Jupyter notebook is a web-based notebook environment for interactive
computing.

Maintained versions
We maintain the two most recently released major versions of Jupyter Notebook, Notebook v5 and Classic Notebook v6. After Notebook v7.0 is released, we will no longer maintain Notebook v5. All Notebook v5 users are strongly advised to upgrade to Classic Notebook v6 as soon as possible.
The Jupyter Notebook project is currently undertaking a transition to a more modern code base built from the ground-up using JupyterLab components and extensions.
There is new stream of work which was submitted and then accepted as a Jupyter Enhancement Proposal (JEP) as part of the next version (v7): https://jupyter.org/enhancement-proposals/79-notebook-v7/notebook-v7.html
There is also a plan to continue maintaining Notebook v6 with bug and security fixes only, to ease the transition to Notebook v7: jupyter/notebook-team-compass#5 (comment)
Notebook v7
The newest major version of Notebook is based on:
- JupyterLab components for the frontend
- Jupyter Server for the Python server
This represents a significant change to the jupyter/notebook code base.
To learn more about Notebook v7: https://jupyter.org/enhancement-proposals/79-notebook-v7/notebook-v7.html
Classic Notebook v6
Maintenance and security-related issues are now being addressed in the 6.4.x branch.
A 6.5.x branch will be soon created and will depend on nbclassic for the HTML/JavaScript/CSS assets.
New features and continuous improvement is now focused on Notebook v7 (see section above).
If you have an open pull request with a new feature or if you were planning to open one, we encourage switching over to the Jupyter Server and JupyterLab architecture, and distribute it as a server extension and / or JupyterLab prebuilt extension. That way your new feature will also be compatible with the new Notebook v7.
Jupyter notebook, the language-agnostic evolution of IPython notebook
Jupyter notebook is a language-agnostic HTML notebook application for
Project Jupyter. In 2015, Jupyter notebook was released as a part of
The Big Split™ of the IPython codebase. IPython 3 was the last major monolithic
release containing both language-agnostic code, such as the IPython notebook,
and language specific code, such as the IPython kernel for Python. As
computing spans across many languages, Project Jupyter will continue to develop the
language-agnostic Jupyter notebook in this repo and with the help of the
community develop language specific kernels which are found in their own
discrete repos.
- The Big Split™ announcement
- Jupyter Ascending blog post
Installation
You can find the installation documentation for the
Jupyter platform, on ReadTheDocs.
The documentation for advanced usage of Jupyter notebook can be found
here.
For a local installation, make sure you have
pip installed and run:
Usage — Running Jupyter notebook
Running in a local installation
Launch with:
Running in a remote installation
You need some configuration before starting Jupyter notebook remotely. See Running a notebook server.
Development Installation
See CONTRIBUTING.md for how to set up a local development installation.
Contributing
If you are interested in contributing to the project, see CONTRIBUTING.md.
Community Guidelines and Code of Conduct
This repository is a Jupyter project and follows the Jupyter
Community Guides and Code of Conduct.
Resources
- Project Jupyter website
- Online Demo at jupyter.org/try
- Documentation for Jupyter notebook
- Korean Version of Installation
- Documentation for Project Jupyter
- Issues
- Technical support — Jupyter Google Group
About the Jupyter Development Team
The Jupyter Development Team is the set of all contributors to the Jupyter project.
This includes all of the Jupyter subprojects.
The core team that coordinates development on GitHub can be found here:
https://github.com/jupyter/.
Our Copyright Policy
Jupyter uses a shared copyright model. Each contributor maintains copyright
over their contributions to Jupyter. But, it is important to note that these
contributions are typically only changes to the repositories. Thus, the Jupyter
source code, in its entirety is not the copyright of any single person or
institution. Instead, it is the collective copyright of the entire Jupyter
Development Team. If individual contributors want to maintain a record of what
changes/contributions they have specific copyright on, they should indicate
their copyright in the commit message of the change, when they commit the
change to one of the Jupyter repositories.
With this in mind, the following banner should be used in any source code file
to indicate the copyright and license terms:
# Copyright (c) Jupyter Development Team.
# Distributed under the terms of the Modified BSD License.
Jupyter Notebook
This is a quick guide to install Jupyter Notebook with Conda and pip on Windows or Mac operating system. We’ll guide you through the installation process for both Mac and Windows operating systems.

Install Jupyter Notebook on Windows
Walk though of installing Jupyter on Windows using Anaconda, Miniconda and Pip.

Install Jupyter Notebook on Mac OS
Walk though of installing Jupyter on Mac using Anaconda, Miniconda and Pip.

Getting Started With Jupyter Notebook
Once you have Jupyter Notebook installed, you can start creating and editing notebooks.
Introduction: Jupyter Notebook and Python Environment Tools
Jupyter Notebook is an open-source, interactive web application that allows you to create, share, and collaborate on documents containing live code, equations, visualizations, and narrative text. It is widely used for data analysis, scientific computing, and teaching programming concepts. In this article, we’ll guide you through the installation process for both Mac and Windows operating systems.
| Option | Description |
|---|---|
Anaconda |
Anaconda is a free and open-source distribution of Python and R programming languages that includes a wide range of pre-installed packages and libraries, such as NumPy, pandas, and Jupyter Notebook, which makes it convenient for users who need a comprehensive environment for their projects. However, the full installation can require over 3 GB of disk space which includes an extensive list of pre-installed packages, saving saves time and effort in setting up a fully functional environment. |
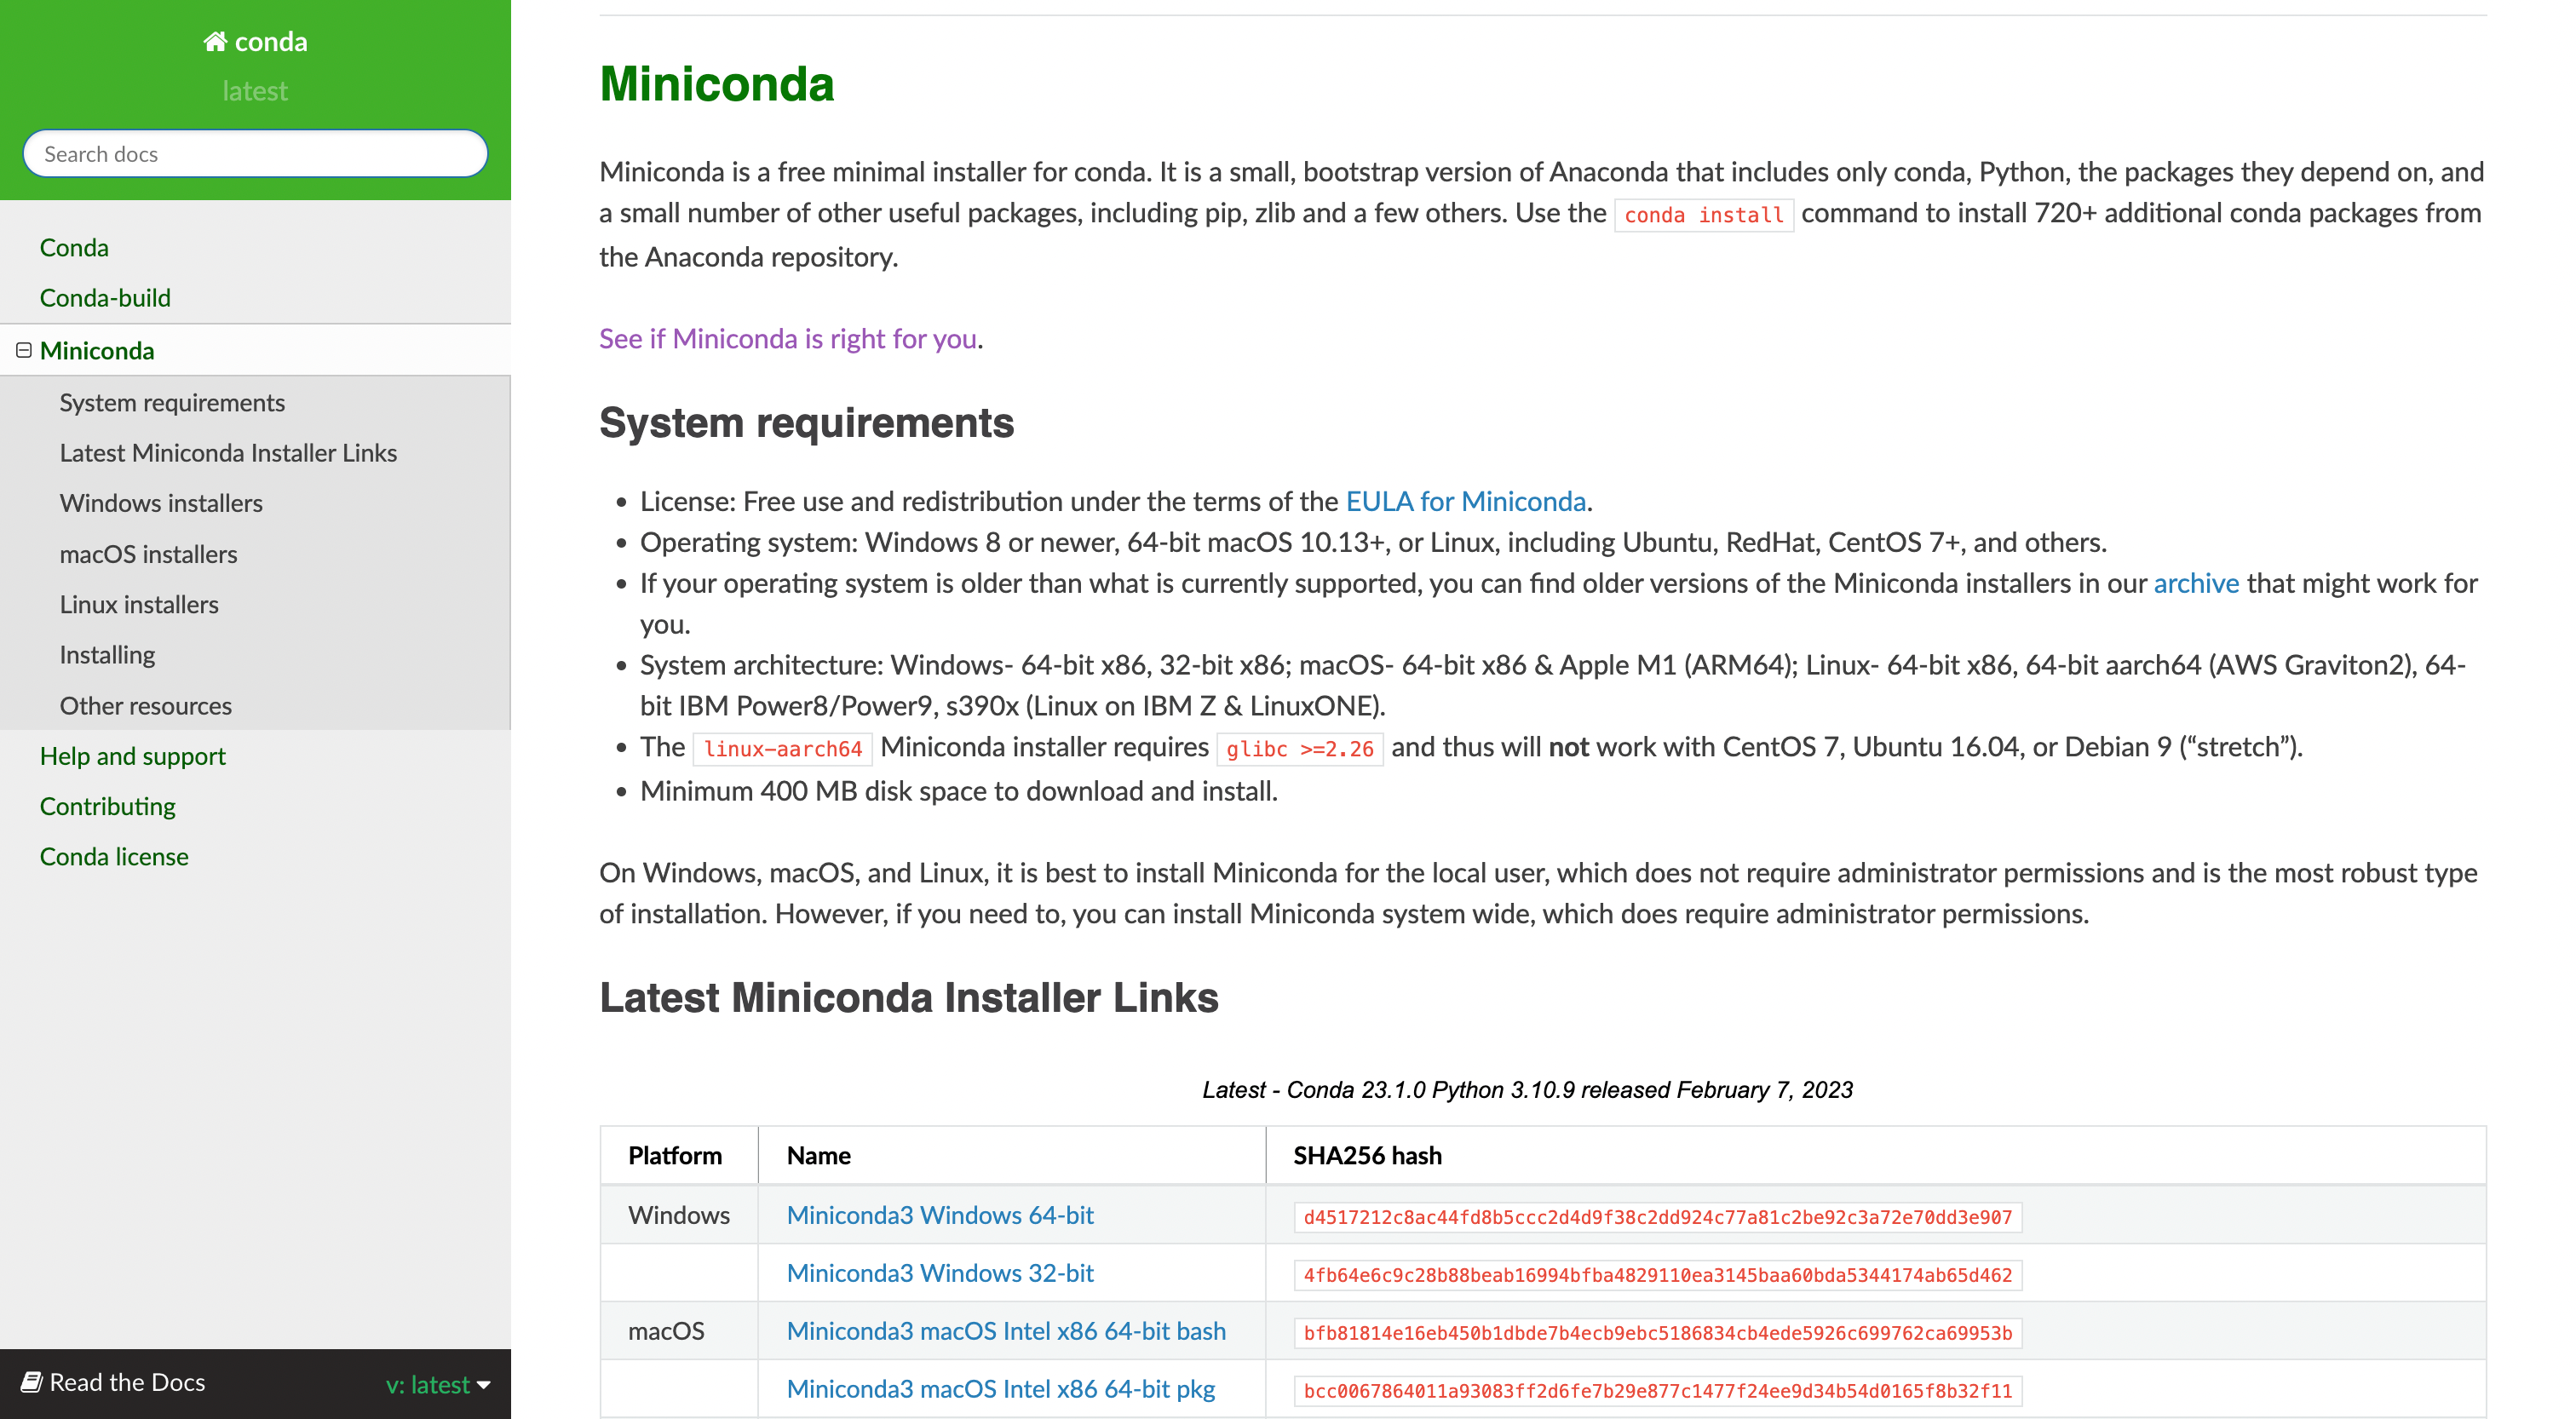
Miniconda |
Miniconda is a lightweight version of Anaconda that provides a minimalistic Python environment, including only the necessary components to run Conda, the package, and environment manager. Unlike Anaconda, Miniconda does not include pre-installed packages. Users can install only the specific packages they need for their projects, which makes it a suitable choice for those who prefer a more compact and customizable environment. Miniconda has much lower memory requirements compared to Anaconda, taking up only 400-500 MB of disk space and making it an attractive option for users who prefer to manage their packages individually. |
Conda |
Conda is an open-source, cross-platform package manager and environment management system that is the core component of both Anaconda and Miniconda distributions. To use conda, we need to have either Anaconda or Miniconda. |
|
Pip |
Pip is the default package manager for Python that comes bundled with the standard Python distribution. Pip installs packages from the Python Package Index (PyPI) and is focused on managing packages specifically for the Python ecosystem. Pip lacks built-in support for managing environments. However, you can use it alongside Python’s built-in venv module to create isolated environments. It may be challenging to resolve and manage complex dependencies with pip, especially for packages with dependencies on non-Python libraries. |
What should I install, Anaconda, Conda, or Pip
Deciding what to install depends on your specific needs, requirements, and preferences. Here’s a brief comparison between Anaconda, Miniconda, and pip to help you make an informed decision.
| Option | Benefits | Choose If |
|---|---|---|
| Anaconda |
|
|
| Miniconda |
|
|
| Pip |
|
|
Choosing the right Python environment tool depends on individual needs and preferences.
Anaconda offers a comprehensive environment with over 3 GB of pre-installed packages, making it suitable for those seeking a straightforward installation for scientific computing. Miniconda provides a lightweight and minimalistic environment, allowing users to install only the packages they need, making it an attractive option for those with limited storage space. Pip, on the other hand, is the default Python package manager that appeals to those comfortable with a command-line interface and who prefer a more manual approach to package installation.
Understanding the benefits and use cases of Anaconda, Miniconda, and Pip helps users make an informed decision that aligns with their specific requirements for Python development, data science, or machine learning projects.
There are two main methods to install Jupyter Notebook on Windows: using Anaconda or pip. We’ll cover both methods in the following sections.
Installing Jupyter Notebook using Anaconda on Windows
Anaconda is a free, open-source Python distribution that includes many popular scientific computing and data science packages, including Jupyter Notebook.
Step 1: Download Anaconda
Visit the Anaconda distribution page and download the latest version for Windows.

Step 2: Run the Anaconda Installer
Run the downloaded executable file to start installing. Follow the on-screen instructions and accept the default settings.
Step 3: Launch Jupyter Notebook
Once the installation is complete, launch Anaconda Navigator from the Start menu. Click on the Jupyter Notebook icon to launch the application.
Installing Jupyter Notebook using Miniconda on Windows
To install Jupyter Notebook using Miniconda on Windows, follow these steps:
Step 1: Download Miniconda
Visit the Miniconda download page and download the Miniconda installer for Windows. Choose the Python version you prefer (usually the latest version is recommended) and select the appropriate installer based on your system architecture (64-bit or 32-bit).
Step 2: Install Miniconda
Run the downloaded Miniconda installer (.exe file) by double-clicking it. Follow the installation prompts, and make sure to check the option “Add Miniconda to my PATH environment variable” during the installation. This ensures that Miniconda and its associated commands are accessible from the command line.
Step 3: Open Command Prompt or PowerShell
Press `Win + R`, type cmd or powershell, and press Enter to open the Command Prompt or PowerShell window.
Step 4: Update Conda
Before installing Jupyter Notebook, it is a good practice to update Conda to the latest version. Run the command to update Conda:
conda update -n base -c defaults conda
Step 5: Create a new Conda environment (optional)
It’s recommended to create a separate Conda environment for your project to avoid potential conflicts between packages. Replace myenv with your desired environment name and <python_version> with your preferred Python version (e.g., 3.9):
conda create -n myenv python=<python_version>Activate the newly created environment by running:
conda activate myenv
Step6: Install Jupyter Notebook
With Conda updated and your environment activated (if created), install Jupyter Notebook using the following command:
conda install -c conda-forge notebookThis command installs Jupyter Notebook from the conda-forge channel.
Step 6: Launch Jupyter Notebook
Start Jupyter Notebook by running this command:
jupyter notebookThis command will open Jupyter Notebook in your default web browser. You can now create, edit, and run Jupyter Notebooks within the specified Conda environment.
Jupyter Notebook Install Using pip on Windows
If you prefer not to use conda, you can install Jupyter Notebook using pip package manager for Python.
Step 1: Install Python programming language
Download and install the latest version of Python from the official website (https://www.python.org/downloads/). Make sure to check the option “Add Python to PATH” during the installation.
Step 2: Install Jupyter Notebook
Open the Command Prompt and run the following command using pip install to install Jupyter Notebook:
pip install jupyter
Step 3: Start Jupyter Notebook
Type the following command in the Command Prompt to launch Jupyter Notebook:
jupyter notebookHow to Install Jupyter Notebook on Mac
There are two main methods to install Jupyter Notebook on Mac: using Anaconda or pip. We’ll cover both methods in the following sections.
Installing Jupyter Notebook using Anaconda on Mac
The process of installing Jupyter Notebook using Anaconda on Mac is very similar to the Windows installation.
Step 1: Download Anaconda
Visit the Anaconda distribution page and download the latest version for macOS.
Step 2: Run the Anaconda Installer
Open the downloaded file and follow the on-screen instructions. Accept the default settings to complete the installation.
Step 3: Launch Jupyter Notebook
Open the Anaconda Navigator from your Applications folder. Click on the Jupyter Notebook icon to launch the application.
Jupyter Notebook Install Using `pip` on Mac
The process of installing Jupyter Notebook using pip on Mac is similar to the Windows installation.
Step 1: Install Python
Download and install the latest version of Python from the official website (https://www.python.org/downloads/).
Step 2: Install Jupyter Notebook
Open the Terminal and run the following command to install Jupyter Notebook:
pip3 install jupyterStep 3: Launch Jupyter Notebook
Type the following command in the Terminal to launch Jupyter Notebook:
jupyter notebookGetting Started With Jupyter Notebook
Now that you have Jupyter Notebook installed, you can start creating and editing notebooks.
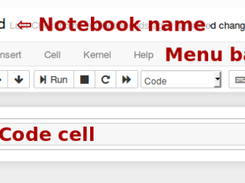
Building your first Jupyter Notebook project
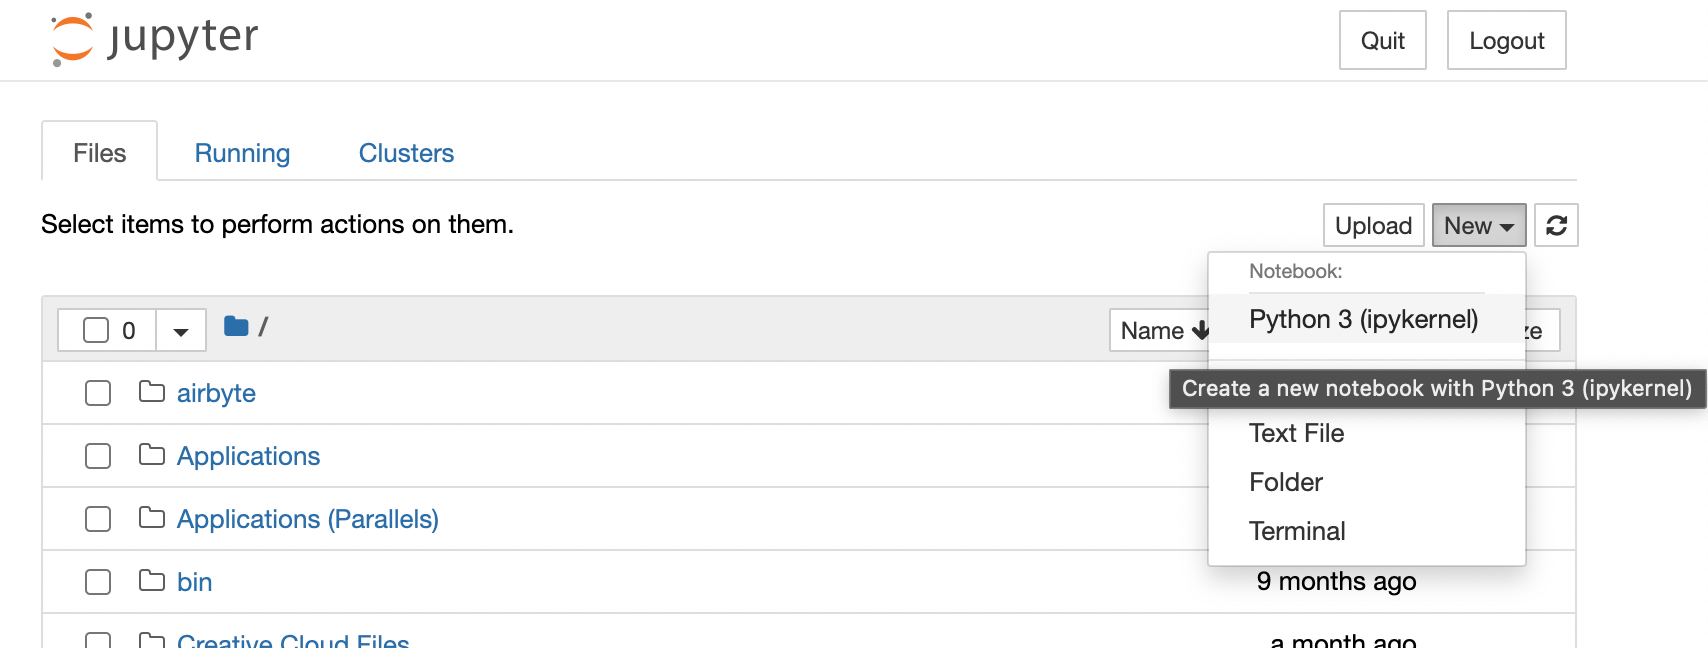
To create a new notebook, click on the “New” button in the top right corner of the Jupyter Notebook interface and select “Python 3” (or the version you have installed) from the drop-down menu.
A new notebook will open with an empty code cell. You can start writing your code, markdown text, or equations in the cell. To execute the code in a cell, press Shift + Enter.
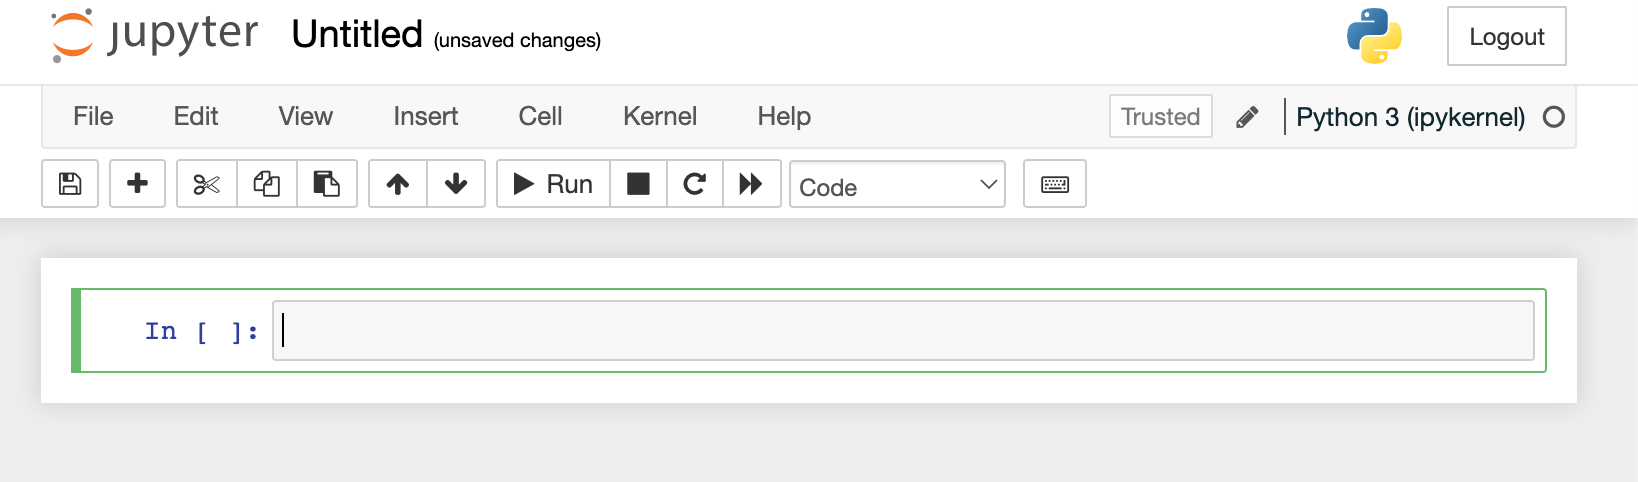
You can add new cells, delete cells, or change the cell type (code, markdown, or raw) using the toolbar at the top of the notebook. Additionally, you can access various notebook settings, download the notebook in different formats, or save and checkpoint your progress using the “File” and “Kernel” menus.
Installing a Python Module in Jupyter Notebook with pip install
To install additional Python modules in Jupyter, use the `!pip` or `!pip3` command followed by the module name. For example, to install the NumPy module, run the following command in a Jupyter Notebook cell:
!pip install numpyFor Mac users, you might need to use pip3:
!pip3 install numpy
Classic Jupyter Notebook is a powerful tool. However, if you are looking to collaborate with others in a seamless could based Notebook that supports simultaneous use of Python, R and SQL, check out Noteable. It is fully compatible with classic Jupyter notebook, meaning you can import and export `ipynb` files, and requires no set up at all. Just sign up and code away!