Под GNU/Linux-дистрибутивы создано огромное количество полезных и удобных инструментов и приложений для обычных пользователей и разработчиков. Далеко не всё из этого доступно на Windows, но, к счастью, для ОС от Microsoft есть решения, исправляющие эту проблему.
WSL — официальная подсистема Linux внутри Windows
В Windows 10 существует крайне полезная вещь под названием Windows Subsystem for Linux (WSL). Она позволяет использовать GNU/Linux-среду прямо в Windows и запускать не только команды, но и, например, Bash-скрипты. Для использования WSL необходимо следовать инструкции ниже.
Шаг 1. Проверьте, подходит ли текущая версия Windows требованиям. Для этого нажмите сочетание клавиш Win+R, затем введите winver. Найдите строку «Сборка ОС» — она должна быть свежее версии 14316.
Шаг 2. Запустите стандартную утилиту PowerShell от имени администратора и введите в ней команду для включения WSL:
dism.exe /online /enable-feature /featurename:Microsoft-Windows-Subsystem-Linux /all /norestart
Шаг 3. Если версия Windows, определённая в первом пункте, свежее 18362, вы можете установить WSL 2, который в разы быстрее первой версии и обладает доработанным ядром. Введите команду ниже, если нужно установить WSL 2:
dism.exe /online /enable-feature /featurename:VirtualMachinePlatform /all /norestart
После этого скачайте и установите пакет обновления с официального сайта.
Шаг 4. Перезагрузите компьютер. Если была произведена установка WSL 2, введите в PowerShell от имени администратора следующую команду:
wsl —set-default-version 2
Шаг 5. После перезагрузки откройте фирменный магазин приложений Microsoft Store и найдите подходящий GNU/Linux-дистрибутив. Самым популярным является Ubuntu — вы можете установить любую версию из представленных в Microsoft Store.
Шаг 6. Как только установка завершится, найдите дистрибутив в меню «Пуск» и запустите его.
Шаг 7. Пройдите этап первоначальной настройки, введя имя нового пользователя и придумав пароль.
Шаг 8. Теперь различные GNU/Linux-команды можно выполнять, запустив дистрибутив, либо введя в командной строке wsl <команда>. Например, для просмотра всех файлов в текущей директории достаточно в командной строке выполнить wsl ls -a.
Обращу внимание на то, что путь к дискам в WSL отличается от такового в Windows. Вместо привычного C:/ используйте /mnt/c/. Также не забывайте про экранирование пробелов с помощью символа \ — это также пригодится при вводе путей к файлам.
Помимо выполнения базовых команд, с помощью WSL можно даже запускать приложения с графическим интерфейсом. Правда, рассчитывать на большое количество поддерживаемых подобных программ не стоит.
Шаг 1. Загрузите X-сервер и установите его.
Шаг 2. Запустите его с помощью ярлыка на рабочем столе. В открывшемся окне выберите вариант Multiple windows, затем Start no client. Завершите настройку кнопкой Finish.
Шаг 3. Откройте дистрибутив через меню Пуск и выполните команду export DISPLAY=:0
Шаг 4. Запустив приложение с графическим интерфейсом в WSL, вы увидите новое окно прямо в Windows.
CoreUtils — лёгкий инструмент для запуска базовых команд
Плюс данной утилиты — возможность запуска не только на Windows 10, но и на более старых версиях ОС. Кроме того, она легка и не занимает много места. Не обошлось без недостатков — программа скудна на функционал и не обновлялась очень давно. Она не только не умеет запускать скрипты и приложения с GUI, но и поддерживает лишь самые базовые GNU/Linux-команды. Установка CoreUtils весьма проста.
Шаг 1. Скачайте утилиту с официального сайта.
Шаг 2. Следуйте инструкциям установщика.
Шаг 3. Откройте «Панель управления», в разделе «Система и безопасность» выберите пункт «Система». На панели слева откройте «Дополнительные параметры системы». Нажмите кнопку «Переменные среды» и в открывшемся окне найдите область с заголовком «Системные переменные». В случае, когда там есть переменная Path, выберите её, нажмите «Изменить» и далее создайте новую строку. Содержимым этой строки должен быть путь к папке, который был указан при установке. Если вы ничего не меняли, то введите следующее:
C:\Program Files (x86)\GnuWin32\bin
Переменной Path нет? Тогда для начала создайте её кнопкой «Создать», затем в поле имени введите Path, а в поле значения — строку выше.
Шаг 4. Запустите командную строку и выполняйте команды прямо там.
Cygwin — запуск команд и Bash-скриптов
Ещё одна утилита, схожая с CoreUtils, но обладающая более широким функционалом — в том числе и возможностью запуска скриптов. Из минусов — немалый вес и более сложная установка. Разумеется, не идёт ни в какое сравнение с максимально удобным WSL, но для базовых команд вполне подойдёт.
Шаг 1. Загрузите Cygwin и запустите установку.
Шаг 2. Выберите Install from Internet, укажите директории для установки и загрузки пакетов, а также любой подходящий сайт из списка для скачивания файлов.
Шаг 3. В процессе установки можете выбрать необходимые пакеты, либо сразу нажать «Далее», оставив базовый набор.
Шаг 4. Откройте «Панель управления», в разделе «Система и безопасность» выберите пункт «Система». На панели слева откройте «Дополнительные параметры системы». Нажмите кнопку «Переменные среды» и в открывшемся окне найдите область с заголовком «Системные переменные». В случае, когда там есть переменная Path, выберите её, нажмите «Изменить» и далее создайте новую строку. Содержимым этой строки должен быть путь к папке, который был указан при установке. Если вы ничего не меняли, то введите следующее:
C:\cygwin64\bin
Переменной Path нет? Тогда для начала создайте её кнопкой «Создать», затем в поле имени введите Path, а в поле значения — строку выше.
Шаг 5. Команды можно выполнять как через командную строку, так и через специальный терминал.
Шаг 6. Для удаления Cygwin достаточно удалить папку, в которую программа была установлена, а также (по желанию) значение из переменной Path по методу, обратному тому, что был описан в 4 шаге (не удаляйте саму переменную).
A “Window Terminal” is a command-line interface inside a GUI window. While the Windows operating system is a perfectly-capable OS that can perform various tasks and functions using just the GUI itself, a terminal running on top of Windows allows you to perform administrative tasks with convenience.
Using different terminals, you can connect to remote computers, transfer large files, execute cmdlets remotely, and even run apps and programs on a remote computer.
Other than that, it also enables you to perform complex automation tasks in a few cmdlets which can take a while if performed traditionally using Windows GUI.
If you are a system administrator, or just like using the command line, this article lists the best terminal emulators you can run on top of Windows 10 and Windows 11 with maximum command support and ease of use.
Table of contents
- Top Terminal Emulators for Windows
- Windows Terminal
- Cmder
- ZOC Terminal Emulator
- Xshell
- ConEmu
- Hyper
- Putty
- Honorable Mentions
- Closing Thoughts
Top Terminal Emulators for Windows
Windows Terminal
Download Windows Terminal

The Windows Terminal comes preinstalled in Windows 10 and 11. It can also be downloaded from Microsoft Store.
Although it lacks some of the features that other terminal emulators hold, it still provides convenient CLI usage without having to install a third-party emulator.
The Windows Terminal is an improvement over the legacy Command Prompt and Windows PowerShell, and combines these CLIs plus the Git Bash, Windows Subsystem for Linux (WSL), and Azure Cloud Shell into an integrated interface.
Additionally, it allows running multiple tabs simultaneously, allowing you to perform multiple tasks and connections at the same time.
Cmder
Download Cmder

Cmder is another Windows terminal built on top of “ConEmu” with the addition of Clink. Clink enhances the features of ConEmu by integrating support for Git commands, amongst Command Prompt and PowerShell. It supports running Unix-base cmdlets on top of the Windows OS and is fully compatible with Cygwin, Mintty, and msysgit.
Cmder comes in two versions – portable and full. Only the full version supports Unix-based commands, while the portable version is only 10 MBs in size and can be run directly from a USB. The portable version is widely used by sysadmins which they can carry around in a USB and use as per need.
Additionally, like Windows Terminal, Cmder can also run multiple tabs simultaneously.
That said, there are reports of non-Unicode characters having issues running with Cmder. If you use such characters often, then you may want to opt for another terminal.
ZOC Terminal Emulator
Download ZOC Terminal Emulator

Even though ZOC Terminal Emulator is an excellent command line tool, it is not free to use. This is perhaps the only drawback of the tool.
Other than that, like most other emulators, ZOC has a multi-tabbed interface that allows you to run multiple instances at the same time.
This tool does not only have a terminal interface like Windows Terminal but also includes a bunch of settings and menus that you can use your mouse to access. Additionally, it also supports Linux (Xterm) emulation, which includes 256-color support, meta-keys, and local printing. It also includes the Cisco CLI as well.
This terminal is an all-in-one solution for heavy file transfers and utilizes X, Y, and Zmodem, amongst FTP, FTPS, SFTP, and SCP.
Xshell
Download Xshell

Xshell is available in both free (for non-commercial use) and paid versions.
This terminal emulator supports SSH, SFTP, RLOGIN, Telnet, and SERIAL. Xshell comes in multiple language packs to cater to clients all around the world and is also designed for commercial use.
Multi-session management, work automation, support for UTF-8 coding, data safety, and security are some of the salient features of Xshell. Using the MIT Kerberos authentication system, this tool enables users to specify a master password to restrict access and keep the data safe and secure.
ConEmu
Download ConEmu

ConEmu is a free, open-source, Windows-specific terminal emulator with multi-tab support. The tool offers many CLI tabs as well as Graphical User Interface (GUI) programs that can be customized.
As it offers many customization options, such as hotkeys, personalized color palettes, and an auto-hideable mode, the software is popular amongst programmers and developers. ConEmu is also compatible with numerous shells, including PowerShell, PuTTY, and Cmder.
However, the lack of key functions, such as remote connections, makes the software less than ideal for novice users.
Hyper
Download Hyper

Hyper is a cross-platform, web-based terminal emulator. By “web-based,” we mean that it uses web-based technologies like CSS, Electron, and JavaScript to connect to remote devices.
Using Hyper, you can connect to multiple devices using the SSH protocol. Moreover, it has the ability to be expanded using plugins and add-ons. With multi-tab support, tiling pane, support for different themes, quick rendering, and split screen view, hyper becomes the ideal Windows terminal for sysadmins and developers on the go.
Putty
Download Putty

Putty is perhaps one of the most popular and love terminals out there. Designed for both advanced users and beginners, it has a simplistic design that supports SSH, Telnet, Rlogin, SUPDUP, and Serial protocols for a secure, remote connection.
Using the PSFTP (PuTTY SFTP client) and PSCP (PuTTY Secure Copy client) utilities, it can safely transfer files between computers. Putty supports SSH-1, SSH-2, and naming session profiles for storing configuration.
Honorable Mentions
Apart from the top 7 Windows terminal emulators that we have discussed above, there still are plenty of other emulators that are equally good. Here is a list in case your needs are not met using the aforementioned terminal emulators:
- MobaXterm
- KiTTY
- ConsoleZ
- z/Scope
- FireCMD
- Terminus
- Git Bash
Closing Thoughts
Terminal Emulators let you gain more control over the remote devices. It allows you to perform certain tasks, such as automation, that previously weren’t possible using the Windows GUI. Moreover, it also allows you to control computers with different operating systems from a PC running the Windows OS.
Let us know which one of these emulators did you prefer and why?
wsl-terminal
A terminal emulator for Windows Subsystem for Linux (WSL), based on mintty, fatty and wslbridge2.
All emojis designed by OpenMoji – the open-source emoji and icon project. License: CC BY-SA 4.0
中文页面(The Chinese README is no longer maintained)
Screenshot
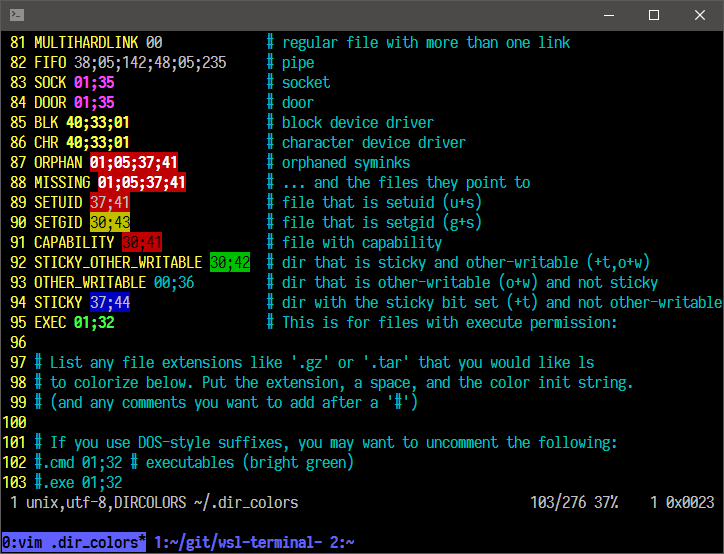
More screenshots here.
Usage
-
Make sure you have 7z installed. On Ubuntu run:
sudo apt install p7zip-full, on Archlinux: runpacman -S p7zip -
Change the directory to the folder where you want to install wsl-terminal to.
Make sure to install wsl-terminal in a the windows filesystem and not in the wsl filesistem. The installation folder needs to be on a local NTFS volume.
- Option 1: If you’re in cmd.exe run:
wsl bash -c "$(wget https://raw.githubusercontent.com/mskyaxl/wsl-terminal/master/scripts/install.sh -qO -)"
- Option 2: If you’re in wsl already run
bash -c "$(wget https://raw.githubusercontent.com/mskyaxl/wsl-terminal/master/scripts/install.sh -qO -)"
If you want to install the tabbed version you have to add a -t as parameter as shown bellow
bash -c "$(wget https://raw.githubusercontent.com/mskyaxl/wsl-terminal/master/scripts/install.sh -qO -)" '' -t
-
Run
open-wsl.exeto open a WSL terminal in current directory. -
Run
tools/1-add-open-wsl-terminal-here-menu.js(help) to add aOpen wsl-terminal Herecontext menu toexplorer.exe(Runtools/1-remove-open-wsl-terminal-here-menu.jsto remove it). If you are using Total Commander, Use wsl-terminal with Total Commander may help you. -
run-wsl-file.execan run any.sh(or any others like.py.pl) script files in wsl-terminal, supportOpen Withcontext menu inexplorer.exe. -
vim.execan open any files with vim (in wsl-terminal), supportOpen Withcontext menu inexplorer.exe.vim.execan be renamed toemacs.exenvim.exenano.exe...to open files inemacsnvimnano....
Keyboard shortcuts
| key | function |
|---|---|
Alt + Enter |
Fullscreen |
Alt + F2 |
New window |
Alt + F3 |
Search text |
Ctrl + [Shift] + Tab |
Switch window |
Ctrl + = + - 0 |
Zoom |
Ctrl + Click |
Open URL or dir/file under the cursor |
Ctrl + Right Click |
Open context menu |
Bind wsl-terminal to a hotkey.
Params
open-wsl
Usage: open-wsl [OPTION]...
  -a: activate an existing wsl-terminal window.
      if use_tmux=1, attach the running tmux session.
  -l: start a login shell and cd to $HOME (doesn't work with use_tmux=1).
  -c command: run command (e.g. -c "echo a b; echo c; cat").
  -e commands: run commands (e.g. -e echo a b; echo c; cat).
  -C dir: change directory to a WSL dir (e.g. /home/username).
  -W dir: change directory to a Windows dir (e.g. c:\Users\username).
  -d distro: switch distros.
  -b "options": pass additional options to wslbridge.
  -B "options": pass additional options to mintty.
  -h: show help.
For -B and -b, see also mintty params and wslbridge2 params.
cmdtool (run it in WSL)
Usage: cmdtool [OPTION]...
  wcmd: run Windows programs with cmd.exe /c.
  wstart: run Windows programs with cmd.exe /c start.
  wstartex file|url: like wstart, but use WSL file path.
  update: check the latest wsl-terminal version, and upgrade it.
  killall: kill all WSL processes.
  install dash: install Cygwin dash (for debugging).
  install busybox: install Cygwin busybox (for debugging).
Tools
Files in tools directory:
| filename | function |
|---|---|
| 1-add-open-wsl-terminal-here-menu.js | Add Open wsl-terminal Here context menu to explorer.exe. |
| 1-remove-open-wsl-terminal-here-menu.js | Remove Open wsl-terminal Here context menu. |
| 2-add-wsl-terminal-dir-to-path.js | Add wsl-terminal directory to Path environment variable. |
| 2-remove-wsl-terminal-dir-from-path.js | Remove wsl-terminal directory from Path environment variable. |
| 3-write-distro-to-config-file.js | Write distro guids to etc/wsl-terminal.conf. |
| 4-create-start-menu-shortcut.js | Create a start menu shortcut to open-wsl -C ~. |
| 4-create-start-menu-shortcut-login-shell.js | Create a start menu shortcut to open-wsl -l. |
| 4-remove-all-start-menu-shortcuts.js | Remove all wsl-terminal start menu shortcuts. |
| 5-add-open-with-vim-menu.js | Add Open with vim in wsl-terminal context menu. |
| 5-remove-open-with-vim-menu.js | Remove Open with vim in wsl-terminal context menu. |
| 6-set-default-shell.bat | Set shell in etc/wsl-terminal.conf to the default shell in WSL. |
Double click any .js file to run it. If it was open by any editor, open it with Microsoft (R) Windows Based Script Host, or open a cmd.exe in tools directory and run wscript xxx.js.
Configuration files
etc/wsl-terminal.conf is wsl-terminal config file.
[config]
title="my title"
shell=/bin/bash
use_tmux=0
;icon=
;distro=
etc/themes/* are theme files, use themes.
etc/minttyrc is mintty config file, mintty tips.
Upgrade
Open open-wsl.exe in wsl-terminal directory, run ./cmdtool update to check the latest wsl-terminal version and upgrade it. If the download speed is too slow, you can download wsl-terminal-v{version}.7z from releases with other tools, and put it into wsl-terminal directory, then run ./cmdtool update.
wget and 7z commands are needed (Ubuntu: apt install wget p7zip-full, Archlinux: pacman -S wget p7zip) .
Config files won’t be overridden, etc/wsl-terminal.conf and etc/minttyrc will be placed to etc/wsl-terminal.conf.pacnew and etc/minttyrc.pacnew. Some .bak files will be left in bin, because they are running, those files will be removed after the next upgrading.
Use tmux
- Install tmux in WSL.
- Set
use_tmux=1inetc/wsl-terminal.conf. And setattach_tmux_locally=1if the version number is less than0.8.1. - Add these lines to
~/.bashrc(shell=/bin/bashin config) or~/.zshrc(shell=/bin/zshin config):
[[ -z "$TMUX" && -n "$USE_TMUX" ]] && {
    [[ -n "$ATTACH_ONLY" ]] && {
        tmux a 2>/dev/null || {
            cd && exec tmux
        }
        exit
    }

    tmux new-window -c "$PWD" 2>/dev/null && exec tmux a
    exec tmux
}
If you’re using fish then update your ‘~/.config/fish/config.fish’ (shell=/bin/fish in config) with
if [ -z "$TMUX" ]; and [ -n "$USE_TMUX" ]
    if [ -n "$ATTACH_ONLY" ]
        if not tmux a 2>/dev/null
            cd; and exec tmux
        end
        exit
    end

    tmux new-window -c "$PWD" 2>/dev/null; and exec tmux a
    exec tmux
end
Then open-wsl will use tmux.
Switch distros
Use open-wsl -d distro to switch distros:
# list all distros
> wslconfig /l
Legacy (Default)
Ubuntu

# use Ubuntu (will run wslconfig /s Ubuntu before mintty)
> open-wsl -d Ubuntu

# Ubuntu is the default distro now
> wslconfig /l
Ubuntu (Default)
kali-linux
Or set distro in wsl-terminal.conf (Won’t change the default distro).
Run tools/3-write-distro-to-config-file.js (help), then a msgbox will show the result:
result has been written to ..\etc\wsl-terminal.conf:

;distro=kali-linux

;distro=Ubuntu

remove the ; before distro to use the distro.
If you want to pass the distro_guid to open-wsl in cmdline:
# pass the distro guid to wslbridge
> open-wsl -b "-d Ubuntu"
Links
FAQ
Issues
Releases
Wiki
Build
Prerequisites
- Install WSL and make sure
wgettarxzgzipp7zipare available (Ubuntu: runapt install wget tar xz-utils gzip p7zip-full, Archlinux: runpacman -S wget tar xz gzip p7zip) are installed in WSL. - for the tabbed version: cygwin x64 with the following packages installed
gcc-g++,make,w32api-headers(for compiling fatty)
Build steps
-
clone the repo in WSL(to maintain the linux EOL characters) but on windows drive eg (
/mnt/c/Users/<userName>/work/wsl-terminal) -
use build.sh to build with the appropiate parameters.
➜  wsl-terminal git:(master) scripts/build.sh -h
Usage:
    build.sh -h                 Display this help message.
    build.sh -a                 Builds wsl-terminal and wsl-terminal-tabbed.
    build.sh -t                 Builds only wsl-terminal-tabbed(cygwin is required).
    build.sh                    Builds only wsl-terminal.
Roadmap
- Bug fixing
- add x11 support
License
MIT
A terminal emulator for Windows Subsystem for Linux (WSL), based on mintty, fatty and wslbridge2.
All emojis designed by OpenMoji – the open-source emoji and icon project. License: CC BY-SA 4.0
中文页面(The Chinese README is no longer maintained)
Screenshot
More screenshots here.
Usage
-
Make sure you have 7z installed. On Ubuntu run:
sudo apt install p7zip-full, on Archlinux: runpacman -S p7zip -
Change the directory to the folder where you want to install wsl-terminal to.
Make sure to install wsl-terminal in a the windows filesystem and not in the wsl filesistem. The installation folder needs to be on a local NTFS volume.
- Option 1: If you’re in cmd.exe run:
wsl bash -c "$(wget https://raw.githubusercontent.com/mskyaxl/wsl-terminal/master/scripts/install.sh -qO -)"
- Option 2: If you’re in wsl already run
bash -c "$(wget https://raw.githubusercontent.com/mskyaxl/wsl-terminal/master/scripts/install.sh -qO -)"
If you want to install the tabbed version you have to add a -t as parameter as shown bellow
bash -c "$(wget https://raw.githubusercontent.com/mskyaxl/wsl-terminal/master/scripts/install.sh -qO -)" '' -t
-
Run
open-wsl.exeto open a WSL terminal in current directory. -
Run
tools/1-add-open-wsl-terminal-here-menu.js(help) to add aOpen wsl-terminal Herecontext menu toexplorer.exe(Runtools/1-remove-open-wsl-terminal-here-menu.jsto remove it). If you are using Total Commander, Use wsl-terminal with Total Commander may help you. -
run-wsl-file.execan run any.sh(or any others like.py.pl) script files in wsl-terminal, supportOpen Withcontext menu inexplorer.exe. -
vim.execan open any files with vim (in wsl-terminal), supportOpen Withcontext menu inexplorer.exe.vim.execan be renamed toemacs.exenvim.exenano.exe...to open files inemacsnvimnano....
Keyboard shortcuts
| key | function |
|---|---|
Alt + Enter |
Fullscreen |
Alt + F2 |
New window |
Alt + F3 |
Search text |
Ctrl + [Shift] + Tab |
Switch window |
Ctrl + = + - 0 |
Zoom |
Ctrl + Click |
Open URL or dir/file under the cursor |
Ctrl + Right Click |
Open context menu |
Bind wsl-terminal to a hotkey.
Params
open-wsl
Usage: open-wsl [OPTION]...
  -a: activate an existing wsl-terminal window.
      if use_tmux=1, attach the running tmux session.
  -l: start a login shell and cd to $HOME (doesn't work with use_tmux=1).
  -c command: run command (e.g. -c "echo a b; echo c; cat").
  -e commands: run commands (e.g. -e echo a b; echo c; cat).
  -C dir: change directory to a WSL dir (e.g. /home/username).
  -W dir: change directory to a Windows dir (e.g. c:\Users\username).
  -d distro: switch distros.
  -b "options": pass additional options to wslbridge.
  -B "options": pass additional options to mintty.
  -h: show help.
For -B and -b, see also mintty params and wslbridge2 params.
cmdtool (run it in WSL)
Usage: cmdtool [OPTION]...
  wcmd: run Windows programs with cmd.exe /c.
  wstart: run Windows programs with cmd.exe /c start.
  wstartex file|url: like wstart, but use WSL file path.
  update: check the latest wsl-terminal version, and upgrade it.
  killall: kill all WSL processes.
  install dash: install Cygwin dash (for debugging).
  install busybox: install Cygwin busybox (for debugging).
Files in tools directory:
| filename | function |
|---|---|
| 1-add-open-wsl-terminal-here-menu.js | Add Open wsl-terminal Here context menu to explorer.exe. |
| 1-remove-open-wsl-terminal-here-menu.js | Remove Open wsl-terminal Here context menu. |
| 2-add-wsl-terminal-dir-to-path.js | Add wsl-terminal directory to Path environment variable. |
| 2-remove-wsl-terminal-dir-from-path.js | Remove wsl-terminal directory from Path environment variable. |
| 3-write-distro-to-config-file.js | Write distro guids to etc/wsl-terminal.conf. |
| 4-create-start-menu-shortcut.js | Create a start menu shortcut to open-wsl -C ~. |
| 4-create-start-menu-shortcut-login-shell.js | Create a start menu shortcut to open-wsl -l. |
| 4-remove-all-start-menu-shortcuts.js | Remove all wsl-terminal start menu shortcuts. |
| 5-add-open-with-vim-menu.js | Add Open with vim in wsl-terminal context menu. |
| 5-remove-open-with-vim-menu.js | Remove Open with vim in wsl-terminal context menu. |
| 6-set-default-shell.bat | Set shell in etc/wsl-terminal.conf to the default shell in WSL. |
Double click any .js file to run it. If it was open by any editor, open it with Microsoft (R) Windows Based Script Host, or open a cmd.exe in tools directory and run wscript xxx.js.
Configuration files
etc/wsl-terminal.conf is wsl-terminal config file.
[config]
title="my title"
shell=/bin/bash
use_tmux=0
;icon=
;distro=
etc/themes/* are theme files, use themes.
etc/minttyrc is mintty config file, mintty tips.
Upgrade
Open open-wsl.exe in wsl-terminal directory, run ./cmdtool update to check the latest wsl-terminal version and upgrade it. If the download speed is too slow, you can download wsl-terminal-v{version}.7z from releases with other tools, and put it into wsl-terminal directory, then run ./cmdtool update.
wget and 7z commands are needed (Ubuntu: apt install wget p7zip-full, Archlinux: pacman -S wget p7zip) .
Config files won’t be overridden, etc/wsl-terminal.conf and etc/minttyrc will be placed to etc/wsl-terminal.conf.pacnew and etc/minttyrc.pacnew. Some .bak files will be left in bin, because they are running, those files will be removed after the next upgrading.
Use tmux
- Install tmux in WSL.
- Set
use_tmux=1inetc/wsl-terminal.conf. And setattach_tmux_locally=1if the version number is less than0.8.1. - Add these lines to
~/.bashrc(shell=/bin/bashin config) or~/.zshrc(shell=/bin/zshin config):
[[ -z "$TMUX" && -n "$USE_TMUX" ]] && {
    [[ -n "$ATTACH_ONLY" ]] && {
        tmux a 2>/dev/null || {
            cd && exec tmux
        }
        exit
    }

    tmux new-window -c "$PWD" 2>/dev/null && exec tmux a
    exec tmux
}
If you’re using fish then update your ‘~/.config/fish/config.fish’ (shell=/bin/fish in config) with
if [ -z "$TMUX" ]; and [ -n "$USE_TMUX" ]
    if [ -n "$ATTACH_ONLY" ]
        if not tmux a 2>/dev/null
            cd; and exec tmux
        end
        exit
    end

    tmux new-window -c "$PWD" 2>/dev/null; and exec tmux a
    exec tmux
end
Then open-wsl will use tmux.
Switch distros
Use open-wsl -d distro to switch distros:
# list all distros
> wslconfig /l
Legacy (Default)
Ubuntu

# use Ubuntu (will run wslconfig /s Ubuntu before mintty)
> open-wsl -d Ubuntu

# Ubuntu is the default distro now
> wslconfig /l
Ubuntu (Default)
kali-linux
Or set distro in wsl-terminal.conf (Won’t change the default distro).
Run tools/3-write-distro-to-config-file.js (help), then a msgbox will show the result:
result has been written to ..\etc\wsl-terminal.conf:

;distro=kali-linux

;distro=Ubuntu

remove the ; before distro to use the distro.
If you want to pass the distro_guid to open-wsl in cmdline:
# pass the distro guid to wslbridge
> open-wsl -b "-d Ubuntu"
Links
FAQ
Issues
Releases
Wiki
Build
Prerequisites
- Install WSL and make sure
wgettarxzgzipp7zipare available (Ubuntu: runapt install wget tar xz-utils gzip p7zip-full, Archlinux: runpacman -S wget tar xz gzip p7zip) are installed in WSL. - for the tabbed version: cygwin x64 with the following packages installed
gcc-g++,make,w32api-headers(for compiling fatty)
Build steps
-
clone the repo in WSL(to maintain the linux EOL characters) but on windows drive eg (
/mnt/c/Users/<userName>/work/wsl-terminal) -
use build.sh to build with the appropiate parameters.
  ➜  wsl-terminal git:(master) scripts/build.sh -h
  Usage:
      build.sh -h                 Display this help message.
      build.sh -a                 Builds wsl-terminal and wsl-terminal-tabbed.
      build.sh -t                 Builds only wsl-terminal-tabbed(cygwin is required).
      build.sh                    Builds only wsl-terminal.
Roadmap
- Bug fixing
- add x11 support
License
MIT
When you need to run Linux command-line tools or even GUI applications on a Windows machine, the first thing to come to mind is often virtual machines. And while that does work, there is a better option. The Windows Subsystem for Linux (WSL) feature creates a compatibility layer that allows you to run Linux binary executables natively on Windows.
This is more efficient as WSL doesn’t have to deal with the overhead of a usual VM setup, meaning it requires fewer resources. WSL also allows you to use both Windows and Linux tools on the same files, as you’re able to directly access the Windows files from Linux.
And while there are numerous such reasons to use WSL, the one that’s most relevant to us is that WSL lets you use a Linux terminal on Windows. As such, we’ll focus on WSL and the steps to install a Linux terminal using it in this article.
WSL 1 and WSL 2
Microsoft first introduced WSL in 2016 with the Windows 10 version 1607 Anniversary Update. WSL 1 used the LXSS Manager Service (particularly the lxss.sys and lxcore.sys drivers) for interactions between Windows and the subsystem.
WSL 1 didn’t utilize virtualization and instead made direct use of some of the hardware and the host file system, which had some implications. For instance, the virtual network adapter would be bridged to the host NIC, meaning the Linux distribution would have an IP address in the same network as the host machine.
WSL 2 was released with the version 2004 update in 2020. It made considerable changes to the architecture to increase file system performance and support full system call compatibility.
WSL 2 utilizes a specific optimized set of Hyper-V features to run the Linux kernel inside a lightweight VM. The hardware components are virtualized as well, but because this VM runs behind the scenes, the user experience is no more complicated than before.
The WSL 2 VM uses a full Linux kernel that’s optimized for best performance and auto-serviced via Windows Updates. And while WSL 1 stored the Linux files on the Windows drive, WSL 2 uses a virtual hard disk formatted with ext4. This essentially means that WSL 2 offers way better performance, compatibility, and support for GUI applications.
WSL 2 is only supported on Windows 11 or Windows 10 version 1903 or later. Aside from some very niche scenarios, you should always opt for WSL 2, provided it’s supported on your Windows build.
With all that said, we’ll first talk about installing WSL 1. But if you just need steps to upgrade to or install WSL 2, you can skip ahead to the next section.
Here’s how you can install a Linux terminal with WSL 1:
- Press Win + R, type
powershell, and press CTRL + Shift + Enter. - Execute the following command:
dism /online /enable-feature /featurename:Microsoft-Windows-Subsystem-Linux /all
- Press Y to accept the prompt to restart your PC.
- After booting, download your preferred distro from the WSL Store. If that doesn’t work, you can download and install it directly from Microsoft’s site.

- After the download completes, press Open.
- After the installation completes, enter a new UNIX username and password.

- The setup process is pretty much done. As for what to do next, we recommend starting by updating and upgrading the packages. For instance, on Ubuntu, you can do this with
sudo apt update && sudo apt upgrade. After that, you can start playing around in the terminal and running shell scripts or whatever else you prefer.


You can manage WSL’s Linux distros via Powershell or CMD with the wsl command (eg. wsl ls -la), or you can enter bash to open a Bash shell. Microsoft recommends using Windows Terminal, as it allows you to open and switch between multiple distros and command lines easily.

Install or Upgrade to WSL 2
As WSL 2 utilizes virtualization, you must first enable hardware-assisted virtualization via the BIOS. You’ll find the virtualization option (AMD-V, SVM, VT-d, VT-x, or something similar) in the Advanced or CPU Configuration section.
Afterward, all you need to do is run the wsl --install command. This command will automate everything, from enabling the required features to installing WSL and the default Linux distro (Ubuntu).
The last part won’t be satisfactory to a lot of users. As such, we’ll now talk about how to perform other tasks like installing specific Linux distributions.
Troubleshooting Common Issues
When installing WSL, users often encounter some errors. You can check the troubleshooting guide from Microsoft for a detailed list, but we’ll address the common ones right here:
- Installation failed with error 0x80070003
Go to Settings > System > Storage > More / Advanced Storage Settings > Change where new content is saved and ensure new apps save to the system drive (usually C:).
- Error 0x80070003 or error 0x80370102
Ensure virtualization is enabled in the BIOS. - WslRegisterDistribution failed with error 0x8007019e
Ensure the WSL feature is enabled. If it’s disabled, you can enable it by running the following command in an elevated PowerShell window:Enable-WindowsOptionalFeature -Online -FeatureName Microsoft-Windows-Subsystem-Linux - Error: Windows Subsystem for Linux has no installed distributions.
WSL distributions are user-account specific. So, ensure you installed the distros on the same account you’re using right now. - Error: WSL 2 requires an update to its kernel component.
If you manually installed WSL 2 instead of using the command we showed above, you must also install the kernel update package. Additionally, you should also ensure the Virtual Machine Platform feature is enabled by running the following command in PowerShell:Enable-WindowsOptionalFeature -Online -FeatureName VirtualMachinePlatform
