В данной статье поговорим о том, как установить оснастки Active Directory в Windows 7. Как вы, наверное, помните, для того, чтобы в Windows XP появилась оснастка Active Directory Users and Computers (сокращенно ADUC), необходимо установить специальный набор утилит от Microsoft – Windows 2003 Admin Pack. В Windows 7 процесс установки консолей управления Active Directory несколько изменился.
Во-первых, Admin Pak теперь стал называться Remote Server Administration Tools (RSAT). Где найти и скачать RSAT для Windows 7 я уже писал. Обратите внимание, что существует несколько версий RSAT для Windows 7: версии будут отличаться в зависимости от разрядности вашей ОС (32 ил 64 –битная Window 7) и установленного Service Pack (скачать RSAT для Windows 7 SP1). Если вы не знаете, какая версия ОС используется у вас, нажмите кнопку Start, щелкните правой кнопочкой мыши по значку «Computer» и выберите «Properties». Окно с версией системы будет выглядеть примерно так:

В поле «System type:» будет указан тип вашей ОС Windows 7. В том случае, если вы используете 32 битную версию Windows 7, необходимо скачать файл, имя которого начинается с «x86…» (сейчас это «x86fre_GRMRSAT_MSU.msu», но имя может измениться). Для пользователей 64-битных систем, необходимо скачать файл, имя которого начинается с «amd64…» (сейчас это «amd64fre_GRMRSATX_MSU.msu») – это пакет подойдет даже в том случае, если вы используете процессор, отличный от AMD 64-bit.
После того, как вы скачаете RSAT для Windows 7, его нужно установить (в принципе это обычное обновление Microsoft KB).
Во-вторых, после установки RSAT в Windows 7, по умолчанию большинство дополнительных функций управления отключены, и оснастку управления Active Directory в Windows 7 нужно активировать вручную.
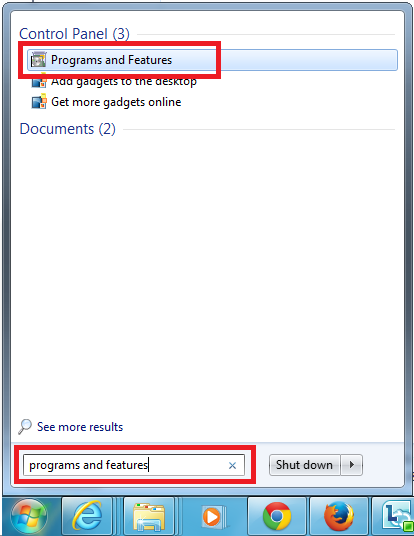
- Перейдите в панель управления Control Panel, выберите раздел Programs.
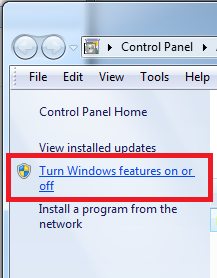
- В разделе Programs and Features, щелкните по ссылке Turn Windows features on or off.

- Перейдите в раздел Remote Server Administration Tools > Role Administration Tools, и выберите AD DS and AD LDS Tools.

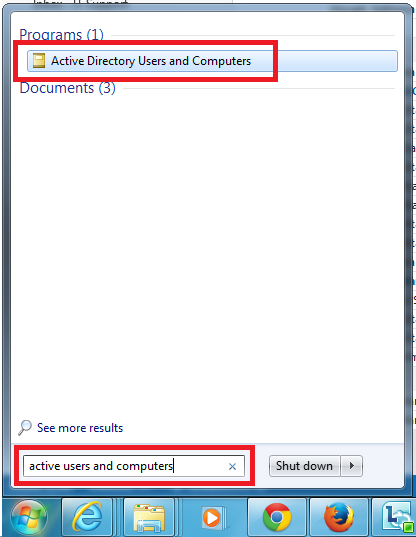
После этого консоль ADUC и другие оснастки управления AD в Windows 7 появится в панели управления в разделе Administrative Tools.

Активировать оснастку «Active Directory User and Computer» в Windows 7 можно и из командной строки, однако в любом случае придется скачать и установить RSAT.
В командной строке с правами администратора наберите следующие команды, добавляющие оснастки Active Directory:
dism /online /enable-feature /featurename:RemoteServerAdministrationTools-Roles-AD-DS

 dism /online /enable-feature /featurename:RemoteServerAdministrationTools-Roles-AD-DS-SnapIns
Active Directory
Admin Pak теперь стал называться Remote Server Administration Tools (RSAT).
скачать RSAT для Windows 7
после установки RSAT в Windows 7, по умолчанию большинство дополнительных функций управления отключены, и оснастку управления Active Directory в Windows 7 нужно активировать вручную.
- Перейдите в панель управления Control Panel, выберите раздел Programs.
- В разделе Programs and Features, щелкните по ссылке Turn Windows features on or off.
![]()
- Перейдите в раздел Remote Server Administration Tools > Role Administration Tools, и выберите AD DS and AD LDS Tools.

После этого консоль ADUC и другие оснастки управления AD в Windows 7 появится в панели управления в разделе Administrative Tools.

В командной строке с правами администратора наберите следующие команды, добавляющие оснастки Active Directory:
dism /online /enable-feature /featurename:RemoteServerAdministrationTools-Roles-AD-DS

dism /online /enable-feature /featurename:RemoteServerAdministrationTools-Roles-AD-DS-SnapIns
Disclosure: Some of the links on this site are affiliate links, meaning that if you click on one of the links and purchase an item, I may receive a commission. All opinions however are my own.
Active Directory Users and Computers (ADUC) is a tool or can be called a Microsoft Management Console snap-in which helps in managing the Active Directory by creating objects, moving objects between OUs, and deleting objects.
It lets you take control of objects like users and computers, Organisational Units (OU), and attributes of each. You can use it only to move objects within a domain and not to other domains.
ADUC is the only tool that lets you move accounts using a GUI. It was introduced first in Windows Server 2000 as the basic Active Directory Management Tool.
Install Active Directory on Windows 7 – Step-by-Step
Active Directory Tools are not available by default in Windows OS. Thus, you need to install it by manually downloading the updated package on the official Microsoft site.
Steps to Install Active Directory Users and Computers tool on Windows 7
Install and add active directory users and computer tools on windows 7 by following these steps:
Step 1: Go to the official link of Microsoft – https://www.microsoft.com/en-AU/download/details.aspx?id=7887.
Step 2: Click the “Download” button under the “Remote Server Administration Tools for Windows 7 with Service Pack 1 (SP10).
Step 3: You should know your system type for this step. If you don’t know, then go to Start -> right-click “Computer” tab and then click on “Properties” to find out your system type. Then decide which package to download, x64 (64 bit) or x86 (32 bit).
Step 4: Choose the suitable directory package and click the “Next” button.
Step 5: It will get downloaded, and after that run the setup that is installed.
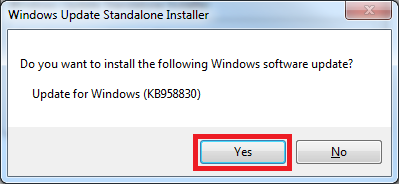
Step 6: Click ‘Yes’ when it asks Are you sure you want to download the package.
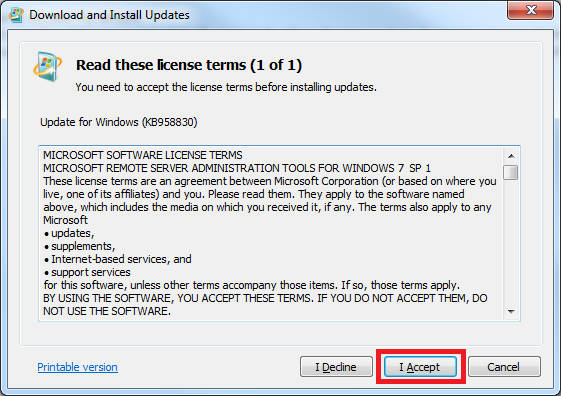
Step 7: Click on “I Accept” on the terms and conditions.
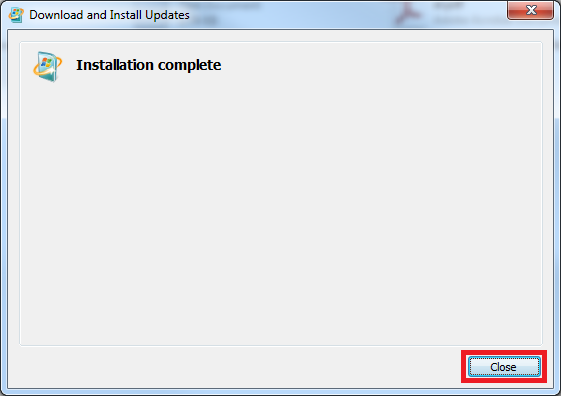
Step 8: Press the “Close” button after complete installation.
Step 9: Turn ON the Features by going to Control Panel -> Programs and Features -> Adjust Computer Settings.
Step 10: Under Windows Features popup, find “Remote Server Administration Tools” and expand it.
Step 11: Go to Role Administration Tools -> AD DS and AD LDS Tools -> AD DS Tools.
Enable Active Directory Administrative Center
Step 12: Click on the Active Directory Administrative Center.
Step 13: Finally, click OK and the system will save your changes.
Step 14: Restart your Windows 7 system again.
Install RSAT Active Directory Tools on Windows 10/8 1809
In case your system is Windows 10 1809 or higher, RSAT is not supported by the Microsoft installer, because it is already present there. To install RSAT active directory on windows 10 or 8 you simply have to turn on the RSAT Active Directory Tools.
Steps To Install RSAT Active Directory Windows 10
Here are the detailed steps that you can follow to enable RSAT Directory Tools on Windows 10:
Step 1: Go to the Start Menu in Windows 10 system.
Step 2: Choose “Settings -> apps -> manage optional features -> Add feature.”
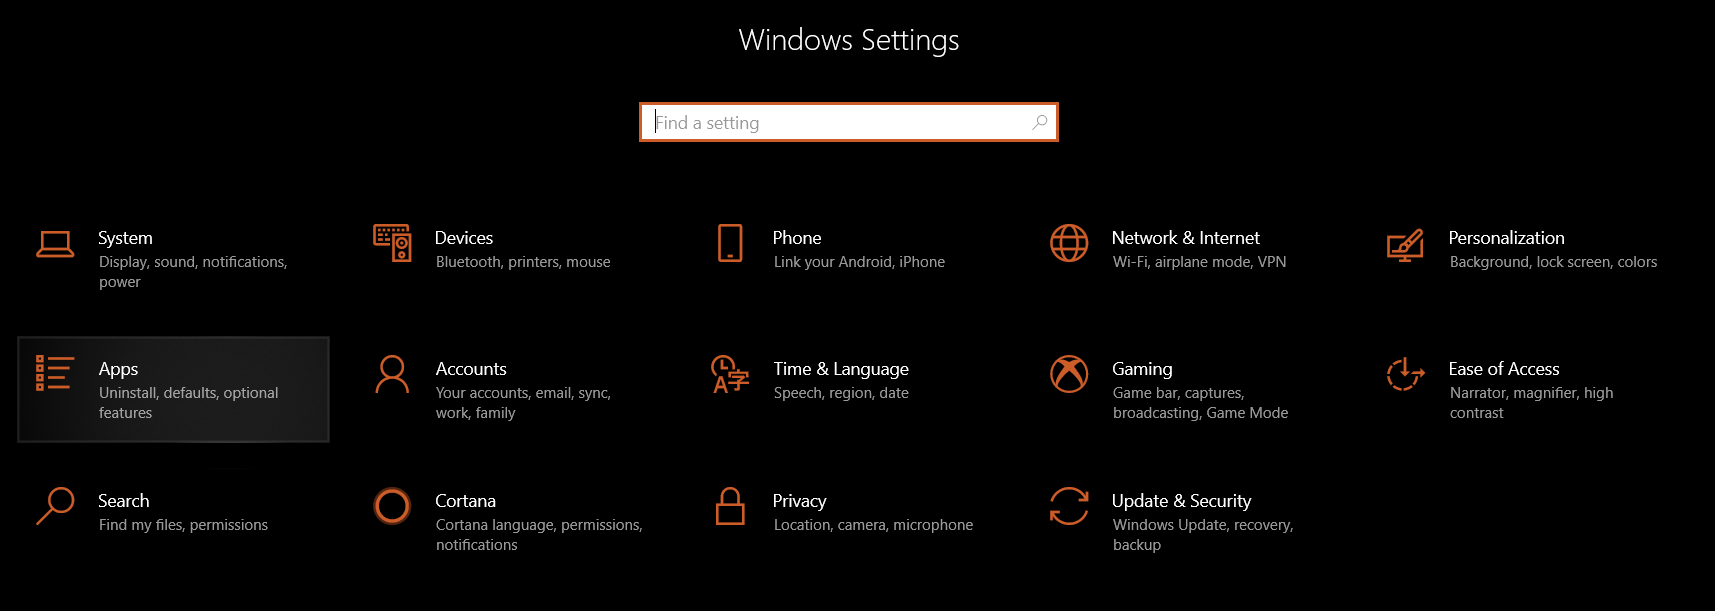

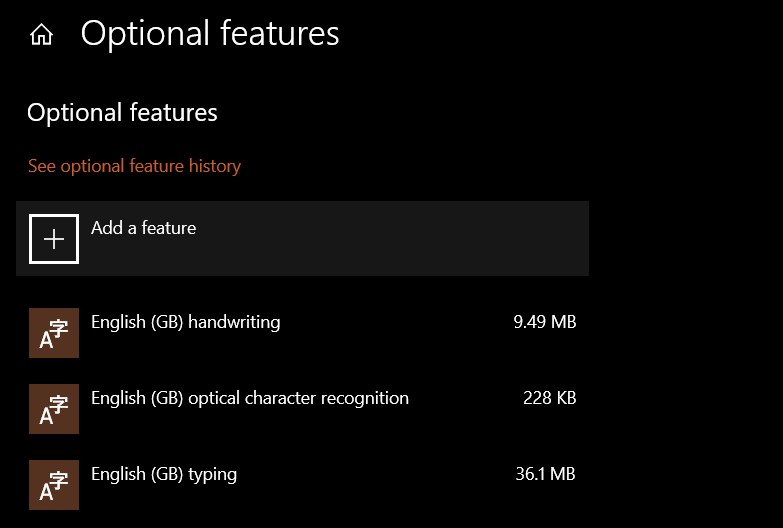
Step 3: Look for the option “RSAT: Active Directory Domain Services and Lightweight Directory Tools.”
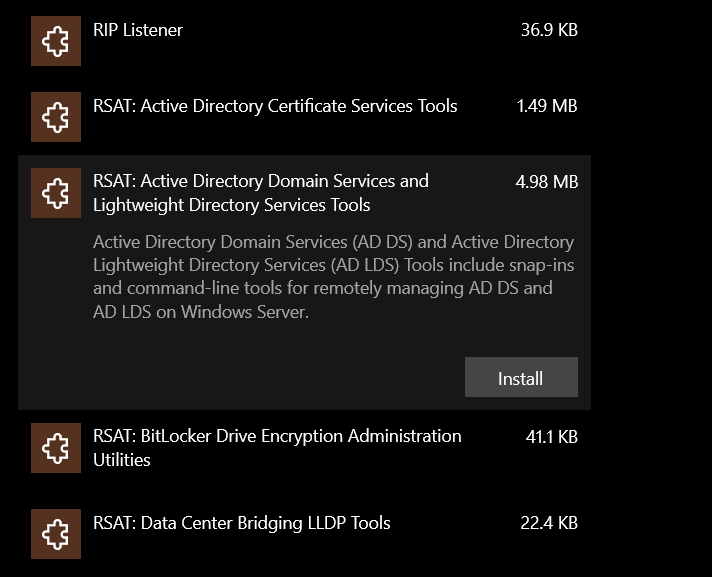
Step 4: “Install” it and sometimes this new feature will get updated.
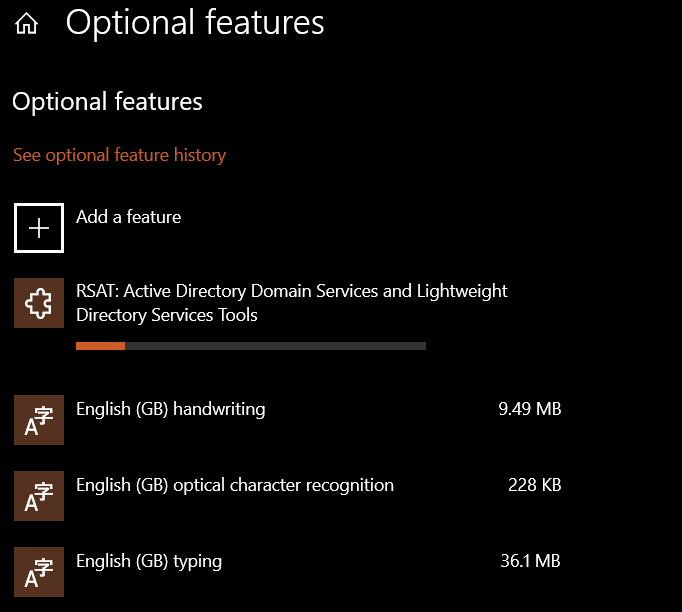
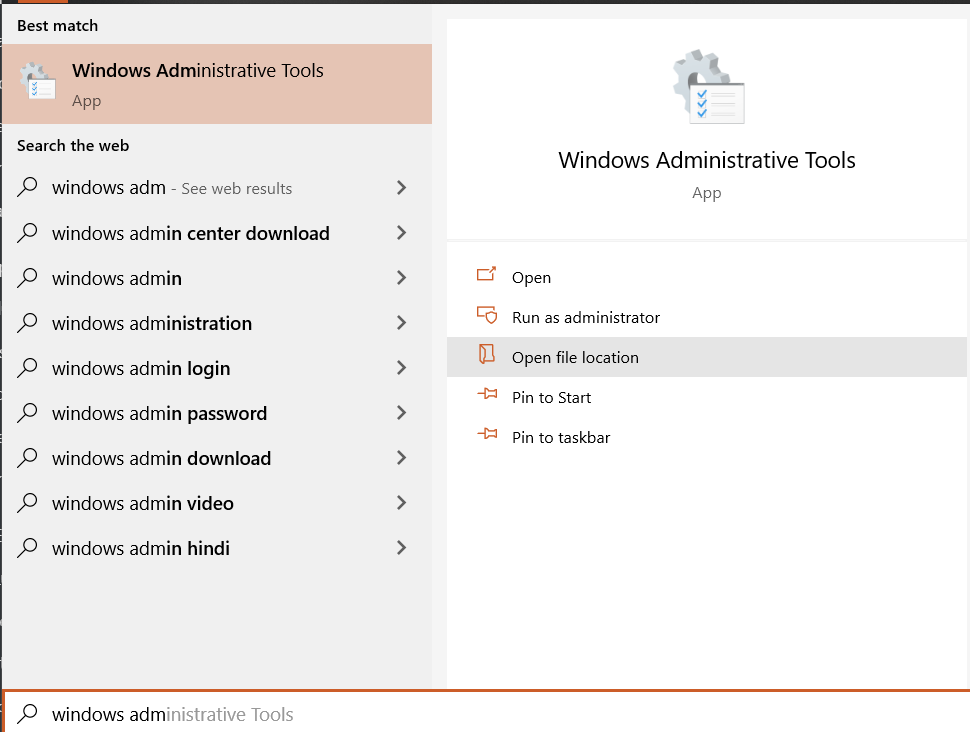
Step 5: After some time, it will appear on the Start -> Windows Administrative Tools.”
Active Directory Users and Computer Tools on Windows 10 / 8 1803 or Earlier Version
Windows 10/8 systems do not support this feature and thus require downloading and installing the Active Directory users and computers tool. Only Windows 10 Professional and Enterprise systems are allowed for Active Directory installation.
Is your Netflix not working? Check out this post and know how to easily fix the M7111-1931-404 Netflix error.
Install Active Directory Users and Computers Windows 10 – Step-by-Step
Follow steps to install the active directory users and computer tools on windows 10/8 or any earlier version.
Step 1: Go to the official Microsoft link page: https://www.microsoft.com/en-us/download/details.aspx?id=45520 and click on “Download” under “Remote Server Administration Tools” for Windows 10.
Step 2: Check the system type (32bit/ 64bit) and then tick on the suitable package.
Step 3: On clicking Next, the download will start.
Step 4: Find the active directory download folder and run the setup.
Step 5: Click “Yes” when it prompts for confirmation of “windows update standalone installer.”
Turn ON the Active Directory Administrative Centre
Step 6: In a similar way, install the packages in your Windows 10/8 system. Then Turn ON the Active Directory Administrative Centre feature.
Step 7: Then, go to Control Panel -> Programs -> Programs and Features -> Turn Windows features on or off.
Step 8: Then Expand the Role Administration Tools and check the AD DS Tools.
Step 9: Finally, restart the system.
No Option for “Remote Server Administration Tools” on Windows 10
Steps if no options for, “Remote Server Administration Tools”, on Windows 10:
Follow these steps if Windows Features does not have the “Remote Server Administration Tools”.
Step 1: Follow Steps 1 through 9, as explained above.
Step 2: From “Turn Windows Features On or Off”, select “Active Directory Lightweight Directory Services” and click “OK”.
Step 3: Windows will now get updated for the new changes.
Step 4: Then, go to Start Menu for “Active Directory” and check “Active Directory Users and Computers.” It will show there which means the package has been successfully installed and switched ON.
Active Directory Users and Computers Conclusion:
The above steps will be helpful for installing or switching ON the Active Directory Tool. It is clear that ADUC is helpful in administering most of the responsibilities. It lets you manage and reset passwords, FSMO server roles, unlock users, change group memberships, etc.
AD is a directory tool that authorizes and authenticates all users and computers in a Windows domain type network.
В этой статье мы поговорим о том, как установить оснастки Active Directory в Windows 7. Как вы, наверное, помните, для того, чтобы оснастка Active Directory Users and Computers (сокращенно ADUC) появилась в Windows XP, специальный набор должен быть установлен из пакета администрирования Microsoft – Windows 2003. В Windows 7 процесс установки консолей управления Active Directory немного изменился.
В-первыйAdmin Pak теперь называется инструментами удаленного администрирования сервера (RSAT). Я уже писал, где найти и скачать RSAT для Windows 7. Обратите внимание, что существуют разные версии RSAT для Windows 7: версии различаются в зависимости от количества бит вашей 32- или 64-битной операционной системы (Windows 7) и установлен пакет обновления (скачать RSAT для Windows 7 SP1). Если вы не знаете, какую версию операционной системы вы используете, нажмите кнопку «Пуск», щелкните правой кнопкой мыши значок своего компьютера и выберите «Свойства». Окно версии системы будет выглядеть так:

В поле «Тип системы:» будет указан тип операционной системы Windows 7. Если вы используете 32-разрядную версию Windows 7, вам необходимо загрузить файл, имя которого начинается с «x86…» (теперь это “x86fre_GRMRSAT_MSU msu”, но имя может измениться). Для пользователей 64-битных систем вам необходимо загрузить файл, имя которого начинается с «amd64…» (теперь это «amd64fre_GRMRSATX_MSU.msu»): этот пакет будет работать, даже если вы используете процессор, отличный от AMD 64. -по.
После скачивания RSAT для Windows 7 его необходимо установить (в принципе, это обычное обновление Microsoft KB).
В соответствии спосле установки RSAT в Windows 7 расширенные функции управления по умолчанию отключены, и оснастку управления Active Directory в Windows 7 необходимо активировать вручную.
- Зайдите в Панель управления, выберите Программы.
- В разделе «Программы и компоненты» щелкните ссылку «Включение или отключение компонентов Windows.

- Перейдите в Инструменты удаленного администрирования сервера> Инструменты администрирования ролей и выберите Инструменты доменных служб Active Directory и Инструменты AD LDS.
После этого консоль ADUC и другие оснастки управления AD в Windows 7 появятся на панели управления в разделе «Администрирование.
Вы также можете включить оснастку «Active Directory User and Computer» в Windows 7 из командной строки, но вам нужно будет загрузить и установить RSAT в любом случае.
В командной строке с правами администратора введите следующие команды, чтобы добавить оснастки в Active Directory:
dISM / Online / enable-feature / featurename: RemoteServerAdministrationTools-Roles-AD-DS DISM / online / enable-feature / featurename: RemoteServerAdministrationTools-Roles-AD-DS-SnapIns
Источник изображения: winitpro.ru
The Active Directory Users and Computers tools come as part of the Microsoft Server Tools. Once the Server Tools are installed you are able to add the Active Directory Users and Computers tools features to the computer. The steps below detail how to do this.
Step 1: Download from Microsoft website
- Download the package here: https://docs.microsoft.com/en-us/troubleshoot/windows-server/system-management-components/remote-server-administration-tools – make sure to select the correct one for your system, 32-bit or 64-bit
Step 2: Install the update package
- When you run the update package you will see this message, which explains that you are able to install an update – click ‘Yes’

- Then after reading and agreeing to the terms, click ‘I Accept’

- The installation will take a few minutes, when complete click ‘Close’
Step 3: Turn on the “feature”
- Open the Windows Start menu and in the search box type ‘Programs and Features’.
- When it appears above, click on the icon for ‘Programs and Features’

- On the left of the window click on the link for ‘Turn Windows features on or off’

- Expand Remote Server Administration Tools > Role Administration Tools > AD DS and AD LDS Tools > AD DS Tools
- Place a tick next to ‘Active Directory Administrative Center’

- Click ‘OK’ to save the changes
- Once it is installed you can use the Windows Start menu to find ‘Active Directory Users and Computers’