
Current version: 1.2.9 | Older versions and release notes (opens new window)
# Direct download
# Windows
Installer (.exe): 64 bit (opens new window) | 32 bit (opens new window) | ARM (opens new window)
Portable (.zip): 64 bit (opens new window) | 32 bit (opens new window) | ARM (opens new window)
How to check if your computer is 32 bit or 64 bit (opens new window)
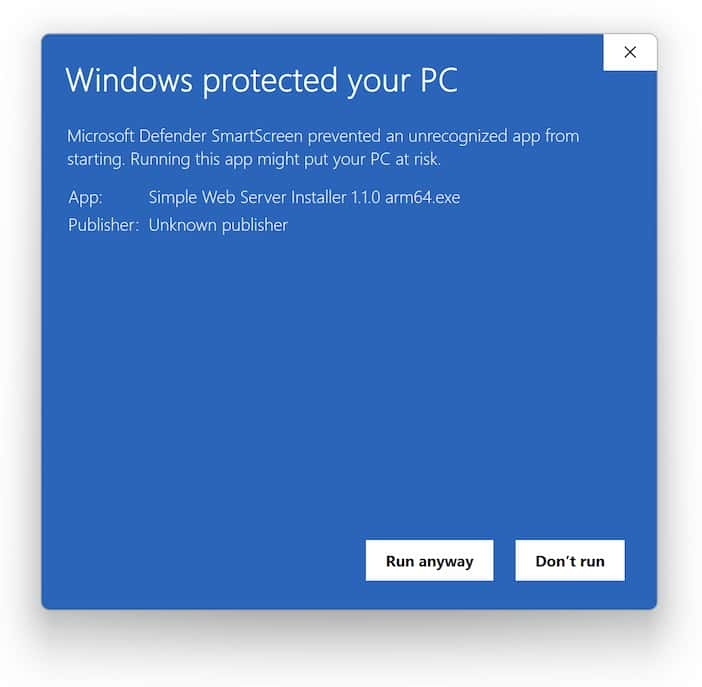
These downloads are not signed. You will probably see a warning message when running the installer.
Click More info and then Run anyway to continue.
# macOS
Installer (.dmg): Intel Chip (opens new window) | Apple Silicon (opens new window) (Mac OSX 10.12+)
Standalone (.app inside .zip): Intel Chip (opens new window) | Apple Silicon (opens new window)
How to check if your Mac has an Intel processor or Apple silicon (opens new window)
# Linux
Debian/Ubuntu (.deb): 64 bit (opens new window) | ARM (opens new window)
Fedora/openSUSE (.rpm): 64 bit (opens new window) | ARM (opens new window)
Portable (.zip): 64 bit (opens new window) | ARM (opens new window)
If we don’t have the download you need, you can manually build for your platform.
# Chrome OS
Simple Web Server is not supported on Chrome OS. Chrome OS users should use Web Server for Chrome (opens new window) for as long as Chrome Apps continue to work on the platform.

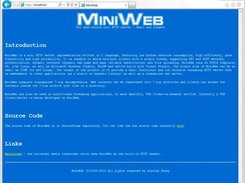
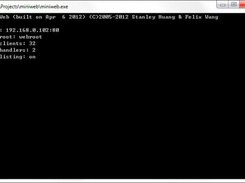
MiniWeb is a high-efficiency, cross-platform, small-footprint HTTP server implementation in C language. It implements GET and POST methods and works on multiple platforms ranging from server, desktop, game console and IoT hardware.
Features
- small footprint HTTP server written in pure C language
- GET & POST actions with basic HTTP authentication
- easy-to-extend with URL handler callbacks
- cross-platform and scalable
- serial port access via HTTP
- integrated UDP server interacting with HTTP server
Project Samples
License
GNU Library or Lesser General Public License version 2.0 (LGPLv2)
Streamline your workflows by migrating customer records into a digital format. With one centralized system for customer management, scheduling, invoicing, create automated payment reminders for customers, payments, reporting, and more, you gain full visibility across business operations that allows you to better serve your customers from home or the office.
User Ratings
4.4
out of 5 stars
★★★★★
★★★★
★★★
★★
★
ease
1 of 5
2 of 5
3 of 5
4 of 5
5 of 5
4 / 5
features
1 of 5
2 of 5
3 of 5
4 of 5
5 of 5
4 / 5
design
1 of 5
2 of 5
3 of 5
4 of 5
5 of 5
4 / 5
support
1 of 5
2 of 5
3 of 5
4 of 5
5 of 5
1 / 5
User Reviews
- All
- ★★★★★
- ★★★★
- ★★★
- ★★
- ★
-
nice project, its a shame that it is abandoned
-
Small. Simple. Exactly what is needed.
The only major issue is I cannot specify IP address of interface to bind to. As result, I cannot connect to server. But with small changes in code I’ve fixed that issue. -
Good Simple Web-server it’s what I need. Thank you!
1 user found this review helpful.
-
Exactly what I need for testing my small js framework test. Thanks developers.
-
Literally the most USEFUL thing ever when I need portability, or just when I have a low amount of storage! LOVE IT.
1 user found this review helpful.
Read more reviews >
Additional Project Details
Operating Systems
Linux, BSD, Windows
Intended Audience
Developers
Programming Language
C
Related Categories
C HTTP Servers
-
Overview


Simple, minimalist web server for testing and debugging purposes. Runs as a Windows application only.
It’s free for commercial and non-commercial use.
The server is extremely simple to use. Just unpack the ZIP file, run the executable, and that’s all. You can tweak the configuration later if needed.
Download — Tiny Web Server Application »
- Download and unpack the ZIP package.
- Optional: edit RebexTinyWebServer.exe.config.
- Run RebexTinyWebServer.exe
- Press Start button to begin serving files via HTTP/HTTPS.
- Accessible via HTTP and HTTPS protocols.
- TLS 1.3/1.2 support and up-to-date TLS cipher support.
- Legacy TLS 1.1/1.0 supported as well.
- Detailed activity log (optional raw communication logging).
- Free to use, even for commercial purposes.
- Runs on any Windows OS with .NET 4.6 or higher.
- No setup needed. Just unpack the ZIP file and run.
When to use Rebex Tiny Web Server
-
Local web development and testing
Need to test your web page now? Not willing to wait days or weeks
for your tech-support department to install a testing web server?
Don’t want to spend hours learning how to configure a full-features web
server yourself?Get Tiny Web Server and start testing your HTML pages over HTTPS in minutes.
-
Need temporary local web server for connectivity testing
Install Tiny Web Server, run it and try connecting from your devices.
When NOT to use Rebex Tiny Web Server
-
Need a production web server
Tiny Web Server is meant for testing and debugging purposes only.
It is not intended for Internet-facing endpoints.
Compatibility
Tiny Web Server runs on:
- Windows 11, 10, 8.1, 7.
- Windows Server 2019, 2016, or 2012.
- Windows Vista, Server 2008. You might have to install .NET 4.6 first when using the server on these legacy systems.
Configuration
The server can be configured using RebexTinyWebServer.exe.config file.
This configuration file must be placed in the same folder as the executable file.
httpPort-
TCP port on which the server listens for HTTP connections.
If not specified, the HTTP is disabled. httpsPort-
TCP port on which the server listens for HTTPS connections.
If not specified, the HTTPS is disabled. webRootDir-
Root data folder. If the folder does not exist,
the server creates it and puts some test data there.
Default is./wwwroot. defaultFile-
Default file to be sent if the request URL points to a directory.
Default isindex.html. serverCertificateFile-
Path to the server certificate with associated private key.
PKCS #12 (.pfx file extension) format is supported.
A new self-signed certificate is generated if it does not exist:.pfxfile is intended to be used on the server..cerfile is intended to be installed on the client into
the «Trusted Root Certification Authorities» store.
For more information, read our
Introduction to Public Key Certificates.
Default isserver-certificate.pfx. serverCertificatePassword- Password for the server certificate.
autoStart-
If set to
true, the server starts when application is started.
No need to press the button.
Default isfalse.
Note:
To minimize possible «port in use» conflict, the initial values of ports are assigned to 1180 for HTTP and 11443 for HTTPS.
If you need to test your web client with standard ports, please modify httpPort and httpsPort
in the configuration file to 80 for HTTP and 443 for HTTPS and make sure there is no other service using those ports.
Version history
1.0.0 (2022-02-22)
- First version.
Contact
Have a feature request or a question? Contact us or ask
at Rebex Q&A Forum.
Web Server for Windows
A simple web server for windows with Nginx, PHP, MariaDB/PostgreSQL and phpMyAdmin
- Nginx 1.xx
- PHP 7.x
- cURL
- OPCache
- APCu
- Sendmail
- Composer
- MariaDB 10.x
- phpMyAdmin 5.x
- With config for phpMyAdmin configuration storage
- phpMyAdmin 5.x
- PostgreSQL 12.x
- pgAdmin 4.xx
Getting
cmd
cd C:\
git clone https://gitlab.com/breithbarbot/web-server-windows.git server
Download
- Download the source files and extract to the each respective folder
- C:\server\nginx: Nginx
- C:\server\php: [Minimum recommended version 7.4.2] PHP (x64 Thread Safe)
- The VC15 builds require to have the Visual C++ Redistributable for Visual Studio 2017 x64
- C:\server\mariadb: MariaDB (ZIP file — Windows x86_64)
- C:\server\phpmyadmin: [Minimum recommended version 5.0.1] phpMyAdmin
- C:\server\pgsql: PostgreSQL
Configuration
General
-
Update your PATH system variable
C:\server\mariadb\binC:\server\pgsql\binC:\server\nginxC:\server\php
-
Restart your system (or just restart all open terminals).
Nginx
nginx-1.X.X.zip in:
C:\server\nginx.
Execute: cp C:\server\nginx\conf\nginx.conf C:\server\nginx\conf\nginx.conf.bak
Configuration
- Edit nginx files:
- nginx documentation
- Edit:
# C:\server\nginx\conf\nginx.conf

#user  nobody;
# Calcul: grep processor /proc/cpuinfo | wc -l
worker_processes  auto;

error_log  C:/server/var/log/nginx/error.log warn;
pid        C:/server/var/log/nginx/nginx.pid;

events {
    # Definition of the maximum number of simultaneous connections (Use the command to know the maximum value of your server: `ulimit -n`)
    worker_connections  1024;
    multi_accept        on;
}

http {
    ##
    # ngx_http_charset_module
    ##
    charset  utf-8;


    ##
    # ngx_http_core_module
    ##
    client_max_body_size  500M;
    include               mime.types;
    default_type          application/octet-stream;
    keepalive_timeout     65s;
    sendfile              on;
    #tcp_nopush           on;


    ##
    # ngx_http_gzip_module
    ##
    gzip             on;
    gzip_proxied     any;
    gzip_comp_level  6;
    gzip_types       text/plain text/css application/json application/x-javascript text/xml application/xml application/xml+rss text/javascript;


    ##
    # ngx_http_log_module
    ##
    #log_format  main  '$remote_addr - $remote_user [$time_local] "$request" '
    #                  '$status $body_bytes_sent "$http_referer" '
    #                  '"$http_user_agent" "$http_x_forwarded_for"';
    #access_log        C:/server/var/log/nginx/http_access.log  main;
    error_log          C:/server/var/log/nginx/http_error.log  warn;


    ##
    # Virtual Host Configs
    ##
    include  C:/server/nginx/conf/conf.d/*.conf;
}
Virtual Host
Place your configuration files in the
conf.ddirectory.
- Create:
# C:\server\nginx\conf\conf.d\default.conf

# HTTP Server
server {
    listen       80;
    server_name  localhost;


    root   c:/server/www;


    location / {
        index  index.html index.htm index.php;
    }


    # redirect server error pages to the static page /50x.html
    #
    error_page   500 502 503 504  /50x.html;
    location = /50x.html {
        root   html;
    }


    # pass the PHP scripts to FastCGI server listening on 127.0.0.1:9000
    #
    location ~ \.php$ {
        fastcgi_pass   127.0.0.1:9000;
        fastcgi_index  index.php;
        fastcgi_param  SCRIPT_FILENAME  $realpath_root$fastcgi_script_name;
        include        fastcgi_params;
    }


    # deny access to .htaccess files, if Apache's document root
    # concurs with nginx's one
    #
    location ~ /\.ht {
        deny  all;
    }


    #access_log  C:/server/var/log//nginx/localhost.access.log;
    error_log   C:/server/var/log//nginx/localhost.error.log warn;
}
PHP
php-7.X.X-Win32-VC15-x64.zip in:
C:\server\php.
Execute: cp C:\server\php\php.ini-development C:\server\php\php.ini
Configuration
- List of Supported Timezones
- Edit:
; C:\server\php\php.ini

[PHP]
realpath_cache_size = 10M
realpath_cache_ttl = 300
memory_limit = 512M
error_log = "C:\server\var\log\php_errors.log"
post_max_size = 50M
include_path = ".;C:\server\php\pear"
extension_dir = "ext"
sys_temp_dir = "C:\server\var\tmp"
upload_tmp_dir = "C:\server\var\tmp"
upload_max_filesize = 10M
extension=bz2
extension=curl
extension=fileinfo
extension=gd2
extension=intl
extension=mbstring

[Date]
date.timezone = Europe/Paris

[Session]
session.save_path = "C:\server\var\tmp"
session.gc_maxlifetime = 86400

[soap]
soap.wsdl_cache_dir="C:\server\var\tmp"
PEAR
- Create folder:
mkdir C:\server\php\pear - PEAR Packages
cURL / SSL
- Download: https://curl.haxx.se/docs/caextract.html
- Save file in: C:\server\php\extras\ssl\cacert.pem
- Edit:
; C:\server\php\php.ini

[PHP]
extension=openssl

[curl]
curl.cainfo = "C:\server\php\extras\ssl\cacert.pem"

[openssl]
openssl.cafile="C:\server\php\extras\ssl\cacert.pem"
OPCache (Optional)
- Edit:
; C:\server\php\php.ini

[opcache]
zend_extension=opcache
opcache.enable=1
opcache.enable_cli=1
opcache.memory_consumption=256
opcache.interned_strings_buffer=16
opcache.max_accelerated_files=30000
opcache.error_log="C:\server\var\log\php_opcache_errors.log"
APCu (Optional)
- Download 7.4 Thread Safe (TS) x64
- Save file in:
C:\server\php\ext\php_apcu.dll - Edit at the end:
; C:\server\php\php.ini

[apcu]
extension=apcu
apc.enabled=1
apc.enable_cli=1
apc.shm_size=64M
apc.ttl=3600
Sendmail (Optional)
- Download: https://www.glob.com.au/sendmail/
- Copy all files in: C:\server\sendmail
- Edit:
; C:\server\php\php.ini

[mail function]
sendmail_path = "\"C:\server\sendmail\sendmail.exe\" -t"
- Edit file:
C:\server\sendmail\sendmail.ini
Composer
- Download and install: https://getcomposer.org/download/
- The default installation folder/file is: C:\ProgramData\ComposerSetup\bin\composer.phar
- If you have this error during install: Signature mismatch, could not verify the phar file integrity
- Comment temporarily:
zend_extension=opcachein C:\server\php\php.ini, run Composer install and after, uncomment.
- Comment temporarily:
Xdebug (Optional)
- Download PHP 7.4 VC15 TS (64 bit)
- Save file in:
C:\server\php\ext\php_xdebug.dll - Add at the end:
; C:\server\php\php.ini

[Xdebug]
zend_extension=xdebug
xdebug.profiler_enable_trigger = 1
xdebug.profiler_output_dir = "C:/server/var/tmp/profiler"
xdebug.remote_host=127.0.0.1
xdebug.remote_port=9001

; Display all the tree
xdebug.var_display_max_depth = -1
xdebug.var_display_max_children = -1
xdebug.var_display_max_data = -1
MariaDB
mariadb-10.X.X-winx64.zip in:
C:\server\mariadb.
- Documentation
Installation (In admin)
# Create windows service
C:/server/mariadb/bin/mysql_install_db.exe --datadir=C:/server/mariadb/data --service=MariaDB

# Start and stop the new service
net start MariaDB
net stop MariaDB
Configuration
-
Edit:
; C:\server\mariadb\data\my.ini

[mysqld]
datadir=C:/server/mariadb/data

socket=C:/server/var/tmp/mariadb.sock

tmpdir=C:/server/var/tmp

long_query_time=10

key_buffer_size=256M
sort_buffer_size=4M
read_buffer_size=2M
table_open_cache=400

query_cache_limit=16M
query_cache_size=64M

collation-server=utf8mb4_general_ci
character-set-server=utf8mb4

[client]
socket=C:/server/var/tmp/mariadb.sock
plugin-dir=C:/server/mariadb/lib/plugin
-
Edit:
; C:\server\php\php.ini

[PHP]
extension=mysqli
extension=pdo_mysql
Various
- Default login: root
- Default password: EMPTY
- For set or unset password?
- Start mariadb server in admin in safe mode.
C:/server/bin/start-mariadb-safe-mode.bat
- Run commands:
- For set password:
 USE mysql;
 UPDATE user SET `password` = PASSWORD('YOUR_PASSWORD') WHERE `User` = 'root';
 FLUSH PRIVILEGES;
 quit;
- For unset password:
UPDATE user SET password = '' WHERE User = 'root';
- For set password:
- Restart MariaDB
- Start mariadb server in admin in safe mode.
Debug?
C:/server/mariadb/bin/mysqld.exe --defaults-file=C:/server/mariadb/data/my.ini --log-error=C:/server/var/log/mariadb/ --console
Remove service (In admin)
C:/server/mariadb/bin/mysqld.exe --remove
phpMyAdmin
phpMyAdmin-5.X.X-all-languages.zip in:
C:\server\phpmyadmin.
- Creation of a symbolic link
- Execute (In cmd in Administrator):
mklink /D C:\server\www\phpmyadmin C:\server\phpmyadmin
- Execute (In cmd in Administrator):
Configuration (Automatique)
- Using Setup script
Configuration (Manual)
-
Execute:
cp C:/server/phpmyadmin/config.sample.inc.php C:/server/phpmyadmin/config.inc.php
-
phpMyAdmin Blowfish Secret Generator
-
Edit/create:
// C:\server\phpmyadmin\config.inc.php

/**
* This is needed for cookie based authentication to encrypt password in
* cookie. Needs to be 32 chars long.
*/
$cfg['blowfish_secret'] = ''; /* YOU MUST FILL IN THIS FOR COOKIE AUTH! */

/**
* Servers configuration
*/
$i = 0;

/**
* Server: localhost
*/
$i++;
/* Authentication type */
$cfg['Servers'][$i]['auth_type'] = 'config';
/* Server parameters */
$cfg['Servers'][$i]['hide_db'] = 'information_schema|mysql|performance_schema|phpmyadmin';
$cfg['Servers'][$i]['host'] = 'localhost';
$cfg['Servers'][$i]['compress'] = false;
$cfg['Servers'][$i]['user'] = 'root';
// $cfg['Servers'][$i]['password'] = '';
$cfg['Servers'][$i]['AllowNoPassword'] = true;

/**
* phpMyAdmin configuration storage settings.
*/

/* User used to manipulate with storage */
// $cfg['Servers'][$i]['controlhost'] = '';
// $cfg['Servers'][$i]['controlport'] = '';
$cfg['Servers'][$i]['controluser'] = 'pma';
$cfg['Servers'][$i]['controlpass'] = 'pmapass';

/* Storage database and tables */
$cfg['Servers'][$i]['pmadb'] = 'phpmyadmin';
$cfg['Servers'][$i]['bookmarktable'] = 'pma__bookmark';
$cfg['Servers'][$i]['relation'] = 'pma__relation';
$cfg['Servers'][$i]['table_info'] = 'pma__table_info';
$cfg['Servers'][$i]['table_coords'] = 'pma__table_coords';
$cfg['Servers'][$i]['pdf_pages'] = 'pma__pdf_pages';
$cfg['Servers'][$i]['column_info'] = 'pma__column_info';
$cfg['Servers'][$i]['history'] = 'pma__history';
$cfg['Servers'][$i]['table_uiprefs'] = 'pma__table_uiprefs';
$cfg['Servers'][$i]['tracking'] = 'pma__tracking';
$cfg['Servers'][$i]['userconfig'] = 'pma__userconfig';
$cfg['Servers'][$i]['recent'] = 'pma__recent';
$cfg['Servers'][$i]['favorite'] = 'pma__favorite';
$cfg['Servers'][$i]['users'] = 'pma__users';
$cfg['Servers'][$i]['usergroups'] = 'pma__usergroups';
$cfg['Servers'][$i]['navigationhiding'] = 'pma__navigationhiding';
$cfg['Servers'][$i]['savedsearches'] = 'pma__savedsearches';
$cfg['Servers'][$i]['central_columns'] = 'pma__central_columns';
$cfg['Servers'][$i]['designer_settings'] = 'pma__designer_settings';
$cfg['Servers'][$i]['export_templates'] = 'pma__export_templates';

/**
* End of servers configuration
*/

/**
* Directories for saving/loading files from server
*/
$cfg['UploadDir'] = 'import';
$cfg['SaveDir'] = 'save';

$cfg['MaxRows'] = 50;

$cfg['DefaultLang'] = 'fr';

$cfg['ShowPhpInfo'] = true;
$cfg['ForceSSL'] = false;
$cfg['Import']['charset'] = 'utf-8';
$cfg['Export']['compression'] = 'gzip';
$cfg['Export']['charset'] = 'utf-8';
$cfg['NavigationTreeEnableGrouping'] = false;
-
Run:
mkdir C:\server\phpmyadmin\import
mkdir C:\server\phpmyadmin\save
- Run:
C:/server/mariadb/bin/mysql.exe -u root < C:/server/phpmyadmin/sql/create_tables.sql - Create a new user/password in phpMyAdmin for phpMyAdmin configuration storage with full privileges (without GRANT access) for the phpmyadmin database.
- Update
$cfg['Servers'][$i]['controluser']and$cfg['Servers'][$i]['controlpass']variables inconfig.inc.php
- Update
- Delete DB (optional): test
- Optimisation
- http://localhost/phpmyadmin/server_status_advisor.php
-
PostgreSQL
postgresql-11.X-X-windows-x64-binaries.zip in:
C:\server\pgsql.
- Documentation
Installation (In admin)
# Create data DB folder
mkdir C:\server\pgsql\data

# Place the cuseur
cd C:\server\pgsql\bin
initdb.exe -U postgres -A password -E utf8 -W -D ../data

# Create Windows service
cd C:\server\pgsql\bin
pg_ctl register -D C:/server/pgsql/data -N PostgreSQL

# Start and stop PostgreSQL server
net start PostgreSQL
net stop PostgreSQL
Configuration
- Edit:
; C:\server\php\php.ini

[PHP]
extension=pdo_pgsql
extension=pgsql
Debug?
# Place the cuseur
cd C:\server\pgsql\bin

# Start server
pg_ctl -D ../data -l trace_file start

# Stop server
pg_ctl -D ../data -l trace_file stop
Remove service (In admin)
pg_ctl unregister -N PostgreSQL
Start & Stop all servers
- Start (In admin):
C:/server/_start.bat - Stop (In admin):
C:/server/_stop.bat
For future update ?
- Execute:
- Comparison between your config and the README.md doc
Uninstall
- Backup your DB(s) and project(s)
- Kill all services
- Remove entry your PATH system variable:
- C:\server\mariadb\bin
- C:\server\nginx
- C:\server\php
- Remove MariaDB service (in admin):
C:/server/mariadb/bin/mysqld.exe --remove - Restart your system.
Локальные серверы позволяют запускать свой сайт без использования хостинга, прямо на домашнем компьютере. Это может пригодиться для детального тестирования, а также в процессе разработки. Ничего не помешает накатить туда CMS и взаимодействовать с базами данных. Вся сложность заключается в выборе самой программы, которая и выполняет роль локального сервера. Подходящих вариантов существует огромное количество, и каждый из них обладает своими особенностями, так что сказать, какой локальный сервер лучше других, достаточно сложно.
Давайте детально разберемся в этом вопросе, рассмотрев несколько самых популярных представителей. Итак, топ лучших локальных серверов.
OpenServer
Начать стоит с программы под названием OpenServer. При ознакомлении сразу же бросается в глаза дружелюбный продуманный интерфейс, который и является одним из главных плюсов этого решения. Среди других преимуществ можно отметить простую установку, удобное управление с добавленными сайтами и отсутствие необходимости долгой настройки, чтобы все работало как надо. OpenServer отлично помещается на обычную флешку и не состоит из множества компонентов, поэтому прекрасно подходит для портативной работы.

Если минусы в OpenServer и есть, то они связаны только с небольшими проблемами во время функционирования сайтов, но решаются за несколько секунд банальным перезапуском программы. В остальном же это один из лучших вариантов для тех, кто давно хотел развернуть локальный сервер на своем компьютере или всегда иметь его под рукой, записав на флешку.
Распространяется OpenServer бесплатно, а разработчики предлагают лишь добровольно поддержать проект. Перейти к скачиванию этой программы для Windows можно на официальном сайте.
Комьюнити теперь в Телеграм
Подпишитесь и будьте в курсе последних IT-новостей
Подписаться
Denwer
Denwer – один из самых популярных в свое время локальных серверов, считавшийся монополистом на отечественном рынке, поскольку ни одно из существующих на тот момент решений не смогло составить ему конкуренцию. Этот веб-сервер прост в установке и практически не занимает места на компьютере. С управлением программой разберется даже начинающий пользователь.

Однако проект долгое время не обновлялся, что сказалось на его развитии в дальнейшем. Еще одним недостатком, который может стать решающим для некоторых пользователей, будет отсутствие графического интерфейса, из-за чего приходится все действия выполнять через консоль. Сейчас Denwer можно скачать с официального сайта.
Читайте также


WampServer
Следующий доступный веб-сервер называется WampServer. Он тоже популярен в определенных кругах пользователей. Его преимущество заключается в простоте установки и нетребовательности к системе, что позволяет нормально взаимодействовать с программой на любом компьютере. Присутствует поддержка всех необходимых компонентов, поэтому с настройкой и запуском локального сервера проблем не возникнет.
 Однако есть у WampServer и ряд недостатков, которые в большинстве своем связаны с настройкой. Для этого придется редактировать локальные файлы, а также заморочиться с правильным конфигурированием MySQL. Распространяется этот инструмент бесплатно.
XAMPP
XAMPP – полноценный комплект всего программного обеспечения, которое необходимо для развертывания локального сервера на домашнем компьютере. Плюсами этого инструмента можно считать бесплатное распространение и поддержку абсолютно всех пакетов, включая PHP, MariaDB и Perl.

Из минусов можно отметить только медленную работу в сравнении с аналогами, однако при правильной настройке эта проблема ликвидируется. Для начала использования XAMPP нужно перейти на официальный сайт и скачать исполняемый файл.
AMPPS
AMPPS будет сложнее использовать как полноценный веб-сервер из-за тонкостей в настройке, однако здесь есть перечень всех требуемых приложений, позволяющих разрабатывать на PHP, подключая при этом MySQL.

Взаимодействие с AMPPS происходит через сайт, открывающийся в любом браузере, однако отсутствие полноценного графического интерфейса в виде софта для ОС может стать для некоторых недостатком этого решения. Для дальнейшего ознакомления и загрузки AMPPS перейдите на официальный сайт.
Читайте также


The Uniform Server
Одна из самых легких версий локального сервера, предназначенная для компьютеров под управлением Windows. Это ее главное преимущество, ведь пользователю не придется скачивать огромное количество файлов, которые занимают дисковое пространство.

К недостаткам The Uniform Server относится то, что с самой программой придется взаимодействовать практически всегда через консоль, а в графическом интерфейсе выполняется всего несколько действий.
Если вы решили попробовать это решение, загрузите его с официального сайта и начните бесплатное использование.
Devilbox
Devilbox тоже подходит для локальной разработки, ведь он поддерживает полное взаимодействие с LAMP, разработчики не ставят ограничений по одновременно запущенным проектам, а настройка док-стека происходит при помощи PHP.

В Devilbox все уже настроено, поэтому сразу после установки можно перейти к полноценной разработке и тестированию. Однако недостатком можно считать принцип установки, ведь он немного сложнее, нежели у конкурентов. Ознакомиться с ним и скачать все необходимые файлы можно на http://devilbox.org/.
Winginx
Если вы давно искали веб-сервер, который функционировал бы в среде NGINX, но не могли найти подходящий вариант, обратите внимание на Winginx. Это комплексный инструмент, поддерживающий разные языки программирования и несколько систем управления базами данных.

Из недостатков стоит выделить необходимость ручной сборки, а также ограниченную гибкость в сравнении с конкурентами, функционирующими на Apache. Winginx доступен на сайте разработчика.
Это далеко не все популярные локальные серверы, но именно эти, я считаю, заслуживают большего внимания. К тому же все они распространяются бесплатно. Какой из этих локальных серверов лучше, решать вам.
