In this post I will share the step-by-step process on how to install System Center 2012 Configuration Manager as a Standalone Primary Server in a Windows Server 2012 lab environment.
What you need:
- Windows Server 2012
- SCCM 2012
- SQL Server 2012 Enterprise with SP1 x64
Download the iso files from your TechNet/MSDN subscription or TechNet Evaluation Center.
Step 1. Setup SCCM 2012 LAB Environment

I have the following virtual machines:
DEMO-DC01 – With 2GB of RAM. .
DEMO-CM01 – With 8GB of RAM. C: 60GB (OS) D: 160GB (DATA).
In DEMO-DC01, create the following domain accounts for now.
- SCCMAdmin – SCCM Admin Account
- SQLSvrAgnt – for running SQL Services
Step 2. Install and Configure SQL Server 2012 in DEMO-CM01.
In DEMO-CM01 login as LAB\Administrator

Add LAB\SCCMAdmin, LAB\DEMO-CM01 and LAB\Administrator to the local Administrators group.
Mount the SQL Server 2012 installer and run setup.exe

From the menu, click on the New Server stand-alone installation or add features to an existing installation.

When you get the Windows Firewall warning in the Setup Support Rules this means that you need to open TCP port 1433 and 4022 for SQL replication, Here are the steps:
——————————————————————————————————————————————————
Open TCP port 1433 and 4022 for SQL replication
——————————————————————————————————————————————————
Press Windows logo key ![]() + C to launch Charms and in the Search Apps box, type wf.msc for Windows Firewall with Advance Security.
+ C to launch Charms and in the Search Apps box, type wf.msc for Windows Firewall with Advance Security.


In the left pane of Windows Firewall with Advanced Security right-click Inbound Rules, and then click New Rule.

In the Rule Type dialog box, select Port and then click Next.

In the Protocol and Ports dialog box, select TCP. Select Specific local ports, and then type port numbers 1433 for SQL Server default instance and 4022 for Inter-site communications use the SQL Server Service Broker. Click Next.

In the Action dialog box, select Allow the connection, and then click Next.

In the Profile dialog box, select Domain and then click Next.

In the Name dialog box, type a profile name such as SQL ports for ConfigMgr 2012 and then click Finish.
——————————————————————————————————————————————————
…SQL Server 2012 Setup continued

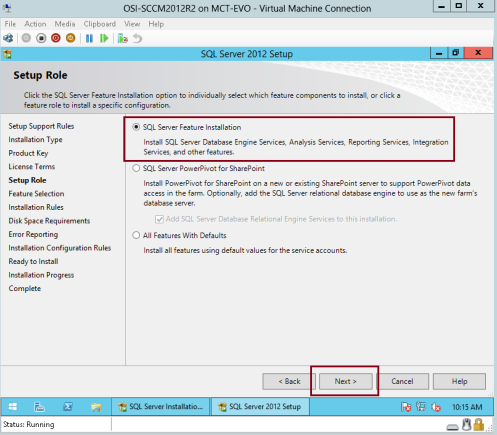
In the Setup Role by default, SQL Server Feature Installation is selected, click Next.

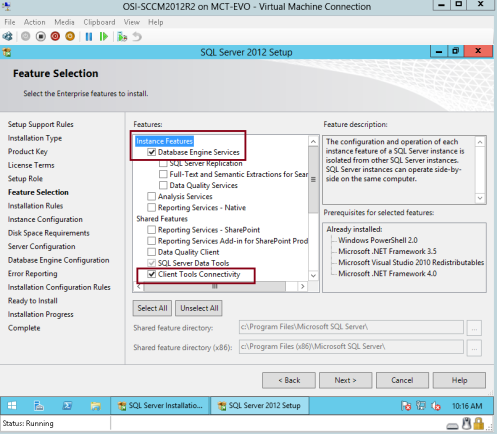
In the Feature Selection, just click the Select All button and click Next.

In the Installation Rules, click Next.

In the Instance Configuration, select Named instance and set it to MSSQLSERVER. You may change the Instance root directory to another location (e.g., D:|SQLDB). Click Next to continue.

In the Disk Space Requirements, click Next.

In the Server Configuration, Service Accounts tab, make sure to configure ALL SQL services to run under a domain user account (e.g., LAB\SQLSvrAgnt) instead of the local system or network services.
——————————————————————————————————————————————————
This is to prevent the error “Fail to create SQL Server Certificate…” during installation during installation of Config Manager 2012 later.

——————————————————————————————————————————————————
…Moving on, in the same window click the Collation tab.

In the Collation tab make sure SQL_Latin1_General_CP1_CI_AS is select are the Database Engine. If SQL Server is installed with a different collation ConfigMgr 2012 installation will fail. Click Next to continue.

In the Database Engine Configuration, click Add Current User and click Next.

In the Analysis Services Configuration, click Add Current User and click Next.

In the Reporting Services Configuration, Click Next.

In the Distributed Replay Controller, click Add Current User and click Next. In the Distributed Replay Controller, Click Next.

In the Installation Configuration Rules window, once the checking is done, click Next.

SQL Server 2012 is ready to install, click the Install button.

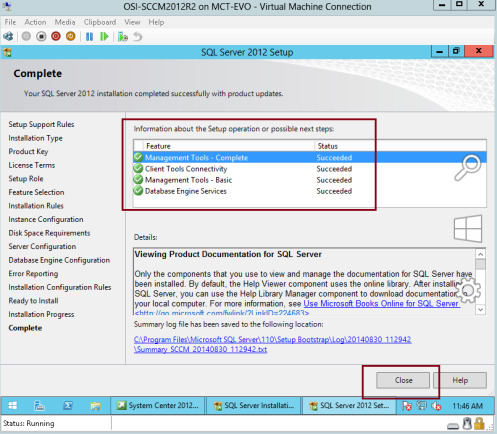
Confirm that SQL Server 2012 is successfully installed and click the Close button.
Launch the SQL Server Management Studio

Right-click on the Sequel Server, DEMO-CM01 and view its Properties.

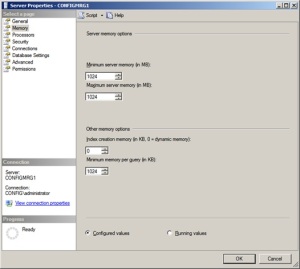
Under the Memory I have set the Minimum and Maximum memory size to 8192 if don’t set this into 8192 you’ll have a little warning during the installation of Config Manager 2012. Setting the Memory b/w 2048 to 4096 will still work. By default the Minimum server memory (in MB) is set to 0 and the Maximum server memory (in MB) is set to 2147483647.

In the Security, make a right-click under Logins and select New Login…

Add the LAB\SCCMAdmin account.

Under Server Roles tick the [ ⁄ ]sysadmin check box to give the SCCMAdmin account SQL privileges, click OK to close the window. Close the SQL Server Management Studio and we’re done with the setup of SQL Server 2012.
Step 3. Create System Management Container and Delegate of Permission.
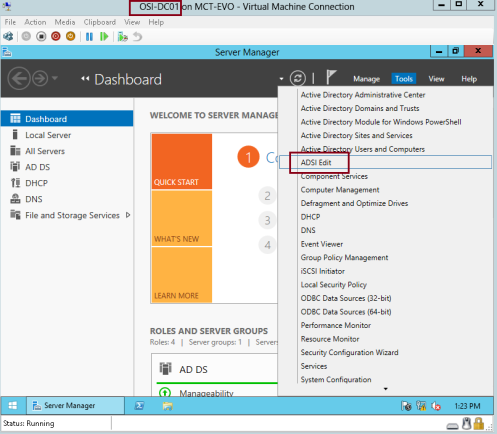
Go back to DEMO-DC01, in the Server Manager > Tools open ADSI Edit to create the System Management container.

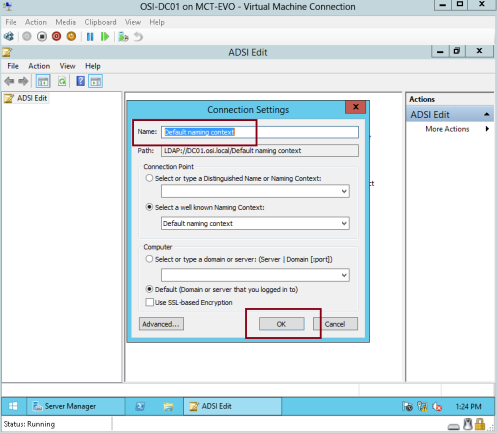
In the left pane, browse the Default naming context > expand DC and look for CN=System > make a right-click > in the context menu select New > Object…

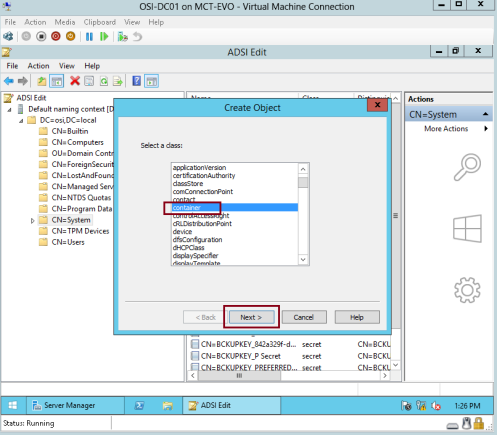
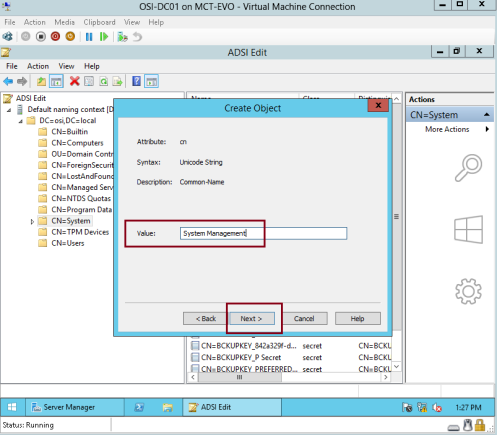
In the Create Object window, scroll and select container and click Next.

In the Value: type System Management (it’s important to take note of the spelling, capitalization and the space between the two words).

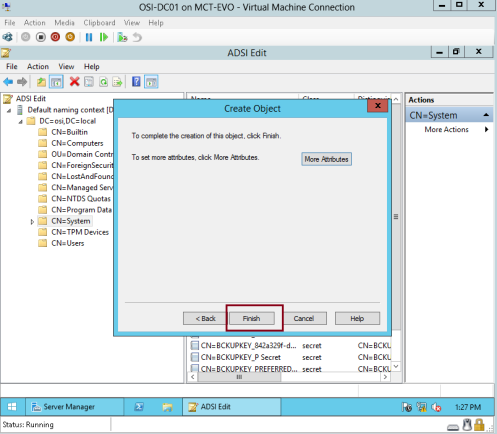
click Finish to close the window.
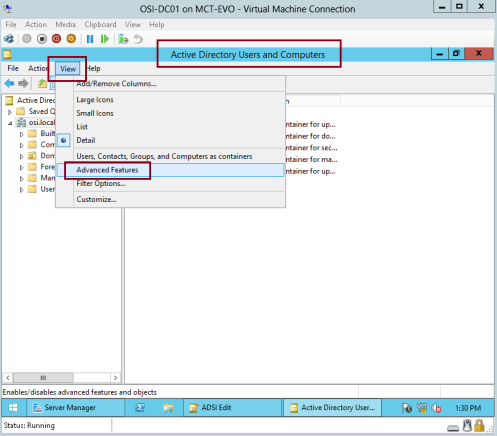
From the Server Manager > Tools open Active Directory Users and Computers click View and select Advance Features to view additional containers that are not available by default.
We need to give Config Manager (DEMO-CM01) privileged to update the content of the System Management container.

In ADUC browse for System > System Management > Right-click and select Delegate Control.

In the Delegation of Control Wizard click Next.

Click the Add button

In the Object Types make sure to select Computers.

Search for the Config Manager server (DEMO-CM01).

Once the server is selected, click Next.

Select Create a custom task to delegate click Next.

In the Active Directory Object Type select This folder, existing objects in this folders, and creation of new objects in this folder and click Next.

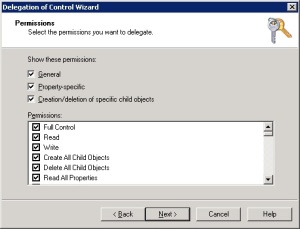
Tick on the 3 permissions General, Property-specific and Creation/deletion of specific child objects. Under Permissions tick on Full Control and click Next.

Click Finish to close the wizard.

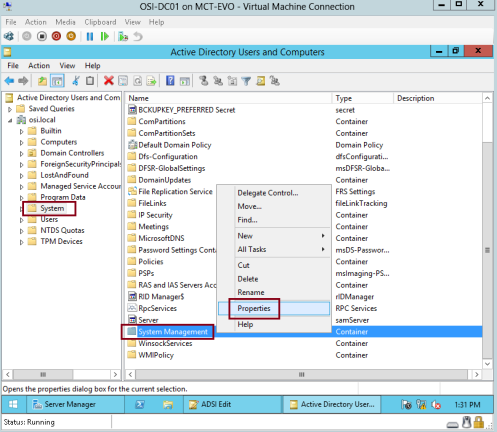
Verify that DEMO-CM01 permission is full control, in Active Directory, right-click the System Management and select properties.
Step 4. Install Web Server (IIS) Role and other Features in DEMO-CM01.
In Server Manager > Manage > Add Roles and Features


In the Server Roles, select Web Server (IIS)

When prompted to “Add features that are required for Web Server (IIS)?” click the Add Features button.and click Next.

In Features, select .NET Framework 3.5 Feature and Background Intelligent Transfer Service (BITS)

When prompted to “Add features that are required for Background Intelligent Transfer Service (BITS)?” click the Add Features button.
BITS – is the technology that allows us to throttle all the network communication that occurs between servers to client where it utilizes idle bandwidth to transfer data.

Still in the Features page, scroll down and select Remote Differential Compression (RDC) and click Next.
RDC – is a client–server synchronization algorithm which BITS leans on to ensure that the files goes in the most efficient way possible.
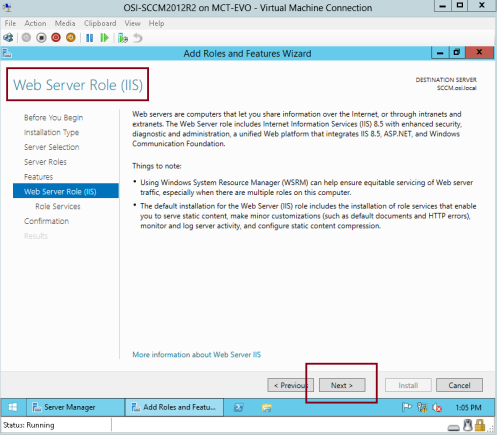
In the Web Server Role (IIS) > Role Services, verify that the following are selected:
- Common HTTP Features: Default Document, Directory Browsing, HTTP Errors Static Content, HTTP Redirection
- Health and Diagnostics: HTTP logging, Logging tools, Request Monitor Tracing
- Performance: Static Content Compression
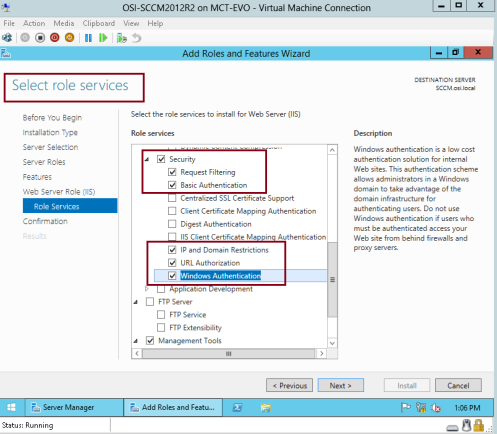
- Security: Basic Authentication, IP and Domain Restrictions, Windows Authentication
- URL Authorization, Request Filtering
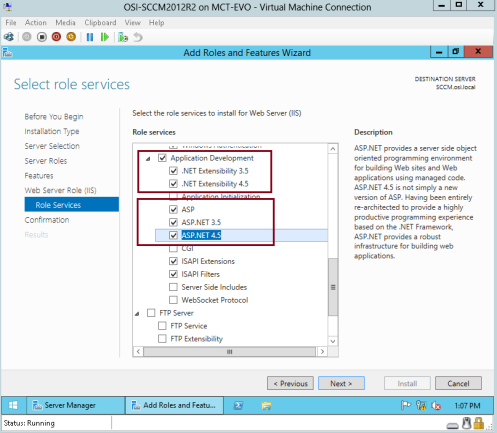
- Application Development: .NET Extensibility 3.5, .NET Extensibility 4.5, ASP.NET 3.5, ASP.NET 4.5, ISAPI Extensions, ISAPI Filters
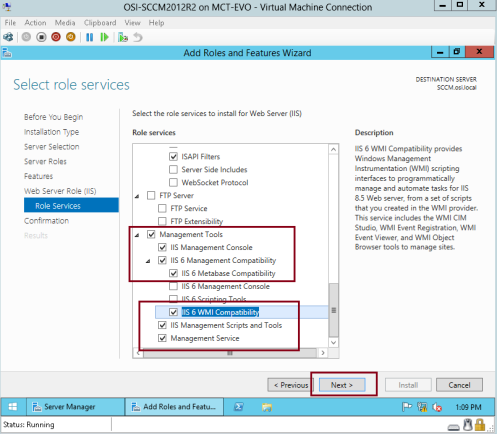
- Management Tools: IIS Management Scripts and Tools, Management Service | IIS 6 Management Compatibility
click Next and in the Confirmation page, click on Install.
Step 5. Extend Active Directory Schema for SCCM 2012.
After installing IIS and the other features, mount the installation file of System Center 2012 Configuration Manager and browse to its directory <Drive>:\SMSSETUP\BIN\X64\

Double click the extadsch.exe

extadsch.exe will run briefly and closes after.
When you run the Extadsh.exe its actually running ConfirMgr_ad_schema.ldf, this LDF file contains the instructions for what needs to be changed in Active Directory to support the schema extensions.

You can examine its content by opening ConfirMgr_ad_schema.ldf in Notepad.

If you’re curious go and browse through the SMS Schema Attributes. This will give you better understanding on how Active Directory schema extensions work for Configuration Manager.

From the LDF file:
# ———————————————————————-
# This section adds a new attribute for SMS Capabilities information. This is a
# new attribute for SMS V4.
#
# This attribute updates the MS-SMS-Management-Point class.
# ———————————————————————-
dn: CN=mS-SMS-Capabilities,CN=Schema,CN=Configuration,DC=x ← this is the path of where the change is going to happen
changetype: add ← it’s going to add something
objectClass: top
objectClass: attributeSchema ← theres an obect class that attributes schema
cn: mS-SMS-Capabilities ←in this folder location
attributeID: 1.2.840.113556.1.6.29.2.1.14 ← here is the ID
attributeSyntax: 2.5.5.4 ←Syntax value
#schemaIDGUID:: y1C8EEwlBkWgB+T2V+XESA== ← here its showing the GUID
isSingleValued: TRUE
oMSyntax: 20
searchFlags: 0
isMemberOfPartialAttributeSet: TRUE
dn:
changetype: modify
replace: schemaupdatenow ← this portion will update the schema
schemaupdatenow: 1
For more information about Extending the Schema in System Center 2012 Configuration Manager, go to this link: http://blogs.technet.com/b/configurationmgr/archive/2012/10/30/extending-the-schema-in-system-center-2012-configuration-manager.aspx
Back in DEMO-DC01 in the root directory, you’ll see a small text file ExtADSch.txt and when you open it, you’ll find the line: Successfully extended the Active Directory schema.

Step 6. Install Config Manager 2012

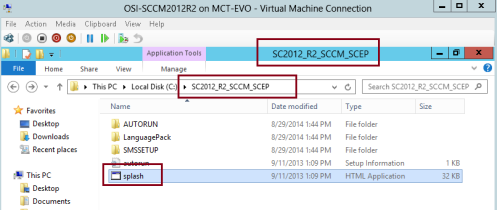
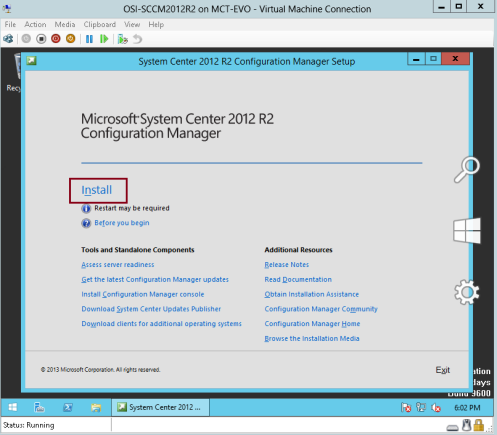
In the Config Manager installation directory go ahead and double-click splash.hta.

In the Setup menu go ahead and click Access server readiness it will run the Installation Prerequisite Check.
The Installation Prerequisite Check will check your server for problems that will prevent Config Manager installing on your machine and will give you details how to resolve them. Some “Warning” status will also show but this won’t prevent from installing Config Manager.

For this case we have a “Warning” status on “WSUS DSK on site server” this can be installed later. In some cases if you have under 8GB of RAM it will give you a “Warning on SQL Server process memory allocation“. Warning indicates that you need to fix things before the installing Config Manager. Click OK to close the window.
Back in the Setup page.

Click Install.

In the 1st page its basically reminding us to make sure we’ve met the minimum requirement for Config Manager 2012 installation, click Next.

Install a Configuration Manager primary site and click Next.

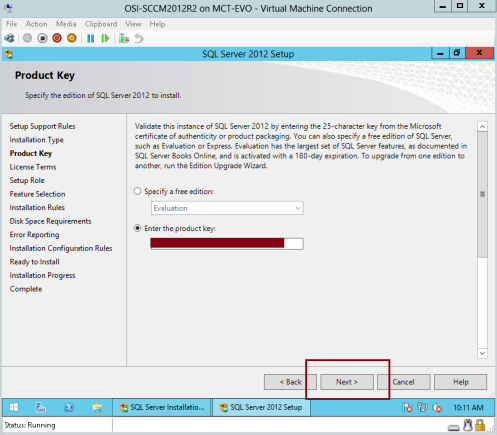
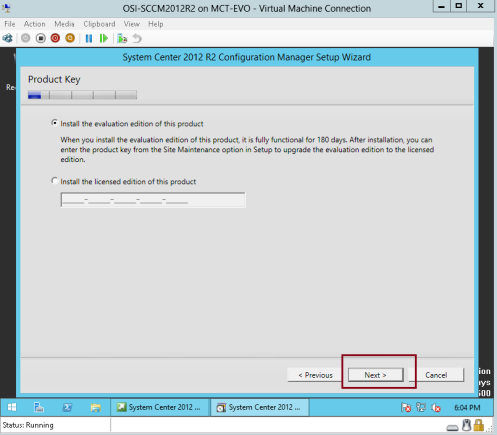
Enter the product key if you have it, else choose Install this product as an evaluation.

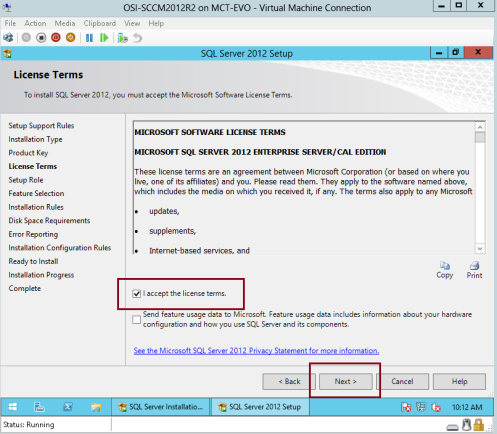
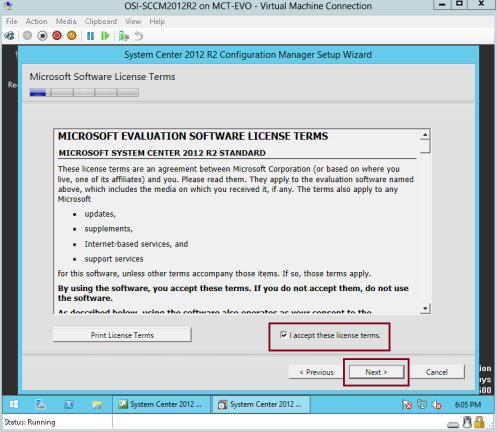
Accept the license terms and click Next.

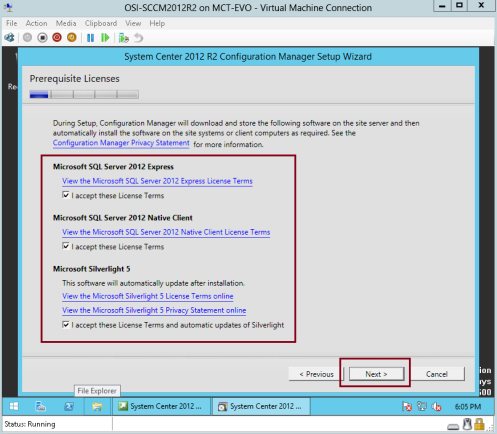
Accept all the licenses terms and click Next.

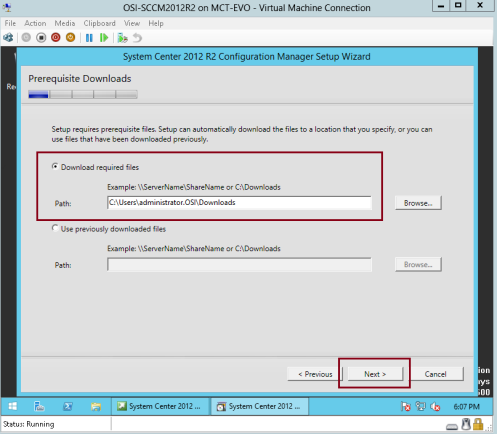
In the Prerequisite Downloads, choose where b/w the 2 options and click Next.

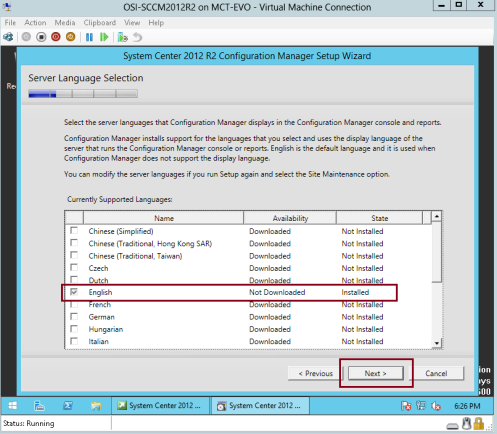
In the Server Language Selection leave the default selection unless other languages are required, click Next.

In the Client Language Selection leave the default selection unless other languages are required, click Next.

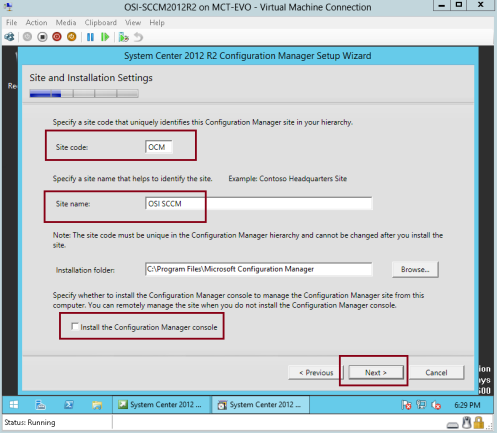
Enter a 3 character site code and site name that normally pertains to the site location and click Next.

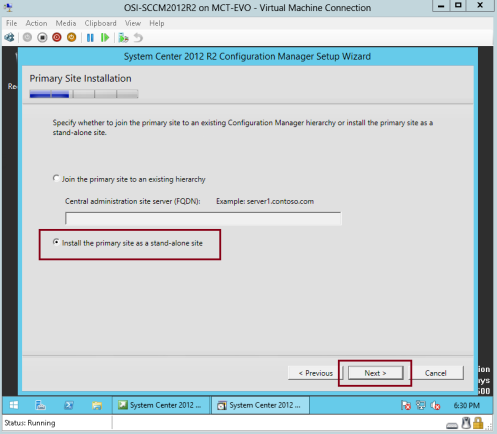
In the Primary Site Installation page, for lab purposes we will select Install the primary site to a stand-alone site by selection this, you will not be able to extend beyond one site.
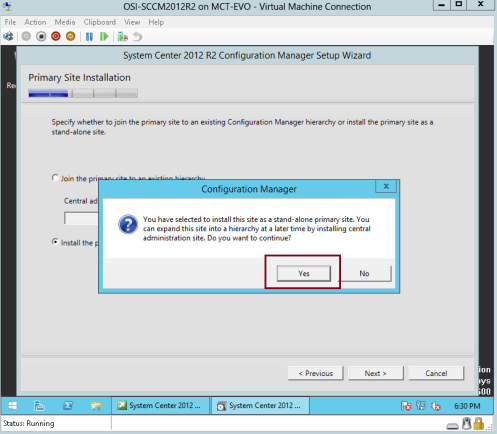
A message will prompt that you have selected the stand-alone primary site and informing you that you will not be able to join that site to a hierarchy moving forward.
For production implementation, your design decision is very important because you cannot undo this after the installation.

Click Yes to continue.

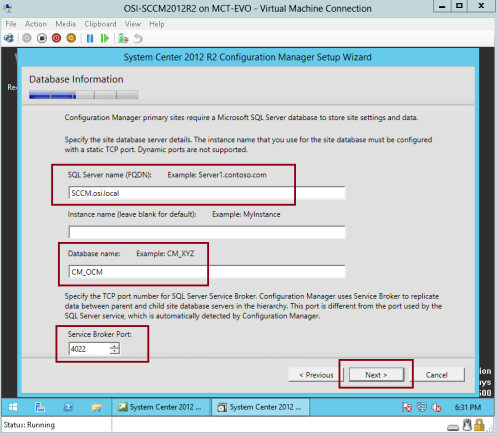
In the Database Information just leave the default as we have SQL installed in the same server. Leave the default port numer for the SQL Server Broker. Click Next

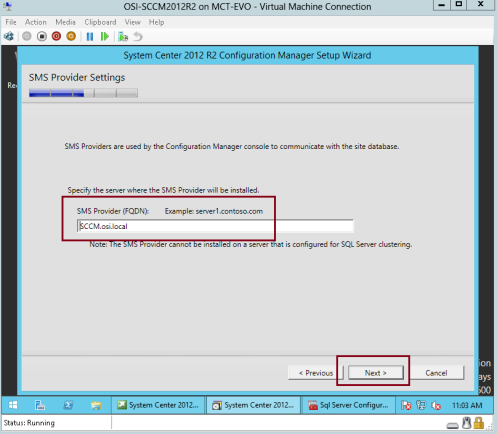
In the SMS Provider Settings leave the default site, this allows the site database to communicate with Config Manager console. Click Next.

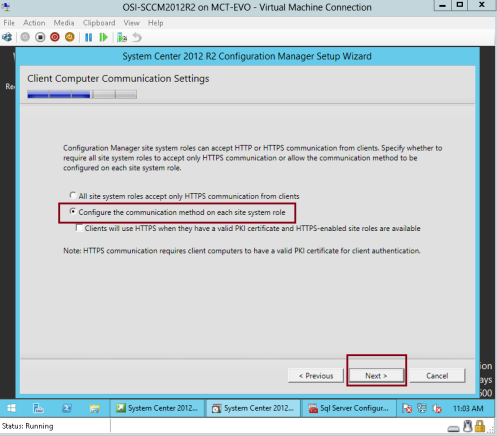
In the Client Computer Communication Settings, since we don’t have a fully functional PKI infrastructure we’ll select Configure the communication method on each site system role. Click Next.

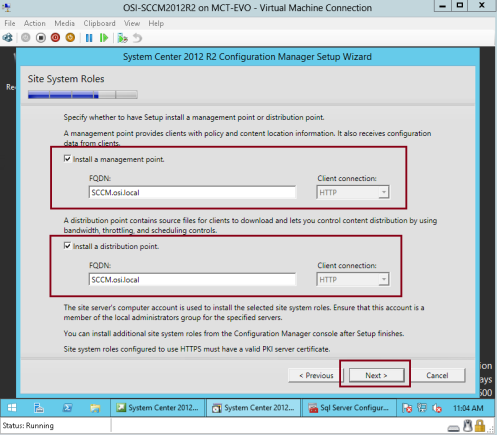
The Site System Roles page is already populated, click Next.
the Management Point is the point of communications b/w the client and the server Distribution Point is the location where you store your packages and applications.

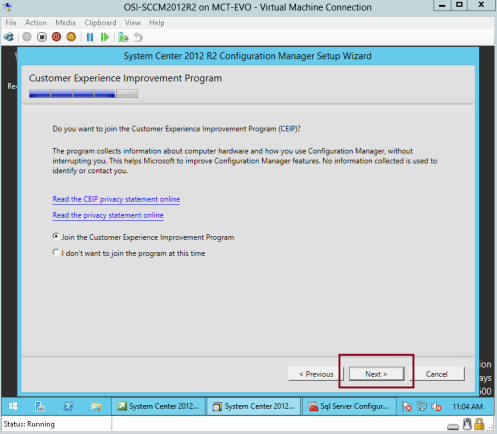
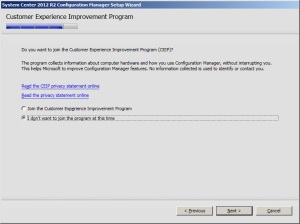
You may or may not join the CEIP. Click Next.

Click the Next button for the final Prerequisite Check.

Click Begin Install.

Confirm that your installation is successfully. Click Close to complete you’re installation.

Launch Config Manager 2012 console and configure it as per your requirements.
Summary: here are the things we’ve done to complete the Config Manager 2012 installation.
- Build a Windows Server 2012 server
- Install SQL Server 2012
- Verify SQL Collation is set to SQL_Latin1_General_CP1_CI_AS
- Configure SQL Server memory allocation
- Windows Firewall
- Open TCP port 1433 and 4022
- Create SCCM Admin account in AD.
- Assign to SQL Server “sysadmin” role.
- Create “System Management” container in AD
- Delegate SCCM Servers Full Control access.
- Install IIS Role and Services:
- Common HTTP Features: Default Document, Directory Browsing, HTTP Errors Static Content, HTTP Redirection
- Health and Diagnostics: HTTP logging, Logging tools, Request Monitor Tracing
- Performance: Static Content Compression
- Security: Basic Authentication, IP and Domain Restrictions, Windows Authentication
- URL Authorization, Request Filtering
- Application Development: .NET Extensibility 3.5, .NET Extensibility 4.5, ASP.NET 3.5, ASP.NET 4.5, ISAPI Extensions, ISAPI Filters
- Management Tools: IIS Management Scripts and Tools, Management Service | IIS 6 Management Compatibility
- Add Windows Features: NET Framework 3.5, Background Intelligent Transfer Service (BITS), Remote Differential Compression
- Extend AD schema
- Run Prerequisite Check
- Install Config Manager 2012
References:
- http://www.windows-noob.com/forums/index.php?/topic/4422-using-sccm-2012-rc-in-a-lab-part-1-installation/
- http://www.deploymentresearch.com/
- http://henkhoogendoorn.blogspot.sg/2013/01/fail-to-create-sql-server-certificate.html
На чтение 5 мин Опубликовано Обновлено
SCCM (System Center Configuration Manager) — это мощная платформа, которая предоставляет средства для управления и развертывания компьютеров, устройств и приложений в сети. Установка SCCM на Windows Server 2012 R2 может быть сложной задачей, требующей определенных навыков и знаний. В этой подробной инструкции мы расскажем, как установить SCCM на Windows Server 2012 R2 шаг за шагом.
Перед тем, как приступить к установке SCCM, убедитесь, что ваш сервер соответствует минимальным требованиям. Windows Server 2012 R2 должен быть установлен и настроен корректно. Обновите операционную систему до последней версии и установите все необходимые патчи и обновления.
Для начала установки SCCM вам понадобятся учетные данные администратора, которые имеют подходящие разрешения на сервере. Подключитесь к серверу с помощью учетных данных администратора и запустите установку SCCM. Выберите язык установки и пройдите через ввод лицензионного ключа и принятие условий лицензионного соглашения.
После этих первоначальных шагов вы увидите окно конфигурации. Здесь вам нужно выбрать способ установки – «триада» (standalone primary site), «центральное место с управляемой клиентской информацией» (central administration site with managed client information) или «дополнительное место для управления» (additional site for management).
Важно: Правильный выбор режима установки зависит от ваших конкретных потребностей и архитектуры сети.
Содержание
- SCCM на Windows Server 2012 R2: как установить?
- Подготовка сервера к установке SCCM
- Загрузка и установка SCCM
SCCM на Windows Server 2012 R2: как установить?
Прежде чем начать процесс установки, необходимо убедиться, что ваш сервер Windows Server 2012 R2 соответствует следующим минимальным требованиям:
- Процессор: 64-разрядный (x64) с тактовой частотой не менее 1,4 ГГц
- Оперативная память: не менее 4 ГБ
- Свободное место на жестком диске: не менее 10 ГБ
- Список необходимых ролей и компонентов, которые должны быть установлены на сервере, включает:
- Службы удаленной базы данных (Remote Differential Compression, Windows Server Backup, BITS)
- Windows Server Update Services (WSUS)
- IIS с установленными Web-сервером, ASP.NET, BITS и Remote Differential Compression
- SQL Server с ограниченным веб-сервисом
Когда все требования выполнены, можно приступать к установке SCCM. Следуйте приведенным ниже шагам:
- Скачайте установщик SCCM с официального сайта Microsoft.
- Запустите установщик и выберите «Установить новый экземпляр на сервере».
- Прочтите и принимайте условия лицензионного соглашения.
- Выберите путь установки и щелкните «Установить».
- Настройте параметры установки, включая имя сайта, порт HTTPS, параметры безопасности и прочие. Щелкните «Далее».
- Выберите опцию «Установить клиентский интерфейс», если вы хотите использовать SCCM для управления клиентскими устройствами.
- Завершите установку, следуя инструкциям на экране.
- После завершения установки, откройте консоль SCCM и выполните начальную настройку.
Поздравляем! Вы успешно установили SCCM на сервере Windows Server 2012 R2. Теперь вы готовы использовать его для управления и мониторинга своих клиентских устройств и сетевых ресурсов.
Подготовка сервера к установке SCCM
Перед установкой SCCM на сервере с операционной системой Windows Server 2012 R2 необходимо выполнить некоторые предварительные шаги:
- Проверить соответствие системных требований. Для установки SCCM необходим процессор x64 и операционная система Windows Server 2012 R2 с последними обновлениями.
- Установить необходимые компоненты, такие как .NET Framework 4.7.2, Windows Assessment and Deployment Kit (ADK) для Windows 10 и SQL Server Native Client.
- Проверить наличие необходимых разрешений. Для установки и настройки SCCM требуются разрешения суперадминистратора (Full Administrator) на сервере.
- Подготовить доменное имя службы. SCCM требует установки своего доменного имени службы, которое должно быть коротким, уникальным и не содержать пробелов или специальных символов.
- Разместить сервер SCCM в домене. Удостоверьтесь, что сервер, на котором будет установлен SCCM, уже находится в домене.
- Настроить сертификаты безопасности. Для обеспечения безопасности данных и связи между клиентами и сервером SCCM необходимо настроить сертификаты.
После выполнения указанных шагов сервер будет готов к установке SCCM. Это позволит успешно продолжить процесс установки и настройки системы управления конфигурациями.
Загрузка и установка SCCM
Перед установкой SCCM на сервере с операционной системой Windows Server 2012 R2 необходимо загрузить и установить несколько предварительных компонентов.
Шаг 1: Загрузка SCCM
Перейдите на официальный сайт Microsoft и пройдите по ссылке для загрузки System Center Configuration Manager. Убедитесь, что вы выбрали версию, соответствующую вашей операционной системе.
Шаг 2: Установка предварительных компонентов
Перед установкой SCCM необходимо убедиться, что на сервере установлены следующие компоненты:
- Microsoft SQL Server: Установите Microsoft SQL Server или используйте существующий экземпляр SQL Server для хранения данных SCCM.
- Windows Assessment and Deployment Kit (ADK): Загрузите и установите ADK с официального сайта Microsoft. ADK необходим для создания образов операционных систем и других задач.
- Windows Server Update Services (WSUS): Установите WSUS, чтобы использовать его в качестве обновлений для клиентов SCCM.
- Internet Information Services (IIS): Установите роль IIS на сервере для хостинга веб-сайтов и веб-служб SCCM.
Шаг 3: Запуск установки SCCM
После установки всех предварительных компонентов можно приступить к установке SCCM. Запустите загруженный файл установки и следуйте инструкциям мастера установки.
Примечание: Во время установки вам потребуется указать параметры конфигурации, такие как настройки базы данных SQL Server, информацию о сервере WSUS и другие необходимые данные. Внимательно прочитайте и заполните все поля согласно требованиям.
A little bit of intro about SCCM 2012 R2 :
System Center solutions help you manage the physical and virtual information technology (IT) environments across data centers, client computers, and mobile devices. You can improve your productivity by using the integrated and automated solutions of System Center.
What SCCM 2012 R2 can do for you?
You can use the change and configuration management capabilities of System Center 2012 R2 Configuration Manager to perform tasks such as:
• Deploying operating systems, software applications, and software updates.
• Monitoring and remediating computers for compliance settings.
• Collecting hardware and software inventory.
• Remote administration
So today in this post, lets go through a full step by step how can you deploy SCCM 2012 R2 in your infrastructure, for this demo, i will install SCCM 2012 R2 in Windows Server 2012 R2.
Before we start deploy SCCM 2012 R2, be aware that there are 2 main prerequisites you need to download :
1 – Download SQL Server 2012
2 – Download ADK 8.1 (Windows Assessment and Deployment Kit for Windows 8.1)
For this demo, i will use 4 VM (Domain Server, SCCM member server, Windows 7 & Windows 8.1)
*** Please do not attempt this process in Production environment if you are not familiar with the process & setup***
Lets get started :
1 – 1st step we need to install Web Server in SCCM member server…
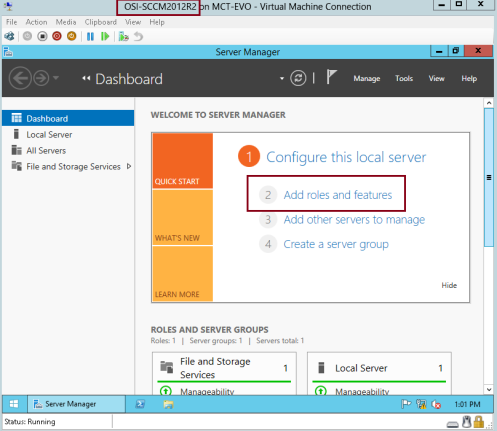
On the SCCM VM server (OSI-SCCM), open Server Manager, and click Ad Roles & Features…
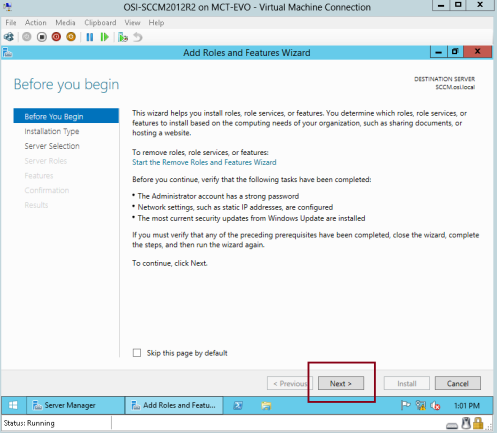
2 – On the Before you begin interface, click Next…
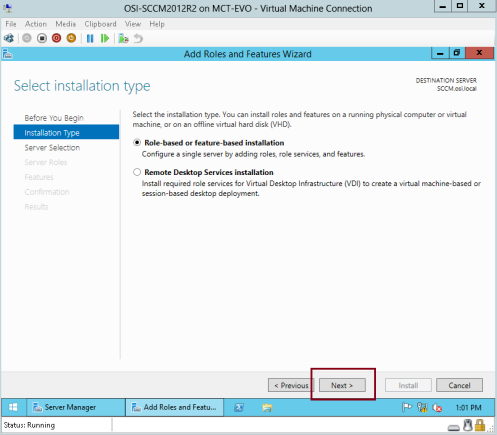
3 – On the Select installation type interface, proceed with Next…
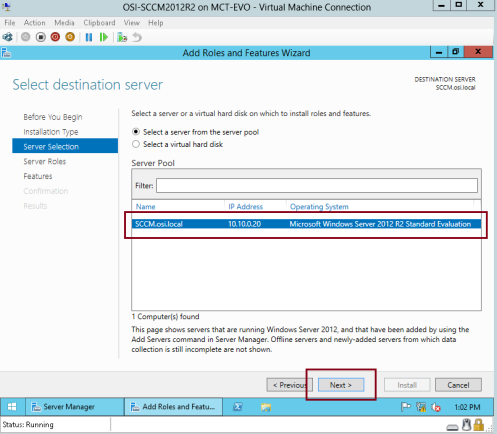
4 – On the Select destination server interface, verify your server and then click Next…
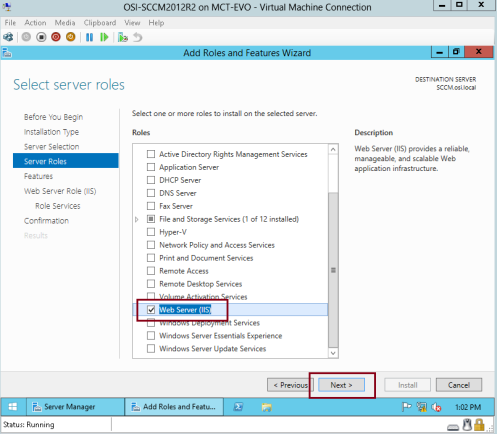
5 – On the Select server roles interface, click Web Server (IIS) and then click Next…
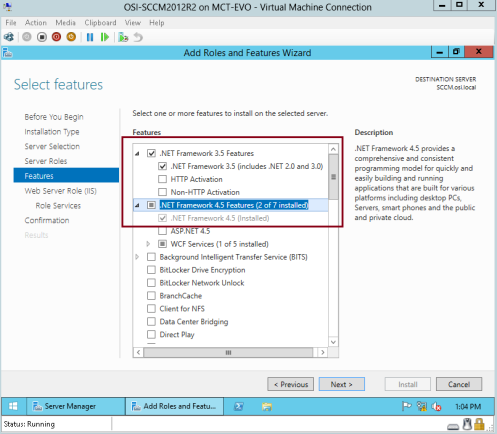
6 – On the Select features interface, click .Net Framework 3.5 & 4,5, and then scroll down and click Remote Differential Compression, then click Next…
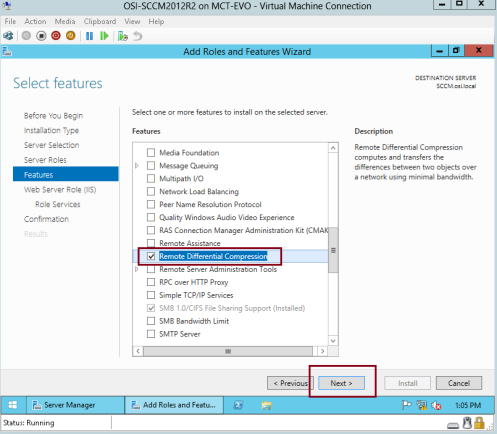
7 – On the Web Server Role (IIS) interface, proceed with Next…
8 – On the Select role services interface, under Security and select Request Filtering, Basic Authentication, IP and Domain Restrictions URL Authorization and Windows Authentication.
9 -Then scroll down, under Application Development, click .Net Extensibility 3.5 & .Net Extensibility 4.5, then click ASP, ASP.Net 3.5 & ASP.Net 4.5…
10 – Scroll down again, under Management Tools, click IIS Management Console, IIS 6 Management Compatibility, IIS 6 Metadata Compatibility, IIS 6 WMI Compatibility, IIS Management Scripts and Tools and Management Service, then click Next…
11 – On the Confirm installation selections, click Specify an alternate source path link…
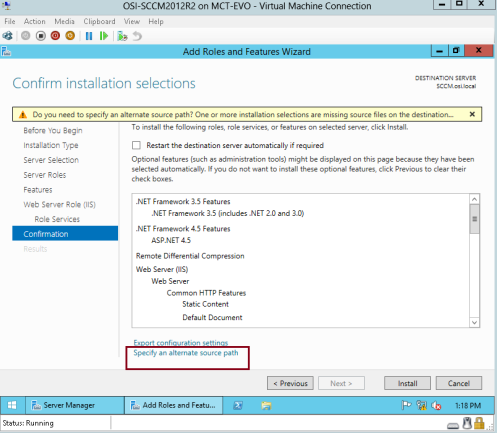
12 – Verify that you had insert Windows Server 2012 R2 installer in the SCCM 2012 member server, on the Specify Alternate Source Path interface, in the path column, type your installer Windows Server 2012 R2 drive (D:\sources\sxs) and then click OK…
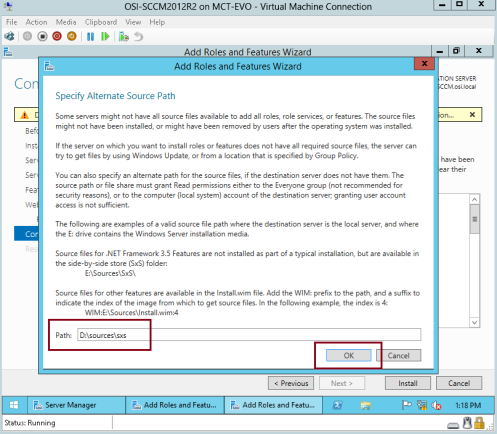
13 – On the Confirm installation selections interface, click Install…
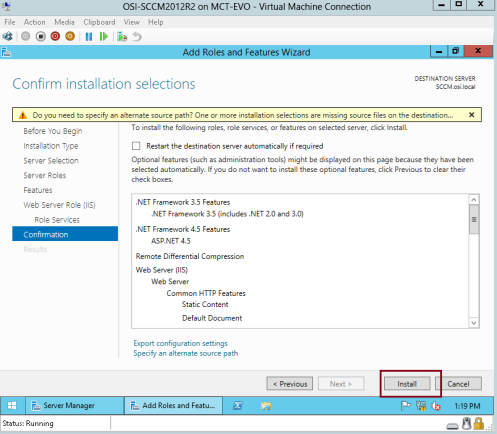
14 – Wait for few minutes to lets the installation complete…
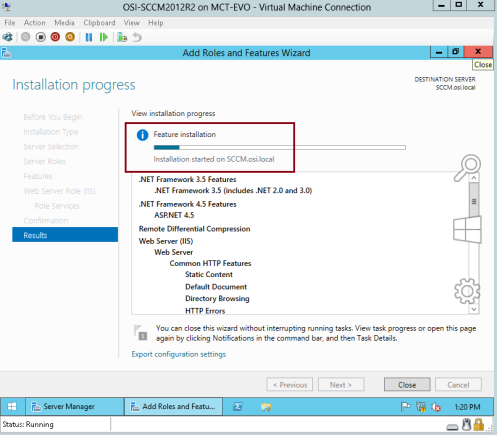
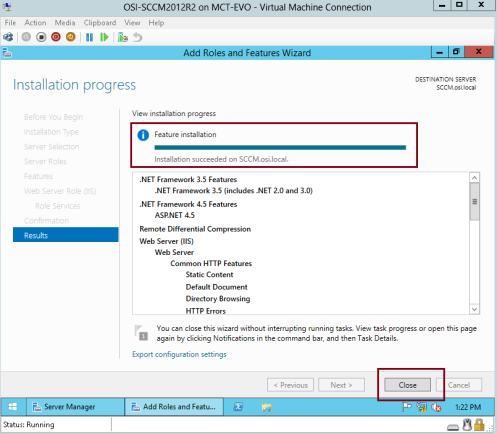
15 – Once the installation complete, click Close….
16 – Switch to Domain Server (OSI-DC01), open Server Manager and then click Tools, and click ADSI Edit…
*** We going to use ADSI Edit to create System Management Container, Active Directory schema does not create this container automatically so we to create the System Management Container manually.***
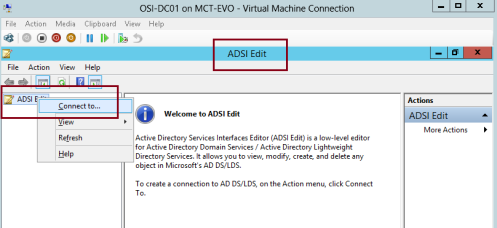
17 – In the ADSI Edit console, right click ADSI Edit and click Connect…
18 – In the Connection Settings box, verify that Default naming context is selected and then click OK…
19 – browse to CN=System container, right CN=System, click New and choose Object…

20 – In the Create Object box, click container and then click Next…
21 – in the Value, type System Management and then click Next…
22 – Click Finish to complete the process…
23 – Next, open Active Directory Users & Computers, click View and then click Advanced Features…
24 – Click System, right click System Management folder and then click Properties…
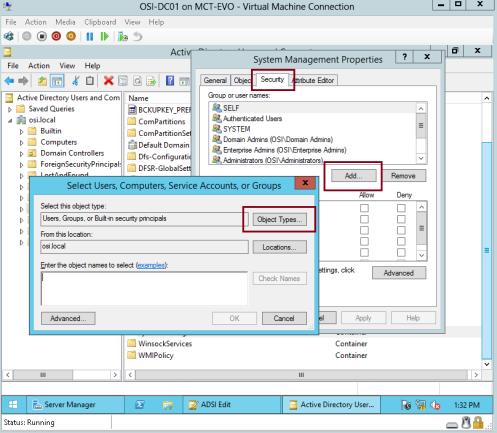
25 – On the System Management Properties box, click Add and then click Object Types…
*** What are we going to do here is to configure permissions on the System Management container.***
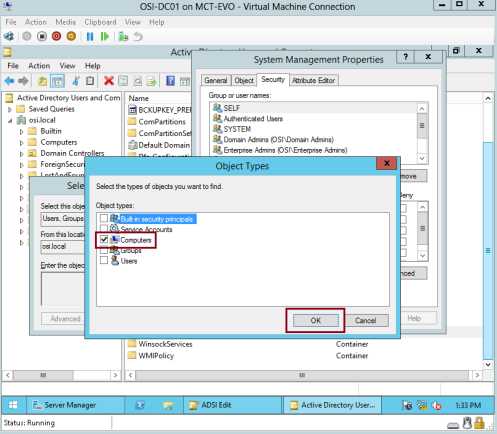
26 – On the Object Types interface, just click Computers and then click OK…
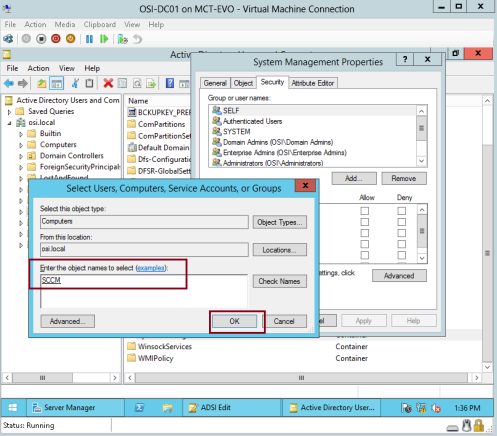
27 – On the Select Users, Computer, Service Accounts, or Group interface, type SCCM (this is our SCCM member server) and then click OK…
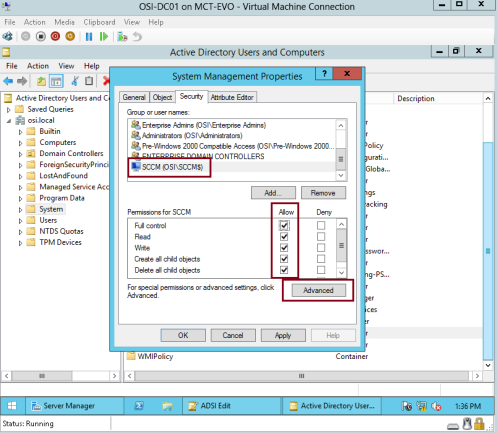
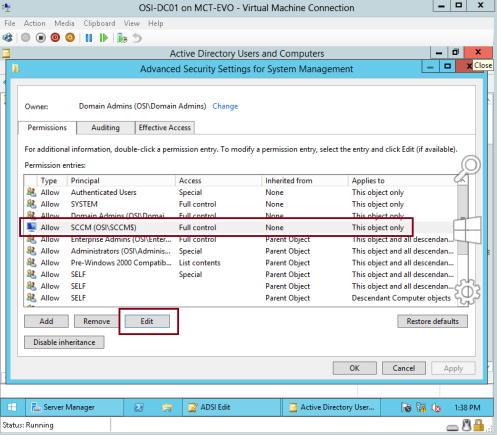
28 – On the System Management Properties interface, click SCCM (OSI\SCCM$) and click Full Control under Permissions of SCCM and then click Advanced…
29 – On the Advanced Security Settings for System Management interface, under Permission Entries:, click Allow SCCM (OSI\SCCM$) and then click Edit…
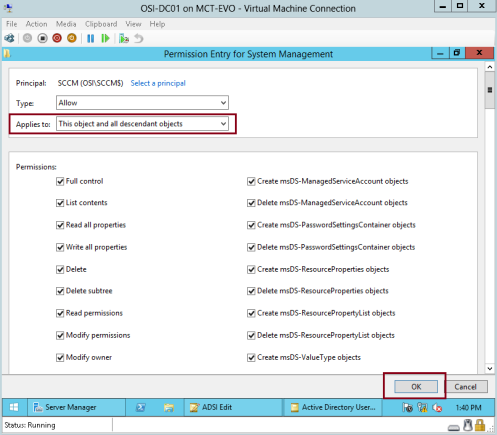
30 – On the Permissions Entry for System Management interface, verify that you choose Applies to: This object and all descendant objects and then click OK…
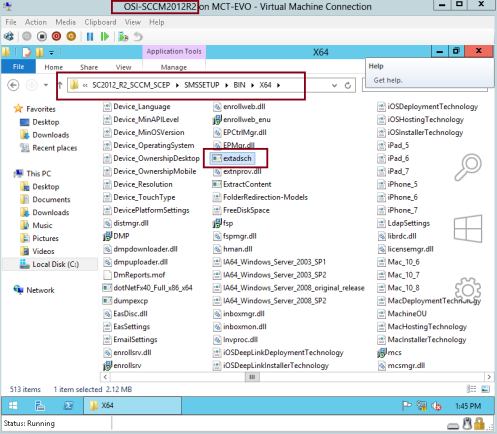
31 – Now switch back to SCCM server, and browse to SCCM installation folder which is SMSSetup\Bin\X64, then click extadsch file…
*** This extadsch file will extend the AD DS schema***
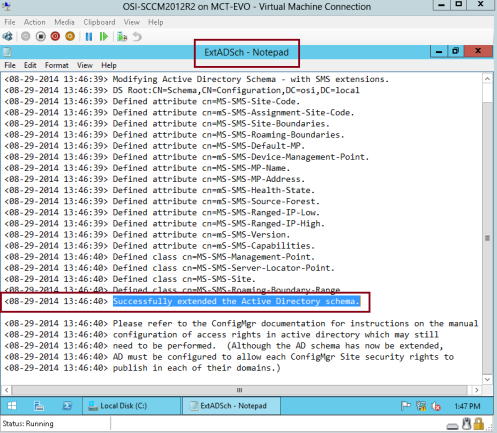
32 – Open C: Drive, and locate & open the ExtADSch.txt file …

33 – Verify that AD Schema extended process successful…
34 – Next Step, we need to install the SQL Server as per prerequisites, for this demo i will be using SQL Server 2012…
Mount the SQL Server 2012 Installer to SCCM Server…
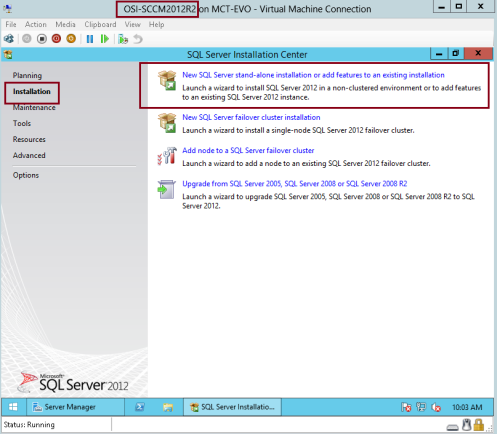
On the SQL Server Installation Center interface, click New SQL Server stand-alone installation or add features to an existing installation…
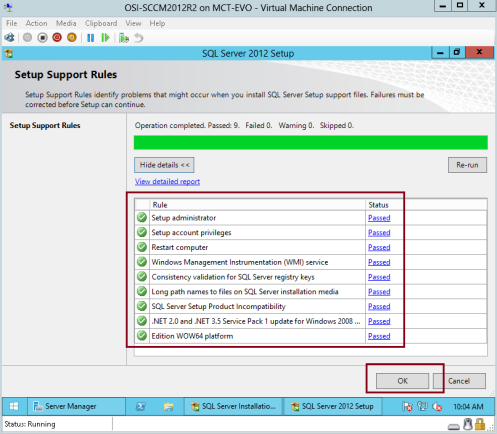
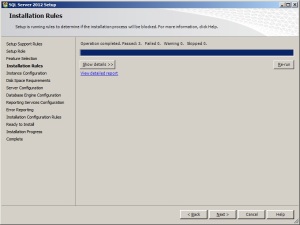
35 – Verify that on the Setup Support Rules interface, all the prerequisites listed as Passed, and then click OK…
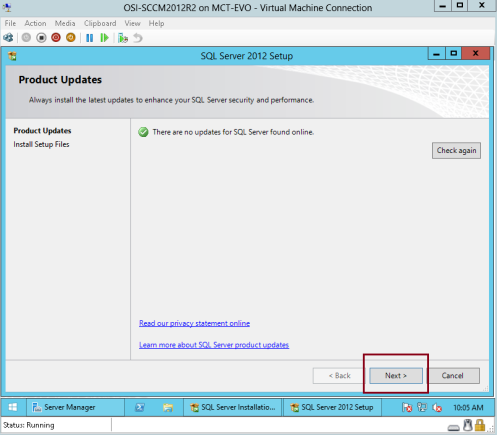
36 – On the Product updates interface, click Next…
*** i recommend that you do full Windows Update on the SCCM server so that you face any issue on the SQL installation***
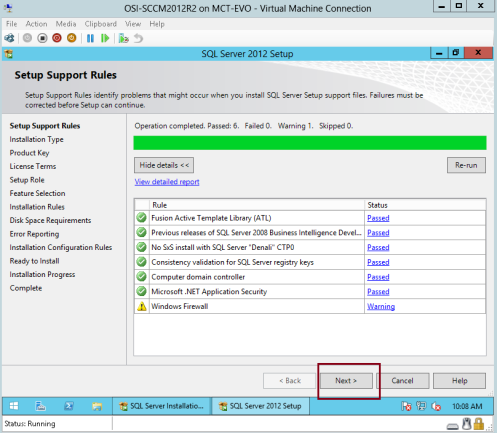
37 – On the Setup Support Rules interface, click Next…
38 – On the Installation Type interface, click Perform a new installation of SQL Server 2012, and then click Next…

39 – On the Product key interface, key in your SQL Server 2012 product key and click Next…
40 – On the License Terms interface, click I accept the license terms and then click Next…
41 – On the Setup Role interface, click SQL Server Feature Installation and then click Next…
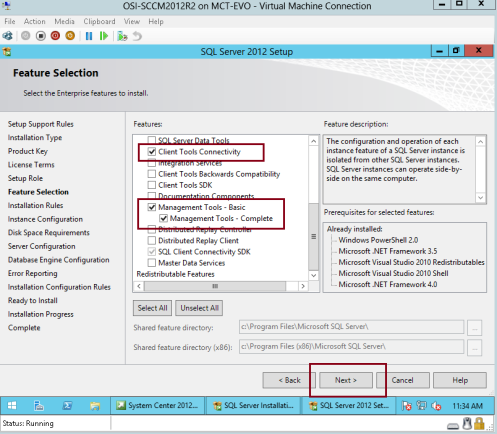
42 – On the Feature Selection interface, click Database Engine Services, Client Tools Connectivity and Management Tools – Complete, then click Next…
43 – On the Installation Rules interface, click Next…

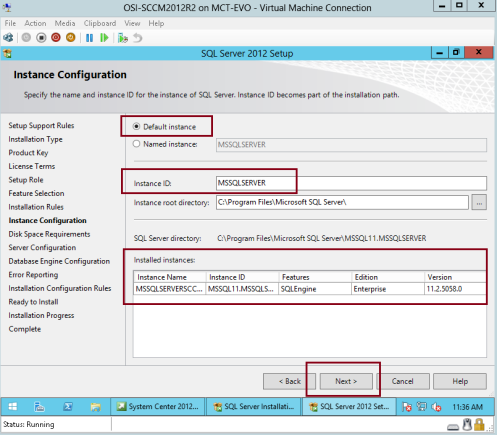
44 – On the Instance Configuration interface, click Default instance and then click Next…
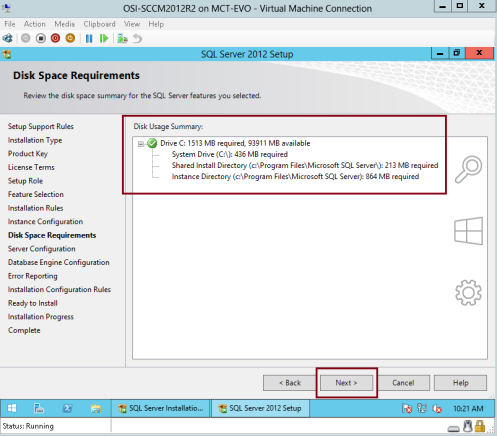
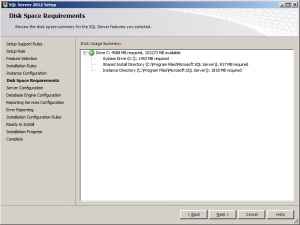
45 – On the Disk Space Requirements, click Next…
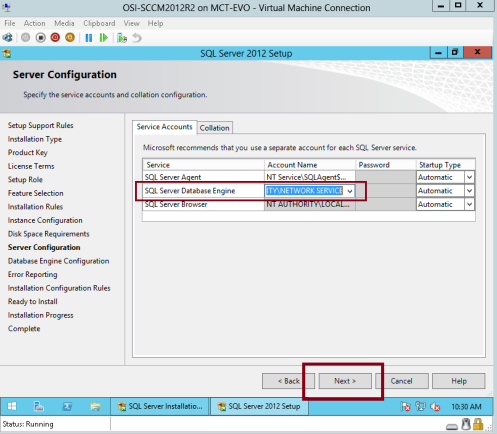
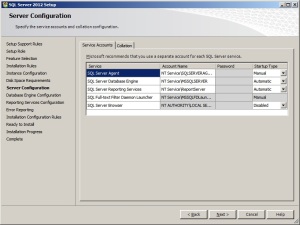
46 – On the Server Configuration interface, under Startup Type, verify that all startup set to Automatic, then click SQL Server Database Engine, under Account Name, click <<Browse…>>…

47 – Under Enter the object name to select, type Network Service and then click OK…
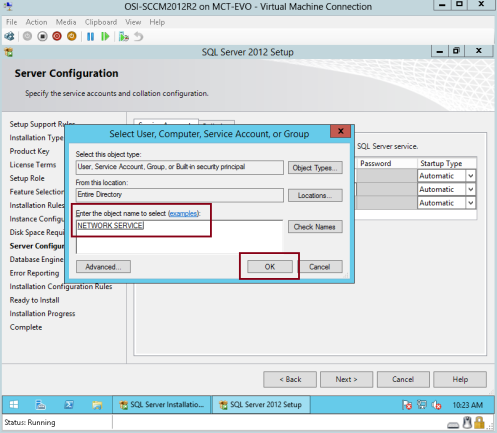
48 – click next to proceed…
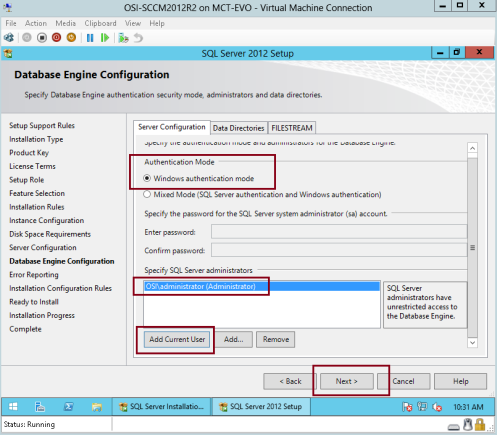
49 – On the Database Engine Configuration interface, verify that you click Windows authentication mode and click Add Current User, and then click Next…
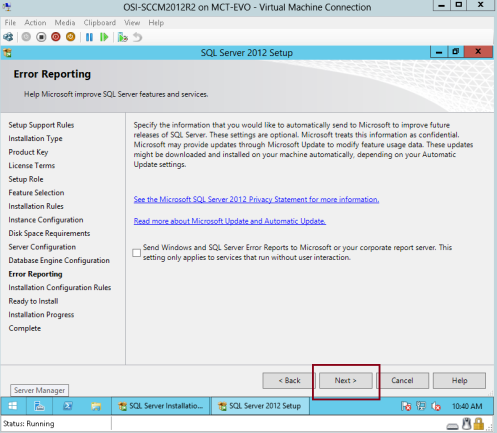
50 – On the Error Reporting interface, click Next…
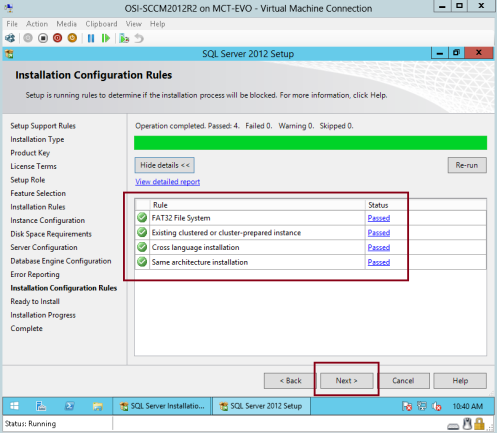
51 – On the Installation Configuration Rules interface, verify that all the rule status are passed and then click Next…
52 – On the Ready to Install interface, click Install…
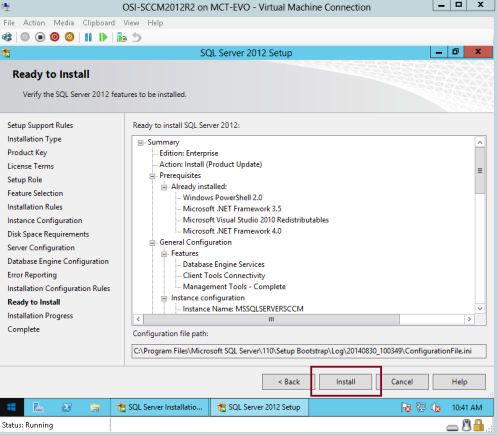
53 – after few minutes, installation should complete and verify that the feature status is success and then click Close…
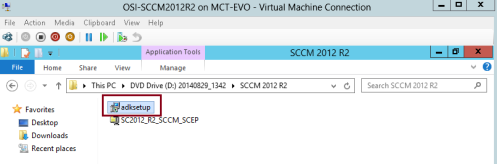
54 – Next, we need to install Windows Assessment and Deployment kit for Windows 8.1 (adksetup) in our SCCM server…
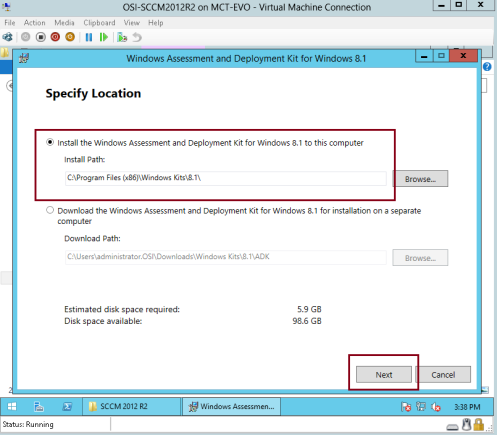
55 – On the Specify Location for the Windows Assessment and Deployment kit for Windows 8.1, click Install the Windows Assessment and Deployment kit for Windows 8.1 to this computer and then click Next…
56 – Proceed with Next…
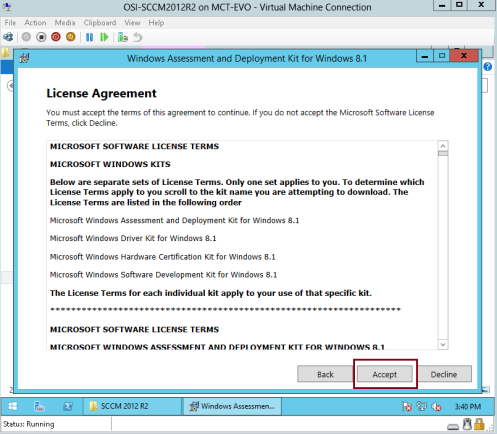
57 – On the License Agreement interface, click Next…
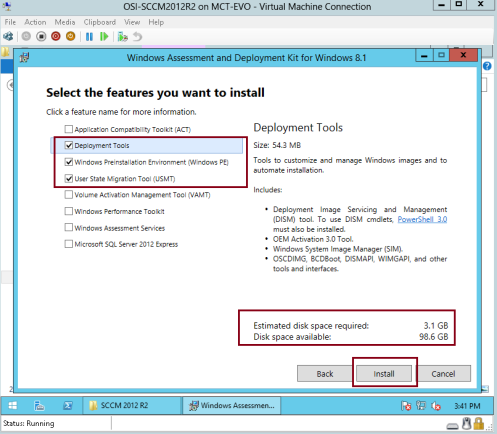
58 – On the Select the features you want to install interface, click Deployment Tools, Windows Preinstallation Environment (Windows PE) and User State Migration Tool (USMT) and then click Install…
*** For this step please be aware that you need internet connection on the SCCM server so that the setup will download all the require file to proceed with the next step.***
59 – Once the installation Windows Assessment and Deployment kit for Windows 8.1 setup complete, proceed with SCCM 2012 R2 installation.
Mount the SCCM 2012 R2 installer, and then click splash file…
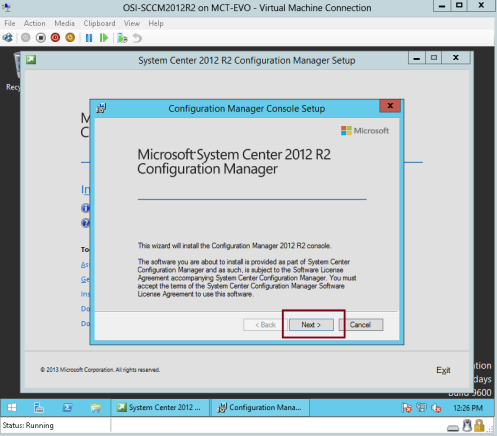
60 – On the Microsoft System Center 2012 R2 Configuration Manager interface, click Install…
61 – On the Before You Begin interlace, click Next…
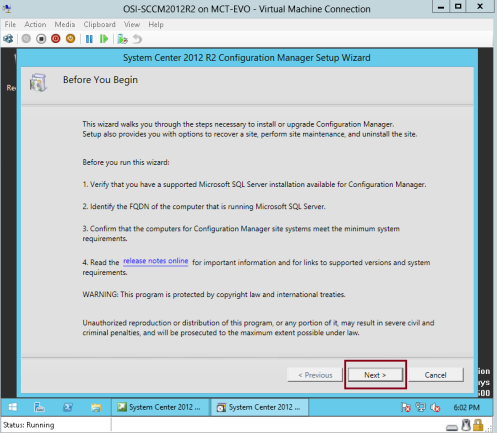
62 – On the Getting Started interface, verify that you click Install a Configuration Manager primary site, and then click Next…

63 – On the Product Key interface, click Next…
64 – On the Microsoft Software License Terms interface, click I accept these license terms and then click Next…
65 – On the Prerequisites Licenses interface, click all 3 boxes and then click Next…
66 – On the Prerequisites Download interface, click Download require files button and then click Next…
*** Please verify that your SCCM member server is connected to Internet.***
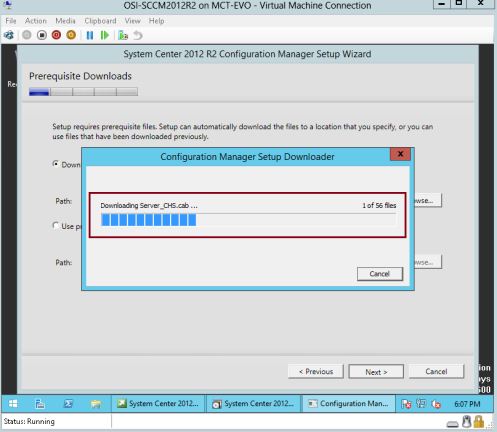
67 – wait few minutes for the download to complete…
68 – On the Database Information interface, click Next…

69 – On the Server Language Selection interface, English is selected, then click Next…
70 – On the Site and Installation Settings interface, in the Site Code:, type any unique site code for your SCCM, in this demo i key in OCM, in the Site name:, type the site name that will identify our SCCM site, for this demo i just type OSI SCCM, un-tick the Install the Configuration Manager Console and then click Next…
71 – On the Primary Site Installation interface, click Install the Primary site as a stand-alone site, and then click Next…
72 – click Yes…
73 – On the Database Information interface, verify all the information is correct and then click Next…
74 – Under specify the locations for SQL Server data file…, click Next…

75 – On the SMS Provider Settings interface, verify the SMS provider (FQDN) is our SCCM server (SCCM.osi.local), and then click Next…
76 – On the Client Computer Communications Settings interface, click Configure the Communication method on each site system role, and then click Next…
77 – On the Site System Roles interface, verify that Install a management point and install a distribution point is selected and then click Next…
78 – On the Customer experience Improvement Program interface, click Next…
79 – On the Settings Summary interface, click Next…
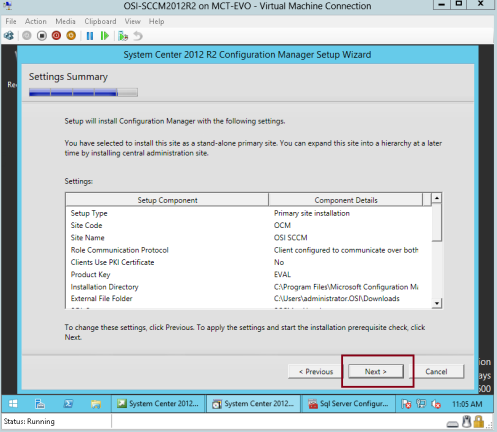
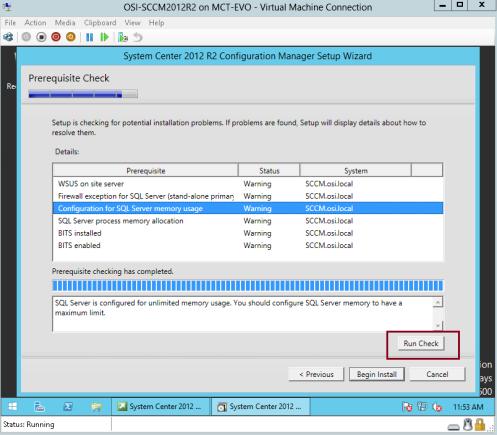
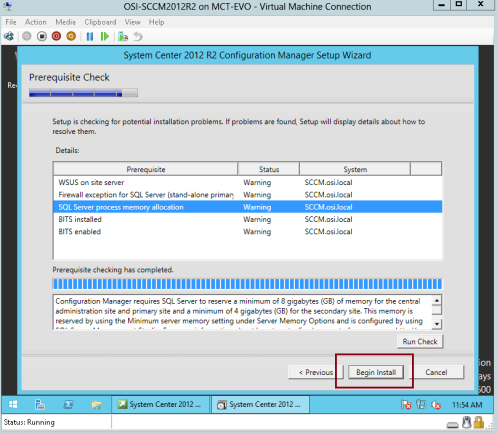
80 – On the Prerequisite Check interface, before you click Begin install, please verify the warning for SQL Server memory usage…
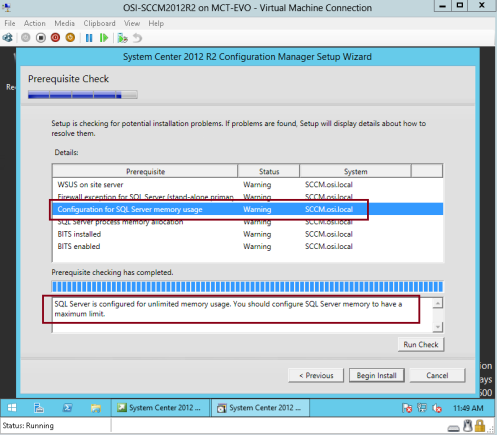
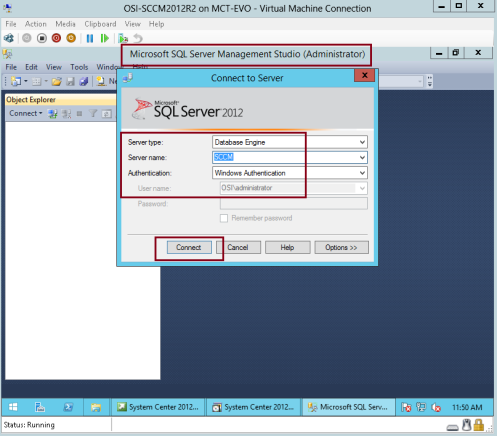
81 – To solve the SQL Server Minimum memory issue that stated on the SCCM wizard, please open SQL Server 2012 Management Studio, verify the Server name is connected to our SCCM and then click Connect…
82 – In the SQL Server 2012 Management Studio, under Object Explore, right click SCCM and then click Properties…
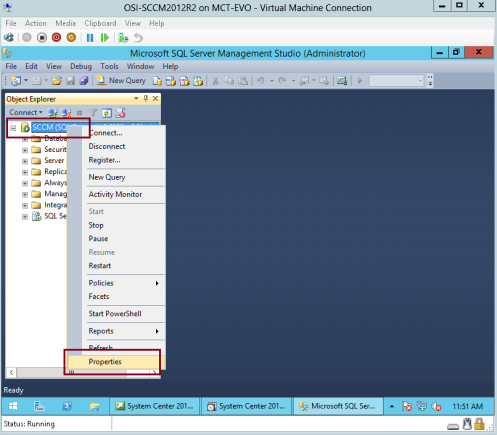
83 – On the Server properties – SCCM interface, click Memory, under Minimum and Maximum server Memory, type 4000 and then click OK…

84 – Switch back to SCCM 2012 installation wizard and click Run Check…
85 – Now click Begin Install and wait…
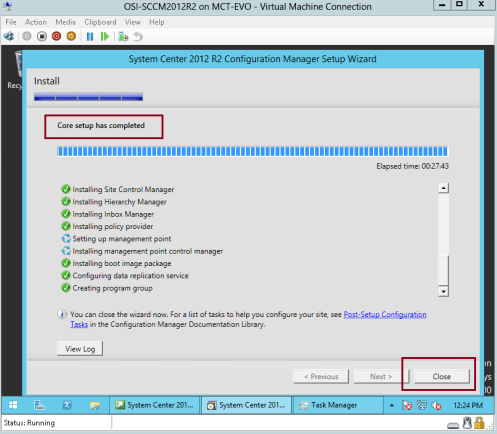
86 – On the Install interface, verify that Core Setup has completed and then click Close…
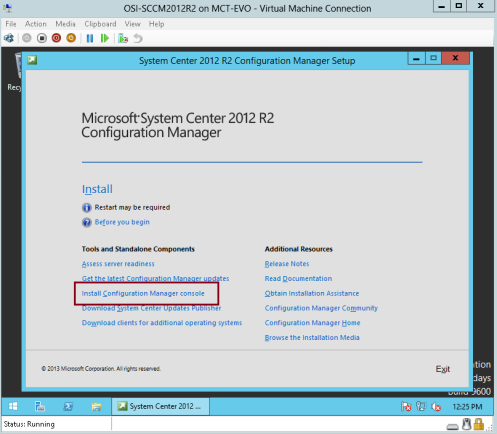
87 – On the Microsoft System Center 2012 R2 Configuration Manager interface, click Install Configuration Manager console…
88 – click Next…
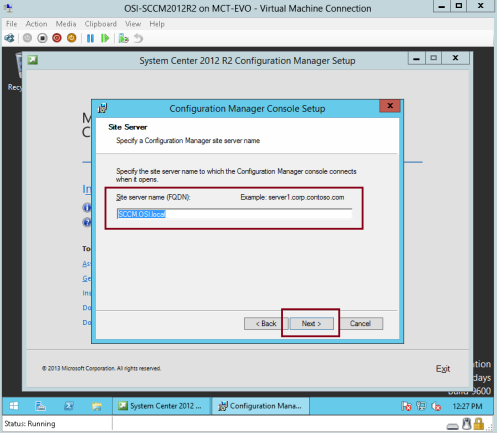
89 – On the Site Server, type our SCCM member server FQDN and then click Next…
90 – On the Installation Folder interface, click Next…

91 – On the Customer Experience Improvement Program, click Next…

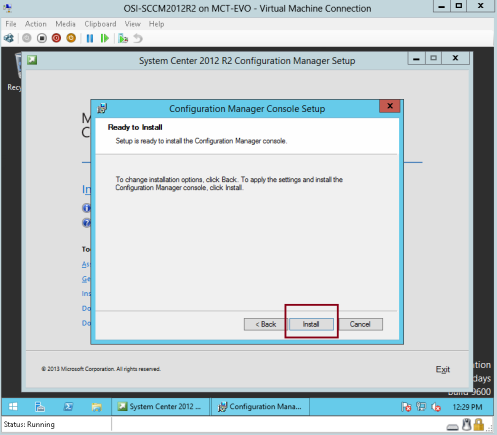
92 – Click Install…
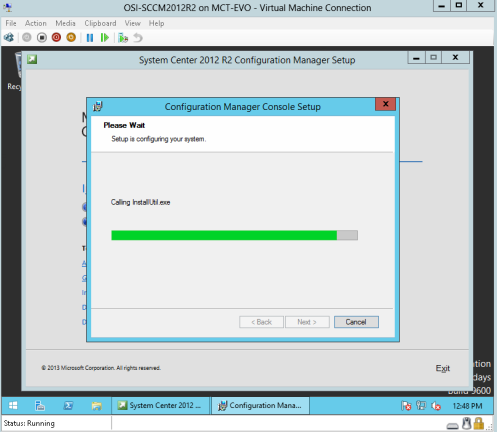
93 – Wait for the installation to complete…
94 – Click Finish…
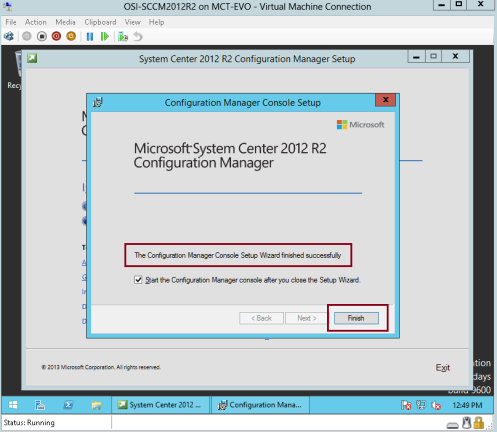
95 – Finally, we had successfully completed installing SCCM 2012 R2, and now lets create some boundary so that we can do scanning on our infrastructure…
*** FYI : A boundary is an intranet network location that can contain one or devices that more you want to manage. There are multiple ways to define boundaries, and a hierarchy can have boundaries that you define by using any combination of the
available methods. Boundary information is stored as global data and, as such, replicates throughout the hierarchy. To use boundaries for Configuration Manager operations, you must add them to boundary groups.***
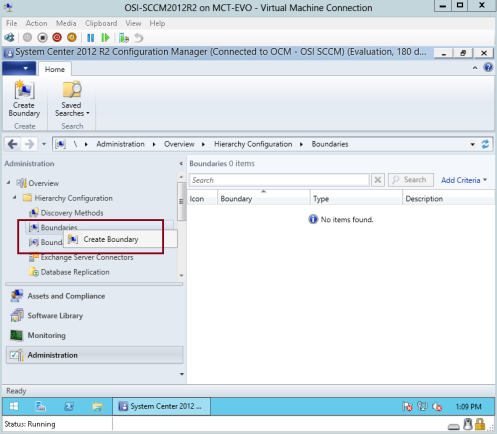
On the SCCM 2012 R2 console, under Administration, right click Boundaries and click Create Boundary…
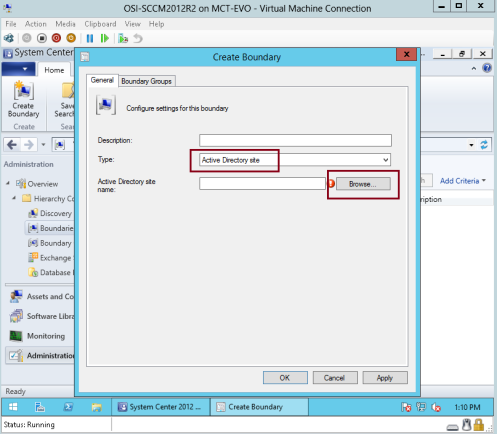
96 – On the Create Boundary box, next to Type: verify that you choose Active Directory site and then click Browse…
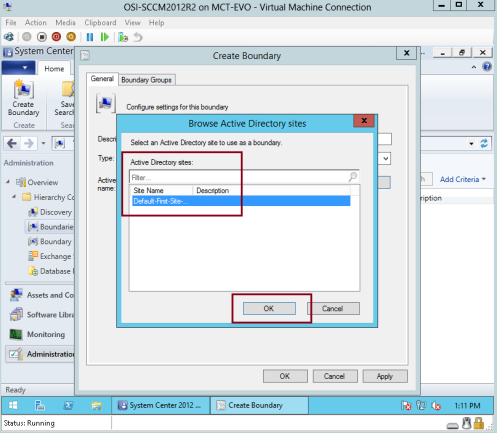
97 – On the Browse Active Directory sites interface, click Default- First-Site-Name and then click OK…
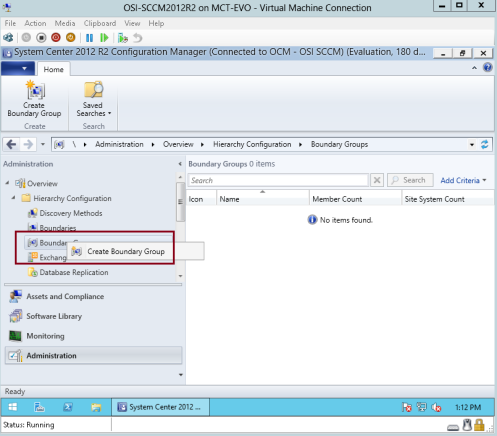
98 – On the Create Boundary interface, verify all the information and then click OK…

99 – on the SCCM 2012 R2 console, right click Boundary Group and then click Create Boundary Group…
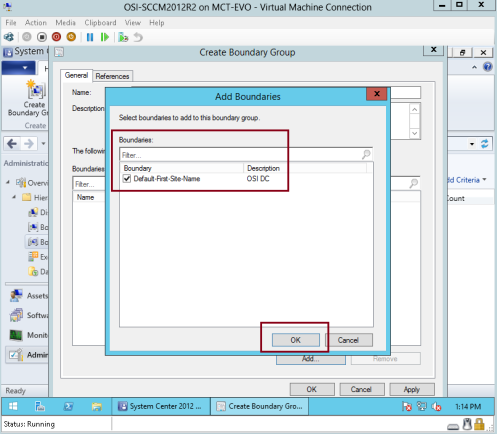
100 – On the Create Boundary Group interface, under General, type the name of the new Boundary (OSI Main Boundary) and then click Add…

101 – On the Add Boundaries interface, tick the Default- First-Site-Name and then click OK…
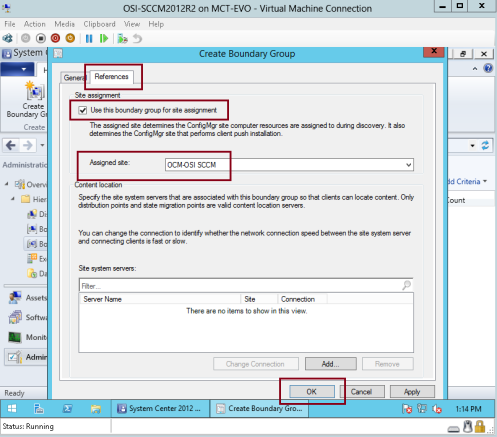
102 – click References tab, under Site assignment click Use this boundary group for site assignment and click OK…
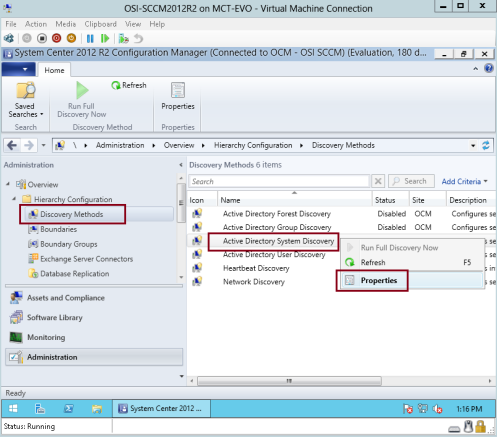
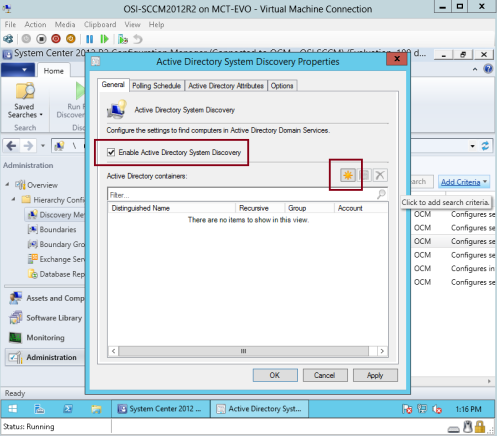
103 – on the SCCM 2012 R2, click Discovery Methods and then on the right side click Active Directory System Discovery and the right click and click Properties…
104 – On the Active Directory System Discovery Properties interface, click Enable Active Directory System Discovery and then click star button…
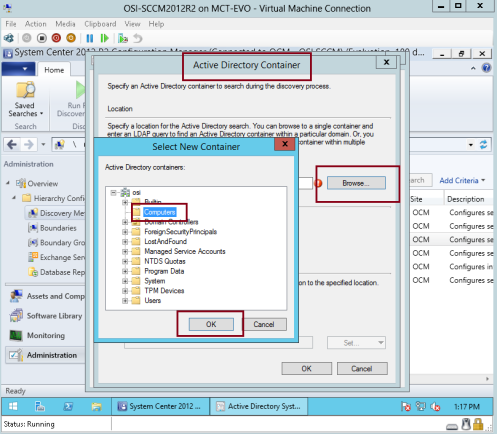
105 – On the Select New Container box, click Computers folder and then click OK…
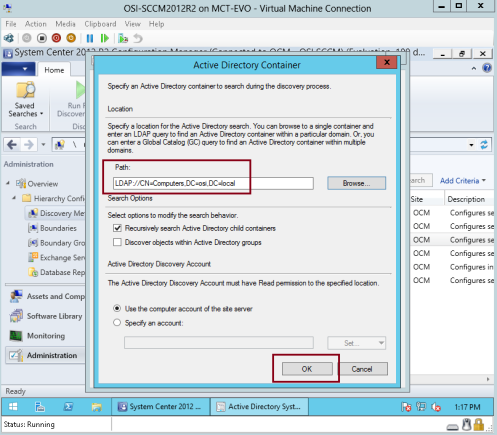
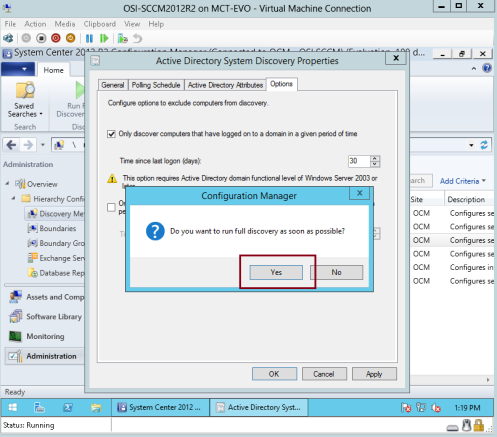
106 – on the Active Directory Container, verify the path and click OK…
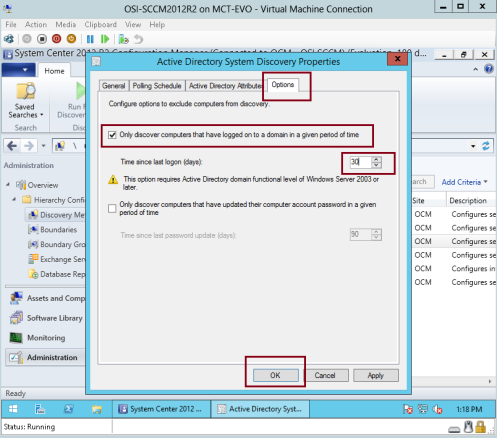
107 – click Options tab, and then click Only discover computers that have logged on to a domain in given period of time, in this demo i type 30 days, and then click OK…
108 – On the Configuration Manager interface, click Yes…
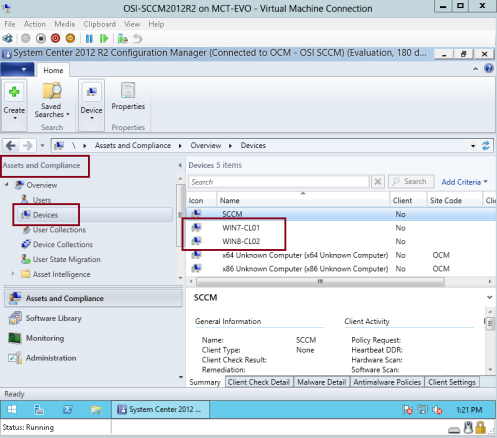
109 – On the SCCM 2012 R2 console, click Assets and Compliance, then click Devices, verify that all your client PC will listed under the devices name…
Orait, i’m done for now.. i will continue blogging about SCCM 2012 R2 in the future, still long way to go…
*** to my client that having issue regarding SCCM 2012 deployment, i hope with this post can solve any deploying issue that you all had previously…
*** to my students, existing @ future students, my SCCM 2012 R2 classes will start around September 2014. *** Please take note…
Check out my new SCCM 1511 step by step guide
The following guide will take you through the installation of SCCM 2012 R2 with a simple Primary Server approach and with the SQL server located on the same device. It assumes that no earlier version of SCCM is installed in the Active Directory domain it is being installed into.
Before installing SCCM 2012 R2 you will need to run through some prep work to get the Active Directory configured and extended, along with some application and role/feature installs
Prepare Active Directory for Configuration Manager
Create the System Management Container in AD
Connect to a domain controller and load ADSI Edit. Under the System OU create a new Object.

Choose Container and click Next.

Enter the name System Management and click Next.

Complete the wizard and close ADSIEdit.
Delegate control to the SCCM site server to the newly created container in AD Users and Computers. Create a custom task to delegate and choose ‘This folder, existing objects in this folder and creation of new objects in this folder’


Check all Permission boxes and complete the wizard
Extend the Schema
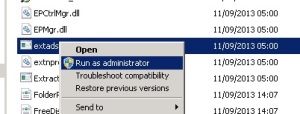
From the SCCM 2012 media copy the \SMSSetup\Bin\x64\ folder to a Domain Controller holding the Schema Master Role. Ensure the account used is a member of the Schema Admins group in AD. Right click the Extadsch.exe and choose ‘Run as Administrator ‘.
A log file ‘ExtADSch.log’ will be generated on the root of the C: Drive. Check for the entry ‘Successfully extended the Active Directory schema.’
<01-01-2014 21:25:22> Successfully extended the Active Directory schema.
To check what Extadsch.exe is doing to the Active Directory then open up the file ConfigMgr_ad_schema.ldf that is located in the same folder.
Install Site Server Prerequisites
The following roles and features need to be installed onto the SCCM Site Server prior to installation:
- BITS
- Remote Differential Compression
- IIS Components
- .Net Framework 3.5
Add the following IIS components
Static Content
Default Document
Directory Browsing
HTTP Errors
HTTP Redirection
Application Development
ASP.NET
.NET Extensibility
ASP
ISAPI Extensions
ISAPI Filters
Health and Diagnostics
HTTP logging
Logging tools
Request Monitor
Tracing
Security
Basic Authentication
Windows Authentication
URL Authorization
Request Filtering
IP and Domain Restrictions
Performance
Static Content Compression
Management Tools
IIS Management Console
IIS Management Scripts and Tools
Management Service
IIS 6 Management Compatibility
IIS 6 Metabase Compatibility
IIS 6 WMI Compatibility
IIS 6 Scripting Tools
IIS 6 Management Console
Install Windows Assessment and Deployment Kit (Windows ADK) for Windows 8.1
Go to http://www.microsoft.com/en-gb/download/details.aspx?id=39982 and download ADK 8.1.
Run the adksetup.exe file. Accept the licence agreement. This will download and install .Net Framework 4.5.

Restart the system when prompted.

After the restart setup will resume. Accept the default location for installation and click Next.

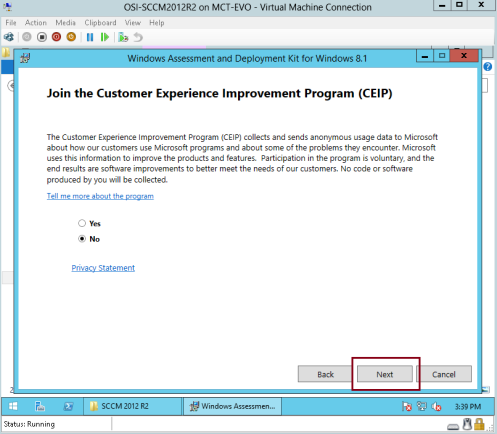
Select whether to join the CEIP and click Next.

Accept the licence agreement.

Install the following components and then click Install.
- User State Migration Tool (USMT)
- Windows Deployment Tools
- Windows PreInstallation Environment (Windows PE)


Once complete click Close.
Install SQL Server
SQL Server 2012 SP1 is being installed as the SCCM database.
Run the setup.exe
Install a new stand-alone installation of SQL

Click Ok.

Install the product key or run in evaluation mode. Click Next.

Accept the licence agreement and click Next.

Include any product updates. Click Next.

Click Next.

Choose the feature installation and click Next.

Install the selected features and click Next.

Click Next.
Leave as the default instance and click Next.

Click Next at the disk space requirements screen.
Set any account to run the SQL services, in this instance the defaults have been selected. Once confirmed, click the Collation tab.
Click the Customize button.

Choose the ‘SQL Collation, used for backwards compatibility’ option and choose SQL_Latin1_General_CP1_CI_AS. Click Ok. Click Next.

Use Windows authentication and Add the current user. Click Next.

Set Reporting Services to install only. Click Next.

Set error reporting preferences and click Next.

Click Next.

Click Install to begin the installation process.

Once installed open up SSMS and limit the amount of RAM SQL can use to 50% of total RAM. Set the value for both max and min.
Set SQL to run with either a named domain account, network service or local system account. If using a named account grant the log on as a service right via gpedit.msc or GPO.

Install SCCM 2012 R2
Begin the install of SCCM 2012 R2 by running splash.hta. Click Install.

Click Next.

Choose to install a primary site in this instance. Click Next.

Enter a licence key or evaluate. Click Next.

Accept the licence agreement and click Next.

Accept pre-req licences and click Next.

Create a folder to store install updates and point the SCCM install to that location. Click Next.

Updates will download and install.

Select any language requirements for the SCCM server and click Next.

Select any client language requirements and click Next.

Enter a 3 digit site code and description and click Next. Be aware of Microsoft list of pre-reserved site code names. http://support.microsoft.com/kb/279868/en-us

Choose whether to run the primary as stand-alone or join to an existing hierarchy. Click Next.

In this instance a stand-alone primary is being installed. Click Yes to accept.

Accept the database default configuration and click Next.

Specify the path to the SQL database file and log file. In this instance it is the defaults. Click Next.

Click Next to set the current server as the SMS Provider

Set ‘Configure the communication method on each site system role’ as a PKI infrastructure is not being used. Click Next.

Install both a MP and a DP onto the site server. Click Next.

Choose whether to join the CEIP. Click Next.
Click Next at the Summary screen.

The following warnings can be ignored at the pre-req check screen. Click Begin Install.

SCCM will begin the installation.

Click close when complete.

Launch the SCCM Console. Ensure the site and database report as healthy in the Monitoring workspace under System Status>Site Status

Microsoft System Center 2012 one of the perfect tools that integrate and work with ALM to provide very powerful ALM environment in different areas, for example SCOM or System Center Operation Manager integrates with TFS in the DevOps scenario to support integration between Development and Operation and many other scenarios, I will start to show some of these wonderful integration and I start by showing how to install System Center 2012 Configuration Manager SP1 (SCCM 2012 SP1) with MS SQL Server 2012 SP1 on Windows Server 2012.
Sections
- Examine the environment
- Add required Windows Roles and Features for Windows Server 2012
- Create a System Management Container on DC machine
- Extend the Active Directory Schema on SCCM machine
- Install SQL Server 2012 SP1 on Windows Server 2012
- Download and install Assessment and Deployment Kit
- Install System Center Configuration Manger 2012 SP1
The following is a step-by-step video for this post.
[youtube=http://youtu.be/mhQPhda-aRk]
Examine the environment
In this scenario I have 3 machines Domain Controller (DC08.com), SCCM (SCCM-2012) and one client with Windows 8 (SCCM-Client-Win8), of course the SCCM-2012 and SCCM-Client-Win8 joined the domain.
Add required Windows Roles and Features for Windows Server 2012
Open the Server Manager and click on Add roles and features.
Just click next…next until reach Server Roles.
In the Server Roles choose Web Server (IIS), add the required features and then click Next.

Select .NET Framework 3.5 and make sure 4.5 is selected too after that select BIT and add required features after that scroll down.

Add Remote Differential Compression.
in Security choose Basic Authentication, IP and Domain Restrictions, URL Authorization and Window Authentication 
Add ASP, ASP.NET 3.5, ASP.NET 4.5 add also any required features after that scroll down.
Add IIS 6 WMI Compatibility, IIS Management Scripts and Tools, Management Service and click Next.
Select Restart the destination and then click on Specify an alternate source path.
Insert the Windows Server 2012 DVD into the machine and put its drive letter followed by :Sourcessxs and click OK.
After the installation complete click on Close.
Create a System Management Container on DC machine.
Connect to the Domain Controller machine using Remote Desktop.
From the run type ADSIedit.msc to open the ADSI, click connect to and accept the default.
Navigate to System and create new container with the exactly spelling and case “System Management“
Open the Active Directory Users and Computers and from View menu click on Advanced Features.
Navigate to “System Management” and add the SCCM machine to it.
Give the SCCM machine full controller permission and click Advanced.
Select the SCCM machine and click Edit.
Change the apply to “This object and all descendant objects” and choose Apply this permission.
Close the Active Directory remote desktop, we will not use it again for now.
Extend the Active Directory Schema on SCCM machine
Insert the SCCM DVD into your DVD and navigate to SMSSETUPBINX64. double click on extadsch.
Navigate to the C drive and open the created file ExtADSch.txt.
Make sure that it is successfully extend the schema.
Install SQL Server 2012 SP1 on Windows Server 2012
Insert or mount the SQL Server 2012 DVD into your DVD drive and click on New SQL Server stand-alone-installation.
It’s better to include the update and then click Next.
Select SQL Server Feature Installation.
Select Database Engine Services and scroll down.
Select Client Tools Connectivity, Management Tools Basic, Management Tools Complete and click Next.
Make all service automatic and assign Network Services for SQL Server Database Engine.
Review the Collation and make sure it’s “latin1_general_ci_as“, click Next.
Add the current user that will be used to install SCCM 2012, click next..next until the installation complete.
After installation complete, open SQL Server Management Studio and click on the instance name and choose Properties, choose Memory, enter 4000 as Minimum and Maximum server memory, it’s recommended to be 8000.
Download and install Assessment and Deployment Kit
Download Assessment and Deployment Kit, for download click here after that click on adksetup.
Only select Deployment Tools, Windows Preinstallation Environment (Windows PE), User State Migration Tools and then click Install.

Install System Center Configuration Manger 2012 SP1
Insert the media of System Center Configuration Manager SP1 (SCCM 2012) into your machine and click Install.
Select Install a Configuration Manager primary site and then click Next for more understanding about why we choose this option and the other options, see the video for this post.
Select and Accept all licenses terms and conditions.
Browse and choose the path to download the needed files for installation.
After the download complete click Next.
Type a code for the site and the site name deselect the installation of Management Console, we will install it later.
Select Install the primary site as stand-alone site.
We enter the SQL Server name here, we will leave the default since SCCM will be installed on the same machine with SQL Server.
We choose where to install the SMS provider, we will leave the default on the same machine.
Select Configure the communication method on each site system role.
Leave the default to install management point and the distribution point and click Next.
The prerequiest check run and show some warnings, we can install WSUS later and it OK for the other warnings, click Begin Install.
The installation start and review it until complete.
Click on Install Configuration Manager console.

Type the name of the server that has SCCM in our case it’s the same machine but of course we can install this console on any machine even on a desktop machine.

Now the System Center Configuration Manager Console will open and it’s ready to use 🙂