In this tutorial I am going to show you how to install Windows Server 2022 on Ubuntu Nested KVM.
You can download the Windows Server 2022 from the official Microsoft Evaluation Download site. You need to enter you information do download the eval.
https://www.microsoft.com/en-us/evalcenter/evaluate-windows-server-2022
You can download the virtual IO drivers from here.
https://fedorapeople.org/groups/virt/virtio-win/direct-downloads/stable-virtio/virtio-win.iso
To install the necessary packages to run KVM virtualized software packages, install the following.
sudo apt -y install bridge-utils cpu-checker libvirt-clients libvirt-daemon qemu qemu-kvm virt-manager
Check if you Ubuntu machine allows running of KVM or nested KVM.
sudo kvm-ok

Add your sudoer user to the following group.
sudo adduser <username> kvm
sudo adduser <username> libvirt
Make sure that your Virtualized Daemon is running
sudo systemctl status libvirtd
If you have not create a directory where there is enough space you might want to do so.
sudo ln -s /mnt/ /mnt/
sudo mkdir -p /
Make sure you have install remote access tool such as VNC. You can follow the following tutorial if you need the steps to do it.
https://old.dracocybersecurity.com/install-tightvncserver-on-ubuntu-20-04/
First copy or download the windows iso and virtio windows driver file necessary for the installation to the Ubuntu Server
We are going to use virtual manager (virt-manager) to install the Windows Server 2022.
Next you can follow the step by step guide to install Windows Server 2022 using Virtual Manager (virt-manager)
Run virt-manager from the terminal in the GDE

Right Click on QEMU/KVM and select New.

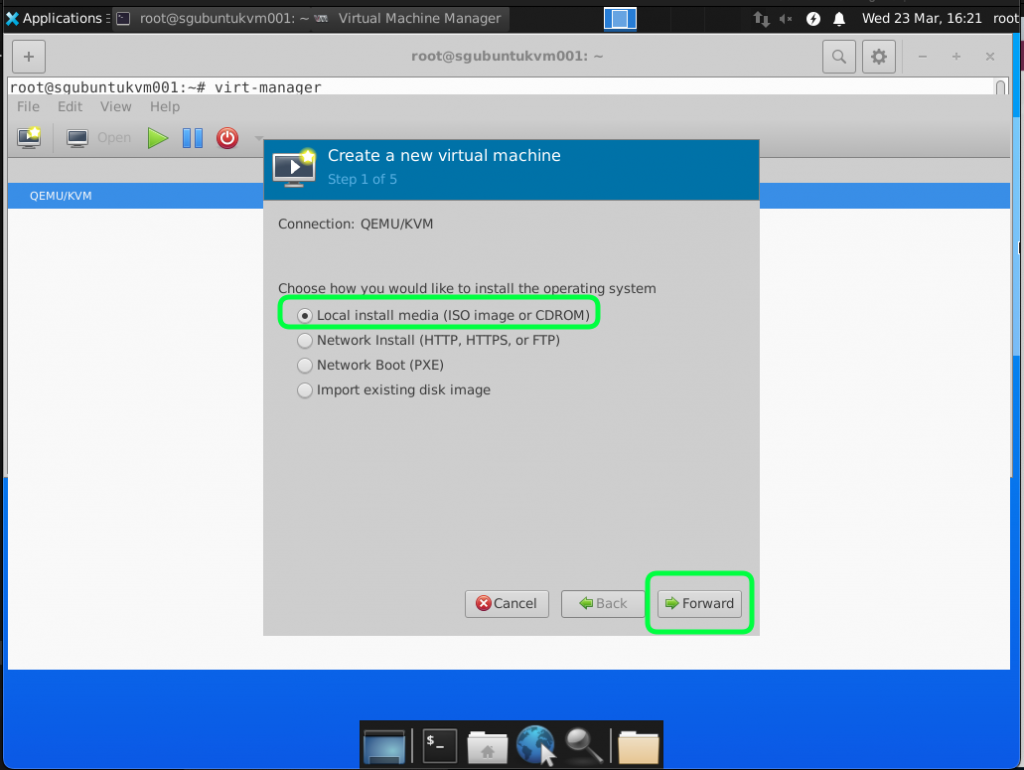
We are using local images that we have copied into the Ubuntu so select Local install media and click Forward.
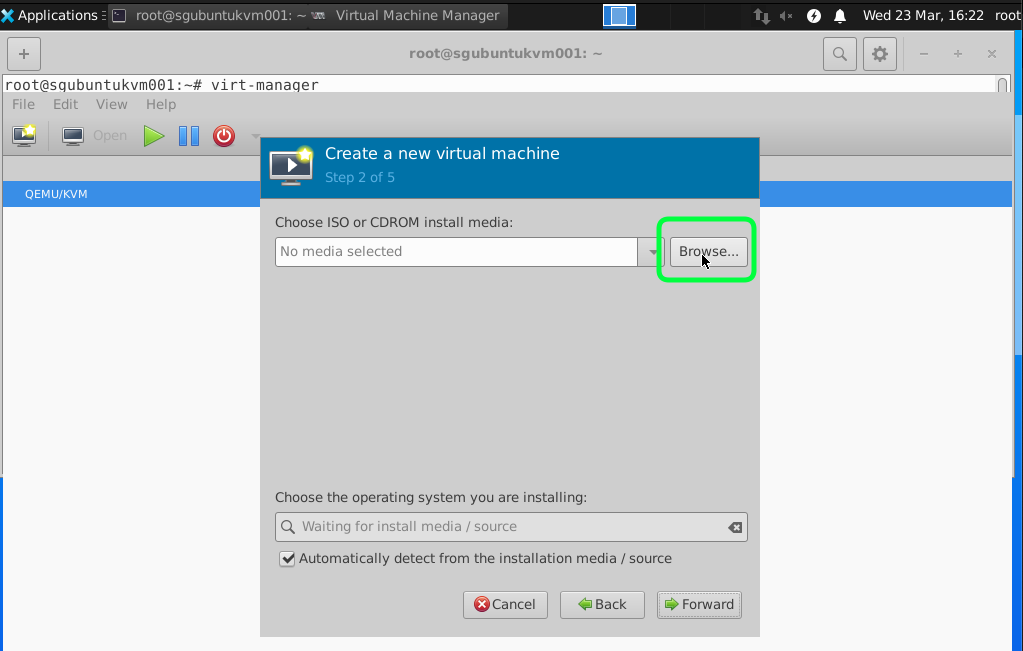
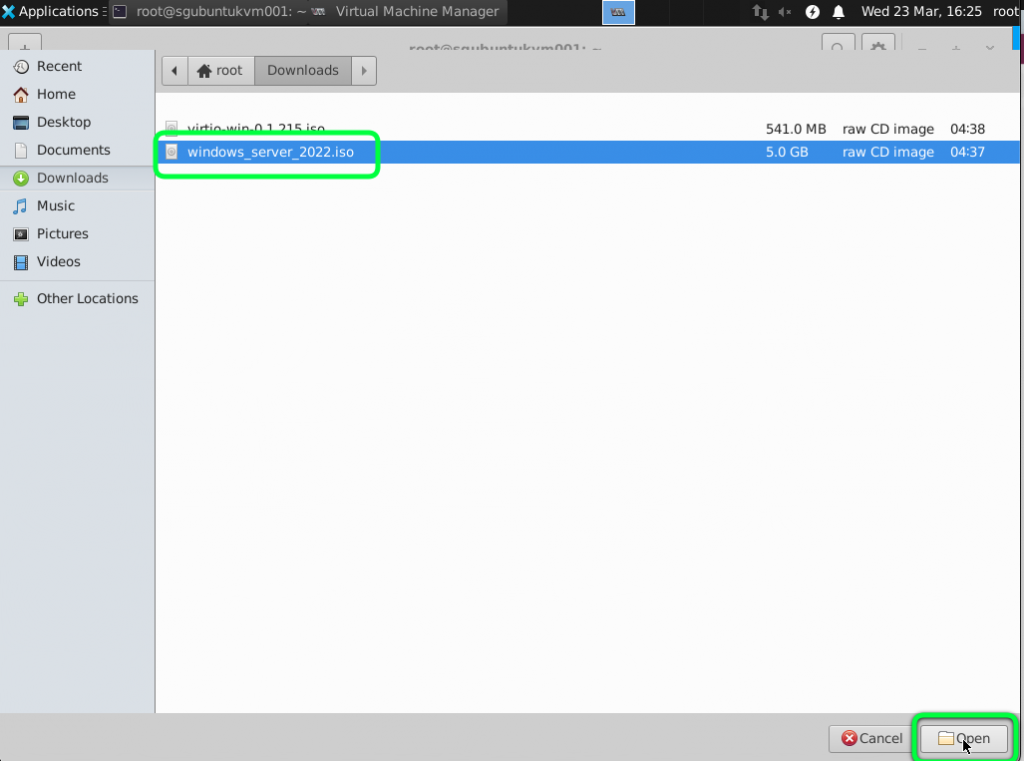
Click on Browse and Select the Windows Image.

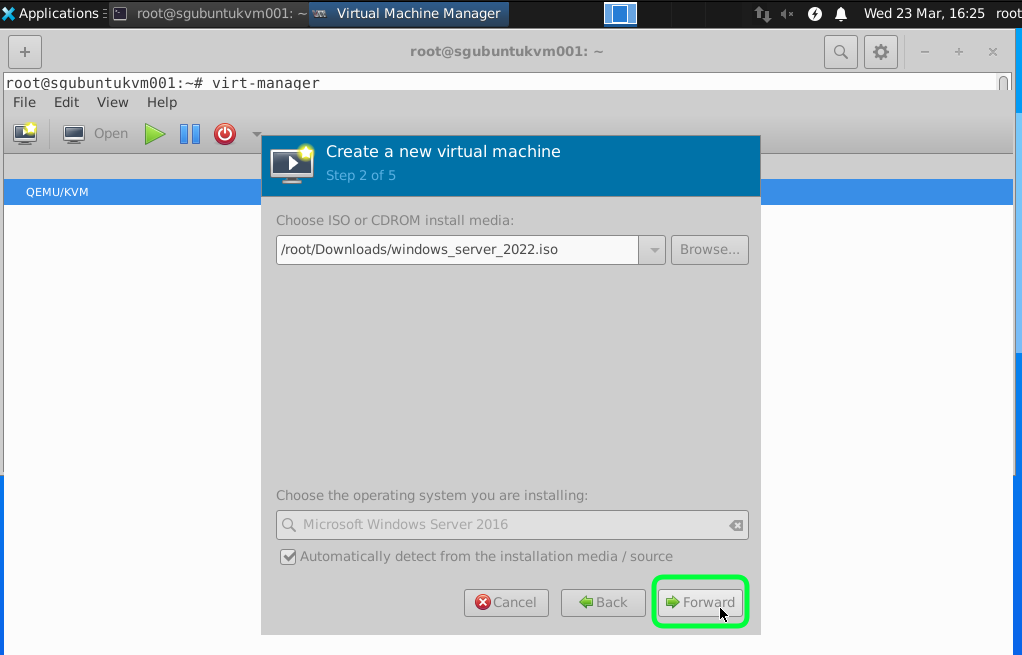
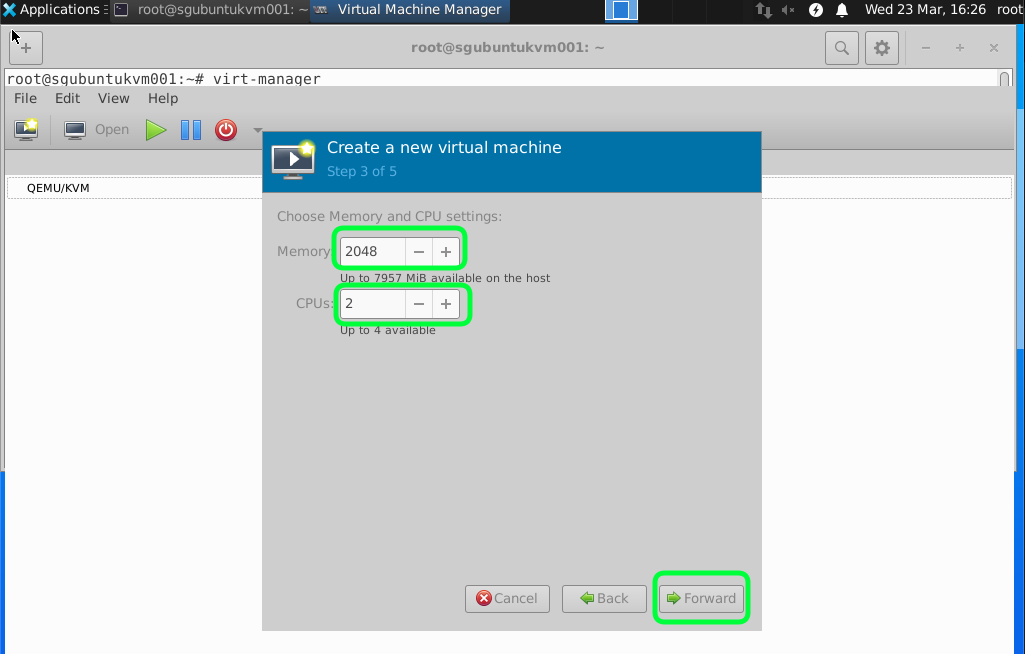
I would recommend having minimum 2GB RAM and 2 vCPUs for a start. As anything lower than this make the VM very slow and can become unstable.
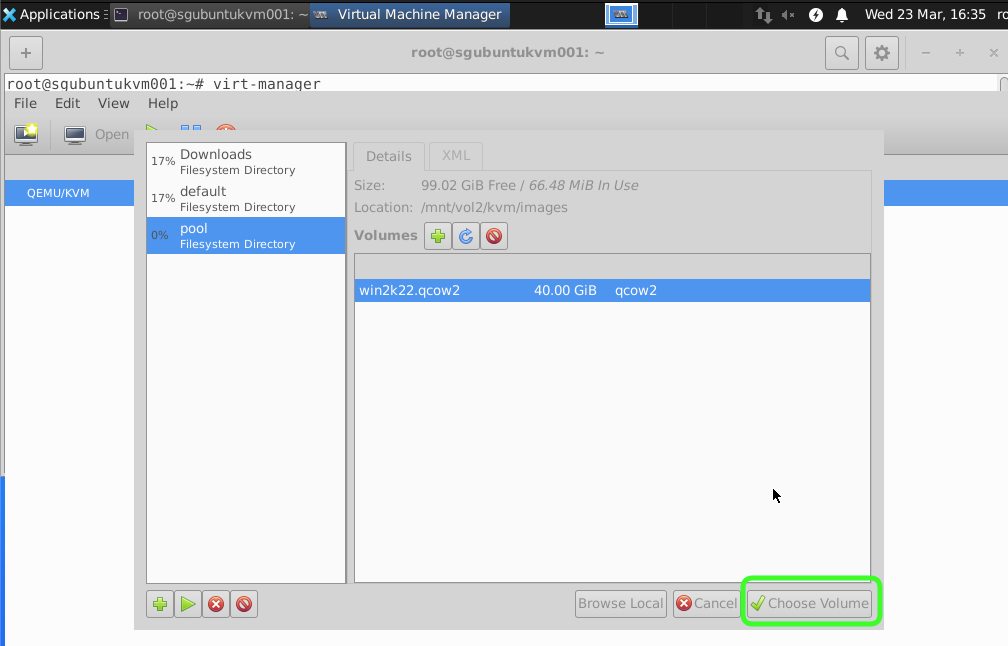
For this tutorial we are going to add and select a attached storage.
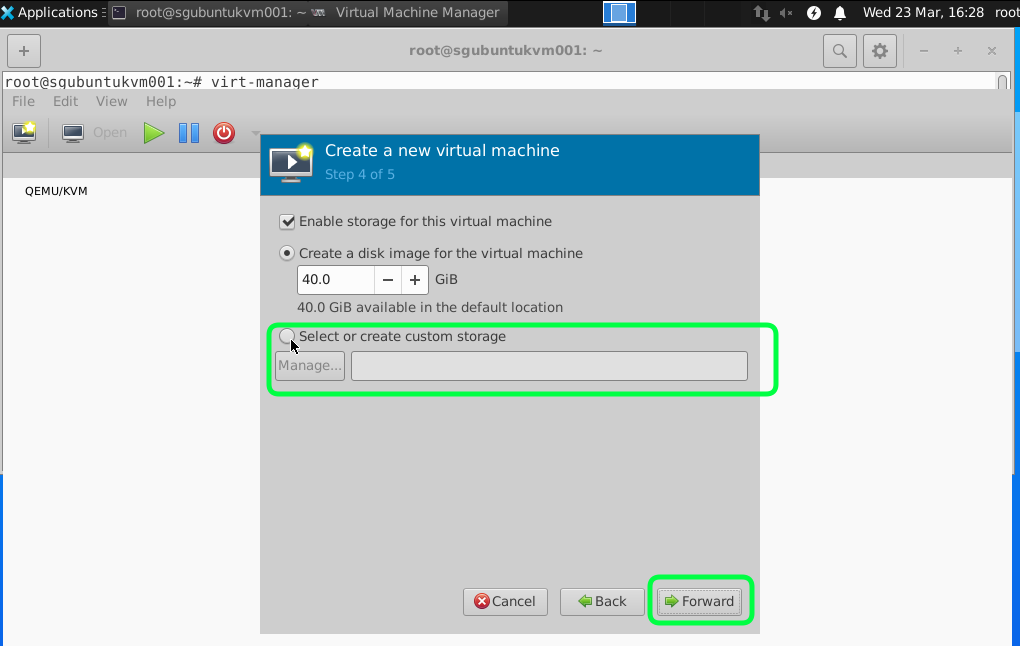
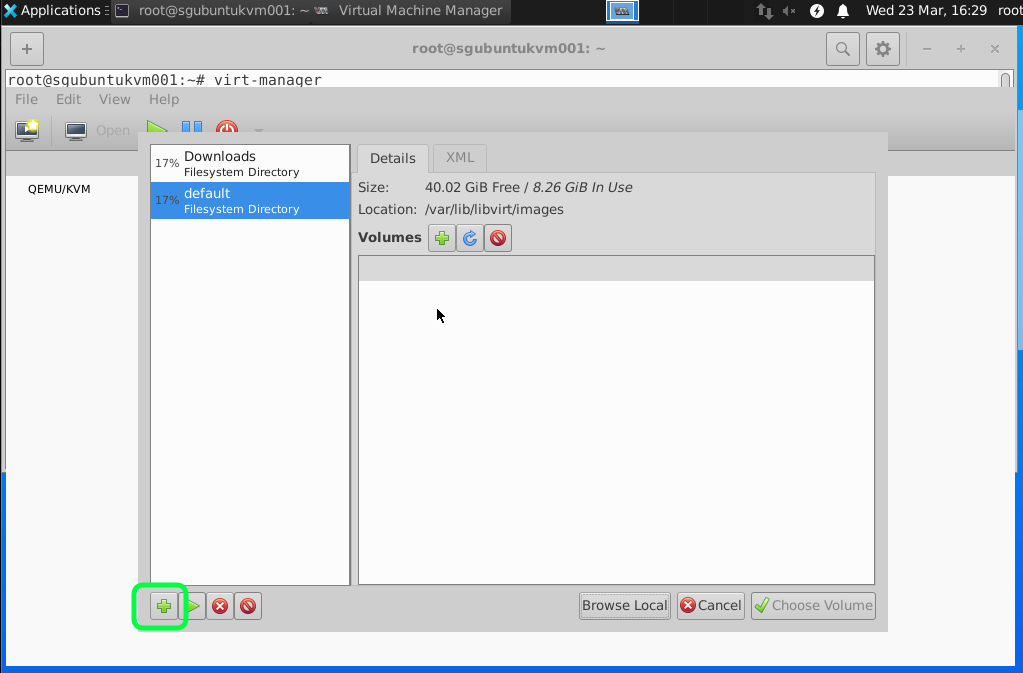
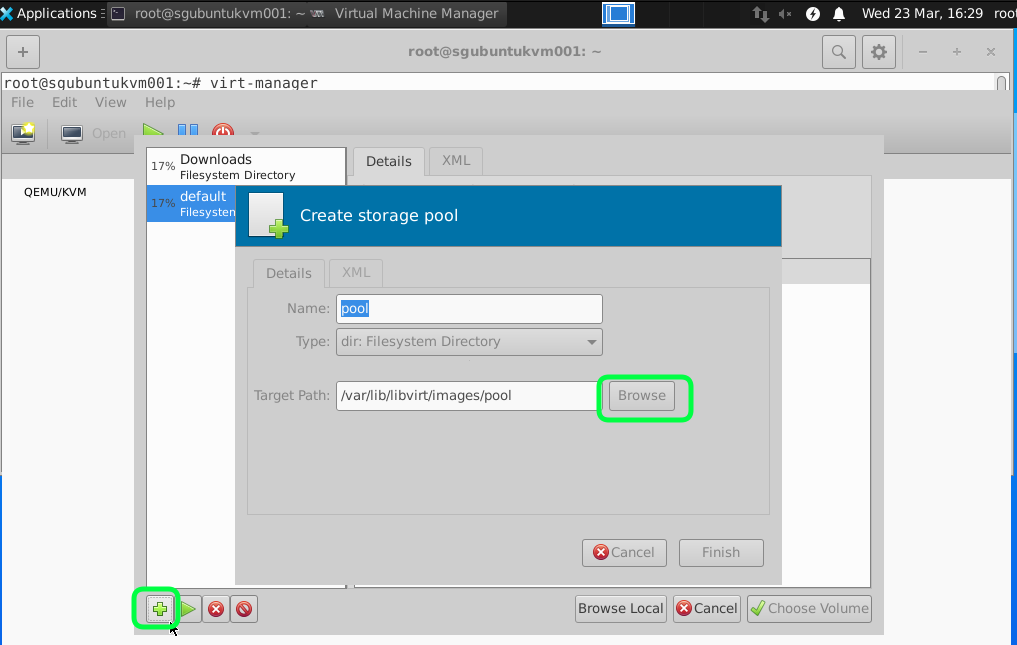
Click on the add icon to select a new Directory.
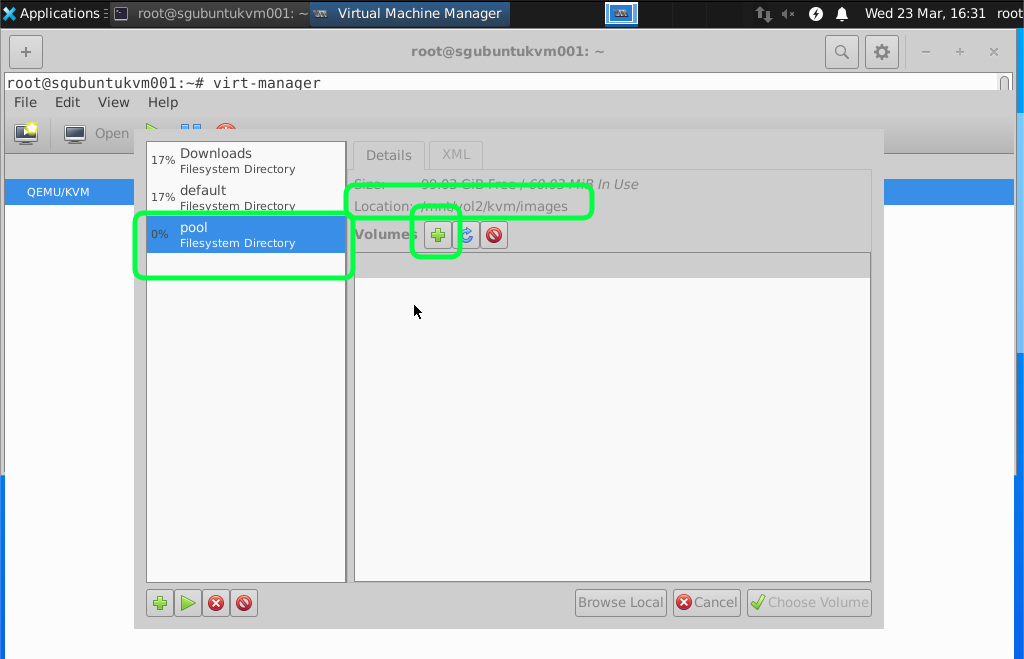
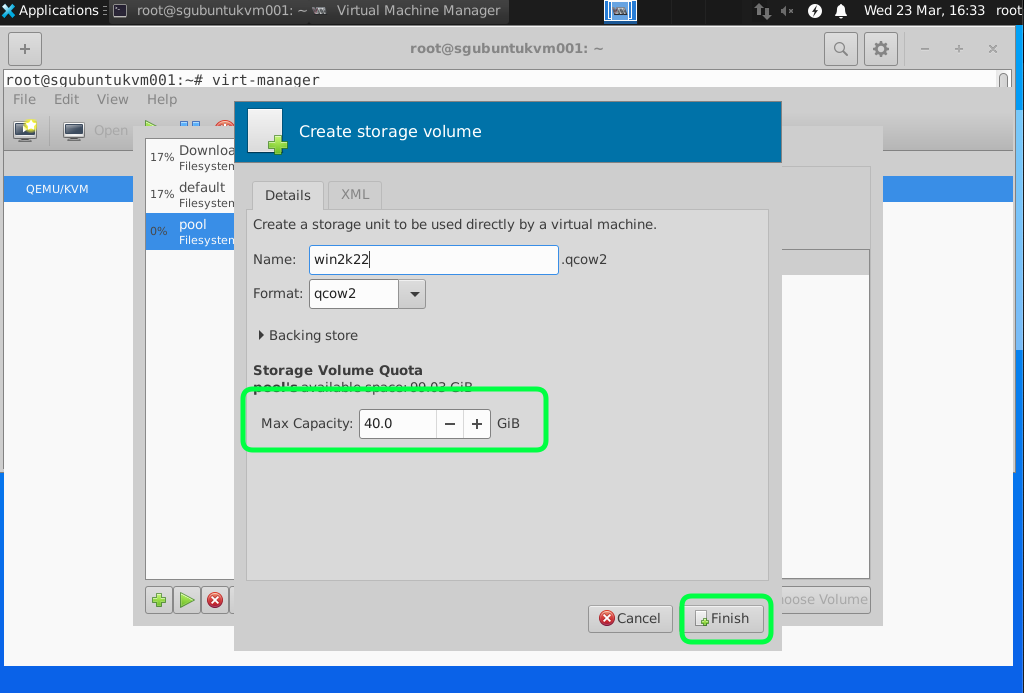
Recommend to have 40GB of Hard disk space you can start with a smaller size and fix disk with more capacity later but setting the minimum of 40GB it should last you for a while. If you are using the Windows Server just as a Active Directory for my lab.
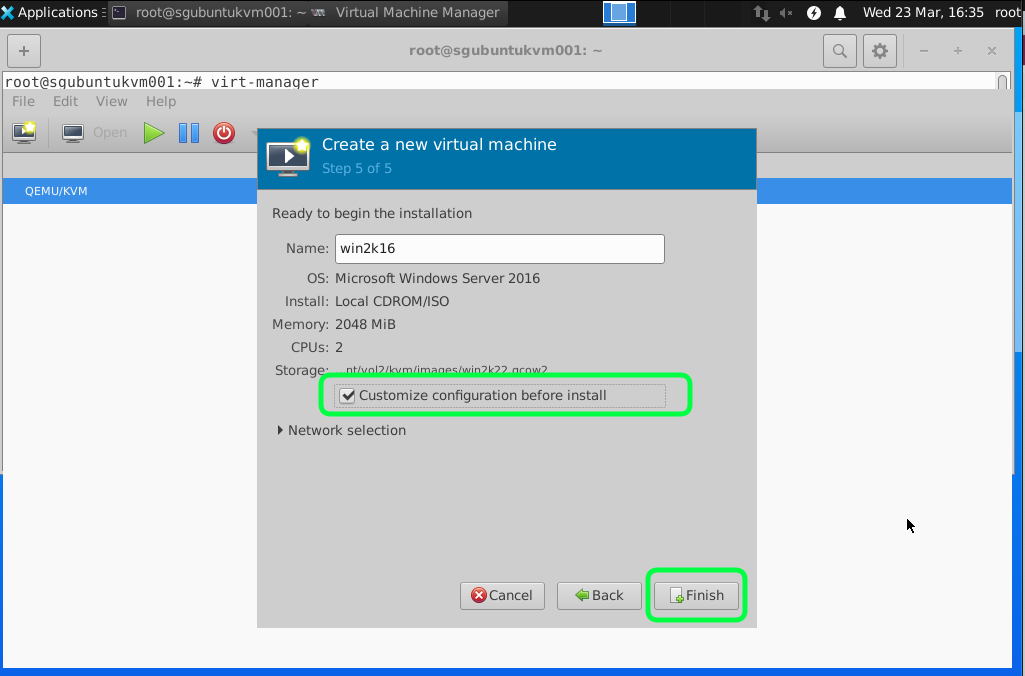
Click on Customize Configuration before install to adjust a few settings.
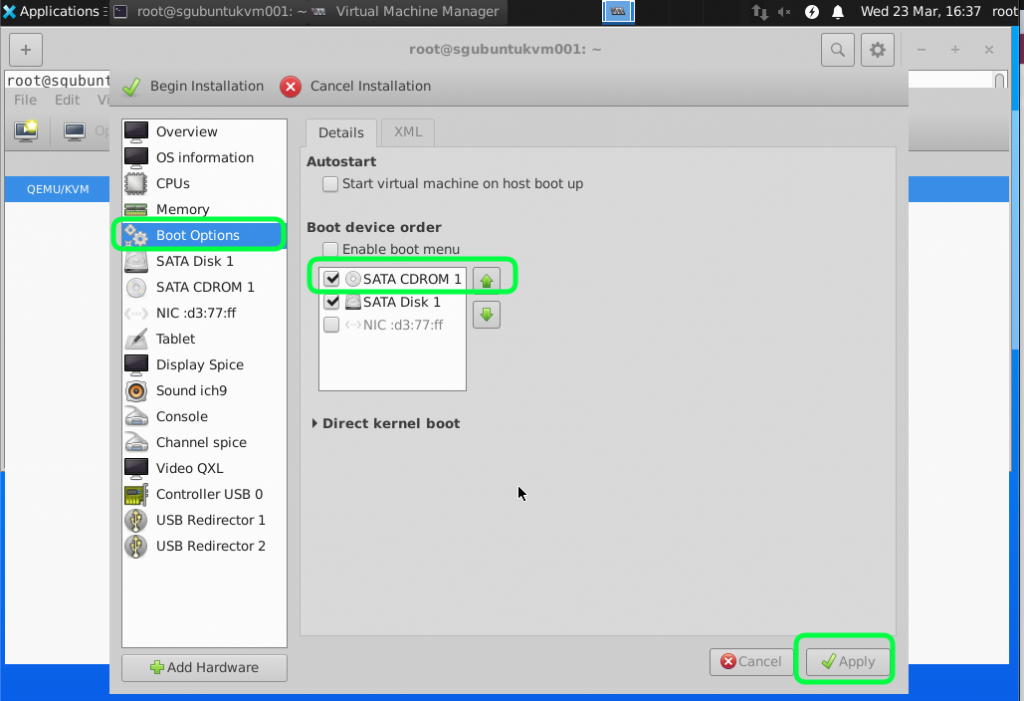
Set the boot option to boot from the CD ROM where the Windows Server ISO is stored.
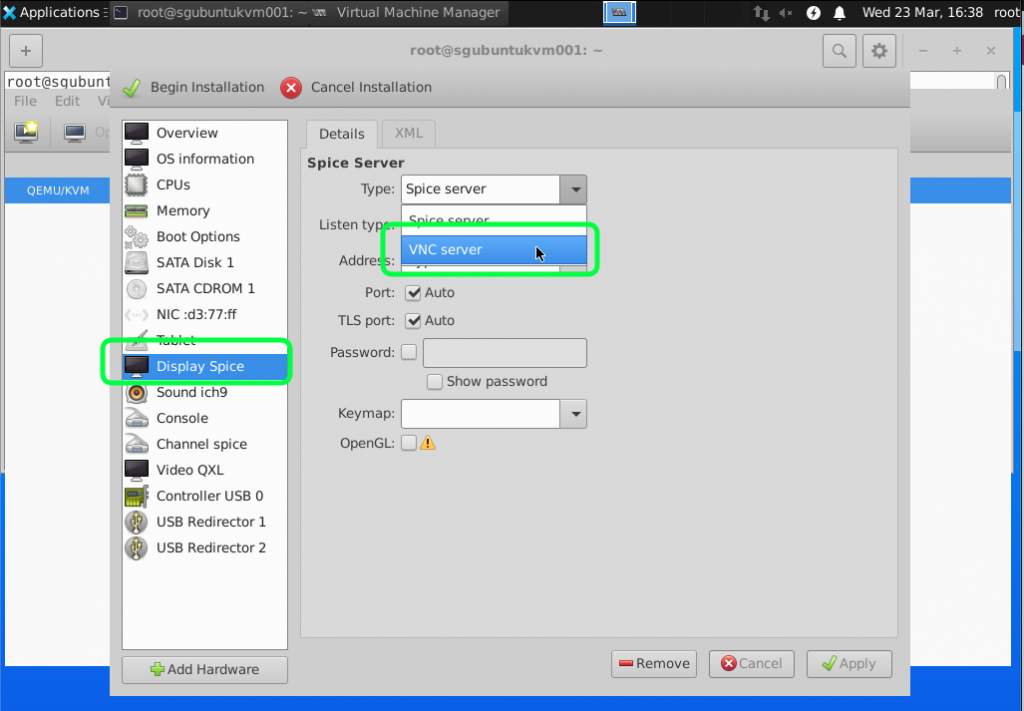
I find VNC Server Display better for installing Windows Server. For Spice I sometime lose the keyboard control.
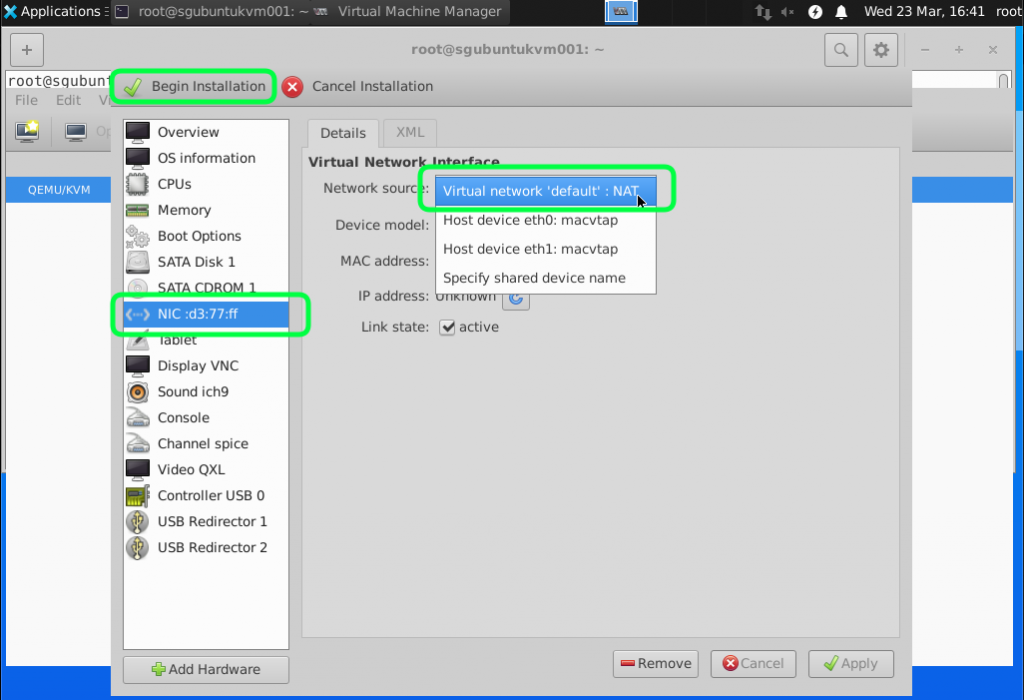
We are going to use the default NAT just to test the connectivity and ensure that the virtual nic/network is working. We will go through the bridge mode in the next tutorial. You can start the installation by clicking on Begin Installation.
Once that is done you can go through the normal windows installation process. Depend on the resources and the connection to the internet it might take some time to complete the installation.
To allow non root (sudo) users that you have added to the libvirt group to be able to configure the VM you need to edit the /etc/libvirt/libvirtd.conf file.
nano /etc/libvirt/libvirtd.conf
Add or uncomment the following and change the permission accordingly.
unix_sock_group = “libvirt”
unix_sock_rw_perms = “0770”

Restart the libvirtd service.
sudo systemctl restart libvirtd.service
You wanted to install the windows 2019 server on a hypervisor and the option that you have right now is to use the QEMU KVM hypervisor. Then you are in the right place.
And when it comes to virtualization I love KVM, as it is Open-source and free too. Whenever I had to choose between hypervisors I would always prefer KVM than anything else.
I was working for Palo Alto and Checkpoint lab the other day, and I wanted to test out the LDAP integration with the firewall.
The only way I can test LDAP configuration is by installing the windows server with its services in it. So I decided to spin up the window server 2019 in KVM.
The Windows server 2016/2019 works really well with the KVM hypervisors. Since there are support virtio drivers, you get to install all the display, network, and graphics related drivers in it.
If you are new to KVM, don’t worry, I have covered some of the useful KVM commands here, I would highly recommend you check them out. It will be useful when you wanted to manage the VM’s with KVM.
In the past, I covered the installation of windows 10 on a Centos/Redhat and Ubuntu KVM hypervisors, and in this article, I am going to install windows server 2019 on a KVM hypervisor.
Prerequisite
You need to have a good configuration machine or a server with Linux installed in it, either Centos/Redhat or Ubuntu with GUI. And we can install KVM software in it.
To install kvm on Ubuntu you can enter the command below.
sudo apt update
sudo apt install qemu-kvm bridge-utils virt-manager libosinfo-bin -y
If you are using Centos then the command will be as follows.
yum install qemu-kvm libvirt virt-install virt-manager virt-install -y
Windows server 2019 ISO image.
If you have the server ISO image then great, or you can get a trail from the Microsoft site here.
Windows 2019 VirtIO drivers
You can download the VirtIO drivers here
How to install windows server 2019 in KVM?
- Creation of windows server VM.
- Setup windows resources.
- Customize configuration before install.
- Configure the CPU for the KVM windows guest properly.
- Add windows VirtIO driver.
- Change the boot order.
- Start the Windows installation.
- No windows harddisk in KVM ?, fix that now.
- Set the Administrator Password.
- Install the virtio drivers for windows server 2019.
1. Creation of windows server VM.
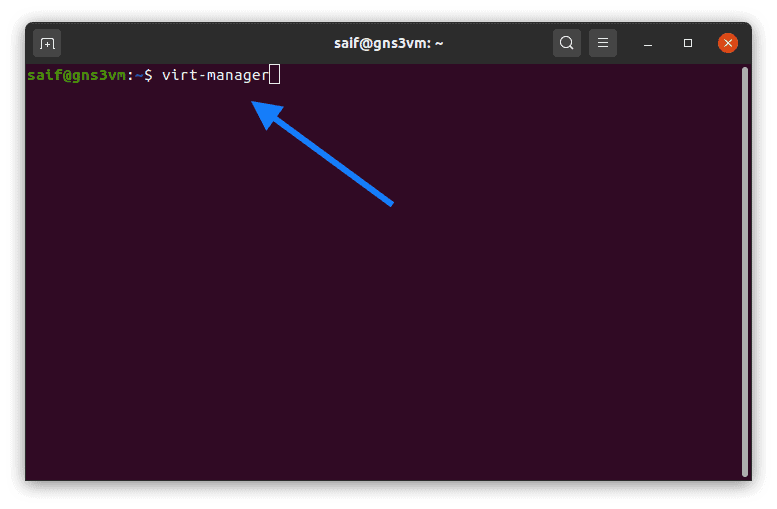
Open terminal and type virt-manager and hit enter.
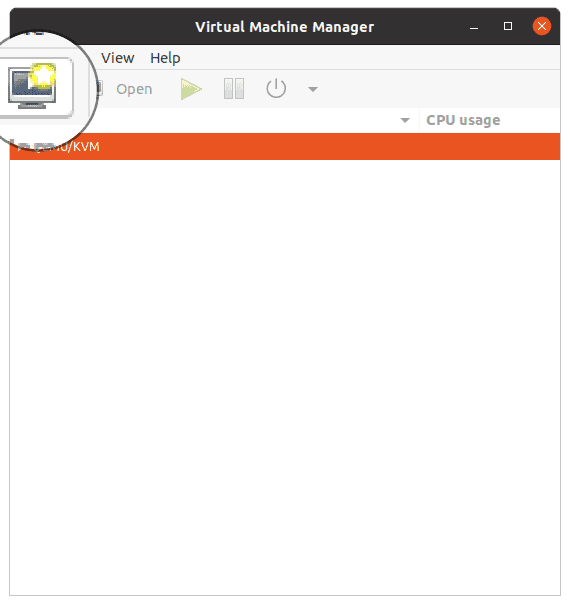
A new virtual machine manager window now pop up, click on create new virtual machine icon.
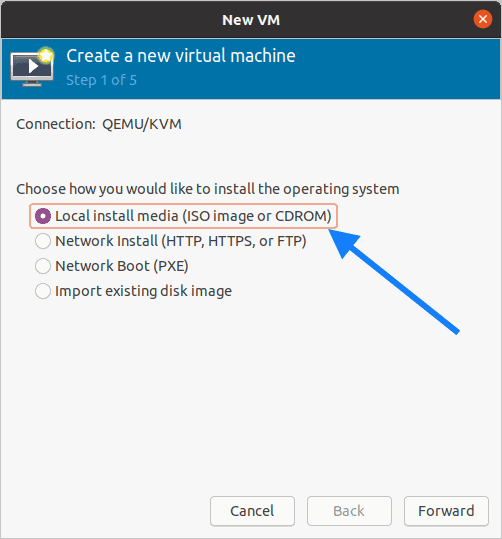
In the creation of New VM pop up, select Local install media (ISO image or CDROM), then click on Forward.
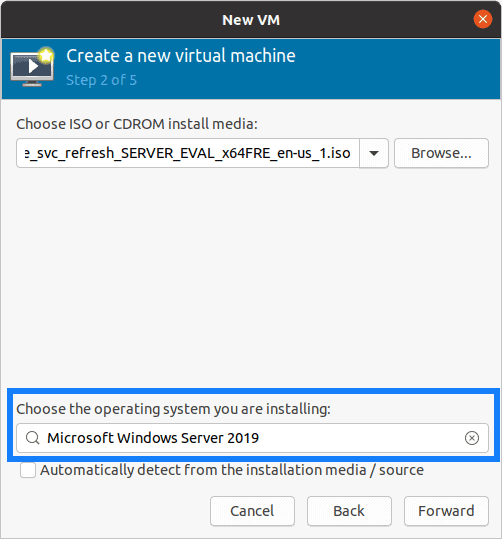
You now have to choose the Microsoft windows server 2019 as the operating system.
Uncheck the option which says Automatically detect from the installation media/source and start typing Microsoft window server 2019.
Choose the same from the list and click on Forward.
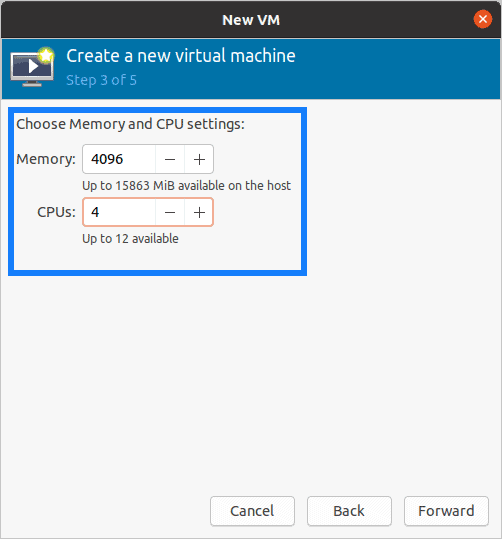
You can now configure the Memory and CPU for the machine, I am adding memory as 4GB and 4 CPU.
2. Setup windows resources.
Configure the the memory and CPU here and click on Forward.
You may add more if you require.
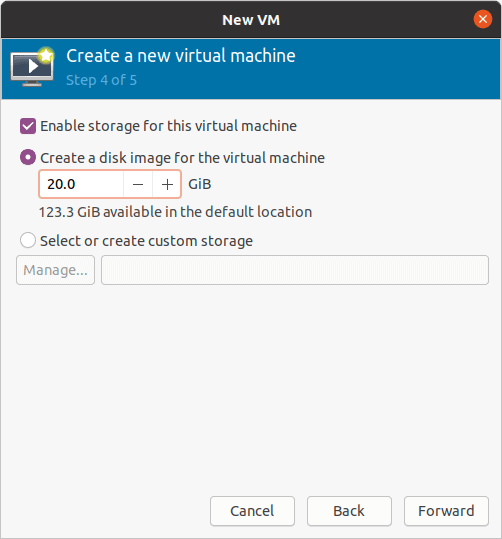
In the windows Storage, by default it would pick up the storage size as 40GB, I am changing it to 20GB.
You may select the default size or more, but don’t worry, you can change the storage size later by following the guide here.
3. Customize configuration before install.
Check the option which says Customize configuration before install and click on Finish.
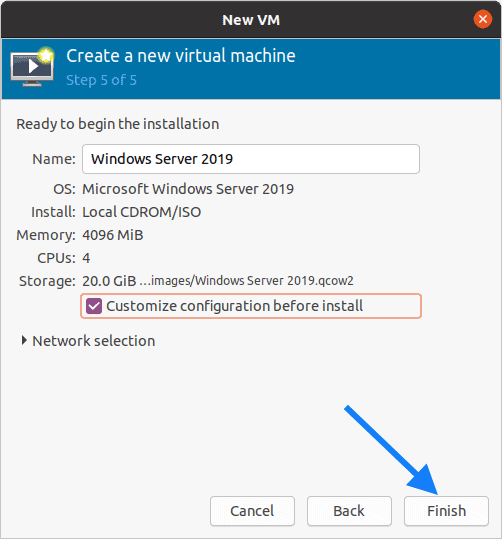
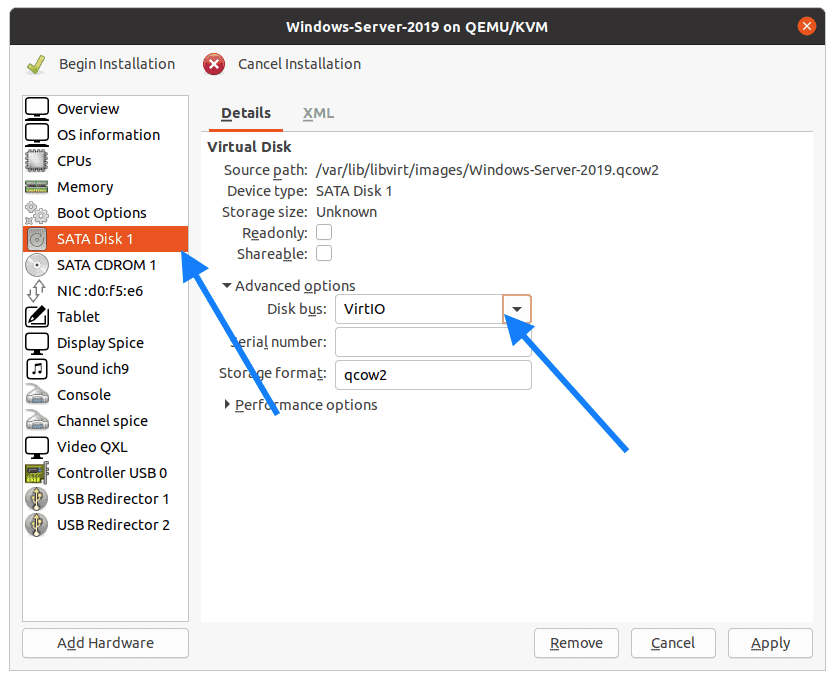
You will now be presented with QEMU KVM customization wizard.
First lets go ahead and change the storage to VirtIO, click on SATA Disk 1 and in the disk bus select VirtIO and click on Apply.
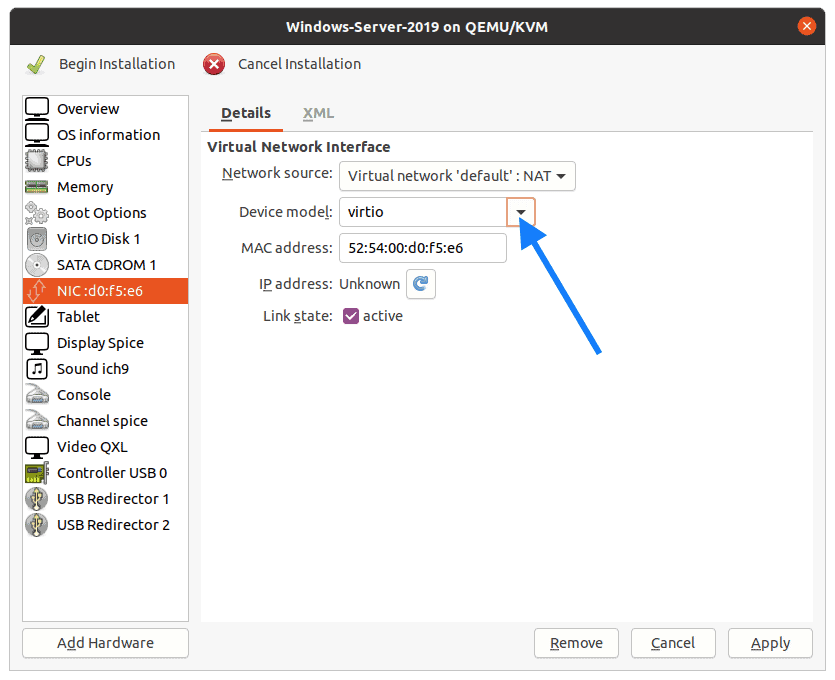
Click on the Network Interface Card and change it to Virtio here as well and click on Apply.
Notice that I have selected the NAT as the interface, this would help my server to connect the internet via the host machine.
In production, this must be different, as you might use a bridge interface that connects to the switch to get to the network.
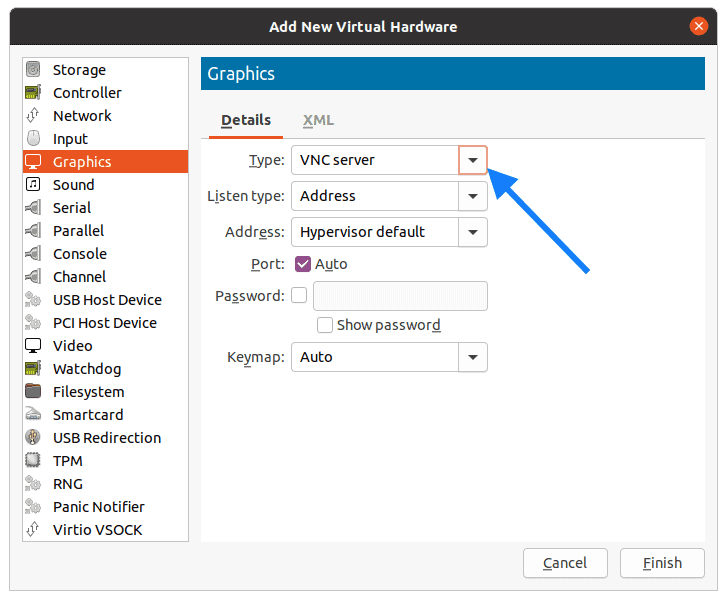
Next lets go ahead and add the VNC server as the Graphics.
Click on Add hardware again, and from the list select Graphics and in Type select VNC Server, then click on Finish.
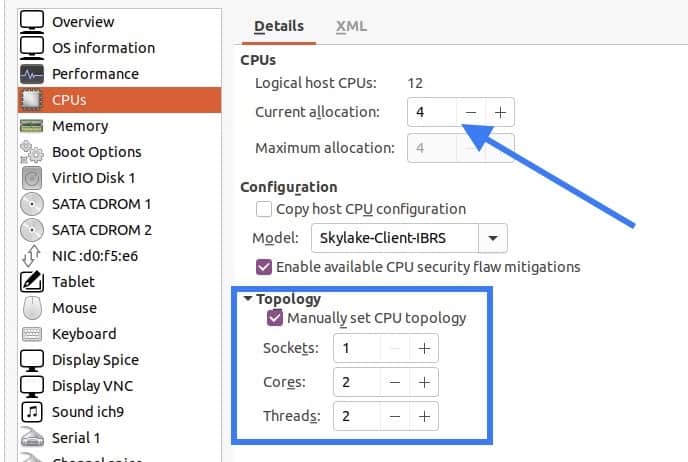
4. Configure the CPU for the KVM windows guest properly.
Though we configured the CPU as 4, it will actually not pick up all four cores until you specify in the configuration.
So make changes like below. Click on CPU’s and in the Current Allocation specify 4 CPU and in the topology check the options Manually set CPU topology and in Sockets type 1 and cores 2 and Threads 2 as well. You may change it as per your requirements.
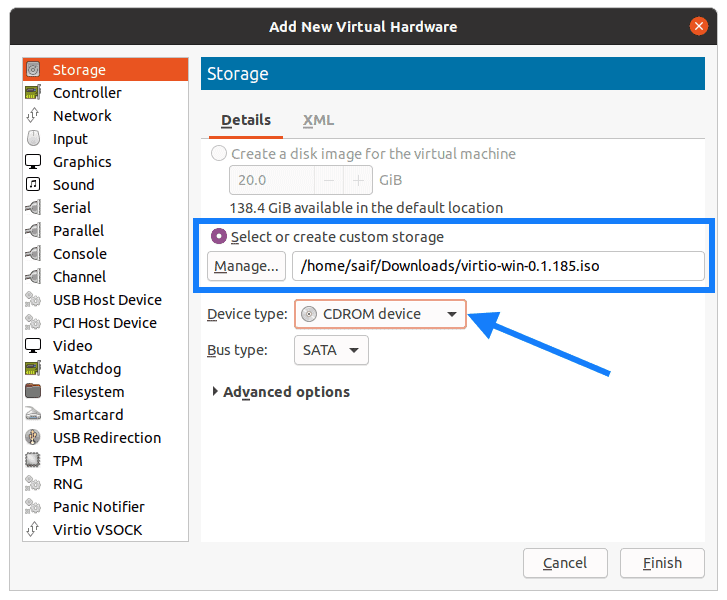
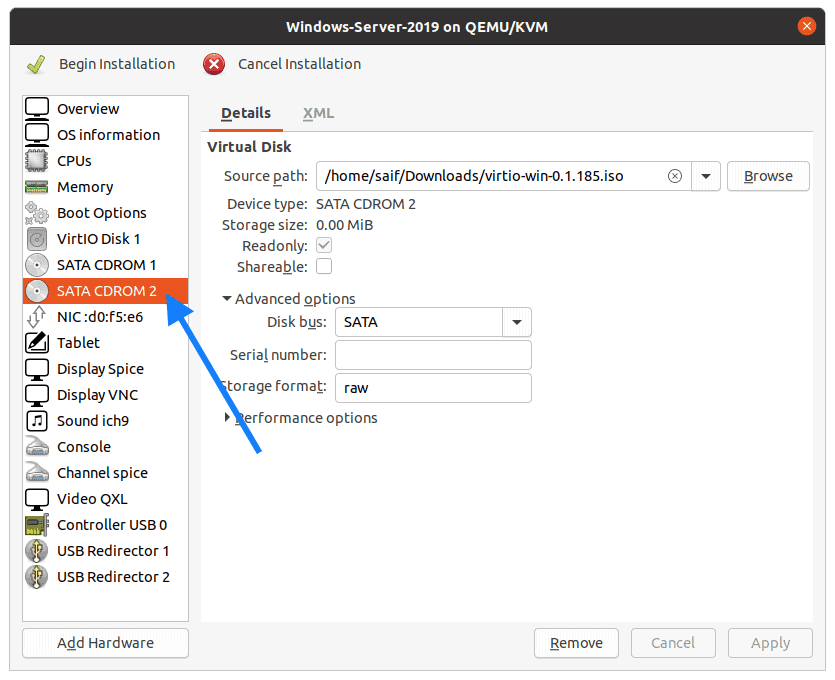
5. Add windows VirtIO driver.
Remember that we have download virtio drivers for windows server 2019 at the beginning? Lets add that now.
CLick on Add hardware and select storage.
Check the option Select or create custom storage and click on Manage to attach the windows kvm drivers to the configuration.
In the device type select CDROM device from the list then click on Finish.
When you look VM configuration you should be able to see there are two CDROM’s.
CDROM1 is for the windows 2019 iso image.
CDROM2 is for the windows 2019 KVM Qemu drivers.
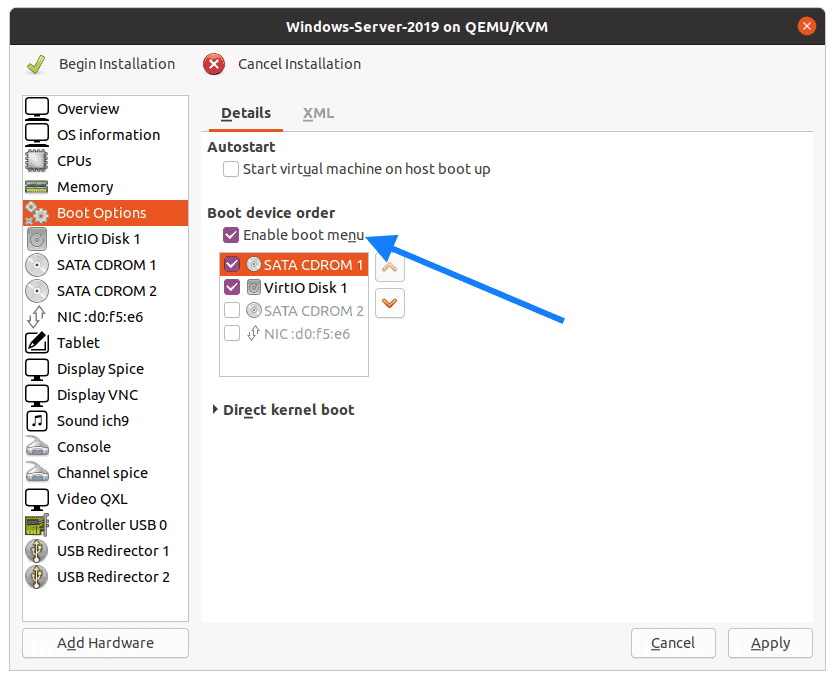
6. Change the boot order.
You need to make sure that you choose windows ISO image during the boot when you proceed with the installation.
Click on Boot options and check the options which says Enable boot menu.
And check the SATA CDROM1 and VirtIO disk 1.
Move CDROM1 to be the primary boot device.
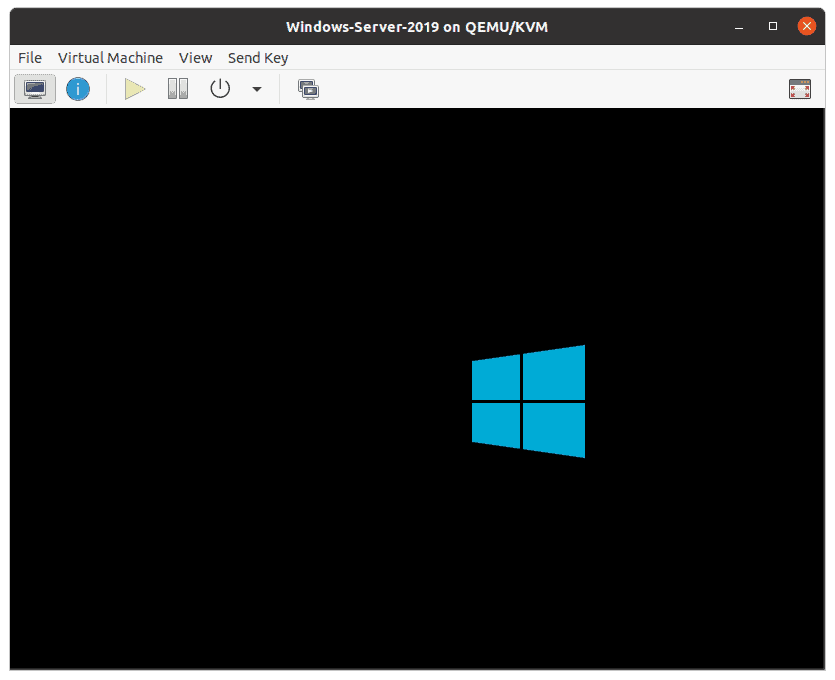
7. Start the windows installation.
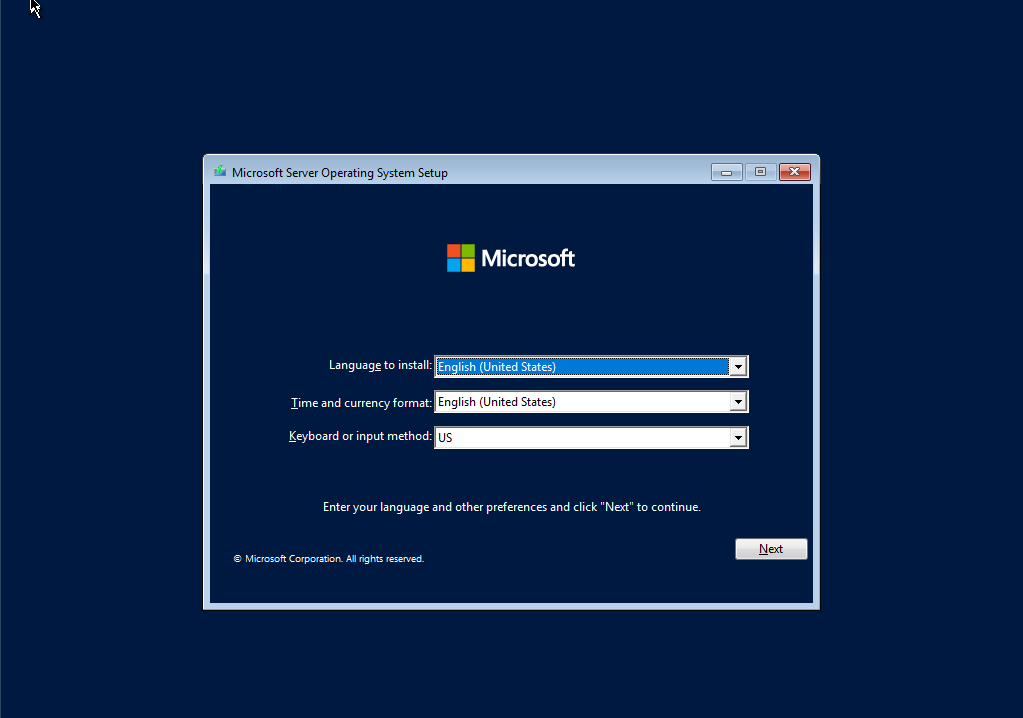
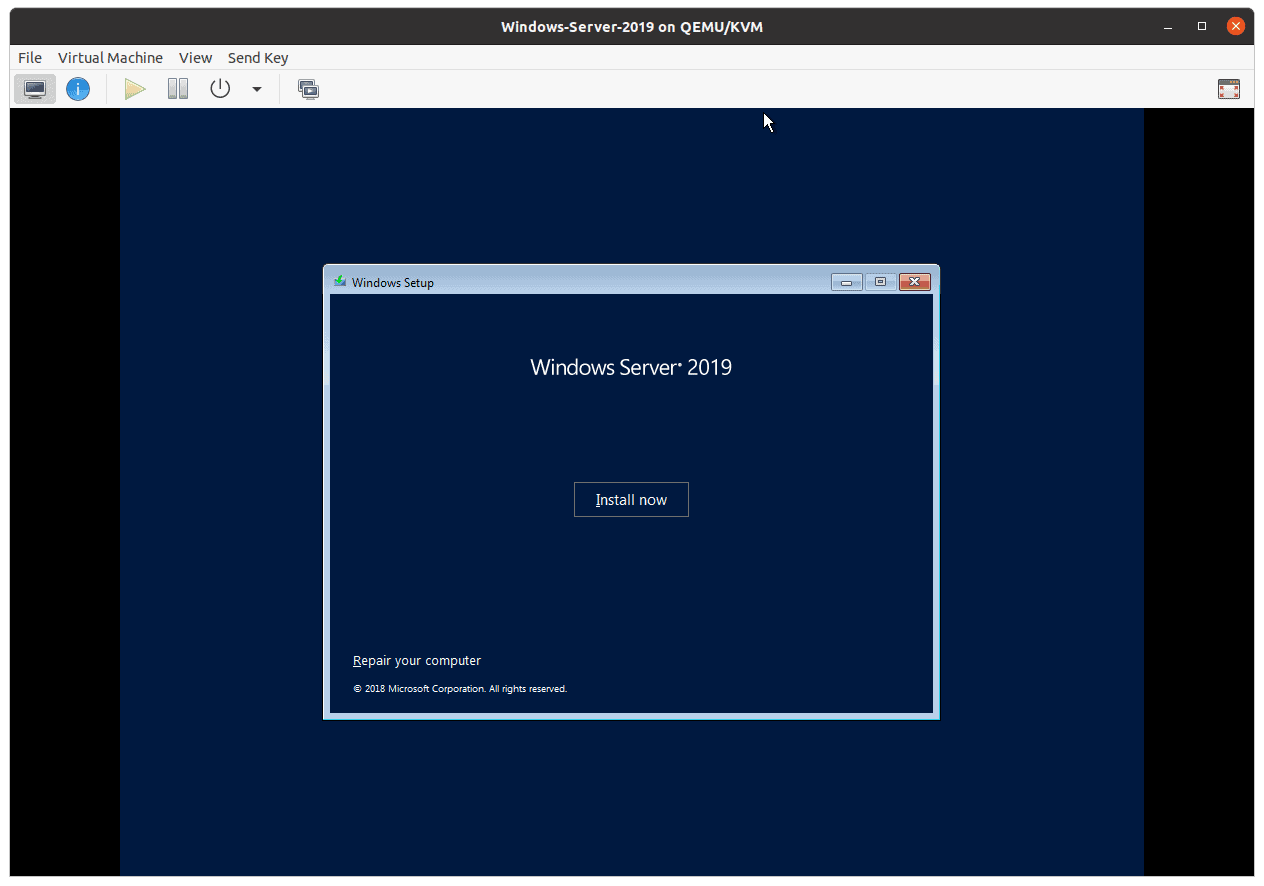
You may now click on begin installation and you should be able to see the windows 2019 installation screen appears with the windows logo.
In the setup wizard Choos the Langauge and the country then click on Next.
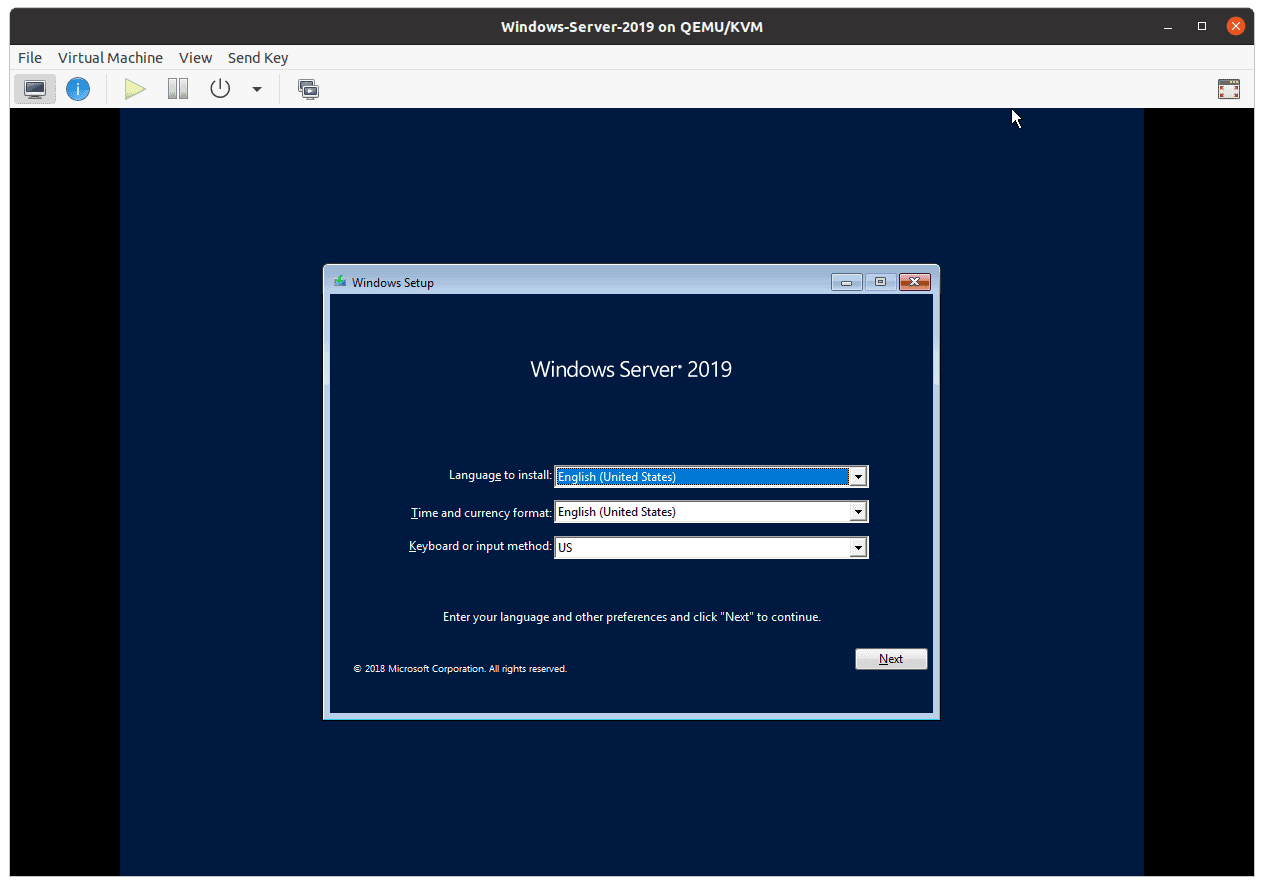
You may click on Install now on the windows Setup wizard.
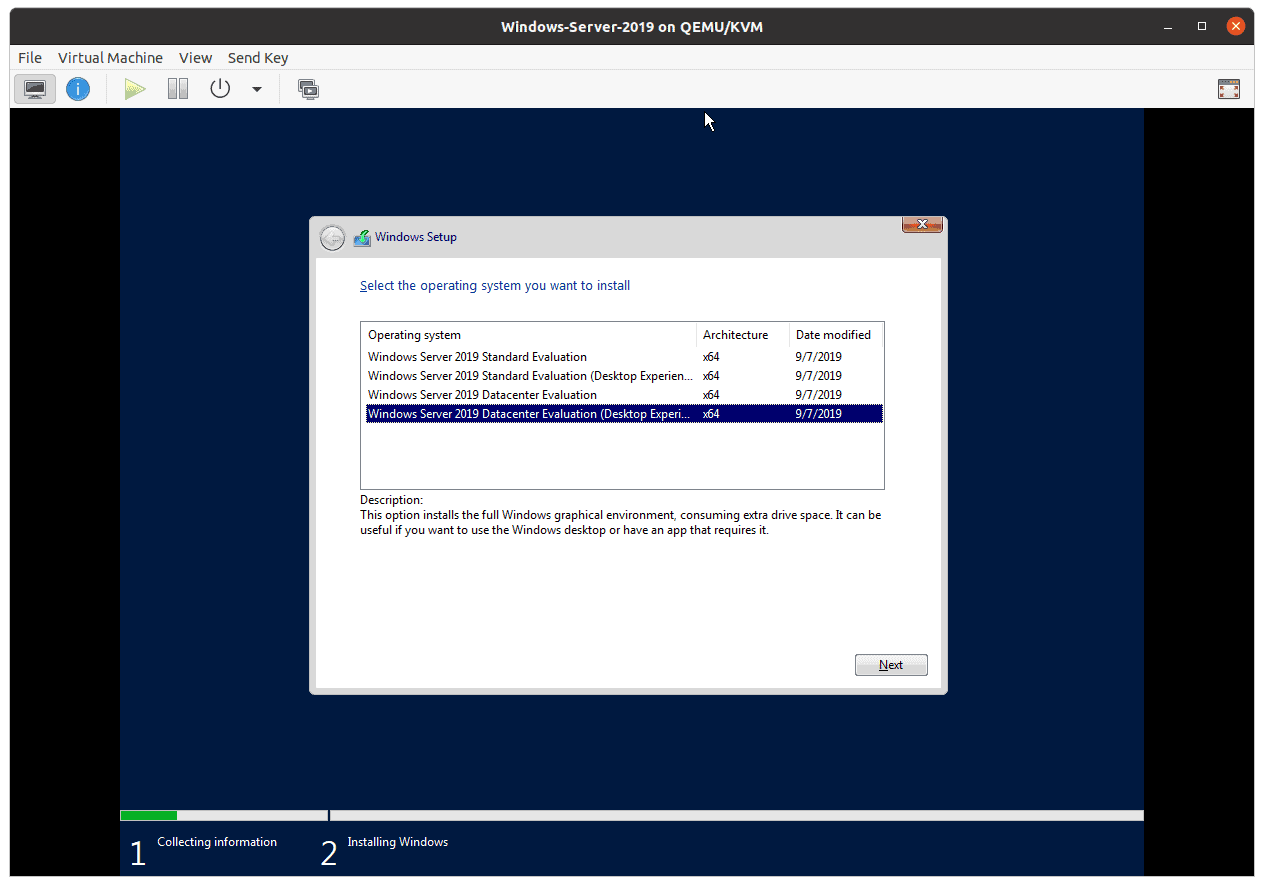
Choose the windows server version that you would like to install then click on Next.
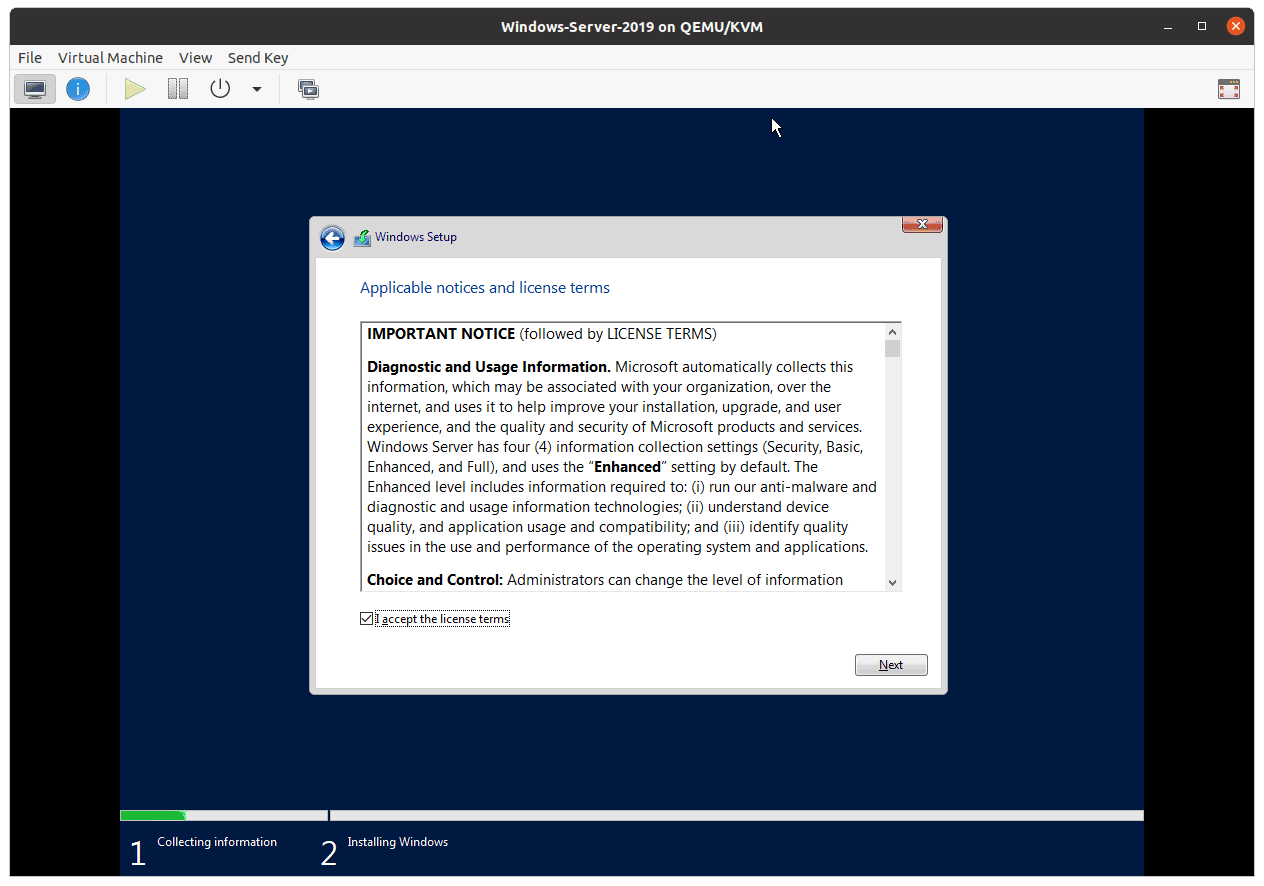
Accept the license agreement then click on next.
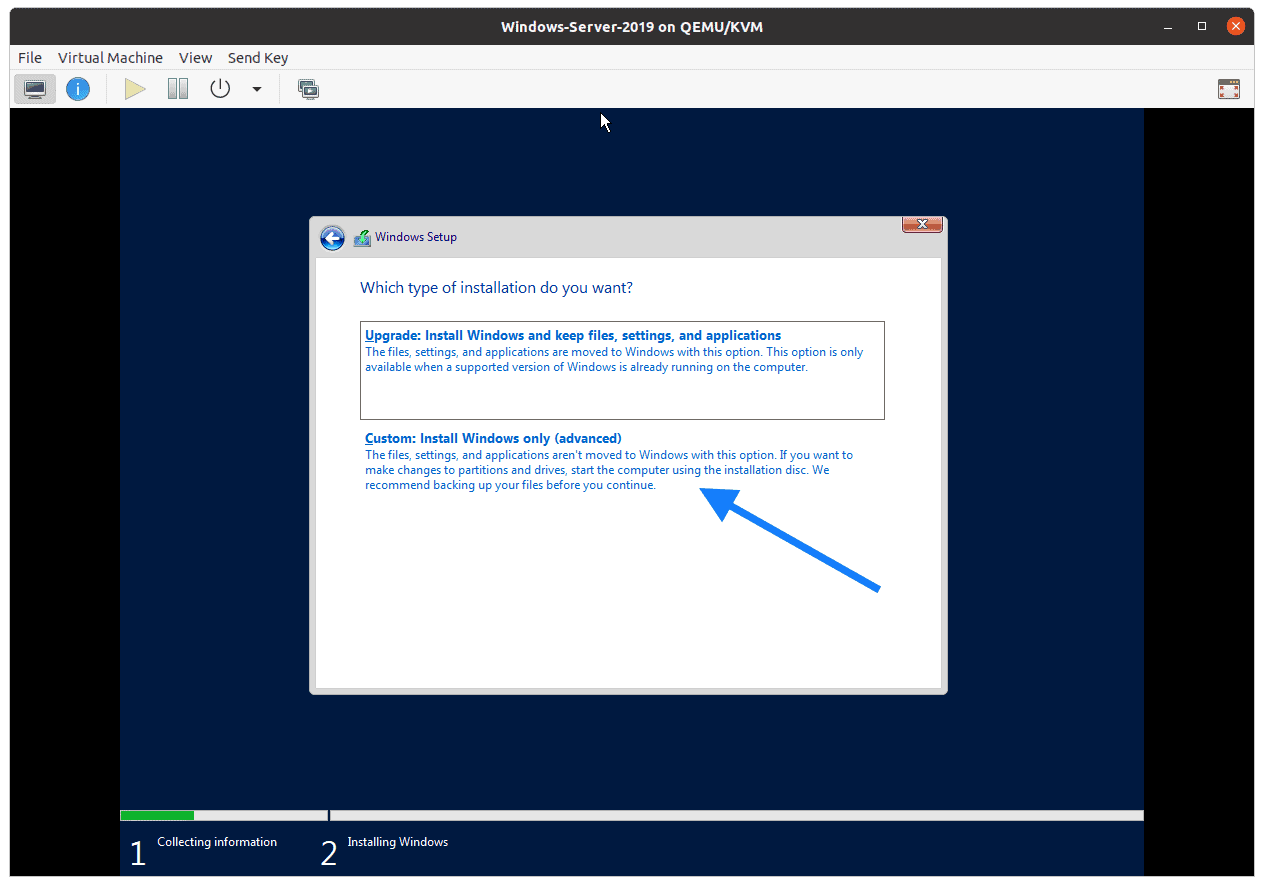
From the installation option choose Custom
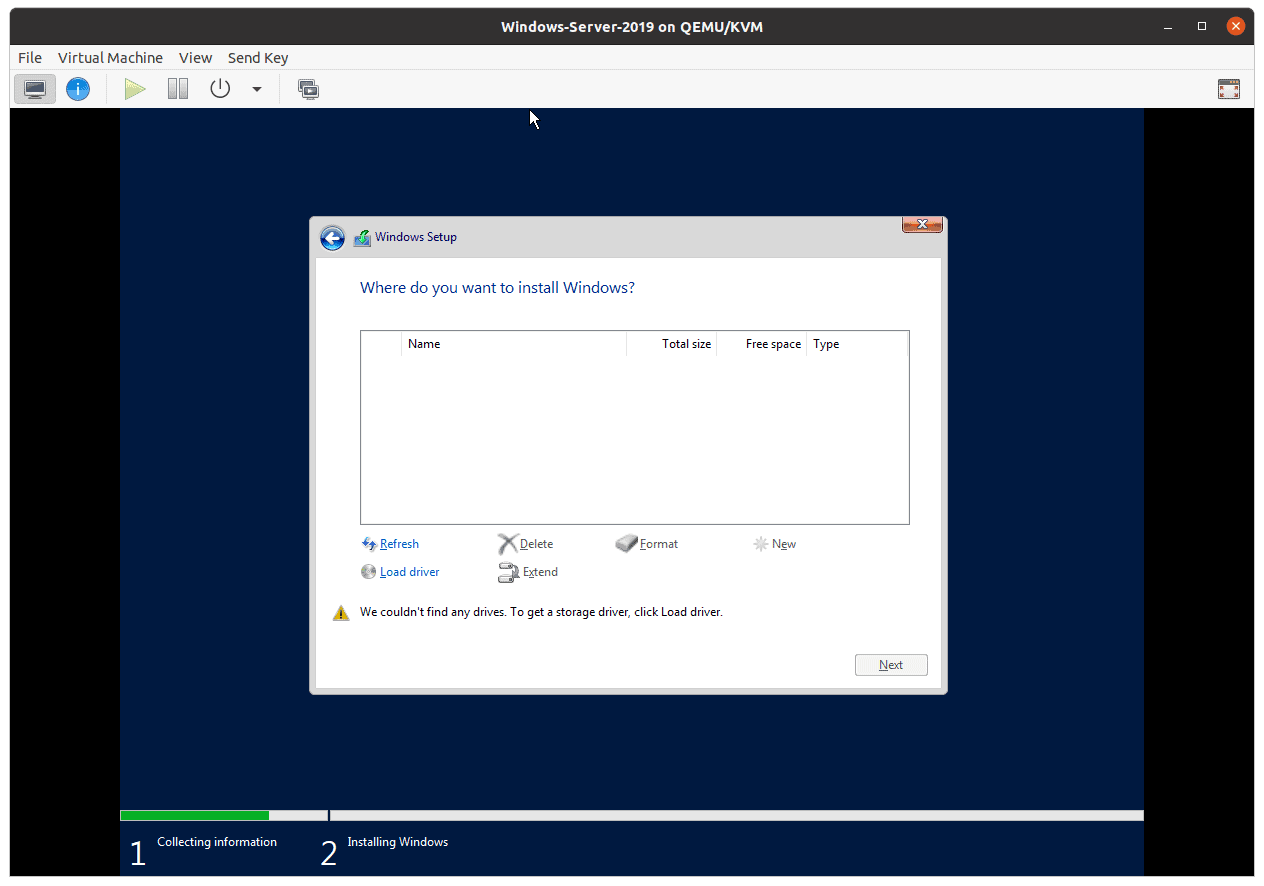
8. No windows harddisk in kvm ?, fix that now.
As you can see the we have added a hardisk of 20GB but we are not able to see them, lets go ahead and fix that by clicking Load driver.
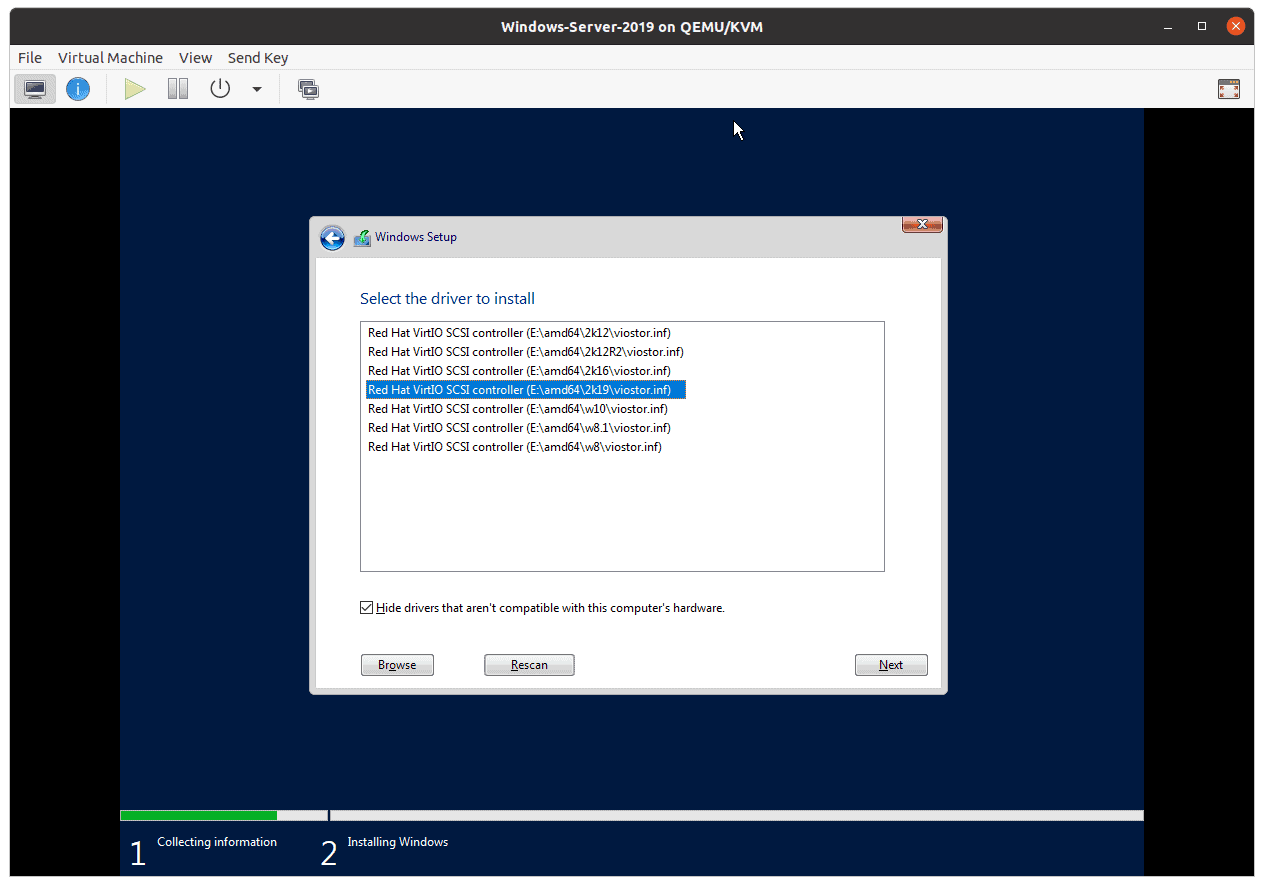
Since we already attached VirtIO driver for windows, the steup wizard will list out available drivers.
Select windows server 2019 from the list and then click on Next.
After few seconds, you should be able to see the harddisk that you have added, select the harddisk then click on Next.
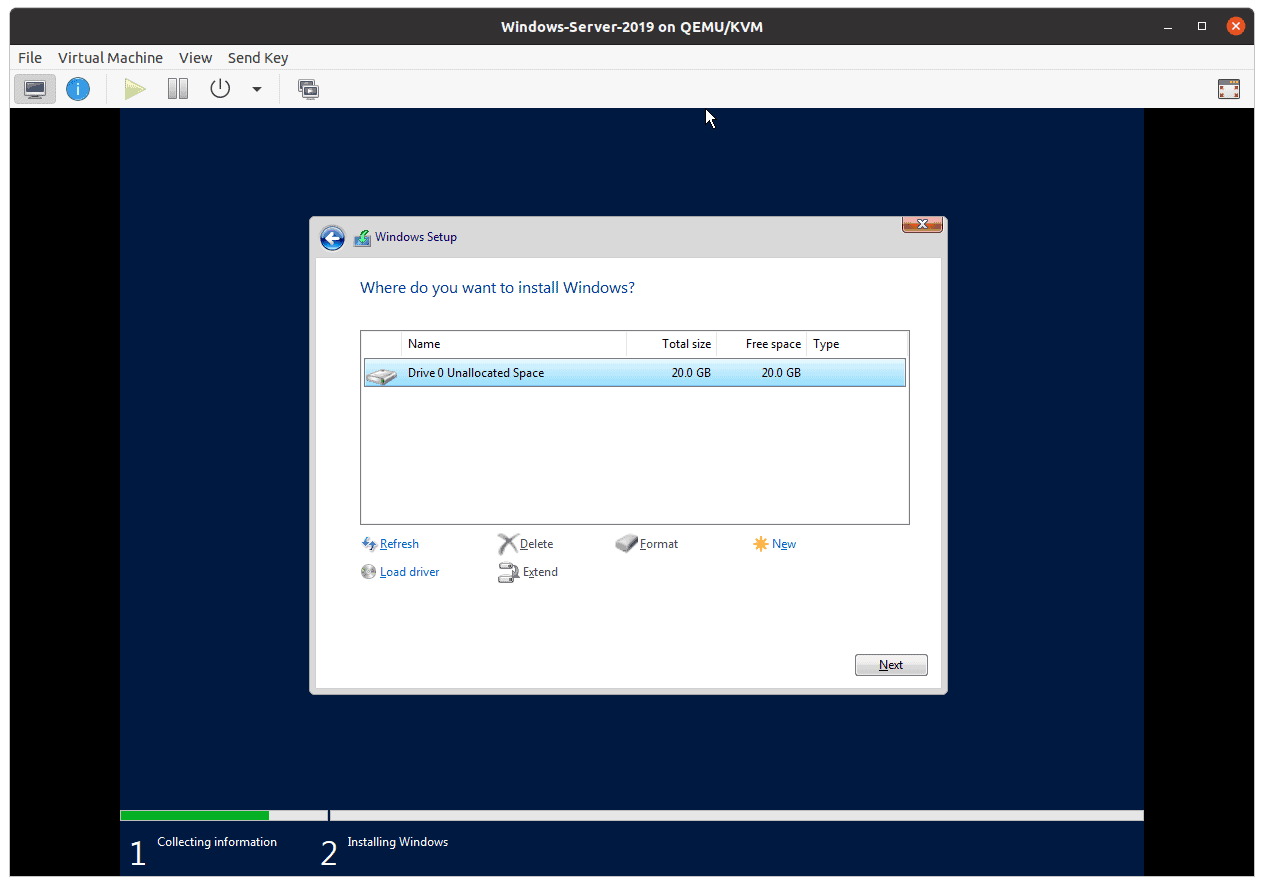
The installation now begin now.
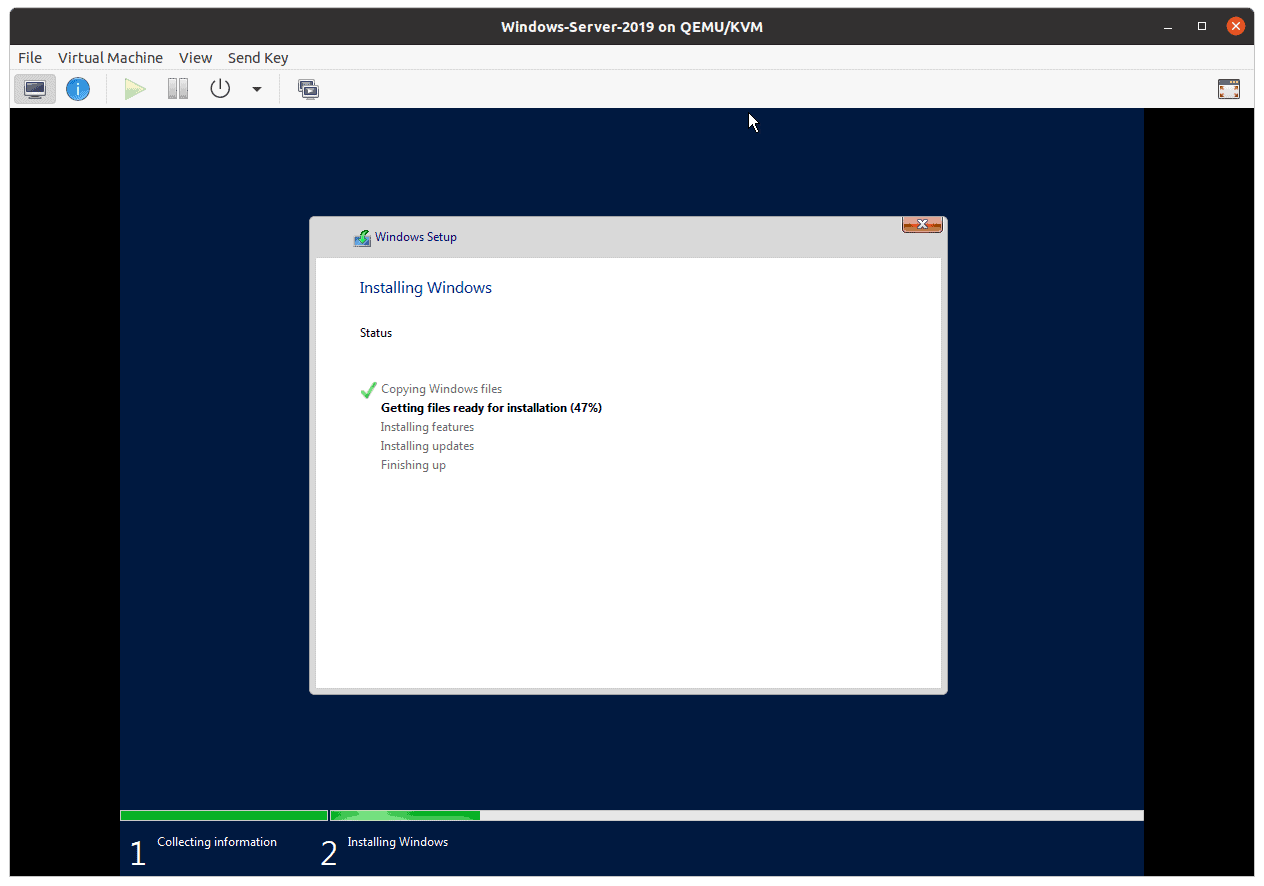
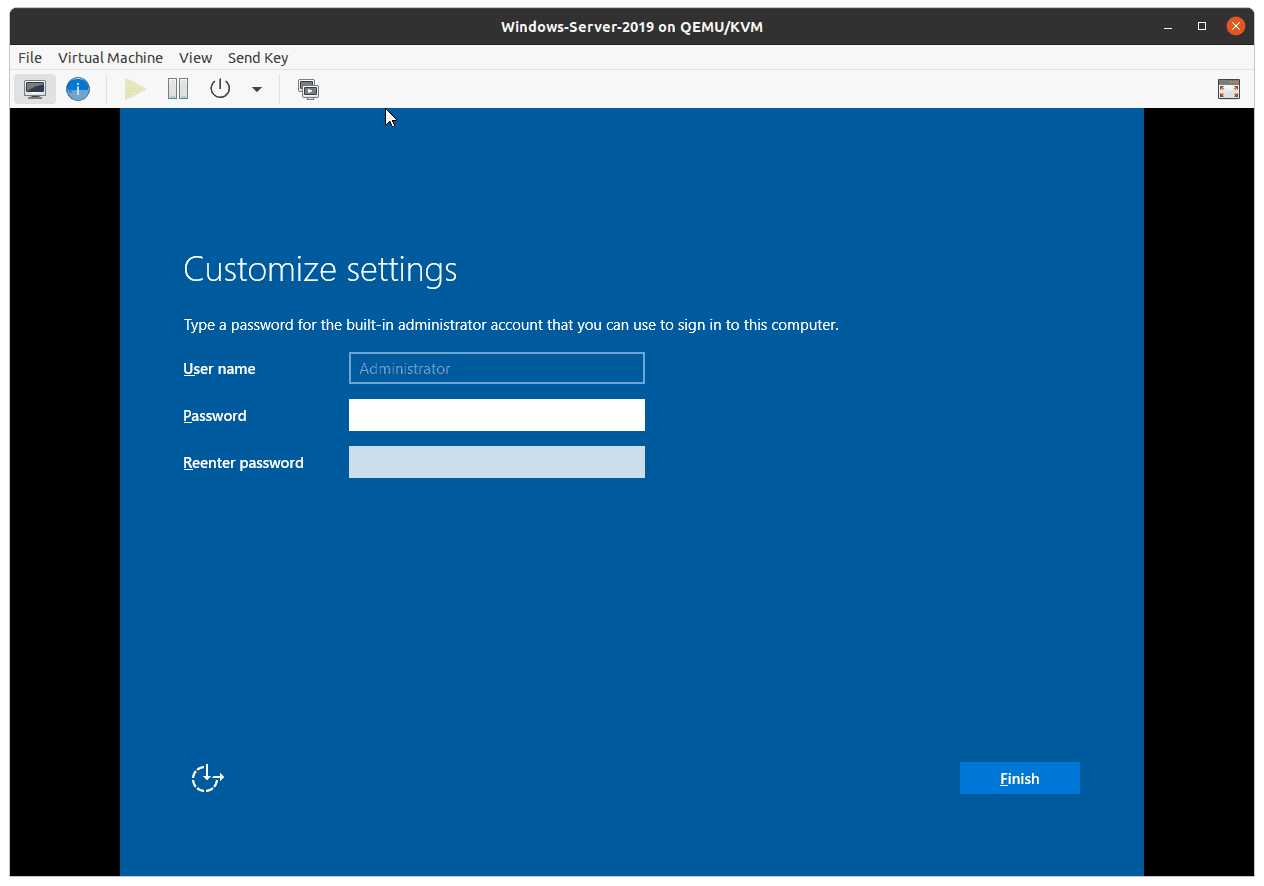
9. Set the administrator Password.
After the installation is completed, it will ask you to setup the Administrators password, type that in and then click on Finish.
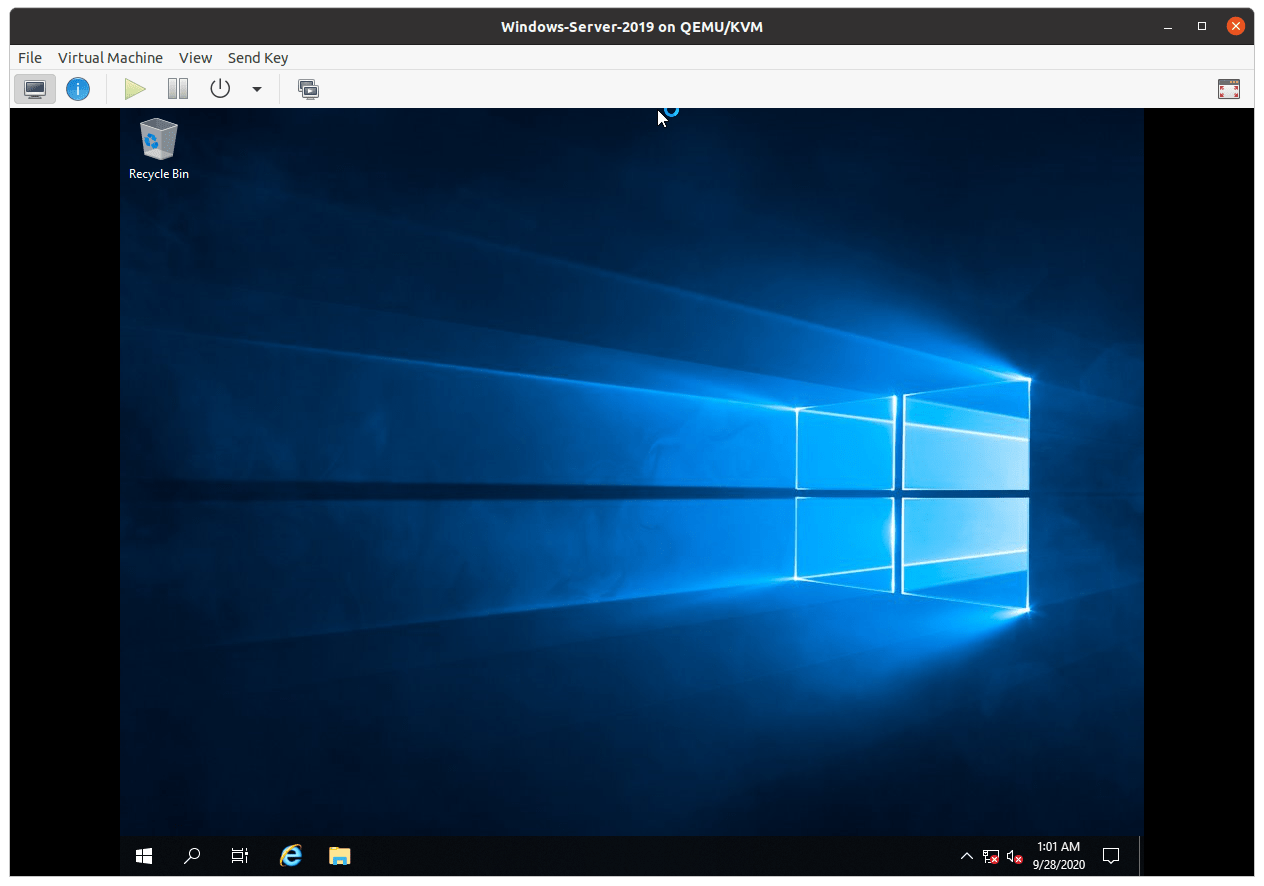
You now will be presented to the windows server 2019 homescreen.
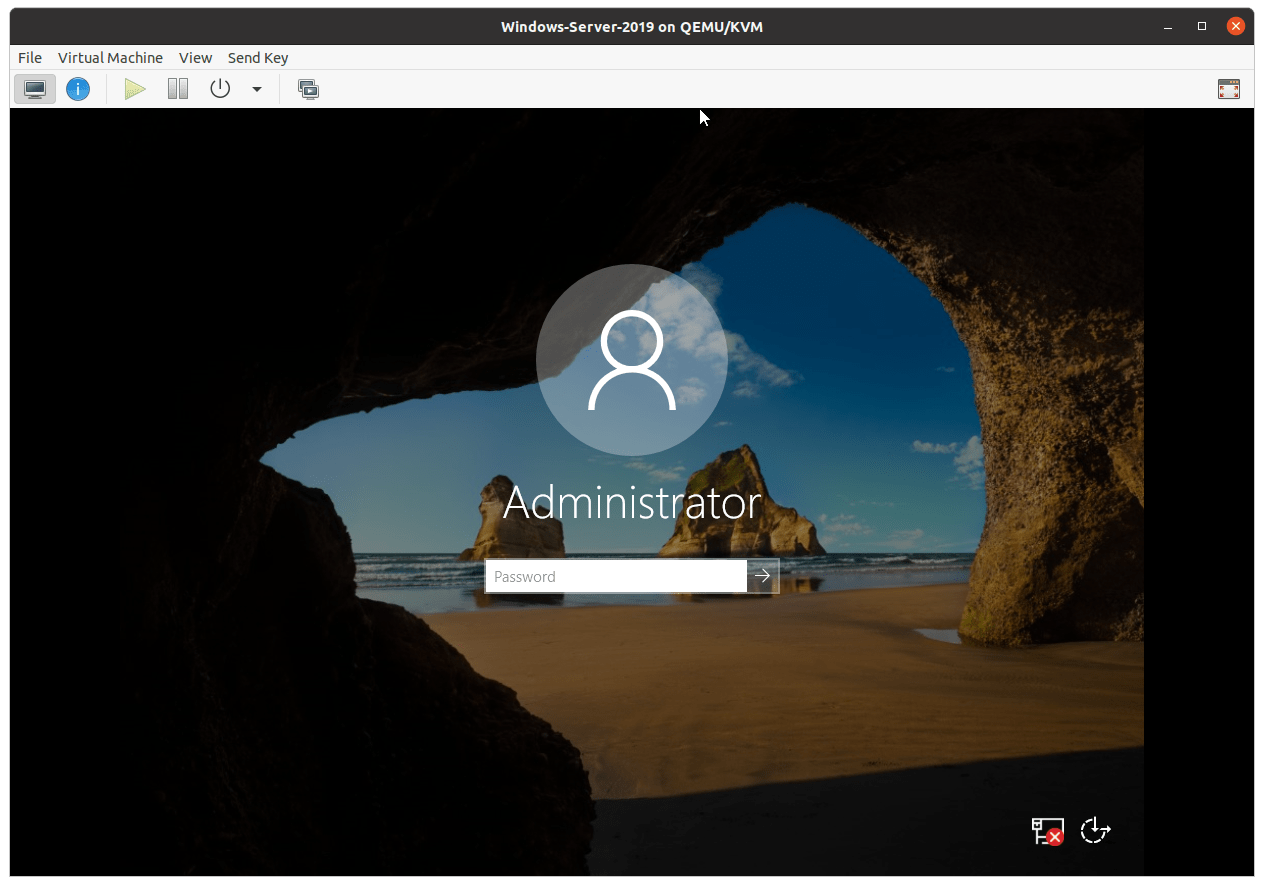
If you lock the machine, it would ask you to press CRL ALT DEL to log back in again.
Type the Administrator password then you should be able to login.
10. Install the virtio drivers for windows server 2019.
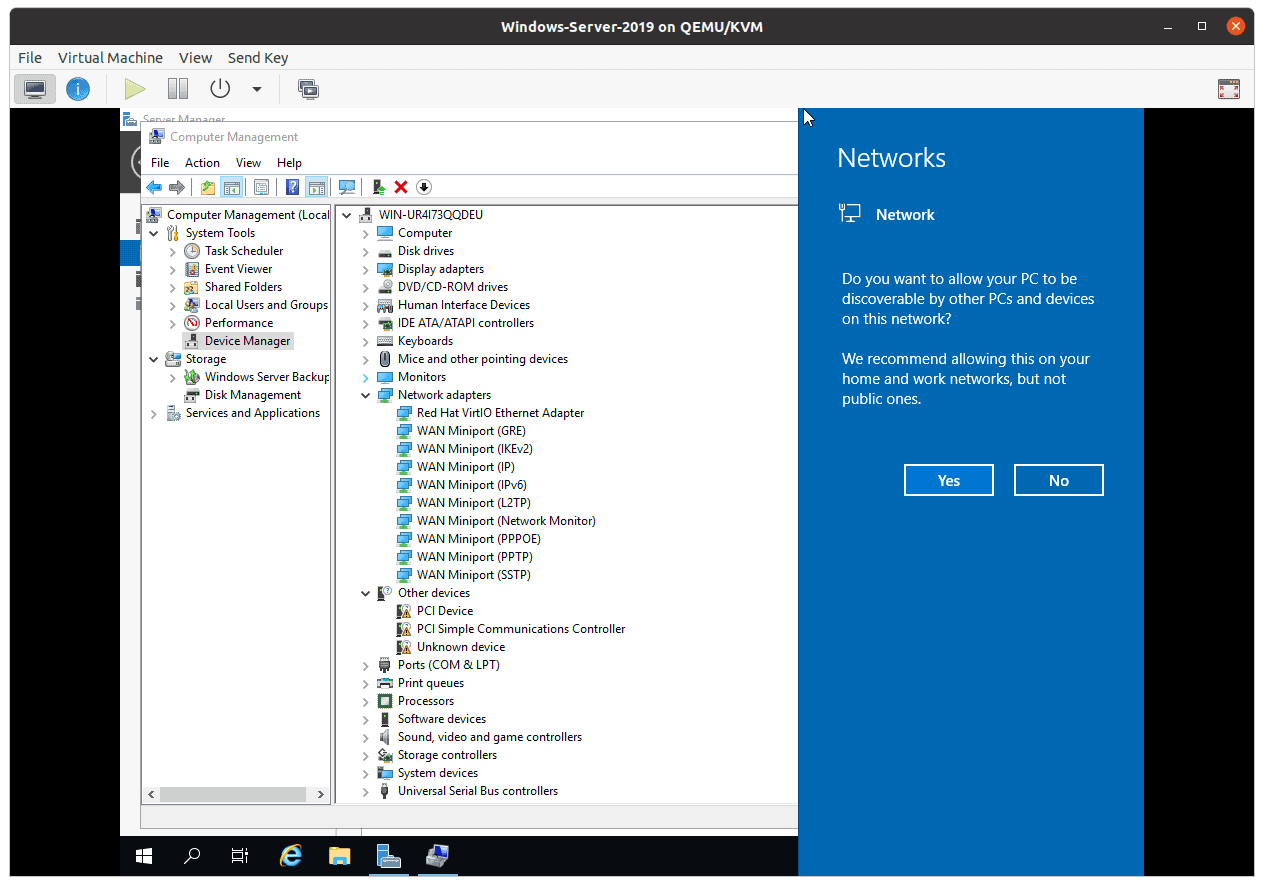
If you looked into the screen, you should be able to see that the network connection is showing x mark, which indicate there is no network confiurated.
Basically we haven’t installed the network driver in order for the windows server to communicate with the network.
In the server manager, click on Tools, then click on Computer management.
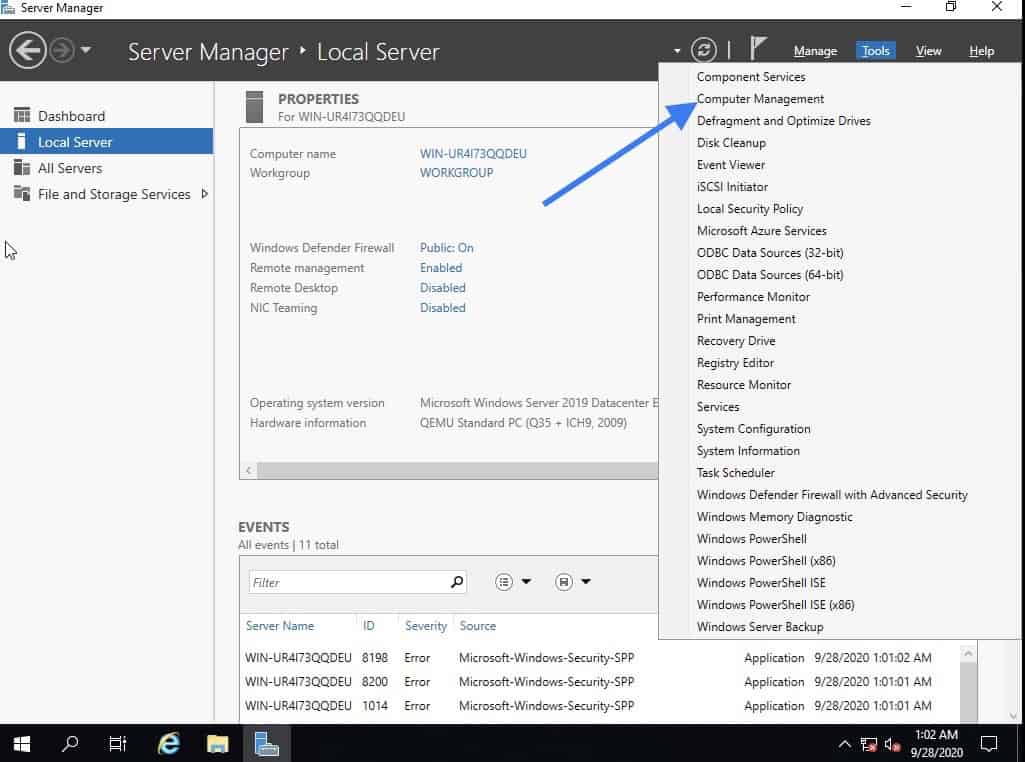
In the computer management, click on Device manager.
You can see under device manager, in Other devices list of drivers that needs to be installed.
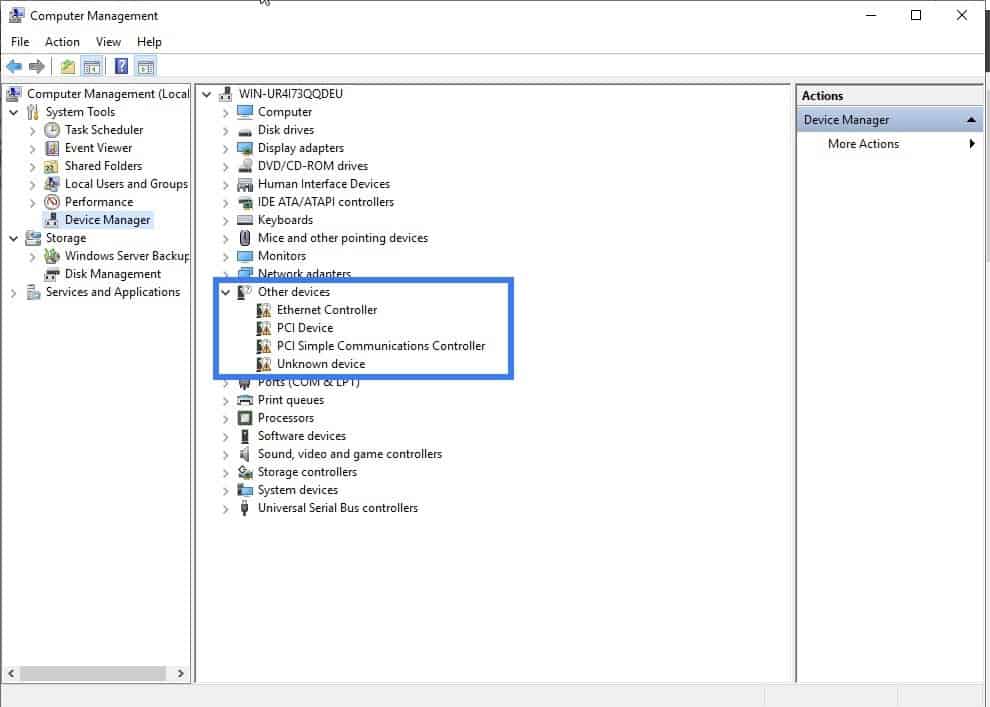
Lets go ahead and install the network driver first.
Right click on Ethernet controller and click on Update driver.
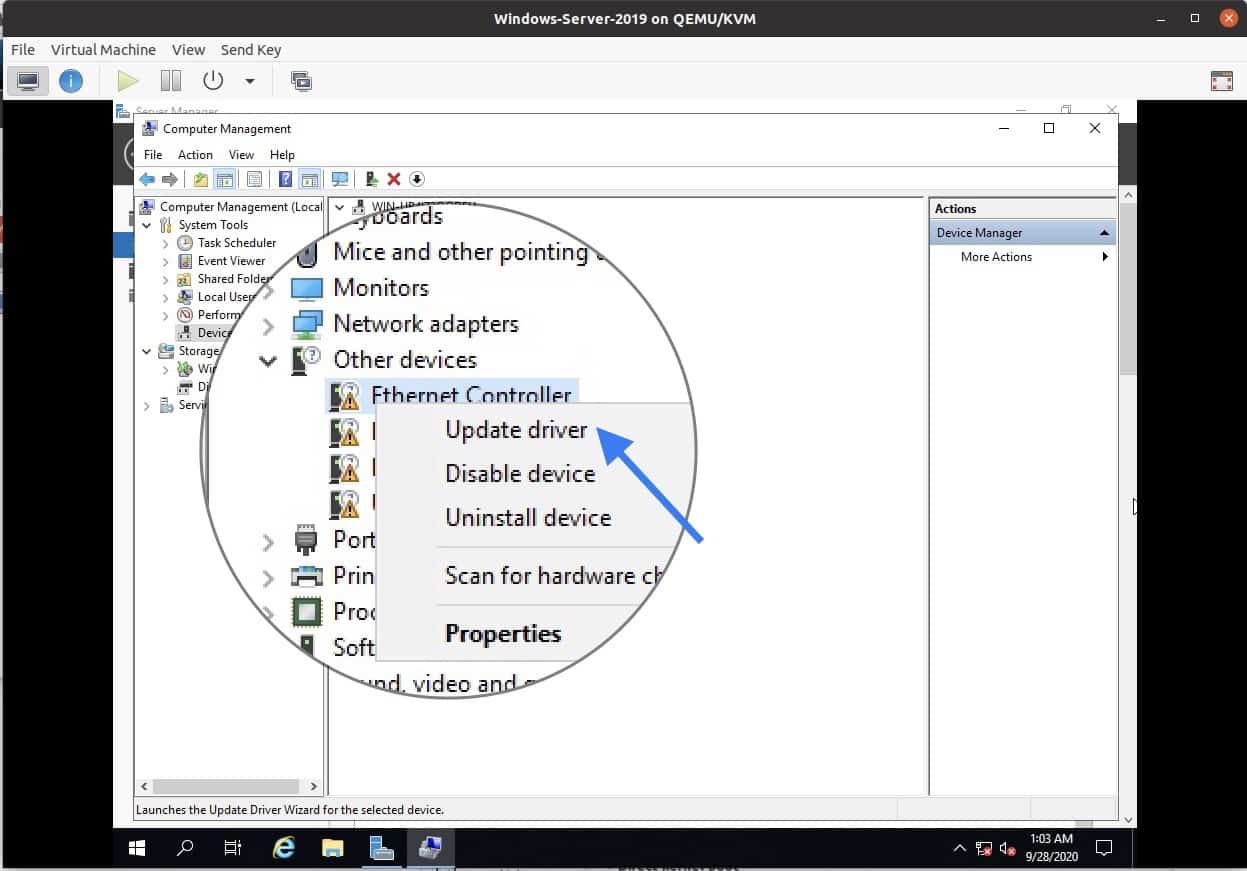
Select the option, browse for my local machine to install the driver.
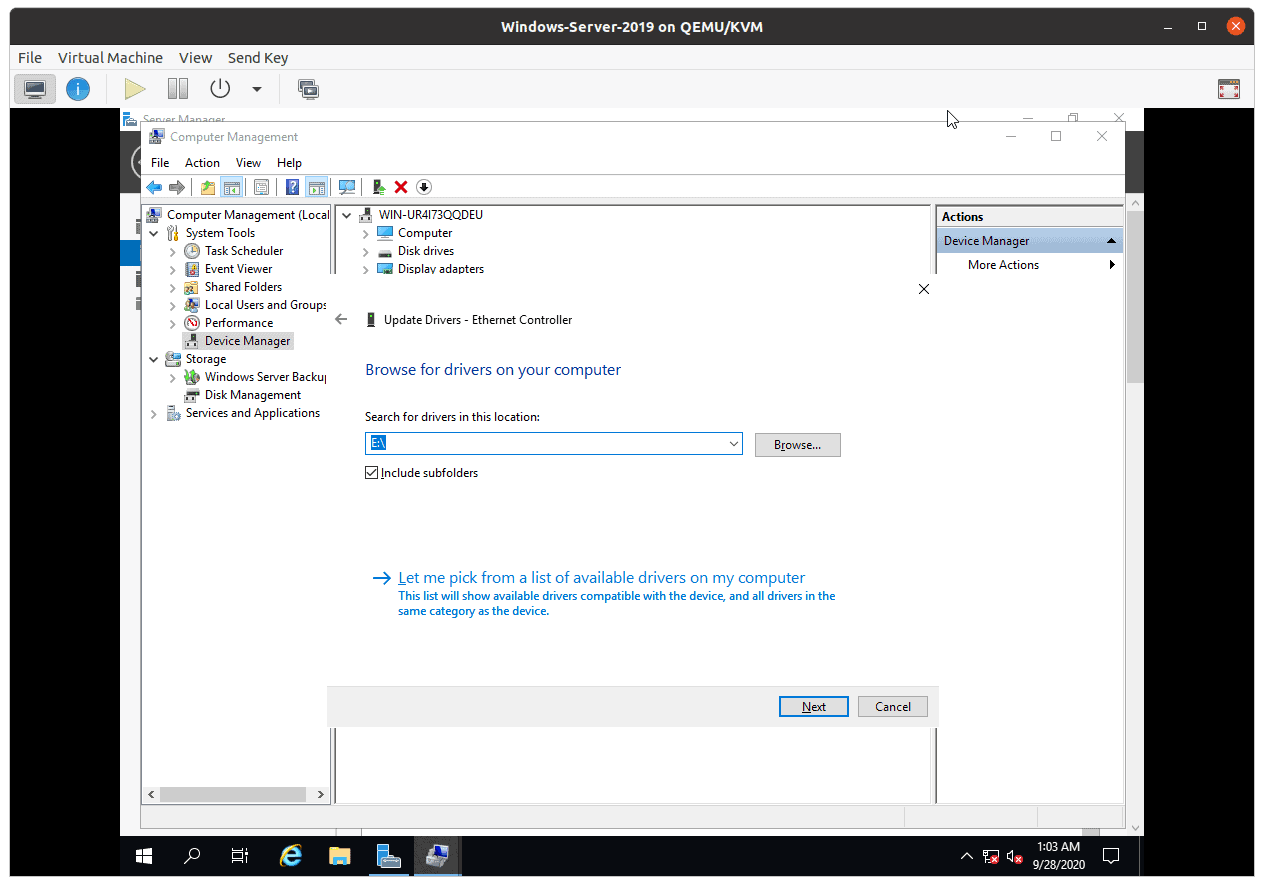
In the browse attach the Windows qemu drivers that you had downloaded earlier in CDROM 2.
Click on next.
You will get a prompt to install the Redhat network driver, click install.
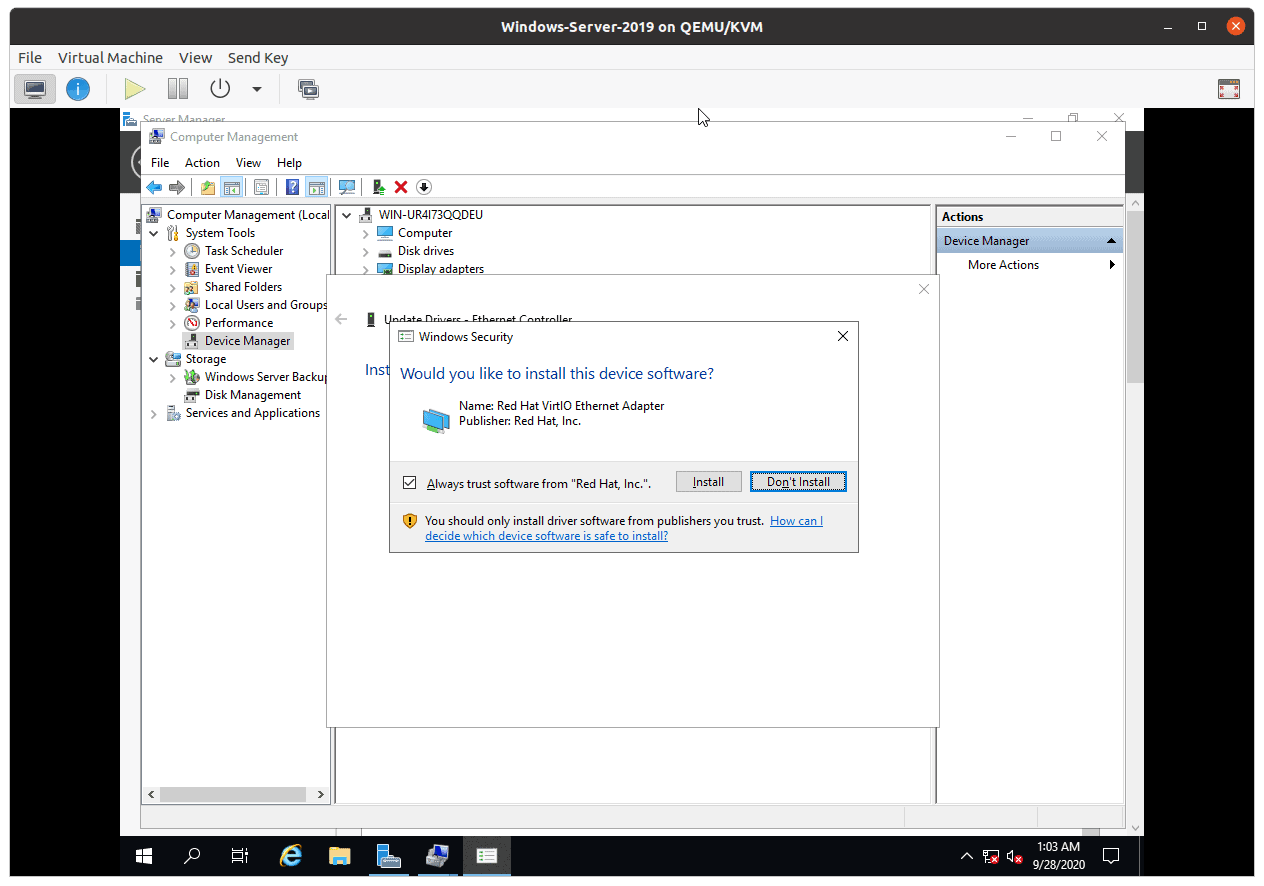
Once the installation is complete, you should now be able to see the netwokrs notification asking whether you want to share the network or not, which I clicked on No at the moment.
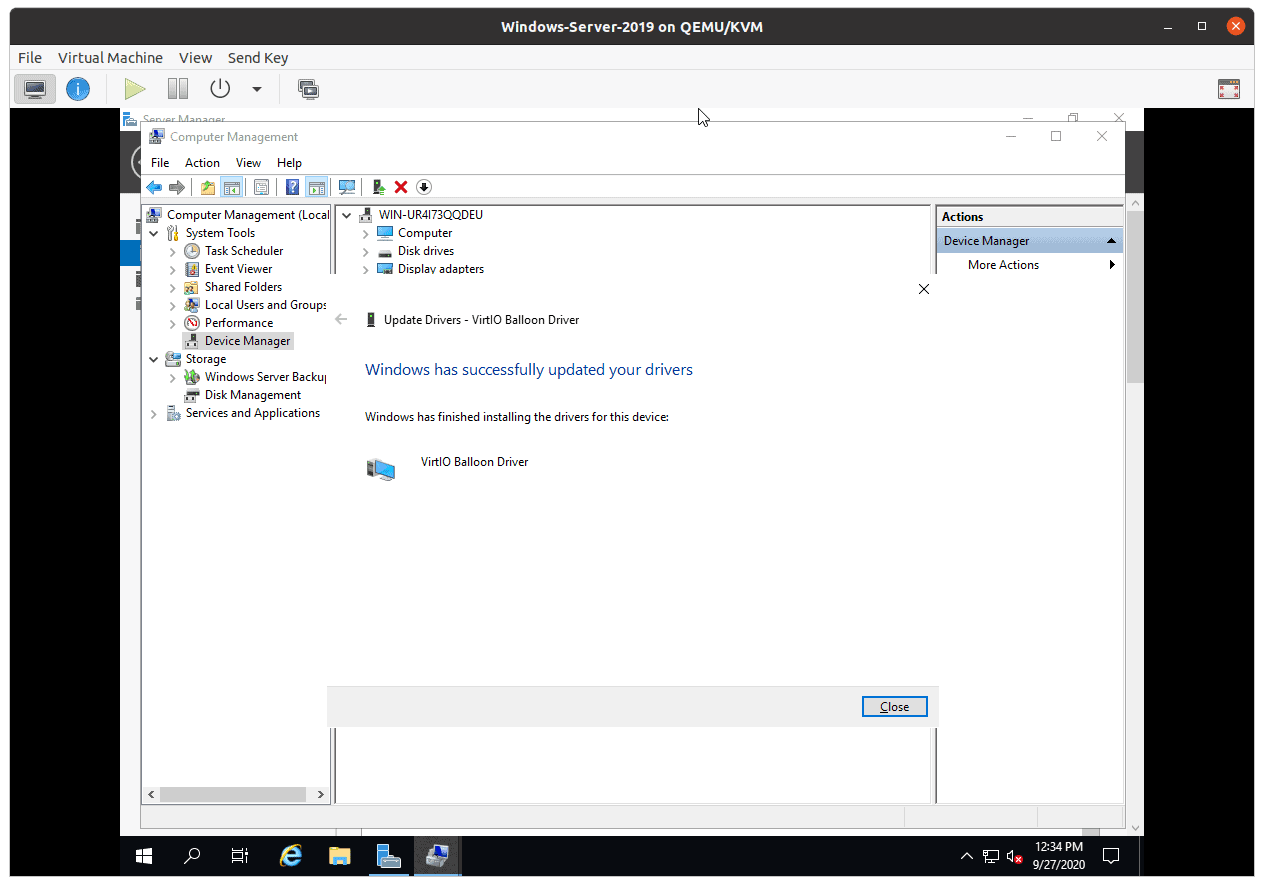
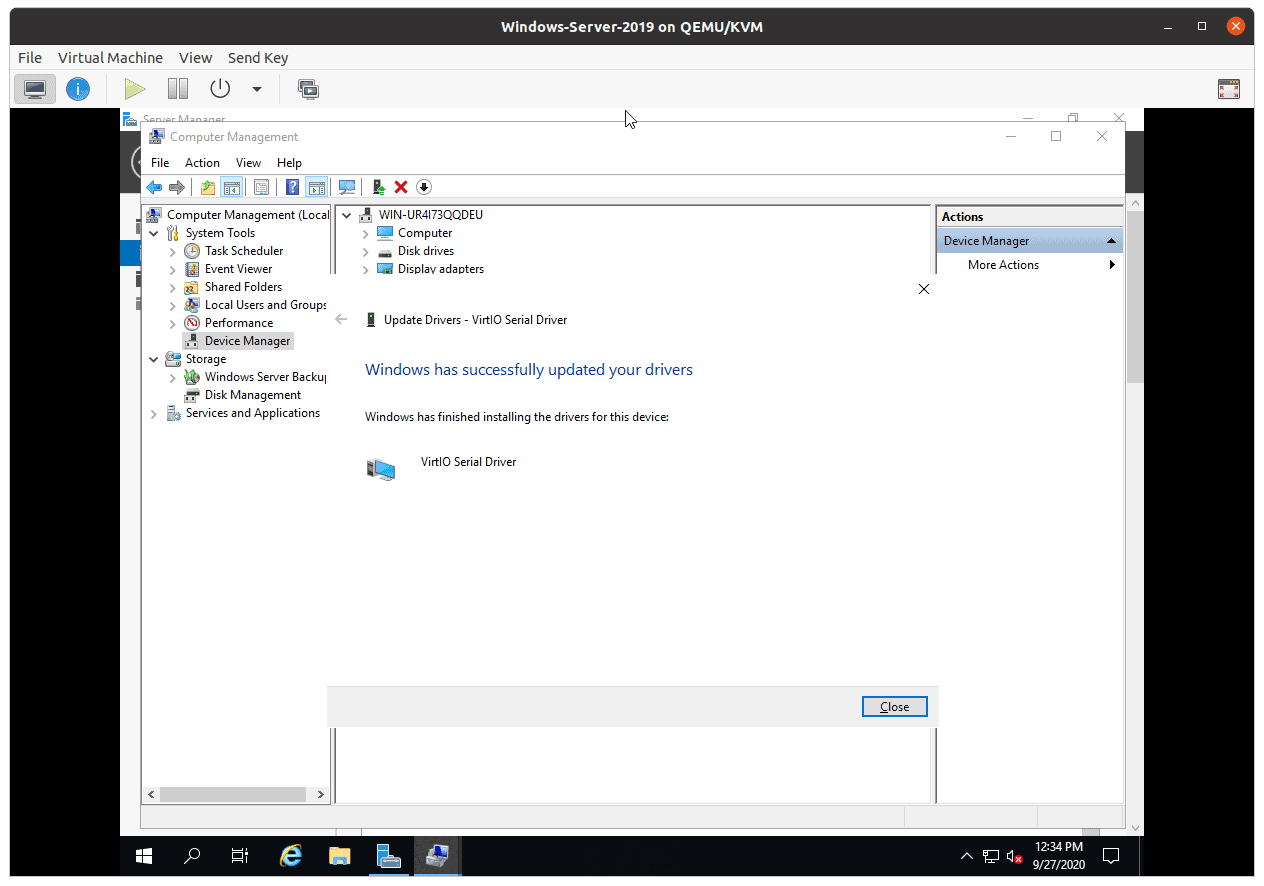
Install rest of other drivers as well.
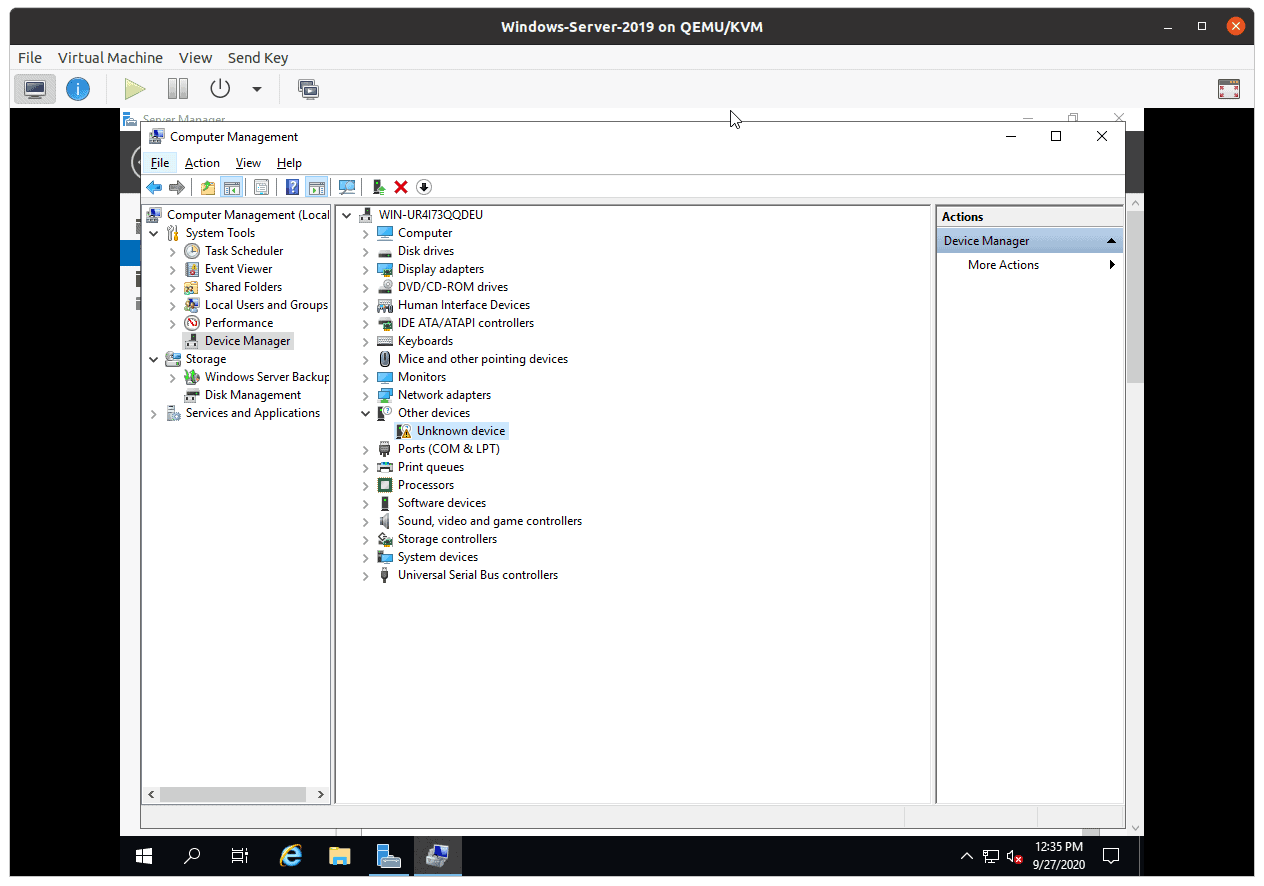
The only driver that you now left at last is Unknown device, even if you try to update it it wont get updated.
So you should be fine at this point.
When you wanted to access this VM again, you just open the terminal and do a virt-viewer and choose the windows server as the VM.
If you have remote SSH access to the KVM host with X11 forwarding then you can open this server using the virt-viewer as well, which is cool.
This quick install guide for installing Windows Server 2019 evaluation edition on a KVM / QEMU hypervisor using the CLI.
The CLI interface is vital for my KVM install because my lab computer is headless server. So feel free to use virt-manager to install if you like.
This guide assumes you have all of the necessary packages for KVM / QEMU are installed. If not please see this post
Step 1:
Download a copy of the Windows Server 2019 ISO file from the Microsoft Website.
(you can use any email and phone number combo.) I used something similar to 0@1.1 for email and 10123456789 for my phone number
Step 2:
Create the Windows Server 2019 Virtual Machine
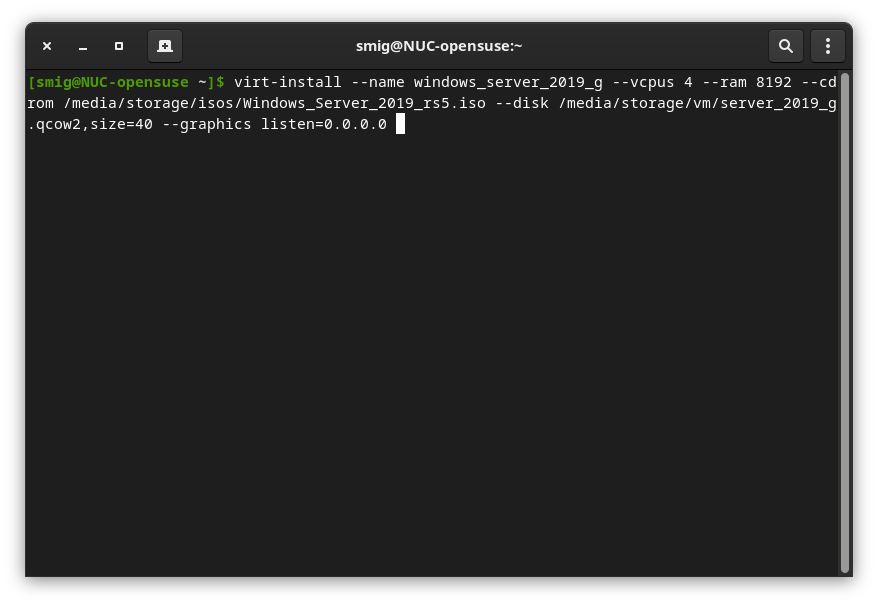
Command Breakdown:
virt-install --name <name of vm> --vcpus <number of cpus for vm> --ram <memory amount in mb> --cdrom <iso file location> --disk <options for virtual hard disk> --graphics <listen to 0.0.0.0>
(note about listen to 0.0.0.0 do not use in production environments. Not secure. However it’s useful in my lab environment so that I can remote in without using a ssh tunnel)
Step 3:
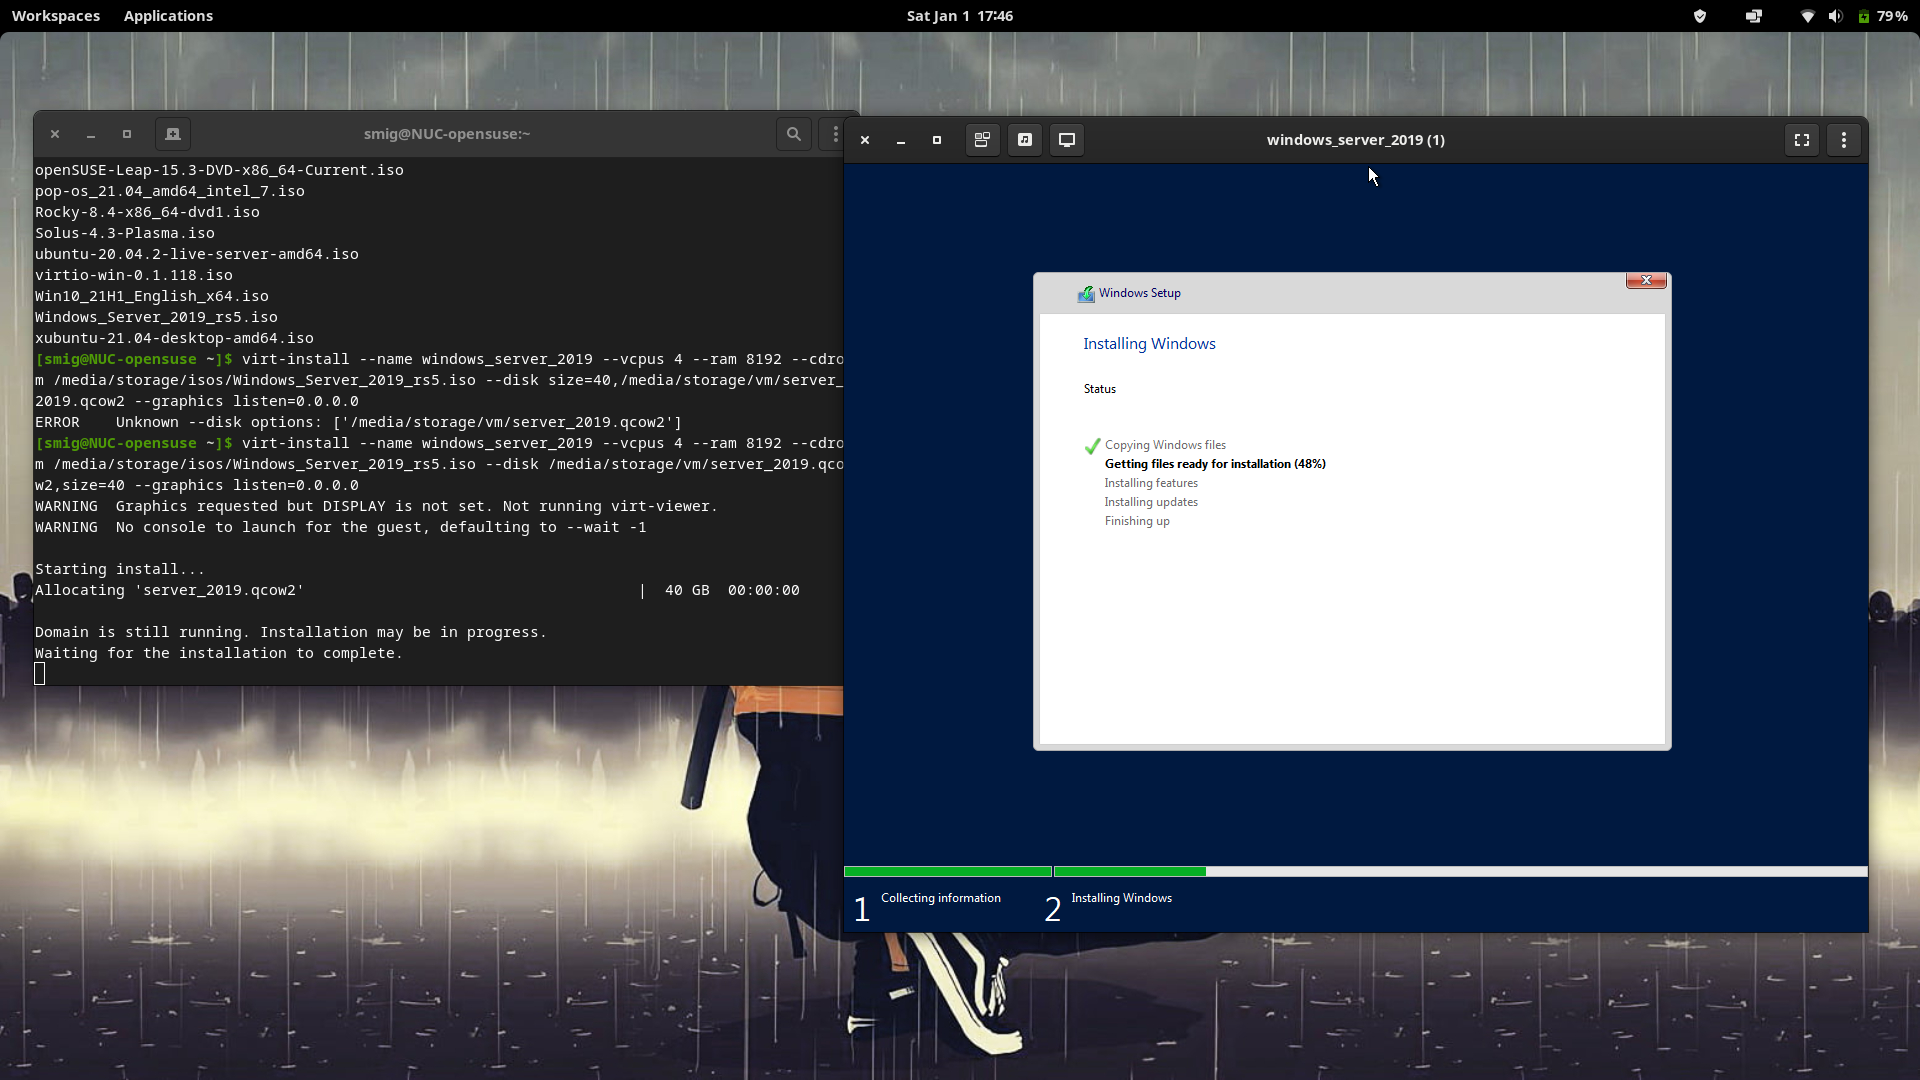
Go through the usual installation steps to install Window Server 2019. The Virtual Machine will reboot once the installation is finished.
Step 4:
Install the missing drivers by mounting the virtio drivers .iso disk to your VM. (Download ISO Here)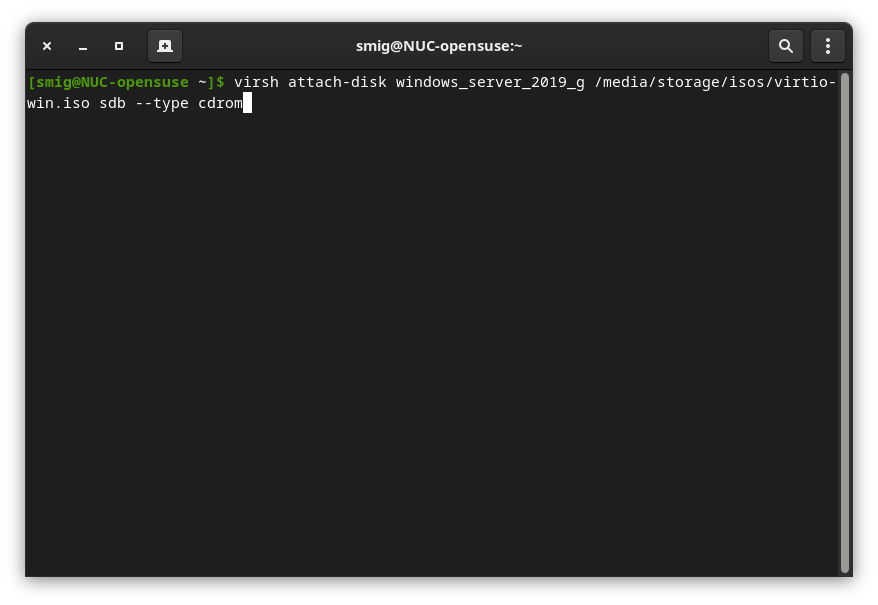
Command Breakdown:
virsh attach-disk <name of vm> <file path for virtio iso file> <vm device name> --type cdrom
Next open the computer management console on the Windows Server 2019 VM.
You should devices with yellow caution badges. Install the drivers for those by updating the driver and using the cdrom drive as the search location.
Step 5:
Edit the VM’s CPU Information for improved performance.
virsh edit <vm name>
Edit the CPU informtaion in the XML file to reflect the correct setup.
For example my setup above has 4 vcpus. So it’s reflecrted below.
  <cpu mode='host-model' check='partial'>
    <topology sockets='1' dies='1' cores='2' threads='2'/>
  </cpu>
Sockets = 1 (Only change if you have more than one cpu)
Cores = 2 (Edit to the amount of cores your virtual machine will use)
Threads = 2 (Edit to the amount of Threads per core)
And there you have it. You have a working Server 2019 virtual machine to play around with.
Hope this quick guide helps!
Are you let down when you saw there is no guide to use Windows Server 2016 under *nix environments? I really loved Microsoft when I heard they are working on Windows containers, but when this week has arrived, it was sad to see that installation requirements were Windows and HyperV. But actually it is not. You just have to modify the VHD file a bit with nicer tools and execute the already available script in the downloaded VM. I will assume you are running a decent version of Linux and accepted EULA and all the legal stuff that I do not care.
1. Getting the required tools:
$ sudo apt-get install qemu-kvm virt-manager // or virtualbox, but we need qemu-kvm for image manipulation
$ sudo apt-get install qemu-utils libguestfs-tools // image manipulation tools
2. Downloading files
WS2016 TP3 VHD image
Be careful, the VHD image is around 6.3 GB zipped, 13 GB unzipped VHD.
$ wget http://aka.ms/containerhostvhd -O host.zip
$ unzip host.zip
$ // outputs windowsserver_en-us_tp3_container_vhd.vhd
NSSM: (Non Sucking Service Manager)
Manages services, does not seem to be an official MS tool but, it was included in the official script.
$ wget http://nssm.cc/release/nssm-2.24.zip
$ unzip nssm-2.24.zip
unattend.xml
You have to type this file, it is in the gist. If you want, you can modify the password (beware, 2 instances).
3. Modifiyng the VM Image
First, we convert VHD image to QCOW2 format. Beware it takes a lot of time, even on an SSD. Then, we mount it using the tools we have. Reason we use sudo is that we mount it through KVM to make it faster and more reliable. Then we need to copy the attend.xml to C:/ and nssm.exe to System32 folders.
$ qemu-img convert -f vpc -O qcow2 windowsserver_en-us_tp3_container_vhd.vhd ws2016_core.qcow2
$ mkdir mnt
$ sudo guestmount -a ws2016_core.qcow2 -i mnt
$ sudo cp unattend.xml mnt/
$ suco cp nssm-2.24/win64/nssm.exe mnt/Windows/System32/
$ sudo umount mnt/
4. Creating a new VM
You have to create a new virtual machine, you can do it with VirtManager or VirtualBox.
virt-manager
- Create a new Virtual Machine
- Import existing disk image, Forward
- Provide existing storage path, Browse
- Browse Local
- Find ws2016_core.qcow2, and Open
- OS Type: Windows
- Version: Microsoft Windows Server 2008 or later
- Adjust memory and RAM (give as much as you can)
- Finish
virtualbox
My VirtualBox did not support the qcow2 image I had, we may need to convert it to VDI (virtual disk image) so it plays with it nicer. You can do it via:
$ qemu-img convert -f qcow2 -O vdi container_host.qcow2 container_host.vdi
- New
- Name whatever you like
- Type: Microsoft Windows, Version: Windows 2012 (64 bit)
- Memory: Be generous, at least 2GB
- Use an existing virtual drive
- Browse icon, find the vdi image we had
- Finish (optionally change CPU count from settings to run it faster)
5. Running the VM
When you run VM via virt-manager or virtualbox, you will see some Windows logo and then you will see a command window. Maximize it and execute the powershell, and execute the already available script we have. I know this could be automated with unattend.xml, but I am no MS expert
C:\Users\Administrator> powershell
PS C:\Users\Administrator> cd /
PS C:\> .\Install-ContainerHost.ps1
It will ask you to type DockerPath. And you need to write http://aka.ms/ContainerTools and it will download docker.exe from web and place it to System32 folder.
6. Running Docker commands in Windows
You will see the following as a result:

Happy containerizing!
Mustafa Akın
mustafa91 at gmail
In this tutorial, I’ll show you how to install Windows Server on a VPS natively (without the need for virtualization software like VBOX, VMware…)
Requirements:
- At least 2 machines (1 for sharing the setup data via Samba/Network Share, the other for installation)
- Networking access between 2 machines
- VNC/KVM/IPMI access of the target machine which will handle the installation, UART/Serial console access only will not work
- The targeted installation machine must either be VPS using full virtualization (KVM/QEMU/VMware/VBOX) or is a dedicated server running on barebone hardware, OpenVZ or any kind of kernel virtualization or container is not supported.
- root access of the Linux server
Note:
- This tutorial might not always be working if the virtualization/hardware of the targeted machine is using some weird driver/non-standard hardware configuration.
- I’ll also show you how to integrate VirtIO driver into Windows installation image for it to recognize network driver because Windows doesn’t have the driver for VirtIO built-in.
- Some VPS providers set Static IP for their clients, make sure you’ve written down the current IP configuration on the Linux server that you’re going to install Windows on it, just in case!
1. Integrating VirtIO driver into Windows ISO
Why we have to do this? Because on some common virtualization software which some VPS providers use, they use a specialized driver for their virtual devices and these devices doesn’t have driver pre-installed in Windows, the results could be somewhere from non-working network card to unbootable because of lacking disk driver
You could download the latest VirtIO driver for the most variant of Windows HERE, chose the latest version, download the ISO file and extract it to get the driver files.
If you know that the devices on the targeted machine use don’t need a specialized driver or you’re trying to install on a dedicated/bare-metal server, you could skip this step.
You could do this with DISM and tons of command line… but to simplify the procedure I would recommend you to use NTLite. Here I’m using NTLite v1.7.1.6572 which is the latest version when this post is created.
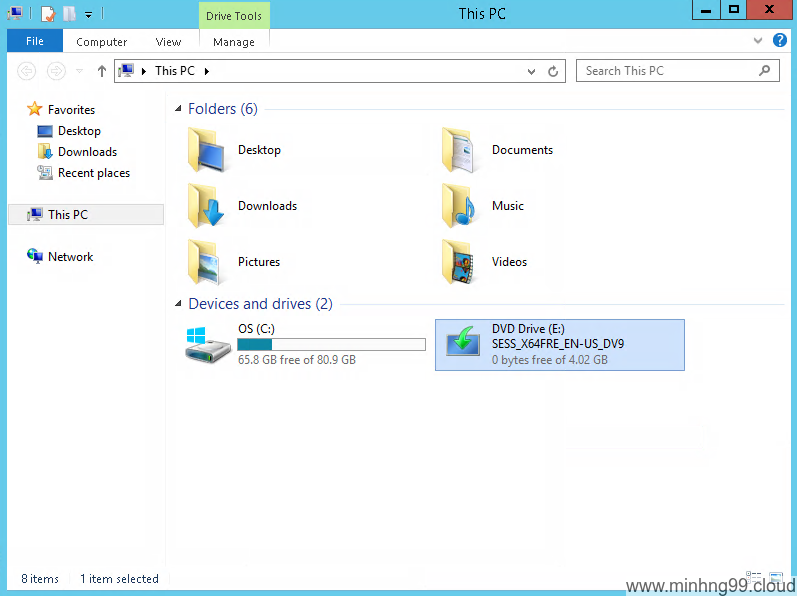
You’ll need a Windows setup ISO, here I’m using Windows Server 2019 evaluation downloaded from Microsoft’s website, after downloaded it you’ll need to extract the content from it, you could use 7-Zip or some other ISO extract tools but here I’m just using Windows to mount it and then copy it out.
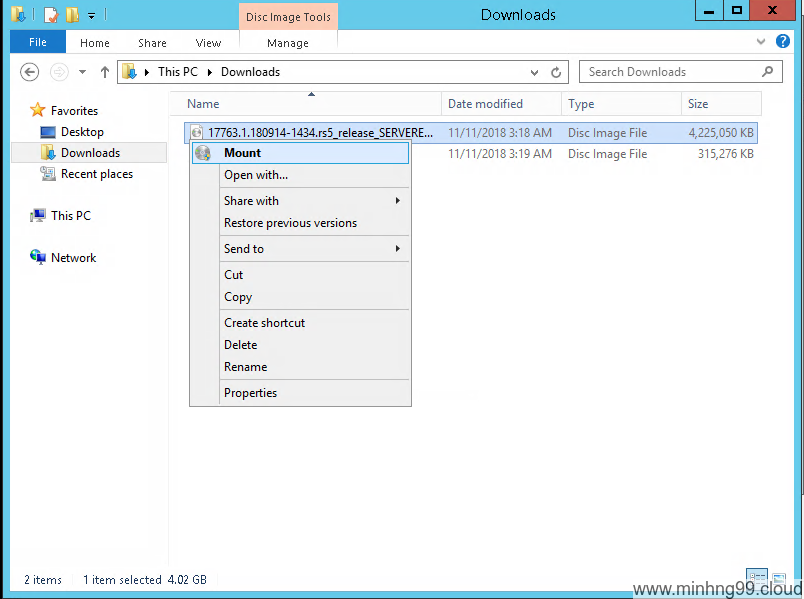
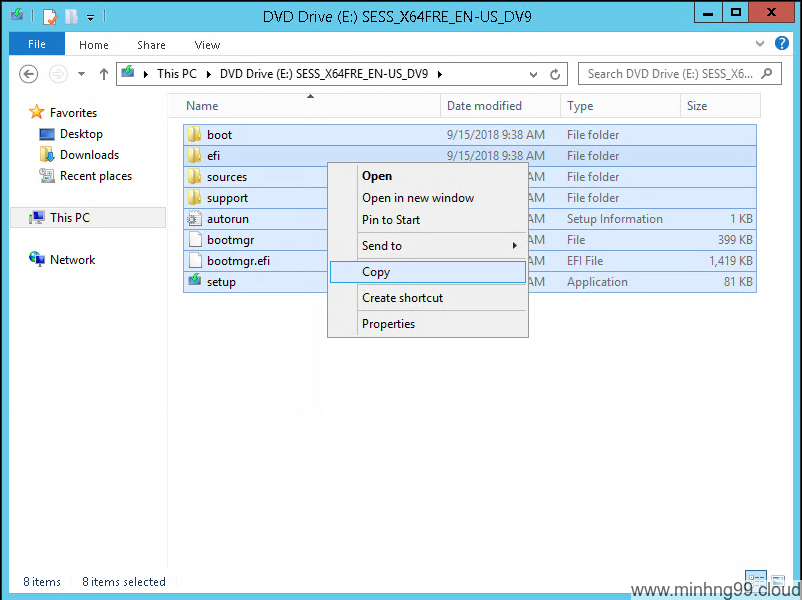
Why do I have to copy it out? Because NTLite (or Windows’s DISM) does not want to work with a read-only .wim file so you’ll have to copy it out somewhere writable.
Now we will have to load it to NTLite for adding drivers into it.

Starting off by click Add and then Image directory
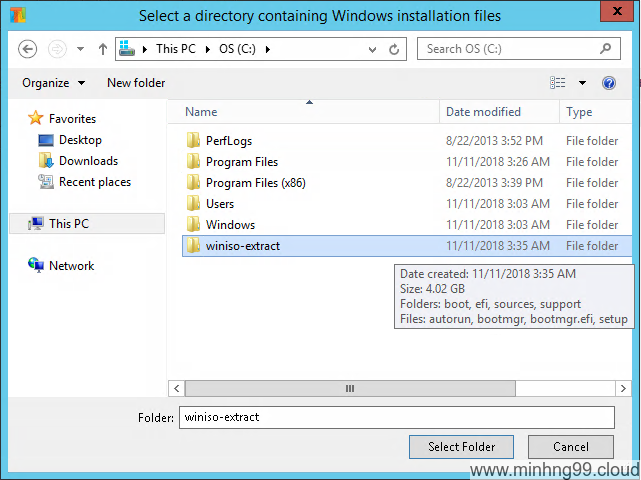
Here choose the directory of the extracted content from the ISO file, I’ve copied the contents to C:\winiso-extract.
Do not select the mounted, read-only drive
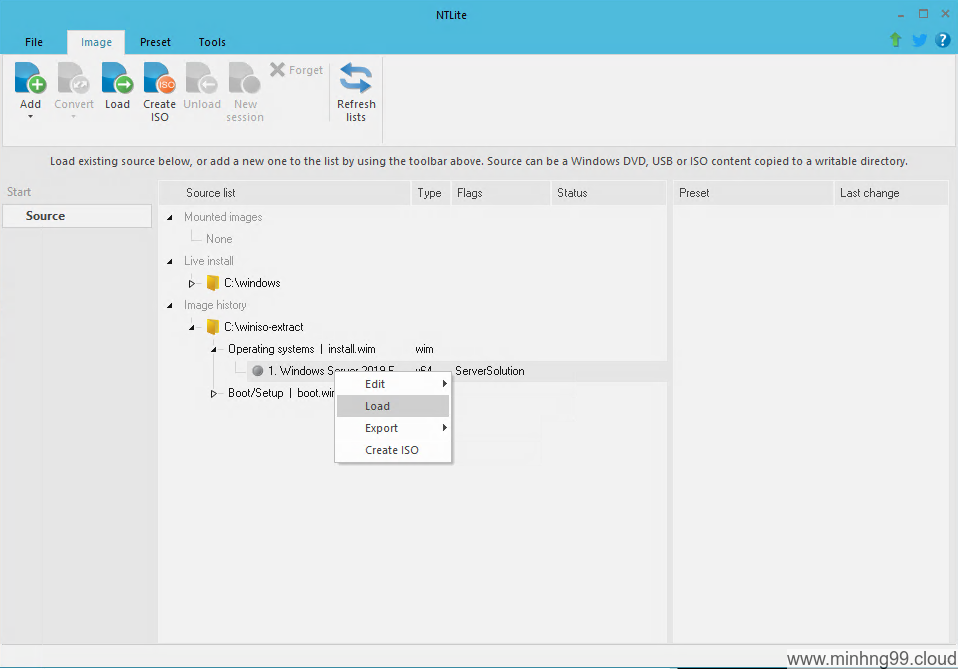
NTLite will show how many variants of the OS is available inside the ISO files, there could be multiple selections here like for Pro/Core Installation/Datacenter… Select the one that you’re going to install, if you install the driver into the wrong version which you will not use for the actual setup then you’ll NOT get the driver that you’ve integrated or you could integrate the driver for every variant of it… but it will need some time to do so, here my ISO only have Essential so I’ll just go with it
Right-click into the variant you want to integrate driver under Operating systems | install.wim and select Load
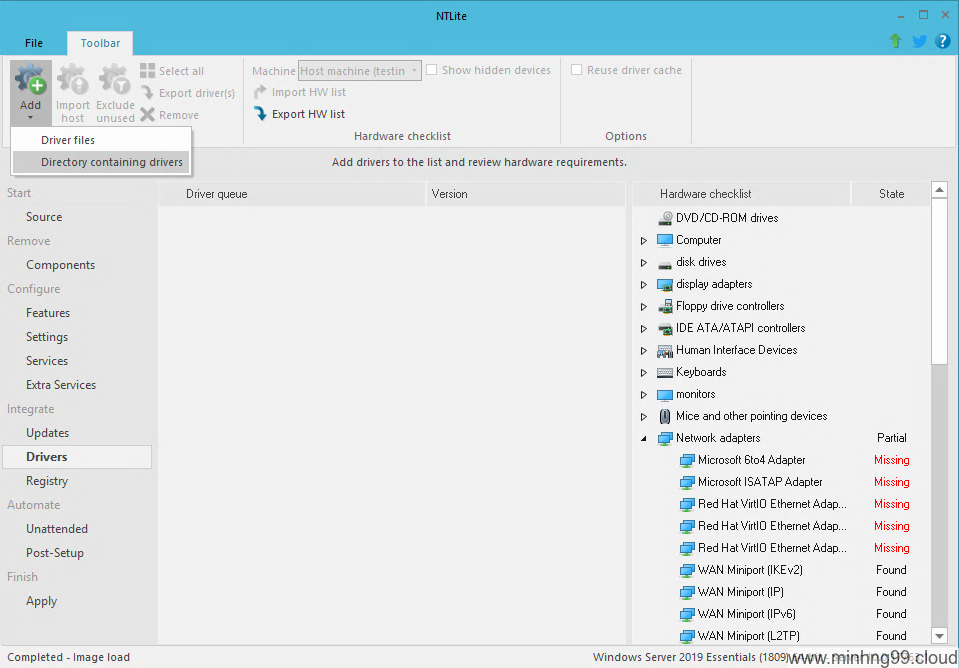
After some time of waiting, the long menu on the left side will appear, now select Drivers, Add, Directory containing drivers
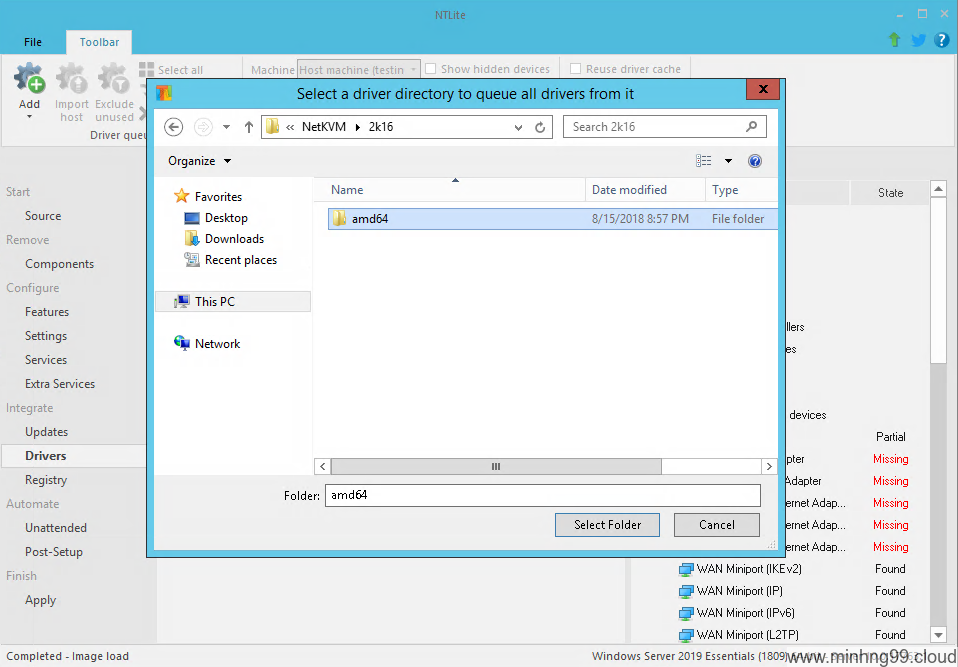
Now you have to select the appropriate driver for your OS version and architecture, select the wrong one could bring disaster so make sure it’s the right one.
The driver folder which you select should’ve looked something like this inside:

For Windows to work on VirtIO virtualized properly, you have to have at least these 4 driver in it (Baloon, NetKVM, VioSCSI, VIOStor), NetKVM is the important bit because you will be able to download those drivers later but without internet access on your targetted machine after install has finished then you have no way to download anything.
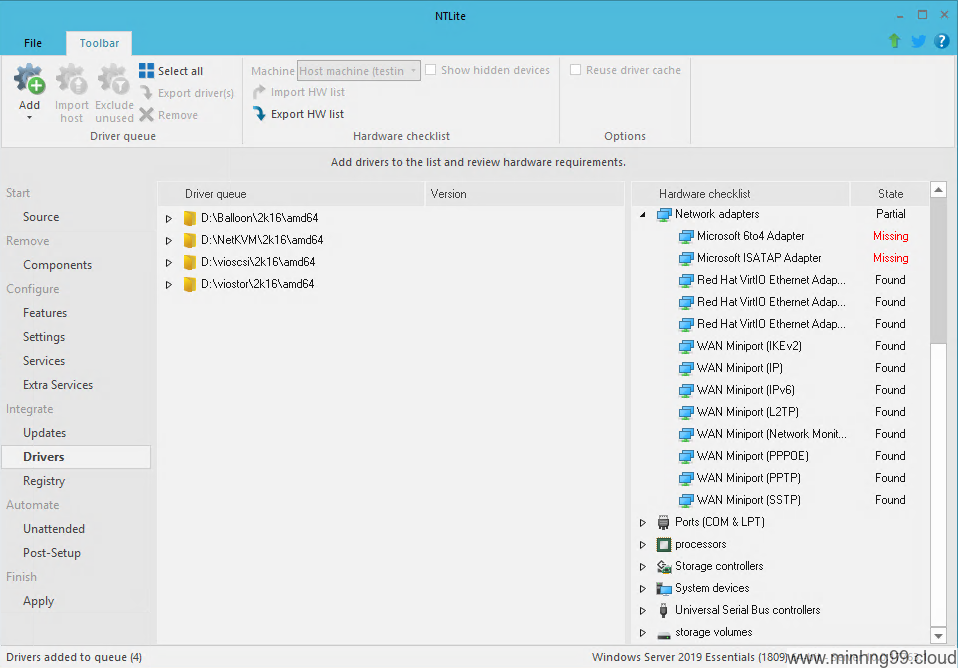
I’ll just be going to add as below…
Now select the Apply on the left side, chose the option as you want in the middle, you could skip the Create ISO if you’re gonna to create a shared directory right after this… But it’s nice to have the ISO image for backing up somewhere so you don’t have to do this again.
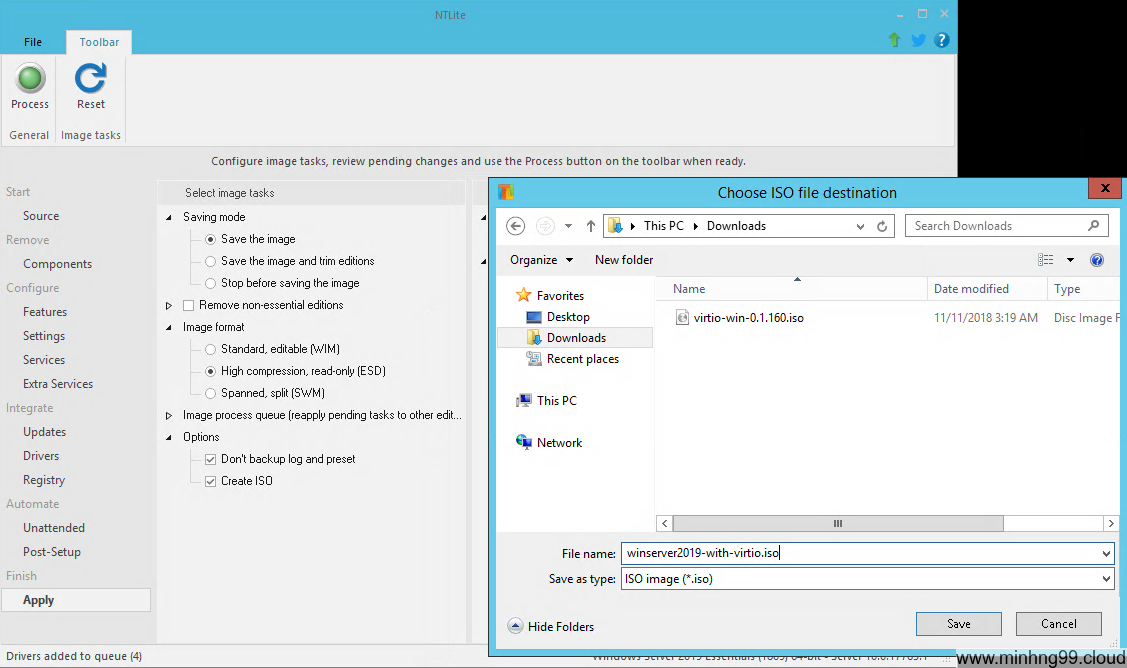
After you’ve done fiddling around, press the green Process button on the top left corner for NTLite to do its job.
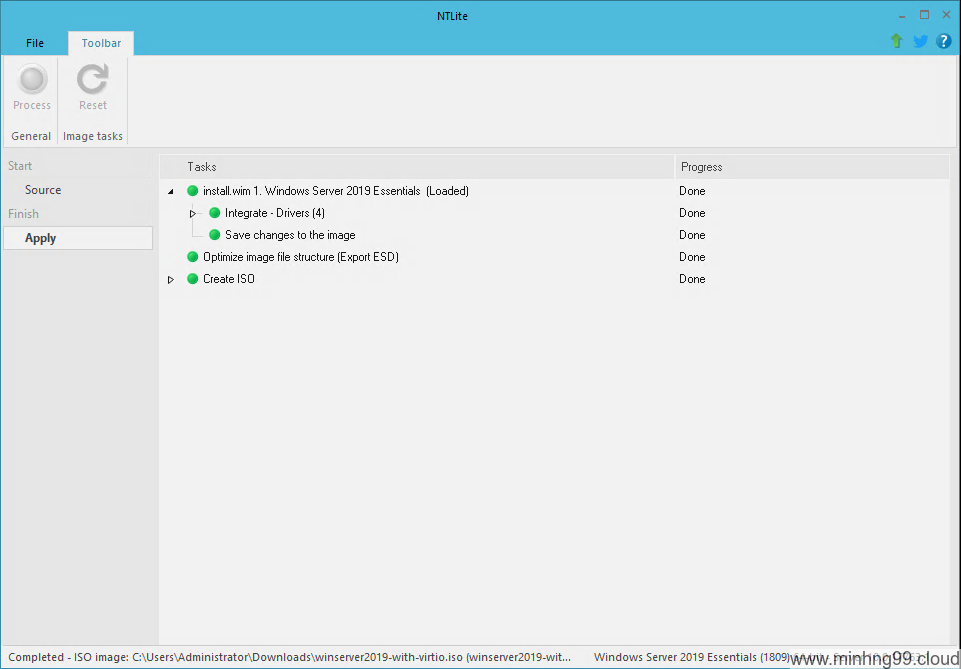
This could take a pretty long time to finish so just wait patiently and hopefully it will succeed in the end.
2. Create a shared folder of the Windows Installation ISO
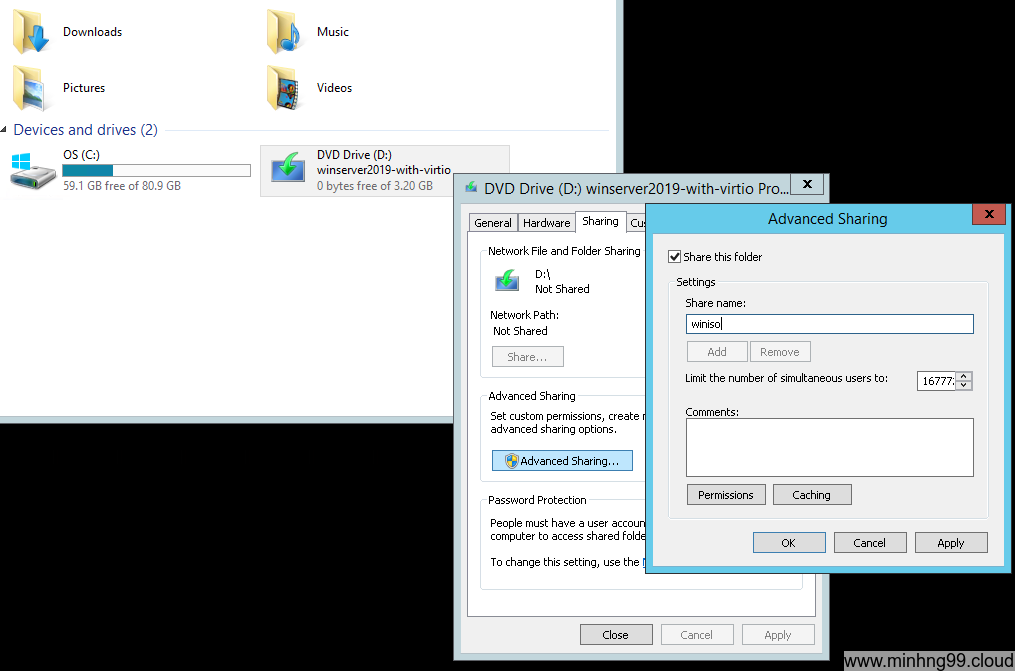
Now I’m assuming that you’ve succeeded in integrating the drivers into the Installation ISO? Good, now you’ll need to create a Shared folder on another Windows machine, you could use Samba to create a shared folder on Linux if you don’t have another Windows machine laying around but since I already have a Windows machine here so I’ll just use it.
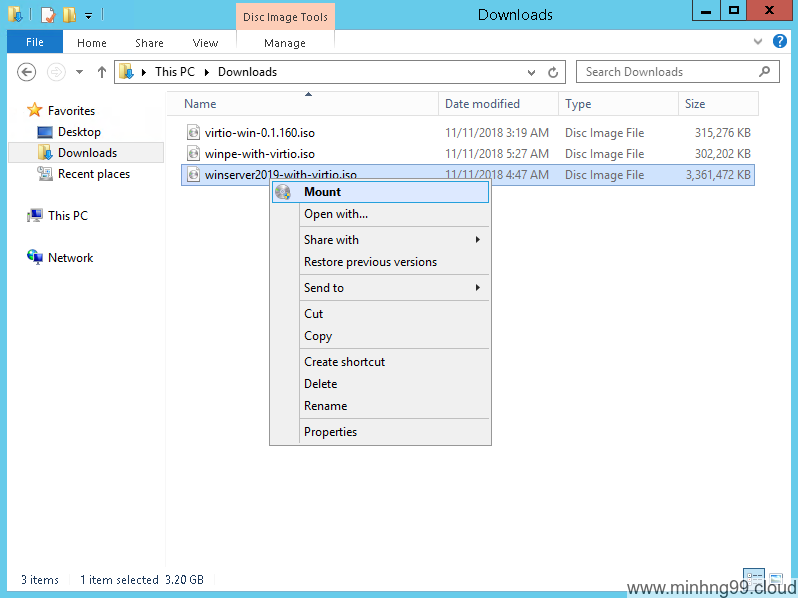
If you did not use Create ISO with NTLite, it will save the driver integrated setup into the Image directory which you’ve selected earlier, you could directly use it without any issue (the Image directory is C:\winiso-extract in my case) but here since I’ve created a new ISO so I’m gonna to mount it and serve the mounted drive as a Shared folder
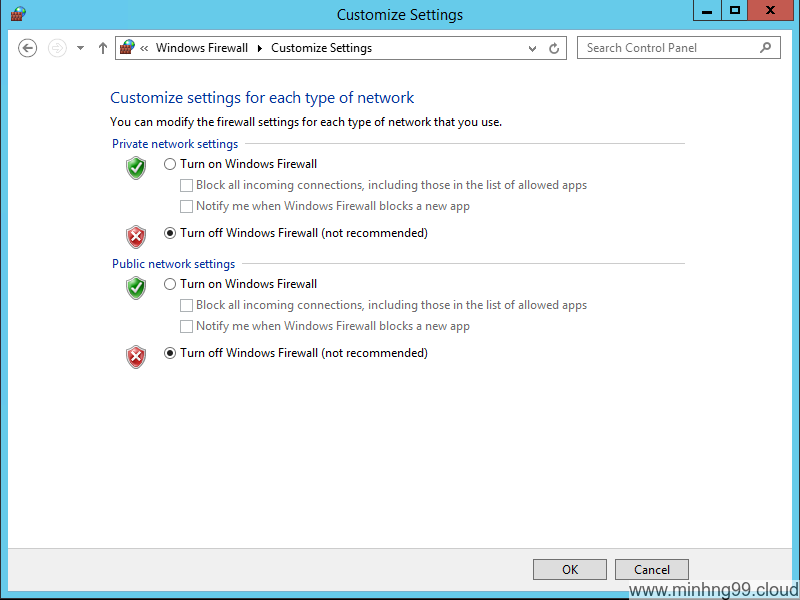
You’ll need to Disable Windows Firewall for reaching the Shared folder from outside the internet (which is what the targeted installation machine will do).
3. Obtaining WinPE ISO
WinPE ISO is a very “mini” version of Windows which can run on RAM, you’ll need to install a big Windows Assessment and Deployment Kit (ADK) which is around 1.5GB just to create a 300MB ISO file which is ridiculous, I’ll attach the WinPE ISO file with the VirtIO driver integrated here for easier for you to use it.
But here’s the related docs if you curious on how to get the ISO file: https://docs.microsoft.com/en-us/windows-hardware/manufacture/desktop/download-winpe–windows-pe
You also could use NTLite to add VirtIO driver to WinPE.
Download my WinPE ISO integrated with VirtIO driver:
winpe-with-virtio.iso
4. Configure GRUB to boot WinPE on Linux server
The Linux OS I’m using is Ubuntu 18.04, other OS might involve different steps to generate new grub config file.
First of, login to your Linux server using SSH using root.
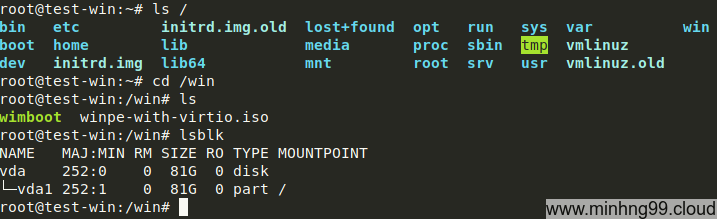
Create a new dir called win in / by executing command:
Download wimboot into the directory by using the command:
wget https://www.minhng99.cloud/assets/files/wimboot -O /win/wimboot
Download and copy the winpe-with-virtio.iso into /win/winpe-with-virtio.iso also
Now be careful with the partitions here, on my server there’s only 1 disk and 1 partition (your server might be different), and my / is located on disk 0 partition 1, if your grub bootloader is located on another partition then it will need a little bit of modification for it to work… I’ll tell you how to deal with different partition scheme later.
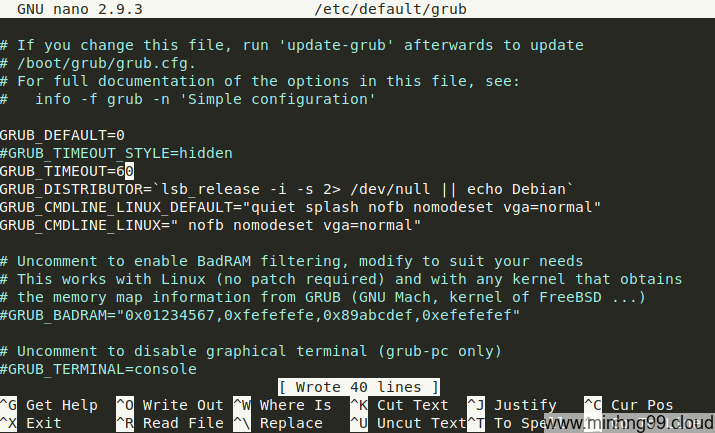
Now edit the file /etc/default/grub to comment out (or delete) the line GRUB_TIMEOUT_STYLE=hidden as above.
Some other grub version might use GRUB_HIDDEN_TIMEOUT_QUIET=true, comment out (or delete) that line also.
Use Ctrl+O to save and Ctrl+X to exit.
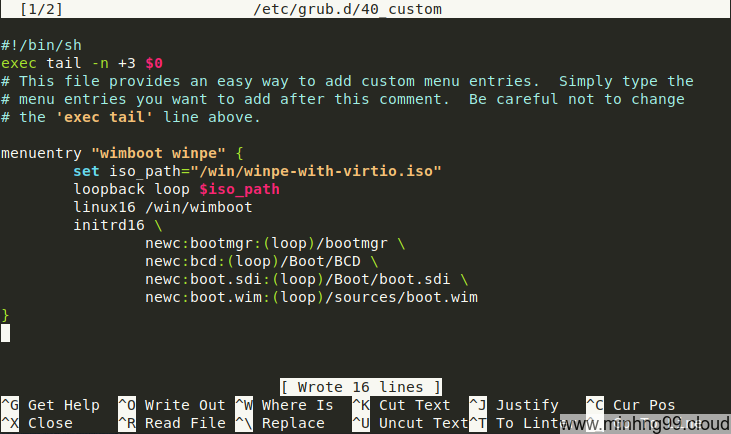
Now use edit the file /etc/grub.d/40_custom and add the following code at the end of that file
menuentry "wimboot winpe" {
        set iso_path="/win/winpe-with-virtio.iso"
        loopback loop $iso_path
        linux16 /win/wimboot
        initrd16 \
                newc:bootmgr:(loop)/bootmgr \
                newc:bcd:(loop)/Boot/BCD \
                newc:boot.sdi:(loop)/Boot/boot.sdi \
                newc:boot.wim:(loop)/sources/boot.wim
}
Remember I said something with the partitioning? If your / is not located on the same disk and partition as grub, you will have to do a little modification to the set iso_path="/win/winpe-with-virtio.iso" for pointing grub to the proper disk/partition by change it to set iso_path="(hd0,1)/win/winpe-with-virtio.iso" here hd0,1 means the ISO file is located on the disk 0 and partition 1, change those number as your partition scheme, also — there’s no partition 0, the first partition is 1.
You need to modify the linux16 /win/wimboot to point it to the correct partition also.
If your partition scheme is the same as mine then you can just copy and paste it in place.
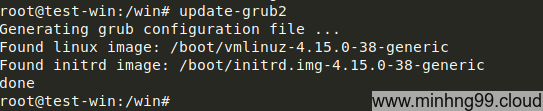
Now run update-grub2 to generate new grub config file.
5. Installs Windows by using WinPE
Now you have to access the VNC/KVM/IPMI of the Linux VPS you wanted to install Windows on it, this is a special feature and it’s available on most of hosting services which allow you to control the VPS/server even the network is down/system crash/kernel panic…, it works by capture the screen output from the machine and send it to you meanwhile capture your input and send it to the machine just like you are in front of it and access it physically.
If you don’t have access to such feature then you will not be able to do setup.. at least with the method of this tutorial which involves manual setup
Open the VNC from the VPS’s control panel, type reboot in the SSH and you would see something like this
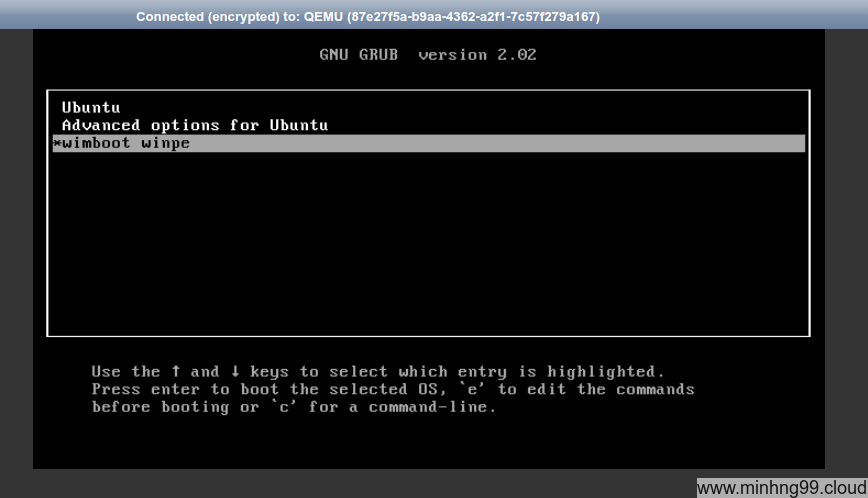
Use your [arrow keys] and select the wimboot winpe and [Enter]
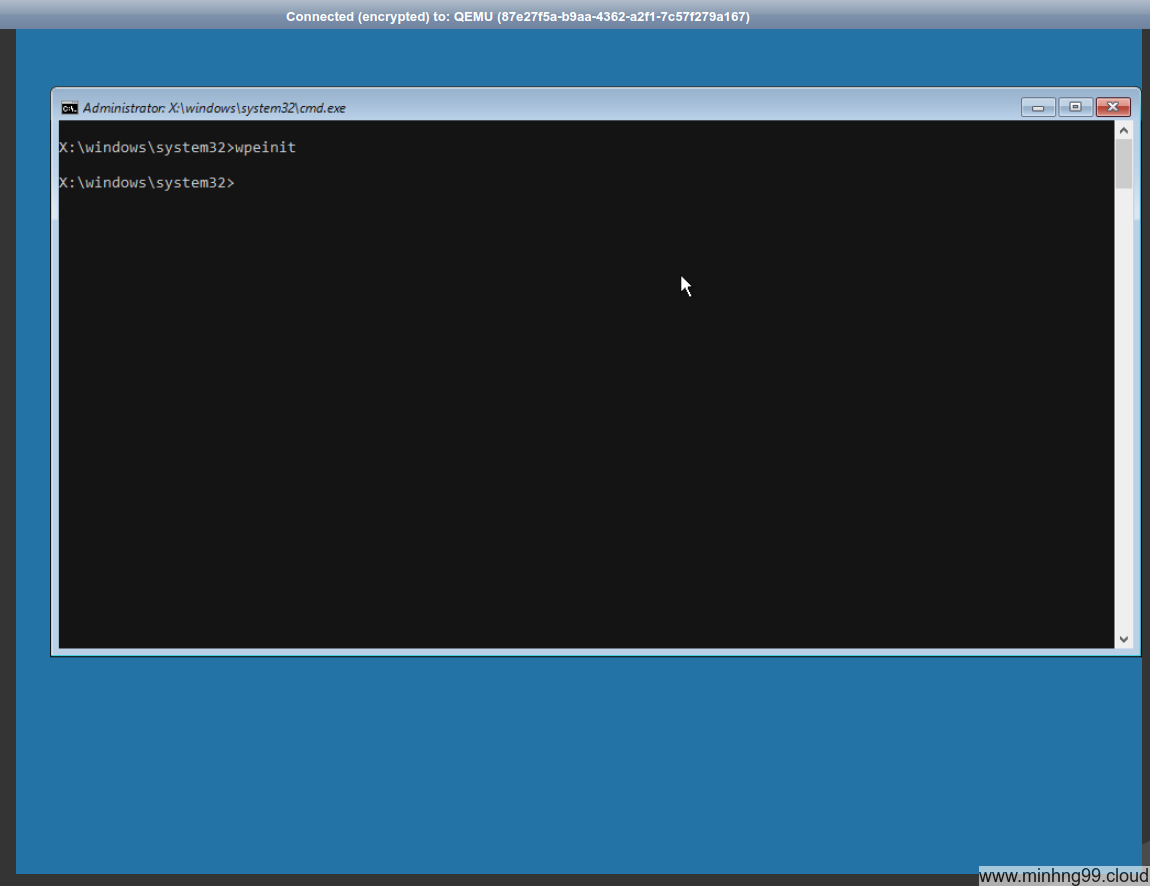
Now the WinPE is booted and you would see something like this, it’s fine, don’t panic. Now check the internet accessibility by pinging a known working IP address like 1.1.1.1 or 8.8.8.8
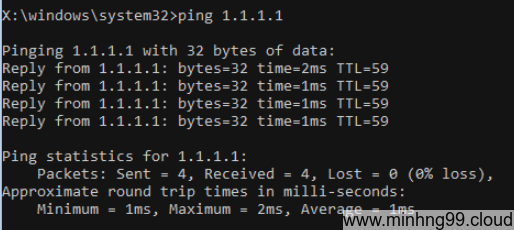
If you see it reply then good, internet access is working and you may proceed to the next step, if the network is not working (request timed out or something else showing) then there might be error in somewhere, it could be your VPS provider doesn’t allow DHCP and you have to set the IP by using the command line, or it could be the network device not being recognized. You will have to diagnose this yourself, sorry.
Now do you remember the Shared directory we’ve created on step 2? You need it now.
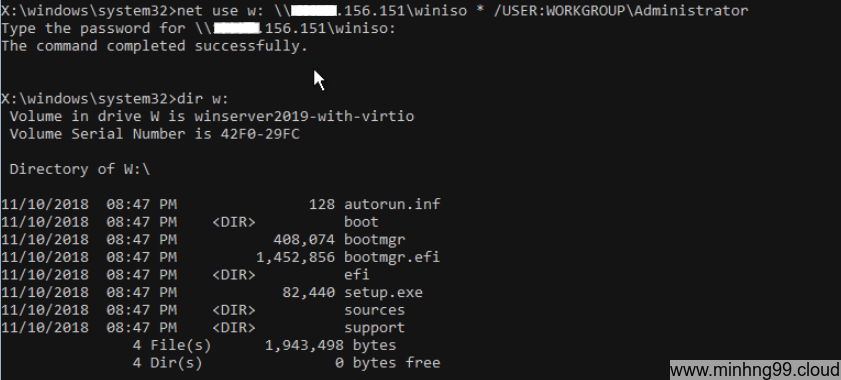
Mount the Shared directory which is the contents of the Windows Setup to drive w:
net use w: \\YOUR_SHARED_SERVER_IP\winiso * /USER:WORKGROUP\YOUR_SHARED_DIRECTORY_USERNAME
Type the password for YOUR_SHARED_DIRECTORY_USERNAME then [Enter], if it say successfully as above then it’s good to go, otherwise you have to check the step 2 again.
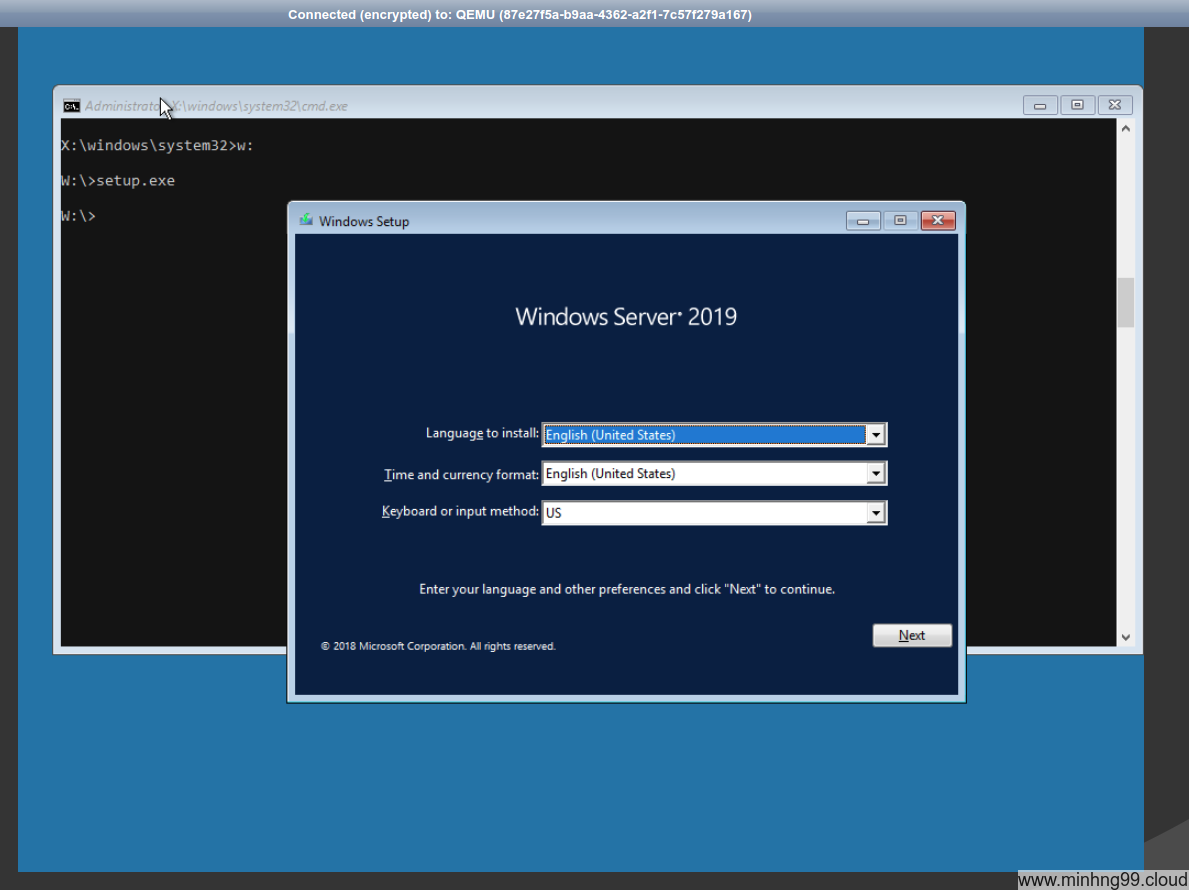
Now navigate to the Windows Setup drive which is w: by typing
and then run the setup with
and proceed the installation process as you would do on a normal Windows Setup
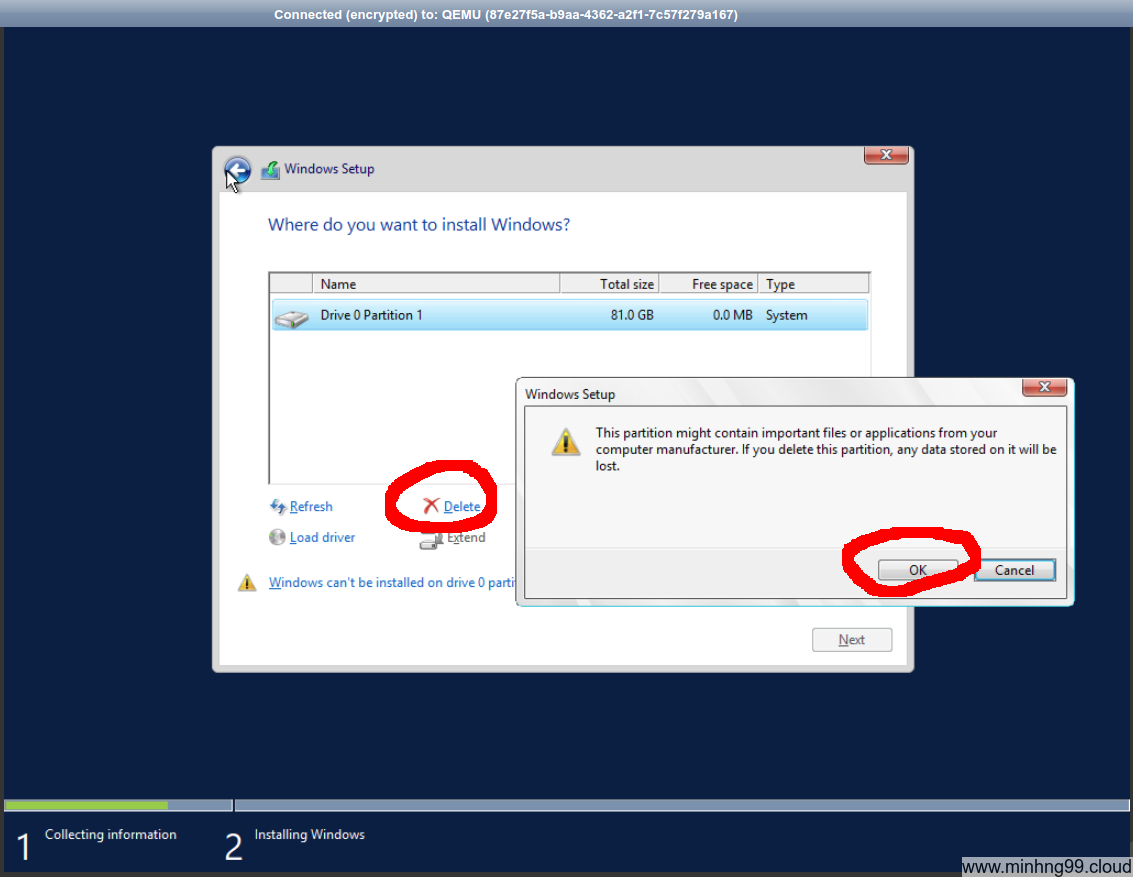
As for this step, select Delete for deleting the Linux OS’s partition !! YOU WILL LOSE ALL OF YOUR LINUX OS’S DATA !! and select Next or you could create the partition as you’d like.
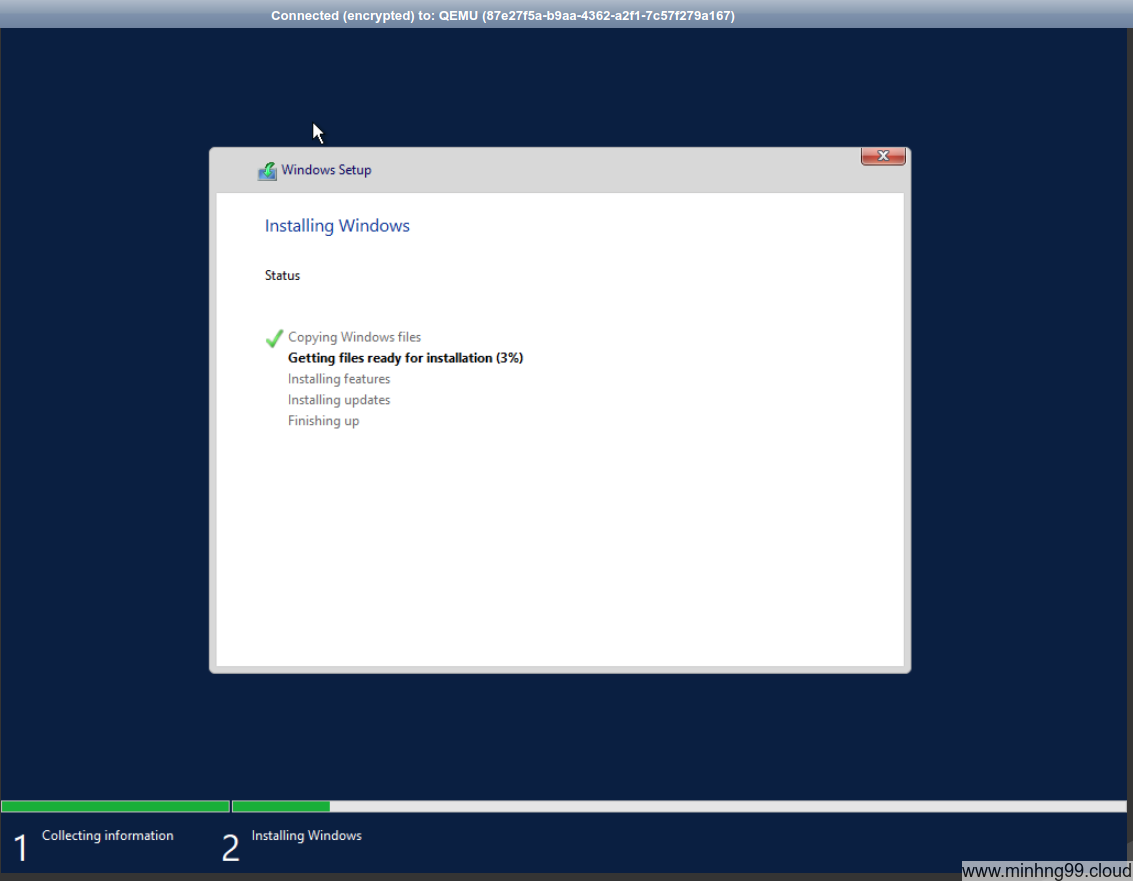
Now it’s time to wait and hope that everything will be OK, the speed of this highly depends on your Linux server’s Download speed and the Shared server’s Upload speed (whichever is the slowest)
Unfortunately… Windows Server 2019 somehow bugged and results in BSoD when the installation successful so I’ve redone it with Windows Server 2016, it’s basically the same.
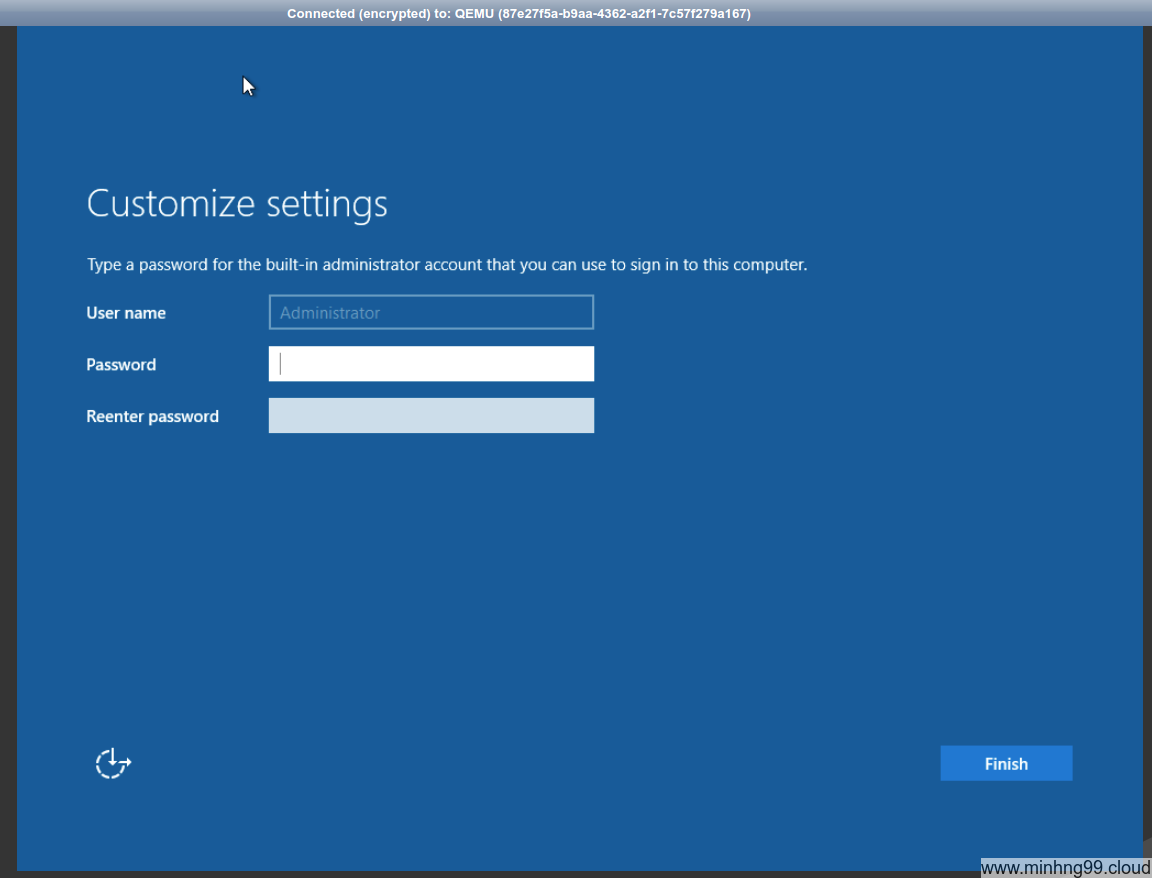
Woohoo, we got to this welcome screen now, just set things up yourself.
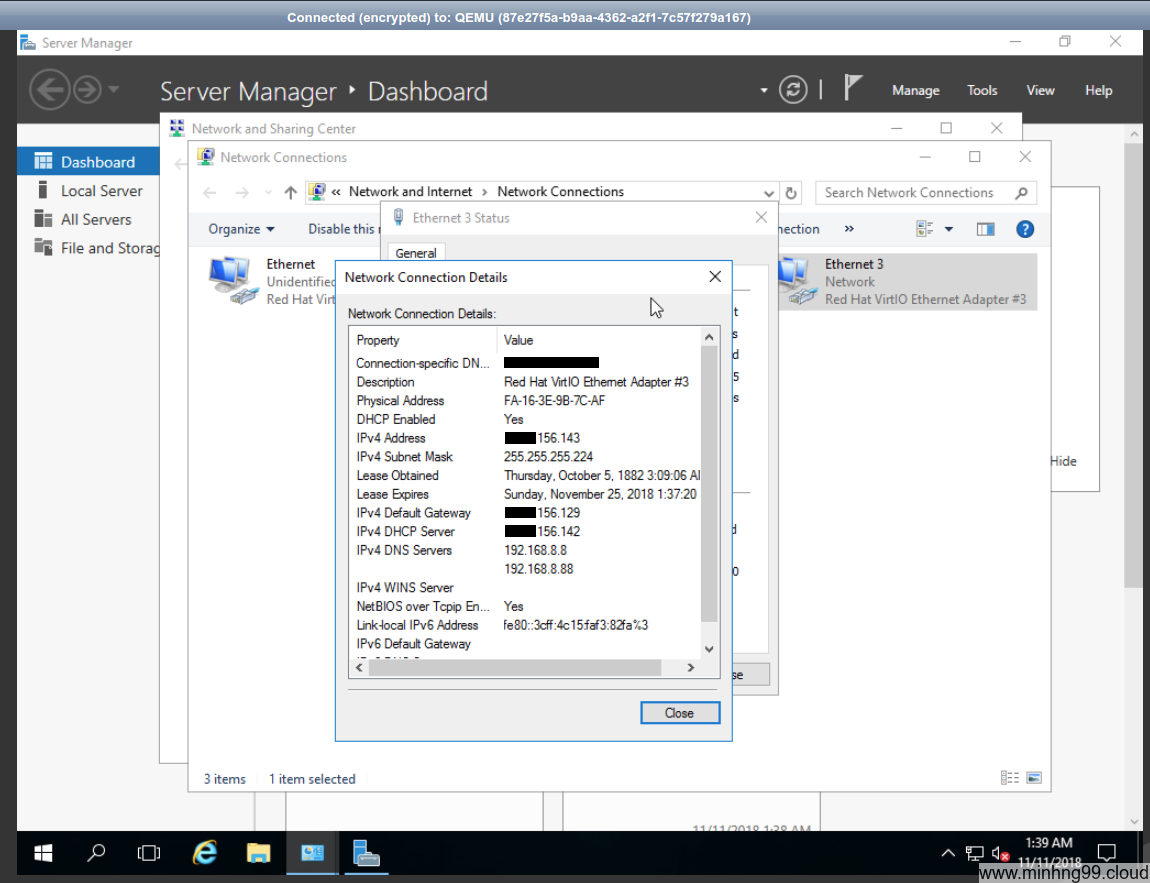
As we can see, the network device is recognized and working properly.
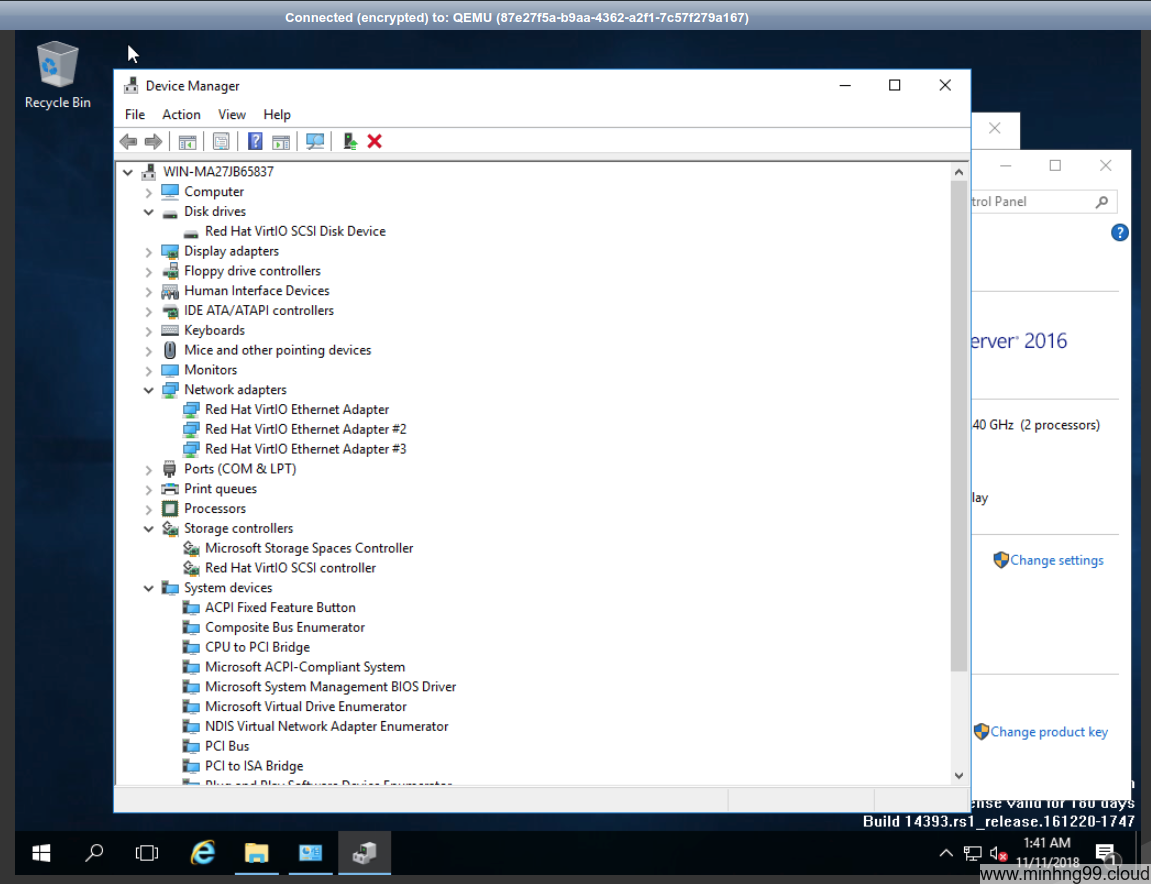
Also, there are no missing drivers.
Now you just have to enable RDP or install TeamViewer or just… use VNC as is for remoting your server. With this tutorial, you can install Windows Server yourself on hosting providers which are not supported it or charging you ridiculous amount of “license fees”, but I don’t think that they’ll happy to see you’re running Windows Server without their permission 
Resources:
wimboot
Windows Server 2016 Standard/Datacenter ISO with VirtIO
Windows PE ISO with VirtIO