1. Overview
Windows Subsystem for Linux (WSL) allows you to install a complete Ubuntu terminal environment in minutes on your Windows machine, allowing you to develop cross-platform applications without leaving Windows.
In this tutorial, we’ll show you how to get up and running with Ubuntu on WSL. These instructions will work on both Windows 10 or Windows 11.
Whilst WSL is a powerful tool for all users, some features, such as the ability to run graphical Linux applications, are only available on Windows 11. Please check out our Windows 11 tutorial for more information.
2. Install WSL
Installing WSL is now easier than ever. Search for Windows PowerShell in your Windows search bar, then select Run as administrator.

At the command prompt type:
wsl --install
And wait for the process to complete.
For WSL to be properly activated, you will now need to restart your computer.
3. Download Ubuntu
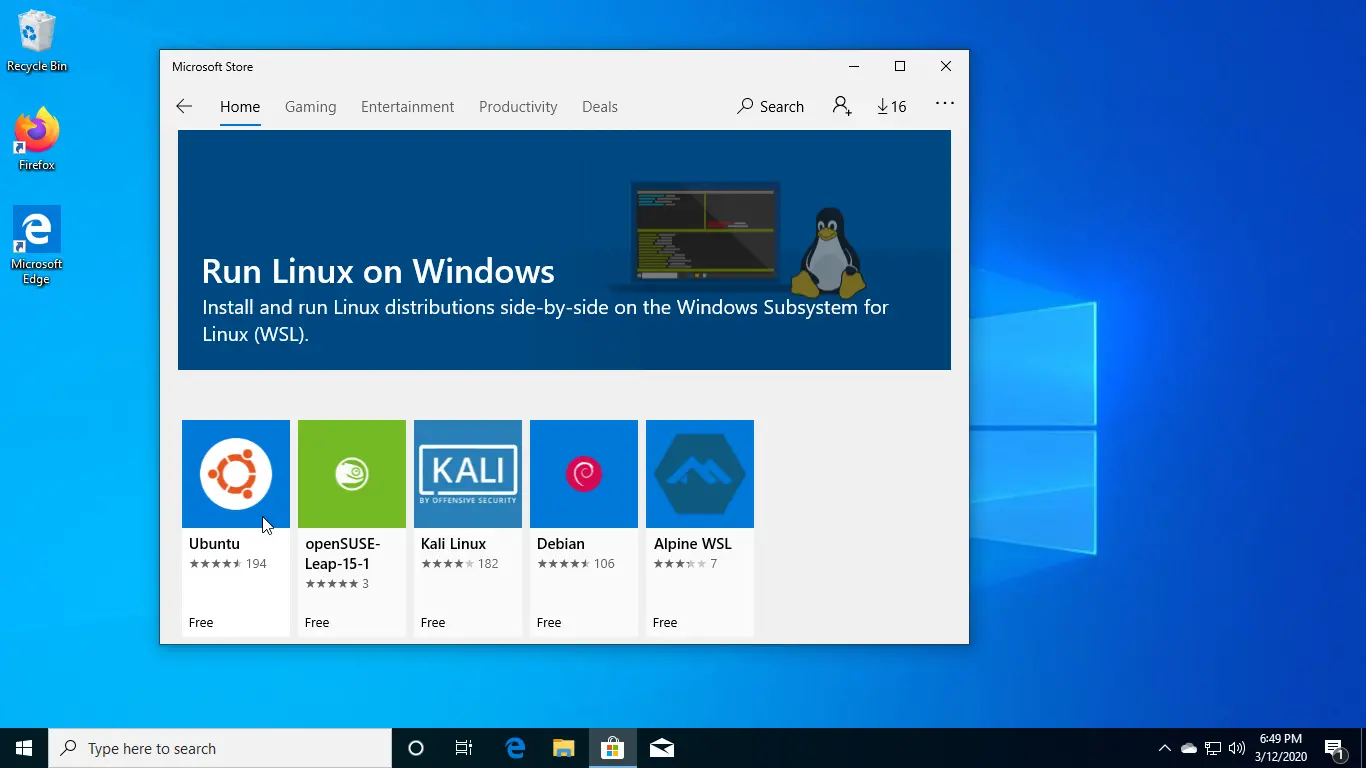
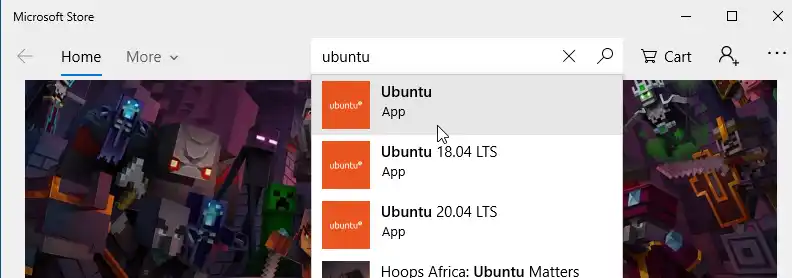
WSL supports a variety of Linux distributions, including the latest Ubuntu release, Ubuntu 20.04 LTS and Ubuntu 18.04 LTS. You can find them by opening the Microsoft store app and searching for Ubuntu.
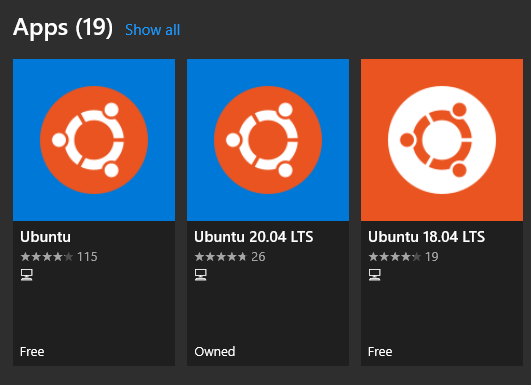
Choose the distribution you prefer and then click on Get as shown in the following screenshot:

Ubuntu will then install on your machine.
The one line install!
There is a single command that will install both WSL and Ubuntu at the same time.
When opening PowerShell for the first time, simply modify the initial instruction to:
wsl --install -d ubuntu
This will install both WSL and Ubuntu! Don’t forget to restart your machine before continuing.
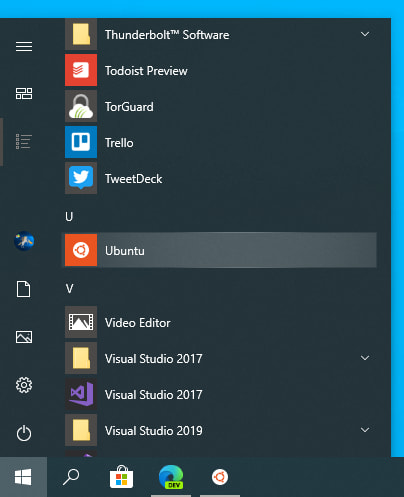
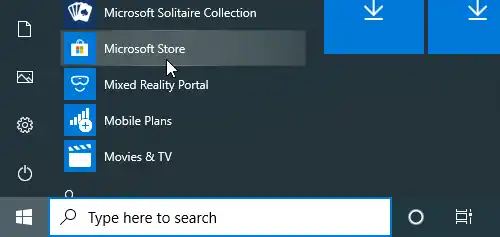
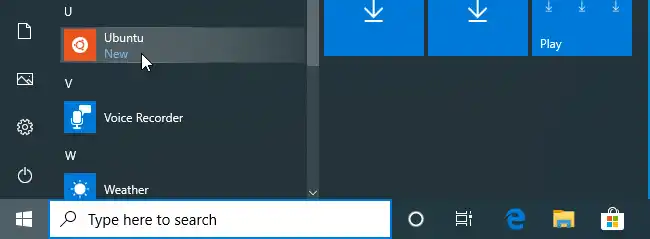
Once installed, you can either launch the application directly from the store or search for Ubuntu in your Windows search bar.
4. Configure Ubuntu
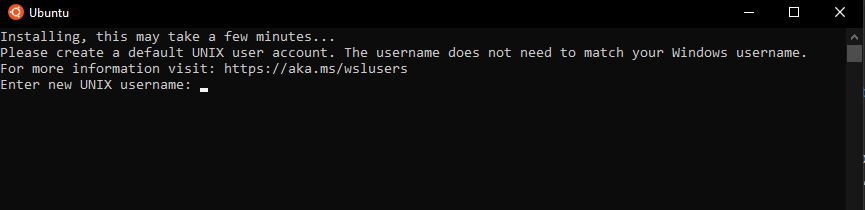
Congratulations, you now have an Ubuntu terminal running on your Windows machine!
If Ubuntu returns an error during this initial installation, then the most common issue is that virtualisation is disabled in your device’s BIOS menu. You will need to turn this on during your device’s boot sequence. The location of this option varies by manufacturer, so you will need to refer to their documentation to find it.
Once Ubuntu has finished its initial setup you will need to create a username and password (this does not need to match your Windows user credentials).
Finally, it’s always good practice to install the latest updates with the following commands, entering your password when prompted.
sudo apt update
Then
sudo apt upgrade
Press Y when prompted.
5. Install your first package
Installing packages on Ubuntu is as easy as using a single command. Below, you will see how to install bpython, a simple python interpreter for trying out ideas, featuring some nice usability features like expected parameters and autocompletion.
To check that you have the latest package lists, type:
sudo apt update
Then install bpython:
sudo apt install bpython
To run the application type:
bpython
And you’re ready to go!

6. Customising your Terminal with Windows Terminal Preview
Since you’re likely to be using your Ubuntu terminal a fair bit, it’s always nice to do some customisation. We recommend installing Windows Terminal Preview to get the most user-friendly setup. You can find it in the Microsoft Store.

Windows Terminal allows you to open multiple Terminal instances as tabs, so you can have PowerShell running alongside Ubuntu. It also includes a number of customisation options. In the below screenshot, we’ve changed the tab name and colour, and configured the terminal appearance to use the Tango Dark theme and the Ubuntu font!
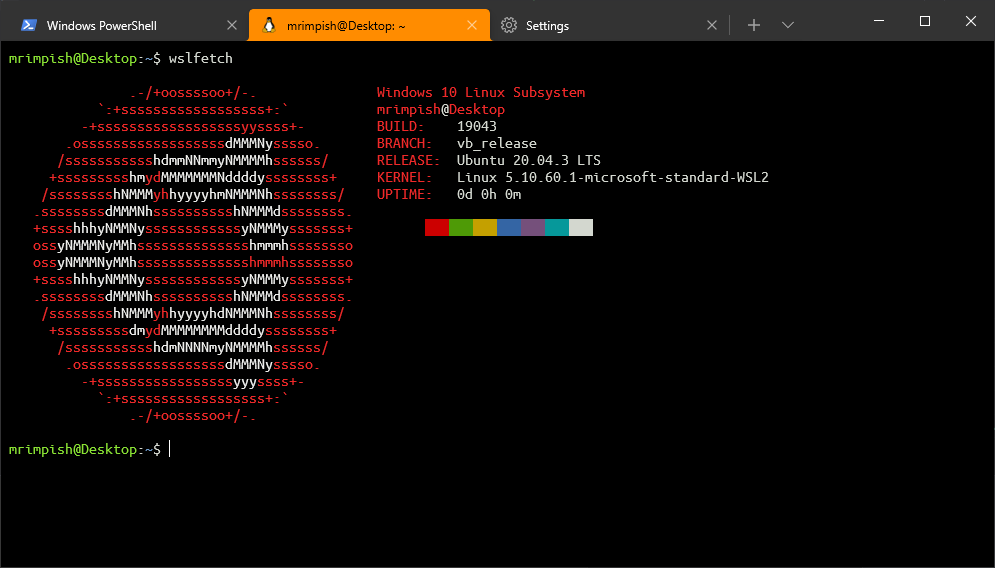
These customisations can be applied universally using the Appearance menu in Settings or to individual profiles which each have their own Appearance menu. Try it yourself to find something you feel comfortable with!

7. Enjoy Ubuntu on WSL!
That’s it! In this tutorial, you’ve seen how to install WSL and Ubuntu, set up your profile, and install your first package. You also got some tips on how to customise your experience.
We hope you enjoy working with Ubuntu inside WSL. Don’t forget to check out our blog for the latest news on all things Ubuntu.
Further Reading
- Install Ubuntu on WSL2 on Windows 11 with GUI Support
- Working with Visual Studio Code on Ubuntu on WSL2
- Enabling GPU acceleration on Ubuntu on WSL2 with the NVIDIA CUDA Platform
- Setting up WSL for Data Science
- WSL on Ubuntu Wiki
- Ask Ubuntu
Was this tutorial useful?
Thank you for your feedback.
Linux users celebrated when it was reported that Bash shell was coming to Windows. And while it was not readily available to all users at first, the Windows 10 Creators Update made Linux on Windows more accessible.
Want to join in on
the fun? Here’s how you can have Linux on Windows operating system without
having to go through a virtual machine.

Defining
Bash
Bash is basically a subsystem for Ubuntu. With Bash, you have a Linux system running inside Windows. It’s the very same Bash you’d find in Linux. You can use it to execute Linux commands without the need for a virtual machine or dual booting.
Using Bash shell,
developers can experience Linux natively on a Windows machine.
Enabling
Linux on Windows
There are two ways
of enabling a Windows subsystem for Linux. One is through PowerShell and the
other would be through Windows Features.
Use
PowerShell
Search for PowerShell and run it as an
administrator. Once open, type this command and press Enter after:
Enable-WindowsOptionalFeature -Online -FeatureName Microsoft-Windows-Subsystem-Linux
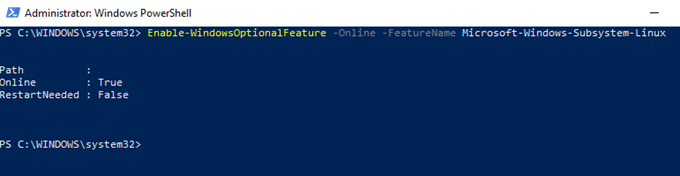
You will be prompted to confirm by hitting Y or N. Press Y to proceed then reboot your computer. If it’s already installed, you won’t have to restart.
Use
Windows Features
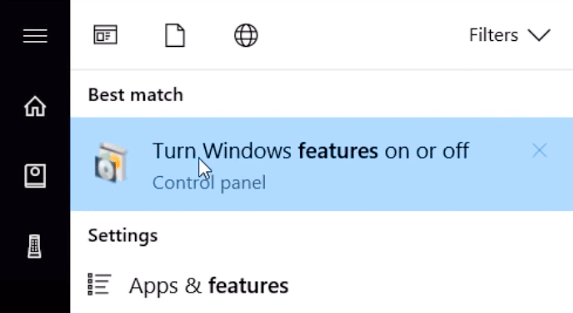
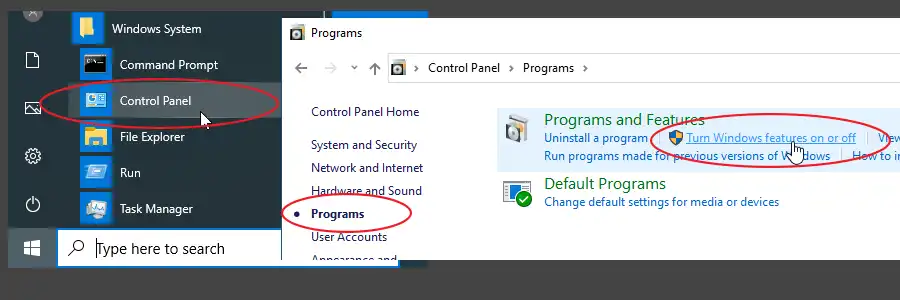
Use Search to look for a Control Panel application called Turn Windows Features On or Off.
Note: You can also get to the
application by heading directly to Control
Panel > Programs > Programs and Features > Turn Windows Features On or Off.
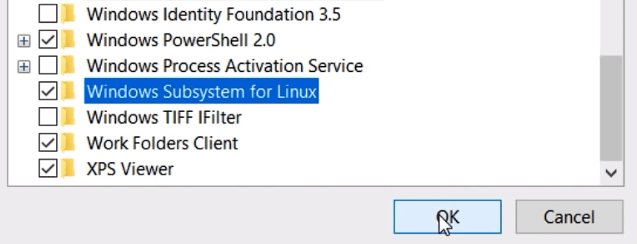
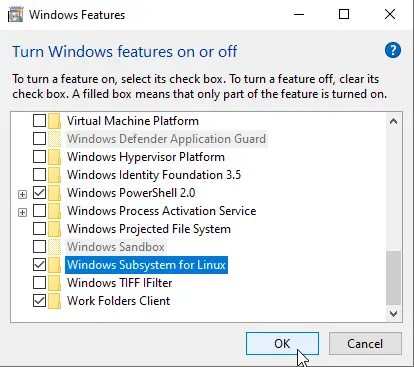
Once open, go
through the list of features until you find Windows Subsystem for Linux. Tick the box to enable the option.
The computer will
run and apply some changes. After it’s done, you will be asked to restart your
computer.
Downloading a Linux Distro
Windows should now be able to run Linux. Now you have to download a Linux distro like Ubuntu for Windows to enter Linux commands.

Simply head on over to the Microsoft Store and download the Linux distro of your choice. You need to be logged in to proceed.
There are multiple systems available, but we’ll install Ubuntu and use it throughout the rest of this post. The download will likely take a while because of the large file size.
Running
Linux
The Linux system you
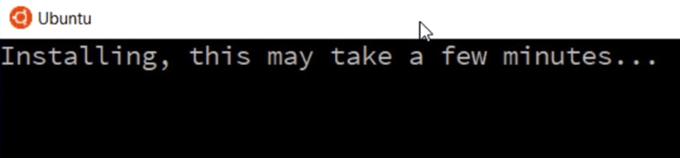
installed will run like a regular Windows application. Open Ubuntu. It will
perform a one-time installation. You will be able to use Ubuntu Linux faster
the next time you open the application.
Once installed, you
will be asked to enter a username and a password. Provide all the necessary
information.

From here on out,
you will be able to go through the directory as you would in Linux. You will
need to use SUDO APT to run root
commands. You can also use APT-GET, APT INSTALL, AND APT UPDATE. You’re pretty
much free to do everything you can do in a Linux terminal.
One thing to
remember is that the Windows files system will be located inside the MNT
folder.
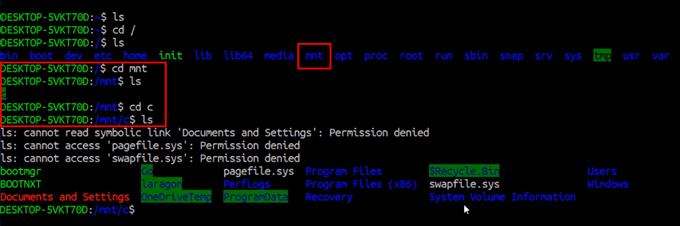
If you want to edit Windows files from the Linux system, you would have to enter CD MNT, do LS then enter CD C and another LS to locate all the files stored inside Windows. Enjoy Linux with Windows 10!
Ubuntu on Windows is a Windows 10 app that runs on Windows Subsystem for Linux (WSL), which is an Application compatibility layer for running Linux operating systems natively on Microsoft Windows.
Installing Ubuntu on Windows 10 involves a two-step process: First we enable the Windows Subsystem for Linux feature from the control panel then we install the Ubuntu app from the Microsoft store.
Enable Windows Subsystem for Linux
First we must enable the WSL Feature. Open Control panel (Start button > Windows System), go to Programs category and Select Turn Windows features on or off.
Find the feature called Windows Subsystem for Linux, then activate the checkbox and click the OK button.
This will install the WSL feature and ask you to restart your PC at the end of the process. You must restart your computer before you use this feature.
Install Ubuntu Operating System
Once you are back in Windows, open the Microsoft store from the start menu and search Ubuntu.
Select the top result, as shown in the following screenshot, and install the app once the detail page loads.
After that, a shortcut will be available in the start menu to open the new Ubuntu App.
The first time you start Ubuntu, you will be prompted to create a username and password.
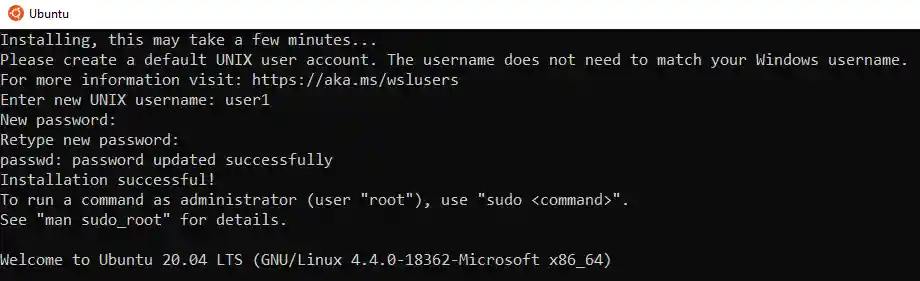
Congratulations! Now you have the access to the Ubuntu bash shell within your Windows 10 PC, Without a hypervisor or dual booting.
Run the lsb_release -a command to find out the version of Ubuntu that was installed.

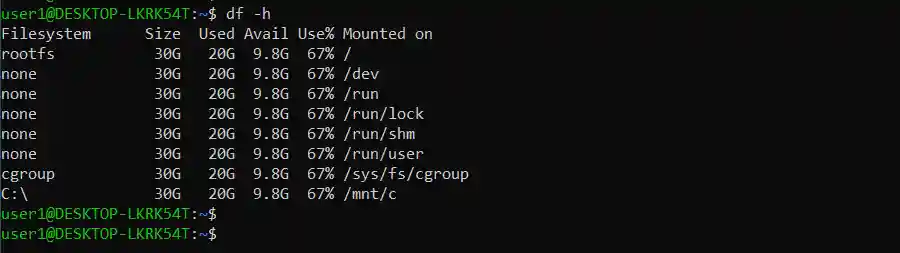
Windows file system (C: drive) is mounted into the Ubuntu subsystem under /mnt/c mount point.
Now you have an Ubuntu development environment with access to the bash command line directly on Windows 10, without the overhead of running a virtual machine.
When you install Ubuntu on Windows, the most recent LTS version (20.04 LTS as for now) will be installed. Ubuntu 18.04 is also available as an app if you want.
The latest Windows 10 Insider Preview Build 14316 brought in a ton of new features, including Windows Subsystem for Linux. Aimed at developers, the subsystem is added in the latest test iteration of Windows 10 to allow developers to use Linux utilities without using a VM or a remote system. Windows 10 Anniversary Update slated for release this summer, will bring the ability to use Bash to run command-line Linux applications. As Microsoft has offered a preview of several features of the Anniversary Update in the latest Build 14316, running Bash on Windows 10 is also one of them.
You can enroll in Windows Insider Program to take a look at all the new features of Windows 10 14316. Once enrolled, follow this guide to run Ubuntu on Windows 10.

How to run Ubuntu on Windows 10
In this guide, we will help you run Ubuntu on Windows 10. Once in, you will be running Ubuntu 14.04 «trusty,» and can also install the tools that you need, using the Apt package manager.
You will now be able to use Linux utilities, without having to run a virtual machine or a remote system. Bash on Windows 10 has access to your Windows filesystem, so you will be able to work on the same files from within Bash.

Remember, this is not technically Linux, as you are running a userspace version of Ubuntu, running on WSL (not Linux kernel). But, you will be able to run Bash shell commands, Bash scripts, and Bash shell tools. Microsoft also says that Ubuntu on Windows 10 allows you to run Linux-first tools like Ruby and Python directly on Windows.
For more, please visit Microsoft.
Updated December 27, 2022.
So you want to install Ubuntu on Windows 10 or Windows 11? Don’t worry, you’re at the right place. You might be surprised to know, but there’s no single, universal way to install and run Ubuntu on Windows.
In this post, we lay out 3 ways to install and run Unbuntu on Windows 10 or Windows 11, including:
- WSL (Windows Subsystem for Linux).
- Using a USB stick.
- Using a VM (Virtual Machine).
So, without further ado, let’s get started.
1. Install Ubuntu on Windows with Windows Subsystem for Linux (WSL)
The Windows Subsystem for Linux, WSL for short, is an environment created on top of the Windows operating system that helps users run the Linux environment on their Windows 10 or Windows 11.
WSL includes things like command line tools, utilities, and other applications. But, keep in mind that you won’t get the default GNOME GUI that comes with other methods of installing Ubuntu in Windows 10.
That is to say, you can only run Ubuntu through the Windows Terminal by using WSL. Also, to run WSL, you’ve to meet certain minimum requirements on Windows 10 or Windows 11; here they are:
- 64-bit operating system.
- Windows 10 build 14393 or later.
If you meet the above minimum requirements, you should be able to run Ubuntu on Windows without any difficulties. Here’s how:
On your Windows machine, go to the Start menu search bar, type in ‘windows features,’ and select the Best match. The Windows Features will be launched.
On it, select the Turn Windows Features on or off feature. From there, scroll down to the Windows Subsystem for Linux, select the checkbox and click on OK.

Windows will begin installing the WSL files, so give it a few minutes. After the installation is finished, reboot your PC or let it reboot by itself if you have the option.
After the reboot, launch the Command prompt. Go to the Start menu search bar, type in ‘cmd,’ and select the Best match. In the Command prompt, type bash and hit Enter.
Now you need to install Ubuntu on Windows, so head to https://aka.ms/wslstore. As soon as you enter the website URL in the address bar, Microsoft Store will be launched on your PC.
There, you’ll see a host of different Linux distributions that you are free to run side-by-side on your Windows operating system. Click on Ubuntu. From there, click on Get to download Ubuntu on Windows.

Next, click Install to install Ubuntu on Windows.

The Ubuntu environment installation will begin on your PC. When the installation gets finished, click on Open to open Ubuntu on Windows.

A new window will get launched and the Ubuntu installation will begin in your WSL. The installation might take a few minutes to complete, depending on your internet speed. So don’t worry if it takes a while.

When Ubuntu installation is complete, you’ll be prompted to set a username. Type in a relevant name and hit Enter. Next, you’ll have to set a password. Do that. Once you’re done with all the credentials, Ubuntu will be all set up.


After everything’s set and done, it’s a good idea to do a quick update for your Ubuntu. Run the following command and hit Enter:
# sudo apt updateWait till the update gets completed and by the time you’re done, Ubuntu will be successfully running on your PC. Now you can access the Ubuntu command line whenever you want on Windows 10 or Windows 11.
2. Install Ubuntu on Windows from a USB stick
Installing Ubuntu on Windows through the above method works. But, it doesn’t really give you the complete feel of the Ubuntu operating system, which nowadays comes with a GNOME GUI.
The second method on our list is designed to get around just this problem. You can run Ubuntu on Windows from a USB stick without any difficulties.
All you need is the Ubuntu ISO installation media, a USB drive, and software to make your USB stick bootable and write the ISO file onto the stick. There’s a plethora of apps online that can help make your USB bootable.
For this example, we’ve chosen Rufus. You can pick whichever you like.
Let’s first download the Ubuntu ISO file. Head to the official Ubuntu download page, and get the file from there. Currently, the latest LTS version is Ubuntu 20.04.3, so we’ll download that.

After you’ve downloaded the relevant file, you now need to download the Rufus app from the official website. When the download is complete, run the application and then insert your USB stick to make it bootable.


On the main menu of Rufus, click on SELECT, and pick the ISO file you’ve just downloaded. Set the Partition scheme to MBR and Target system to BIOS or UEFI. Under the Format Options section, leave everything as default. Then click on START.

You might get a dialog box asking you to download some additional files. Click on Yes and the files will be downloaded, following which, the ISO copying process will also begin. In the next dialog box, select the Write in ISO Image mode (Recommended), and click on OK.
The copying will get completed in a few seconds and when everything’s done, click on Close.
Now whenever you need to run Ubuntu on Windows, simply plug in the USB before starting up your PC and the computer will boot up from your USB drive. You’ll then get taken to the Ubuntu installation menu and from there, click Try Ubuntu.
That’s it! You’ll now be able to run Ubuntu on Windows 10 or Windows 11 whenever you want.
3. Install Ubuntu on Windows from a Virtual Machine (VM)
A Virtual Machine, or just VM for short, is a virtual environment that helps you run a computer within your computer. Think of it as running an operating system inside a specific VM app.
We’ve already covered how you can install Windows 11 on a Virtual Machine, so it’s no surprise that in the third method, we’ll install Ubuntu on Windows 10 or Windows 11 with a Virtual Machine.
We’ll be making use of Virtual Box here, an open-source Virtual Machine developed by Oracle. To get started, head to the official Virtual Box website and download the app from there; then install the app when you’re done with the download.

Now, we also need an Ubuntu ISO file again. You can download it from official Ubuntu download page as we did in the above step. After the download is complete, launch the VirtualBox and select New from the taskbar above.
In the new dialog box, give a specific name to your new virtual machine (I’ll be setting the name as Ubuntu), set the type as Linux, choose the Version as Ubuntu and click on Next.
Then decide a specific amount of RAM, which you want to assign to your virtual machine, and click on Next.
Finally, select the Create a virtual hard disk now radio box and select Create.

In the next dialog box, select VDI (VirtualBox Disk Image) and click on Next. On the next menu, pick Dynamically allocated and click on Next. Finally, set the size for your virtual hard drive and click on Create
If you look at the left-hand side of your VirtualBox Manager, you’ll see the name of your virtual machine. To get it up and running, simply click on Start and your VM will be launched.

Now we’ve to pick the Ubuntu ISO file that you downloaded earlier. Click on Add, choose the Ubuntu image, and select Open. Then click on Choose > Start.

Ubuntu will be launched on your Virtual Machine. From there, select the language of your choice, and you’ll see two options again: you can either ‘try’ Ubuntu or you can simply install it.
Pick the one you like, follow the on-screen instructions, and you’ll be able to run to Ubuntu on Windows through the VM from now on.
Ubuntu on Windows
And that’s it, folks. These are some of the easiest ways to install and run Ubuntu on Windows. Hopefully, you found the method that worked best for you and can run the Ubuntu OS without any hiccups.