 При анонсе Windows 11 Майкрософт пообещала возможность запуска Android приложений в новой операционной системе. На момент релиза функция была недоступна, затем появилась в предварительных версиях системы, теперь же доступна всем пользователям.
В этой инструкции пошагово о том, как включить Windows Subsystem for Android в Windows 11, установить Android приложения и дополнительная информация, которая может оказаться полезной в контексте рассматриваемой темы. Также может быть полезным: Лучшие эмуляторы Android для Windows.
Установка Windows Subsystem for Android (WSA, Подсистема Windows для Android)
Все описанные действия по установке Подсистемы Windows для Android актуальны на момент написания статьи: вероятнее всего в скором времени процесс будет проще.
Необходимые шаги для установки Windows Subsystem for Android или WSA в Windows 11:
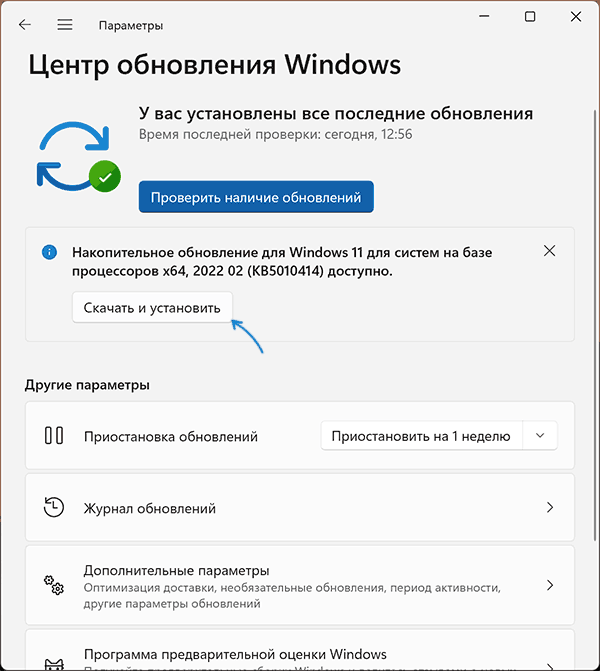
- Установите накопительное обновление KB5010414 через Центр обновления Windows, если вы этого еще не сделали.

- Для того, чтобы WSA могла работать, необходимо, чтобы на компьютере была включена виртуализация. Среди прочих требований — наличие SSD. Мне неизвестно, насколько критичен последний пункт при ручной установке Windows Subsystem for Android, к которой мы прибегнем далее.
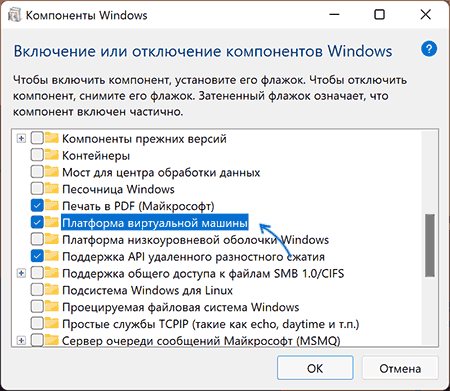
- Зайдите в Панель управления (для её открытия можно использовать поиск в панели задач) — Программы и компоненты, откройте пункт «Включение или отключение компонентов Windows», включите компонент «Платформа виртуальной машины», установите его и перезагрузите компьютер. Подробнее: Как установить дополнительные компоненты Windows 11 и Windows 10.

- Следующий шаг — установка приложения Windows Subsystem for Android, которое устанавливается при установке Amazon Appstore из магазина Microsoft Store. Сейчас приложение доступно лишь пользователям из США (но проверьте, возможно, к моменту, когда вы читаете этот материал, это уже не так), поэтому придется использовать обходной путь: зайдите на сайт https://store.rg-adguard.net/
- В пункте слева выберите «ProductId», в поле ввода данных введите 9p3395vx91nr и нажмите кнопку с изображением «галочки» справа. Внизу отобразится список доступных файлов для загрузки, требуется скачать файл размером более одного гигабайта в конце списка с именем
MicrosoftCorporationII.WindowsSubsystemForAndroid_НОМЕР_ВЕРСИИ_neutral_~_8wekyb3d8bbwe.msixbundle

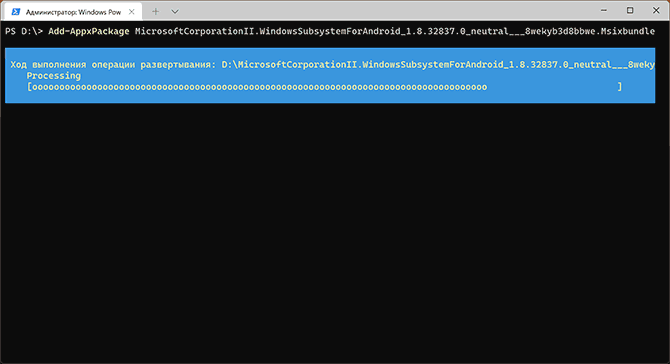
- Загруженный файл не получится установить просто запустив его. Для установки откройте Терминал Windows от имени администратора (правый клик по кнопке Пуск и выбрать нужный пункт в контекстном меню), а затем используйте команду
Add-AppxPackage полный_путь_к_скачанному_файлу
Путь можно скопировать, нажав правой кнопкой по файлу и выбрав соответствующий пункт в контекстном меню. Если путь содержит пробелы, возьмите его в кавычки.


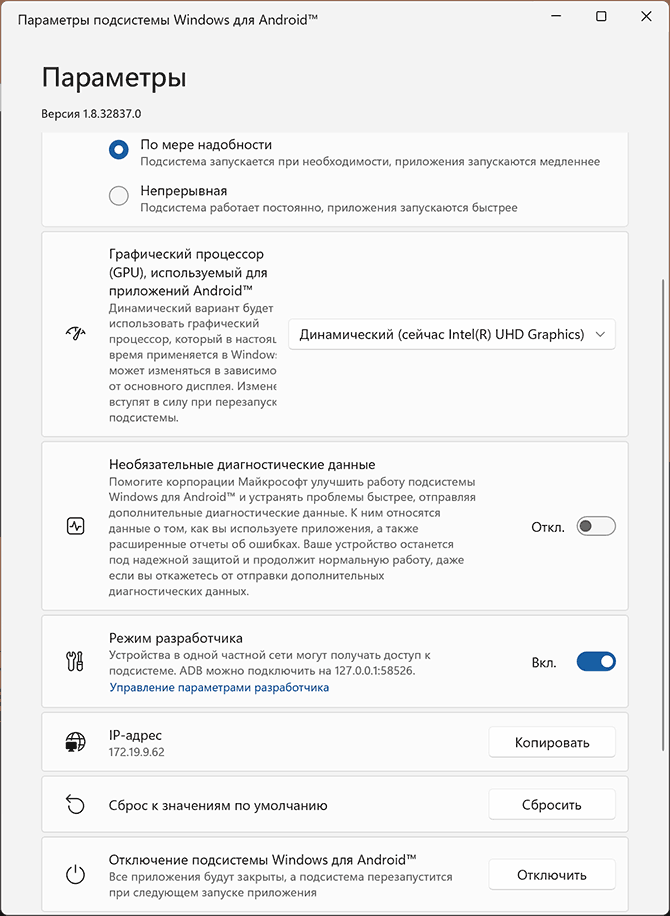
В результате выполнения указанных действий WSA или Подсистема Windows для Android будет установлена на компьютере, а в списке доступных приложений появится приложение «Параметры подсистемы Windows для Android».
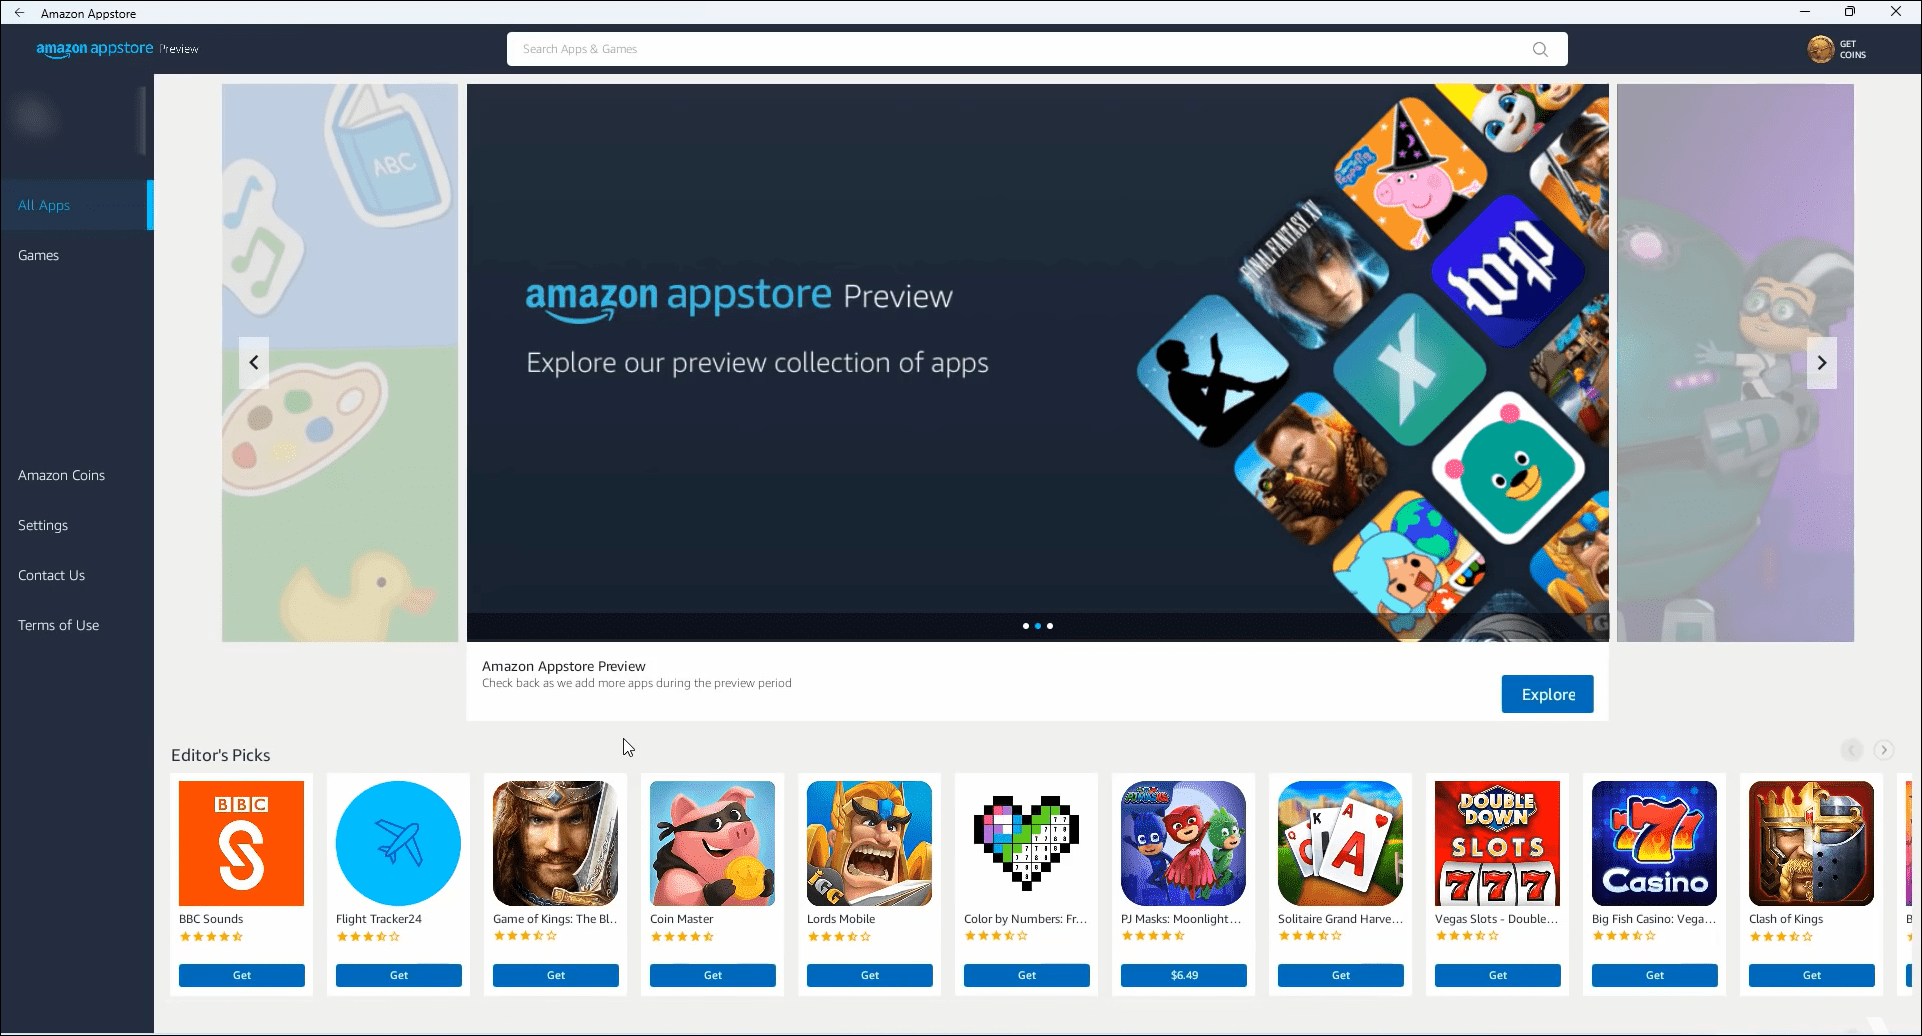
После запуска подсистемы Windows для Android (первый раз можно быстро запустить, открыв пункт «Файлы» в параметрах подсистемы Windows для Android), на компьютере также будет установлено приложение Amazon AppStore — стандартный метод установки Android-приложений в Windows 11.
Установка Android приложений в Windows 11
Стандартный метод установки Android приложений в Windows 11 — Amazon AppStore, однако на текущий момент (если ситуация изменится, и вы заметите это раньше меня, пожалуйста, напишите в комментариях), после входа в приложение вы увидите уведомление о том, что оно недоступно в нашей стране:
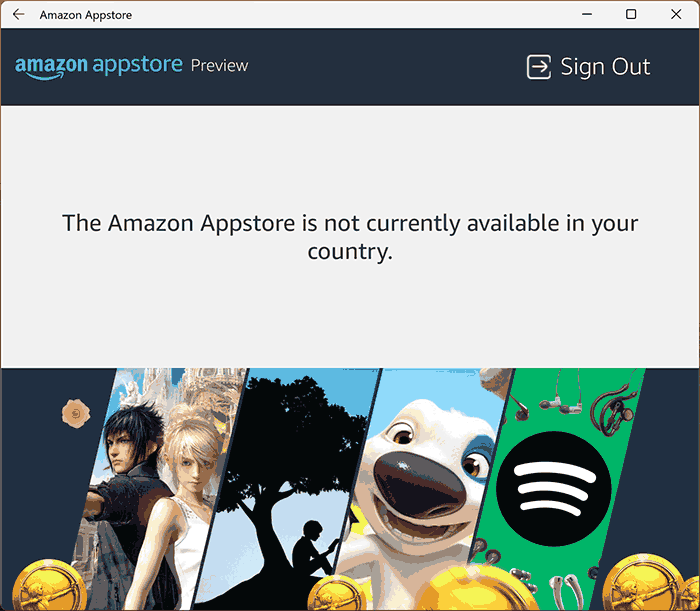
Поэтому придется использовать один из следующих методов.
Ручная установка Android-приложений в WSA с помощью adb.exe
Первый метод — использовать команды adb.exe для установки приложений из файлов APK вручную. Порядок действий:
- Скачайте инструменты командной строки platform-tools, включая adb.exe и распакуйте в удобную папку на вашем компьютере, рекомендую брать отсюда: https://adbinstaller.com/ — в этом варианте будет загружено только самое необходимое.
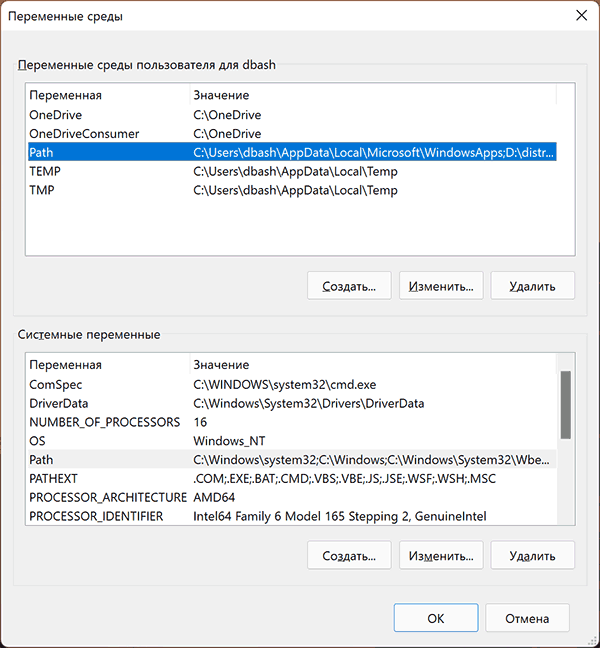
- Шаги 2-4 можно не выполнять, если вы готовы указывать полный путь к adb.exe в командной строке. Нажмите клавиши Win+R на клавиатуре, введите sysdm.cpl и нажмите Enter. Перейдите на вкладку «Дополнительно» и нажмите кнопку «Переменные среды».
- Выберите переменную Path (для пользователя, если требуется использование только текущим пользователем или в разделе «Системные переменные» для всей системы» и нажмите «Изменить».

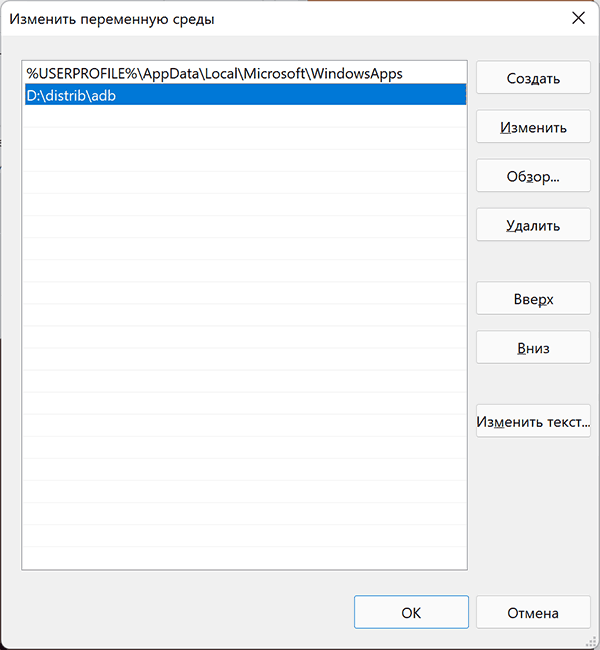
- Нажмите «Создать» и добавьте путь к папке с файлом adb.exe в системную переменную Path.

- Откройте приложение «Параметры подсистемы Windows для Android», включите пункт «Режим разработчика». Если сама WSA не запущена, запустите её (например, откройте пункт «Файлы» вверху окна, после открытия можно закрыть). Обратите внимание на пункт «IP-адрес» в параметрах, скопируйте его (если адрес не отображается, нажмите кнопку «Обновить» после запуска подсистемы Windows для Android).
- Скачайте нужные вам приложения Android в виде файлов APK, например вот так: Как скачать APK приложений Android.
- Запустите командную строку от имени Администратора (как запустить командную строку от администратора в Windows 11).
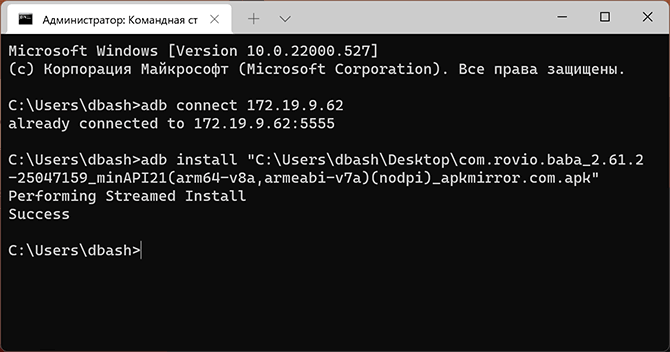
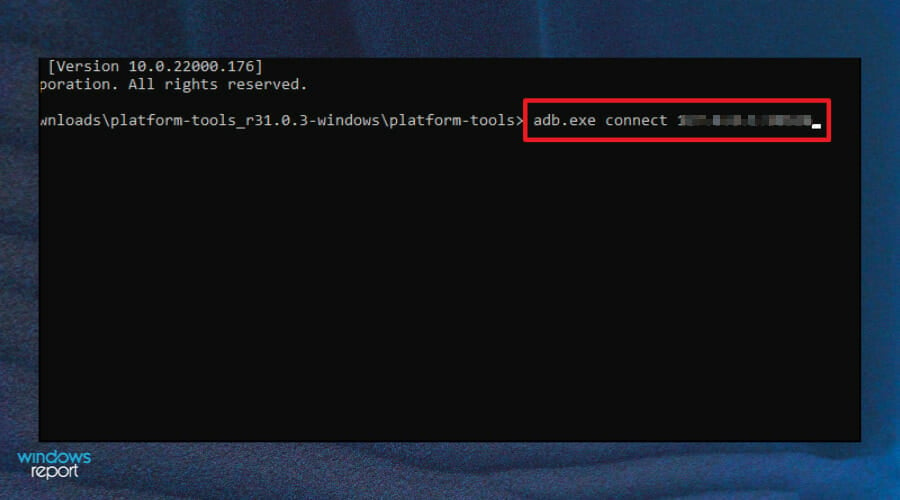
- Введите команду adb connect IP-адрес (где IP-адрес — адрес WSA из 5-го шага).
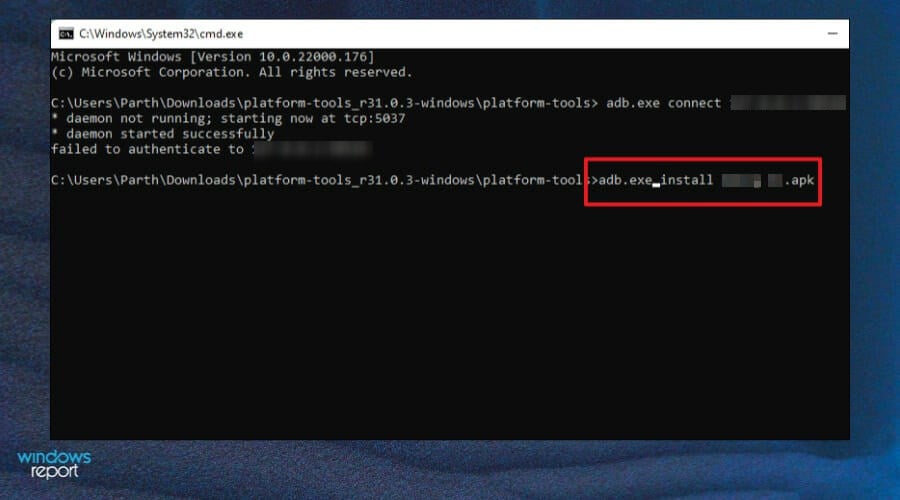
- Используйте команды adb install путь_к_файлу_apk для установки приложений Android. Успешно установленные приложения будут добавляться в меню Пуск Windows 11.

Не все приложения исправно работают: некоторые будут сообщать об ошибках или необходимости установки из Google Play (по всей видимости, из-за отсутствия Google Play Services). Но некоторые работают очень хорошо:
Даже работающие приложения не всегда делают это вполне исправно, среди замеченных проблем — неправильная отрисовка текстового контента в браузерах.
WSATools
В магазине Microsoft Store вы можете найти приложение WSATools, которое призвано облегчить установку приложений Android в Windows 11. Всё что требуется — указать файл APK устанавливаемого Android приложения, а всё остальное программа должна выполнить автоматически, в том числе — скачать и установить adb.exe при необходимости.

Однако в моем тесте установка в актуальной не Preview версии Windows 11 не удалась: экземпляр adb.exe, скачиваемый WSATools отказывается запускаться, а при ручной установке adb.exe, приложение либо зависает, либо «не видит» установленного adb.
Видео
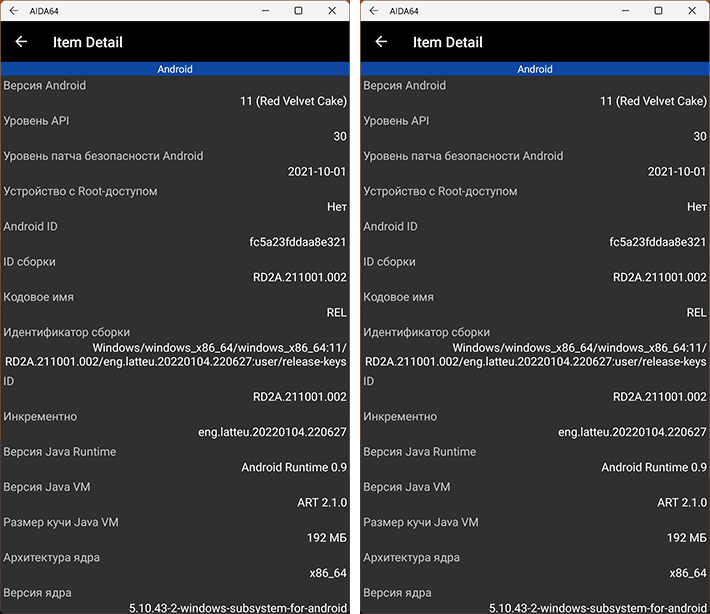
Если кому-то интересны характеристики виртуального устройства, запущенного в рамках Подсистемы Windows для Android, ниже — скриншоты с этой информацией.
Также, думаю, может заинтересовать проект MagiskOnWSA https://github.com/LSPosed/MagiskOnWSA для установки OpenGApps и получения Root в Windows Subsystem for Android.
Learn how to get your favorites apps on Windows 11
by Loredana Harsana
Loredana is a passionate writer with a keen interest in PC software and technology. She started off writing about mobile phones back when Samsung Galaxy S II was… read more
Updated on
- Android apps are delivered to users through the Google Play Store and other app stores.
- When one has an application in APK format but no Android device to install it on, one can use a third-party app.
- Windows 11, through the Windows Subsystem for Android, now allows you to open and install such files on your PC.
Many of our readers asked how to install and run APKs on Windows 11 and this article is going to answer all the questions.
You will have to download an APK file opener for your operating system – but that’s only if you don’t already have one installed. For more advanced features and a higher probability of opening an APK file, we recommend File Viewer Plus which has more than 400 extensions available.
- Is my PC APK ready?
- What do I need to install APK files on Windows 11?
- How can I install APK files on Windows 11?
- 1. Download and install Windows Subsystem for Android
- 2. Download and install the Amazon Appstore
- 3. Sideload APKs using an APK file
- Are there implications of running APKs from third-party sites?
- Are APK files safe?
Is my PC APK ready?
There are two ways to install APK files on Windows: use an Android emulator or unpack them with a special application.
In order to install APKs on Windows 11, you need to have Hyper-V and Virtual Machine Platform enabled.
To enable the two features:
How we test, review and rate?
We have worked for the past 6 months on building a new review system on how we produce content. Using it, we have subsequently redone most of our articles to provide actual hands-on expertise on the guides we made.
For more details you can read how we test, review, and rate at WindowsReport.
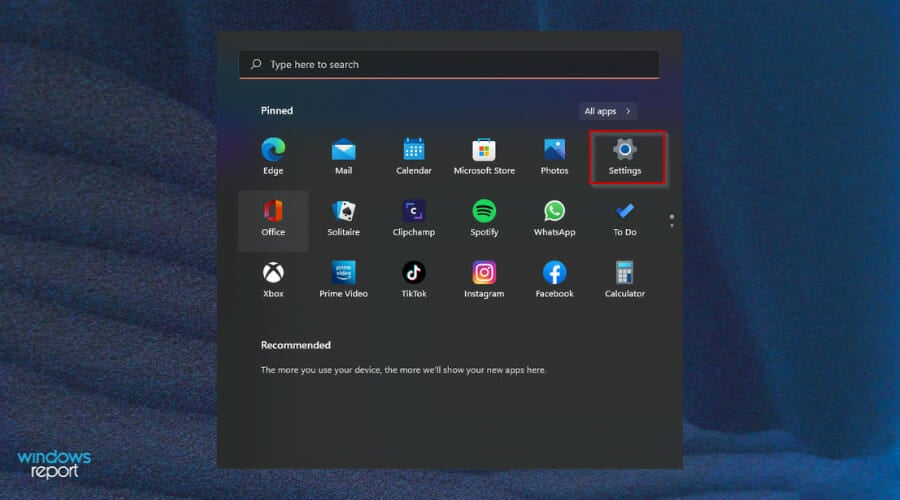
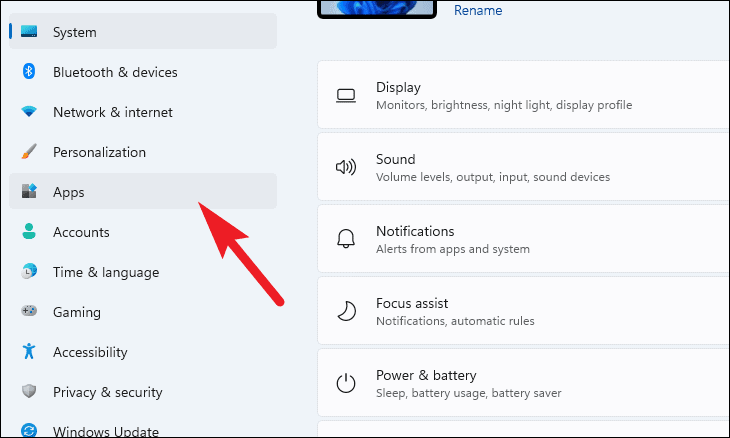
1. Hit the Windows + I keys simultaneously to open the Start Menu then select the Settings app.
2. Navigate to Apps and select Optional features.

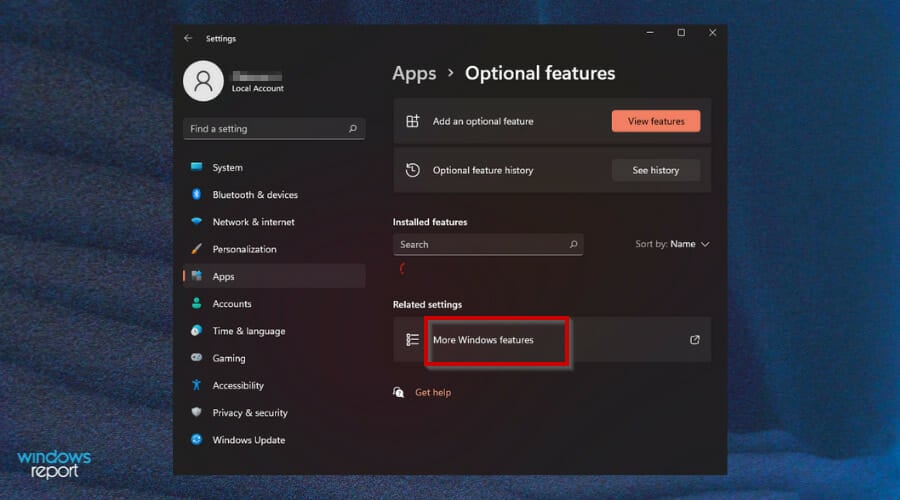
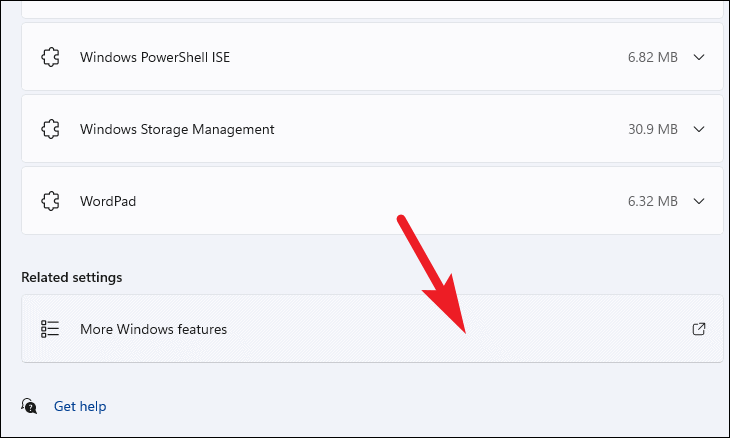
3. Select More Windows Features.
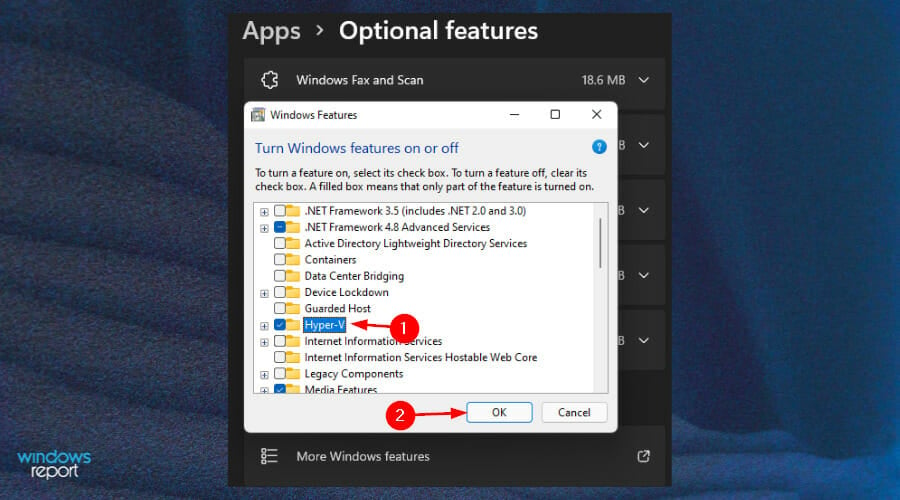
4. Locate Hyper-V and click on the checkbox then press OK.
5. Also find Virtual Machine Platform, click on the checkbox and press OK.

6. Wait for the installation to complete.
What do I need to install APK files on Windows 11?
The majority of Android apps are written for phones, and won’t run on the larger screens of PCs. There are ways to get around this, but they vary in effectiveness and riskiness.
You will probably want to download a Google Play Store alternative for your Windows 11 PC. The most common app stores are the Amazon Appstore and the Microsoft Store.
The only limitation is that the stores offer a limited number of applications so if you need one that is unavailable, you will have to sideload it. In addition, your PC must meet the minimum system requirements before you can run any APKs.
Sideloading means installing apps from sources other than the official stores. There are quite a few reasons why one might want to do this: free apps, avoiding data usage when downloading games and videos, and so on.
Don’t hesitate to visit our guide on how to sideload Android apps on Windows 11 if you choose to install them from third-party sites.
For Windows 11 users, Microsoft’s Windows Subsystem for Android is a great new addition to the operating system. It allows you to run Android apps on your PC or laptop.
How can I install APK files on Windows 11?
1. Download and install Windows Subsystem for Android
- Press the Windows + I keys to open the Start Menu.
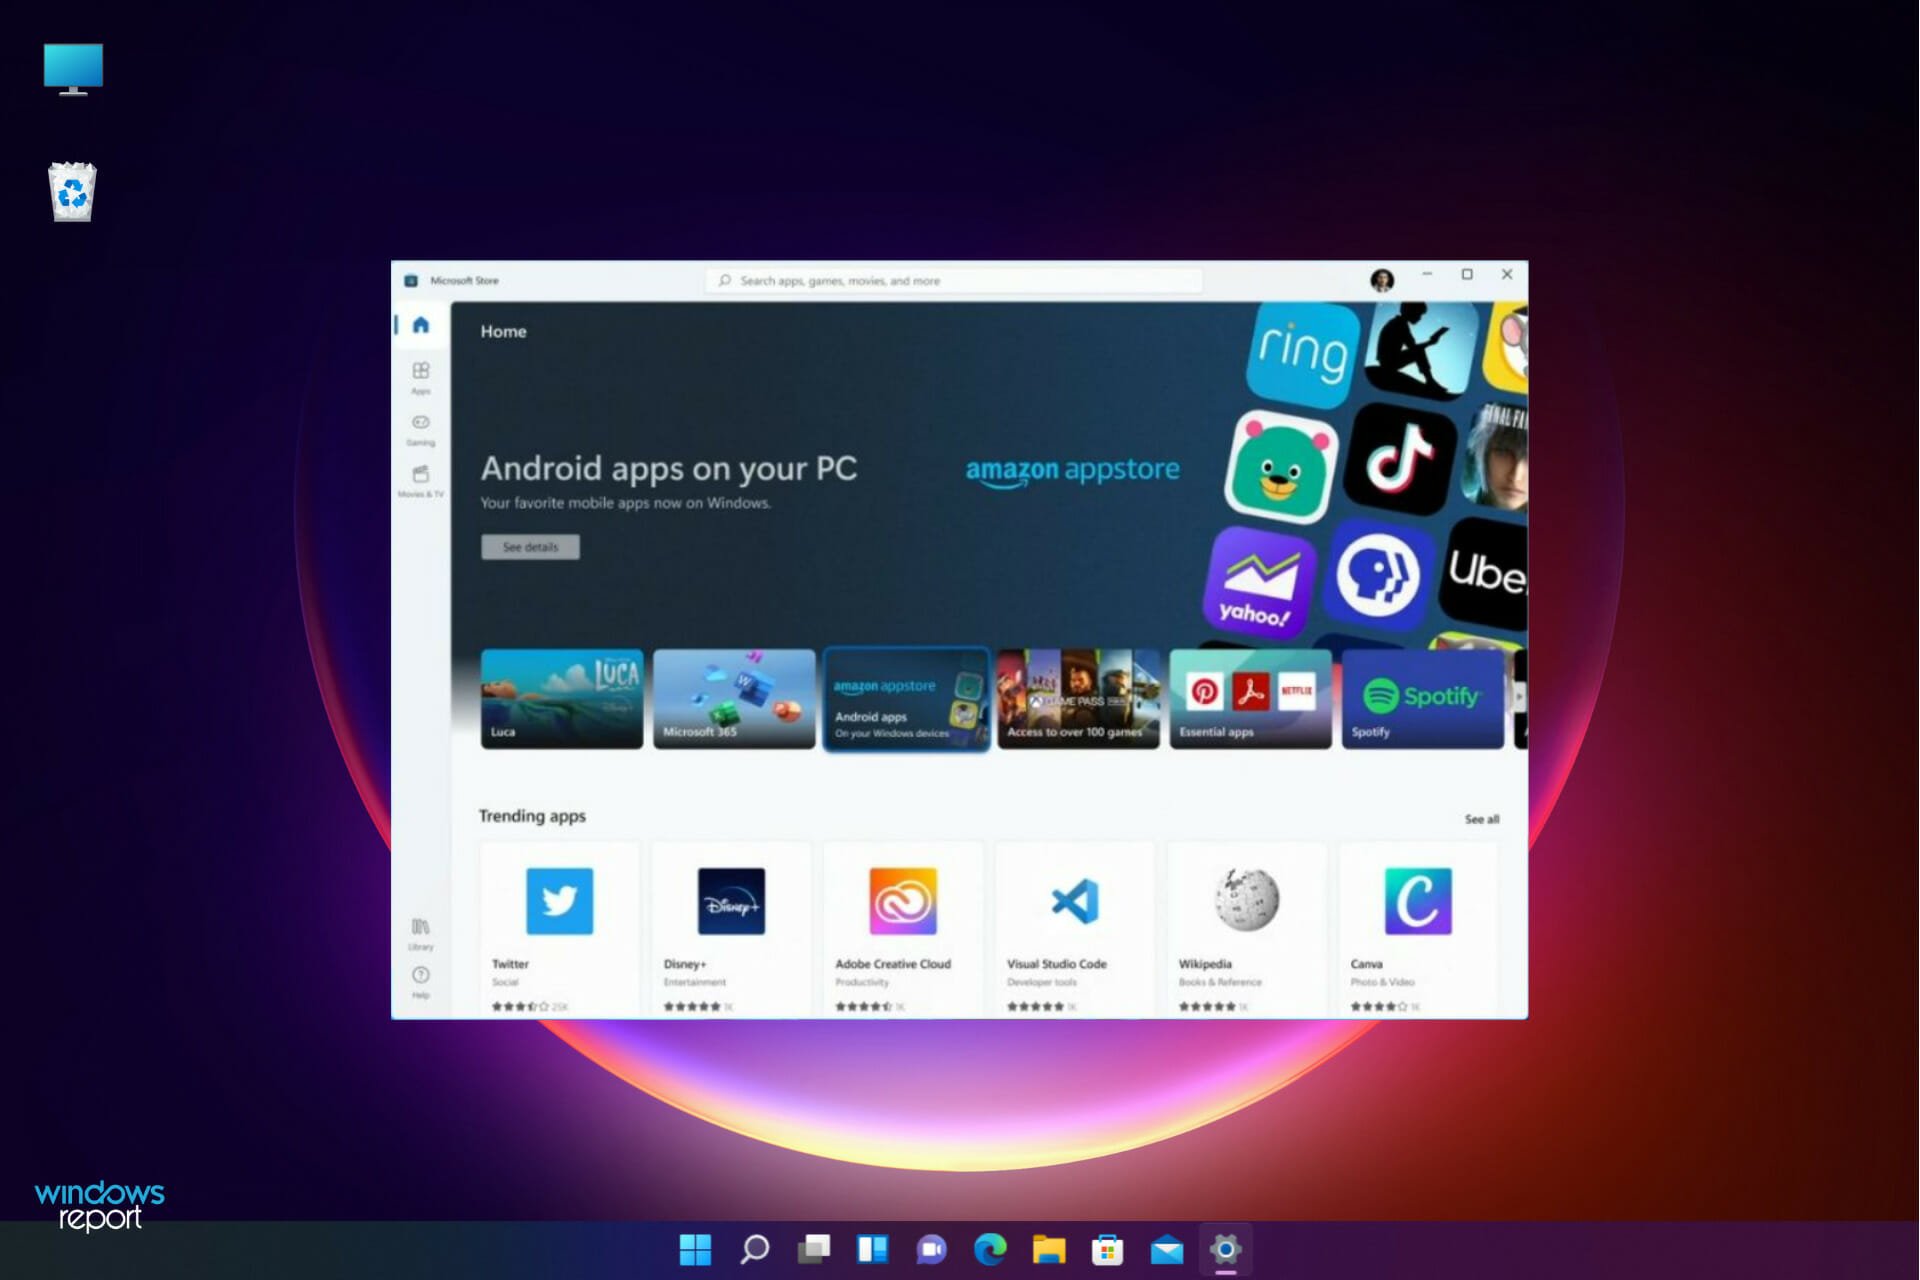
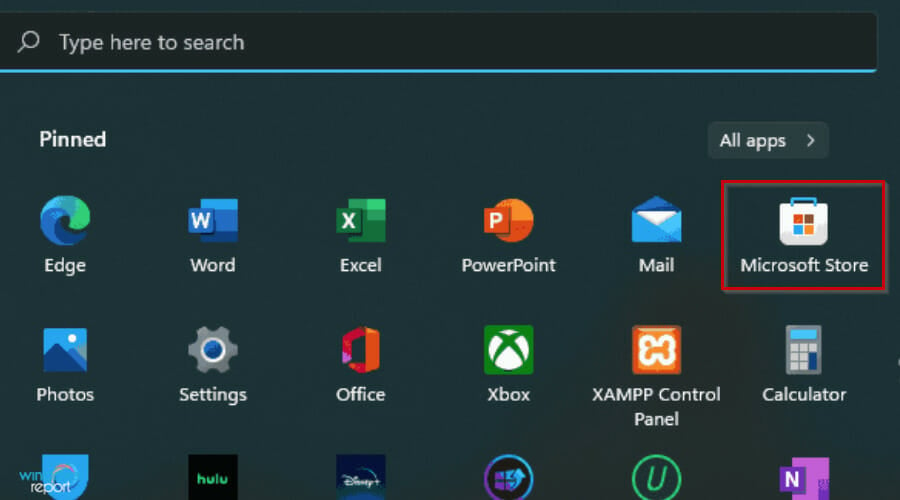
- Select Microsoft Store to launch.

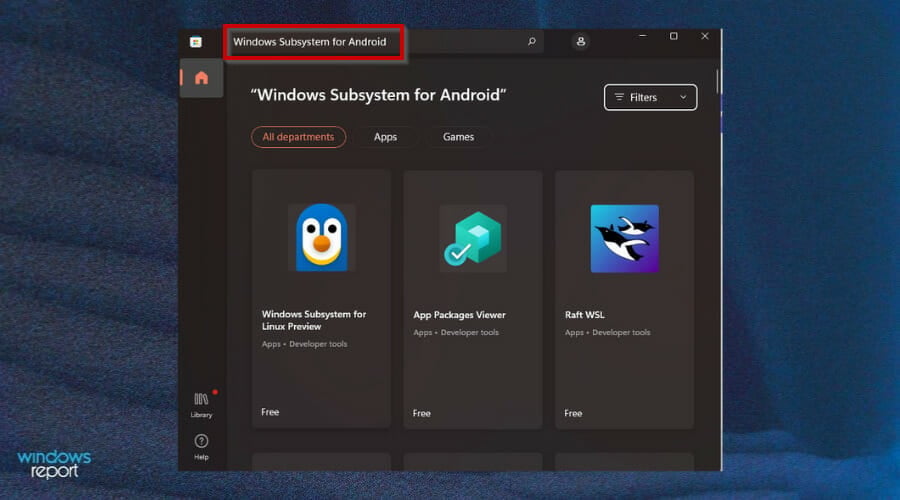
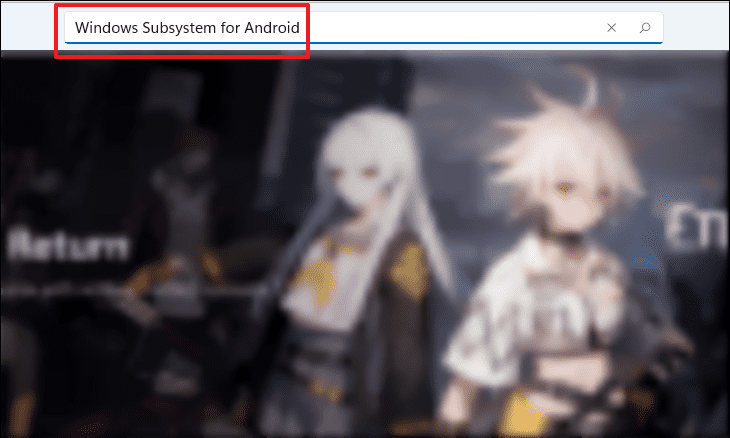
- Type Windows Subsystem for Android on the Microsoft Store search window and press Enter.
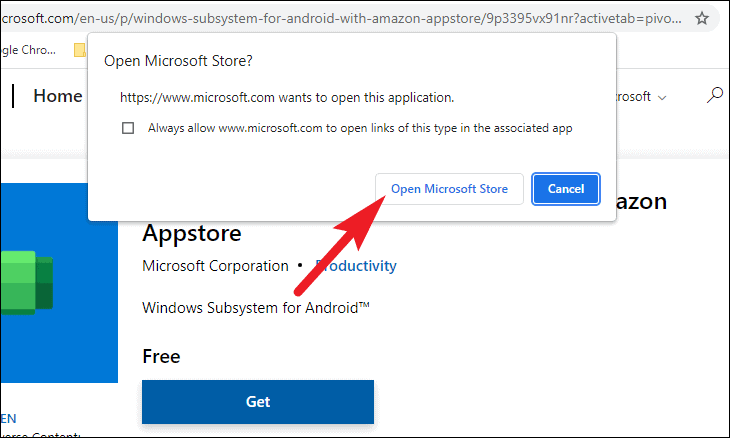
- Click Open Microsoft Store to be redirected to the Microsoft Store.
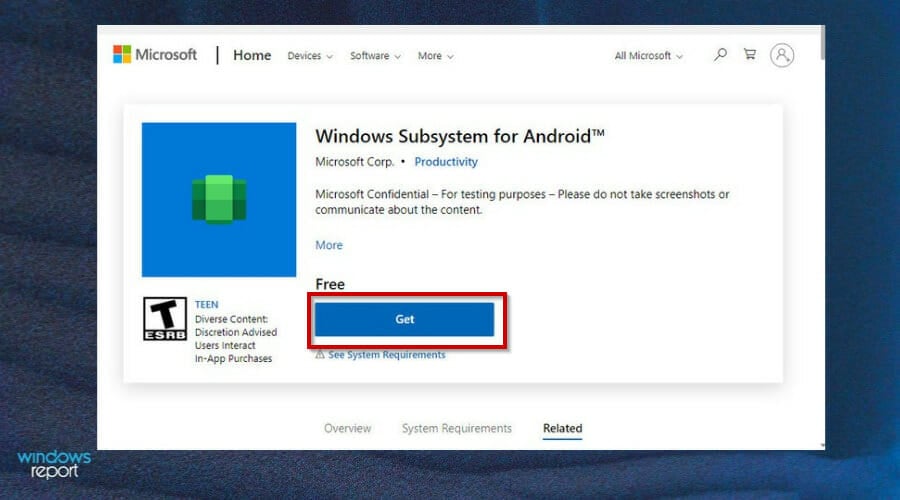
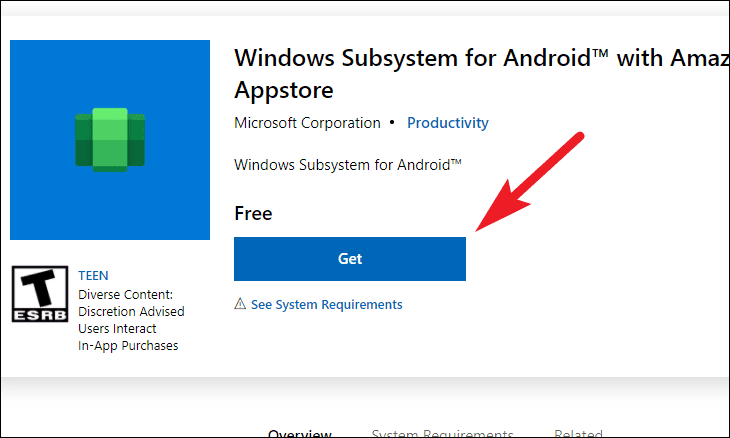
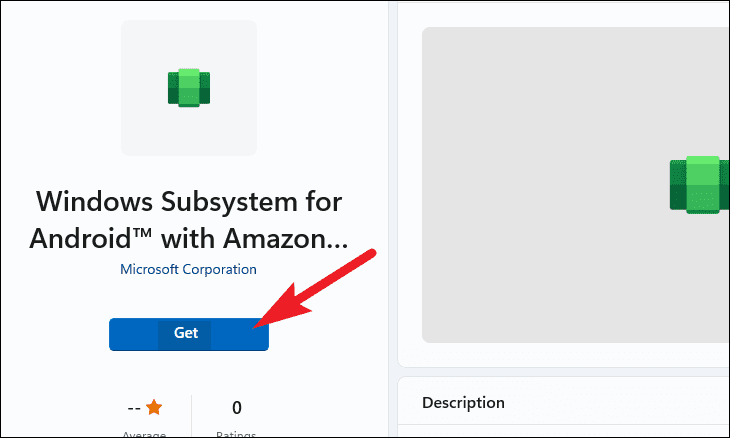
- Hit the Get button to start installation.
- Once installed, you can now download and open APKs.

2. Download and install the Amazon Appstore
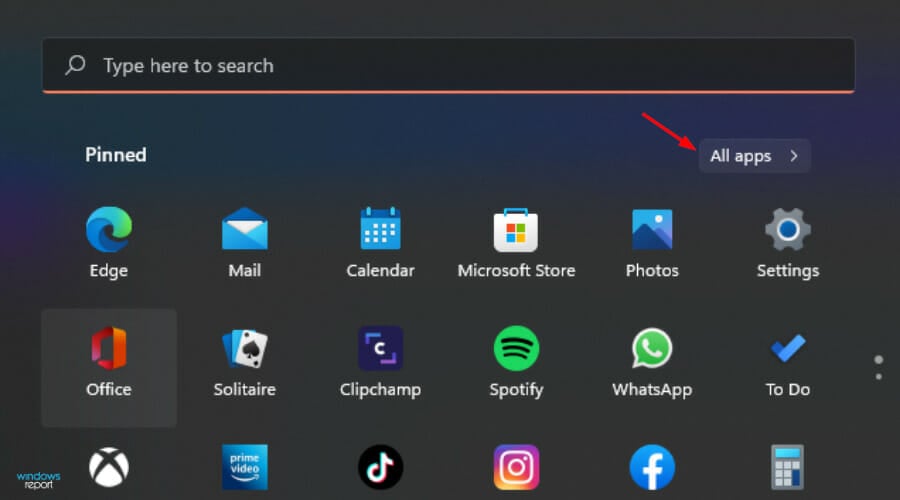
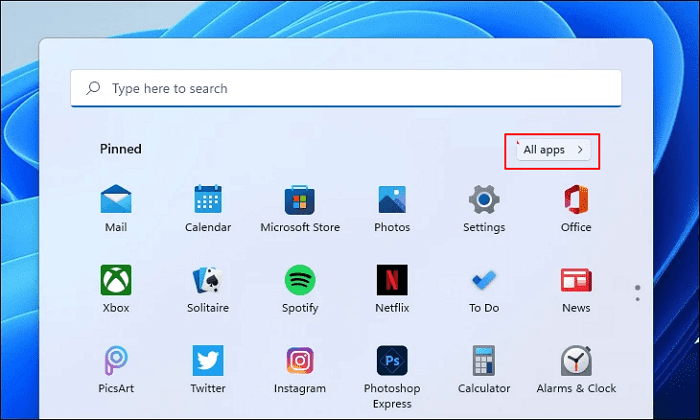
- Press the Windows + I key to open the Start Menu and click on All apps.
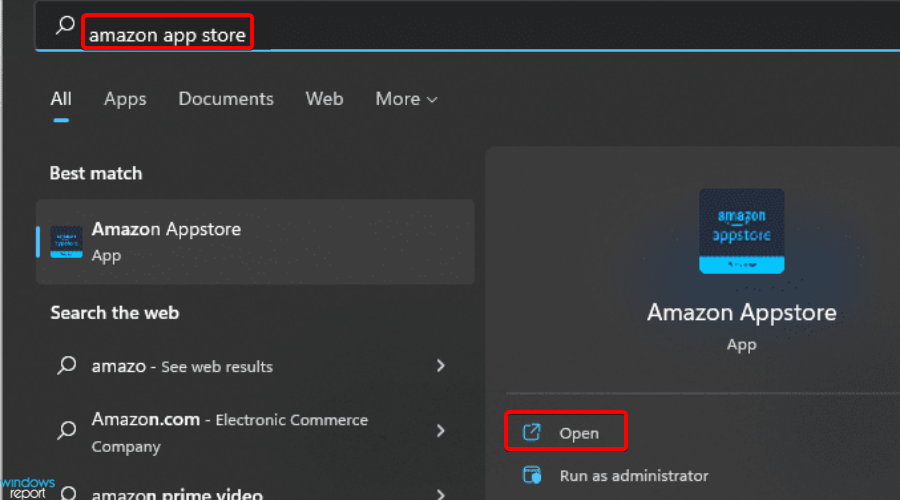
- Locate the Amazon Appstore and click on it to launch.
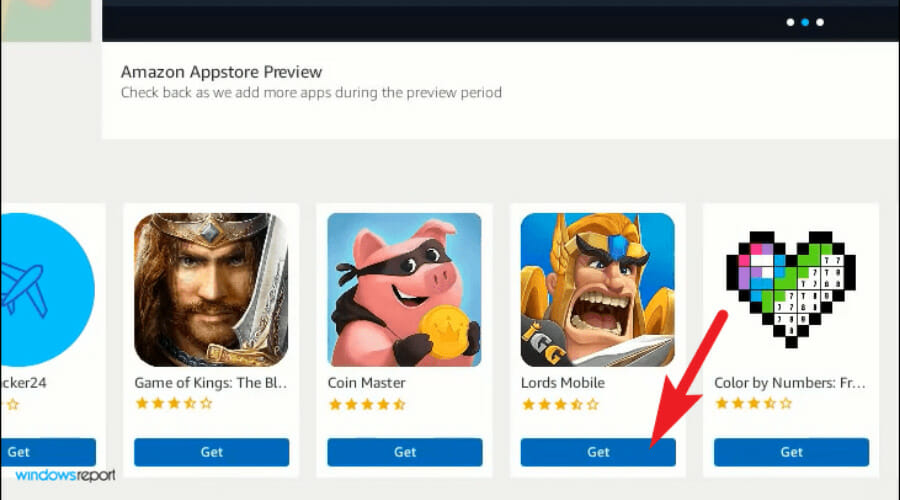
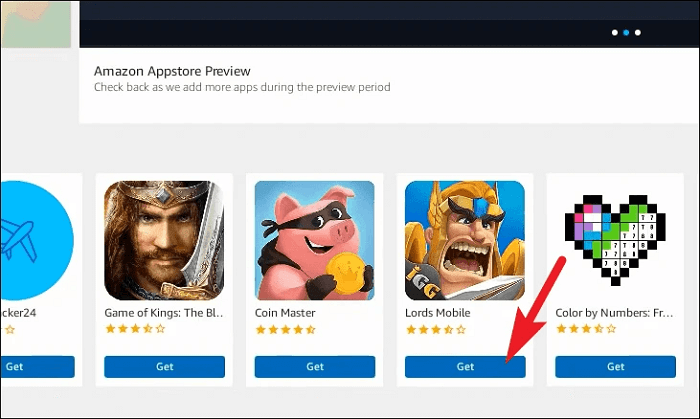
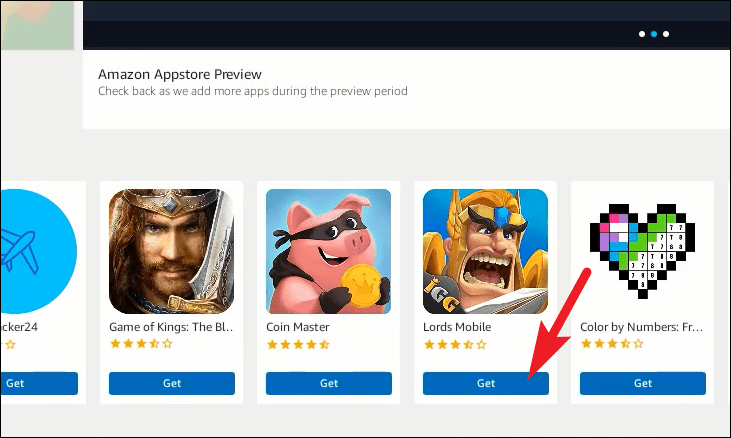
- Find the application of your choice and click on the Get button.
3. Sideload APKs using an APK file
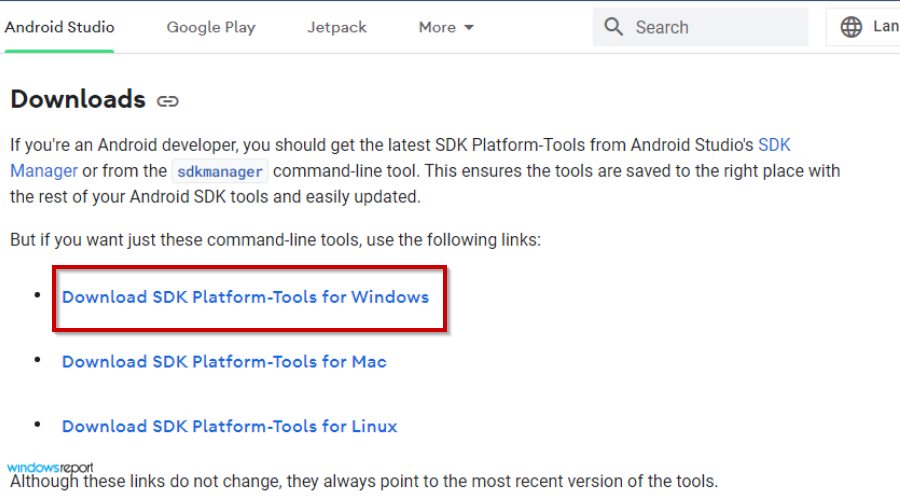
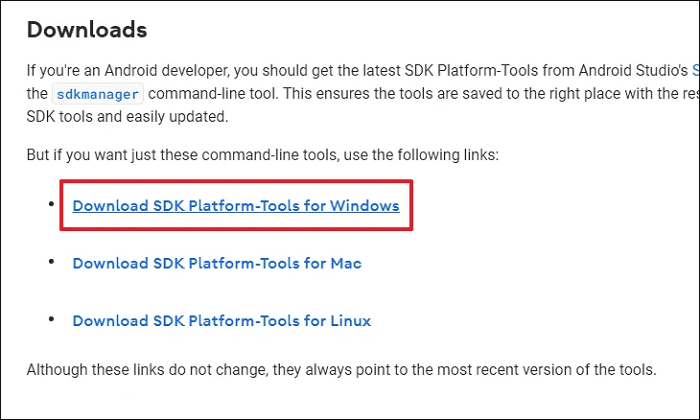
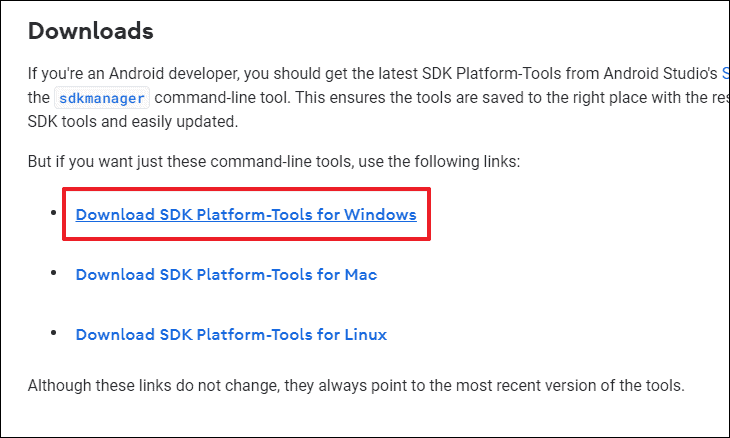
- Open your browser and click to Download SDK Platform-Tools for Windows.
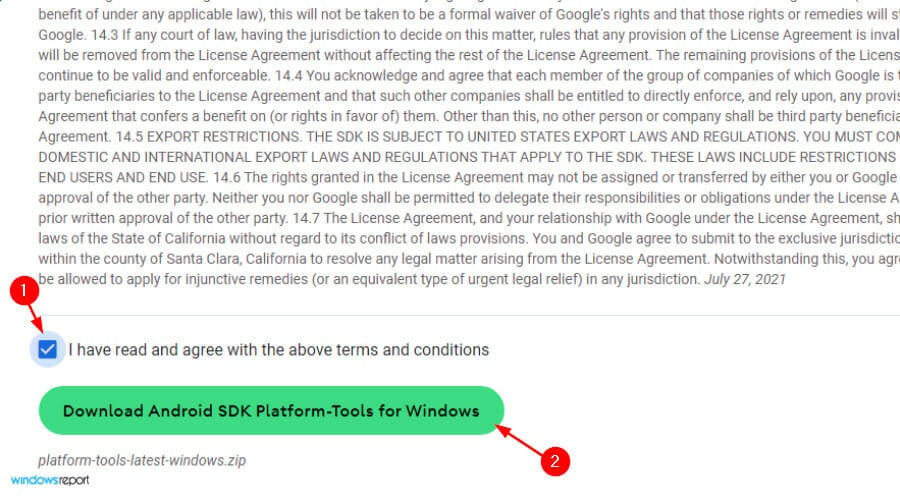
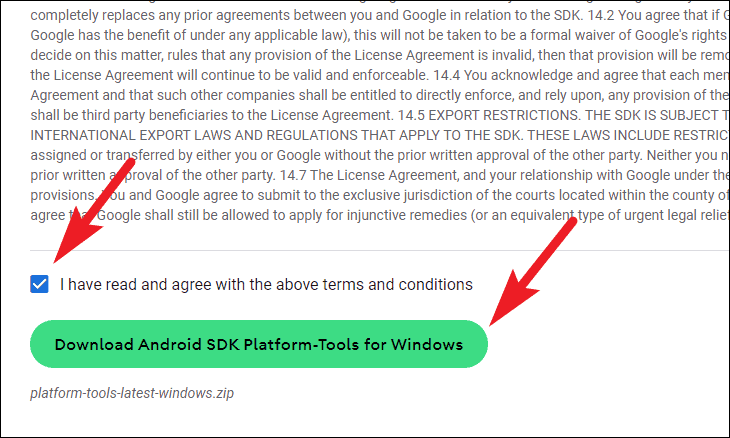
- Click the checkbox I have read and agree with the above terms and conditions to start downloading.
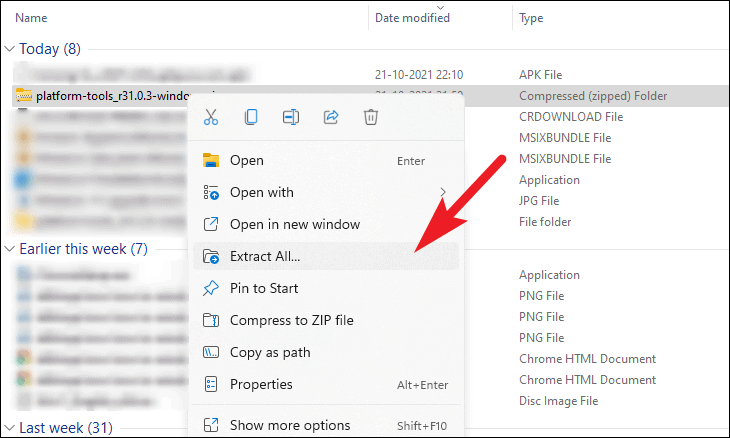
- Open the zip folder to extract all files.
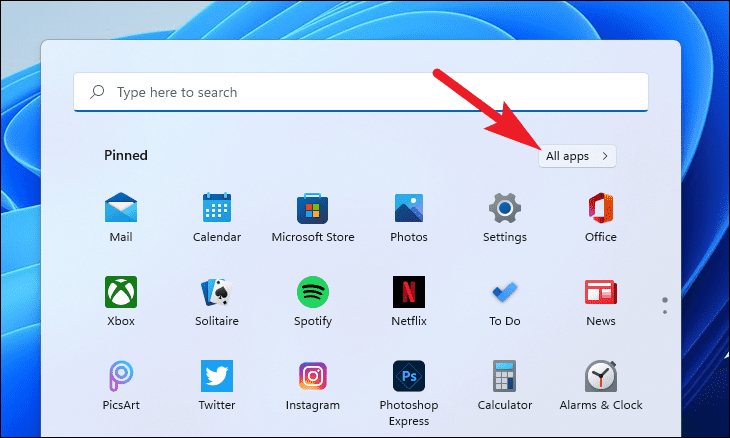
- Open the Start Menu and select All apps.
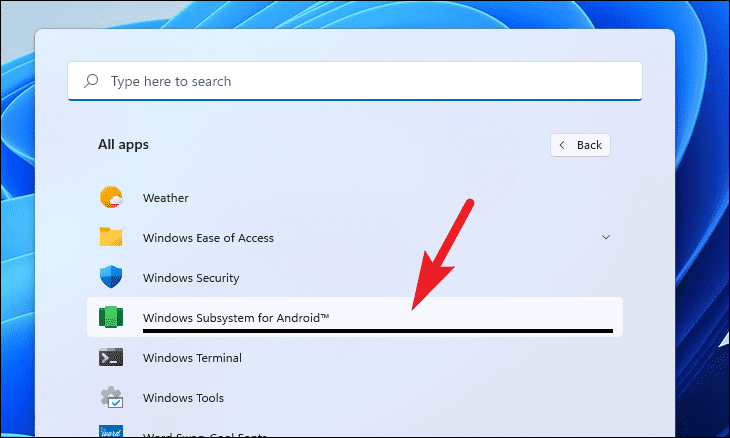
- Locate Windows Subsystem for Android and launch it.
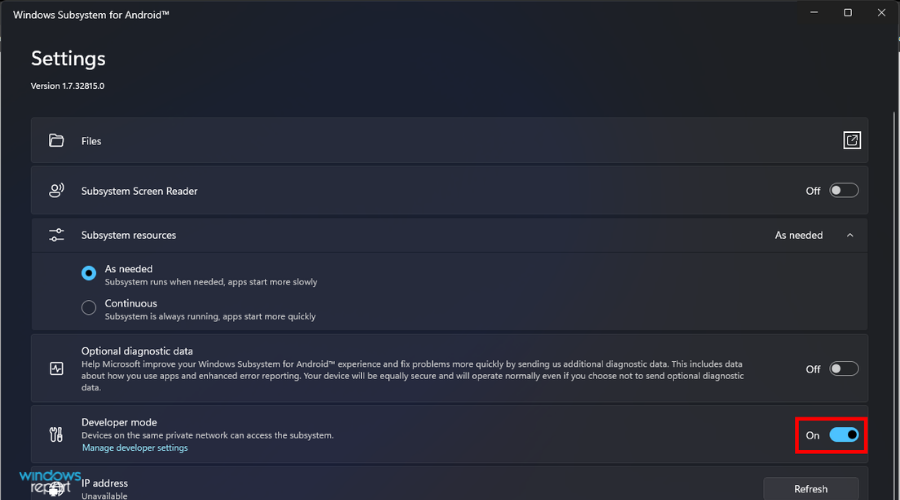
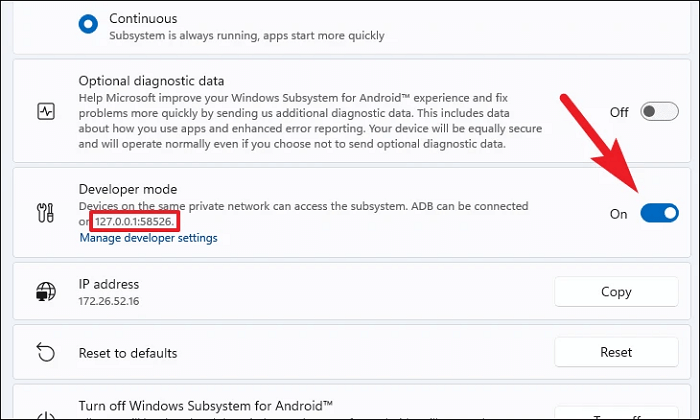
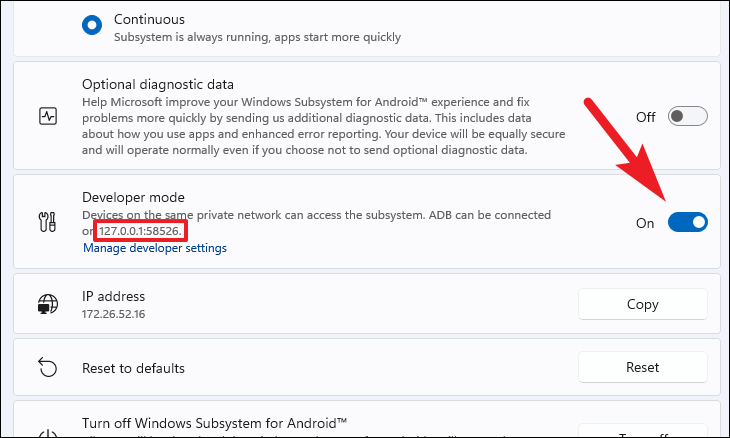
- Select Developer mode and toggle it on.
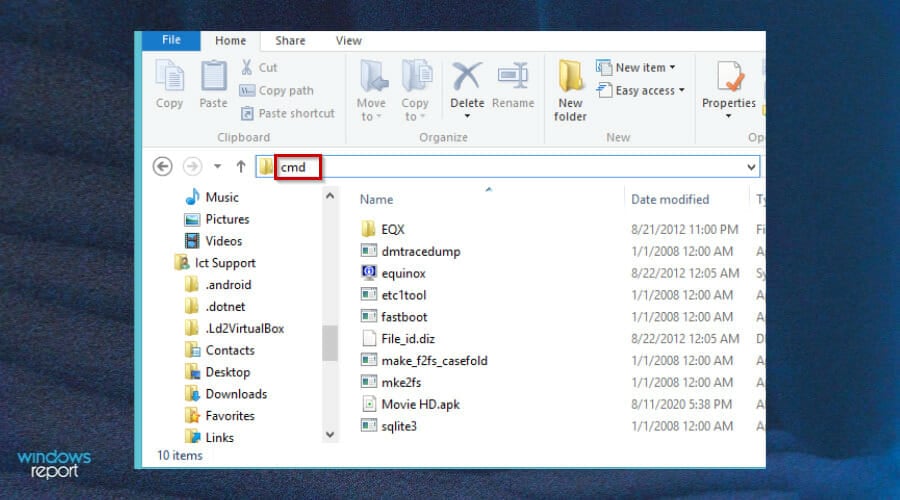
- Go back to the extract folder and type cmd on the address bar.
- Type in the following commands and press Enter after each one:
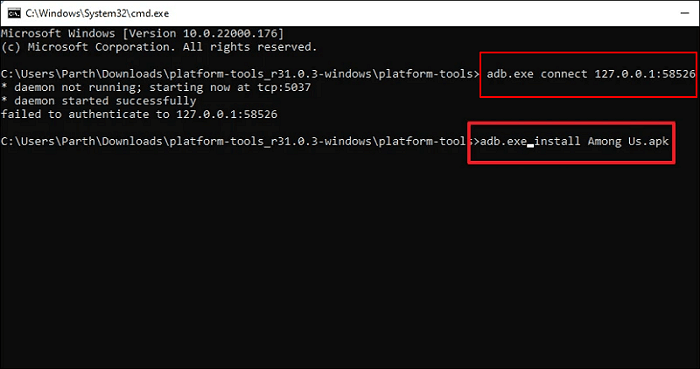
adb.exe connect <IP address>adb.exe install <file name>.apk - Once your app is installed successfully, the following message will be displayed:
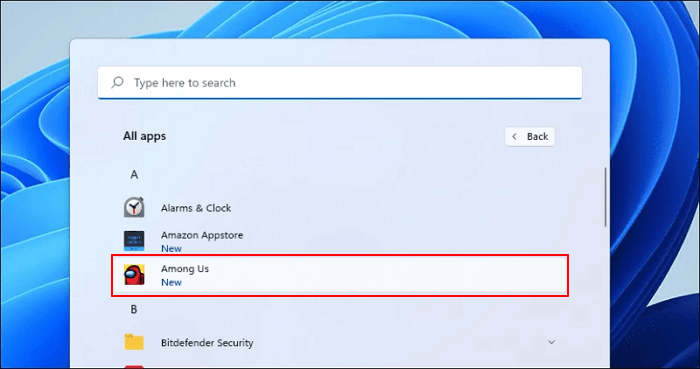
- Go back to the Start Menu and launch your APK to open.


Are there implications of running APKs from third-party sites?
The safety of this approach is often questioned. Are you really installing what you think you are? Probably not from a random site you found on the Web.
But when you have a choice between an app installed from a site you know and one that is not, there are other considerations. It’s worth reviewing those to make sure your risk profile is as low as it can be.
When installing APKs from third-party sites, Windows users need to be aware of the risks. Malware attacks are a growing threat. You need to make sure that your device is completely safe and secure. We have outlined some of the top antiviruses for your PC to keep you safe while browsing.
Are APK files safe?
First, you should never download applications from untrusted websites. You can never know what malware they might contain. If you want to install an application on your PC and don’t find it in the official store, head to the official site to see if the app is available there.
The goal here is not just to avoid downloading malicious software like viruses and spyware but also software that will take control of your device for other purposes, such as sending spam emails or stealing data from your online accounts.
Another thing to watch out for when installing APKs is phishing scams. A hacker can use this method to trick you into giving away sensitive information like credit card details or even login credentials for your online accounts.
If you are not careful, clicking on a malicious link can lead you to a phishing website that will try and steal important information from you. Remember to always check the address bar in your browser before entering any sensitive information.
Also, if you choose to use other Android emulators to run APKs and encounter installation problems, refer to our guide on how to resolve the issue.
We hope you found a way to open and install APKs from one or more of the methods we listed above. If you encounter any problems while running APKs, leave us a comment down below.
![]()
- Complex Level: Medium
- Applies to: Install APK on Windows 11 for both Public and Preview Insider users.
Timeline for Windows 11 Supporting Android Apps:
- 1. On October 21st, 2021, Microsoft introduced Android apps on Windows 11 to Windows Insiders.
- 2. On February 15th, 2022, Windows Subsystem for Android was available for public preview.
On February 16th, 2022, Windows Subsystem for Android allows Windows 11 devices to run Android apps in Amazon Appstore. Currently, the newest Windows Subsystem for Android is only available in the United States.
At The Beginning:
This page covers everything that you need to know about Windows System for Android that enables Windows 11 devices to install APK and run Android applications available in Amazon Appstore. Both Windows 11 Public and Preview Insider users can all get a full guide here to obtain the latest Windows 11 system and sideload Android apps successfully on their computers.
If you are one of them, follow the respective guide here to install and run Android apps on your computers with respective solutions.
In this article, you’ll learn:
- #1. Check If Your Windows 11 PC Meets the System Requirements for Android Apps
- #2. Prepare Windows 11 PC Ready for Installing APK
- #3. How to Install APK on Windows 11 Insider OS
Sure! Since Microsoft announced on October 5th, 2021, it’s already a known truth that Windows 11 will support running Android apps soon with an Android Subsystem. However, since then, Windows users have continued asking when and how to install APK on Windows 11.
So for the question of «Can I run Android Apps on Windows 11», the answer is Yes! Here in the following, you’ll get everything you need to know about Windows Subsystem for Android App and how to install APK on your Windows 11 computers. So let’s get started now.
Which OS Can Install Android APK and Run Android Apps
After the release of the Windows 11 KB5010414 update on February 15th, 2022, it’s now a real thing for sideloading and running Android apps as a partnership of Amazon Appstore. Then, it’s now a reality that Windows 11 Public users in the U.S. area could get the new update and configure the computer to install APK in Windows 11.
So what about the Windows users outside the United States? The good news is that any Windows 11 Preview Insiders can also download the Windows Subsystem for Android App on their computers.
In a word, regardless you are a Windows 11 Public user in the United States or a Preview Insider around the world, you can all install Windows 11 for Android Apps now.
How to do so? Here is a full guide for you:
- #1. Check If Windows 11 On Your PC Meets The System Requirements for Android Apps
- #2. Prepare Windows 11 PC Ready for Installing APK
- #3. How to Install APK on Windows 11 Insider/Window 11 Public
If you think this article is helpful for you to install apk on Windows 11, you can click the button below to share it with someone who needs it!
#1. Check If Your Windows 11 PC Meets the System Requirements for Android Apps
Note that not all computers installed with Windows 11 can get the newest Windows Subsystem for Android App. This new system has some basic requirements on computer hardware, let’s see the details.
- RAM: 8 GB or 16 GB (recommended)
- Storage Type: Solid State Drive (SSD)
- Processor: Intel Core i3 8th or above; AMD Ryzen 3000 or above; Qualcomm Snapdragon 8c or above.
- Processor architecture: x64 or ARM64
- Virtual Machine Platform: Virtualization must be enabled on Windows 11
So how do you know if your computer reaches the system requirement specification? Here are two methods that you can pick either one to follow.
Method 1. Check If Your PC Support Windows 11 with Automated Software
EaseUS Partition Master offers you a powerful feature called Win11 Checker that you can directly check if your PC supports Windows 11 or not here.
Step 1. Launch EaseUS Partition Master and click «Toolkit».
Step 2. Click «Win11 Checker» to open this feature. Then click the Check Now button to start.
Step 3. The Windows 11 compatibility result window will soon appear. All the incompatible and compatible configuration items will be listed.
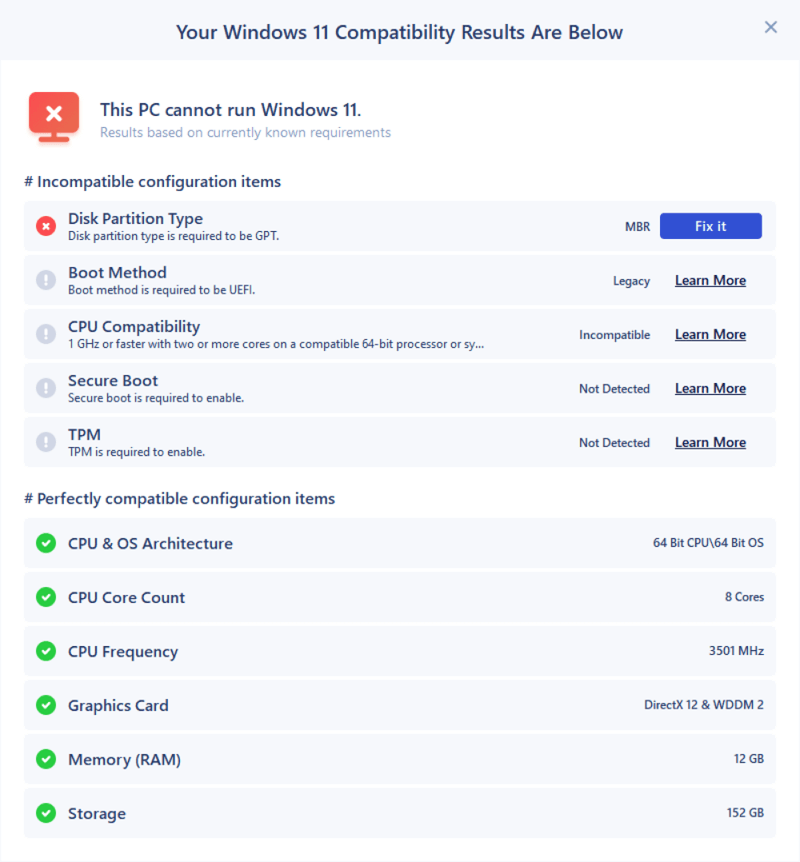
If you see Incompatible configuration items on the result screen, it means that your computer is not compatible with Windows 11. If you see no items, it means that your computer is perfectly compatible with the newest Windows 11 requirements.
Method 2. Check if your Windows 11 PC Meets the System Requirements to Install APK:
Step 1. Press Windows + I keys to open Settings.
Step 2. Click on «Systems» and click «About» on the system settings window.
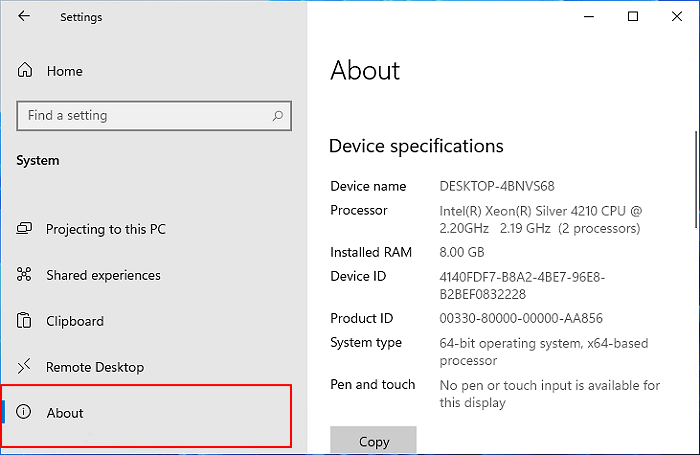
Step 3. Check and confirm if your computer meets the system requirements for installing APK on Windows 11:
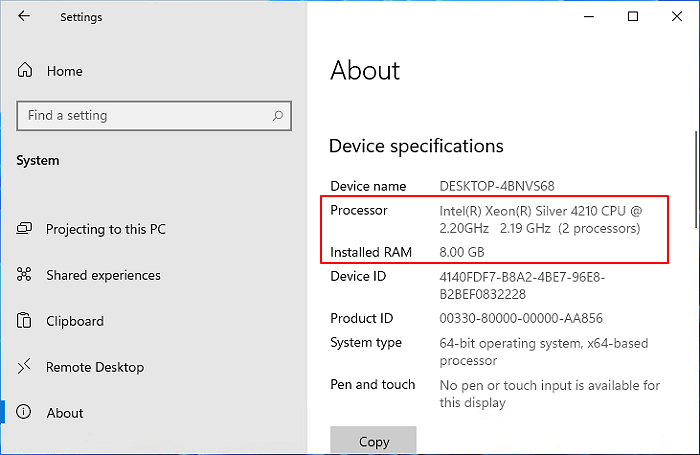
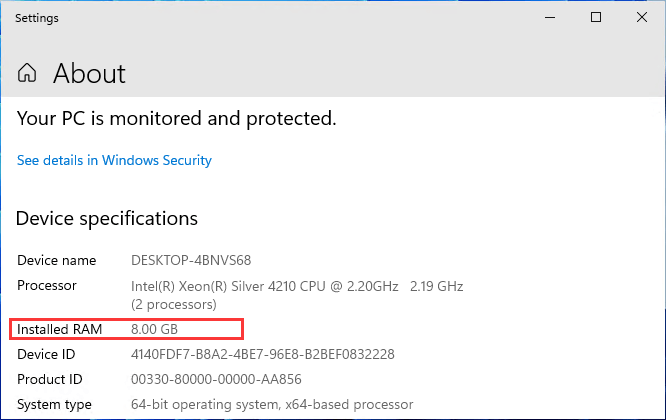
- Under the Device specifications section, confirm the RAM and CPU requirements.
- Under the Windows specifications section, confirm if your Windows 11 is equal to or higher than 22000.257.
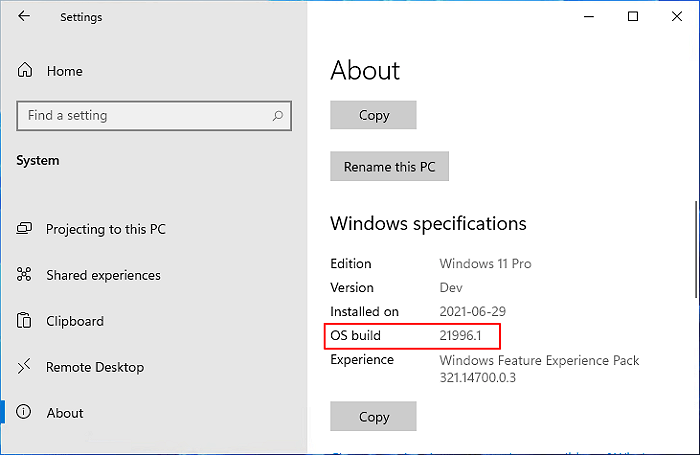
For example, my current OS is an older version and I’ll need to update my computer to the newest Windows 11 first.
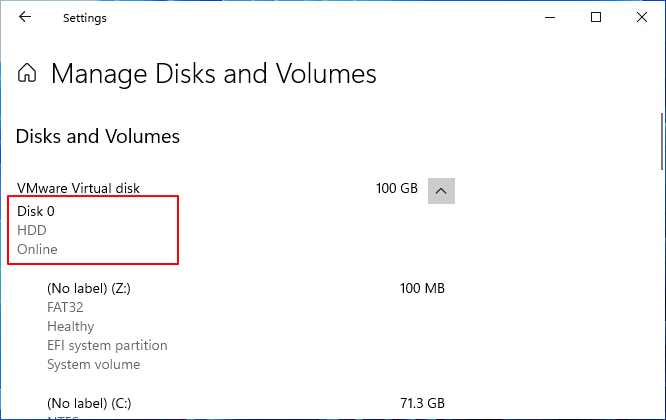
- Click «System» > «Storage», under the storage management section, click «Advanced storage settings» > «Disks & volumes» settings to see if the media type of main drive is SSD.
If it’s HDD, you can’t install APK on Windows 11.
If your computer meets all the requirements, you can directly skip the 2nd part of «Prepare Windows 11 PC Ready» and move to the 3rd or 4th part to install APK on Windows 11.
If your computer doesn’t meet all the requirements, follow the 2nd part to configure and get the computer ready for installing and running Android apps.
#2. Prepare Windows 11 PC Ready for Installing APK
Here we’ll guide you through configuring and getting Windows 11 PC ready for installing APK Android apps from the following 4 parts: RAM, Storage Type, Processor/Processor architecture, and Virtual Machine.
Let’s go.
1. Increase RAM If It’s Less Than 8GB
If the RAM on your computer is less than 8GB, you can purchase a new RAM card to extend it to 8GB or 6GB.
Here is how to do so:
Step 1. Check the RAM storage on your PC:
Right-click on «This PC» > Click «Properties», and next to the «Installed RAM» section, you can view the RAM storage on your PC.
Step 2. Purchase a RAM card for your PC.
Note that the RAM card needs to be the same storage capacity as the original card installed on your PC.
For example: 4GB — 4GB; 8GB — 8GB; 16GB — 16GB; 32GB — 32GB.
If you purchased a 32GB RAM card, but the original card is 16GB, the new memory card performance will be configured to run the same speed as the old card.
Step 3. Install the new RAM card to your PC:
Shut down your PC and open the computer case > Find the RAM card slot, insert and fasten the new RAM card > Close the computer cause and restart the computer.

After this, you need to wait for the computer to boot up, and the system will automatically detect and display the added RAM storage.
2. Migrate Windows 11 from HDD to SSD
When your Windows 11 operating system is installed on a mechanical hard disk drive, the new Subsystem won’t install on your PC. This is because the system requires an SSD for installing APK on Windows 11.
To do so, you can transfer and migrate Windows 11 from HDD to a new SSD with the help of reliable partition manager software — EaseUS Partition Master.
Here is how to migrate Windows 11 system from HDD to SSD without reinstallation:
1st. Purchase and Install a New SSD to Windows 11
Two tips for selecting and adding a new SSD for Windows 11 OS migration:
- The new SSD must be equal to or better than the used space of the Windows 11 system partition.
- New SSD must be installed or added as an internal disk on your PC.
Here is how to do so:
Step 1. Purchase a new SSD that contains equal or bigger storage capacity than the system drive, for example, 120GB SSD = 120GB C drive, or 256GB, 512GB SSD.
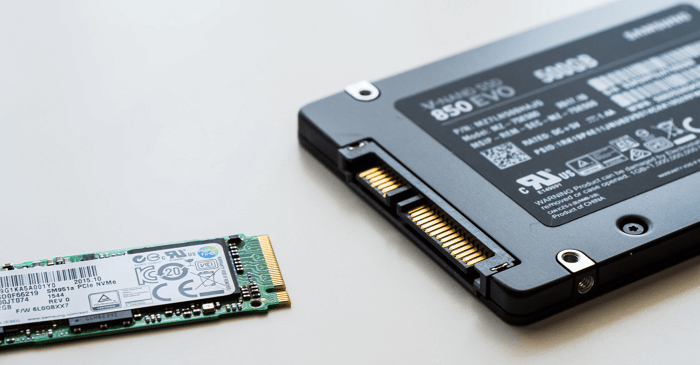
Step 2. Check the new SSD type: a SATA SSD or an M.2/NVMe SSD.
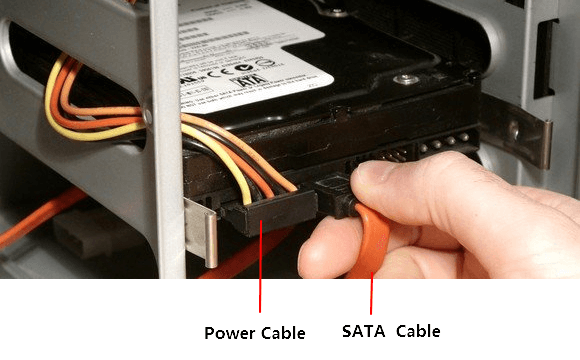
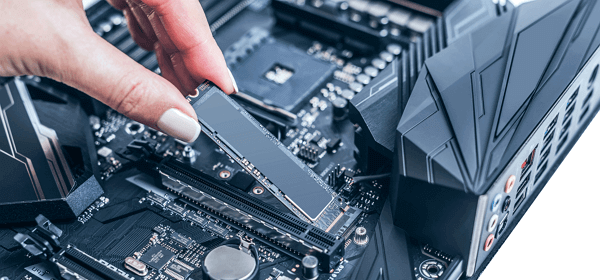
Step 3. Shutdown the computer, open the computer case, install the new SSD:
- If it’s a SATA SSD, connect the SSD to the computer via a SATA cable and a power cable.
- If it’s an M.2 or NVMe SSD, find the SSD slot, slide in the SSD disk, and fasten it.
Step 3. Once done, reboot your computer.
2nd. Initialize New SSD on Windows 11
To make the new SSD readable on Windows 11, you need first to initialize this disk to share the same disk type as your current OS drive. Here is how to do so:
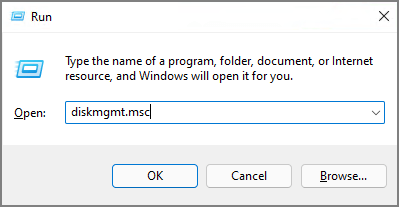
Step 1. Press Windows + R keys, type diskmgmt.msc in the opened Run dialog and click «OK» to open disk management.
Step 2. Right-click the OS disk, select «Properties», go to the Volumes tab, and check the partition style.
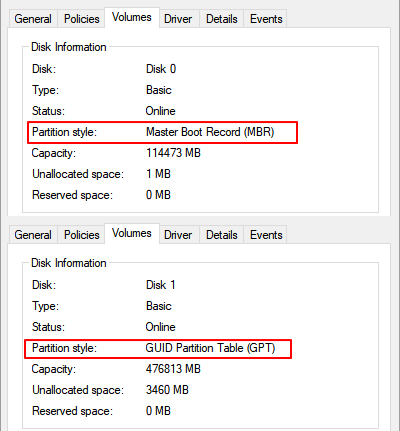
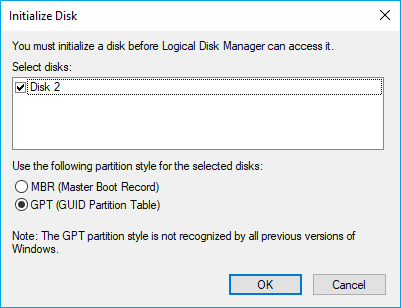
Step 3. Right-click on the SSD and select «Initialize Disk», then select «GPT» as the type.
(Windows 11 requires GPT as boot disk type as it needs UEFI and Secure Boot modes.)
3rd. Migrate Windows 11 to SSD Without Reinstallation
Once you set up the SSD, you are now good to transfer Windows 11 to SSD with the help of OS migration software like EaseUS Partition Master.
Note: The operation of migrating OS to SSD or HDD will delete and remove existing partitions and data on your target disk when there is not enough unallocated space on the target disk. If you saved important data there, back up them to an external hard drive in advance.
Step 1. Select «Clone» from the left menu. Select the «Migrate OS» and click «Next» to continue..
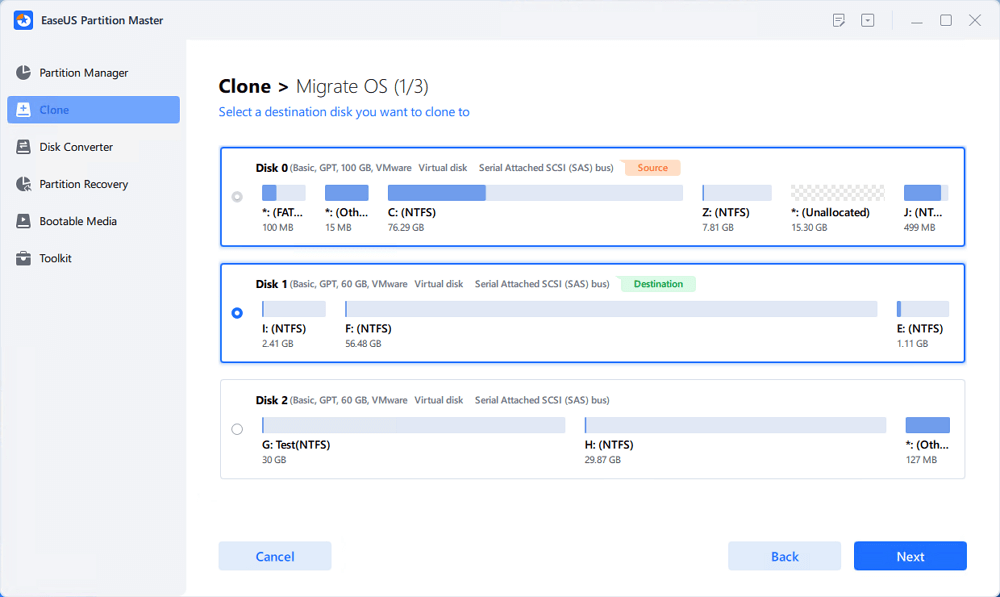
Step 2. Select the target disk you want to clone. Click «Next».
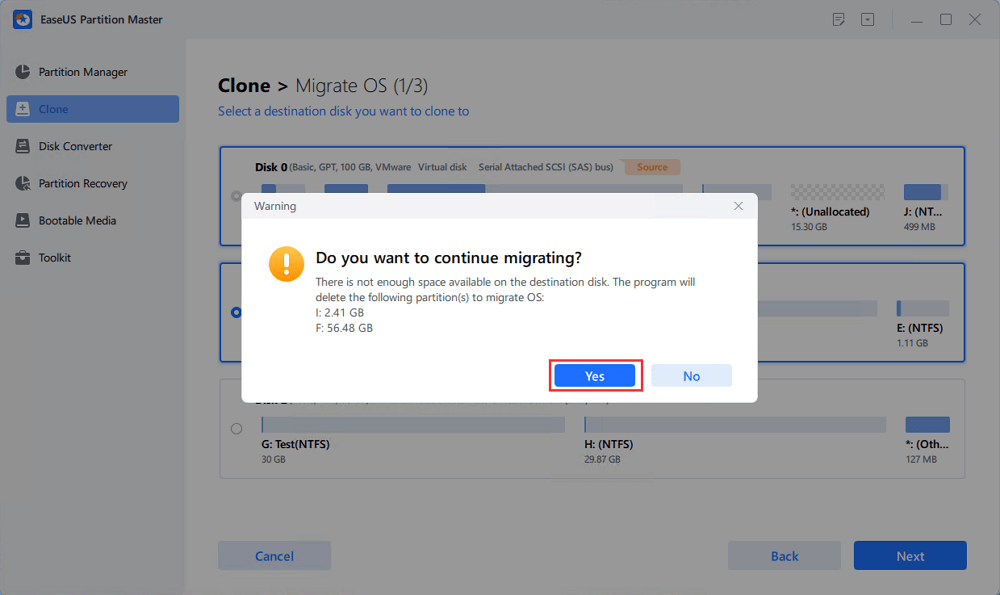
Step 3. Click «Yes» after checking the warning message. The data and partitions on the target disk will be deleted. Make sure that you’ve backed up important data in advance. If not, do it now.
Step 4. Preview the layout of your target disk. You can also click the disk layout options to customize the layout of your target disk as you want. Then click «Start» to start migrating your OS to a new disk
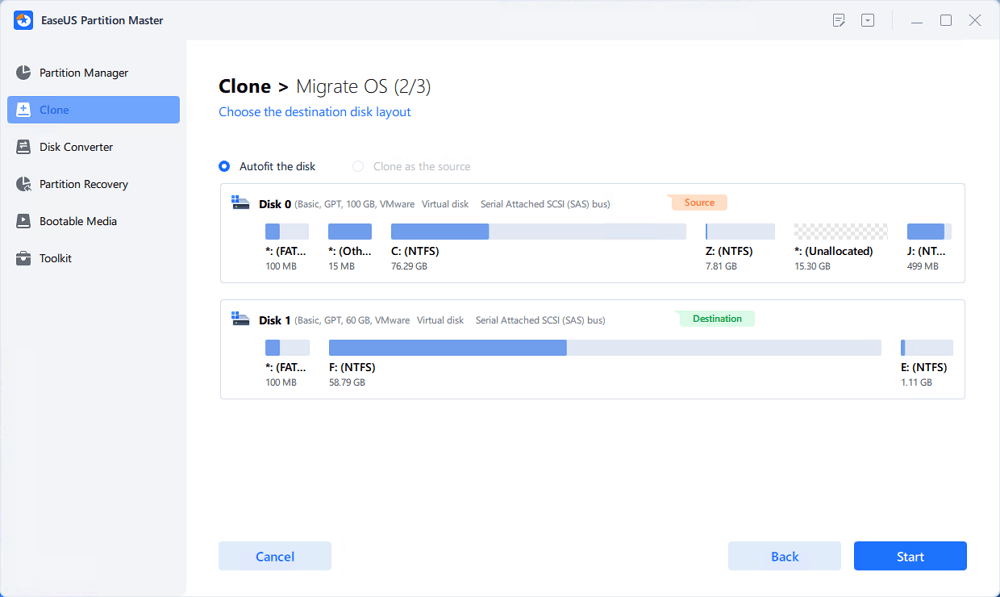
Step 5. When you see a confirming message, asking «If you want to start up computer from the clone target disk», tick «Adjust the order to boot from the clone target disk» and click the respective button through your demands.
- Reboot Now: it means to reboot the PC and boot OS from the new disk immediately.
- Done: it means to make the changes later.

3. Upgrade Processor/Processor Architecture
Note that if your computer processor or processor architecture is older Intel Core i3 8th, AMD Ryzen 3000, Qualcomm Snapdragon 8c, etc., you have two ways to go:
- Option 1. Manually replace and upgrade the CPU processor on your own.
Here is a checklist of Windows 11 supported Processors: https://docs.microsoft.com/en-us/windows-hardware/design/minimum/supported/windows-11-supported-intel-processors
See details for upgrading CPU.
- Option 2. Replace your old computer with a newer one.
For nun-geek users, we don’t recommend you try to replace the CPU processor as it’s easy to get your computer broken. However, if you have no technical skills, replacing the Old PC with a new computer is much easier.
Also, if your computer is 32bit, you’ll need to replace the computer with a 64bit for installing APK files on Windows 11.
4. Enable Virtualization on Windows 11
To emulate the Subsystem for Andriod on Windows 11, you’ll need to enable virtualization on your PC to access a larger library of apps like APK apps to use and install.
Here is how to do so:
First. Enger BIOS Settings
- Press Windows + S, type settings in the search box, and open Settings.
- Click «Windows Update» on the left pane, then select «Advanced options».
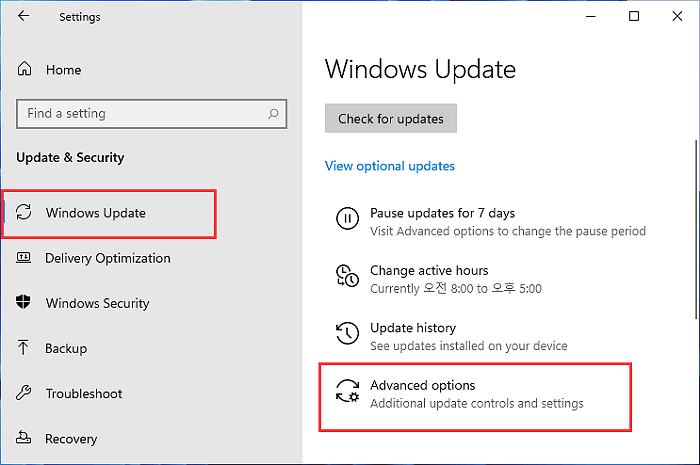
- Click «Recovery» > Select «Restart now» next to the Advanced startup section.
- Click «Troubleshoot» > «Advanced Options» > «UEFI Firmware Settings».
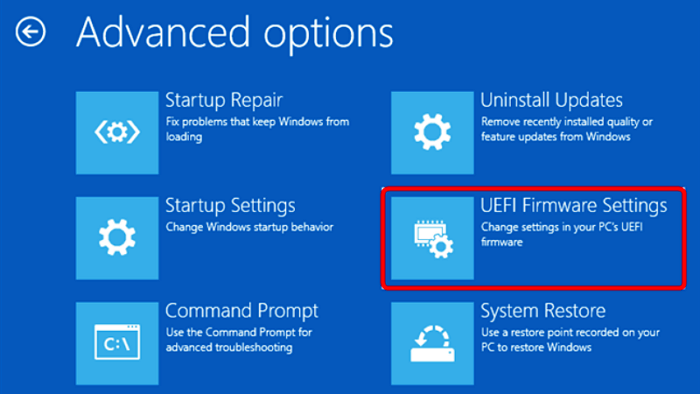
- Click «Restart» on the UEFI Fireware Settings window so to enter BIOS settings.

Second. Enable Virtualization in BIOS
Here we’ll show you how to enable Virtualization in Intel and AMD CPUs. Let’s see the details:
Enable Virtulization for Intel CPU:
- On BIOS settings, press F7 or click «Advanced Mode».
- Click «Advanced» > Select «CPU configuration».
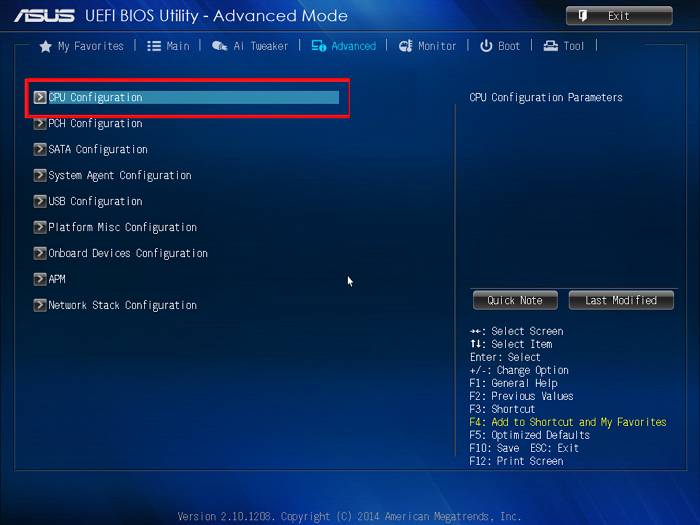
- Click «Intel Virtualization Technology», select «Enabled».
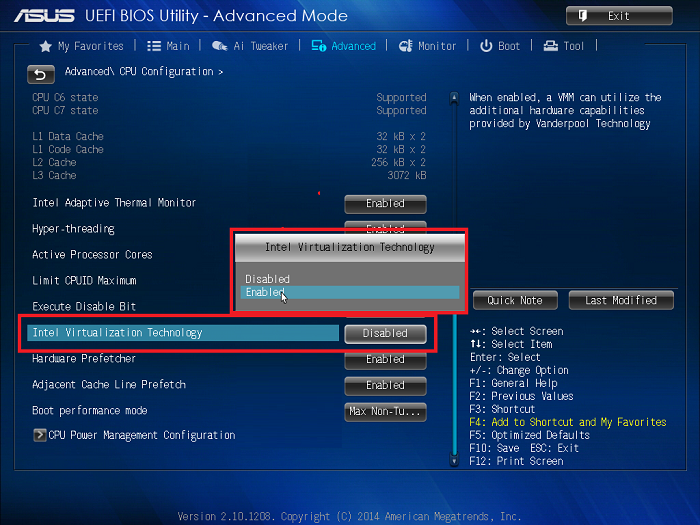
- Press F10 to save and exit, or click «Exit» and save changes.
Enable Virtualization for AMD CPU:
- On BIOS settings, press F7 or click «Advanced Mode».
- Click «Advanced» > «CPU Configuration».
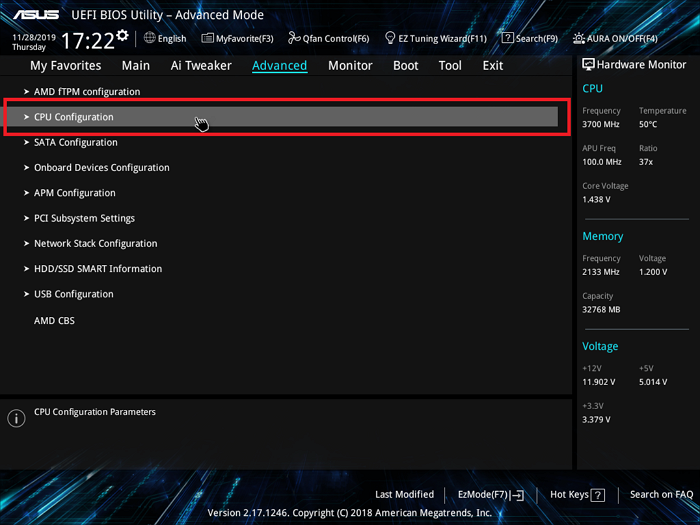
- Select «SVM Mode» and click «Enabled».

- Click «Exit» and click «OK» to save the changes and restart the computer.
After this, you can now move to the next part to install Android APK on Windows 11. As the ways to install APK on Windows 11 are different, we suggest you first confirm your current running version of Windows 11 and then follow the right guide to get the desired APK application installed on your PC.
#3. How to Install APK on Windows 11 Insider OS
For Windows Insiders, you need first make sure that you’ve updated Windows 11 to the latest version with the following steps:
Open Settings > Click on «Windows Update» > Click on «Check for updates».
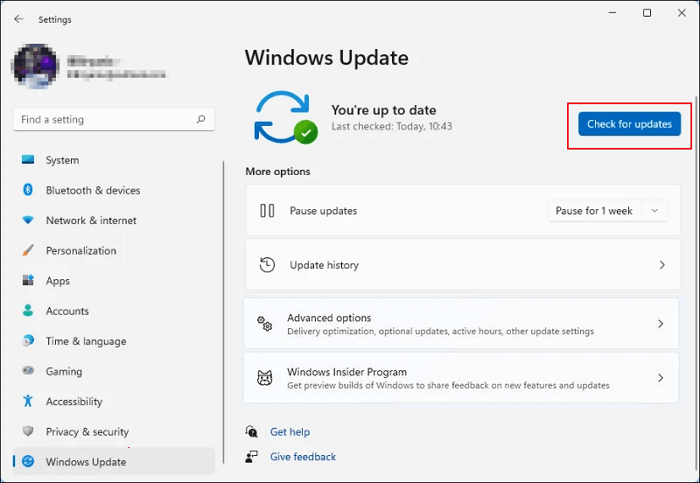
Wait for the process to complete and then restart the computer to install the new updates.
First. Check for Microsoft Store Update
It’s also important that both Insider and Public users update the Microsoft Store so as to install APK apps on Windows 11. Here is how to do so:
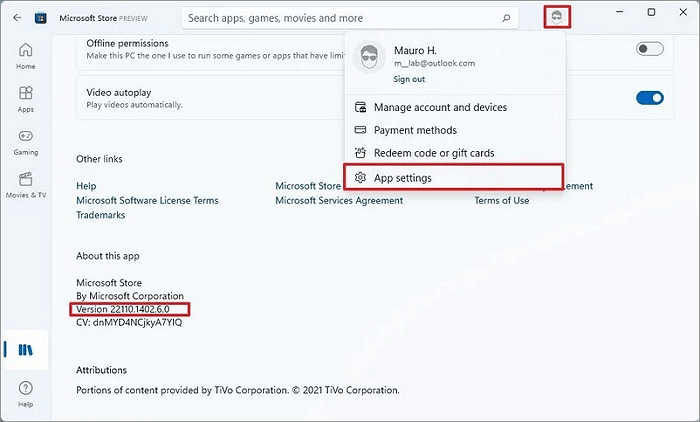
Step 1. Open Microsoft Store, click «Library,» and click «Get updates».
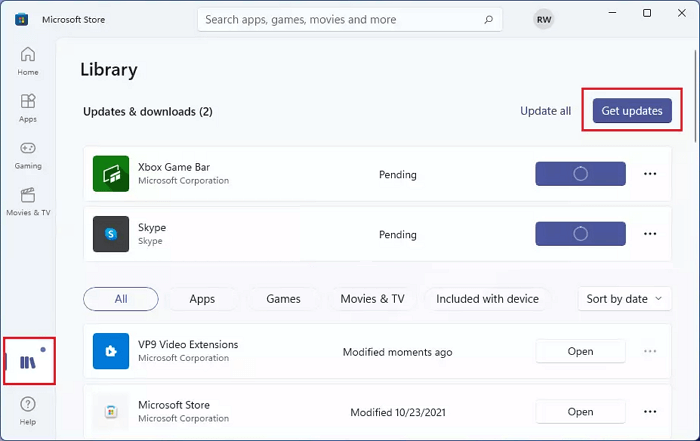
Step 2. Click the Profile menu, select «App settings», then confirm if Microsoft Store is with 22110.1402.6.0 or even higher version.
If not, upgrade the Microsoft Store app to the new version.
Second. Install Windows Subsystem for Android with Amazon App Store on Windows 11
Step 1. Open Microsoft Store app, search «Windows Subsystem for Android,» and click «Get».
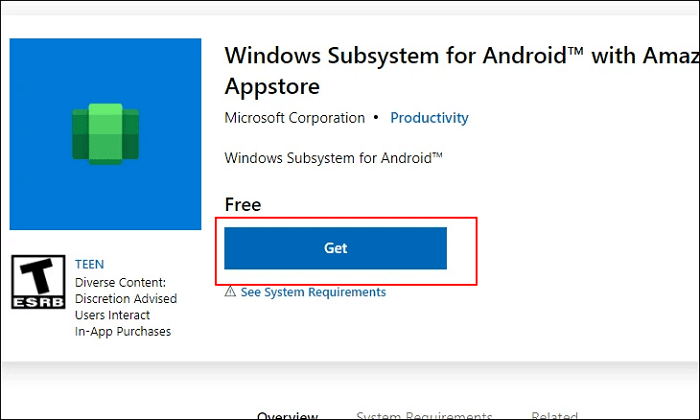
Step 2. Click «Get» or «Install» on the Microsoft Store app.
Wait for the process to complete.
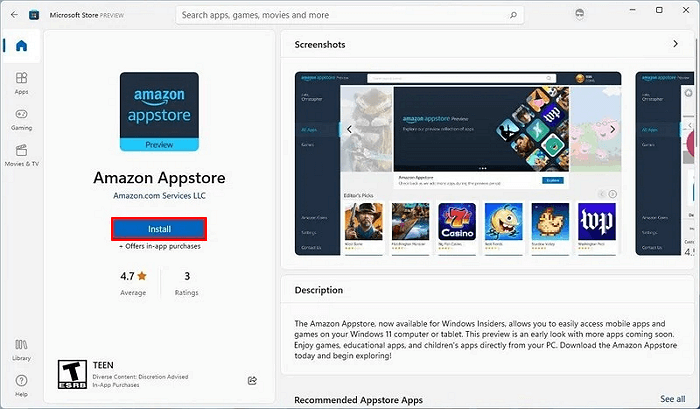
Step 3. Search to open Amazon Appstore in Microsoft Store, click «Install».
Step 4. Click «Set up» and click «Download» > «Next» > «Restart».
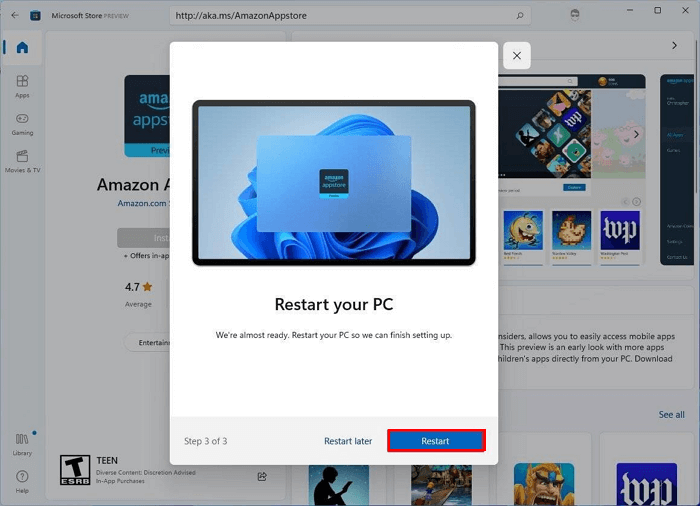
After this, you are now good to go and install Android APK applications on your Windows 11 computers.
Last. Install Android Apps on Windows 11 from Amazon Appstore
Step 1. Open the start menu on Windows 11, and click «All apps».
Step 2. Sign in with your Amazon account, and then you are good to select and install Android applications by clicking «Get».
Bonus Tip: How to Install APK on Windows 11 to Sideload Android Apps
Alongside Amazon Appstore, you can also sideload apps on Windows 11 via the APK files. Here is how to do so:
Step 1. Go to Android developer website: https://developer.android.com/studio/releases/platform-tools
Step 2. Go to the Downloads section and click «Download SDK Platform-Tools for Windows».
Step 3. Check «I have read and agree with the above terms and conditions», and click «Download Android ADK Platform-Tools for Windows».
Step 4. Once done, go to the download directory, right-click the zipped folder, and select «Extract All».

Step 5. Once the zipped folder opens, download and copy to save the APK file for a desired app to the folder.
Step 6. Open Windows Subsystem for Android on Windows 11 from the menu bar, enable the Developer mode on WSA window: switch to On size.
Step 7. Open Command Prompt, type the following command lines, and hit Enter each time:
- adb.exe connect ip address
- adb.exe install file name.apk
Wait for the process to complete. This will help to install the APK file on Windows 11.
Once done, you can now go to the App section on the start menu to view and use the sideloaded Android apps on Windows 11.
Conclusion
On this page, we introduced some key points to make sure you can install Android APK or apps on Windows 11 successfully. To make it simple, check and confirm that you follow the guidelines one by one:
- You are the latest new Windows 11 Public or Insider user of 22000.527 or higher.
- Your computer meets Windows 11 requirements for installing Android apps: 8GB or more RAM, SSD OS disk, enable virtualization, processor, and update processor architecture.
If you are unsure if your computer meets the requirements, take EaseUS Partition Master to test the compatibility.
If you don’t know how to get the latest Windows 11, relax, and you can revert to the #2 part to get Windows 11 ready for this.
For the complete process of installing Android apps on Windows 11, go to the #3 part and get a complete guide. I hope this page indeed works for you.
FAQs About How to Install APK on Windows 11
If you have more questions about installing APK on Windows 11, follow the questions here and find answers below:
1. How do I open a APK file in Windows 11?
- Install Windows Subsystem for Android (WSA) on your PC.
- Create a virtual Android machine on computer with WSA.
- Sideload APK files of your favored apps and games.
- Install and then open the Android apps.
2. How do I manually install Android apps on Windows 11?
- Go to the Migcorosft Store.
- Go to the Amazon Appstore.
- Click on ‘Install’.
- Sign in with your Microsoft Account.
- Follow the instructions and sign in with your account.
- Download the Android apps you want.
3. Can you run Android apps on Windows 11?
Yes, sure. Microsoft has officially supported users to run Android apps on Windows 11 with its Windows Subsystems for Android. If you are interested in, follow the tutorial guide on this page to download and run Android apps and games on Windows 11.
Windows 11 is far superior in terms of design and providing ease of convenience to the user. However, Microsoft didn’t stop at that and went one step further by making it leaps ahead relative to any other previous iteration of Windows in terms of interoperability as well.
With Windows 11, you can officially install Android apps on your Windows PC through the Amazon Appstore. Plus, you can also sideload Android app APK files and run them on your PC.
Note: As of the time of writing this article (21st October’21), this feature is only available for the users enrolled in Windows Insider Program.
Getting your Windows 11 Computer Ready
Before you straight away jump to download and install Android apps on your Windows device, you need to make sure ‘Hyper-V’ and ‘Virtual Machine Platform’ optional features are enabled on your PC.
To get started, launch the Settings app from the Start Menu of your device or by using the Windows+i keyboard shortcut.
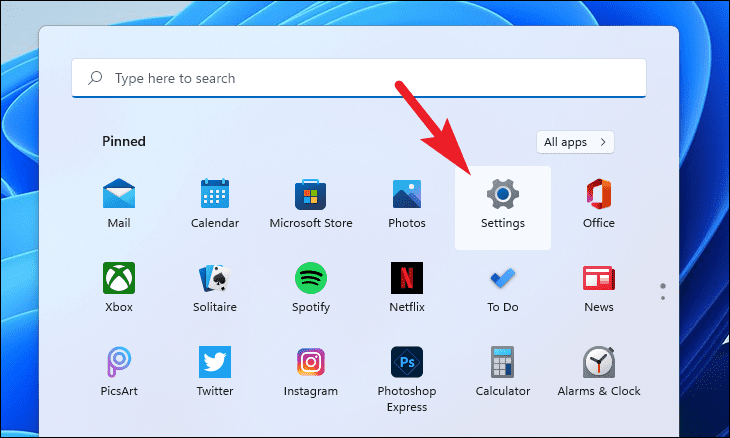
Next, click on the ‘Apps’ option present on the left sidebar of the Settings window.
After that, click on the ‘Optional features’ tile from the right section of the window.
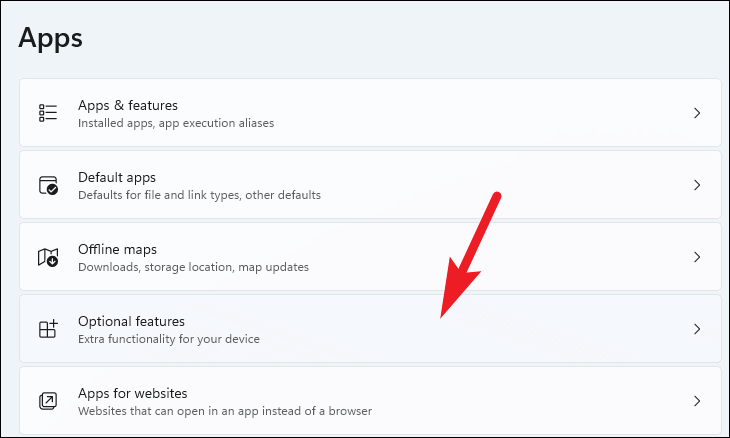
Then, click on the ‘More Windows features’ tile present under the ‘Related settings’ section. This will open a separate window on your screen.
Now, from the ‘Windows Features’ window, locate the ‘Hyper-V’ option and click on the checkbox preceding the feature to select it.
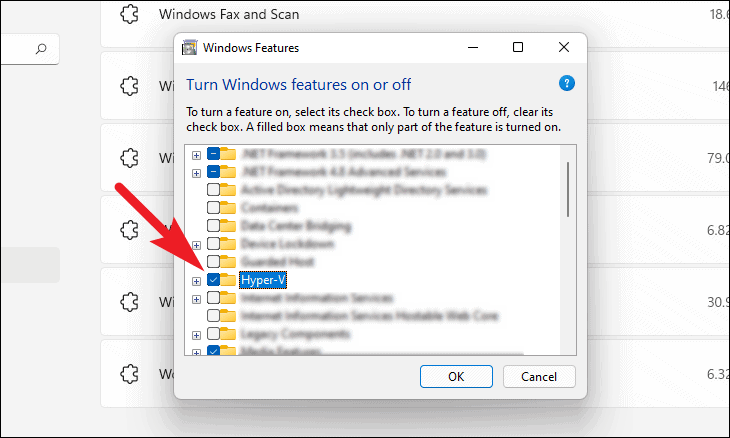
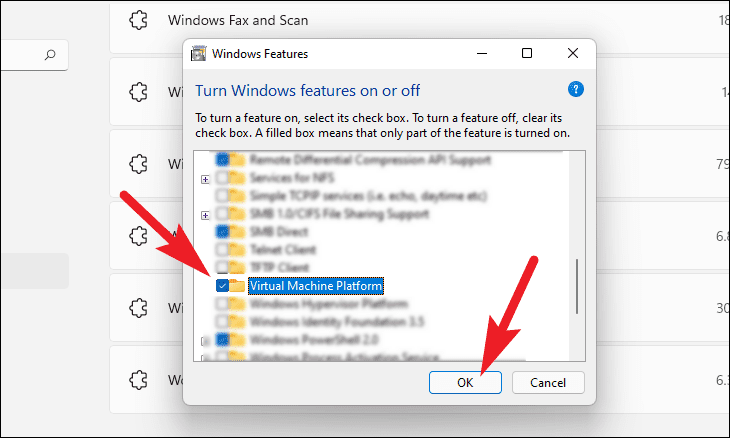
Then, scroll down locate the ‘Virtual Machine Platform’ feature, and click on the checkbox preceding it to select it as well. Finally, click on the ‘OK’ button to install both of these optional features on your Windows machine.
This action will open a separate window on your screen to download the required files, wait patiently till the installation completes.
Download and Install Windows Subsystem for Android with Amazon App Store
Windows Subsystem for Android is a new component layer on top of Windows 11 that powers the Amazon Appstore as it comprises of Linux kernel and Android OS which runs the Andriod apps on your system.
The tech jargon may feel a bit too complex for the uninitiated. But that being said, Microsoft will distribute the ‘Windows Subsystem for Andriod’ as an app from the Microsoft Store for an easy download and install experience to the users.
First, launch the ‘Microsoft Store’ app from the Start Menu of your Windows device or search for it in Windows Search.
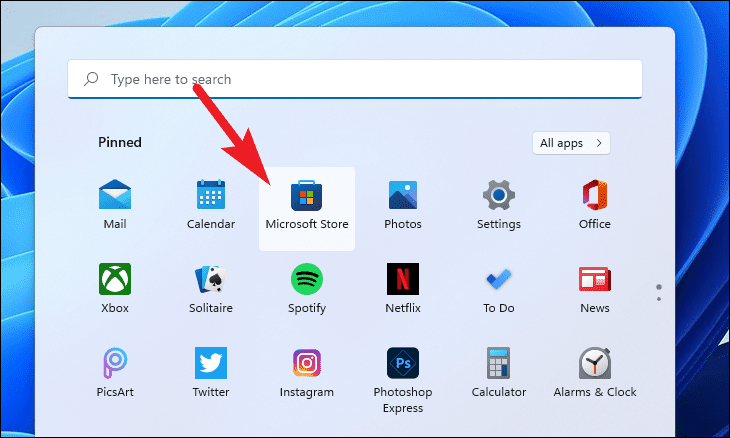
On the Microsoft Store window, click on the search bar and type ‘Windows Subsystem for Android’, and hit Enter on your keyboard to perform a search.
Alternatively, you can also navigate to the app by heading to the official Microsoft Store website at microsoft.com/windows-subsystem-for-android… and then click the ‘Get’ button on the webpage.
Next, you will receive a prompt asking you to if you wish to be redirected to the Microsoft Store, click on the ‘Yes’ button. This will open Microsoft Store on your Windows machine.
Once you are on the app page on the Microsoft Store, click on the ‘Get/Install’ button present on the Microsoft Store window to install the app.
Manually Install Windows Subsystem for Android
In case for some reason you are not able to download the Windows Subsystem for Android from the Microsoft Store, you can also install it manually on your system by downloading the installation package for it.
Pre-requisites
- Windows Subsystem for Android msixbundle (Link)
ProductId: 9P3395VX91NR, Ring: SLOW - Amazon App Store for Windows msixbundle (Optional)
Install Windows Subsystem for Android using Windows Terminal
Once you have the installer package for Windows Subsystem for Android, it is pretty straightforward to install it on your system.
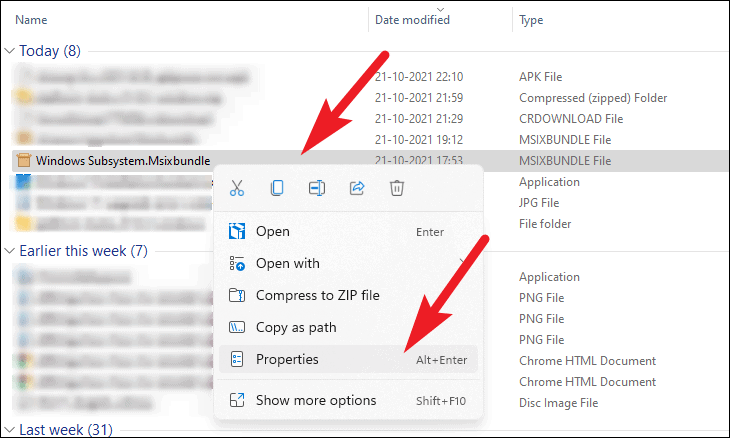
Before you proceed with the installation, head to the directory containing the installer package and right-click on it. Then, choose the ‘Properties’ option. This will open a separate window on your screen.
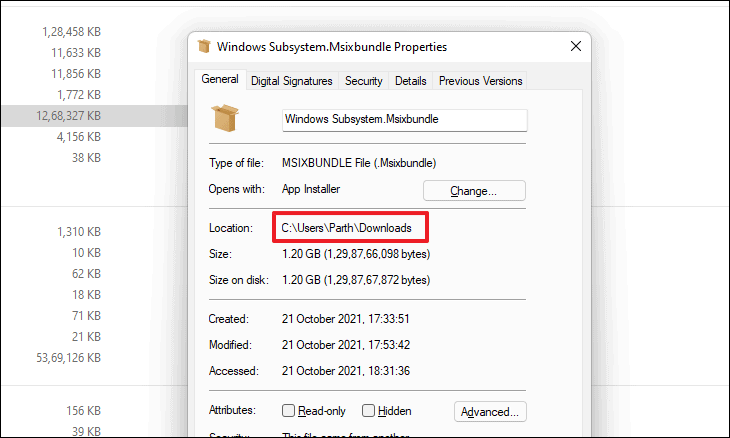
Then, select the path specified to the right of the ‘Location:’ field and keep it handy as it will be needed during the installation process.
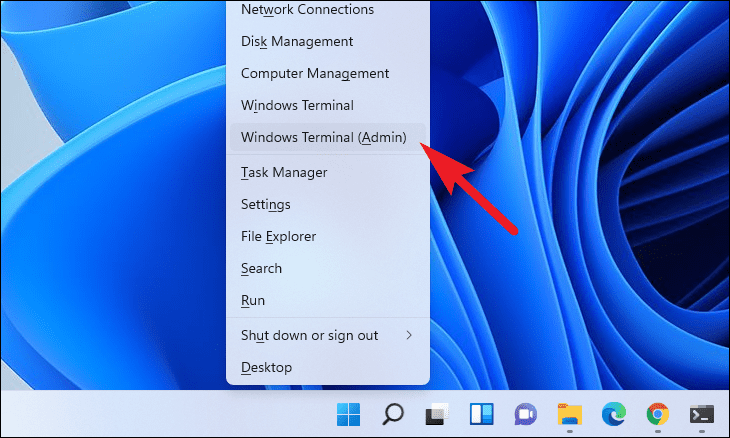
Next, press the Windows+X shortcut on your keyboard to bring up the Windows super user menu. Then, click on the ‘Windows Terminal (Administrator)’ option from the list to open an elevated window of the Windows Terminal.
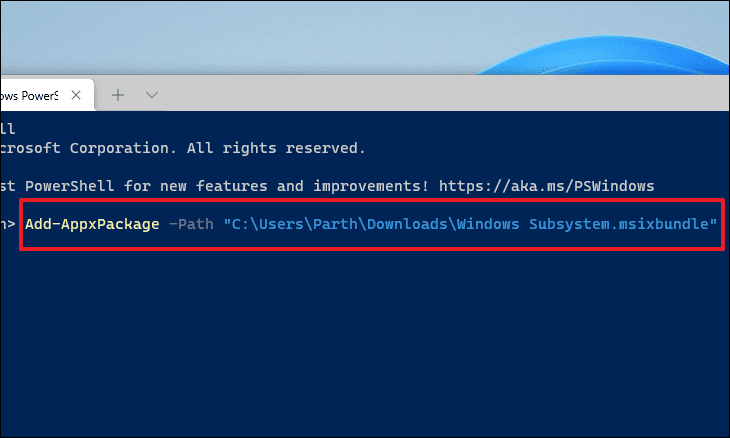
After that, type or copy+paste the following command to install the package on your computer.
Add-AppxPackage -Path "<copied path>\<package name>.msixbundle"Note: Replace the <copied path> placeholder with the path address you copied earlier, along with <package name> placeholder with the exact name of the package in the command below.
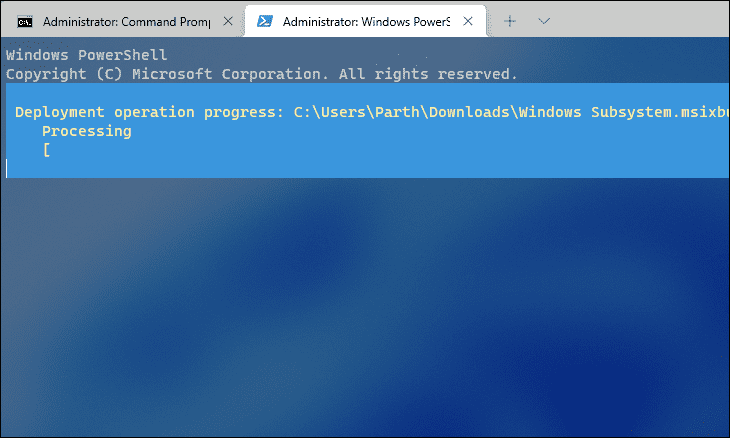
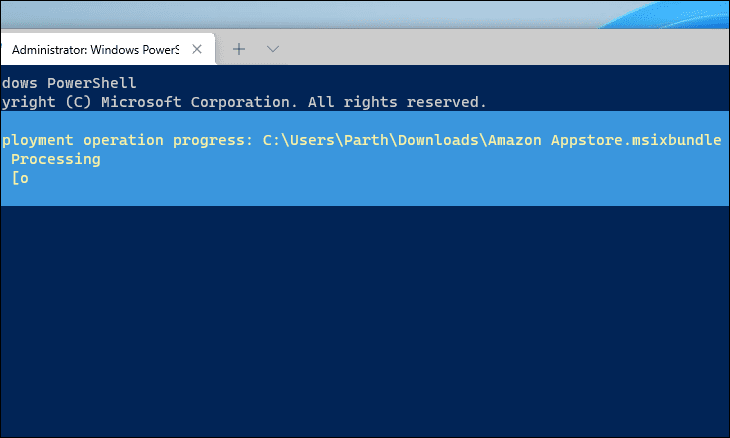
Powershell will now start installing the package on your system, wait till the process finishes.
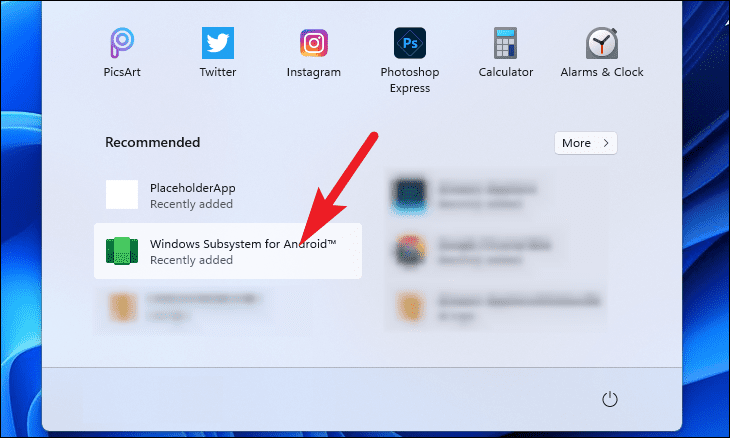
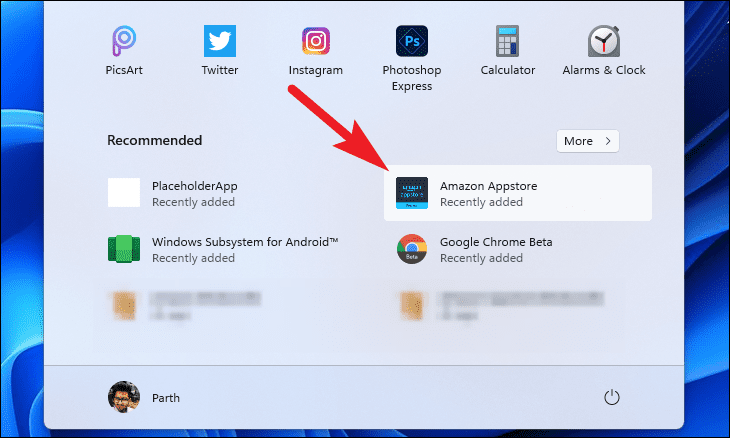
Once installed, you will be able to locate the app under the ‘Recommended’ section of the Windows Start Menu.
Reportedly, some users do not get the ‘Amazon Appstore’ along with the ‘Windows Subsystem for Android’. If that’s the case with you as well, you will need to install the Amazin Appstore separately.
To do so, head back to the elevated window of the Windows Terminal. Then, type or copy+paste the following command in the PowerShell window and hit Enter to install the app on your system.
Add-AppxPackage -Path "<directory path>\<package name>.msixbundle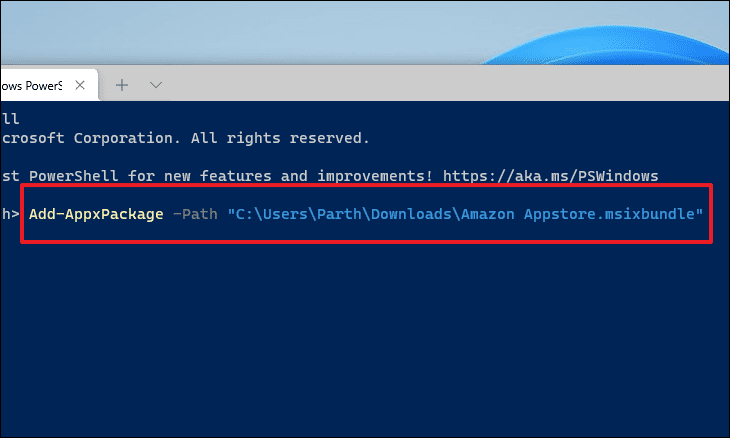
Powershell will now install the app on your system, wait while the process runs in the background.
You will be able to locate the Amazon Appstore under the ‘Recommended’ section of the Start Menu, once it has been installed on the system.
Installing Android Apps on Windows 11 using Amazon Appstore
Once you have installed the Windows subsystem for Android along with Amazon Appstore on your device, you are all set to enjoy Andriod apps on your PC.
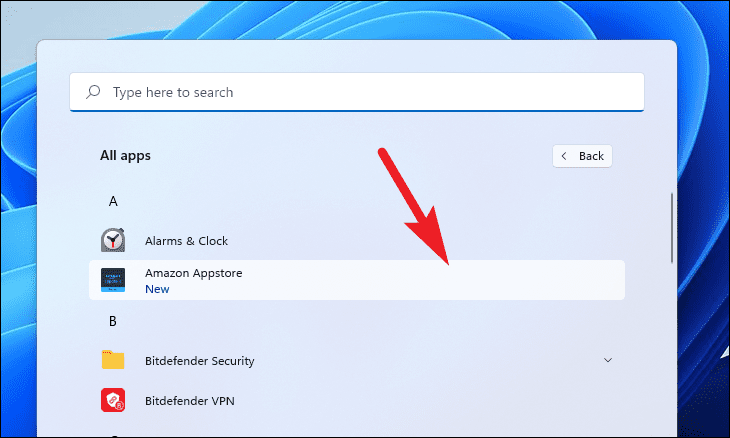
To get started, open the Start Menu and click on the ‘All apps’ button present at the top right corner of the flyout.

Next, locate the ‘Amazon Appstore’ from the alphabetically ordered list and click on it to launch the app.
You will need to sign in to your Amazon account on the first launch of the app. Once done, you will be greeted by the Amazon Appstore home screen.
To install any application of your choice, click on the ‘Get’ button present on individual tiles of the app.
How to Sideload Android Apps on Windows 11 via APK Files
Along with the apps available through the Amazon Appstore, you can also sideload apps of your choice on Windows 11 provided you have a .apk file for the app you wish to install.
First, head to the official Android developer website developer.android.com/platform-tools. Then, locate the ‘Downloads’ section and click on the ‘Download SDK Platform-Tools for Windows’ option. This will open an overlay window on your screen.
Next, scroll down and click the checkbox preceding the ‘ I have read and agree with the above terms and conditions’ field, and then click on the ‘Download Android SDK Platform-Tools for Windows’ button to initiate the download.
Once the download has been completed, head to the download directory and right-click on the zipped folder. Then, choose the ‘Extract all’ option from the context menu to extract the folder.
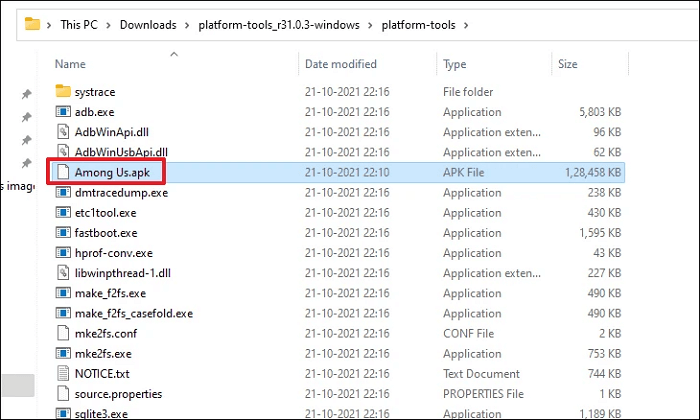
Next, head to the directory containing your .apk file. Copy the file using the context menu or Ctrl+C shortcut. Then, paste the file into the extracted folder by pressing the Ctrl+V shortcut on your keyboard.
Note: Make sure to copy the name of the file you wish to install and keep it handy as it will be needed in further steps.

Now, open Start Menu and click on the ‘All apps’ button present at the top right corner of the flyout.
Next, scroll to locate and click on the ‘Windows Subsystem for Android’ tile to launch it.
From the WSA window, locate the ‘Developer mode’ option and toggle the following switch to the ‘On’ position. Also, note the IP address displayed on the tile.
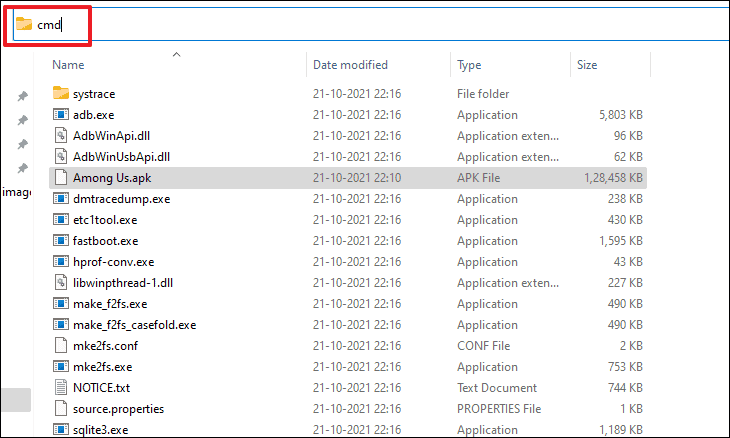
Now, back to the extracted folder, click on the address bar of the folder and type cmd. Then, hit Enter on your keyboard to open a Command Prompt window set to the current directory.
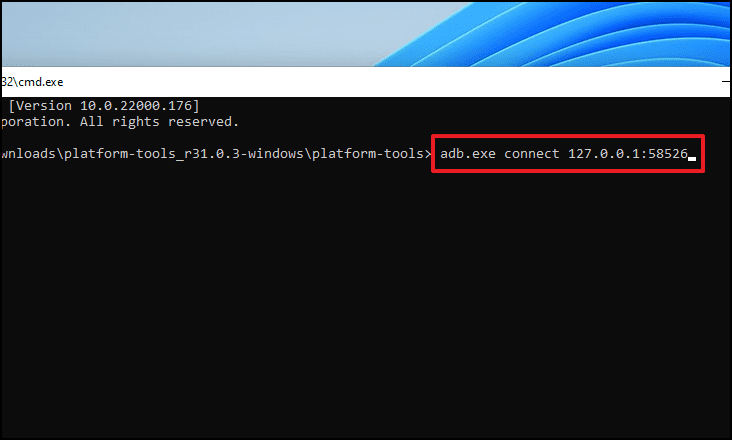
Next, type or copy+paste the following command to connect to Android Debug Bridge (ADB).
adb.exe connect <IP address>Note: Replace the <IP address> placeholder with the IP address present on the ‘Developer options’ tile of the Windows Subsystem for Android window.
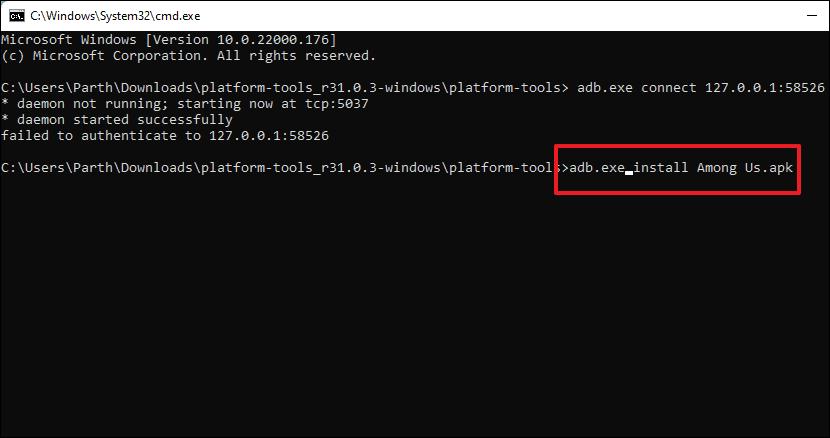
After that, type or copy+paste the following command to sideload the application on your Windows machine.
adb.exe install <file name>.apkNote: Make sure to replace <file name> placeholder with your current file name to install the .apk on your system.
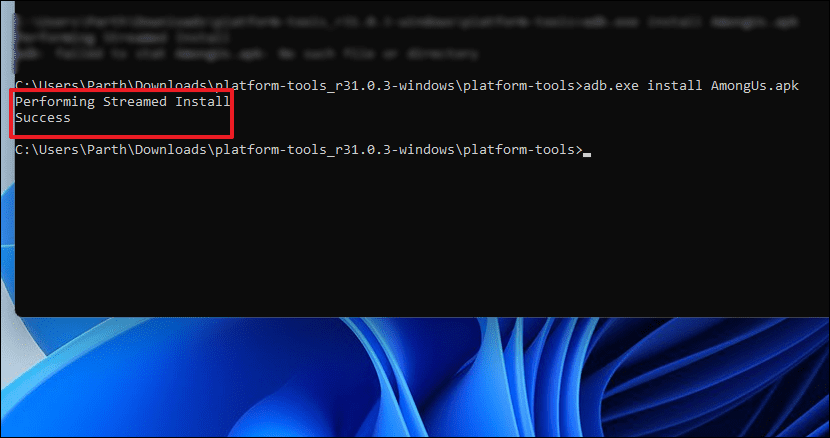
Once the app has been successfully installed, you will see a message stating so on the screen.
Finally, head to the Start Menu, and click on the ‘All apps’ button. Next, scroll down to locate your app from the alphabetically ordered list and click on it to launch.
That’s how you can run Android apps on your Windows 11 PC.

Your Windows 11 computer currently doesn’t include one of the most-anticipated features of the operating system — native Android support. This allows you to run Android apps directly on your PC. Luckily, you can enable it pretty easily.
The ability to run Android apps on Windows 11 is now available, but only in select countries (full list below). Don’t worry, though, you can still install Android apps on Windows 11 even if you’re not in one of these regions. Here’s how.
QUICK ANSWER
To install Android apps on Windows 11, you simply need to enable a few settings and install the Amazon Appstore from the Microsoft Store. If you’re in an unsupported region, you can also sideload the Windows Subsystem for Android and manually install apps using APK files. For step-by-step instructions, simply click on one of the below sections.
JUMP TO KEY SECTIONS
- How to install Android apps on Windows 11 officially (Select regions only)
- How to run Android apps on Windows 11 unofficially
- What Android apps can you get on Windows 11?
- Benefits of running Android apps on Windows 11
How to install Android apps on Windows 11 officially
Android apps on Windows 11 are officially available in the following countries: Andorra, Austria, Belgium, France, Germany, Gibraltar, Guernsey, Ireland, Isle of Man, Italy, Japan, Jersey, Liechtenstein, Luxembourg, Monaco, San Marino, Spain, Switzerland, the United Kingdom, the United States, and the Vatican City. The other requirement is that you should have a compatible Windows 11 system, running Build 22000.526 or higher.
If you live in an unsupported country, you can trick Windows 11 by changing your region in Settings > Language & Region > Country or Region > United States.
Install the Windows Subsystem for Android
Now that you have the latest Windows 11 build, you can move on to install the Windows Subsystem for Android. This is basically an entire Android build that runs as a virtualization instance inside Windows, letting you run Android apps on Windows. There are a few steps to getting the subsystem on your Windows 11.
Open the Microsoft Store, and click the Library tab at the bottom left corner.

Palash Volvoikar / Android Authority
Click the Get updates button.

Palash Volvoikar / Android Authority
Your Microsoft Store should finish updating. Click the profile button on the title bar to the right to check the version. The version number should be in the About this app section. Make sure it is 22110.1402.6.0 or higher.

Palash Volvoikar / Android Authority
Once your Microsoft Store is up to date, you can move on to enable virtualization. Newer systems will need you to flip the switch in the BIOS/UEFI settings, usually called Intel VT-X or AMD-V, depending upon the brand of CPU in your system. Then you can enable it inside Windows 11.
- Open the Control Panel, navigate to the Programs section
- Click Turn Windows features on or off.
- Enable Virtual Machine Platform and Windows Hypervisor Platform by ensuring the boxes next to them are checked
- Click OK.

Palash Volvoikar / Android Authority
Restart your system. Search for and open the Amazon Appstore in the Microsoft Store, and click Get. Go through the setup process. This will install the Windows Subsystem for Android and the Amazon Store, and get your system ready for Android apps.

Installing Android apps through the Amazon Appstore
The process to install Android apps officially is rather simple. You will need an Amazon account.
- Open the Amazon Appstore via the Start menu/search.
- Click the Already an Amazon customer? Sign in button, enter your credentials and click Sign-In.
- Search and select the app you want to install, and click the Get/Download/Install button.

How to run Android apps on Windows 11 unofficially
The requirements are the same here. You will need Windows 11, build 22000.282, or later. You also need to enable hardware virtualization and meet minimum system requirements. The difference is that we will have to sideload the subsystem instead of installing it officially. Ensure you update to the latest build of Windows 11 before you begin, and enable Virtual Machine Platform and Windows Hypervisor Platform.
Sideloading the Windows Subsystem for Android
Some folks may not be able to get their hands on the Windows Subsystem for Android and Amazon Appstore despite following the steps. In that case, installing the Subsystem manually is an option. It’s a little tricky, but it can work.
Search for Windows PowerShell, right-click the app search result, and click Run as administrator.

Palash Volvoikar / Android Authority
In PowerShell, copy-paste this code:
Code
winget install 9p3395vx91nr -s msstoreand hit the enter key.

Palash Volvoikar / Android Authority
You’ll have to agree to the agreement terms of the store in PowerShell. When prompted, type in the letter Y and press the Enter key.

Palash Volvoikar / Android Authority
PowerShell will then prompt you with some more license terms, specific to the Subsystem this time. Press Y and Enter again.

Palash Volvoikar / Android Authority
The Subsystem package will then download and install, and you’ll get a Microsoft Store notification saying it was successful.

Palash Volvoikar / Android Authority
Installing Android apps on Windows 11
If you managed to get the Amazon Appstore to install directly, you can open it by searching for it from the Start menu. It will ask you to log in once with your Amazon account. Once done, you can search for the app you want and click the Get button to download it. Any Android app installed on Windows 11 will show up as a normal program you can directly run from the Start menu.
If you don’t have access to the store, which you won’t if you sideloaded the Subsystem, you will have to download the APKs and install them via PowerShell manually. For this, you will need to have a system-wide Android Debug Bridge (ADB) installed on your system. This is needed because the Subsystem acts like an Android phone wirelessly connected to the Windows 11 PC, and you can use ADB to leverage that connection to push APKs of your choice. This method is useful for installing apps that are not available on the Amazon Appstore.
- Download the 15-second ADB Installer here. Extract and run the installer.
- Give the administrator permission when asked.
- It will run in a terminal window, asking you Y/N as yes or no for installing specific components.
- We need all three components, so press Y and the Enter key for all three — install ADB and Fastboot, install ADB system-wide, and install Drivers.
- The driver installer will pop up as a separate window, which you have to follow to finish the installation.

Palash Volvoikar / Android Authority
- Download the APK file of the app of your choice from a trusted source like APK Mirror.
- For this tutorial, we’re using the Firefox browser for Android.
- Run the Windows Subsystem for Android. You can do this by simply searching for it and clicking on it from the Start Menu.
- In the settings, make sure Developer Mode is turned on. Click the boxed arrow in the Files tab to get the Subsystem running.

Palash Volvoikar / Android Authority
Run PowerShell as an administrator again.
To connect to the Subsystem via ADB, copy the IP address you can see in the Subsystem settings. Type adb connect in the PowerShell window, followed by the copied IP address. Ensure there’s a space between the word connect and the IP address. Press Enter.
Use the command adb devices to verify that the connection was successful.

Palash Volvoikar / Android Authority
Now, find the APK file in your Downloads folder. Right-click it, and click Copy as path.
Go back to the PowerShell window, type adb install, and paste the path you copied. Make sure to remove the quotation marks at the beginning and end of the path. You can use arrow keys to navigate through the command text. Your final command should look like this:
Code
adb install C:\Users\yourname\Downloads\firefox.apk
Palash Volvoikar / Android Authority
Press Enter to begin the installation. You’ll see the PowerShell say Performing Streamed Install, followed by a Success message.

Palash Volvoikar / Android Authority
The app is now installed and should now show up in the Start menu.
What Android apps can you get on Windows 11?
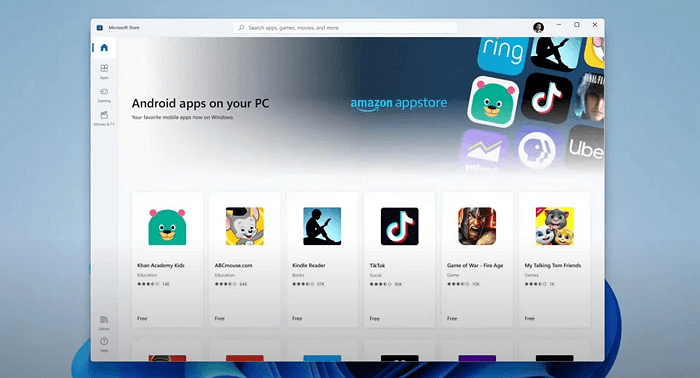
For now, the Amazon Appstore for Windows has over 1,000 apps available. These include games like Lords Mobile, June’s Journey, Coin Master, reading apps like Kindle, and kids’ apps like Khan Academy Kids and Lego Duplo World. Big apps like Gmail and YouTube are missing, due to the absence of Google Mobile Services.
With the sideloading method, it’s more or less the same issue. You will not be able to install apps that require Google Services or have split installation files with an APKM extension. However, you can install more than 50 apps this way, provided you can find the APK file.
Benefits of running Android apps on Windows 11
There’s one big upside to native Android emulation on Windows — there’s no need to install third-party Android emulators. There are many uses for this, including using chat apps like WhatsApp on your PC or trying to play mobile games on your PC. The process of installing Android apps on Windows has always been a long one, but when the final release of this feature hits, it will become quick and easy, likely for good.
It is also likely to take up fewer system resources than third-party emulators. So far, in the current stage, this feature has a few quirks, but we expect it to be smooth sailing by the time it’s ready for public release.
FAQs
Yes, Windows 11 can officially run Android apps. The feature is only available in a few countries right now, but you can unofficially get it running if you want to.
Yes, you can. There are ways to unofficially install Android apps using APK files, and also install Google Play Store.
No, Windows 11 doesn’t officially support the Google Play Store. However, you can sideload the latter through unofficial means.