В этой инструкции пошагово о том, как включить Windows Subsystem for Android в Windows 11, установить Android приложения и дополнительная информация, которая может оказаться полезной в контексте рассматриваемой темы. Также может быть полезным: Лучшие эмуляторы Android для Windows.
Установка Windows Subsystem for Android (WSA, Подсистема Windows для Android)
Все описанные действия по установке Подсистемы Windows для Android актуальны на момент написания статьи: вероятнее всего в скором времени процесс будет проще.
Необходимые шаги для установки Windows Subsystem for Android или WSA в Windows 11:
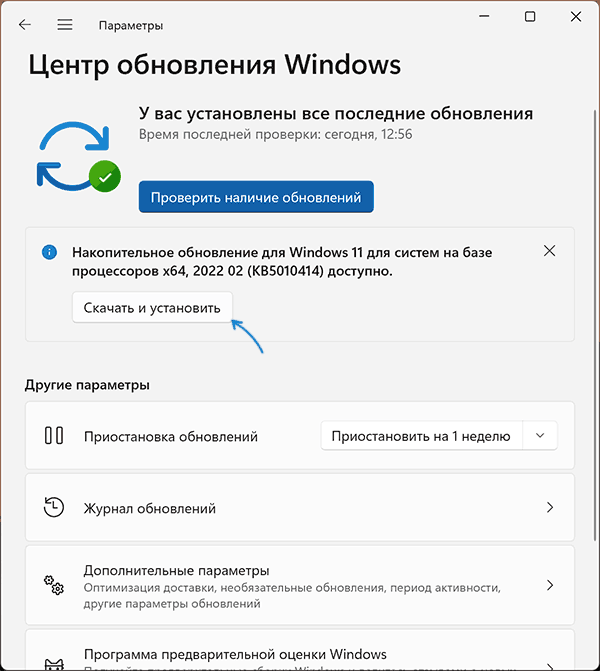
- Установите накопительное обновление KB5010414 через Центр обновления Windows, если вы этого еще не сделали.
- Для того, чтобы WSA могла работать, необходимо, чтобы на компьютере была включена виртуализация. Среди прочих требований — наличие SSD. Мне неизвестно, насколько критичен последний пункт при ручной установке Windows Subsystem for Android, к которой мы прибегнем далее.
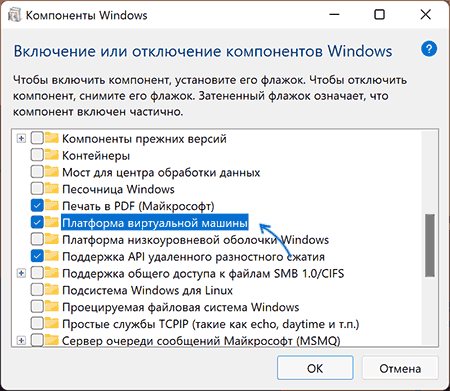
- Зайдите в Панель управления (для её открытия можно использовать поиск в панели задач) — Программы и компоненты, откройте пункт «Включение или отключение компонентов Windows», включите компонент «Платформа виртуальной машины», установите его и перезагрузите компьютер. Подробнее: Как установить дополнительные компоненты Windows 11 и Windows 10.
- Следующий шаг — установка приложения Windows Subsystem for Android, которое устанавливается при установке Amazon Appstore из магазина Microsoft Store. Сейчас приложение доступно лишь пользователям из США (но проверьте, возможно, к моменту, когда вы читаете этот материал, это уже не так), поэтому придется использовать обходной путь: зайдите на сайт https://store.rg-adguard.net/
- В пункте слева выберите «ProductId», в поле ввода данных введите 9p3395vx91nr и нажмите кнопку с изображением «галочки» справа. Внизу отобразится список доступных файлов для загрузки, требуется скачать файл размером более одного гигабайта в конце списка с именем
MicrosoftCorporationII.WindowsSubsystemForAndroid_НОМЕР_ВЕРСИИ_neutral_~_8wekyb3d8bbwe.msixbundle
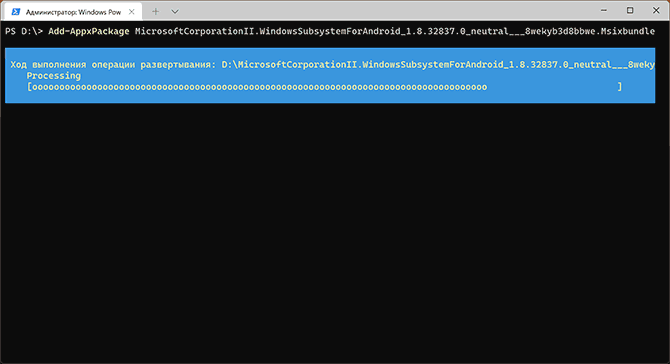
- Загруженный файл не получится установить просто запустив его. Для установки откройте Терминал Windows от имени администратора (правый клик по кнопке Пуск и выбрать нужный пункт в контекстном меню), а затем используйте команду
Add-AppxPackage полный_путь_к_скачанному_файлу
Путь можно скопировать, нажав правой кнопкой по файлу и выбрав соответствующий пункт в контекстном меню. Если путь содержит пробелы, возьмите его в кавычки.
В результате выполнения указанных действий WSA или Подсистема Windows для Android будет установлена на компьютере, а в списке доступных приложений появится приложение «Параметры подсистемы Windows для Android».
После запуска подсистемы Windows для Android (первый раз можно быстро запустить, открыв пункт «Файлы» в параметрах подсистемы Windows для Android), на компьютере также будет установлено приложение Amazon AppStore — стандартный метод установки Android-приложений в Windows 11.
Установка Android приложений в Windows 11
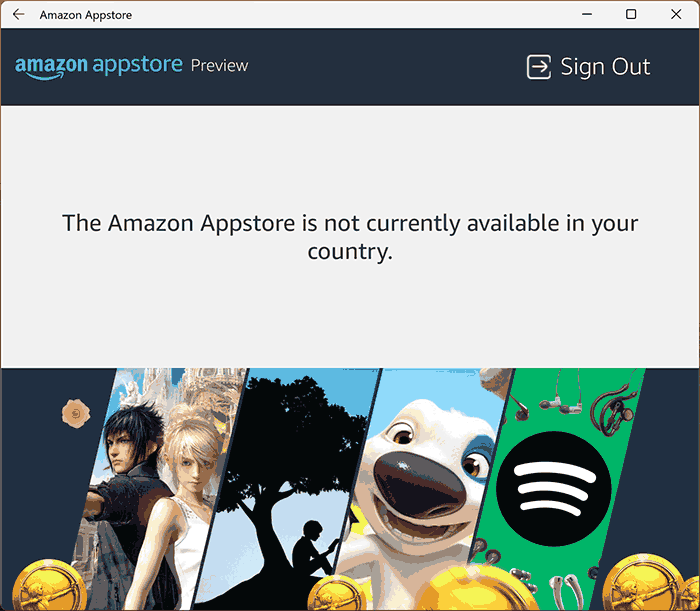
Стандартный метод установки Android приложений в Windows 11 — Amazon AppStore, однако на текущий момент (если ситуация изменится, и вы заметите это раньше меня, пожалуйста, напишите в комментариях), после входа в приложение вы увидите уведомление о том, что оно недоступно в нашей стране:
Поэтому придется использовать один из следующих методов.
Ручная установка Android-приложений в WSA с помощью adb.exe
Первый метод — использовать команды adb.exe для установки приложений из файлов APK вручную. Порядок действий:
- Скачайте инструменты командной строки platform-tools, включая adb.exe и распакуйте в удобную папку на вашем компьютере, рекомендую брать отсюда: https://adbinstaller.com/ — в этом варианте будет загружено только самое необходимое.
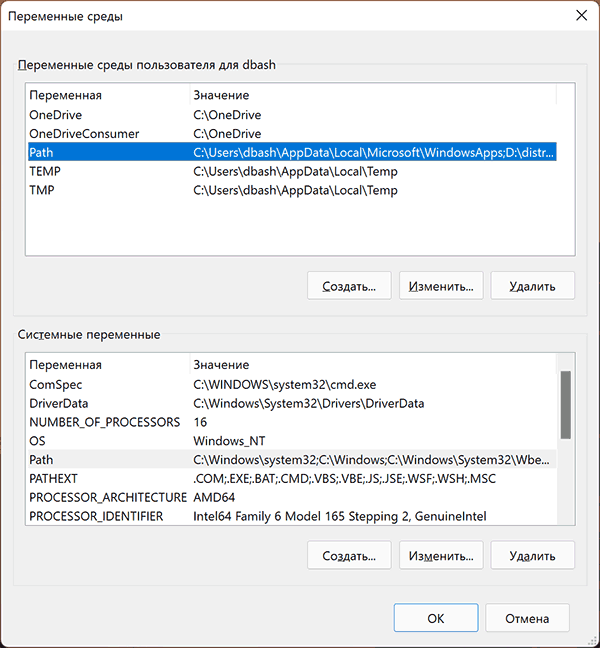
- Шаги 2-4 можно не выполнять, если вы готовы указывать полный путь к adb.exe в командной строке. Нажмите клавиши Win+R на клавиатуре, введите sysdm.cpl и нажмите Enter. Перейдите на вкладку «Дополнительно» и нажмите кнопку «Переменные среды».
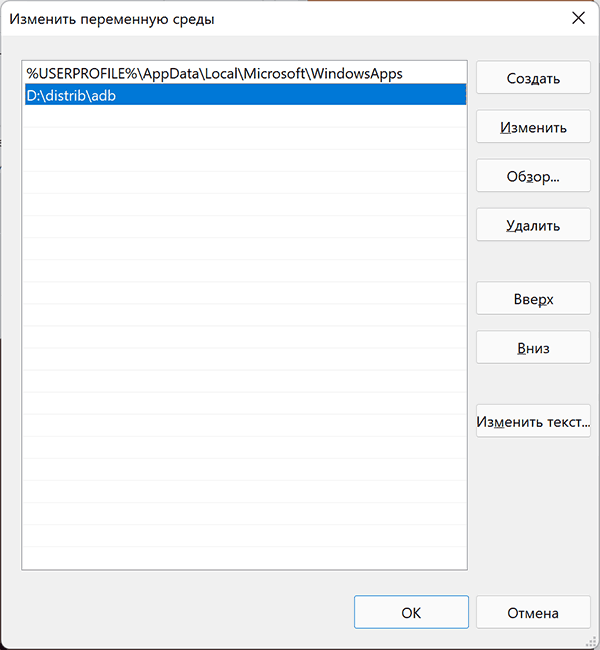
- Выберите переменную Path (для пользователя, если требуется использование только текущим пользователем или в разделе «Системные переменные» для всей системы» и нажмите «Изменить».
- Нажмите «Создать» и добавьте путь к папке с файлом adb.exe в системную переменную Path.
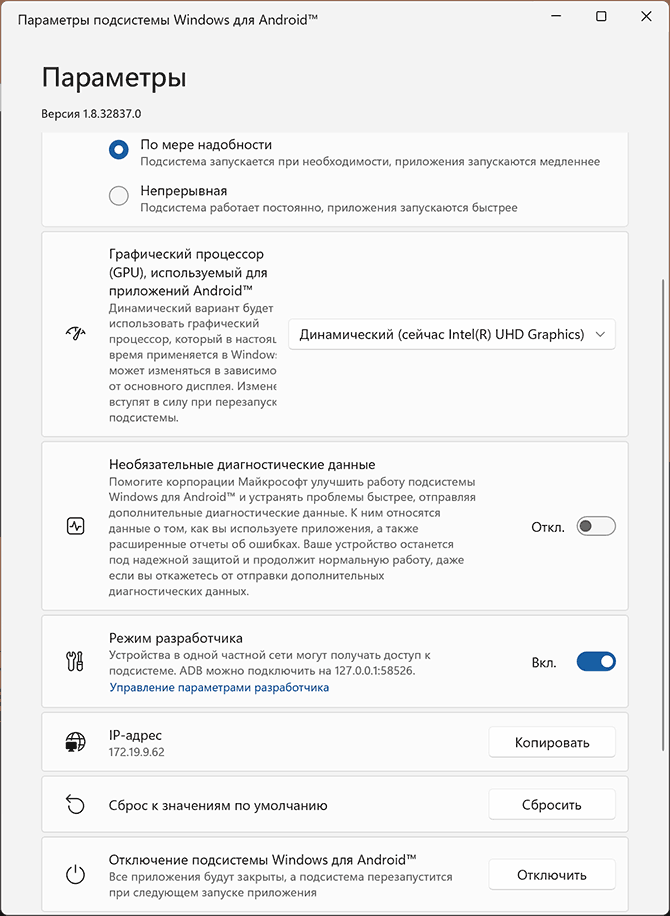
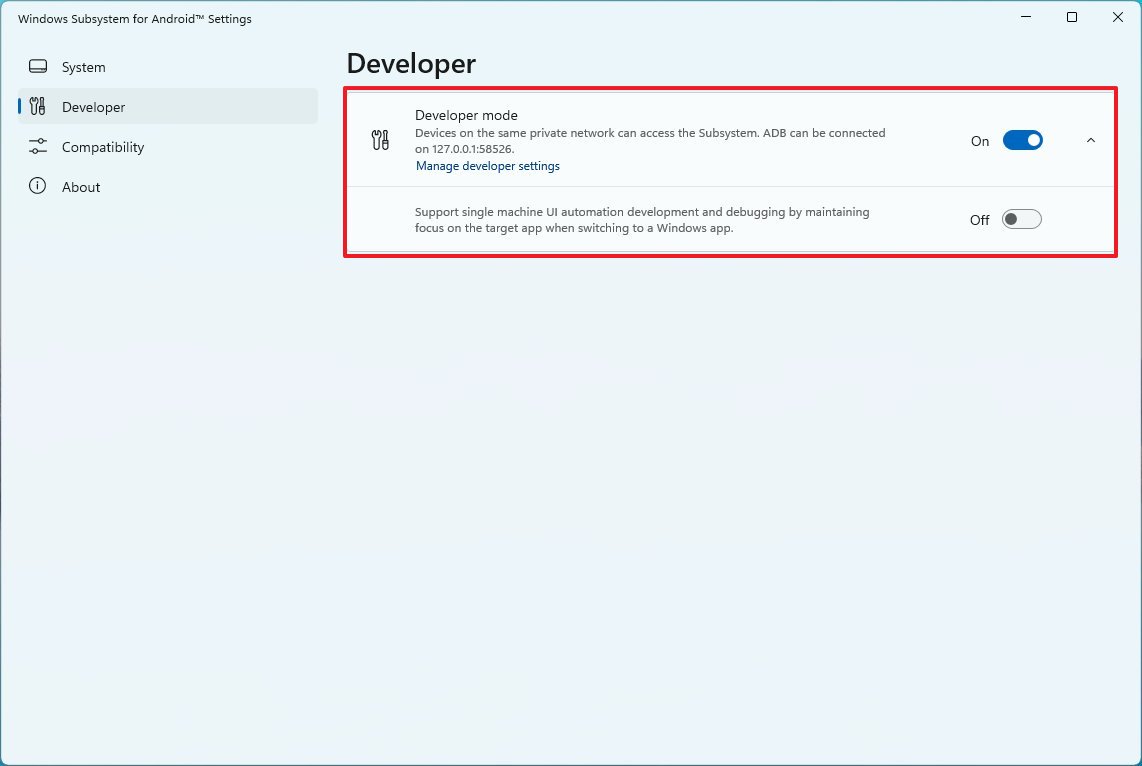
- Откройте приложение «Параметры подсистемы Windows для Android», включите пункт «Режим разработчика». Если сама WSA не запущена, запустите её (например, откройте пункт «Файлы» вверху окна, после открытия можно закрыть). Обратите внимание на пункт «IP-адрес» в параметрах, скопируйте его (если адрес не отображается, нажмите кнопку «Обновить» после запуска подсистемы Windows для Android).
- Скачайте нужные вам приложения Android в виде файлов APK, например вот так: Как скачать APK приложений Android.
- Запустите командную строку от имени Администратора (как запустить командную строку от администратора в Windows 11).
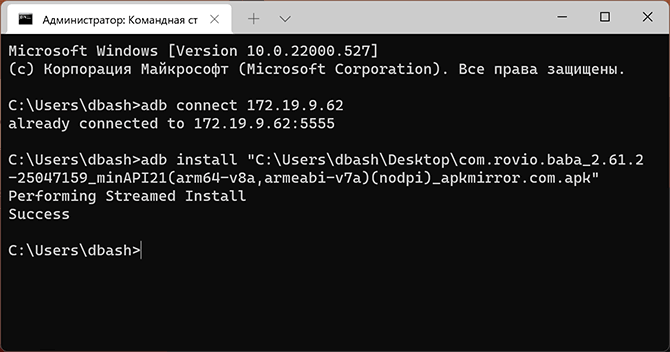
- Введите команду adb connect IP-адрес (где IP-адрес — адрес WSA из 5-го шага).
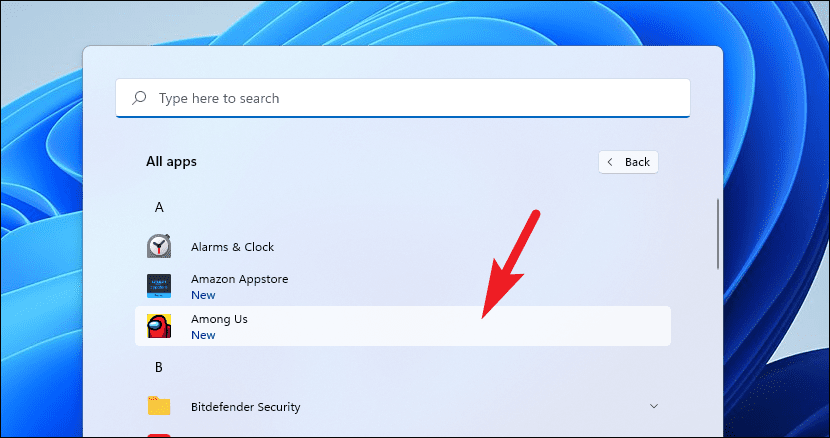
- Используйте команды adb install путь_к_файлу_apk для установки приложений Android. Успешно установленные приложения будут добавляться в меню Пуск Windows 11.
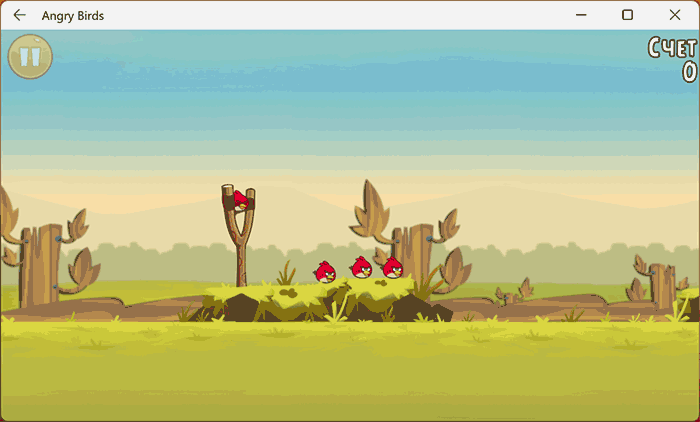
Не все приложения исправно работают: некоторые будут сообщать об ошибках или необходимости установки из Google Play (по всей видимости, из-за отсутствия Google Play Services). Но некоторые работают очень хорошо:
Даже работающие приложения не всегда делают это вполне исправно, среди замеченных проблем — неправильная отрисовка текстового контента в браузерах.
WSATools
В магазине Microsoft Store вы можете найти приложение WSATools, которое призвано облегчить установку приложений Android в Windows 11. Всё что требуется — указать файл APK устанавливаемого Android приложения, а всё остальное программа должна выполнить автоматически, в том числе — скачать и установить adb.exe при необходимости.
Однако в моем тесте установка в актуальной не Preview версии Windows 11 не удалась: экземпляр adb.exe, скачиваемый WSATools отказывается запускаться, а при ручной установке adb.exe, приложение либо зависает, либо «не видит» установленного adb.
Видео
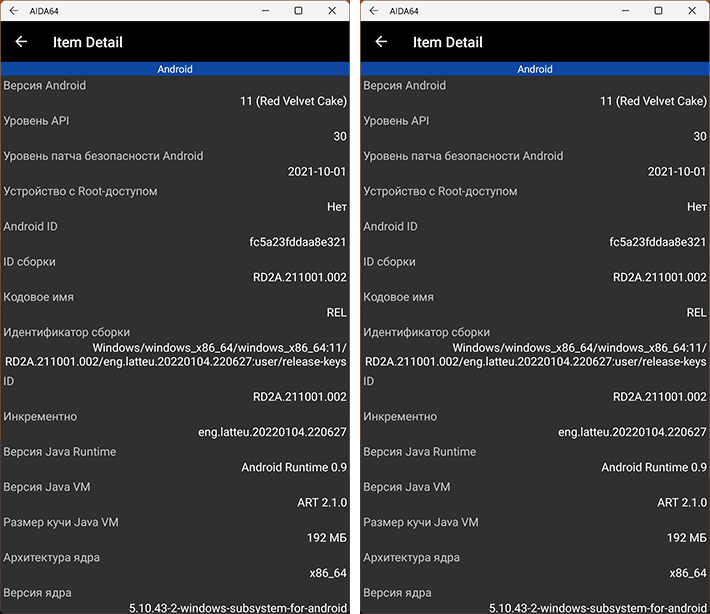
Если кому-то интересны характеристики виртуального устройства, запущенного в рамках Подсистемы Windows для Android, ниже — скриншоты с этой информацией.
Также, думаю, может заинтересовать проект MagiskOnWSA https://github.com/LSPosed/MagiskOnWSA для установки OpenGApps и получения Root в Windows Subsystem for Android.
(Image credit: Future)
On Windows 11, the Windows Subsystem for Android (WSA) is an integration that allows you to run Android apps on a laptop or desktop alongside Windows apps. Officially, you can only install apps from the Amazon Appstore, but it’s also possible to sideload Android apps using the Android Debugging Bridge (ADB) tools.
The platform is still available as a preview, and it’s limited to the United States, Japan, and several additional markets, including Australia, Canada, France, Germany, Italy, Spain, and the United Kingdom.
This how-to guide will walk you through the steps you need to know to get started getting and using Android apps on Windows 11.
How to install Windows Subsystem for Android on Windows 11
You first need to check your computer specifications to determine if the device meets the minimum requirements.
System requirements
These are the requirements to install Android apps on Windows 11:
- Memory: 8GB (16GB recommended).
- Processor: Intel Core i3 8th Gen, AMD Ryzen 3000, Qualcomm Snapdragon 8c, or better.
- Storage: Solid-state drive (SSD).
- Microsoft Store app: Version 22110.1402.6.0 or higher.
- Windows 11: Build 22000.526 or higher.
Check system requirements
To check the system requirements, use these steps:
- Open Settings.
- Click on System.
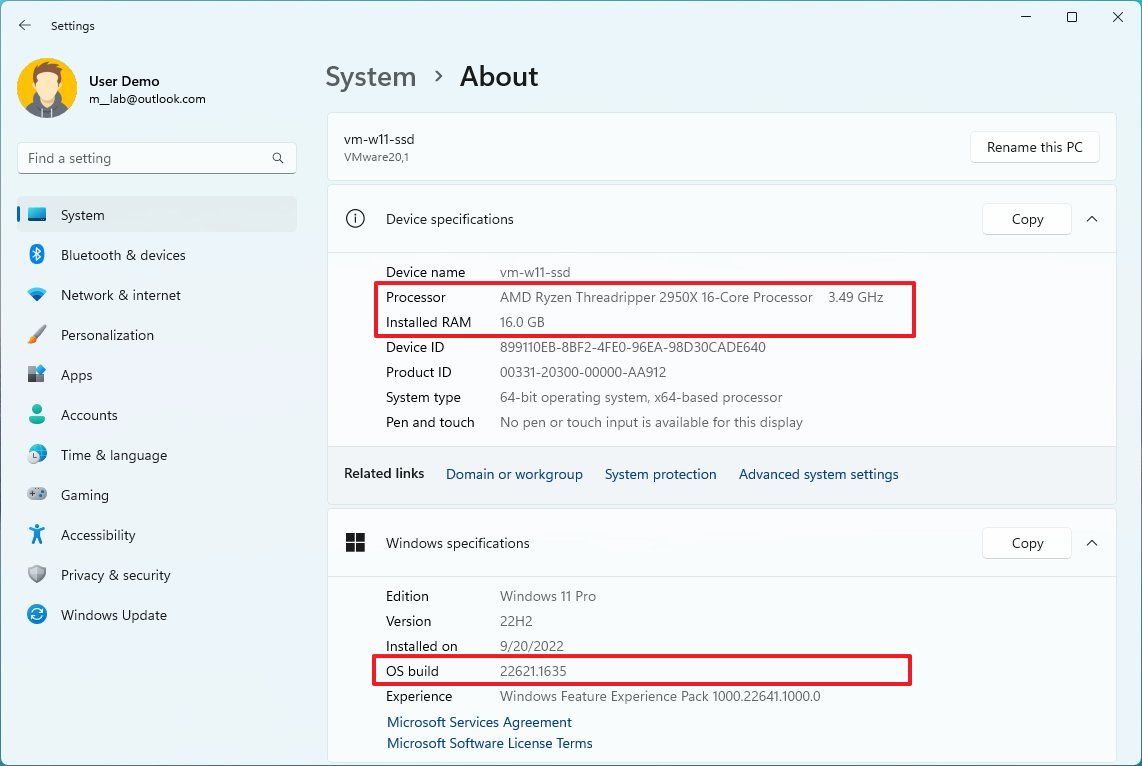
- Click the About page on the right side.
- Under the «Device specifications» section, confirm the RAM and CPU specs.
- Under the «Windows specifications» section, confirm the build number is equal to or higher than 22000.526.
- Click on System.
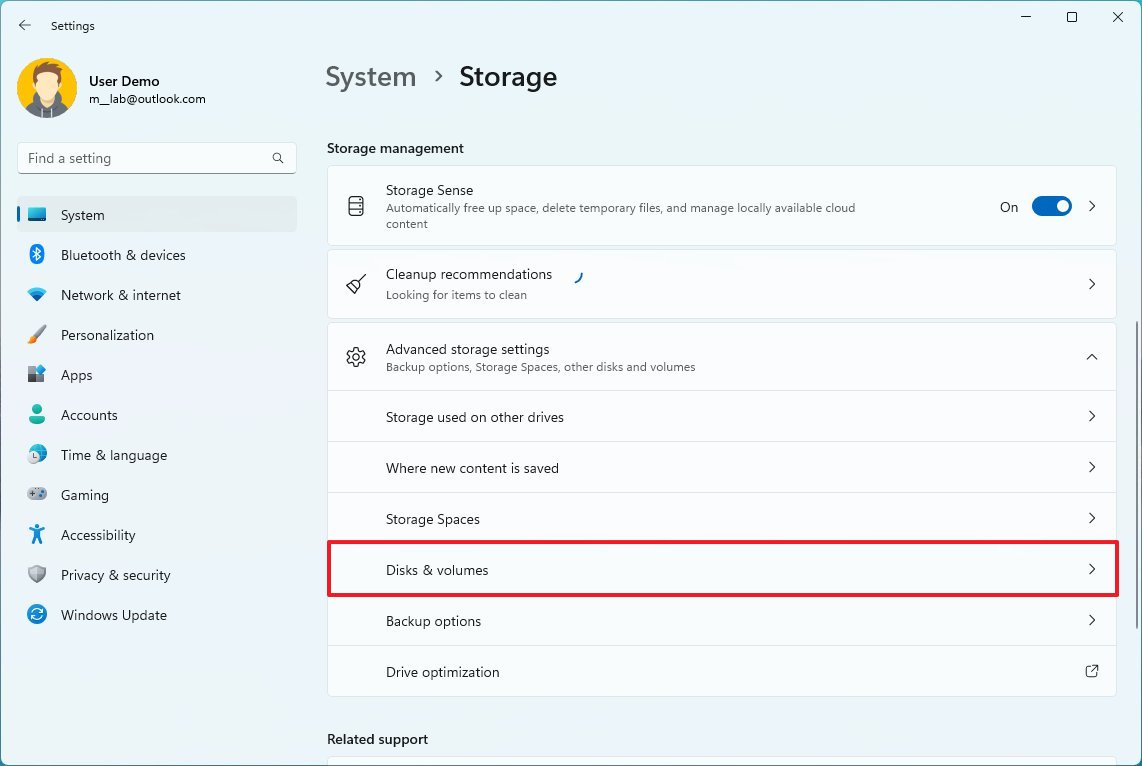
- Click the Storage page on the right side.
- Under the «Storage management» section, select the «Advanced storage settings» option.
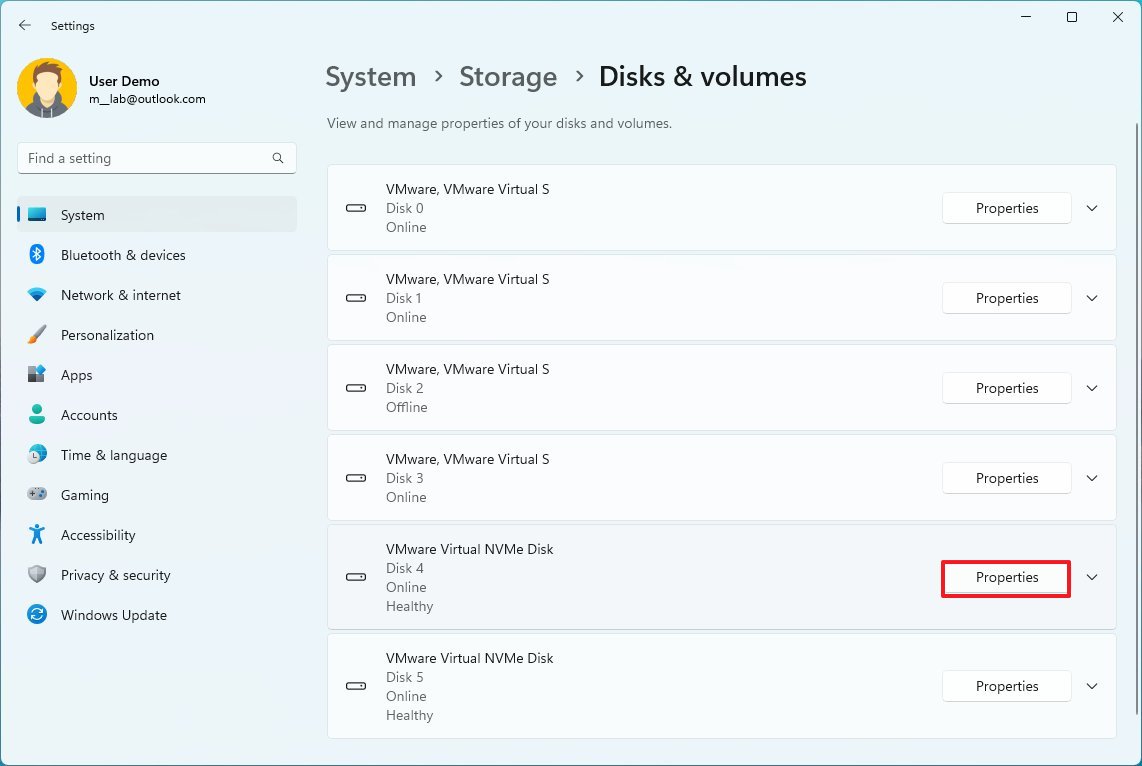
- Click the Disks & volumes setting.
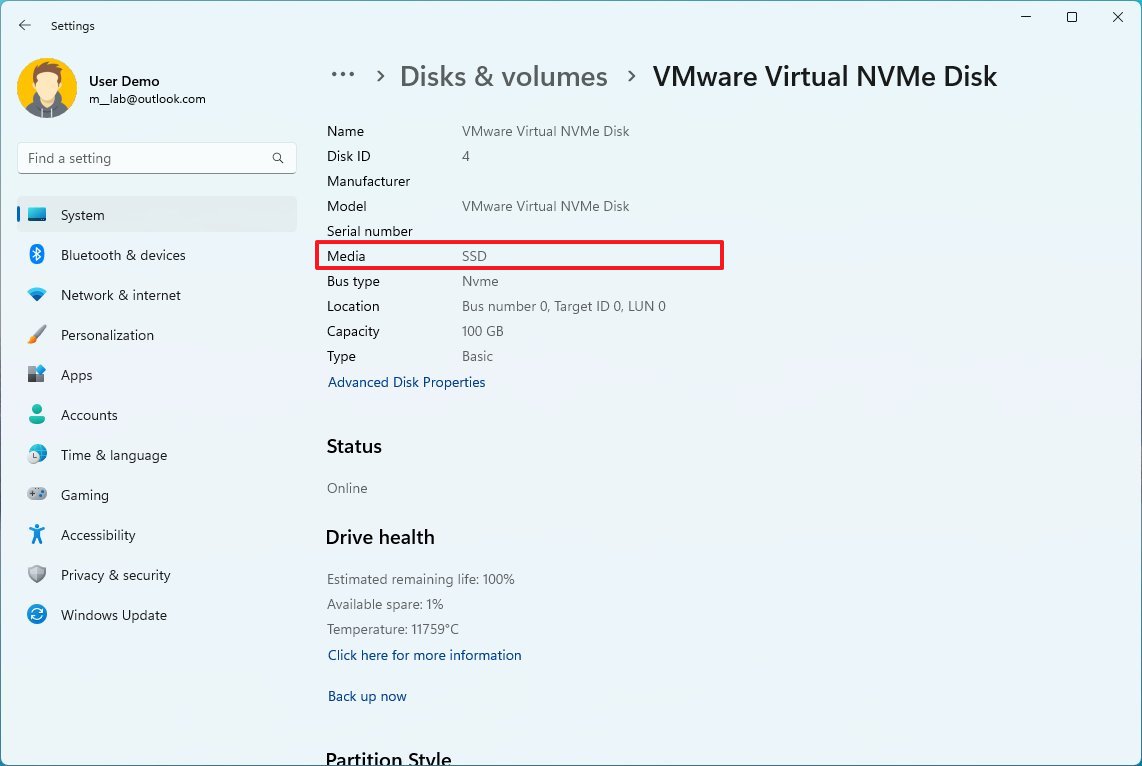
- Select the main drive and click the Properties button.
- Confirm the media type is SSD. (If it’s «HDD,» you cannot to install the platform.)
Once you complete the steps, check for updates to ensure the system has the latest patches and the most up-to-date version of the Microsoft Store.
Check for Windows 11 updates
To download and install updates on Windows 11, use these steps:
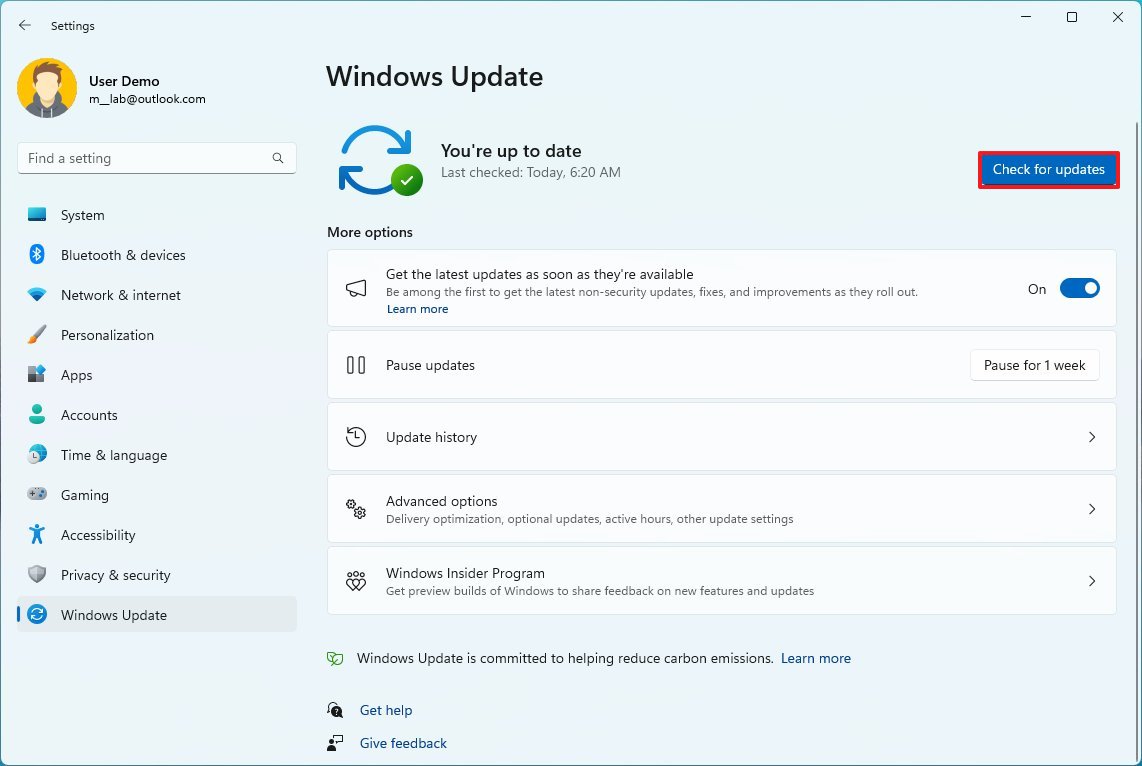
- Open Settings.
- Click on Windows Update.
- Click the «Check for updates» button.
After completing the steps, restart the computer to apply the system updates.
Check for Microsoft Store update
The computer must also have the latest version of the Microsoft Store app to download the Amazon Appstore app.
To check the Microsoft Store version and check for updates, use these steps:
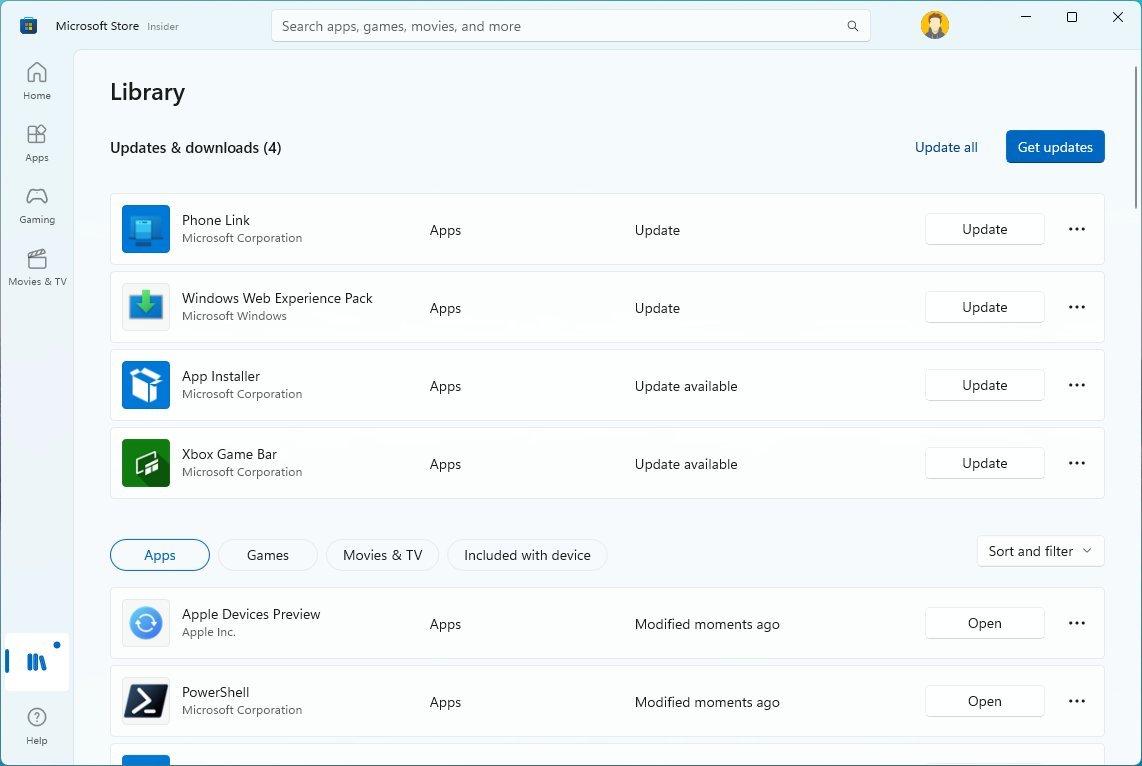
- Open Microsoft Store app.
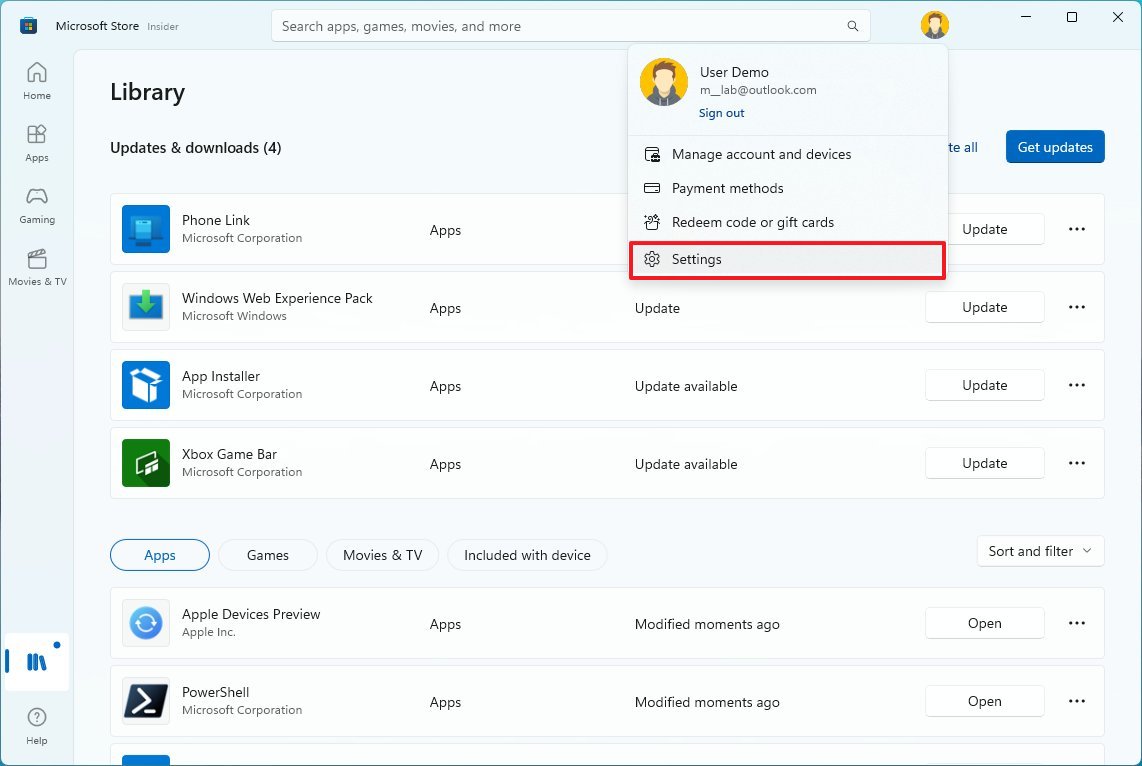
- Click on Library.
- Click the Get updates button.
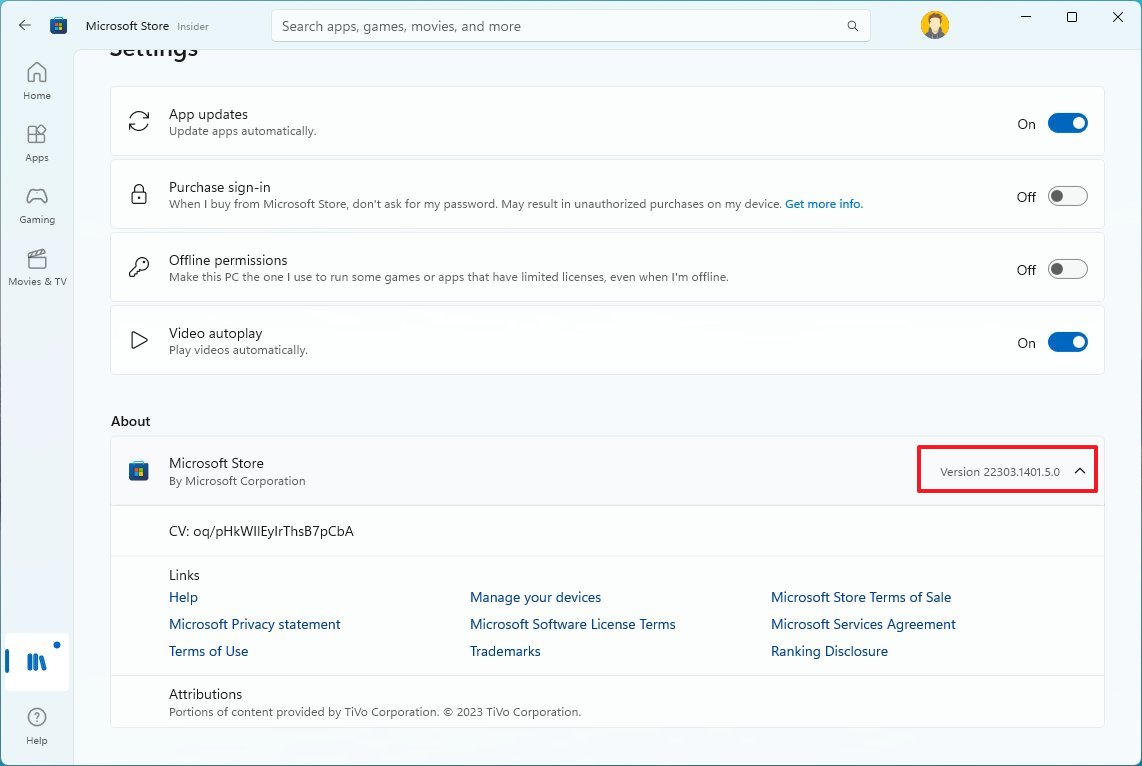
- Click the Profile menu and select the App settings option.
- Confirm the version is equal to or higher than 22110.1402.6.0.
After you complete the steps, you can enable the virtualization features on the UEFI firmware and Windows 11.
Enable virtualization
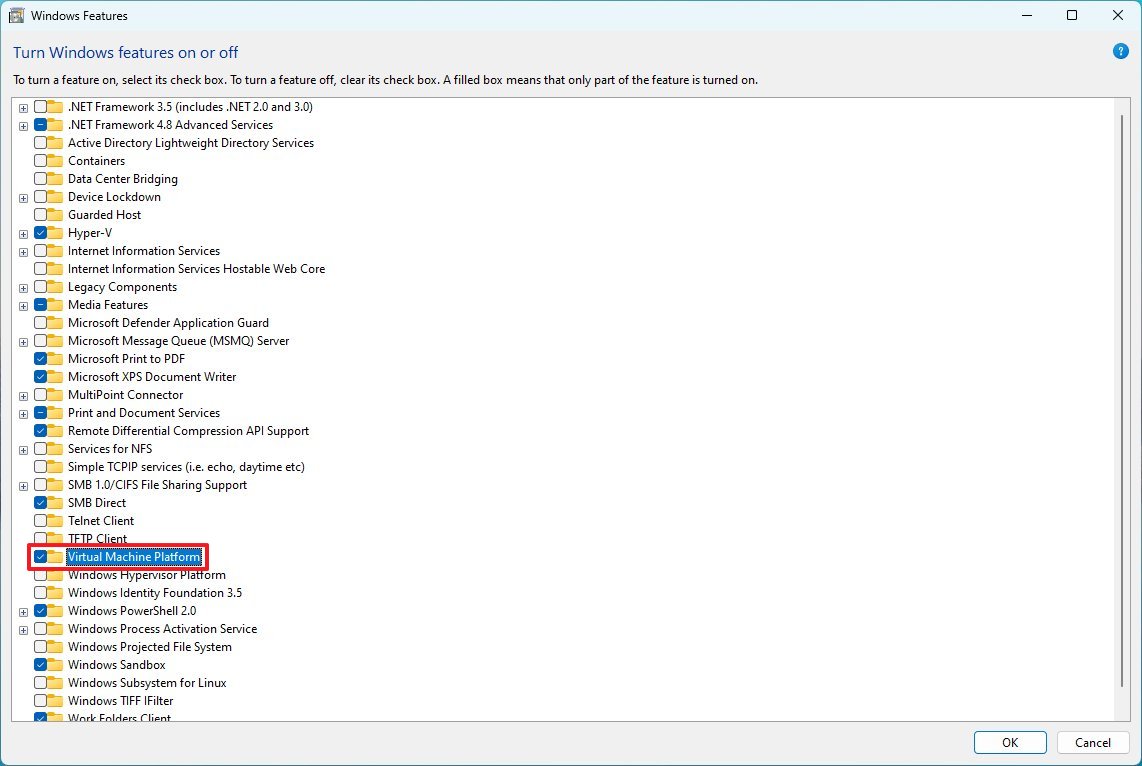
The Windows Subsystem for Android also requires hardware and software virtualization to run the virtual machine that makes everything possible. Since these steps are different per device, you may have to check your manufacturer support website for specific details depending on the computer. This feature may already be enabled if you have a computer with modern hardware. Once virtualization has been enabled, you can turn on the «Virtual Machine Platform» feature on Windows 11.
To enable the Virtual Machine Platform feature on Windows 11, use these steps:
- Open Start.
- Search for Turn Windows features on or off and click the top result to open the experience.
- Check the «Virtual Machine Platform» option.
- Click the OK button.
- Click the Restart button.
Once you complete the steps, you can install the Windows Subsystem for Android and the Amazon Appstore.
Install Windows Subsystem for Android
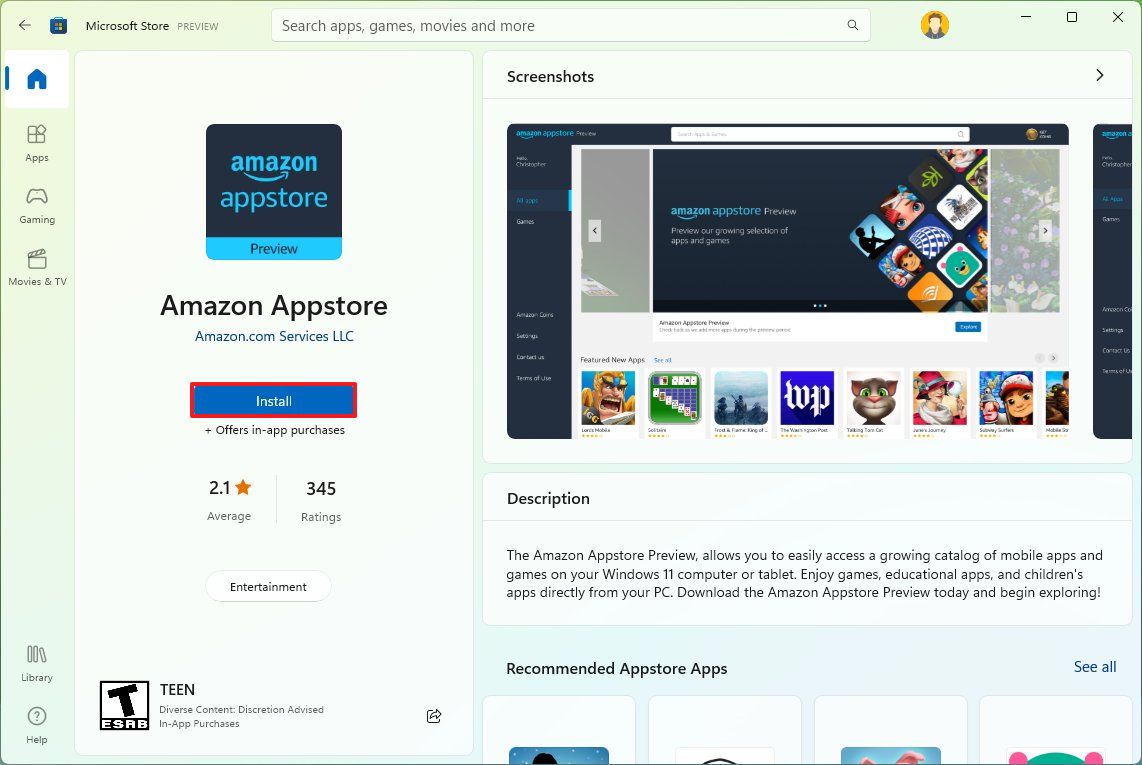
To install the Windows Subsystem for Android alongside the Amazon Appstore on Windows 11, use these steps:
- Open the Amazon Appstore page.
- Click the Install button.
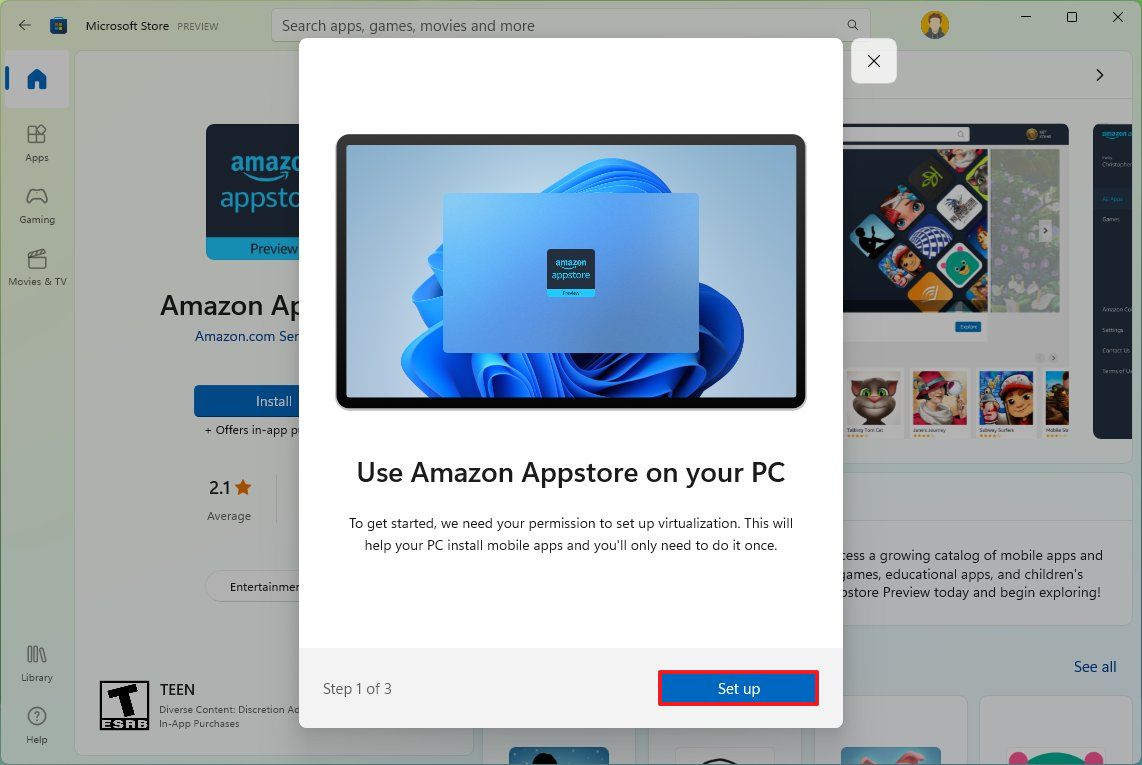
- Click the Set up button.
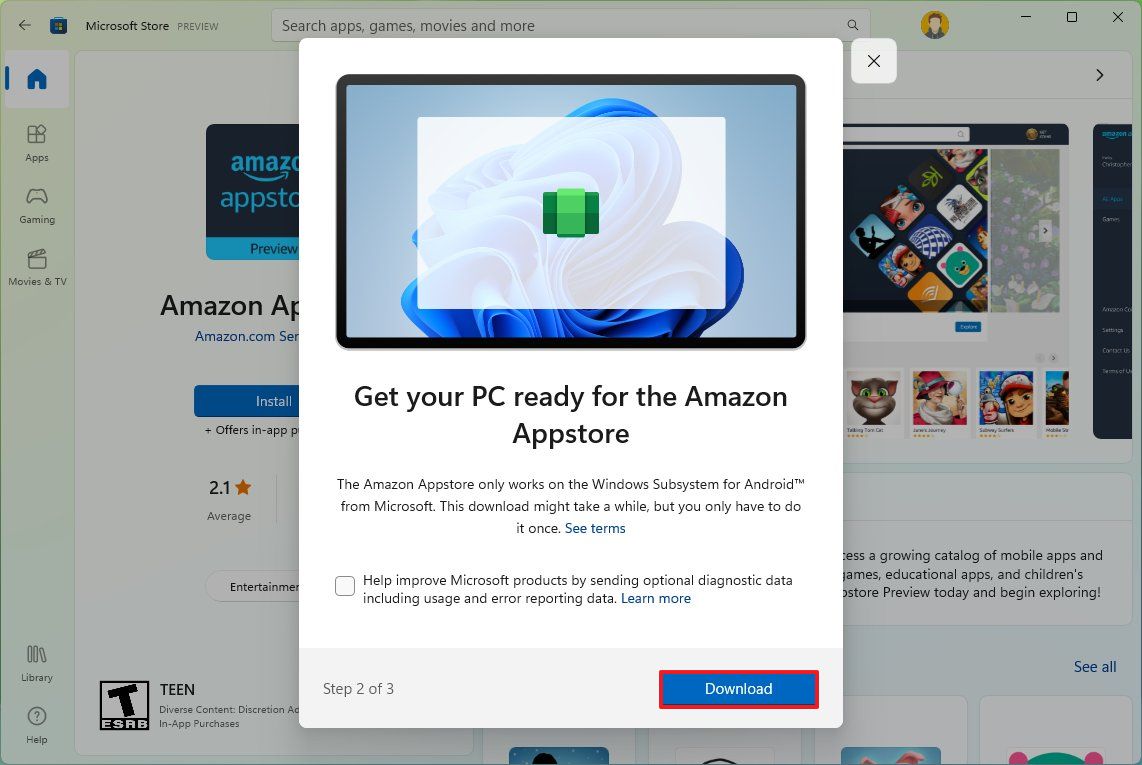
- Click the Download button.
- Click the Next button.
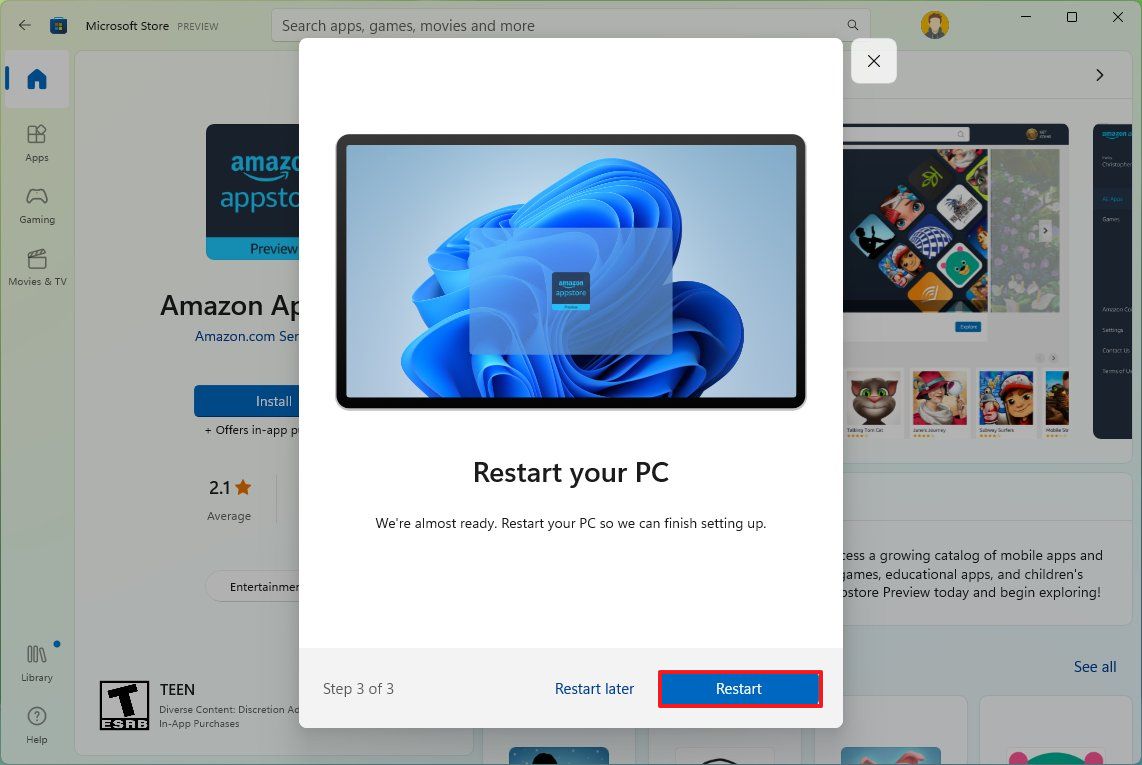
- Click the Restart button.
After you complete the steps, you can finally install Android apps on Windows 11.
How to install Android apps on Windows 11
To install Android apps on Windows 11, use these steps:
- Open Start.
- Search for Amazon Appstore and click the top result to open the app.
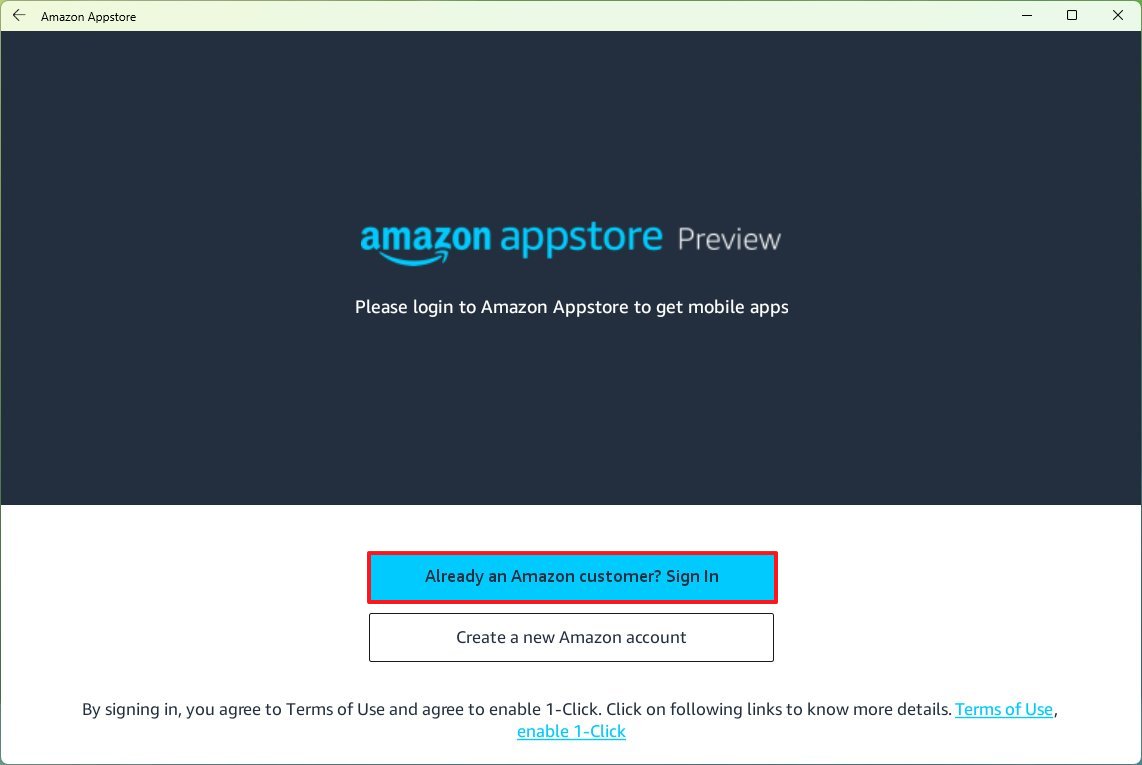
- Click the Sign in button.
- Sign in with your Amazon account.
- Select the application.
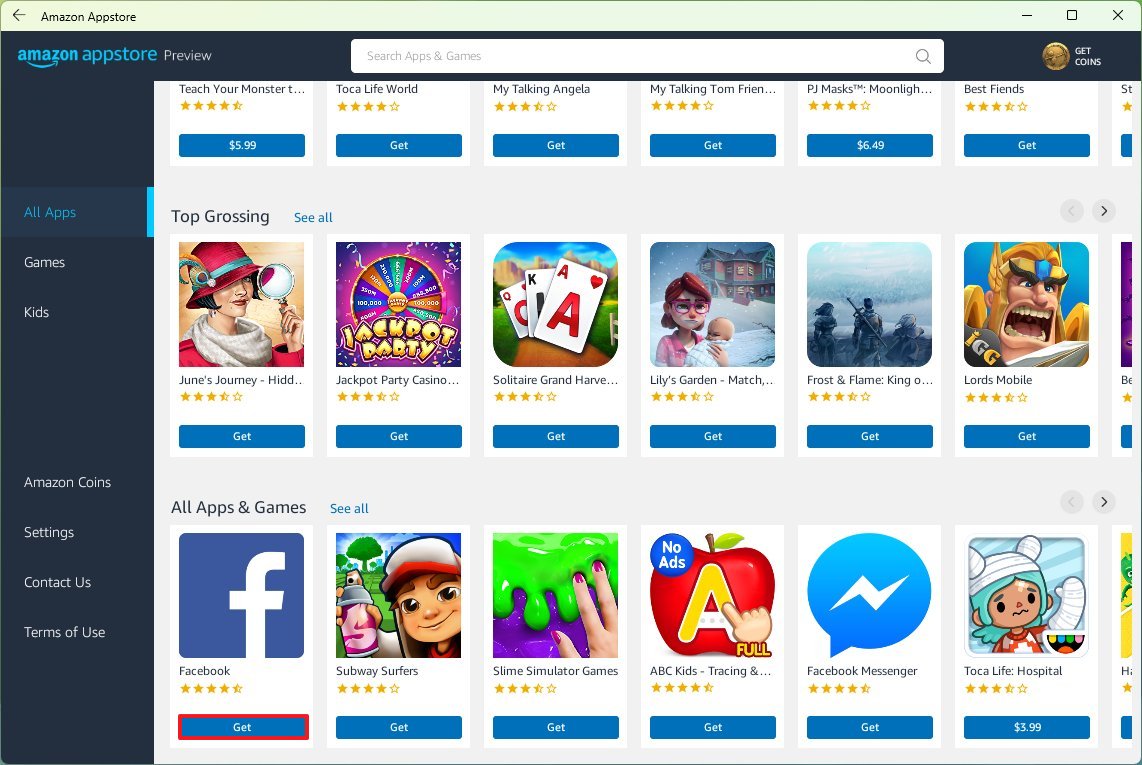
- Click the Get button.
- Click the Download button.
- Click the Download button again.
Once you complete the steps, you can open the app from the Amazon Appstore, or it’ll also be listed in the Start menu. The app will probably be listed in the «All apps» section if you can’t find it.
Android app will behave like a regular Microsoft Store app. You can maximize, minimize, and resize windows and use the mouse and keyboard for input. You can terminate the application by clicking the «Close» button like any other app, but it might take a little time.
How to uninstall Android apps on Windows 11
On Windows 11, you can uninstall Android apps like any other Microsoft Store app from the Start menu or Settings app.
Remove apps from Start menu
To remove Android apps from the Windows 11 Start menu, use these steps:
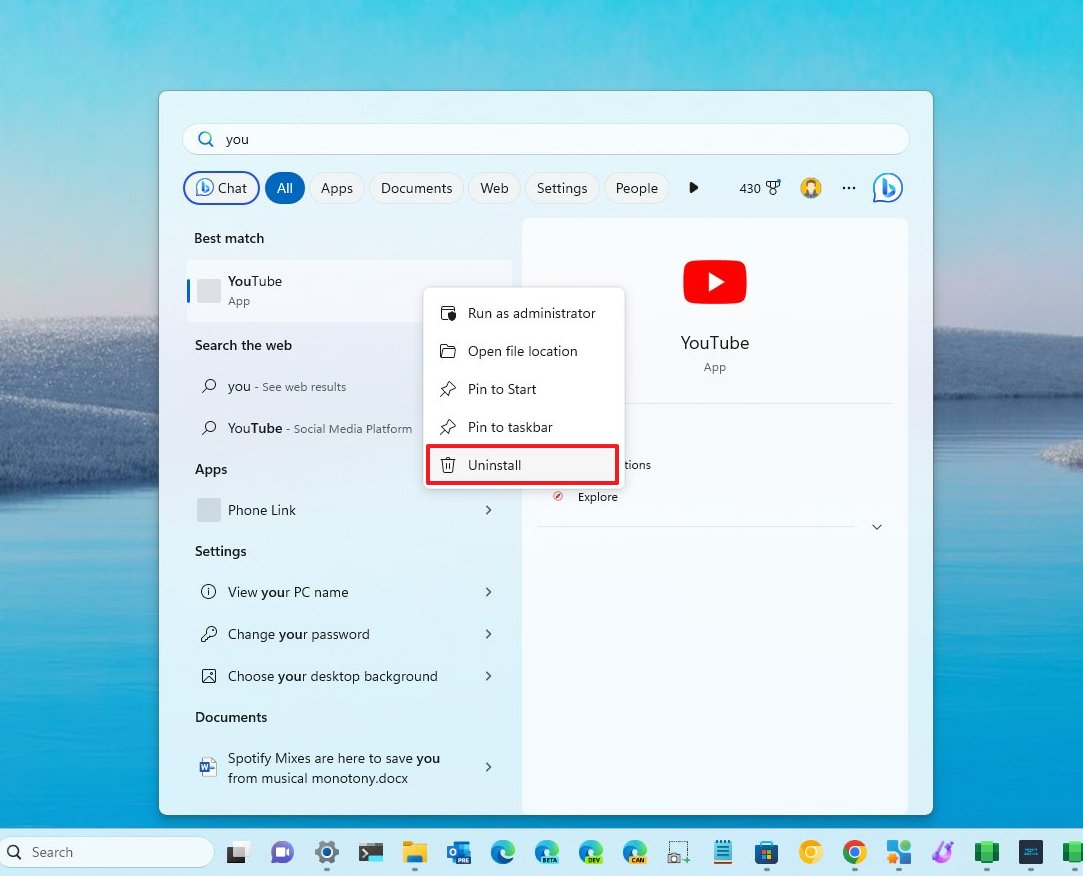
- Open Start.
- Search for the app.
- Right-click the Android apps and select the Uninstall button.
Remove apps from Settings
To uninstall Android apps from the Settings app, use these steps:
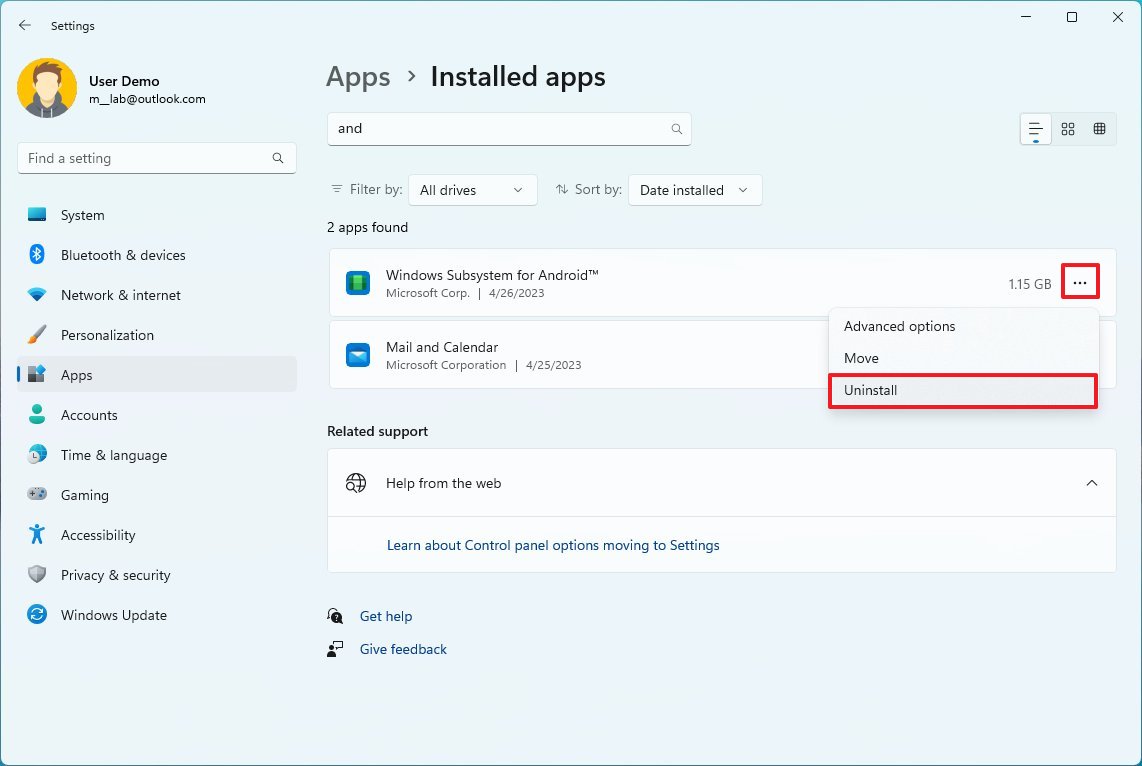
- Open Settings.
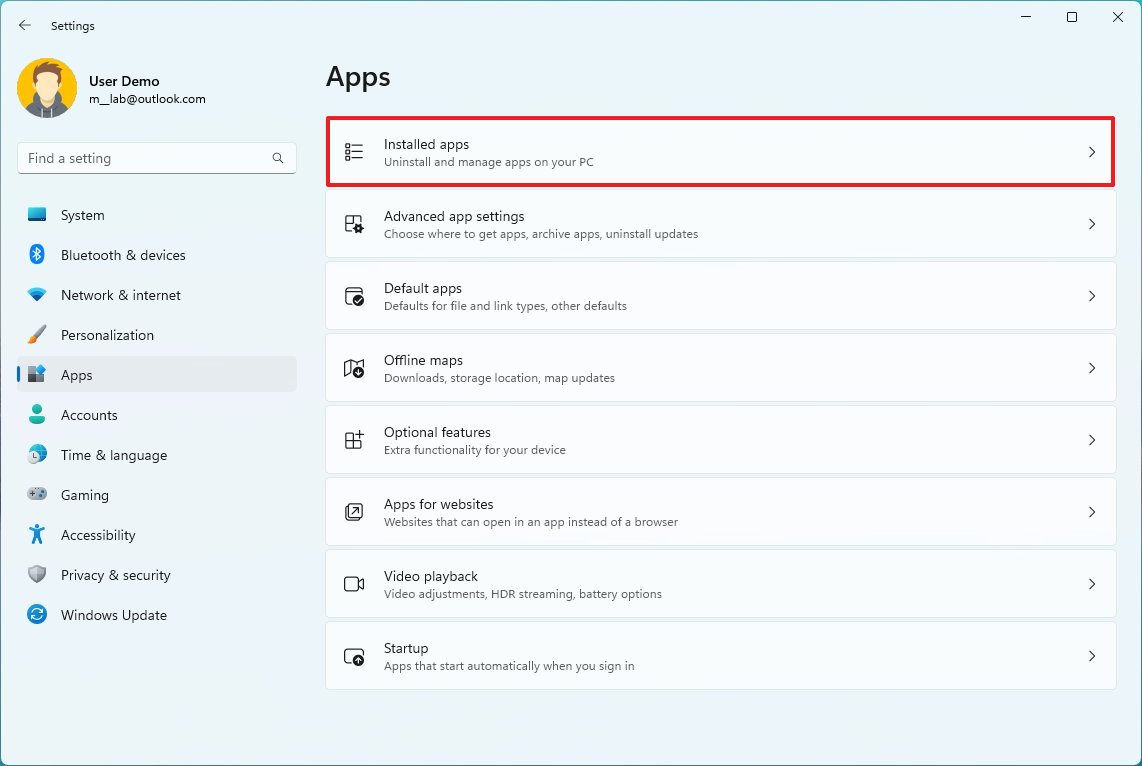
- Click on Apps.
- Click the Installed apps page from the right side.
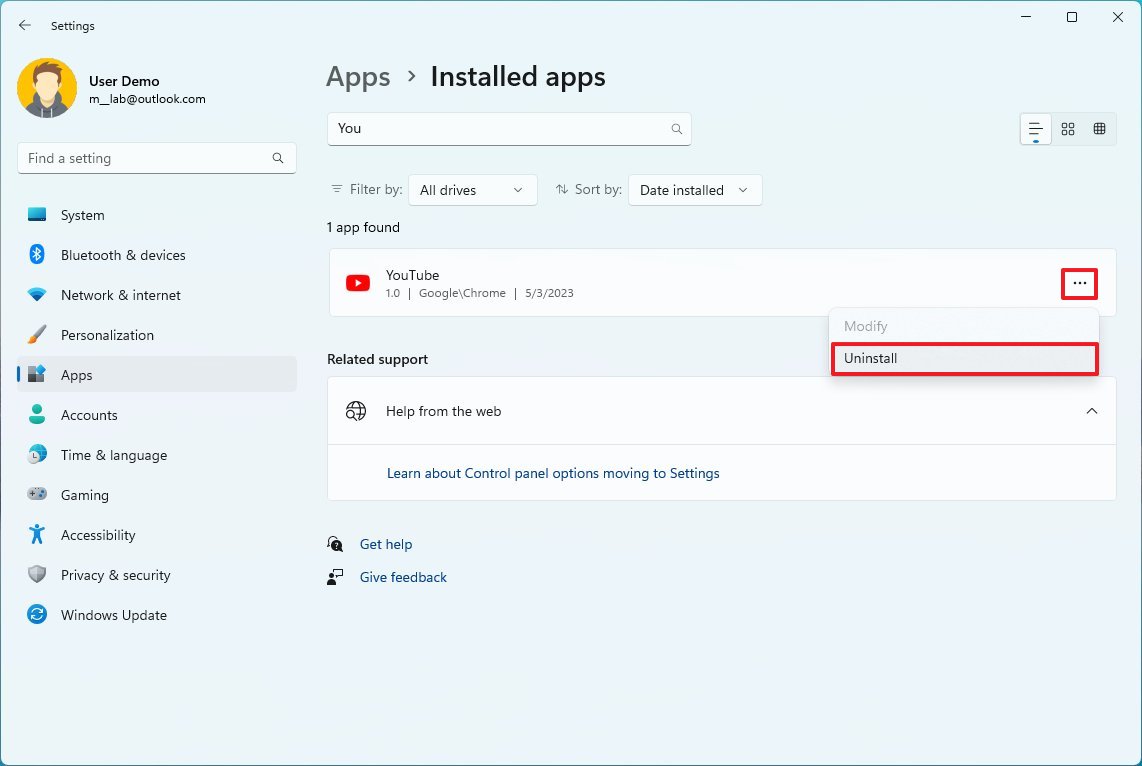
- Select the Android app.
- Click the menu (three-dots) button and select the Uninstall option.
- Click the Uninstall button again.
After you complete the steps, the app will no longer be available on the computer.
These instructions work for removing apps from the Amazon Appstore or apps you sideloaded using the Android Debugging Bridge (ADB) tools.
How to uninstall Windows Subsystem for Android on Windows 11
To uninstall the Windows Subsystem for Android, Amazon Appstore, and installed apps, use these steps:
- Open Settings.
- Click on Apps.
- Click the Apps & features page from the right side.
- Select the «Windows Subsystem for Android» app.
- Click the menu (three-dots) button and select the Uninstall option.
- Click the Uninstall button again.
- Restart the computer.
- Quick note: Restarting isn’t required, but the system may need a refresh to remove any remaining files and configuration. Also, if you don’t restart, if you are reinstalling the platform, you may get an error downloading the components from the Microsoft Store.
Once you complete the steps, the Windows Subsystem for Android, Amazon Appstore, and Android apps will be removed from Windows 11.
Other details
Although the platform works out of the box with the default configuration, the Windows Subsystem for Android also comes with various settings, which you can open from the Start menu.
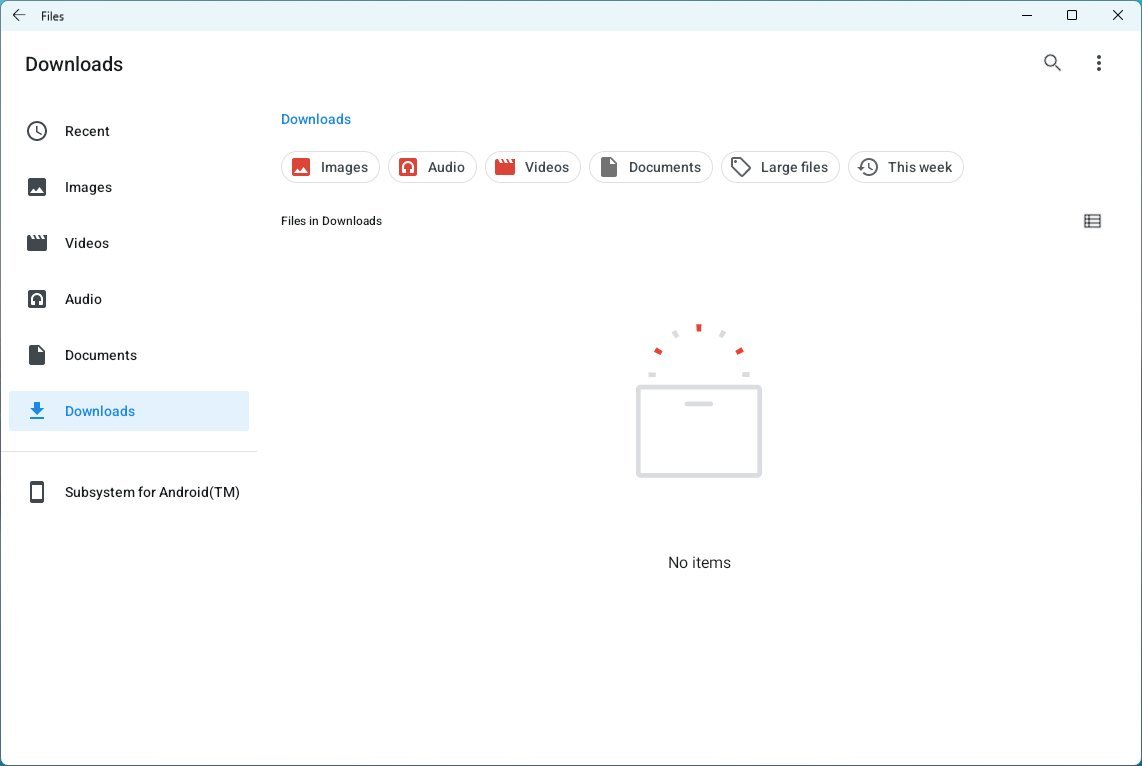
The «System» page allows you to access files you created and downloaded using the platform, including images, audio, videos, documents, and more.
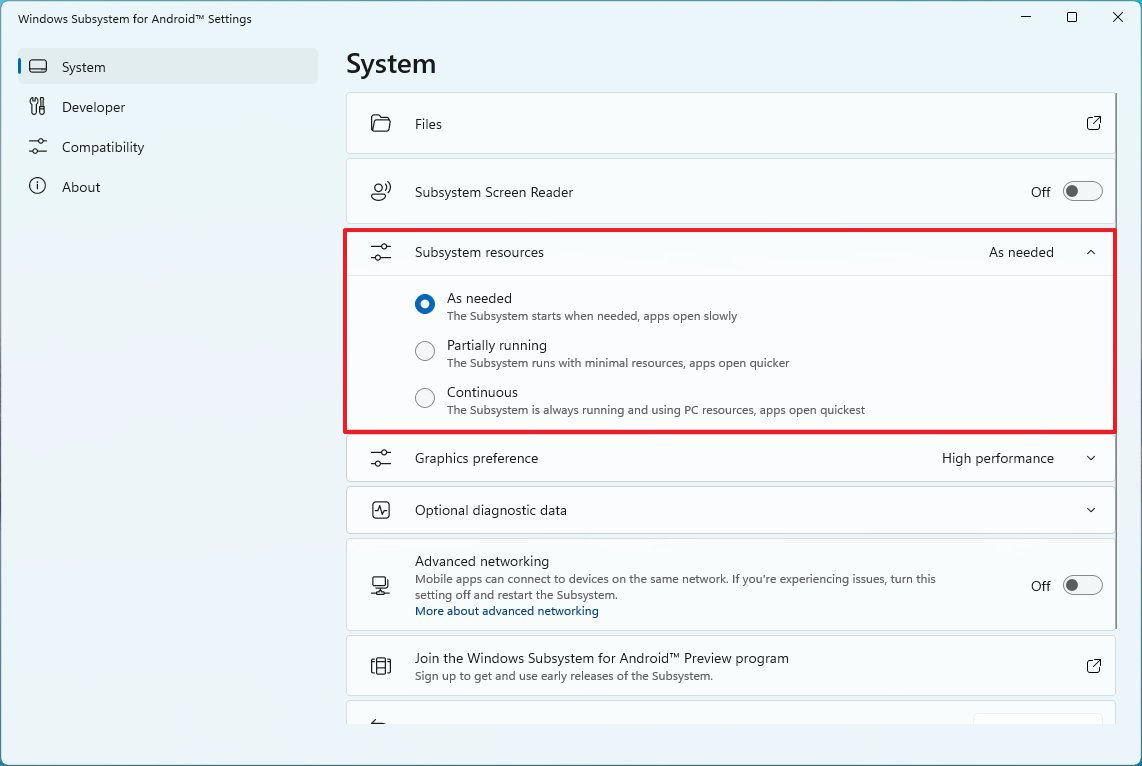
By default, the subsystem remains dormant until you launch an application. However, the settings page also includes a «Subsystem resources» feature allowing you to run the virtual machine continuously in the background.
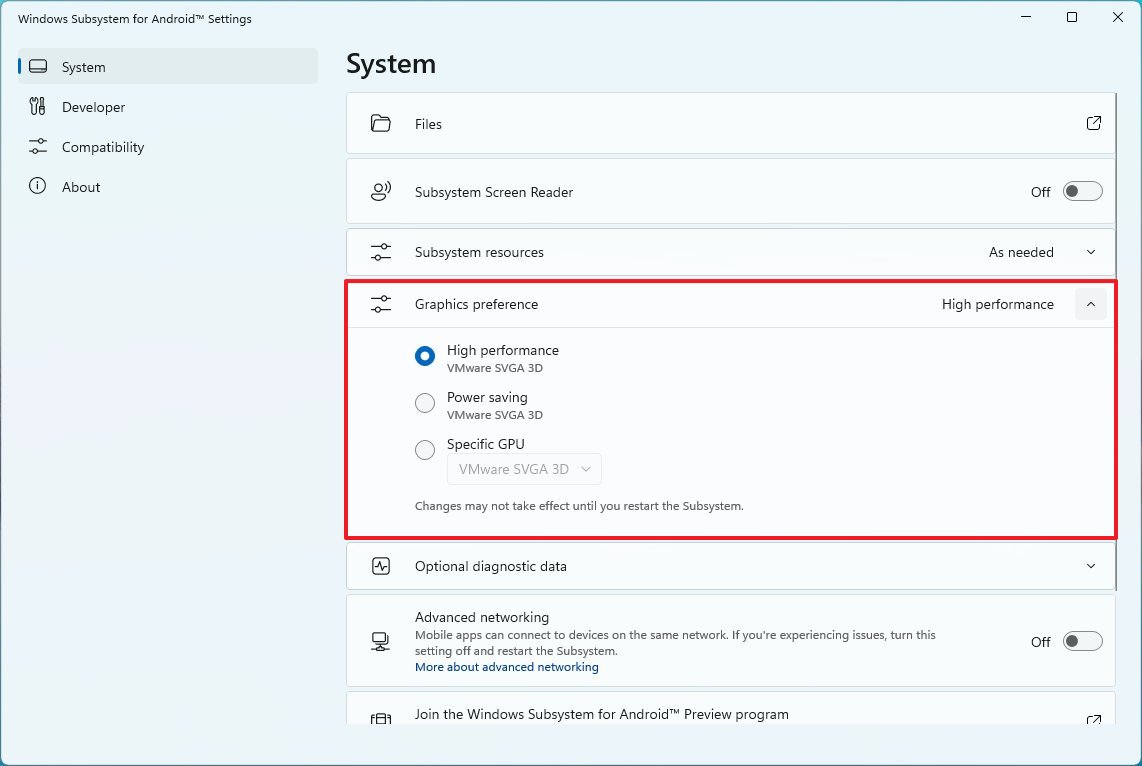
You can also assign the graphic card the platform should use when running applications using the «Graphics and Performance» setting.
In the «Developer» section, you can enable «Developer mode» for testing and debugging.
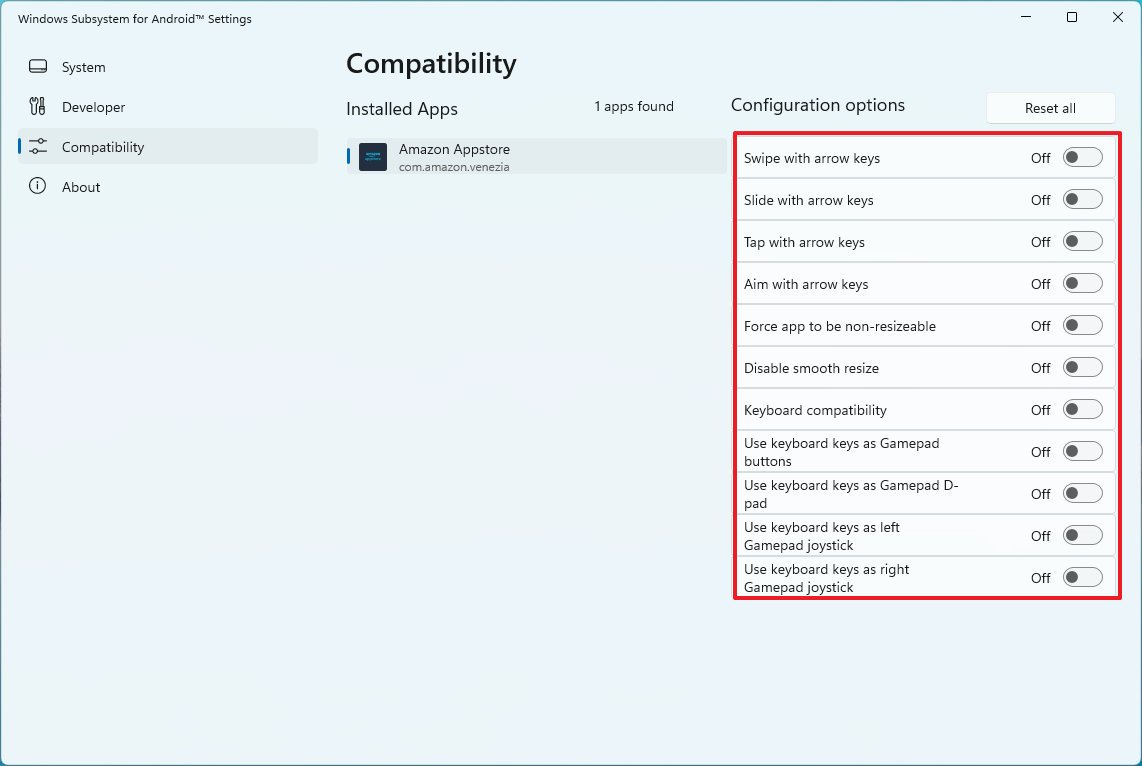
The «Compatibility» section includes a number of shims you can enable per application to make Android apps more compatible with the platform on Windows 11.
Although bringing Android apps support is a welcome addition to Windows 11, you cannot run any app you want. For example, the Amazon Appstore only includes around 20,000 apps. While it may seem like a lot, it’s not, and most of them are low—quality games. Also, if you sideload apps, you may be able to install virtually any app, but those that require Google Play Services like Gmail, Google Maps, and others won’t work.
You can check which apps are compatible with Windows 11 using this community list on GitHub.
This guide includes the steps to install WSA through the Amazon Appstore. However, you can also install the Windows Subsystem for Android app, which will also install the Amazon Appstore.
The platform is only available in a handful of regions. However, if you are located in a country that is still not supported, you can get around this by changing the region settings. You can perform this task from Settings > Time & language > Language & region and change the «Country or region» setting to the «United States» option.
If you are a developer, Microsoft has published various resources to optimize your Android apps to run with the Windows Subsystem for Android. The documentation explains the steps to set up the development environment and configure the platform settings. Also, you will find information to add support for keyboard and mouse, resizing windows, and more details on the virtual machine, security, and Amazon Appstore.
More resources
For more helpful articles, coverage, and answers to common questions about Windows 10 and Windows 11, visit the following resources:
- Windows 11 on Windows Central — All you need to know
- Windows 10 on Windows Central — All you need to know
All the latest news, reviews, and guides for Windows and Xbox diehards.
Mauro Huculak is technical writer for WindowsCentral.com. His primary focus is to write comprehensive how-tos to help users get the most out of Windows 10 and its many related technologies. He has an IT background with professional certifications from Microsoft, Cisco, and CompTIA, and he’s a recognized member of the Microsoft MVP community.
Your Windows 11 computer currently doesn’t include one of the most-anticipated features of the operating system — native Android support. This allows you to run Android apps directly on your PC. Luckily, you can enable it pretty easily.
The ability to run Android apps on Windows 11 is now available, but only in select countries (full list below). Don’t worry, though, you can still install Android apps on Windows 11 even if you’re not in one of these regions. Here’s how.
QUICK ANSWER
To install Android apps on Windows 11, you simply need to enable a few settings and install the Amazon Appstore from the Microsoft Store. If you’re in an unsupported region, you can also sideload the Windows Subsystem for Android and manually install apps using APK files. For step-by-step instructions, simply click on one of the below sections.
JUMP TO KEY SECTIONS
- How to install Android apps on Windows 11 officially (Select regions only)
- How to run Android apps on Windows 11 unofficially
- What Android apps can you get on Windows 11?
- Benefits of running Android apps on Windows 11
How to install Android apps on Windows 11 officially
Android apps on Windows 11 are officially available in the following countries: Andorra, Austria, Belgium, France, Germany, Gibraltar, Guernsey, Ireland, Isle of Man, Italy, Japan, Jersey, Liechtenstein, Luxembourg, Monaco, San Marino, Spain, Switzerland, the United Kingdom, the United States, and the Vatican City. The other requirement is that you should have a compatible Windows 11 system, running Build 22000.526 or higher.
If you live in an unsupported country, you can trick Windows 11 by changing your region in Settings > Language & Region > Country or Region > United States.
Install the Windows Subsystem for Android
Now that you have the latest Windows 11 build, you can move on to install the Windows Subsystem for Android. This is basically an entire Android build that runs as a virtualization instance inside Windows, letting you run Android apps on Windows. There are a few steps to getting the subsystem on your Windows 11.
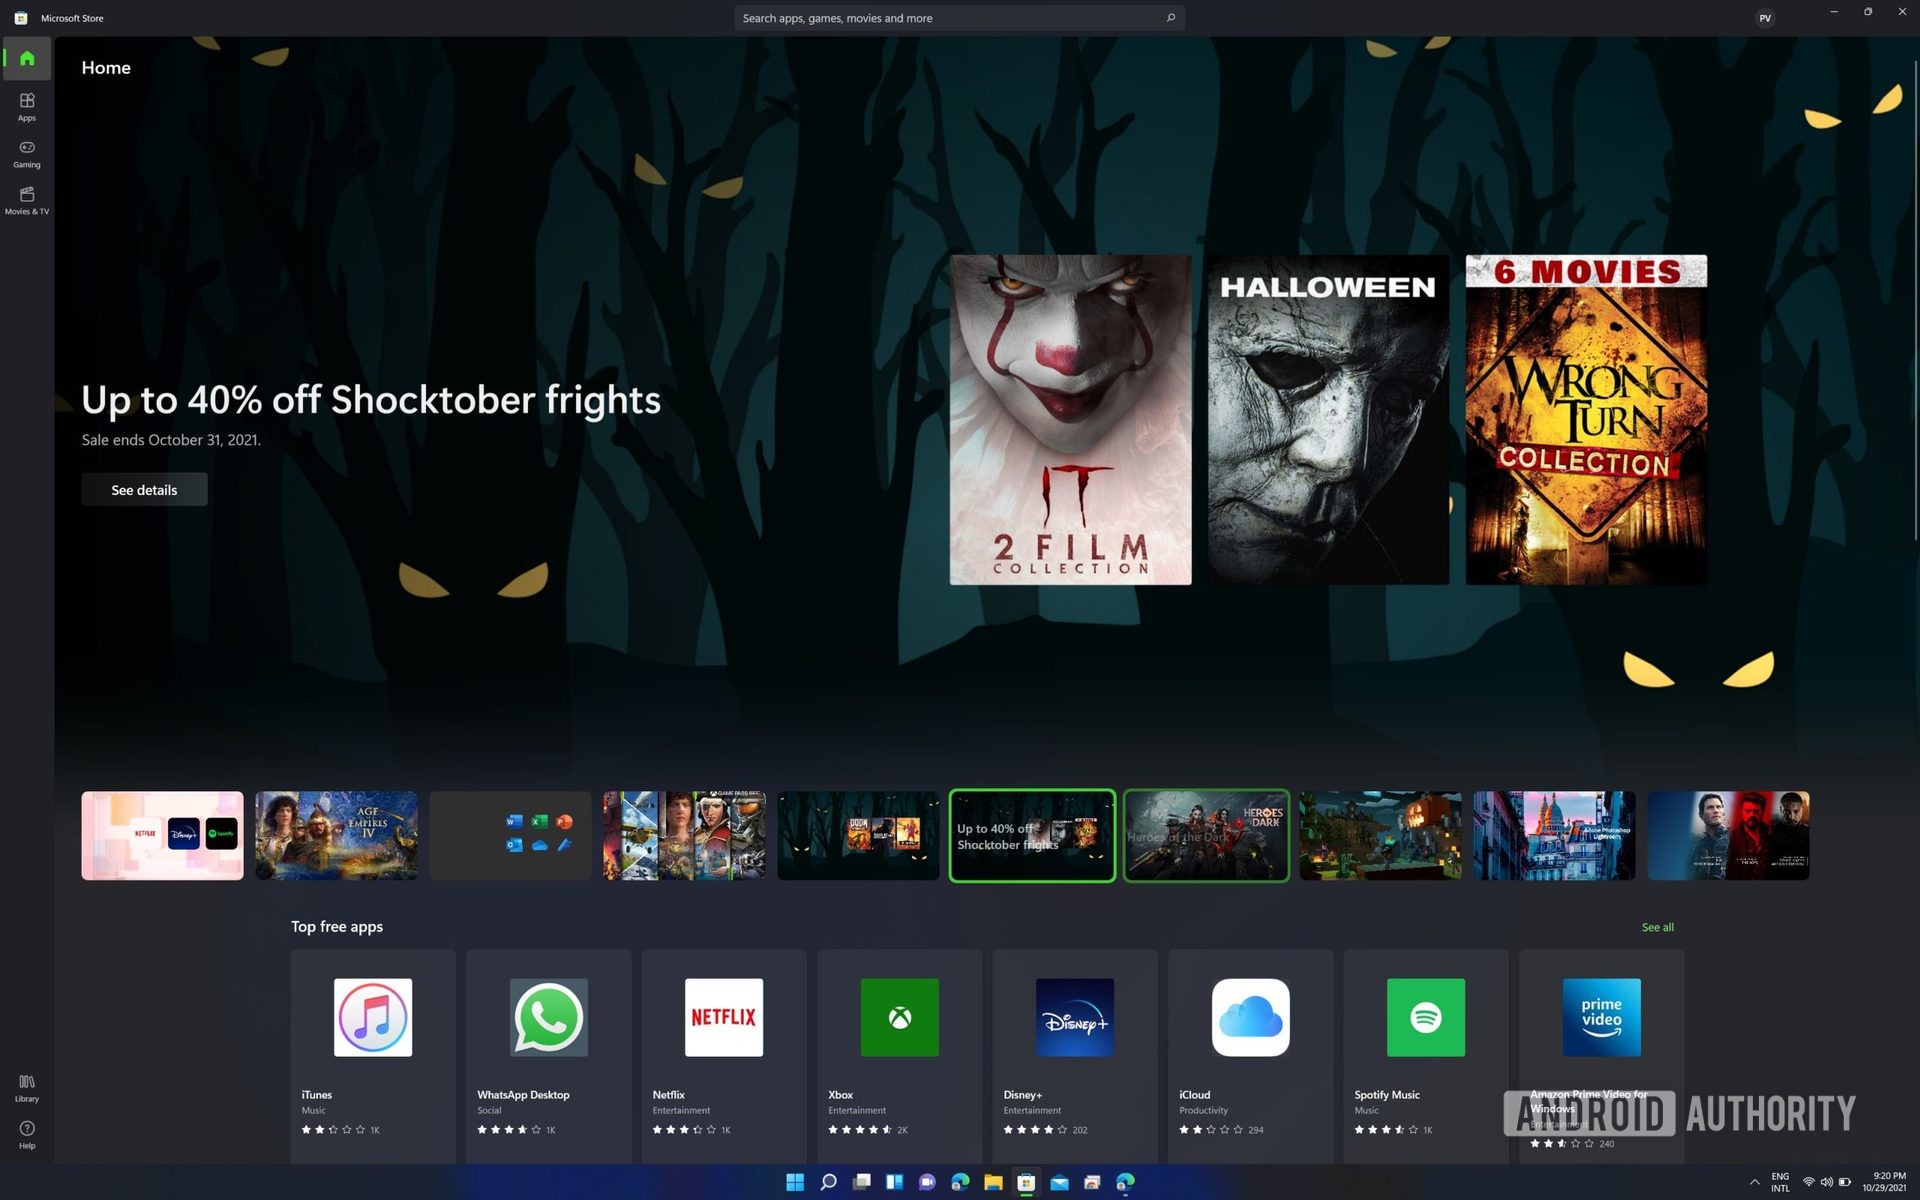
Open the Microsoft Store, and click the Library tab at the bottom left corner.
Palash Volvoikar / Android Authority
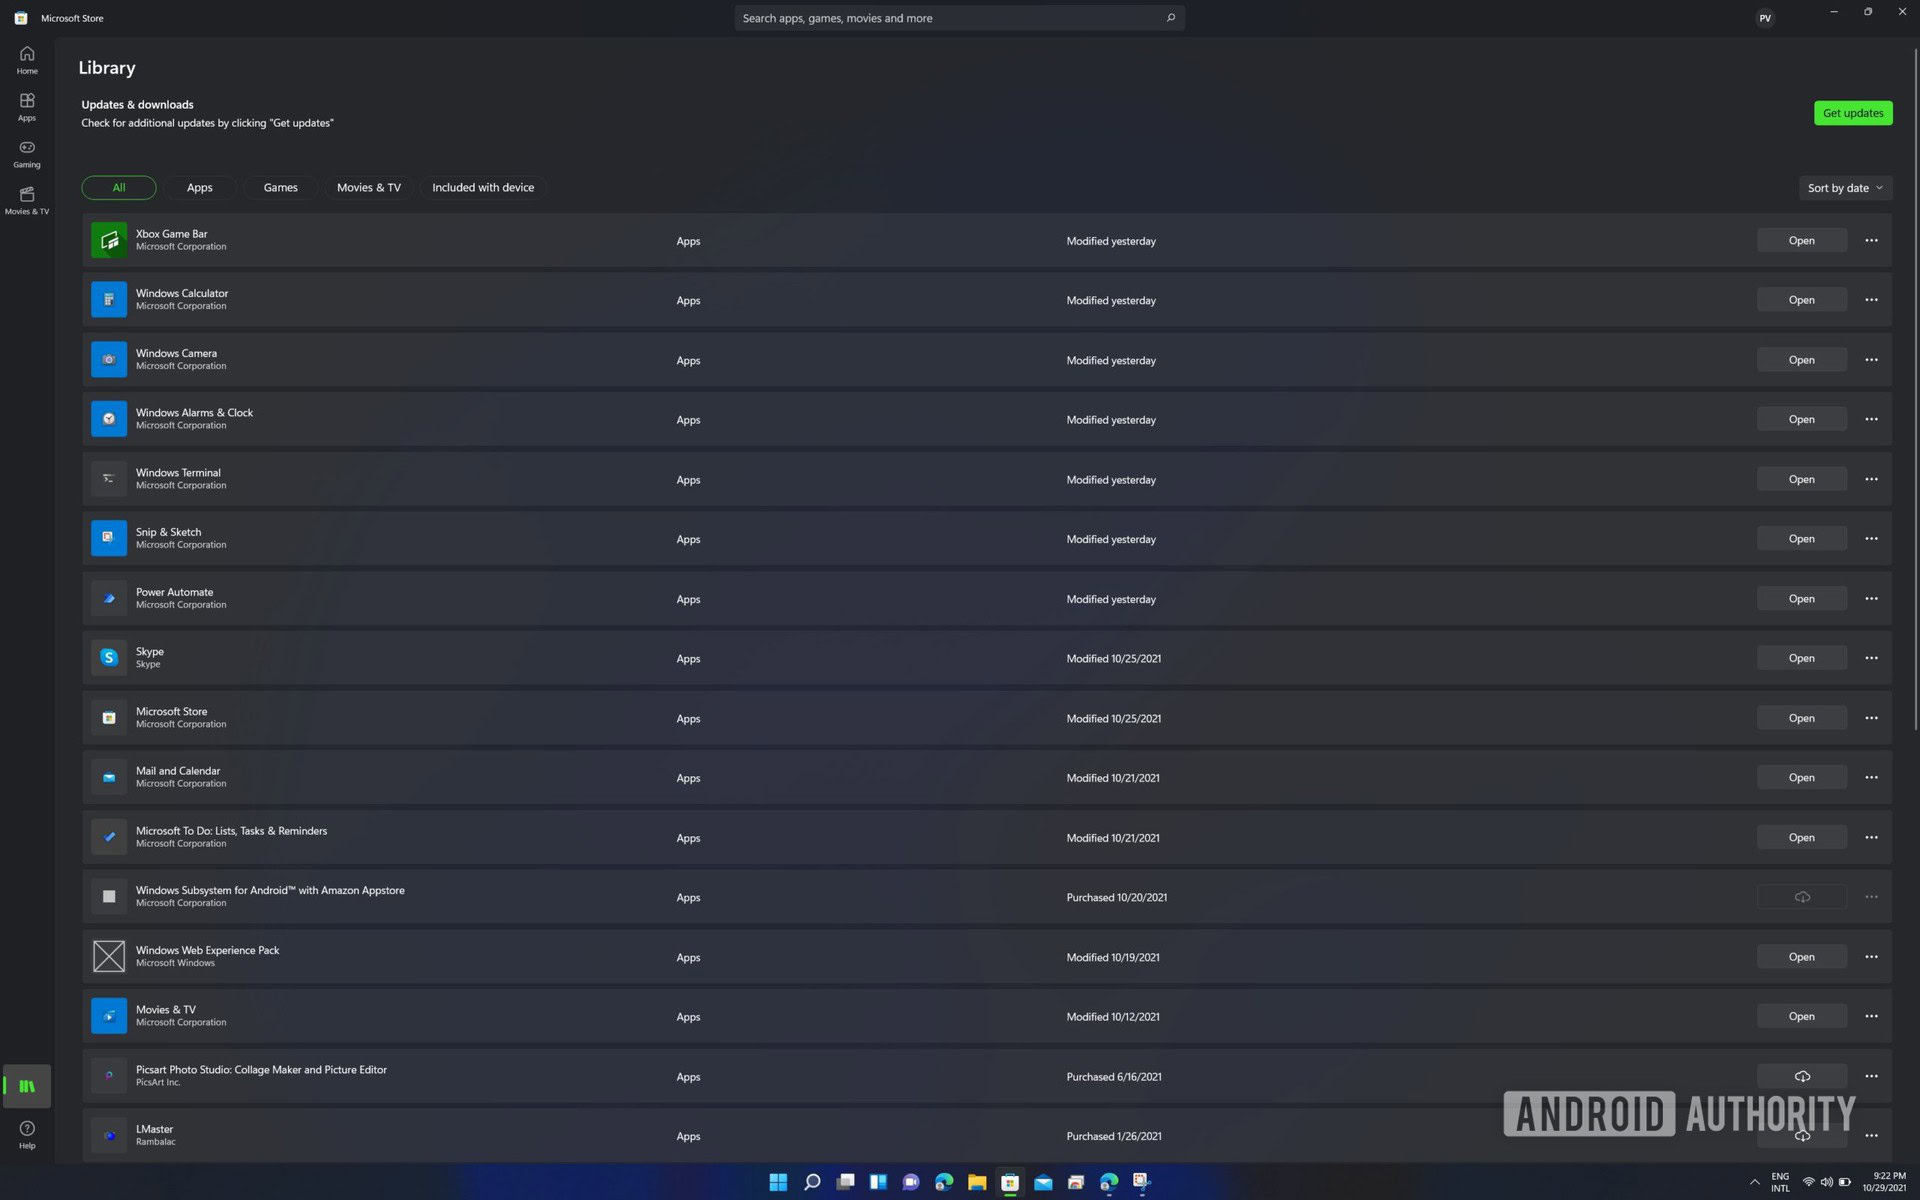
Click the Get updates button.
Palash Volvoikar / Android Authority
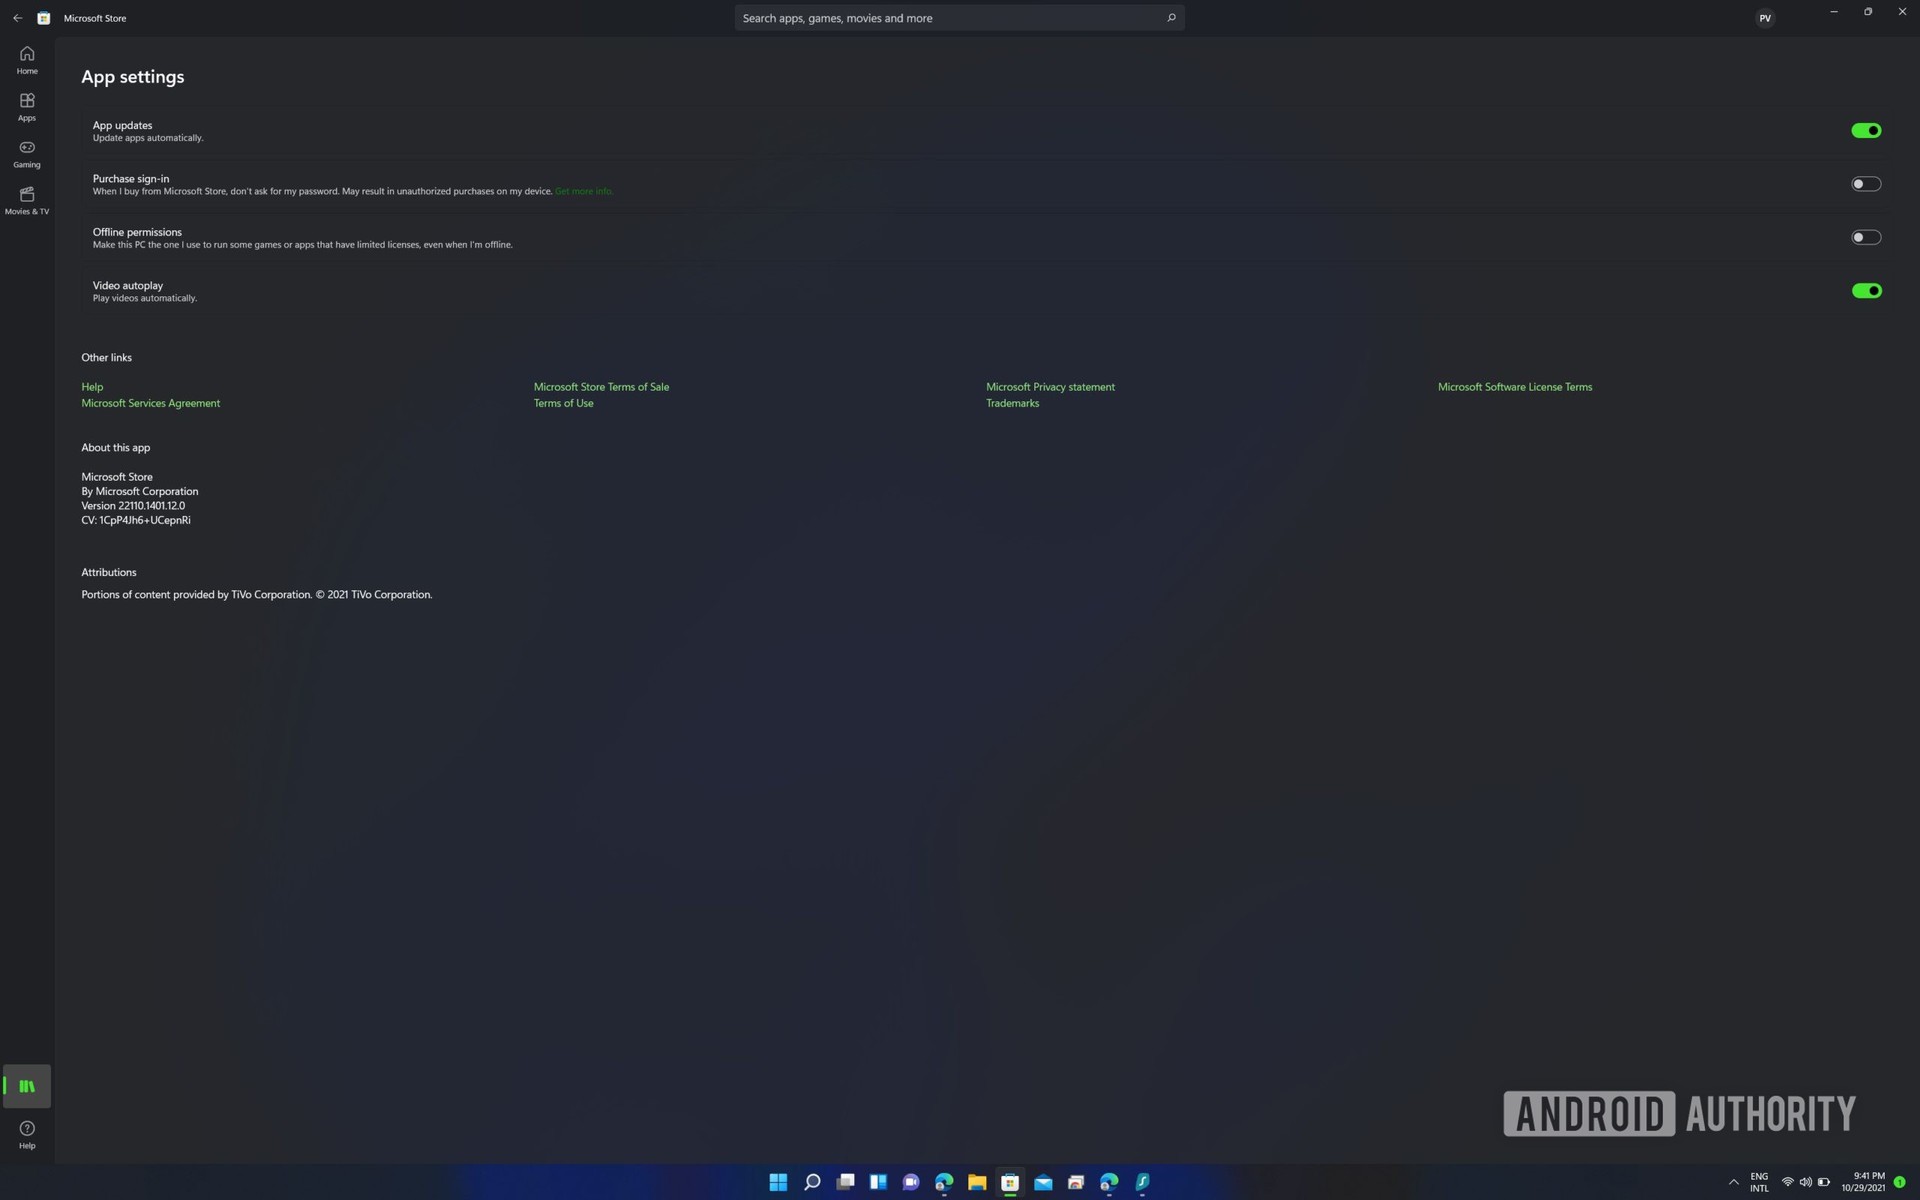
Your Microsoft Store should finish updating. Click the profile button on the title bar to the right to check the version. The version number should be in the About this app section. Make sure it is 22110.1402.6.0 or higher.
Palash Volvoikar / Android Authority
Once your Microsoft Store is up to date, you can move on to enable virtualization. Newer systems will need you to flip the switch in the BIOS/UEFI settings, usually called Intel VT-X or AMD-V, depending upon the brand of CPU in your system. Then you can enable it inside Windows 11.
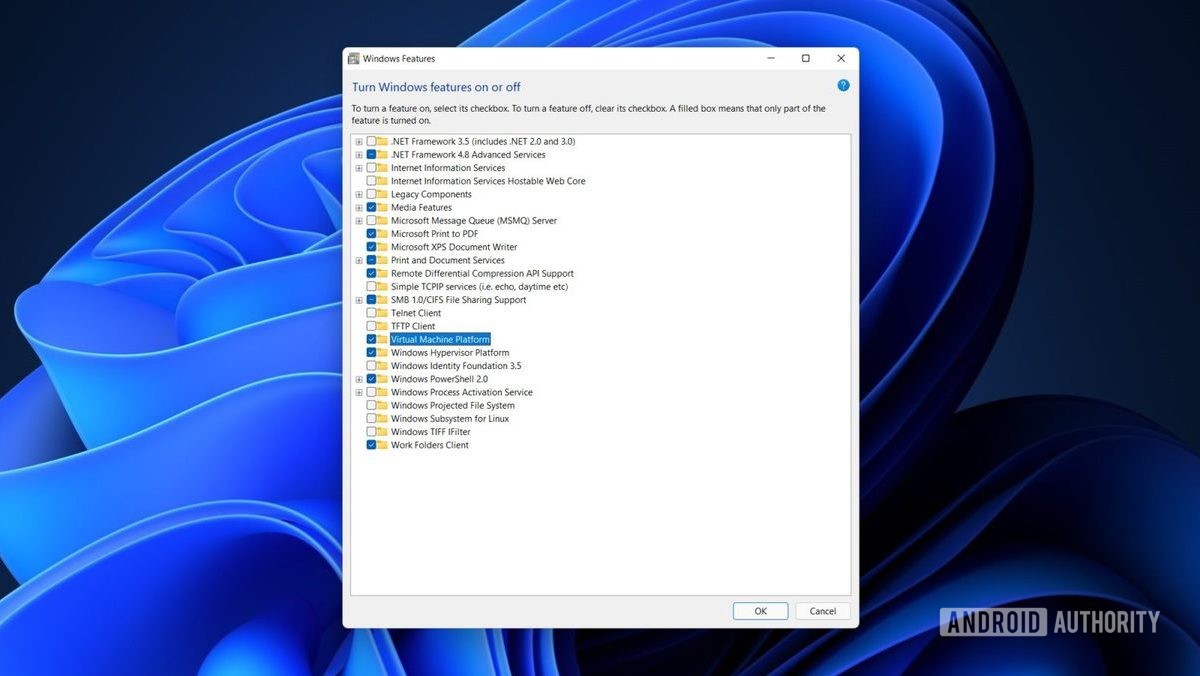
- Open the Control Panel, navigate to the Programs section
- Click Turn Windows features on or off.
- Enable Virtual Machine Platform and Windows Hypervisor Platform by ensuring the boxes next to them are checked
- Click OK.
Palash Volvoikar / Android Authority
Restart your system. Search for and open the Amazon Appstore in the Microsoft Store, and click Get. Go through the setup process. This will install the Windows Subsystem for Android and the Amazon Store, and get your system ready for Android apps.
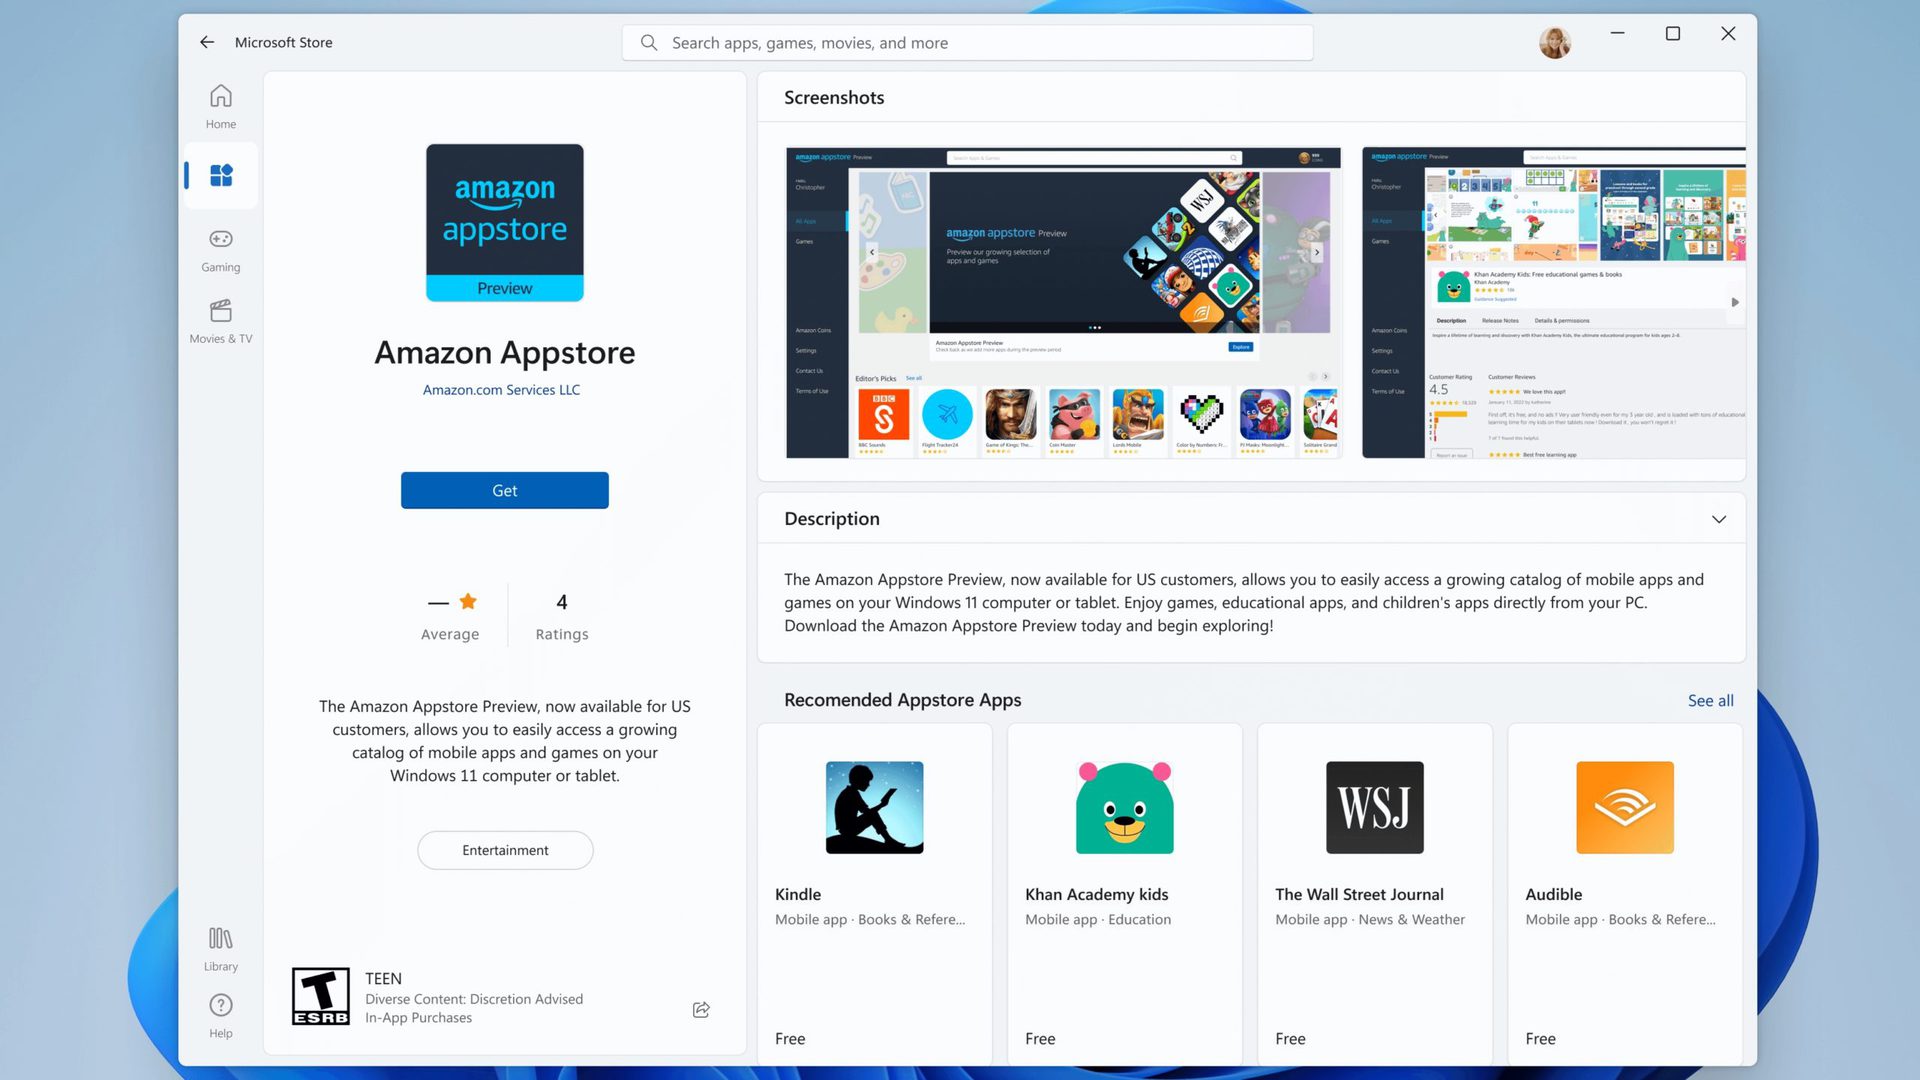
Installing Android apps through the Amazon Appstore
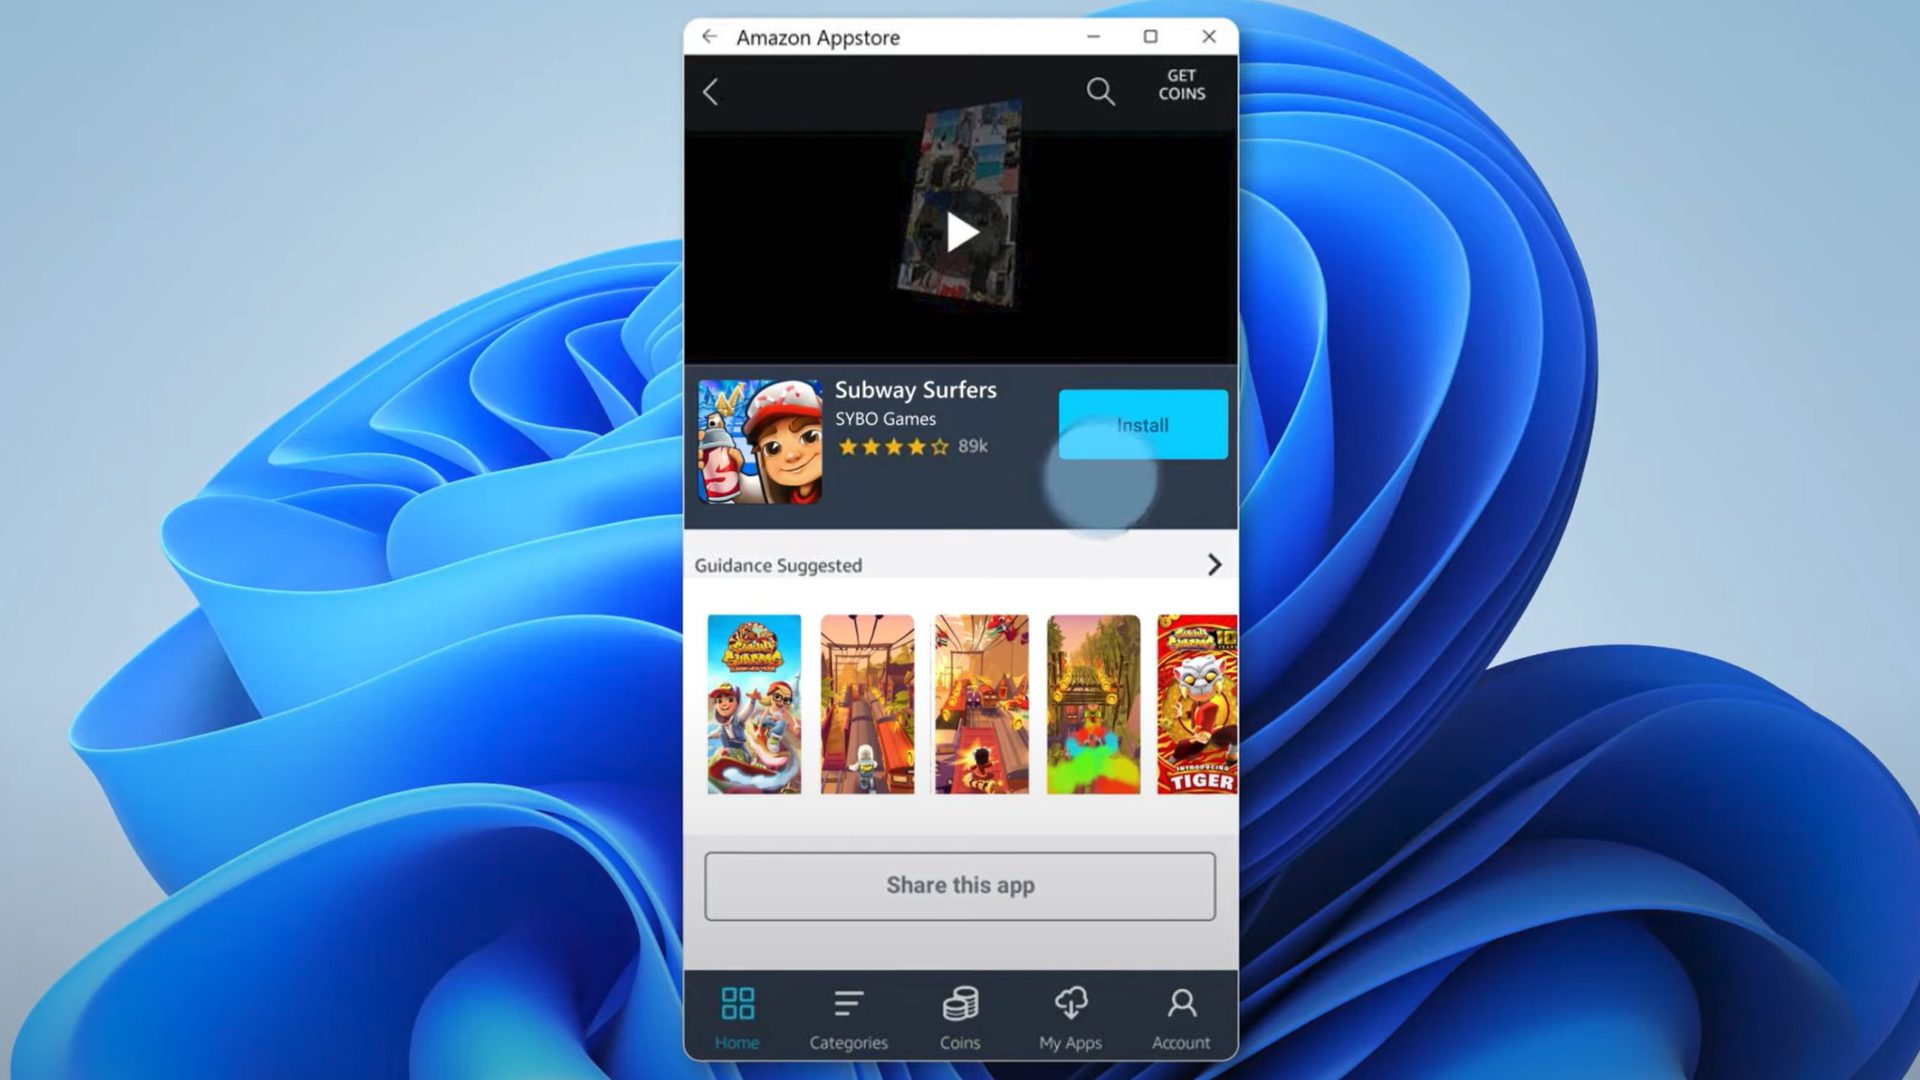
The process to install Android apps officially is rather simple. You will need an Amazon account.
- Open the Amazon Appstore via the Start menu/search.
- Click the Already an Amazon customer? Sign in button, enter your credentials and click Sign-In.
- Search and select the app you want to install, and click the Get/Download/Install button.
How to run Android apps on Windows 11 unofficially
The requirements are the same here. You will need Windows 11, build 22000.282, or later. You also need to enable hardware virtualization and meet minimum system requirements. The difference is that we will have to sideload the subsystem instead of installing it officially. Ensure you update to the latest build of Windows 11 before you begin, and enable Virtual Machine Platform and Windows Hypervisor Platform.
Sideloading the Windows Subsystem for Android
Some folks may not be able to get their hands on the Windows Subsystem for Android and Amazon Appstore despite following the steps. In that case, installing the Subsystem manually is an option. It’s a little tricky, but it can work.
Search for Windows PowerShell, right-click the app search result, and click Run as administrator.
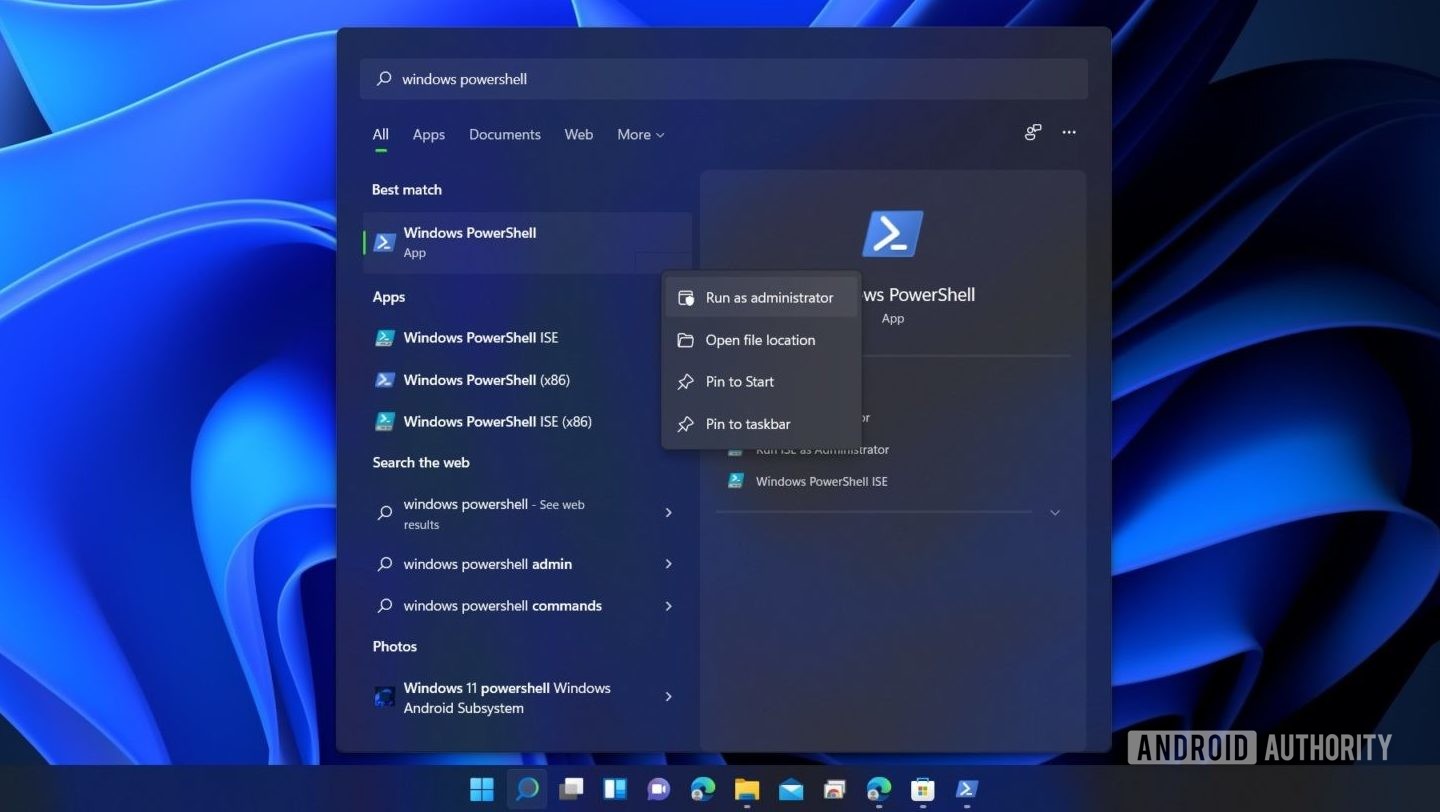
Palash Volvoikar / Android Authority
In PowerShell, copy-paste this code:
Code
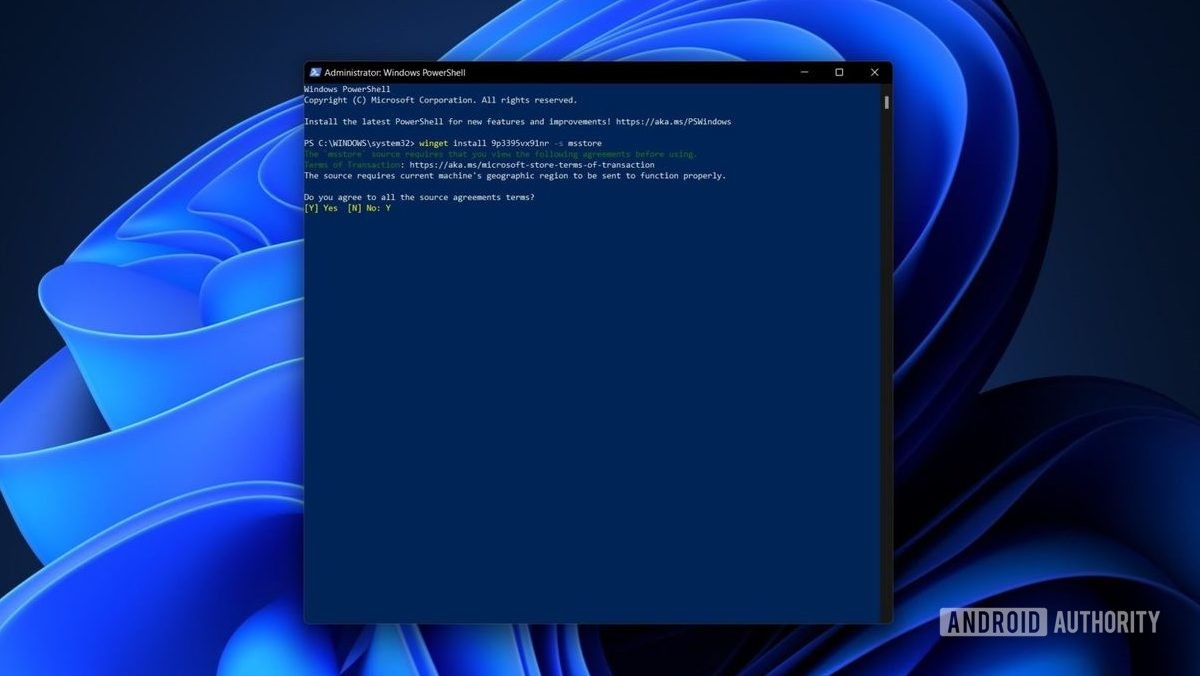
winget install 9p3395vx91nr -s msstoreand hit the enter key.
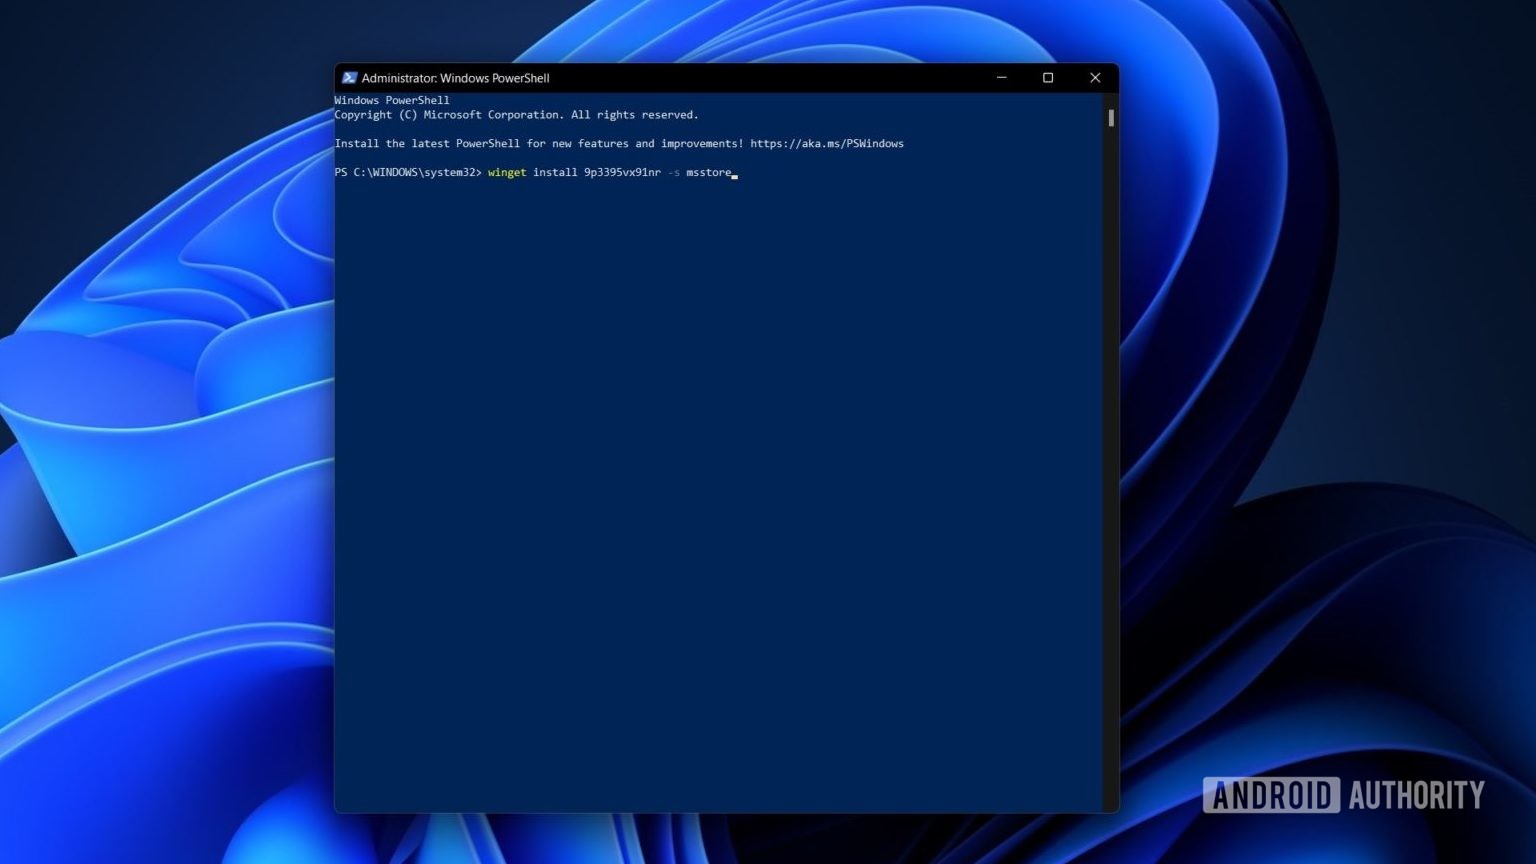
Palash Volvoikar / Android Authority
You’ll have to agree to the agreement terms of the store in PowerShell. When prompted, type in the letter Y and press the Enter key.
Palash Volvoikar / Android Authority
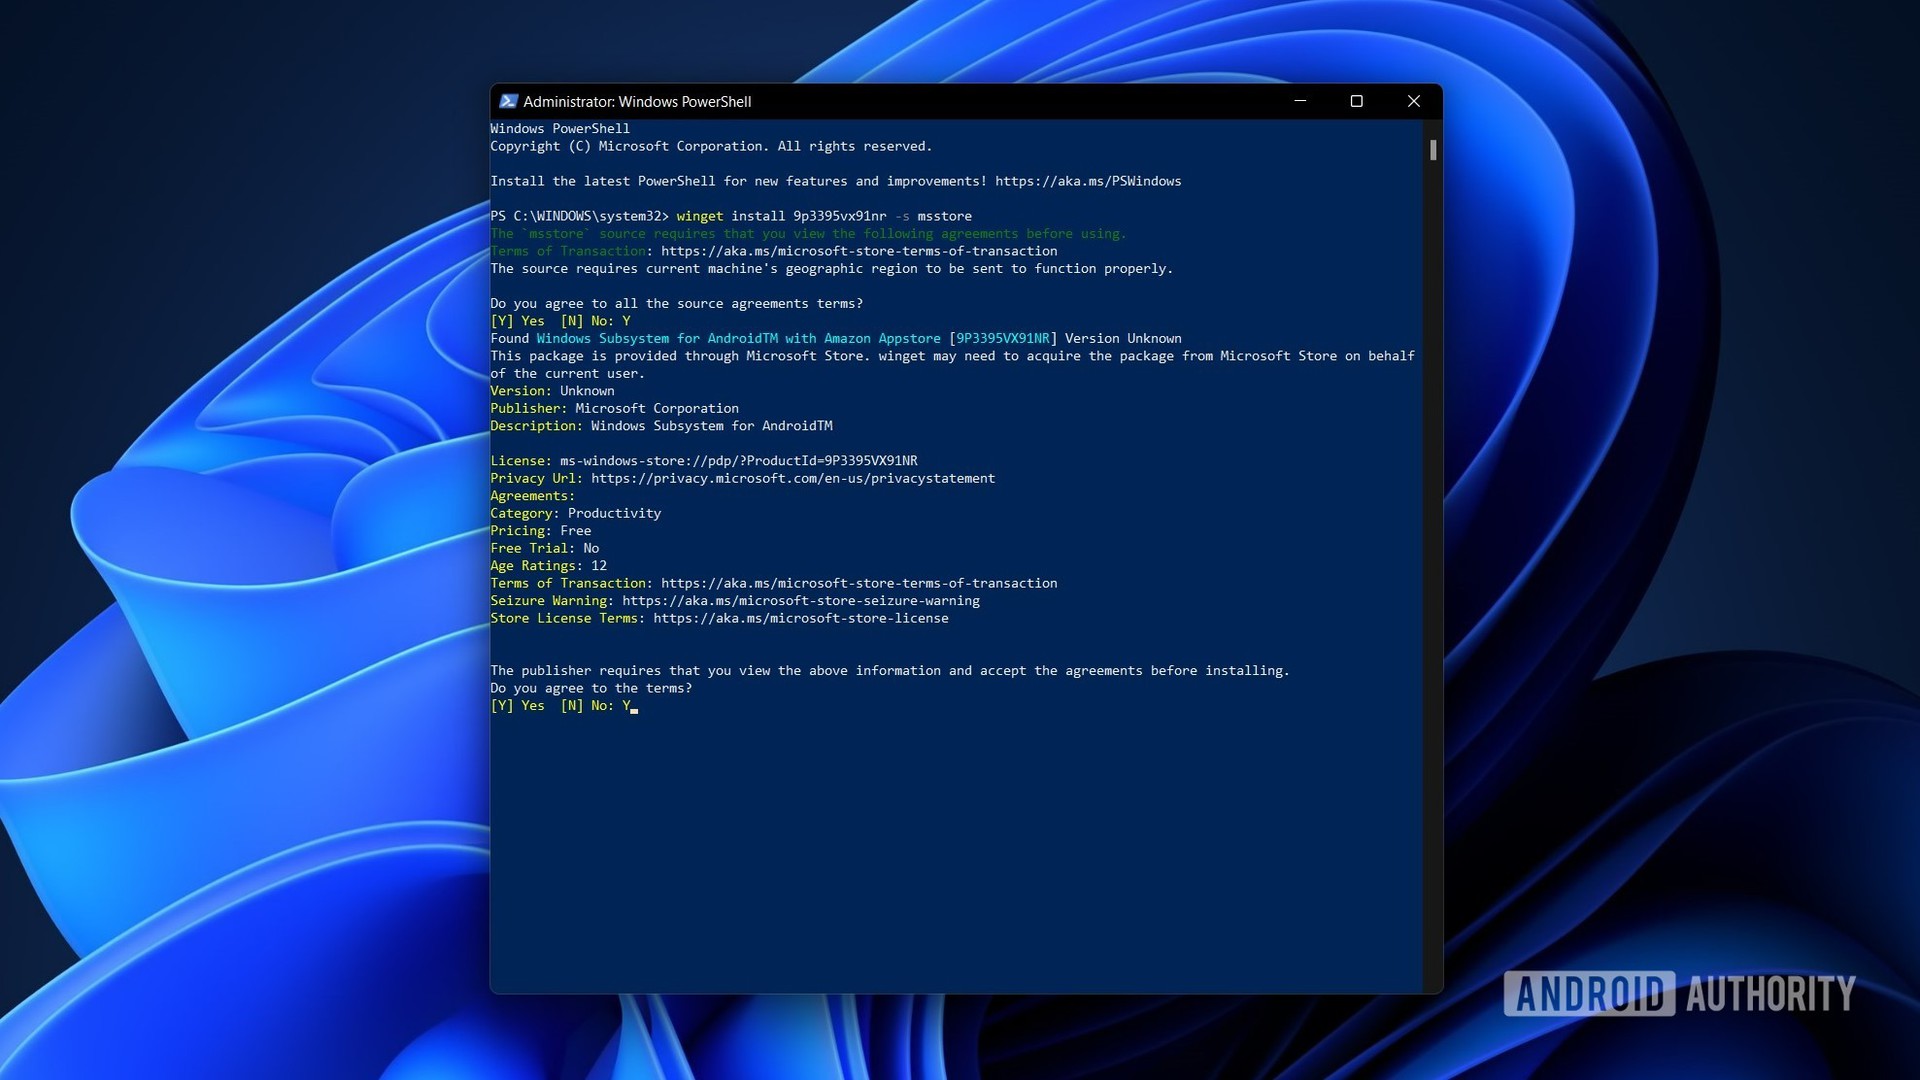
PowerShell will then prompt you with some more license terms, specific to the Subsystem this time. Press Y and Enter again.
Palash Volvoikar / Android Authority
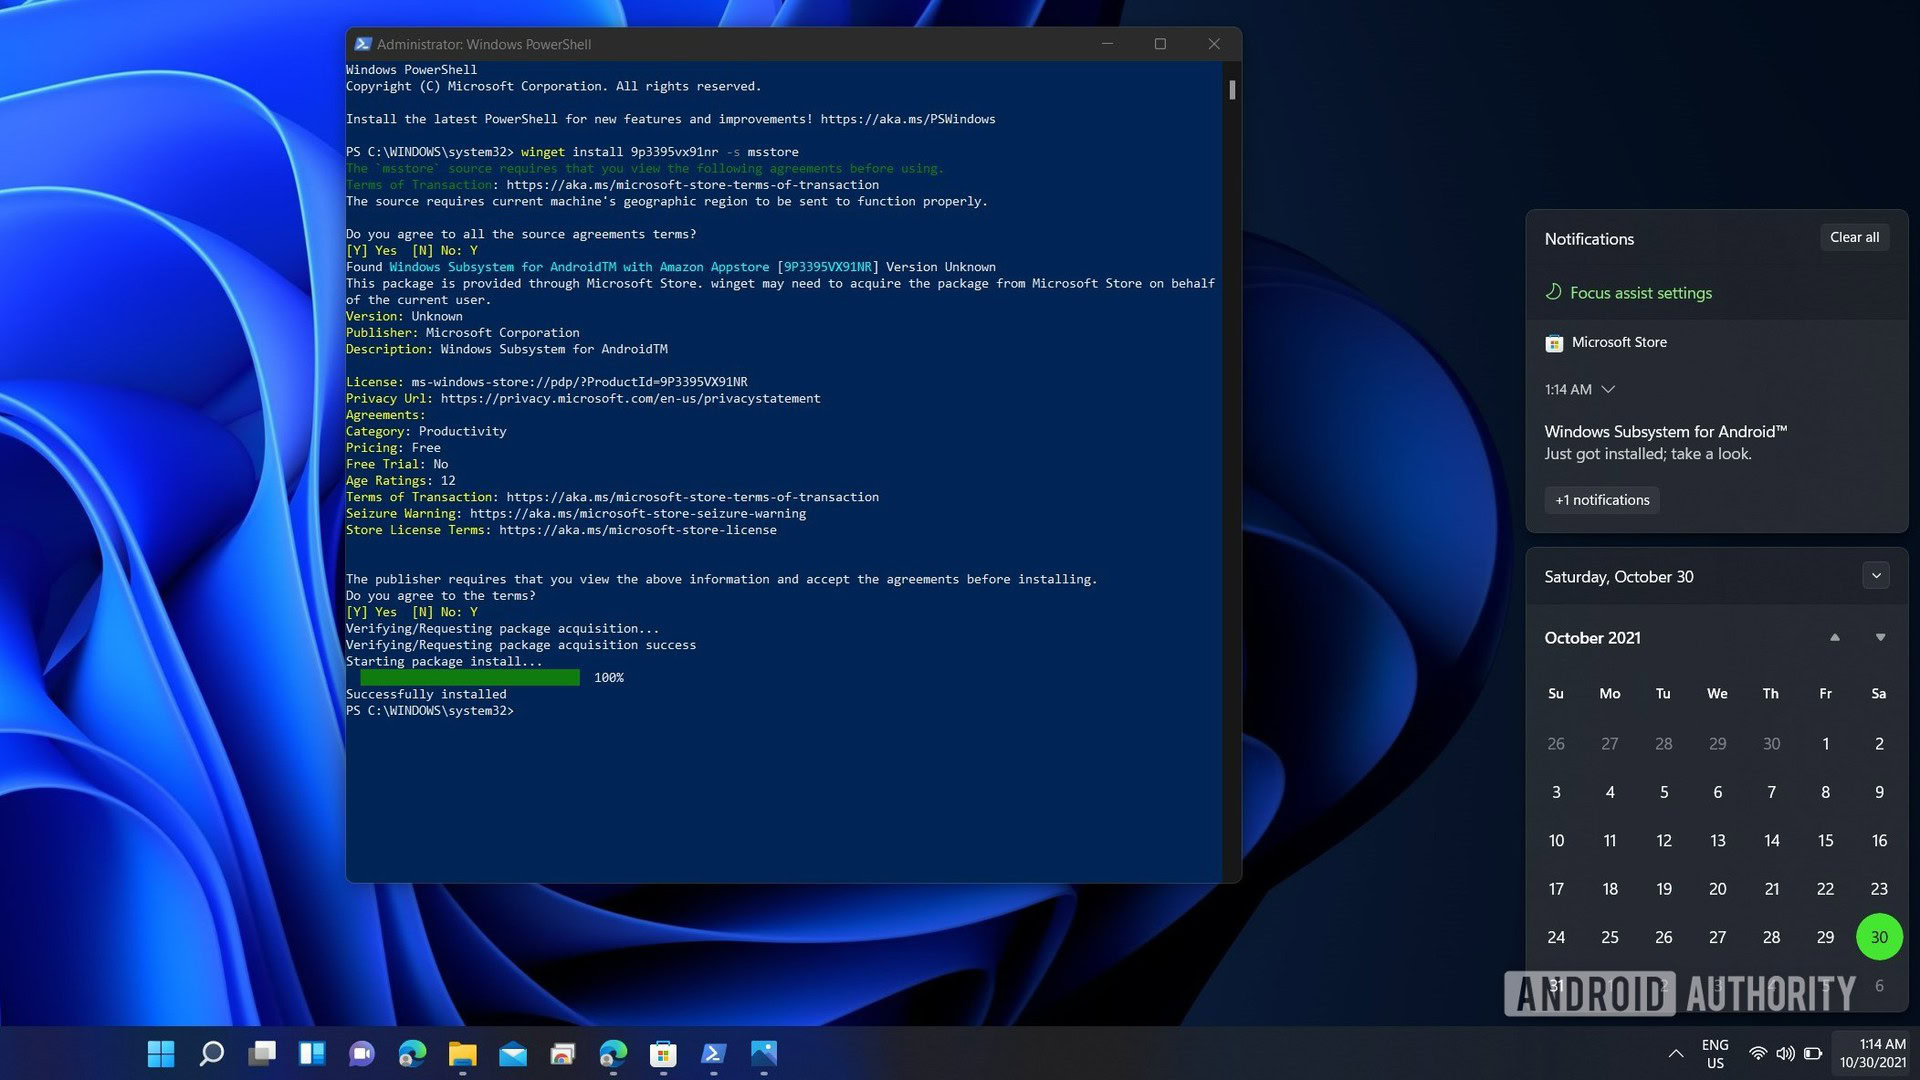
The Subsystem package will then download and install, and you’ll get a Microsoft Store notification saying it was successful.
Palash Volvoikar / Android Authority
Installing Android apps on Windows 11
If you managed to get the Amazon Appstore to install directly, you can open it by searching for it from the Start menu. It will ask you to log in once with your Amazon account. Once done, you can search for the app you want and click the Get button to download it. Any Android app installed on Windows 11 will show up as a normal program you can directly run from the Start menu.
If you don’t have access to the store, which you won’t if you sideloaded the Subsystem, you will have to download the APKs and install them via PowerShell manually. For this, you will need to have a system-wide Android Debug Bridge (ADB) installed on your system. This is needed because the Subsystem acts like an Android phone wirelessly connected to the Windows 11 PC, and you can use ADB to leverage that connection to push APKs of your choice. This method is useful for installing apps that are not available on the Amazon Appstore.
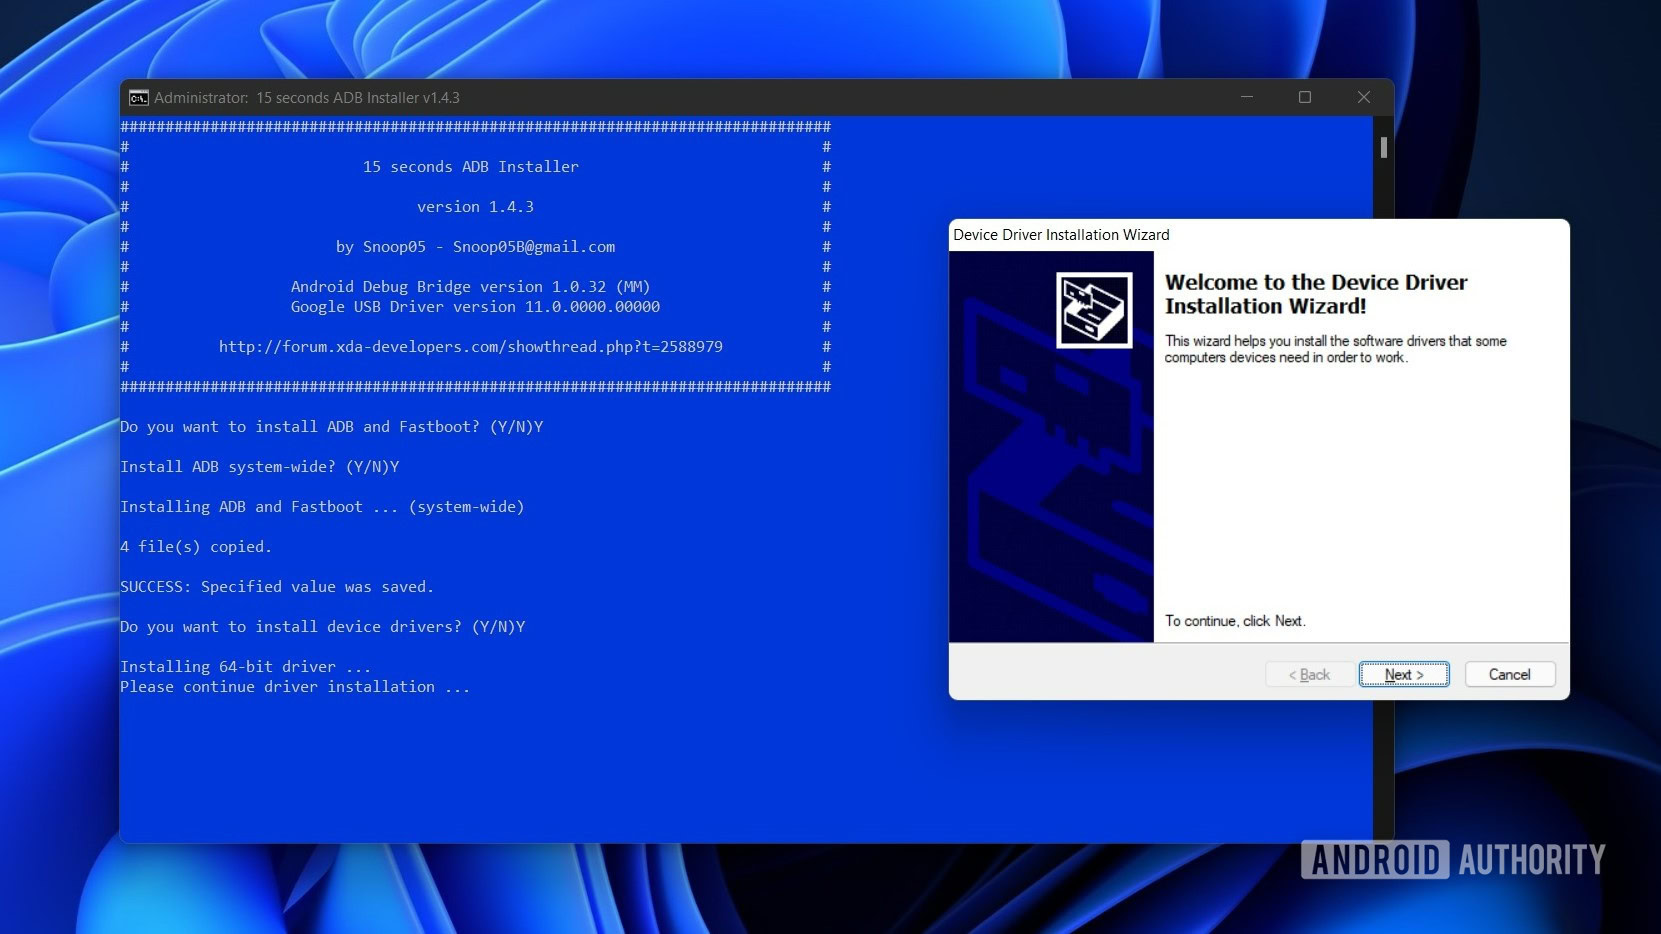
- Download the 15-second ADB Installer here. Extract and run the installer.
- Give the administrator permission when asked.
- It will run in a terminal window, asking you Y/N as yes or no for installing specific components.
- We need all three components, so press Y and the Enter key for all three — install ADB and Fastboot, install ADB system-wide, and install Drivers.
- The driver installer will pop up as a separate window, which you have to follow to finish the installation.
Palash Volvoikar / Android Authority
- Download the APK file of the app of your choice from a trusted source like APK Mirror.
- For this tutorial, we’re using the Firefox browser for Android.
- Run the Windows Subsystem for Android. You can do this by simply searching for it and clicking on it from the Start Menu.
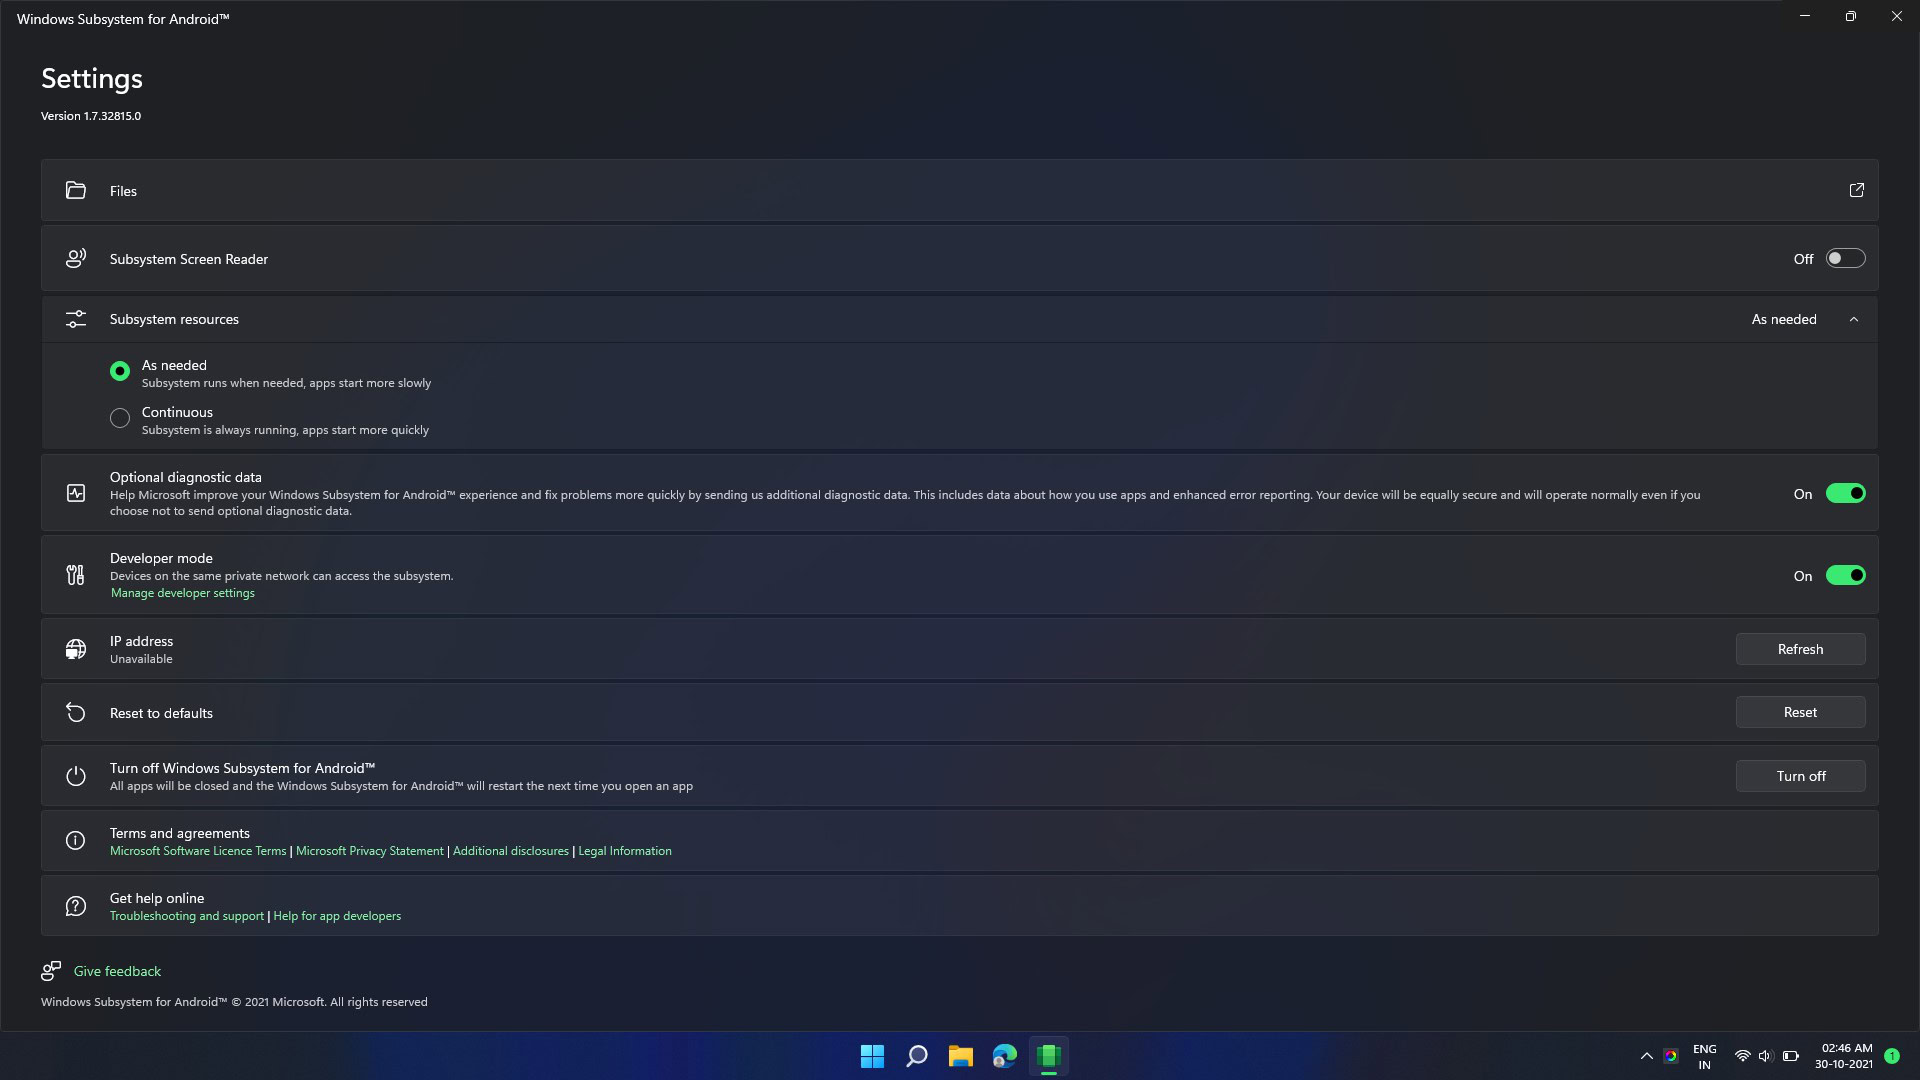
- In the settings, make sure Developer Mode is turned on. Click the boxed arrow in the Files tab to get the Subsystem running.
Palash Volvoikar / Android Authority
Run PowerShell as an administrator again.
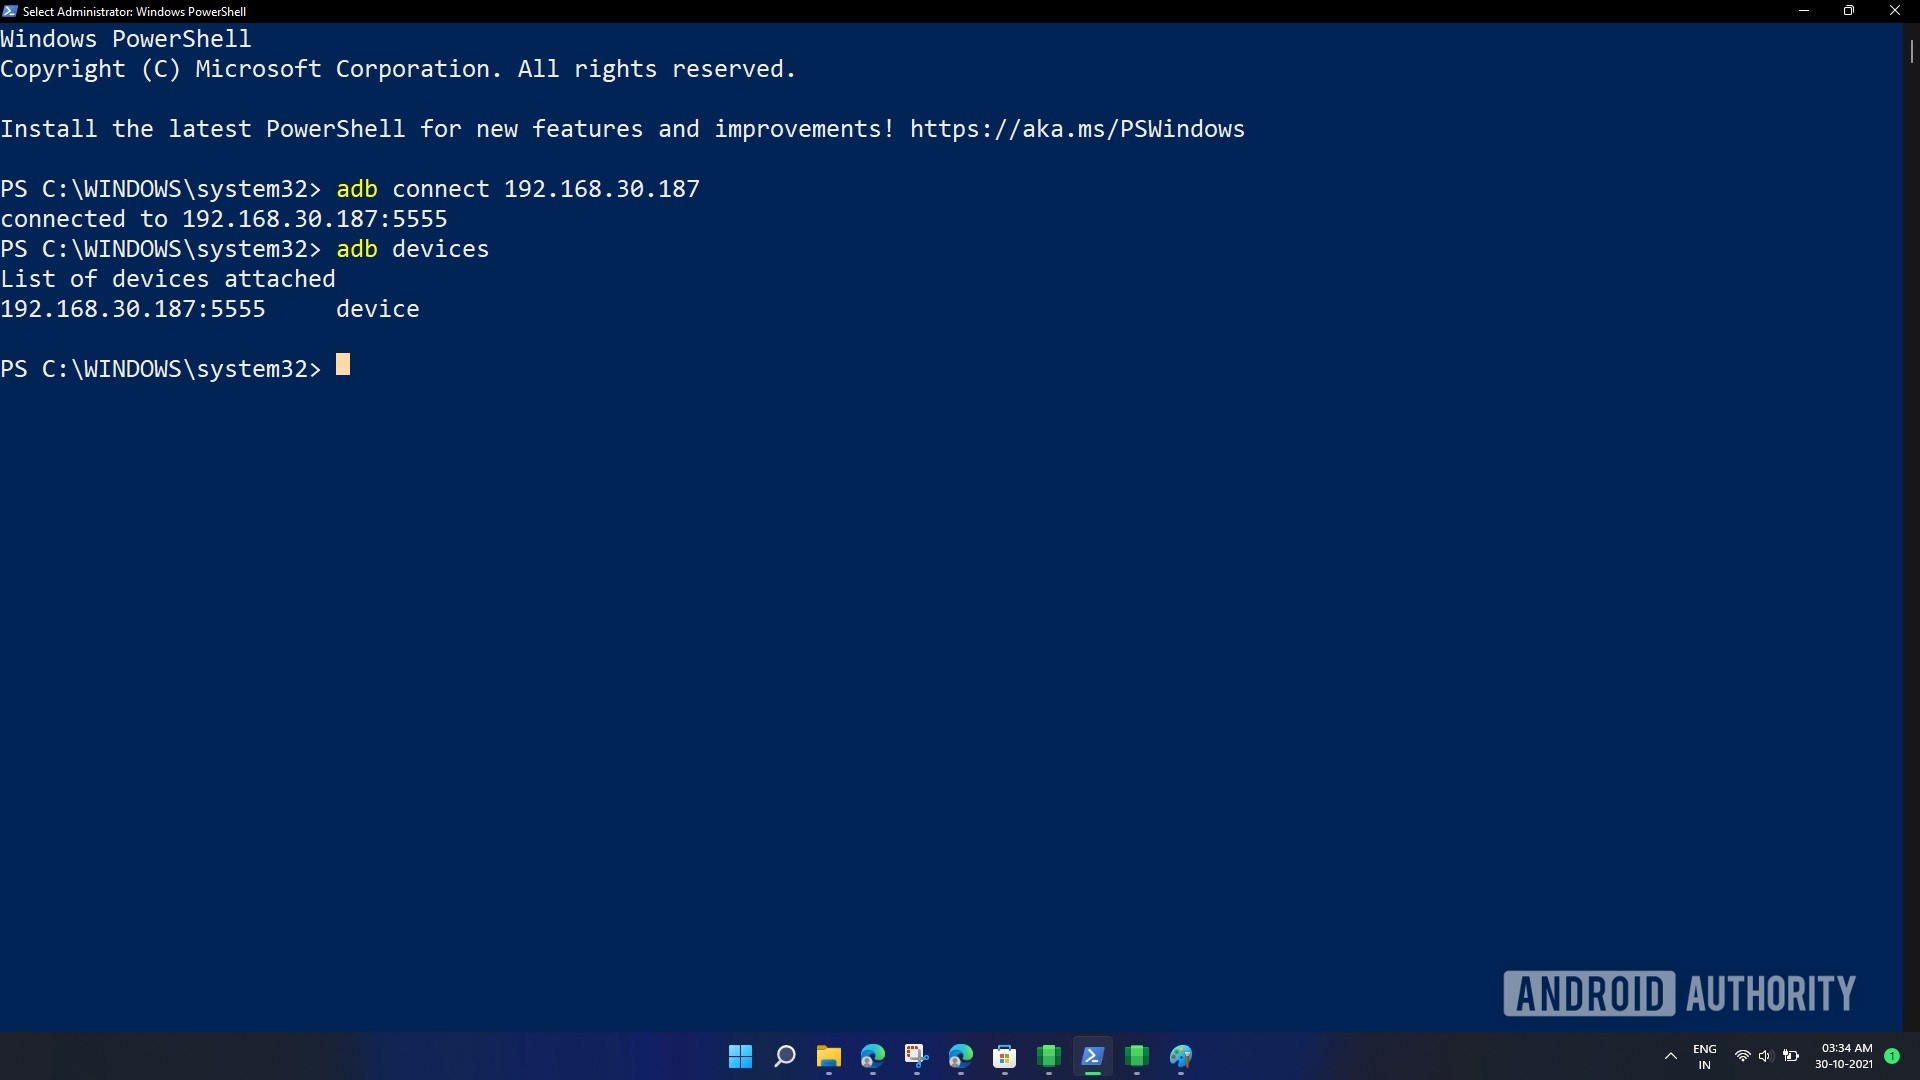
To connect to the Subsystem via ADB, copy the IP address you can see in the Subsystem settings. Type adb connect in the PowerShell window, followed by the copied IP address. Ensure there’s a space between the word connect and the IP address. Press Enter.
Use the command adb devices to verify that the connection was successful.
Palash Volvoikar / Android Authority
Now, find the APK file in your Downloads folder. Right-click it, and click Copy as path.
Go back to the PowerShell window, type adb install, and paste the path you copied. Make sure to remove the quotation marks at the beginning and end of the path. You can use arrow keys to navigate through the command text. Your final command should look like this:
Code
adb install C:\Users\yourname\Downloads\firefox.apk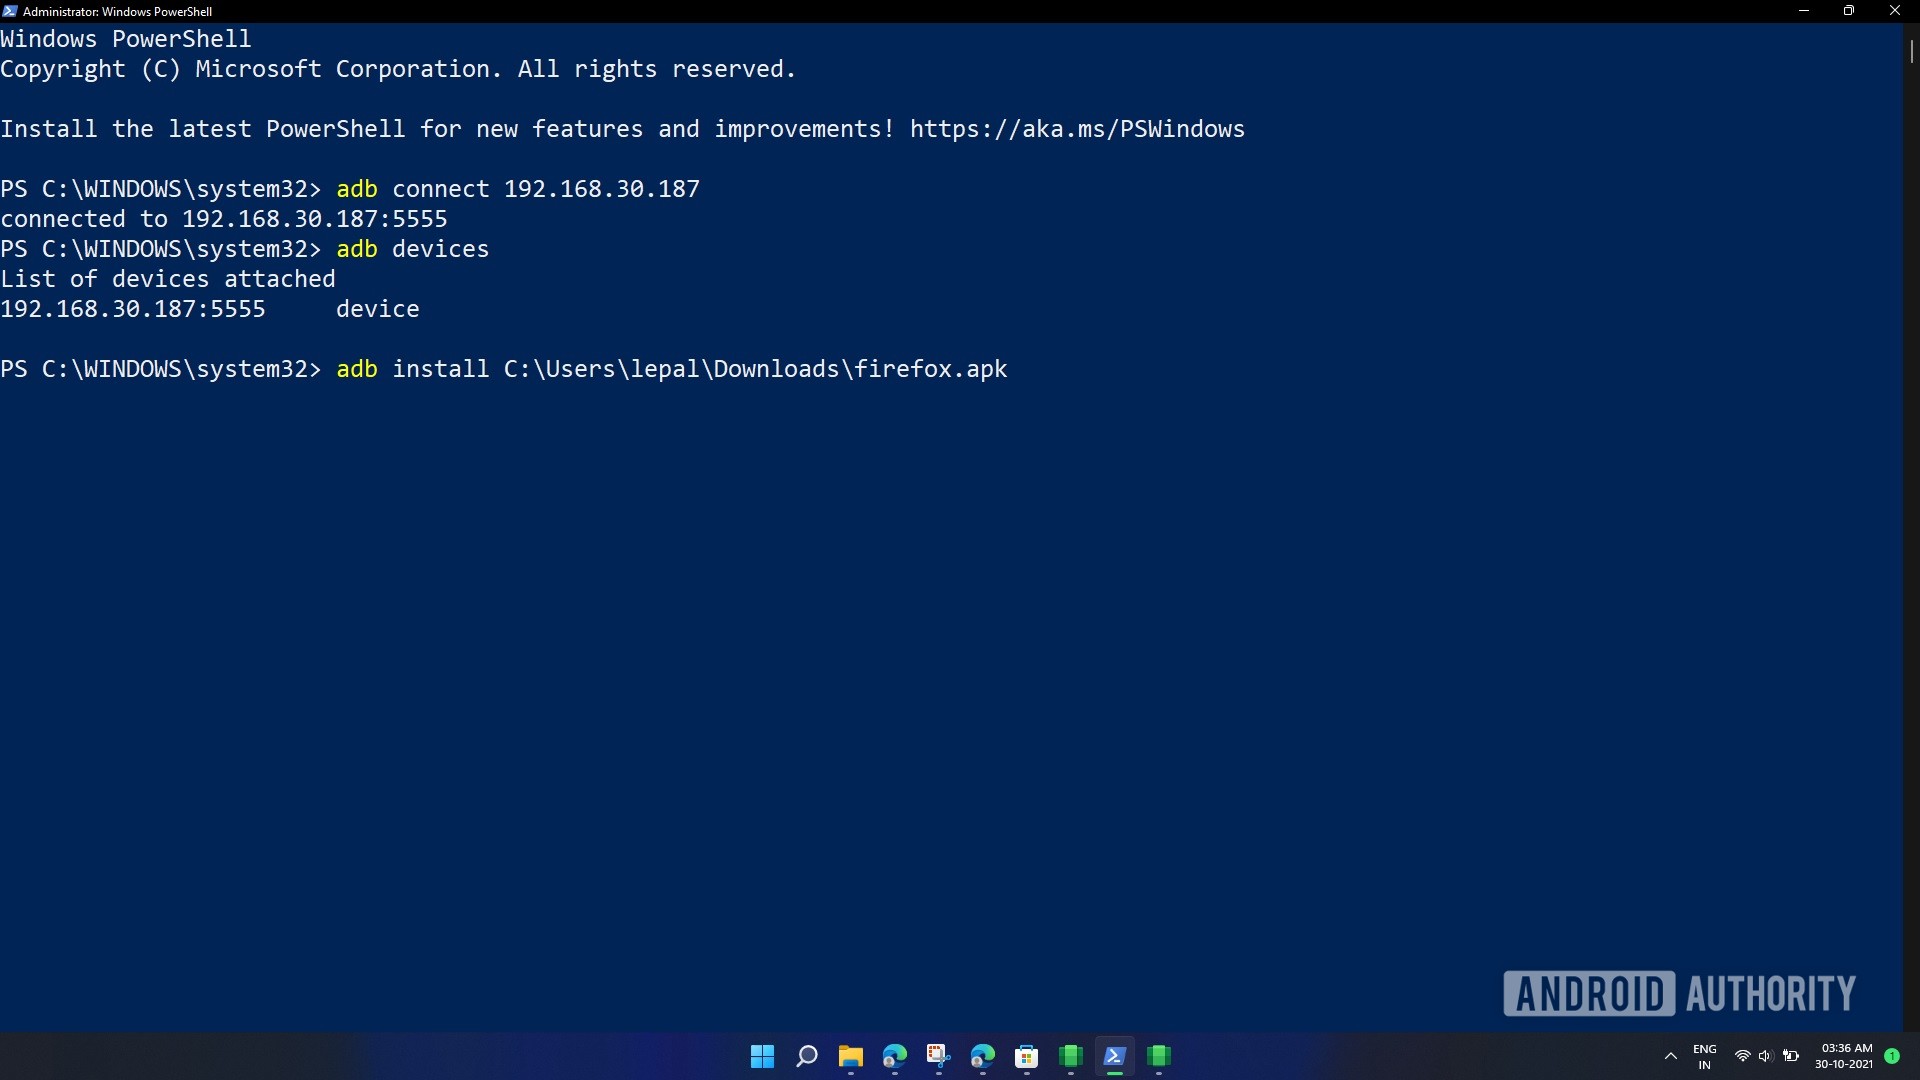
Palash Volvoikar / Android Authority
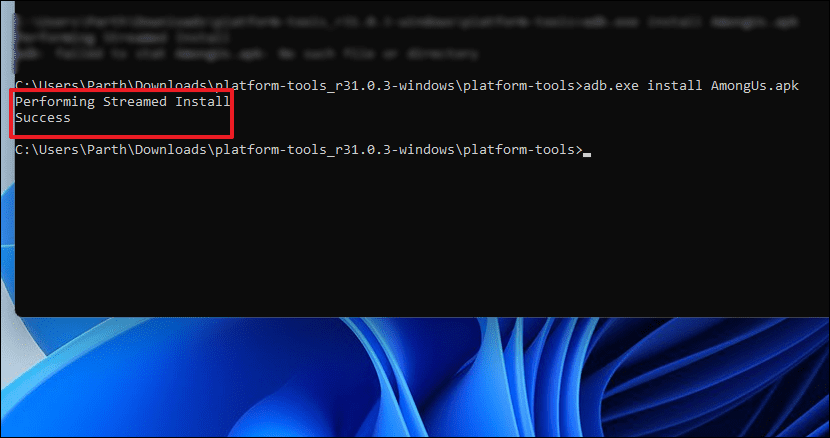
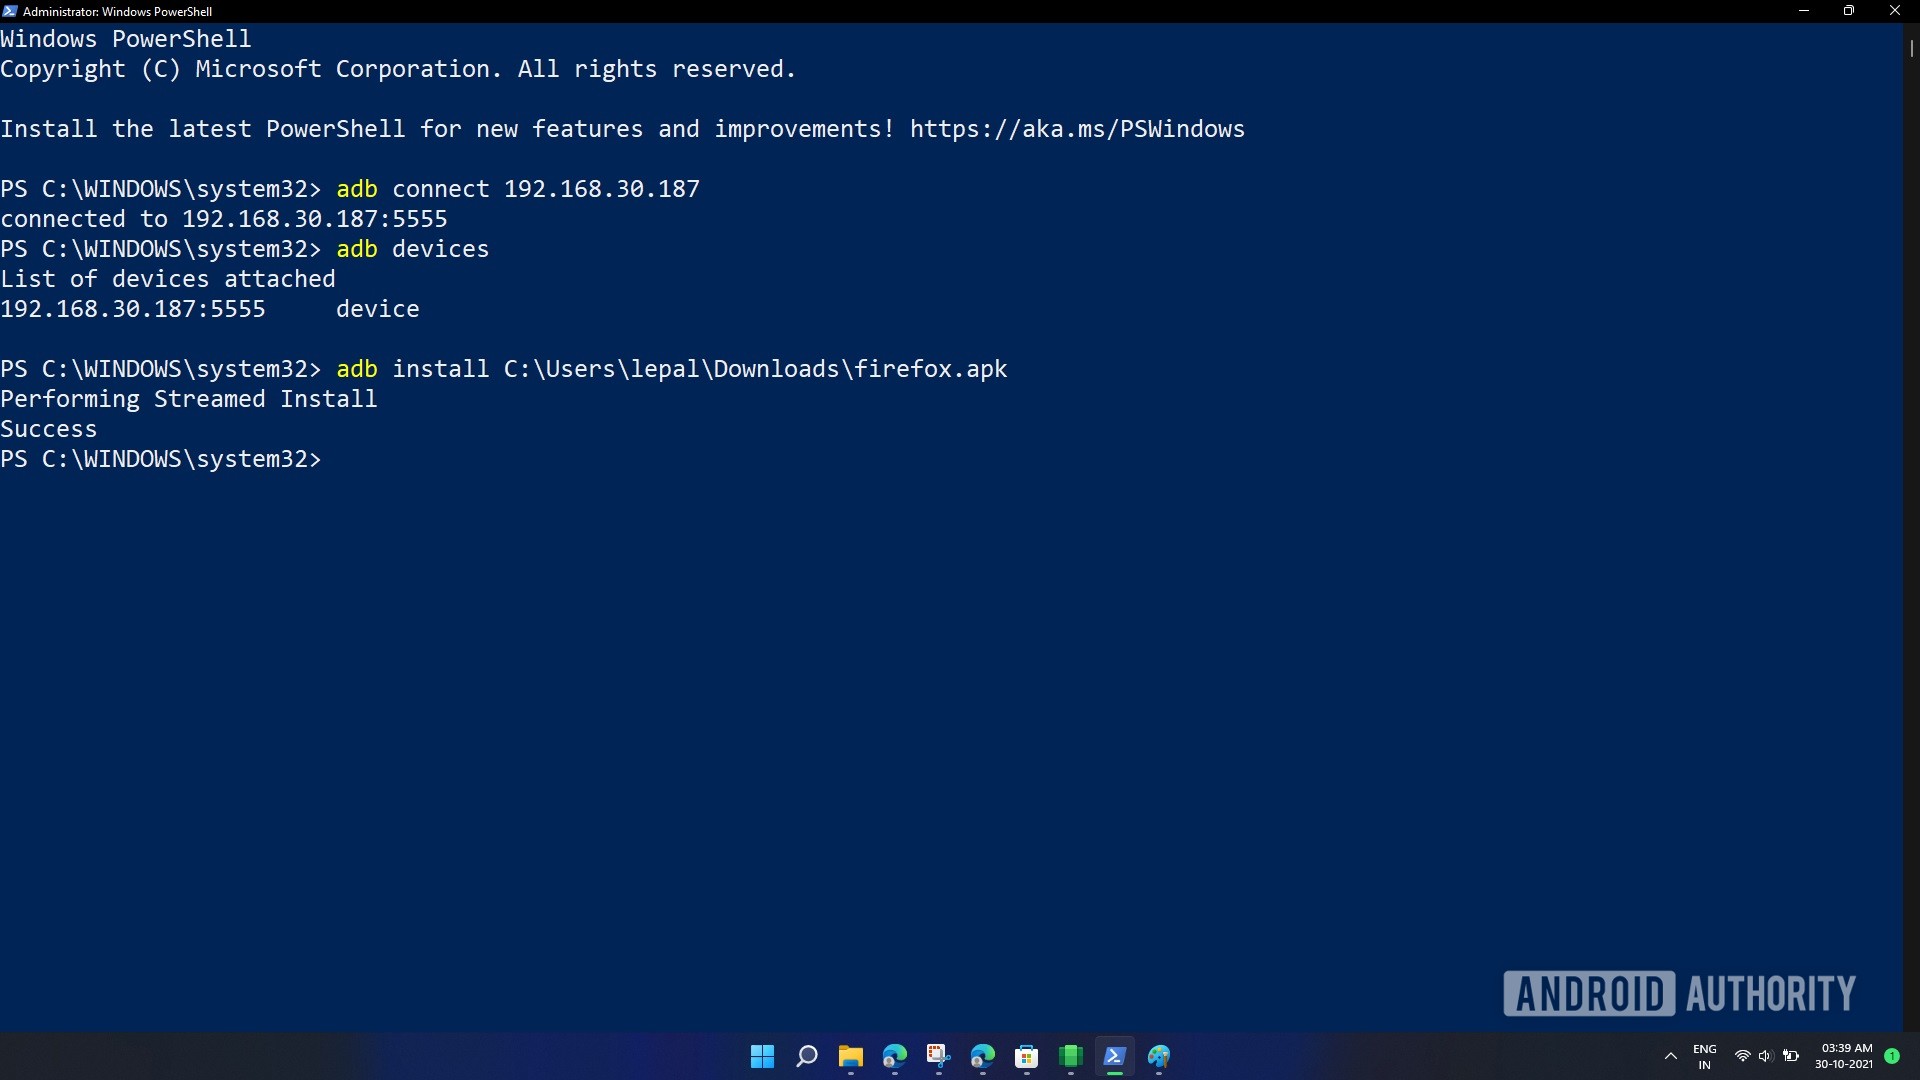
Press Enter to begin the installation. You’ll see the PowerShell say Performing Streamed Install, followed by a Success message.
Palash Volvoikar / Android Authority
The app is now installed and should now show up in the Start menu.
What Android apps can you get on Windows 11?
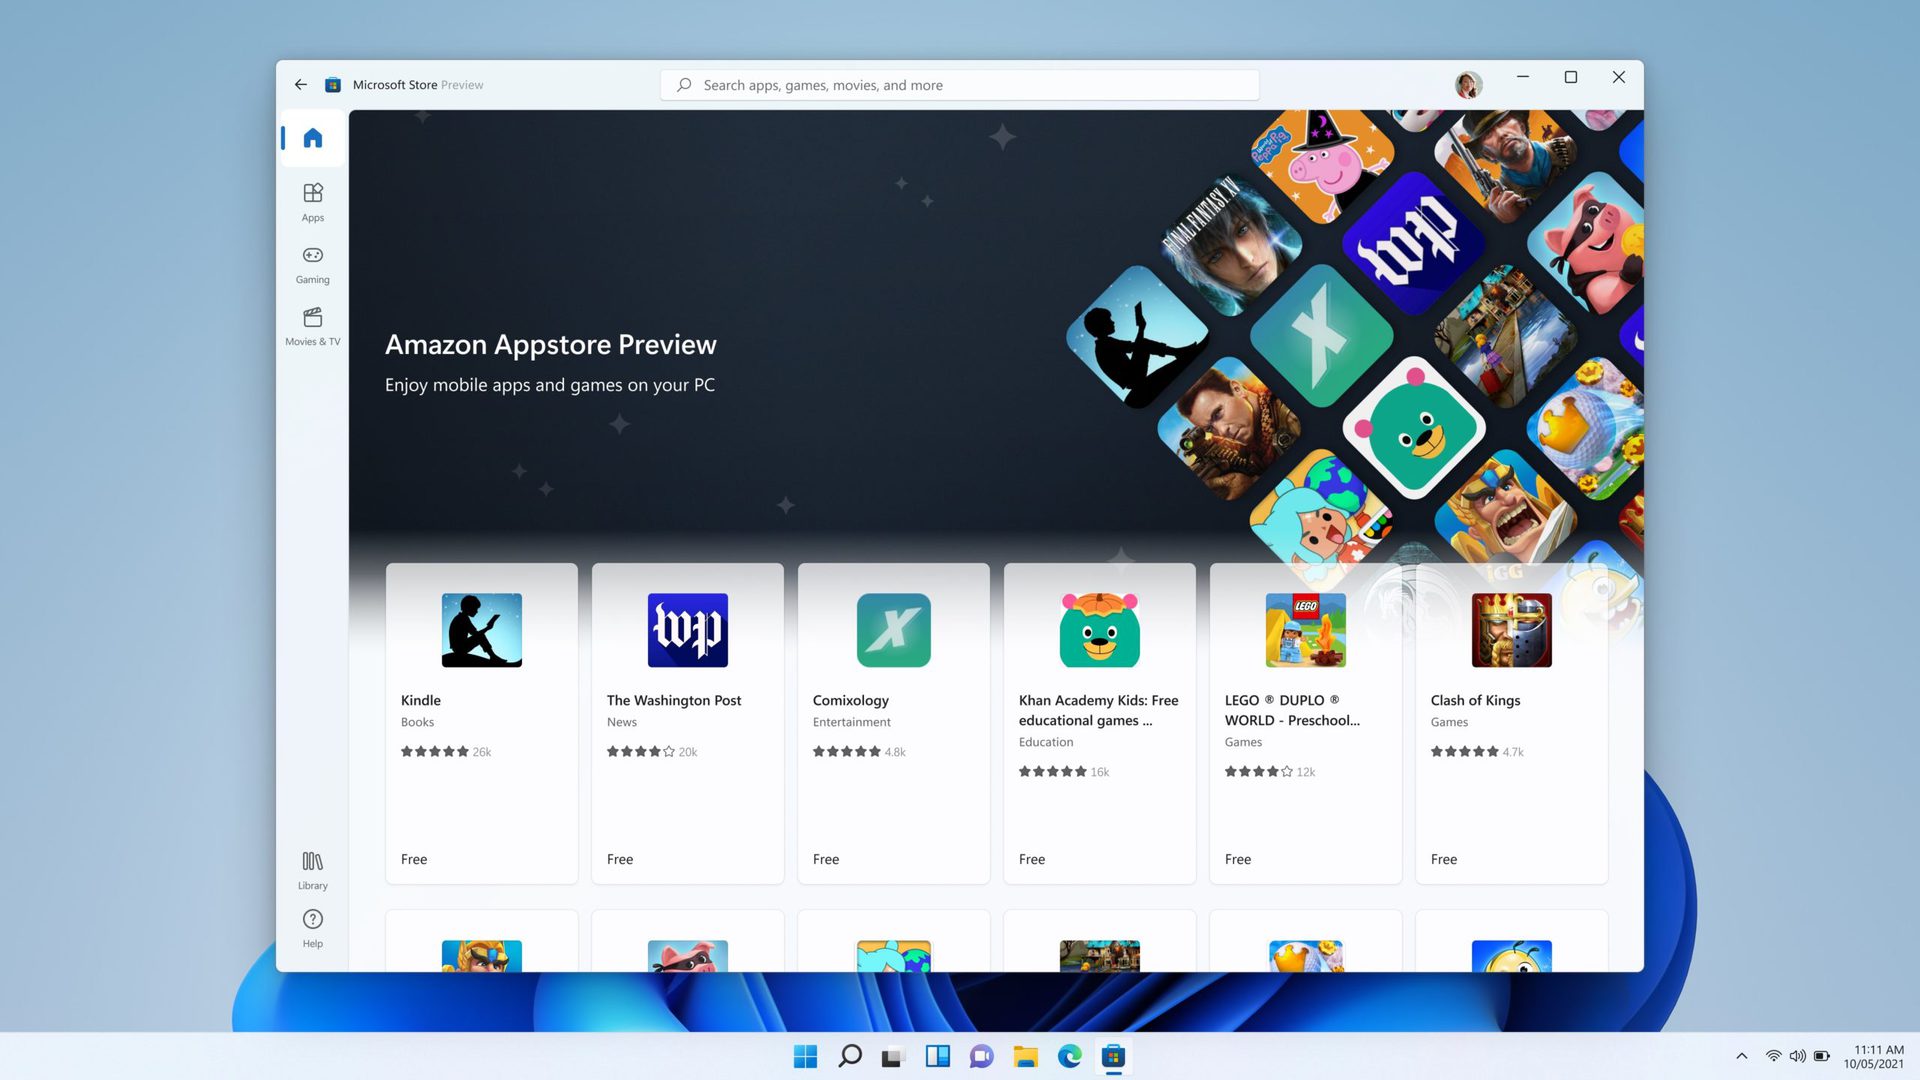
For now, the Amazon Appstore for Windows has over 1,000 apps available. These include games like Lords Mobile, June’s Journey, Coin Master, reading apps like Kindle, and kids’ apps like Khan Academy Kids and Lego Duplo World. Big apps like Gmail and YouTube are missing, due to the absence of Google Mobile Services.
With the sideloading method, it’s more or less the same issue. You will not be able to install apps that require Google Services or have split installation files with an APKM extension. However, you can install more than 50 apps this way, provided you can find the APK file.
Benefits of running Android apps on Windows 11
There’s one big upside to native Android emulation on Windows — there’s no need to install third-party Android emulators. There are many uses for this, including using chat apps like WhatsApp on your PC or trying to play mobile games on your PC. The process of installing Android apps on Windows has always been a long one, but when the final release of this feature hits, it will become quick and easy, likely for good.
It is also likely to take up fewer system resources than third-party emulators. So far, in the current stage, this feature has a few quirks, but we expect it to be smooth sailing by the time it’s ready for public release.
FAQs
Yes, Windows 11 can officially run Android apps. The feature is only available in a few countries right now, but you can unofficially get it running if you want to.
Yes, you can. There are ways to unofficially install Android apps using APK files, and also install Google Play Store.
No, Windows 11 doesn’t officially support the Google Play Store. However, you can sideload the latter through unofficial means.
- Активация «Платформы виртуальной машины» в Windows 11
- Установка Windows Subsystem for Android
- Установка WSATools
- Установка Android Debugging Bridge (ADB)
- Настройка Windows Subsystem for Android
- Настройка WSATools
- Установка APK-приложения в Windows 11
Раньше запуск Android-приложений на Windows-компьютерах мог осуществляться только при использовании программ-эмуляторов Android, например, BlueStacks или Nox App Player. Сейчас существует альтернативный способ — использование «Платформы виртуальной машины» и подсистемы «Windows Subsystem for Android» (WSA). Первая уже есть в составе Windows 11 — нужно лишь включить ее. Подсистему WSA потребуется установить отдельно через Microsoft Store.
Однако на активации виртуальной машины и инсталляции Windows Subsystem for Android дело не заканчивается. Следующая задача, с которой столкнется пользователь, это установка на компьютер APK-файла (т.е. Android-приложения). Существует, как минимум, два способа сделать это:
- Ручной. Предполагает установку инструментов Android Debugging Bridge (ADB), управление которыми осуществляется через терминал Windows при помощи специальных команд.
- Автоматический. Предполагает использование утилиты WSATools (также распространяется через Microsoft Store), которая возьмет задачу по работе с Android Debugging Bridge (т.е. инструменты эти все равно придется устанавливать) и терминалом Windows на себя.
Ручной способ рассматривать не будем (даже в автоматическом довольно много чего нужно проделать).
Активация «Платформы виртуальной машины» в Windows 11
Здесь все просто:
- Запустите системную утилиту Выполнить, используя комбинацию клавиш Win + R, впишите в нее команду OptionalFeatures и нажмите ОК:

- Откроется новое окно Компоненты Windows. Найдите в списке компонент Платформа виртуальной машины, установите галочку перед ним и нажмите ОК:
- Дождитесь окончания активации виртуальной машины, что может занять несколько минут:
- Далее нужно будет перезагрузить компьютер.
Установка Windows Subsystem for Android
Программное обеспечение Windows Subsystem for Android распространяется через Microsoft Store, однако попытки найти его непосредственно через приложение магазина могут не увенчаться успехом (почему-то в результатах поиска отображается «Windows Subsystem for Linux»). В этом случае действуем по следующей схеме:
- Запускаем любой браузер и переходим по этой ссылке (ведет на страницу загрузки Windows Subsystem for Android на сайт Microsoft Store) и нажимаем кнопку Get in Store app в правом верхнем углу:
- Теперь в приложении Microsoft Store на компьютере откроется нужная нам страница — нажимаем кнопку Установить:
- Откроется еще одно небольшое окно. Нажимаем в нем несколько раз Далее и дожидаемся окончания скачивания и установки Windows Subsystem for Android (размер приложение составляет примерно 1 ГБ, потому нужно будет подождать).
Установка WSATools
С этим приложением не должно возникнуть никаких проблем. Просто выполните поиск по запросу «WSATools» в Microsoft Store и установите программу, кликнув по кнопке Получить:
Установка Android Debugging Bridge (ADB)
Инструменты Android Debugging Bridge распространяются в виде портативных утили в ZIP-архиве. Нам нужно скачать его, распаковать в любой папке на компьютере, а затем указать в настройках WSATools место распаковки:
- Перейдите на официальную страницу ADB.
- Прокрутите страницу до раздела Downloads и кликните по ссылке Download SDK Platform-Tools Windows.
- Сохраните ZIP-архив «platform-tools» в любой папке на компьютере и распакуйте его.
Теперь перейдем к настройке всего того, что было скачано.
Настройка Windows Subsystem for Android
При установке приложений из Microsoft Store ярлыки для их запуска не появляются на рабочем столе, но их можно найти в меню Пуск или в специальной папке Приложения через Проводник. Второй вариант удобнее. Просто скопируйте в адресную строку Проводника или в системную утилиту Выполнить команду:
shell:::{AD1405D2-30CF-4877-8468-1EE1C52C759F}\Apps
Кликните пару раз по значку Параметры подсистемы Windows для Android:
В открывшемся окне перейдите во вкладку Разработчик и активируйте Режим разработчика:
Настройка WSATools
Запустите утилиту WSATools из папки Приложения по аналогии с запуском подсистемы Windows для Android. Дальнейшие действия:
- В главном окне WSATools кликните по значку с изображением шестеренки, чтобы перейти в настройки программы:
- Раскройте блок Custom ADB Location, затем кликните по кнопке Select adb.exe и укажите путь до файла «adb.exe», который хранится в папке, куда был распакован ранее архив «platform-tools»:
- Нажмите Save для сохранения настроек.
Оставьте программу запущенной. Переходим к завершающей части нашей инструкции.
Установка APK-приложения в Windows 11
После сохранения настроек WSATools кликните по кнопке Install an APK в главном окне программы. Если все правильно установлено и настроено, должно открыться окно выбора APK-файла. В качестве примера мы установим и запустим Android-версию браузера Opera:
Скорее всего (зависит от того, откуда был скачан APK-файл), WSATools выведет сообщение о невозможности получения информации об устанавливаемом приложении. Нажмите Install Anyway, чтобы проигнорировать это:
Далее в левом нижнем углу кликните по кнопке Install. Это приведет к отображению нового окна Разрешить отладку ADB?. Поставьте флажок напротив Всегда разрешать с этого компьютера и нажмите кнопку Разрешить (если галочку не ставить, то это окно будет появляться при каждой установке APK):
Дождитесь окончания установки APK-приложения:
Если все прошло успешно надпись «Application installed successfully» отобразится на зеленом фоне (если он будет красным, значит, APK не был установлен). Кликните по кнопке Open App:
Последнее действие не обязательно приведет к запуску установленного APK. Не страшно. Откройте меню Пуск, перейдите в нем в раздел Все приложения и найдите имя только что установленного приложения (можно также воспользоваться поиском). В нашем случае это «Opera»:
Дождитесь запуска подсистемы Windows для Android:
Наконец, мобильный браузер Opera был запущен в Windows 11. Перейдем на сайт 2ip.ru, чтобы привести доказательства:
Как можно видеть, напротив графы Операционная система написано «Android 13».
Windows 11 is far superior in terms of design and providing ease of convenience to the user. However, Microsoft didn’t stop at that and went one step further by making it leaps ahead relative to any other previous iteration of Windows in terms of interoperability as well.
With Windows 11, you can officially install Android apps on your Windows PC through the Amazon Appstore. Plus, you can also sideload Android app APK files and run them on your PC.
Note: As of the time of writing this article (21st October’21), this feature is only available for the users enrolled in Windows Insider Program.
Getting your Windows 11 Computer Ready
Before you straight away jump to download and install Android apps on your Windows device, you need to make sure ‘Hyper-V’ and ‘Virtual Machine Platform’ optional features are enabled on your PC.
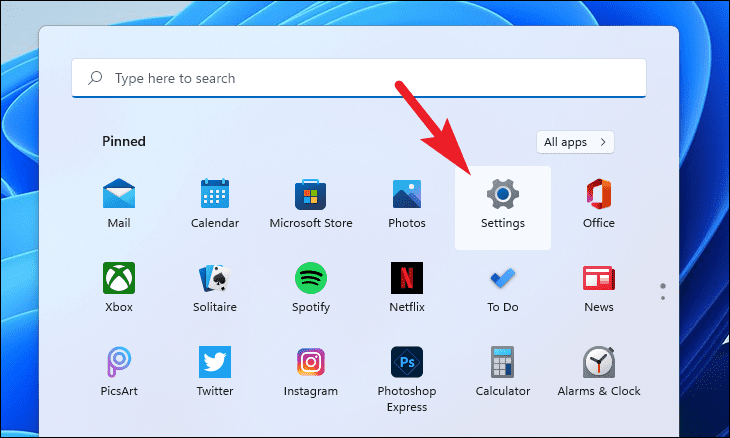
To get started, launch the Settings app from the Start Menu of your device or by using the Windows+i keyboard shortcut.
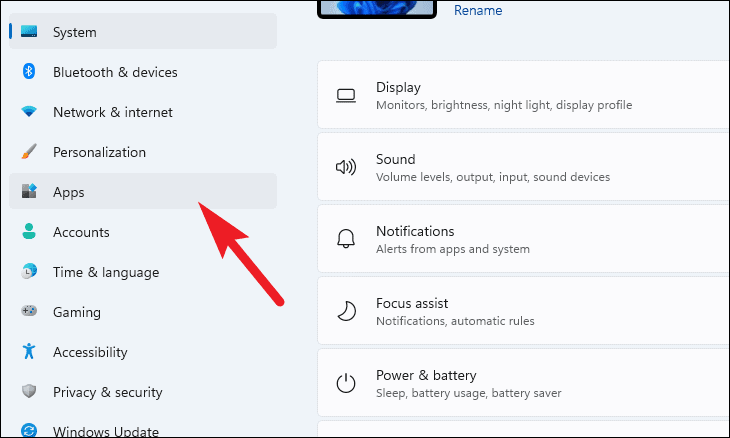
Next, click on the ‘Apps’ option present on the left sidebar of the Settings window.
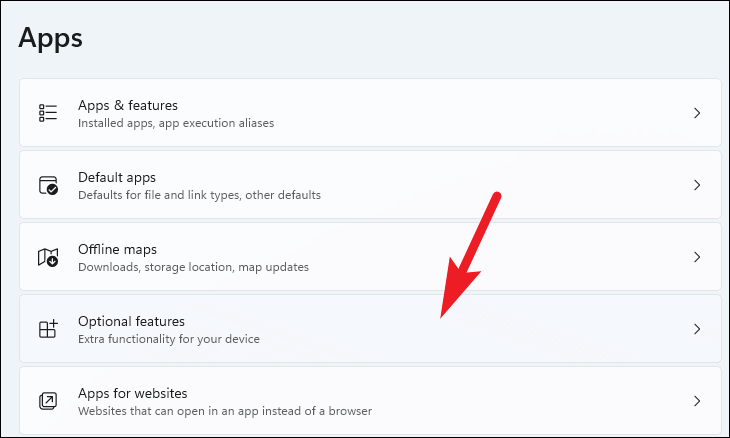
After that, click on the ‘Optional features’ tile from the right section of the window.
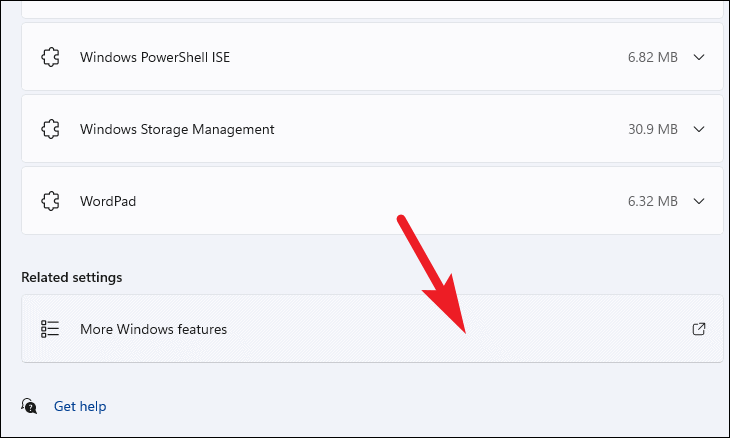
Then, click on the ‘More Windows features’ tile present under the ‘Related settings’ section. This will open a separate window on your screen.
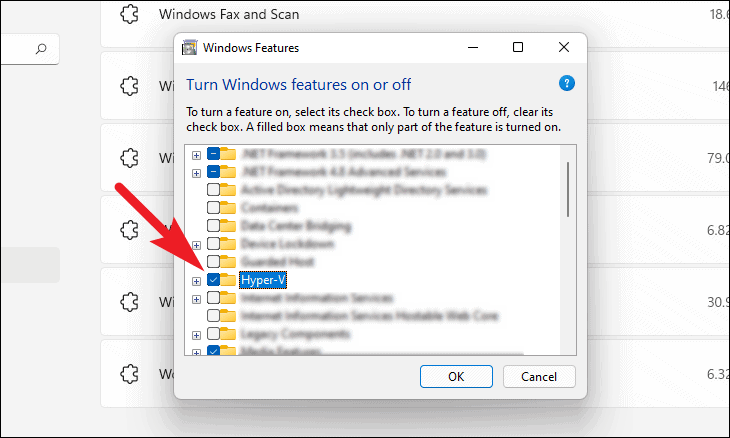
Now, from the ‘Windows Features’ window, locate the ‘Hyper-V’ option and click on the checkbox preceding the feature to select it.
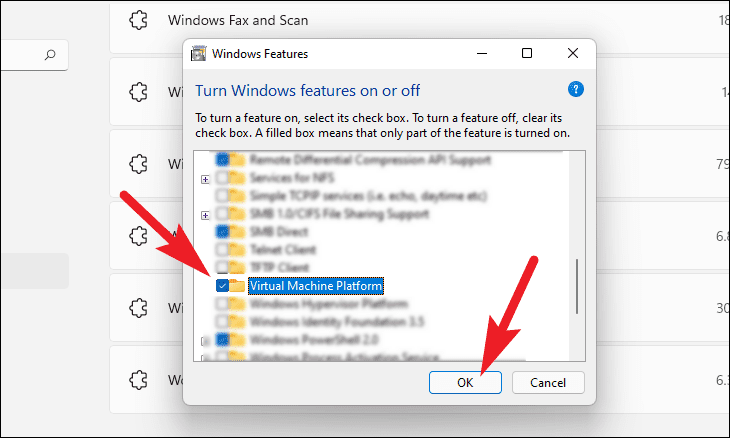
Then, scroll down locate the ‘Virtual Machine Platform’ feature, and click on the checkbox preceding it to select it as well. Finally, click on the ‘OK’ button to install both of these optional features on your Windows machine.
This action will open a separate window on your screen to download the required files, wait patiently till the installation completes.
Download and Install Windows Subsystem for Android with Amazon App Store
Windows Subsystem for Android is a new component layer on top of Windows 11 that powers the Amazon Appstore as it comprises of Linux kernel and Android OS which runs the Andriod apps on your system.
The tech jargon may feel a bit too complex for the uninitiated. But that being said, Microsoft will distribute the ‘Windows Subsystem for Andriod’ as an app from the Microsoft Store for an easy download and install experience to the users.
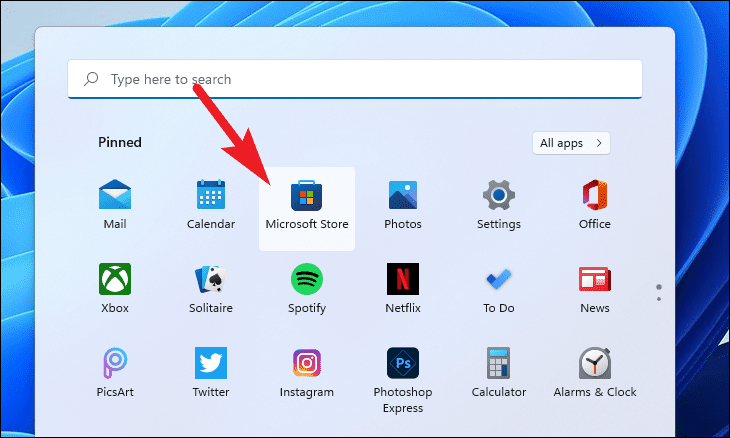
First, launch the ‘Microsoft Store’ app from the Start Menu of your Windows device or search for it in Windows Search.
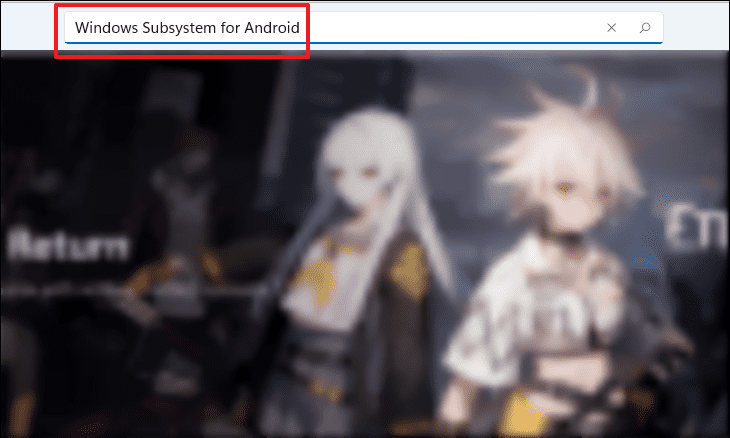
On the Microsoft Store window, click on the search bar and type ‘Windows Subsystem for Android’, and hit Enter on your keyboard to perform a search.
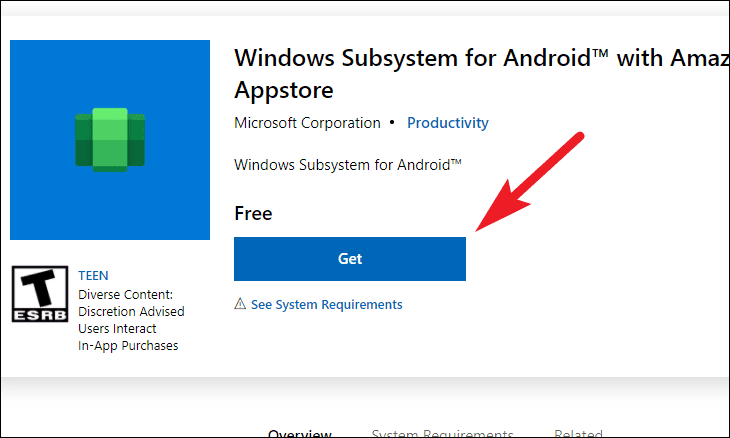
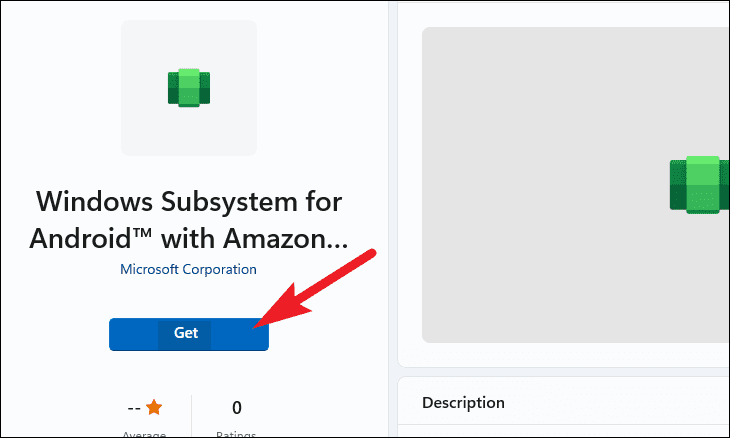
Alternatively, you can also navigate to the app by heading to the official Microsoft Store website at microsoft.com/windows-subsystem-for-android… and then click the ‘Get’ button on the webpage.
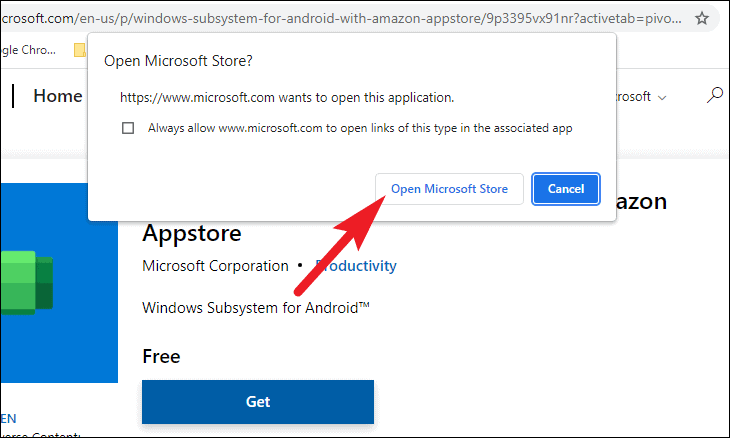
Next, you will receive a prompt asking you to if you wish to be redirected to the Microsoft Store, click on the ‘Yes’ button. This will open Microsoft Store on your Windows machine.
Once you are on the app page on the Microsoft Store, click on the ‘Get/Install’ button present on the Microsoft Store window to install the app.
Manually Install Windows Subsystem for Android
In case for some reason you are not able to download the Windows Subsystem for Android from the Microsoft Store, you can also install it manually on your system by downloading the installation package for it.
Pre-requisites
- Windows Subsystem for Android msixbundle (Link)
ProductId: 9P3395VX91NR, Ring: SLOW - Amazon App Store for Windows msixbundle (Optional)
Install Windows Subsystem for Android using Windows Terminal
Once you have the installer package for Windows Subsystem for Android, it is pretty straightforward to install it on your system.
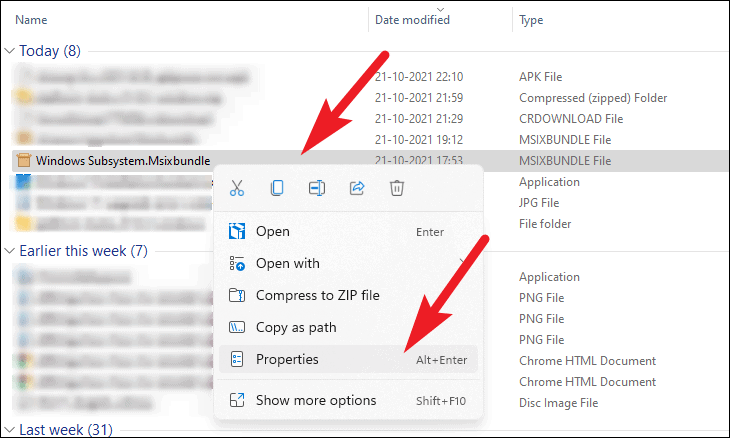
Before you proceed with the installation, head to the directory containing the installer package and right-click on it. Then, choose the ‘Properties’ option. This will open a separate window on your screen.
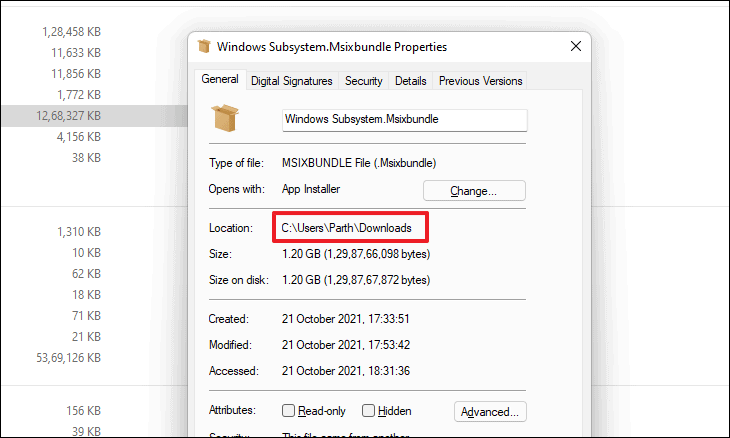
Then, select the path specified to the right of the ‘Location:’ field and keep it handy as it will be needed during the installation process.
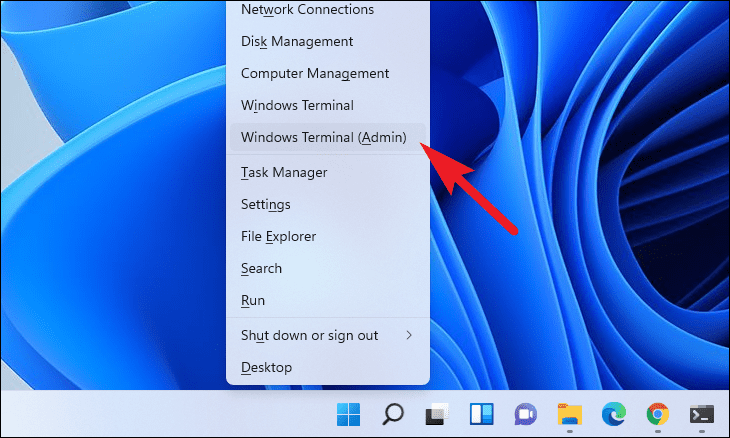
Next, press the Windows+X shortcut on your keyboard to bring up the Windows super user menu. Then, click on the ‘Windows Terminal (Administrator)’ option from the list to open an elevated window of the Windows Terminal.
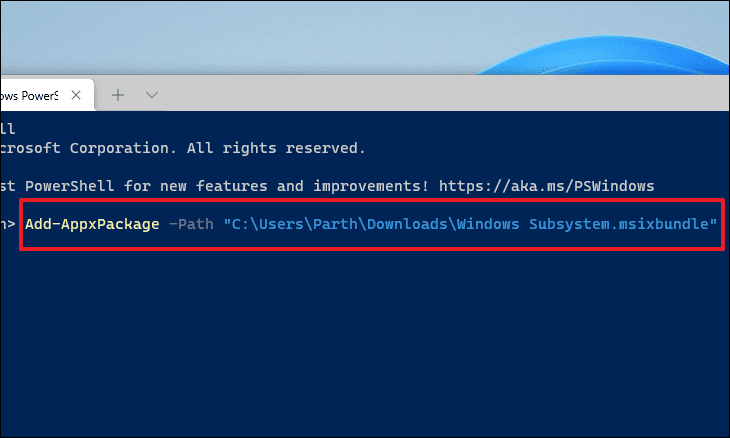
After that, type or copy+paste the following command to install the package on your computer.
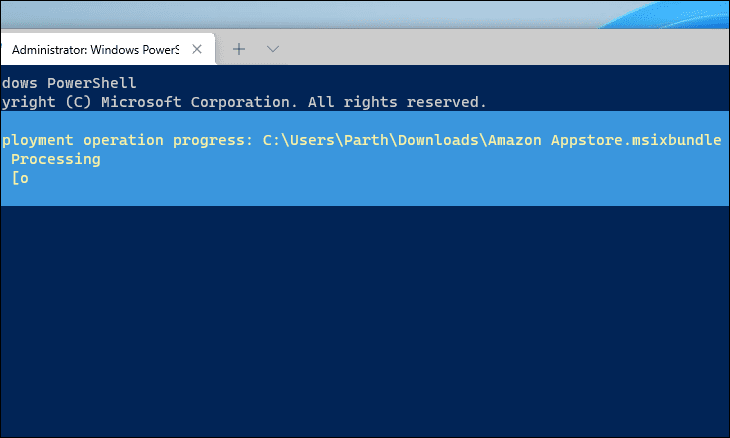
Add-AppxPackage -Path "<copied path>\<package name>.msixbundle"Note: Replace the <copied path> placeholder with the path address you copied earlier, along with <package name> placeholder with the exact name of the package in the command below.
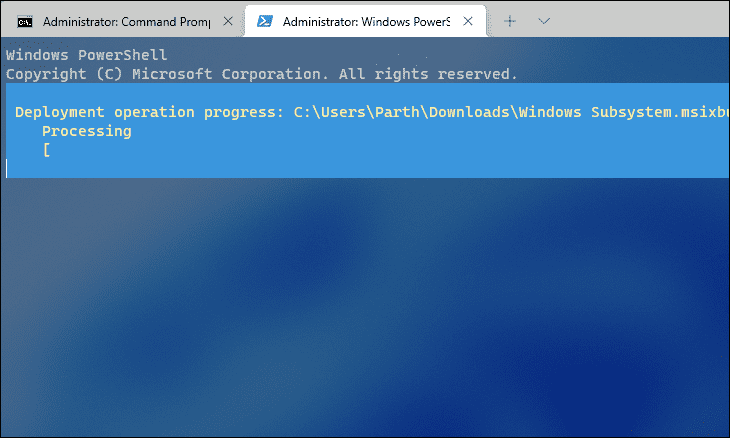
Powershell will now start installing the package on your system, wait till the process finishes.
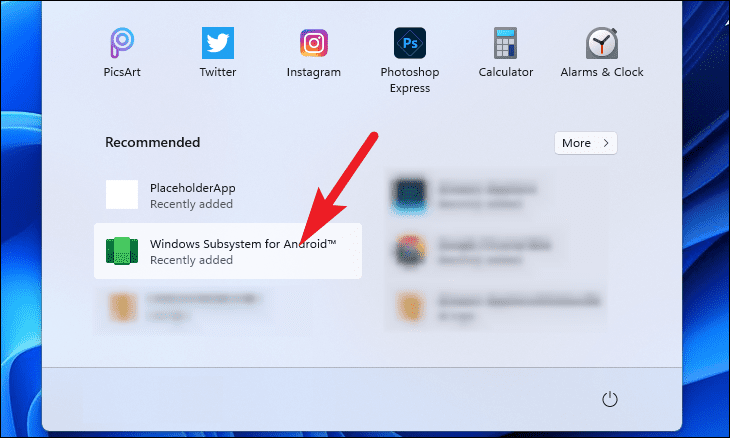
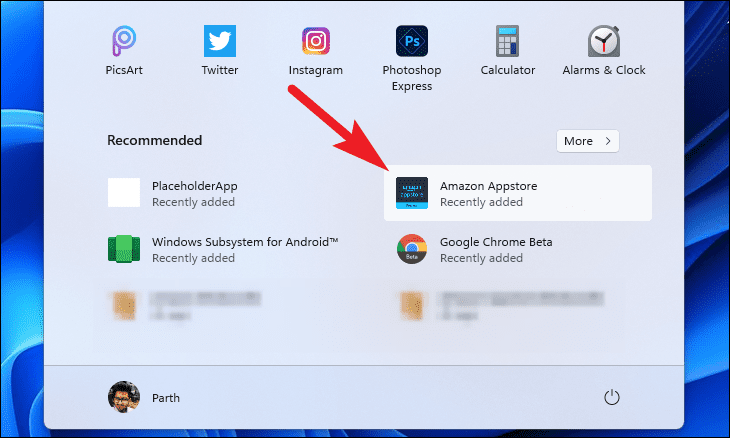
Once installed, you will be able to locate the app under the ‘Recommended’ section of the Windows Start Menu.
Reportedly, some users do not get the ‘Amazon Appstore’ along with the ‘Windows Subsystem for Android’. If that’s the case with you as well, you will need to install the Amazin Appstore separately.
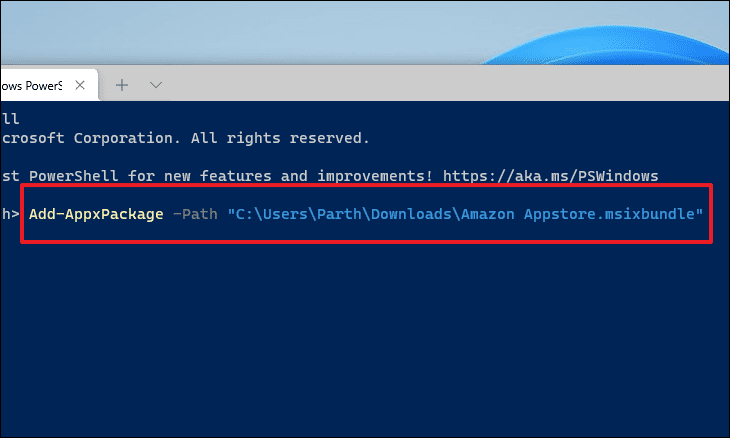
To do so, head back to the elevated window of the Windows Terminal. Then, type or copy+paste the following command in the PowerShell window and hit Enter to install the app on your system.
Add-AppxPackage -Path "<directory path>\<package name>.msixbundlePowershell will now install the app on your system, wait while the process runs in the background.
You will be able to locate the Amazon Appstore under the ‘Recommended’ section of the Start Menu, once it has been installed on the system.
Installing Android Apps on Windows 11 using Amazon Appstore
Once you have installed the Windows subsystem for Android along with Amazon Appstore on your device, you are all set to enjoy Andriod apps on your PC.
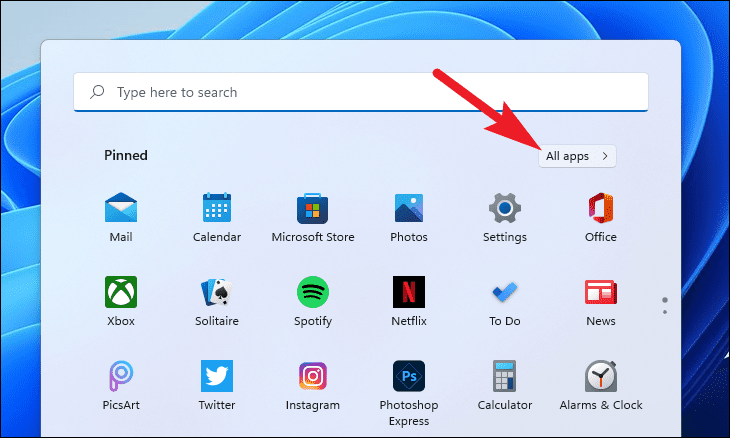
To get started, open the Start Menu and click on the ‘All apps’ button present at the top right corner of the flyout.
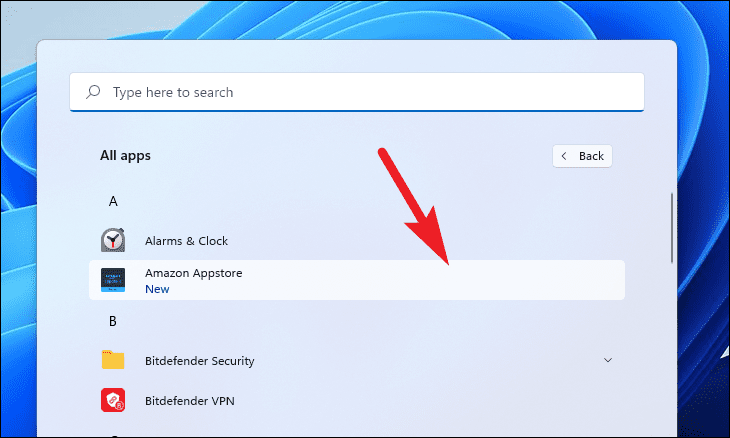
Next, locate the ‘Amazon Appstore’ from the alphabetically ordered list and click on it to launch the app.
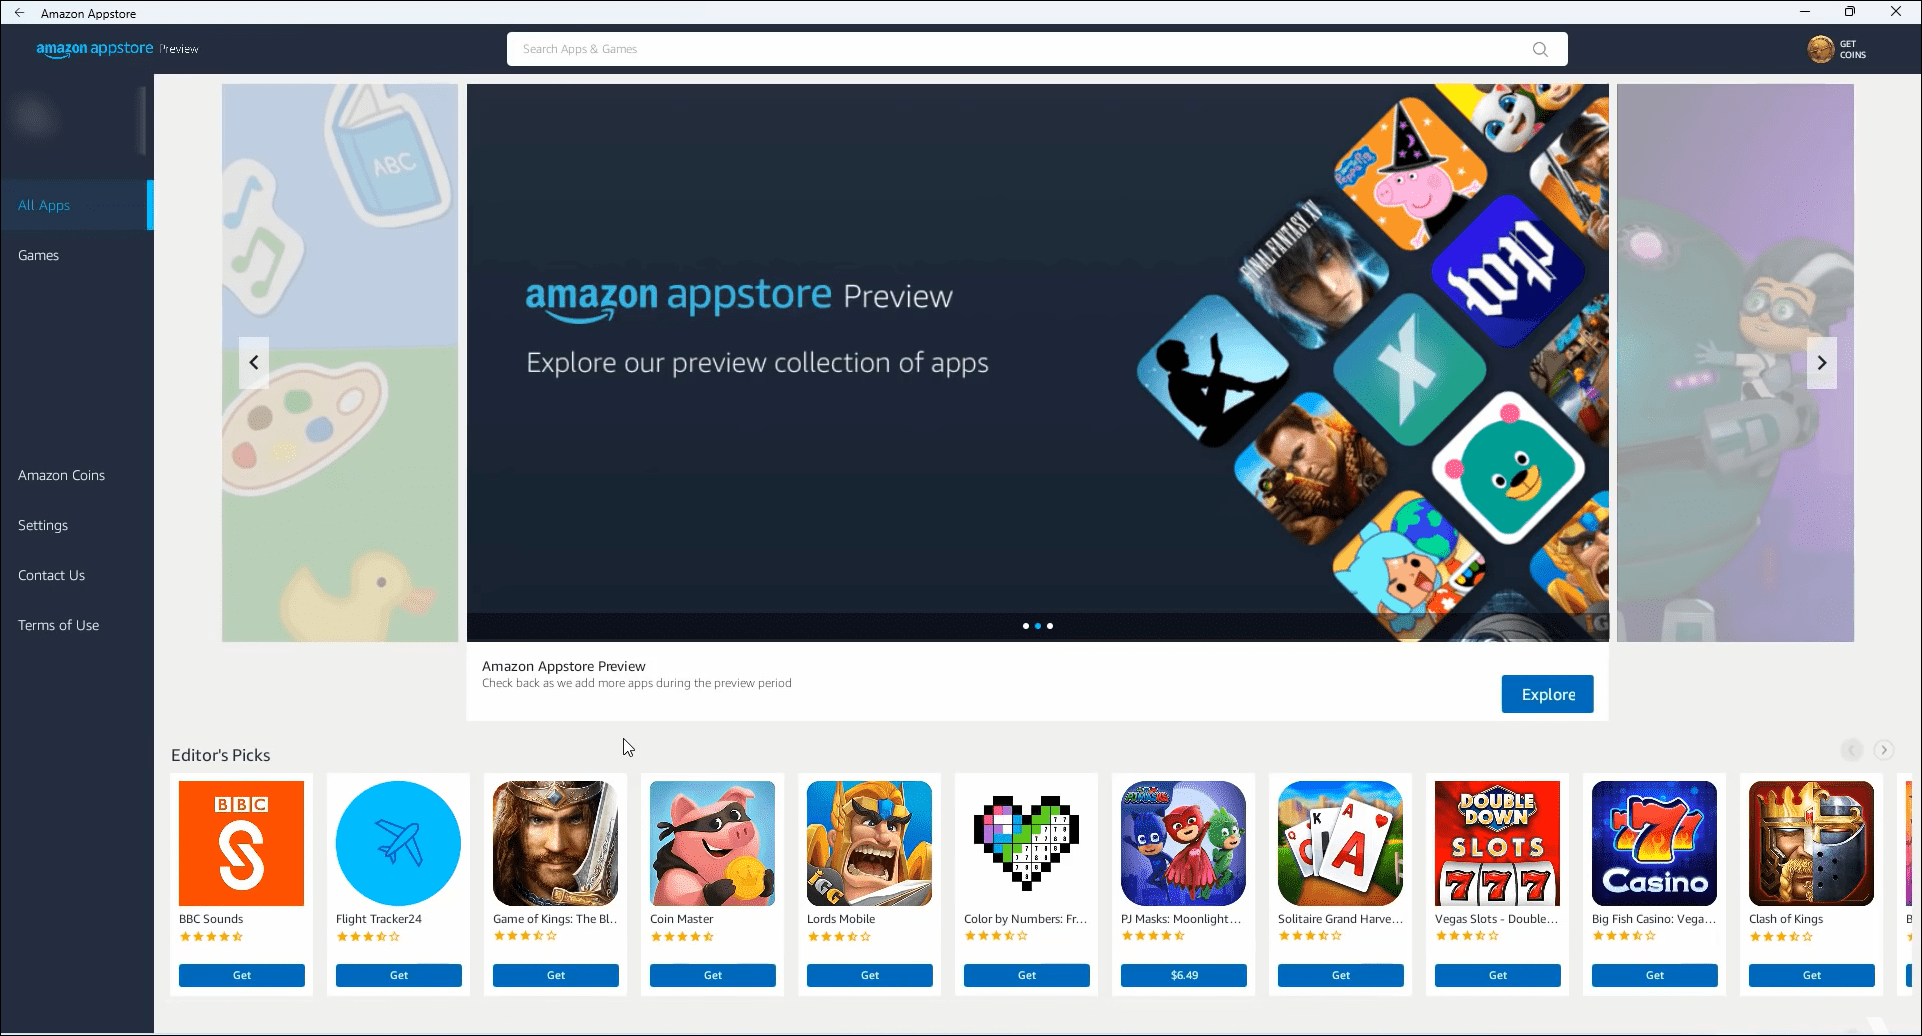
You will need to sign in to your Amazon account on the first launch of the app. Once done, you will be greeted by the Amazon Appstore home screen.
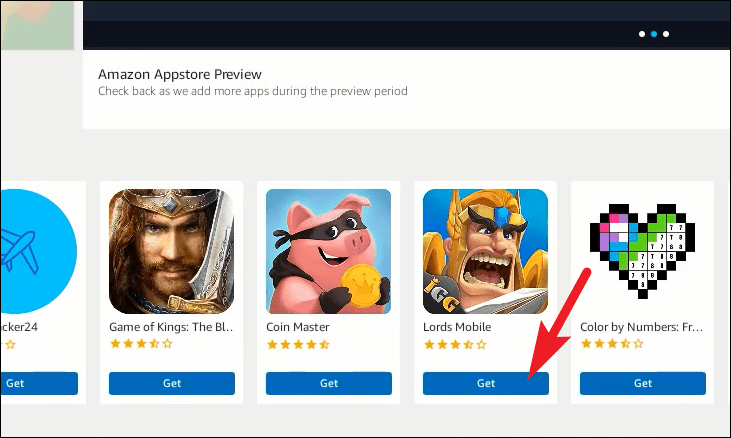
To install any application of your choice, click on the ‘Get’ button present on individual tiles of the app.
How to Sideload Android Apps on Windows 11 via APK Files
Along with the apps available through the Amazon Appstore, you can also sideload apps of your choice on Windows 11 provided you have a .apk file for the app you wish to install.
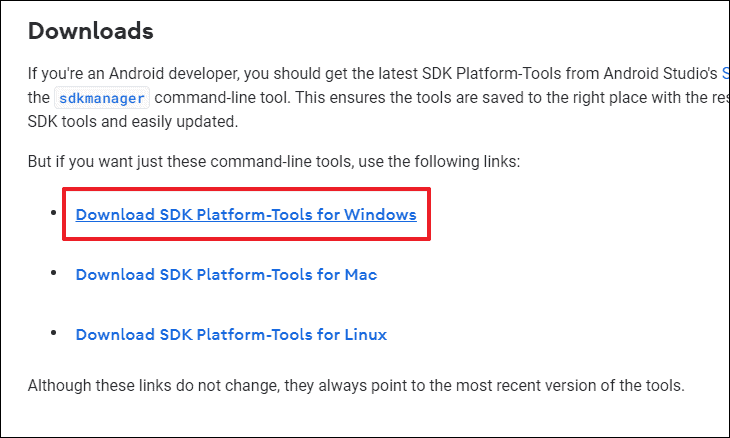
First, head to the official Android developer website developer.android.com/platform-tools. Then, locate the ‘Downloads’ section and click on the ‘Download SDK Platform-Tools for Windows’ option. This will open an overlay window on your screen.
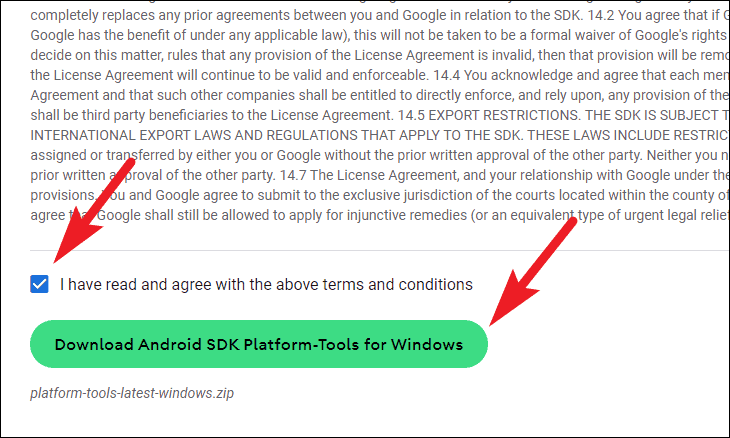
Next, scroll down and click the checkbox preceding the ‘ I have read and agree with the above terms and conditions’ field, and then click on the ‘Download Android SDK Platform-Tools for Windows’ button to initiate the download.
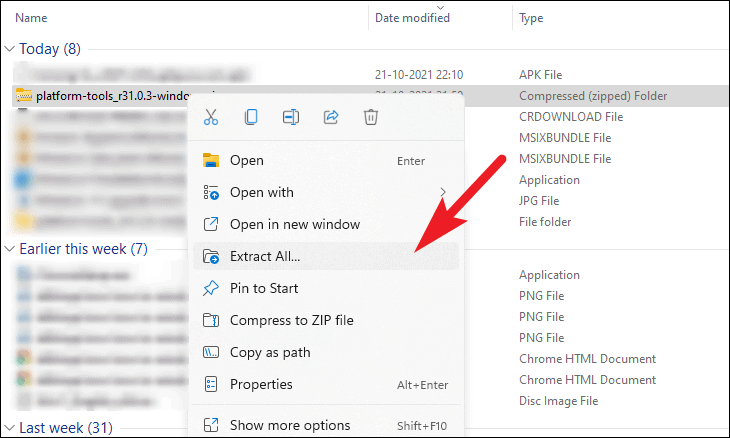
Once the download has been completed, head to the download directory and right-click on the zipped folder. Then, choose the ‘Extract all’ option from the context menu to extract the folder.
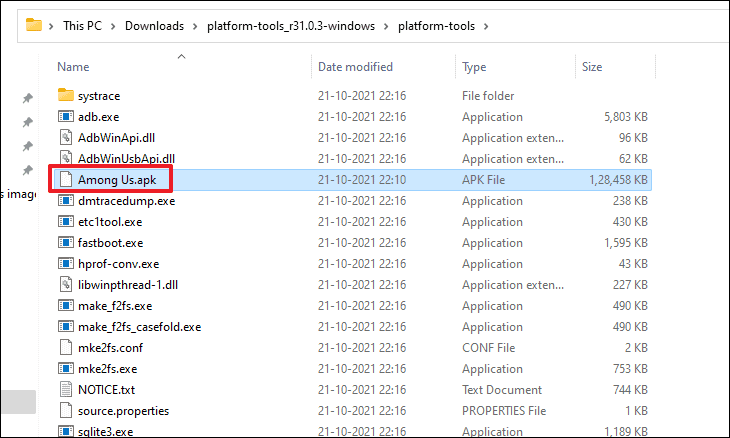
Next, head to the directory containing your .apk file. Copy the file using the context menu or Ctrl+C shortcut. Then, paste the file into the extracted folder by pressing the Ctrl+V shortcut on your keyboard.
Note: Make sure to copy the name of the file you wish to install and keep it handy as it will be needed in further steps.
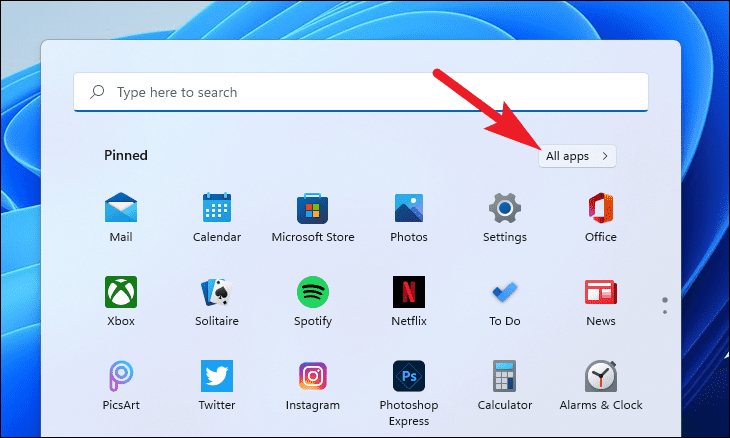
Now, open Start Menu and click on the ‘All apps’ button present at the top right corner of the flyout.
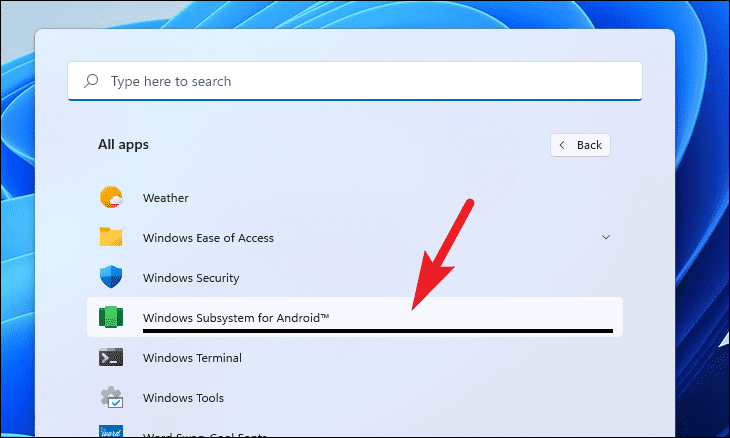
Next, scroll to locate and click on the ‘Windows Subsystem for Android’ tile to launch it.
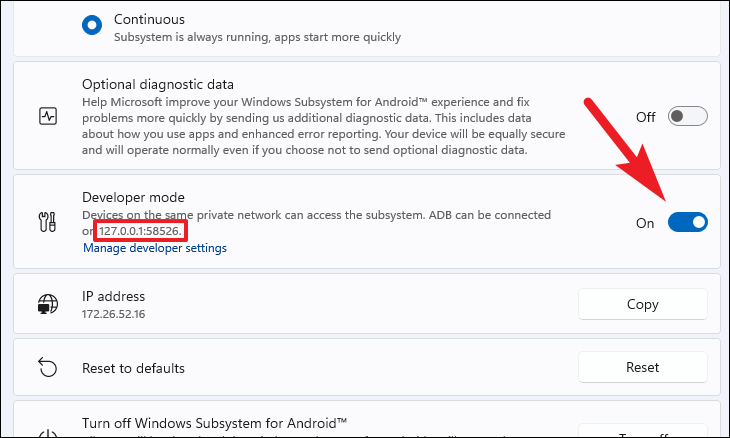
From the WSA window, locate the ‘Developer mode’ option and toggle the following switch to the ‘On’ position. Also, note the IP address displayed on the tile.
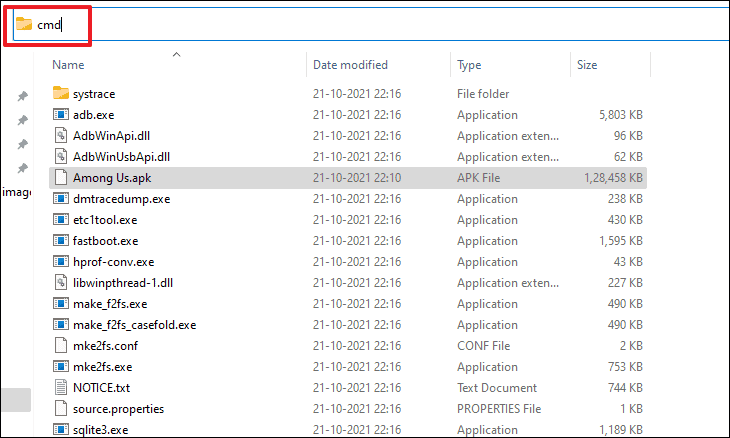
Now, back to the extracted folder, click on the address bar of the folder and type cmd. Then, hit Enter on your keyboard to open a Command Prompt window set to the current directory.
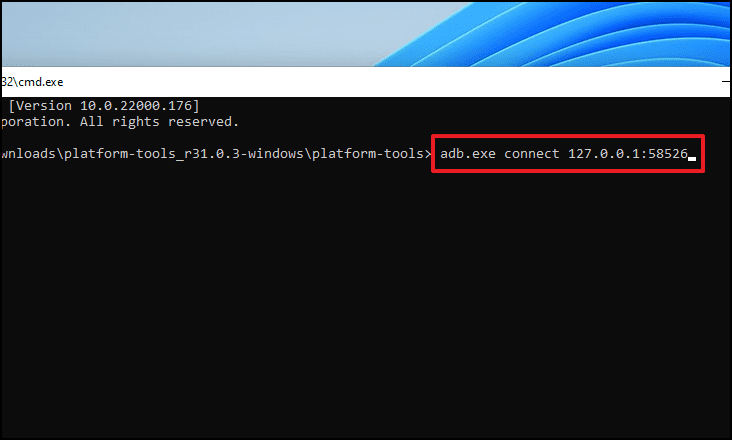
Next, type or copy+paste the following command to connect to Android Debug Bridge (ADB).
adb.exe connect <IP address>Note: Replace the <IP address> placeholder with the IP address present on the ‘Developer options’ tile of the Windows Subsystem for Android window.
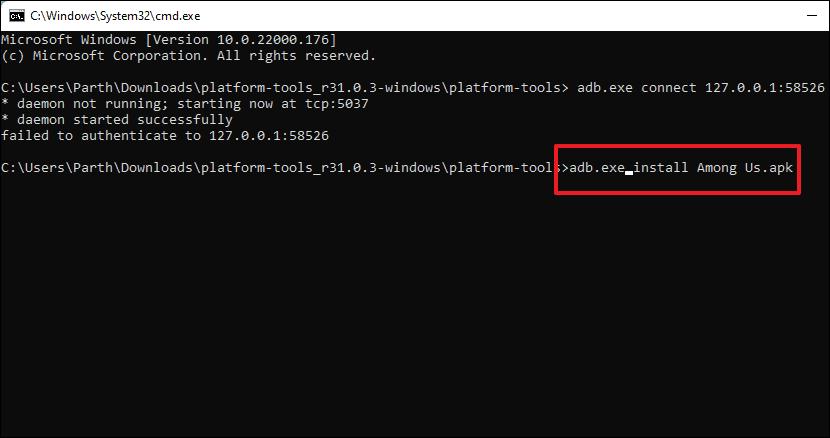
After that, type or copy+paste the following command to sideload the application on your Windows machine.
adb.exe install <file name>.apkNote: Make sure to replace <file name> placeholder with your current file name to install the .apk on your system.
Once the app has been successfully installed, you will see a message stating so on the screen.
Finally, head to the Start Menu, and click on the ‘All apps’ button. Next, scroll down to locate your app from the alphabetically ordered list and click on it to launch.
That’s how you can run Android apps on your Windows 11 PC.
