This will take about 30 minutes.
In this guide, we will be installing Ruby on Rails on Windows 10.
We’re going to use the Windows Subsystem for Linux (WSL) to accomplish this. This allows you to install a Linux distribution natively on Windows without a virtual machine.
Ruby on Rails will always be deployed to a Linux server, so it’s best for us to use the same for development.
Windows allows you to run various Linux operating systems inside of Windows similar to a virtual machine, but natively implemented. We’ll use this to install Ruby and run our Rails apps.
You must be running Windows 10 version 2004 and higher (Build 19041 and higher) or Windows 11.
Open Powershell and run:
wsl --install -d Ubuntu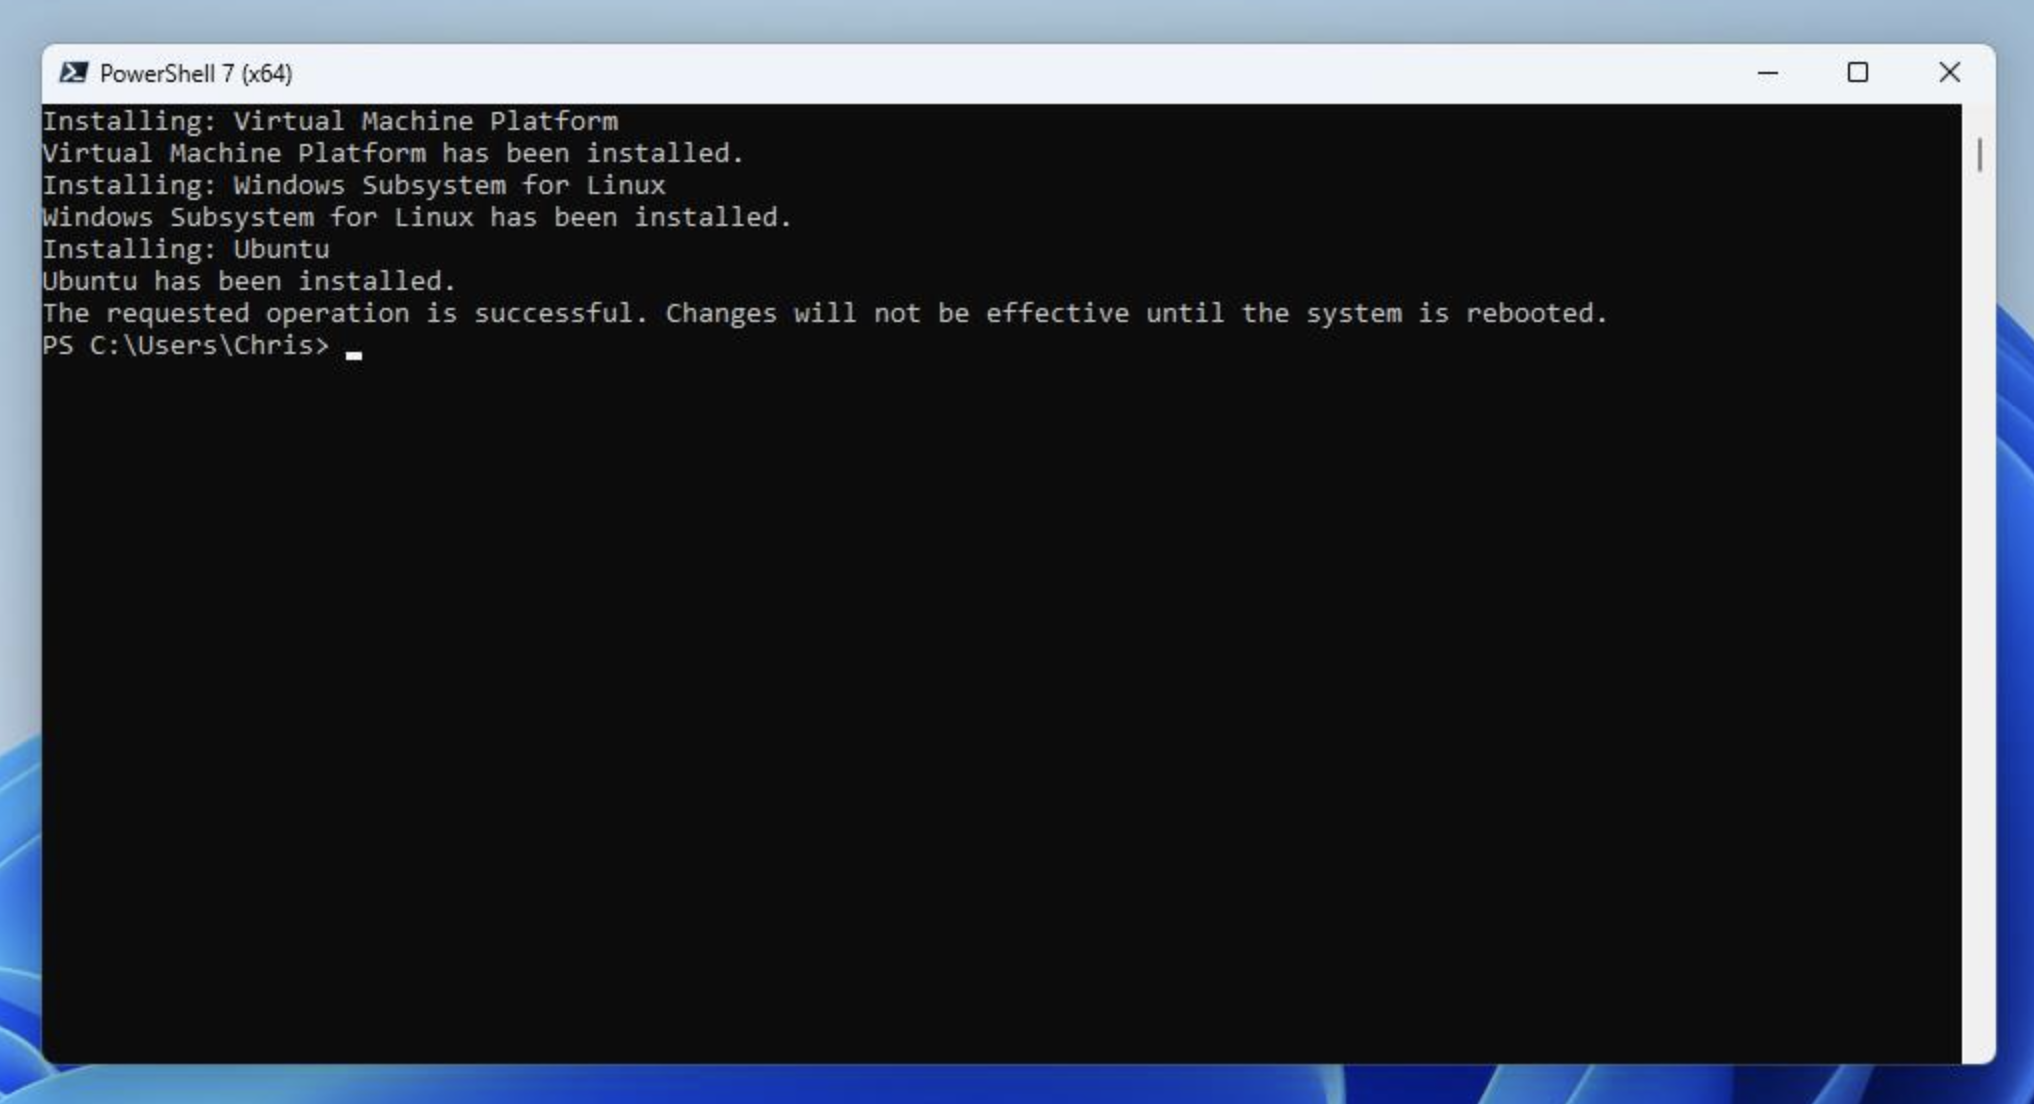
Reboot your computer to finish the installation.
Once initial setup is finished, you will be prompted to create a username and password for your Ubuntu install.
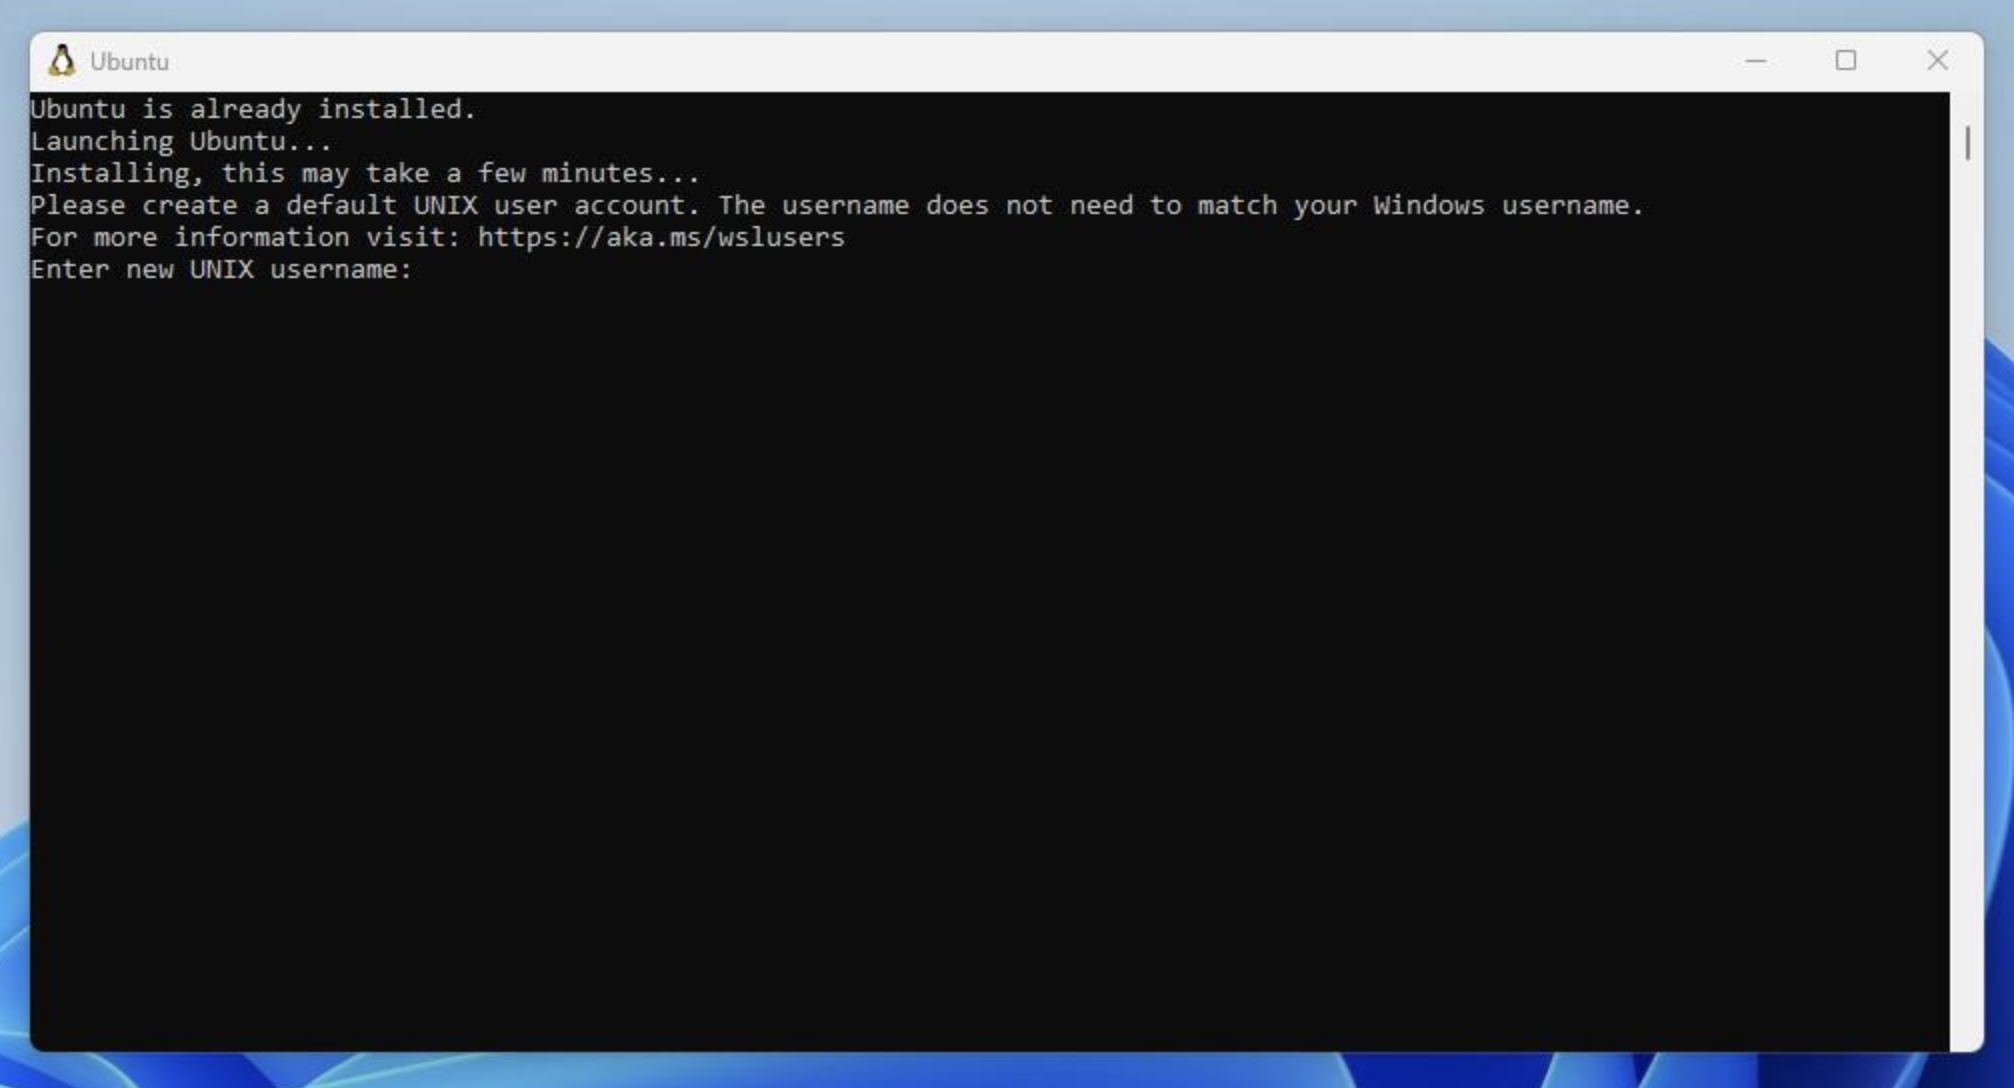
You can search for «Ubuntu» in the Windows Start Menu anytime to open the Ubuntu terminal.
Congrats! You now have Ubuntu installed on Windows with WSL. You’ll use this to run your Rails server and other processes for development.
The first step is to install dependencies for compiling Ruby. Open your Terminal and run the following commands to install them.
sudo apt-get update
sudo apt-get install git-core zlib1g-dev build-essential libssl-dev libreadline-dev libyaml-dev libsqlite3-dev sqlite3 libxml2-dev libxslt1-dev libcurl4-openssl-dev software-properties-common libffi-dev
Next we’re going to be installing Ruby using a version manager called ASDF.
The reason we use ASDF over rbenv, rvm or others is that ASDF can manage other languages like Node.js too.
Installing asdf is a simple two step process. First you install asdf, and then add it to your shell:
cd
git clone https://github.com/excid3/asdf.git ~/.asdf
echo '. "$HOME/.asdf/asdf.sh"' >> ~/.bashrc
echo '. "$HOME/.asdf/completions/asdf.bash"' >> ~/.bashrc
echo 'legacy_version_file = yes' >> ~/.asdfrc
echo 'export EDITOR="code --wait"' >> ~/.bashrc
exec $SHELL
Then we can install ASDF plugins for each language we want to use. For Rails, we can install Ruby and Node.js for our frontend Javascript.
asdf plugin add ruby
asdf plugin add nodejs
Choose the version of Ruby you want to install:
To install Ruby and set the default version, we’ll run the following commands:
asdf install ruby 3.2.2
asdf global ruby 3.2.2

# Update to the latest Rubygems version
gem update --system
Confirm the default Ruby version matches the version you just installed.
which ruby
#=> /home/username/.asdf/shims/ruby
ruby -v
#=> 3.2.2
Then we can install the latest Node.js for handling Javascript in our Rails apps:
asdf install nodejs 18.16.1
asdf global nodejs 18.16.1

which node
#=> /home/username/.asdf/shims/node
node -v
#=> 18.16.1

# Install yarn for Rails jsbundling/cssbundling or webpacker
npm install -g yarn
Configuring Git
We’ll be using Git for our version control system so we’re going to set it up to match our Github account. If you don’t already have a Github account, make sure to register. It will come in handy for the future.
Replace my name and email address in the following steps with the ones you used for your Github account.
git config --global color.ui true
git config --global user.name "YOUR NAME"
git config --global user.email "YOUR@EMAIL.com"
ssh-keygen -t ed25519 -C "YOUR@EMAIL.com"
The next step is to take the newly generated SSH key and add it to your Github account. You want to copy and paste the output of the following command and paste it here.
cat ~/.ssh/id_ed25519.pubOnce you’ve done this, you can check and see if it worked:
ssh -T git@github.comYou should get a message like this:
Hi excid3! You've successfully authenticated, but GitHub does not provide shell access.Choose the version of Rails you want to install:
gem install rails -v 7.0.6Now that you’ve installed Rails, you can run the rails -v command to make sure you have everything installed correctly:
rails -v
# Rails 7.0.6
If you get a different result for some reason, it means your environment may not be setup properly.
For PostgreSQL, we’re going to add a new repository to easily install a recent version of Postgres.
sudo apt install postgresql libpq-dev
sudo service postgresql start
You’ll need to start postgresql each time you load your WSL environment.
The postgres installation doesn’t setup a user for you, so you’ll need to follow these steps to create a user with permission to create databases. Feel free to replace chris with your username.
sudo -u postgres createuser chris -s
# If you would like to set a password for the user, you can do the following
sudo -u postgres psql
postgres=# \password chris
Let’s create your first Rails application on Windows!
rails new myapp -d postgresql

#### Or if you want to use MySQL
rails new myapp -d mysql

# Then, move into the application directory
cd myapp

# If you setup MySQL or Postgres with a username/password, modify the
# config/database.yml file to contain the username/password that you specified

# Create the database
rake db:create

rails server
You can now visit http://localhost:3000 to view your new website!
Getting an «Access Denied» error?
If you received an error that said Access denied for user 'root'@'localhost' (using password: NO) then you need to edit the config/database.yml file to match the database username and password.
Editing Code
Install VS Code on Windows and install the WSL extension. This will allow you to edit code in Windows but run commands and extensions in WSL. Read more about Developing in WSL.
That’s it! Let us know in the comments below if you run into any issues or have any other protips to share!
How to Install Ruby on Rails Windows 10/11 (Step by Step Tutorial). With so many programming languages in our IT environment that play a important role Ruby is one of those languages. It is pretty powerful and used for many dynamic tasks but mostly in web application development. Also there are many famous software built using this language. Therefore today we are going to learn how to install Ruby on Windows 11. In this article we will set up Ruby on Rails development environment on Windows 10/11.
What is Ruby on Rails?
")
Ruby on Rails or RoR, is a framework that is built on Ruby, a programming language that was created in the 1990s. There is a simple idea behind making RoR available to developers: to provide an intuitive framework for developing robust, high performance web pages.
Often referred to as “RoR” or just “Rails,” Ruby on Rails is a free and open source for developing web applications in Ruby, an object oriented programming language that is similar to Python and Perl.
In comparison to other frameworks, Ruby on Rails has a great advantage, which is its speed and ease of use that the developers enjoy while working within the environment. A change made to an application is immediately reflected, eliminating the lengthy and time consuming web development process normally associated with it.
Benefits of Ruby on Rails
Cost effective
Ruby on Rails is an open source framework which is 100% free and based on Linux. From a developer’s perspective, it’s also easy to use. Using ruby, developers can save a lot of their time and effort that leads to reducing the overall cost, due to the availability of so many gems (plugins).
Based on the Model View Controller architecture (MVC)
An application developed using this MVC architecture consists of three interconnected layers. These layers contain the code that interacts with the application data. Also, it centralizes both the application’s business logic and the rules for manipulating the data. Among the various formats that the data is presented to the users are HTML, XML, RSS, PDF, and other formats.
Managing changes is easy
Adding new features and editing existing code for a site is easy with Ruby on Rails. You can quickly and easily perform future modifications to your website (for example, changing the data model significantly) after launching your site.
Secure
Ruby framework contains some security features that are enabled by default. Furthermore, using Ruby on Rails means adhering to the secure development lifecycle, which can be a complicated method in terms of security assurance.
There is an active Rails community that works to identify and patch new vulnerabilities, and documentation of the framework is available both officially and unofficially.
Flexibility
Ruby on Rails offers a high level of flexibility and offers many advantages such as easy integration with frameworks and technologies such as AngularJS. Developers can use multiple technologies and separate layers of an application because of its flexibility.
Productivity
When you combine Ruby and third party libraries, you will be able to develop features that are incredibly fast. This makes Ruby an extremely productive programming language. In most cases, these libraries are available as gems, which are packaged libraries and applications that are installed by using a tool referred to as Ruby Gems.
Consistent
In order to stay structured and readable, developers adhere to standardized file management and programming conventions. This also helps save time.
Large Online Community
On GitHub, a social coding site, this language is among the most popular. Among the community’s developers are many who are continually improving code as well as assisting others with their projects.
Whenever you need a particular piece of functionality, there is a high probability that someone else has already created it or is willing to provide assistance to you for fixing any issues. But still, you’ll need a team of skilled programmers to handle the code.
An extensive collection of free plugins
Another RoR advantage is the abundance of free gems or plugins. You can use RoR to create your own website that meets your business needs – for example, you can provide advanced eCommerce services or set up an exclusive social network that guarantees a high level of data security to your users.
Follow this post to show you how to install Ruby on Rails on Windows 10/11.
Install Ruby on Rails on Windows 10/11
Install Git
Before starting, you will need to install the Git software package on your system. You can download it from the Git download page.
Once the Git package is downloaded, follow the below steps to install Git on your system.
Step 1 – Double click on the Git downloaded file. You should see the Git License screen:

Step 2 – Click on the Next. You should see the destination selection screen:

Step 3 – Click on the Next. You should see the component selection screen:

Step 4 – Click on the Next. You should see the Start Menu selection screen:

Step 5 – Click on the Next. You should see the Editor selection screen:

Step 6 – Click on the Next. You should see the adjust Git branch screen:

Step 7 – Click on the Next. You should see the path selection screen:

Step 8 – Click on the Next. You should see the choose SSH executable screen:

Step 9 – Click on the Next. You should see the Choose HTTPS backend screen:

Step 10 – Click on the Next. You should see the Git line ending conversions screen:

Step 11 – Click on the Next. You should see the Terminal emulation configuration screen:

Step 12 – Click on the Next. You should see the Git default behavior screen:

Step 13 – Click on the Next. You should see the Credential helper selection screen:

Step 14 – Click on the Next. You should see the extra option selection screen:

Step 15 – Click on the Next to finish the installation.
Install Ruby on Windows
First, visit the Ruby installer website and download the latest version of Ruby to your system. Once the Ruby installer is downloaded, follow the below steps to install Ruby to your system:
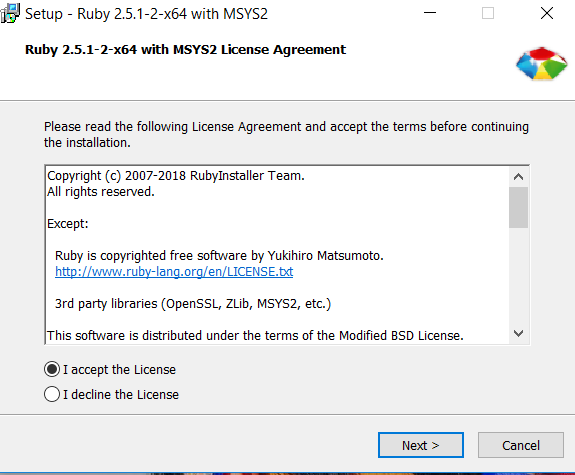
Step 1 – Double click on the Ruby installer to start the installation. You should see the License page:

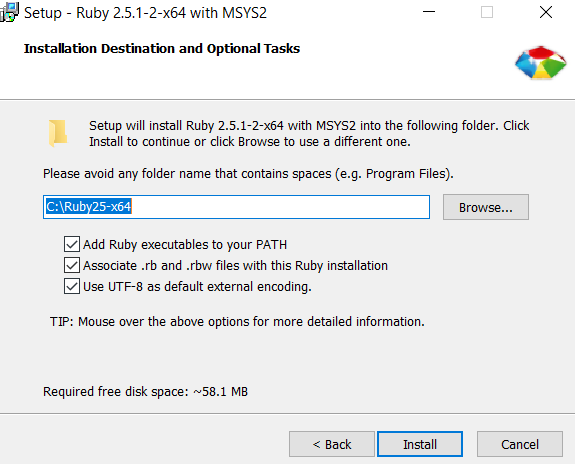
Step 2 – Accept the License agreement and click on the Next button. You should see the installation location selection page:

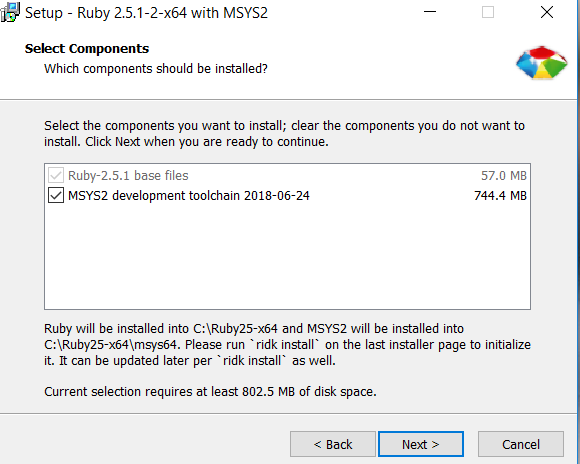
Step 3 – Select your installation path and click on the Install button. You should see the component selection page:

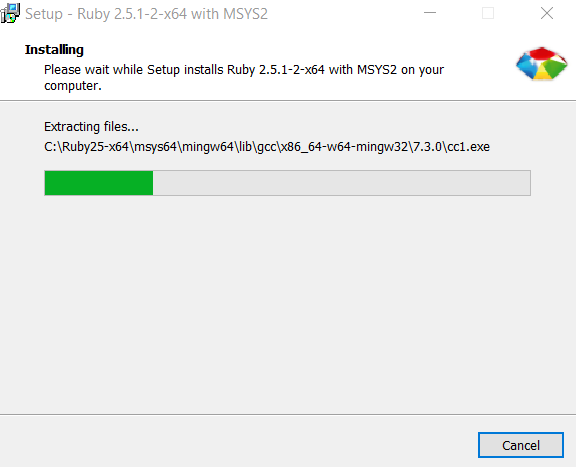
Step 4 – Select your desired components and click on the Next button. Once the Ruby is installed, you should see the following page:

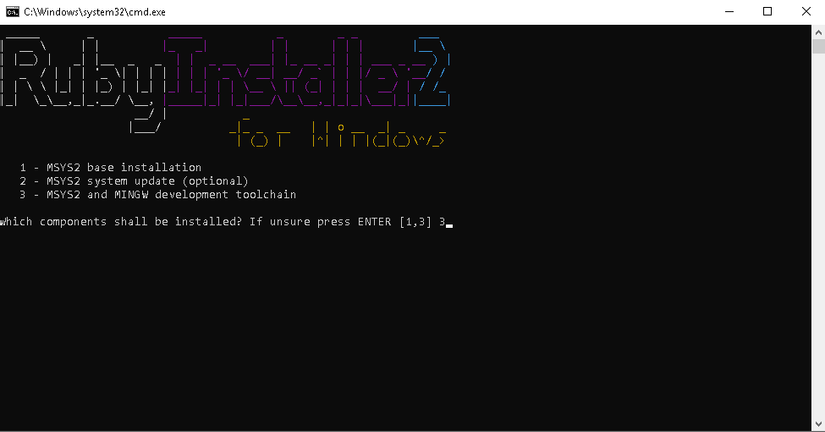
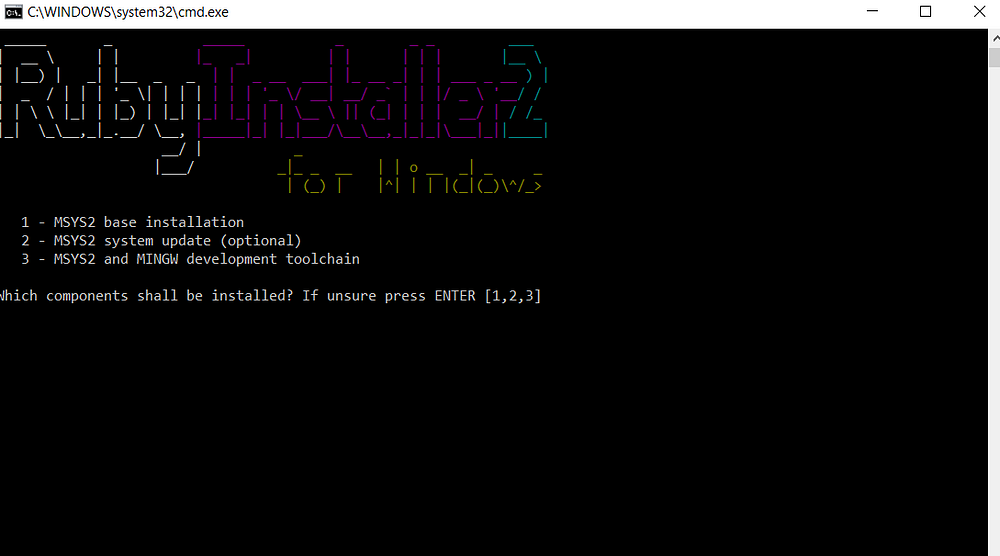
Step 5 – Click on the Finish button. You should see the Ruby toolchain selection page:

Step 6 – Type 3 to install the Ruby development toolchain and press the Enter key to finish the installation.
Launch the Ruby Shell
After installing Ruby, search for “Ruby” in the Windows Desktop. You should see the following page:

Click on the “start command prompt with Ruby” to launch the Ruby command prompt. Now, verify the Ruby version using the following command:
You should see the Ruby version in the following page:

To verify the Gem installation and list all installed Gems, run the following command:
You should see the following page:

If you want to update the Ruby gems, run the following command:
Install Rails on Windows via Gem command
Rails is one of the Ruby gems and you can install it using the gem command as shown below:
Once the Rails is installed, you should see the following page:

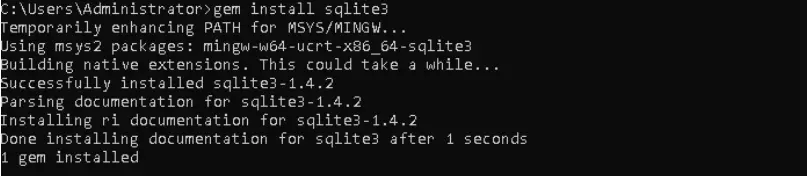
Rails applications cannot operate without a database. Rails support MySQL or the SQLite database. SQLite3 is the default Rails database and it can be installed using the following command:

Create a Rails Application
After installing Ruby and Rails, we will create a simple Rails application to check the Ruby on Rails installation. Let’s create a simple application named app with the following command:
You will get some tzinfo-data related error. To resolve this error, open the Gemfile located inside the app directory using the NotePad editor.
gem 'tzinfo-data', platforms: [:x64_mingw, :mingw, :mswin]
And, replaced it with the following line:
gem 'tzinfo-data', '~> 1.2021', '>= 1.2021.5'
Save and close the file then open the Ruby shell and change the directory to your app directory:
Next, update all gems using the following command:
Now, start the Rails application using the following command:
Once the application is started, you will get the following screen:

Access Rails Application
At this point, Rails is started and listens on port 3000 on localhost. Now, open your web browser and access your Rails application using the URL http://localhost:3000. You should see the Rails application page on the following screen:

Great job about learning how to Install Ruby on Rails Windows 10/11. Let’s summarize.
How to Install Ruby on Rails Windows 10/11 Conclusion
Ruby is a programming language and development environment for web applications, data analysis and general programming. Now your installation is ready and you will be able to create your rails apps and have fun! In this post, we have learned how to install Ruby on Rails on a Windows machine. We also learned how to create a simple Rails application. I hope you have now enough knowledge of Ruby on Rails installation. You can now start developing your own Rails application.
In this article, I will show everyone how to install and run on Windows without installing a virtual machine, Linux or on Ubuntu.
How to install Ruby on Rails Windows 10/11. With so many programming languages in our IT environment, Ruby is one of them. It is quite powerful and used for many dynamic tasks but mainly web application development. Also there are many famous software built in this language. Therefore, today we will learn how to install Ruby on Windows 11. In this article we will set up a Ruby on Rails development environment on Windows 10/11.
1. Install Git
Before you begin, you will need to install the Git software package on your system.
You can download it from the Git download page. https://git-scm.com/download/win
2. Install Ruby on Windows
First, go to the Ruby installer website and download the latest version of Ruby for your system. https://rubyinstaller.org/downloads/
After clicking Finish to install ruby, the window as shown below appears:
Press Enter to finish the installation.
3. Launch Ruby Shell
Open terminal : right click on home screen, press Terminal . Check the installed Ruby version with the command
It will appear as shown below:
Verify Gem installation and list all installed Gems, run the following command:
To update Gem, we use:
You will see the following page: 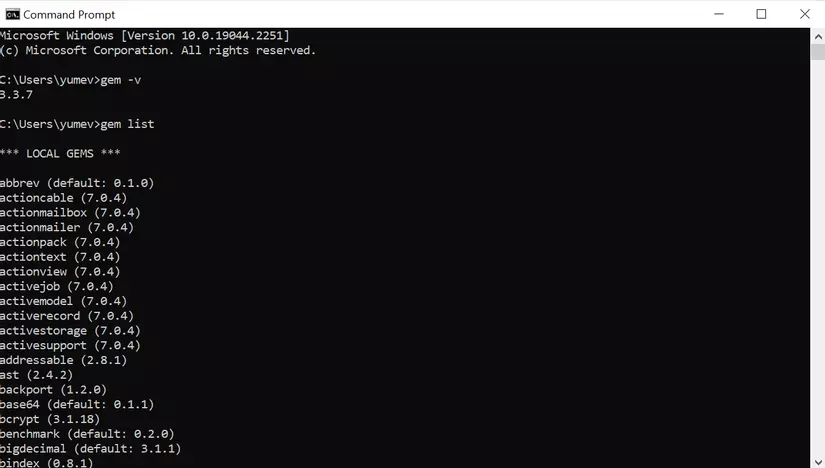
If you want to update Gem Ruby, run the following command:
4. Install Rails on Windows via Gem . command
Rails is one of the Ruby Gems and you can install it using the gem command as shown below:
After Rails is installed, you will see the following page: 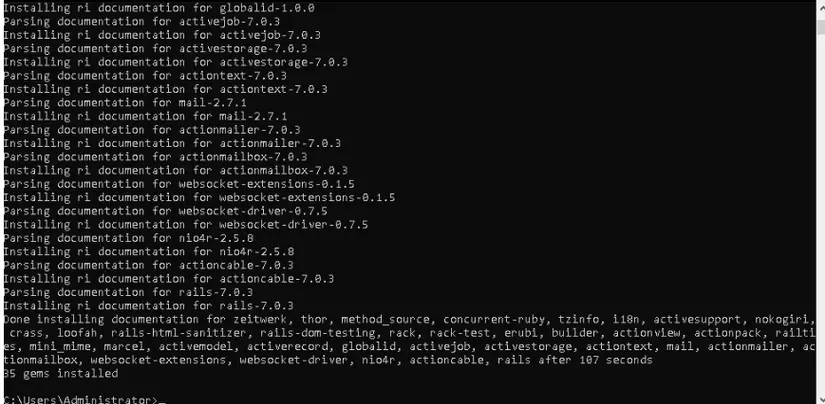
Rails applications cannot function without a database. Rails supports MySQL or SQLite databases. SQLite3 is the default Rails database and it can be installed with the following command:
5. Create a Rails App
After installing Ruby and Rails, we will create a simple Rails application to test the installation of Ruby on Rails. Let’s create a simple application named app with the following command:
You will get some error related to tzinfo data. To fix this error, open the Gemfile located inside the applications folder using the NotePad editor.
- Find the following line:
|
gem ‘tzinfo-data’, platforms: [:x64_mingw, :mingw, :mswin] |
- And, replace it with the following line:
|
gem ‘tzinfo-data’, ‘~> 1.2021’, ‘>= 1.2021.5’ |
- Save and close the file then open Ruby shell .
Change directory to your application directory:
Next, update all Gems with the following command:
Now, start the Rails application using the following command:
When the application is started, you will get the following screen: 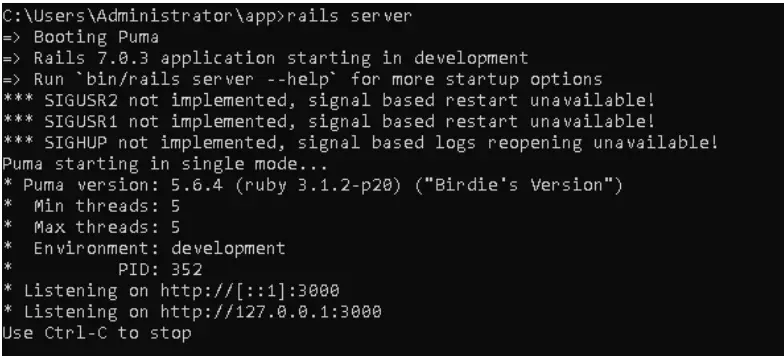
Press Ctrl+click on the address like the image above: http://127.0.0.1:3000 you will see the Rails application page on the following screen:
You can start developing your own Rails app now
~~ Conclusion: ~~
- Ruby is a programming language and development environment for Web applications, data analysis, and general programming. In this post, we learned how to install Ruby on Rails on a Windows machine and learned how to create one. Simple Rails application.
- After many days of programming on Windows, I recommend you to use it on Linux, Ubuntu and Mac CentOS. Why, because there are very few Rails learning materials on Windows, if there is an error, we have to learn for a long time to fix it, and the libraries on Win are not enough to fix the error.
Refer:
- how-to-install-ruby-on-rails-windows-10-11
With this blog, we will learn Installation of Ruby on Rails (Rails) on Windows 10 in detailed and an easy step-by-step process.
Pre-requisite:
- Ruby
- Ruby gems
- Git
- IDE (Notepad can also be used)
Let’s start with installation of Ruby.
Installation of Ruby on Windows
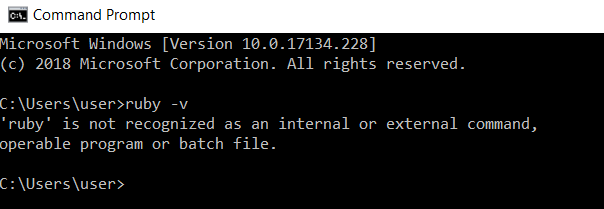
Step 1. Check whether ruby is installed or not.
C:\Users\user> ruby -v
Step 2. To install Ruby on Windows, go to this link https://rubyinstaller.org/
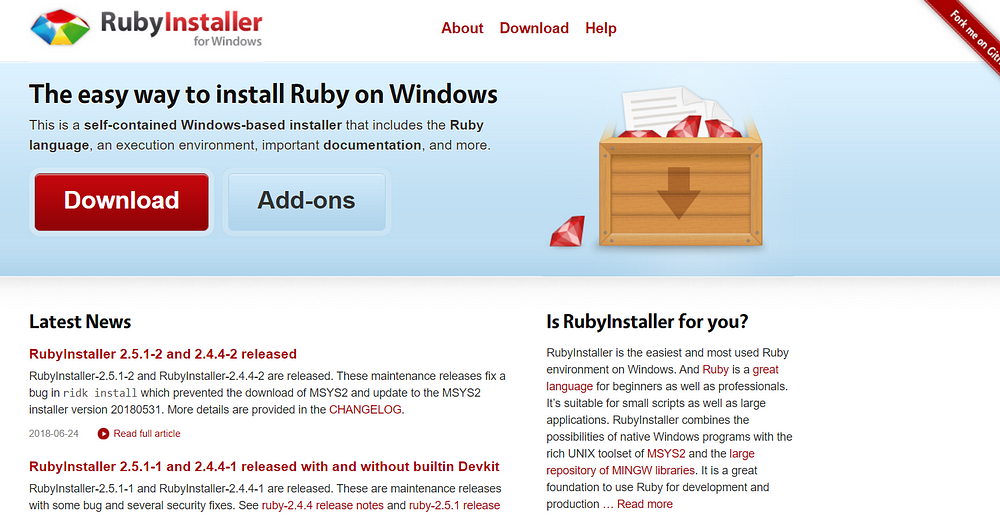
Step 3. Click on Download. It will navigate you to the download window.
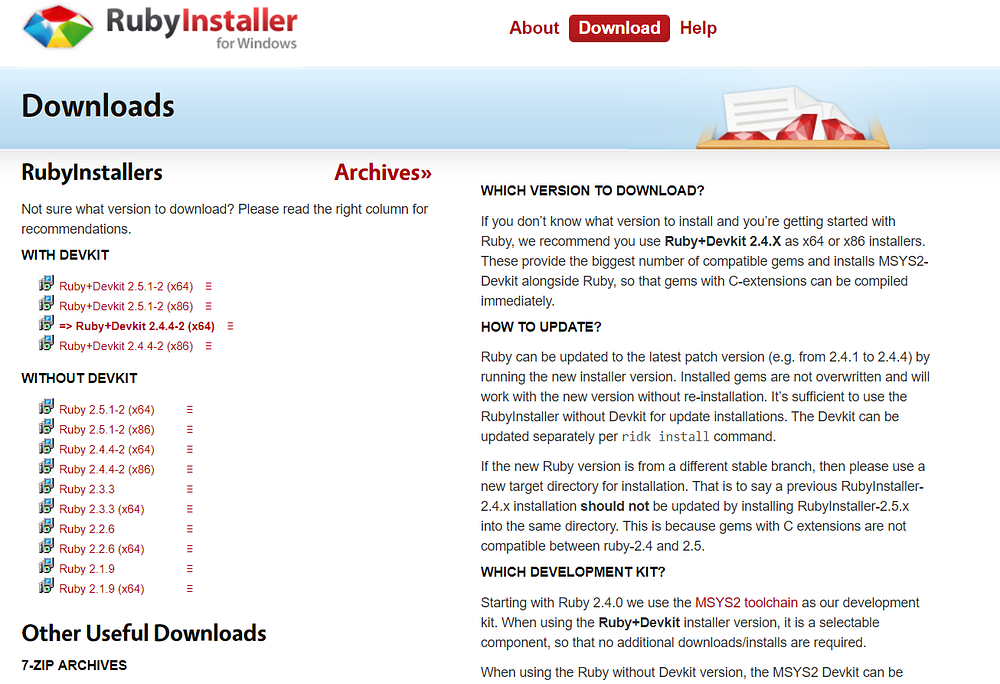
Download the 64-bit .exe file (if your system is 32-bit then download x86 version and if using older forms like Vista then it is recommended to download Ruby 2.19)
Step 4. Run the rubyinstaller.exe file
*Make sure all the three boxes are checked.
Once the package will install, the ruby gems will be installed along with it.
Ruby gems: It is a package manager for Ruby and provides a standard format to distribute Ruby programs and libraries.
Each gem has a name, version, and platform. For example, the rake gem has a 0.8.7 version. Rake’s platform is ruby, which means it works on any platform Ruby runs on.

Once you will click ‘Finish’, following command prompt will be displayed.
- Note: They are just command prompt alternatives. You can ignore them and close the window to continue using your command prompt.
Step 5. Go to Command prompt and check the ruby installation.
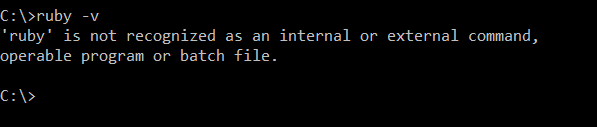
Oopss.. We are required to set the path of Ruby bin folder in our Windows environment variables.
Step 6. Set the PATH :
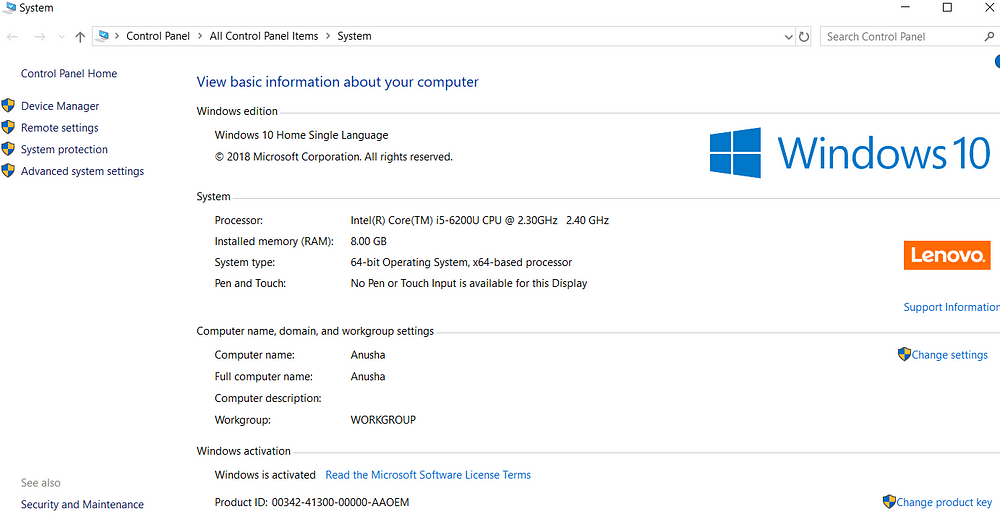
a). Go to Sart → Type System
b). Click ‘Advanced system settings’
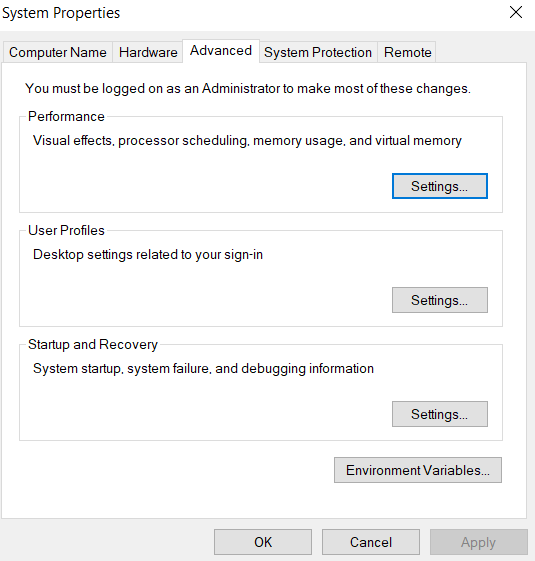
c). Click on ‘Environment Variables’
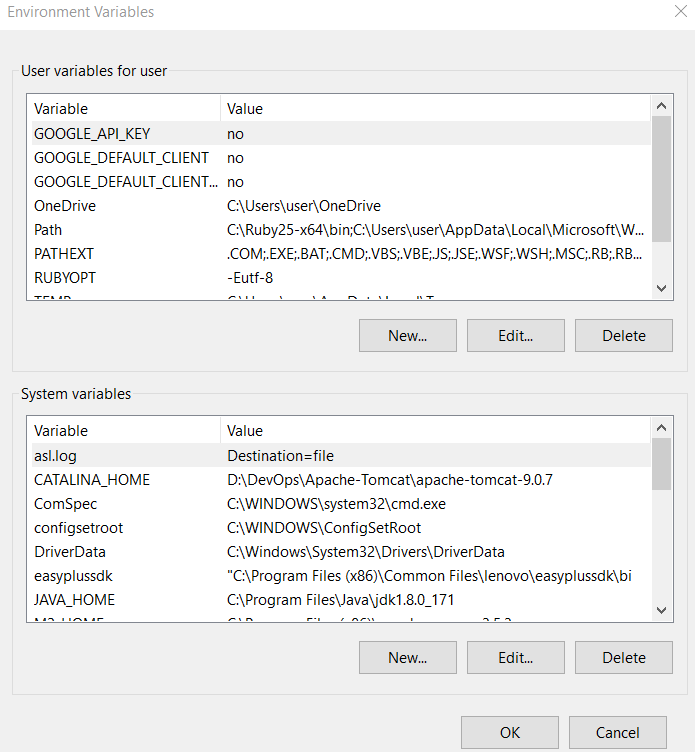
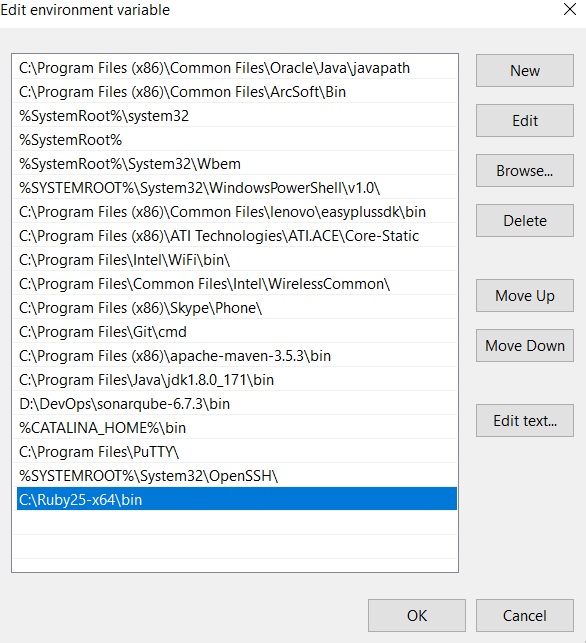
In ‘System variables’ section,scroll down and select ‘Path’ → Click ‘Edit’

d). Click on ‘New’, and provide the path to the bin folder of Ruby and click ‘OK’.
Step 7. Now check the Ruby version again from command prompt.
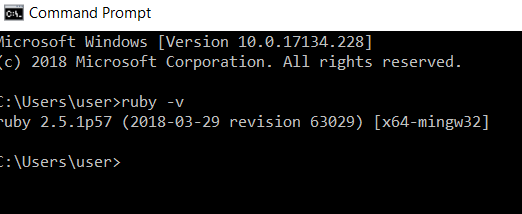
Voillaa!! We have installed Ruby successfully on Windows.
Installation of Ruby on Rails on Windows
Install Rails using Rubygems− With Rubygems loaded, you can install all of Rails and its dependencies using the following command through the command line −
C:\Users\user> gem install rails
You might get this security alert. Click on ‘Allow access’.

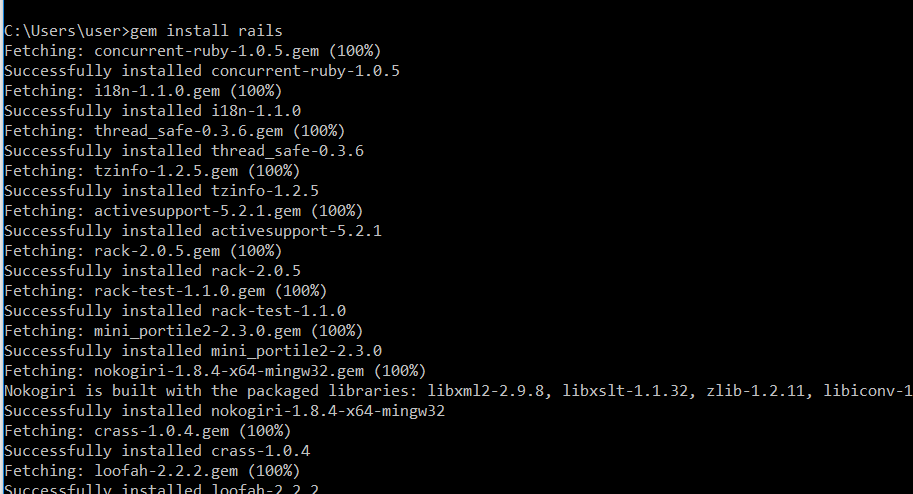
Note: It will take some time to install all dependencies. Therefore, while installing gem dependencies, a persistent internet connection is required.
Check Rails version:
C:\Users\user> rails -v
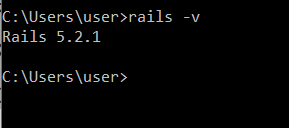
Congratulations!! We are now on RAILS 5.2.1 on Windows.
To keep rails updated:
C:\Users\user> gem update rails
Please follow and like us:
![]()
![]()
![]()
Installing Ruby on Rails on a Windows 10 system can seem like a challenging task, but following the right steps can make the process smoother. Firstly, you will need to install Ruby programming language by downloading the latest version from their official website and completing the installation process. Next, you’ll need to install the Node.js JavaScript runtime environment using the appropriate installer for your system. After installing Ruby and Node.js, you can move on to installing Rails. One way to do this is by running the command «gem install rails» in the command prompt. However, it’s important to note that you may encounter some errors or issues during the installation process, so it’s important to troubleshoot these problems to complete the installation successfully. In general, it’s recommended to follow a detailed guide or tutorial to ensure that you’re completing the installation process correctly.
Video Tutorial:Can I install Ruby on Rails on Windows 10?
To install Ruby on Windows 10, you can follow the below steps:
1. Download the latest version of Ruby from the official Ruby website.
2. Run the installer and select the components you want to install. Make sure to select the option to add Ruby to your PATH environment variable.
3. Click on the «Install» button to start the installation process.
4. Once the installation is complete, open the Command Prompt and type «ruby -v» to check if Ruby has been installed successfully.
5. You can also install the Ruby Development Kit (DevKit) for Windows, which includes necessary tools to install Ruby gems that require native C-language extensions.
Following these steps should allow you to successfully install Ruby on your Windows 10 computer.
Can I run Ruby on Rails on Windows?
Yes, you can run Ruby on Rails on Windows. However, it is generally easier to develop Ruby on Rails applications on a Unix-based operating system such as Linux or macOS. This is because many Ruby on Rails gems and tools are designed to work best in a Unix-based environment, and may require additional setup or configuration to work properly on Windows. That being said, there are tools and applications available that can help simplify the setup process for running Ruby on Rails on Windows, such as the RubyInstaller and the RailsInstaller. Additionally, using a virtual machine or containerization technology like Docker can also provide a more Unix-like environment on a Windows machine.
How to install Ruby on Rail?
Installing Ruby on Rails involves several steps, here are the broad steps:
Step 1: Install Ruby: Ruby is a prerequisite for installing Ruby on Rails. You can download the RubyInstaller from the Ruby website.
Step 2: Install Rails: Once you have Ruby up and running, you can install Rails by using the following command in the terminal or command prompt: gem install rails.
Step 3: Install Dependencies: Depending on your operating system, you may need to install some dependencies like OpenSSL for Rails to run successfully.
Step 4: Verify the Installation: After installation, verify that Rails is installed by running the command rails -v in the terminal or command prompt. It should display the version number of the Rails framework installed.
In summary, installing Ruby on Rails involves installing Ruby, installing Rails, installing dependencies, and verifying the installation. By following these steps, you should be able to install Ruby on Rails on your machine.
What is the best free Ruby on Rails IDE for Windows?
As a tech blogger, I would recommend using Visual Studio Code as the best free Ruby on Rails IDE for Windows. Visual Studio Code offers many useful features for Ruby on Rails development, such as syntax highlighting, code completion, debugging, and git integration. It also has a wide range of extensions that can enhance the coding experience, such as the Ruby, Ruby Solargraph, and Ruby language server extensions. Additionally, Visual Studio Code is lightweight and easy to use, making it an excellent choice for Ruby on Rails developers who are just starting.
Which operating system is best for Ruby on Rails?
Ruby on Rails can run on various operating systems such as Linux, macOS, and Windows. However, the general consensus among developers is that Ruby on Rails is better suited for Linux or macOS than Windows. Linux is considered the most popular choice for Rails development due to its stability, security, and open-source nature. Moreover, many developers prefer macOS due to its UNIX-like environment and ease of use. That being said, it ultimately depends on the individual’s comfort level and familiarity with the operating system. Regardless of the operating system, developers can use tools such as Ruby Version Manager and Bundler to manage dependencies and versions of Ruby and Rails.
How do I run a Ruby program on Windows?
To run a Ruby program on Windows, you’ll first need to download and install Ruby for Windows. Once you’ve installed Ruby, you can write your program in a text editor and save it with a .rb extension. Next, open up a command prompt and navigate to the directory where your Ruby file is saved using the ‘cd’ command. Finally, to run the program, type ‘ruby your_program_name.rb’ in the command prompt and hit enter. Your Ruby program should then run and output any results to the command prompt. It’s important to note that when running Ruby programs on Windows, you should use the Command Prompt or PowerShell rather than the Windows Terminal.