27.05.2019 — 13:22
обсудить
12170+
размер текста
Чтобы найти отчёт CHKDSK после перезагрузки Windows 10, придётся заглянуть в системный журнал событий. В ином случае, вы попросту останетесь в неведении о найденных ошибках или битых секторах на системном диске.
Утилита CHKDSK (с англ. checking disk – проверка диска) позволяет в автоматическом режиме протестировать HDD на наличие логических ошибок, а также по возможности исправить битые сектора (с англ. bad sectors) в файловой системе.
Пошаговая инструкция:
- Нажмите сочетание клавиш «Win + X”;
- Перейдите в «Просмотр событий» в меню;

- В списке слева перейдите к «Журналы Windows ? Приложения»;
- В панели справа щёлкните опцию «Найти»;
- Введите в поле «chkdsk» и нажмите «Найти далее»;
- В центральной области щёлкните строку — код события1001 (источник Wininit);
- Ниже можно ознакомиться с результатами проверки диска;
- В панели справа можно “Сохранить выбранное событие” в формате text.


Вместо послесловия
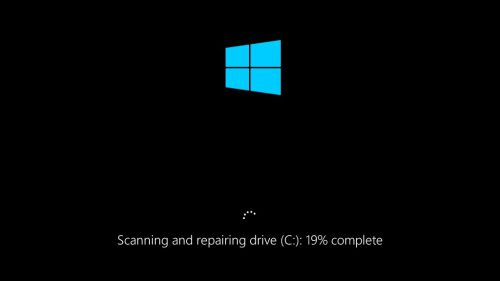
Из-за обновления до Windows 10 результаты проверки диска были скрыты от глаз обычных пользователей. Теперь проверка на этапе загрузки системы отражает только лишь общий прогресс в процентном соотношении.
CHKDSK.exe (check disk) — стандартная встроенная утилита Windows для проверки жестких дисков на наличие ошибок. Утилита chkdsk позволяет проверить носитель и файловую систему на физические и логические ошибки, найти поврежденные секторы (bad sectors) и исправить найденные проблемы. В этой статье мы рассмотрим особенности использования утилиты проверки диска chkdsk в Windows 10, а также возможность проверки диска из PowerShell с помощью командлета Repair-Volume.
Содержание:
- Проверка диска в Windows 10 с помощью утилиты chkdsk
- Проверка ошибок на жестком диске с помощью PowerShell
- Просмотр результата (лога) проверки диска Chkdsk в Windows 10
Утилита chkdsk в Windows 10 поддерживает проверку дисков с файловыми системами NTFS, FAT32. Для ReFS томов она не применима, т.к. там используются другие механизмы обеспечения целостности данных.
Проверка диска в Windows 10 с помощью утилиты chkdsk
Чтобы проверить жесткий диск на ошибки, запустите командную строку с правами администратора. Выполните команду:
chkdsk E: /F /R
Данная команда запустит проверку диска E:\, найденные ошибки будут исправлены автоматически (/F), при наличии поврежденных секторов будет выполняться попытка восстановления информации (/R). Полная проверка диска может занять длительное время в зависимости от емкости носителя и количества файлов.
Утилита chkdsk последовательно выполняет четыре прохода, на которых выполняется проверка метаданных тома:
- Этап 1. Проверка файлов
- Этап 2. Проверка индексов
- Этап 3. Проверка дескрипторов безопасности
- Этап 4. Проверка секторов
После окончания проверки диска вы увидите подробную статистику диска, информацию о поврежденных секторах и файлах, предпринятых действиях по восстановлению.
Если утилита chkdsk не обнаружила проблем, появится надпись:
Windows has scanned the file system and found no problems.
No further action is required.

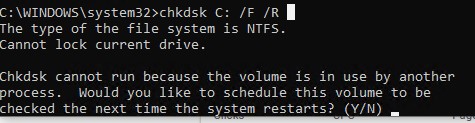
Вы не сможете выполнить онлайн сканирование и исправление ошибок на системном диске (C:\). При запуске команды
chkdsk C: /F /R
вы увидите, что диск заблокирован и его проверку можно выполнить только при следующей перезагрузке Windows:
Cannot lock current drive. Chkdsk cannot run because the volume is in use by another process. Would you like to schedule this volume to be checked the next time the system restarts? (Y/N).
Невозможно выполнить команду Chkdsk, так как указанный том используется другим процессом. Следует ли выполнить проверку этого тома при следующей перезагрузке системы?
Если вы хотите проверить диск при следующей загрузке компьютера, нажмите
Y
->
Enter
. Появится сообщение “
This volume will be checked the next time the system restarts
”.
Теперь, если вы перезагрузите Windows, запустится проверка диска. Нужно дождаться ее окончания.
Если вы хотите проверить на ошибки диск в офлайн режиме (пропустить онлайн проверку), используйте опцию offlinescanandfix:
chkdsk E: /f /offlinescanandfix
При использовании опции offlinescanandfix для системного диска будет предложено запланировать проверку при перезагрузке.
Скорость офлайн проверки диска в Windows 10 существенно увеличена по сравнению с предыдущими версиями ОС.
/X — еще один полезный атрибут chkdsk. Он позволяет отключить том перед проверкой, принудительно закрыв все открытые файловые дескрипторы.
Также нужно обратить внимание на новую опцию chkdsk —
/spotfix
. Данный параметр применяется только для томов NTFS. Параметр spotfix позволяет существенно сократить время офлайн проверки диска с нескольких часов до секунд. Вместо полной проверки всего диска выполняется только поиск и исправление ошибок, зафиксированных ранее (во время обычной проверки диска) в файле $corrupt. В этом случае chkdsk сразу исправляет ошибки, не тратя время на сканирование диска. Это особенно полезно при проверке больших томов.
Не рекомендуется прерывать выполнение команды chkdsk. Однако, если вы руками остановите/завершите процесс chkdsk.exe, вы не повредите этим том (он не повредится сильнее, чем он был поврежден изначально). В любом случае через какое-то время рекомендуется выполнить полную проверку диска.
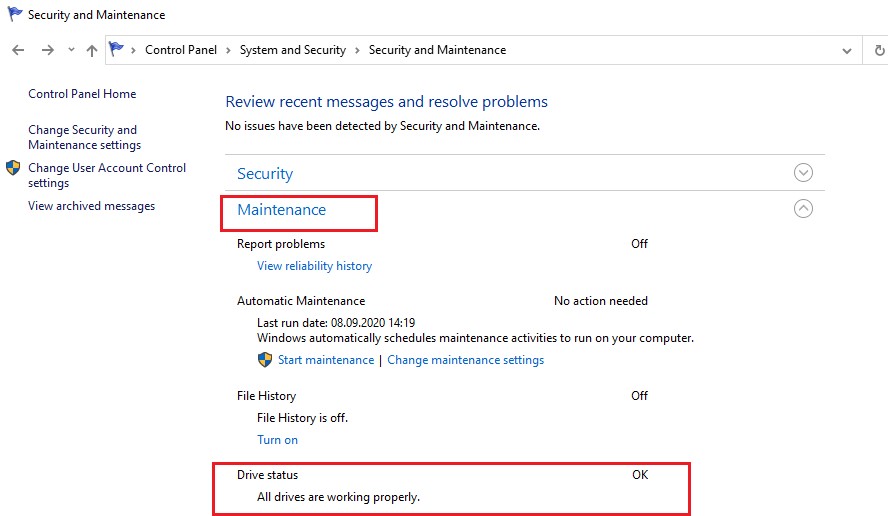
В Windows 10 обслуживание дисков (проверка и дефрагментация) выполняются автоматически по расписанию или во время бездействия компьютера. Информацию о статусе автоматической проверки дисков можно найти в меню Панель управления -> Центр безопасности и обслуживания -> Обслуживание -> Состояние диска (Control Panel -> System and Security -> Security and Maintenance -> Drive status). На скриншоте виден статус
All drives are working properly
.
Задание проверки диска, которое называется ProactiveScan, и запускается в рамках Windows 10 Automatic Maintance Task можно найти в Task Scheduler -> Microsoft -> Windows -> Chkdsk.
Также в современных билдах Windows 10 добавлена утилита диагностики хранилища
StorDiag.exe
(Storage Diagnostic Tool). Данная утилита выполняет сразу несколько операций проверки диска (
chkdsk
,
fsutil
и
fltmc
). Лог можно сохранить в виде ETW трейса. Например:
stordiag.exe -collectEtw -checkfsconsistency -out %userprofile%\desktop
Проверка ошибок на жестком диске с помощью PowerShell
В версии PowerShell 4.0 появился отдельный командлет для проверки диска Repair-Volume. Это командлет является PowerShell аналогом команды chkdsk.
Чтобы из PowerShell выполнить онлайн проверку жесткого диска на ошибки, выполните команду:
Repair-Volume –driveletter C –scan
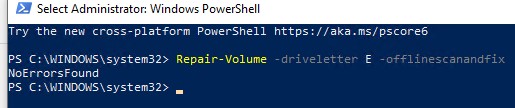
Если нужно выполнить офлайн проверку и автоматически исправить ошибки, используйте параметр offlinescanandfix:
Repair-Volume –driveletter E –offlinescanandfix
Если ошибок на диске не найдено, вы увидите сообщение NoErrorsFound.
Также поддерживается быстрое исправление ошибок с помощью параметра spotfix (исправляются только ошибки, найденные при онлайн сканировании):
Repair-volume –driveletter E –spotfix
Можно проверить сразу несколько локальных дисков:
Repair-Volume -DriveLetter EHI –SpotFix
Через CIM сессии проверить диски на удаленных компьютерах:
Repair-Volume –driverletter c -scan –cimsession fs01,fs02,dc01
Также вы можете проверить SMART состояние жестких дисков из PowerShell с помощью командлетов из модуля Storage:
Get-PhysicalDisk | Sort Size | FT FriendlyName, Size, MediaType,SpindleSpeed, HealthStatus, OperationalStatus -AutoSize

Просмотр результата (лога) проверки диска Chkdsk в Windows 10
При проверке диска в онлайн режиме, вы видите в консоли полную статистику. Однако, если вы запланировали проверку диска с помощью опции offlinescanandfix, вы не увидите на экране загрузки Windows итоговый отчет chkdk. В Windows 10 на экране загрузки отображается только общий процент выполнения проверки диска.
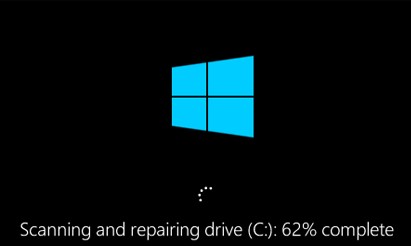
В Windows 7 и более ранних версиях Windows, подробная информация о действиях, выполняемых утилитой chkdsk, отображалась прямо на экране загрузки ОС.
В Windows 10 вы можете получить информацию о всех действиях, которые были выполнены процедурой проверки дисков только из журнала событий Windows (Event Viewer).
Откройте Windows Event Viewer (
Eventvwr.msc
).
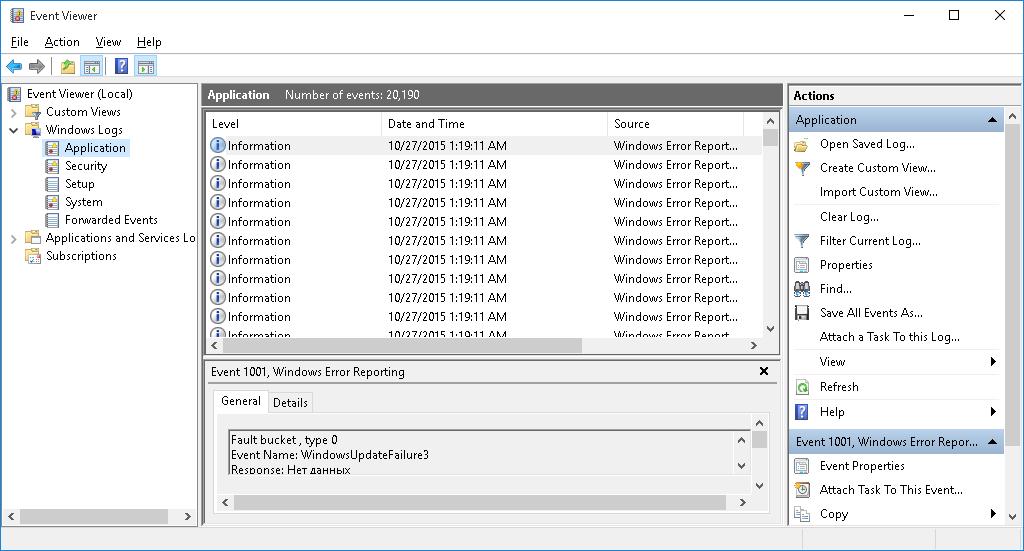
В открывшемся окне перейдите в раздел Windows Logs -> Application.
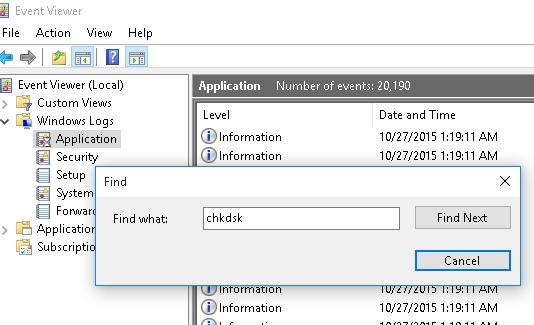
Щелкните ПКМ по разделу Application и выберите пункт меню Find. В строке поиска введите chkdsk и нажмите Find next.
Можно искать по источнику событий. Для поиска событий проверки диска при загрузке Windows нужно искать включить фильтр по событиям с источнико Wininit. Для событий проверки диска, инициированных пользователем смотрите источник Chkdsk.
Поиск должен перейти на последнее событие с Event ID 1001 и источником Wininit. На вкладке General будет содержаться подробный лог с данными последней проверки системного диска.
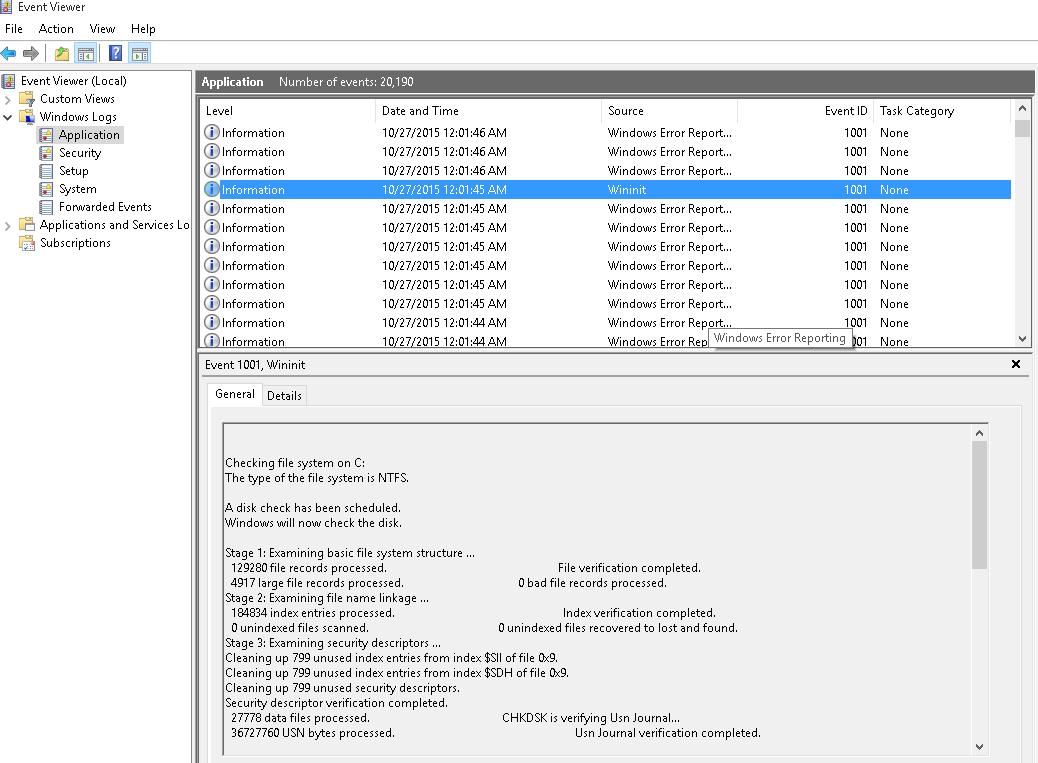
Checking file system on C:
The type of the file system is NTFS.
A disk check has been scheduled.
Windows will now check the disk.
Stage 1: Examining basic file system structure ...
129280 file records processed.                                                         File verification completed.
4917 large file records processed.                                     0 bad file records processed.
Stage 2: Examining file name linkage ...
184834 index entries processed.                                                       Index verification completed.
0 unindexed files scanned.                                           0 unindexed files recovered to lost and found.
Stage 3: Examining security descriptors ...
Cleaning up 799 unused index entries from index $SII of file 0x9.
Cleaning up 799 unused index entries from index $SDH of file 0x9.
Cleaning up 799 unused security descriptors.
Security descriptor verification completed.
27778 data files processed.                                           CHKDSK is verifying Usn Journal...
36727760 USN bytes processed.                                                          Usn Journal verification completed.
Stage 4: Looking for bad clusters in user file data ...
129264 files processed.                                                               File data verification completed.
Stage 5: Looking for bad, free clusters ...
6493921 free clusters processed.                                                       Free space verification is complete.
CHKDSK discovered free space marked as allocated in the volume bitmap.
Windows has made corrections to the file system.
No further action is required.
41428991 KB total disk space.
15154156 KB in 90362 files.
75308 KB in 27779 indexes.
0 KB in bad sectors.
223839 KB in use by the system.
55376 KB occupied by the log file.
25975688 KB available on disk.
4096 bytes in each allocation unit.
10357247 total allocation units on disk.
6493922 allocation units available on disk.
Internal Info:
00 f9 01 00 88 cd 01 00 a9 dd 03 00 00 00 00 00 ................
ad 00 00 00 66 00 00 00 00 00 00 00 00 00 00 00 ....f...........
Windows has finished checking your disk.
Please wait while your computer restarts.
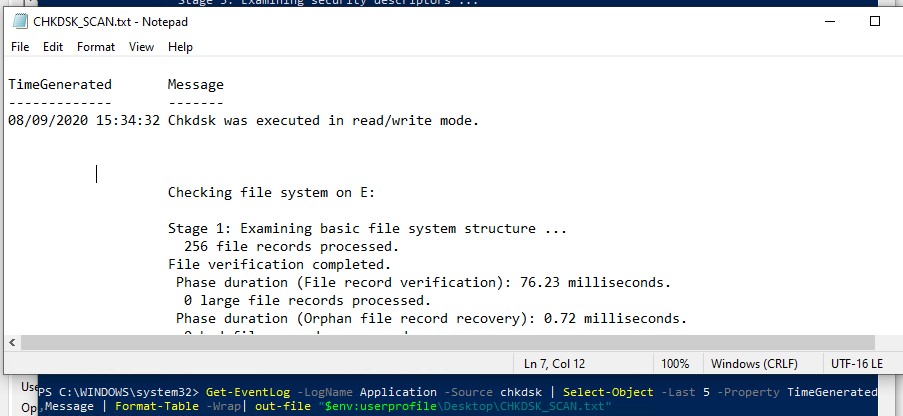
Вы можете получить информацию из событий проверки диска с помощью PowerShell. Следующая команда экспортирует 5 последних результатов проверки диска из журнала событий и сохранит их на рабочий стол в текстовый файл CHKDSK_SCAN.txt.
Get-EventLog -LogName Application -Source chkdsk | Select-Object -Last 5 -Property TimeGenerated,Message | Format-Table -Wrap| out-file "$env:userprofile\Desktop\CHKDSK_SCAN.txt"
Полученный файл можно открыть в любом текстовом редакторе.
Итак, мы получили журнал проверки дисков, выполненной при загрузке Windows 10. Если Windows запускает проверку при каждой загрузке ОС или проверка зависает, возможно стоит временно отключить автоматическую проверку дисков при загрузке Windows.
27.12.2015
Просмотров: 4918
В Windows 7 и более ранних версиях проверка диска chkdsk запускалась при включении ПК, как результат некорректного завершения работы. Однако её также можно было запустить самостоятельно через командную строку. По окончании сканирования пользователь мог увидеть результаты проверки и исправленные ошибки. В операционной системе Windows 10 этой возможности нет. На экране монитора отчёт сканирования chkdsk отображается в виде общего процента выполнения. Казалось бы, этого достаточно, но опытным пользователям может понадобиться информация об исправленных ошибках и внесённых изменениях в операционную систему. Как же посмотреть отчёт chkdsk в Windows 10?
Читайте также: Проверка накопителя с помощью CHKDSK.EXE
Для того, чтобы проверить жёсткий диск на наличие ошибок, стоит запустить команду chkdsk. Для этого жмём «Пуск», далее «Командная строка (администратор)». В открывшемся окне вводим «chkdsk D/ f/ r/ v».

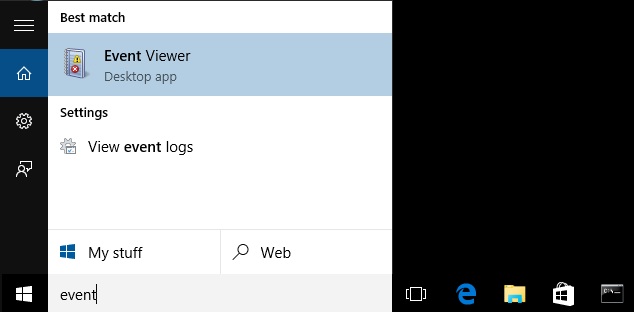
После сканирования закрываем командную строку и жмём «Пуск». В поисковой строке вводим «Event Viewer».

Откроется новое окно. В левом меню выбираем раздел «Windows Logs» и «Application».

Кликаем правой кнопкой мыши по «Application» и выбираем «Найти». Вводим chkdsk и кликаем «Enter».

Поиск выдаст первый лог с ID 1001. Внизу переходим ко вкладке «Основное» и смотрим результаты.

Также запустив командную строку с правами администратора и, ввёл запрос «get-winevent -FilterHashTable @{logname=»Application»; id=»1001″}| ?{$_.providername –match «wininit»} | fl timecreated, message | out-file c:\CHKDSK_REPORT.txt», можно получить отчёт о сканировании.

Открыть его можно в любом текстовом редакторе.
Find how to view chkdsk logs and where are they stored
by Matthew Adams
Matthew is a freelancer who has produced a variety of articles on various topics related to technology. His main focus is the Windows OS and all the things… read more
Updated on
- Check our guide to find where Chkdsk logs are stored on your Windows 10 PC.
- Event Viewer is the main application used to open and view Chkdsk log files, but you can also use PowerShell to export the log as a text file.
Chkdsk or Check Disk is a built-in utility for disk repairs in Windows and is often the first used by users. After each scan, it creates a log file detailing the collected information. This concerns users and they have been asking where are Chkdsk logs stored in Windows 10.
The log files are critical for various reasons, whether to identify or eliminate the problem. And that cannot be done until you can access the log file in a readable format. That’s what we will be helping you with today. So, let’s find out the Chkdsk log file location in Windows 7 and later iterations.
What is the location of chkdsk logs?
If you have been trying to figure out where the Chkdsk logs are stored in Windows 10, it’s the System Volume Information folder on the system drive, usually the C: drive. The folder also contains other critical information and is the Chkdsk log location in Windows 11 as well.
How we test, review and rate?
We have worked for the past 6 months on building a new review system on how we produce content. Using it, we have subsequently redone most of our articles to provide actual hands-on expertise on the guides we made.
For more details you can read how we test, review, and rate at WindowsReport.
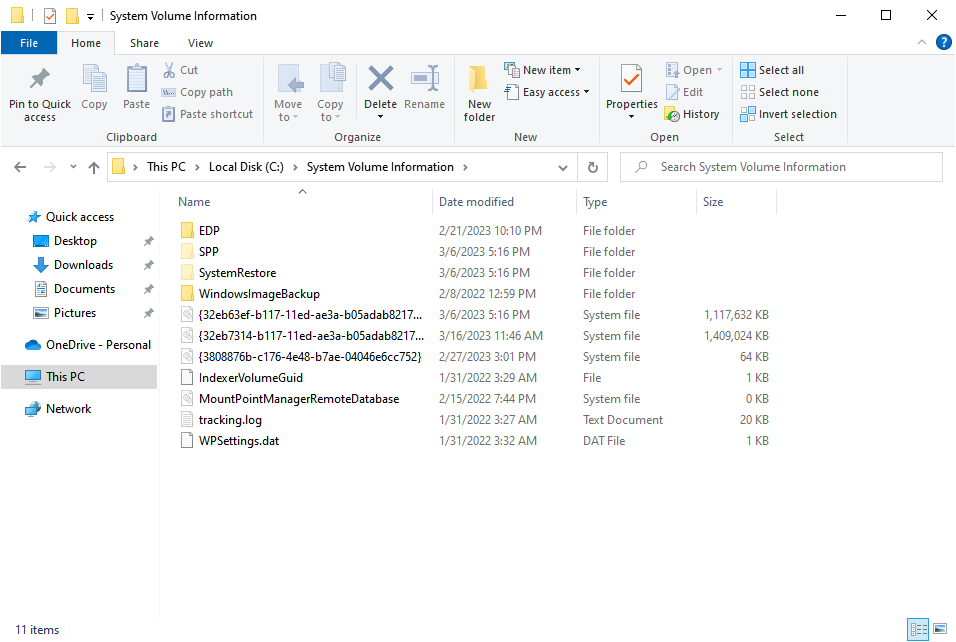
But you can’t access the Chkdsk logs in File Explorer since the files here are protected and not accessible under default settings. Also, we don’t recommend changing these since you can have Chkdsk output to file or view them in the Event Viewer. Let’s find out how.
How do I view Chkdsk logs in Windows 10?
- What is the location of chkdsk logs?
- How do I view Chkdsk logs in Windows 10?
- 1. With Event Viewer
- 2. Via PowerShell
1. With Event Viewer
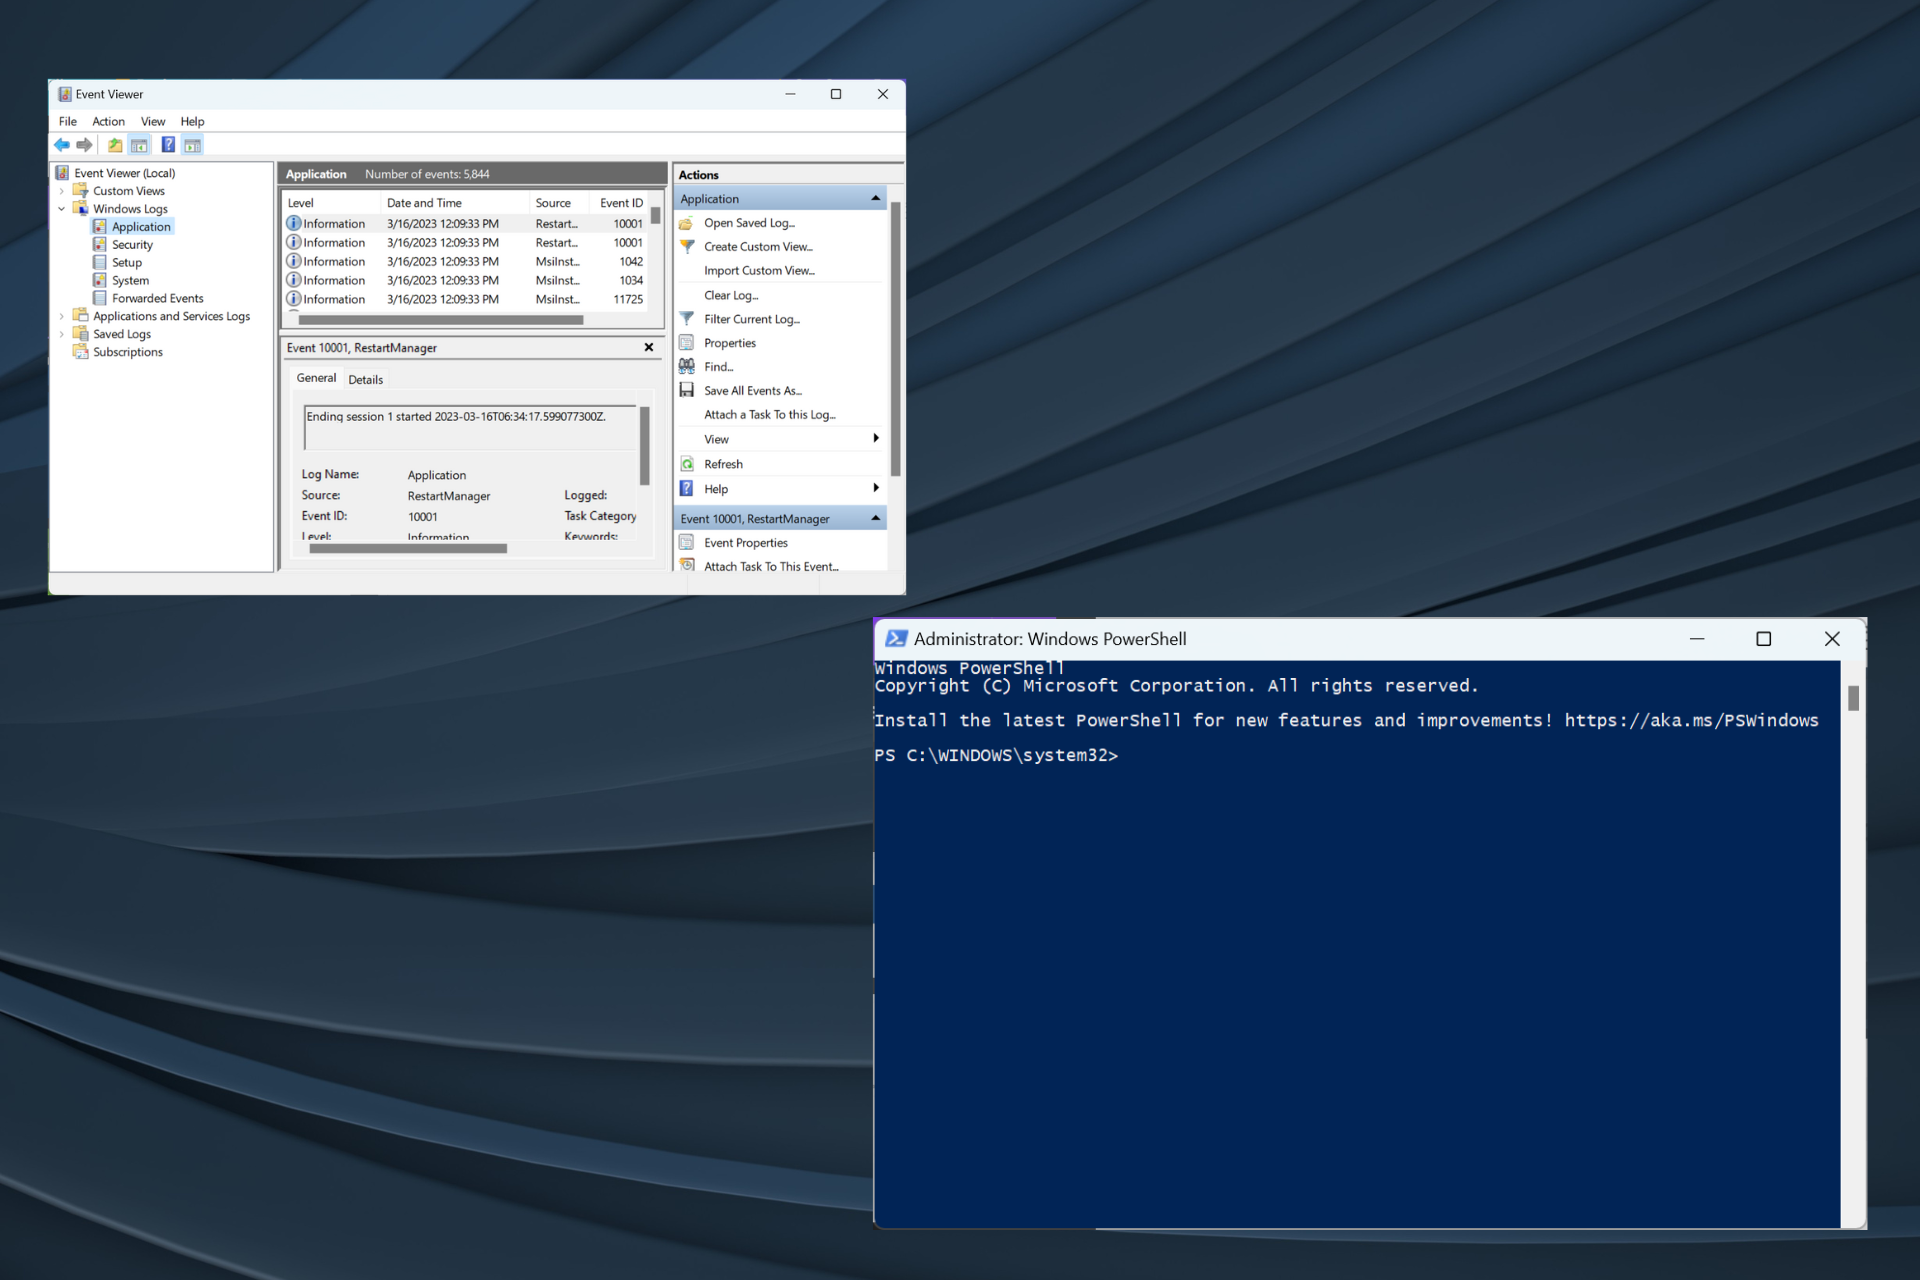
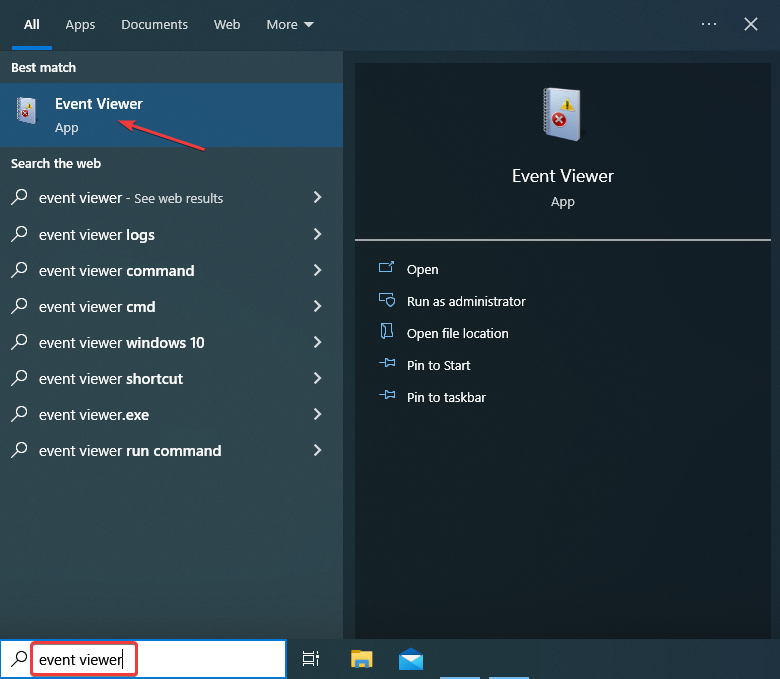
- Press Windows + S to open the Search menu, type Event Viewer in the text field, and click on the relevant result.

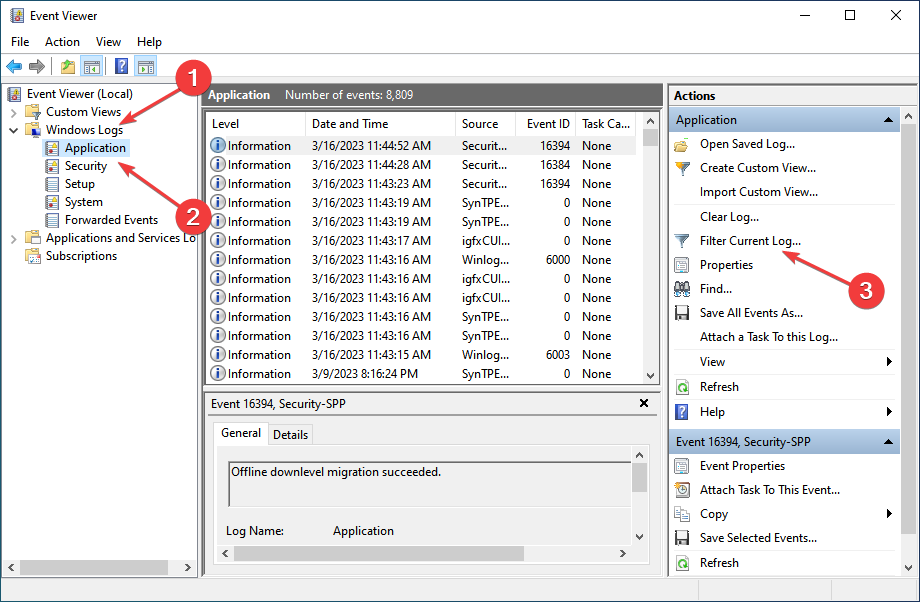
- Expand Windows Logs from the navigation pane, select Applications under it, and then click on Filter Current Log on the right.

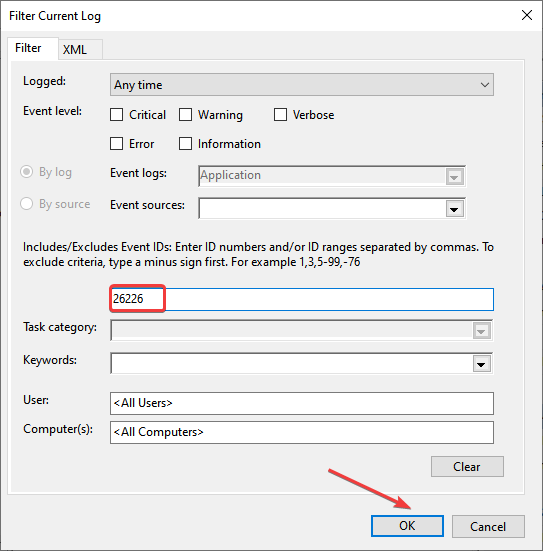
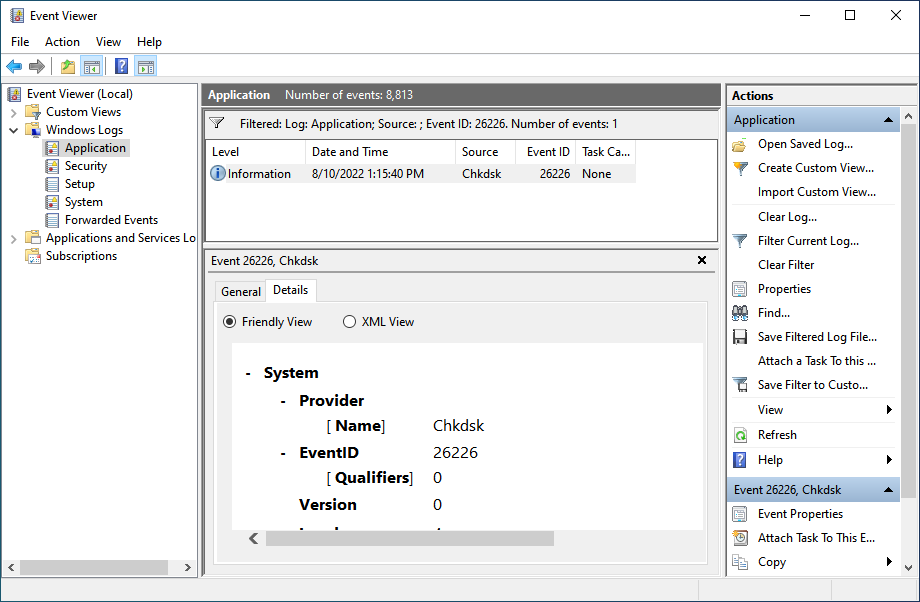
- Enter 26226, the event ID for Check Disk, in the All Event IDs text field, and click OK.

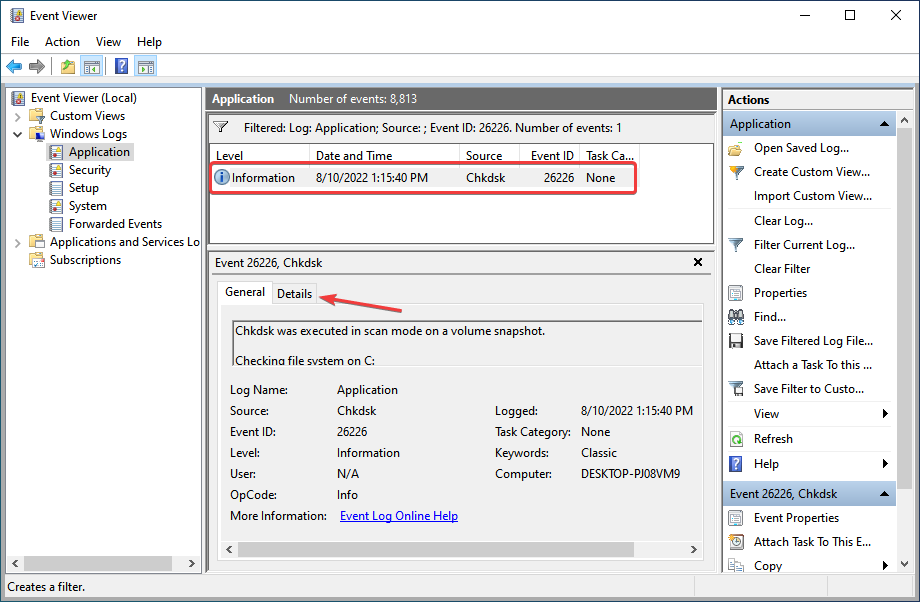
- All the Chkdsk logs will now be listed. You can click on one to see a brief overview in the General tab or head to the Details tab for a comprehensive result.
- You can now view the Chkdsk log in Friendly View and XML View.
Using the Event Viewer to view Chkdsk logs is probably the simplest way. But if you find that Chkdsk log is not in Event Viewer, there’s another method to export the file.
2. Via PowerShell
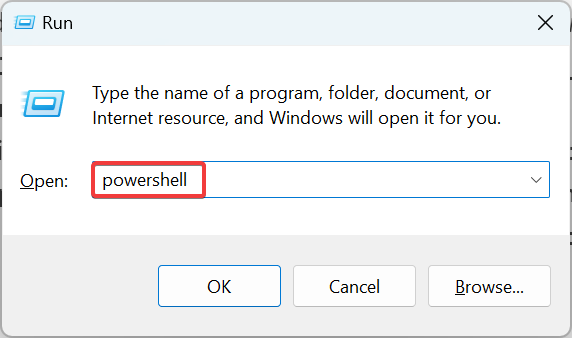
- Press Windows + R to open Run, type powershell in the text field, and then hit Enter.

- Click Yes in the UAC prompt.
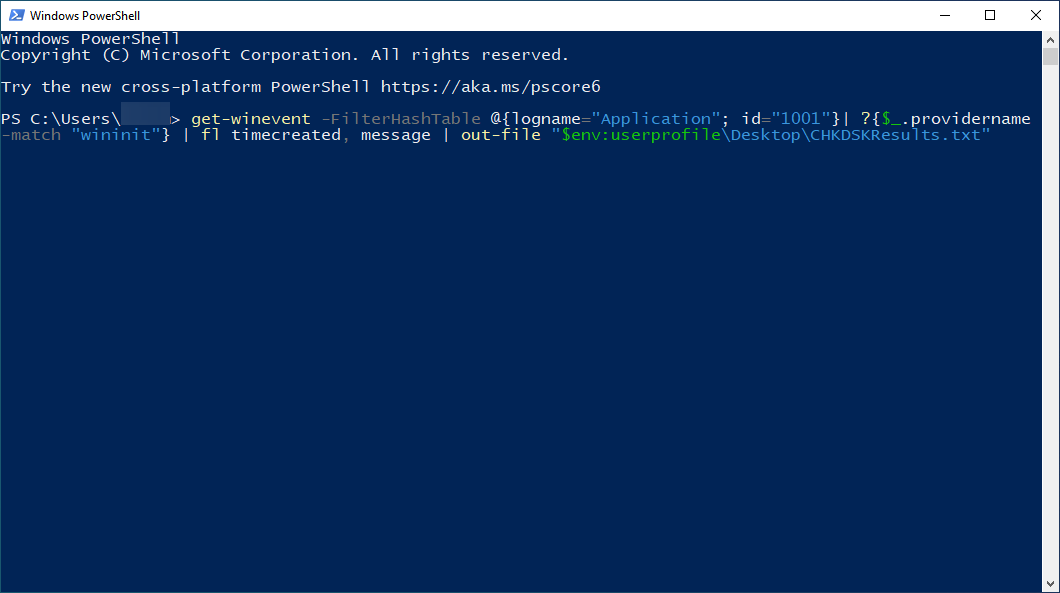
- To export the Chkdsk log as a text file to the desktop, execute this command:
get-winevent -FilterHashTable @{logname="Application"; id="1001"}| ?{$_.providername -match "wininit"} | fl timecreated, message | out-file "$env:userprofile\Desktop\CHKDSKResults.txt"
- Go to the desktop, and open the CHKDSKResults.txt file to view the logs.


That’s it! You now know where are Chkdsk logs stored in Windows 10, how to access them, and view the detailed results. Also, the same information applies to the Chkdsk log file location on Windows Server 2012; you can access these from the Event Viewer.
And while you are here, do not forget to check some quick tips to improve your PC’s performance.
For any other questions and suggestions, don’t hesitate to reach for the comments section below.
![]()
Chkdsk (short for Check Disk) is a built-in Windows utility used to scan and fix errors on a hard drive or other storage device. Chkdsk automatically creates a log file during the scan process, which contains detailed information about the scan and any errors or issues found.
In Windows 10, the Chkdsk log file is typically located in the Event Viewer. To access the Chkdsk log file:
1. Press the Windows key + R to open the Run command box.
2. Type «eventvwr.msc» (without quotes) and press Enter.
3. In the Event Viewer window, expand the «Windows Logs» section in the left-hand pane.
4. Click on «Application» to see all application-related events.
5. Look for «Wininit» under the «Source» column on the right-hand side and click on it.
6. Look for the most recent «Checking file system» entry and double-click on it to open the log.
Alternatively, you can also find the Chkdsk log file by navigating to the following file path: %windir%System32winevtLogsApplication.evtx
From there, locate the most recent «Wininit» entry and click on it to see the Chkdsk log.
Video Tutorial:How do I find my chkdsk log?
How do I fix chkdsk errors in Windows 10?
When Windows 10 encounters problems with its file system or hard drive, it may perform a chkdsk (check disk) scan during boot-up to identify and fix errors. If chkdsk is unable to repair the errors, it’s necessary to perform additional troubleshooting.
Here are some steps you can take to fix chkdsk errors in Windows 10:
1. Open the Command Prompt with administrative privileges by pressing the Windows key + X and selecting «Command Prompt (Admin)«.
2. Type «chkdsk C: /f /r /x» into the Command Prompt and press Enter. This command will scan your C: drive for errors, attempt to repair them, and force a dismount of the drive if necessary.
3. If prompted, enter «Y» to schedule a chkdsk scan during the next boot-up.
4. Restart your computer to initiate the chkdsk scan.
5. Wait for the scan to complete. This can take several hours depending on the size and health of your hard drive.
6. If chkdsk is still unable to fix the errors, you may need to perform additional troubleshooting steps, such as using a disk repair tool or reinstalling Windows 10.
It’s important to regularly perform routine maintenance, such as disk cleanup and defragmentation, to prevent file and drive errors from occurring in the first place.
How do I find chkdsk results in Windows 11?
To find chkdsk results in Windows 11, you need to open the Event Viewer tool by searching for it in the Start menu or by using the Run dialog box (pressing Windows key + R). Once the tool is opened, navigate to the «Windows Logs» section and select «Application.» You should be able to see an event labeled «Wininit» – this event holds information about the chkdsk scan. Double-click on the event to open its details, and scroll down to view the results of the chkdsk scan and any errors or issues that were found. If you’re having trouble finding the chkdsk results, you can also use the command line interface by typing «eventvwr» into the Run dialog box to open the Event Viewer tool, or by using the «chkdsk» command with the «/v» parameter to display the results directly in the command prompt.
How do I run chkdsk in recovery mode?
To run chkdsk in Recovery Mode, follow the below steps:
1. Shut down your computer if it’s not already turned off.
2. Turn on your computer and immediately press the F11 key repeatedly until the «Advanced Startup Options» screen appears.
3. Select «Troubleshoot» from the options and then click on «Advanced Options«.
4. Click on «Command Prompt«.
5. When the Command Prompt opens, type «chkdsk /r» (without quotes) and then press Enter.
6. Chkdsk will scan your drive and attempt to repair any errors it finds.
It’s important to note that running chkdsk can take some time depending on the size of your drive, so be patient and let it complete the process.
Where are the old chkdsk files stored?
CHKDSK or Check Disk is a utility tool used by Windows operating system to scan and repair disk errors. When you run CHKDSK on a drive, it creates a log file for every scan it performs. These log files store information about the errors found on the disk, the status of the repair process, and other useful details.
The location of the CHKDSK log files depends on the version of Windows you are using. In Windows 10 and 8, the log files are stored in the «C:WindowsLogsWindows» directory. In Windows 7 and earlier versions, the log files can be found in the «C:WindowsChkdsk.log» or «C:WindowsChkdsk.txt» directory.
Keep in mind that CHKDSK log files tend to become very large, so it’s a good idea to save them to an external hard drive or cloud storage if you don’t need them for immediate troubleshooting purposes.
Is disk error checking the same as chkdsk?
Disk error checking and chkdsk are similar concepts, but they are different in some ways. Disk error checking is a feature in the Windows operating system that scans the hard drive for errors and corrects them automatically. Chkdsk, on the other hand, is a specific utility program within the Windows operating system which can be used to perform more advanced disk error checking and repair tasks.
Chkdsk can be run on any mounted volume within the operating system, and it can perform checks for various errors like bad sectors, cross-linked files, and lost clusters. Additionally, chkdsk can fix these errors, and it can also recover data from corrupted or unreadable files.
So while disk error checking is a more basic feature of the operating system, chkdsk is a more advanced tool that can be used to perform more specialized tasks when diagnosing and repairing hard drive issues.
{«@context«:»https://schema.org”,»@type»:»FAQPage»,»mainEntity»:[{«@type«:»Question»,»name»:»How do I fix chkdsk errors in Windows 10?»,»acceptedAnswer»:{«@type«:»Answer»,»text»:»When Windows 10 encounters problems with its file system or hard drive, it may perform a chkdsk (check disk) scan during boot-up to identify and fix errors. If chkdsk is unable to repair the errors, it’s necessary to perform additional troubleshooting. nnHere are some steps you can take to fix chkdsk errors in Windows 10: nn1. Open the Command Prompt with administrative privileges by pressing the Windows key + X and selecting «Command Prompt (Admin)«. nn2. Type «chkdsk C: /f /r /x» into the Command Prompt and press Enter. This command will scan your C: drive for errors, attempt to repair them, and force a dismount of the drive if necessary. nn3. If prompted, enter «Y» to schedule a chkdsk scan during the next boot-up. nn4. Restart your computer to initiate the chkdsk scan. nn5. Wait for the scan to complete. This can take several hours depending on the size and health of your hard drive. nn6. If chkdsk is still unable to fix the errors, you may need to perform additional troubleshooting steps, such as using a disk repair tool or reinstalling Windows 10. nnIt’s important to regularly perform routine maintenance, such as disk cleanup and defragmentation, to prevent file and drive errors from occurring in the first place.»}},{«@type«:»Question»,»name»:»How do I find chkdsk results in Windows 11?»,»acceptedAnswer»:{«@type«:»Answer»,»text»:»To find chkdsk results in Windows 11, you need to open the Event Viewer tool by searching for it in the Start menu or by using the Run dialog box (pressing Windows key + R). Once the tool is opened, navigate to the «Windows Logs» section and select «Application.» You should be able to see an event labeled «Wininit» – this event holds information about the chkdsk scan. Double-click on the event to open its details, and scroll down to view the results of the chkdsk scan and any errors or issues that were found. If you’re having trouble finding the chkdsk results, you can also use the command line interface by typing «eventvwr» into the Run dialog box to open the Event Viewer tool, or by using the «chkdsk» command with the «/v» parameter to display the results directly in the command prompt.»}},{«@type«:»Question»,»name»:»How do I run chkdsk in recovery mode?»,»acceptedAnswer»:{«@type«:»Answer»,»text»:»To run chkdsk in Recovery Mode, follow the below steps:nn1. Shut down your computer if it’s not already turned off.n2. Turn on your computer and immediately press the F11 key repeatedly until the «Advanced Startup Options» screen appears.n3. Select «Troubleshoot» from the options and then click on «Advanced Options«.n4. Click on «Command Prompt«.n5. When the Command Prompt opens, type «chkdsk /r» (without quotes) and then press Enter.n6. Chkdsk will scan your drive and attempt to repair any errors it finds.nnIt’s important to note that running chkdsk can take some time depending on the size of your drive, so be patient and let it complete the process.»}},{«@type«:»Question»,»name»:»Where are the old chkdsk files stored?»,»acceptedAnswer»:{«@type«:»Answer»,»text»:»CHKDSK or Check Disk is a utility tool used by Windows operating system to scan and repair disk errors. When you run CHKDSK on a drive, it creates a log file for every scan it performs. These log files store information about the errors found on the disk, the status of the repair process, and other useful details.nnThe location of the CHKDSK log files depends on the version of Windows you are using. In Windows 10 and 8, the log files are stored in the «C:\Windows\Logs\Windows» directory. In Windows 7 and earlier versions, the log files can be found in the «C:\Windows\Chkdsk.log» or «C:\Windows\Chkdsk.txt» directory.nnKeep in mind that CHKDSK log files tend to become very large, so it’s a good idea to save them to an external hard drive or cloud storage if you don’t need them for immediate troubleshooting purposes.»}},{«@type«:»Question»,»name»:»Is disk error checking the same as chkdsk?»,»acceptedAnswer»:{«@type«:»Answer»,»text»:»Disk error checking and chkdsk are similar concepts, but they are different in some ways. Disk error checking is a feature in the Windows operating system that scans the hard drive for errors and corrects them automatically. Chkdsk, on the other hand, is a specific utility program within the Windows operating system which can be used to perform more advanced disk error checking and repair tasks. nnChkdsk can be run on any mounted volume within the operating system, and it can perform checks for various errors like bad sectors, cross-linked files, and lost clusters. Additionally, chkdsk can fix these errors, and it can also recover data from corrupted or unreadable files.nnSo while disk error checking is a more basic feature of the operating system, chkdsk is a more advanced tool that can be used to perform more specialized tasks when diagnosing and repairing hard drive issues.»}}]}