Время на прочтение
2 мин
Количество просмотров 29K
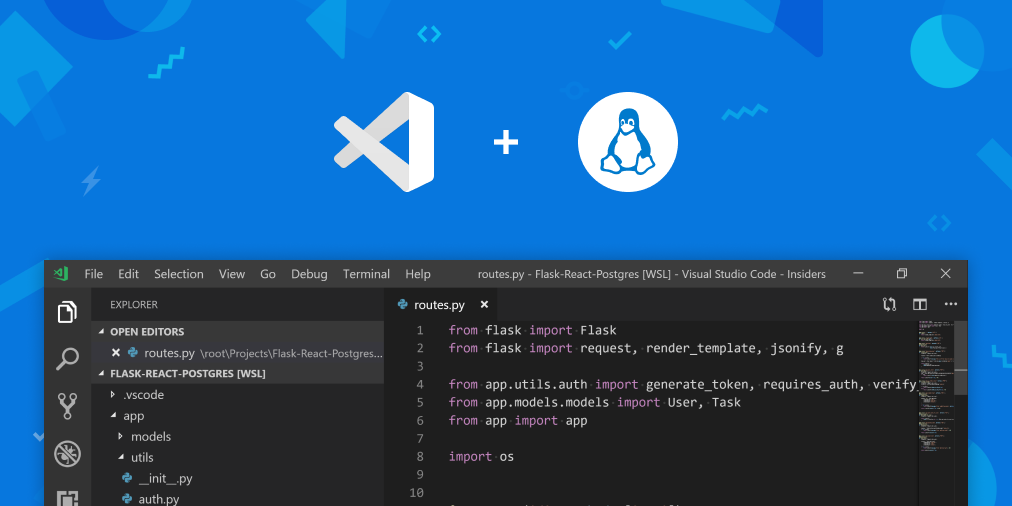
Работа с VS Code Remote и Windows Subsystem for Linux (WSL) дает возможность использовать полнофункциональную среду разработки Linux на ноутбуке или десктопе с предустановленной Windows. В этом материале рассмотрим то, как использовать эти инструменты для разработки приложений на Python в Linux.
Первым делом: установка необходимых компонентов
Чтобы выполнить все действия описанные в данной статье, вам понадобятся WSL и VS Code с установленным расширением VS Code Remote — WSL. Давайте быстро рассмотрим, что это такое и как это установить.
Windows Subsystem for Linux
Инструмент Windows Subsystem for Linux, сокращённо WSL, позволяет запускать неизмененные двоичные файлы Linux непосредственно в Windows. Это означает, что вы можете использовать ваши любимые инструменты Linux, приложения командной строки и рабочие процессы на вашем компьютере с Windows, без необходимости использовать сложные настройки, такие как Dual Boot. А лучше всего то, что WSL является тесно интегрированным решением между Windows и Linux. Иначе говоря, если вы любите Linux, то вы можете получить доступ ко всем файлам и исполняемым файлам Windows прямо из оболочки bash, а если вы любите Windows, то вы можете легко получить доступ к двоичным файлам и файлам Linux из PowerShell или CMD.
Если вы новичок в WSL и хотите узнать больше, то можете пройти наш полный курс: Начало работы с подсистемой Windows для Linux, либо ознакомиться только с инструкцией по установке в документации WSL.
Visual Studio Code
Visual Studio Code является легким, но мощным редактором кода, который работает на десктопе и доступен на Windows, macOS и Linux. Он поставляется со встроенной поддержкой JavaScript, TypeScript и Node.js, а также имеет богатую экосистему расширений для других языков (таких как C++, C#, Java, Python, PHP, Go) и сред выполнения (таких как .NET и Unity). Загрузите и начните свое путешествие с VS Code.
Вам также потребуется расширение VS Code Remote — WSL, которое позволяет использовать контейнер, удаленный компьютер или Windows Subsystem for Linux (WSL) в качестве полнофункциональной среды разработки. Чтобы узнать больше и начать работу, посетите страницу с документацией по VS Code Remote.
На старт, внимание, Linux!
Вместо написания длинного раздела по началу работы с VS Code Remote в WSL, мы решили снять это небольшое видео, демонстрирующее ведение разработки на Python в WSL, с использованием VS Code Remote.
Это не просто изолированный Python, вы можете использовать VSCode Remote и WSL в любом Linux-проекте
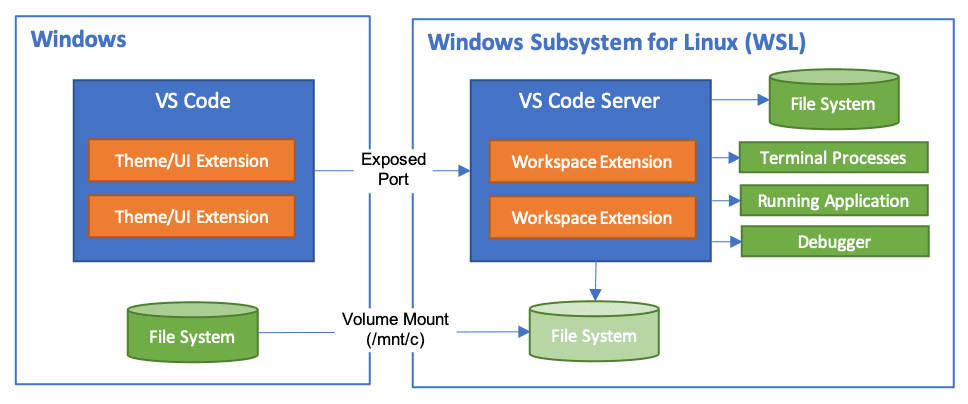
При использовании VS Code Remote в WSL команды и расширения запускаются непосредственно в дистрибутиве Linux, поэтому вам не нужно беспокоиться о проблемах двоичной совместимости или других проблемах, связанных с кросс-ОС. Вы можете использовать VS Code в WSL так же, как и в Windows.
VS Code Remote и WSL меняют правила игры, когда дело доходит до разработки под Linux на Windows. Эти инструменты позволяют разрабатывать, запускать и отлаживать тонны приложений Linux непосредственно на вашем компьютере с Windows, предоставляя вам лучшее из среды Windows и Linux.
Если вы желаете узнать больше о Windows Subsystem for Linux и все о командной строке Windows, то следите за обновлениями в этом блоге! А если вам интересно узнать больше о VS Code Remote, вы можете прочитать статью в блоге здесь и обширную документацию, охватывающую архитектуру, здесь.
Мы рады представить вам мощную комбинацию из VS Code Remote и WSL!
Удачного кодинга!
The Visual Studio Code WSL extension lets you use the Windows Subsystem for Linux (WSL) as your full-time development environment right from VS Code. You can develop in a Linux-based environment, use Linux-specific toolchains and utilities, and run and debug your Linux-based applications all from the comfort of Windows.
The extension runs commands and other extensions directly in WSL so you can edit files located in WSL or the mounted Windows filesystem (for example /mnt/c) without worrying about pathing issues, binary compatibility, or other cross-OS challenges.
This lets VS Code provide a local-quality development experience — including full IntelliSense (completions), code navigation, and debugging — regardless of where your code is hosted.
Getting started
Note: After reviewing this topic, you can get started with the introductory WSL tutorial.
Installation
To get started, you need to:
-
Install the Windows Subsystem for Linux along with your preferred Linux distribution.
Note: WSL 1 does have some known limitations for certain types of development. Also, extensions installed in Alpine Linux may not work due to
glibcdependencies in native source code inside the extension. See the Remote Development and Linux article for details. -
Install Visual Studio Code on the Windows side (not in WSL).
Note: When prompted to Select Additional Tasks during installation, be sure to check the Add to PATH option so you can easily open a folder in WSL using the
codecommand. -
Install the WSL extension. If you plan to work with other remote extensions in VS Code, you may choose to install the Remote Development extension pack.
Open a remote folder or workspace
From the WSL terminal
Opening a folder inside the Windows Subsystem for Linux in VS Code is very similar to opening up a Windows folder from the command prompt or PowerShell.
-
Open a WSL terminal window (using the start menu item or by typing
wslfrom a command prompt / PowerShell). -
Navigate to a folder you’d like to open in VS Code (including, but not limited to, Windows filesystem mounts like
/mnt/c) -
Type
code .in the terminal. When doing this for the first time, you should see VS Code fetching components needed to run in WSL. This should only take a short while, and is only needed once.Note: If this command does not work, you may need to restart your terminal or you may not have added VS Code to your path when it was installed.
-
After a moment, a new VS Code window will appear, and you’ll see a notification that VS Code is opening the folder in WSL.

VS Code will now continue to configure itself in WSL and keep you up to date as it makes progress.
-
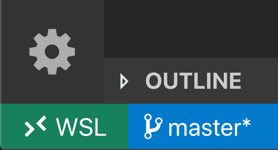
Once finished, you now see a WSL indicator in the bottom left corner, and you’ll be able to use VS Code as you would normally!

That’s it! Any VS Code operations you perform in this window will be executed in the WSL environment, everything from editing and file operations, to debugging, using terminals, and more.
From VS Code
Alternatively, you can open a WSL window directly from VS Code:
- Start VS Code.
- Press F1, select WSL: Connect to WSL for the default distro or WSL: Connect to WSL using Distro for a specific distro.
- Use the File menu to open your folder.
If you already have a folder open, you can also use the WSL: Reopen Folder in WSL command. You will be prompted which distro to use.
If you are in a WSL window and want to open the current input in a local window, use WSL: Reopen in Windows.
From the Windows command prompt
To open a WSL window directly from a Windows prompt use the --remote command line parameter:
code --remote wsl+<distro name> <path in WSL>
for example: code --remote wsl+Ubuntu /home/jim/projects/c
We need to do some guessing on whether the input path is a file or a folder. If it has a file extension, it is considered a file.
To force that a folder is opened, add slash to the path or use:
code --folder-uri vscode-remote://wsl+Ubuntu/home/ubuntu/folder.with.dot
To force that a file is opened add --goto or use:
code --file-uri vscode-remote://wsl+Ubuntu/home/ubuntu/fileWithoutExtension
Working with Git
If you are working with the same repository in WSL and Windows, be sure to set up consistent line endings. See tips and tricks for details.
You can also avoid passwords by configuring WSL to use the Windows Git credential manager. See tips and tricks for details.
Managing extensions
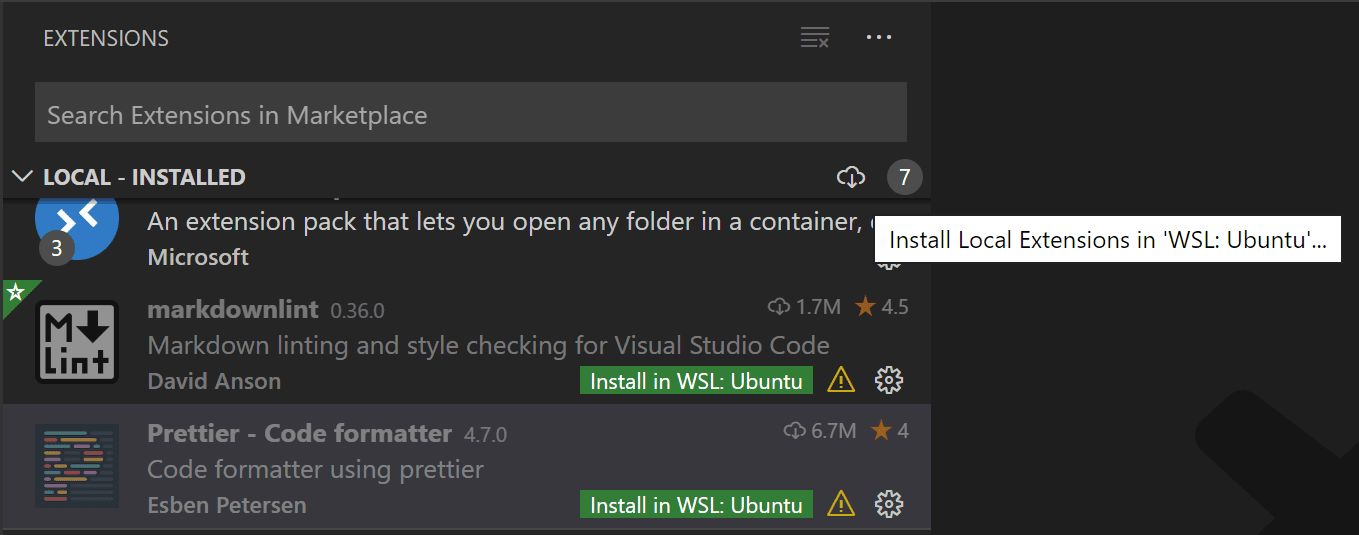
VS Code runs extensions in one of two places: locally on the UI / client side, or in WSL. While extensions that affect the VS Code UI, like themes and snippets, are installed locally, most extensions will reside inside WSL.
If you install an extension from the Extensions view, it will automatically be installed in the correct location. Once installed, you can tell where an extension is installed based on the category grouping. There will be Local — Installed category and one for WSL.
Note: If you are an extension author and your extension is not working properly or installs in the wrong place, see Supporting Remote Development for details.
Local extensions that actually need to run remotely will appear dimmed and disabled in the Local — Installed category. Select Install to install an extension on your remote host.

You can also install all locally installed extensions inside WSL by going to the Extensions view and selecting Install Local Extensions in WSL: {Name} using the cloud button at the right of the Local — Installed title bar. This will display a dropdown where you can select which locally installed extensions to install in your WSL instance.
Opening a terminal in WSL
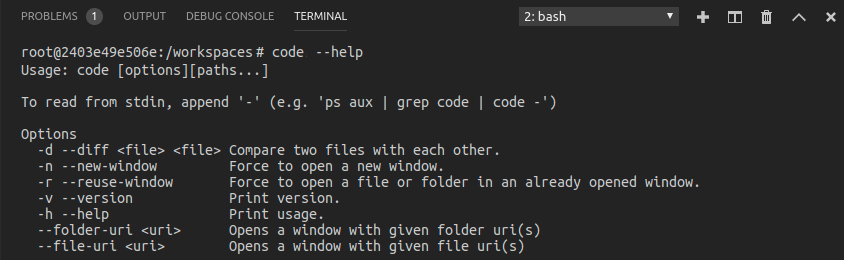
Opening a terminal in WSL from VS Code is simple. Once folder is opened in WSL, any terminal window you open in VS Code (Terminal > New Terminal) will automatically run in WSL rather than locally.
You can also use the code command line from this same terminal window to perform a number of operations such as opening a new file or folder in WSL. Type code --help to see what options are available from the command line.
Debugging in WSL
Once you’ve opened a folder in WSL, you can use VS Code’s debugger in the same way you would when running the application locally. For example, if you select a launch configuration in launch.json and start debugging (F5), the application will start on remote host and attach the debugger to it.
See the debugging documentation for details on configuring VS Code’s debugging features in .vscode/launch.json.
WSL specific settings
VS Code’s local user settings are also reused when you have opened a folder in WSL. While this keeps your user experience consistent, you may want to vary some of these settings between your local machine and WSL. Fortunately, once you have connected to WSL, you can also set WSL specific settings by running the Preferences: Open Remote Settings command from the Command Palette (F1) or by selecting the Remote tab in the Settings editor. These will override any local settings you have in place whenever you open a folder in WSL.
Advanced: Environment setup script
When VS Code Remote is started in WSL, no shell startup scripts are run. This was done to avoid issues with startup scripts that are tuned for shells. If you want to run additional commands or modify the environment this can be done in a setup script ~/.vscode-server/server-env-setup (Insiders: ~/.vscode-server-insiders/server-env-setup). If present, the script is processed before the server is started.
The script needs to be a valid Bourne shell script. Be aware that an invalid script will prevent the server from starting up. If you end up with a script that prevents the server from starting, you will have to use a regular WSL shell and delete or rename the setup script.
Check the WSL log (WSL: Show Log) for output and errors.
Advanced: Opening a WSL 2 folder in a container
If you are using WSL 2 and Docker Desktop’s WSL 2 back-end, you can use the Dev Containers extension to work with source code stored inside WSL! Just follow these steps:
-
If you have not already, install and setup Docker Desktop’s WSL 2 support.
Tip: Go to Settings > Resources > WSL Integration and enable Docker integration with the WSL distribution you will be using.
-
If you have not already, install the Dev Containers extension along with the WSL extension.
-
Next, open your source code folder in WSL as you would normally.
-
Once your folder is open in WSL, select Dev Containers: Reopen in Container from the Command Palette (F1).
-
If the folder does not have a
.devcontainer/devcontainer.jsonfile in it, you’ll be asked to pick a starting point from a filterable list or an existing Dockerfile or Docker Compose file (if one exists). -
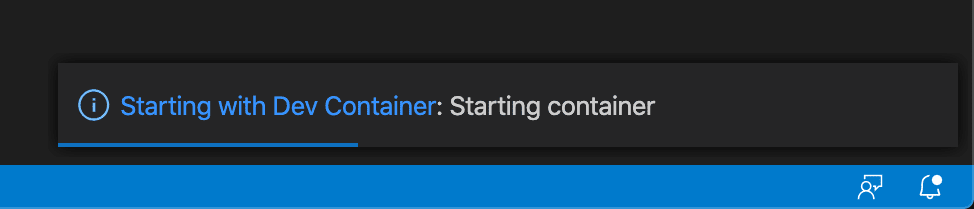
The VS Code window (instance) will reload and start building the dev container. A progress notification provides status updates.
-
After the build completes, VS Code will automatically connect to the container. You can now work with the your source code from inside the container.
See the Dev Containers documentation for more information.
Known limitations
This section contains a list of common know issues with WSL. The intent is not to provide a complete list of issues but to highlight some of the common problems seen with WSL.
See here for a list of active issues related to WSL.
I see EACCES: permission denied error trying to rename a folder in the open workspace in WSL 1
That’s a known problem with the WSL file system implementation (Microsoft/WSL#3395, Microsoft/WSL#1956) caused by the file watcher active by VSCode. The issue will only be fixed in WSL 2.
To avoid the issue, set remote.WSL.fileWatcher.polling to true. However, polling based file watching has a performance impact for large workspaces.
For large workspace you want to increase the polling interval: remote.WSL.fileWatcher.pollingInterval and control the folders that are watched: files.watcherExclude.
WSL 2 does not have that file watcher problem is also not affected by the new setting.
Golang in WSL 1
| Issue | Existing issues |
|---|---|
| Delve debugger doesn’t work under WSL | go-delve/delve#810, Microsoft/vscode-go#926 |
Node.js in WSL 1
| Issue | Existing issues |
|---|---|
| NodeJS Error: spawn EACCES (different variants of this error) | Microsoft/WSL#3886 |
| Webpack HMR not working | Microsoft/WSL#2709 |
| Firebase via node unusably slow only on WSL | Microsoft/WSL#2657 |
Git limitations
If you clone a Git repository using SSH and your SSH key has a passphrase, VS Code’s pull and sync features may hang when running remotely. Either use an SSH key without a passphrase, clone using HTTPS, or run git push from the command line to work around the issue.
Docker Extension limitations
While the Docker extension can run both remotely and locally, if it is already installed locally, you will be unable to install on a remote SSH host without first uninstalling it locally. We will address this problem in a future VS Code release.
Extension limitations
Many extensions will work in WSL without modification. However, in some cases, certain features may require changes. If you run into an extension issue, see here for a summary of common problems and solutions that you can mention to the extension author when reporting the issue.
In addition, some extensions installed in an WSL when using an Alpine Linux-based distribution may not work due to glibc dependencies in native code inside the extension. See the Remote Development with Linux article for details.
Common questions
Why am I asked to change the default distro?
When using WSL: Connect to WSL using Distro and running on WSL older than Windows 10, May 2019 Update (version 1903) you will be asked to switch the default distribution as the WSL command can only work on the default distro as it does not support the -d option yet.
You can always manually switch the default distro by using wslconfig.exe.
For example:
wslconfig /setdefault Ubuntu
You can see which distributions you have installed using:
wslconfig /l
I’m seeing an error about a missing library or dependency
Some extensions rely on libraries not found in the vanilla install of certain WSL Linux distributions. You can add additional libraries into your Linux distribution by using its package manager. For Ubuntu and Debian based distributions, run sudo apt-get install <package> to install the needed libraries. Check the documentation for your extension or the runtime that is mentioned for additional installation details.
What are the connectivity requirements for the WSL extension?
The WSL extension and VS Code Server require outbound HTTPS (port 443) connectivity to:
update.code.visualstudio.commarketplace.visualstudio.comvscode.blob.core.windows.net*.vo.msecnd.net(Azure CDN)*.gallerycdn.vsassets.io(Azure CDN)
Some extensions (like C#) download secondary dependencies from download.microsoft.com or download.visualstudio.microsoft.com. Others (like Visual Studio Live Share) may have additional connectivity requirements. Consult the extension’s documentation for details if you run into trouble.
All other communication between the server and the VS Code client is accomplished through an random local TCP port. You can find a list of locations VS Code itself needs access to in the network connections article.
I’m behind a proxy and have connectivity issues
Proxy settings might be missing on either the Windows or the WSL side.
When a remote window is opened out of VSCode, the WSL extension tries to download the VSCode server on the Windows side. It therefore uses the Window side proxy configuration:
- inherited from the OS settings
- as described in Network Connections in Visual Studio Code
When the remote VSCode is started from a WSL terminal, the download is done using wget in the WSL distro. Proxy settings can be configured in:
- wget proxy settings: https://stackoverflow.com/questions/11211705/how-to-set-proxy-for-wget
- manually in the server setup script
Once the server is up and running the proxy settings on the Remote tab are used.
Can I force an extension to run locally / remotely ?
Extensions are typically designed and tested to either run locally or remotely, not both. However, if an extension supports it, you can force it to run in a particular location in your settings.json file.
For example, the setting below will force the Docker extension to run locally and Remote — SSH: Editing Configuration Files extension to run remotely instead of their defaults:
"remote.extensionKind": {
    "ms-azuretools.vscode-docker": [ "ui" ],
    "ms-vscode-remote.remote-ssh-edit": [ "workspace" ]
}
A value of "ui" instead of "workspace" will force the extension to run on the local UI/client side instead. Typically, this should only be used for testing unless otherwise noted in the extension’s documentation since it can break extensions. See the article on Supporting Remote Development for details.
The VS Code extension API abstracts away local/remote details so most extensions will work without modification. However, given extensions can use any node module or runtime they want, there are situations where adjustments may need to be made. We recommend you test your extension to be sure that no updates are required. See Supporting Remote Development for details.
Questions or feedback
- See Tips and Tricks or the FAQ.
- Search on Stack Overflow.
- Add a feature requests or report a problem.
- Contribute to our documentation or VS Code itself.
- See our CONTRIBUTING guide for details.
10/4/2023
Как настроить полноценное окружение разработчика, привыкшего к Linux и Mac OS X.
Традиционно считается, что разработчики (в особенности связанные с бэкенд-разработкой) предпочитают использовать unix-like-системы. Причиной тому было немало. Ситуация начала несколько меняться в 2017 году — именно тогда вышел первый стабильный релиз Windows Subsystem for Linux (также известен под более ранним названием BashOnWindows), который дал разработчикам то, чего они так давно ждали, — полноценный Linux в качестве приложения в Windows!
Но не всё оказалось так просто — лишь к концу 2018 года WSL стало возможно использовать полноценно, при этом способ отнюдь не очевиден. О нём и пойдёт речь.
Конечная цель
Для начала пара слов о том, что такое вообще Windows Subsystem for Linux, он же WSL в сокращённом варианте. Это прослойка между ядром Windows и приложениями для Linux, которая позволяет преобразовывать системные вызовы к ядру Linux в вызовы к ядру Windows. Благодаря тому, что виртуализация практически отсутствует, такое решение работает быстрее традиционной виртуализации, где эмулируется целый компьютер, как это происходит в Oracle VirtualBox и VMWare Player.
Кроме того, WSL включает в себя целый ряд утилит для интеграции с Windows — пути в файловой системе автоматически преобразовываются в нужный формат, из-под Linux можно запускать приложения в Windows (но не наоборот!), Linux в WSL имеет доступ ко всем портам и сервисам в Windows.
Для разработчика основное применение WSL сразу же видится в развёртывании среды разработки именно там. Всё же установка многих языков, компиляторов и интерпретаторов, утилит происходит в Linux куда проще — часто одной командой из репозитория. Да и привычная консоль под рукой.
В статье будет рассматриваться именно настройка среды разработки в WSL — для примера возьмём небольшой проект, написанный на Python/Angular/Go (а почему бы и нет?), разрабатываемый в Visual Studio Code. Однако описанные рекомендации в целом подойдут для любого другого редактора или IDE.
Установка для Windows 10 x64
Важный момент: WSL официально поддерживается только в Windows 10 x64, начиная с Anniversary Update. Если у вас иная версия — альтернативное решение представлено в следующем разделе.
- Включить поддержку Windows Subsystem for Unix, открыв PowerShell от администратора и выполнив команду:
PS C:\Windows\system32> Enable-WindowsOptionalFeature -Online -FeatureName Microsoft-Windows-Subsystem-Linux
- Если у вас установлена десктопная редакция Windows 10: зайти в Microsoft Store и установить необходимый вам дистрибутив. Для нашего эксперимента будет использована Ubuntu 18.04 LTS. Затем вы сможете запустить ваш дистрибутив через меню «Пуск».
- Если у вас установлена иная редакция Windows, без Microsoft Store (например, Windows 10 LTSC либо Windows Server): в PowerShell выполнить следующие команды:
PS C:\Windows\system32> cd ~
PS C:\Users\somebody> Rename-Item .\Ubuntu.appx .\Ubuntu.zip
PS C:\Users\somebody> Expand-Archive .\Ubuntu.zip .\Ubuntu
PS C:\Users\somebody> cd .\Ubuntu\
PS C:\Users\somebody> .\ubuntu1804.exe
При первом запуске необходимо задать ваши логин и пароль.
Далее уже вам откроется консоль с Ubuntu.
Установка для 32-битных редакций Windows 10 и Windows 7, 8 и 8.1
К сожалению, на этих редакциях WSL не поддерживается. Но мы можем без особого труда заменить его Vagrant — мощной утилитой для конфигурирования виртуальных машин. Vagrant работает поверх других сред виртуализации: VirtualBox, VMWare Player или Microsoft Hyper-V. Поэтому стоит понимать, что такой вариант будет по умолчанию медленнее, нежели WSL. А в случае с VirtualBox значительно медленнее из-за файловой системы vboxsf.
Установить Vagrant можно с официального сайта. Также вам потребуется VirtualBox и Git. После этого создайте папку для вашей виртуальной машины, в ней создайте файл Vagrantfile со следующим содержимым:
Vagrant.configure(«2») do |config|
config.vm.box = «bento/ubuntu-18.04»
config.vm.synced_folder «c:/», «/windows»
# Необходимо указать для каждого порта, который вы хотите расшарить из ВМ или в ВМ
config.vm.network :forwarded_port, host: 5432, guest: 5432
config.vm.provider «virtualbox» do |vb|
vb.memory = 2048
end
end
После чего в том же PowerShell или cmd выполните команду:
vagrant up
После загрузки, настройки и запуска виртуальной машины вы попадёте в консоль Linux. Ура!
Устанавливаем всякие скучные вещи
Разворачиваем наше окружение под Python/JS/Go.
:~$ sudo apt update
:~$ sudo apt install build-essential
:~$ sudo apt install -y git nodejs golang python-dev libreadline-dev libbz2-dev libssl-dev libsqlite3-dev libxslt1-dev libxml2-dev libffi-dev
:~$ curl -L https://raw.githubusercontent.com/yyuu/pyenv-installer/master/bin/pyenv-installer | bash
:~$ # Инсталлятор попросит вас добавить загрузку pyenv в ~/.bashrc
:~$ source ~/.bashrc
:~$ pyenv install 3.7.2
:~$ pyenv global 3.7.2
Быстро проверяем работоспособность версий и, собственно, версии:
:~$ nodejs -v
v8.10.0
:~$ go version
go version go1.10.4 linux/amd64
:~$ python -V
Python 3.7.2
:~$
Неужели всё уже работает?
Конечно нет.
Сразу стоит отметить важный факт: ни Visual Studio Code, ни Sublime Text, ни даже ваша любимая IDE ничего не знают о существовании WSL. Из коробки более-менее с ним умеют работать только продукты от JetBrains. Лично мне Visual Studio Code по настройке, скорости работы нравится куда больше (но это текстовый редактор, о чём не стоит забывать).
И единственное, что вы можете сделать в Visual Studio Code, установленной на Windows, — подключить себе WSL вместо стандартного PowerShell в терминале. Это делается в User Settings:
{
«terminal.integrated.shell.windows»: «C:\\Windows\\System32\\wsl.exe»,
# Добавьте сюда иные настройки по вашему усмотрению
}
На этом всё. Про линтер, автодополнение кода из библиотек, подсветку ошибок можете забыть, по крайней мере для Python. Способа решения сообщество ждёт вот уже три года. Сейчас самый простой и действенный способ заставить его работать — установить в WSL.
- Установите MobaXterm и Cmder. Конечно, вы можете по своему выбору заменить их на альтернативные приложения. MobaXterm — мощный SSH-терминал со встроенным X-сервером, что позволяет ему рендерить приложения, которые запускаются на удалённом X-сервере (в данном случае — внутри WSL). Cmder — локальный эмулятор терминала с поддержкой PowerShell, cmd, bash, WSL и не только, с нормальным копипастом.
- Запустите Cmder. По умолчанию он запустит cmd, но при двойном клике на нижнюю панель покажет окно, где есть возможные варианты.
- Нам нужен тот вариант, что отмечен как {WSL::bash}. Он запустит в новой вкладке консоль внутри WSL.
- Запустите MobaXterm. Он сразу же увидит WSL, установленную в системе. Для запуска X-сервера нажмите выделенную на скриншоте кнопку.
- Настроим WSL для запуска GUI-приложений. Для этого откройте файл ~/.bashrc и допишите в него:
export DISPLAY=:0
- После этого выполните команду source ~/.bashrc для применения изменений.
- Не обязательно, но желательно установить XFCE (или другой DE на ваш вкус), а также поставить шрифты, иначе от внешнего вида VS Code у вас, возможно, вытекут глаза. По крайней мере, люди жалуются.
:~$ sudo apt install -y xfce4
:~$ sudo apt install -y fonts-noto fonts-noto-hinted fonts-noto-mono fonts-noto-unhinted
- Скачайте установщик Visual Studio Code с официального сайта.
- Установите зависимости и сам VS Code:
:~$ sudo apt install libgtk2.0-0 libxss1 libasound2
:~$ sudo dpkg -i <code deb file>
:~$ sudo apt install -f
- Запустите VS Code при помощи команды code.
Вот теперь работает  Ещё более кратко и по сути расписано вот тут.
Однако до совершенства есть ещё один штрих.
{
…
«window.titleBarStyle»: «native»,
…
}
Добавьте приведённую выше настройку в User Settings. В противном случае окно VS Code не будет ресайзиться.
А ты ещё докажи, что работает
Разворачивается оно стандартно для подобного рода проектов.
# You are on a project root
:~$ python -m venv env/
:~$ source env/bin/activate
:~$ pip install -r requirements.txt
:~$ cd frontend
:~$ npm install
:~$ ng build outDir=../backend/microblog/static
:~$ cd ../backend
:~$ python manage.py runserver
Отличия в настройке между Vagrant и WSL
Единственное существенное различие в контексте статьи — необходимость пробрасывать порты в хостовую файловую систему. По умолчанию Vagrant поднимает SSH-туннель на порту 2222 — именно туда вам будет необходимо логиниться из Cmder и добавить соответствующее соединение в MobaXterm.
Более подробно об использовании Vagrant с MobaXterm можно прочитать по ссылке.
Итоги
Но стоит заметить, что даже подобные извращения могут помочь многим людям, вынужденно сталкивающимися с… не всегда очевидным поведением новой технологии от Microsoft.
How to install a Linux development environment on Windows

Using Ubuntu and WSL2
- Why this guide
- Why WSL2?
- Why not WSL2?
- Why this guide
- Right now it’s a great time to try WSL
- What goes where
- Enable WSL2
- If you need to: enable Virtualisation in UEFI/BIOS
- Set WSL to WSL2
- Get apps via Winget
- Configure Terminal for Unix settings
- Make git use Windows Credential Manager
- Set up Windows for development in WSL2
- Add Ubuntu to Windows Explorer
- Use a tiling window manager
- Set up Ubuntu for development in WSL2
- Install Linux developer Tools
- Quiet Ubuntu’s login
- Use sudo without a password
- Make tab completion work with any case
- Add other development tools
- Make VScode open files using file:linenumber syntax
- Add an
opencommand to open files with Windows apps - Add ~/bin to your PATH
- Add any databases or other Linux services
- Configure git to ignore file mode changes
- Conclusion
- About the author
Why this guide
This a guide for people familiar with Linux and Unix environment, to create a development environment on Windows using WSL2 and Ubuntu.
I don’t work for Microsoft or Canonical — I develop web apps and before that was a Linux admin. For most of this time, my main machines have been either Linux or macOS. This means:
- My fingers know bash’s defaults. I type
/to separate directories,ctrl Rto search history, and edit lines withctrl ◀andctrl ▶without thinking. I knowgrep,sedawkand the usual ways of scraping and manipulating text on the console. - I select things in a terminal to automatically copy them and I click a mouse button to paste.
- The idea that anybody would want a file in anything other than ‘LF’ line endings is alien to me.
In short, my developer profile is very Linux and Unix oriented. Much like you, I don’t want to throw away that knowledge and muscle memory to use something different.
Why WSL2?
-
It’s familiar. Working with WSL2 isn’t that much different than changing Linux distributions, or moving between Linux and macOS.
-
Windows has excellent hardware support. Whether you get high-end Surface hardware, or build your own rig from components, you’ll get full featured Windows drivers from the hardware manufacturer.
-
apt-gethas more packages thanbrewon macOS. -
Design tools common in web development are usually available for Windows.
-
There are some useful Windows-based developer GUI tools. While I’m comfortable using
git rebase -i(so don’t @ me), the visual interactive rebase in Fork, a Windows git app, is a great way to clean up my commit history before pushing.
Finally: Windows is nice. The inbuilt tools are modern and uncluttered, my desktop unlocks when I sit down due to Windows Hello, I can transfer files back and forth between my desktop and my phone easily.
Why not WSL2?
-
Like setting up any new OS, there’s work to do to make it your own.
-
Some things will be different if you’re used to another OS.
-
While storing your code on Linux makes things nice and fast, accessing files on Linux from most Windows tools is still not as fast as accessing Windows files from Windows tools. In practice (as a node developer working on large TypeScript project) I find the current speed to not be an issue in my day to day work.
In addition, the Windows version of Visual Studio Code has an extension for WSL2 to do file operations on the Linux side, making them much faster.
Why this guide
The aims for this guide as follows:
-
To be as complete as possible, have this guide be the go-to place for people used to developing on a Unix environment.
-
To include developer focused settings of interest to Linux/Unix developers that make working on WSL2 easier, like
.bashrc,.inputrcandgitsettings. -
To save time when setting up a new development environment. Eg, setting WSL to version 2 before installing Ubuntu (so Ubuntu is already WSL version 2), and installing Ubuntu before Docker (so Docker and VScode detect Ubuntu and add their commands.)
-
Best practices, like keeping your code on the Linux side to make them faster.
Right now it’s a great time to try WSL
There’s a new Ubuntu release (20.04) and a new Windows release (20.04), both with a bunch of new features.
What goes where
- Your code will be in the Linux filesystem, for speed.
- Your language support (node, Python, Ruby, Rust. Go, Elixir etc) will in Linux.
- Databases (I like Postgres) and Docker containers will be in Linux
- IDEs will be in Windows (vscode installs a special WSL helper into Linux though)
- Browsers will be in Windows (yes, WSL makes localhost work exactly like normal)
Enable WSL2
Click Start Type «Powershell». Click «Run as Administrator»
Run these two commands to enable WSL:
dism.exe /online /enable-feature /featurename:Microsoft-Windows-Subsystem-Linux /all /norestart

dism.exe /online /enable-feature /featurename:VirtualMachinePlatform /all /norestart
Reboot (and enable Virtualisation in UEFI/BIOS if you need to)
Surface devices have virtualisation turned on already,so you can just reboot.
Otherwise, you may have to go into your UEFI/BIOS and enable Virtualisation. You can reboot to your UEFI/BIOS from inside Windows. Open the Settings app, search for «Recovery Options», and «Restart Now».
When your PC reboots, it will go into Advanced startup. Go to “Troubleshoot -> Advanced options» and click on the «UEFI Firmware Settings» option.
Set WSL to WSL2
Currently, the older WSL1 is still the default. The new WSL2 (which uses a real Linux kernel):
wsl --set-default-version 2
Open Ubuntu from the start menu and and let it install.
Have a message about Virtualisation needing to be enabled? See the next step.
This ensures distros you install subsequently will run on WSL 2.
If you’ve already installed Ubuntu, just convert our existing WSl1 Ubuntu to WSL2 run:
wsl -l -v
wsl --set-version Ubuntu 2
wsl --set-default-version 2
Get apps via Winget
Get App Installer (which includes the winget command) if you don’t have it already.
Let’s install:
- DockerDesktop (the Windows apps adds
docker-composeand other useful things to Linux) - Git (needed for Windows GUI tools)
- Power Toys (for tiling window management)
- Powershell (the latest one is faster)
- Visual Studio Code
- Windows Terminal
Note: ‘Ubuntu 20.04’ isn’t available by Winget, but will be soon.
foreach ($app in 'DockerDesktop', 'Git', 'Power Toys', 'Powershell', 'Visual Studio Code', 'Windows Terminal') { winget install -e $app }
Configure Terminal for Unix settings
Open terminal settings and change:
Then look at the profiles. Find the Ubuntu profile. See the Ubuntu profile has a GUID? Change the default profile GUID to the Ubuntu GUID.
Also, because transparent terminals are cool, add this to the Ubuntu profile:
"useAcrylic": true,
"acrylicOpacity": 0.9
Browse iterm2colorschemes.com and download the equivalent named Windows Terminal file from their Windows Terminal color schemes. Open Settings and paste it into the schemes section, then select that scheme name for the profile you want to use it with in profiles.
Make git use Windows Credential Manager
edit ~/bin/git-credential-manager
And make the file’s contents be:
#!/bin/bash
exec '/mnt/c/Program Files/Git/mingw64/libexec/git-core/git-credential-manager.exe' $@
Set the modes:
chmod +x ~/bin/git-credential-manager
Then edit ~/.gitconfig and add
[credential]
    helper = manager
Set up Windows for development in WSL2
Ensure Windows git always uses LF line endings (Unix-style)
git config --global core.autocrlf false
git config --global core.eol lf
Ensure VScode always uses LF line endings (Unix-style)
In vscode, open ‘Preferences’, and search for ‘eol’. Set The default end of line character. to /n

Add Ubuntu to Windows Explorer
Pin \\wsl$\Ubuntu to Quick Access

Map Ubuntu to Windows Drive
This allows you to access Linux’s file system from older Windows applications which cannot access network paths.


Use a tiling window manager
If you’re the tiling window manager, check out FancyZones. It’s part of PowerToys.
Set up Ubuntu for development in WSL2
Open Ubuntu from Windows Terminal and set up your development environment:
Make VScode the default editor, and open files using file:linenumber syntax
A lot of Linux commands use $EDITOR to be the preferred editor. Let’s set that to VScode.
code -g allows vscode to open a filename:linenumber and immediately to go that line number in a file. VSCode doesn’t do this by default, because some files can have a colon in them. I don’t put colons in file names, and I like to be able to launch my editor with the alias edit, so I add this to my .bashrc
export EDITOR=code
alias edit='code -g'
Install Linux developer Tools
sudo apt install build-essential
Quiet Ubuntu’s login
touch /home/mike/.hushlogin
Use sudo without a password
Typing your own password can get boring.
And edit the line below to as follows:
# Allow members of group sudo to execute any command
# %sudo ALL=(ALL:ALL) ALL
%sudo ALL=(ALL) NOPASSWD:ALL
After you save the file, sudo will no longer ask for passwords.
Make tab completion work with any case
Open .inputrc (create it if needed) and add:
set completion-ignore-case On
$include /etc/inputrc
Add other development tools
Your command line developer tools are generally Linux ones, and will live in the WSL2 filesystem.
I code primarily on node.js, so I’d install
curl -sL https://deb.nodesource.com/setup_10.x | sudo -E bash -
sudo apt-get install -y nodejs
Add an open command to open files with Windows apps
WSL2 comes with a Debian package called wslu which contains a command to open files using Windows, called wslview. Personally, I prefer the name open so:
Add ~/bin to your PATH
I like to add personal scripts and files to ~/bin
Add any databases or other Linux services
WSL2’s Ubuntu uses a custom /init, which uses /etc/init.d style scripts.
You can start, stop, check the status of these with:
sudo /etc/init.d/postgresql start
or
sudo service postgresql start
Replacing start with stop or status etc.
Configure git projects to ignore file mode changes
Checking out a repo on your Linux box, Windows git tools may report some files seem to have changed, with no actual modification of their contents:

What has changed is their Unix file modes (the mod in chmod) — let’s disable this. Inside a project:
git config core.fileMode false

Conclusion
About the author
I’ve been using Linux for a little over 20 years, including at places like Red Hat and IBM’s dedicated Linux group. I’m the example sudo user in /etc/sudoers in a couple of distros.
The Visual Studio Code WSL extension lets you use the Windows Subsystem for Linux (WSL) as your full-time development environment right from VS Code. You can develop in a Linux-based environment, use Linux-specific toolchains and utilities, and run and debug your Linux-based applications all from the comfort of Windows.
The extension runs commands and other extensions directly in WSL so you can edit files located in WSL or the mounted Windows filesystem (for example /mnt/c) without worrying about pathing issues, binary compatibility, or other cross-OS challenges.
This lets VS Code provide a local-quality development experience — including full IntelliSense (completions), code navigation, and debugging — regardless of where your code is hosted.
Getting started
Note: After reviewing this topic, you can get started with the introductory WSL tutorial.
Installation
To get started, you need to:
-
Install the Windows Subsystem for Linux along with your preferred Linux distribution.
Note: WSL 1 does have some known limitations for certain types of development. Also, extensions installed in Alpine Linux may not work due to
glibcdependencies in native source code inside the extension. See the Remote Development and Linux article for details. -
Install Visual Studio Code on the Windows side (not in WSL).
Note: When prompted to Select Additional Tasks during installation, be sure to check the Add to PATH option so you can easily open a folder in WSL using the
codecommand. -
Install the WSL extension. If you plan to work with other remote extensions in VS Code, you may choose to install the Remote Development extension pack.
Open a remote folder or workspace
From the WSL terminal
Opening a folder inside the Windows Subsystem for Linux in VS Code is very similar to opening up a Windows folder from the command prompt or PowerShell.
-
Open a WSL terminal window (using the start menu item or by typing
wslfrom a command prompt / PowerShell). -
Navigate to a folder you’d like to open in VS Code (including, but not limited to, Windows filesystem mounts like
/mnt/c) -
Type
code .in the terminal. When doing this for the first time, you should see VS Code fetching components needed to run in WSL. This should only take a short while, and is only needed once.Note: If this command does not work, you may need to restart your terminal or you may not have added VS Code to your path when it was installed.
-
After a moment, a new VS Code window will appear, and you’ll see a notification that VS Code is opening the folder in WSL.
VS Code will now continue to configure itself in WSL and keep you up to date as it makes progress.
-
Once finished, you now see a WSL indicator in the bottom left corner, and you’ll be able to use VS Code as you would normally!
That’s it! Any VS Code operations you perform in this window will be executed in the WSL environment, everything from editing and file operations, to debugging, using terminals, and more.
From VS Code
Alternatively, you can open a WSL window directly from VS Code:
- Start VS Code.
- Press F1, select WSL: Connect to WSL for the default distro or WSL: Connect to WSL using Distro for a specific distro.
- Use the File menu to open your folder.
If you already have a folder open, you can also use the WSL: Reopen Folder in WSL command. You will be prompted which distro to use.
If you are in a WSL window and want to open the current input in a local window, use WSL: Reopen in Windows.
From the Windows command prompt
To open a WSL window directly from a Windows prompt use the --remote command line parameter:
code --remote wsl+<distro name> <path in WSL>
for example: code --remote wsl+Ubuntu /home/jim/projects/c
We need to do some guessing on whether the input path is a file or a folder. If it has a file extension, it is considered a file.
To force that a folder is opened, add slash to the path or use:
code --folder-uri vscode-remote://wsl+Ubuntu/home/ubuntu/folder.with.dot
To force that a file is opened add --goto or use:
code --file-uri vscode-remote://wsl+Ubuntu/home/ubuntu/fileWithoutExtension
Working with Git
If you are working with the same repository in WSL and Windows, be sure to set up consistent line endings. See tips and tricks for details.
You can also avoid passwords by configuring WSL to use the Windows Git credential manager. See tips and tricks for details.
Managing extensions
VS Code runs extensions in one of two places: locally on the UI / client side, or in WSL. While extensions that affect the VS Code UI, like themes and snippets, are installed locally, most extensions will reside inside WSL.
If you install an extension from the Extensions view, it will automatically be installed in the correct location. Once installed, you can tell where an extension is installed based on the category grouping. There will be Local — Installed category and one for WSL.
Note: If you are an extension author and your extension is not working properly or installs in the wrong place, see Supporting Remote Development for details.
Local extensions that actually need to run remotely will appear dimmed and disabled in the Local — Installed category. Select Install to install an extension on your remote host.
You can also install all locally installed extensions inside WSL by going to the Extensions view and selecting Install Local Extensions in WSL: {Name} using the cloud button at the right of the Local — Installed title bar. This will display a dropdown where you can select which locally installed extensions to install in your WSL instance.
Opening a terminal in WSL
Opening a terminal in WSL from VS Code is simple. Once folder is opened in WSL, any terminal window you open in VS Code (Terminal > New Terminal) will automatically run in WSL rather than locally.
You can also use the code command line from this same terminal window to perform a number of operations such as opening a new file or folder in WSL. Type code --help to see what options are available from the command line.
Debugging in WSL
Once you’ve opened a folder in WSL, you can use VS Code’s debugger in the same way you would when running the application locally. For example, if you select a launch configuration in launch.json and start debugging (F5), the application will start on remote host and attach the debugger to it.
See the debugging documentation for details on configuring VS Code’s debugging features in .vscode/launch.json.
WSL specific settings
VS Code’s local user settings are also reused when you have opened a folder in WSL. While this keeps your user experience consistent, you may want to vary some of these settings between your local machine and WSL. Fortunately, once you have connected to WSL, you can also set WSL specific settings by running the Preferences: Open Remote Settings command from the Command Palette (F1) or by selecting the Remote tab in the Settings editor. These will override any local settings you have in place whenever you open a folder in WSL.
Advanced: Environment setup script
When VS Code Remote is started in WSL, no shell startup scripts are run. This was done to avoid issues with startup scripts that are tuned for shells. If you want to run additional commands or modify the environment this can be done in a setup script ~/.vscode-server/server-env-setup (Insiders: ~/.vscode-server-insiders/server-env-setup). If present, the script is processed before the server is started.
The script needs to be a valid Bourne shell script. Be aware that an invalid script will prevent the server from starting up. If you end up with a script that prevents the server from starting, you will have to use a regular WSL shell and delete or rename the setup script.
Check the WSL log (WSL: Show Log) for output and errors.
Advanced: Opening a WSL 2 folder in a container
If you are using WSL 2 and Docker Desktop’s WSL 2 back-end, you can use the Dev Containers extension to work with source code stored inside WSL! Just follow these steps:
-
If you have not already, install and setup Docker Desktop’s WSL 2 support.
Tip: Go to Settings > Resources > WSL Integration and enable Docker integration with the WSL distribution you will be using.
-
If you have not already, install the Dev Containers extension along with the WSL extension.
-
Next, open your source code folder in WSL as you would normally.
-
Once your folder is open in WSL, select Dev Containers: Reopen in Container from the Command Palette (F1).
-
If the folder does not have a
.devcontainer/devcontainer.jsonfile in it, you’ll be asked to pick a starting point from a filterable list or an existing Dockerfile or Docker Compose file (if one exists). -
The VS Code window (instance) will reload and start building the dev container. A progress notification provides status updates.
-
After the build completes, VS Code will automatically connect to the container. You can now work with the your source code from inside the container.
See the Dev Containers documentation for more information.
Known limitations
This section contains a list of common know issues with WSL. The intent is not to provide a complete list of issues but to highlight some of the common problems seen with WSL.
See here for a list of active issues related to WSL.
I see EACCES: permission denied error trying to rename a folder in the open workspace in WSL 1
That’s a known problem with the WSL file system implementation (Microsoft/WSL#3395, Microsoft/WSL#1956) caused by the file watcher active by VSCode. The issue will only be fixed in WSL 2.
To avoid the issue, set remote.WSL.fileWatcher.polling to true. However, polling based file watching has a performance impact for large workspaces.
For large workspace you want to increase the polling interval: remote.WSL.fileWatcher.pollingInterval and control the folders that are watched: files.watcherExclude.
WSL 2 does not have that file watcher problem is also not affected by the new setting.
Golang in WSL 1
| Issue | Existing issues |
|---|---|
| Delve debugger doesn’t work under WSL | go-delve/delve#810, Microsoft/vscode-go#926 |
Node.js in WSL 1
| Issue | Existing issues |
|---|---|
| NodeJS Error: spawn EACCES (different variants of this error) | Microsoft/WSL#3886 |
| Webpack HMR not working | Microsoft/WSL#2709 |
| Firebase via node unusably slow only on WSL | Microsoft/WSL#2657 |
Git limitations
If you clone a Git repository using SSH and your SSH key has a passphrase, VS Code’s pull and sync features may hang when running remotely. Either use an SSH key without a passphrase, clone using HTTPS, or run git push from the command line to work around the issue.
Docker Extension limitations
While the Docker extension can run both remotely and locally, if it is already installed locally, you will be unable to install on a remote SSH host without first uninstalling it locally. We will address this problem in a future VS Code release.
Extension limitations
Many extensions will work in WSL without modification. However, in some cases, certain features may require changes. If you run into an extension issue, see here for a summary of common problems and solutions that you can mention to the extension author when reporting the issue.
In addition, some extensions installed in an WSL when using an Alpine Linux-based distribution may not work due to glibc dependencies in native code inside the extension. See the Remote Development with Linux article for details.
Common questions
Why am I asked to change the default distro?
When using WSL: Connect to WSL using Distro and running on WSL older than Windows 10, May 2019 Update (version 1903) you will be asked to switch the default distribution as the WSL command can only work on the default distro as it does not support the -d option yet.
You can always manually switch the default distro by using wslconfig.exe.
For example:
wslconfig /setdefault Ubuntu
You can see which distributions you have installed using:
wslconfig /l
I’m seeing an error about a missing library or dependency
Some extensions rely on libraries not found in the vanilla install of certain WSL Linux distributions. You can add additional libraries into your Linux distribution by using its package manager. For Ubuntu and Debian based distributions, run sudo apt-get install <package> to install the needed libraries. Check the documentation for your extension or the runtime that is mentioned for additional installation details.
What are the connectivity requirements for the WSL extension?
The WSL extension and VS Code Server require outbound HTTPS (port 443) connectivity to:
update.code.visualstudio.commarketplace.visualstudio.comvscode.blob.core.windows.net*.vo.msecnd.net(Azure CDN)*.gallerycdn.vsassets.io(Azure CDN)
Some extensions (like C#) download secondary dependencies from download.microsoft.com or download.visualstudio.microsoft.com. Others (like Visual Studio Live Share) may have additional connectivity requirements. Consult the extension’s documentation for details if you run into trouble.
All other communication between the server and the VS Code client is accomplished through an random local TCP port. You can find a list of locations VS Code itself needs access to in the network connections article.
I’m behind a proxy and have connectivity issues
Proxy settings might be missing on either the Windows or the WSL side.
When a remote window is opened out of VSCode, the WSL extension tries to download the VSCode server on the Windows side. It therefore uses the Window side proxy configuration:
- inherited from the OS settings
- as described in Network Connections in Visual Studio Code
When the remote VSCode is started from a WSL terminal, the download is done using wget in the WSL distro. Proxy settings can be configured in:
- wget proxy settings: https://stackoverflow.com/questions/11211705/how-to-set-proxy-for-wget
- manually in the server setup script
Once the server is up and running the proxy settings on the Remote tab are used.
Can I force an extension to run locally / remotely ?
Extensions are typically designed and tested to either run locally or remotely, not both. However, if an extension supports it, you can force it to run in a particular location in your settings.json file.
For example, the setting below will force the Docker extension to run locally and Remote — SSH: Editing Configuration Files extension to run remotely instead of their defaults:
"remote.extensionKind": {
    "ms-azuretools.vscode-docker": [ "ui" ],
    "ms-vscode-remote.remote-ssh-edit": [ "workspace" ]
}
A value of "ui" instead of "workspace" will force the extension to run on the local UI/client side instead. Typically, this should only be used for testing unless otherwise noted in the extension’s documentation since it can break extensions. See the article on Supporting Remote Development for details.
The VS Code extension API abstracts away local/remote details so most extensions will work without modification. However, given extensions can use any node module or runtime they want, there are situations where adjustments may need to be made. We recommend you test your extension to be sure that no updates are required. See Supporting Remote Development for details.
Questions or feedback
- See Tips and Tricks or the FAQ.
- Search on Stack Overflow.
- Add a feature requests or report a problem.
- Contribute to our documentation or VS Code itself.
- See our CONTRIBUTING guide for details.
10/4/2023