Для работы Raspberry Pi требуется операционная система, которая хранится на карте microSD.
Raspberry Pi OS (ранее называвшаяся Raspbian) — официальная поддерживаемая операционная система для Raspberry Pi. Кроме Raspberry Pi OS можно использовать и другие, такие как Ubuntu, RetroPie, RISC OS Pi, LibreELEC и другие.
Raspberry Pi Imager
Raspberry Pi Imager – это программа, с помощью которой можно записать нужный образ системы на microSD карту.
Скачивание и подготовка
-
Скачай Raspberry Pi Imager для Windows, macOS, Ubuntu x86 и установи на свой компьютер. Чтобы установить Raspberry Pi Imager на Raspberry – введи в окне терминала
sudo snap install rpi-imager. -
Запусти Raspberry Pi Imager;

-
Подключи microSD карту к компьютеру;

Форматирование карты microSD
-
Отформатируй microSD карту в формате FAT32 перед записью нового образа. Для этого нажми
CHOOSE OSв окне Raspberry Pi Imager; -
В выпадающем списке выбери
Erase; -
Нажми
CHOOSE SD CARD; -
Выбери из списка свою карту;
-
Нажми
WRITE;Запустится процесс форматирования. Это займет несколько минут. -
Об окончании форматирования, Raspberry Pi Imager сообщит появлением диалогового окна. Нажми
CONTINUE;


 Запустится процесс форматирования. Это займет несколько минут.

Запись образа системы
-
Теперь начнем запись нового образа. Открой список систем;
-
Выбери образ системы которую хочешь записать на свою карту;
-
Нажми
CHOOSE SD CARD; -
Выбери из списка свою карту;
-
Нажми
WRITE;Запустится процесс записи. Это займет несколько минут. -
Об окончании записи, Raspberry Pi Imager сообщит появлением диалогового окна. Нажми
CONTINUE;


 Запустится процесс записи. Это займет несколько минут.

Теперь можешь достать карту с образом системы и приступить к запуску Raspberry Pi.
Запись сохраненных образов систем
Кроме официальных систем, можно записать сохраненные. Например образ Raspberry Pi OS от Амперки, с включенным SSH, VNC и другими дополнительными настройками.
-
Отформатируй карту microSD в формате FAT32 перед записью образа;
-
В окне Raspberry Pi Imager открой список систем и выбери
Use custom; -
Найди на своем компьютере сохраненный файл образа, выбери его и нажми
Open; -
Дальше следуй инструкции начиная с шага №3.


Что дальше?
Ресурсы
v1.7.5
- Windows: fix handling .zip files.
- Windows: allow Imager to start on Windows server editions that do not have «Wireless LAN service» role installed and are missing wlanapi.dll
(No changes from v1.7.4.1 for Linux and Mac other than version number)
Mac version
Raspberry.Pi.Imager.1.7.5.dmg is an Intel architecture build, and requires Rosetta 2 if run on Apple M1/M2 machines.
Raspberry.Pi.Imager.1.7.5.UNIVERSAL.BUILD.dmg is an universal build for both Intel and Apple M1/M2 architectures. It requires at least OS X 10.14.
v1.7.4.1
- Advanced settings: fix creating files on FAT partition that are an exact multiple of cluster size.
- Advanced settings: allow end-of-directory marker to be missing in FAT32 root directory (fixes customizing Homebridge image)
- Do you want to apply saved settings window: offer ‘no’ option, without clearing settings.
- Linux: eject storage properly through udisks2.
- Windows/OSX: update dependencies libarchive/zlib/liblzma/zstd
- Windows: update libcurl and OpenSSL dependencies
- Add Russian translation
Mac version
Raspberry.Pi.Imager.1.7.4.1.dmg is an Intel architecture build, and requires Rosetta 2 if run on Apple M1/M2 machines.
Raspberry.Pi.Imager.1.7.4.1.UNTESTED.UNIVERSAL.BUILD.dmg is an universal build for both Intel and Apple M1/M2 architectures. It requires at least OS X 10.14 and has only been tested on Intel and M2 Mac Mini. This software has currently NOT been tested on M1 hardware, nor on Macbooks, and will not be officially released, until this is the case. Use at your own risk.
v1.7.4 release
- Advanced settings: fix escaping single quotes ( ‘ ) in WLAN password
- Windows only: when auto-detecting the WLAN password used by the computer running Imager, it now processes passwords that contain < > ‘ » & correctly.
- Advanced settings: default to using username of logged-in user instead of ‘pi’
- Now uses a different method to edit files on the FAT partition to apply advanced settings. Imager now understands the FAT16/FAT32 file system format and can edit files by itself using the raw disk device, without having to rely on the operating system to mount the partition first.
- French translation update
Mac version
Raspberry.Pi.Imager.1.7.4.dmg is an Intel architecture build, and requires Rosetta 2 if run on Apple M1/M2 machines.
Raspberry.Pi.Imager.1.7.4.UNTESTED.UNIVERSAL.BUILD.dmg is an universal build for both Intel and Apple M1/M2 architectures. It requires at least OS X 10.14 and has only been tested on Intel and M2 Mac Mini. This software has currently NOT been tested on M1 hardware, nor on Macbooks, and will not be officially released, until this is the case. Use at your own risk.
v1.7.3 release
- Fix persisting public key authentication setting
- Add digital signage icon
- Fix «Cannot send events to objects owned by a different thread» warning
- Update Slovan/Korean language files
- Allow selecting file names without extension
- Add possibility to outsource handling of custom settings to script at /usr/lib/raspberrypi-sys-mods/imager_custom
- Advanced settings: disallow invalid characters in hostname field
- Linux: use GnuTLS instead of OpenSSL for computing SHA256
- Linux: prefill wlan PSK if Linux distribution uses NetworkManager
v1.7.2 release
- Advanced options: remove overscan option
- Advanced options: remove first run wizard suppression option
- gz/xz/zstd custom images: pad if image size is not dividable by 512 byte
- Store saved wifi password hashed
- Make buttons blue on focus, to ease keyboard navigation
- Add Japan, Korean translations
v1.7.1 release
- Fix advanced settings not working if wifi settings were saved to «always use» in previous Imager version.
v1.7 release
- Show advanced settings button if the operating system indicates it
supports «advanced settings» by «init_format»: «cloudinit» | «systemd» in the
repository json file. Saved settings are also only applied if the OS indicates support. Some heuristics are used with custom images from disk. - Advanced settings: add support for cloudinit format (used by Ubuntu server)
- Advanced settings: add support for specifying username
- Advanced settings: allow setting username and password separately from SSH
- Advanced settings: allow hidden wifi SSID
- Advanced settings: allow multi-line authorized_keys
- Linux: Retry on GnuTLS Recv errors
- Linux: Some fixes to deal better with Linux distributions auto-mounting drives
- Add Slovenija translation
- Adds support for zstd
- Allow nested subitems entries
- Add word-wrapping to OS list (contributed by mzanetti)
- Update icons
- Fix «Error writing file to disk» appearing sporadically on cancelling write.
- Linux: fix «terminate called without an active exception» on closing Imager while still writing.
- Windows/Mac: update bundled libarchive version to 3.5.2
- Mac: dual GPU systems: use integrated GPU to limit battery consumption.
- Telemetry: phone back home when image from repository is written:
- name and URL of image written, parent category.
- about the computer running Imager: OS, version, architecture,
locale, Imager version, Pi revision
v1.6.2 release
- Add website link support
- Add CLI support
- Advanced settings: fix handling of wifi passwords with special characters (store wifi passwords as PBKDF2 hash)
- Mac OS X: fix double free (fixes crash on Chinese OS X)
- Windows: fix window position restore on laptops if Imager was previously on a screen to the top or left of main screen, and that screen is no longer available.
v1.6.1 release
- Advanced options: delay modifying files on FAT partition until config.txt is visible.
- Advanced options: search all mount points for FAT partition.
- Mac OS X: use alternative method to detect preferred language.
- Update translations.
- Linux: revert «disable high dpi scaling on incorrect EDID» due to it causing the custom file selection dialog not to function properly on Fedora.
- Linux: when writing .zip files with multiple files, delay extracting .zip after mounting FAT32 if necessary. Workaround for when Imager is run in a sandboxed environment in which udisks2 running on the host system reports the mount completed, but it is not there yet in the sandbox.
- Advanced options: if user configured they want to use SSH, but forget to enter password, highlight «password» label red to draw attention to that, instead of just refusing to save settings.
v1.6 release
- Add advanced users option screen available under SHIFT-CTRL-X
- Windows: no longer shutdown storage services during imaging
- Windows: fix crash on drives without name (drivelist: fix zero length wstring handling)
- Windows: fix progress indication in taskbar on images >2 GB
- Linux: [wayland] fix «Client tried to set invalid geometry» error
- Linux: allow NVMe drives as destination drive
- Linux: filter out zram virtual devices in drive selection
- Fix handling of .iso files
- Update translations
- GUI: change «SD card» -> «Storage»
Raspberry Pi Imager is a graphical SD card writing tool that helps you install an operating system on your Raspberry Pi the easiest way. It is the official tool recommended by the Raspberry Pi Foundation, and it works flawlessly on Windows, Linux, and Mac.
While flashing an OS on your SD card can be done by several other tools such as Win32 Disk Imager, Balena Etcher, etc., the Raspberry Pi Imager stands out and makes the process more straightforward and safe. It can download the OS image automatically from the official repository and install it to the SD card seamlessly.
This article will show you how to use the Raspberry Pi Imager to flash operating system images on your microSD card. Also, I’ll be showing you how to access the tool’s advanced settings to change locale settings, set username and password, and to format your drive to FAT32 file system. So, without further ado, let’s dive right in.
Contents
- How to Install Raspberry Pi Imager on Windows
- How to Use Raspberry Pi Imager
- Installing Raspberry Pi OS
- Final Words
Here, I am going to show you how to install the imager on Windows operating system. For sake of this guide, I’ll be using Windows 11.
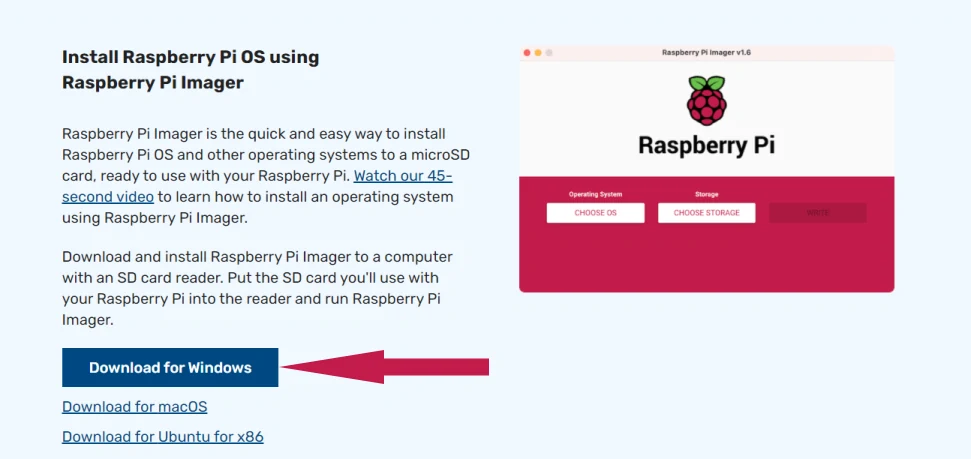
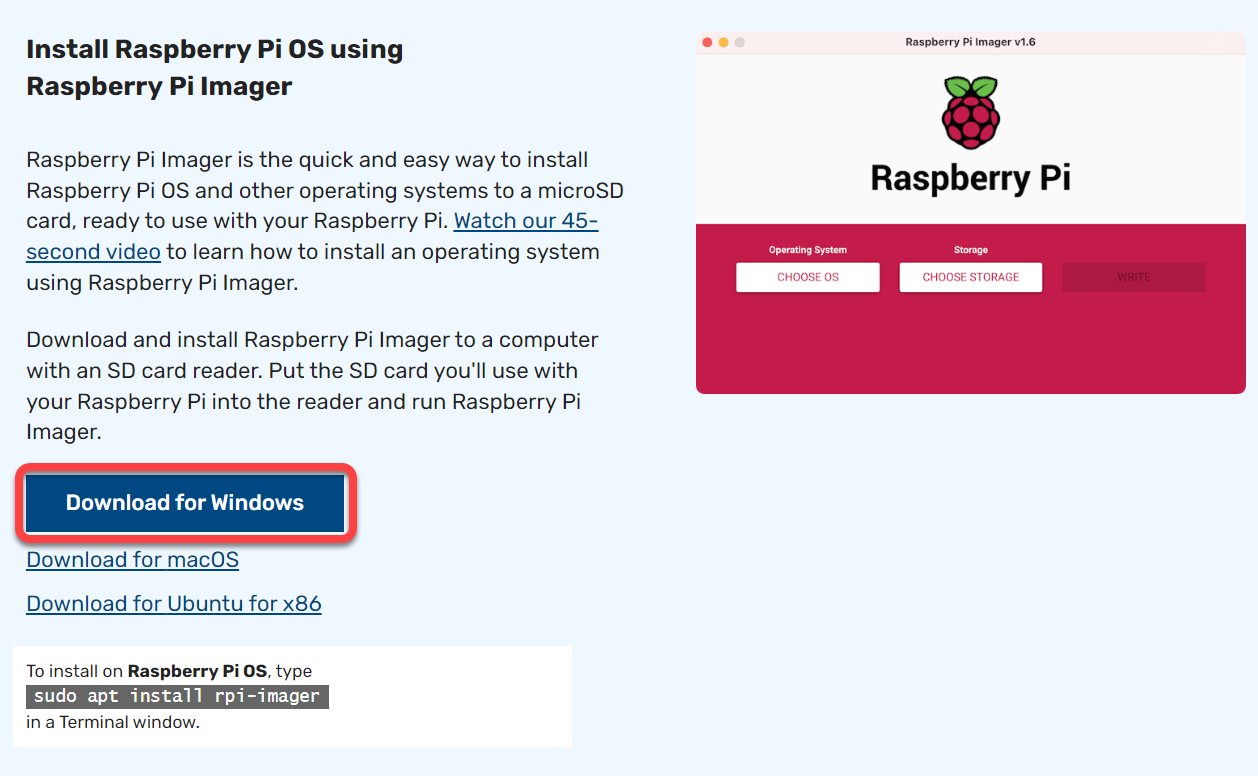
- First of all, head over to the official download page of the tool in any browser of your choice.
- Now, scroll down to see the button that says “Download for Windows” and click on it. This will start downloading the tool to your computer.

- Once the download is complete, run the Raspberry PI imager file (.exe) to begin the installation process.
- Click Yes if prompted for permission.
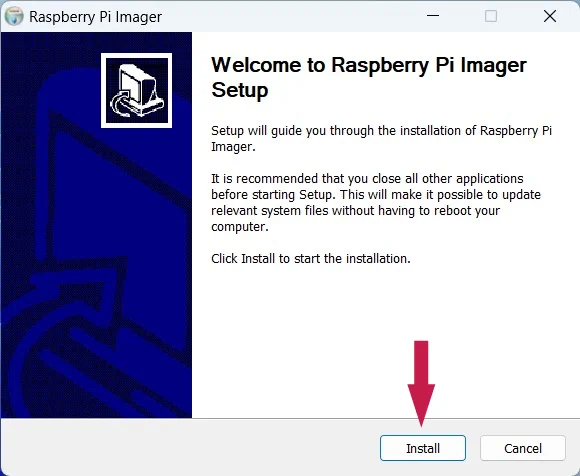
- This will open up the installation window. Here click on the Install button.

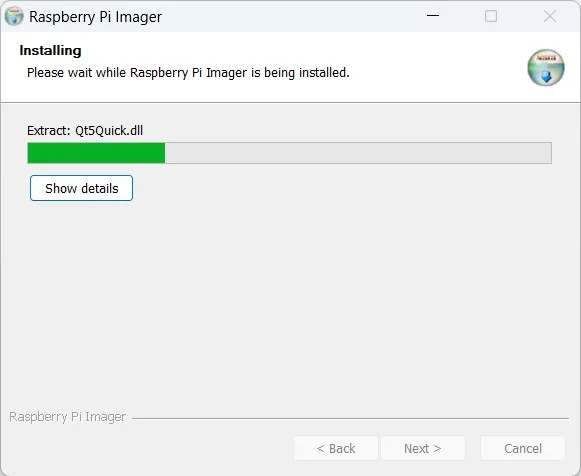
- The installation will start now and you need to wait for a few seconds to complete the process.

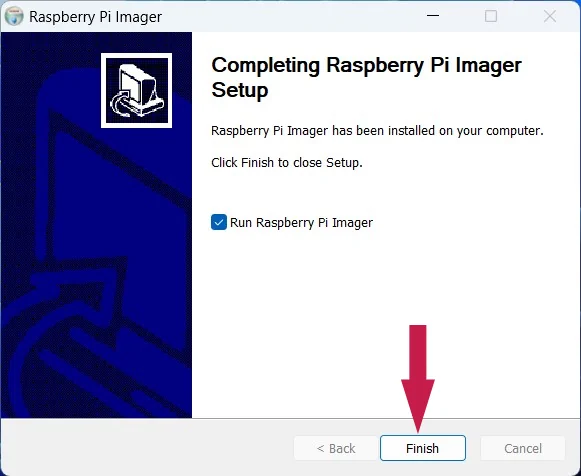
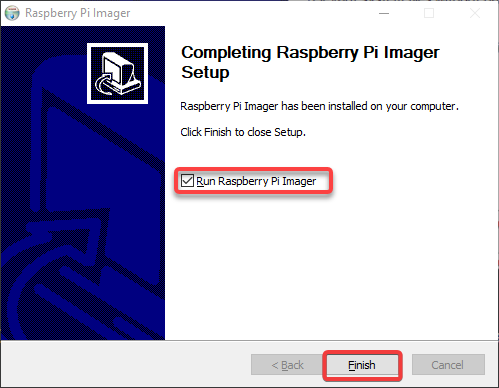
- Once it completes, click on the Finish button to exit the installer. If you check the option “Run Raspberry Pi Imager”, the tool will open up after you click Finish.
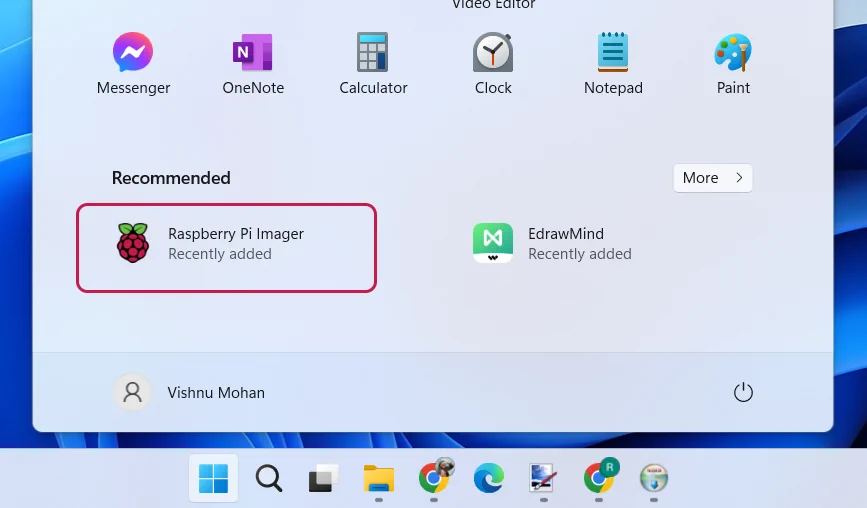
- Now, if it is not starting automatically, you can start it from the Windows Start menu as shown in the screenshot below.

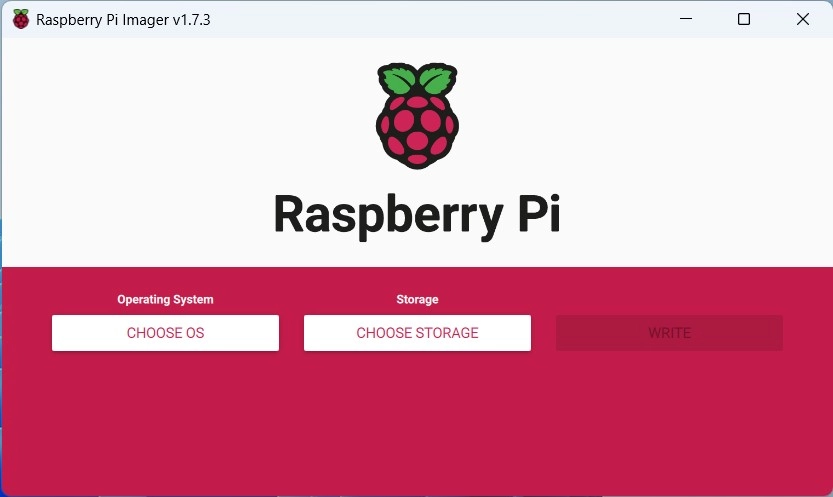
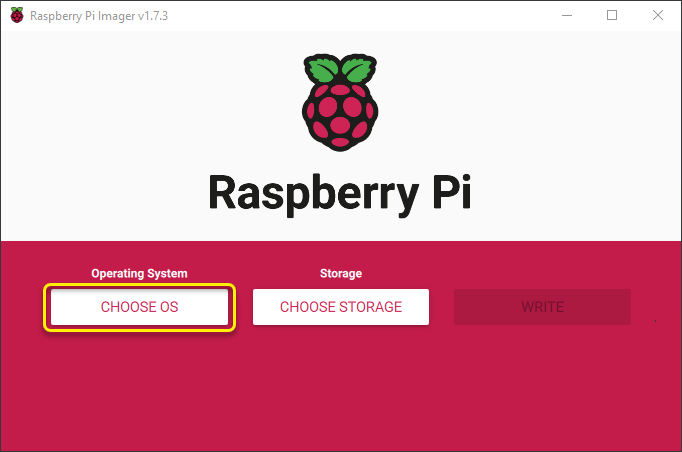
- Once the application opens up, it’ll look like this:

How to Use Raspberry Pi Imager
You’ve seen how to install the imager on Windows and now let’s see how to use it for various purposes such as flashing OS, updating bootloader, etc.
Installing Raspberry Pi OS
Before we get into the installation process, make sure that you’ve plugged your microSD card into the computer and is showing up under the Devices and drives section in This PC.
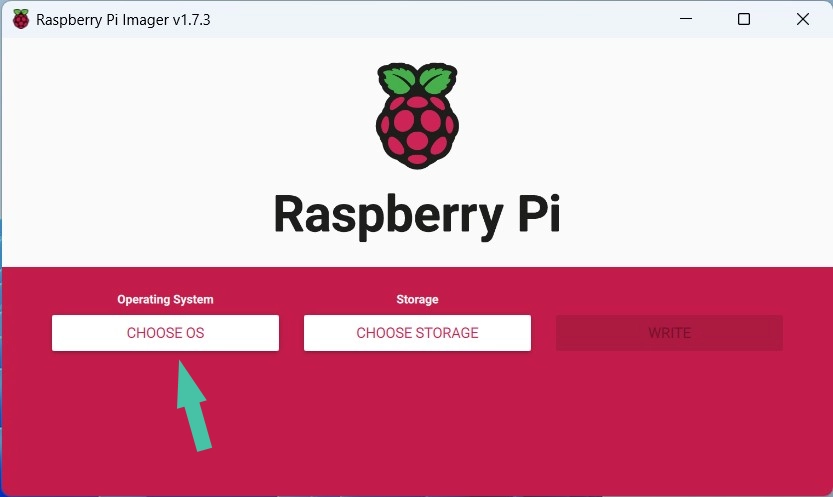
- In the Imager interface, first, you need to select the operating system by clicking the CHOOSE OS button.
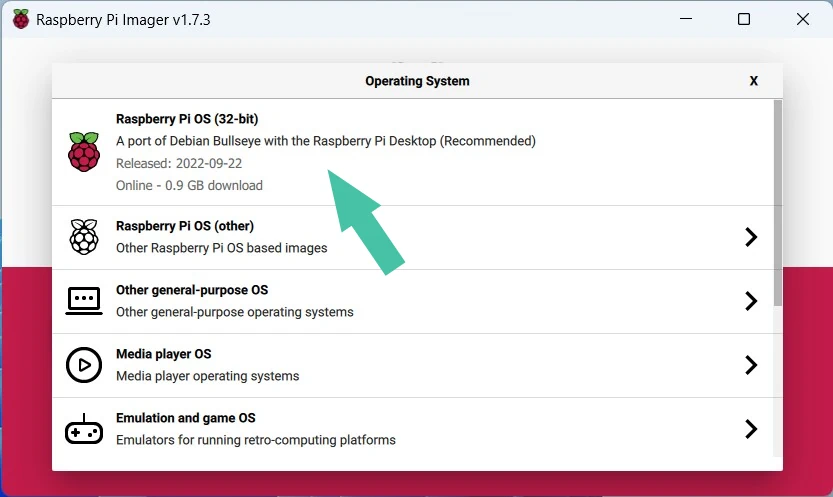
- It will list a few common operating systems for Raspberry Pi. Select the Raspberry Pi OS (32-bit) and it will automatically download and install the OS on your microSD card. If you choose the Raspberry Pi OS (Other) option, you can see (as shown in the below screenshot) the lite, 32 bit full, 64 bit, and legacy versions of the OS.
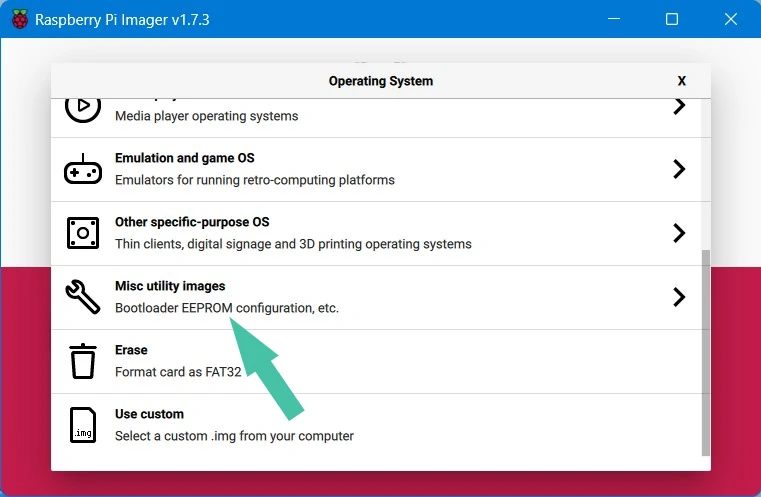
- If you choose Misc utility Images option, you can find recovery images for Raspberry Pi. And inside that, you can select bootloader or PINN which is a multi-boot OS installer with OS admin features.

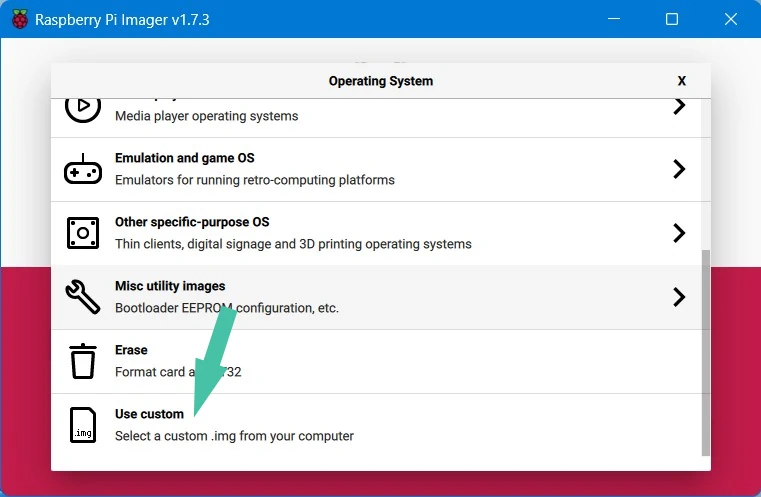
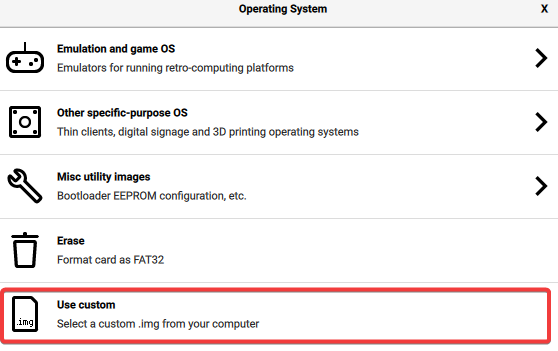
- If you’ve downloaded the OS file from any unofficial sources or want to any other OS image, you can use the Use custom option to select your preferred image.
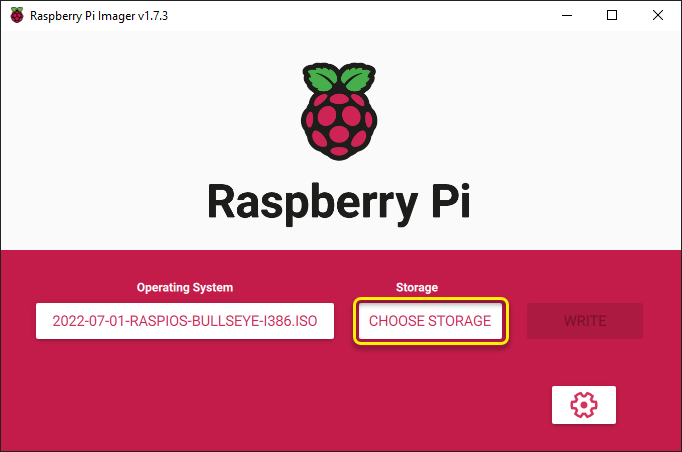
- Once you choose the OS, the next step is to CHOOSE STORAGE in which you want to flash it. Here you need to choose your microSD card from the list then appears.
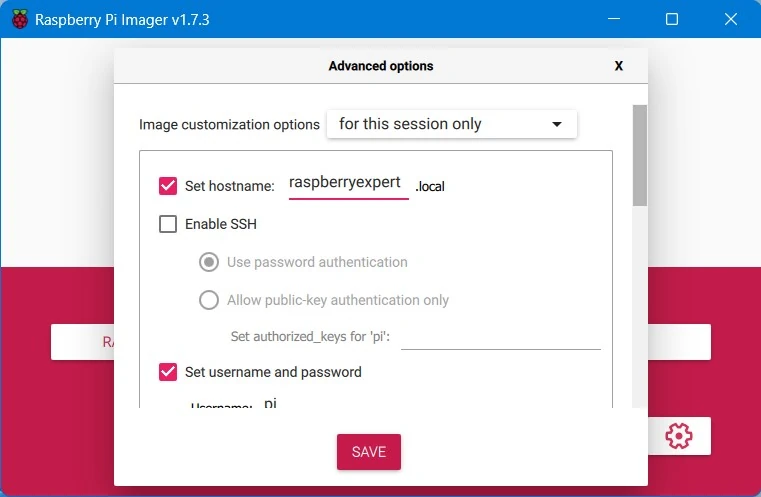
- The next step is to flash your OS onto the drive. But before that you can use the advanced options to customize your install. For example, you can set a new username and password other than the default password, set hostname, enable SSH, configure wireless LAN, change locale settings, etc. Once done with that click SAVE.
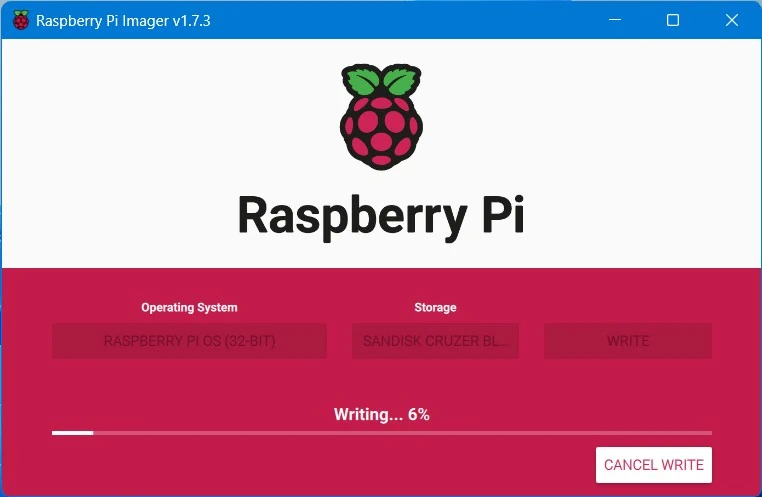
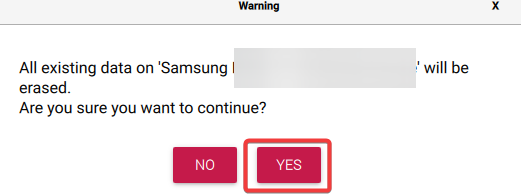
- To start the flashing the OS, click WRITE and then YES to confirm. This will begin the process and should take a few minutes to complete.

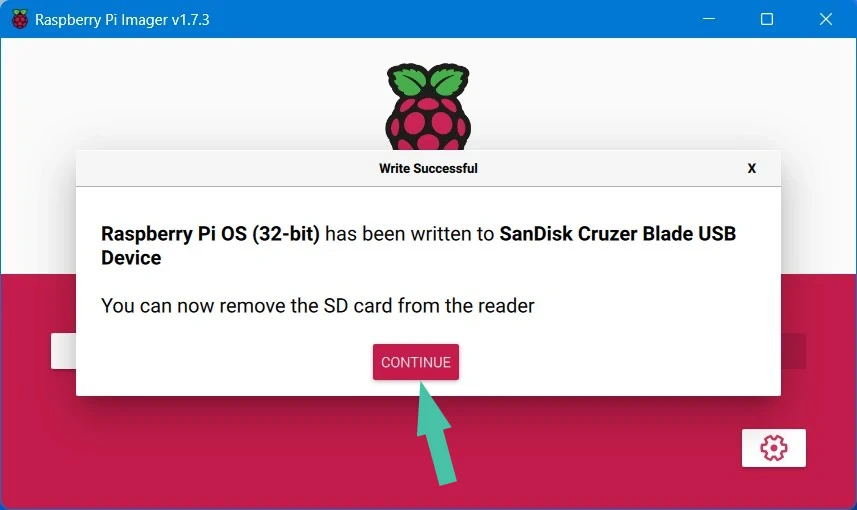
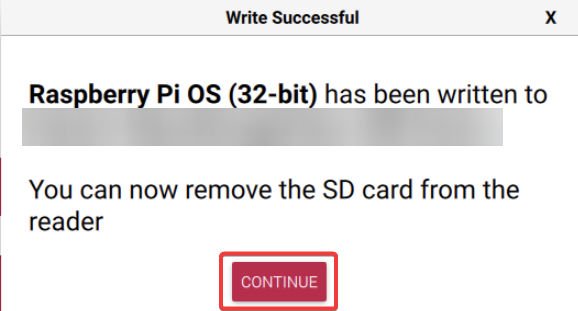
- Once the flashing process completes, you will be presented with a Write successful message. Click CONTINUE.

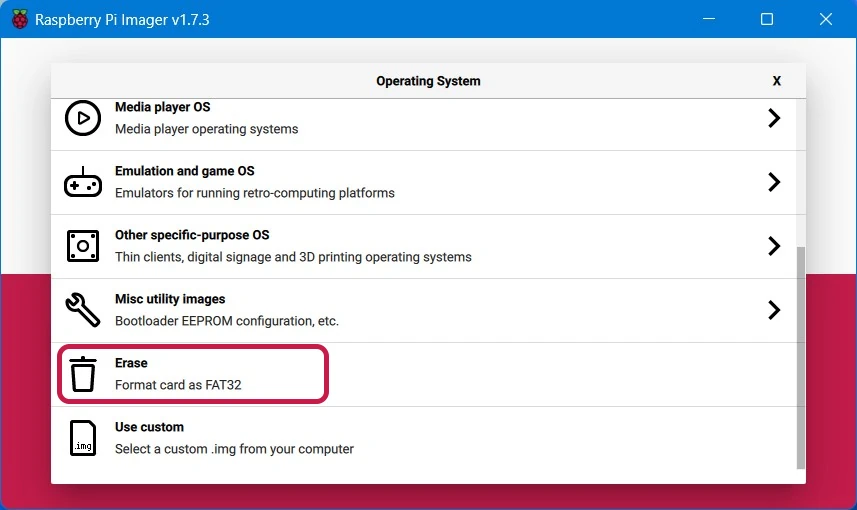
- The next use of the Raspberry Pi imager software is to format and SD card or a USB drive to FAT32 file system. For this to do, Open Imager and click CHOOSE OS. Now, scroll down and select the Erase option as shown in the screenshot below.
- Then as usual, select the SD card and the click WRITE. Once done, click CONTINUE.
 If you choose the Raspberry Pi OS (Other) option, you can see (as shown in the below screenshot) the lite, 32 bit full, 64 bit, and legacy versions of the OS.
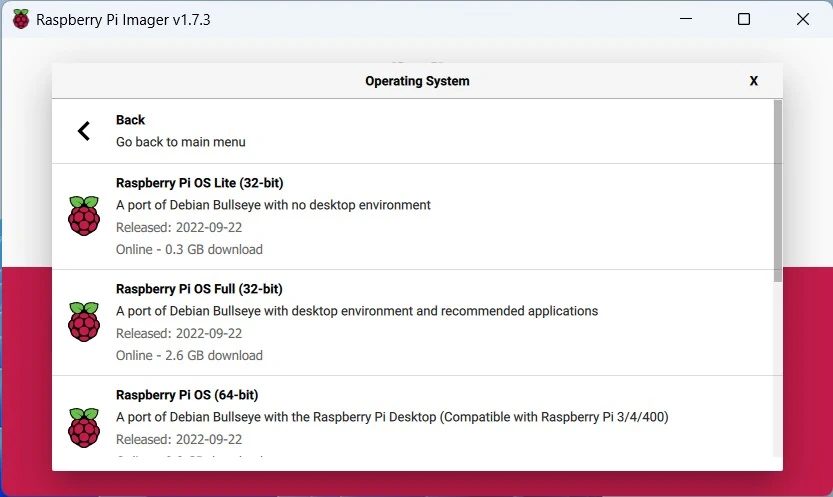
Final Words
Now that you know what are the important uses of the Imager tool and how to do them your own. It’s all easy to do but should know what you are doing. This official tool has replaced some other well known flashing software but for good reasons. It’s safe and officially recommended by the Raspberry Pi foundation.
If you come across and issue, do let us know in the comments.

Whether you want a fresh start with your Raspberry Pi or if you wish to install a specific OS, the Raspberry Pi Imager for Windows will do the trick.
Raspberry Pi Imager is a free and open-source tool but can be considered the ultimate tool for typical Raspberry Pi users. Even though writing images to SD cards can be a bit tricky, worry not. In this tutorial, you will learn how to install and write a bootable image to an SD card.
Experience different OSes by writing images with Raspberry Pi Imager!
Prerequisites
This tutorial comprises hands-on demonstrations. To follow along, you will need the following:
- A computer running Windows 10 (or later) – This tutorial uses Windows 10 21H2.
- An SD card with at least 8GB storage space – The more storage space, the better!
- A microSD card reader (or any SD card adapter compatible with your computer).
- A Raspberry Pi OS image file to install – This tutorial uses Raspberry Pi Desktop.
Downloading and Installing Raspberry Pi Imager for Windows
Created by the Raspberry Pi Foundation, the Raspberry Pi Imager is software that lets you write images onto storage devices, such as SD cards. For this tutorial, you will use the Raspberry Pi Imager for Windows to write a Raspberry Pi image onto your SD card.
But first, you will need to download and install the Raspberry Pi Imager for Windows:
1. Open your web browser, and head to the official Raspberry Pi website.
2. Next, click Downloads for Windows to download the Raspberry Pi Imager installer.
2. Once downloaded, double-click on the installer to launch the setup wizard.

3. Now, click the Install button to install Raspberry Pi Imager on your computer.

5. Lastly, tick the checkbox below, click Finish to close the wizard, and run Raspberry Pi Imager.
Writing an Image to Your SD Card
Now that you have installed Raspberry Pi Imager for Windows, it is time to write an image to your SD card, also known as “imaging” or “flashing.”
Once the image is written, you can boot your Raspberry Pi from the SD card and use it like any other computer.
Note that writing an image erases all of the data on your SD card. So be sure to back up any important files before proceeding.
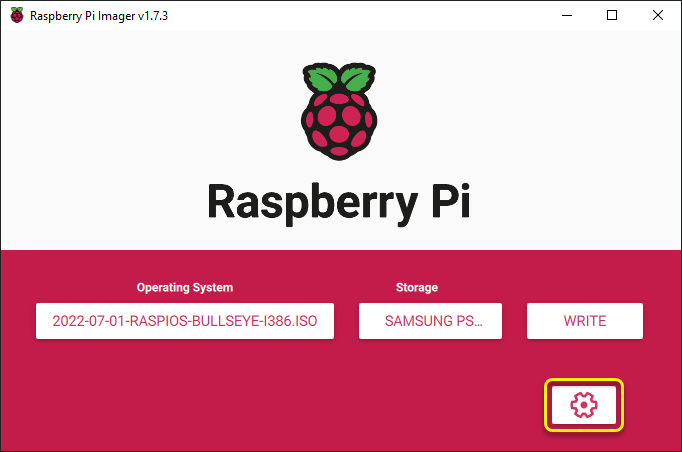
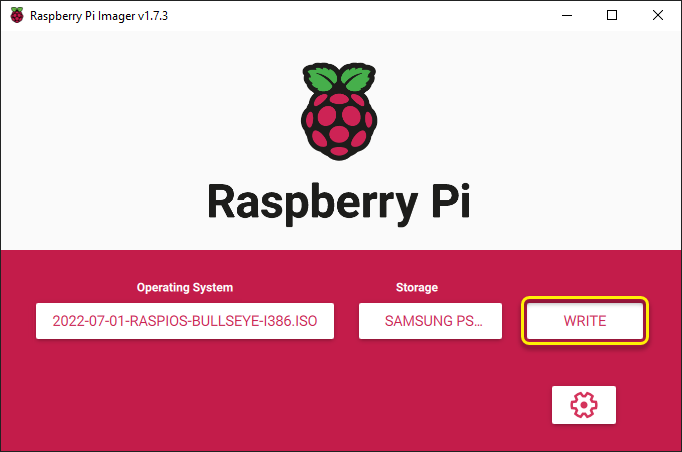
1. On the main screen of the Raspberry Pi Imager, click the CHOOSE OS button to select the OS you want to install.
2. Next, choose an OS from the options shown below. Many options are available, but for this tutorial, scroll down and select the Use custom option at the bottom.
This option lets you choose an image file from your computer from a dialog box, so you are not limited to the OS list.
💡 Some of the most popular distributions, like Kali Linux, Fedora, DietPi, or Chromium OS, are not on the list. But the Use custom option lets you use them to create your image.
3. Locate the Raspberry Pi image file on your computer, and click Open.
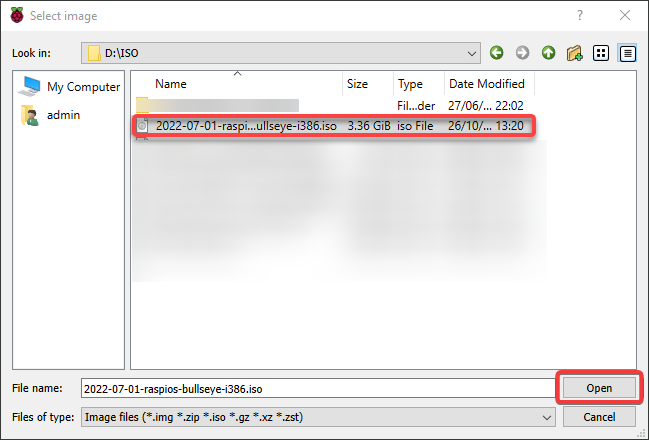
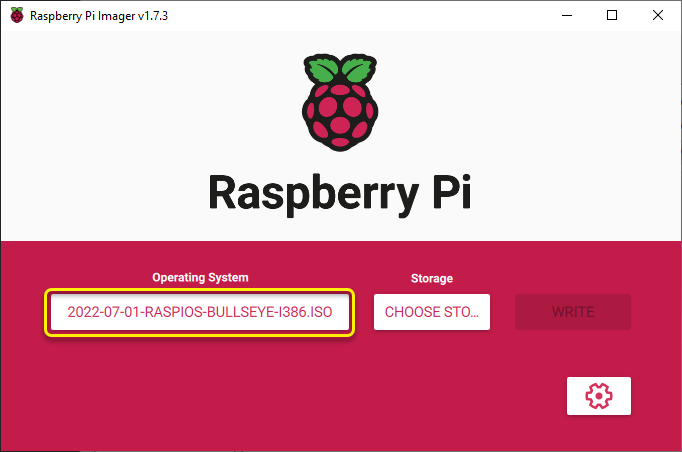
The OS you chose is now displayed in the Operating System box, as shown below.
4. Now, insert your SD card into your computer.
5. Once inserted, click the CHOOSE STORAGE button to locate the SD card.
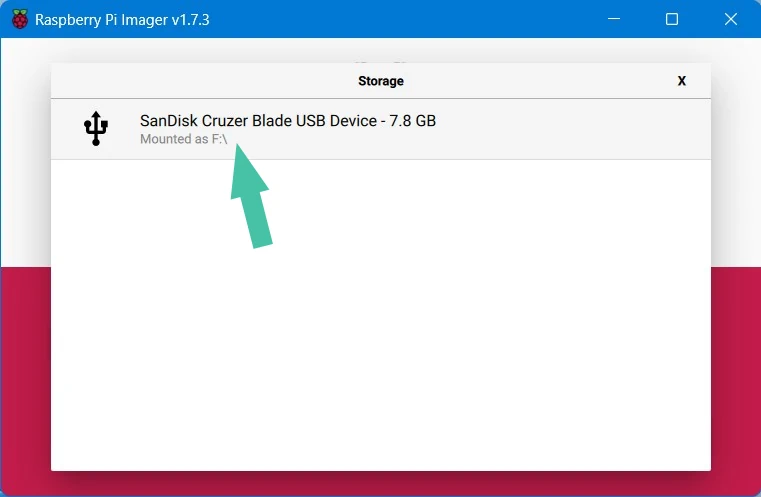
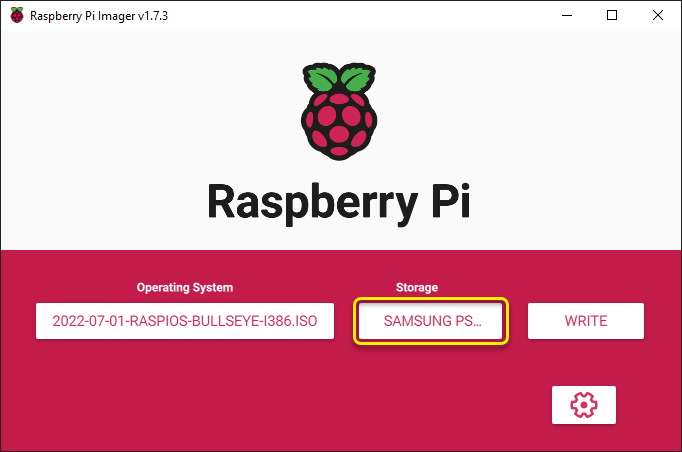
6. Select the SD card you inserted from the list of storage devices connected to your computer.

Below, you can see the selected SD card is now displayed in the Storage box.
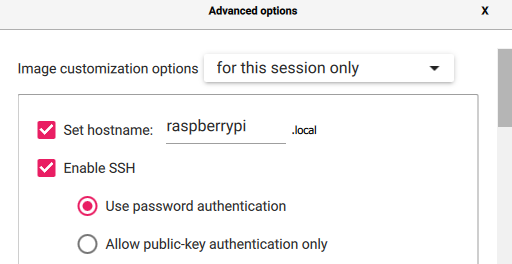
7. Next, click the settings icon to access the advanced options.
8. Configure the hostname and SSH settings on the Advanced options window with the following:
- Tick the Set hostname checkbox and provide a hostname for your Raspberry Pi to uniquely identify your computer on a network.Tick the Enable SSH checkbox to enable Secure Shell (SSH) access to your Raspberry Pi. SSH allows you to access your Raspberry Pi from another computer remotely.
- Select the Use password authentication option to require a password when you SSH to your Raspberry Pi.
9. Now, tick the Set username and password checkbox and enter a username and a strong password for your Raspberry Pi. You will use these credentials to SSH into your Raspberry Pi once it has been imaged.

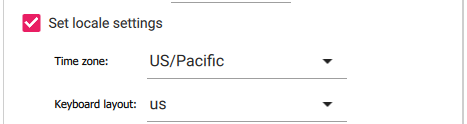
10. Tick the Set locale settings checkbox and select your preferred Time zone and Keyboard layout for your Raspberry Pi. Note that choosing your location from the list ensures the accurate time zone.
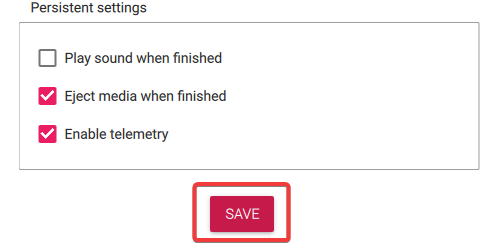
11. Under Persistent settings, enable the following:
- Eject media when finished – This setting helps to safely eject the SD card from your computer when the imaging process is complete.Enable telemetry – This setting helps the Raspberry Pi Foundation improve the Raspberry Pi Imager for Windows tool.
Keep other settings as is, and click Save to save your settings and close the window.
12. Once saved, click WRITE to begin writing the image against your selected settings to your SD card.
Click YES when prompted to confirm writing the image.
A new window opens, displaying the progress of the write operation. Depending on the image size and your SD card speed, this process can take a while.

13. Finally, click CONTINUE to close the message box and return to the main screen once complete.
Booting Up Raspberry Pi via SD Card
You have successfully managed to write an image to your SD card. But to verify the image works, you will have to boot your Raspberry Pi from the image.
- Remove the SD card from your computer.
- Insert the SD card into your Raspberry Pi and connect the power supply. The green LED on your Raspberry Pi should start flashing, which indicates the Raspberry Pi is booting up.
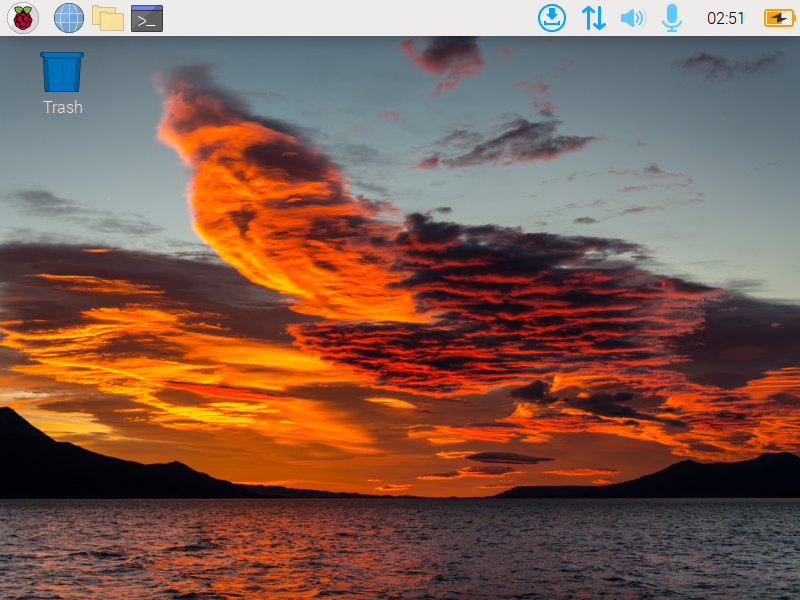
- Wait a minute or so for your Raspberry Pi to boot up. Once up, Raspberry Pi will be displayed on your screen, as shown below. The output below verifies Raspberry Pi is working and the image was successfully written to your SD card. Congratulations! You have now imaged your first SD card with the Raspberry Pi Imager for Windows tool.
Conclusion
The Raspberry Pi Imager for Windows provides a quick way to write OS images on your SD card. And in this tutorial, you have learned how to install Raspberry Pi Imager, write an image, and boot to your Raspberry Pi via SD card.
Experimenting with the Raspberry Pi can be fun. And since Raspberry Pi is a low-cost and low-power device, why not learn about building LAMP web servers and hosting your website? Keep Raspberry Pi running 24/7 without breaking the bank!