Overview
This guide covers RabbitMQ installation on Windows. It focuses on the two recommended installation
options:
- Using Chocolatey
- Using the official installer as an administrative user
The guide also covers a few post-installation topics in the context of Windows:
- The basics of node configuration
- CLI tool authentication
- RabbitMQ Windows Service
- Managing the node
- Firewall and security tools effects
- Log file location
- Default user limitations
and more. These topics are covered in more details in the rest of documentation guides.
A separate companion guide covers known Windows-specific issues
and ways to mitigate them.
Using chocolatey
RabbitMQ packages are distributed via Chocolatey.
New releases can take a while (sometimes weeks) to get through approvals,
so this option is not guaranteed to provide the latest release.
It does, however, manage the required dependencies.
To install RabbitMQ using Chocolatey, run the following command from the command line or from PowerShell:
choco install rabbitmq
For many use cases, Chocolatey is the optimal installation method.
The Chocolatey RabbitMQ package is open source and can be found on GitHub.
Using the Installer
The official RabbitMQ installer is produced for every RabbitMQ release.
Compared to installation via Chocolatey, this option gives Windows users
the most flexibility but also requires them to be
aware of certain assumptions and requirements in the installer:
- There must be only one Erlang version installed at a time
- Erlang must be installed using an administrative account
- It is highly recommended that RabbitMQ is also installed as an administrative account
- Installation path must only contain ASCII characters. It is highly recommended that the path does not contain spaces in any directory names.
- It may be necessary to manually copy the shared secret file used by CLI tools
- CLI tools require Windows console to operate in UTF-8 mode
When these conditions are not met, Windows service and CLI tools may require
reinstallation or other manual steps to get them to function as expected.
This is covered in more detail in the Windows-specific Issues guide.
Dependencies
RabbitMQ requires a 64-bit supported version of Erlang for Windows to be installed.
Erlang 25.3 is the latest supported version.
Binary builds of other (for example, earlier) versions of Erlang for Windows can be obtained from the Erlang/OTP Version Tree page.
Erlang must be installed using an administrative account or it won’t be discoverable to the RabbitMQ Windows service.
Once a supported version of Erlang is installed, download the RabbitMQ installer, rabbitmq-server-{version}.exe
and run it. It installs RabbitMQ as a Windows service and starts it using the default configuration.
Direct Downloads
| Description | Download | Signature |
|---|---|---|
| Installer for Windows systems (from GitHub) | rabbitmq-server-3.12.6.exe | Signature |
Run RabbitMQ Windows Service
Once both Erlang and RabbitMQ have been installed, a RabbitMQ node can be started as a Windows service.
The RabbitMQ service starts automatically. RabbitMQ Windows service
can be managed from the Start menu.
CLI Tools
RabbitMQ nodes are often managed, inspected and operated using CLI Tools
in PowerShell.
On Windows, CLI tools have a .bat suffix compared to other platforms. For example,
rabbitmqctl on Windows is invoked as rabbitmqctl.bat.
In order for these tools to work they must be able to authenticate with RabbitMQ nodes
using a shared secret file called the Erlang cookie.
The main CLI tools guide covers most topics related to command line tool usage.
In order to explore what commands various RabbitMQ CLI tools provide, use the help command:
# lists commands provided by rabbitmqctl.bat
rabbitmqctl.bat help

# lists commands provided by rabbitmq-diagnostics.bat
rabbitmq-diagnostics.bat help

# ...you guessed it!
rabbitmq-plugins.bat help
To learn about a specific command, pass its name as an argument to help:
rabbitmqctl.bat help add_user
Cookie File Location
On Windows, the cookie file location depends on
whether the HOMEDRIVE and HOMEPATH environment variables are set.
If RabbitMQ is installed using a non-administrative account, a shared secret file
used by nodes and CLI tools will not be placed into a correct location,
leading to authentication failures when rabbitmqctl.bat
and other CLI tools are used.
One of these options can be used to mitigate:
- Re-install RabbitMQ using an administrative user
- Copy the file .erlang.cookie manually from %SystemRoot% or %SystemRoot%\system32\config\systemprofile
to %HOMEDRIVE%%HOMEPATH%.
Node Configuration
The service starts using its default settings, listening
for connections on default interfaces and ports.
Node configuration is primarily done using a configuration file.
A number of available environment variables can be used
to control node’s data location, configuration file path and so on.
This is covered in more detail in the Configuration guide
Environment Variable Changes on Windows
Important: after setting environment variables, it is necessary to re-install the Windows service. Restarting the service will not be sufficient.
Managing a RabbitMQ Node
Managing the Service
Links to RabbitMQ directories can be found in the Start Menu.
There is also a link to a command prompt window that
will start in the sbin dir, in the Start Menu. This is
the most convenient way to run the command line tools.
Note that CLI tools will have to authenticate to the target RabbitMQ node.
Stopping a Node
To stop the broker or check its status, use
rabbitmqctl.bat in sbin (as an administrator).
rabbitmqctl.bat stop
Checking Node Status
The following CLI command runs a basic health check
and displays some information about the node if it is running.
# A basic health check of both the node and CLI tool connectivity/authentication
rabbitmqctl.bat status
For it to work,
two conditions must be true:
- The node must be running
- rabbitmqctl.bat must be able to authenticate with the node
See the CLI tools section and the Monitoring and Health Checks guide
to learn more.
Log Files and Management
Server logs are critically important in troubleshooting and root cause analysis.
See Logging and File and Directory Location guides
to learn about log file location, log rotation and more.
Firewalls and Security Tools
Firewalls and security tools can prevent RabbitMQ Windows service and CLI tools from operating
correctly.
Such tools should be configured to whitelist access to ports used by RabbitMQ.
Default User Access
The broker creates a user guest with password
guest. Unconfigured clients will in general use these
credentials. By default, these credentials can only be
used when connecting to the broker as localhost so you
will need to take action before connecting from any other
machine.
See the documentation on access control for information on how to create more users and delete
the guest user.
Port Access
RabbitMQ nodes bind to ports (open server TCP sockets) in order to accept client and CLI tool connections.
Other processes and tools such as anti-virus software may prevent RabbitMQ from binding to a port. When that happens,
the node will fail to start.
CLI tools, client libraries and RabbitMQ nodes also open connections (client TCP sockets).
Firewalls can prevent nodes and CLI tools from communicating with each other.
Make sure the following ports are accessible:
- 4369: epmd, a peer discovery service used by RabbitMQ nodes and CLI tools
- 5672, 5671: used by AMQP 0-9-1 and 1.0 clients without and with TLS
- 25672: used for inter-node and CLI tools communication (Erlang distribution server port)
and is allocated from a dynamic range (limited to a single port by default,
computed as AMQP port + 20000). Unless external connections on these ports are really necessary (e.g.
the cluster uses federation or CLI tools are used on machines outside the subnet),
these ports should not be publicly exposed. See networking guide for details. - 35672-35682: used by CLI tools (Erlang distribution client ports) for communication with nodes
and is allocated from a dynamic range (computed as server distribution port + 10000 through
server distribution port + 10010). See networking guide for details. - 15672: HTTP API clients, management UI and rabbitmqadmin
(only if the management plugin is enabled) - 61613, 61614: STOMP clients without and with TLS (only if the STOMP plugin is enabled)
- 1883, 8883: MQTT clients without and with TLS, if the MQTT plugin is enabled
- 15674: STOMP-over-WebSockets clients (only if the Web STOMP plugin is enabled)
- 15675: MQTT-over-WebSockets clients (only if the Web MQTT plugin is enabled)
It is possible to configure RabbitMQ
to use different ports and specific network interfaces.
Upgrading Erlang VM
If you have an existing installation and are planning to upgrade
the Erlang VM from a 32-bit to a 64-bit version then you must uninstall
the broker before upgrading the VM. The installer will not be able to stop
or remove a service that was installed with an Erlang VM of a different
architecture.
Dump File Location When Running as a Service
In the event that the Erlang VM terminates when RabbitMQ is running
as a service, rather than writing the crash dump to the current
directory (which doesn’t make sense for a service) it is written
to an erl_crash.dump file in the base directory of
the RabbitMQ server, defaulting to %APPDATA%\%RABBITMQ_SERVICENAME% — typically %APPDATA%\RabbitMQ otherwise.
Getting Help and Providing Feedback
If you have questions about the contents of this guide or
any other topic related to RabbitMQ, don’t hesitate to ask them
using GitHub Discussions
or our community Discord server.
Help Us Improve the Docs <3
If you’d like to contribute an improvement to the site,
its source is available on GitHub.
Simply fork the repository and submit a pull request. Thank you!
Overview
This guide describes how RabbitMQ can be installed and configured manually on Windows. In general
we recommend using one the more automation-friendly options for Windows when possible.
Install Erlang/OTP
RabbitMQ requires a 64-bit supported version of Erlang for Windows to be installed.
Latest binary builds for Windows can be obtained from the Erlang/OTP Version Tree page.
Erlang will appear in the Start Menu,
and \erl{version}\bin\erl.exe will be in C:\Program Files for 64-bit Erlang installations
Important: your system should only have one version of Erlang installed.
Please consult the Windows-specific Issues page.
Make Sure ERLANG_HOME is Set
In case there’s an existing RabbitMQ installation with the broker running as a service and
you installed an Erlang VM with a different architecture then the service must be uninstalled
before updating ERLANG_HOME.
Set ERLANG_HOME to where you actually put your Erlang installation, e.g.
C:\Program Files\erl{version} (full path).
The RabbitMQ batch files expect to execute %ERLANG_HOME%\bin\erl.exe.
Go to Start > Settings > Control Panel > System > Advanced > Environment Variables.
Create the system environment variable ERLANG_HOME
and set it to the full path of the directory which contains bin\erl.exe.
Install RabbitMQ Server
After making sure a supported Erlang version is installed, download rabbitmq-server-windows-3.12.6.zip.
Direct Downloads
| Description | Download | Signature |
|---|---|---|
| Installer for Windows systems (from GitHub) | rabbitmq-server-windows-3.12.6.zip | Signature |
From the zip file, extract the folder named
rabbitmq_server-3.12.6
into C:\Program Files\RabbitMQ
(or somewhere suitable for application files).
Synchronise the Erlang Cookie
The Erlang cookie is a shared secret used for authentication between RabbitMQ nodes and CLI tools.
The value is stored in a file commonly referred to as the Erlang cookie file.
The cookie file used by the service account and the user
running rabbitmqctl.bat must be synchronised for
CLI tools such as rabbitmqctl.bat to function. All nodes in a cluster must have the same
cookie value (cookie file contents).
Please see How CLI Tools Authenticate to Nodes (and Nodes to Each Other): the Erlang Cookie for details.
Locating CLI Tools and App Data
CLI tools
Within the rabbitmq_server-3.12.6\sbin
directory are some scripts which run commands to control the RabbitMQ server.
The RabbitMQ server can be run as either an application or service (not both).
- rabbitmq-server.bat starts the broker as an application
- rabbitmq-service.bat manages the service and starts the broker
- rabbitmqctl.bat manages a running broker
Log in as an administrator. To see the output, run these from a
Command Prompt
in the sbin directory.
Note: On Windows Vista (and later) it is necessary to
elevate privilege
(e.g. right-click on the icon to select Run as Administrator).
Set up the system path so RabbitMQ server and CLI tools from the sbin directory
can be executed without using fully qualified paths.
- Create a system environment variable (e.g. RABBITMQ_SERVER) for
«C:\Program Files\RabbitMQ\rabbitmq_server-3.12.6».
Adjust this if you put rabbitmq_server-3.12.6 elsewhere,
or if you upgrade versions. - Append the literal string «;%RABBITMQ_SERVER%\sbin» to your system path (aka %PATH%).
Now it should be possible to run rabbitmq commands from any (administrator) Command Prompt.
Navigate to rabbitmq_server-3.12.6\sbin
to run commands if the system path does not contain the RabbitMQ sbin
directory.
Node Data Directory
By default, the RabbitMQ logs and node’s data directory
are stored in the current user’s Application Data directory
e.g. C:\Documents and Settings\%USERNAME%\Application Data or
C:\Users\%USERNAME%\AppData\Roaming.
Execute echo %APPDATA% at a Command Prompt
to find this directory. Alternatively, Start > Run %APPDATA% will open this folder.
A node can be configured to use a different data directory
using one of these environment variables: RABBITMQ_BASE, RABBITMQ_MNESIA_BASE or
RABBITMQ_MNESIA_DIR. Please read the relocation guide for a description
of how each of these variables works.
Running RabbitMQ Server as an Application
The application is started by the rabbitmq-server.bat
script in sbin.
Customise RabbitMQ Environment Variables
The service will run fine using its default settings. It is possible to customise the RabbitMQ environment
or edit configuration.
Important: after setting environment variables, it is necessary to restart the node.
Start the Broker as an Application
Run the command
rabbitmq-server.bat -detached
This will start a node in the background (not attached to the Command Prompt).
Alternatively, rabbitmq-server.bat can be executed in Windows Explorer
to start a node in foreground.
When a node is started, a Command Prompt window opens,
displays a short startup banner, indicating that the RabbitMQ
broker has been started successfully.
If the node was started without the -detached option,
e.g. using Windows Explorer, a second Command Prompt
window will be necessary to control the application using CLI tools.
Important: closing the original Command Prompt window
will forcefully shut down a server started this way.
Running RabbitMQ Server as a Service
The service will run in the security context of the system account
without the need for a user to be logged in on a console.
This is normally more appropriate for production use.
The server should not be run as a
service and application simultaneously.
The service runs using the rabbitmq-service.bat script in sbin.
Customise RabbitMQ Environment Variables
The service will run fine using its default settings. It is possible to customise the RabbitMQ environment
or edit configuration.
Important: after setting environment variables, it is necessary to reinstall the service.
Install the Service
Install the service by running
rabbitmq-service.bat install
A service with the name defined by RABBITMQ_SERVICENAME
should now appear in the Windows Services control panel
(Start > Run services.msc).
Managing the Service
To manage the service (install, remove, start, stop,
enable, disable), use
rabbitmq-service.bat
commands. Alternatively, the Windows Services panel
(services.msc) can be used to perform some of the
same functions as the service script.
Start the Broker as a Service
To start the broker, execute
rabbitmq-service.bat start
If the output from this command is
«Service RABBITMQ_SERVICENAME started«, then the service was started
successfully.
Confirm the service named RABBITMQ_SERVICENAME
reports a «Started» status in Services:
Start > Run services.msc.
Upgrading Erlang VM
If you have an existing installation and are planning to upgrade
the Erlang VM from a 32bit to a 64bit version then you must uninstall
the broker before upgrading the VM. The installer will not be able to stop
or remove a service that was installed with an Erlang VM of a different
architecture.
Managing a RabbitMQ Node
Managing the Service
Links to RabbitMQ directories can be found in the Start Menu.
There is also a link to a command prompt window that
will start in the sbin dir, in the Start Menu. This is
the most convenient way to run the command line tools.
Note that CLI tools will have to authenticate to the RabbitMQ node running locally. That involves a shared secret file
which has to be placed into the correct location for the user.
Stopping a Node
To stop the broker or check its status, use
rabbitmqctl.bat in sbin (as an administrator).
rabbitmqctl.bat stop
Checking Node Status
The following command performs the most basic node health check and displays some information about
the node if it is running:
rabbitmqctl.bat status
See RabbitMQ CLI tools guide and the Monitoring and Health Checks guide for details.
Log Files and Management
Server logs are critically important in troubleshooting and root cause analysis.
See Logging and File and Directory Location guides
to learn about log file location, log rotation and more.
Troubleshooting When Running as a Service
In the event that the Erlang VM crashes whilst RabbitMQ is running
as a service, rather than writing the crash dump to the current
directory (which doesn’t make sense for a service) it is written
to an erl_crash.dump file in the base directory of
the RabbitMQ server (set by the RABBITMQ_BASE environment
variable, defaulting
to %APPDATA%\%RABBITMQ_SERVICENAME% —
typically %APPDATA%\RabbitMQ otherwise).
Default User Access
The broker creates a user guest with password
guest. Unconfigured clients will in general use these
credentials. By default, these credentials can only be
used when connecting to the broker as localhost so you
will need to take action before connecting from any other
machine.
See the documentation on access control for information on how to create more users and delete
the guest user.
Port Access
RabbitMQ nodes bind to ports (open server TCP sockets) in order to accept client and CLI tool connections.
Other processes and tools such as anti-virus software may prevent RabbitMQ from binding to a port. When that happens,
the node will fail to start.
CLI tools, client libraries and RabbitMQ nodes also open connections (client TCP sockets).
Firewalls can prevent nodes and CLI tools from communicating with each other.
Make sure the following ports are accessible:
- 4369: epmd, a peer discovery service used by RabbitMQ nodes and CLI tools
- 5672, 5671: used by AMQP 0-9-1 and 1.0 clients without and with TLS
- 25672: used for inter-node and CLI tools communication (Erlang distribution server port)
and is allocated from a dynamic range (limited to a single port by default,
computed as AMQP port + 20000). Unless external connections on these ports are really necessary (e.g.
the cluster uses federation or CLI tools are used on machines outside the subnet),
these ports should not be publicly exposed. See networking guide for details. - 35672-35682: used by CLI tools (Erlang distribution client ports) for communication with nodes
and is allocated from a dynamic range (computed as server distribution port + 10000 through
server distribution port + 10010). See networking guide for details. - 15672: HTTP API clients, management UI and rabbitmqadmin
(only if the management plugin is enabled) - 61613, 61614: STOMP clients without and with TLS (only if the STOMP plugin is enabled)
- 1883, 8883: MQTT clients without and with TLS, if the MQTT plugin is enabled
- 15674: STOMP-over-WebSockets clients (only if the Web STOMP plugin is enabled)
- 15675: MQTT-over-WebSockets clients (only if the Web MQTT plugin is enabled)
It is possible to configure RabbitMQ
to use different ports and specific network interfaces.
Windows-specific Issues
We aim to make RabbitMQ a first-class citizen on Windows. However, sometimes there are circumstances beyond our
control. Please consult the Windows-specific Issues page.
Getting Help and Providing Feedback
If you have questions about the contents of this guide or
any other topic related to RabbitMQ, don’t hesitate to ask them
using GitHub Discussions
or our community Discord server.
Help Us Improve the Docs <3
If you’d like to contribute an improvement to the site,
its source is available on GitHub.
Simply fork the repository and submit a pull request. Thank you!
• 3 min read
RabbitMQ — это прекрасный инструмент по работе с очередями, работающий на всех популярных платформах. Если вы планируете использовать систему очередей в своём проекте, вам нужна асинхронная обработка процессов, и работа с задачами в фоне, то RabbitMQ является очень удачным выбором.
RabbitMQ — это отличный инструмент, который выполняет свои задачи превосходно. Отличным преимуществом является качественная документация и широкий спектр функциональных возможностей.
RabbitMQ считается одной из самых продвинутых систем по работе с очередями. Это всё благодаря тому, что RabbitMQ имеет много возможностей. Если хорошо разобраться в этой системе, то, в дальнейшем, работа с другими системами очередей не вызовет у вас конфуза.
Но, прежде, чем писать RabbitMQ tutorial, как обычно, начнём с установки и запуска. В этой статье я шаг за шагом продемонстрирую процесс установки. Если вы ещё не знакомы, с системами очередей, и слабо понимаете механизм их работы, то советую прочитать ранее опубликованную статью об основам очередей.
Установка Erlang
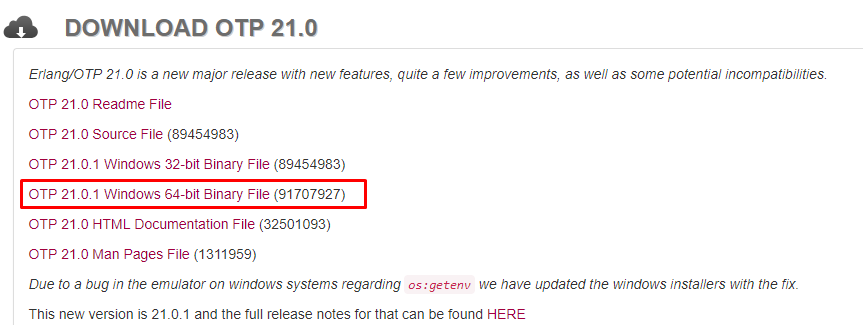
RabbitMQ запускается в виртуальной среде Erlang. Не спрашивайте зачем, просто установите Erlang, без которого RabbitMQ не сможет работать. Последнюю версию для windows можно скачать по ссылке.
На странице скачивания установочного файла нужно выбрать версию, в зависимости от вашей системы (в моём случае, это версия для 64-разрядного процессора):
Установка RabbitMQ
После установки Erlang следующим шагом будет установка самого RabbitMQ (ну наконец-то). Скачать последнюю версию RabbitMQ можно по ссылке.
С установкой всё просто — запускаем скачанный файл, и со всем соглашаемся.
Установка плагина управления RabbitMQ с WEB-интерфейса
После установки, RabbitMQ сразу же будет запущен, потому, можно сразу же начинать с ним работать.
Обычным для программиста является работа из консоли. Но, иногда, одной консоли бывает недостаточно. Потому, в этом шаге будет установлен плагин RabbitMQ Web для работы с очередями из WEB-интерфейса. Этот интерфейс предоставляет удобный вывод статистики, информацию о работающих процессах, логах, и т.д.
Для того, чтобы установить плагин, нужно из консоли перейти в папку sbin, которая находится по пути установки RabbitMQ (в моём случае C:\Program Files\RabbitMQ Server\rabbitmq_server-3.7.7\sbin). При этом, запускать нужно от имени администратора.
Или же, проще нажать кнопку winsows, и начать печатать rabbit, и, из найденных результатов интересует в данном случае только RabbitMQ Command Prompt.
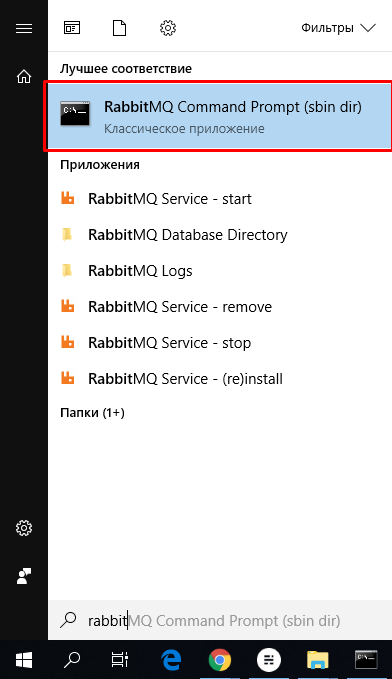
Запустив который мы окажемся в консоли, в нужной для работы директории.
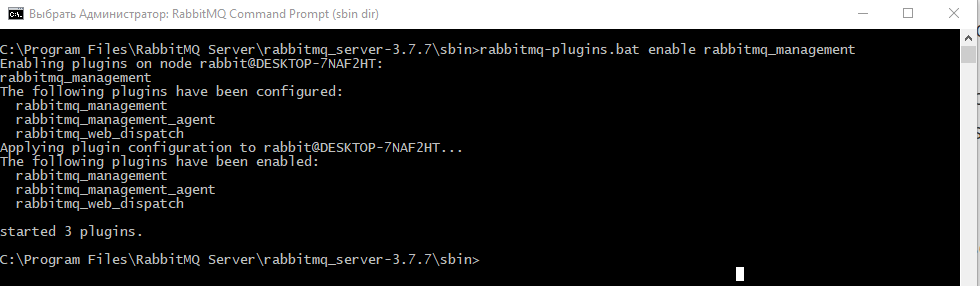
В открывшейся консоли нужно выполнить команду
rabbitmq-plugins.bat enable rabbitmq_management,
которая, как раз и включит этот плагин. Получиться должно что-то вроде этого:
Заключительным шагом от нас требуется перезапустить сервис, поочерёдно выполнив команды:
rabbitmq-service.bat stop
rabbitmq-service.bat install
rabbitmq-service.bat start
Теперь, удостоверимся, что все шаги были проделаны правильно, открыв ссылку в адресной строке http://localhost:15672.
Ожидаемо должны увидеть страницу входа в WEB-интерфейс: 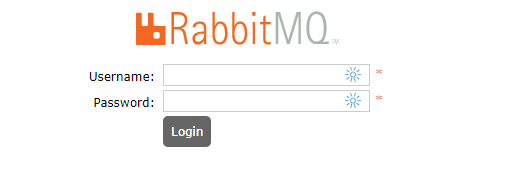
По умолчанию, данные для входа в панель управления:
Логин: guest
Пароль: guest
Вот, что вы должны увидеть в итоге:
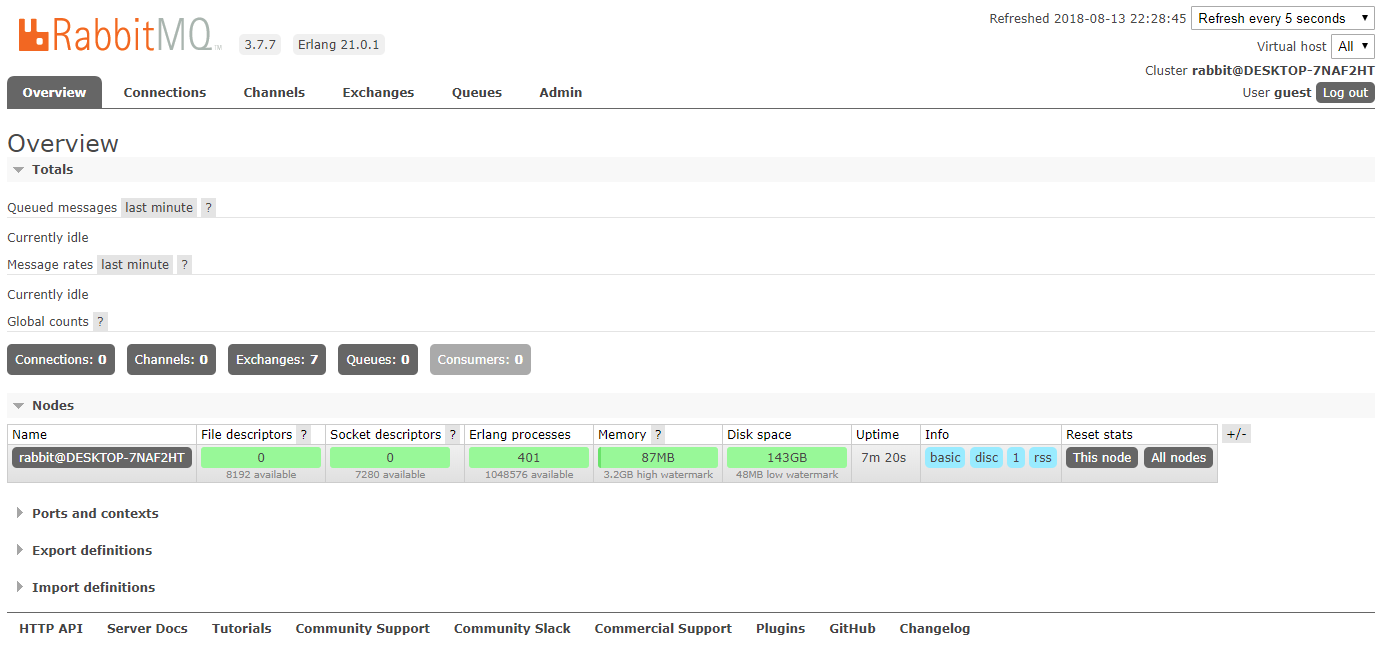
На этом установка полностью завершена, и сервис RabbitMQ готов к работе. Теперь можно свободно работать, и использовать все функции этого мощного и полезного инструмента. В следующей статье по RabbitMQ будет рассмотрен практический пример по работе с системой очередей: добавление, удаление, обработка, и т.д.
Протестируем работу сервиса
Если вы всё ещё не верите мне, что RabbitMQ работает, то, для теста можете открыть ссылку http://localhost:15672/api/vhosts, пройдя базовую аутентификацию (данные для входа те же — guest:guest), и должны получить JSON-ответ с информацией о состоянии работы сервиса.

Резюме
В этой статье я показал, как установить RabbitMQ на windows 10, как протестировать его работу, и установить плагин RabbitMQ WEB (для работы в WEB-интерфейсе). Это очень крутой инструмент, который рекомендовано освоить каждому программисту.
По поводу «рекомендовано» — это мягко говоря. Сейчас RabbitMQ используется почти во всех high-load проектах. И, зачастую, во всех вакансиях (на PHP программиста) требуют именно знание системы очередей RabbitMQ. Потому, хорошее понимание этого инструмента, и опыт работы с ним повышает шансы найти работу в хорошей компании.
Рассмотрим установку RabbitMQ (программный брокер сообщений) на Windows.
Установка Erlang
Перед установкой RabbitMQ, убедитесь, что на вашем компьютере установлены Erlang и .NET Framework (обычно они уже установлены, но лучше проверить наличие обновлений).
Erlang. Загрузите установщик Erlang с официального сайта. Запустите установщик и следуйте инструкциям установки, установка очень простая — просто соглашайтесь со всеми пунктами. После установки проверьте, что Erlang правильно установлен, открыв командную строку и введите команду erl. Если Erlang успешно установлен, откроется интерактивная оболочка Erlang. Также разрешаем правила firewall Windows defender, которые срабатывают при запуске компонента.
Установка и запуск RabbitMQ
Теперь можно приступить к установке RabbitMQ. Загрузите установщик RabbitMQ с официального сайта. Запустите установщик RabbitMQ. Установка также простая, соглашаемся со всеми пунктами. Во время установки укажите путь для установки RabbitMQ и другие настройки, если требуется.
После завершения установки, можно запустить RabbitMQ и проверить его работу. Перейдите в папку, где установлен RabbitMQ, и найдите папку «sbin». Запустите командную строку от имени администратора и перейдите в директорию. Например: C:\Program Files\RabbitMQ Server\rabbitmq_server-3.12.2\sbin
Выполняем команду для установки Web-плагина:
rabbitmq-plugins.bat enable rabbitmq_management
Далее запускаем последовательно команды:
rabbitmq-service.bat stop
rabbitmq-service.bat install
rabbitmq-service.bat start
Теперь можно заходить через веб-интерфейс, который по умолчанию работает на порту 15672. Для доступа к веб-интерфейсу откройте веб-браузер и перейдите по адресу http://localhost:15672/. Введите логин и пароль (по умолчанию «guest»/»guest»).
Теперь RabbitMQ установлен и готов к использованию.
Нужна помощь? Обслуживание и настройку RabbitMQ мы осуществляем в рамках услуги DevOps аутсорсинг.
Looking for a reliable message broker service that can help you manage your data effectively?
Look no further than RabbitMQ — a popular AMQP (Advanced Message Queuing Protocol) based message broker that’s trusted by developers and businesses worldwide. Available for Windows, Linux, and macOS, RabbitMQ is easy to install and use and offers a range of powerful features for message queuing and routing. To start with RabbitMQ on your Windows machine, you must install Erlang/OTP first. In this article, we’ll walk you through the process of installing and configuring RabbitMQ on Windows, so you can start using this powerful tool to manage your data more effectively.
How to Install RabbitMQ?
Step 1. Download Erlang/OTP for RabbitMQ from the Erlang downloads web page. Before downloading Erlang, check the version compatibility with RabbitMQ from this page. 2) Run the Erlang setup to start the installation.

Step 2. After completing the Erlang installation, download the RabbitMQ from the downloads webpage. Download the official installer of RabbitMQ. Alternatively, you can install it using Chocolatey.
Step 3. Make sure to install the RabbitMQ Server as administrator. Run the setup to start the installation.

Step 4. At the end of the installation, select the Start RabbitMQ service check box and click Finish.

Step 5. Go to the Start menu and open the Run command. Open the Services list by running services.msc in the run window.
Step 6. Make sure the RabbitMQ service is running.

Configure the RabbitMQ Management Console
Step 1. Open the Windows command prompt/PowerShell window and switch to the RabbitMQ installed location. By default, RabbitMQ executables will be installed in the C:\Program Files\RabbitMQ Server\rabbitmq_server-3.11.13\sbin location.
Step 2. Run the rabbitmq-plugins and enable the rabbitmq_management command in the command window. If you use PowerShell, run .\rabbitmq-plugins.bat to enable the rabbitmq_management command.
.\rabbitmq-plugins.bat enable rabbitmq_management
rabbitmq-plugins enable rabbitmq_management

Step 3. Restart the RabbitMQ server. Run the following commands in PowerShell/command window.
.\rabbitmqctl.bat stop
.\rabbitmq-server.bat  -detached
rabbitmqctl.bat stop
rabbitmq-server.bat -detached
Step 4. Open the browser and navigate to http://localhost:15672.

Step 5. Login with the default username and password. The default username is guest, and the password is guest.

Step 6. Navigate to the Admin tab, and specify a username and password. Select the role as administrator by clicking on the admin from the list of roles. Click on Add user button.

Step 7. The new user created will not have login permission to the management console. You need to provide access to the virtual host to enable login permission.

Step 8. Click on the username; in the user console, select the virtual host(/) and click the Set Permission button.

Step 9. Log out of the guest user and log in with the new user username and password.
Conclusion
Congratulations! You’ve successfully installed and configured RabbitMQ on your Windows machine and set up the management console to start managing your data with ease. With RabbitMQ, you have access to a powerful message broker that can help you optimize your data management, streamline your workflows, and ensure smooth communication between your applications. Whether you’re new to RabbitMQ or an experienced user, our step-by-step guide has everything you need to get started and take full advantage of this versatile tool. By following these simple steps, you can start enjoying the benefits of RabbitMQ today.