Introduction: REMOTE ACCESS YOUR SYNOLOGY NAS VIA QUICKCONNECT, EZ INTERNET OR PORT FORWARDING
In this article, you are going to learn how to access all of your data inside your Synology via Remote Access.
If you really enjoy this article, consider checking out my TechWizTime YouTube Channel.
And for an awesome source of Raspberry Pi Accessories, check out my Raspberry Pi Amazon List.
Let’s get started!
Step 1: What You’ll Need
- A Synology NAS with the latest DiskStation
- Working Internet Connection
- An UPnP compatible Router (in case of EZ Internet)
Step 2: Synology QuickConnect Method
Log in to your Synology NAS.
Go to your DiskStation menu button and open control panel then choose QuickConnect.
Place a tick besides “Enable QuickConnect” Log in or register a new Synology account, and once you do, give your DiskStation a name in the Quick Connect ID section.
NOTE: If the name has been taken you will see an alert down the bottom. Agree to the terms and conditions by placing a tick in the box and click Apply.
Once the QuickConnect ID is accepted you’ll be given a URL you can use to connect your Synology NAS via the internet. Save this URL somewhere safe on your phone or another device and you’ll always have access to your files wherever you are.
NOTE: You can control very speficic settings such as not letting mobile applications have access to your NAS in the “Advanced” Tab of the QuickConnect configuration panel.
FIX: If you happen to encounter an error like “You are not authorized to use this service” You need to change the security setting by going to the “Security” section in the QuickConnect configuration panel. Tick “Enhanced browser compatibility by skipping IP” before hitting “Apply”.
Step 3: EZ Internet Method
NOTE: To use this service you will need to have a router that supports UPnP.
Go to the DiskStation menu and choose EZ Internet. This will start the wizard that will guide you through the entire process.
On the first screen click next.
On the firewall setup screen place a tick in the “Enable firewall to block incoming connections” box. If you just want access to the DiskStation manager then click Next otherwise scroll through the list and place a check beside the services you want to have access to.
Next you will need to set up a hostname by typing it into the box. Here you can also change the domain name associated with the hostname you choose.
On the next screen you will need to register or log in into your Synology account before you can accept the Terms and Conditions.
Once you accept them click “Next” Check the settings written here are correct and click the apply button so the firewall and DDNS settings will be set up.
Once it finishes, click the “Finish” button. Make sure you have written down the domain name so you can have access to your Synology NAS.
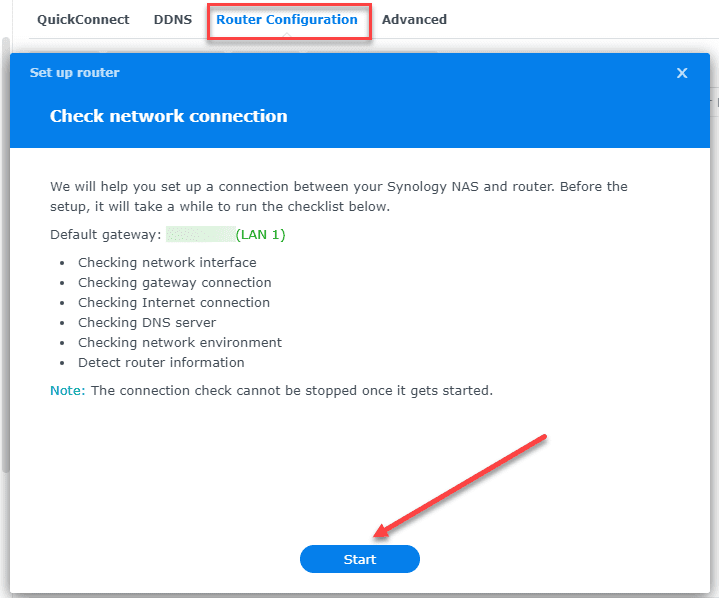
FIX: If the link is coming back with an error your router may not be compatible and the firewall settings may not have taken effect. To check this, go to the DiskStation menu and choose the control panel. Select the external access icon and go to the router configuration tab up the top. Lastly click on the setup router button. If a message comes up saying “No UPnP router found” then this method won’t work for you.
Step 4: Synology Port Forwarding Method
NOTE: Before starting, you need to make sure that the Synology NAS has its gateway setup with the IP address of the router. To do so, go to the DiskStation menu and choose control panel. Then choose “Network” and besides Default Gateway click on the “Edit” button. Make sure the IP address is your router. If not, you may need to manually configure DNS server on the network screen. Please be aware if you don’t know what you’re doing here, you might lose access to your Synology NAS.
Log into your router’s web interface to configure the ports that need to be open for access.
NOTE: Every router is different so this will need to be something you check with your particular routers manual.
Here is the list of ports you will need to open to access various features of the Synology NAS.
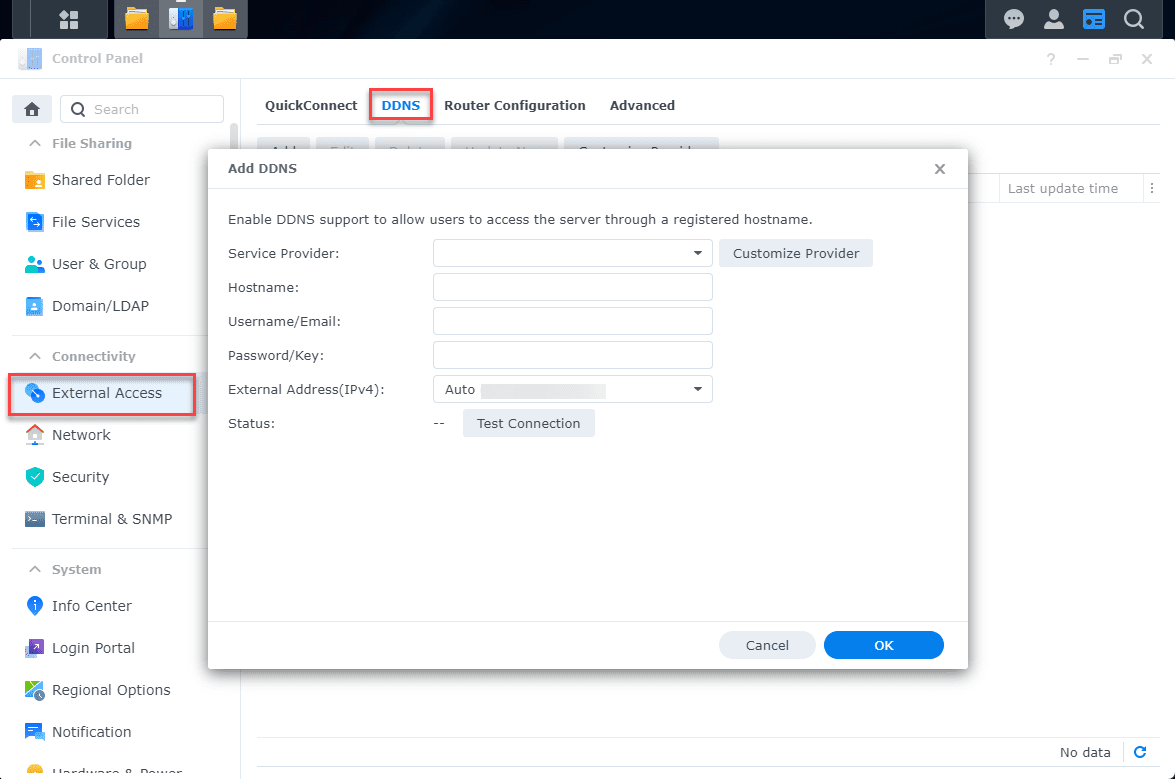
Once you have set up your router with the correct ports you can set up DDNS hostname for access by going to the DiskStation menu and choosing control panel.
Next choose “External access” and then, under the “DDNS” tab, choose the “Add” button, then you’ll see a huge drop down menu of different dynamic DNS providers
NOTE: You’ll need to have set up an account with a provider to use their service.
After you’ve chosen a provider, input all your details on the DDNS page, click on the “Test Connection” button to make sure everything is communicating correctly. Once you’re done, click the “Ok” button.
Now you’ve manually set up port forwarding and have access to your Synology NAS using remote access over the Internet.
Congratulations, you’ve just configured your NAS to allow you to access your data from anywhere in the world as long as you have an internet connection.
Could you do everything by yourself? Did you had any problems during the tutorial? Have any suggestion? Then leave a comment below.
If you enjoy this Instructable, consider checking out my TechWizTime YouTube Channel.
And for a good source of Raspberry Pi products, check out my Raspberry Pi Amazon List..
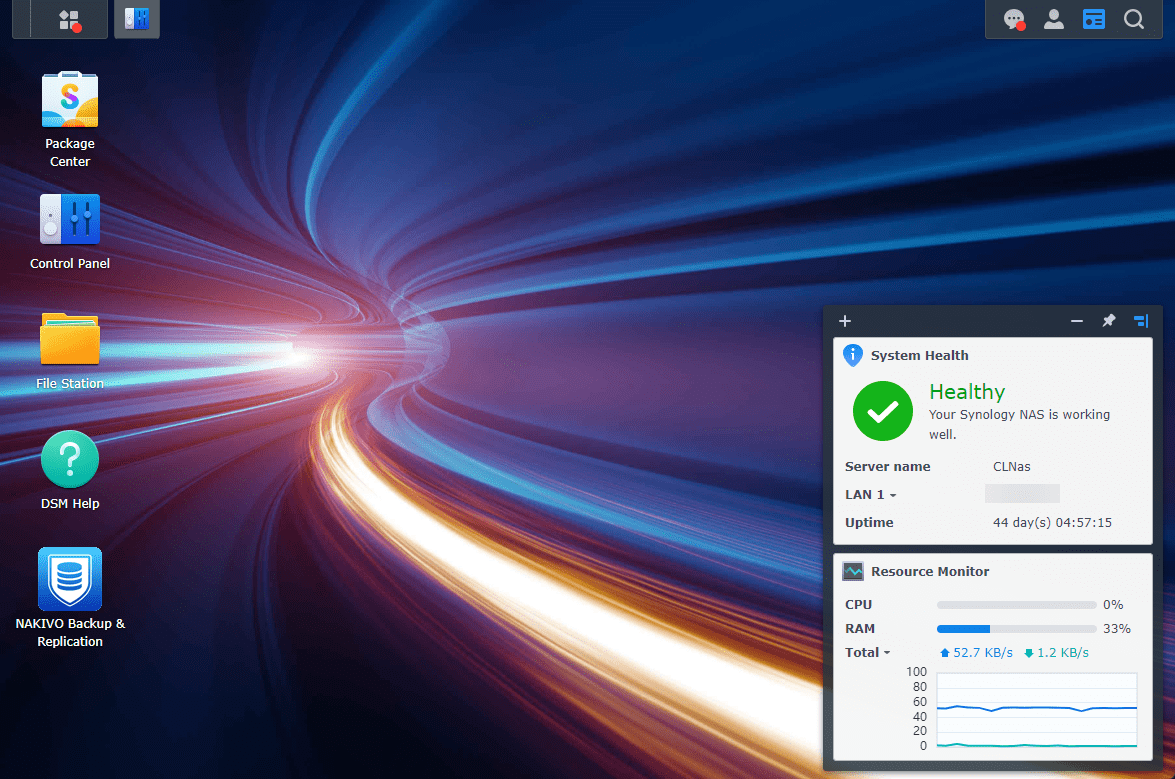
One of the things I like about Synology NAS devices is the apps and the built-in technologies that make the solution seamless and easy to use. Synology has done a great job of providing many great tools for that purpose. One is the Synology QuickConnect configuration, allowing you to connect to your Synology NAS remotely and access files and other resources. This post will look at Synology QuickConnect setup and configuration and see how you can easily configure the solution for easy remote access.
Table of contents
- What is Synology QuickConnect?
- Steps to set up QuickConnect on your Synology DiskStation
- Using Synology QuickConnect to Access Synology Services
- How to use QuickConnect to access your Synology NAS remotely
- Accessing Synology Mobile Applications
- Accessing Synology NAS Services from official Synology Android Apps
- QuickConnect may not be “quick”
- Best Practices with Synology QuickConnect
- Dynamic DNS and Synology NAS server
- Synology QuickConnect Plex
- Figure out the port number and the IP address of the server
- Set Up QuickConnect In DSM6
- Summarizing Enabling QuickConnect
- A simple alternative to port forwarding
- QuickConnect limitations
- Dynamic DNS may be a better option
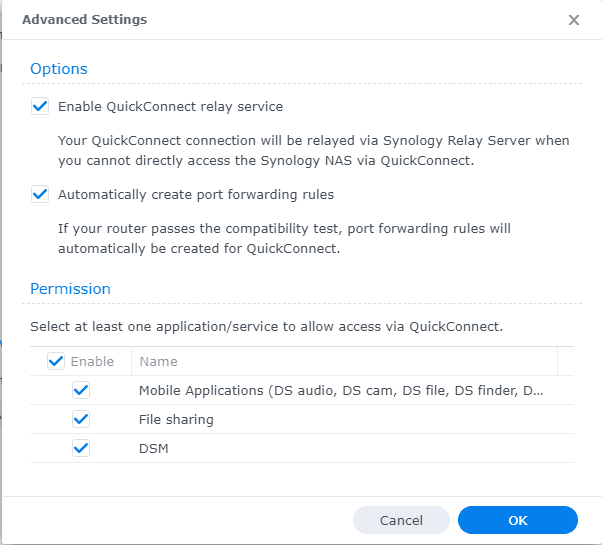
- Understanding those advanced settings
- Accessing the server’s login page remotely
- File Sharing with Synology QuickConnect
- Automatically create port forwarding rules
- Securing your Synology NAS and account
- Related Posts
- Wrapping up
Synology QuickConnect is a feature provided by Synology for their NAS devices, designed to simplify remote access and bypass the need for complex network configurations, such as port forwarding or Dynamic DNS. With QuickConnect, users can easily access their Synology NAS services, such as file sharing, media streaming, and data backup, from any device with an internet connection.
QuickConnect creates a unique ID for your Synology NAS, which is then linked to your Synology account. When you try to access your NAS remotely using this QuickConnect ID, your request is routed through Synology servers, establishing a secure connection between your device and your NAS.
This process allows users to access their NAS without configuring advanced network settings or remembering their IP address.

Steps to set up QuickConnect on your Synology DiskStation
Setting up Synology QuickConnect on your DiskStation is a simple process allowing you to access your Synology NAS remotely without needing complicated network settings or port forwarding.
-
First, log in to your Synology DiskStation Manager (DSM) using your local IP address.
-
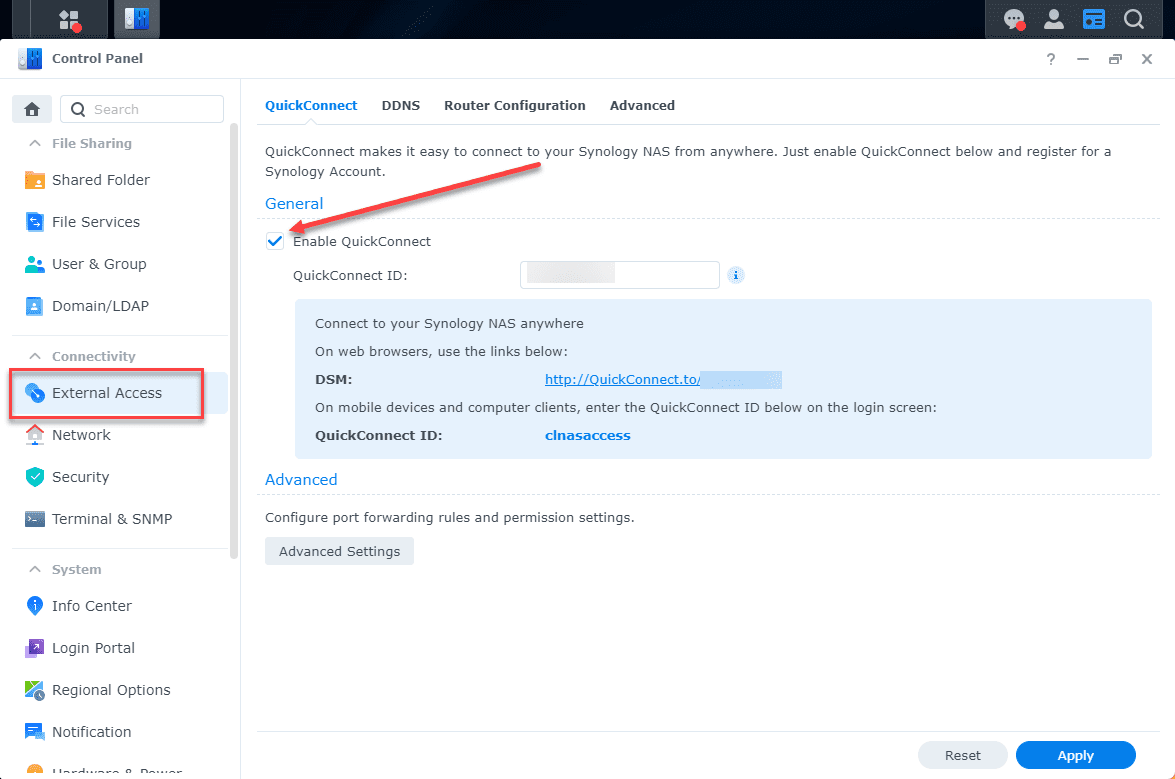
Once logged in, open the Control Panel > External Access menu and navigate to the QuickConnect tab. If you do not have a Synology account, you can create a new one from the login page.
-
Enable Synology QuickConnect by checking the “Enable QuickConnect” box and following the on-screen instructions to link your Synology account and access your Synology server.
After enabling QuickConnect, you will receive a unique QuickConnect ID. Note this ID, which you will need to access your Synology NAS remotely.
Alternatively, you can disable QuickConnect using the reverse of the process.
Using Synology QuickConnect to Access Synology Services
Once you have enabled QuickConnect on your Synology DiskStation, you can use the QuickConnect ID to access various Synology services such as File Station, Synology Photos, and Synology Drive. To access these services, enter your QuickConnect ID in the Synology app or web interface.
How to use QuickConnect to access your Synology NAS remotely
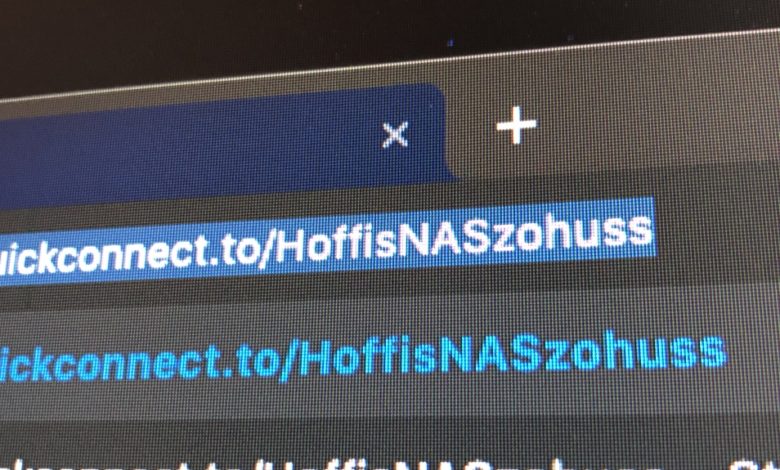
With QuickConnect enabled, accessing your Synology NAS remotely is a breeze. First, open your preferred web browser and type in the following address, which has you enter your Synology QuickConnect ID: https://quickconnect.to/YourQuickConnectID.
Replace “YourQuickConnectID” with the actual QuickConnect ID you received earlier. You will be directed to the login page of your Synology NAS. Enter your user account credentials to log in and access your files and services.
Accessing Synology Mobile Applications
Synology offers a range of mobile apps for Android and iOS devices, allowing you to access your Synology NAS services on the go. Some popular Synology apps include DS file, DS photo, and DS audio.
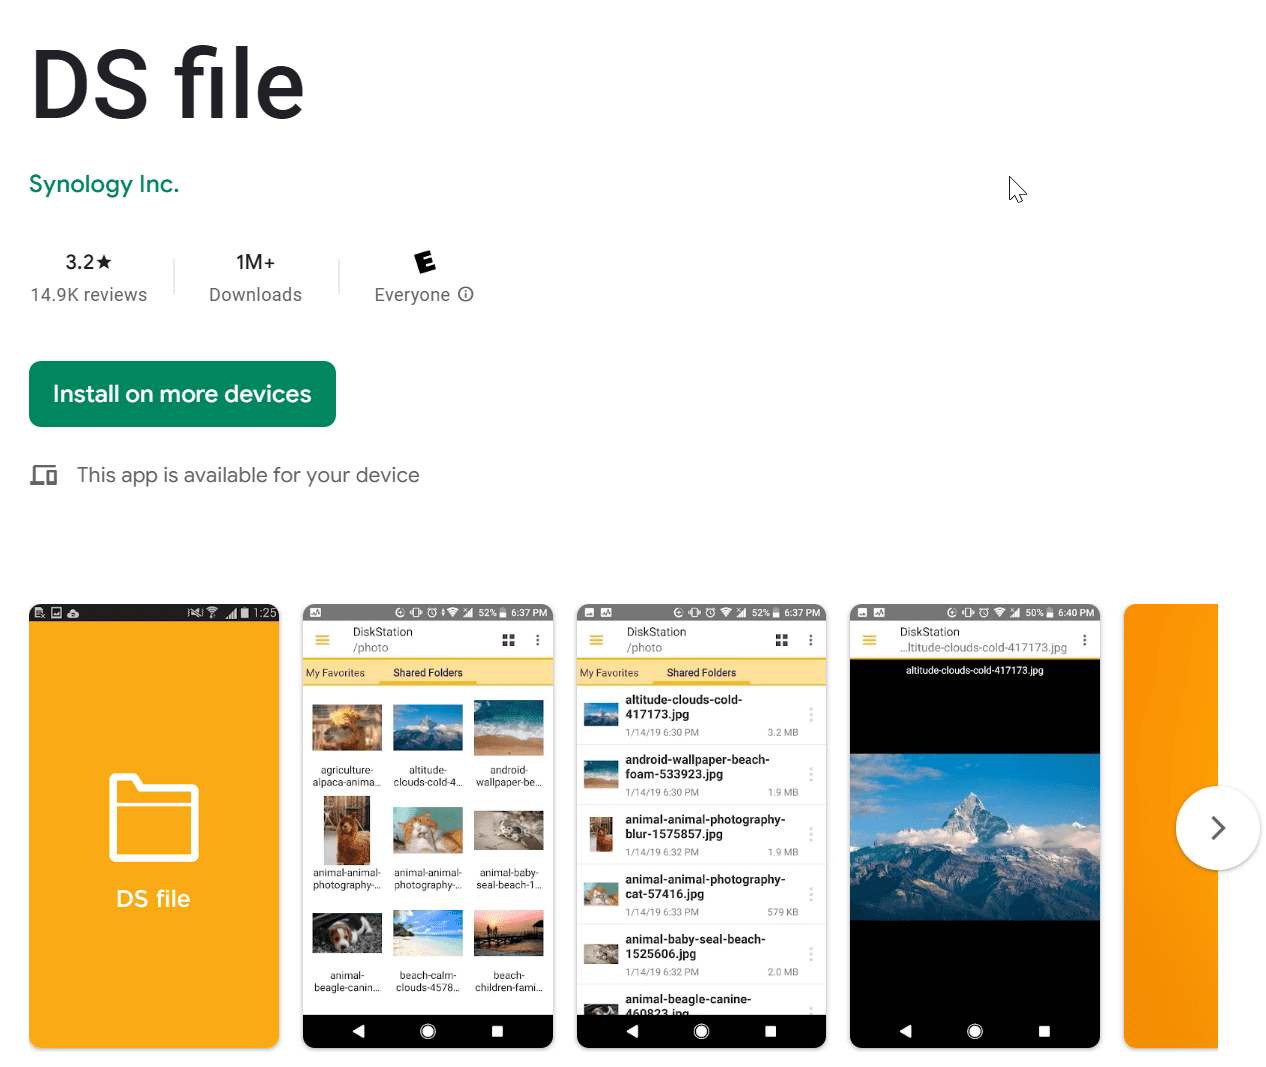
To access these apps, simply download and install them on your mobile device and enter your QuickConnect ID when prompted.
Accessing Synology NAS Services from official Synology Android Apps
Once you have the Synology Android apps installed, accessing your NAS services is straightforward. Open the app, enter your QuickConnect ID, and log in with your user account credentials. You can now access your Synology NAS services from your Android device.
QuickConnect may not be “quick”
While QuickConnect offers a convenient way to access your Synology NAS remotely, it may not always provide the fastest connection speeds. This is because the QuickConnect relay service is used when a direct connection is not possible, which can result in slower data transfer rates since your data is funneling through Synology servers.
Consider configuring port forwarding on your router and using Dynamic DNS to improve connection speeds.
Best Practices with Synology QuickConnect
To ensure optimal performance and security when using QuickConnect, follow these best practices:
-
Keep your Synology NAS and DSM software up-to-date to ensure compatibility and receive the latest security patches.
-
Use strong, unique passwords for your Synology account and user accounts.
-
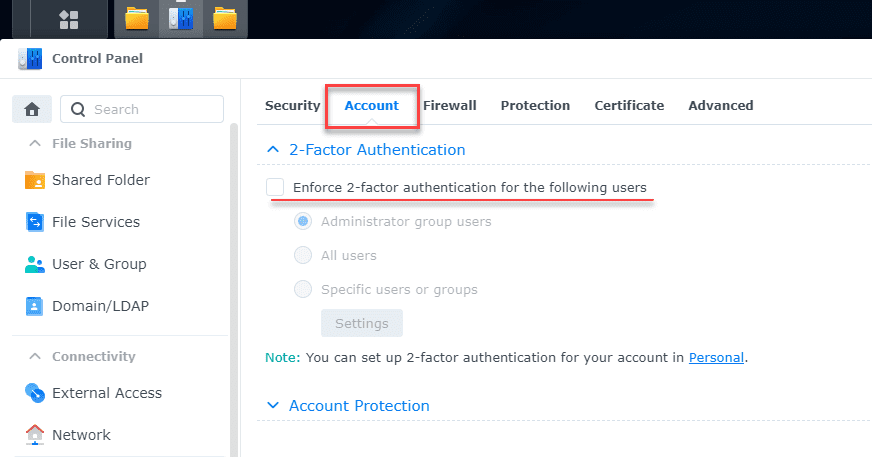
Enable two-factor authentication for added security.
-
Regularly monitor your Synology NAS logs for any suspicious activity.
-
Configure port forwarding and use Dynamic DNS for faster connections when possible.
Dynamic DNS and Synology NAS server
Configuring Dynamic DNS (DDNS) and port forwarding on your router allows you to maintain more control over your remote access and improve connection speeds.
While setting up DDNS and port forwarding can be more time-consuming than using QuickConnect, the benefits include a direct connection to your Synology NAS server and bypassing the QuickConnect relay service, which can result in faster data transfer rates than when you enable Quickconnect relay service.
To configure DDNS on your Synology NAS:
-
Go to the Control Panel, then navigate to the External Access section.
-
Follow the on-screen instructions to set up a DDNS service. Once DDNS is set up, you must configure port forwarding rules on your router.
Below is the DDNS settings under the External Access tab.
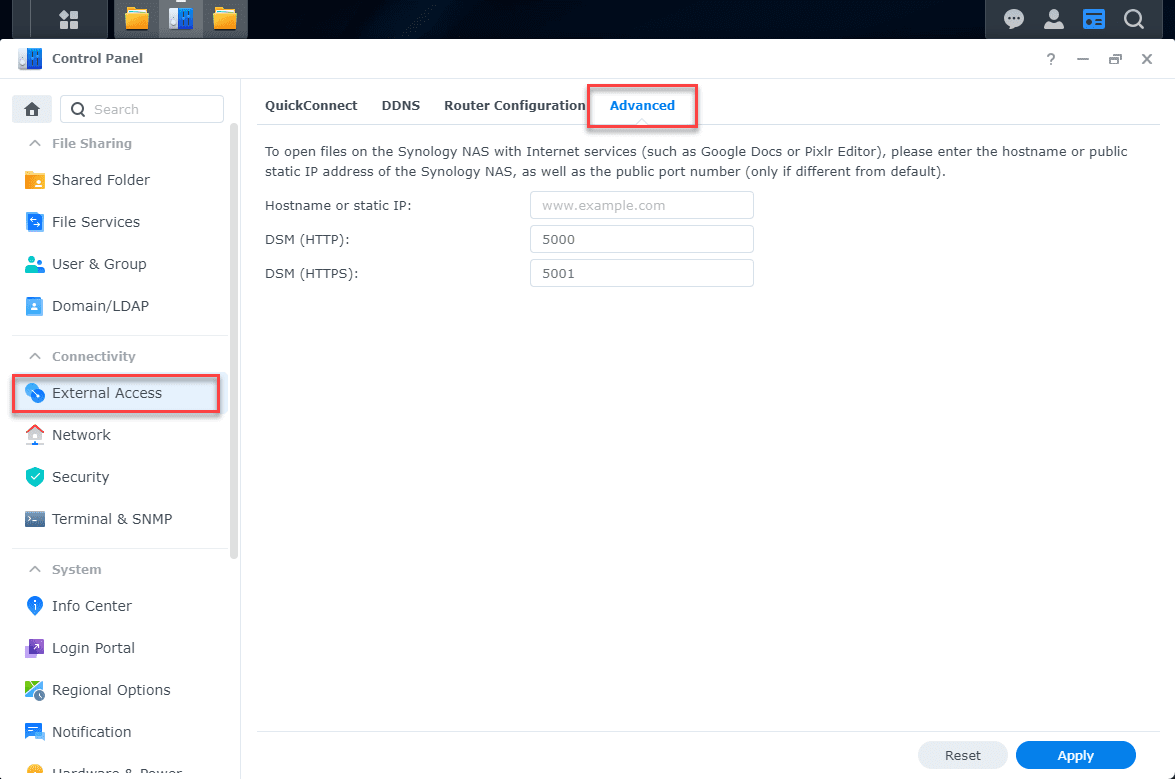
Under the Advanced settings, you can specify a hostname or static IP to open files on the Synology NAS with Internet services like Google Docs or Pixlr Editor.
Consult your router’s documentation for specific instructions on creating port forwarding rules for your Synology NAS services.
Synology QuickConnect Plex
Plex is a popular media server application that can be installed on your Synology NAS. While QuickConnect simplifies remote access for most Synology services, it does not support Plex directly.
To remotely access your Plex server on a Synology NAS, you must set up port forwarding rules on your router and use a DDNS service or Plex’s built-in remote access feature.
Figure out the port number and the IP address of the server
To configure port forwarding rules for your Synology NAS, you will need to know the local IP address of your NAS and the port numbers for the services you want to access remotely.
You can find the local IP address of your Synology NAS in the Control Panel under Network settings. Port numbers for various Synology services can be found in the DSM Help documentation.
Set Up QuickConnect In DSM6
DSM6 is the legacy operating system for Synology NAS devices. However, setting up QuickConnect in DSM6 is similar to the process in newer versions of DSM. Log in to your Synology NAS using your local IP address, then open the Control Panel and navigate to the QuickConnect settings.
Enable QuickConnect by linking it to your Synology account and follow the on-screen instructions to generate your QuickConnect ID.
Summarizing Enabling QuickConnect
As previously described, enabling QuickConnect is a straightforward process. Log in to your Synology NAS, open the Control Panel, and navigate to the QuickConnect settings.
Check the “Enable QuickConnect” box and link your Synology account to generate your QuickConnect ID. Make sure to keep a record of your QuickConnect ID for future use.
A simple alternative to port forwarding
Synology QuickConnect is a convenient feature that simplifies remote access to your Synology NAS without complex network settings or port forwarding.
Following the steps outlined in this blog post, you can easily set up and use QuickConnect to access your Synology services from anywhere with an internet connection.
However, consider configuring Dynamic DNS and port forwarding as an alternative remote access solution for optimal performance and security.
Synology QuickConnect allows users to access their Synology NAS devices and services without needing advanced network configuration.
With a wide range of mobile apps available, users can access their files and media on the go, making the most of their Synology NAS experience.
QuickConnect limitations
While QuickConnect is a convenient solution for remote access, it’s essential to be aware of its limitations, such as potentially slower connection speeds when using the relay service.
By following best practices, including keeping your Synology NAS up-to-date, using strong passwords, and enabling two-factor authentication, you can improve the security and performance of your remote access experience.
Dynamic DNS may be a better option
For those seeking more control and faster connection speeds, configuring Dynamic DNS and port forwarding can be a worthwhile investment of time and effort.
These advanced settings allow users to bypass the QuickConnect relay service, resulting in more direct connections and better data transfer rates.
Regardless of your remote access method, Synology NAS devices offer a powerful and versatile solution for file sharing, media streaming, and data storage.
By leveraging QuickConnect, Dynamic DNS, or a combination of both, you can enjoy secure and convenient access to your Synology NAS services anytime, anywhere.
Understanding those advanced settings
Advanced options in Synology NAS devices, such as Dynamic DNS and port forwarding, can be initially intimidating but are crucial for users seeking more control and better performance.
Dynamic DNS is a service that automatically updates your public IP address with a domain name, making it easier to access your NAS remotely.
Port forwarding, conversely, involves configuring your router to direct incoming network traffic to specific devices or services within your local network.
To understand and configure these advanced settings, consult your Synology NAS and router documentation. Familiarizing yourself with these settings will help you optimize your remote access experience and ensure a more secure and efficient connection to your Synology NAS.
Accessing the server’s login page remotely
To access your Synology NAS server’s login page remotely using QuickConnect, open a web browser and enter the following address: https://quickconnect.to/YourQuickConnectID. Replace “YourQuickConnectID” with your actual QuickConnect ID.
This will take you to the login page of your Synology NAS, where you can enter your user account credentials to access your files and services.
File Sharing with Synology QuickConnect
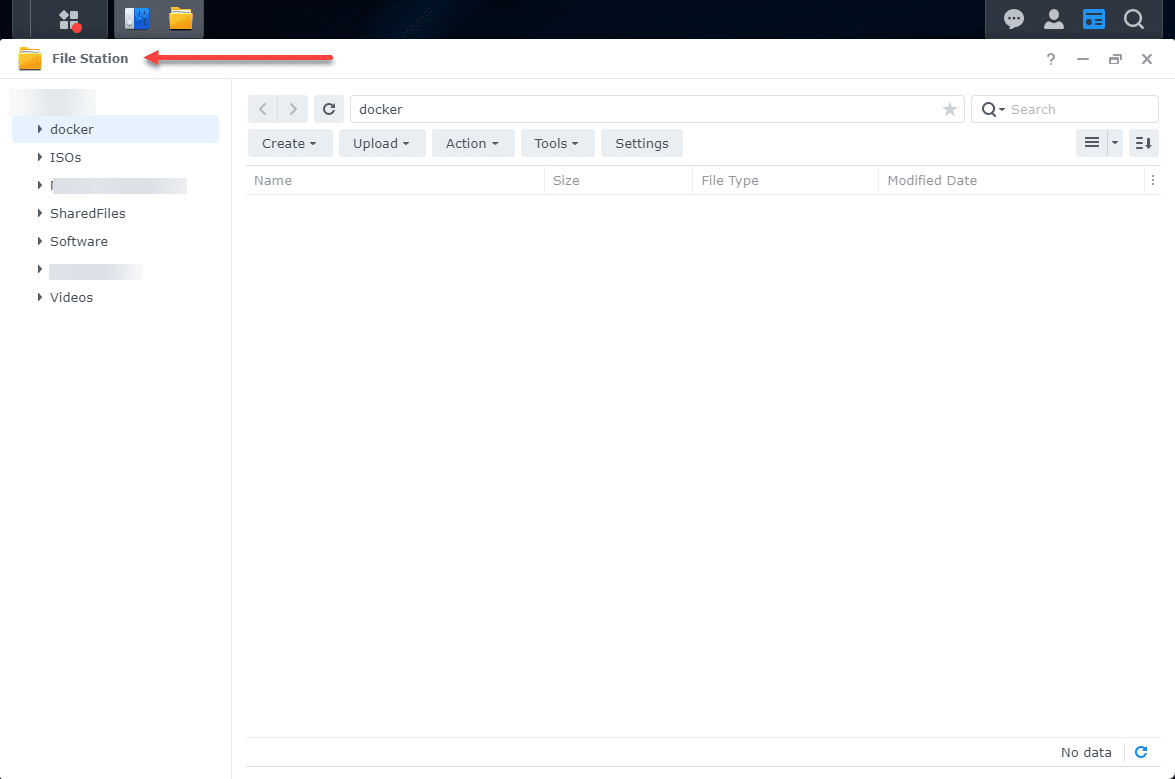
Synology QuickConnect makes file sharing a seamless experience. Once you have enabled QuickConnect on your Synology NAS, you can easily use Synology’s File Station to share files with others.
File Station is a web-based file management tool that allows you to browse, organize, and share files stored on your Synology NAS.
To share a file, log in to File Station and navigate to the file or folder you wish to share. Right-click on the file or folder and select “Share.” A sharing link will be generated, which you can send to others for easy access to the shared content.
Recipients can then use the link to download or view the shared files without needing a Synology account.
Automatically create port forwarding rules
Synology DSM has a means under Control panel to help configure the connection between your Synology NAS and your router. Navigate to Router Configuration.
Securing your Synology NAS and account
It’s essential to keep your Synology account up-to-date and secure to ensure the best possible experience with QuickConnect and other Synology services. Regularly check your account settings to confirm that your email address, password, and additional personal information are accurate and current.
Additionally, enable two-factor authentication for an added layer of security, and monitor your account for any suspicious activity. Maintaining a secure Synology account allows you to enjoy a safe and reliable remote access experience with your Synology NAS.
Wrapping up
Synology QuickConnect is a simple and easy way to enable connectivity to your Synology NAS device without needing a lot of networking experience or going through the configuration of setting up port forwarding. It is a simple checkbox in your External access settings and doesn’t require complex tasks to enable.
As mentioned, you won’t see the best performance when enabling QuickConnect, as Synology servers proxy your connection to your Synology device. If you want the best performance, you will want to configure dynamic DNS and port forwarding.
На чтение 2 мин. Просмотров 1k. Опубликовано

NAS-устройство Synology включает функцию QuickConnect, которая позволяет удаленно обращаться к интерфейсу DiskStation Manager. Вот как это сделать.
Вероятно, вас приветствовала страница настройки QuickConnect при первой установке NAS-устройства Synology, но, возможно, вы ее пропустили. Однако, если вы передумали, никогда не поздно это настроить. Плюс, это довольно легко сделать.
Для начала запустите DiskStation Manager, а затем откройте панель управления.

В окне панели управления выберите параметр «QuickConnect».

Установите флажок «Включить QuickConnect», чтобы включить эту функцию.

Затем нажмите «Войти или зарегистрировать учетную запись Synology».

Возможно, вы уже создали учетную запись Synology при настройке своего NAS, поэтому просто войдите в систему, используя свои учетные данные, а затем нажмите кнопку «Вход». Если вы еще не зарегистрировали учетную запись, вы можете сделать это и здесь.

После входа в систему создайте QuickConnect ID. Это имя пользователя, которое вы будете использовать для удаленного доступа к NAS.

После этого установите флажок, чтобы принять условия обслуживания и политику конфиденциальности, а затем нажмите кнопку «Применить».

Когда это будет сделано, появится новое окно со ссылкой, которую вы будете использовать для удаленного доступа к NAS через веб-браузер, а также с идентификатором, который вы будете использовать при удаленном доступе к вашему NAS с мобильного устройства с помощью мобильных приложений Synology.

Когда вы находитесь вдали от дома, вы можете просто перейти на http://quickconnect.to/YourID (где «YourID» – это ваш QuickConnect ID). После этого вы получите доступ к пользовательскому интерфейсу NAS, как если бы вы были дома. А если вы хотите получить доступ к файлам NAS на своем мобильном устройстве, вы можете загрузить приложения Synology и ввести свой идентификатор QuickConnect при входе в систему.
Quick Connect является удобной и безопасной функцией в NAS-системах Synology, которая позволяет быстро и легко получить доступ к вашим файлам и службам из любого устройства с подключением к интернету. Однако перед использованием Quick Connect необходимо выполнить некоторые настройки.
Первоначальная настройка Quick Connect в Synology требует создания учетной записи Synology, которая будет использоваться для доступа к вашему устройству и сервисам через Quick Connect. Для этого откройте веб-интерфейс DSM (DiskStation Manager) на вашем устройстве и войдите в учетную запись администратора.
Затем перейдите в раздел «Quick Connect» в меню «Параметры системы». Здесь вы сможете увидеть статус Quick Connect, а также создать и настроить вашу учетную запись Synology. Введите ваше имя пользователя и пароль, а затем нажмите «Завершить». Quick Connect автоматически создаст и настроит вашу учетную запись Synology.
Важно отметить, что для использования Quick Connect вам также потребуется настроить и открыть порты на вашем маршрутизаторе. Инструкции по настройке портов можно найти на сайте производителя маршрутизатора.
После завершения настройки вашего учетной записи Synology вы сможете использовать Quick Connect для доступа к вашим файлам и службам из любого места, где есть подключение к интернету. Просто откройте веб-браузер, введите адрес Quick Connect в формате «http://quickconnect.to/ваше_имя_пользователя» и нажмите «Ввод». Затем введите ваше имя пользователя и пароль, и вы будете перенаправлены в ваш аккаунт Synology.
Содержание
- Подключение Quick Connect Synology: Почему и как
- Создание учетной записи Synology
- Включение функции Quick Connect
- Настройка маршрутизатора для Quick Connect
- Установка приложения Synology QuickConnect
- Подключение к Synology с помощью Quick Connect
- Расширенные настройки Quick Connect
Подключение Quick Connect Synology: Почему и как
Существует несколько причин, почему использование Quick Connect может быть полезным:
| Простота настройки | Quick Connect не требует сложной конфигурации сети. Просто включите функцию и войдите в свою учетную запись Synology. |
| Безопасность | Quick Connect предоставляет безопасное подключение к вашему NAS, так как все данные передаются по защищенному SSL-каналу. |
| Удобство | С помощью Quick Connect вы можете легко доступиться к вашим файлам и базе данных, даже если у вас нет статического IP-адреса или динамического DNS-имени. |
Чтобы воспользоваться Quick Connect, вам необходимо выполнить следующие шаги:
- Включите Quick Connect
Перейдите в панель управления вашего NAS и зайдите в раздел «QuickConnect». Проверьте, включена ли функция Quick Connect. Если нет, включите ее. - Войдите в учетную запись Synology
После включения Quick Connect вы сможете войти в свою учетную запись Synology. Введите свои учетные данные и нажмите «Войти». - Обращайтесь к вашему NAS через Quick Connect ID
Когда вы вошли в свою учетную запись Synology, вы получите Quick Connect ID, который вы можете использовать для доступа к вашему NAS. Просто введите Quick Connect ID в адресную строку вашего браузера и нажмите «Ввод».
Подключение Quick Connect Synology предоставляет простое и безопасное решение для доступа к вашему NAS. Следуя указанным выше шагам, вы сможете настроить Quick Connect и наслаждаться удаленным доступом к вашим файлам и приложениям на вашем NAS.
Создание учетной записи Synology
Прежде чем настраивать QuickConnect Synology, вам потребуется создать учетную запись Synology. Эта учетная запись будет вашим идентификатором при доступе к устройству и управлении им.
Вот как создать учетную запись Synology:
- Откройте веб-браузер и введите IP-адрес вашего устройства Synology в адресную строку.
- Нажмите на кнопку «Создать учетную запись».
- Заполните все необходимые поля, такие как имя пользователя, пароль и адрес электронной почты.
- Выберите уровень привилегий для вашей учетной записи.
- Нажмите на кнопку «Создать».
После создания учетной записи Synology вы сможете использовать ее для доступа к устройству, настройки QuickConnect и других функций устройства.
Включение функции Quick Connect
Чтобы включить функцию Quick Connect на устройстве Synology, выполните следующие шаги:
- Подключитесь к вашему устройству Synology через браузер, введя его IP-адрес в адресной строке.
- Войдите в систему с помощью своего имени пользователя и пароля.
- Перейдите в меню «Панель управления» и выберите «QuickConnect».
- Убедитесь, что вкладка «Общий доступ» выбрана в верхней части страницы.
- Включите функцию Quick Connect, переключив соответствующий переключатель в положение «Вкл».
- Нажмите на кнопку «Настроить» рядом с разделом «ID сервиса QuickConnect».
- Выберите имя, которое будет использоваться в качестве части адреса Quick Connect URL.
- Нажмите кнопку «Применить» для сохранения настроек.
После завершения этих шагов функция Quick Connect будет включена на устройстве Synology. Теперь вы сможете получить доступ к своему устройству через Quick Connect URL из любого места без необходимости настройки сложных сетевых параметров.
Настройка маршрутизатора для Quick Connect
Для того чтобы воспользоваться функцией Quick Connect на вашем сетевом устройстве Synology, необходимо настроить ваш маршрутизатор. Вот пошаговая инструкция:
- Войдите в административную панель маршрутизатора. Обычно это делается путем ввода IP-адреса веб-интерфейса маршрутизатора в адресную строку браузера. Если вы не знаете IP-адрес маршрутизатора, вы можете найти его в документации вашего маршрутизатора или обратиться к производителю.
- Перейдите в раздел настроек маршрутизатора для проброса портов (port forwarding). Обычно это раздел под названием «Firewall» или «NAT» в настройках маршрутизатора.
- Добавьте новое правило проброса портов. Вам понадобится указать номер порта и протокол для проброса, а также локальный IP-адрес сетевого устройства Synology. Для Quick Connect рекомендуется использовать порт 5000 (для HTTP) или порт 5001 (для HTTPS).
- Сохраните изменения и перезагрузите ваш маршрутизатор, чтобы изменения вступили в силу.
После настройки маршрутизатора для проброса портов, функция Quick Connect будет готова к использованию. Вы сможете получить доступ к вашему сетевому устройству Synology удаленно через Интернет, используя адрес в формате «quickconnect.to/ваше_имя_quick_connect». Обратите внимание, что для работы Quick Connect также необходимо настроить ваше устройство Synology и включить функцию Quick Connect в настройках DSM (Synology DiskStation Manager).
Установка приложения Synology QuickConnect
Для установки приложения Synology QuickConnect настройте свое устройство Synology NAS, следуя этой подробной инструкции:
- Войдите в управление DSM (DiskStation Manager) на своем устройстве Synology NAS, используя имя пользователя и пароль администратора.
- Откройте «Панель управления» и выберите «QuickConnect» из списка доступных приложений.
- На странице QuickConnect нажмите на вкладку «Настройки» и убедитесь, что опция «Включить сервис QuickConnect» включена.
- Введите желаемое имя идентификатора для своего QuickConnect-аккаунта. Убедитесь, что это имя не занято.
- Нажмите на кнопку «Применить» для сохранения настроек и завершения процесса установки приложения.
После завершения установки приложения Synology QuickConnect вы сможете использовать его для удаленного доступа к своему устройству Synology NAS и управления им через Интернет.
Подключение к Synology с помощью Quick Connect
Чтобы подключиться к Synology с помощью Quick Connect, вам нужно выполнить следующие шаги:
- Зарегистрируйте учетную запись Synology: Если у вас еще нет учетной записи Synology, перейдите на официальный сайт Synology и зарегистрируйтесь.
- Включите Quick Connect на вашем устройстве Synology: Чтобы включить Quick Connect, откройте настройки DSM (DiskStation Manager) и найдите раздел «Quick Connect».
- Войдите в учетную запись Quick Connect: После включения Quick Connect, вы увидите уникальный идентификатор вашего устройства Synology. Запишите этот идентификатор.
- Подключитесь к Synology с помощью Quick Connect: Откройте веб-браузер и введите адрес «https://quickconnect.to/ваш_идентификатор». Введите имя пользователя и пароль вашей учетной записи Synology. Нажмите кнопку «Войти».
После выполнения этих шагов вы будете подключены к вашему устройству Synology с помощью Quick Connect. Вы сможете получить доступ к файлам, использовать стриминг медиафайлов и использовать другие функции, которые предоставляет ваше устройство Synology.
Расширенные настройки Quick Connect
Настройка функции Quick Connect на вашем устройстве Synology позволяет получить удаленный доступ к вашему серверу NAS с помощью уникального идентификатора. Однако, кроме основных параметров настройки Quick Connect, существуют и более продвинутые настройки, которые могут быть полезными в определенных случаях.
1. Проброс портов: Если ваш NAS находится за маршрутизатором или файрволлом, вам может понадобиться настроить проброс портов для правильной работы Quick Connect. Для этого, вам нужно настроить ваш маршрутизатор или файрволл таким образом, чтобы перенаправлять трафик Quick Connect с внешнего порта на порт вашего NAS. Дополнительную информацию о настройке проброса портов можно получить в документации вашего маршрутизатора или файрволла.
2. Разрешить доступ к файлам и папкам: По умолчанию, доступ к файлам и папкам на вашем NAS через Quick Connect может быть ограничен. Однако, вы можете настроить разрешения для доступа к файлам и папкам с помощью установки соответствующих прав доступа для пользователей и групп. Таким образом, вы сможете контролировать, кто и как может получить доступ к вашим файлам и папкам.
3. Установка SSL-сертификата: Если вы хотите обеспечить дополнительную защиту для вашего Quick Connect, вы можете установить SSL-сертификат на свой сервер NAS. Это позволит шифровать ваше соединение, обеспечивая безопасность передачи данных. Для установки SSL-сертификата на ваш сервер NAS, вам необходимо получить SSL-сертификат от надежного удостоверяющего центра и следовать инструкциям Synology по его установке.
Внимание: Все вышеперечисленные настройки требуют некоторых знаний в области сетевых технологий и безопасности. Поэтому, перед изменением этих настроек, рекомендуется ознакомиться с документацией Synology и осознать потенциальные риски и последствия.
| Название настройки | Описание |
|---|---|
| Проброс портов | Настройка маршрутизатора или файрволла для перенаправления трафика Quick Connect. |
| Разрешить доступ к файлам и папкам | Настройка прав доступа для пользователей и групп, для контроля доступа к файлам и папкам. |
| Установка SSL-сертификата | Установка SSL-сертификата для шифрования соединения и обеспечения безопасности передачи данных. |
If you store your data on a Synology NAS stored, you probably want to be able to access it not only from home, but also when you are on the go. There are a number of possibilities for this purpose. One of the easiest is to use a free Synology Account in combination with Synology QuickConnect. We will show you how to set up and use the practical service.
Some time ago, the NAS manufacturer Synology introduced a practical function with which the NAS data can be accessed via the Internet. Synology QuickConnect not only enables remote access to your NAS server, it also bypasses other necessary setup steps such as assigning an external IP address via DDNS or port forwarding in the router. To do this, the service communicates with a Synology server, which then controls the communication between the NAS and your smartphone or laptop, for example.
In addition, your Synology NASes get a so-called when they are set up QuickConnect ID. You can use this to connect to your NAS both locally and via the Internet. The advantage: Once set up, you can also use services such as Synology PhotoStation or Synology Drive reach via the internet. Your NAS server becomes a full-fledged cloud solution.
An important clue: The use of Synology QuickConnect is not without controversy because communication with the NAS device runs via Synology servers. Especially in the Synology forum is often of of the use discouraged, I personally trust Synology in terms of security architecture and data protection, but everyone has to decide for themselves. If you want to do without the convenience of QuickConnect and prefer to have full control over your network yourself, I recommend setting up manually DDNS along with port releases in the router. The setup is done in the DiskStation Manager in the control Panel in the submenu DDNS. Or that Network access via VPN. Regardless, I recommend looking into the technical QuickConnect white paper. You can download the English language PDF see here. It explains the functionality and security concept of Synology QuickConnect.
It’s all ok? Then let’s get started!
1. Set up Synology Account
We always start from one already furnished and updated NAS installation off. If this is the case, you need another one for QuickConnect Synology Account. You judge on this website leads over A Create Account a. If you already have a Synology account, enter it in the DSM Control Panel -> Action Center -> Synology Account .

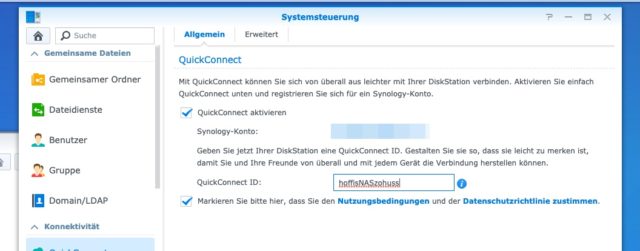
2. Enable Synology QuickConnect
It continues in the control panel in the menu QuickConnect. Put a tick Activate QuickConnect. Also confirms the privacy policy that you read here can. Also, you must have one Set QuickConnect ID. This will later serve as the «name» of your NAS drive, both locally and via the Internet. If your selection is already taken, you must specify a different ID. If everything fits, click Apply.
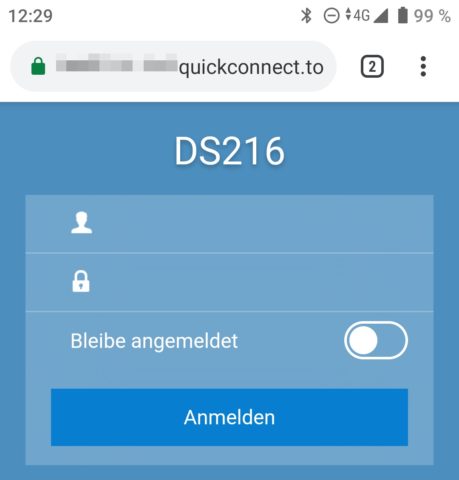
3. Access Synology NAS via QuickConnect
From now on you can access your NAS via the following address:
https://QuickConnectID.QuickConnect.to/
or
https://quickconnect.to/QuickConnectID
You will then automatically land on the DiskStation Manager homepage. As I said, you can also enter the ID in the Synology Apps or services like Synology Drive specify.
4. Test QuickConnect
To check whether remote access to your Synology NAS really works, you can use your smartphone, for example. Disconnects the WLAN connection and calls up the QuickConnect URL when there is a mobile connection. Alternatively, you can use an app like DS Files for Android or iOS. Now register here with the QuickConnect ID and check if everything works. Alternatively, you can also check Synology’s account page to see if your NAS servers are reachable. Log in and switch to the tab My devices.
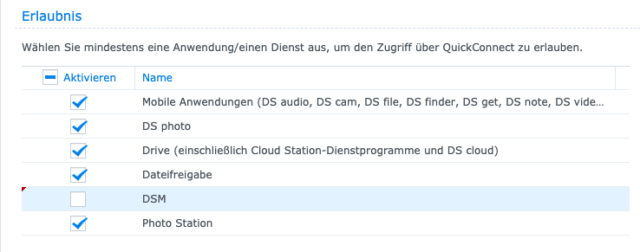
5. Only allow Synology QuickConnect for certain services
By default, Synology QuickConnect allows access to all standard services of your Synology devices. But you can also restrict access. To do this, open the control panel under Quick Connect the rider Erweitert. Here you remove at permission the services that should not be accessible via the Internet. Take this one for example DSM off, neither you nor others can access the administration of the NAS drives — this should make sense in many cases.
As I said: I think Synology QuickConnect is great. The service makes remote access to NAS data and services easy and requires little configuration. At the same time, I can understand anyone for whom such a convenient solution is too «open».
More tips, tricks and guidance on Synology NAS systems we collect here. General hardware topics of all kinds are available at our Discover hardware tutos.
Order Synology NAS cheaply

Freelance journalist, enthusiastic about technology since the blissful Amiga days, Apple desktop fan and Android fan on the go, gambles on Windows, can’t do without music (from classic rock to ska to punk) and audio books, likes to take postcard photos, always has at least two cell phones and is very happy about one coffee donation 