Qt Creator
Qt Creator is a cross-platform, integrated development environment (IDE) for
application developers to create applications for multiple desktop, embedded,
and mobile device platforms.
The Qt Creator Manual is available at:
https://doc.qt.io/qtcreator/index.html
For an overview of the Qt Creator IDE, see:
https://doc.qt.io/qtcreator/creator-overview.html
Supported Platforms
The standalone binary packages support the following platforms:
- Windows 10 (64-bit) or later
- (K)Ubuntu Linux 20.04 (64-bit) or later
- macOS 10.15 or later
Contributing
For instructions on how to set up the Qt Creator repository to contribute
patches back to Qt Creator, please check:
https://wiki.qt.io/Setting_up_Gerrit
See the following page for information about our coding standard:
https://doc.qt.io/qtcreator-extending/coding-style.html
Compiling Qt Creator
Prerequisites:
- Qt 6.2 or later. The Qt version that you use to build Qt Creator defines the
minimum platform versions that the result supports
(Windows 10, RHEL/CentOS 8.4, Ubuntu 20.04, macOS 10.15 for Qt 6.2). - Qt WebEngine module for QtWebEngine based help viewer
- On Windows:
- MinGW with GCC 9 or Visual Studio 2019 or later
- Python 3.5 or later (optional, needed for the python enabled debug helper)
- Debugging Tools for Windows (optional, for MSVC debugging support with CDB)
- On Mac OS X: latest Xcode
- On Linux: GCC 9 or later
- LLVM/Clang 10 or later (optional, LLVM/Clang 14 is recommended.
See instructions on how to
get LLVM.
The ClangFormat plugin uses the LLVM C++ API.
Since the LLVM C++ API provides no compatibility guarantee,
if later versions don’t compile we don’t support that version.) - CMake
- Ninja (recommended)
The used toolchain has to be compatible with the one Qt was compiled with.
Getting Qt Creator from Git
The official mirror of the Qt Creator repository is located at
https://code.qt.io/cgit/qt-creator/qt-creator.git/. Run
git clone https://code.qt.io/qt-creator/qt-creator.git
to clone the Qt Creator sources from there. This creates a checkout of the
Qt Creator sources in the qt-creator/ directory of your current working
directory.
Qt Creator relies on some submodules, like
litehtml for displaying documentation. Get these
submodules with
cd qt-creator  # switch to the sources, if you just ran git clone
git submodule update --init --recursive
Note the --recursive in this command, which fetches also submodules within
submodules, and is necessary to get all the sources.
The git history contains some coding style cleanup commits, which you might
want to exclude for example when running git blame. Do this by running
git config blame.ignoreRevsFile .gitignore-blame
Linux and macOS
These instructions assume that Ninja is installed and in the PATH, Qt Creator
sources are located at /path/to/qtcreator_sources, Qt is installed in
/path/to/Qt, and LLVM is installed in /path/to/llvm.
Note that if you install Qt via the online installer, the path to Qt must
include the version number and compiler ABI. The path to the online installer
content is not enough.
Note that /path/to/Qt doesn’t imply the full path depth like:
$USER/Qt/6.2.4/gcc_64/lib/cmake/Qt6, but only $USER/Qt/6.2.4/gcc_64.
See instructions on how to
get LLVM.
mkdir qtcreator_build
cd qtcreator_build

cmake -DCMAKE_BUILD_TYPE=Debug -G Ninja "-DCMAKE_PREFIX_PATH=/path/to/Qt;/path/to/llvm" /path/to/qtcreator_sources
cmake --build .
Windows
These instructions assume that Ninja is installed and in the PATH, Qt Creator
sources are located at \path\to\qtcreator_sources, Qt is installed in
\path\to\Qt, and LLVM is installed in \path\to\llvm.
Note that if you install Qt via the online installer, the path to Qt must
include the version number and compiler ABI. The path to the online installer
content is not enough.
Note that \path\to\Qt doesn’t imply the full path depth like:
c:\Qt\6.2.4\msvc2019_64\lib\cmake\Qt6, but only c:/Qt/6.2.4/msvc2019_64.
The usage of slashes / is intentional, since CMake has issues with backslashes \
in CMAKE_PREFX_PATH, they are interpreted as escape codes.
See instructions on how to
get LLVM.
Decide which compiler to use: MinGW or Microsoft Visual Studio.
MinGW is available via the Qt online installer, for other options see
https://wiki.qt.io/MinGW. Run the commands below in a shell prompt that has
<path_to_mingw>\bin in the PATH.
For Microsoft Visual C++ you can use the «Build Tools for Visual Studio». Also
install the «Debugging Tools for Windows» from the Windows SDK installer. We
strongly recommend using the 64-bit version and 64-bit compilers on 64-bit
systems. Open the x64 Native Tools Command Prompt for VS <version> from the
start menu items that were created for Visual Studio, and run the commands
below in it.
md qtcreator_build
cd qtcreator_build

cmake -DCMAKE_BUILD_TYPE=Debug -G Ninja "-DCMAKE_PREFIX_PATH=/path/to/Qt;/path/to/llvm" \path\to\qtcreator_sources
cmake --build .
Qt Creator can be registered as a post-mortem debugger. This can be done in the
options page or by running the tool qtcdebugger with administrative privileges
passing the command line options -register/unregister, respectively.
Alternatively, the required registry entries
HKEY_LOCAL_MACHINE\SOFTWARE\Microsoft\Windows NT\CurrentVersion\AeDebug
HKEY_LOCAL_MACHINE\SOFTWARE\Wow6432Node\Microsoft\Windows NT\CurrentVersion\AeDebug
can be modified using the registry editor regedt32 to contain
qtcreator_build\bin\qtcdebugger %ld %ld
When using a self-built version of Qt Creator as post-mortem debugger, it needs
to be able to find all dependent Qt-libraries and plugins when being launched
by the system. The easiest way to do this is to create a self-contained Qt
Creator by installing it and installing its dependencies. See «Options» below
for details.
Note that unlike on Unix, you cannot overwrite executables that are running.
Thus, if you want to work on Qt Creator using Qt Creator, you need a separate
installation of it. We recommend using a separate, release-built version of Qt
Creator to work on a debug-built version of Qt Creator.
Alternatively, take the following template of CMakeUserPresets.json for
reference. Write your own configurePreset inheriting cmake-plugin-minimal in
CMakeUserPresets.json to build with IDEs (such as QtCreator, VSCode,
CLion…etc) locally:
{
  "version": 4,
  "cmakeMinimumRequired": {
    "major": 3,
    "minor": 23,
    "patch": 0
  },
  "configurePresets": [
    {
      "name": "custom",
      "displayName": "custom",
      "description": "custom",
      "inherits": "cmake-plugin-minimal",
      "binaryDir": "${sourceDir}/build/${presetName}",
      "toolset": {
        "value": "v142,host=x64",
        "strategy": "external"
      },
      "architecture": {
        "value": "x64",
        "strategy": "external"
      },
      "cacheVariables": {
        "CMAKE_CXX_COMPILER": "cl.exe",
        "CMAKE_C_COMPILER": "cl.exe",
        "CMAKE_PREFIX_PATH": "c:/Qt/6.2.4/msvc2019_64"
      }
    }
  ]
}
Options
If you do not have Ninja installed and in the PATH, remove -G Ninja from
the first cmake call. If you want to build in release mode, change the build
type to -DCMAKE_BUILD_TYPE=Release. You can also build with release
optimizations but debug information with -DCMAKE_BUILD_TYPE=RelWithDebInfo.
You can find more options in the generated CMakeCache.txt file. For instance,
building of Qbs together with Qt Creator can be enabled with -DBUILD_QBS=ON.
Installation is not needed. You can run Qt Creator directly from the build
directory. On Windows, make sure that your PATH environment variable points to
all required DLLs, like Qt and LLVM. On Linux and macOS, the build already
contains the necessary RPATHs for the dependencies.
If you want to install Qt Creator anyway, that is however possible using
cmake --install . --prefix /path/to/qtcreator_install
To create a self-contained Qt Creator installation, including all dependencies
like Qt and LLVM, additionally run
cmake --install . --prefix /path/to/qtcreator_install --component Dependencies
To install development files like headers, CMake files, and .lib files on
Windows, run
cmake --install . --prefix /path/to/qtcreator_install --component Devel
If you used the RelWithDebInfo configuration and want debug information to be
available to the installed Qt Creator, run
cmake --install . --prefix /path/to/qtcreator_install --component DebugInfo
Perf Profiler Support
Support for the perf profiler
requires the perfparser tool that is part of the Qt Creator source package, and also
part of the Qt Creator Git repository in form of a submodule in src/tools/perfparser.
Compilation of perfparser requires ELF and DWARF development packages.
You can either download and extract a prebuilt package from
https://download.qt.io/development_releases/prebuilt/elfutils/ and add the
directory to the CMAKE_PREFIX_PATH when configuring Qt Creator,
or install the libdw-dev package on Debian-style Linux systems.
You can also point Qt Creator to a separate installation of perfparser by
setting the PERFPROFILER_PARSER_FILEPATH environment variable to the full
path to the executable.
Getting LLVM/Clang for the Clang Code Model
The Clang code model uses Clangd and the ClangFormat plugin depends on the
LLVM/Clang libraries. The currently recommended LLVM/Clang version is 14.0.
Prebuilt LLVM/Clang packages
Prebuilt packages of LLVM/Clang can be downloaded from
https://download.qt.io/development_releases/prebuilt/libclang/
This should be your preferred option because you will use the version that is
shipped together with Qt Creator (with backported/additional patches). In
addition, MinGW packages for Windows are faster due to profile-guided
optimization. If the prebuilt packages do not match your configuration, you
need to build LLVM/Clang manually.
If you use the MSVC compiler to build Qt Creator the suggested way is:
1. Download both MSVC and MinGW packages of libclang.
2. Use the MSVC version of libclang during the Qt Creator build.
3. Prepend PATH variable used for the run time with the location of MinGW version of libclang.dll.
4. Launch Qt Creator.
Building LLVM/Clang manually
You need to install CMake in order to build LLVM/Clang.
Build LLVM/Clang by roughly following the instructions at
http://llvm.org/docs/GettingStarted.html#git-mirror:
-
Clone LLVM/Clang and checkout a suitable branch
git clone -b release_130-based --recursive https://code.qt.io/clang/llvm-project.git -
Build and install LLVM/Clang
For Linux/macOS:
cmake \
  -D CMAKE_BUILD_TYPE=Release \
  -D LLVM_ENABLE_RTTI=ON \
  -D LLVM_ENABLE_PROJECTS="clang;clang-tools-extra" \
  -D CMAKE_INSTALL_PREFIX=<installation location> \
  ../llvm-project/llvm
cmake --build . --target install
For Windows:
cmake ^
  -G Ninja ^
  -D CMAKE_BUILD_TYPE=Release ^
  -D LLVM_ENABLE_RTTI=ON ^
  -D LLVM_ENABLE_PROJECTS="clang;clang-tools-extra" ^
  -D CMAKE_INSTALL_PREFIX=<installation location> ^
  ..\llvm-project\llvm
cmake --build . --target install
Clang-Format
The ClangFormat plugin depends on the additional patch
https://code.qt.io/cgit/clang/llvm-project.git/commit/?h=release_130-based&id=42879d1f355fde391ef46b96a659afeb4ad7814a
While the plugin builds without it, it might not be fully functional.
Note that the plugin is disabled by default.
Licenses and Attributions
Qt Creator is available under commercial licenses from The Qt Company,
and under the GNU General Public License version 3,
annotated with The Qt Company GPL Exception 1.0.
See LICENSE.GPL-EXCEPT for the details.
Qt Creator furthermore includes the following third-party components,
we thank the authors who made this possible:
YAML Parser yaml-cpp (MIT License)
https://github.com/jbeder/yaml-cpp
QtCreator/src/libs/3rdparty/yaml-cpp
Copyright (c) 2008-2015 Jesse Beder.
Permission is hereby granted, free of charge, to any person obtaining a copy
of this software and associated documentation files (the «Software»), to deal
in the Software without restriction, including without limitation the rights
to use, copy, modify, merge, publish, distribute, sublicense, and/or sell
copies of the Software, and to permit persons to whom the Software is
furnished to do so, subject to the following conditions:
The above copyright notice and this permission notice shall be included in
all copies or substantial portions of the Software.
THE SOFTWARE IS PROVIDED «AS IS», WITHOUT WARRANTY OF ANY KIND, EXPRESS OR
IMPLIED, INCLUDING BUT NOT LIMITED TO THE WARRANTIES OF MERCHANTABILITY,
FITNESS FOR A PARTICULAR PURPOSE AND NONINFRINGEMENT. IN NO EVENT SHALL THE
AUTHORS OR COPYRIGHT HOLDERS BE LIABLE FOR ANY CLAIM, DAMAGES OR OTHER
LIABILITY, WHETHER IN AN ACTION OF CONTRACT, TORT OR OTHERWISE, ARISING FROM,
OUT OF OR IN CONNECTION WITH THE SOFTWARE OR THE USE OR OTHER DEALINGS IN
THE SOFTWARE.
KSyntaxHighlighting
Syntax highlighting engine for Kate syntax definitions
This is a stand-alone implementation of the Kate syntax highlighting
engine. It’s meant as a building block for text editors as well as
for simple highlighted text rendering (e.g. as HTML), supporting both
integration with a custom editor as well as a ready-to-use
QSyntaxHighlighter sub-class.
Distributed under the:
MIT License
Permission is hereby granted, free of charge, to any person obtaining
a copy of this software and associated documentation files (the
«Software»), to deal in the Software without restriction, including
without limitation the rights to use, copy, modify, merge, publish,
distribute, sublicense, and/or sell copies of the Software, and to
permit persons to whom the Software is furnished to do so, subject to
the following conditions:
The above copyright notice and this permission notice shall be included
in all copies or substantial portions of the Software.
THE SOFTWARE IS PROVIDED «AS IS», WITHOUT WARRANTY OF ANY KIND,
EXPRESS OR IMPLIED, INCLUDING BUT NOT LIMITED TO THE WARRANTIES OF
MERCHANTABILITY, FITNESS FOR A PARTICULAR PURPOSE AND NONINFRINGEMENT.
IN NO EVENT SHALL THE AUTHORS OR COPYRIGHT HOLDERS BE LIABLE FOR ANY
CLAIM, DAMAGES OR OTHER LIABILITY, WHETHER IN AN ACTION OF CONTRACT,
TORT OR OTHERWISE, ARISING FROM, OUT OF OR IN CONNECTION WITH THE
SOFTWARE OR THE USE OR OTHER DEALINGS IN THE SOFTWARE.
The source code of KSyntaxHighlighting can be found here:
https://cgit.kde.org/syntax-highlighting.git
QtCreator/src/libs/3rdparty/syntax-highlighting
https://code.qt.io/cgit/qt-creator/qt-creator.git/tree/src/libs/3rdparty/syntax-highlighting
Clazy
https://github.com/KDE/clazy
Copyright (C) 2015-2018 Clazy Team
Distributed under GNU LIBRARY GENERAL PUBLIC LICENSE Version 2 (LGPL2).
Integrated with patches from
https://code.qt.io/cgit/clang/clazy.git/.
LLVM/Clang
https://github.com/llvm/llvm-project.git
Copyright (C) 2003-2019 LLVM Team
Distributed under the Apache 2.0 License with LLVM exceptions,
see https://github.com/llvm/llvm-project/blob/main/clang/LICENSE.TXT
With backported/additional patches from https://code.qt.io/cgit/clang/llvm-project.git
std::span implementation for C++11 and later
A single-header implementation of C++20’s std::span, conforming to the C++20
committee draft. It is compatible with C++11, but will use newer language
features if they are available.
https://github.com/martinmoene/span-lite
QtCreator/src/libs/3rdparty/span
Copyright 2018-2021 Martin Moene
Distributed under the Boost Software License, Version 1.0.
(See accompanying file LICENSE.md or copy at http://boost.org/LICENSE_1_0.txt)
Open Source front-end for C++ (license MIT), enhanced for use in Qt Creator
Roberto Raggi roberto.raggi@gmail.com
QtCreator/src/libs/3rdparty/cplusplus
Copyright 2005 Roberto Raggi roberto@kdevelop.org
Permission to use, copy, modify, distribute, and sell this software and its
documentation for any purpose is hereby granted without fee, provided that
the above copyright notice appear in all copies and that both that
copyright notice and this permission notice appear in supporting
documentation.
The above copyright notice and this permission notice shall be included in
all copies or substantial portions of the Software.
THE SOFTWARE IS PROVIDED «AS IS», WITHOUT WARRANTY OF ANY KIND, EXPRESS OR
IMPLIED, INCLUDING BUT NOT LIMITED TO THE WARRANTIES OF MERCHANTABILITY,
FITNESS FOR A PARTICULAR PURPOSE AND NONINFRINGEMENT. IN NO EVENT SHALL THE
KDEVELOP TEAM BE LIABLE FOR ANY CLAIM, DAMAGES OR OTHER LIABILITY, WHETHER IN
AN ACTION OF CONTRACT, TORT OR OTHERWISE, ARISING FROM, OUT OF OR IN
CONNECTION WITH THE SOFTWARE OR THE USE OR OTHER DEALINGS IN THE SOFTWARE.
Open Source tool for generating C++ code that classifies keywords (license MIT)
Roberto Raggi roberto.raggi@gmail.com
QtCreator/src/tools/3rdparty/cplusplus-keywordgen
Copyright (c) 2007 Roberto Raggi roberto.raggi@gmail.com
Permission is hereby granted, free of charge, to any person obtaining a copy of
this software and associated documentation files (the «Software»), to deal in
the Software without restriction, including without limitation the rights to
use, copy, modify, merge, publish, distribute, sublicense, and/or sell copies of
the Software, and to permit persons to whom the Software is furnished to do so,
subject to the following conditions:
The above copyright notice and this permission notice shall be included in all
copies or substantial portions of the Software.
THE SOFTWARE IS PROVIDED «AS IS», WITHOUT WARRANTY OF ANY KIND, EXPRESS OR
IMPLIED, INCLUDING BUT NOT LIMITED TO THE WARRANTIES OF MERCHANTABILITY, FITNESS
FOR A PARTICULAR PURPOSE AND NONINFRINGEMENT. IN NO EVENT SHALL THE AUTHORS OR
COPYRIGHT HOLDERS BE LIABLE FOR ANY CLAIM, DAMAGES OR OTHER LIABILITY, WHETHER
IN AN ACTION OF CONTRACT, TORT OR OTHERWISE, ARISING FROM, OUT OF OR IN
CONNECTION WITH THE SOFTWARE OR THE USE OR OTHER DEALINGS IN THE SOFTWARE.
SQLite (version 3.8.10.2)
SQLite is a C-language library that implements a small, fast, self-contained,
high-reliability, full-featured, SQL database engine.
SQLite (https://www.sqlite.org) is in the Public Domain.
ClassView and ImageViewer plugins
Copyright (C) 2016 The Qt Company Ltd.
All rights reserved.
Copyright (C) 2016 Denis Mingulov.
Contact: http://www.qt.io
This file is part of Qt Creator.
You may use this file under the terms of the BSD license as follows:
«Redistribution and use in source and binary forms, with or without
modification, are permitted provided that the following conditions are
met:
* Redistributions of source code must retain the above copyright
notice, this list of conditions and the following disclaimer.
* Redistributions in binary form must reproduce the above copyright
notice, this list of conditions and the following disclaimer in
the documentation and/or other materials provided with the
distribution.
* Neither the name of The Qt Company Ltd and its Subsidiary(-ies) nor
the names of its contributors may be used to endorse or promote
products derived from this software without specific prior written
permission.
THIS SOFTWARE IS PROVIDED BY THE COPYRIGHT HOLDERS AND CONTRIBUTORS
«AS IS» AND ANY EXPRESS OR IMPLIED WARRANTIES, INCLUDING, BUT NOT
LIMITED TO, THE IMPLIED WARRANTIES OF MERCHANTABILITY AND FITNESS FOR
A PARTICULAR PURPOSE ARE DISCLAIMED. IN NO EVENT SHALL THE COPYRIGHT
OWNER OR CONTRIBUTORS BE LIABLE FOR ANY DIRECT, INDIRECT, INCIDENTAL,
SPECIAL, EXEMPLARY, OR CONSEQUENTIAL DAMAGES (INCLUDING, BUT NOT
LIMITED TO, PROCUREMENT OF SUBSTITUTE GOODS OR SERVICES; LOSS OF USE,
DATA, OR PROFITS; OR BUSINESS INTERRUPTION) HOWEVER CAUSED AND ON ANY
THEORY OF LIABILITY, WHETHER IN CONTRACT, STRICT LIABILITY, OR TORT
(INCLUDING NEGLIGENCE OR OTHERWISE) ARISING IN ANY WAY OUT OF THE USE
OF THIS SOFTWARE, EVEN IF ADVISED OF THE POSSIBILITY OF SUCH DAMAGE.»
Source Code Pro font
Copyright 2010, 2012 Adobe Systems Incorporated (http://www.adobe.com/),
with Reserved Font Name ‘Source’. All Rights Reserved. Source is a
trademark of Adobe Systems Incorporated in the United States
and/or other countries.
This Font Software is licensed under the SIL Open Font License, Version 1.1.
The font and license files can be found in QtCreator/src/libs/3rdparty/fonts.
JSON Library by Niels Lohmann
Used by the Chrome Trace Format Visualizer plugin instead of QJson
because of QJson’s current hard limit of 128 Mb object size and
trace files often being much larger.
The sources can be found in QtCreator/src/libs/3rdparty/json.
The class is licensed under the MIT License:
Copyright © 2013-2019 Niels Lohmann
Permission is hereby granted, free of charge, to any person obtaining a
copy of this software and associated documentation files (the “Software”), to
deal in the Software without restriction, including without limitation the
rights to use, copy, modify, merge, publish, distribute, sublicense, and/or sell
copies of the Software, and to permit persons to whom the Software is furnished
to do so, subject to the following conditions:
The above copyright notice and this permission notice shall be included
in all copies or substantial portions of the Software.
THE SOFTWARE IS PROVIDED “AS IS”, WITHOUT WARRANTY OF ANY KIND, EXPRESS
OR IMPLIED, INCLUDING BUT NOT LIMITED TO THE WARRANTIES OF MERCHANTABILITY,
FITNESS FOR A PARTICULAR PURPOSE AND NONINFRINGEMENT. IN NO EVENT SHALL THE
AUTHORS OR COPYRIGHT HOLDERS BE LIABLE FOR ANY CLAIM, DAMAGES OR OTHER
LIABILITY, WHETHER IN AN ACTION OF CONTRACT, TORT OR OTHERWISE, ARISING FROM,
OUT OF OR IN CONNECTION WITH THE SOFTWARE OR THE USE OR OTHER DEALINGS IN THE
SOFTWARE.
The class contains the UTF-8 Decoder from Bjoern Hoehrmann which is
licensed under the MIT License (see above). Copyright © 2008-2009 Björn
Hoehrmann bjoern@hoehrmann.de
The class contains a slightly modified version of the Grisu2 algorithm
from Florian Loitsch which is licensed under the MIT License (see above).
Copyright © 2009 Florian Loitsch
litehtml
The litehtml HTML/CSS rendering engine is used as a help viewer backend
to display help files.
The sources can be found in:
* QtCreator/src/plugins/help/qlitehtml
* https://github.com/litehtml
Copyright (c) 2013, Yuri Kobets (tordex)
Redistribution and use in source and binary forms, with or without
modification, are permitted provided that the following conditions are met:
- Redistributions of source code must retain the above copyright
notice, this list of conditions and the following disclaimer. - Redistributions in binary form must reproduce the above copyright
notice, this list of conditions and the following disclaimer in the
documentation and/or other materials provided with the distribution. - Neither the name of the nor the
names of its contributors may be used to endorse or promote products
derived from this software without specific prior written permission.
THIS SOFTWARE IS PROVIDED BY THE COPYRIGHT HOLDERS AND CONTRIBUTORS «AS IS» AND
ANY EXPRESS OR IMPLIED WARRANTIES, INCLUDING, BUT NOT LIMITED TO, THE IMPLIED
WARRANTIES OF MERCHANTABILITY AND FITNESS FOR A PARTICULAR PURPOSE ARE
DISCLAIMED. IN NO EVENT SHALL BE LIABLE FOR ANY
DIRECT, INDIRECT, INCIDENTAL, SPECIAL, EXEMPLARY, OR CONSEQUENTIAL DAMAGES
(INCLUDING, BUT NOT LIMITED TO, PROCUREMENT OF SUBSTITUTE GOODS OR SERVICES;
LOSS OF USE, DATA, OR PROFITS; OR BUSINESS INTERRUPTION) HOWEVER CAUSED AND
ON ANY THEORY OF LIABILITY, WHETHER IN CONTRACT, STRICT LIABILITY, OR TORT
(INCLUDING NEGLIGENCE OR OTHERWISE) ARISING IN ANY WAY OUT OF THE USE OF THIS
SOFTWARE, EVEN IF ADVISED OF THE POSSIBILITY OF SUCH DAMAGE.
gumbo
The litehtml HTML/CSS rendering engine uses the gumbo parser.
Copyright 2010, 2011 Google
Licensed under the Apache License, Version 2.0 (the «License»);
you may not use this file except in compliance with the License.
You may obtain a copy of the License at
http://www.apache.org/licenses/LICENSE-2.0
Unless required by applicable law or agreed to in writing, software
distributed under the License is distributed on an «AS IS» BASIS,
WITHOUT WARRANTIES OR CONDITIONS OF ANY KIND, either express or implied.
See the License for the specific language governing permissions and
limitations under the License.
gumbo/utf8.c
The litehtml HTML/CSS rendering engine uses gumbo/utf8.c parser.
Copyright (c) 2008-2009 Bjoern Hoehrmann bjoern@hoehrmann.de
Permission is hereby granted, free of charge, to any person obtaining a copy
of this software and associated documentation files (the «Software»), to deal
in the Software without restriction, including without limitation the rights
to use, copy, modify, merge, publish, distribute, sublicense, and/or sell
copies of the Software, and to permit persons to whom the Software is
furnished to do so, subject to the following conditions:
The above copyright notice and this permission notice shall be included in
all copies or substantial portions of the Software.
SourceCodePro fonts
Qt Creator ships with the following fonts licensed under OFL-1.1:
- SourceCodePro-Regular.ttf
- SourceCodePro-It.ttf
- SourceCodePro-Bold.ttf
SIL OPEN FONT LICENSE
Version 1.1 — 26 February 2007
PREAMBLE
The goals of the Open Font License (OFL) are to stimulate worldwide
development of collaborative font projects, to support the font creation
efforts of academic and linguistic communities, and to provide a free and
open framework in which fonts may be shared and improved in partnership
with others.
The OFL allows the licensed fonts to be used, studied, modified and
redistributed freely as long as they are not sold by themselves. The
fonts, including any derivative works, can be bundled, embedded,
redistributed and/or sold with any software provided that any reserved
names are not used by derivative works. The fonts and derivatives,
however, cannot be released under any other type of license. The
requirement for fonts to remain under this license does not apply
to any document created using the fonts or their derivatives.
DEFINITIONS
«Font Software» refers to the set of files released by the Copyright
Holder(s) under this license and clearly marked as such. This may
include source files, build scripts and documentation.
«Reserved Font Name» refers to any names specified as such after the
copyright statement(s).
«Original Version» refers to the collection of Font Software components as
distributed by the Copyright Holder(s).
«Modified Version» refers to any derivative made by adding to, deleting,
or substituting — in part or in whole — any of the components of the
Original Version, by changing formats or by porting the Font Software to a
new environment.
«Author» refers to any designer, engineer, programmer, technical
writer or other person who contributed to the Font Software.
PERMISSION & CONDITIONS
Permission is hereby granted, free of charge, to any person obtaining
a copy of the Font Software, to use, study, copy, merge, embed, modify,
redistribute, and sell modified and unmodified copies of the Font
Software, subject to the following conditions:
-
Neither the Font Software nor any of its individual components,
in Original or Modified Versions, may be sold by itself. -
Original or Modified Versions of the Font Software may be bundled,
redistributed and/or sold with any software, provided that each copy
contains the above copyright notice and this license. These can be
included either as stand-alone text files, human-readable headers or
in the appropriate machine-readable metadata fields within text or
binary files as long as those fields can be easily viewed by the user. -
No Modified Version of the Font Software may use the Reserved Font
Name(s) unless explicit written permission is granted by the corresponding
Copyright Holder. This restriction only applies to the primary font name as
presented to the users. -
The name(s) of the Copyright Holder(s) or the Author(s) of the Font
Software shall not be used to promote, endorse or advertise any
Modified Version, except to acknowledge the contribution(s) of the
Copyright Holder(s) and the Author(s) or with their explicit written
permission. -
The Font Software, modified or unmodified, in part or in whole,
must be distributed entirely under this license, and must not be
distributed under any other license. The requirement for fonts to
remain under this license does not apply to any document created
using the Font Software.
TERMINATION
This license becomes null and void if any of the above conditions are
not met.
DISCLAIMER
THE FONT SOFTWARE IS PROVIDED «AS IS», WITHOUT WARRANTY OF ANY KIND,
EXPRESS OR IMPLIED, INCLUDING BUT NOT LIMITED TO ANY WARRANTIES OF
MERCHANTABILITY, FITNESS FOR A PARTICULAR PURPOSE AND NONINFRINGEMENT
OF COPYRIGHT, PATENT, TRADEMARK, OR OTHER RIGHT. IN NO EVENT SHALL THE
COPYRIGHT HOLDER BE LIABLE FOR ANY CLAIM, DAMAGES OR OTHER LIABILITY,
INCLUDING ANY GENERAL, SPECIAL, INDIRECT, INCIDENTAL, OR CONSEQUENTIAL
DAMAGES, WHETHER IN AN ACTION OF CONTRACT, TORT OR OTHERWISE, ARISING
FROM, OUT OF THE USE OR INABILITY TO USE THE FONT SOFTWARE OR FROM
OTHER DEALINGS IN THE FONT SOFTWARE.
Qbs
Qt Creator installations deliver Qbs. Its licensing and third party
attributions are listed in Qbs Manual at
https://doc.qt.io/qbs/attributions.html
conan.cmake
CMake script used by Qt Creator’s auto setup of package manager dependencies.
The sources can be found in:
* QtCreator/src/share/3rdparty/package-manager/conan.cmake
* https://github.com/conan-io/cmake-conan
The MIT License (MIT)
Copyright (c) 2018 JFrog
Permission is hereby granted, free of charge, to any person obtaining a copy
of this software and associated documentation files (the «Software»), to deal
in the Software without restriction, including without limitation the rights
to use, copy, modify, merge, publish, distribute, sublicense, and/or sell
copies of the Software, and to permit persons to whom the Software is
furnished to do so, subject to the following conditions:
The above copyright notice and this permission notice shall be included in all
copies or substantial portions of the Software.
THE SOFTWARE IS PROVIDED «AS IS», WITHOUT WARRANTY OF ANY KIND, EXPRESS OR
IMPLIED, INCLUDING BUT NOT LIMITED TO THE WARRANTIES OF MERCHANTABILITY,
FITNESS FOR A PARTICULAR PURPOSE AND NONINFRINGEMENT. IN NO EVENT SHALL THE
AUTHORS OR COPYRIGHT HOLDERS BE LIABLE FOR ANY CLAIM, DAMAGES OR OTHER
LIABILITY, WHETHER IN AN ACTION OF CONTRACT, TORT OR OTHERWISE, ARISING FROM,
OUT OF OR IN CONNECTION WITH THE SOFTWARE OR THE USE OR OTHER DEALINGS IN THE
SOFTWARE.
TartanLlama/expected
Implementation of std::expected compatible with C++11/C++14/C++17.
https://github.com/TartanLlama/expected
To the extent possible under law, the author(s) have dedicated all
copyright and related and neighboring rights to this software to the
public domain worldwide. This software is distributed without any warranty.
http://creativecommons.org/publicdomain/zero/1.0/
WinPty
Implementation of a pseudo terminal for Windows.
https://github.com/rprichard/winpty
The MIT License (MIT)
Copyright (c) 2011-2016 Ryan Prichard
Permission is hereby granted, free of charge, to any person obtaining a copy
of this software and associated documentation files (the «Software»), to
deal in the Software without restriction, including without limitation the
rights to use, copy, modify, merge, publish, distribute, sublicense, and/or
sell copies of the Software, and to permit persons to whom the Software is
furnished to do so, subject to the following conditions:
The above copyright notice and this permission notice shall be included in
all copies or substantial portions of the Software.
THE SOFTWARE IS PROVIDED «AS IS», WITHOUT WARRANTY OF ANY KIND, EXPRESS OR
IMPLIED, INCLUDING BUT NOT LIMITED TO THE WARRANTIES OF MERCHANTABILITY,
FITNESS FOR A PARTICULAR PURPOSE AND NONINFRINGEMENT. IN NO EVENT SHALL THE
AUTHORS OR COPYRIGHT HOLDERS BE LIABLE FOR ANY CLAIM, DAMAGES OR OTHER
LIABILITY, WHETHER IN AN ACTION OF CONTRACT, TORT OR OTHERWISE, ARISING
FROM, OUT OF OR IN CONNECTION WITH THE SOFTWARE OR THE USE OR OTHER DEALINGS
IN THE SOFTWARE.
ptyqt
Pty-Qt is small library for access to console applications by pseudo-terminal interface on Mac,
Linux and Windows. On Mac and Linux it uses standard PseudoTerminal API and on Windows it uses
WinPty(prefer) or ConPty.
https://github.com/kafeg/ptyqt
MIT License
Copyright (c) 2019 Vitaly Petrov, v31337@gmail.com
Permission is hereby granted, free of charge, to any person obtaining a copy
of this software and associated documentation files (the «Software»), to deal
in the Software without restriction, including without limitation the rights
to use, copy, modify, merge, publish, distribute, sublicense, and/or sell
copies of the Software, and to permit persons to whom the Software is
furnished to do so, subject to the following conditions:
The above copyright notice and this permission notice shall be included in all
copies or substantial portions of the Software.
THE SOFTWARE IS PROVIDED «AS IS», WITHOUT WARRANTY OF ANY KIND, EXPRESS OR
IMPLIED, INCLUDING BUT NOT LIMITED TO THE WARRANTIES OF MERCHANTABILITY,
FITNESS FOR A PARTICULAR PURPOSE AND NONINFRINGEMENT. IN NO EVENT SHALL THE
AUTHORS OR COPYRIGHT HOLDERS BE LIABLE FOR ANY CLAIM, DAMAGES OR OTHER
LIABILITY, WHETHER IN AN ACTION OF CONTRACT, TORT OR OTHERWISE, ARISING FROM,
OUT OF OR IN CONNECTION WITH THE SOFTWARE OR THE USE OR OTHER DEALINGS IN THE
SOFTWARE.
libvterm
An abstract C99 library which implements a VT220 or xterm-like terminal emulator.
It doesn’t use any particular graphics toolkit or output system, instead it invokes callback
function pointers that its embedding program should provide it to draw on its behalf.
It avoids calling malloc() during normal running state, allowing it to be used in embedded kernel
situations.
https://www.leonerd.org.uk/code/libvterm/
The MIT License
Copyright (c) 2008 Paul Evans leonerd@leonerd.org.uk
Permission is hereby granted, free of charge, to any person obtaining a copy
of this software and associated documentation files (the «Software»), to deal
in the Software without restriction, including without limitation the rights
to use, copy, modify, merge, publish, distribute, sublicense, and/or sell
copies of the Software, and to permit persons to whom the Software is
furnished to do so, subject to the following conditions:
The above copyright notice and this permission notice shall be included in
all copies or substantial portions of the Software.
THE SOFTWARE IS PROVIDED «AS IS», WITHOUT WARRANTY OF ANY KIND, EXPRESS OR
IMPLIED, INCLUDING BUT NOT LIMITED TO THE WARRANTIES OF MERCHANTABILITY,
FITNESS FOR A PARTICULAR PURPOSE AND NONINFRINGEMENT. IN NO EVENT SHALL THE
AUTHORS OR COPYRIGHT HOLDERS BE LIABLE FOR ANY CLAIM, DAMAGES OR OTHER
LIABILITY, WHETHER IN AN ACTION OF CONTRACT, TORT OR OTHERWISE, ARISING FROM,
OUT OF OR IN CONNECTION WITH THE SOFTWARE OR THE USE OR OTHER DEALINGS IN
THE SOFTWARE.
terminal/shellintegrations
The Terminal plugin uses scripts to integrate with the shell. The scripts are
located in the Qt Creator source tree in src/plugins/terminal/shellintegrations.
https://github.com/microsoft/vscode/tree/main/src/vs/workbench/contrib/terminal/browser/media
MIT License
Copyright (c) 2015 — present Microsoft Corporation
Permission is hereby granted, free of charge, to any person obtaining a copy
of this software and associated documentation files (the «Software»), to deal
in the Software without restriction, including without limitation the rights
to use, copy, modify, merge, publish, distribute, sublicense, and/or sell
copies of the Software, and to permit persons to whom the Software is
furnished to do so, subject to the following conditions:
The above copyright notice and this permission notice shall be included in all
copies or substantial portions of the Software.
THE SOFTWARE IS PROVIDED «AS IS», WITHOUT WARRANTY OF ANY KIND, EXPRESS OR
IMPLIED, INCLUDING BUT NOT LIMITED TO THE WARRANTIES OF MERCHANTABILITY,
FITNESS FOR A PARTICULAR PURPOSE AND NONINFRINGEMENT. IN NO EVENT SHALL THE
AUTHORS OR COPYRIGHT HOLDERS BE LIABLE FOR ANY CLAIM, DAMAGES OR OTHER
LIABILITY, WHETHER IN AN ACTION OF CONTRACT, TORT OR OTHERWISE, ARISING FROM,
OUT OF OR IN CONNECTION WITH THE SOFTWARE OR THE USE OR OTHER DEALINGS IN THE
SOFTWARE.
terminal/shellintegrations/clink
The Terminal plugin uses a lua script to integrate with the cmd shell when using clink.
https://github.com/chrisant996/clink-gizmos
MIT License
Copyright (c) 2023 Chris Antos
Permission is hereby granted, free of charge, to any person obtaining a copy
of this software and associated documentation files (the «Software»), to deal
in the Software without restriction, including without limitation the rights
to use, copy, modify, merge, publish, distribute, sublicense, and/or sell
copies of the Software, and to permit persons to whom the Software is
furnished to do so, subject to the following conditions:
The above copyright notice and this permission notice shall be included in all
copies or substantial portions of the Software.
THE SOFTWARE IS PROVIDED «AS IS», WITHOUT WARRANTY OF ANY KIND, EXPRESS OR
IMPLIED, INCLUDING BUT NOT LIMITED TO THE WARRANTIES OF MERCHANTABILITY,
FITNESS FOR A PARTICULAR PURPOSE AND NONINFRINGEMENT. IN NO EVENT SHALL THE
AUTHORS OR COPYRIGHT HOLDERS BE LIABLE FOR ANY CLAIM, DAMAGES OR OTHER
LIABILITY, WHETHER IN AN ACTION OF CONTRACT, TORT OR OTHERWISE, ARISING FROM,
OUT OF OR IN CONNECTION WITH THE SOFTWARE OR THE USE OR OTHER DEALINGS IN THE
SOFTWARE.
cmake
The CMake project manager uses the CMake lexer code for parsing CMake files
https://gitlab.kitware.com/cmake/cmake.git
CMake — Cross Platform Makefile Generator
Copyright 2000-2023 Kitware, Inc. and Contributors
All rights reserved.
Redistribution and use in source and binary forms, with or without
modification, are permitted provided that the following conditions
are met:
-
Redistributions of source code must retain the above copyright
notice, this list of conditions and the following disclaimer. -
Redistributions in binary form must reproduce the above copyright
notice, this list of conditions and the following disclaimer in the
documentation and/or other materials provided with the distribution. -
Neither the name of Kitware, Inc. nor the names of Contributors
may be used to endorse or promote products derived from this
software without specific prior written permission.
THIS SOFTWARE IS PROVIDED BY THE COPYRIGHT HOLDERS AND CONTRIBUTORS
«AS IS» AND ANY EXPRESS OR IMPLIED WARRANTIES, INCLUDING, BUT NOT
LIMITED TO, THE IMPLIED WARRANTIES OF MERCHANTABILITY AND FITNESS FOR
A PARTICULAR PURPOSE ARE DISCLAIMED. IN NO EVENT SHALL THE COPYRIGHT
HOLDER OR CONTRIBUTORS BE LIABLE FOR ANY DIRECT, INDIRECT, INCIDENTAL,
SPECIAL, EXEMPLARY, OR CONSEQUENTIAL DAMAGES (INCLUDING, BUT NOT
LIMITED TO, PROCUREMENT OF SUBSTITUTE GOODS OR SERVICES; LOSS OF USE,
DATA, OR PROFITS; OR BUSINESS INTERRUPTION) HOWEVER CAUSED AND ON ANY
THEORY OF LIABILITY, WHETHER IN CONTRACT, STRICT LIABILITY, OR TORT
(INCLUDING NEGLIGENCE OR OTHERWISE) ARISING IN ANY WAY OUT OF THE USE
OF THIS SOFTWARE, EVEN IF ADVISED OF THE POSSIBILITY OF SUCH DAMAGE.
RSTParser
RSTParser is an open-source C++ library for parsing reStructuredText
https://github.com/vitaut-archive/rstparser
License
Copyright (c) 2013, Victor Zverovich
All rights reserved.
Redistribution and use in source and binary forms, with or without
modification, are permitted provided that the following conditions are met:
- Redistributions of source code must retain the above copyright notice, this
list of conditions and the following disclaimer. - Redistributions in binary form must reproduce the above copyright notice,
this list of conditions and the following disclaimer in the documentation
and/or other materials provided with the distribution.
THIS SOFTWARE IS PROVIDED BY THE COPYRIGHT HOLDERS AND CONTRIBUTORS «AS IS» AND
ANY EXPRESS OR IMPLIED WARRANTIES, INCLUDING, BUT NOT LIMITED TO, THE IMPLIED
WARRANTIES OF MERCHANTABILITY AND FITNESS FOR A PARTICULAR PURPOSE ARE
DISCLAIMED. IN NO EVENT SHALL THE COPYRIGHT OWNER OR CONTRIBUTORS BE LIABLE FOR
ANY DIRECT, INDIRECT, INCIDENTAL, SPECIAL, EXEMPLARY, OR CONSEQUENTIAL DAMAGES
(INCLUDING, BUT NOT LIMITED TO, PROCUREMENT OF SUBSTITUTE GOODS OR SERVICES;
LOSS OF USE, DATA, OR PROFITS; OR BUSINESS INTERRUPTION) HOWEVER CAUSED AND
ON ANY THEORY OF LIABILITY, WHETHER IN CONTRACT, STRICT LIABILITY, OR TORT
(INCLUDING NEGLIGENCE OR OTHERWISE) ARISING IN ANY WAY OUT OF THE USE OF THIS
SOFTWARE, EVEN IF ADVISED OF THE POSSIBILITY OF SUCH DAMAGE.
QtKeychain
QtKeychain provides the Axivion plugin with the means to securely store
and retrieve dashboard credentials.
https://github.com/frankosterfeld/qtkeychain
Distributed under the Modified BSD License
Redistribution and use in source and binary forms, with or without
modification, are permitted provided that the following conditions
are met:
- Redistributions of source code must retain the above copyright
notice, this list of conditions and the following disclaimer. - Redistributions in binary form must reproduce the above copyright
notice, this list of conditions and the following disclaimer in the
documentation and/or other materials provided with the distribution. - The name of the author may not be used to
endorse or promote products derived from this software without
specific prior written permission.
THIS SOFTWARE IS PROVIDED BY THE AUTHOR «AS IS» AND ANY EXPRESS OR
IMPLIED WARRANTIES, INCLUDING, BUT NOT LIMITED TO, THE IMPLIED WARRANTIES
OF MERCHANTABILITY AND FITNESS FOR A PARTICULAR PURPOSE ARE DISCLAIMED.
IN NO EVENT SHALL THE AUTHOR BE LIABLE FOR ANY DIRECT, INDIRECT,
INCIDENTAL, SPECIAL, EXEMPLARY, OR CONSEQUENTIAL DAMAGES (INCLUDING, BUT
NOT LIMITED TO, PROCUREMENT OF SUBSTITUTE GOODS OR SERVICES; LOSS OF USE,
DATA, OR PROFITS; OR BUSINESS INTERRUPTION) HOWEVER CAUSED AND ON ANY
THEORY OF LIABILITY, WHETHER IN CONTRACT, STRICT LIABILITY, OR TORT
(INCLUDING NEGLIGENCE OR OTHERWISE) ARISING IN ANY WAY OUT OF THE USE OF
THIS SOFTWARE, EVEN IF ADVISED OF THE POSSIBILITY OF SUCH DAMAGE.
Время на прочтение
8 мин
Количество просмотров 22K
Пару слов о том для чего это понадобилось вообще: у меня была простая ситуация — не было быстрого интернета и был компьютер с начисто установленной windows 10. К тому же проект, который ковыряю, требует сборки как под 32 так и под 64 битную архитектуру, поэтому мне показалось что наличие Qt, одинаково сконфигуренного и скомпилированного под эти архитектуры будет только плюсом.
0) Желательно заранее отрубить службы Windows Search и Superfetch и защитник винды. Они на наших операциях будут только тормозить систему, а ресурсы нам скоро понадобятся. Кроме того очень полезно сделать языком ввода по умолчанию английский.
1) Создаем папку «C:\QT» — тут будут жить наши сборки.
2) Для начала нам конечно же понадобится сам компилятор mingw-w64. Качаем инсталлер тут.
3) Устанавливаем по очереди обе версии:
первая установка:
Version — 5.2.0 — последняя на момент написания статьи;
Architecture — i686 — сначала ставим 32 битную версию (пускай вас не пугает что оно не i386, i686 это Интел пентиум про и выше, сумеете запустить 2k винду на чем то более древнем — удачи!)
Threads — win32 — если не портируете исходники с юниксов лучше выбрать нативные;
Exeption — sjlj — мне нужно так, если вам нужны другие — бога ради;
Build revision — 1 опять же последняя на момент написания статьи;
Назначение выбрал «C:\mingw-w64-i686» ибо из Program Files могут быть проблемы с пробелами в путях у qt.
Вторая установка все то же самое кроме:
Architecture — x86_64;
Путь «C:\mingw-w64-x86_64»;
Я так же убрал галку «создать ярлыки», иначе они перезапишутся 64 битной версией, мне это неудобно.
Если не хотите плодить много папок в корне ставить можно в «C:\QT\mingw-w64-i686» и «C:\QT\mingw-w64-x86_64» соответвенно архитектурам, роли это не играет.
4) Качаем исходники бибилиотеки QT 4.8.7 тут
5) Распаковываем сам Qt (тут лучше заранее озаботится наличием программы 7zip ибо виндовый архиватор сначала будет распаковывать во временную папку, потом копировать из нее туеву хучу мелких файлов, идиот, а потом ещё и создаст дополнительную папку внутри с тем же именем) сразу в 2 копии «C:\QT\qt-4.8.7-mingw-w64-i686» и «C:\QT\qt-4.8.7-mingw-w64-x64» (вторая нужна на случай ошибок при конфигуре, гораздо быстрее переименовать копию и пустить фоном распаковываться ещё одну, чем ждать пока отработает mingw32-make confclean). Если не уверены в архиваторе проверяем чтобы в этих папках сразу были папки bin, util, src и т.д., если архиватор создал ещё одну вложенную — вытаскиваем содержимое на уровень выше.
6) Идем в свойства системы и меняем переменную PATH (надо же в моей 10-ке сделали нормальный интерфейс для этого) добавляем туда путь пока только к 32 битной версии компилятора, у меня это: «C:\mingw-w64-i686\mingw32\bin». Если вдруг у вас в PATH есть пути к другим компиляторам временно убираем их оттуда.
7) Запускаем cmd от админа (это важно) и вводим:
g++ -v
должна появится инфа о компиляторе, если этого не произошло значит компиль установлен неправильно, ищем ошибку на предыдущих шагах. Если вывелась информация проверяем, что мы ничего не напутали: у нас запускается действительно 32 битная версия, и что она именно та которую мы установили на предыдущих шагах, а не из оригинального mingw без w64 (это по сути разные проекты) или, прости господи, вижуал студии.
Если все нормально переходим в папку с Qt:
cd C:\QT\qt-4.8.7-mingw-w64-i586
запускаем там конфигур как-то так:
.\configure -debug-and-release -opensource -confirm-license -platform win32-g++ -graphicssystem raster -no-openssl -nis -iconv -system-proxies -no-freetype -plugin-sql-odbc -plugin-sql-sqlite -qt-style-windows -qt-style-windowsxp -qt-style-windowsvista -qt-style-plastique -qt-style-cleanlooks -qt-style-motif -qt-style-cde -qt-style-windowsce -qt-style-windowsmobile -qt-style-s60
в этом конфиге по максимому все что можно собрать без зависимостей. Мне openssl не очень нужен, иначе его нужно собрать заранее. Если критично время можно отключить примеры, не собирать дополнительные темы и odbc плагин. Справку по опциям можно получить так: «.\configure -help». Далее ждем несколько минут пока отработает конфигур, и запускаем компиляцию:
mingw32-make -j4
у меня 4 ядерный процессор по этому опция -j4 она обозначает делать компиляцию в 4 потока. Сразу оговорюсь, компиляция с этой опцией до конца не проходит, грохается на qtdeclarative с ошибкой копирования файла, видимо где то неправильно прописаны зависимости. Мне достаточно было запустить компиляцию после сбоя ещё раз. Ошибка кстати повторилась и на 64 битной версии. На core i5-3570 c 8-ю гигами оперы компиляция одной версии в 4 потока занимает почти 2 часа.
 Если у вас медленный интернет, пока компилится сам Qt можно поставить на закачку qt creator 3.2.2 (это последняя версия, которая компилится на 4.8.x), ActivePerl-5.20.2 !32 битную версию! и msysgit !32 битную версию! Указанные тут верcии это последние на момент написания статьи, и, соответственно, те с которыми работал я. Если у вас что-то не пошло на более новых, попробуйте указанные мной. Предупрежу сразу, до сборки qtcreator ставить msysgit очень не желательно, креатор нормально не соберется если увидит в патче sh.exe, а для нормальной работы с гитом его как раз стоит ставить с прописыванием PATH.
9) Устанавливаем perl: я не ставил документацию и примеры, местом назначения сделал «C:\perlx86». Галку «Add perl to the PATH environment variable» не снимаем. После установки в командной строке (естественно не в той, в которой компилится Qt) пишем «perl -v», должна появится информация о версии.
10) Распаковываем qt creator в » C:\QT\qt-creator-opensource-src-3.2.2″, так же проверяем чтобы внутри не было вложенной папки, а сразу были папка bin и остальное.
11) Ждем когда компилируется qt. Никаких прямых сообщений что компиляция завершена успешно, не будет. У меня последним собрался ‘C:/QT/qt-4.8.7-mingw-w64-i586/demos/declarative/webbrowser’. Можно запустить qtdemo.exe для проверки, позапускать примеры. Снова открываем редактор переменных среды, дописываем в PATH «C:\QT\qt-4.8.7-mingw-w64-i586\bin». Опять же убеждаемся, что это единственный профиль qt в PATH. Проверяем себя, перезапустив командную строку и набрав «qmake -v».
12) Открываем блокном файл «C:\QT\qt-creator-opensource-src-3.2.2\src\libs\utils\tcpportsgatherer.cpp», находим строчку
#if __GNUC__ == 4 && (!defined(__MINGW64_VERSION_MAJOR) || __MINGW64_VERSION_MAJOR < 2)и меняем её на
#if __MINGW64_VERSION_MAJOR == 5 || (__GNUC__ == 4 && (!defined(__MINGW64_VERSION_MAJOR) || __MINGW64_VERSION_MAJOR < 2))13) Перезапускаем cmd опять же от админа. Собираем creator в новой папке:
mkdir C:\QT\qt-creator-3.2.2-x86

cd C:\QT\qt-creator-3.2.2-x86

qmake -r ../qt-creator-opensource-src-3.2.2/qtcreator.pro

mingw32-make release -j4
надеюсь, повторяться про опцию -j4 не надо.
14) Ждем окончания компиляции, запускаем qtcreator, убеждаемся что работает. Закрываем, настраивать в нем пока ещё нечего. Если очень жалко места на диске и оперативы, можно уже скомпиленный creator закинуть в папку с Qt (скопировать только папки bin, lib, share) и добросить в папку bin недостающие dll-ки из mingw. По человечески же, надо наоборот: убрать компилятор и Qt из PATH и докопировать в папку bin creator-а dll-ки из папок bin от Qt и компилятора.
15) Снова открываем редактор PATH убираем оттуда путь к скомпиленному Qt «C:\QT\qt-4.8.7-mingw-w64-i586\bin» и меняем путь к компилятору c «C:\mingw-w64-i686\mingw32\bin» на «C:\mingw-w64-x86_64\mingw64\bin». Опять же перезапускаем cmd от админа и проверяем что нам выдаст
g++ -v
если все в норме, делаем все то же самое что и в шаге 6, только путь у нас теперь будет другой.
cd C:\QT\qt-4.8.7-mingw-w64-x86_64

.\configure -debug-and-release -opensource -confirm-license -platform win32-g++ -graphicssystem raster -no-openssl -nis -iconv -system-proxies -no-freetype -plugin-sql-odbc -plugin-sql-sqlite -qt-style-windows -qt-style-windowsxp -qt-style-windowsvista -qt-style-plastique -qt-style-cleanlooks -qt-style-motif -qt-style-cde -qt-style-windowsce -qt-style-windowsmobile -qt-style-s60

mingw32-make -j4
16) Теперь, пока компилится 64 битная версия Qt, можно заняться и гитом (джитом, не знаю какая транскрипция правильнее). Устанавливаем msysgit v2.6.3 !32 битную версию! запускаем инсталлер сразу от админа, иначе он поставит нам версию только для локального пользователя, оно нам не надо. Путь я выбрал «C:\msysGitX86». На следующем шаге можно ткнуть галку, которая создаст ярлык к консоли на рабочем столе. Eщё через шаг выбираем «Use git from the Windows Command Promt», Я еще выбрал «Use Windows` default console window» для терминала, остальное на любителя или по умолчанию.
На blogspot есть замечательная статья о том как подружить qt creator и github. Однако в ней не даны инструкции что делать если винт на котором все это настроено сгорел синим пламенем. Попробуем восполнить этот пробел.
17) Запускаем git-bash от админа, с ярлыка который нам создал установщик
делаем настройки, конечно же подставив ту почту на которую зарегистрирован аккаунт на гитхабе и свой никнейм
git config --global user.email "myMail@example.com"

git config --global user.name "myGithubNick"

git config --global push.default simple
генерим новую пару ключей для ssh:
ssh-keygen -t rsa -C "myMail@example.com"
3 раза жмакаем enter, заходим браузером в свой профиль на гитхабе, удаляем старый ключ (если конечно не собираемся им пользоваться, а он утрачен как у меня) и добавляем новый.
пробуем склонировать существующий репозиторий:
mkdir C:\\myproject

cd C:\\myproject

git clone git@github.com:myGithubNick/mysuperproject.git
обратите внимание что пользователь «git», а не никнейм; никнейм указывается уже после двоеточия. Кроме того никаких https:// или git:// перед адресом быть не должно, если получаете сообщение, что нужно использовать https, значит гитхаб не опознал в вас владельца репозитория, ищите проблемы с ключами или ssh. Если все в порядке, гит сделает нам копию репозитория в папке mysuperproject. Зайдем в нее и проверим что репозиторий рабочий, и у нас есть все права
cd ./mysuperproject

git remote -v

touch .testfile.txt

git add .testfile.txt

git commit -m test

git push

git reset --hard HEAD~1

git push -f
естественно ошибок быть не должно, если есть значит что-то не так с установкой гита или ssh.
18) Дожидаемся пока скомпилится 64 битная версия Qt. Убираем из PATH 64 битный компилятор, либо совсем, либо меняем на 32 битную версию, это уже как удобнее. Открываем блокнотом «C:\QT\qt-4.8.7-mingw-w64-x86_64\mkspecs\win32-g++\qmake.conf», сразу после комментов дописываем «QMAKE_TARGET.arch += x86_64», сохраняем, закрываем.
19) Снова запускаем creator (если сейчас он перестал запускаться, значит что-то лишнее есть в path или не все библиотеки мы ему подложили).
Открываем Инструменты(Tools)->Параметры(Options). Сразу же в разделе Среда(Environment) на вкладке Основные(General) нас просят ввести путь к командe patch, можно использовать «C:\msysGitX86\usr\bin\patch.exe». Идём во Внешние утилиты(External Tools) — правим пути.
Переходим в раздел Сборка и запуск(Build & Run), переходим на вкладку Отладчики(Debuggers), нажмаем Добавить(Add), название даем: «mingw32-w64-gdb», путь: «C:\mingw-w64-i686\mingw32\bin\gdb.exe». Снова жмем Добавить(Add), название даем: «mingw64-w64-gdb», путь: «C:\mingw-w64-x86_64\mingw64\bin\gdb.exe».
Переходим на вкладку Компиляторы(Compilers), нажмаем Добавить(Add) ->MinGW, если нет определенных в path имя даем «MinGW32-W64» и путь «C:\mingw-w64-i686\mingw32\bin\g++.exe» (можно и копию сделать для удобства, не страшно). Добавляем ещё один: имя «MinGW64-W64» путь «C:\mingw-w64-x86_64\mingw64\bin\g++.exe», ABI выбираем 64битные, если есть.
Переходим на вкладку Профили Qt (Qt versions), Если 32 битного профиля нет в path добавляем сначала его «C:\QT\qt-4.8.7-mingw-w64-i586\bin\qmake.exe». Потом добавляем 64 битный «C:\QT\qt-4.8.7-mingw-w64-x86_64\bin\qmake.exe». Имена у меня «Qt 4.8.7 mingw-w64 i586» и «Qt 4.8.7 mingw-w64 x86_64» соответвенно.
Переходим на вкладку Комплекты(kits), сначала настраиваем профиль Desktop:
Название:Desktop
Имя в файловой системе: x86
Тип устройства:Desktop
Устройство: Локальный ПК
Sysroot: — оставляем пустым
Компилятор: MinGW32-W64
Отладчик: mingw32-w64-gdb
Профиль Qt: Qt 4.8.7 mingw-w64 i586
Добавляем ещё один
Название:Desktop 64
Имя в файловой системе: x86_64
Тип устройства:Desktop
Устройство: Локальный ПК
Sysroot: — оставляем пустым
Компилятор: MinGW64-W64
Отладчик: mingw64-w64-gdb
Профиль Qt: Qt 4.8.7 mingw-w64 ч86_64
сохраняем, применяем, пробуем что-нибудь собрать.
Вот пожалуй и все что вспомнил по данной теме.
Кстати небольшой хак: если нужно незначительно переконфигурить уже собранную сборку, ну например openssl вы решили добавить или плагин к какому-нить мускулю не собрался, а 2-3-4 часа ждать пока все перекомпилиться ни разу не улыбается, делаем так: выставляем системное время на минут 10-15 раньше чем последний раз конфигурили сборку, переконфигуриваем, возвращаем время на настоящее. Блокнотом изменяем тот(те) мейкфайл(ы) который(е) затрагивает(ют) наши изменения и запускаем мейк, если не ошиблись с мейкфайлами (на самом деле если знать из чего состоит Qt, и что от чего зависит, ошибится трудно) перекомпилится только тот кусок который нам нужен.
В 1995 году вышла первая версия Qt, инструментария для разработки, который выгодно отличался тем, что предоставлял одинаковый API для разработки как в Windows так и в LInux. С тех пор многое поменялось, теперь вы можете использовать этот Qt5 совершенно бесплатно, при условии динамической линковки с библиотеками фреймворка.
Для создания программ на Qt5 под Windows потребуется MinGW – минималистическая среда разработки программ под Windows. А для установки мы будем использовать MSYS2 – надстройку над MinGW.
Введение
Инструментарий программиста за время с конца XX века претерпел множество изменений. В начале 90-х, когда я только знакомился с программированием, практический весь инструментарий для разработки ПО, в нашей стране, был «пиратским». Не было рынка программного обеспечения (ПО) и соответственно все пользовались тем, что продавалось на «Горбушке» и у «пиратов» на дискетах или дисках. В тоже время на западе практически все популярные среды для разработки ПО, например Borland Pascal, Borland C++, Delphi, C++ Builder и т.д. были платными.
Время шло, развивалось не только платное (проприетарное), но и свободно распространяемое программное обеспечение — это системы Unix/Linux и все производные от них. Развивался инструментарий для разработки для этих систем и, что самое главное, он был бесплатным. Сегодня, для того чтобы создать программу, необязательно тратить крупные суммы на покупку IDE для разработчика.
Qt5 предоставляет удобный и бесплатный инструментарий для разработки ПО на языке C++. Программы, написанные с помощью данного фреймворка, имеют нативный интерфейс что на Windows, что на Linux, а значит программисту не нужно заботиться о «подгонке» дизайна под конкретную ОС или дистрибутив.
Когда я первый раз устанавливал Qt5 c помощью MSYS2 я столкнулся со целым рядом проблем в процессе установки и настройки и это с учетом использования официального гайда по установке. В этой статье я по шагам опишу процесс установки, так что вы сможете без проблем установить среду разработки на ваш ПК.
Внимание! Чтобы избежать проблем и непонятных глюков, я настоятельно рекомендую удалить старые версии MinGW, если они установлены и Git for Windows. А также почистить переменные среды, удалив все старые ссылки на MinGW. В противном случае могут возникать конфликты и глюки при использовании разных версий библиотек и программ.
Установка
Прежде всего нужно скачать MSYS2. Идем на официальный сайт https://www.msys2.org/ и скачиваем дистрибутив для Windows.
Мы будет ставить 64-битную версию. На момент написания руководства, это версия msys2-x86_64-20190524.exe.
Рекомендую ставить msys2 в корень любого диска. По умолчанию он ставиться в папку c:\msys64 или c:\msys32.
Процесс установки элементарен, так что описывать его я не буду. Просто жмем “Далее”, а когда процесс закончиться – Завершить.
Откроется окно консоли Msys2
![]()
Базовая система у нас установлена, переходим к следующему этапу – обновлению.
Обновление
Сразу после установки нужно запустить обновление системы Msys2. Для этого в консоли пишем:
pacman -Syu
Начнется подготовка к обновлению:
$ pacman -Syu
:: Обновление баз данных пакетов...
 mingw32                  454,0 KiB   257K/s 00:02 [#####################] 100%
 mingw32.sig              119,0   B  0,00B/s 00:00 [#####################] 100%
 mingw64                  456,6 KiB   365K/s 00:01 [#####################] 100%
 mingw64.sig              119,0   B  7,26K/s 00:00 [#####################] 100%
 msys                     183,1 KiB   619K/s 00:00 [#####################] 100%
 msys.sig                 119,0   B  0,00B/s 00:00 [#####################] 100%
:: Starting core system upgrade...
предупреждение: terminate other MSYS2 programs before proceeding
разрешение зависимостей...
проверка конфликтов...

Пакеты (8) bash-4.4.023-2  filesystem-2020.02-2  libzstd-1.4.4-2
           mintty-1~3.1.4-1  msys2-runtime-3.0.7-6  pacman-5.2.1-6
           pacman-mirrors-20200307-1  zstd-1.4.4-2

Будет загружено:  16,51 MiB
Будет установлено:  65,35 MiB
Изменение размера:  -4,37 MiB

:: Приступить к установке? [Y/n] y
В процессе обновления будет выдан запрос на установку, нажимаем Y и Enter
:: Получение пакетов...
 msys2-runtime-3.0.7...     2,6 MiB   437K/s 00:06 [#####################] 100%
 bash-4.4.023-2-x86_64   1934,3 KiB   362K/s 00:05 [#####################] 100%
 filesystem-2020.02-...    44,9 KiB  0,00B/s 00:00 [#####################] 100%
 mintty-1~3.1.4-1-x86_64  668,9 KiB   317K/s 00:02 [#####################] 100%
 pacman-mirrors-2020...    20,0 KiB  0,00B/s 00:00 [#####################] 100%
 libzstd-1.4.4-2-x86_64   259,0 KiB   221K/s 00:01 [#####################] 100%
 zstd-1.4.4-2-x86_64      304,7 KiB   205K/s 00:01 [#####################] 100%
ошибка: не удалось получить файл 'pacman-5.2.1-6-x86_64.pkg.tar.xz' из repo.msys2.org : Operation too slow. Less than 1 bytes/sec transferred the last 10 seconds
ошибка: не удалось получить файл 'pacman-5.2.1-6-x86_64.pkg.tar.xz' из sourceforge.net : Operation too slow. Less than 1 bytes/sec transferred the last 10 seconds
 pacman-5.2.1-6-x86_64      4,8 MiB  1597K/s 00:03 [#####################] 100%
(8/8) проверка ключей                              [#####################] 100%
(8/8) проверка целостности пакета                  [#####################] 100%
(8/8) загрузка файлов пакетов                      [#####################] 100%
(8/8) проверка конфликтов файлов                   [#####################] 100%
(8/8) проверка доступного места                    [#####################] 100%
предупреждение: не удалось получить информацию о файле для clang32/
предупреждение: не удалось получить информацию о файле для clang32/bin/
предупреждение: не удалось получить информацию о файле для clang32/etc/
предупреждение: не удалось получить информацию о файле для clang32/etc/config.site
предупреждение: не удалось получить информацию о файле для clang32/include/
предупреждение: не удалось получить информацию о файле для clang32/lib/
предупреждение: не удалось получить информацию о файле для clang32/share/
предупреждение: не удалось получить информацию о файле для clang64/
предупреждение: не удалось получить информацию о файле для clang64/bin/
предупреждение: не удалось получить информацию о файле для clang64/etc/
предупреждение: не удалось получить информацию о файле для clang64/etc/config.site
предупреждение: не удалось получить информацию о файле для clang64/include/
предупреждение: не удалось получить информацию о файле для clang64/lib/
предупреждение: не удалось получить информацию о файле для clang64/share/
предупреждение: не удалось получить информацию о файле для opt/
:: Обработка изменений пакета...
(1/8) обновление msys2-runtime                     [#####################] 100%
(2/8) обновление bash                              [#####################] 100%
(3/8) обновление filesystem                        [#####################] 100%
(4/8) обновление mintty                            [#####################] 100%
(5/8) обновление pacman-mirrors                    [#####################] 100%
(6/8) установка libzstd                            [#####################] 100%
(7/8) установка zstd                               [#####################] 100%
(8/8) обновление pacman                            [#####################] 100%
предупреждение: terminate MSYS2 without returning to shell and check for updates again
предупреждение: for example close your terminal window instead of calling exit
У меня посыпались множественные ошибки, в этом нет ничего страшного, просто закрываем окно консоли, на предупреждение нажимаем «ОК» и запускаем её снова.
Идем в папку C:\msys64 и запускаем msys2.exe
В консоли вводим:
pacman -Su
$ pacman -Su
:: Starting core system upgrade...
 делать больше нечего
:: Запускается полное обновление системы...
разрешение зависимостей...
проверка конфликтов...

Пакеты (52) bash-completion-2.10-1  brotli-1.0.7-2  bsdcpio-3.4.2-2
            bsdtar-3.4.2-2  bzip2-1.0.8-1  ca-certificates-20190110-1
            coreutils-8.32-1  curl-7.69.0-1  dtc-1.6.0-1  file-5.38-2
            findutils-4.7.0-1  gawk-5.0.1-1  gcc-libs-9.1.0-2  glib2-2.54.3-2
            gmp-6.2.0-1  gnupg-2.2.19-1  heimdal-libs-7.7.0-1  icu-65.1-1
            less-551-1  libarchive-3.4.2-2  libbz2-1.0.8-1  libcurl-7.69.0-1
            libedit-20191231_3.1-1  libexpat-2.2.9-1  libgcrypt-1.8.5-1
            libgnutls-3.6.12-1  libgpg-error-1.37-1  libgpgme-1.13.1-2
            libhogweed-3.5.1-1  libiconv-1.16-1  libidn2-2.3.0-1
            liblz4-1.9.2-1  libnettle-3.5.1-1  libnghttp2-1.40.0-1
            libopenssl-1.1.1.d-1  libp11-kit-0.23.20-1  libpcre2_8-10.34-1
            libpsl-0.21.0-1  libreadline-8.0.004-1  libsqlite-3.30.0-1
            libssh2-1.9.0-1  libtasn1-4.16.0-1  libutil-linux-2.35-1
            libxml2-2.9.10-2  libxslt-1.1.34-1  ncurses-6.2-1  nettle-3.5.1-1
            openssl-1.1.1.d-1  p11-kit-0.23.20-1  pkgfile-21-1  sed-4.8-1
            util-linux-2.35-1

Будет загружено:   36,58 MiB
Будет установлено:  208,87 MiB
Изменение размера:    7,09 MiB

:: Приступить к установке? [Y/n]
В процессе обновления будет выдан запрос на установку, нажимаем Y и Enter
Начнется процесс скачивания обновлений и их установки, он может занять длительно время (здесь и далее я, я буду сокращать вывод команд установки и обновления):
:: Получение пакетов...
bash-completion-...   211,6 KiB   242 KiB/s 00:01 [#####################] 100%
...
util-linux-2.35-...  1509,4 KiB   233 KiB/s 00:06 [#####################] 100%
(52/52) проверка ключей                            [#####################] 100%
(52/52) проверка целостности пакета                [#####################] 100%
(52/52) загрузка файлов пакетов                    [#####################] 100%
(52/52) проверка конфликтов файлов                 [#####################] 100%
(52/52) проверка доступного места                  [#####################] 100%
:: Обработка изменений пакета...
( 1/52) обновление bash-completion                 [#####################] 100%
...
(52/52) обновление util-linux                      [#####################] 100%
Мы обновили базовую систему и все основные пакеты.
Для начала проверим, что се обновилось корректно, для этого поставим Git, он нам в любом случае понадобиться.
pacman -S git
$ pacman -S git
разрешение зависимостей...
проверка конфликтов...

Пакеты (35) db-5.3.28-2  expat-2.2.9-1  gdbm-1.18.1-2  heimdal-7.7.0-1
            libgdbm-1.18.1-2  openssh-8.2p1-1  perl-5.30.1-1
            perl-Authen-SASL-2.16-2  perl-Convert-BinHex-1.125-1
            perl-Encode-Locale-1.05-1  perl-Error-0.17029-1
            perl-File-Listing-6.04-2  perl-HTML-Parser-3.72-4
            perl-HTML-Tagset-3.20-2  perl-HTTP-Cookies-6.08-1
            perl-HTTP-Daemon-6.01-2  perl-HTTP-Date-6.05-1
            perl-HTTP-Message-6.22-1  perl-HTTP-Negotiate-6.01-2
            perl-IO-Socket-SSL-2.066-1  perl-IO-stringy-2.111-1
            perl-LWP-MediaTypes-6.02-2  perl-MIME-tools-5.509-1
            perl-MailTools-2.21-1  perl-Net-HTTP-6.19-1
            perl-Net-SMTP-SSL-1.04-1  perl-Net-SSLeay-1.88-1
            perl-TermReadKey-2.38-1  perl-TimeDate-2.32-1  perl-Try-Tiny-0.30-1
            perl-URI-1.76-1  perl-WWW-RobotRules-6.02-2  perl-libwww-6.43-1
            vim-8.2.0121-1  git-2.25.1-1

Будет загружено:   28,99 MiB
Будет установлено:  140,40 MiB

:: Приступить к установке? [Y/n] y
:: Получение пакетов...
 expat-2.2.9-1-x86_64   43,7 KiB  16,7 KiB/s 00:03 [#####################] 100%
...
 git-2.25.1-1-x86_64     5,3 MiB   352 KiB/s 00:16 [#####################] 100%
(35/35) проверка ключей                            [#####################] 100%
(35/35) проверка целостности пакета                [#####################] 100%
(35/35) загрузка файлов пакетов                    [#####################] 100%
(35/35) проверка конфликтов файлов                 [#####################] 100%
(35/35) проверка доступного места                  [#####################] 100%
:: Обработка изменений пакета...
( 1/35) установка expat                            [#####################] 100%
...
 (35/35) установка git                              [#####################] 100%
Дополнительные зависимости для 'git'
    python2: various helper scripts
    subversion: git svn
Установка C++
Приступим к установке библиотек и утилит необходимых для разработки.
Запускаем
pacman -S base-devel git mercurial cvs wget p7zip
$ pacman -S base-devel git mercurial cvs wget p7zip
:: 58 объектов в группе base-devel:
:: Repository msys
   1) asciidoc  2) autoconf  3) autoconf2.13  4) autogen  5) automake-wrapper
   6) automake1.10  7) automake1.11  8) automake1.12  9) automake1.13
   10) automake1.14  11) automake1.15  12) automake1.16  13) automake1.6
   14) automake1.7  15) automake1.8  16) automake1.9  17) bison  18) btyacc
   19) diffstat  20) diffutils  21) dos2unix  22) file  23) flex  24) gawk
   25) gdb  26) gettext  27) gettext-devel  28) gperf  29) grep  30) groff
   31) help2man  32) intltool  33) lemon  34) libtool  35) libunrar
   36) libunrar-devel  37) m4  38) make  39) man-db  40) pacman
   41) pactoys-git  42) patch  43) patchutils  44) perl  45) pkg-config
   46) pkgfile  47) quilt  48) rcs  49) reflex  50) scons  51) sed  52) swig
   53) texinfo  54) texinfo-tex  55) ttyrec  56) unrar  57) wget  58) xmlto

Выберите вариант (по-умолчанию=все):
Нажимaем Enter
...
разрешение зависимостей...
проверка конфликтов...

Пакеты (79) docbook-xml-4.5-2  docbook-xsl-1.79.2-1  libatomic_ops-7.6.10-1
            libgc-7.6.8-1  libguile-2.2.6-1  libiconv-devel-1.16-1
...
            rcs-5.9.4-2  reflex-20191123-1  scons-3.1.2-2  sed-4.8-1
            swig-4.0.1-1  texinfo-6.6-1  texinfo-tex-6.6-1  ttyrec-1.0.8-2
            unrar-5.9.1-1  wget-1.20.3-1  xmlto-0.0.28-2

Будет загружено:   53,08 MiB
Будет установлено:  428,84 MiB
Изменение размера:  281,34 MiB

:: Приступить к установке? [Y/n]
Нажимаем Y и Enter
Ждем загрузки и установки компонентов.
Далее запускаем:
pacman -S perl ruby python2 mingw-w64-x86_64-toolchain
предупреждение: perl-5.30.1-1 не устарел -- переустанавливается
:: 17 объектов в группе mingw-w64-x86_64-toolchain:
:: Repository mingw64
   1) mingw-w64-x86_64-binutils  2) mingw-w64-x86_64-crt-git
   3) mingw-w64-x86_64-gcc  4) mingw-w64-x86_64-gcc-ada
   5) mingw-w64-x86_64-gcc-fortran  6) mingw-w64-x86_64-gcc-libgfortran
   7) mingw-w64-x86_64-gcc-libs  8) mingw-w64-x86_64-gcc-objc
   9) mingw-w64-x86_64-gdb  10) mingw-w64-x86_64-headers-git
   11) mingw-w64-x86_64-libmangle-git  12) mingw-w64-x86_64-libwinpthread-git
   13) mingw-w64-x86_64-make  14) mingw-w64-x86_64-pkg-config
   15) mingw-w64-x86_64-tools-git  16) mingw-w64-x86_64-winpthreads-git
   17) mingw-w64-x86_64-winstorecompat-git

Выберите вариант (по-умолчанию=все):
Нажимaем Enter
разрешение зависимостей...
проверка конфликтов...

Пакеты (48) libyaml-0.2.2-1  mingw-w64-x86_64-bzip2-1.0.8-1
            mingw-w64-x86_64-ca-certificates-20190110-1
            mingw-w64-x86_64-expat-2.2.9-1  mingw-w64-x86_64-gettext-0.19.8.1-8

...

            mingw-w64-x86_64-winpthreads-git-8.0.0.5574.33e5a2ac-1
            mingw-w64-x86_64-winstorecompat-git-8.0.0.5573.a4de8df4-1
            perl-5.30.1-1  python2-2.7.17-1  ruby-2.6.5-1

Будет загружено:   161,54 MiB
Будет установлено:  1046,35 MiB
Изменение размера:   995,82 MiB

:: Приступить к установке? [Y/n]
Нажимаем Y и Enter
Ждем загрузки и установки компонентов.
Установка нужных базовых компонентов завершена.
Запустим установку Qt5, в консоли введем:
pacman -S mingw-w64-x86_64-qt-creator mingw-w64-x86_64-clang
Обратите внимание, что загрузка и установка этих компонентов занимает много времени!
Ждем окончания скачивания и установки всех компонентов.
Установка qtcreator завершена, теперь нужно провести дополнительные настройки:
В консоли введем команду:
rundll32 sysdm.cpl,EditEnvironmentVariables
откроется окно «Переменные среды»

Выбираем переменную Path и нажимаем Изменить

Нажимаем «Создать» и прописываем
C:\msys64\mingw64\bin
Закрываем консоль
Запуск Qt Creator
Запустим обычную консоль cmd.exe
И введём
qtcreator
Если всё сделано правильно, запустится IDE Qt Creator:

Сменим язык на английский, вы можете использовать и русский, но при возникновении проблем, проще будет найти информацию на английском.
Выберем меню Инструменты-> Параметры
Выберем пункт Среда и поле Язык выставим English
Теперь осталось только перезапустить Qt Creator
После перезапуска интерфейс среды разработки изменится на Английский.
Создадим новый проект
File –> New File or Project
Выбираем Application -> Qt Widgets Application и нажимаем на «Choose …»
В этом окне вы можете выбрать папку и название проекта, назовем проект qt_test
Далее нажимаем Next четыре раза
Теперь нам нужно выбрать Kit – набор разработчика. Выбираем Desktop Qt MinGW-w64 64bit (MSYS2)
Далее нажимаем Next и Finish
Теперь осталось только запустить сборку проекта, для того, чтобы проверить, что всё верно настроено.
Нажимаем Ctrl+r
Получаем ошибку, связанную с Vulkan SDK, в открывшемся окне жмем Yes. Эту ошибку можно смело проигнорировать.
У нас должно открыться пустое окно:
![]()
Вот и всё. Среда настроена и готова к использованию.
Заключение
Установка среды разработки и настройка Qt Creator не представляет больших проблем, но есть некоторые подводные камни и неочевидные вещи. Руководствуясь материалами данной статьи, вы сможете установить Qt5 на свой ПК и использовать Qt Creator, для разработки ПО.
Feedback from our recent Qt for Beginners webinar series indicated a need for some basic tutorials for beginners. If you struggle with initially getting Qt set up for development with the Qt Creator IDE and a C++ compiler, this post is for you. I’ll walk you step by step through the process of getting a Qt development environment running on Windows, providing lots of screen shots to guide you.
Assumptions and Prerequisites
For this example I’ll assume you are running Windows 10. We will install the Open Source version of Qt 5.7.0 using the MinGW C++ compiler and the Qt Creator IDE. Installation should be similar if you use a different version of Windows or a different version of Qt. We will use the free MinGW compiler as it makes the setup easy, coming as part of the Qt install. You will need at least 5 GB of free disk space and an Internet connection in order to download the installer and Qt components. Let’s get started!
ICS recommends Qt Commercial for support, maximum IP protection, and because we all should support the community. (The Qt Company offers a free 30-trial version of Qt Commercial.)
Installation Steps
Fire up your web browser and go to http://qt.io. Click on «Download».
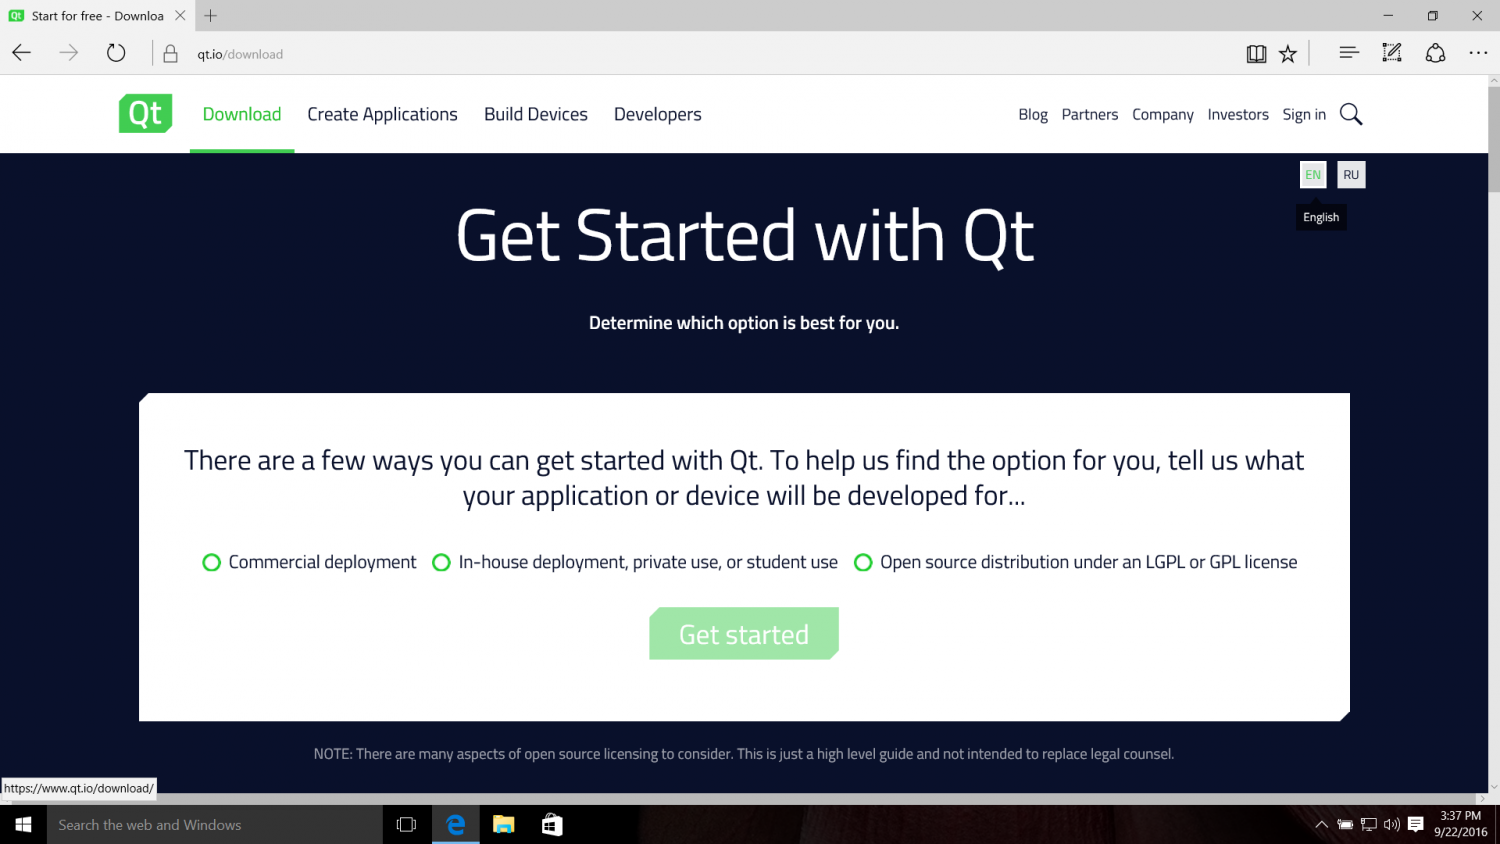
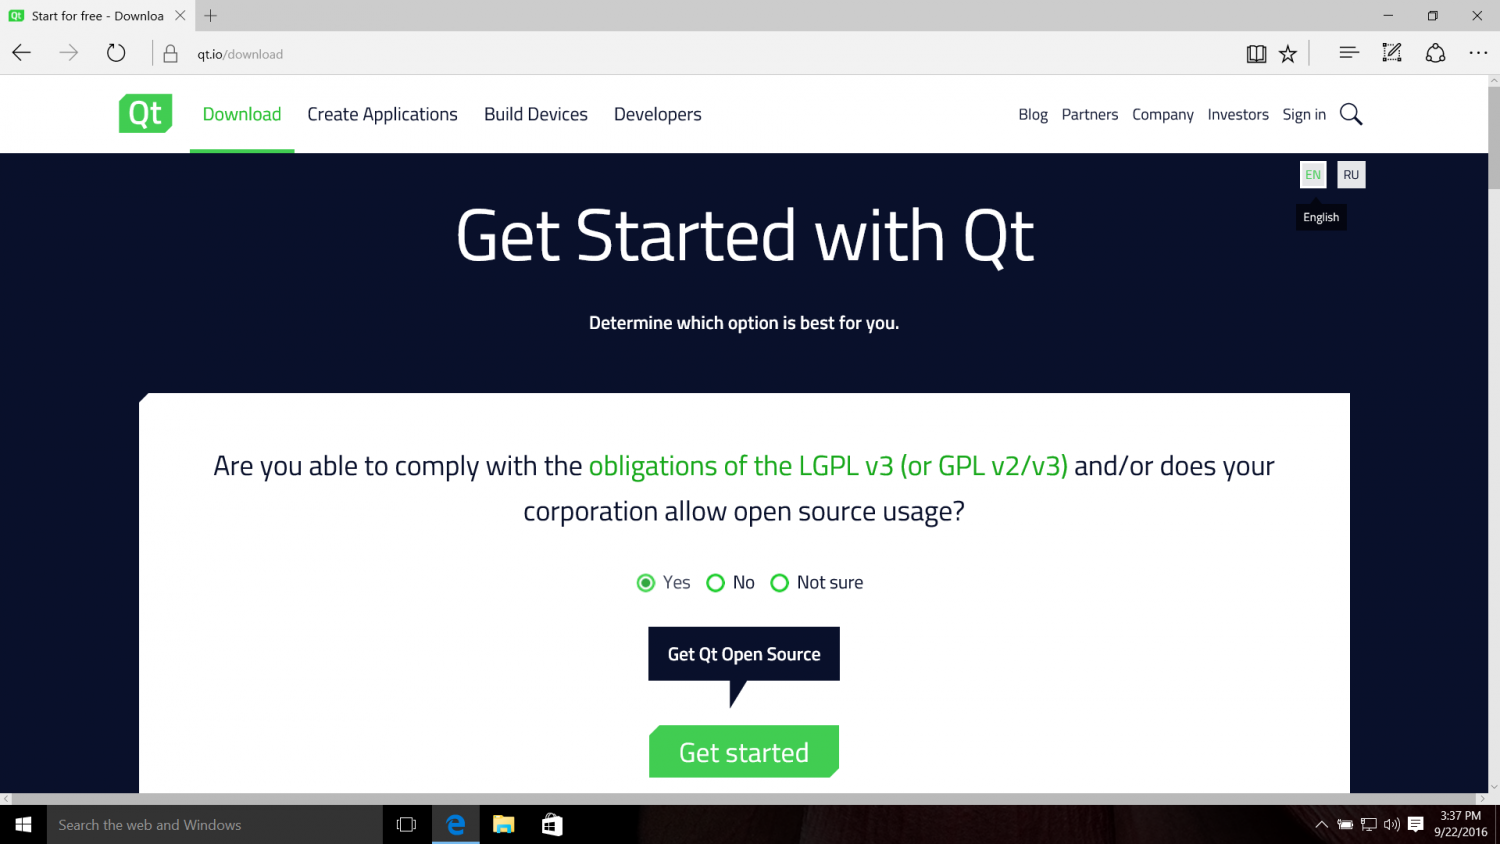
The website will ask you a few questions to determine whether you want the Open Source or commercial versions of Qt. To get the Open Source version select «Open source distribution under an LGPL or GPL license»
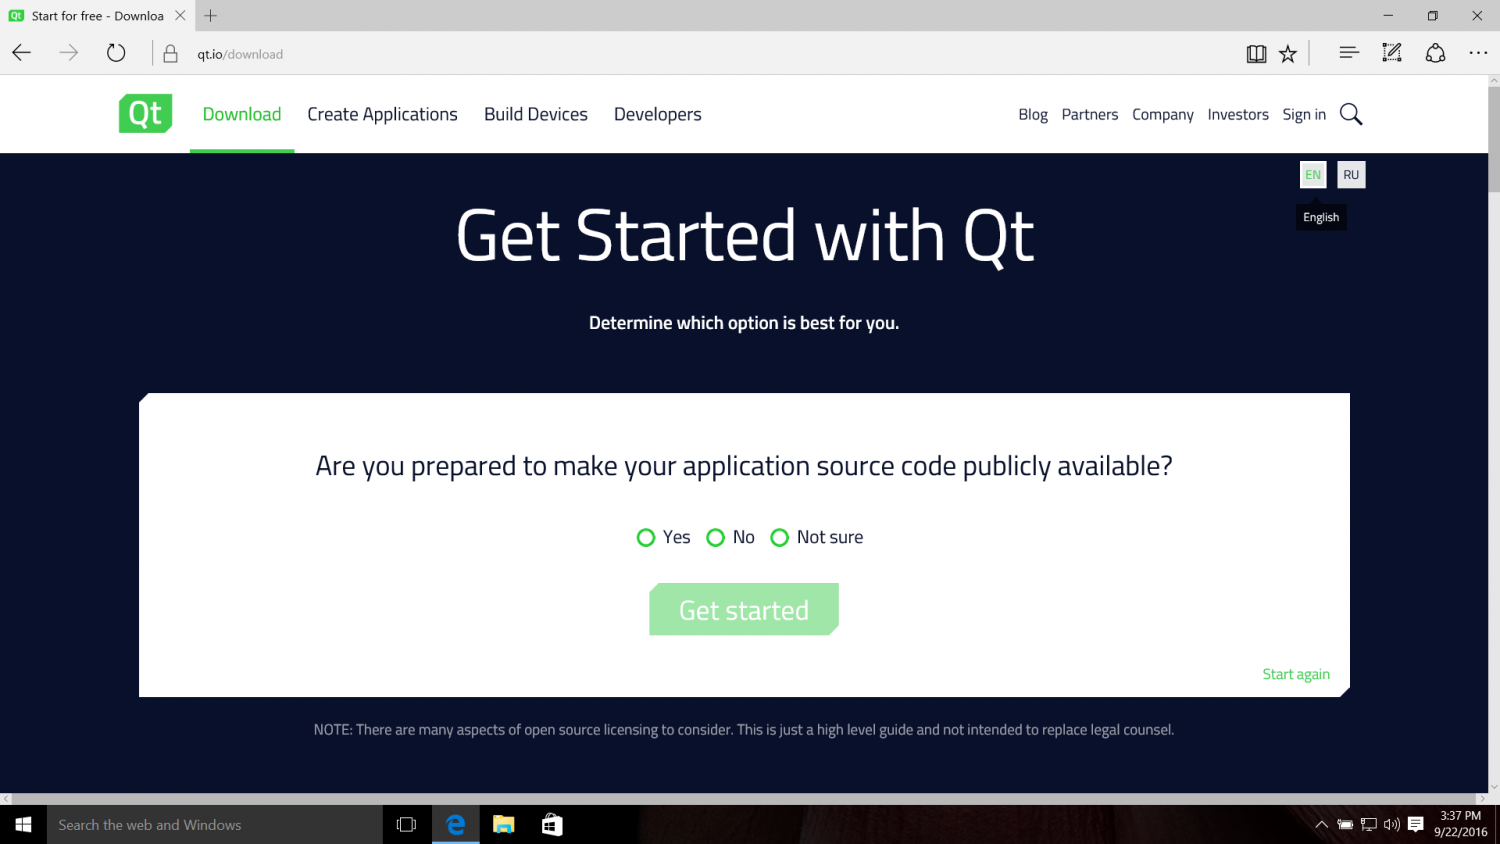
Say Yes to «Are you prepared to make your application source code publicly available?»
Say Yes to «Are you able to comply with the obligations of the LGPL v3 (or GPL v2/v3) and/or does your corporation allow open source usage?»
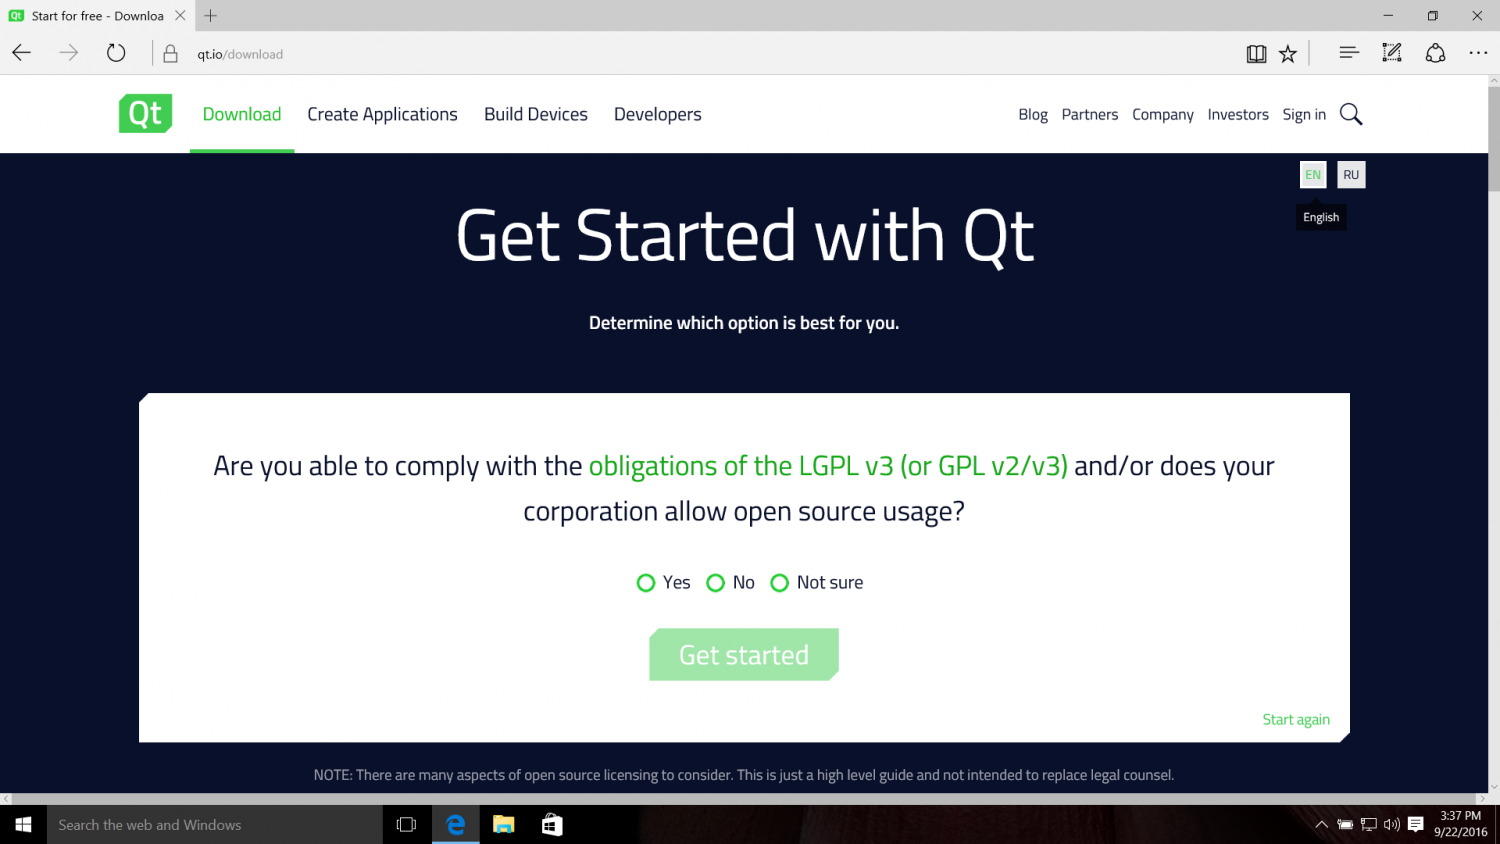
Then click on «Get started» and then «Download Now».
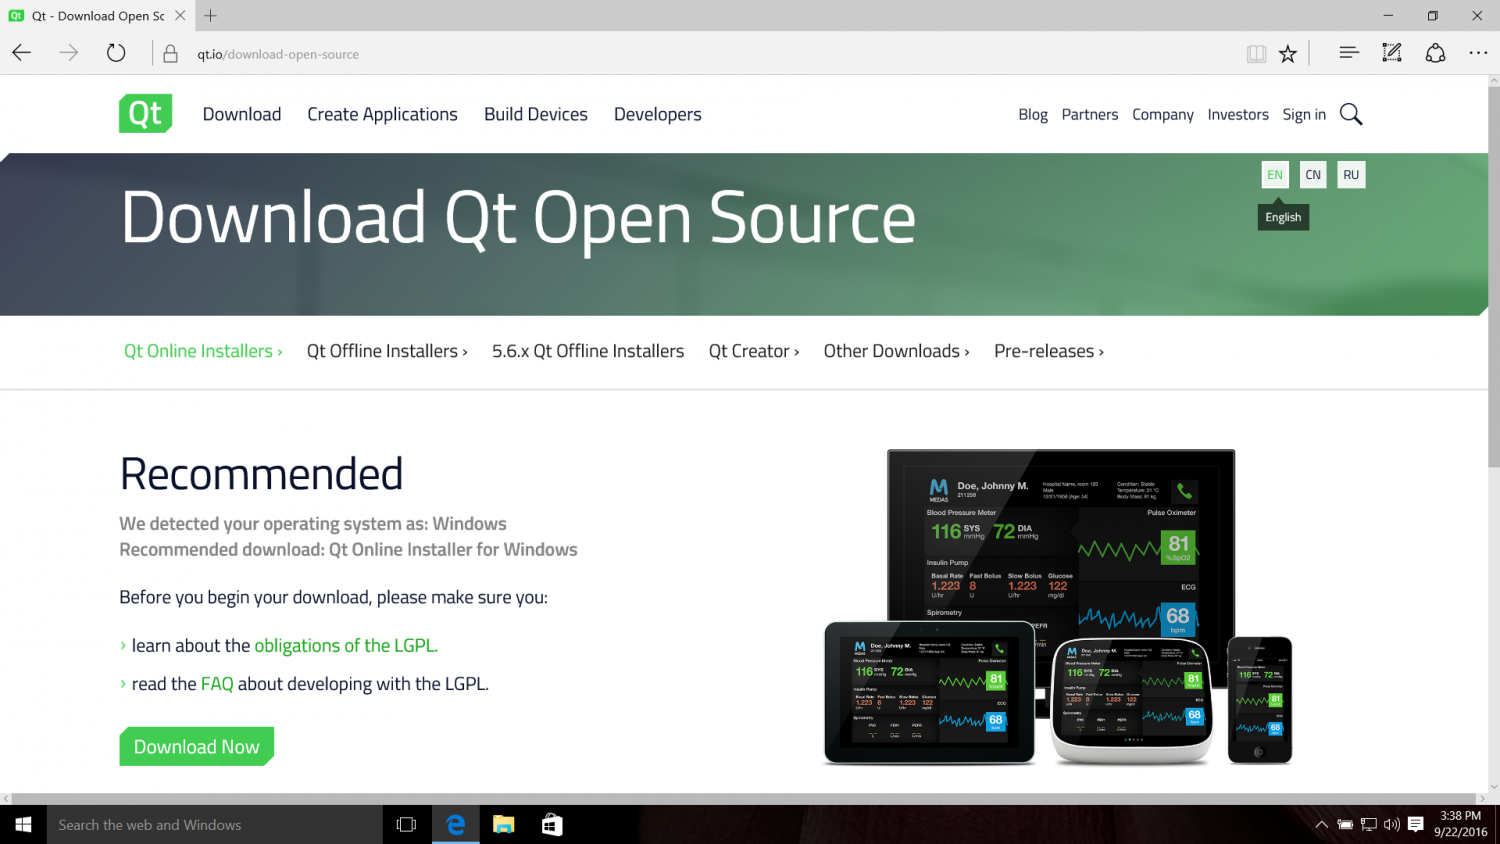
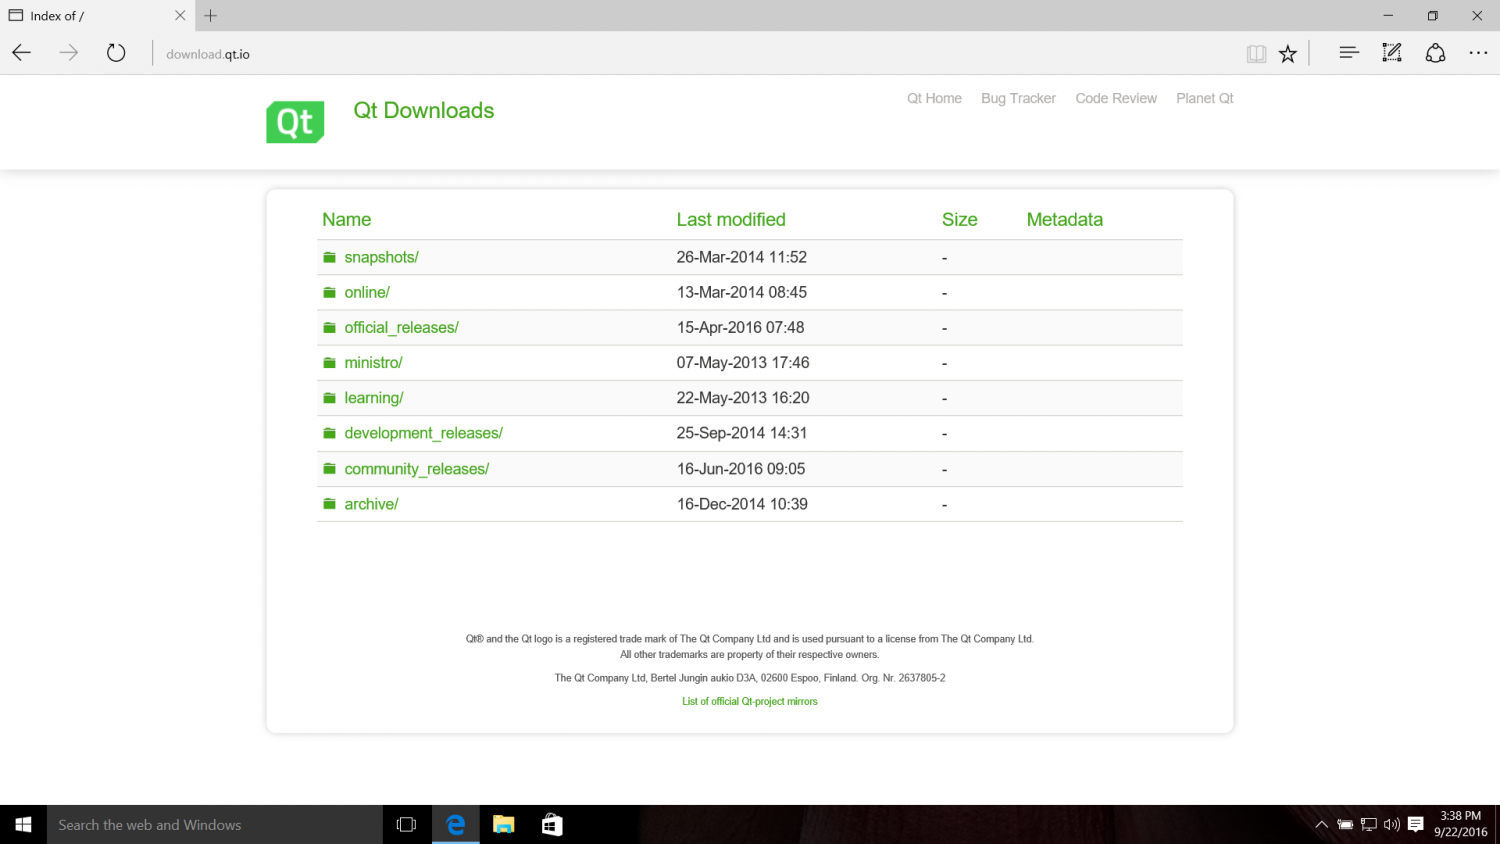
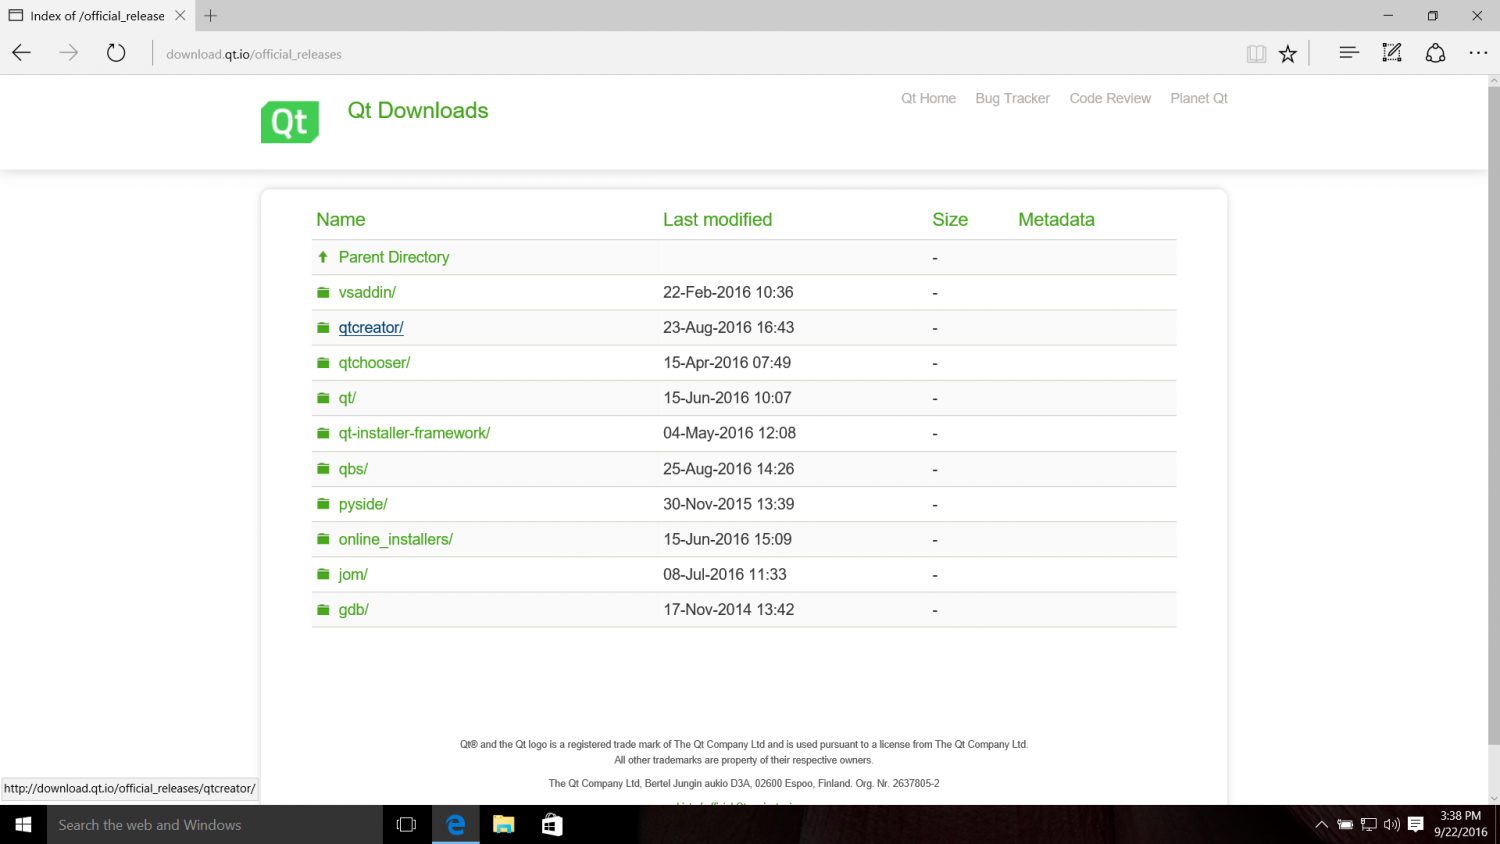
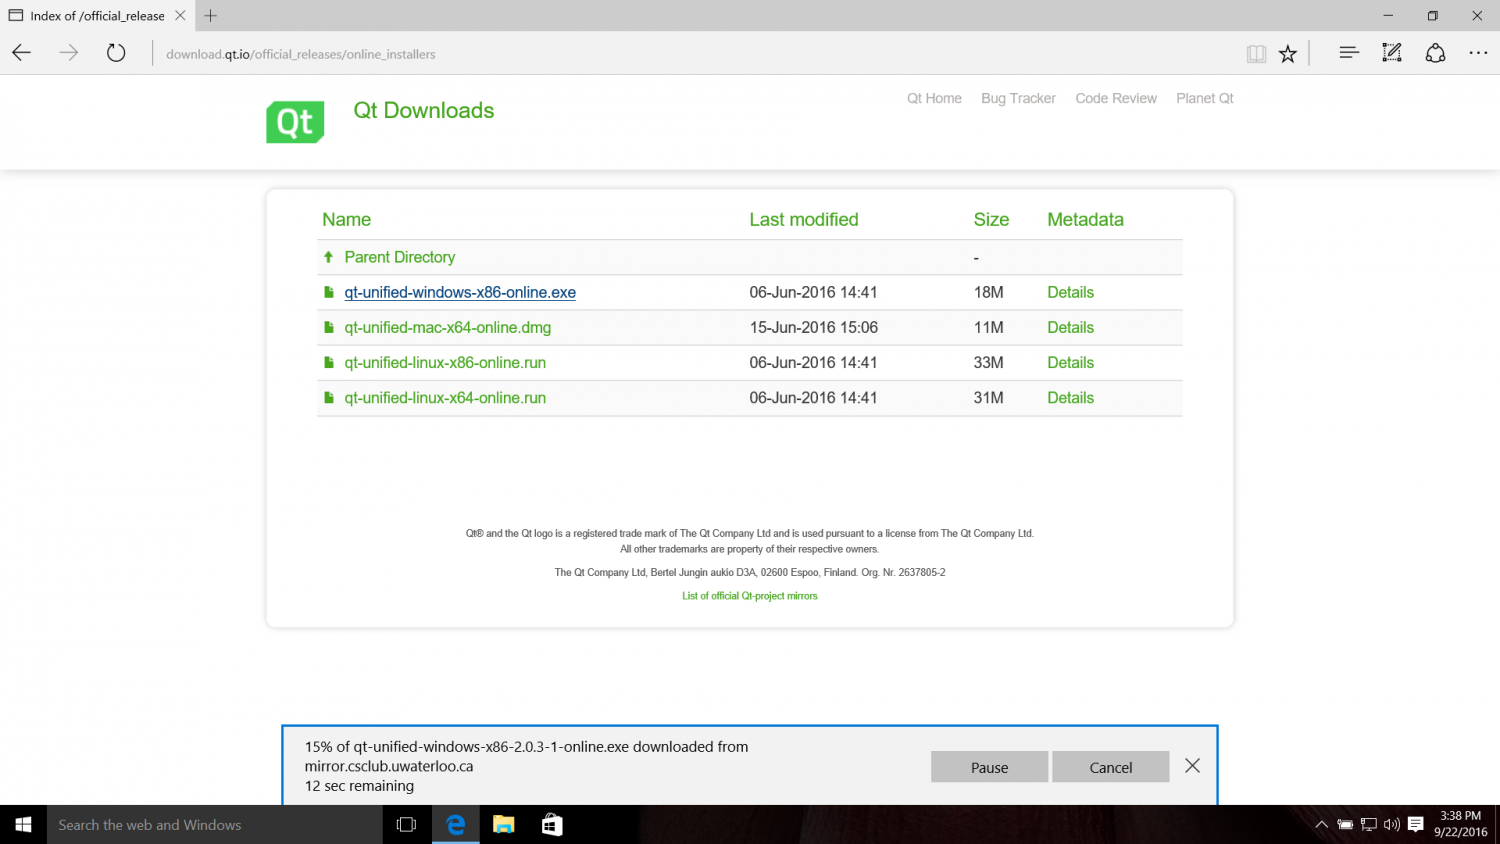
For a quicker way to download Qt and to get different versions other than the latest, you can instead go to http://download.qt.io. Select official_releases, then online_installers, and select to download qt-unified-windows-x86-online.exe
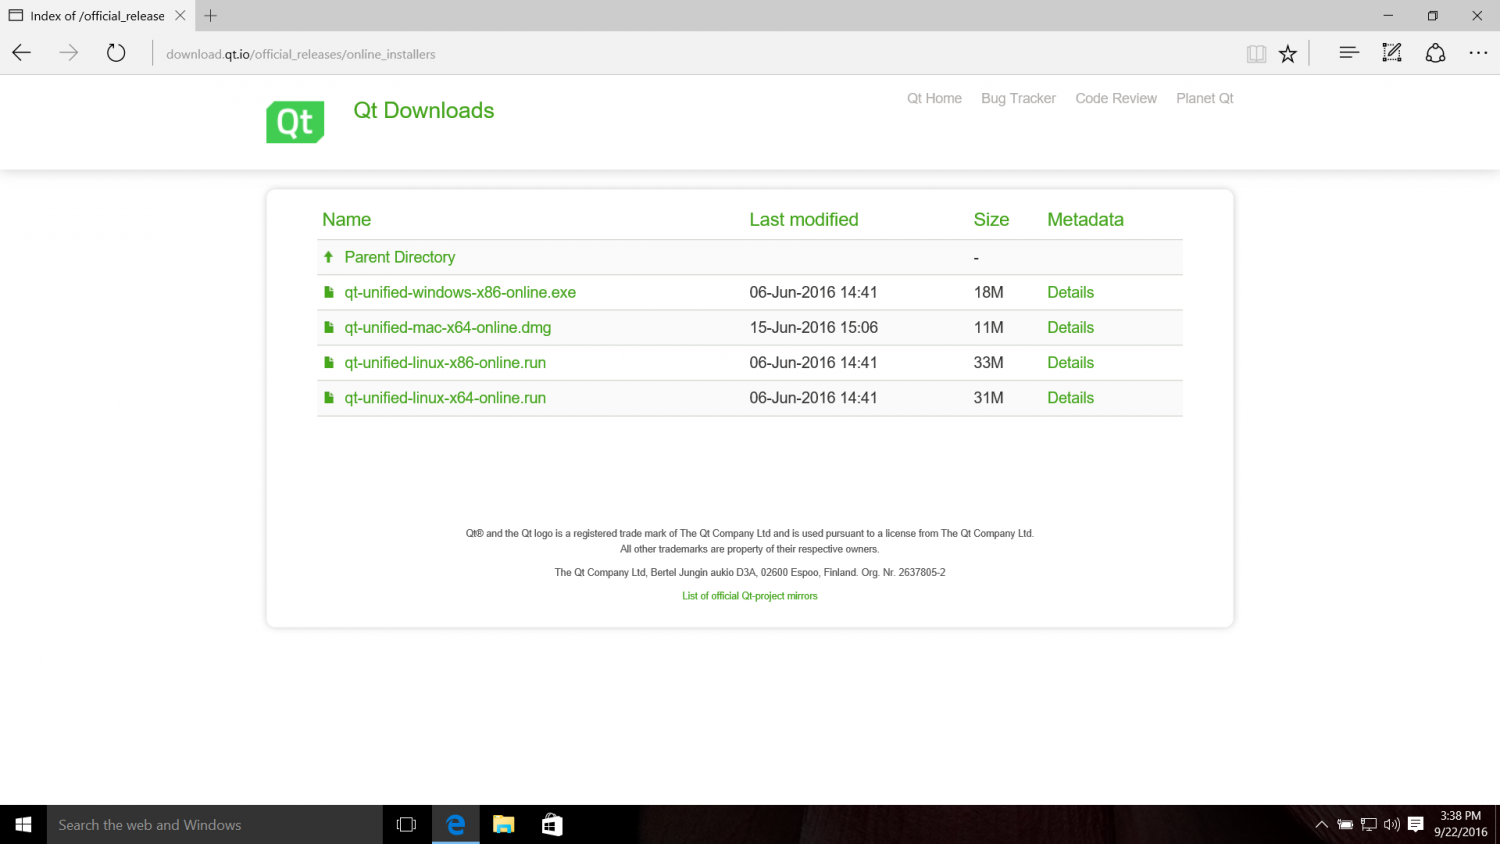
The download is reasonably small (18 MB) and will try to use a local server near you.
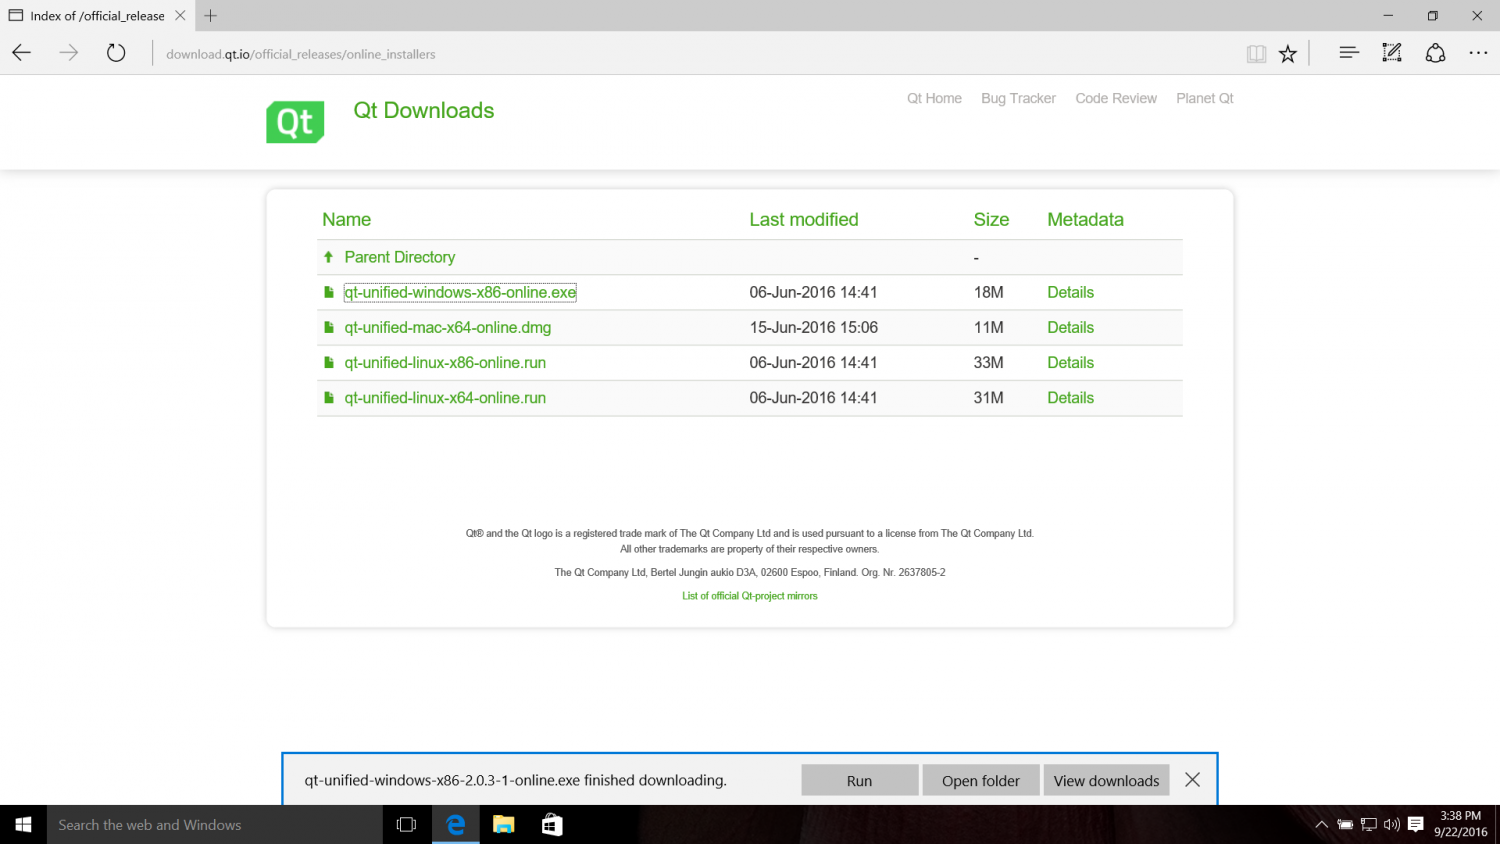
Once downloaded, run the installer program. You will probably need to accept the Windows dialog that requests permission to run the installer.
The installer will come up. Hit Next.
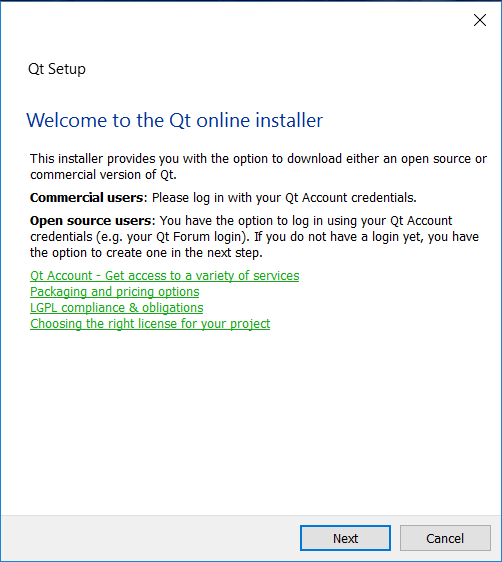
If you have a Qt online account, enter the information here. If you want to create one, go ahead. Otherwise just select Skip to proceed.
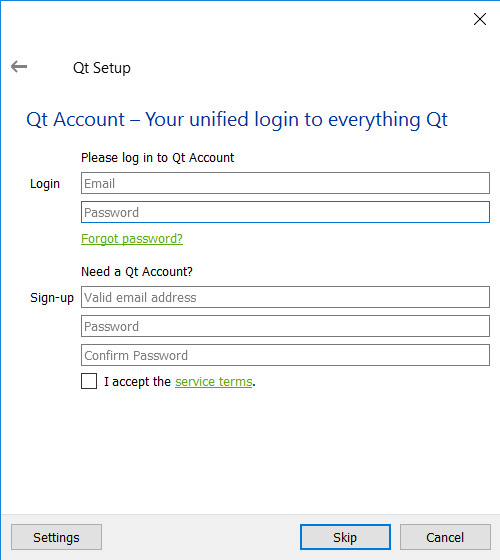
Click Next.

It will now download information about the available components from a remote server.
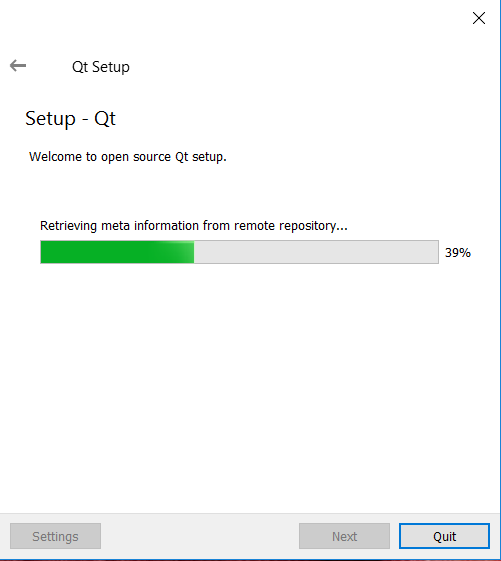
Pick the installation folder (the default is normally fine unless you need more disk space on another drive). A path with spaces in it or that is very long may cause problems later, so avoid doing that.
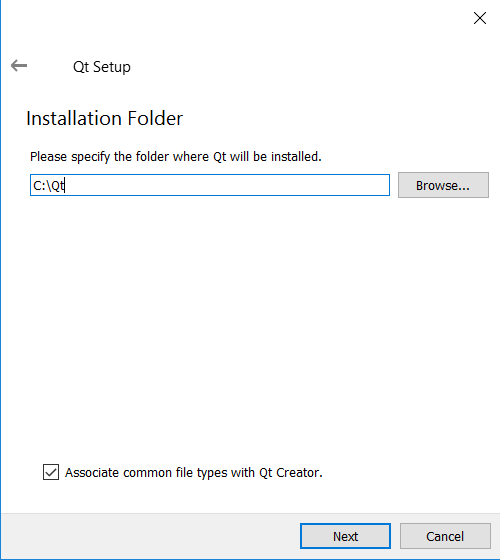
Now, choose the Qt components you want. Let’s do a minimal install. If you want more components you can select them. I expanded Qt 5.7, and under that section selected only MinGW 5.3.0 32-bit, turning off the rest of the checkboxes. The only other item I selected was under Tools, where Qt Creator 4.1.0 is always shown and is not optional.
Click Next.
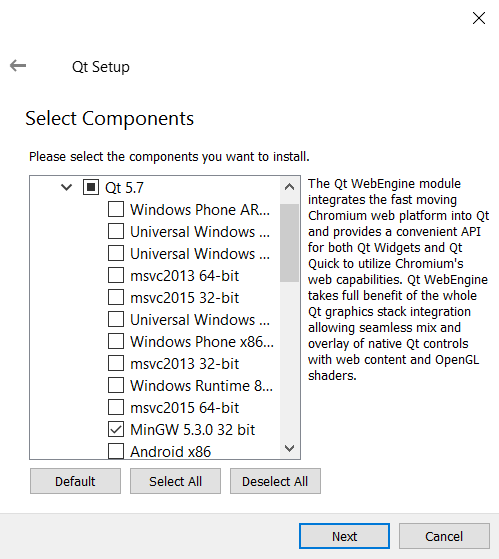
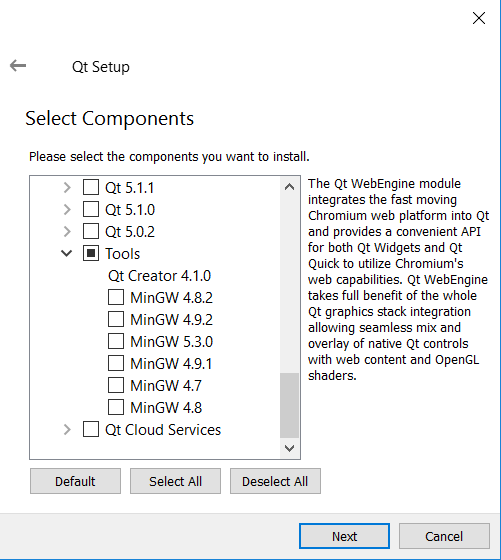
Next read and accept the license agreement.
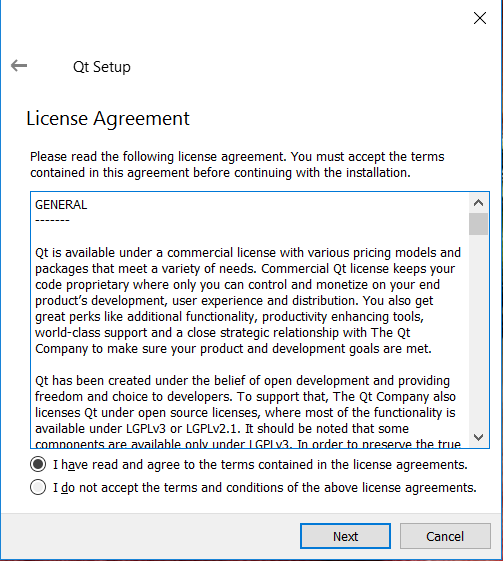
Then pick the Start menu shortcuts you want. The default is typically fine.
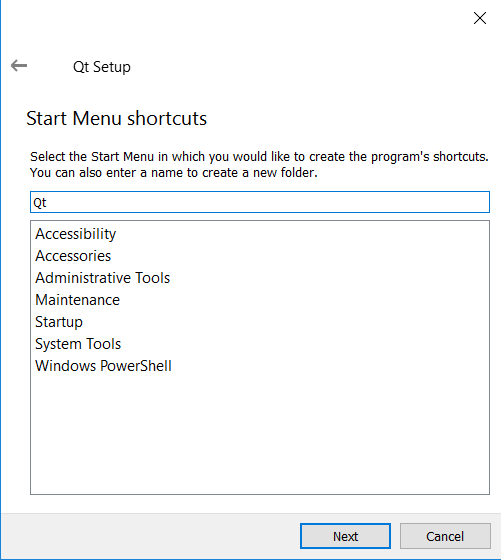
Installation is now ready, so select Next.
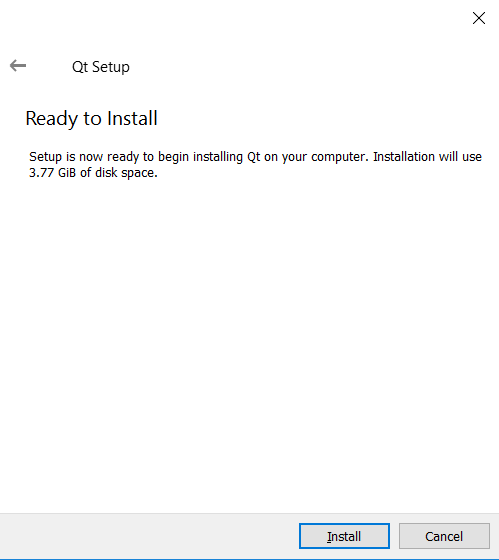
At this point it will download all the selected components. This will take a while depending on the speed of your Internet connection.
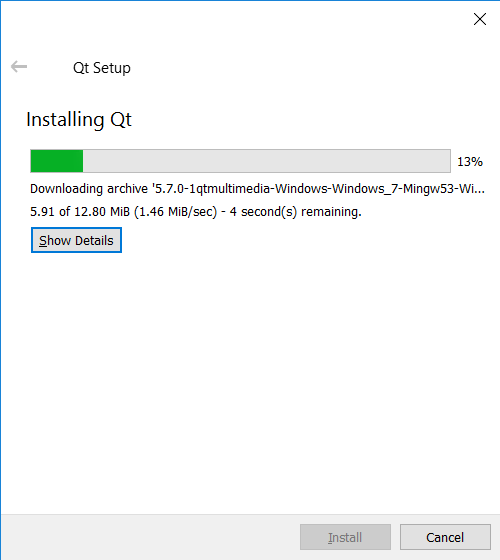
After downloads are completed it will start installing.
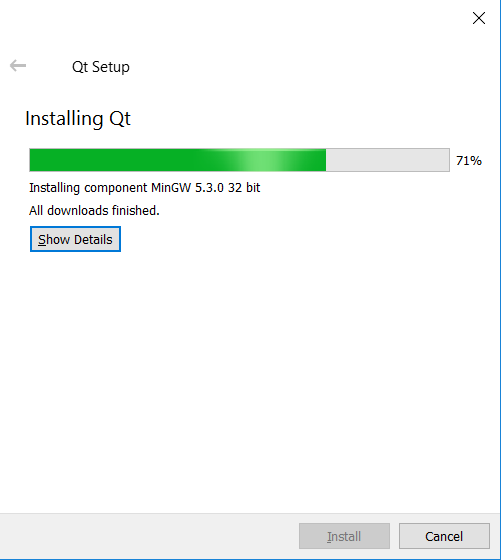
When done, click Finish and launch Qt Creator for the first time.
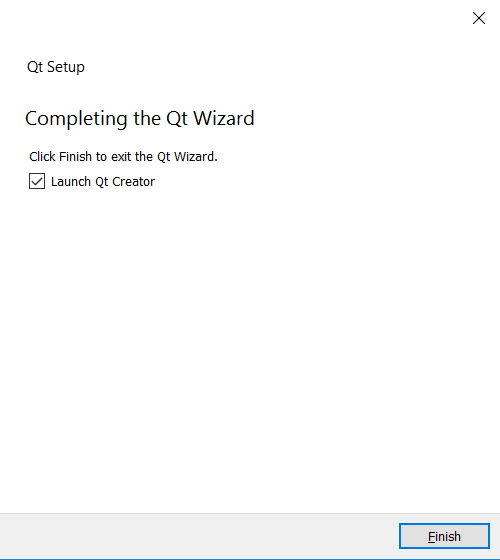
Qt Creator will launch and show the Welcome screen.
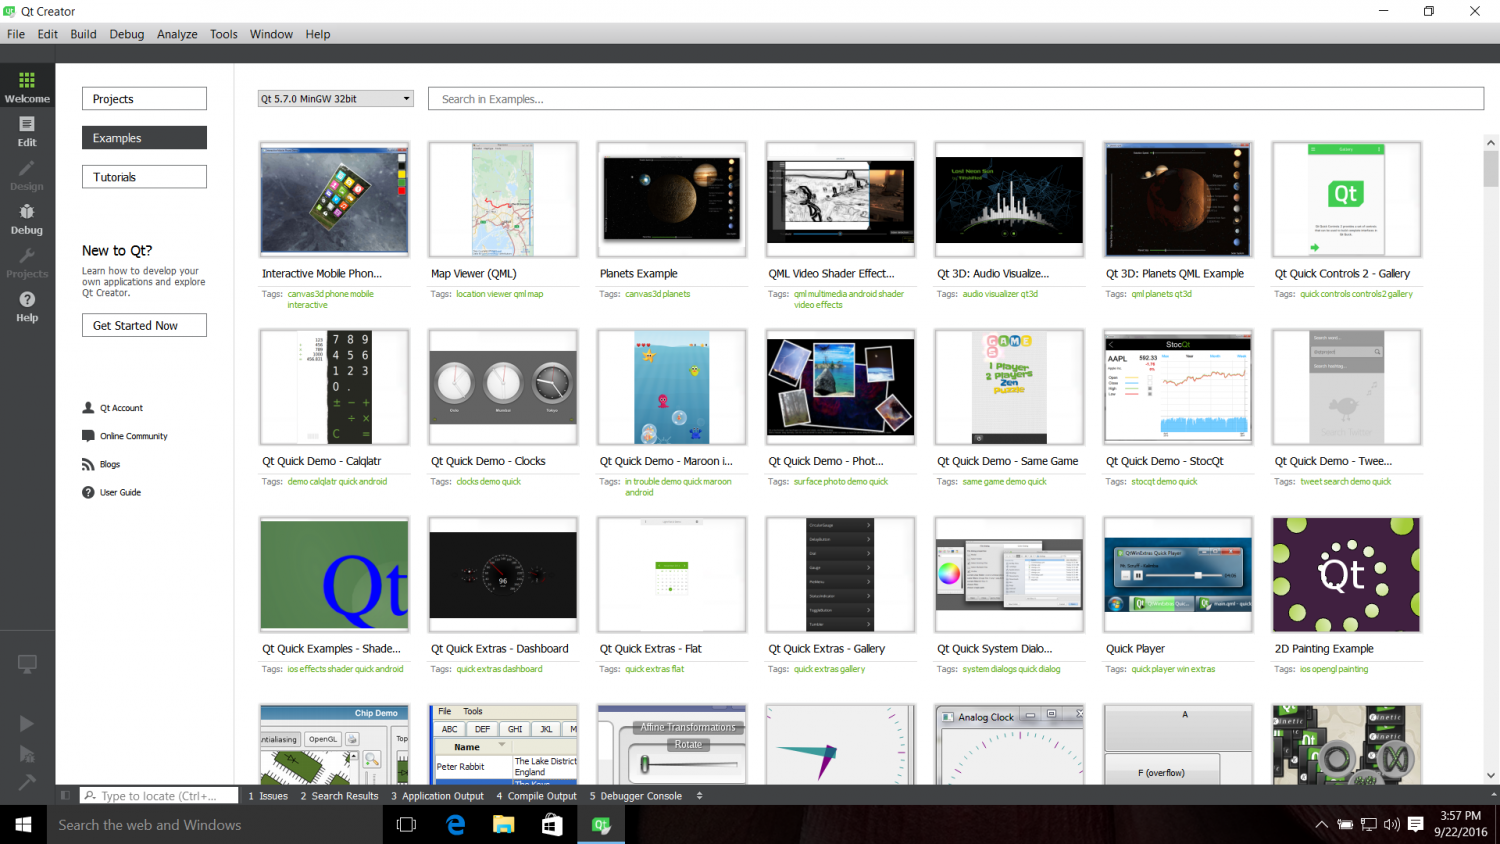
Qt Creator should auto-detect the Qt install and compiler and create a «kit» for desktop development. Look under Tools / Options Build & Run if you want to verify this.


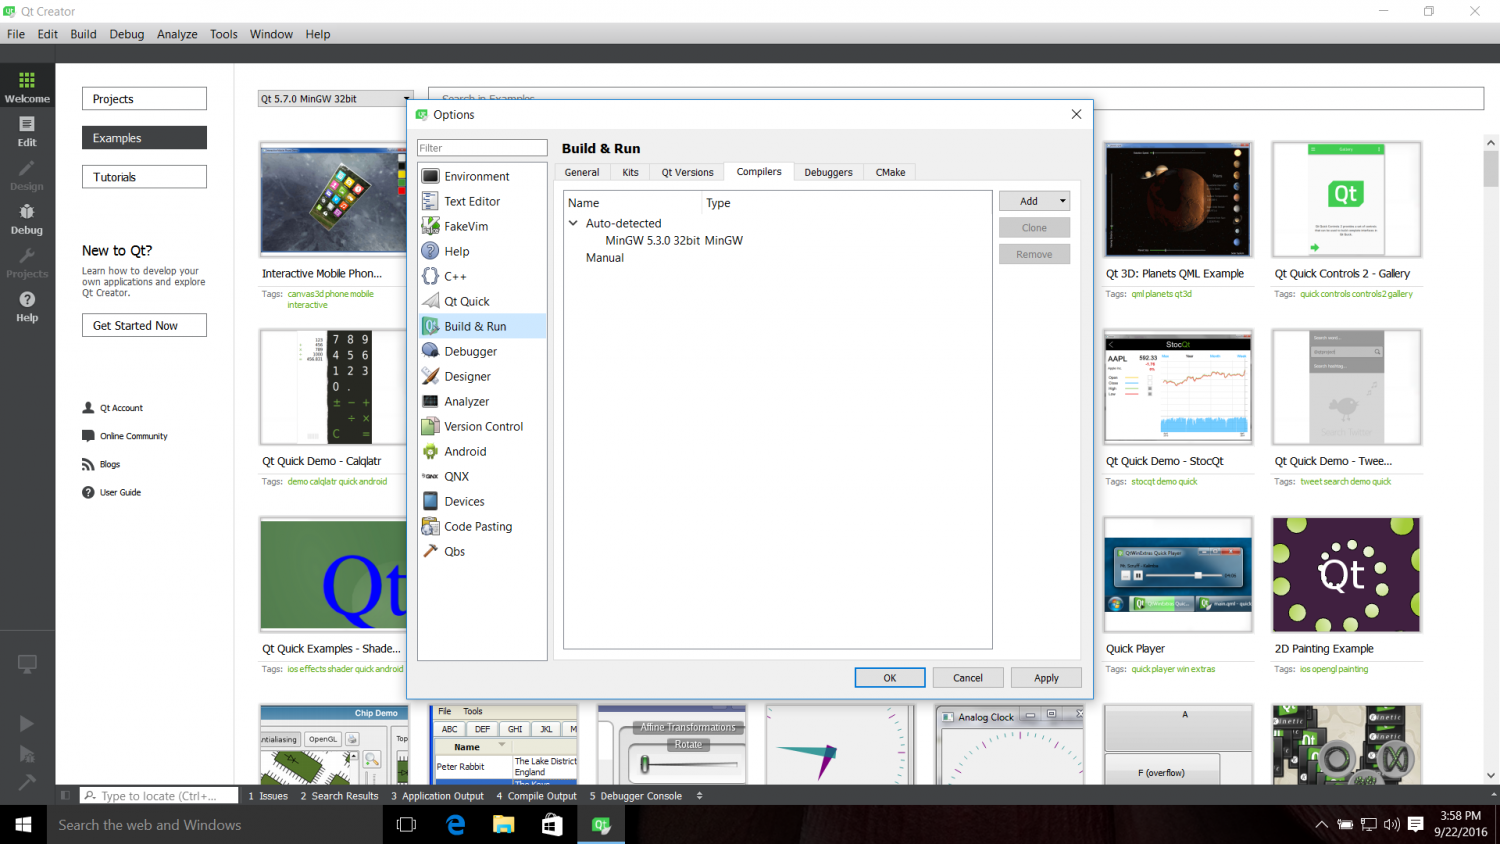
We can now test the installation by creating a simple project. Let’s start with one for widgets: Select File / New File or Project…
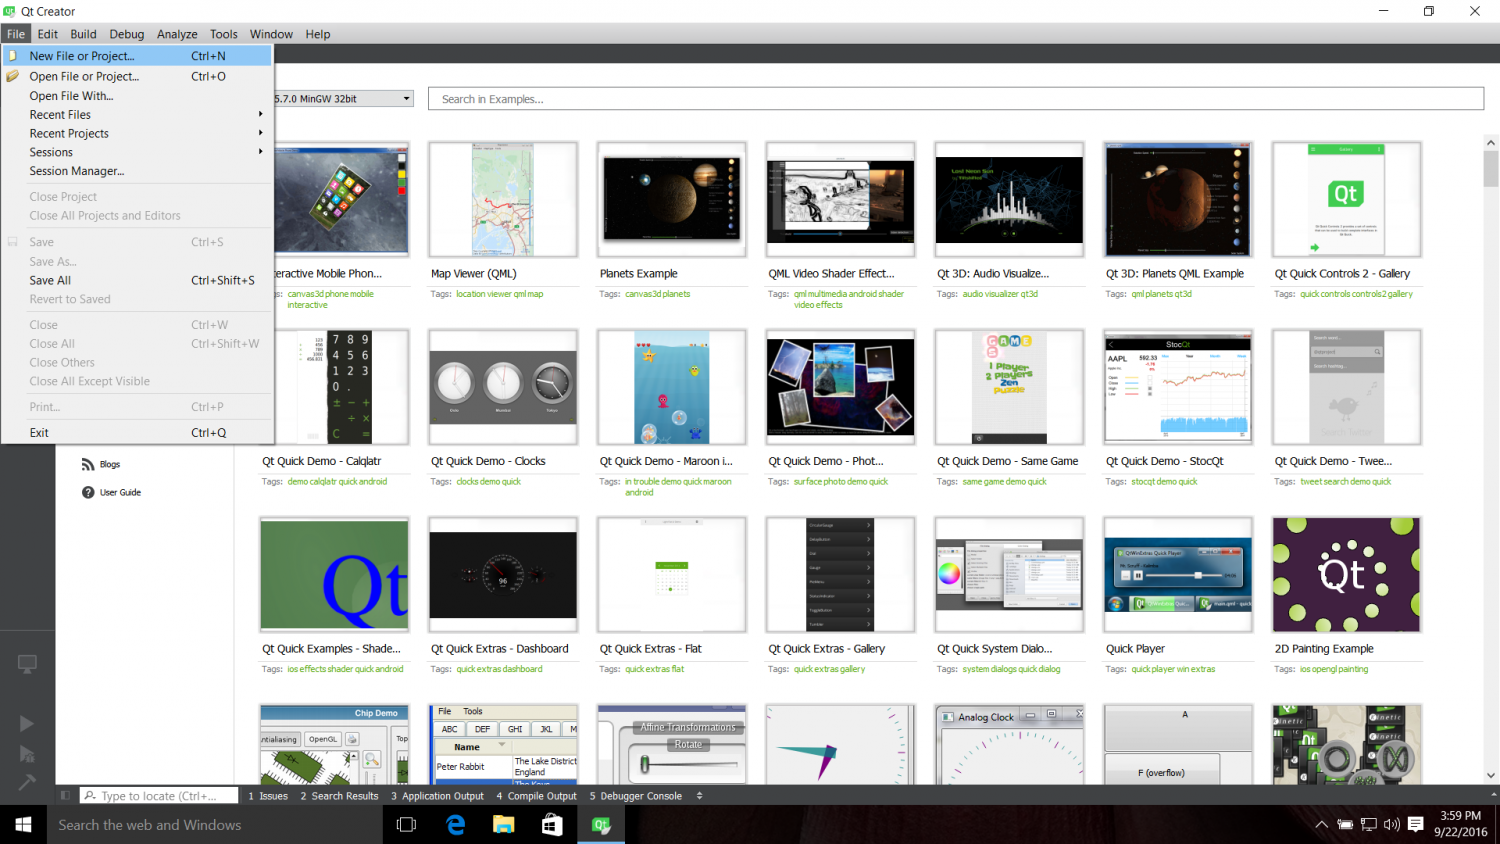
Pick Application and Qt Widgets Application:
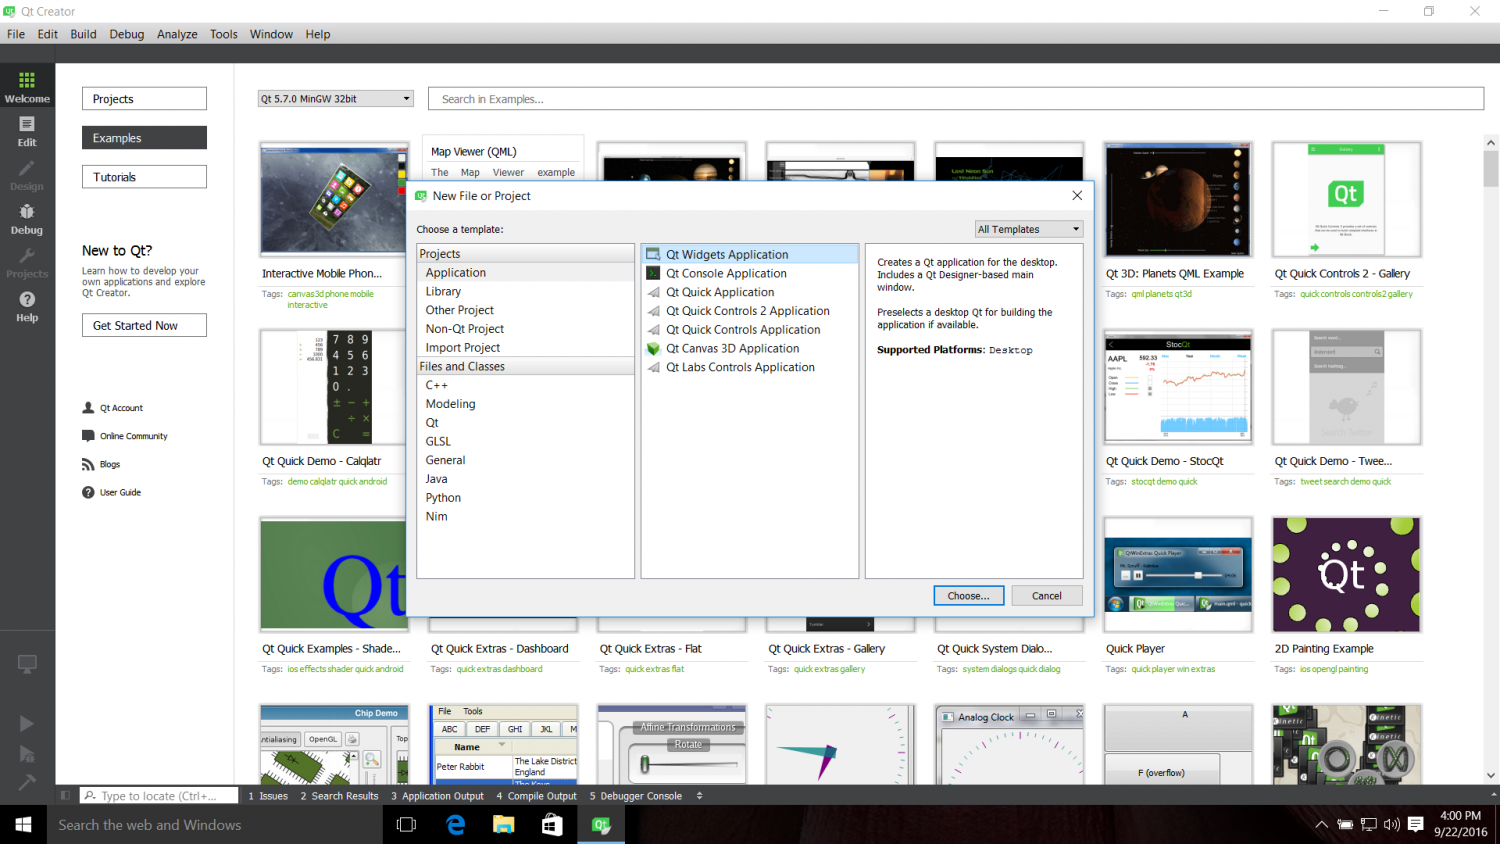
Click Choose… and pick a project name, such as demo1. Click Next.
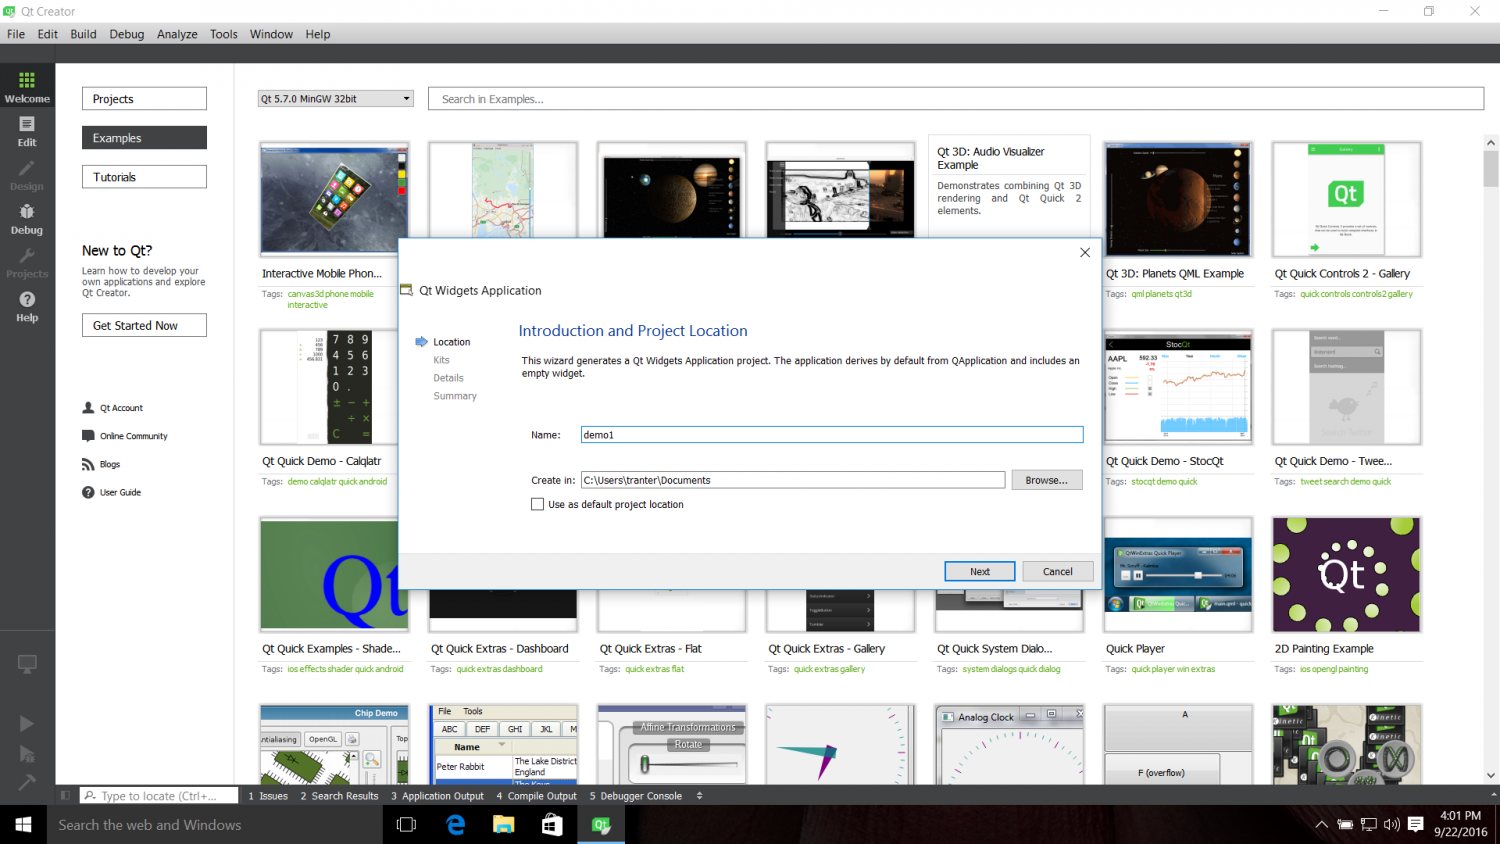
Pick the kit (only one option is available) then Next.
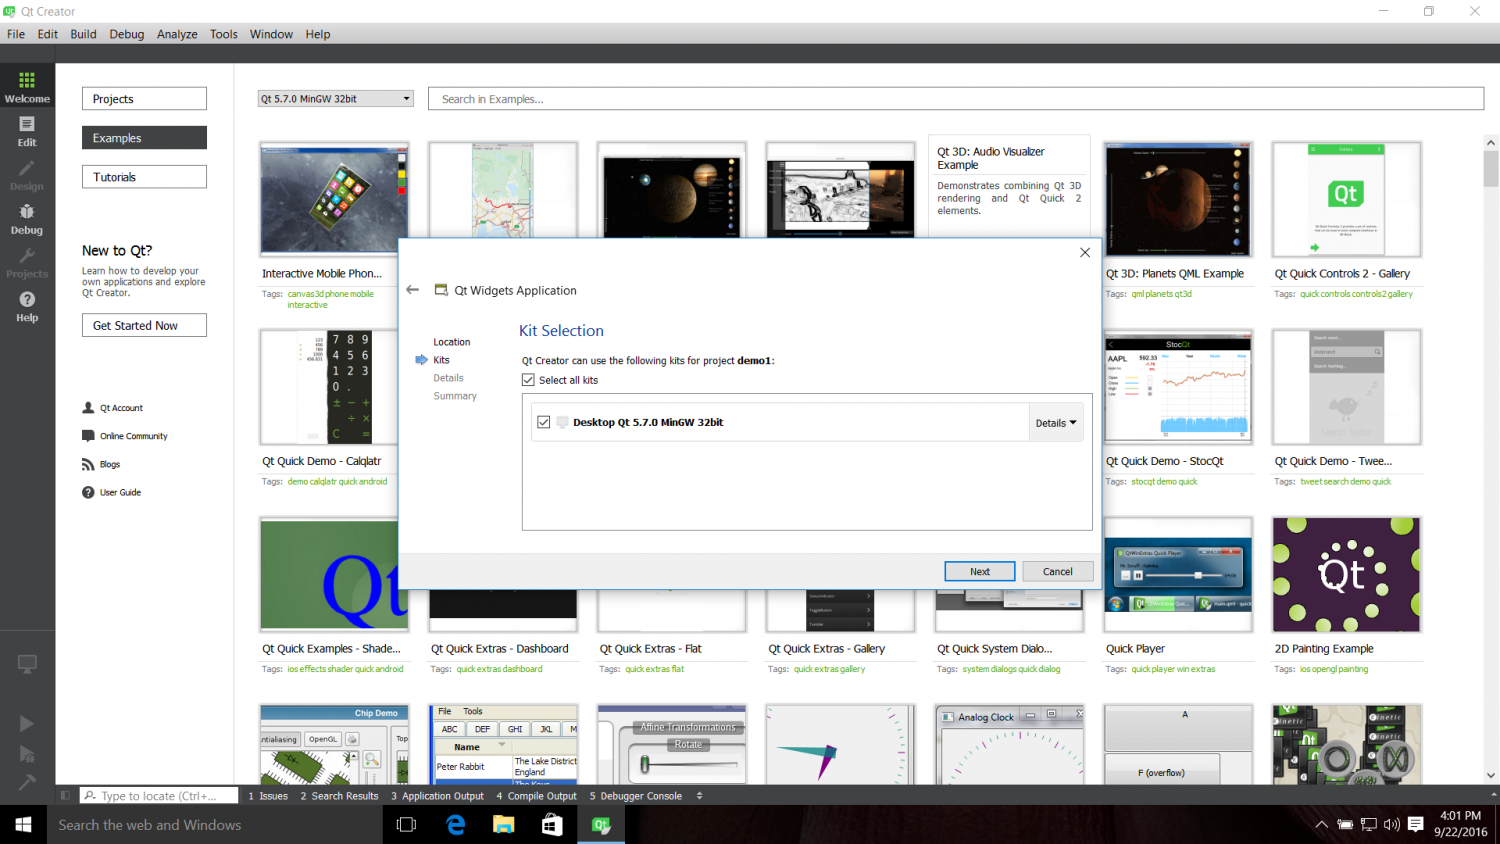
You can specify some more information. Pick the defaults unless you want to use something else. Pick no project management.
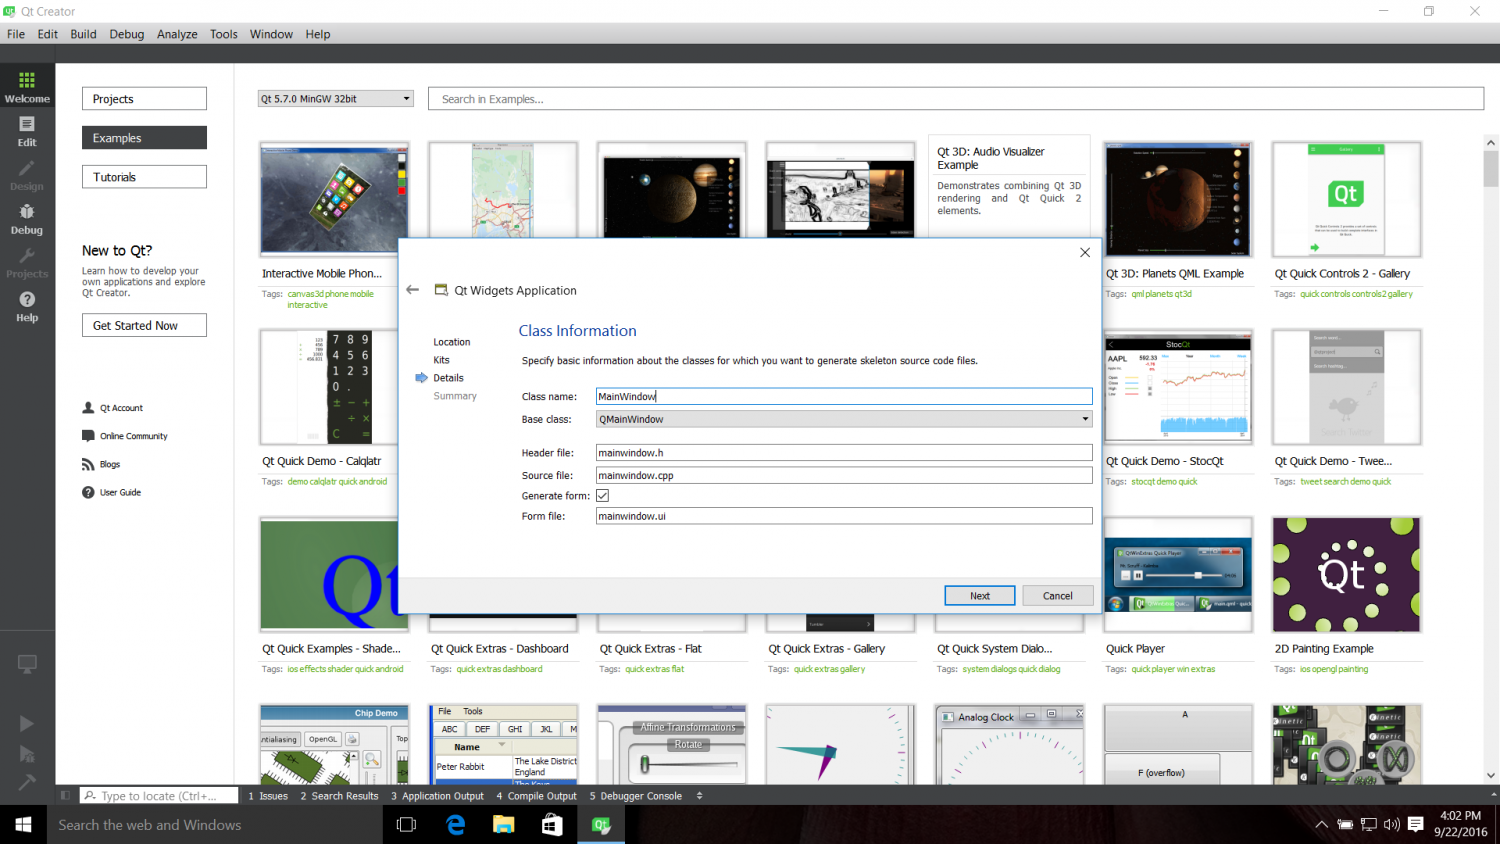
You will now see the created skeleton application. You can look at the source code if desired: a main.cpp, mainwindow class header and cpp files, and a Qt Designer UI file.
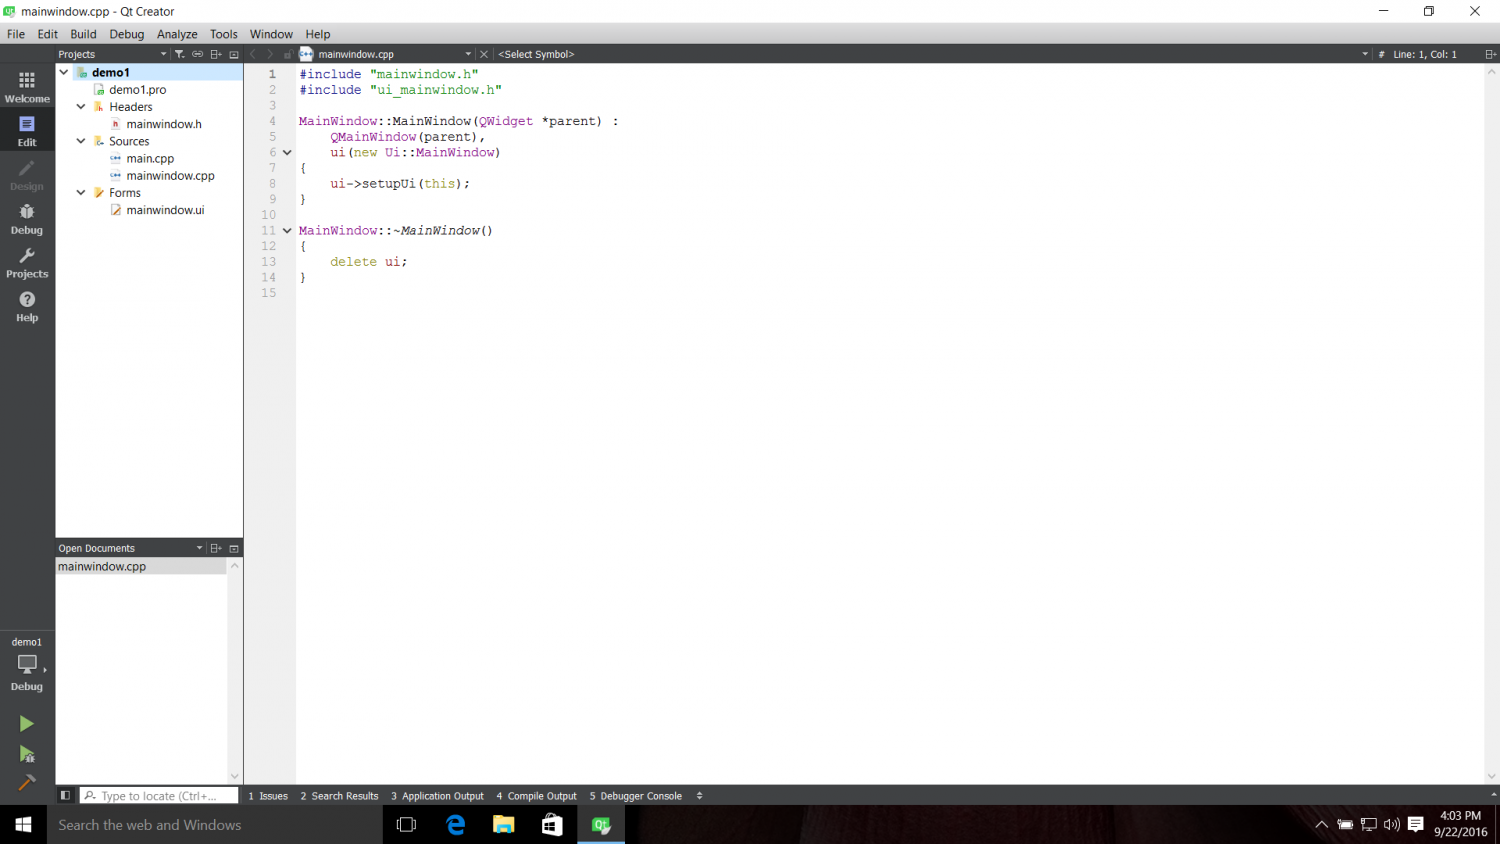
Click the hammer icon at lower left to build it. You can click on Compiler Output if you want to see it. The project should successfully build.
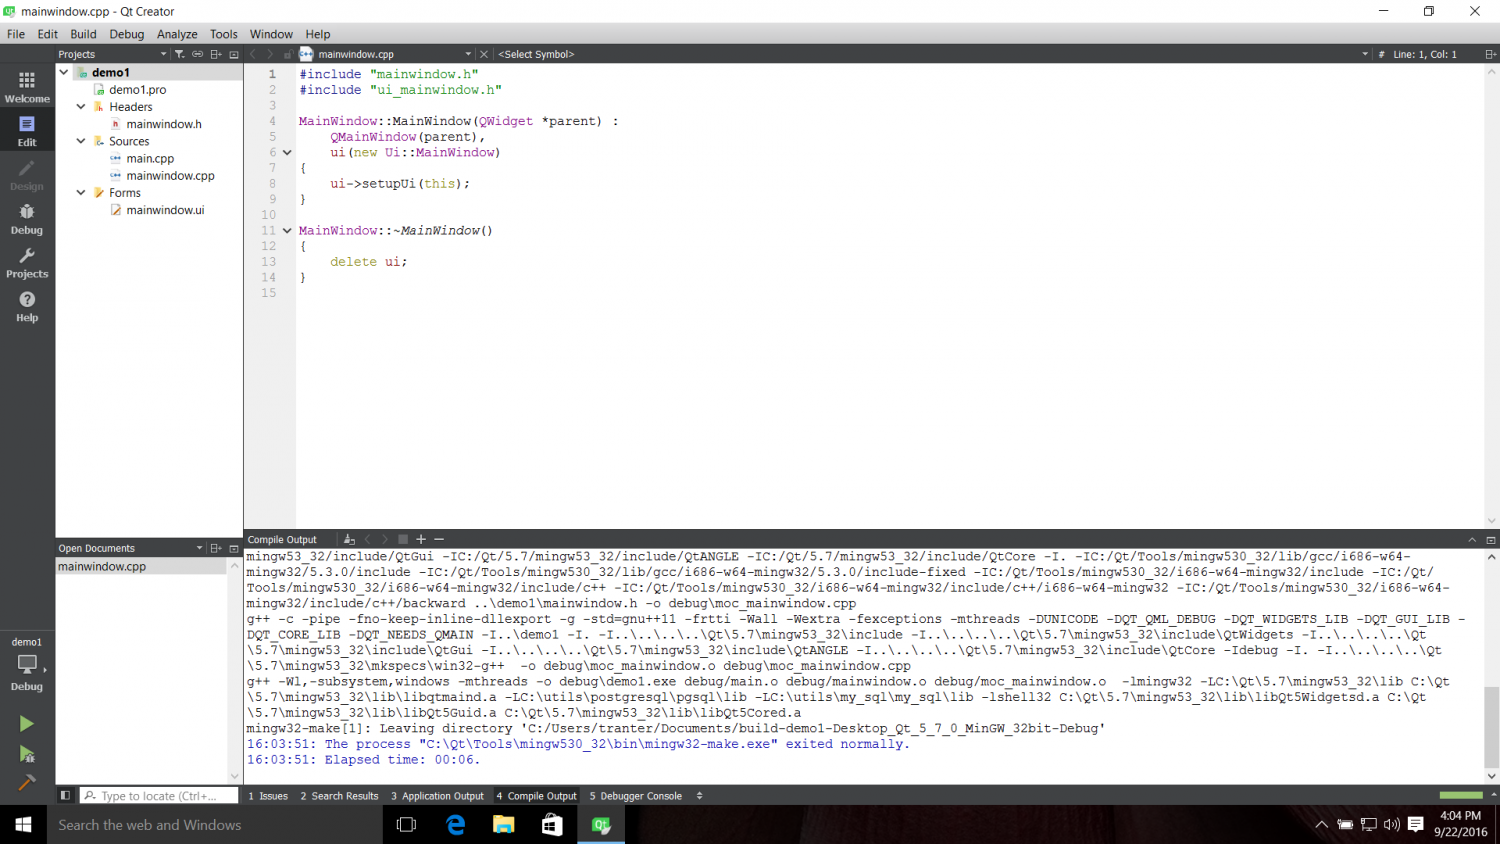
You can now click on the green triangle icon to run it. After doing so, it should launch and you will see a window named MainWindow come up.
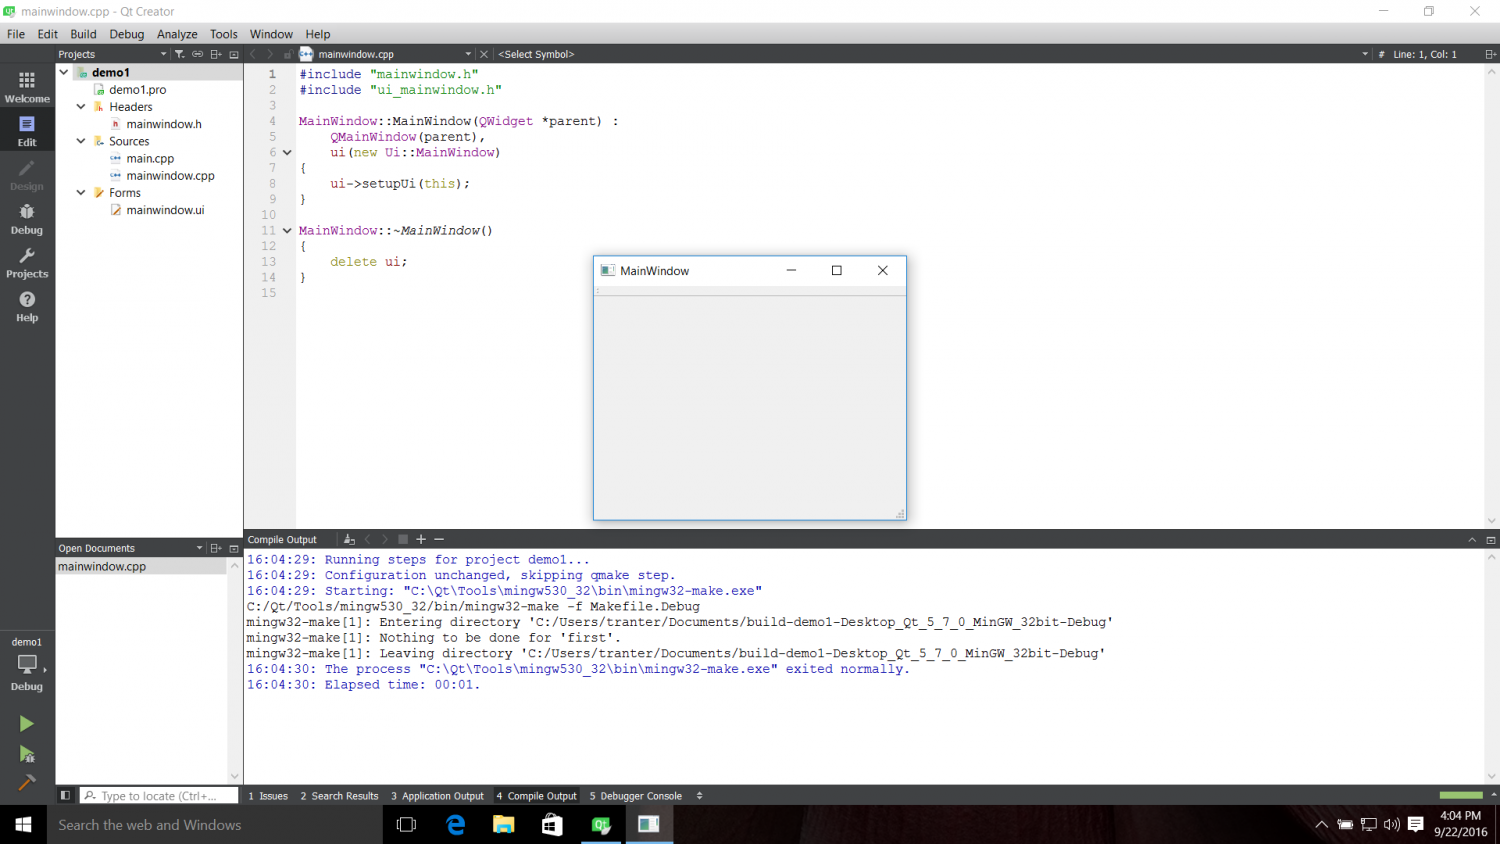
You might also want to try a QML application. Select File / New File or Project… and pick Application / Qt Quick Application (or whatever you prefer).
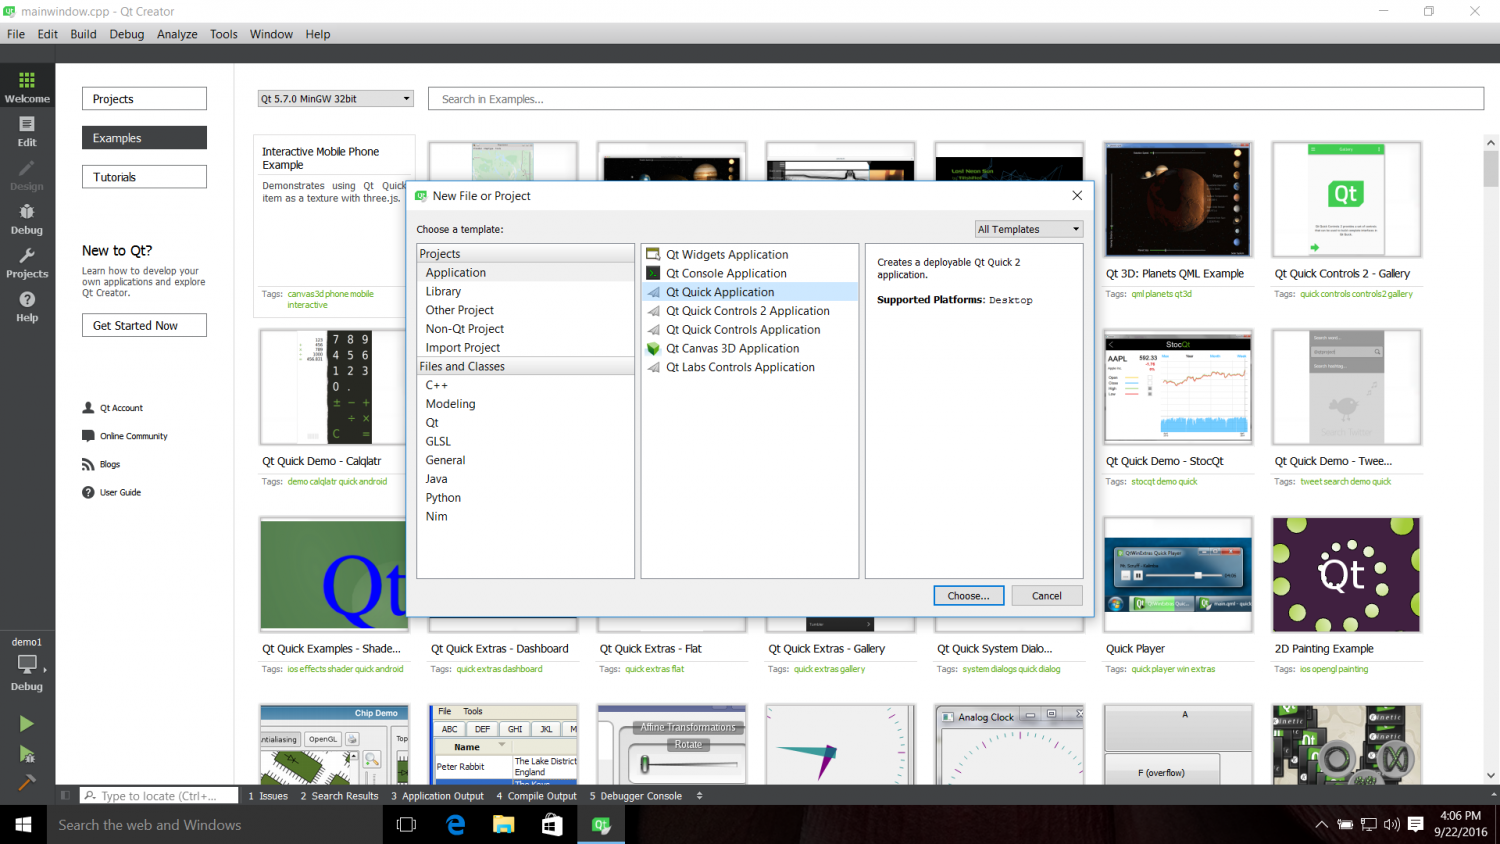
Build and run it as before.
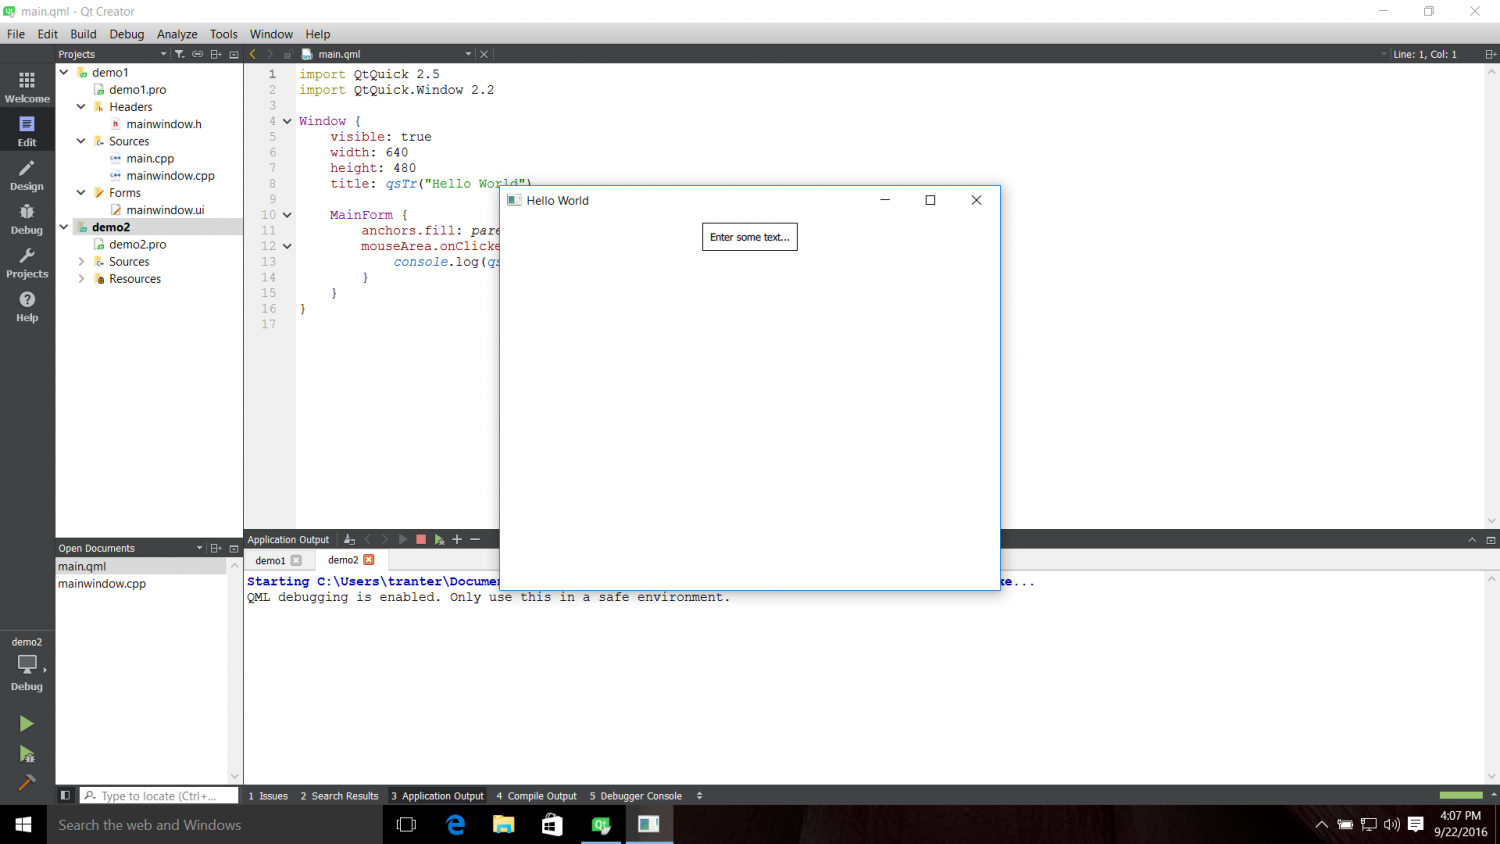
If the above steps worked you are all set up to develop with Qt on the desktop. You can now create your own applications from scratch or start with one of the many examples or tutorials available within Qt Creator.
Under the Start menu you will see a Qt section with entries for Qt Creator, as well as Assistant, Designer and Linguist in case you want to run these tools on their own. There is also an entry for a command prompt for Qt, which will have qmake and other tools in the path so you can work from the command line if desired.
If you want to go back and add or remove more Qt components, run «Uninstall Qt» which is the maintenance tool we used earlier.

Select to Add or remove components or Update components.
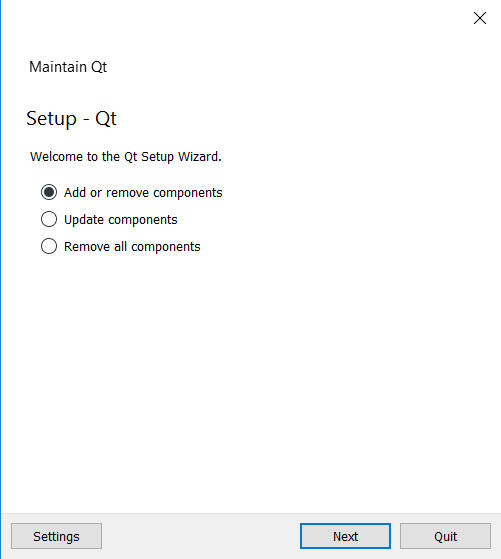
Summary
I hope that you now appreciate that setting up Qt for desktop development is easy and you can be up and running very quickly. This example covered one of the most common setups. It is possible to use other compilers like Microsoft Visual Studio and even different IDEs if you desire. In the future I plan to continue this series for beginners, covering how to set up on a development environment on a Linux desktop and how to compile Qt from source.
I know that your question is how do you install a kit for your Qt Creator, but first I think it’s needed an introduction (Sorry for your eyes, English it’s not my native language)
Introduction
The intention is to use the GCC compiler under Windows, what mean we need MinGW (Minimalist GNU for Windows).
MinGW only works for 32 bits, so we need the 64 bits forks, what means to use the MinGW-w64 or TDM-GCC flavors.
- MinGW , GCC compiler for 32bits applications.
- MinGW-w64 , GCC compiler for 32 and 64 bits applications.
- TDM-GCC , GCC compiler for 32 and 64 bits applications.
With that we can create our applications/programs in Windows. In addition, we have other two different tools:
- Qt Framework library, for create GUI’s/Interfaces with multi-platform compatibility.
- Qt Creator , an C/C++ editor, with additional editing tools for the Qt Framework.
About the binary compatibility chain
When we make an application, we’ve to follow the chain of libraries compiled with the same compiler version, the same way we’ve to follow the application binary interface (32 or 64 bits) for those libraries.
This means, if we want to compile an application for 32 and 64 bits with MinGW-w64 5.3, plus the Qt 5.7 Framework, we need:
- MinGW-w64 5.3 (with flags 32 bits in the config) and the Qt 5.7 Framwork 32 bits build compiled under MinGW-w64 (MinGW-w64 version 5.3 or lower as long as they maintain binary code compatibility with our compiler).
- MinGW-w64 5.3 (with flags 64 bits in the config) and the Qt 5.7 Framwork 64 bits build compiled under MinGW-w64 (MinGW-w64 version 5.3 or lower as long as they maintain binary code compatibility with our compiler).
Now come the weird thing. At Qt official webpage it’s only available the 32bits builds for MinGW… I don’t know why…
Here is when come the Qt64-NG project, a place where get the Qt Framework 64bits binary packages for MinGW-w64. Unfortunately the project is closed, so only are available until the Qt 5.5 Framework version.
I don’t know other place where to get newer 64bits Qt binary packages for MinGW-w64 (Maybe the ones at MSYS2 project? I didn’t tried yet). So, if one need it, at this moment must be compiled by oneself (This is for answer your opensource 5.7 comment).
Install and configuration
Now your question. How to install a kit for your Qt Creator. I’m going to answer for 64bit binaries because it’s what I use (and latter you just need to do the same thing for 32bits)
For use Qt Creator with MinGW-w64, one just need:
-
Download Qt Creator and install it. My advice is to download the 4.1 (or upper version) snapshots if one is going to use CMake projects.
-
Download MinGW-w64 (posix-seh , or your choice flavor) + decompress in one folder.
That’s all, with this we can create 32 and 64 bits applications.
By other way, in addition to the above steps, if one want to create applications using the Qt Framework library (a GUI/Interface for our applications), it’s needed the binary package, this case 64 bit (The 32bit binary package is available at the Qt official page)
- Download Qt64-NG (posix-seh , or your above choose flavor) + decompress in one folder.
After that it’s needed to execute the qtbinpatcher.exe included in that directory, just a double click.
Note: If you change this directory to other path, execute again qtbinpatcher.
Here is where end the installation process. In my case, I have all under the same folder. Example:
D:\Programacion\mingw64_5.3.0rev0\
D:\Programacion\qt64-ng\qt-5.5.0-x64-mingw510r0-seh\
Now you just need to configure QtCreator, in this case:
Tools > Options > C++ , Compilers, Add > MinGW
- In name put the compiler version, MinGW-5.3 x64
It’s the name that will be shown in Kits - In Compiler path browse for the C++ compiler path, in this case D:\Programacion\mingw64_5.3.0rev0\bin\g++.exe
Take note in ABI it’s selected to use 64 bits flags in the compiler. That’s why we put in name x64. For 32 bits, just duplicate and change the selection.
Tools > Options > C++ , Debuggers, Add
- In Path browse to the debugger path, in this case D:\Programacion\mingw64_5.3.0rev0\bin\gdb.exe
- In name put the name showed at version, GDB 7.10.1 in this case.
It’s the name that will be shown in Kits
And, if one want to create 64bits programs using Qt Framework, in addition to the above:
Tools > Options > C++ , Qt versions, Add, and select the qmake.exe placed at the qt64-ng bin directory.
- In this case is, D:\Programacion\qt64-ng\qt-5.5.0-x64-mingw510r0-seh\bin\qmake.exe
- In name put Qt %{Qt:Version} (qt-5.5.0-x64-mingw510r0-seh)
It’s the name that will be shown in Kits tab
Now you just need to specify the Kit:
Tools > Options > C++ , Kits, Add
- In name MinGW-5.3 x64 (Qt-5.5)
- In compiler select MinGW-5.3 x64
- In debugger select GDB 7.10.1
- In Qt Version select Qt 5.5.0 (qt-5.5.0-x64-mingw510r0-seh)
And in CMake goes the CMake path if one is going to use it (I use it with Ninja ).
Note: For install Ninja just copy ninja.exe to the mingw-w64\bin directory, and at the Kit, in Cmake generator push change to generator->ninja , and Extra generator->CodeBlocks. Ninja launch several make commands at same time, what decreases compilation times.
Long text for 1 minute of configuration. The Kit is what we select for compile the project, and one can have as many Kits as one wish (CompilerA x32 + Qt5.x , CompilerB x64 + Qt5.x , CompilerX x64 + Qt4.8, etc, etc).
Now, before to finish, an important thing. After we create a project (and the project it’s open), at the Projects selector (Ctrl+5) we’ve to take care of the Build Environment variables.
Those are the variables that are going to be added at the command who launch our Runs/Builds for testing and debug.
In PATH it’s needed to put the paths to MinGW-w64 and to Qt64-NG. And under my humble opinion, I recommend to put it in that order because of dll’s. Following our example:
PATH D:\Programacion\mingw64_5.3.0rev0\bin;D:\Programacion\qt64-ng\qt-5.5.0-x64-mingw510r0-seh\bin;the_other_paths
At QtCreator snapshots branch I don’t need to check it, it’s done automatically
Most of the C/C++ editors works that way. To install editor, specify compiler&debugger path, and specify Build Environment variables for launch from the editor (overriding those environment variable that we’ve in Windows).
Note: I recommend to compile Qt Creator with 64 bits, due as happen with the Framework, for Windows it’s only available in 32 bit at the official Qt website
Alternative way
By other side, we have:
- MSYS2 , a Linux like tools environment.
There is all the same, just we download/install the packages with the pacman command, and are available the 32 and 64 bit versions. Those applications need to be launched from MSYS2 shell. It’s not a binary compatibility thing but a paths matter.
The libraries available at MSYS2 project can be used in the first tool chain I described (due are build under MinGW-w64 also).
EDIT: Corrected namings, the last explanation, and added Ninja’s url and installation note.