#статьи
-

0
Знакомимся с библиотекой Tkinter — пишем на Python кросс-платформенный калькулятор, который рассчитывает вес человека.
Иллюстрация: Merry Mary для Skillbox Media

Изучает Python, его библиотеки и занимается анализом данных. Любит путешествовать в горах.
Десктопные приложения пишут на разных языках программирования: C++, C#, C, Python и других. Начинающим разработчикам проще всего использовать Python и его библиотеки для работы над графическими интерфейсами.
Одна из таких библиотек — Tkinter. Она входит в стандартный пакет Python и позволяет создавать приложения для Windows, mac OS и Linux. Давайте разберёмся, как устроена эта библиотека, и напишем десктопный калькулятор, помогающий рассчитать вес человека.
GUI (Graphical User Interface) — это графический интерфейс пользователя, оболочка программы, с которой мы взаимодействуем с помощью клавиатуры и мыши. На современных операционных системах почти все программы работают с графическим интерфейсом, и мы каждый день сталкиваемся с GUI: читаем статьи в браузере, набираем текст в редакторе или играем в игры.
Противоположность графическому интерфейсу — командная строка, позволяющая управлять приложением с помощью текстовых команд. Такой интерфейс реализован в терминале macOS и командной строке Windows.
Для работы с GUI в Python есть четыре библиотеки:
- Tkinter;
- Kivy;
- Python QT;
- wxPython.
Мы выбрали Tkinter, потому что она не требует дополнительной установки и позволяет быстро создавать приложения с простым графическим интерфейсом.
Tkinter — это удобный интерфейс для работы со средствами Tk. Приложения, созданные на основе этой библиотеки, кросс-платформенные, то есть могут запускаться на разных операционных системах.
Схематично работу с Tkinter можно представить в виде четырёх шагов:
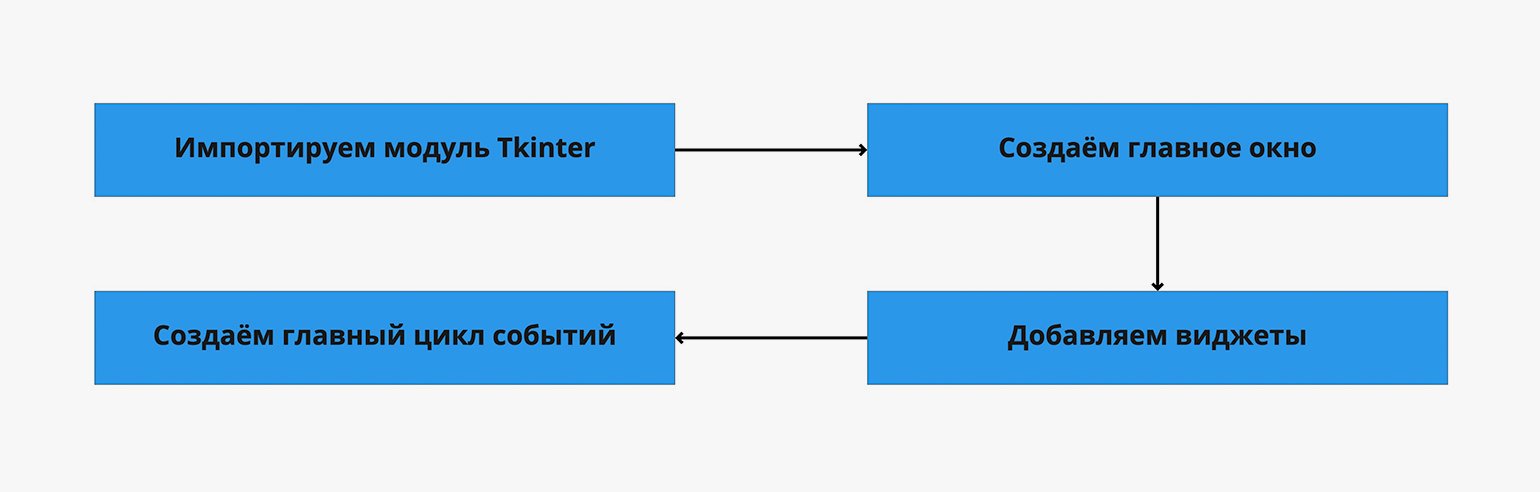
Что здесь происходит:
- Мы подключаем библиотеку Tkinter с помощью директивы import.
- Создаём главное окно приложения, в котором будут размещаться все графические элементы.
- Добавляем виджеты — визуальные элементы, выполняющие определённые действия.
- Создаём главный цикл событий — он включает в себя все события, происходящие при взаимодействии пользователя с интерфейсом.
Ключевые объекты в работе с Tkinter — виджеты. Это аналоги тегов из HTML, которые позволяют создавать интерактивные и неинтерактивные элементы, например надписи или кнопки. Всего их 18, но чаще всего используют следующие:
- Button — кнопки;
- Canvas — «холст», на котором рисуют графические фигуры;
- Entry — виджет для создания полей ввода;
- Label — контейнер для размещения текста или изображения;
- Menu — виджет для создания пунктов меню.
Понять работу с виджетами легче всего на практике. Но прежде чем к ней приступить, обсудим идею нашего первого десктопного приложения.
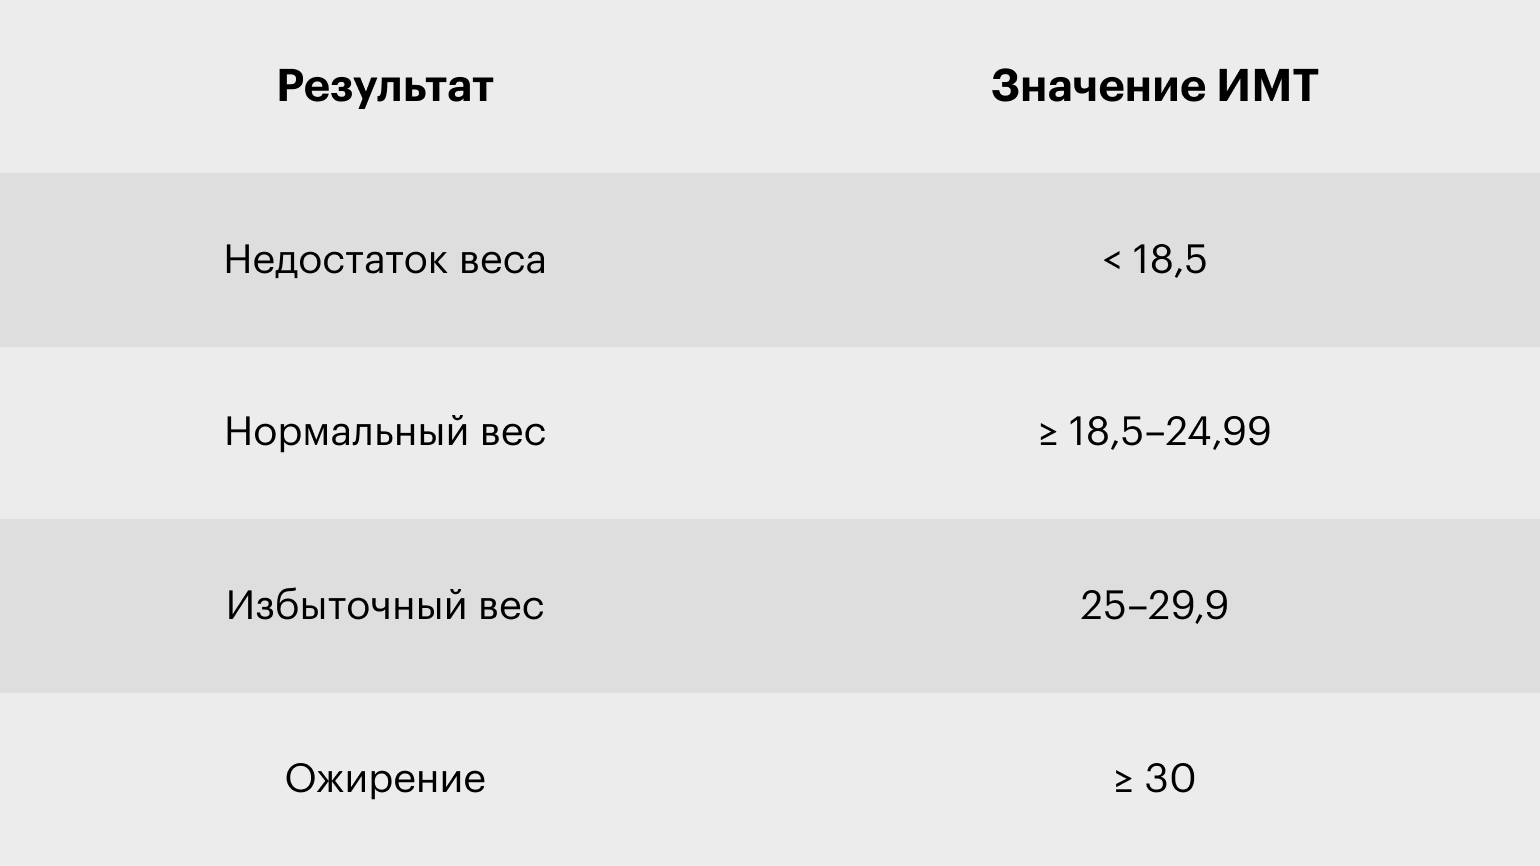
Мы напишем калькулятор индекса массы тела. ИМТ — это важный медицинский показатель, который позволяет оценить, есть ли у человека избыточный вес или ожирение. Он рассчитывается по следующей формуле:
Результаты расчётов оценивают с помощью специальной таблицы. У врачей она имеет много градаций, мы же воспользуемся упрощённой версией:
Писать код на Python лучше всего в специальной IDE, например в PyCharm или Visual Studio Code. Они подсвечивают синтаксис и предлагают продолжение кода — это сильно упрощает работу программиста. Весь код из этой статьи мы писали в Visual Studio Code.
Библиотека Tkinter предустановлена в Python. Поэтому её нужно только импортировать:
import tkinter as tk
Теперь мы можем использовать любые модули из этой библиотеки.

Прежде чем писать код, необходимо ответить на несколько вопросов:
- Какие данные мы хотим получить от пользователя и в каком виде?
- Какое событие будет запускать расчёт ИМТ: нажатие кнопки, получение приложением всех необходимых данных или что-то другое?
- Как будем показывать результат?
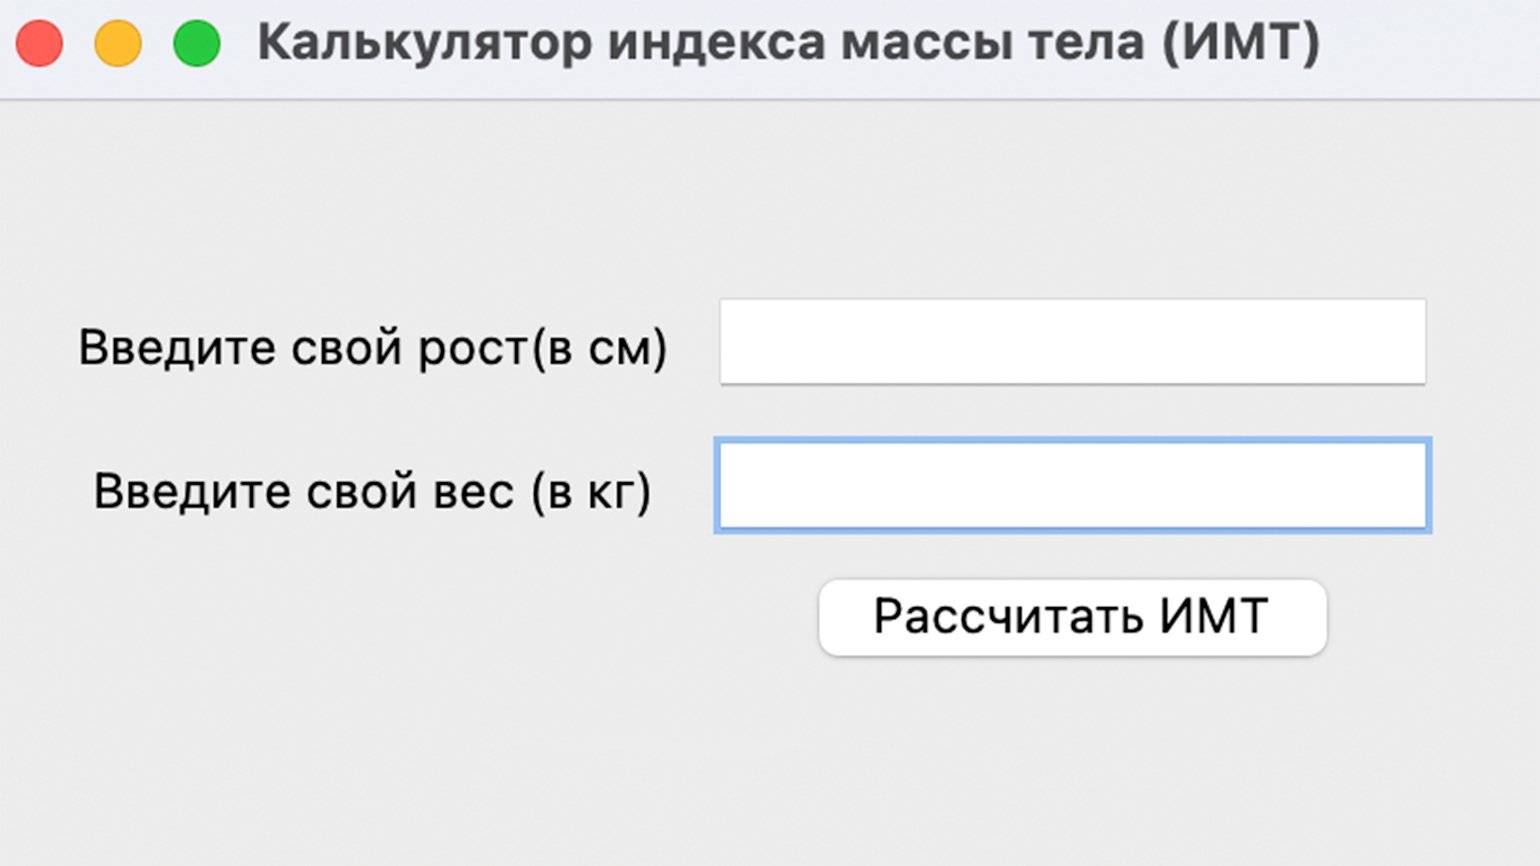
В нашем случае необходимо получить от пользователя вес и рост в виде целых чисел. При этом вес должен быть введён в килограммах, а рост — в сантиметрах. ИМТ будет рассчитываться по нажатии кнопки, а результат — выводиться во всплывающем окне в виде значения ИМТ и категории, к которой он относится.
Схематично графический интерфейс нашего калькулятора будет выглядеть так:

Теперь попробуем реализовать интерфейс и работу калькулятора с помощью Python и Tkinter.
После импорта библиотеки в Python загрузим её методы:
from tkinter import *
from tkinter import messagebox
Первая строка позволяет нам загрузить все методы Tkinter и использовать их в коде без ссылки на их наименование. Второй строкой мы явно импортируем метод messagebox, который будем использовать для вывода всплывающего окна с результатом. Это удобно, так как метод потребуется нам несколько раз.
Теперь создадим окно нашего приложения. Для этого воспользуемся модулем Tk. Приложение назовём «Калькулятор индекса массы тела (ИМТ)»:
window = Tk() #Создаём окно приложения.
window.title("Калькулятор индекса массы тела (ИМТ)") #Добавляем название приложения.
После запуска кода ничего не произойдёт. Это не ошибка. На самом деле код выполнился и окно закрылось. Необходимо явно указать, что окно приложения не должно закрываться до тех пор, пока пользователь сам не сделает этого. Для этого к коду добавим функцию window.mainloop (), указывающую на запуск цикла событий:
window.mainloop()
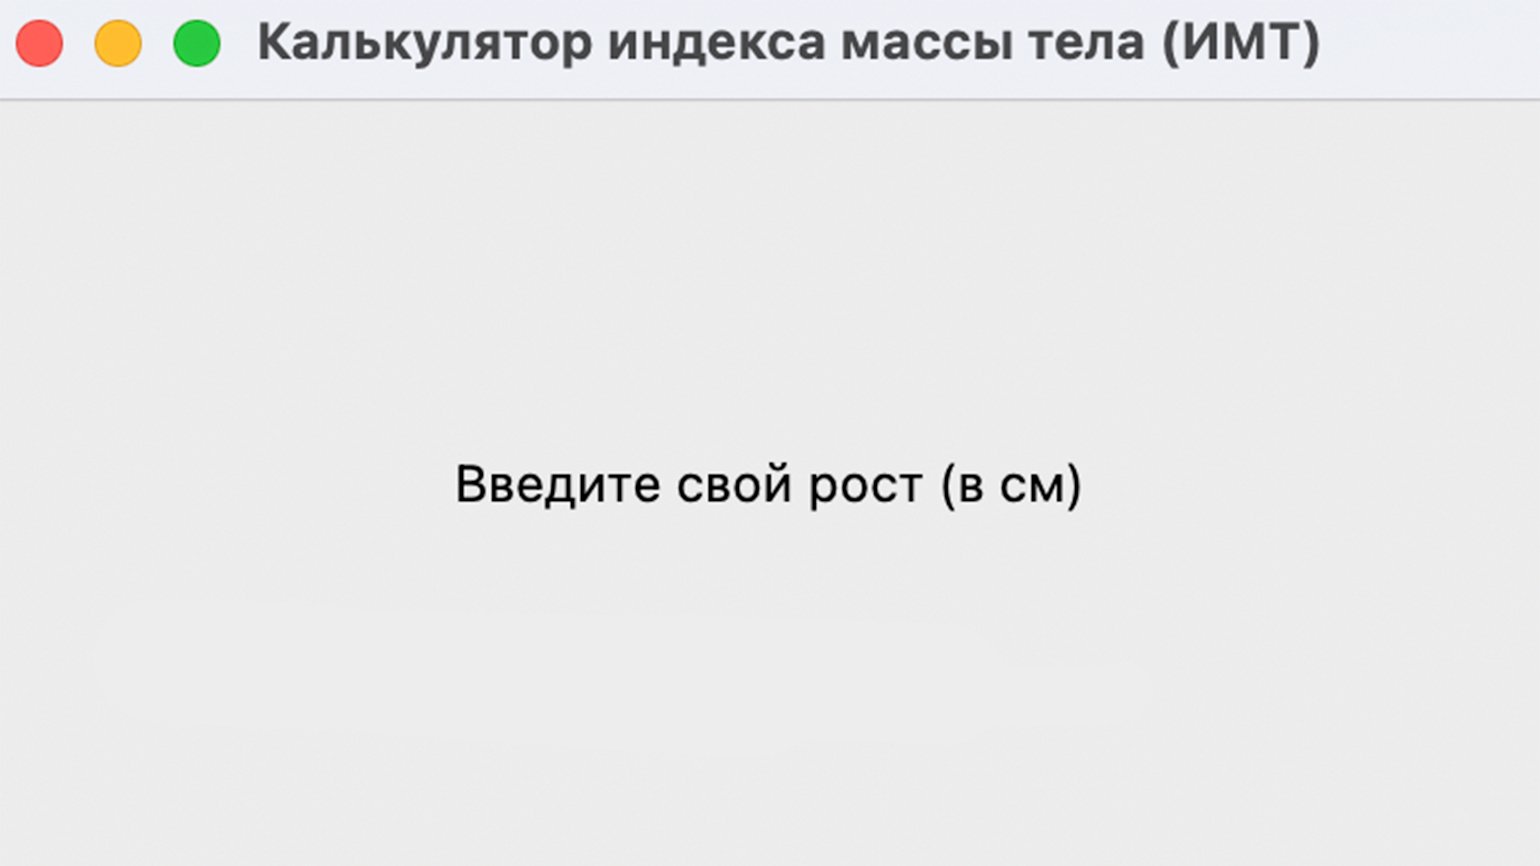
Запустив код, увидим экран приложения:
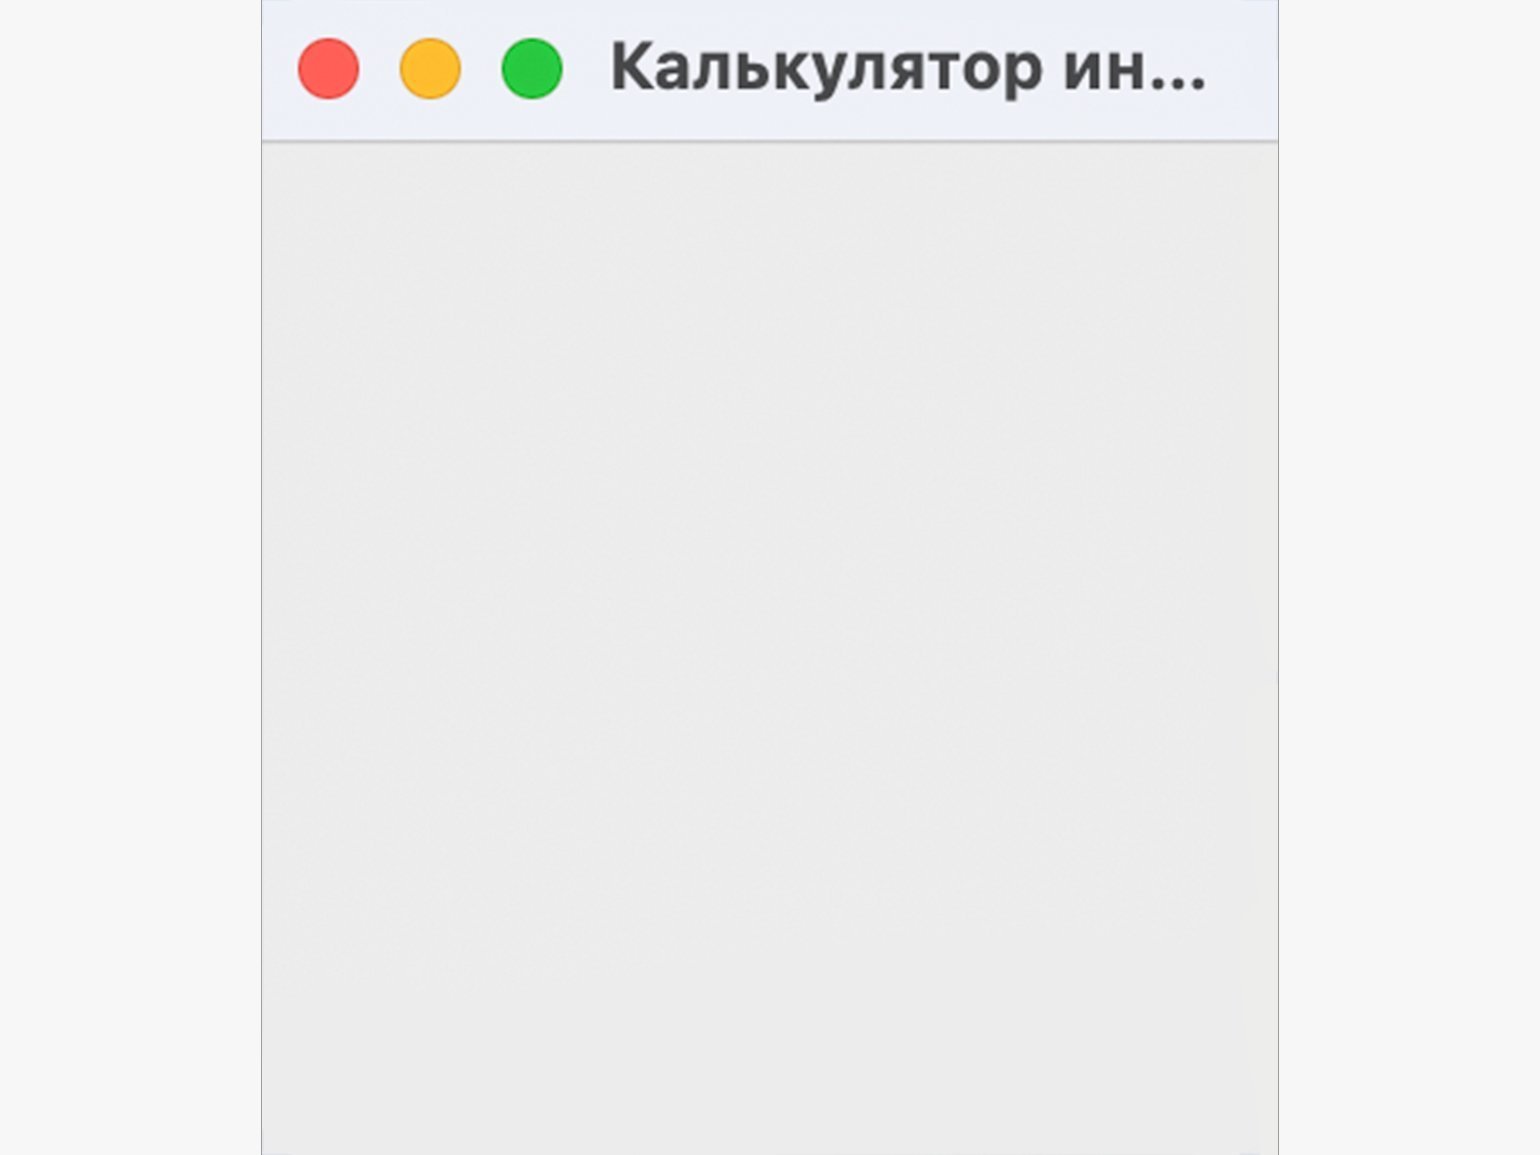
Мы не указали размер окна, поэтому название приложения не помещается в него полностью. Исправим это с помощью метода geometry:
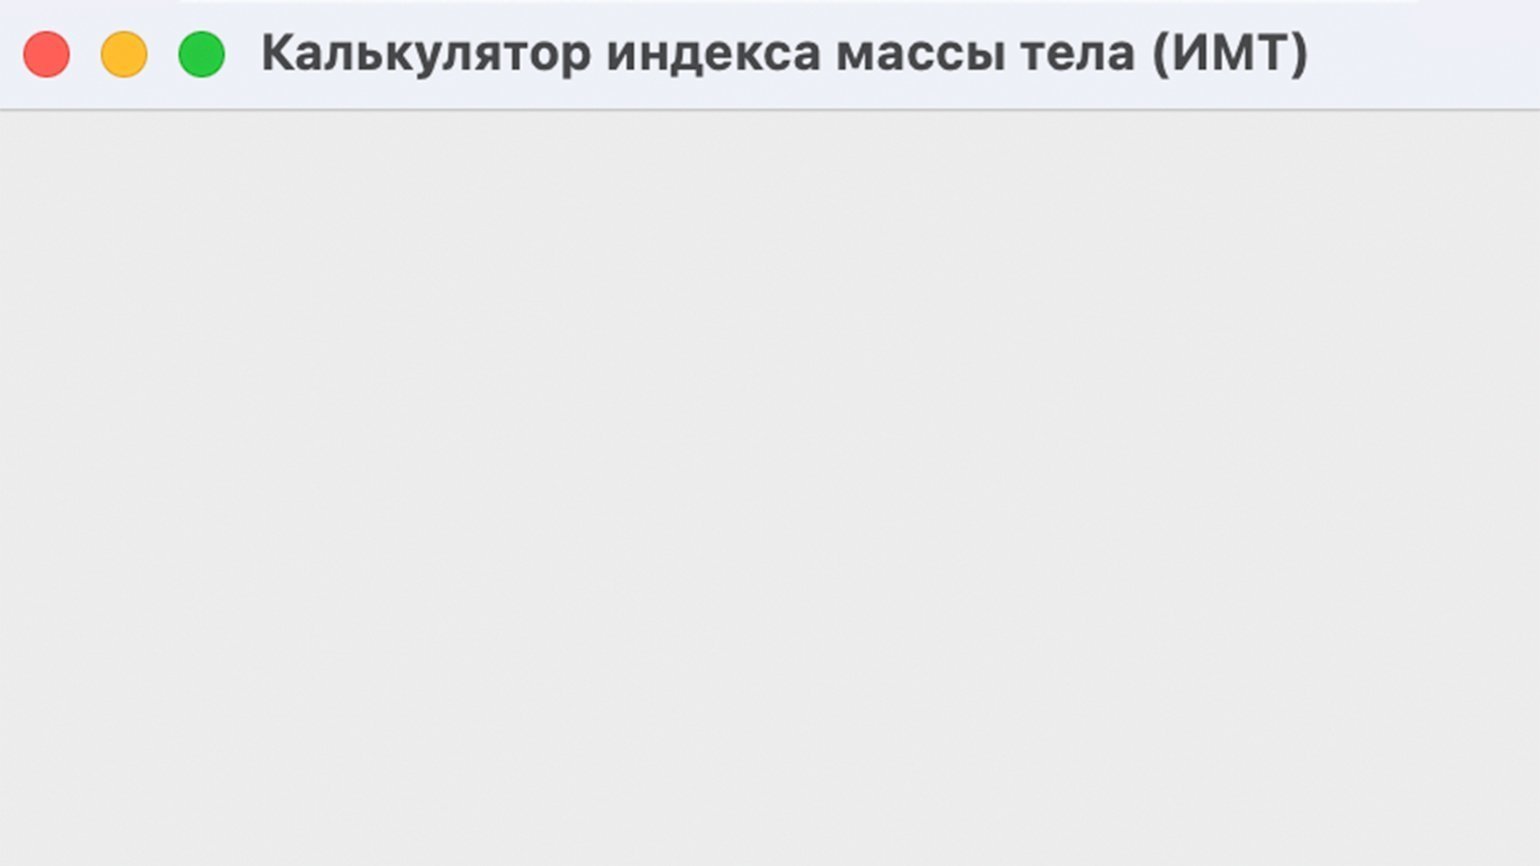
window.geometry('400x300')
Теперь название приложения видно полностью:
В окне приложения необходимо разместить несколько элементов с нашего эскиза: два поля ввода информации с подписями и одну кнопку. Важно, чтобы поля не накладывались друг на друга и не уходили за пределы окна. В Tkinter для этого есть несколько методов:
- pack — используется, когда мы работаем с контейнерами для элементов. Позволяет позиционировать кнопки, надписи или другие элементы внутри контейнеров.
- place — позволяет позиционировать элементы, указывая точные координаты.
- grid — размещает элементы по ячейкам условной сетки, разделяющей окно приложения.
Мы воспользуемся комбинацией методов pack и grid. Для начала создадим виджет Frame для размещения надписей, полей ввода и кнопок. Подробное описание работы виджета есть в документации. Мы же используем только два свойства: padx и pady.
Обозначим отступы по вертикали и горизонтали в 10 пикселей для элементов, которые будут расположены внутри Frame:
frame = Frame(
   window, #Обязательный параметр, который указывает окно для размещения Frame.
   padx = 10, #Задаём отступ по горизонтали.
   pady = 10 #Задаём отступ по вертикали.
)
frame.pack(expand=True) #Не забываем позиционировать виджет в окне. Здесь используется метод pack. С помощью свойства expand=True указываем, что Frame заполняет весь контейнер, созданный для него.
В окне приложения нам необходимо добавить три вида виджетов: поле для ввода информации (Entry), текстовые надписи (Label) и кнопку (Button).
Начнём с надписей. Воспользуемся виджетом Label:
height_lb = Label(
   frame,
   text="Введите свой рост (в см)  "
)
height_lb.grid(row=3, column=1)
Мы передаём виджету Label два параметра:
- frame — используем заготовку виджета Frame, в которой уже настроены отступы по вертикали и горизонтали.
- text — текст, который должен быть выведен на экран.
Для позиционирования виджета используем метод grid. Укажем, что текст должен располагаться в ячейке с координатами «3-я строка, 1-й столбец». Если запустим код, то увидим там единственный элемент:
Сейчас элемент расположен в центре окна, но он займёт правильное положение, когда мы напишем другие элементы.
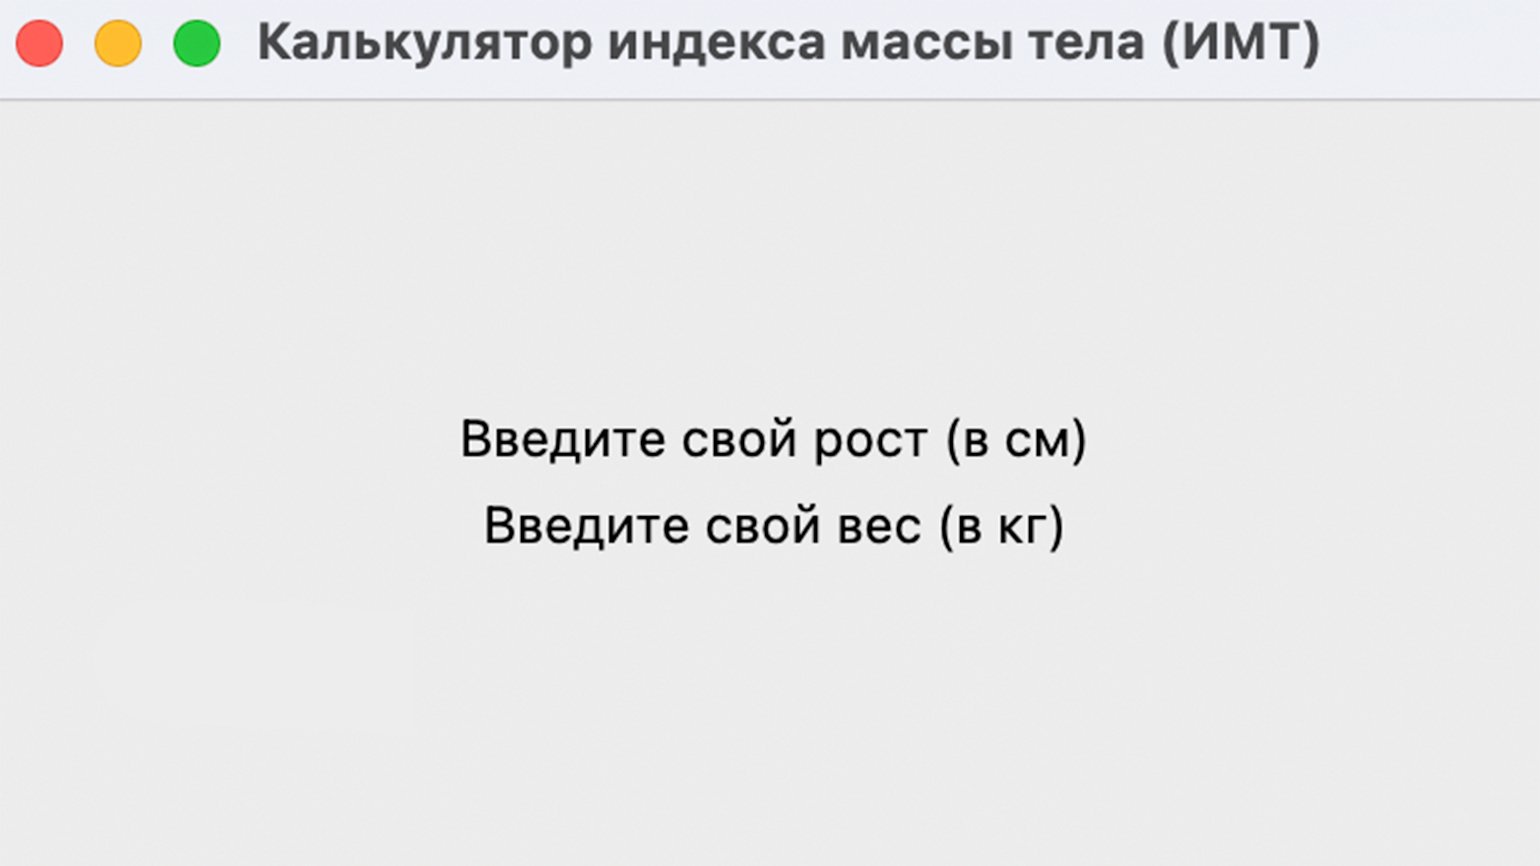
Добавим вторую надпись о весе аналогичным образом, но при позиционировании в grid укажем следующую, четвёртую строку:
weight_lb = Label(
   frame,
   text="Введите свой вес (в кг)  ",
)
weight_lb.grid(row=4, column=1)
Запускаем код и смотрим на результат:
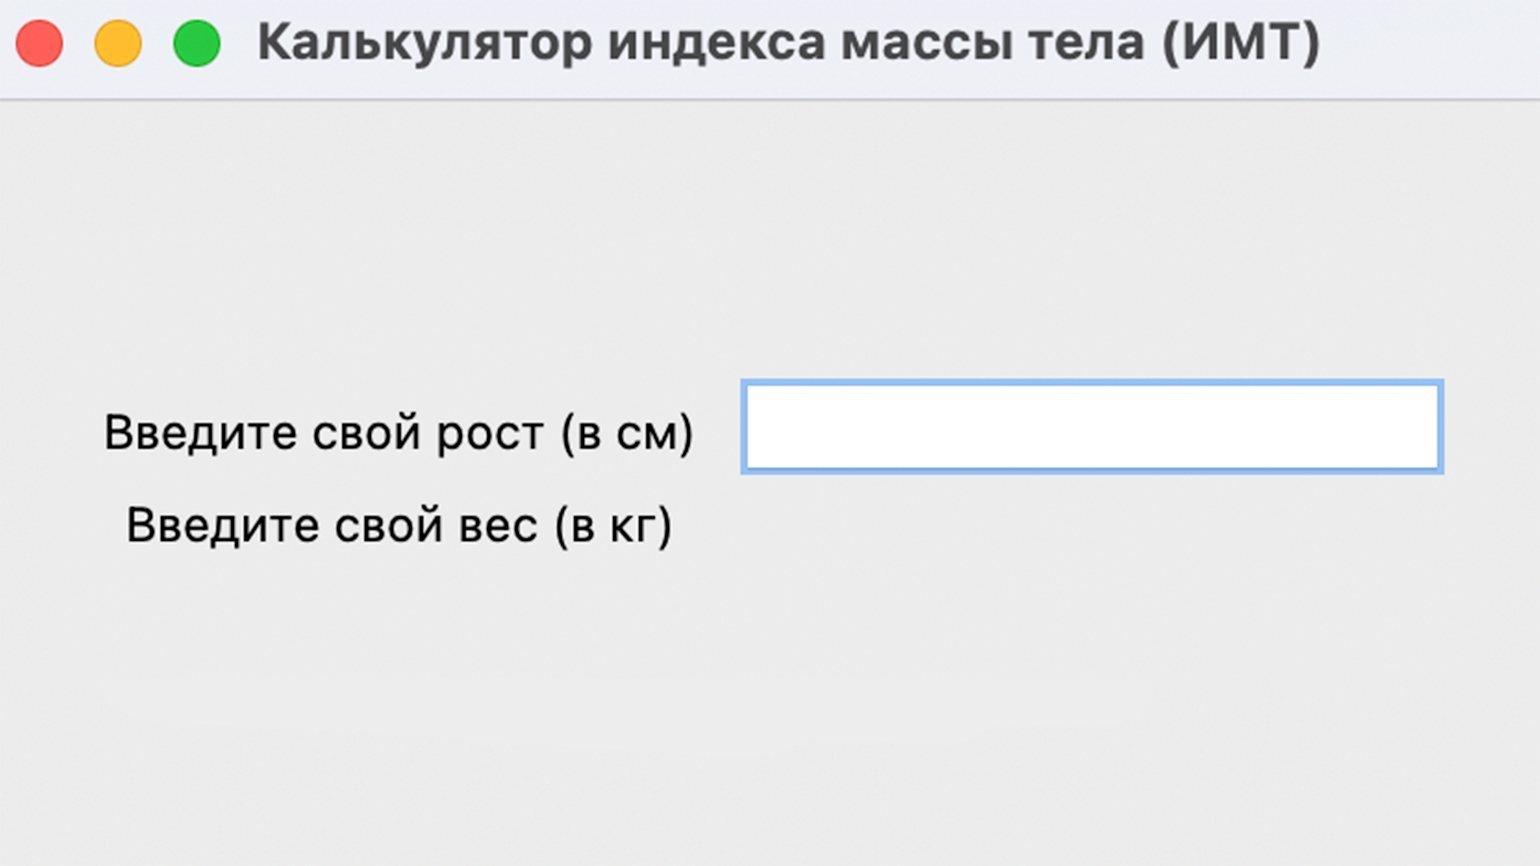
Теперь добавим поля для ввода пользовательской информации, используя виджет Entry:
height_tf = Entry(
   frame, #Используем нашу заготовку с настроенными отступами.
)
height_tf.grid(row=3, column=2)
Для позиционирования мы также воспользовались методом grid. Обратите внимание, что наш элемент должен быть расположен напротив надписи «Введите свой рост (в см)». Поэтому мы используем ячейку в той же строке, но уже во втором столбце. Запустим код и посмотрим на результат:
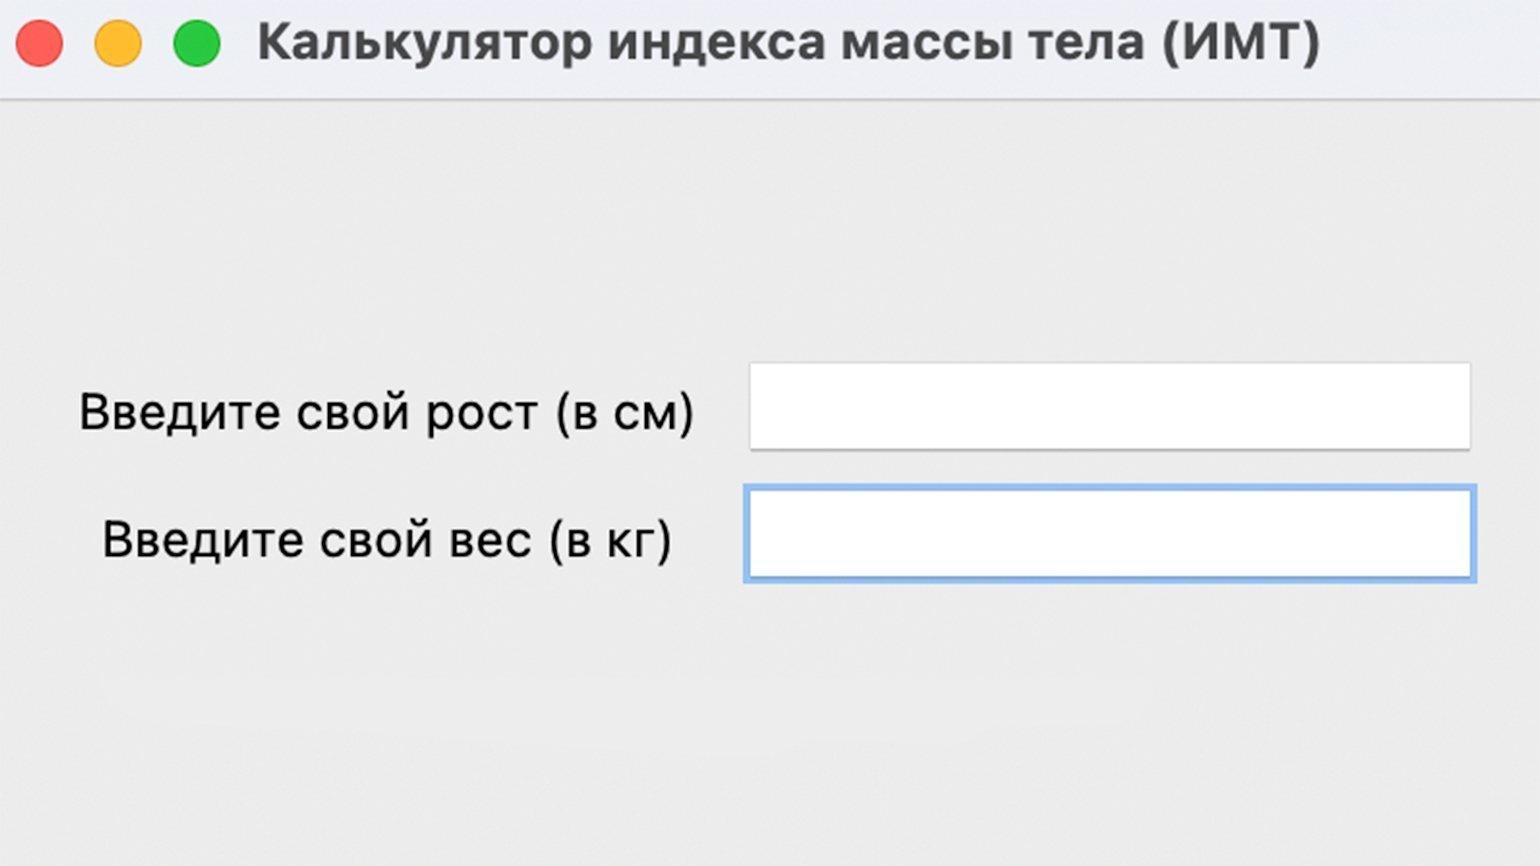
Всё получилось. Остаётся по аналогии добавить поле ввода веса:
weight_tf = Entry(
   frame,
)
weight_tf.grid(row=4, column=2, pady=5)
Посмотрим на результат:
Теперь добавим кнопку, которая будет запускать расчёт ИМТ. Сделаем это с помощью виджета Button:
cal_btn = Button(
   frame, #Заготовка с настроенными отступами.
   text='Рассчитать ИМТ', #Надпись на кнопке.
)
cal_btn.grid(row=5, column=2) #Размещаем кнопку в ячейке, расположенной ниже, чем наши надписи, но во втором столбце, то есть под ячейками для ввода информации.
Посмотрим на результат:
Теперь в приложении есть все графические элементы. Остаётся лишь написать код, который будет получать информацию из виджетов Entry и рассчитывать индекс массы тела.
Напишем простую функцию и разберём её построчно:
def calculate_bmi(): #Объявляем функцию.
   kg = int(weight_tf.get()) #С помощью метода .get получаем из поля ввода с именем weight_tf значение веса, которое ввёл пользователь и конвертируем в целое число с помощью int().
   m = int(height_tf.get())/100 #С помощью метода .get получаем из поля ввода с именем height_tf значение роста и конвертируем в целое число с помощью int(). Обязательно делим его на 100, так как пользователь вводит рост в сантиметрах, а в формуле для расчёта ИМТ используются метры.
   bmi = kg/(m*m)#Рассчитываем значение индекса массы тела.
   bmi = round(bmi, 1) #Округляем результат до одного знака после запятой.
Функция готова. Но теперь нам необходимо оценить полученный результат расчёта и вывести сообщение для пользователя.
Дополним нашу функцию calculate_bmi. Воспользуемся условным оператором if, чтобы учесть полученные значения ИМТ, и методом Tkinter messagebox для отображения сообщения во всплывающем окне:
if bmi < 18.5:
       messagebox.showinfo('bmi-pythonguides', f'ИМТ = {bmi} соответствует недостаточному весу')
   elif (bmi > 18.5) and (bmi < 24.9):
       messagebox.showinfo('bmi-pythonguides', f'ИМТ = {bmi} соответствует нормальному весу')
   elif (bmi > 24.9) and (bmi < 29.9):
       messagebox.showinfo('bmi-pythonguides', f'ИМТ = {bmi} соответствует избыточному весу')
   else:
       messagebox.showinfo('bmi-pythonguides', f'ИМТ = {bmi} соответствует ожирению')
Остаётся последний шаг — наша функция должна запускаться при нажатии на кнопку «Рассчитать ИМТ». Для этого добавим свойство command в виджет Button:
cal_btn = Button(
   frame,
   text='Рассчитать ИМТ',
   command=calculate_bmi #Позволяет запустить событие с функцией при нажатии на кнопку.
)
cal_btn.grid(row=5, column=2)
Запустим код и посмотрим на результат:
Всё работает. Функция получает данные из полей ввода и рассчитывает индекс массы тела, показывая результат на экране.
from tkinter import *
from tkinter import messagebox

def calculate_bmi():
   kg = int(weight_tf.get())
   m = int(height_tf.get())/100
   bmi = kg/(m*m)
   bmi = round(bmi, 1)

   if bmi < 18.5:
       messagebox.showinfo('bmi-pythonguides', f'ИМТ = {bmi} соответствует недостаточному весу')
   elif (bmi > 18.5) and (bmi < 24.9):
       messagebox.showinfo('bmi-pythonguides', f'ИМТ = {bmi} соответствует нормальному весу')
   elif (bmi > 24.9) and (bmi < 29.9):
       messagebox.showinfo('bmi-pythonguides', f'ИМТ = {bmi} соответствует избыточному весу')
   else:
       messagebox.showinfo('bmi-pythonguides', f'ИМТ = {bmi} соответствует ожирению')

window = Tk()
window.title('Калькулятор индекса массы тела (ИМТ)')
window.geometry('400x300')


frame = Frame(
   window,
   padx=10,
   pady=10
)
frame.pack(expand=True)


height_lb = Label(
   frame,
   text="Введите свой рост (в см)  "
)
height_lb.grid(row=3, column=1)

weight_lb = Label(
   frame,
   text="Введите свой вес (в кг)  ",
)
weight_lb.grid(row=4, column=1)

height_tf = Entry(
   frame,
)
height_tf.grid(row=3, column=2, pady=5)

weight_tf = Entry(
   frame,
)
weight_tf.grid(row=4, column=2, pady=5)

cal_btn = Button(
   frame,
   text='Рассчитать ИМТ',
   command=calculate_bmi
)
cal_btn.grid(row=5, column=2)

window.mainloop()
Узнать о возможностях Tkinter и особенностях работы с виджетами можно в официальной документации. А если хотите найти больше реальных примеров для практики, советуем две книги:
- Python GUI Programming with Tkinter. Develop responsive and powerful GUI applications with Tkinter, Алан Мур.
- Tkinter GUI Programming by Example, Дэвид Лав.

Жизнь можно сделать лучше!
Освойте востребованную профессию, зарабатывайте больше и получайте от работы удовольствие. А мы поможем с трудоустройством и важными для работодателей навыками.
Посмотреть курсы
Время на прочтение
15 мин
Количество просмотров 119K
И минимум зависимостей

Dear PyGui принципиально отличается от других фреймворков GUI Python. Рендеринг на GPU, более 70 виджетов, встроенная поддержка асинхронности — это лишь некоторые возможности Dear PyGui. Руководством по работе с этим пакетом делимся к старту курса по разработке на Python.
Парадигма Retained Mode позволяет создавать чрезвычайно динамичные интерфейсы. Dear PyGui не использует нативные виджеты, а рисует с помощью видеокарты компьютера, как PyQt (используя API рендеринга DirectX11, Metal и Vulkan).
Почему Dear PyGui?
По сравнению с другими библиотеками Python GUI Dear PyGui уникален:
-
Рендеринг на GPU.
-
Простая встроенная поддержка асинхронных функций.
-
Полное управление темами и стилями.
-
Простое встроенное окно логирования.
-
70+ виджетов, сотни их комбинаций.
-
Подробная документация, примеры и беспрецедентная поддержка.
Основные моменты
-
Темы — 10 встроенных тем и система пользовательских тем.
-
Graphing — API для работы с графиками (обертка ImPlot).
-
Canvas — низкоуровневый API для рисования.
-
Logging — API логирования.
-
Виджеты — просто прокрутите вниз, чтобы увидеть их.
Установка
Убедитесь, что у вас установлен как минимум Python 3.7 (64 бит).
pip install dearpygui
# или
pip3 install dearpygui
Зависимости
-
Dear ImGui
-
CPython
-
ImPlot
-
CLI11
Начинаем писать GUI
Dear PyGui предоставляет разработчикам python простой способ создания быстрых и мощных графических интерфейсов для скриптов. Dear PyGui состоит из окна программы, окон и виджетов. Окно программы является главным окном вашей программы и создаётся в конце основного скрипта вызовом start_dearpygui().
from dearpygui.core import *


def save_callback(sender, data):
    print("Save Clicked")


add_text("Hello, world")
add_button("Save", callback=save_callback)
add_input_text("string", default_value="Quick brown fox")
add_slider_float("float", default_value=0.273, max_value=1)

start_dearpygui()
Результат:

В приведённом ниже примере программы показано окно программы и ещё одно окно, в котором с помощью встроенной функции документации отображается документация:
from dearpygui.core import *

set_main_window_size(800, 800)
show_about()
show_documentation()

# when running this code please look at the about window and it will report which version of Dear PyGUI is running
# Even if you just did a pip install please ensure you your environment is using the latest package
start_dearpygui()
Dear PyGui состоит из двух модулей: dearpygui.core и dearpygui.simple.
-
dearpygui.core содержит базовую функциональность Dear PyGUI. Через ядро можно делать всё. На самом деле это расширение на языке Си, просто обёрнутое в модуль.
-
dearpygui.simple содержит обёртки и утилиты уже из кода ядра для удобства работы с Dear PyGui.
Инструменты разработки
В Dear PyGui есть полезные инструменты разработки. Метод show_source() принимает имя входного файла Python.
from dearpygui.core import *

show_documentation()
show_debug()
show_about()
show_metrics()
show_source("main.py")  # replace "main.py" with your python file name
show_logger()

start_dearpygui()
Встроенное логирование
Мощный инструмент разработки — Logger, он вызывается методом show_logger(). Уровней логирования 6: Trace, Debug, Info, Warning, Error, Off. Логгер выведет установленный уровень и отфильтрует все уровни ниже.

Уровень лога mvTRACE покажет все команды.
from dearpygui.core import *

show_logger()
set_log_level(mvTRACE)
log("trace message")
log_debug("debug message")
log_info("info message")
log_warning("warning message")
log_error("error message")

start_dearpygui()
Пишем виджеты и контейнеры
Элементы библиотеки можно разделить на:
-
обычные предметы: поля ввода, кнопки;
-
контейнеры (окно, всплывающее окно, всплывающая подсказка, элемент-потомок);
-
элементы макета (группа, следующая колонка (next_column)).
Элементы добавляются командами с префиксом add_.

Каждый элемент должен иметь уникальное имя. По умолчанию, если это применимо, имя станет меткой элемента. При желании можно изменить метку:
-
Поставьте ## после имени (например displayed_name##unique_part). Всё после ## в отображаемом имени будет скрыто.
-
Ключевое слово label, которое отобразит метку вместо имени.
Некоторые имена элементов автоматически генерируются для элементов без аргументов имени в функции (т. е. same_line). Но у них есть необязательное ключевое слово name, и его можно заполнить, когда понадобится ссылка на элемент.
from dearpygui.core import *

add_button("Apply")
add_same_line(spacing=10)
add_button("Apply##1")
add_same_line(spacing=10, name="sameline1")
add_button("Apply2", label="Apply")
add_spacing(count=5, name="spacing1")
add_button("Apply##3")

start_dearpygui()
Контекстные менеджеры dearpygui.simple автоматизируют вызов функции end, позволяют сворачивать код и в самом коде показывают иерархию.
По умолчанию элементы создаются в порядке их описания в коде.
Но, указав контейнер parent, элементы можно добавлять не по порядку. parent вставляет виджет в конец списка дочерних элементов родителя. before в сочетании с ключевым словом parent помещает один элемент перед другим в списке элементов-потомков.
from dearpygui.core import *
from dearpygui.simple import *

add_text("First coded widget")
add_text("This is some text on window 2", parent="window 2")
# we can even specify the parent before it was coded
add_text("This is some text on child 1", parent="child 1")
# we can even specify the parent before it was coded
with window("window 1"):
# simple
    with child("child 1"):
# simple
        add_checkbox("Checkbox")
# this is a input item added inside of the child
add_checkbox("Last coded widget", parent="MainWindow", before="First coded widget")
add_checkbox("Last coded widget 2", parent="child 1", before="Checkbox")

# empty window
with window("window 3"): # simple
    pass

start_dearpygui()
Виджеты
Каждый виджет ввода имеет значение, которое можно задать с помощью ключевого слова default_value при создании или во время выполнения команды set_value. Для доступа к значению виджета можно использовать команду get_value. Мы также можем передавать значение виджета непосредственно в переменную python и из неё.
from dearpygui.core import *

my_var = True
add_checkbox("Radio Button", default_value=my_var)
print("Radio Button Value: ", get_value("Radio Button"))
print("my_var Value: ", my_var)

set_value("Radio Button", False)
print("Radio Button Value: ", get_value("Radio Button"))
print("my_var Value: ", my_var)

my_var = get_value("Radio Button")
print("Radio Button Value: ", get_value("Radio Button"))
print("my_var Value: ", my_var)

start_dearpygui()
Виджеты и обратные вызовы окна
Каждый элемент ввода имеет обратный вызов, который выполняется при взаимодействии с виджетом.
Обратные вызовы добавляют виджетам функциональность. Они могут присваиваться до или после создания элемента функцией set_item_callback, как в коде ниже.
Каждый обратный вызов должен принимать аргументы sender и data.
sender сообщает обратному вызову имя элемента, которым он вызывается.
Аргумент data применяется разными стандартными обратными вызовами для отправки дополнительных данных через определение callback_data.
Виджеты оконного типа имеют специальные обратные вызовы, которые срабатывают при таких событиях, как изменение размера или закрытие окна. Обратные вызовы для конкретных окон могут быть применены к виджету любого типа окна. on_close будет запускать обратный вызов, назначенный ключевому слову, при закрытии окна, а set_resize_callback() будет запускаться при каждом изменении размера контейнера и может быть установлен на любое конкретное окно ключевым словом handler, по умолчанию это MainWindow.
Если вы хотите, чтобы обратный вызов выполнялся на каждом фрейме, воспользуйтесь set_render_callback().
from dearpygui.core import *
from dearpygui.simple import *


def close_me(sender, data):
    log_debug(f"{sender} window has been closed")


def render_me(sender, data):
    log_debug(f"window {sender} has ran a render callback")


def resize_me(sender, data):
    log_debug(f"window {sender} has ran a rezise callback")


show_logger()                                      # were going to use the logger to display callback replies
with window("Tester", on_close=close_me):          # simple
    add_text('resize this window resize callback will occur')
    add_text('close this window using the "x" button and a close callback will occur')

set_render_callback(render_me)
set_resize_callback(resize_me, handler="Tester")

start_dearpygui()
Добавляем и удаляем виджеты в рантайме
С помощью Dear PyGui вы можете динамически добавлять и удалять любые элементы во время выполнения программы. Это можно сделать, используя обратный вызов для выполнения команды add_* нужного элемента, указав родителя, к которому будет принадлежать элемент. По умолчанию, если не указан родительский элемент, виджет будет добавлен в MainWindow.Используя ключевое слово before при добавлении элемента, вы можете контролировать, перед каким элементом родительской группы будет находиться новый элемент. По умолчанию новый виджет помещается в конец.
Хранилище значений и данных
Когда новый виджет добавлен, в системное хранилище добавляется некое значение. По умолчанию идентификатор этого значения — имя виджета. Значения извлекаются из системы значений с помощью get_value(«source name»). Меняются значения вручную, методом set_value(«source name»). Чтобы виджеты разных типов значений могли использовать одно и то же значение в системе хранения, сначала должно быть создано большее значение.
Помните, что вы можете хранить любой объект Python в хранилище данных, даже пользовательские типы данных.
Вот так можно хранить отображение:
from dearpygui.core import *


def store_data(sender, data):
    custom_data = {
        "Radio Button": get_value("Radio Button"),
        "Checkbox": get_value("Checkbox"),
        "Text Input": dget_value("Text Input"),
    }
    add_data("stored_data", custom_data)


def print_data(sender, data):
    log_debug(get_data("stored_data"))


show_logger()
show_debug()
add_radio_button("Radio Button", items=["item1", "item2"])
add_checkbox("Checkbox")
add_input_text("Text Input")
add_button("Store Data", callback=store_data)
add_button("Print Data", callback=print_data)


start_dearpygui()
Меню
Очень важный виджет для функциональности GUI — это бар меню. Строки меню всегда отображаются в верхней части окна и состоят в основном из:
-
Лента главного меню.
-
Выпадающие подменю.
-
Конкретные элементы меню.
Элементы меню добавляются слева направо, а элементы подменю — сверху вниз. Они могут быть вложенными, насколько это необходимо:
from dearpygui.core import *
from dearpygui.simple import *


def print_me(sender, data):
    log_debug(f"Menu Item: {sender}")


show_logger()
with menu_bar("Main Menu Bar"):                    # simple

    with menu("File"):                             # simple

        add_menu_item("Save", callback=print_me)
        add_menu_item("Save As", callback=print_me)

        with menu("Settings"):                     # simple

            add_menu_item("Setting 1", callback=print_me)
            add_menu_item("Setting 2", callback=print_me)

    add_menu_item("Help", callback=print_me)

    with menu("Widget Items"):

        add_checkbox("Pick Me", callback=print_me)
        add_button("Press Me", callback=print_me)
        add_color_picker4("Color Me", callback=print_me)

start_dearpygui()
Диалоги выбора файлов и каталогов
Диалог выбора каталога вызывается select_directory_dialog(), которому необходим обратный вызов.
Файловые диалоги вызываются open_file_dialog(), которому должен быть задан обратный вызов. Аргумент data возвращаемого обратного вызова будет заполнен списком строк из пути к папке и к файлу. Расширения — это дополнительное ключевое слово к диалогу файлов, которое позволяет отфильтровать файлы в диалоге по расширениям.
from dearpygui.core import *


def file_picker(sender, data):
    open_file_dialog(callback=apply_selected_file, extensions=".*,.py")


def apply_selected_file(sender, data):
    log_debug(data)  # so we can see what is inside of data
    directory = data[0]
    file = data[1]
    set_value("directory", directory)
    set_value("file", file)
    set_value("file_path", f"{directory}\\{file}")


show_logger()
add_button("Directory Selector", callback=file_picker)
add_text("Directory Path: ")
add_same_line()
add_label_text("##filedir", source="directory", color=[255, 0, 0])
add_text("File: ")
add_same_line()
add_label_text("##file", source="file", color=[255, 0, 0])
add_text("File Path: ")
add_same_line()
add_label_text("##filepath", source="file_path", color=[255, 0, 0])

start_dearpygui()
Графики
В Dear PyGui есть «простые графики» и «графики», оба типа могут быть динамическими.

Простые графики берут список и строят данные по оси y в зависимости от количества элементов в списке. Это могут быть линейные графики или гистограммы.
В «графиках» используются координаты x и y. Вызывать их нужно командой add_plot(), затем данные могут быть добавлены в виде линейного или рассеянного ряда. Вот список возможностей:
-
Клик с перетаскиванием панорамирует график.
-
Клик с перетаскиванием по оси панорамирует график в одном направлении.
-
Двойной клик масштабирует данные.
-
Правый клик и перетаскивание увеличивают область.
-
Двойной правый клик открывает настройки.
-
Shift + правый клик и перетаскивание масштабирует область, заполняющую текущую ось.
-
Прокрутка колёсика позволяет рассмотреть детали.
-
Прокрутка колёсика по оси увеличивает только по этой оси.
-
Можно переключать и скрывать наборы данных на легенде.
Простые графики можно сделать динамическими, изменив значение вызова plot с помощью set_value().

Динамическая функция может очищать график и добавлять новые данные с помощью обратного вызова, например для рендеринга или обратного вызова элемента.
from dearpygui.core import *
from math import cos


def plot_callback(sender, data):
    # keeping track of frames
    frame_count = get_data("frame_count")
    frame_count += 1
    add_data("frame_count", frame_count)

    # updating plot data
    plot_data = get_data("plot_data")
    if len(plot_data) > 2000:
        frame_count = 0
        plot_data.clear()
    plot_data.append([3.14 * frame_count / 180, cos(3 * 3.14 * frame_count / 180)])
    add_data("plot_data", plot_data)

    # plotting new data
    clear_plot("Plot")
    add_line_series("Plot", "Cos", plot_data, weight=2)


add_plot("Plot", height=-1)
add_data("plot_data", [])
add_data("frame_count", 0)
set_render_callback(plot_callback)

start_dearpygui()
Рисование и холст
В Dear PyGui есть низкоуровневый API, хорошо подходящий для рисования примитивов, пользовательских виджетов и даже динамических рисунков.
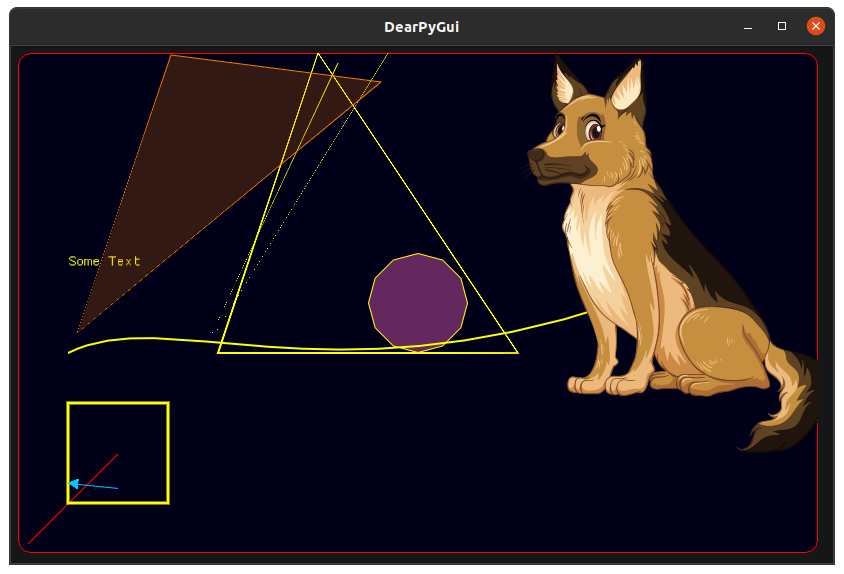
Рисунок запускается вызовом add_drawing(). Начало холста — в левом нижнем углу.
Рисунки имеют масштаб, начало и размер, к которым можно получить доступ и задать их. Масштаб — это множитель значений элементов x и y. Размер указывается в пикселях. На рисунках можно отображать .png, .jpg или .bmp. Изображения рисуются с помощью функции draw_image().
Хотя рисунки можно сделать динамичными, очищая и перерисовывая всё заново, предлагается метод эффективнее: чтобы сделать рисунок динамичным, мы должны использовать ключевое слово tag для обозначения элементов, которые хотим перерисовать. Затем нужно просто вызвать команду рисования, используя тот же тег. Это позволит удалить только один элемент и перерисовать его с помощью новой команды.
from dearpygui.core import *


def on_render(sender, data):
    counter = get_data("counter")
    counter += 1
    modifier = get_data("modifier")
    if counter < 300:
        modifier += 1
    elif counter < 600:
        modifier -= 1
    else:
        counter = 0
        modifier = 2

    xpos = 15 + modifier*1.25
    ypos = 15 + modifier*1.25
    color1 = 255 - modifier*.8
    color3 = 255 - modifier*.3
    color2 = 255 - modifier*.8
    radius = 15 + modifier/2
    segments = round(35-modifier/10)
    draw_circle("Drawing_1", [xpos, ypos], radius, [color1, color3, color2, 255], segments, tag="circle##dynamic")
    add_data("counter", counter)
    add_data("modifier", modifier)


add_data("counter", 0)
add_data("modifier", 2)
add_drawing("Drawing_1", width=700, height=700)
set_render_callback(on_render)

start_dearpygui()
Дельта-время и внутренние часы
Dear PyGui имеет встроенные часы для проверки общего времени работы. get_total_time(), возвращается общее время работы в секундах.
Также с помощью команды get_delta_time() мы можем проверить время между кадрами рендеринга в секундах.
from dearpygui.core import *


def on_render(sender, data):
    delta_time = str(round(get_delta_time(), 4))
    total_time = str(round(get_total_time(), 4))
    set_value("delta_time", delta_time)
    set_value("total_time", total_time)


add_text("Total Time: ")
add_same_line()
add_label_text("##total_time_text", source="total_time")
add_text("Delta Time: ")
add_same_line()
add_label_text("##delta_time_text", source="delta_time")
set_render_callback(callback=on_render)

start_dearpygui()
Таблицы
Dear PyGui имеет простой API таблиц, который хорошо подходит для статических и динамических таблиц.

Виджет таблицы запускается вызовом add_table(). Для редактирования виджета таблицы мы можем использовать методы add_row(), add_column(), которые добавят строку/столбец к последнему слоту таблицы.
В качестве альтернативы мы можем вставить строки/столбцы с помощью insert_row(), insert_column(). Столбцы и строки вставляются в соответствии с их индексным аргументом. Если указанный индекс уже существует, то выходящие столбцы/строки будут удалены, а новая строка/столбец будет вставлена по указанному индексу.
Кроме того, при добавлении или вставке строки/столбца неуказанные ячейки по умолчанию окажутся пустыми. Кроме того, заголовки и ячейки могут быть переименованы, а их значения изменены. Ячейки можно выбирать. Это означает, что мы можем применить обратный вызов к таблице и получить через отправителя данные о том, какая ячейка была выбрана, и даже получить текст внутри ячейки.
from dearpygui.core import *


def table_printer(sender, data):
    log_debug(f"Table Called: {sender}")
    coord_list = get_table_selections("Table Example")
    log_debug(f"Selected Cells (coordinates): {coord_list}")
    names = []
    for coordinates in coord_list:
        names.append(get_table_item("Table Example", coordinates[0], coordinates[1]))
    log_debug(names)


show_logger()
add_table("Table Example", ["Header 0", "Header 1"], callback=table_printer)
add_row("Table Example", ["awesome row", "text"])
add_row("Table Example", ["super unique", "unique text"])
add_column("Table Example", "Header 3", ["text from column", "text from column"])
add_row("Table Example", ["boring row"])

start_dearpygui()
Опрос устройств ввода
Опрос ввода в Dear PyGui делается вызовом команды опроса в функции. Функция должна быть установлена на обратный вызов рендеринга окна, чтобы опрос происходил, когда это окно активно. Обратные вызовы рендеринга выполняются каждый кадр, Dear PyGui может опрашивать на предмет ввода между кадрами.

-
get_mouse_drag_delta()
-
get_mouse_pos()
-
is_key_down()
-
is_key_pressed()
-
is_key_released()
-
is_mouse_button_clicked()
-
is_mouse_button_double_clicked()
-
is_mouse_button_down()
-
is_mouse_button_dragging()
-
is_mouse_button_released()
-
set_key_down_callback()
-
set_key_press_callback()
-
set_key_release_callback()
-
set_mouse_click_callback()
-
set_mouse_double_click_callback()
-
set_mouse_down_callback()
-
set_mouse_drag_callback()
-
set_mouse_wheel_callback()
-
set_render_callback()
-
set_resize_callback()
Подробности смотрите в описании API. Чтобы добиться желаемого поведения, комбинируйте методы.
from dearpygui.core import *


def main_callback(sender, data):
    set_value("Mouse Position", str(get_mouse_pos()))

    if is_key_down(mvKey_A):
        set_value("A key Down", "True")
    else:
        set_value("A key Down", "False")

    if is_key_pressed(mvKey_A):
        set_value("A key Pressed", "True")
    else:
        set_value("A key Pressed", "False")

    if is_key_released(mvKey_A):
        set_value("A key Released", "True")
    else:
        set_value("A key Released", "False")

    if is_mouse_button_dragging(mvMouseButton_Left, 10):
        set_value("Left Mouse Dragging", "True")
    else:
        set_value("Left Mouse Dragging", "False")

    if is_mouse_button_clicked(mvMouseButton_Left):
        set_value("Left Mouse Clicked", "True")
    else:
        set_value("Left Mouse Clicked", "False")

    if is_mouse_button_double_clicked(mvMouseButton_Left):
        set_value("Left Mouse Double Clicked", "True")
    else:
        set_value("Left Mouse Double Clicked", "False")

    if is_key_down(mvKey_Shift) and is_mouse_button_clicked(mvMouseButton_Left):
        set_value("Shift + Left Mouse Clicked", "True")
    else:
        set_value("Shift + Left Mouse Clicked", "False")


add_label_text("A key Down", value="False", color=[0, 200, 255])
add_label_text("A key Pressed", value="False", color=[0, 200, 255])
add_label_text("A key Released", value="False", color=[0, 200, 255])
add_spacing()
add_label_text("Mouse Position", value="(0,0)", color=[0, 200, 255])
add_label_text("Left Mouse Clicked", value="False", color=[0, 200, 255])
add_label_text("Left Mouse Dragging", value="False", color=[0, 200, 255])
add_label_text("Left Mouse Double Clicked", value="False", color=[0, 200, 255])
add_label_text("Shift + Left Mouse Clicked", value="False", color=[0, 200, 255])

set_render_callback(main_callback)

start_dearpygui()
Многопоточность и асинхронные функции
Для вычислений и обратных вызовов, требующих длительного времени, может быть полезно реализовать асинхронные функции или функции, выполняемые в отдельных потоках. Просто вызовите run_async_function().
Важно отметить, что запущенные с помощью команды async функции не могут вызывать другие функции API Dear PyGui.
Асинхронные функции не могут получить доступ к add_data() или get_data(). Поэтому, когда необходимо передать данные в асинхронную функцию, вы должны использовать аргументы с ключевыми словами data и return handler. Любой объект Python можно сделать доступным для функции async, отправив его в функцию через data. Кроме того, любые возвращаемые данные из функции Async будут доступны через ввод data указанного обратного вызова.
from dearpygui.core import *
from time import sleep


def long_async_preparer(data, sender):
    floaty = get_value("Async Input Data")
    run_async_function(long_callback, floaty, return_handler=long_async_return)


def long_callback(sender, data):
    sleep(3)
    return data * 2


def long_async_return(sender, data):
    log_debug(data)


def long_callback2(sender, data):
    sleep(3)
    log_debug(data * 2)

show_logger()
add_text(
    "input a number and see the logger window for the output of the long callback that would normally freeze the GUI")
add_input_float("Async Input Data", default_value=1.0)
add_button("long Function", callback=long_callback2, callback_data=get_value("Async Input Data"), tip="This is the long callback that will freeze the gui")
add_button("long Asynchronous Function", callback=long_async_preparer, tip="this will not a freeze the GUI")

start_dearpygui()
Когда вызывается метод асинхронной функциональности, создаётся пул потоков. Настраиваются время ожидания и количество потоков.
Используя set_thread_count(), мы можем установить количество потоков в пуле, использовать set_threadpool_high_performance(), чтобы указать пулу потоков максимум потоков на компьютере пользователя. Имейте в виду, что при вызове асинхронных функций процессор будет работать на 100 %. Установить время ожидания для пула потоков можно с помощью set_threadpool_timeout(). Это уничтожит пул и освободит ресурсы через заданное время.
Темы и стили
Темы и стилизация виджетов могут применяться к отдельному виджету или приложению в целом. Вот примеры атрибутов стиля:
-
размер шрифта;
-
цветовая схема приложения;
-
скругление углов.

Примеры
Репозиторий демонстраций Dear PyGui.
Для установки необходимых зависимостей запустите в репозитории
pip install -r requirements.txtили
pip3 install -r requirements.txt.Заключение
Dear PyGui — это простой и мощный фреймворк для создания графических интерфейсов пользователя с помощью скриптов на языке Python. Он рисует через GPU и работает на Windows 10, macOS и Linux, содержит функции графики, темы, API для пользовательских отрисовок и инструменты для разработки приложений.
DearPyGui оборачивает Dear ImGui, включает дополнительные виджеты и дополнения (графики, диалоги файлов, изображения, виджет редактирования текста и т. д.), поддерживает асинхронность, добавление элементов на холст, дополнительные инструменты отладки и т. д.
Планы [на 12 октября 2020]:
-
Интерфейс в стиле ООП [вот вариант].
-
Гистограмма, круговая диаграмма и другие элементы.
-
Улучшения для закрепления окон и двух вьюпортов.
-
Виджет 3D.
-
API персонализации виджетов.
Ссылки
Вот так на Python можно сделать достойный графический интерфейс. Язык продолжает развиваться, а благодаря лаконичности и простоте превращается в швейцарский нож программиста. Если разработка на Python вам интересна, переходите на страницы наших курсов, чтобы увидеть, как мы готовим людей к началу карьеры Python-разработчика.

Узнайте больше здесь.
Python, веб-разработка
-
Профессия Fullstack-разработчик на Python
-
Курс «Python для веб-разработки»
-
Профессия Frontend-разработчик
-
Профессия Веб-разработчик
Data Science и Machine Learning
-
Профессия Data Scientist
-
Профессия Data Analyst
-
Курс «Математика для Data Science»
-
Курс «Математика и Machine Learning для Data Science»
-
Курс по Data Engineering
-
Курс «Machine Learning и Deep Learning»
-
Курс по Machine Learning
Мобильная разработка
-
Профессия iOS-разработчик
-
Профессия Android-разработчик
Java и C#
-
Профессия Java-разработчик
-
Профессия QA-инженер на JAVA
-
Профессия C#-разработчик
-
Профессия Разработчик игр на Unity
От основ — в глубину
-
Курс «Алгоритмы и структуры данных»
-
Профессия C++ разработчик
-
Профессия Этичный хакер
А также:
-
Курс по DevOps

Python GUIs for Humans
Transforms the tkinter, Qt, WxPython, and Remi (browser-based) GUI frameworks into a simpler interface. The window definition is simplified by using Python core data types understood by beginners (lists and dictionaries). Further simplification happens by changing event handling from a callback-based model to a message passing one.
Your code is not required to have an object oriented architecture which makes the package usable by a larger audience. While the architecture is simple to understand, it does not necessarily limit you to only simple problems.
The «only good for simple GUIs» summary that you’ll sometimes see is simply incorrect. Some programs are not well-suited for PySimpleGUI, this is true. By definition, PySimpleGUI implements a subset of the underlying GUI frameworks’ capabilities. It’s difficult to define exactly which programs are well suited for PySimpleGUI and which are not. It depends on the details of your program. Duplicating Excel in every detail is an example of something not well suited for PySimpleGUI.
Japanese version of this readme.
PySimpleGUI needs your support. If you find PySimpleGUI useful, please consider sponsoring the project on GitHub or BuyMeACoffee. It’s expensive working full-time on PySimpleGUI and also paying for ongoing expenses (domains, artists, software, consultants, sponsoring open source projects).


Statistics
PyPI Statistics & Versions
| TK | TK 2.7 | Qt | WxPython | Web (Remi) |
|---|---|---|---|---|
 |
 |
 |
 |
 |
 |
 |
 |
 |
 |
 |
 |
 |
 |
 |
 |
 |
 |
 |
 |
GitHub Statistics
| Issues | Commit Activity | Stars | Docs |
|---|---|---|---|
 |
 |
 |
 |
 |
 |

What Is PySimpleGUI
PySimpleGUI is a Python package that enables Python programmers of all levels to create GUIs. You specify your GUI window using a «layout» which contains widgets (they’re called «Elements» in PySimpleGUI). Your layout is used to create a window using one of the 4 supported frameworks to display and interact with your window. Supported frameworks include tkinter, Qt, WxPython, or Remi. The term «wrapper» is sometimes used for these kinds of packages.
Your PySimpleGUI code is simpler and shorter than writing directly using the underlying framework because PySimpleGUI implements much of the «boilerplate code» for you. Additionally, interfaces are simplified to require as little code as possible to get the desired result. Depending on the program and framework used, a PySimpleGUI program may require 1/2 to 1/10th amount of code to create an identical window using one of the frameworks directly.
While the goal is to encapsulate/hide the specific objects and code used by the GUI framework you are running on top of, if needed you can access the frameworks’ dependent widgets and windows directly. If a setting or feature is not yet exposed or accessible using the PySimpleGUI APIs, you are not walled off from the framework. You can expand capabilities without directly modifying the PySimpleGUI package itself.
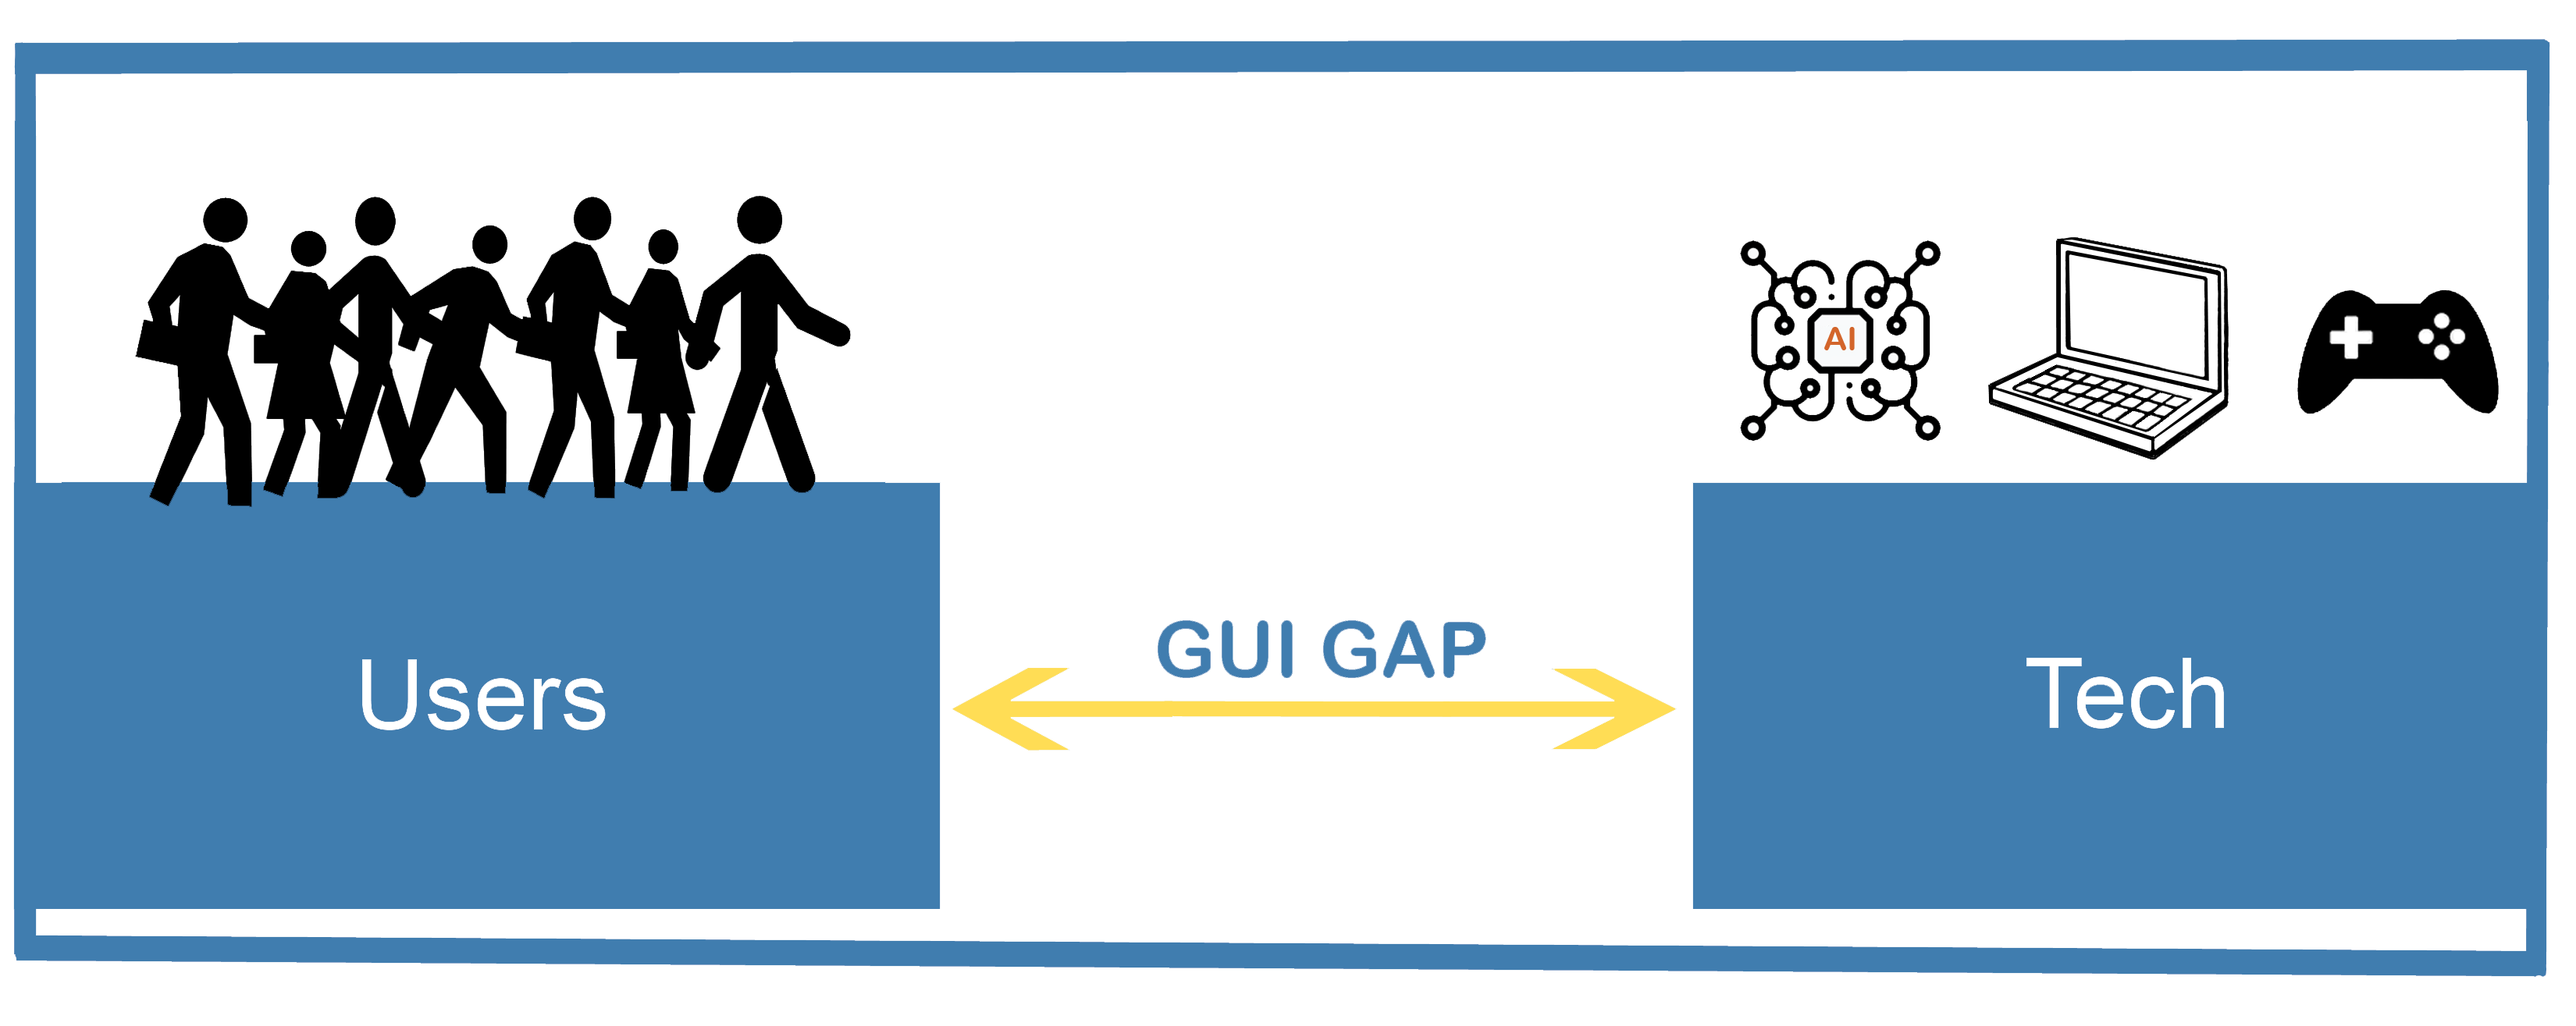
Bridging the «GUI Gap»
Python has brought a large number of people into the programming community. The number of programs and the range of areas it touches is mindboggling. But more often than not, these technologies are out of reach of all but a handful of people. The majority of Python programs are «command line» based. This isn’t a problem for programmer-types as we’re all used to interacting with computers through a text interface. While programmers don’t have a problem with command-line interfaces, most «normal people» do. This creates a digital divide, a «GUI Gap».
Adding a GUI to a program opens that program up to a wider audience. It becomes more approachable. GUIs can also make interacting with some programs easier, even for those that are comfortable with a command-line interface. And finally, some problems require a GUI.
Recognition of Open Source Use
In the Demo Programs or one of the PySimpleGUI Account’s Repos these packages were used at least one time. Some of your are the goodies on the right of the GUI gap.
If you use Open Source software in your project, be sure and supply information about the packages you used.
- chatterbot
- cv2
- fitz
- forecastio
- gtts
- matplotlib
- mido
- mpl_toolkits
- notifypy
- numpy
- pandas
- PIL
- praw
- psgtray
- psutil
- pyfiglet
- pygame
- pylab
- pymunk
- requests
- vlc
- win32api
- win32con
- win32gui
- win32process
LPLG3 as an Example
The licensing terms in the LLC3 Licensing, it states:
- Combined Works.
You may convey a Combined Work under terms of your choice that,
taken together, effectively do not restrict modification of the
portions of the Library contained in the Combined Work and reverse
engineering for debugging such modifications, if you also do each of
the following:a) Give prominent notice with each copy of the Combined Work that
the Library is used in it and that the Library and its use are
covered by this License.b) Accompany the Combined Work with a copy of the GNU GPL and this license
document.
Since the above packages each have a similar license clause, I’m listing them here, in what I would consider a «prominent notice» location, that I’m using the fine works of these groups or individuals. They are used in the Demo Programs most likely or one of the Repos that are under this account as this list is all inclusive.
You all have my respect and admiration. You’re enabling bigger things. What a special kind of thing to make. Who knows what you’ve enabled. I believe more people are getting over to your creations and getting to experience them.
tkinter team — PySimpleGUI would be nowhere without your lengthy work & continuous dedication. ONE GUI API for 3 different OS’s? Really? With no code changes to move between? That’s a huge accomplishment. You’re #1 to me. Thank you for your hard work.
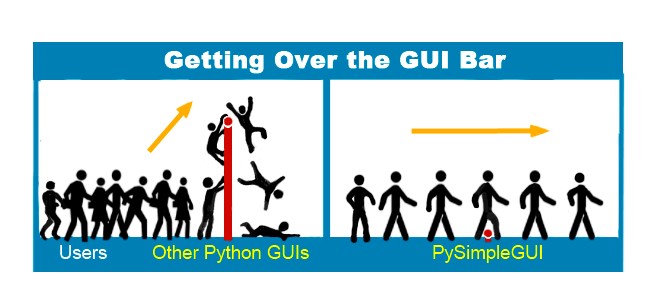
Getting Over «The Bar»
It’s been said by some that «the bar is pretty high» when it comes to learning GUI programming in Python.
What happens when the bar is placed on the ground and can be stepped over?
This is one of the questions that the PySimpleGUI project has tried to answer. Here’s a humorous look at what’s been a not funny situation.
The results have been fascinating to witness and it’s been touching to read the accounts of the journeys of users.
Nothing prepared me for the emails that started to arrive soon after the first release of PySimpleGUI. They are heartwarming and heartbreaking tales of life-long dreams of creating a program that required a GUI. Some made a few attempts, giving up each time. Others never started once they started to research what was required.
After recounting the varied and long road to finding PySimpleGUI, the stories became similar. They each found success and expressed joy and gratitude. The joy expressed in these messages was unlike anything I had encountered in the entirety of career in the computing field.
It’s been these emails and the messages of gratitude seen here in the GitHub Issues that made dedicating my life to his project a non-decision.
Subscribing to Announcements
If you click the «Subscribe» button in the Announcements GitHub Issue, then you’ll be notified when project news is published. This Issue is the official location to get the latest PySimpleGUI information. Information is posted frequently including release contents, tips & tricks, documentation updates, etc. There have been over 1,000 posts since the project started.
About Me
Hi there! I’m Mike. You’ll find me right here, on the PySimpleGUI GitHub, solving problems and continuously pushing PySimpleGUI forward. I’ve dedicated my days, nights, and weekends to the project and PySimpleGUI users. Our successes are ultimately shared. I’m successful when you’re successful.
While I’m a relative newcomer to Python, I’ve been writing software since the 70s. The majority of my career was spent creating products in Silicon Valley. I bring to PySimpleGUI the same professionalism and dedication as I did to the corporate products I developed. You are my customers now.
Project Goals
Two of the most important goals of the PySimpleGUI project:
- Having fun
- Your success
Fun as a goal on a serious project sounds odd, but it’s a serious goal. I find writing these GUI programs to be a lot of fun. One reason is how little time it takes to write a complete solution. If we’re not enjoying the process then someone’s going to give up.
There is a significant amount of documentation, a cookbook, 100’s of demo programs to get you immediately running, a detailed call reference, YouTube videos, online Trinket demos, and more… all working to create… a fun experience.
Your Success is a shared goal. PySimpleGUI was built for developers. You’re my peeps. It’s been an unexpected reward to see the results of the combined effort of users and PySimpleGUI. Use the documentation & other materials to help build your application. If you run into trouble, help is available by opening on Issue on the PySimpleGUI GitHub. Take a look at the section on Support below.
Educational Resources 📚
PySimpleGUI now has an official Udemy course! Check the header of this readme and the PySimpleGUI documentation for a coupon code. The course can be found at www.udemy.com/PySimpleGUI. This course is currently the only income source for the PySimpleGUI project other than sponsorships and donations.
www.PySimpleGUI.org
is easy to remember and is where the documentation is located. You’ll find tabs across the top that represent several different documents. The documentation is located on «Read The Docs» so that there is a table of contents for each document and they are easy to search.
There are 100s of pages of written documentation and 100s of example programs that will help you be effective very quickly. Rather than requiring days or weeks of investment to learn a single GUI package, you may be able to complete your project in a single afternoon when using PySimpleGUI.
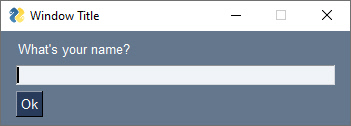
Example 1 — The One-Shot Window
This type of program is called a «one-shot» window because the window is displayed one time, the values collected, and then it is closed. It doesn’t remain open for a long time like you would in a Word Processor.
Anatomy of a Simple PySimpleGUI Program
There are 5 sections to a PySimpleGUI program
import PySimpleGUI as sg                        # Part 1 - The import

# Define the window's contents
layout = [  [sg.Text("What's your name?")],     # Part 2 - The Layout
            [sg.Input()],
            [sg.Button('Ok')] ]

# Create the window
window = sg.Window('Window Title', layout)      # Part 3 - Window Defintion

# Display and interact with the Window
event, values = window.read()                   # Part 4 - Event loop or Window.read call

# Do something with the information gathered
print('Hello', values[0], "! Thanks for trying PySimpleGUI")

# Finish up by removing from the screen
window.close()                                  # Part 5 - Close the Window
The code produces this window
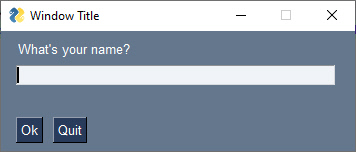
Example 2 — Interactive Window
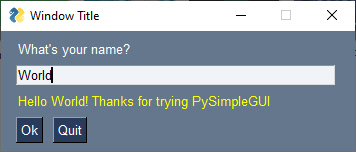
In this example, our window will remain on the screen until the user closes the window or clicks the Quit button. The main difference between the one-shot window you saw earlier and an interactive window is the addition of an «Event Loop». The Event Loop reads events and inputs from your window. The heart of your application lives in the event loop.
import PySimpleGUI as sg

# Define the window's contents
layout = [[sg.Text("What's your name?")],
          [sg.Input(key='-INPUT-')],
          [sg.Text(size=(40,1), key='-OUTPUT-')],
          [sg.Button('Ok'), sg.Button('Quit')]]

# Create the window
window = sg.Window('Window Title', layout)

# Display and interact with the Window using an Event Loop
while True:
    event, values = window.read()
    # See if user wants to quit or window was closed
    if event == sg.WINDOW_CLOSED or event == 'Quit':
        break
    # Output a message to the window
    window['-OUTPUT-'].update('Hello ' + values['-INPUT-'] + "! Thanks for trying PySimpleGUI")

# Finish up by removing from the screen
window.close()
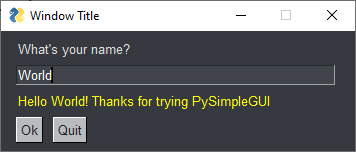
This is the window that Example 2 produces.
And here’s what it looks like after you enter a value into the Input field and click the Ok button.
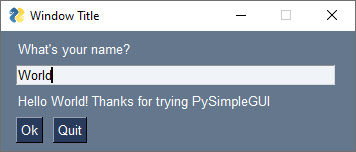
Let’s take a quick look at some of the differences between this example and the one-shot window.
First, you’ll notice differences in the layout. Two changes in particular are important. One is the addition of the key parameter to the Input element and one of the Text elements. A key is like a name for an element. Or, in Python terms, it’s like a dictionary key. The Input element’s key will be used as a dictionary key later in the code.
Another difference is the addition of this Text element:
[sg.Text(size=(40,1), key='-OUTPUT-')],
There are 2 parameters, the key we already covered. The size parameter defines the size of the element in characters. In this case, we’re indicating that this Text element is 40 characters wide, by 1 character high. Notice that there is no text string specified which means it’ll be blank. You can easily see this blank row in the window that’s created.
We also added a button, «Quit».
The Event Loop has our familiar window.read() call.
Following the read is this if statement:
    if event == sg.WINDOW_CLOSED or event == 'Quit':
        break
This code is checking to see if the user closed the window by clicking the «X» or if they clicked the «Quit» button. If either of these happens, then the code will break out of the event loop.
If the window wasn’t closed nor the Quit button clicked, then execution continues. The only thing that could have happened is the user clicked the «Ok» button. The last statement in the Event Loop is this one:
window['-OUTPUT-'].update('Hello ' + values['-INPUT-'] + "! Thanks for trying PySimpleGUI")
This statement updates the Text element that has the key -OUTPUT- with a string. window['-OUTPUT-'] finds the element with the key -OUTPUT-. That key belongs to our blank Text element. Once that element is returned from the lookup, then its update method is called. Nearly all elements have an update method. This method is used to change the value of the element or to change some configuration of the element.
If we wanted the text to be yellow, then that can be accomplished by adding a text_color parameter to the update method so that it reads:
    window['-OUTPUT-'].update('Hello ' + values['-INPUT-'] + "! Thanks for trying PySimpleGUI",
                              text_color='yellow')
After adding the text_color parameter, this is our new resulting window:
The parameters available for each element are documented in both the call reference documentation as well as the docstrings. PySimpleGUI has extensive documentation to help you understand all of the options available to you. If you lookup the update method for the Text element, you’ll find this definition for the call:
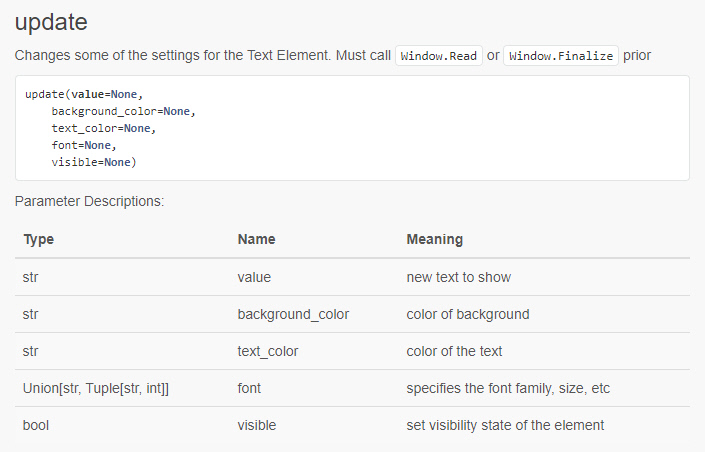
As you can see several things can be changed for a Text element. The call reference documentation is a valuable resource that will make programming in PySimpleGUI, uhm, simple.
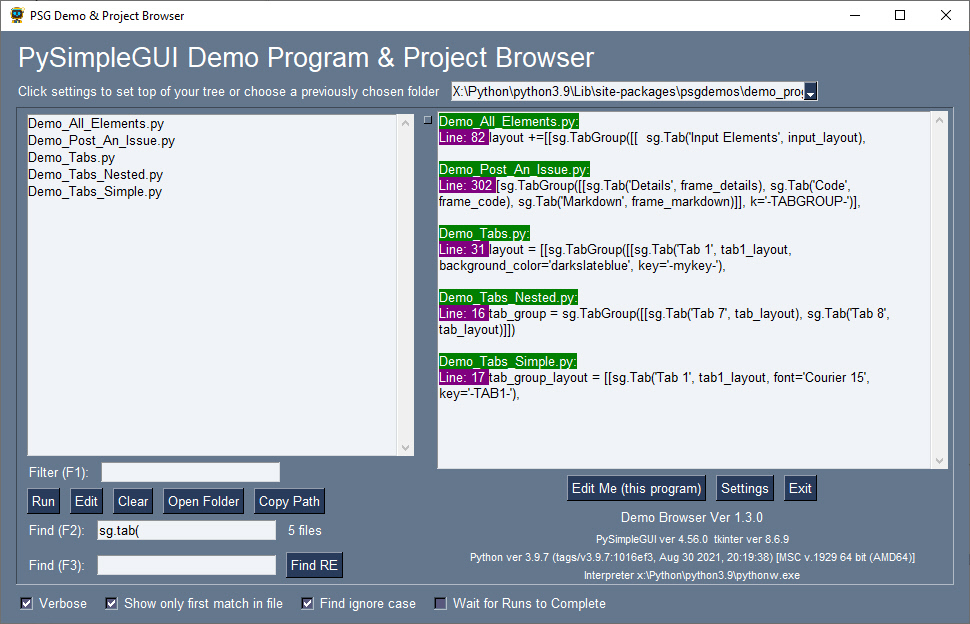
Jump Start! Get the Demo Programs & Demo Browser
The over 300 Demo Programs will give you a jump-start and provide many design patterns for you to learn how to use PySimpleGUI and how to integrate PySimpleGUI with other packages. By far the best way to experience these demos is using the Demo Browser. This tool enables you to search, edit and run the Demo Programs.
To get them installed quickly along with the Demo Browser, use pip to install psgdemos:
python -m pip install psgdemos
or if you’re in Linux, Mac, etc, that uses python3 instead of python to launch Python:
python3 -m pip install psgdemos
Once installed, launch the demo browser by typing psgdemos from the command line»
psgdemos
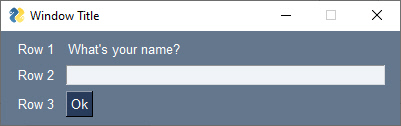
Layouts Are Funny LOL! 😆
Your window’s layout is a «list of lists» (LOL). Windows are broken down into «rows». Each row in your window becomes a list in your layout. Concatenate together all of the lists and you’ve got a layout…a list of lists.
Here is the same layout as before with an extra Text element added to each row so that you can more easily see how rows are defined:
layout = [  [sg.Text('Row 1'), sg.Text("What's your name?")],
            [sg.Text('Row 2'), sg.Input()],
            [sg.Text('Row 3'), sg.Button('Ok')] ]
Each row of this layout is a list of elements that will be displayed on that row in your window.
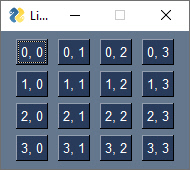
Using lists to define your GUI has some huge advantages over how GUI programming is done using other frameworks. For example, you can use Python’s list comprehension to create a grid of buttons in a single line of code.
These 3 lines of code:
import PySimpleGUI as sg

layout = [[sg.Button(f'{row}, {col}') for col in range(4)] for row in range(4)]

event, values = sg.Window('List Comprehensions', layout).read(close=True)
produces this window which has a 4 x 4 grid of buttons:
Recall how «fun» is one of the goals of the project. It’s fun to directly apply Python’s powerful basic capabilities to GUI problems. Instead of pages of code to create a GUI, it’s a few (or often 1) lines of code.
Collapsing Code
It’s possible to condense a window’s code down to a single line of code. The layout definition, window creation, display, and data collection can all be written in this line of code:
event, values = sg.Window('Window Title', [[sg.Text("What's your name?")],[sg.Input()],[sg.Button('Ok')]]).read(close=True)
The same window is shown and returns the same values as the example showing the sections of a PySimpleGUI program. Being able to do so much with so little enables you to quickly and easily add GUIs to your Python code. If you want to display some data and get a choice from your user, it can be done in a line of code instead of a page of code.
By using short-hand aliases, you can save even more space in your code by using fewer characters. All of the Elements have one or more shorter names that can be used. For example, the Text element can be written simply as T. The Input element can be written as I and the Button as B. Your single-line window code thus becomes:
event, values = sg.Window('Window Title', [[sg.T("What's your name?")],[sg.I()],[sg.B('Ok')]]).read(close=True)
Code Portability
PySimpleGUI is currently capable of running on 4 Python GUI Frameworks. The framework to use is specified using the import statement. Change the import and you’ll change the underlying GUI framework. For some programs, no other changes are needed than the import statement to run on a different GUI framework. In the example above, changing the import from PySimpleGUI to PySimpleGUIQt, PySimpleGUIWx, PySimpleGUIWeb will change the framework.
| Import Statement | Resulting Window |
|---|---|
| PySimpleGUI | |
| PySimpleGUIQt | 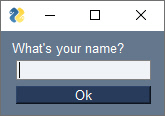 |
| PySimpleGUIWx | 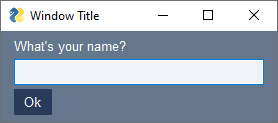 |
| PySimpleGUIWeb | 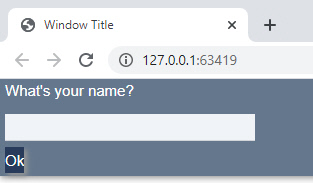 |
Porting GUI code from one framework to another (e.g. moving your code from tkinter to Qt) usually requires a rewrite of your code. PySimpleGUI is designed to enable you to have easy movement between the frameworks. Sometimes some changes are required of you, but the goal is to have highly portable code with minimal changes.
Some features, like a System Tray Icon, are not available on all of the ports. The System Tray Icon feature is available on the Qt and WxPython ports. A simulated version is available on tkinter. There is no support for a System Tray icon in the PySimpleGUIWeb port.
Runtime Environments
| Environment | Supported |
|---|---|
| Python | Python 3.4+ |
| Operating Systems | Windows, Linux, Mac |
| Hardware | Desktop PCs, Laptops, Raspberry Pi, Android devices running PyDroid3 |
| Online | repli.it, Trinket.com (both run tkinter in a browser) |
| GUI Frameworks | tkinter, pyside2, WxPython, Remi |
Integrations
Among the more than 200 «Demo Programs», you’ll find examples of how to integrate many popular Python packages into your GUI.
Want to embed a Matplotlib drawing into your window? No problem, copy the demo code and instantly have a Matplotlib drawing of your dreams into your GUI.
These packages and more are ready for you to put into your GUI as there are demo programs or a demo repo available for each:
| Package | Description |
|---|---|
| Matplotlib | Many types of graphs and plots |
| OpenCV | Computer Vision (often used for AI) |
| VLC | Video playback |
| pymunk | Physics engine |
| psutil | System environment statistics |
| prawn | Reddit API |
| json | PySimpleGUI wraps a special API to store «User Settings» |
| weather | Integrates with several weather APIs to make weather apps |
| mido | MIDI playback |
| beautiful soup | Web Scraping (GitHub issue watcher example) |
Installing
Two common ways of installing PySimpleGUI:
- pip to install from PyPI
- Download the file PySimpleGUI.py and place in your application’s folder
Pip Installing & Upgrading
The current suggested way of invoking the pip command is by running it as a module using Python. Previously the command pip or pip3 was directly onto a command-line / shell. The suggested way
Initial install for Windows:
python -m pip install PySimpleGUI
Initial install for Linux and MacOS:
python3 -m pip install PySimpleGUI
To upgrade using pip, you simply add 2 parameters to the line --upgrade --no-cache-dir.
Upgrade installation on Windows:
python -m pip install --upgrade --no-cache-dir PySimpleGUI
Upgrade for Linux and MacOS:
python3 -m pip install --upgrade --no-cache-dir PySimpleGUI
Single File Installing
PySimpleGUI was created as a single .py file so that it would be very easy for you to install it, even on systems that are not connected to the internet like a Raspberry Pi. It’s as simple as placing the PySimpleGUI.py file into the same folder as your application that imports it. Python will use your local copy when performing the import.
When installing using just the .py file, you can get it from either PyPI or if you want to run the most recent unreleased version then you’ll download it from GitHub.
To install from PyPI, download either the wheel or the .gz file and unzip the file. If you rename the .whl file to .zip you can open it just like any normal zip file. You will find the PySimpleGUI.py file in one of the folders. Copy this file to your application’s folder and you’re done.
The PyPI link for the tkinter version of PySimpleGUI is:
https://pypi.org/project/PySimpleGUI/#files
The GitHub repo’s latest version can be found here:
https://raw.githubusercontent.com/PySimpleGUI/PySimpleGUI/master/PySimpleGUI.py
Now some of you are thinking, «yea, but, wait, having a single huge source file is a terrible idea». And, yea, sometimes it can be a terrible idea. In this case, the benefits greatly outweighed the downside. Lots of concepts in computer science are tradeoffs or subjective. As much as some would like it to be, not everything is black and white. Many times the answer to a question is «it depends».
Galleries
Work on a more formal gallery of user-submitted GUIs as well as those found on GitHub is underway but as of this writing it’s not complete. There are currently 2 places you can go to see some screenshots in a centralized way. Hopefully, a Wiki or other mechanism can be released soon to do justice to the awesome creations people are making.
User Submitted Gallery
The first is a user submitted screenshots issue located on the GitHub. It’s an informal way for people to show off what they’ve made. It’s not ideal, but it was a start.
Massive Scraped GitHub Images
The second is a massive gallery of over 3,000 images scraped from 1,000 projects on GitHub that are reportedly using PySimpleGUI. It’s not been hand-filtered and there are plenty of old screenshots that were used in the early documentation. But, you may find something in there that sparks your imagination.
Uses for PySimpleGUI
The following sections showcase a fraction of the uses for PySimpleGUI. There are over 1,000 projects on GitHub alone that use PySimpleGUI. It’s truly amazing how possibilities have opened up for so many people. Many users have spoken about previously attempting to create a GUI in Python and failing, but finally achieving their dreams when they tried PySimpleGUI.
Your First GUI
Of course one of the best uses of PySimpleGUI is getting you into making GUIs for your Python projects. You can start as small as requesting a filename. For this, you only need to make a single call to one of the «high-level functions» called popup. There are all kinds of popups, some collect information.
popup on itself makes a window to display information. You can pass multiple parameters just like a print. If you want to get information, then you will call functions that start with popup_get_ such as popup_get_filename.
Adding a single line to get a filename instead of specifying a filename on the command line can transform your program into one that «normal people» will feel comfortable using.
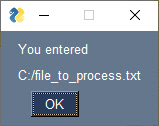
import PySimpleGUI as sg

filename = sg.popup_get_file('Enter the file you wish to process')
sg.popup('You entered', filename)
This code will display 2 popup windows. One to get the filename, which can be browsed to or pasted into the input box.
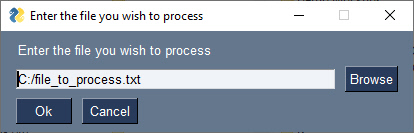
The other window will output what is collected.
Rainmeter-Style Windows
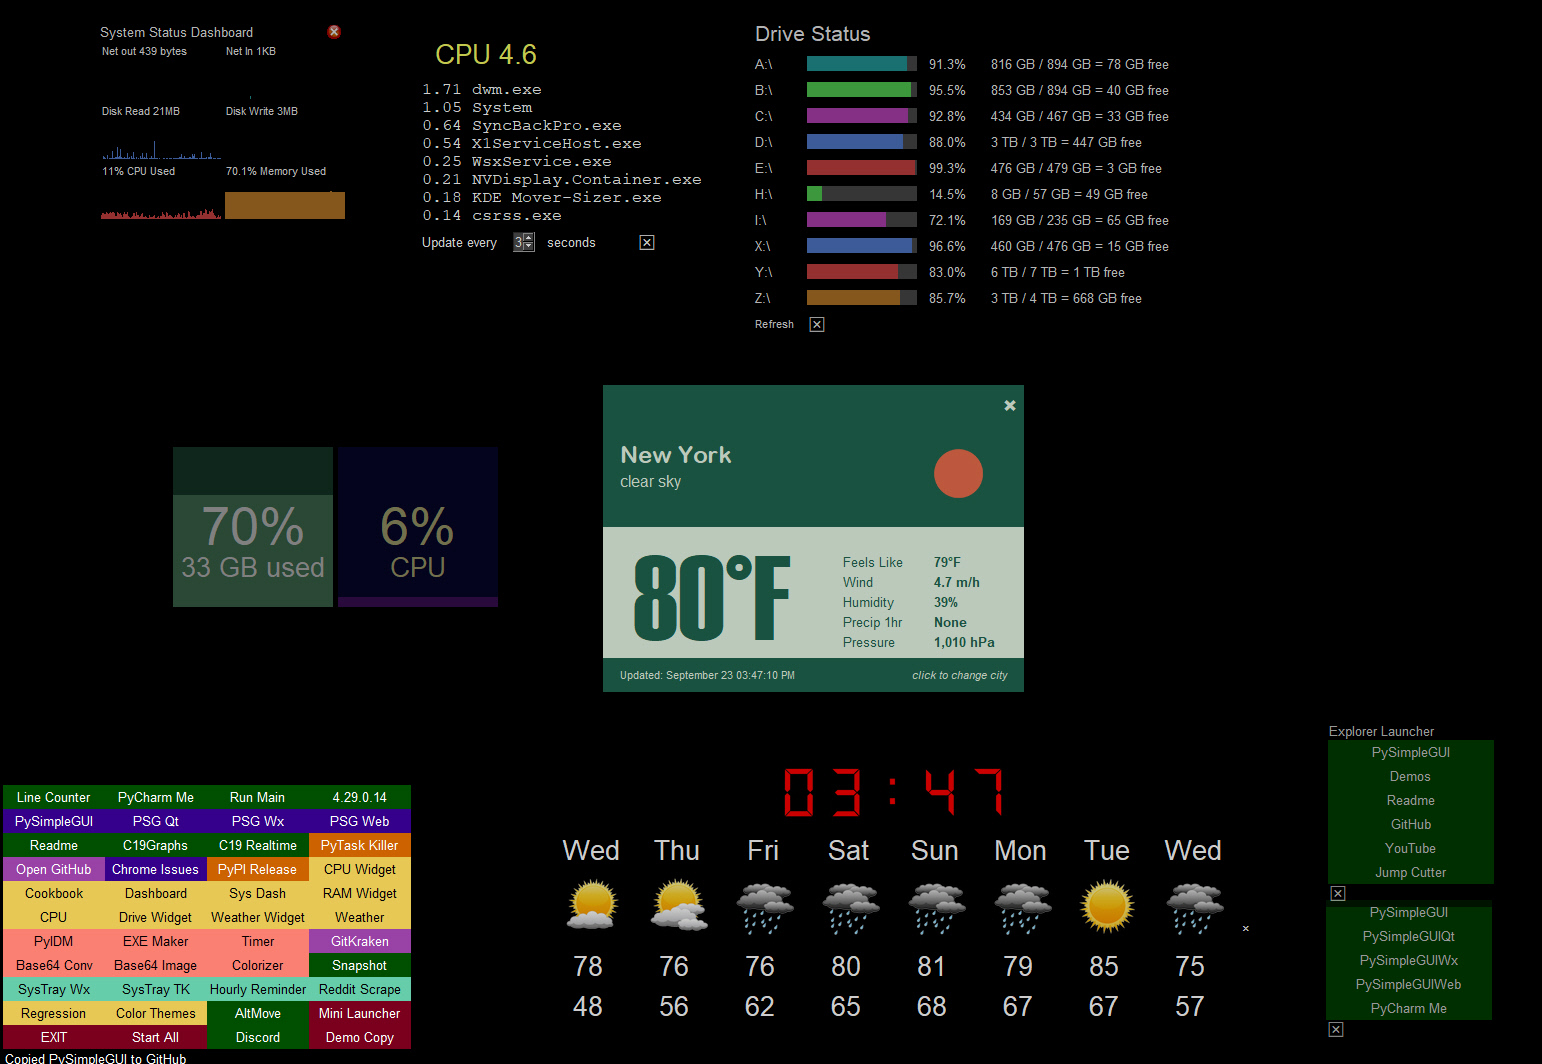
The default settings for GUI frameworks don’t tend to produce the nicest looking windows. However, with some attention to detail, you can do several things to make windows look attractive. PySimpleGUI makes it easier to manipulate colors and features like removing the title bar. The result is windows that don’t look like your typical tkinter windows.
Here is an example of how you can create windows that don’t look like your typical tkinter in windows. In this example, the windows have their titlebars removed. The result is windows that look much like those found when using Rainmeter, a desktop widget program.
You can easily set the transparency of a window as well. Here are more examples of desktop widgets in the same Rainmeter style. Some are dim appearing because they are semi-transparent.
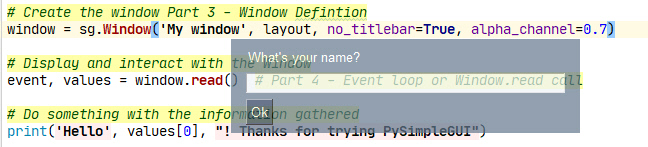
Both of these effects; removing the titlebar and making a window semi-transparent, are achieved by setting 2 parameters when creating the window. This is an example of how PySimpleGUI enables easy access to features. And because PySimpleGUI code is portable across the GUI frameworks, these same parameters work for the other ports such as Qt.
Changing the Window creation call in Example 1 to this line of code produces a similar semi-transparent window:
window = sg.Window('My window', layout, no_titlebar=True, alpha_channel=0.5)
Games
While not specifically written as a game development SDK, PySimpleGUI makes the development of some games quite easy.
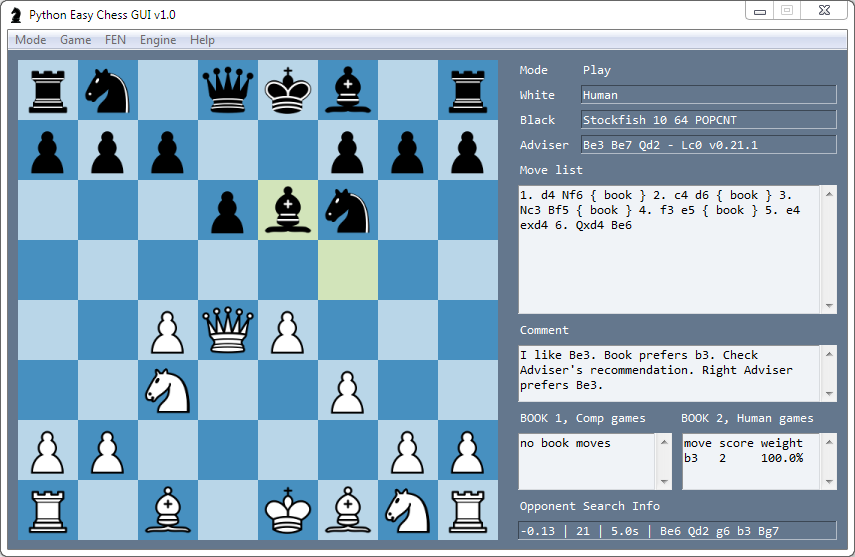
This Chess program not only plays chess, but it integrates with the Stockfish chess-playing AI.

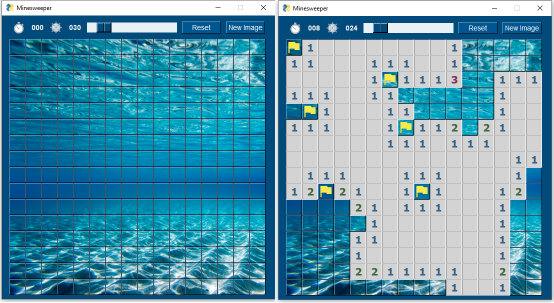
Several variants of Minesweeper have been released by users.

Card games work well with PySimpleGUI as manipulating images is simple when using the PySimpleGUI Graph element.
While not specifically written as a game development SDK, PySimpleGUI makes development of some games quite easy.
Media Capture and Playback
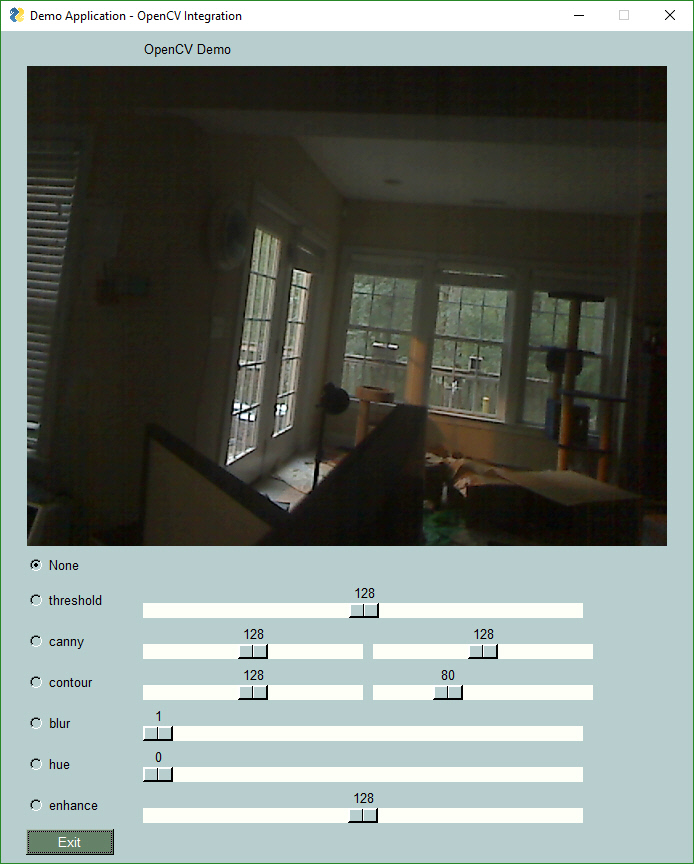
Capturing and displaying video from your webcam in a GUI is 4 lines of PySimpleGUI code. Even more impressive is that these 4 lines of code work with the tkinter, Qt, and Web ports. You can display your webcam, in realtime, in a browser using the same code that displays the image using tkinter.
Media playback, audio and video, can also be achieved using the VLC player. A demo application is provided to you so that you have a working example to start from. Everything you see in this readme is available to you as a starting point for your own creations.
Artificial Intelligence
AI and Python have long been a recognized superpower when the two are paired together. What’s often missing however is a way for users to interact with these AI algorithms familiarly, using a GUI.
These YOLO demos are a great example of how a GUI can make a tremendous difference in interacting with AI algorithms. Notice two sliders at the bottom of these windows. These 2 sliders change a couple of the parameters used by the YOLO algorithm.
If you were tuning your YOLO demo using only the command line, you would need to set the parameters, once, when you launch the application, see how they perform, stop the application, change the parameters, and finally restart the application with the new parameters.
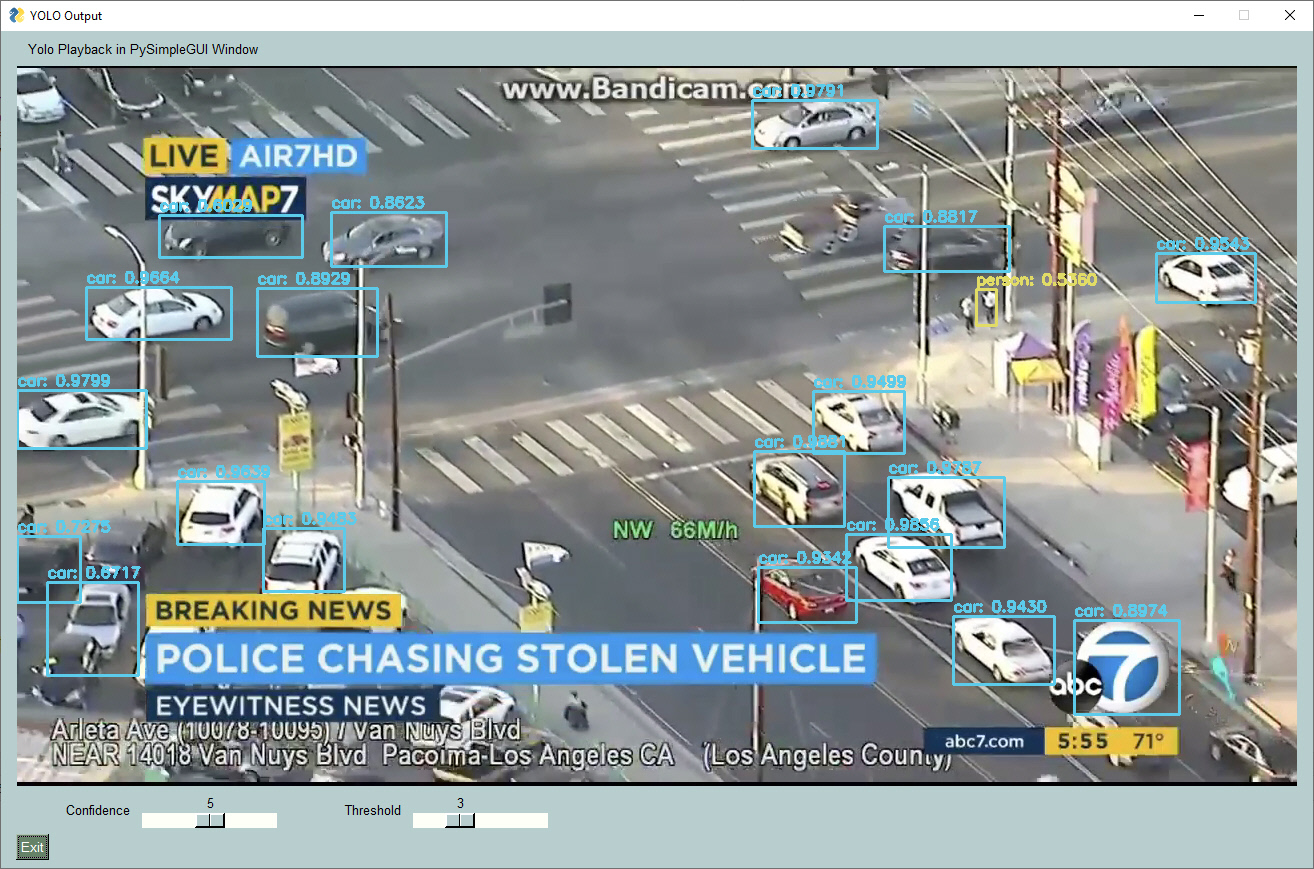
Contrast those steps against what can be done using a GUI. A GUI enables you to modify these parameters in real-time. You can immediately get feedback on how they are affecting the algorithm.
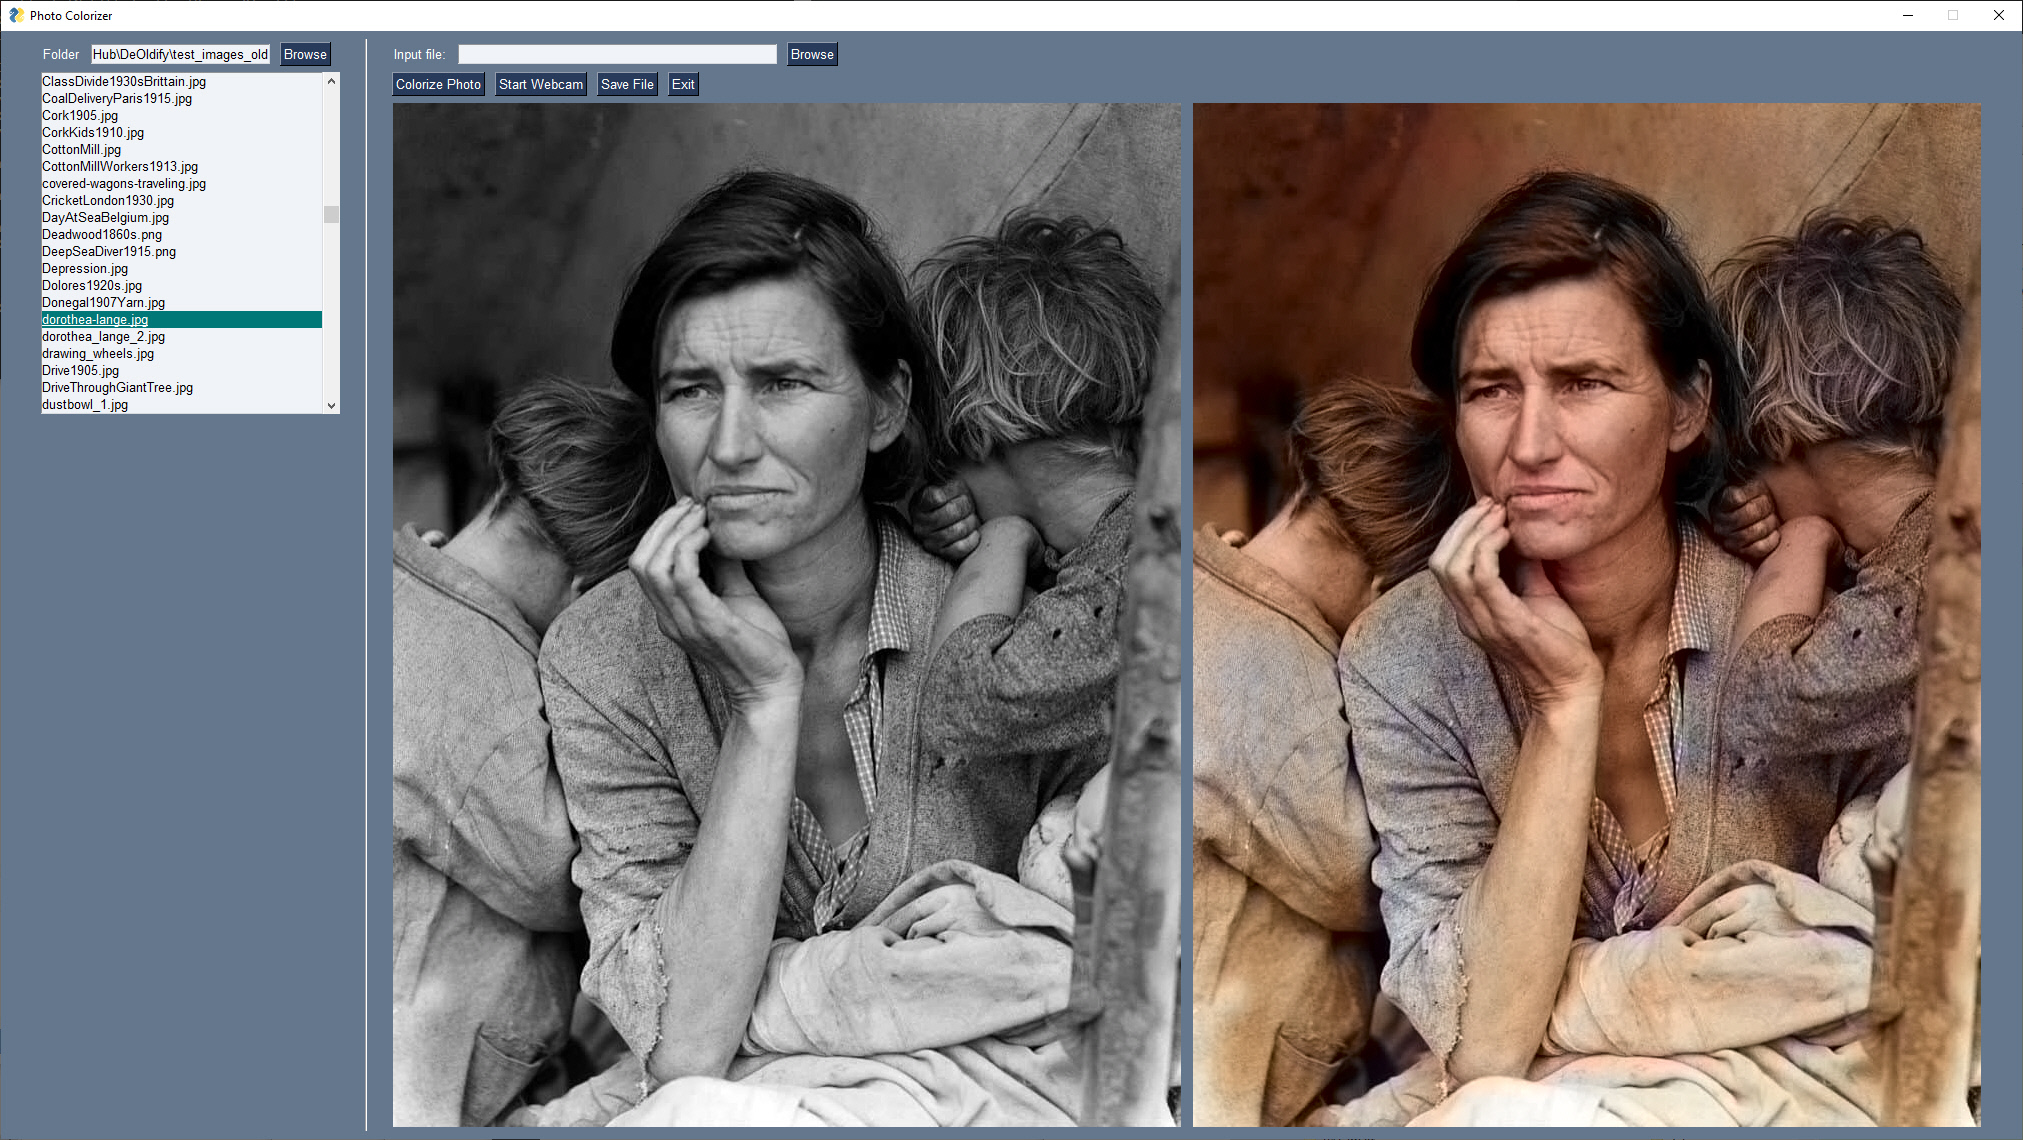
There are SO many AI programs that have been published that are command-line driven. This in itself isn’t a huge hurdle, but it’s enough of a «pain in the ass» to type/paste the filename you want to colorize on the command line, run the program, then open the resulting output file in a file viewer.
GUIs have the power to change the user experience, to fill the «GUI Gap». With this colorizer example, the user only needs to supply a folder full of images, and then click on an image to both colorize and display the result.
The program/algorithm to do the colorization was freely available, ready to use. What was missing is the ease of use that a GUI could bring.
Graphing
Displaying and interacting with data in a GUI is simple with PySimpleGUI. You have several options.
You can use the built-in drawing/graphing capabilities to produce custom graphs. This CPU usage monitor uses the Graph element
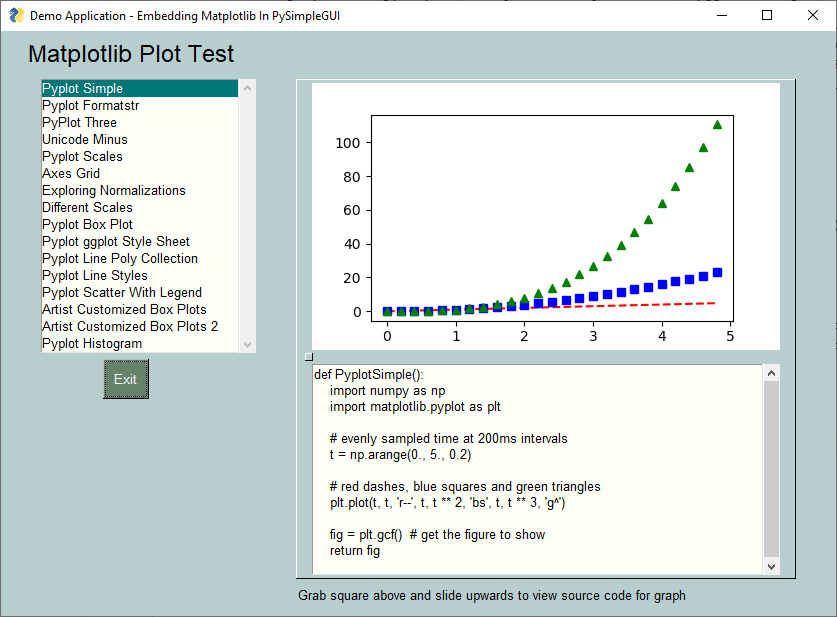
Matplotlib is a popular choice with Python users. PySimpleGUI can enable you to embed Matplotlib graphs directly into your GUI window. You can even embed the interactive controls into your window if you want to retain the Matplotlib interactive features.
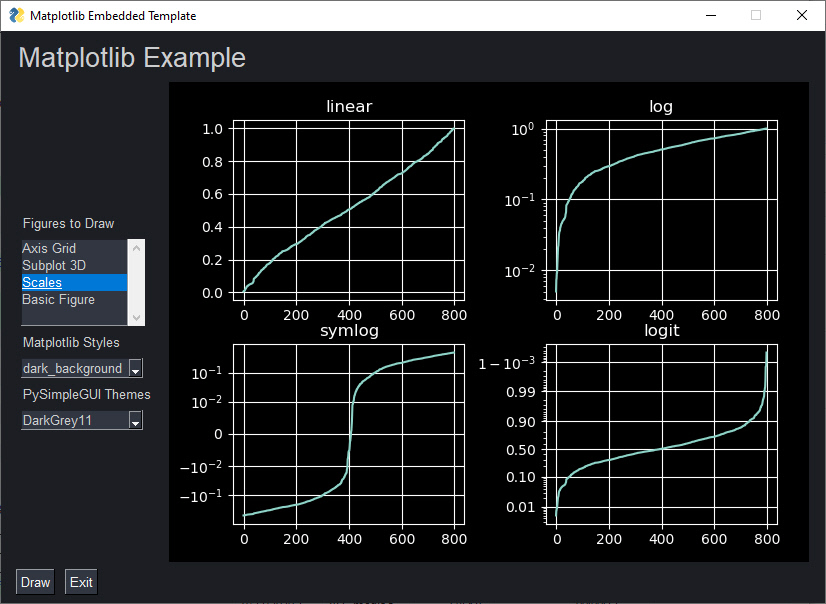
Using PySimpleGUI’s color themes, you can produce graphs that are a notch above default graphs that most people create in Matplotlib.
Front-ends
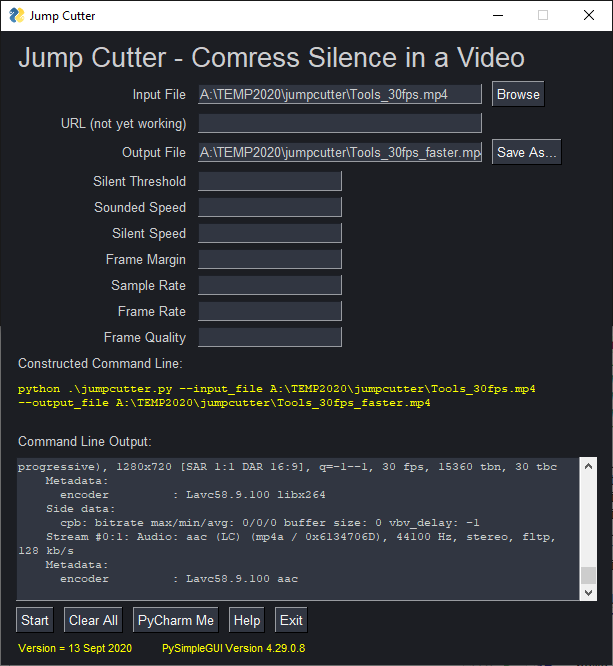
The «GUI Gap» mentioned earlier can be easily solved using PySimpleGUI. You don’t even need to have the source code to the program you wish to add a GUI onto. A «front-end» GUI is one that collects information that is then passed to a command-line application.
Front-end GUIs are a fantastic way for a programmer to distribute an application that users were reluctant to use previously because they didn’t feel comfortable using a command-line interface. These GUIs are your only choice for command-line programs that you don’t have access to the source code for.
This example is a front-end for a program called «Jump Cutter». The parameters are collected via the GUI, a command-line is constructed using those parameters, and then the command is executed with the output from the command-line program being routed to the GUI interface. In this example, you can see in yellow the command that was executed.
Raspberry Pi
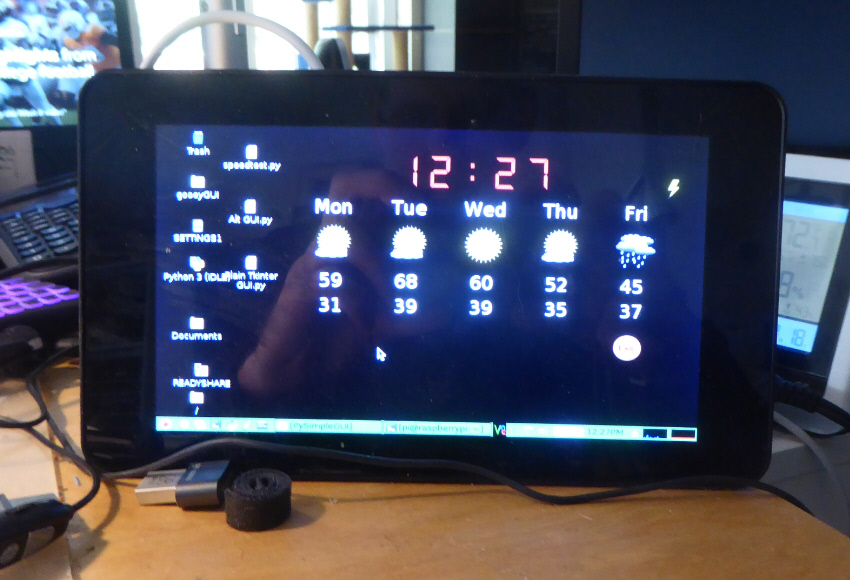
Because PySimpleGUI is compatible back to Python 3.4, it is capable of creating a GUI for your Raspberry Pi projects. It works particularly well when paired with a touchscreen. You can also use PySimpleGUIWeb to control your Pi if it doesn’t have a monitor attached.
Easy Access to Advanced Features
Because it’s very easy to access many of the underlying GUI frameworks’ features, it’s possible to piece together capabilities to create applications that look nothing like those produced using the GUI framework directly.
For example, it’s not possible to change the color/look-and-feel of a titlebar using tkinter or the other GUI packages, but with PySimpleGUI it’s easy to create windows that appear as if they have a custom titlebar.

Unbelievably, this window is using tkinter to achieve what appears to be something like a screensaver.
On windows, tkinter can completely remove the background from your application. Once again, PySimpleGUI makes accessing these capabilities trivial. Creating a transparent window requires adding a single parameter to the call that creates your Window. One parameter change can result in a simple application with this effect:
You can interact with everything on your desktop, clicking through a full-screen window.
Themes
Tired of the default grey GUIs? PySimpleGUI makes it trivial for your window to look nice by making a single call to the theme function. There are over 150 different color themes available for you to choose:
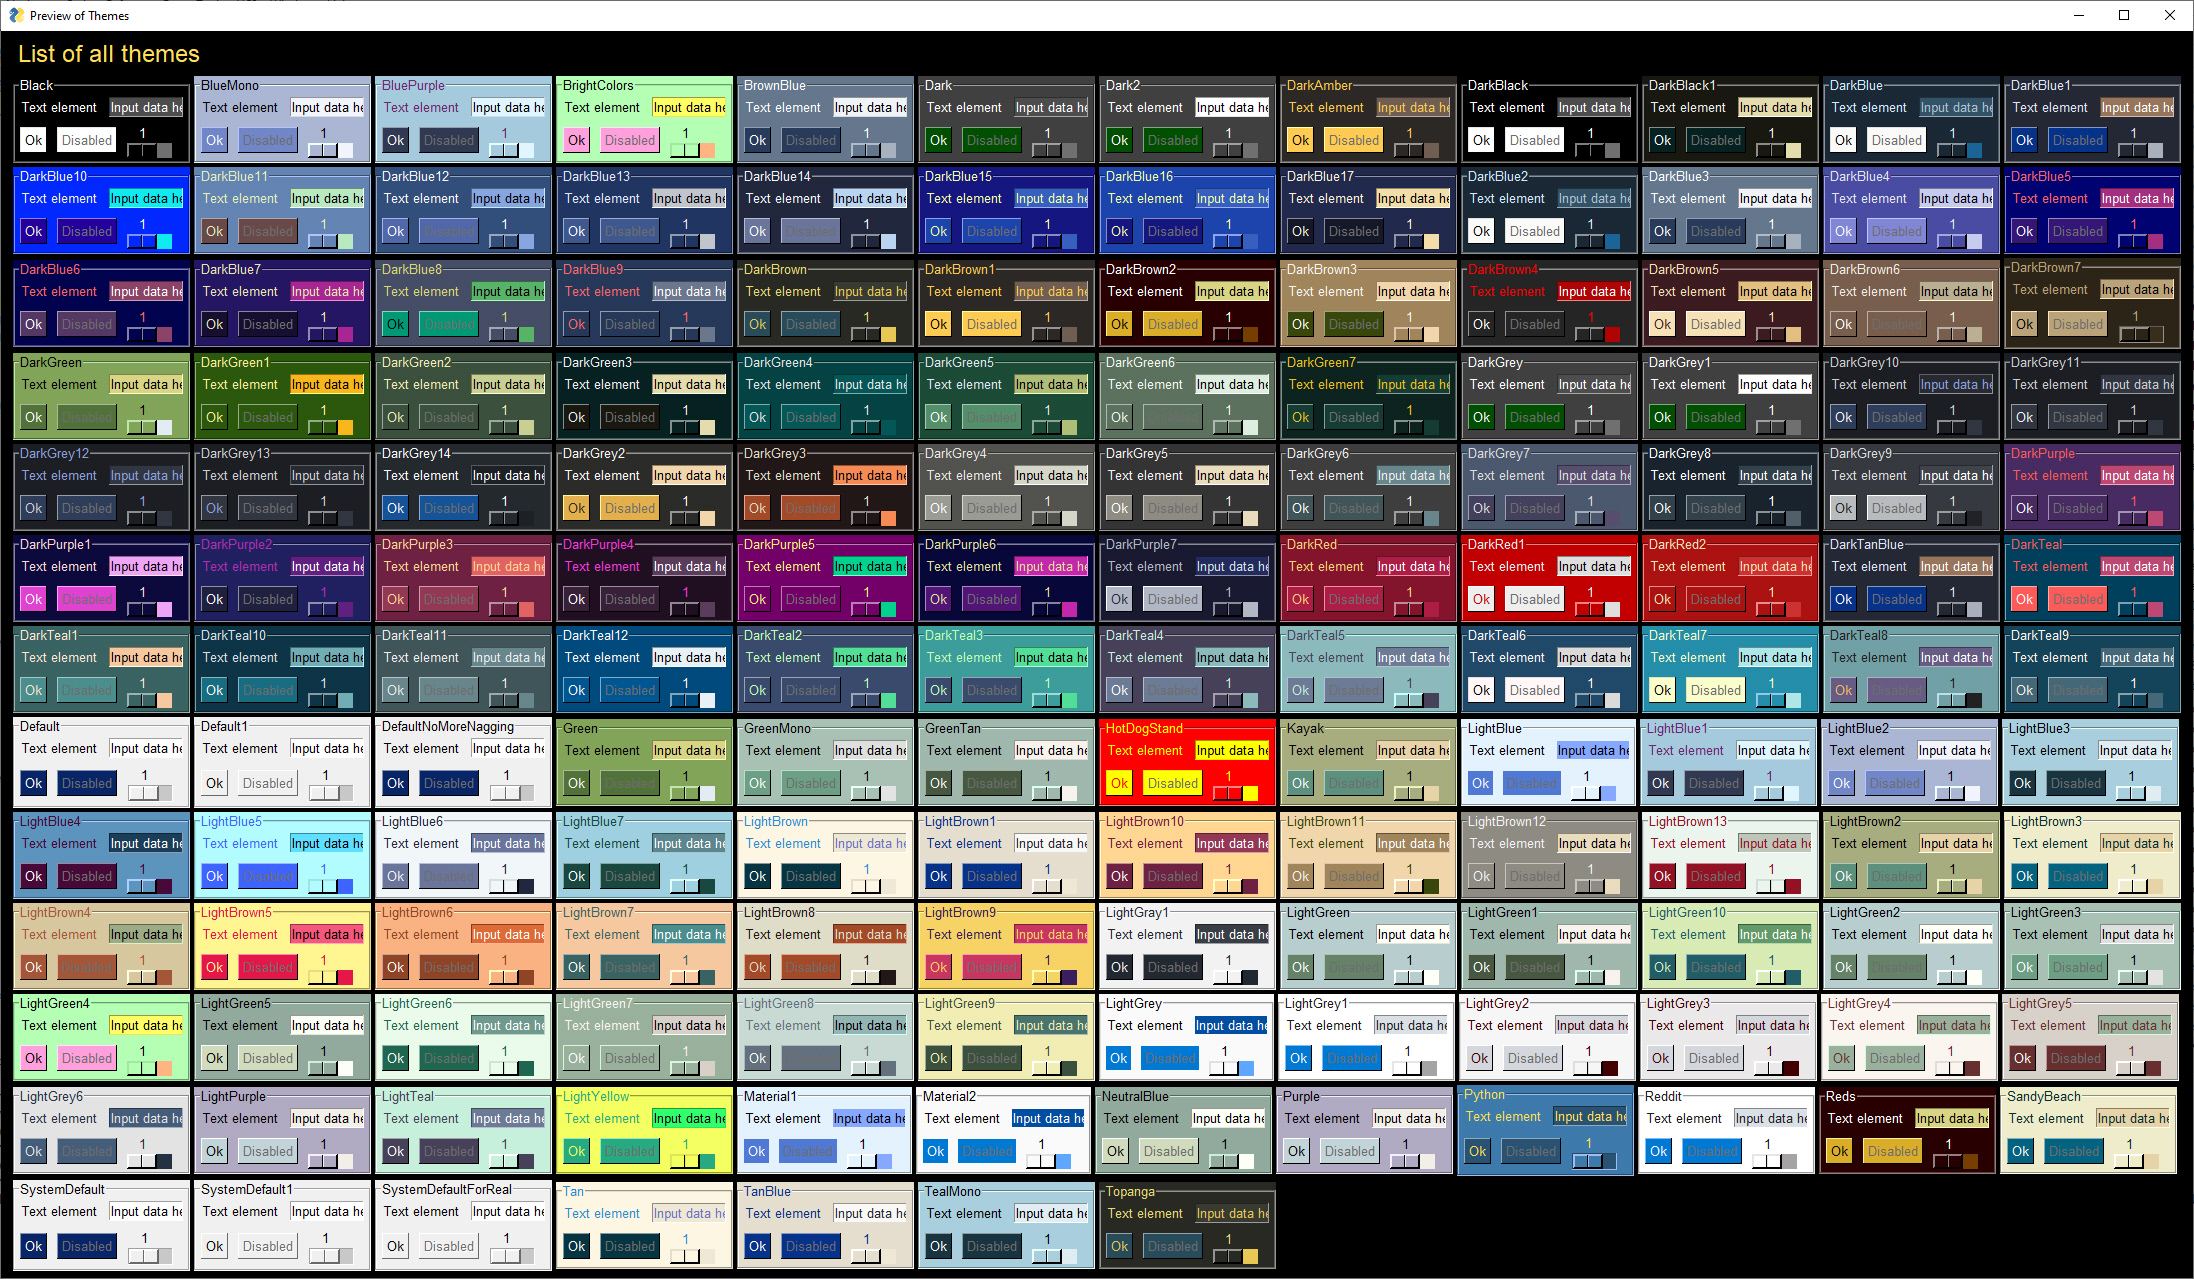
With most GUI frameworks, you must specify the color for every widget you create. PySimpleGUI takes this chore from you and will automatically color the Elements to match your chosen theme.
To use a theme, call the theme function with the name of the theme before creating your window. You can add spaces for readability. To set the theme to «Dark Grey 9»:
import PySimpleGUI as sg

sg.theme('dark grey 9')
This single line of code changes the window’s appearance entirely:
The theme changed colors of the background, text, input background, input text, and button colors. In other GUI packages, to change color schemes like this, you would need to specify the colors of each widget individually, requiring numerous changes to your code.
Distribution
Want to share your PySimpleGUI program with friends and family that don’t have Python installed on their computer? Try the GUI front-end for PyInstaller that you’ll find in the psgcompiler project.

Support
Your first stop should be the documentation and demo programs.
Be sure and install the Demo Browser (instructions in the Cookbook) so that you can search and run the 100s of demo programs.

If you still have a question or need help… no problem… help is available to you, at no cost. Simply file an Issue on the PySimpleGUI GitHub repo and you’ll get help.
Nearly all software companies have a form that accompanies bug reports. It’s not a bad trade… fill in the form, get free software support. This information helps get you an answer efficiently.
In addition to requesting information such as the version numbers of PySimpleGUI and underlying GUI frameworks, you’re also given a checklist of items that may help you solve your problem.
Please fill in the form. It may feel pointless to you. It may feel painful, despite it taking just a moment. It helps get you a solution faster. If it wasn’t useful and necessary information to help you get a speedy reply and fix, you wouldn’t be asked to fill it out. «Help me help you».
Supporting 

Financial support for the project is greatly appreciated. To be honest, financial help is needed. It’s expensive just keeping the lights on. The domain name registrations, a long list of subscriptions for things like Trinket, consulting help, etc., quickly add up to a sizable recurring cost.
PySimpleGUI wasn’t inexpensive to create. While a labor of love, it was very laborious over several years, and quite a bit was invested, and continues to be invested, in creating what you see today.
PySimpleGUI has an open-source license and it would be great if it could remain that way. If you or your company (especially if you’re using PySimpleGUI in a company) are benefiting financially by using PySimpleGUI, you have the capability of extending the life of the project for you and other users.
Buy Me A Coffee
Buy Me a Coffee is a great way to publicly support developers. It’s quick, easy, and your contribution is recorded so that others can see that you’re a supporter of PySimpleGUI. You can also choose to make your donation private.
GitHub Sponsoring
The GitHub recurring sponsorship is how you can sponsor the project at varying levels of support on an ongoing basis. It’s how many Open Source developers are able to receive corporate level sponsorship.
Your help in financially contributing to the project would be greatly appreciated. Being an Open Source developer is financially challenging. YouTube video creators are able to make a living creating videos. It’s not so easy yet for Open Source developers.
Thank you for the Thank You’s
To everyone that’s helped, in whatever fashion, I’m very very grateful.
Even taking a moment to say «thank you» helps, and a HUGE number of you have done that. It’s been an amazing number actually. I value these thanks and find inspiration in the words alone. Every message is a little push forward. It adds a little bit of energy and keeps the whole project’s momentum. I’m so very grateful to everyone that’s helped in whatever form it’s been.
Contributing
While PySimpleGUI is currently licensed under an open-source license, the project itself is structured like a proprietary product. Pull Requests are not accepted.
One of the best ways for you to contribute code is to write and publish applications. Users are inspired by seeing what other users build. Here’s a simple set of steps you can take — Create a GitHub repo, post the code, and include a screenshot in your repo’s readme file. Then come back to the PySimpleGUI repo and post a screenshot in Issue #10 or in the project’s WIKI.
If there is a feature missing that you need or you have an enhancement to suggest, then open an Issue
Special Thanks
The PySimpleGUI team is tiny and they’re all superstars. Every week I’ve been stunned by what they do. Dream-team is an understatement. Simply put @Chr0nicT, @jason990420, @Snaiel and Mike@PySimpleGUI are PySimpleGUI.
This version of the PySimpleGUI readme wouldn’t have come together without the help from @M4cs. He’s a fantastic developer and has been a PySimpleGUI supporter since the project’s launch. @israel-dryer is another long-term supporter and has written several PySimpleGUI programs that pushed the envelope of the package’s capabilities. The unique minesweeper that uses an image for the board was created by Israel. @jason990420 surprised many when he published the first card game using PySimpleGUI that you see pictured above as well as the first minesweeper game made with PySimpleGUI. @Chr0nicT is the youngest developer I’ve worked with, ever, on projects. This kid shocks me on a regular basis. Ask for a capability, such as the PySimpleGUI GitHub Issues form error checking bot, and it simply happens regardless of the technologies involved. I’m fortunate that we were introduced. Someday he’s going to be whisked away, but until then we’re all benefiting from his talent. @Snaiel made the Udemy course happen. It wouldn’t have been 1/4th of what it is without his amazing skills in video production, course design, marketing brilliance, and web programming. The Japanese version of the readme was greatly improved with help from @okajun35. @nngogol has had a very large impact on the project, also getting involved with PySimpleGUI in the first year of initial release. He wrote a designer, came up with the familiar window[key] lookup syntax, wrote the tools that create the documentation, designed the first set of doc strings as well as tools that generate the online documenation using the PySimpleGUI code itself. PySimpleGUI would not be where it is today were it not for the help of these individuals.
The more than 4,000 GitHub repos that use PySimpleGUI are owed a «Thank You» as well, for it is you that has been the inspiration that fuels this project’s engine.
The overseas users that post on Twitter overnight are the spark that starts the day’s work on PySimpleGUI. They’ve been a source of positive energy that gets the development engine started and ready to run every day. As a token of appreciation, this readme file has been translated into Japanese.
PySimpleGUI users have been the best user community an Open Source developer could hope for. I’ve never seen expressions of gratitude and joy like PySimpleGUI users show on a daily basis.
© Copyright 2021, 2022 PySimpleGUI
Python является одним из наиболее популярных языков программирования, который широко используется для разработки приложений с графическим интерфейсом пользователя (GUI). При создании GUI-приложений под Windows, важно выбрать правильную библиотеку, чтобы обеспечить эффективное программирование и отличные результаты.
В этой статье мы рассмотрим несколько лучших Gui библиотек для Python под Windows и рекомендуемые практики для их использования. Мы сравним различные библиотеки по их возможностям, простоте использования, производительности и сообществу разработчиков.
Одной из наиболее популярных Gui библиотек для Python под Windows является PyQt. Она предоставляет широкий спектр инструментов для создания современных и эффективных GUI-приложений. PyQt основана на Qt Framework, что обеспечивает кросс-платформенность и высокую производительность. Она также имеет обширную документацию и активное сообщество разработчиков, что делает ее лучшим выбором для разработки приложений под Windows.
Еще одной популярной библиотекой является Tkinter, которая является стандартной библиотекой для разработки GUI-приложений в Python. Tkinter легко освоить и предоставляет множество функций для создания простых и сложных GUI-приложений. Она хорошо интегрируется с Windows и обеспечивает высокую степень гибкости и настраиваемости. Tkinter также имеет большое сообщество разработчиков, что делает ее хорошим выбором для начинающих разработчиков или тех, кто ищет простое решение для создания GUI-приложений под Windows.
Кроме PyQt и Tkinter, существуют и другие высокопроизводительные и популярные библиотеки, такие как wxPython, Kivy и PySide. Каждая из них имеет свои особенности и предлагает уникальные возможности для разработки GUI-приложений под Windows. Выбор конкретной библиотеки зависит от ваших потребностей и предпочтений в разработке.
Содержание
- Tkinter: стандартная библиотека для создания графического интерфейса
- PyQt: мощный инструмент для разработки кросс-платформенных приложений
- wxPython: гибкая библиотека с поддержкой популярных платформ
- Kivy: интуитивно понятный фреймворк для создания мультимедийных приложений
Tkinter: стандартная библиотека для создания графического интерфейса
Она предоставляет набор инструментов и виджетов, которые позволяют разработчикам быстро и легко создавать пользовательские интерфейсы для своих приложений на Windows. Tkinter предоставляет возможности для создания оконных приложений, диалоговых окон, меню, кнопок, полей ввода и других интерфейсных элементов. Она также поддерживает различные графические объекты, такие как изображения и рисунки, и позволяет работать с различными событиями и обработчиками.
Одним из главных преимуществ Tkinter является его простота использования и интуитивно понятный синтаксис. Она имеет дружественное к начинающим разработчикам API, а также обширную документацию и множество примеров. Tkinter также хорошо интегрируется с другими библиотеками Python, что делает его универсальным инструментом для разработки GUI-приложений.
Однако, несмотря на свою популярность и простоту использования, Tkinter имеет некоторые ограничения и недостатки. Один из них — ограниченный набор графических элементов и стилей, которые можно использовать в интерфейсе. Более продвинутые функции и возможности могут потребовать использования других GUI-библиотек или расширений.
В целом, Tkinter является отличным выбором для начинающих разработчиков и небольших проектов, которым требуется простой и удобный инструмент для создания графического интерфейса под Windows. Однако, при разработке более сложных приложений, возможно потребуется более мощная и гибкая библиотека с более широким набором инструментов и функциональности.
PyQt: мощный инструмент для разработки кросс-платформенных приложений
Основной преимуществом PyQt является его совместимость с различными операционными системами, включая Windows. Это означает, что разработанные с помощью PyQt приложения могут быть запущены на любом устройстве, работающем под управлением Windows, без необходимости вносить какие-либо изменения в исходный код.
PyQt обеспечивает широкие возможности для создания пользовательского интерфейса приложения, включая различные виджеты, такие как кнопки, текстовые поля, таблицы и др. Библиотека также предлагает множество готовых стилей и тем оформления, позволяющих создавать уникальный и современный дизайн для вашего приложения.
Важной особенностью PyQt является ее интеграция с языком программирования Python. Библиотека обеспечивает доступ к всем основным функциональным возможностям Python, что делает разработку приложений быстрой и удобной. Кроме того, PyQt поддерживает множество расширений и плагинов, которые позволяют добавлять дополнительные функциональные возможности к вашему приложению.
PyQt также обладает отличной документацией и активным сообществом разработчиков, которые всегда готовы помочь и поддержать вас в процессе разработки. Большое количество примеров и обучающих материалов позволяют быстро освоиться с библиотекой и начать разрабатывать сложные кросс-платформенные приложения.
В заключение, PyQt — это мощный инструмент для разработки кросс-платформенных приложений под Windows. Библиотека предоставляет разработчикам все необходимые инструменты и функции для создания привлекательного и функционального пользовательского интерфейса. Благодаря своей совместимости с различными операционными системами и удобной интеграции с Python, PyQt позволяет создавать высококачественные приложения, которые работают плавно и без сбоев. Если вам нужно разработать кросс-платформенное приложение под Windows, то PyQt является отличным выбором.
wxPython: гибкая библиотека с поддержкой популярных платформ
wxPython является портом популярного фреймворка wxWidgets, который разрабатывается на языке C++. Благодаря этому, wxPython предоставляет богатый набор виджетов и инструментов для создания разнообразных пользовательских интерфейсов, включая кнопки, текстовые поля, выпадающие списки, таблицы и многое другое.
С помощью wxPython вы можете создавать графические интерфейсы, которые выглядят и работают естественно на различных операционных системах. Благодаря использованию нативных компонентов пользовательского интерфейса, ваши приложения выглядят и ведут себя так же, как и другие приложения на выбранной платформе. Это повышает удобство использования и улучшает опыт пользователя.
Одной из ключевых особенностей wxPython является его гибкость. Благодаря простой и интуитивной структуре библиотеки, вы можете создавать сложные пользовательские интерфейсы с минимальным количеством кода. Вы можете настраивать виджеты, добавлять макеты и обрабатывать события с помощью небольшого количества кода, что делает процесс создания графического интерфейса быстрым и эффективным.
Кроме того, wxPython предоставляет различные инструменты и дополнительные возможности для создания более сложных приложений. Вы можете использовать его для создания игр, настольных приложений, инструментов анализа данных и многого другого. Благодаря богатому эко-системе и активному сообществу разработчиков, вы можете найти множество ресурсов, документации и примеров кода для ускорения процесса разработки.
Суммируя, wxPython — это мощная и гибкая библиотека для создания графического интерфейса на языке Python. Она обладает широким набором функциональных возможностей, поддерживает популярные платформы и обеспечивает гибкость при разработке пользовательского интерфейса. Если вы хотите создавать высококачественные кросс-платформенные приложения на Python, wxPython — это отличный выбор для вас.
Kivy: интуитивно понятный фреймворк для создания мультимедийных приложений
Одной из главных преимуществ Kivy является его кросс-платформенность. Фреймворк поддерживает работу на различных операционных системах, включая Windows, macOS, Linux, Android и iOS. Это позволяет разработчикам создавать приложения, которые могут работать на множестве устройств, сохраняя единый код и интерфейс.
Киви также предлагает обширную библиотеку виджетов и интерфейсных элементов, которые можно использовать для создания пользовательского интерфейса. Благодаря возможности задавать собственные стили и анимации, вы можете легко настроить внешний вид своего приложения и сделать его уникальным.
Великолепная поддержка графики – еще одна сильная сторона Kivy. Фреймворк предоставляет возможность работать с различными типами мультимедиа, включая изображения, видео, звук и даже визуализацию 2D и 3D графики. Это делает Kivy идеальным инструментом для создания игр, графических приложений и прочих мультимедийных проектов.
Существуют множество ресурсов и документации, посвященных Kivy, что делает изучение фреймворка достаточно простым и удобным. Kivy имеет активное сообщество, где вы можете задавать вопросы, делиться своими проектами и находить полезные решения.
В заключение, Kivy – это мощный и интуитивно понятный фреймворк для создания мультимедийных приложений под Windows. Благодаря его кросс-платформенности, обширной библиотеке виджетов и возможности работы с графикой, Kivy предоставляет разработчикам все необходимые инструменты для создания качественных и интерактивных пользовательских интерфейсов.
Помимо всего прочего, на Python можно создавать десктопные приложения с графическим интерфейсом (Python GUI). Это можно сделать с помощью PyQt и Qt Designer, с которыми мы сегодня познакомимся.
Эта статья предназначена для тех, кто только начинает своё знакомство с созданием приложений с графическим интерфейсом (GUI) на Python. В ней мы рассмотрим основы использования PyQt в связке с Qt Designer. Шаг за шагом мы создадим простое Python GUI приложение, которое будет отображать содержимое выбранной директории.
Что нам потребуется
Нам понадобятся PyQt и Qt Designer, ну и Python, само собой.
В этой статье используется PyQt5 с Python 3, но особых различий между PyQt и PySide или их версиями для Python 2 нет.
Windows: PyQt можно скачать здесь. В комплекте с ним идёт Qt Designer.
macOS: Вы можете установить PyQt с помощью Homebrew:
$ brew install pyqt5
Скачать пакет с большинством компонентов и инструментов Qt, который содержит Qt Designer, можно по этой ссылке.
Linux: Всё нужное, вероятно, есть в репозиториях вашего дистрибутива. Qt Designer можно установить из Центра Приложений, но PyQt придётся устанавливать через терминал. Установить всё, что нам понадобится, одной командой можно, например, так:
			# для Fedora:
$ sudo dnf install python3-qt5 qt-creator
# для Debian/Ubuntu:
$ sudo apt install python3-qt5 pyqt5-dev-tools qtcreator
После того как вы закончили с приготовлениями, откройте командную строку/терминал и убедитесь, что вы можете использовать команду pyuic5. Вы должны увидеть следующее:
			$ pyuic5
Error: one input ui-file must be specified
Если вы видите сообщение, что такой команды нет или что-то в таком роде, попробуйте загуглить решение проблемы для вашей операционной системы и версии PyQt.
Если вы используете Windows, то, скорее всего, путь C:\Python36\Scripts (измените 36 на вашу версию Python) не прописан в вашем PATH. Загляните в этот тред на Stack Overflow, чтобы узнать, как решить проблему.
Дизайн
Основы
Теперь, когда у нас всё готово к работе, давайте начнём с простого дизайна.
Откройте Qt Designer, где вы увидите диалог новой формы, выберите Main Window и нажмите Create.
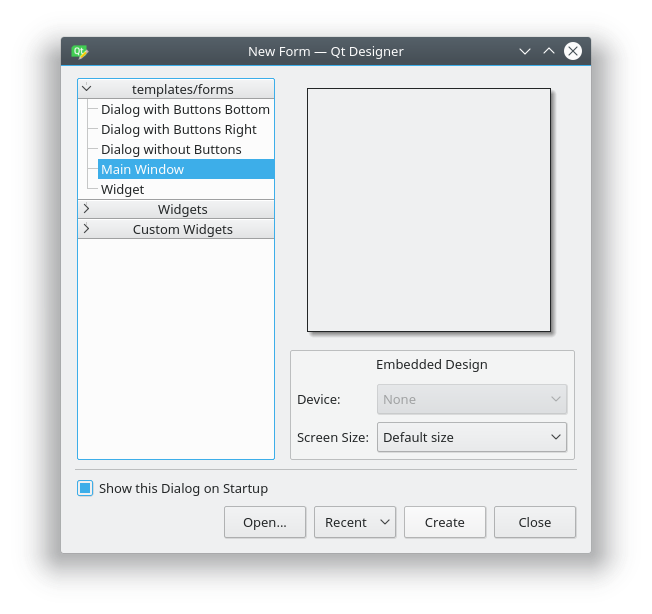
После этого у вас должна появиться форма — шаблон для окна, размер которого можно менять и куда можно вставлять объекты из окна виджетов и т.д. Ознакомьтесь с интерфейсом, он довольно простой.
Теперь давайте немного изменим размер нашего главного окна, т.к. нам не нужно, чтобы оно было таким большим. А ещё давайте уберём автоматически добавленное меню и строку состояния, поскольку в нашем приложении они не пригодятся.
Все элементы формы и их иерархия по умолчанию отображаются в правой части окна Qt Designer под названием Object Inspector. Вы с лёгкостью можете удалять объекты, кликая по ним правой кнопкой мыши в этом окне. Или же вы можете выбрать их в основной форме и нажать клавишу DEL на клавиатуре.

В итоге мы имеем почти пустую форму. Единственный оставшийся объект — centralwidget, но он нам понадобится, поэтому с ним мы ничего не будем делать.
Теперь перетащите куда-нибудь в основную форму List Widget (не List View) и Push Button из Widget Box.
Макеты
Вместо использования фиксированных позиций и размеров элементов в приложении лучше использовать макеты. Фиксированные позиции и размеры у вас будут выглядеть хорошо (пока вы не измените размер окна), но вы никогда не можете быть уверены, что всё будет точно так же на других машинах и/или операционных системах.
Макеты представляют собой контейнеры для виджетов, которые будут удерживать их на определённой позиции относительно других элементов. Поэтому при изменении размера окна размер виджетов тоже будет меняться.
Давайте создадим нашу первую форму без использования макетов. Перетащите список и кнопку в форме и измените их размер, чтобы вышло вот так:
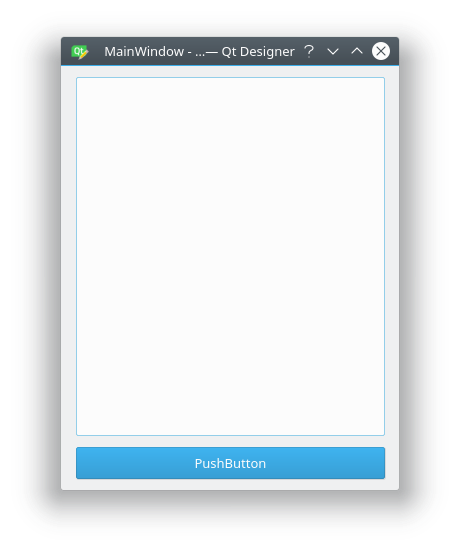
Теперь в меню Qt Designer нажмите Form, затем выберите Preview и увидите что-то похожее на скриншот выше. Выглядит хорошо, не так ли? Но вот что случится, когда мы изменим размер окна:

Наши объекты остались на тех же местах и сохранили свои размеры, несмотря на то что размер основного окна изменился и кнопку почти не видно. Вот поэтому в большинстве случаев стоит использовать макеты. Конечно, бывают случаи, когда вам, например, нужна фиксированная или минимальная/максимальная ширина объекта. Но вообще при разработке приложения лучше использовать макеты.
Основное окно уже поддерживает макеты, поэтому нам ничего не нужно добавлять в нашу форму. Просто кликните правой кнопкой мыши по Main Window в Object Inspector и выберите Lay out → Lay out vertically. Также вы можете кликнуть правой кнопкой по пустой области в форме и выбрать те же опции:
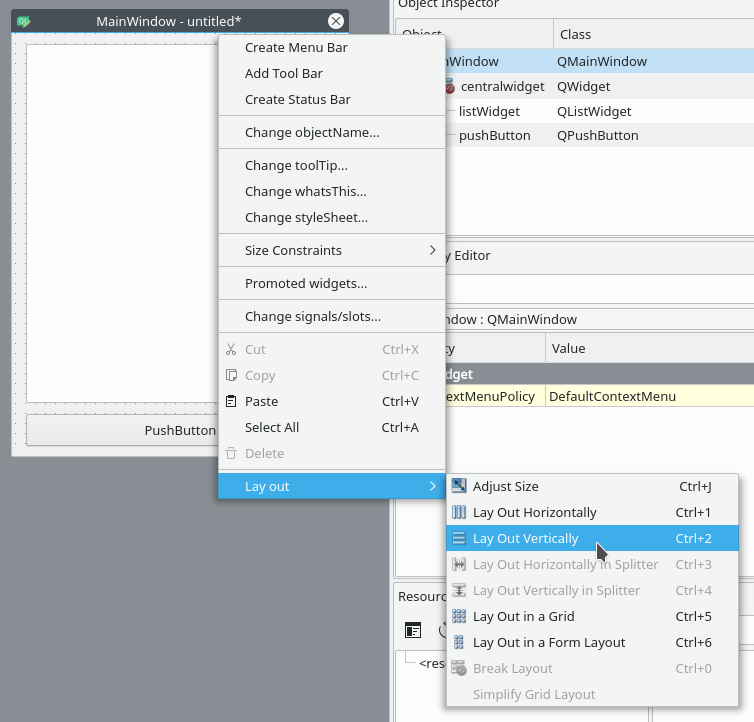
Ваши элементы должны быть в том же порядке, что и до внесённых изменений, но если это не так, то просто перетащите их на нужное место.
Так как мы использовали вертикальное размещение, все элементы, которые мы добавим, будут располагаться вертикально. Можно комбинировать размещения для получения желаемого результата. Например, горизонтальное размещение двух кнопок в вертикальном будет выглядеть так:
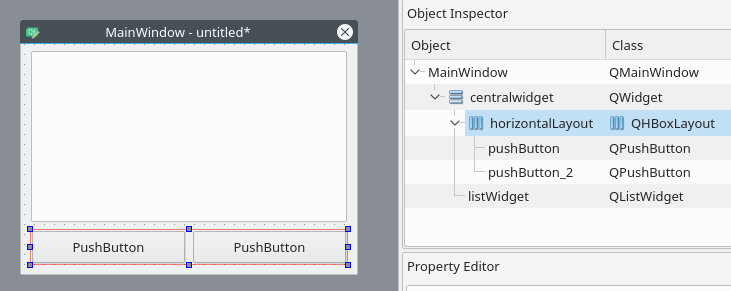
Если у вас не получается переместить элемент в главном окне, вы можете сделать это в окне Object Inspector.
Последние штрихи
Теперь, благодаря вертикальному размещению, наши элементы выровнены правильно. Единственное, что осталось сделать (но не обязательно), — изменить имя элементов и их текст.
В простом приложении вроде этого с одним лишь списком и кнопкой изменение имён не обязательно, так как им в любом случае просто пользоваться. Тем не менее правильное именование элементов — то, к чему стоит привыкать с самого начала.
Свойства элементов можно изменить в разделе Property Editor.
Подсказка: вы можете менять размер, передвигать или добавлять часто используемые элементы в интерфейс Qt Designer для ускорения рабочего процесса. Вы можете добавлять скрытые/закрытые части интерфейса через пункт меню View.
Нажмите на кнопку, которую вы добавили в форму. Теперь в Property Editor вы должны видеть все свойства этого элемента. В данный момент нас интересуют objectName и text в разделе QAbstractButton. Вы можете сворачивать разделы в Property Editor нажатием по названию раздела.
Измените значение objectName на btnBrowse и text на Выберите папку.
Должно получиться так:

Именем объекта списка является listWidget, что вполне подходит в данном случае.
Сохраните дизайн как design.ui в папке проекта.
Превращаем дизайн в код
Конечно, можно использовать .ui-файлы напрямую из Python-кода, однако есть и другой путь, который может показаться легче. Можно конвертировать код .ui-файла в Python-файл, который мы потом сможем импортировать и использовать. Для этого мы используем команду pyuic5 из терминала/командной строки.
Чтобы конвертировать .ui-файл в Python-файл с названием design.py, используйте следующую команду:
$ pyuic5 path/to/design.ui -o output/path/to/design.py
Пишем код
Теперь у нас есть файл design.py с нужной частью дизайна нашего приложения и мы начинать работу над созданием его логики.
Создайте файл main.py в папке, где находится design.py.
Используем дизайн
Для Python GUI приложения понадобятся следующие модули:
			import sys  # sys нужен для передачи argv в QApplication
from PyQt5 import QtWidgets
Также нам нужен код дизайна, который мы создали ранее, поэтому его мы тоже импортируем:
import design # Это наш конвертированный файл дизайна
Так как файл с дизайном будет полностью перезаписываться каждый раз при изменении дизайна, мы не будем изменять его. Вместо этого мы создадим новый класс ExampleApp, который объединим с кодом дизайна для использования всех его функций:
			class ExampleApp(QtWidgets.QMainWindow, design.Ui_MainWindow):
    def __init__(self):
        # Это здесь нужно для доступа к переменным, методам
        # и т.д. в файле design.py
        super().__init__()
        self.setupUi(self)  # Это нужно для инициализации нашего дизайна
В этом классе мы будем взаимодействовать с элементами интерфейса, добавлять соединения и всё остальное, что нам потребуется. Но для начала нам нужно инициализировать класс при запуске кода. С этим мы разберёмся в функции main():
			def main():
    app = QtWidgets.QApplication(sys.argv)  # Новый экземпляр QApplication
    window = ExampleApp()  # Создаём объект класса ExampleApp
    window.show()  # Показываем окно
    app.exec_()  # и запускаем приложение
И чтобы выполнить эту функцию, мы воспользуемся привычной конструкцией:
			if __name__ == '__main__':  # Если мы запускаем файл напрямую, а не импортируем
    main()  # то запускаем функцию main()
В итоге main.py выглядит таким образом:
			import sys  # sys нужен для передачи argv в QApplication
from PyQt5 import QtWidgets
import design  # Это наш конвертированный файл дизайна

class ExampleApp(QtWidgets.QMainWindow, design.Ui_MainWindow):
    def __init__(self):
        # Это здесь нужно для доступа к переменным, методам
        # и т.д. в файле design.py
        super().__init__()
        self.setupUi(self)  # Это нужно для инициализации нашего дизайна

def main():
    app = QtWidgets.QApplication(sys.argv)  # Новый экземпляр QApplication
    window = ExampleApp()  # Создаём объект класса ExampleApp
    window.show()  # Показываем окно
    app.exec_()  # и запускаем приложение

if __name__ == '__main__':  # Если мы запускаем файл напрямую, а не импортируем
    main()  # то запускаем функцию main()
Если запустить этот код: $ python3 main.py, то наше приложение запустится!
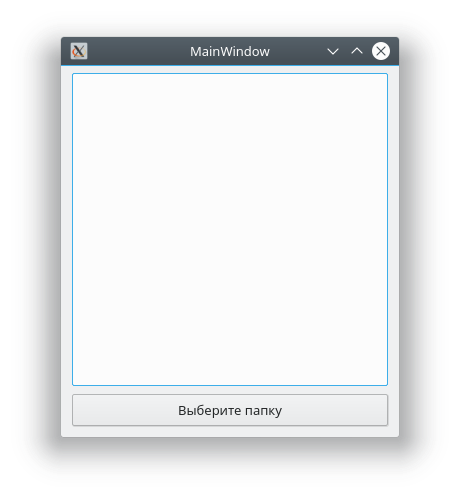
Но нажатие на кнопку ничего не даёт, поэтому нам придётся с этим разобраться.
Добавляем функциональность в наше Python GUI приложение
Примечание Весь дальнейший код пишется внутри класса ExampleApp.
Начнём с кнопки Выберите папку. Привязать к функции событие вроде нажатия на кнопку можно следующим образом:
self.btnBrowse.clicked.connect(self.browse_folder)
Добавьте эту строку в метод __init__ класса ExampleApp, чтобы выполнить привязку при запуске приложения. А теперь взглянем на неё поближе:
self.btnBrowse: здесьbtnBrowse— имя объекта, который мы определили в Qt Designer.selfговорит само за себя и означает принадлежность к текущему классу;clicked— событие, которое мы хотим привязать. У разных элементов разные события, например, у виджетов списка естьitemSelectionChangedи т.д.;connect()— метод, который привязывает событие к вызову переданной функции;self.browse_folder— просто функция (метод), которую мы описали в классеExampleApp.
Для открытия диалога выбора папки мы можем использовать встроенный метод QtWidgets.QFileDialog.getExistingDirectory:
directory = QtWidgets.QFileDialog.getExistingDirectory(self, "Выберите папку")
Если пользователь выберет директорию, переменной directory присвоится абсолютный путь к выбранной директории, в противном случае она будет равна None. Чтобы не выполнять код дальше, если пользователь закроет диалог, мы используем команду if directory:.
Для отображения содержимого директории нам нужно импортировать os:
И получить список содержимого следующим образом:
Для добавления элементов в listWidget мы используем метод addItem(), а для удаления всех элементов у нас есть self.listWidget.clear().
В итоге функция browse_folder должна выглядеть так:
			def browse_folder(self):
    self.listWidget.clear()  # На случай, если в списке уже есть элементы
    directory = QtWidgets.QFileDialog.getExistingDirectory(self, "Выберите папку")
    # открыть диалог выбора директории и установить значение переменной
    # равной пути к выбранной директории

    if directory:  # не продолжать выполнение, если пользователь не выбрал директорию
        for file_name in os.listdir(directory):  # для каждого файла в директории
            self.listWidget.addItem(file_name)   # добавить файл в listWidget
Теперь, если запустить приложение, нажать на кнопку и выбрать директорию, мы увидим:
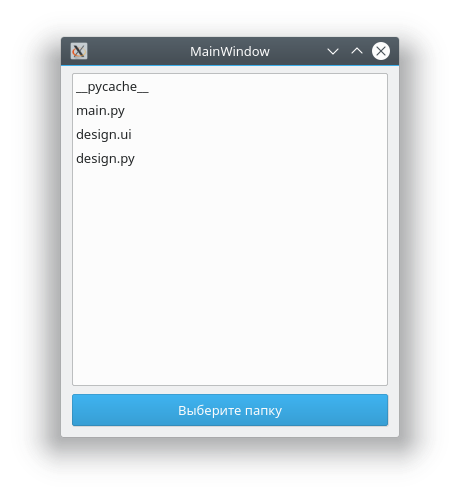
Так выглядит весь код нашего Python GUI приложения:
			import sys  # sys нужен для передачи argv в QApplication
import os  # Отсюда нам понадобятся методы для отображения содержимого директорий

from PyQt5 import QtWidgets

import design  # Это наш конвертированный файл дизайна

class ExampleApp(QtWidgets.QMainWindow, design.Ui_MainWindow):
    def __init__(self):
        # Это здесь нужно для доступа к переменным, методам
        # и т.д. в файле design.py
        super().__init__()
        self.setupUi(self)  # Это нужно для инициализации нашего дизайна
        self.btnBrowse.clicked.connect(self.browse_folder)  # Выполнить функцию browse_folder
                                                            # при нажатии кнопки

    def browse_folder(self):
        self.listWidget.clear()  # На случай, если в списке уже есть элементы
        directory = QtWidgets.QFileDialog.getExistingDirectory(self, "Выберите папку")
        # открыть диалог выбора директории и установить значение переменной
        # равной пути к выбранной директории

        if directory:  # не продолжать выполнение, если пользователь не выбрал директорию
            for file_name in os.listdir(directory):  # для каждого файла в директории
                self.listWidget.addItem(file_name)   # добавить файл в listWidget

def main():
    app = QtWidgets.QApplication(sys.argv)  # Новый экземпляр QApplication
    window = ExampleApp()  # Создаём объект класса ExampleApp
    window.show()  # Показываем окно
    app.exec_()  # и запускаем приложение

if __name__ == '__main__':  # Если мы запускаем файл напрямую, а не импортируем
    main()  # то запускаем функцию main()
На данный момент этот блок не поддерживается, но мы не забыли о нём!Наша команда уже занята его разработкой, он будет доступен в ближайшее время.
Это были основы использования Qt Designer и PyQt для разработки Python GUI приложения. Теперь вы можете спокойно изменять дизайн приложения и использовать команду pyuic5 без страха потерять написанный код.