INTRODUCTION how to install Python 3.7 on Windows Server
Python is a high-level, general-purpose programming language. Its design philosophy emphasizes code readability with the use of significant indentation. Python is dynamically-typed and garbage-collected. It supports multiple programming paradigms, including structured (particularly procedural), object-oriented and functional programming. It is often described as a «batteries included» language due to its comprehensive standard library. how to install Python 3.7 on Windows Server
Python 3.7, the latest version of the language aimed at making complex tasks simple, is now in production release. The most significant additions and improvements to Python 3.7 include:
- Data classes that reduce boilerplate when working with data in classes.
- A potentially backward-incompatible change involving the handling of exceptions in generators.
- A “development mode” for the interpreter.
- Nanosecond-resolution time objects.
- UTF-8 mode that uses UTF-8 encoding by default in the environment.
- A new built-in for triggering the debugger.
Prerequisites how to install Python 3.7 on Windows Server
- Windows Server with Administrator rights
- Access to Powershell
- Access to internet
Step 1. Login to your Windows Server via RDP


Step 2. Open Windows Powershell as Administrator

Step 3. Run the following command to download the python setup
PS C:\Users\Administrator> Invoke-WebRequest -Uri "https://www.python.org/ftp/python/3.7.4/python-3.7.4-amd64.exe" -OutFile "python-3.7.4-amd64.exe"
Step 4. Run the following command to install python and set up path as well
PS C:\Users\Administrator> .\python-3.7.4-amd64.exe /quiet InstallAllUsers=1 PrependPath=1 Include_test=0
Step 5. Run the following command to reload environment variables
PS C:\Users\Administrator> $env:Path = [System.Environment]::GetEnvironmentVariable("Path","Machine") + ";" + [System.Environment]::GetEnvironmentVariable("Path","User")
Step 6. Run python -V to check the version of python installed.

Python official downloads:- https://www.python.org/downloads/
Thank You.
- Remove From My Forums
-
Question
-
I have a server running Windows Server 2012.
I have python 2.7 installed on my server. I can run hello_world.py on my server. However, I have to specify where python.exe is every time.
C:\Python27\python .\hello_world
I added an environment variable: Name: PYTHONPATH, Value: C:\Python27. That didn’t help.
How do I use python without specifying where its located?
For example:
python hello_world
python .\hello_world
Answers
-
You’re still going to need c:\python27 in your PATH. PYTHONPATH is used to find modules/imports — not to tell Windows where to find the executable.
G. Samuel Hays
-
Marked as answer by
Monday, April 29, 2013 4:01 PM
-
Marked as answer by
На чтение 3 мин Опубликовано Обновлено
Windows Server 2012 — это операционная система от Microsoft, предназначенная для развертывания и управления сетевой инфраструктурой организации. Python — это высокоуровневый, интерпретируемый язык программирования с динамической типизацией, который широко используется в различных областях разработки программного обеспечения. Установка Python на Windows Server 2012 позволяет использовать все преимущества этого языка для создания и запуска приложений на сервере.
Процесс установки Python на Windows Server 2012 включает несколько простых шагов. Во-первых, необходимо загрузить установочный файл Python с официального веб-сайта. На веб-сайте Python есть несколько версий для разных операционных систем, поэтому важно выбрать правильную версию для Windows Server 2012. Рекомендуется выбрать последнюю стабильную версию Python для лучшей совместимости и надежности.
После загрузки установочного файла Python необходимо запустить его и следовать инструкциям мастера установки. Мастер установки позволяет выбрать опции установки, такие как путь установки Python и добавление Python в переменную среды. Рекомендуется оставить настройки по умолчанию, если для них нет особых требований или предпочтений. После завершения установки Python будет готов к использованию на Windows Server 2012.
Установка Python на Windows Server 2012
Вот пошаговая инструкция по установке Python на Windows Server 2012:
| Шаг 1: | Откройте ваш любимый веб-браузер и перейдите на официальный веб-сайт Python (https://www.python.org/downloads). |
| Шаг 2: | На главной странице веб-сайта вы увидите раздел загрузки. Выберите версию Python, которую вы хотите установить (рекомендуется устанавливать последнюю стабильную версию) и нажмите на ссылку, чтобы загрузить установщик Python. |
| Шаг 3: | После скачивания запустите установщик Python. |
| Шаг 4: | На первом экране установщика вам будет предложено выбрать, хотите ли вы добавить Python в системные переменные окружения. Рекомендуется оставить по умолчанию включенными все опции и нажать «Next» (Далее). |
| Шаг 5: | На втором экране установщика вам будет предложено выбрать установочный каталог. Рекомендуется оставить по умолчанию и нажать «Install» (Установить). |
| Шаг 6: | Установщик будет копировать файлы Python на ваш компьютер. Этот процесс может занять несколько минут. |
| Шаг 7: | После завершения установки вы увидите экран с сообщением «Setup was successful» (Установка прошла успешно). |
| Шаг 8: | Чтобы убедиться, что Python был успешно установлен, откройте командную строку и введите команду python --version.Вы должны увидеть версию Python, которую вы установили. |
Поздравляю! Теперь Python успешно установлен на ваш Windows Server 2012. Вы можете начать разрабатывать и запускать Python-приложения.
Подготовка к установке
Перед установкой Python на Windows Server 2012 необходимо выполнить некоторые предварительные шаги. Это позволит гладко и успешно установить и настроить Python на сервере.
1. Убедитесь в наличии административных прав на сервере. Для установки и настройки Python требуются права администратора, чтобы иметь доступ к необходимым системным ресурсам.
2. Проверьте доступность и наличие интернет-соединения на сервере. Установщик Python будет скачивать дополнительные компоненты и библиотеки, поэтому требуется интернет-соединение для успешной инсталляции.
3. Убедитесь, что на сервере отключены антивирусные программы или фаерволы, которые могут блокировать установку и работу Python. Если такие программы установлены, отключите их на время установки.
4. Определите версию операционной системы Windows Server 2012 (32-бит или 64-бит). Версия Python, которую вы установите, должна соответствовать версии вашей ОС.
5. Возможно, на сервере уже установлены другие версии Python или другие приложения, которые могут интерферировать с установкой новой версии или использовать одни и те же ресурсы. В этом случае, рекомендуется удалить предыдущие версии Python или убедиться, что их настройки не вмешиваются в работу новой установки.
6. Если вы планируете использовать Python совместно с каким-либо серверным приложением или веб-сервером, убедитесь, что они совместимы и поддерживают установленную версию Python.
После выполнения этих шагов вы готовы к установке Python на ваш сервер Windows Server 2012 и можно приступать к следующему шагу — загрузке установщика Python.
INTRODUCTION how to install Python 3.7 on Windows Server
Python is a high-level, general-purpose programming language. Its design philosophy emphasizes code readability with the use of significant indentation. Python is dynamically-typed and garbage-collected. It supports multiple programming paradigms, including structured (particularly procedural), object-oriented and functional programming. It is often described as a «batteries included» language due to its comprehensive standard library. how to install Python 3.7 on Windows Server
Python 3.7, the latest version of the language aimed at making complex tasks simple, is now in production release. The most significant additions and improvements to Python 3.7 include:
- Data classes that reduce boilerplate when working with data in classes.
- A potentially backward-incompatible change involving the handling of exceptions in generators.
- A “development mode” for the interpreter.
- Nanosecond-resolution time objects.
- UTF-8 mode that uses UTF-8 encoding by default in the environment.
- A new built-in for triggering the debugger.
Prerequisites how to install Python 3.7 on Windows Server
- Windows Server with Administrator rights
- Access to Powershell
- Access to internet
Step 1. Login to your Windows Server via RDP


Step 2. Open Windows Powershell as Administrator

Step 3. Run the following command to download the python setup
PS C:UsersAdministrator> Invoke-WebRequest -Uri "https://www.python.org/ftp/python/3.7.4/python-3.7.4-amd64.exe" -OutFile "python-3.7.4-amd64.exe"
Step 4. Run the following command to install python and set up path as well
PS C:UsersAdministrator> .python-3.7.4-amd64.exe /quiet InstallAllUsers=1 PrependPath=1 Include_test=0
Step 5. Run the following command to reload environment variables
PS C:UsersAdministrator> $env:Path = [System.Environment]::GetEnvironmentVariable("Path","Machine") + ";" + [System.Environment]::GetEnvironmentVariable("Path","User")
Step 6. Run python -V to check the version of python installed.

Python official downloads:- https://www.python.org/downloads/
Thank You.
PostedJanuary 18, 2023
UpdatedJanuary 18, 2023
- Remove From My Forums
-
Question
-
I have a server running Windows Server 2012.
I have python 2.7 installed on my server. I can run hello_world.py on my server. However, I have to specify where python.exe is every time.
C:Python27python .hello_world
I added an environment variable: Name: PYTHONPATH, Value: C:Python27. That didn’t help.
How do I use python without specifying where its located?
For example:
python hello_world
python .hello_world
Answers
-
You’re still going to need c:python27 in your PATH. PYTHONPATH is used to find modules/imports — not to tell Windows where to find the executable.
G. Samuel Hays
-
Marked as answer by
Monday, April 29, 2013 4:01 PM
-
Marked as answer by

Рассмотрим установку языка программирования на Windows Server 2012, хотя установка на Windows 7, Windows 10 будет типовой.
Итак, для установки нам потребуется дистрибутив Python версию которой выбираем и скачиваем по ссылке: https://www.python.org/downloads/
Закачиваем и устанавливаем .msi пакет:

Выбираем установку для всех пользователей:
Выбираем директорию для установки, я оставляю по умолчанию C:Python27:

Далее по умолчанию нажимаем NEXT, NEXT до окончания установки:

Теперь необходимо проверить добавился ли путь для командной строки.
В диспетчере задач нажимаем Run new task:

Набираем cmd и жмем ENTER:

В окне терминала набираем python и жмем Enter, если выдаст информацию, то на этом инсталляция закончена.
У меня, как всегда, просто не получается и python выдает ошибку:
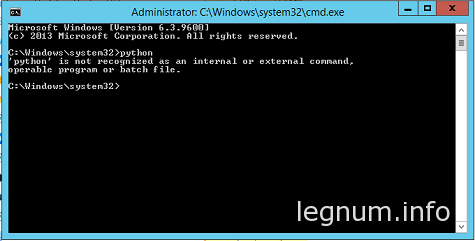
В этом же окне терминала набираем sysdm.cpl и попадаем в System Properties:

Теперь нужно зайти в закладку Advanced и нажать кнопку Environment Variables:

Редактируем Path, добавляем в конце через точку с запятой путь куда установили Python, у меня это выглядит так — ;C:Python27:


Теперь пробуем прописать python, но сделать это нужно в новом окне терминала, который подтянет наши записи:

Вот теперь установка Python закончена и можно работать.
Python is an excellent general purpose language that can be used for batch processing and other tasks on your server.
To install Python on Windows Server operating system, you just need to run the installer and use the simplest configuration.
Steps to Install Python on Windows Server Operating System
-
Download the installer (full as opposed to the web sintaller) and save it to your temp folder.

-
Right-click on the file and select Run as administrator.

-
You’ll see a User Account Control popup window with a question, “Do you want to allow the following program to make changes to this computer?” Just click on Yes.
-
Check the Add Python 3.7 to PATH checkbox at the bottom of the window (or whatever the latest version you’re installing).

-
In Optional Features screen, make sure you at least check the following: pip, py launcher, and for all users. Click Next.

-
On the next screen, Advanced Options, make sure you check Install for all users which then will change the value of Customize install location, just accept the default installation in C:Program Files unless you have a reason to install it somewhere else. Click Install.
-
Once you see Setup was successful just click the Close button.
-
Make sure that C:Program FilesPython37 and C:Program FilesPython37Scripts are in the Path of your System variables.

If you’re able to click on Edit button, you can see all the path entries in each line which is easier to read and edit. In this case, the button is greyed out due to the group policy.


If you don’t care where the program is installed, you can just clik on the Install Now, there’s nothing wrong with the setup and Python will run and this is generally fine for desktop installation.
For server installation, you should be more mindful with the program location better location rather than the default installation under a specific user folder who ran the installer. So it’s better to choose Customize installation.


As a final check, you can open Programs and Features and check if Python and Python Launcher are shown.

That’s all there is to have your server running Python scripts.
If you work mostly with Microsoft stack and need to connect to a SQL Server database using Python, then check this post about Python SQL Server Driver.
Further Reading
How to Activate Built-in Web Server
How to Use Python to Connect to SQL Server
Download
Python Download
Один, конфигурационная среда
Серверная система: Windows Server 2012 R2
Python:Python 3.7.2
django: 2.1.7
Apache:

mod_wsgi:mod_wsgi‑4.6.5+ap24vc15‑cp37‑cp37m‑win_amd64.whl
2. Установка программного обеспечения
1. Установите Python
Справочные статьи:Установить Python
2. Установите django
Справочная статья:Установка Django, проверка версии и удаление в Python
3. Установите Apache
Справочная статья:Установка Apache под windows
4. Устанавливаем mod_wsgi
4.1 Скачать
URL загрузки:https://www.lfd.uci.edu/~gohlke/pythonlibs/#mod_wsgi
Выберите подходящую версию, на этот раз я используюmod_wsgi‑4.6.5+ap24vc15‑cp37‑cp37m‑win_amd64.whl

Это название представляет
1.ap24Представляет версию apache24 (вы узнаете версию, посмотрев путь после распаковки apache)
2.vc15Vc apache, выбранный на третьем шаге выше, равен 15, и здесь выбран тот же vc.
3.cp37 и cp37m,Я не знаю, что представляет собой среду Python — 3,7, в любом случае эти два числа одинаковые.
4.2 Поместите загруженный файл mod_wsgi-4.6.5 + ap24vc15-cp37-cp37m-win_amd64.whl вПапка сценариев каталога PythonНиже, как показано на рисунке, расположение по умолчанию: C: Users Administrator AppData Local Programs Python Python37 Scripts

4.3 После входа в соответствующий каталог запуститеpip install соответствующий каталог файлов .whl,который
pip install C:UsersAdministratorAppDataLocalProgramsPythonPython37Scriptsmod_wsgi-4.6.5+ap24vc15-cp37-cp37m-win_amd64.whl
4.4 После успешной установки выполните следующую команду
mod_wsgi-express module-config
Получив эти три пути, не спешите закрывать командную строку, она вам понадобится позже.
Три, разверните django
1. Настройте Apache, откройте каталог C: Apache24 conf и отредактируйте файл httpd.conf.

Убедитесь, что каталог apache соответствует фактическому каталогу
Define SRVROOT «c:/Apache24»
Добавьте адрес сервера, затем скопируйте три предыдущих пути в конец текста, а затем настройте путь к проекту (мое имя проекта — testDjiango, он находится в каталоге C: Code, обратите внимание на изменение пути к вашему собственному проекту), как показано ниже. :
# Добавить адрес сервера
ServerName localhost:80

LoadFile "c:usersadministratorappdatalocalprogramspythonpython37python37.dll"
LoadModule wsgi_module "c:usersadministratorappdatalocalprogramspythonpython37libsite-packagesmod_wsgiservermod_wsgi.cp37-win_amd64.pyd"
WSGIPythonHome "c:usersadministratorappdatalocalprogramspythonpython37"


 #Django путь проекта к wsgi.py
WSGIScriptAlias / C:CodetestDjiangotestDjiangowsgi.py

 # Первый "/" означает, что имя, введенное в URL-адрес при посещении, пусто, затем введите: 127.0.0.1:80/ для доступа,
 # Также можно настроить, например: / test, затем URL-адрес при посещении: 127.0.0.1:80/test
 # Примечание: в любом случае путь доступа, установленный самим проектом, должен быть добавлен после URL-адреса.

 # Путь к проекту Django
WSGIPythonPath C:CodetestDjiango

 # Настроить права доступа для wsgi.py
<Directory C:CodetestDjiangotestDjiango>
<Files wsgi.py>
Require all granted
</Files>
</Directory>нота: Путь лучше всего копировать поверх фактического файла,Используйте «» в качестве разделителя пути вместо «/»(Если это путь, скопированный непосредственно из командной строки, вам необходимо изменить его), букву диска можно изменить на верхний регистр, но нижний регистр, который я использовал здесь, не является проблемой.
2. Откройте браузер облачного сервера и введите127.0.0.1:80/hello, Или введите в браузере локального компьютера:IP облачного сервера во внешней сети: 80 / привет(Где hello — это путь доступа к URL, установленный самим проектом testDjiango), как показано ниже, успешно развернут!


3. Если вам нужно разрешить внешней сети доступ к проекту, вам необходимо изменить проект python.settings.py Файл (в том же каталоге, что и wsgi.py выше, возьмите мой проект в качестве примера: каталог C: Code testDjiango testDjiango)
В поле ALLOWED_HOSTS файла settings.py добавьте звездочку
ALLOWED_HOSTS = ["*"]Справочная статья: [1]Разверните проект Python Django в окне с помощью решения apache + mod_wsgi
Even if you already have IIS installed, you may need to go through these steps to install the CGI feature if it wasn’t installed as part of the original IIS installation.
Python virtual environments are used to isolate application-specific Python environments from the system-wide Python environment. Even if you will only be running one application on a server, it’s good practice to create a virtual environment for your application to keep the virtual environment free from any unanticipated side effects of system updates.
With the virtual environment created, the next steps are to activate the virtual environment and update pip, Python’s package installer.
Typically, you’ll be installing requirements from a requirements.txt file that is part of the codebase for your application, but for the purposes of this installation guide we’ll install Django in our virtual environment, both to illustrate the steps involved as well as to ensure the virtual environment is working properly. Then we’ll create a sample Django application that we’ll use later to configure with IIS.
- In the same Command Prompt you opened above, with the virtual environment activated, install Django:
pip install django [then press Enter] - As outlined in the prerequisites section at the beginning of this document, you’ll also need to install wfastcgi in order for IIS to be able to pass requests off to Django:
pip install wfastcgi [then press Enter] - Navigate to the root of the C: drive:
cd C: [then press Enter] - Create a new directory in which we’ll put our application:
mkdir apps [then press Enter] - Navigate to the newly created apps directory:
cd apps [then press Enter] - Create a new Django project called foo:
django-admin.py startproject foo [then press Enter] - Navigate to the newly created foo project directory:
cd foo [then press Enter] - Start the Django development server:
python manage.py runserver [then press Enter] - You should see the following output:

- In a browser on the server, go to http://localhost:8000
You should see the following:
- Go back to the Command Prompt and press Ctrl-C to stop the Django development server.


Configure IIS to Serve Django Applications
Thus far we’ve accomplished the following:
- Installed Python
- Installed IIS with CGI
- Created and activated a Python virtual environment
- Installed Django and wfastcgi in a Python virtual environment
- Created a new Django project
- Ran the Django project using the Django development server
With all the underlying infrastructure in place, the last step is to configure IIS to serve Django applications. The Django development server is not designed for production use, so using a production-quality web server such as IIS is mandatory for production applications.
As with previous steps you’ll need to adjust accordingly for the actual application you want to deploy, but for the purposes of this documentation we’ll configure IIS to serve the test Django application we created in the previous steps.
Configure FastCGI in IIS
- Open the IIS Manager by clicking the Windows button, clicking on Administrative Tools, and double-clicking Internet Information Services (IIS) Manager
- Click on the name of the server in the list on the left. If you see the following dialog box, check the box “Do not show this message” and click “No.” (You can always get to this later if necessary by clicking “Get New Web Platform Components” under “Actions” on the right-hand side of IIS Manager.)

- Double-click the “FastCGI Settings” icon

- Under “Actions” on the right-hand side click “Add application …”
- In the Add FastCGI Application dialog, in the “Full Path” box, type the path to the Python executable for the application’s virtual environment:
C:virtualenvsfooScriptspython.exe - In the Arguments input box, type the path to the wfastcgi.py file in the application’s virtual environment:
C:virtualenvsfooLibsite-packageswfastcgi.py - At this point your settings in the Add FastCGI Application dialog should look like this:

- With the Add FastCGI Application dialog box still open, under the “General” section, click on the “Environment Variables” line, then click the gray “…” button that appears next to (Collection) on the right-hand side of the line. This opens the EnvironmentVariables Collection Editor dialog.

- In the EnvironmentVariables Collection Editor dialog, click “Add”
- In the “Name properties” section on the right, click the input box to the right of “Name,” remove the “Name” text that is already in the input box, and enter DJANGO_SETTINGS_MODULE (note that this MUST be entered in ALL CAPS)
- Click the input box to the right of “Value” and enter foo.settings
- Click “Add” again and enter the following:
Name: PYTHONPATH
Value: C:appsfoo - Click “Add” again and enter the following:
Name: WSGI_HANDLER
Value: django.core.wsgi.get_wsgi_application() - At this point you will have three environment variables:

- NOTE: All of these settings are CASE-SENSITIVE. They must be entered with exactly the case indicated here in order to work.
- Click “OK” to close the EnviromentVariables Collection Editor
- Click “OK” to close the Add FastCGI Application dialog


Create and Configure a New IIS Web Site
Next we need to create a new web site in IIS for the Django application, and add a Handler Mapping to the newly created web site so that requests coming to the IIS web site are passed off to the Django application for processing.
- Open IIS Manager
- On the left-hand side under Connections, expand the tree under the server name by clicking on the arrow to the left of the server name
- Right-click on the Sites folder and click “Add Website …”
- For the site name enter foo
- For the physical path, type the following:
C:appsfoo - For the purposes of this example configuration, change the Port to 81, since the Default site is running on port 80. For a real-world application you’ll likely want to use name-based virtual hosting by adding bindings and run the site on port 80.
- You may leave the “Host name” blank. At this point the Add Website dialog should look like this:

- Click “OK”

Next, we’ll add a FastCGI handler mapping to this site so the requests coming into the site will be processed by the Django application.
- In IIS Manager, expand the Sites folder on the left-hand side and click on the foo site
- On the right, double-click “Handler Mappings”
- On the right, under “Actions,” click “Add Module Mapping”

- In the “Request path” box enter an asterisk: *
- Click the arrow on the right-hand side of the “Module” box and select “FastCgi Module”
- NOTE: Make sure to select FastCgi Module, NOT CgiModule
- In the “Executable” box, enter the following:
C:virtualenvsfooScriptspython.exe|C:virtualenvsfooLibsite-packageswfastcgi.py - Note that the character after python.exe is a pipe (|), which is entered by pressing Shift- on your keyboard
- In the “Name” box, enter Django Handler (you can call this whatever you want; it’s merely a friendly name for the module mapping)
- The Add Module Mapping dialog should now look like this:

- Click the “Request Restrictions” button and uncheck the “Invoke handler only if request is mapped to:” checkbox
- Click “OK” to close the Request Restrictions dialog
- Click “OK” to close the Add Module Mapping dialog
- When prompted “Do you want to create a FastCGI application for this executable?” click “No” since we created the application earlier.
- Note that you CAN have it create the FastCGI application for you from the module mapping, but the settings seem to be different and the end result isn’t fully editable. I also detailed how to create the FastCGI application to be as thorough as possible with all the various pieces involved.
- You will now see the Django Handler listed in the Handler Mappings for the foo website:


At this point everything should be working, so verify by loading the application in a browser.
- Open a browser on the server
- Browse to http://localhost:81
- You should see the following:

This is the same result as when we ran the Django test server earlier, but now the requests are being handled by IIS.
Configure Django and IIS to Serve Static Files
Now we have things more or less working but we aren’t quite done. If you browse to the Django admin page (http://localhost:81/admin), you’ll see something like this:
The reason things look a little strange is because IIS doesn’t know where things like the CSS and image files for the Django application are located. In the Django world these assets are referred to as “static files,” and we need to perform a couple of additional steps for IIS to be able to serve these files. This isn’t an issue during development since Django has a static file server built into it, but in production we’ll want IIS to handle serving these files.
How Django handles static files is a bit of a topic in and of itself, so for further information please consult the Django documentation (https://docs.djangoproject.com/en/1.9/howto/static-files/). In this guide we’ll focus on a specific set of steps to get things working without getting into too many of the behind-the-scenes technical details, the different philosophies on where static files can or should be placed, or the various and sundry ways in which this aspect of Django applications can be addressed.
Add a STATIC_ROOT Setting to the Django Settings File
First, your Django application’s settings file needs to include a STATIC_ROOT setting, and this setting is not in Django applications by default. The STATIC_ROOT setting is used when Django’s collectstatic management command is run to determine where to place the collected static files.
In our sample foo application, we’ll tell Django to collect the static files in a static directory located in the same directory as the settings.py file. (You can ultimately put your static directory wherever you wish, but this is where we’ll be putting it for the purposes of this example.)
To accomplish this, do the following:
- Using a plain text editor such as Notepad, or Idle if that was installed when you installed Python, open the file C:appsfoofoosettings.py
- Scroll to the bottom of the file, or use the find feature of your text editor, and find the STATIC_URL setting
- Above the STATIC_URL setting, add the following setting:
STATIC_ROOT = os.path.abspath(os.path.join(BASE_DIR, ‘foo’, ‘static’)) - The placement of the STATIC_ROOT setting in the settings.py file doesn’t matter, but putting it right next to the STATIC_URL setting is typical and keeps all the settings related to static files in one place.
- The STATIC_ROOT setting we’re using as our example will put the static files in C:appsfoofoostatic
- Save the settings.py file
Run the collectstatic Management Command
Now that Django knows where to put the static files, we can run the collectstatic management command. This command takes all the static files for your project, including the static files used by the Django admin and other packages in your virtual environment, and puts them under one static directory, the location of which is the STATIC_ROOT setting we added above, so they can be served by the web server.
Now we have all our static files in one place, but we still haven’t told IIS where they’re located. We’ll accomplish this by adding a static virtual directory to the IIS web site for our application.
Note that the name of the virtual directory in IIS must match the value of the STATIC_URL setting in the Django application’s settings.py file, absent the beginning and trailing slashes. For our sample application we’re using a value of /static/ for the STATIC_URL setting, so the name of the virtual directory in IIS will be static.
Create a virtual directory in IIS as follows:
The last step is to tell IIS which handler to use to serve files out of the static virtual directory. Since at this point our Django Handler is set to serve all files for our application, even with the static virtual directory in place the Django Handler will still be attempting to serve these files.
IIS already has a static file handler active in the web site, but it’s down further in the list of handlers than the global Django Handler we configured, so to get IIS to serve the static files under the static virtual directory we’ll move the static file handler to the top of the handler list on the static virtual directory.
Confirm that everything is working by going to http://localhost:81/admin in a browser. You should now see the CSS being applied to the page.
Additional Concerns with Static Files
- Don’t include the directory to which the STATIC_ROOT setting is pointing in your application’s code repository; these files should not be tracked and versioned from that location, and the Django development server handles static files for you by serving them directly from their various locations. The collectstatic management command should be run as a normal part of the deployment process for production instances of your application.
- For complete information about Django’s handling of static files, and production deployment of static files, please refer to the following section of the Django documentation:
- https://docs.djangoproject.com/en/1.9/howto/static-files/
- https://docs.djangoproject.com/en/1.9/howto/static-files/deployment/
At this point your Django application should be playing nicely with IIS.
Additional Information
The information in this section is merely for reference, and to retain some of the research that was performed in the preparation of this guide even though it ultimately may not have been used as part of the final configuration steps.
Resources/Further Reading
Interesting things I came across while preparing this guide, in no particular order:
- http://mrtn.me/blog/2012/06/27/running-django-under-windows-with-iis-using-fcgi/
- https://www.toptal.com/django/installing-django-on-iis-a-step-by-step-tutorial
- https://www.youtube.com/watch?v=kXbfHtAvubc
- https://www.youtube.com/watch?v=cgTFrAwXeoI
- http://kiahosseini.github.io/server/2016/01/05/running-multiple-django-python-3-projects-in-windows-server-2012-on-iis.html
- http://www.wahyu.org/running-django-1-8-1-on-iis-7-with-python-2-7-9/
- http://serverfault.com/questions/366348/how-to-set-up-django-with-iis-8
- http://stackoverflow.com/questions/34840354/django-on-iis-django-core-exceptions-appregistrynotready-apps-arent-loaded-ye (where I discovered that most of the examples of running Django on IIS had an older reference to the WSGI handler)
- http://netdot.co/2015/03/09/flask-on-iis/
- https://pypi.python.org/pypi/wfastcgi
- https://pip.pypa.io/en/latest/user_guide/#installing-from-local-packages (good information about how to package up applications for deployment on an server without internet access)
- https://groups.google.com/forum/#!topic/web2py/0jUZmhWjaxY
- https://heejune.me/2015/04/22/running-python-flask-on-a-local-iis-not-azure-with-wfastcgi-py/
- http://www.pyinstaller.org/ (another option for packaging up Django applications for automated deployment)
- http://stackoverflow.com/questions/32312590/how-to-fetch-static-css-files-with-django-on-iis
Additional Avenues of Exploration
- It is possible to use a web.config file at the web site level instead of the GUI IIS configuration for FastCGI and the site-specific handlers; see http://stackoverflow.com/questions/9794985/iis-this-configuration-section-cannot-be-used-at-this-path-configuration-lock for details about what needs to be enabled to support this. While it’d be handy to include these as part of the application’s codebase, it does involve installing and enabling a bunch of additional IIS add-ons at the root level of IIS, none of which are necessary for the purposes of running a Django app.
Install WFastCGI Gateway for IIS and Python 3.4
Installing WFastCGI for IIS through the IIS Manager is completely optional. It’s simply an alternate way of installing Python (in this case Python 3.4 specifically), and also provides the wfastcgi.py file that is required to configure a handler in IIS for Python applications.
If you perform these steps, Python 3.4 will be installed at the root of the C: drive, and this distribution of Python 3.4 will also place the wfastcgi.py file in the C:Python34 directory. You can then leverage this file or copy it into your application’s directory to configure the IIS handler.
- Open IIS Manager
- Click on the server in the list under “Connections” on the left-hand side
- At this point you may see a dialog box prompting you to install Microsoft Web Platform:

- If you see this dialog box, click “Yes.” This will open the download page in a web browser.
- If you do not see this box, under “Actions” on the right-hand side of IIS Manager, click on “Get New Web Platform Components.” This will open the download page in a web browser.
- You will be prompted to launch the Microsoft Web Platform application every time you launch IIS Manager, so if you see this dialog box after you have already installed the Web Platform Installer, feel free to check “Do not show this message” and then click “No.”
- On the Microsoft Web Platform web page, click the “Free Download” button.
- After the download completes, located the downloaded file and double-click to run it. As of the time of this writing the file is called wpilauncher.exe
- If you see a Security Warning dialog, click “Run” to run the installer.
- After the installation completes, the Web Platform Installer 5.0 application will launch.
- In the Web Platform Installer 5.0 application, in the search box on the top right, type “fastcgi” (without the quotes) and press Enter.
- In the search results, locate “WFastCGI 2.1 Gateway for IIS and Python 3.4” and click the “Add” button.

- At the bottom of the Web Platform Installer application, click “Install.”
- In the Prerequisites dialog that appears, click “I Accept” to accept the terms of the license.
- The WFastCGI extension will be downloaded and installed. When the installation completes, click “Finish” to close the installation dialog, and then click “Exit” to close the Web Platform Installer.


Note that doing installing the WFastCGI Gateway and Python 3.4 in this way does not automatically configure the FastCGI and Handler Mappings in IIS for you. It does install a default Python FastCGI application, but this will not necessarily automatically work with your application, and at a minimum you would still need to add a Handler Mapping for your application.
Posted by4 years ago
Archived
![]()
My wife and I are trying to get Python (latest 3.x) working on our Windows Server 2012 R2. we have Python installed and we can see it in the command prompt. but we are stuck on configuring the web.config file . is there a step by step instruction on setting up python on Windows Server? the MS website is not intuitive.
any guidance is greatly appreciated.
This thread is archived
New comments cannot be posted and votes cannot be cast
![]()
level 1
what exactly are you trying to do? you mentioned web.config which suggests you’re trying to integrate Python with IIS
Python — один из самых популярных языков программирования, который широко используется для решения различных задач, от веб-разработки до анализа данных. Установка Python на сервер с операционной системой Windows Server 2012 очень проста и займет всего несколько минут.
Первым шагом является загрузка установочного файла Python с официального сайта. Рекомендуется выбирать последнюю стабильную версию Python, так как она содержит все последние исправления и улучшения. Выберите версию Python, соответствующую вашей системной архитектуре (32-битной или 64-битной).
После загрузки установочного файла запустите его и следуйте инструкциям мастера установки. Во время установки рекомендуется выбрать опцию «Добавить Python в PATH», чтобы можно было запускать Python из командной строки без необходимости указывать полный путь к исполняемому файлу.
По завершении установки можно проверить успешность установки Python, открыв командную строку и введя команду «python —version». Если выводится версия Python, значит установка прошла успешно.
Теперь вы можете начать использовать Python на вашем сервере Windows Server 2012. Python предоставляет множество возможностей и библиотек, которые помогут вам создавать мощные и эффективные приложения.
Содержание
- Загрузка дистрибутива Python
- Запуск установщика Python
- Выбор установочных параметров
- Установка Python на Windows Server 2012
- Проверка установки Python
Загрузка дистрибутива Python
|
1. Перейдите на официальный сайт Python по адресу https://www.python.org/downloads/. 2. На главной странице выберите версию Python для Windows и нажмите на ссылку «Download». 3. Выберите подходящий дистрибутив. Рекомендуется скачивать последнюю стабильную версию Python 3.x. |
|
4. В списке файлов найдите соответствующий файл для Windows Server 2012, обычно это файл .exe, и нажмите на него. 5. Выберите опцию «Run» в диалоговом окне загрузки для запуска установщика Python. 6. В диалоговом окне установки выберите «Install Now», чтобы установить Python с настройками по умолчанию. |
|
7. Дождитесь завершения процесса установки. При необходимости следуйте инструкциям на экране. 8. После завершения установки закройте диалоговое окно установщика Python. |
Запуск установщика Python
1. Скачайте установщик Python с официального сайта python.org/downloads. Выберите версию Python, учитывая требования вашего проекта.
2. После загрузки откройте скачанный файл установщика (например, python-3.9.7.exe) двойным щелчком мыши.
3. В появившемся окне установщика выберите «Install Now» для начала установки Python на ваш компьютер.
4. В следующем окне установщика выберите опцию «Add Python to PATH» и нажмите на кнопку «Customize installation», чтобы выбрать дополнительные компоненты, если необходимо.
5. В открывшемся окне «Optional Features» можно выбрать опциональные компоненты, которые вы хотите установить вместе с Python. Рекомендуется оставить стандартные настройки и нажать на кнопку «Next».
6. В следующем окне «Advanced Options» можно изменить расположение установки Python или пропустить этот шаг, оставив расположение по умолчанию. Нажмите «Next».
7. В окне «Setup was successful» убедитесь, что все компоненты успешно установлены. Нажмите «Close», чтобы завершить установку Python.
8. Для проверки успешной установки Python откройте командную строку и введите команду «python —version». Если у вас отображается версия Python, то установка прошла успешно.
Теперь вы можете использовать Python на Windows Server 2012 и начать разработку веб-приложений или других проектов, используя мощный и гибкий язык программирования.
Выбор установочных параметров
При установке Python на Windows Server 2012 необходимо выбрать подходящие установочные параметры. При правильном выборе параметров установка Python будет выполнена успешно и система будет готова к запуску и выполнению программ на этом языке.
Во время установки Python на Windows Server 2012 вам будет предложено выбрать следующие параметры:
- Путь установки — определите место, куда будет установлен Python на вашем сервере. Рекомендуется оставить значение по умолчанию, если у вас нет особых требований к путю установки.
- Параметры установки — выберите, какие компоненты Python вы хотите установить. Обычно рекомендуется установить все компоненты, чтобы иметь доступ ко всем функциям языка. Если вам не нужны определенные компоненты, вы можете их отключить.
- Добавить Python в переменную среды PATH — выберите эту опцию, чтобы добавить путь установки Python в переменную среды PATH операционной системы. Это позволит использовать команду python из любой директории на сервере.
- Создать ярлык на рабочем столе — выберите эту опцию, чтобы создать ярлык для быстрого запуска Python с рабочего стола.
- Создать ярлык в меню «Пуск» — выберите эту опцию, чтобы создать ярлык для запуска Python из меню «Пуск» операционной системы.
После того, как вы выбрали все нужные параметры установки Python на Windows Server 2012, нажмите кнопку «Установить», чтобы начать процесс установки. Подождите, пока процесс установки не будет завершен, и установщик не сообщит вам о том, что Python успешно установлен на ваш сервер.
Установка Python на Windows Server 2012
Если вы хотите установить Python на Windows Server 2012, следуйте этим простым шагам:
- Скачайте установщик Python с официального сайта Python (https://www.python.org/downloads/).
- Запустите установщик Python.
- На первом экране выберите опцию «Install Now», чтобы установить Python с настройками по умолчанию.
- На втором экране поставьте галочку «Add Python to PATH», чтобы добавить Python в переменную среды PATH.
- Нажмите кнопку «Install», чтобы начать установку Python.
- После завершения установки нажмите кнопку «Close».
Теперь у вас установлен Python на Windows Server 2012. Вы можете проверить, что Python установлен правильно, открыв командную строку и введя команду «python —version». Если все прошло успешно, то вы увидите версию Python, установленную на вашем сервере.
Вы можете начать использовать Python на Windows Server 2012 для различных задач, включая разработку веб-приложений, написание скриптов и вычислений.
Проверка установки Python
Чтобы убедиться, что установка Python прошла успешно, выполните следующие шаги:
- Откройте командную строку, нажав WIN + R и введя cmd.
- Введите команду
python --versionи нажмите Enter.
Если Python установлен правильно, вы увидите версию Python в командной строке, например:
| Python | 3.9.2 |
|---|
Если вы видите версию Python, значит установка прошла успешно. Если же вы видите сообщение об ошибке или что-то другое, возможно у вас есть проблемы с установкой.
Теперь, когда у вас установлен Python, вы готовы начать использовать его для разработки и выполнения Python-скриптов!