Introduction
VirtIO Drivers are paravirtualized drivers for kvm/Linux (see http://www.linux-kvm.org/page/Virtio). In short, they enable direct (paravirtualized) access to devices and peripherals for virtual machines using them, instead of slower, emulated, ones.
A quite extended explanation about VirtIO drivers can be found here http://www.ibm.com/developerworks/library/l-virtio.
At the moment these kind of devices are supported:
- block (disks drives), see Paravirtualized Block Drivers for Windows
- network (ethernet cards), see Paravirtualized Network Drivers for Windows
- balloon (dynamic memory management), see Dynamic Memory Management
You can maximize performances by using VirtIO drivers. The availability and status of the VirtIO drivers depends on the guest OS and platform.
Windows OS Support
Windows does not have native support for VirtIO devices included.
But, there is excellent external support through opensource drivers, which are available compiled and signed for Windows:
https://fedorapeople.org/groups/virt/virtio-win/direct-downloads/archive-virtio/?C=M;O=D
Note that this repository provides not only the most recent, but also many older versions.
Those older versions can still be useful when a Windows VM shows instability or incompatibility with a newer driver version.
The binary drivers are digitally signed by Red Hat, and will work on 32-bit and 64-bit versions of Windows
Installation
Using the ISO
You can download the latest stable or you can download the most recent build of the ISO.
Normally the drivers are pretty stable, so one should try out the most recent release first.
You can access the ISO in a VM by mounting the ISO with a virtual CD-ROM/DVD drive on that VM.
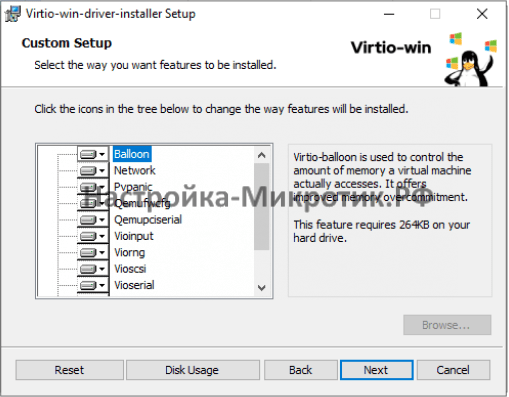
Wizard Installation
You can use an easy wizard to install all, or a selection, of VirtIO drivers.
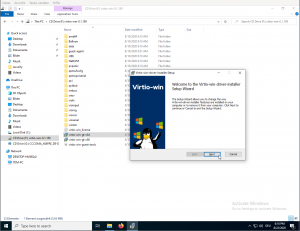
- Open the Windows Explorer and navigate to the CD-ROM drive.
- Simply execute (double-click on) virtio-win-gt-x64
- Follow its instructions.
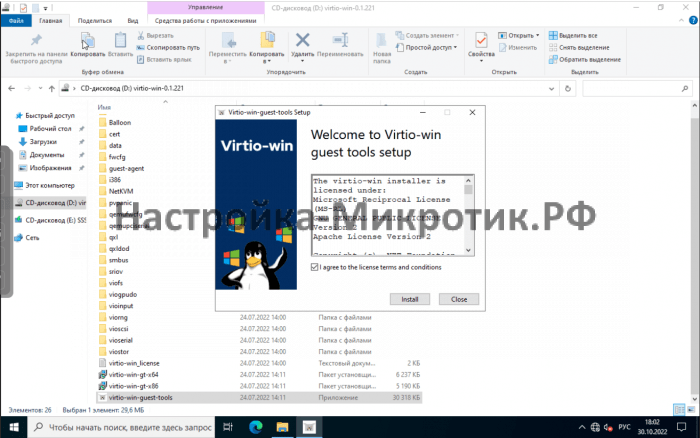
- (Optional) use the virtio-win-guest-tools wizard to install the QEMU Guest Agent and the SPICE agent for an improved remote-viewer experience.
- Reboot VM
Manual Installation
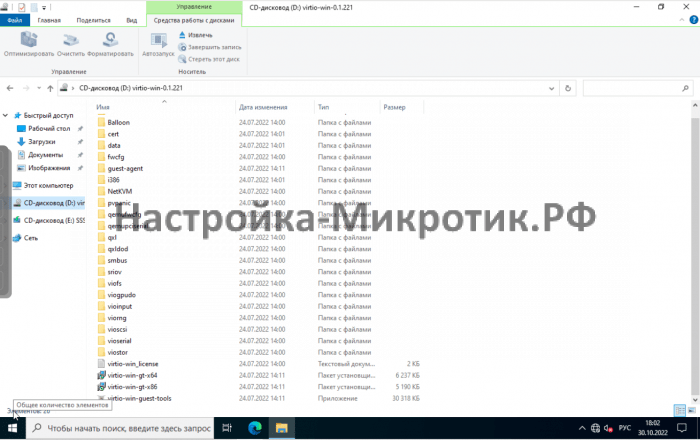
- Open the Windows Explorer and navigate to the CD-ROM drive.
- There you can see that the ISO consists of several directories, each having sub-directories for supported OS version (for example, 2k19, 2k12R2, w7, w8.1, w10, …).
- Balloon
- guest-agent
- NetKVM
- qxl
- vioscsi
- …
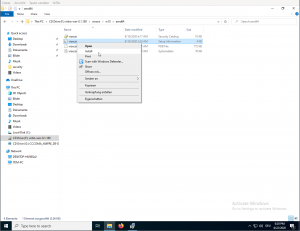
- Navigate to the desired driver directories and respective Windows Version
- Right-click on the file with type «Setup Information»
- A context menu opens, select «Install» here.
- Repeat that process for all desired drivers
- Reboot VM.
Downloading the Wizard in the VM
You can also just download the most recent virtio-win-gt-x64.msi or virtio-win-gt-x86.msi from inside the VM, if you have already network access.
Then just execute it and follow the installation process.
Troubleshooting
Try an older version of the drivers first, if that does not help ask in one of our support channels:
https://pve.proxmox.com/wiki/Get_support
Further Reading
https://docs.fedoraproject.org/en-US/quick-docs/creating-windows-virtual-machines-using-virtio-drivers/index.html
http://www.linux-kvm.org/page/WindowsGuestDrivers
The source code of those drivers can be found here: https://github.com/virtio-win/kvm-guest-drivers-windows
http://www.linux-kvm.org/page/WindowsGuestDrivers/Download_Drivers
See also
- Paravirtualized Block Drivers for Windows
- Paravirtualized Network Drivers for Windows
- Dynamic Memory Management
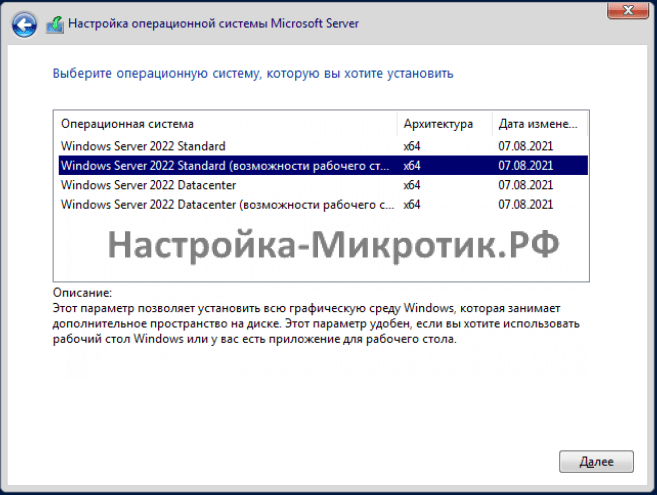
Пошаговая установка Windows Server на гипервизор Proxmox с использованием VirtIO Drivers на примере Windows Server 2022
Подготовка к установке
Скачиваем Windows нужной версии, это может быть любой Windows от XP до Server 2022
Скачиваем ISO VirtIO Drivers — https://pve.proxmox.com/wiki/Windows_VirtIO_Drivers#Using_the_ISO
Если не нашли — прямая ссылка https://fedorapeople.org/groups/virt/virtio-win/direct-downloads/stable-virtio/virtio-win.iso
Подготовка к установке
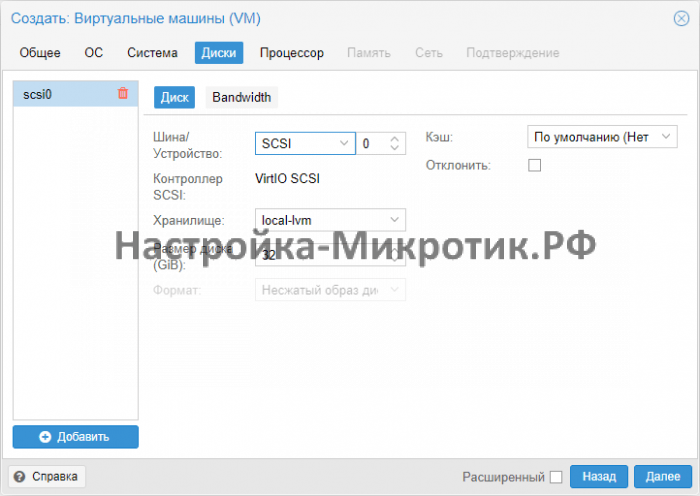
Всегда выбирайте SCSI диск, он самый быстрый из всех. IDE упирается в 40Мб/сек, SATA в 600Мб/сек, а SCSI может выжать всю скорость дисковой системы сервера. Для Linux серверов всегда выбирается VirtIO Block, как полностью совместимый и самый быстрый.
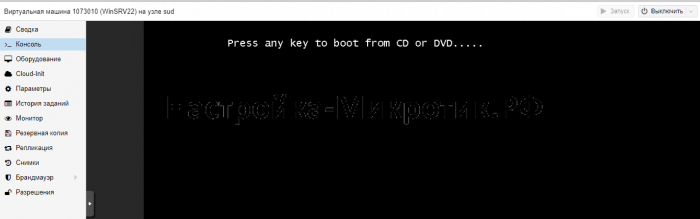
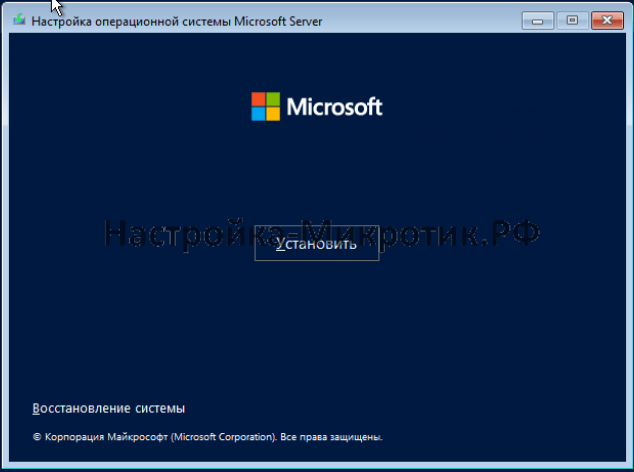
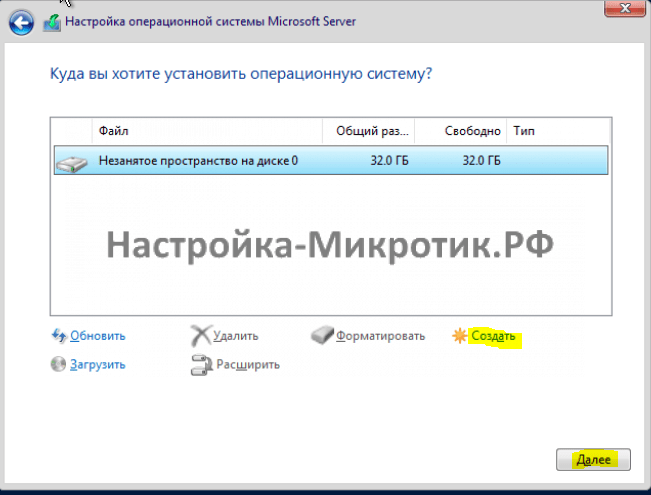
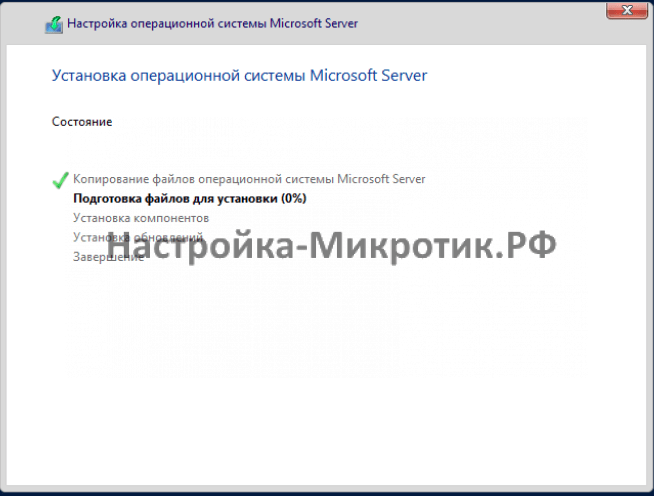
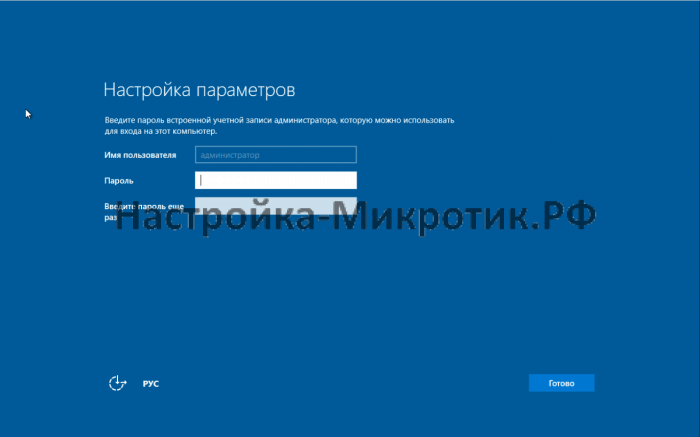
Установка

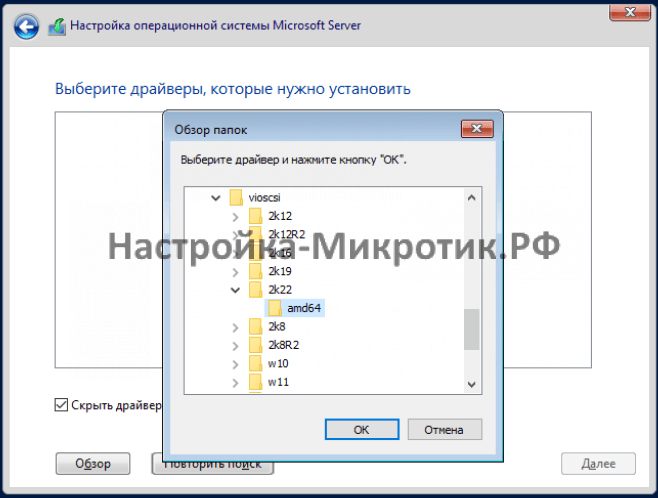
D:\vioscsi\2k22\amd64

When running Windows guest VMs on Proxmox VE, some drivers need to be installed before several key components can be used or will work properly. There’s the Balloon driver, which reports correct RAM usage to the Proxmox host; there are the SCSI drivers which you will need if you want to use VirtIO drives with Windows; VirtIO ethernet drivers; and so forth. The Proxmox tutorial videos show Windows drivers being installed but don’t show how the nice ISO full of Windows drivers is obtained in the first place. Here’s how I did it.
First of all, we need to find those drivers somewhere. After some searching on Proxmox forums I found download links in this post. I chose the first option on the list, and downloaded the current stable version of the Windows KVM drivers from this page. Scroll down to the Direct Download section and choose “Latest virtio-win iso.”
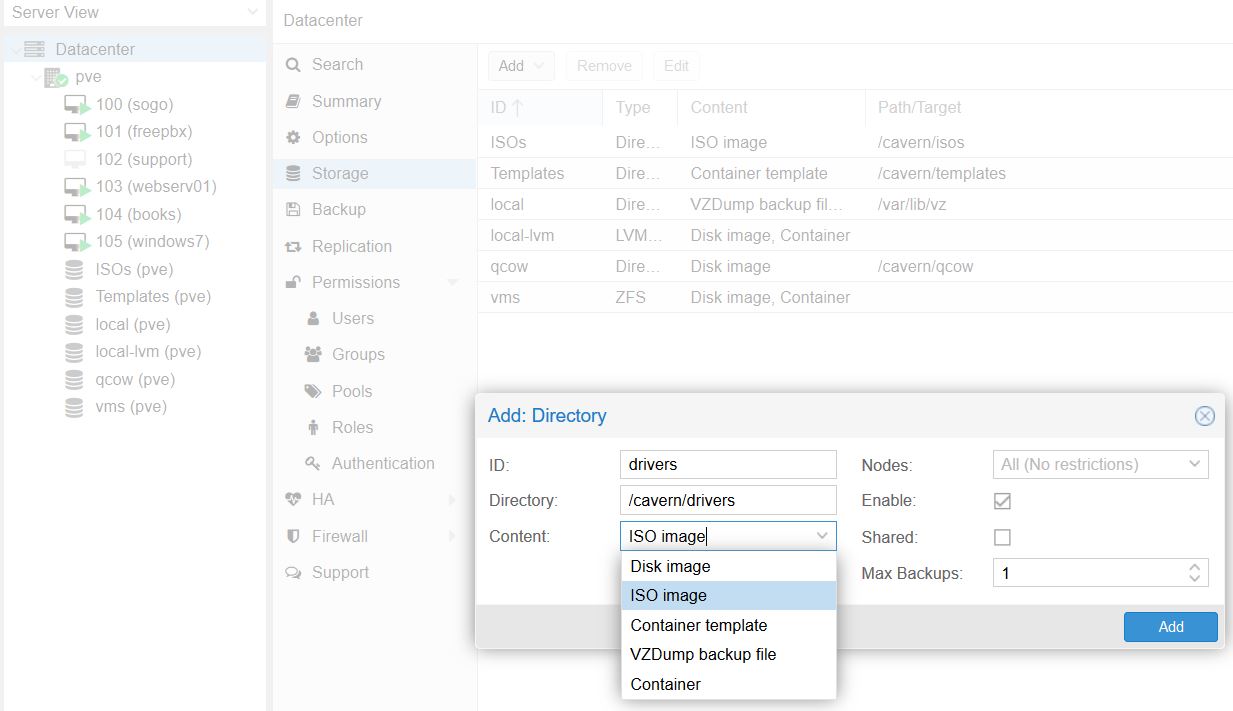
With that file in your computer’s Downloads folder, head over to the Proxmox GUI in your browser. In the left-hand pane, click on Datacenter; then to the right, select Storage. In the toolbar, click Add; and in the dropdown box, choose Directory.
Give your new storage directory a descriptive name, specify a directory location somewhere on your machine (if this directory does not already exist it will be created), and tell Proxmox that it will contain ISO images.
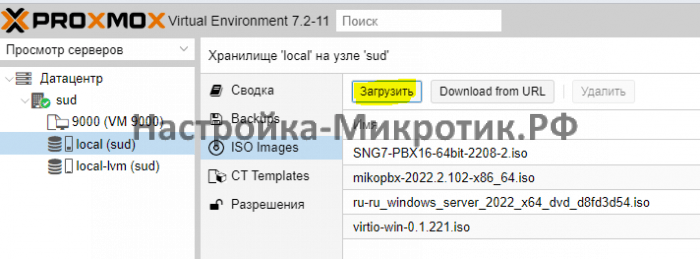
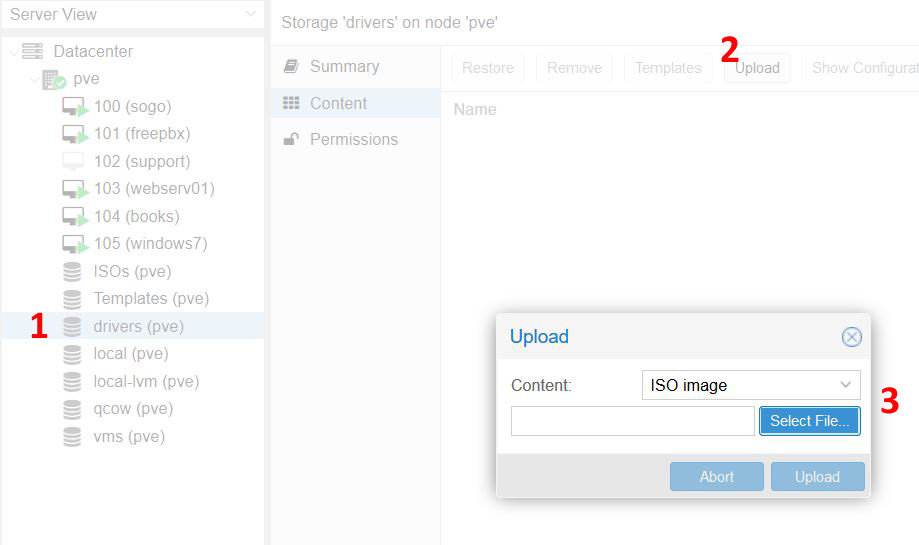
Now click on that new storage pool you just added; in the Content tab, click Upload. Select the ISO file you downloaded earlier and upload it.
When the file is done downloading you will see it listed in the Content view. Now you can use this file as a CD drive and use it to install drivers in Windows VMs; click here for a more comprehensive article on that process.
Как и многие другие гипервизоры для корректной работы виртуальных машин Proxmox рекомендуется, чтобы была выполнена установка гостевых средств интеграции Proxmox. Например, такие же рекомендации есть и для гипервизоров ESXi, VMware Workstation, VirtualBox. Установка гостевых средств интеграции позволяет получить полный набор всех доступных возможностей, которые вам может предоставить Proxmox – расширенное управление электропитанием, получение дополнительной информации в веб панели управления гипервизора, дополнительные драйвера т.д.

В этой публикации я покажу установку гостевых средств интеграции для платформы Windows и для платформы Linux.
Установка гостевых средств интеграции Proxmox для Linux
Установка гостевых средств интеграции для Linux проще, чем для Windows. Для наиболее популярных дистрибутивов гостевые средства интеграции Proxmox уже доступны в репозиториях с программных обеспечением дистрибутива.
Debian дистрибутивы
Для установки гостевых средств интеграции на Debian подобных дистрибутивах выполните следующую действия:
1. Включаем гостевые средства интеграции в настройках виртуальной машины:

2. В гостевой операционной системе установите средства интеграции:
sudo apt install qemu-guest-agent3. Затем включите службу гостевых средств интеграции:
sudo systemctl enable qemu-guest-agent4. Останавливаем виртуальную машину.
5. Заново запускаем виртуальную машину.
RHEL дистрибутивы
Для установки гостевых средств интеграции на Debian подобных дистрибутивах выполните следующую действия:
1. Включаем гостевые средства интеграции в настройках виртуальной машины:
2. В гостевой операционной системе установите средства интеграции:
yum install qemu-guest-agent3. Затем включите службу гостевых средств интеграции:
systemctl enable qemu-guest-agent4. Останавливаем виртуальную машину.
5. Заново запускаем виртуальную машину.
Установка гостевых средств интеграции Proxmox для Windows
Процесс установки средств интеграции на Windows немного длиннее:
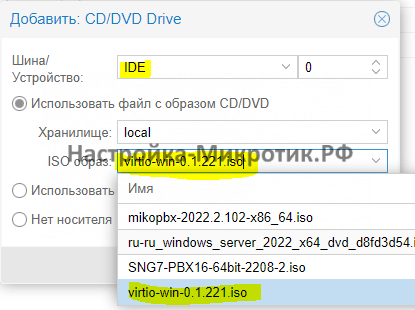
1. Загружаем дистрибутив с VirtIO.
2. Монтируем образ из п. 1 – либо непосредственно в гостевой ОС, либо через виртуальный CD/DVD привод в Proxmox.
3. Включаем гостевые средства интеграции в настройках виртуальной машины.

4. В корне смонтированного образа находим файл с дистрибутивом VirtIO нужной вам разрядности и запускаем его.

5. Следуя шагам мастера выполняем установку дистрибутива VirtIO.
6. Затем запустите дистрибутив “virtio-win-guest-tools.msi”. Следуя шагам мастера выполните установку.
7. Останавливаем виртуальную машину.
8. Заново запускаем виртуальную машину.
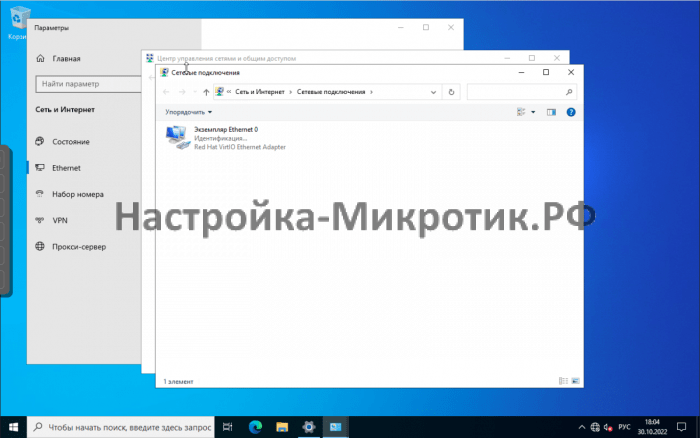
Процедуру проверки стоит начать с веб интерфейса администрирования Proxmox. В случае успешной установки и корректной работы гостевых средств интеграции вы должны увидеть на вкладке “Summary” сводную информацию об IP-адресах виртуальной машины.

Также в консоли Proxmox вы можете выполнить вот такую команду:
qm agent <vmid> ping
В случае, если гостевые средства интеграции доступы эта команда возвращает пустой вывод. Если средства интеграции по какой-то причине не доступны, то должна отобразиться какая-то ошибка.
Если ошибка все же возникла, то проверьте статусы служб интеграции в гостевой операционной системе. Для Linux систем это служба qume-quest-agent:
systemctl status qemu-quest-agent

Для Windows систем это служба “QEMU-GA”.

Authors: | Created: 2022-04-09 | Last update: 2022-12-22
Proxmox Windows Virtual Machine Configuration
This guide will walk you through configuring Windows 10 or Windows 11 Virtual Machines with VirtIO Disks and Networking using Proxmox. This configuration was tested to work with the GPU passthroughs feature from one of the following guides:
- GPU Passthrough to VM — Full GPU passthrough to VM guide
- iGPU Passthrough to VM — Cpu’s GPU passthrough to VM guide (Intel)
- iGPU Split Passthrough — Splitting (CPU’s GPU) to Multiple GPUs passthrough to VM guide
Prerequirements
Before we begin, we need to download the VirtIO Drivers for Windows iso. Upload it via the GUI as any other ISO file.
You can allso use ssh and download it directly from the Proxmox server.
wget -P /var/lib/vz/template/iso https://fedorapeople.org/groups/virt/virtio-win/direct-downloads/stable-virtio/virtio-win.iso
Create a VM in Proxmox
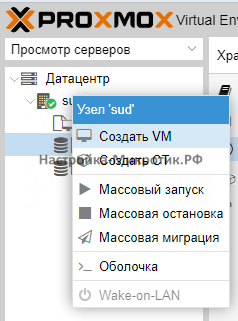
Create a Virutal Machine in Proxmox as usual.
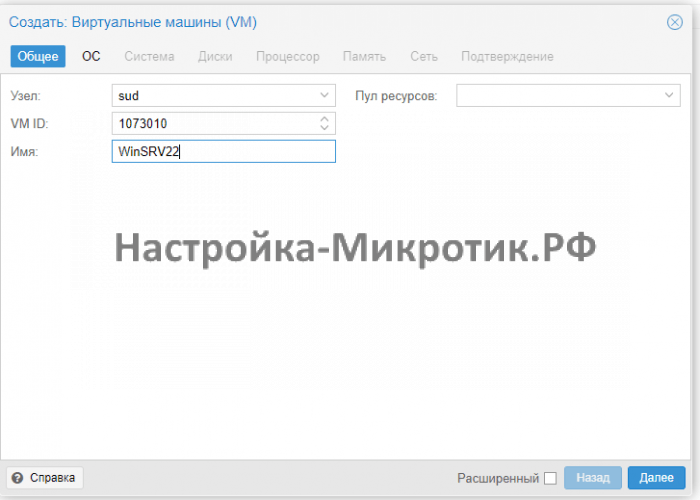
General
Select Advanced options.

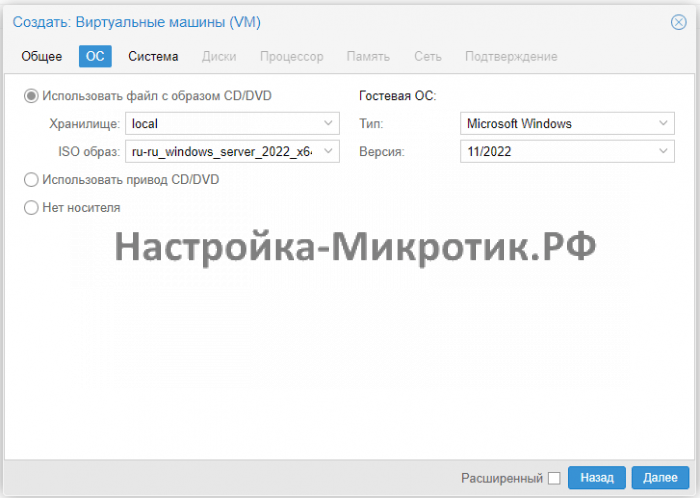
OS
Choose the iso file image for Windows 10 or 11. Change Type to Microsoft Windows and Version to your’s windows version.

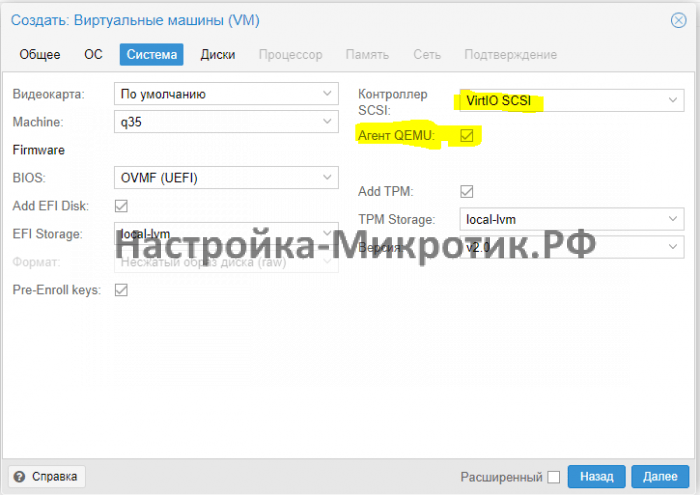
System
Change the Machine type to q35, BIOS to UEFI. Add TPM for Windows 11. Alocate Storage for UEFI BIOS and TPM.

Disks
Set Bus/Device to VirtIO Block and Cache to Write Through. Select the storage disk and the VM’s disk size.

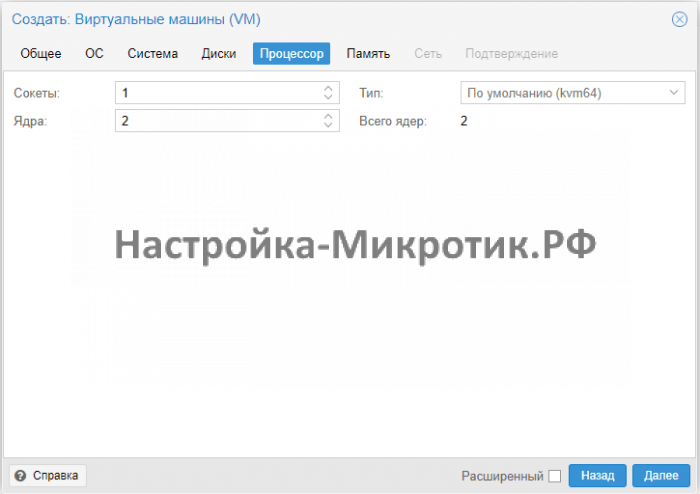
CPU
Choose how many cores you want to use. Set The cpu Type to Host

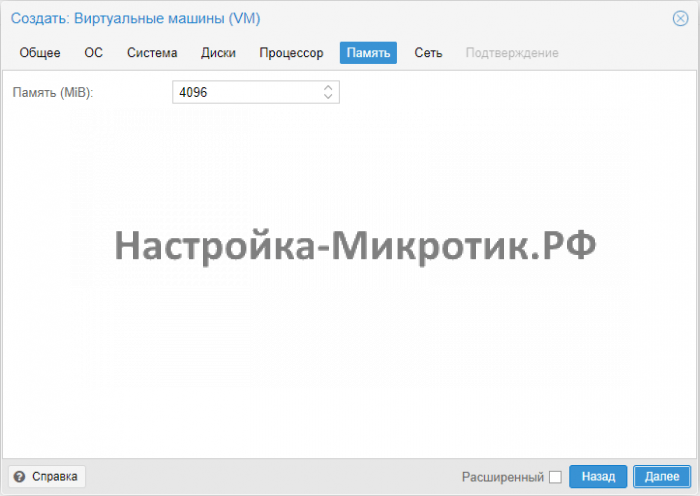
Memory
Alocate the memory for the VM. Make sure the Ballooning Device is enabled.

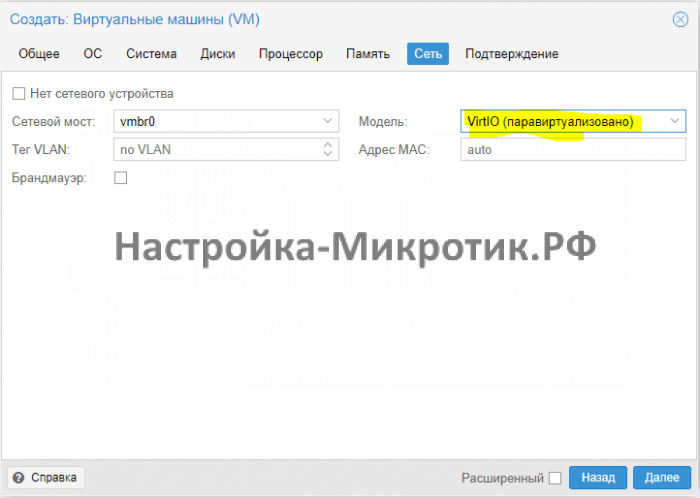
Network
Select your preferred network interface. Set the Model to VirtIO (paravirtualized).

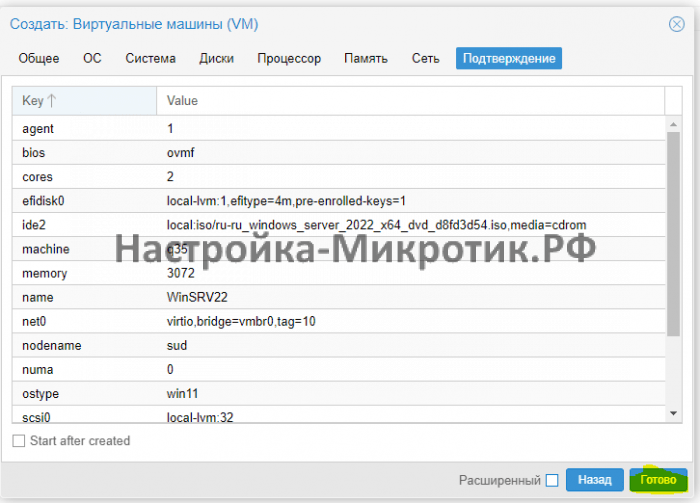
Confirm
Don’t Start the VM after creating it.

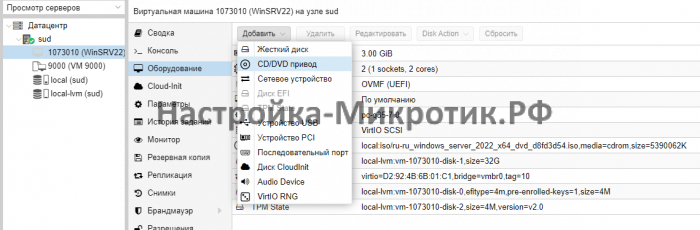
Add CD/DVD to VM
We will need to use the VirtIO Drivers for Windows iso file to install the drivers while installing the Windows VM.

Hardware Before Installation
This how the hardware of the VM should look like befor starting the Windows installation.

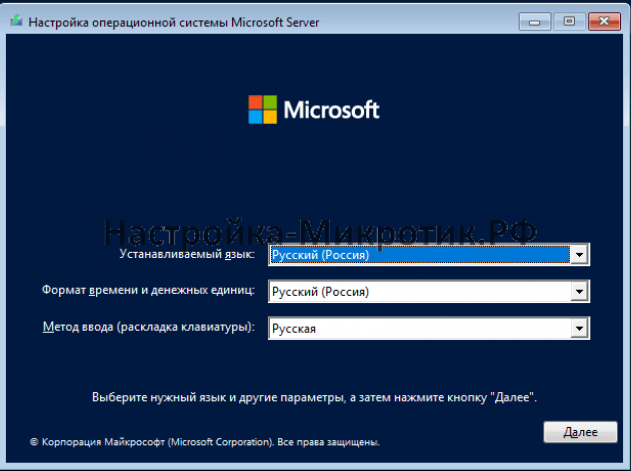
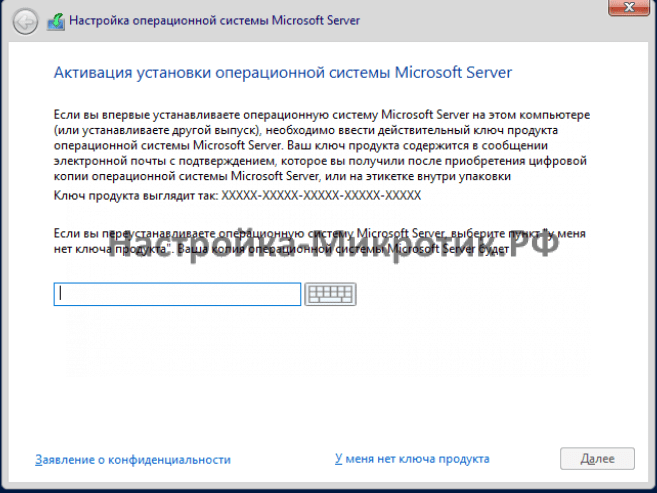
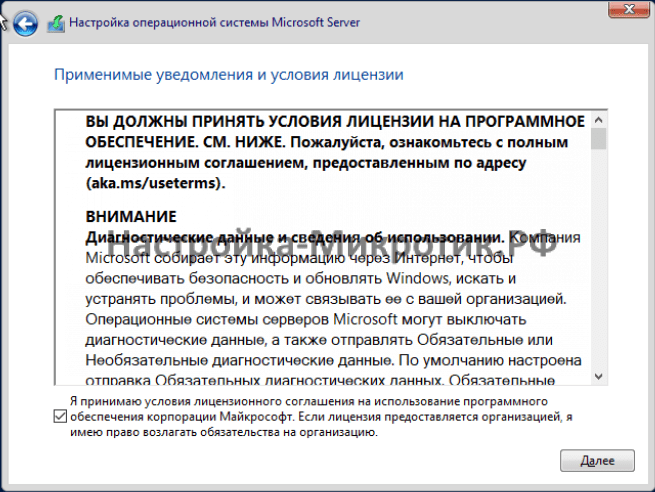
Windows Installation
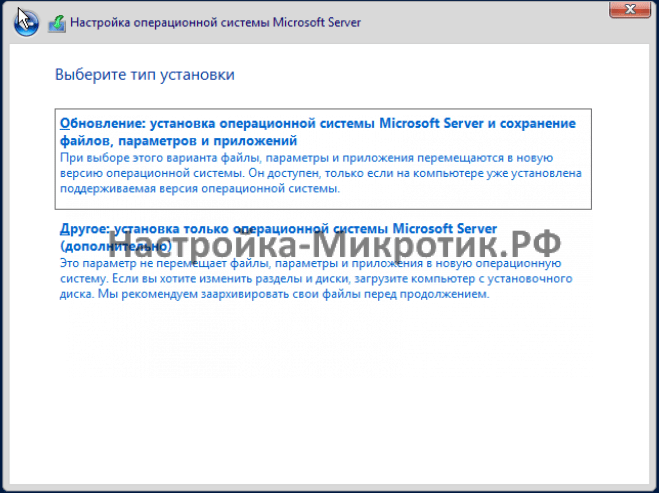
The Windows installation process is the same as any other Windows OS installation. The only caveat is that you need to install the drivers for the Storage devices and Network devices.
Choose Custom: Install Windows only (advanced)

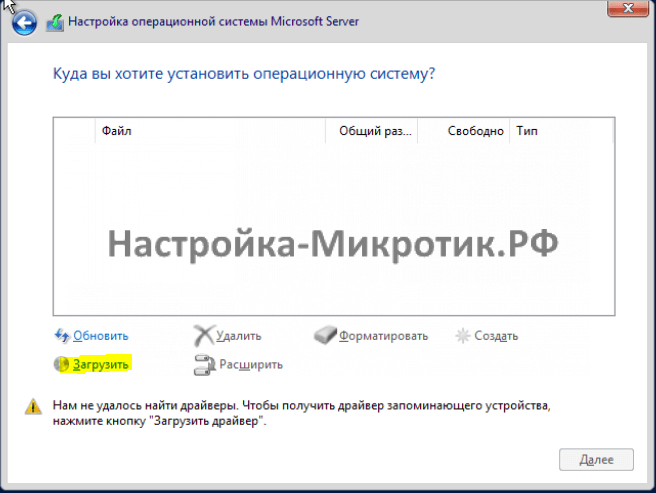
Missing Storage Devices
When prompted to select the storage device to install windows the device won’t show since we are using the VirtIO storage. Select Load Driver. 
Load the VirtIO Drivers
Browse to the VirtIO Disk find a folder called viostor and select the appropriate windows driver.

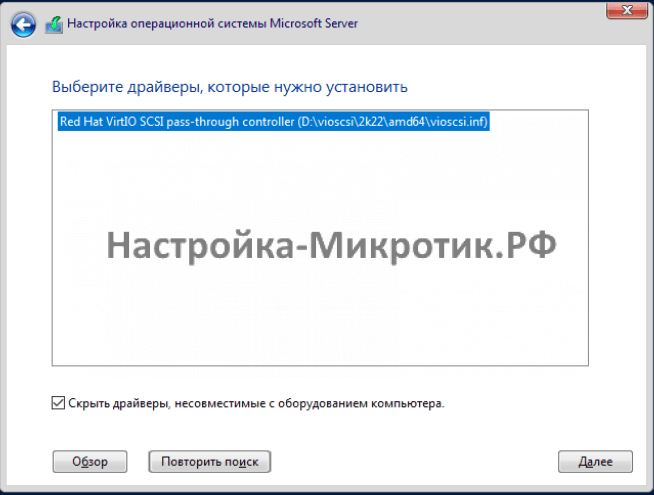
You should see the a Red Hat VirtIO driver selected. Click Next and install the driver.

Continue with the installation as usual

Missing Network Driver
Windows won’t be able to load network drivers while installing. When prompted with something for connecting to the Internet, select I Don't have internet and skip it. We will deal with the network drivers at post installation.

Post Installation
Install all the VirtIO Drivers for Windows
Open the VirtIO CD and run the virtio-win-gt-x64.exe, virtio-win-guest-tools installer. This will install all the missing virtio drivers for the VM and guest OS tools.

After the installtion your Device Manager should look like this without any errors.

Remove the VirtIO CD/DVD and Windows iso
Power off the VM.
Remove the added CD/DVD for VirtIO iso.

Select Do nor use any media on the CD/DVD with the Windows iso.

At this point we are done with the installation of the Windows VM.
Follow those guides for utilizing a GPU passthrough to VM:
- GPU Passthrough to VM — Full GPU passthrough to VM guide
- iGPU Passthrough to VM — Cpu’s GPU passthrough to VM guide (Intel)
- [GPU Split Passthrough][gpu-split-passthrough] — Splitting (Nvidia) to Multiple GPUs passthrough to VM guide