Однако иногда вам все равно необходимо выполнить полное сканирование системы на вирусы вручную, чтобы убедиться, что все в безопасности. В этой статье мы расскажем, как сканировать всю систему Windows 10 на вирусы с помощью Microsoft Defender.
Чтобы выполнить проверку на вирусы всей системы Windows 10 с помощью Microsoft Defender через Windows Security, выполните следующие действия:
- Нажмите кнопку Windows, чтобы открыть меню Пуск.
- Войдите в систему безопасности Windows и нажмите на первый результат поиска.
- Щелкните Защита от вирусов и угроз.
- В разделе Текущие угрозы щелкните Параметры сканирования.

- Выберите Полная проверка, чтобы проверить всю систему.
- Нажмите кнопку Сканировать сейчас.

После этого Microsoft Defender просканирует ваше устройство на наличие вирусов или вредоносных программ. Если он обнаруживает эти программные угрозы безопасности, он автоматически удаляет или изолирует их.
Время сканирования зависит от количества данных на вашем компьютере. Если у вас много данных, вам следует начать сканирование, когда вы закончите, и позволить вашему компьютеру выполнить ночное сканирование.
2. Используйте командную строку.
Чтобы просканировать всю систему на вирусы с помощью командной строки, выполните следующие действия:
- Нажмите кнопку Windows, чтобы открыть меню Пуск.
- Введите командную строку, щелкните правой кнопкой мыши первый результат поиска и выберите Запуск от имени администратора.
- Введите следующую командную строку в командную строку и нажмите Enter, чтобы получить доступ к последней версии программного обеспечения Microsoft Defender:
cd c: ProgramDataMicrosoftWindows DefenderPlatform4 *
- Введите следующую команду и нажмите Enter, чтобы провести сканирование:
mpcmdrun -scan -scantype 2
После того, как вы выполните этот шаг, антивирусное ПО начнет сканирование на вирусы. В командной строке вы должны увидеть статус «Начать сканирование», а когда сканирование будет завершено, вы получите сообщение «Сканирование завершено».
3. Используйте PowerShell.
Вы также можете использовать PowerShell, чтобы включить полную проверку на вирусы в системе Windows 10.
- Нажмите кнопку Windows, чтобы открыть меню Пуск.
- Введите powershell и щелкните правой кнопкой мыши первый результат поиска, затем выберите Запуск от имени администратора.
- Введите следующую команду в PowerShell и нажмите Enter:
start-mpscan -scantype fullscan
После того, как вы выполните этот шаг, Защитник Microsoft проведет полное сканирование системы Windows 10 на вирусы, чтобы удалить все обнаруженные вирусы и вредоносные программы.
Удачи.
You can run various scans to locate virus on CMD
by Vlad Turiceanu
Passionate about technology, Windows, and everything that has a power button, he spent most of his time developing new skills and learning more about the tech world. Coming… read more
Updated on
- If you want to run a virus scan from CMD, you will see that it’s pretty easy.
- Ensure you type in the correct commands into the Command Prompt app else you’ll trigger the command not recognized error.
- Running full scans provide broader information on the security state of your system.
Windows Defender is Windows’ primary security tool. Sometimes, you might not have access to your GUI and must access Windows Defender directly from the Command Prompt. This article will provide you with the best ways to run a virus scan from CMD.
Can I locate the virus using Command Prompt?
The short answer is yes; you can determine if your system is infected with a virus directly from Command Prompt. Virtually, all actions you carry out in your GUI can be done using the command line e.g Resetting your IP Address, searching for files, changing DNS servers, etc.
Locating viruses and malware using Command Prompt isn’t as intuitive as when done on the GUI. However, with the right steps and guidance, you can achieve exact results on the terminal you usually get on the GUI.
One thing to note about operating your antivirus tool from the command line is that scans generated from the terminal will only provide you with a report of the viruses found in the system; it won’t delete or quarantine them, unlike on the GUI.
How we test, review and rate?
We have worked for the past 6 months on building a new review system on how we produce content. Using it, we have subsequently redone most of our articles to provide actual hands-on expertise on the guides we made.
For more details you can read how we test, review, and rate at WindowsReport.
After discovering the virus from the Command Prompt app, you must delete it manually.
How can I run a virus scan from CMD?
- Press the Windows key + S, type in command prompt, right-click on the displayed result, and select Run as Administrator.
- In the User Account Control window, select Yes.
- In the CMD window, type in the following command to navigate to the Microsoft Antivirus Directory:
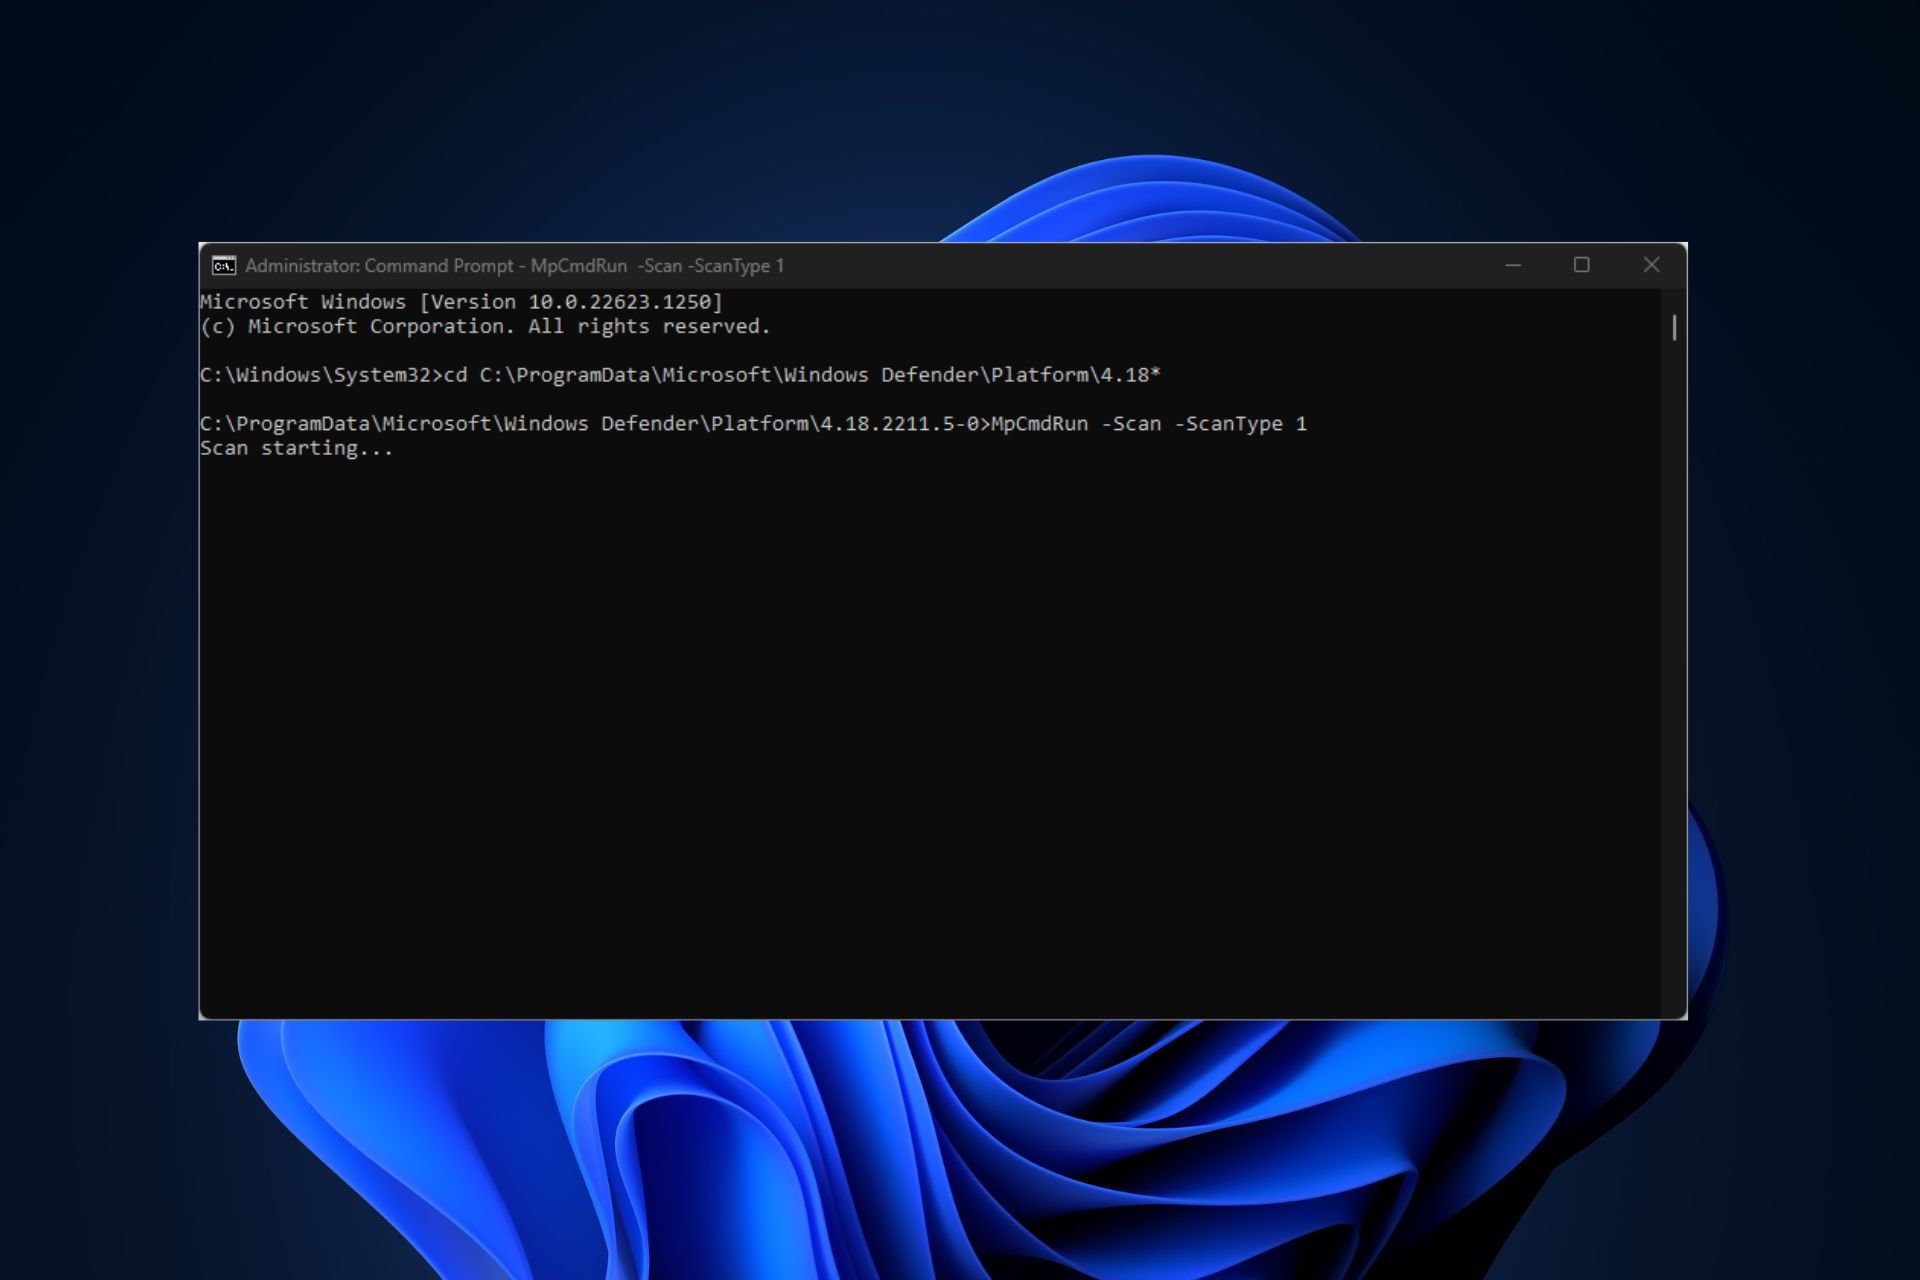
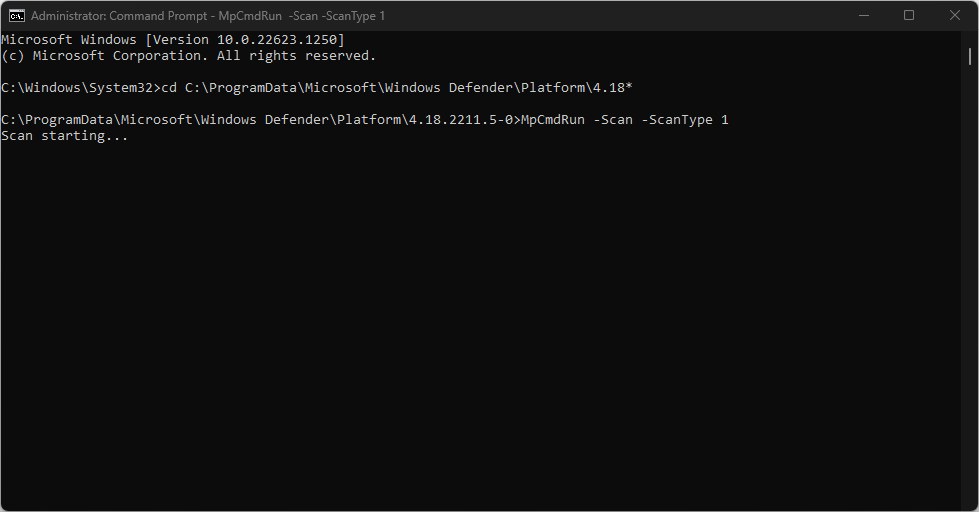
cd C:\ProgramData\Microsoft\Windows Defender\Platform\4.18* - After navigating to the Windows Defender directory, type in the following to run a quick scan:
MpCmdRun.exe -Scan -ScanType 1
- If you want to run a full scan, type the following command and press Enter:
MpCmdRun.exe -Scan -ScanType 2 - If you need to stop the scan mid-way, press Ctrl + C to quit the scan.
Just like on the GUI app, you’ll see the progress report of the scan. Like on the Windows Defender app, running a quick scan should only take a few minutes, depending on the size of the files stored on your computer.
There are cases where you’d like to run a full virus scan. Running a full virus scan ensures that all sectors of your computers are fully scanned. Scans like this take up way much time but are more efficient.
How do I run a custom scan from CMD?
- Click the Start button, type cmd, and select Run as administrator to open an elevated Command Prompt window.
- Type in the following command and press Enter:
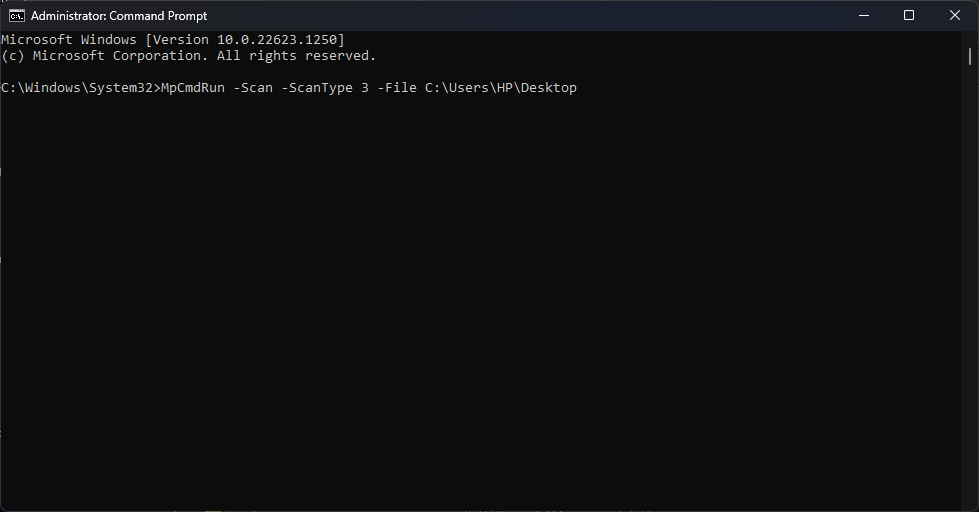
MpCmdRun.exe -Scan -ScanType 3 -File PATH - Ensure you replace PATH with the path to the folder you want to scan. For example, if you want to scan your desktop for viruses, you’ll use the command:
MpCmdRun.exe -Scan -ScanType 3 -File C:\Users\YOURNAME\Desktop - Ensure you change the YOURNAME to your username.
How do I run a Boot Sector scan
- Windows key + S, type in command prompt, right-click on the displayed result, and select Run as Administrator.
- Type in the following command and press Enter:
MpCmdRun.exe -Scan -ScanType -BootSectorScan
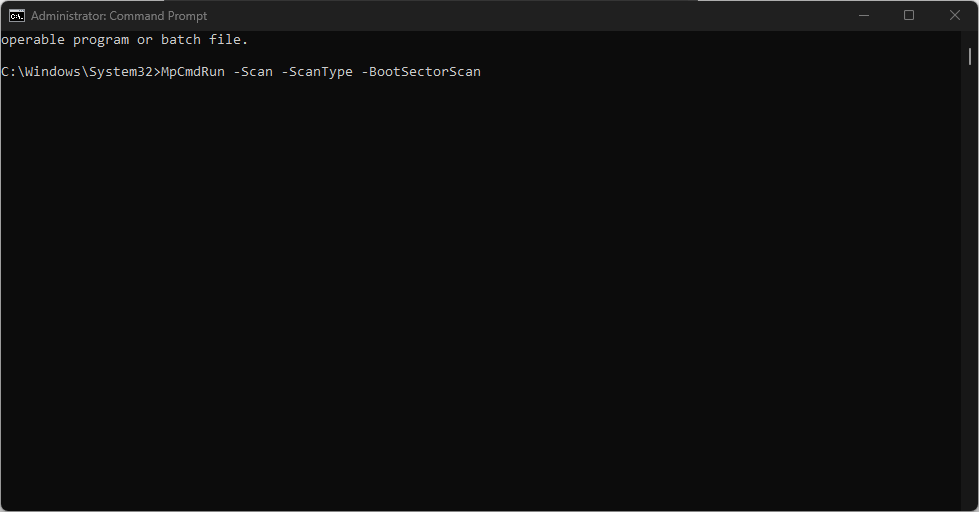
Running this command from the command prompt will scan your PC’s boot sector and remove any suspicious files found in the system. Here is a detailed guide on how to fix a corrupt boot sector.
How do I restore quarantined files using Command Prompt?
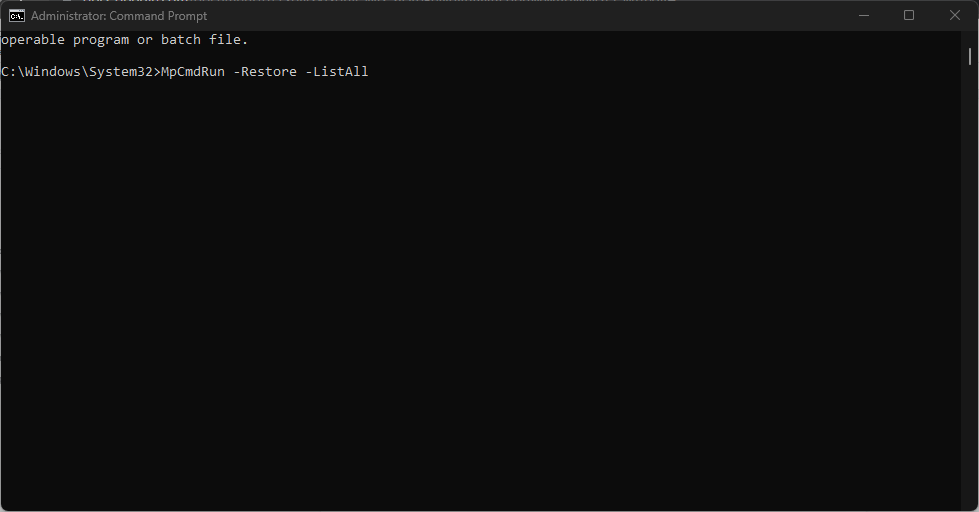
- While in the command prompt, type in the following to view the list of quarantined files:
MpCmdRun.exe -Restore -ListAll - Then type the following command: MyApp.exe along with the name of the file you want to restore, and press Enter.
When Windows Defender detects malicious files, it quarantines them. Oftentimes, the antivirus might mistakenly quarantine legitimate files.
Running a virus scan from the command prompt is less intuitive than the GUI. However, when you’ve been completely locked out of your GUI due to malware, you must run Windows Defender directly from the Command Prompt app.
For this, you will need an elevated Command Prompt window. We have a guide on what to do if you can’t open Command Prompt as administrator.
With the steps outlined above, you can run any virus scan directly from CMD. For any other questions or potential solutions, let us know in the comments section below.
![]()
The Windows operating system has a built-in anti-malware called the Microsoft Defender Antivirus which is always running to protect the user from potential attacks such as viruses, spyware, rootkits, and ransomware. This defender responds to the attacks by taking action immediately rather than responding to them after your computer has been infected.
As much as the Microsoft Defender is always running in the background to protect from attacks, one should run a full virus scan occasionally to ensure that nothing suspicious may have escaped the defender and infected your windows system. You can perform these scans when Windows is running slow, or you suspect the system is infected.
Let’s see how to do it.
Ensure that no malware escapes the windows defender by keeping it updated always.
Update the Windows defender using the command prompt
Running a Virus Scan from the CMD
To perform a scan on your system, you need to run the CMD with administrative privileges.
-
You can do so from the start menu by searching for
Command Prompt.From the search results, right-click on
Command Promptand chooseRun as administrator.
If you are not signed in as admin, you will notice that the
User Account Controlwindow opens up.Click the
Yesbutton, and thecommand promptshould open. -
The are three types of scans that you can perform on your system with Microsoft defender: I.e., Quick Scan, Custom Scan, and Full scan. Let’s start with the quick scan.
Quick Scan
The quick scan only scans for the critical areas of your system, such as running processes, system files, and registry keys. This scan is designed to be faster makeing it a good option for regular use.
To perform a quick scan, you have to change your current directory to the windows Defender installation directory. You can do this using the cd command. Use the command below to navigate to the windows defender installation directory.
cd C:\ProgramData\Microsoft\Windows Defender\Platform\4.18*Once you are in the right folder, run the quick scan using the following command and hit
EnterMpCmdRun -Scan -ScanType1You will notice the
Start scanningmessage after executing the command. Once the scan is complete, the message changes toscan finished. And just like that, you have quickly scanned your system using the command prompt.Custom Scan
With the custom scan, you get to specify the files, folders, and drives the defender should scan. This option is useful if you suspect that a particular file or folder has been infected with malware. You can also use this option to examine an external drive.
To perform a custom scan, open the
command promptand run the command below to change directories to the windows defender installation folder.cd C:\ProgramData\Microsoft\Windows Defender\Platform\4.18*Once you are in the right folder, perform the custom scan with the following command.
MpCmdRun -Scan -ScanType 3 -File <directory>Note: Replace the
<directory>with the drive you wish to scan.Full Scan
For the full scan, the defender examines the entire system thoroughly. It scans all the files and folders, email databases, external drives, and the critical areas of the system such as the programs loaded at startup, system memory, system backup, and even network drives. This option takes long (hours), depending on the size of the hard drive and the number of files. This scan is more comprehensive and can detect all types of malware and viruses. Ensure you run this scan periodically to keep your system safe from threats.
To perform a full scan, cd into the Windows defender installation directory as shown above and run the command below.
MpCmdRun -Scan -ScanType 2With this command a full scan of your system will be initiated.


Running Full Virus Scan from the GUI.
If you are not comfortable using the command prompt, you can use the graphical user interface to perform the same scans as above. Let us see how.
-
Start by opening the start menu.
-
Search for
windows Securityand open the top result from the search. -
From there, Open
Virus & threat protection. -
A new window should open that has the different types of scan.
You can choose a
quick scanfrom here, and the system will initiate it immediately. -
If you want to perform the full or custom scan, Choose the scan option to open more scan options.


Choose the scan type you want and click Scan now. This will initiate the scan and if anything is detected, the Microsoft defender will remove/ quarantine the threats automatically.
Conclusion
Windows defender ensures that your computer is safe from malware. It runs periodically in the background and quarantines any threats found. However, some threats may escape the windows defender. Hence, one should run regular virus scans to maintain the security and integrity of the windows system. By following the steps outlined in this article, you can perform the different types of scans, such as the Quick, Custom, or the Full scans, to ensure that you are safe from malware, viruses, and ransomware.
If you found the article helpful, consider sharing it with those that might find it helpful.
Thank you for reading.
If you enjoy our content, please consider buying us a coffee to support our work:

Published by
![]()
Just a guy behind the Screen who lacks knowledge about what the future holds. Join me on my Journey.
Привет друзья! В написании сегодняшней статьи огромную помощь оказал Роман Нахват (Ro8), скажем ему Спасибо!
В продолжении темы, поднятой в последних статьях, расскажу об антивирусном сканере Emsisoft Commandline Scanner. Разработчик сканера — Emsisoft Ltd, предлагает использовать его профессиональным администраторам. Особенность сканера в том, что его запуск и вся дальнейшая работа происходит в командной строке. Насколько хорош сканер и как им пользоваться правильно, давайте разберём в сегодняшней статье.
Антивирусный сканер командной строки для профессионалов — Emsisoft Commandline Scanner
Переходим по ссылке на сайт разработчика https://www.emsisoft.ru/ru/software/cmd/и выбираем версию сканера, соответственно разрядности, установленной у вас операционной системы, жмём «Скачать».

Двойным щелчком левой мыши открываем установщик сканера.

Установщик предлагает распаковать файлы утилиты корень диска (C:).
Соглашаемся и жмём «Install»

Происходит распаковка файлов сканера в корень диска (C:).


Для запуска Emsisoft Commandline Scanner не используется проводник, а только командная строка. Запускаем командную строку администратора и вводим первую команду.

Первая команда позволит нам войти в личную папку сканера.
cd C:\EmsisoftCmd\
мы находимся в личной папке сканера,
следующей командой вызываем полную справку о работе сканера Emsisoft Commandline Scanner, изучаем её.
a2cmd.exe /S /help

Для начинающих пользователей дам несколько основных команд проверки вашего компьютера или ноутбука на присутствие вредоносных программ.
a2cmd.exe /S /malware (по мнению разработчика, лучший вариант быстрого сканирования заражённого компьютера на любые активные заражения). С помощью этой команды в моей операционной системе за считанные минуты было просканировано 106317 файлов и найдено 9 заражённых объектов, все найденные объекты указаны.

a2cmd.exe /S /malware /d, /delete (в результате ввода этой команды, также произойдёт быстрое сканирование заражённого компьютера на любые активные заражения и если таковые будут найдены, будет произведено их обезвреживание.
Found ->9 (Найдено) 9 вредоносных объектов.
Removed 6 (Удалено) 6.
Some objects are still in use and can’t be removed now. They will be removed on
next Windows start. Некоторые объекты все еще используются и не могут быть удалены. Они будут удалены после перезагрузки Windows.

a2cmd.exe /S /Memory (вызывает проверку сканером оперативной памяти вашей операционной системы, то есть, если сейчас в вашей Windows работает вредоносная программа любого типа, она будет найдена.
Если ввести команду a2cmd.exe /S /Memory /d, /delete, то зловред будет удалён в процессе сканирования.
В нашем случае вирусов не обнаружено.
Found ->0 (Найдено 0)

a2cmd.exe /S /quick (также произойдёт быстрое сканирование запущенных программ на вредоносность).
a2cmd.exe /S /quick /d, /delete (найденные вредоносные объекты будут сразу удалены).
Found ->3 (Найдено 3).

Следующая команда:
a2cmd.exe /S /F=C: (вызывает полную проверку диска (C:) на вирусы).
где /f= указывает полный путь к файлу, папке или диску, который нужно сканировать.
Можете ввести команду:
a2cmd.exe /S /F=C: /d, /delete (вызывает полную проверку диска (C:) на вирусы с последующим их удалением).
В моём случае на диске (C:) не найдено ни одной опасной программы.

a2cmd.exe /S /F=F:\Spy (ищет вирусы на диске F: в папке Spy),
a2cmd.exe /S /F=F:\Spy /d, /delete (заражённые файлы при сканировании будут удалены)
где /f= указывает полный путь к файлу, папке или диску, который нужно сканировать.
В результате просканировано 56 файлов и найдено 0 вредоносных объектов.

a2cmd.exe /S /F=H:\ (сканируется на вирусы USB-флешка (буква диска H:). Можете ввести команду:
a2cmd.exe /S /F=H:\ /d, /delete, при сканировании найденные на флешке вирусы будут удалятся автоматически.
В результате просканировано 3136 файлов и найдено 0 вредоносных объектов.

Ещё команды:
a2cmd.exe /S /F=C:\Windows\ (происходит сканирование на вирусы системной папки C:\Windows).
a2cmd.exe /S /rk /d, /delete (система сканируется на руткиты, которые при обнаружении удаляются).
Заключение:
Emsisoft Commandline Scanner в силу своей специфичности будет интересен в первую очередь профессионалам и компьютерным энтузиастам.
Друзья, большая просьба к тем пользователям, которые работали со сканером Emsisoft Commandline Scanner высказать свои дополнения к статье.
Статьи по этой теме:
1. Zemana AntiMalware — отличное решение для защиты вашего компьютера от всех типов вредоносных программ!
2. Антивирусный сканер — Emsisoft Emergency Kit
Как использовать Windows Defender из командной строки в Windows 10
Windows Defender — встроенное антивирусное ПО для Windows 10. И хотя графический интерфейс Windows Defender довольно прост в использовании, но вы также можете использовать этот антивирус через командную строку. В чём-то это даже удобнее.
Командная строка Windows Defender позволяет вам выполнять все основные действия: выполнение различных типов сканирования, внесение и восстановление файлов в карантин, добавление динамических сигнатур и удаление или обновление описаний вирусов.

Запустите командную строку с правами администратора.
Если вы когда-либо использовали графический интерфейс Windows Defender, то вы будете знать, что он имеет три типа сканирования.
- Быстрое сканирование: Как следует из названия, Quick Scan работает быстро и рассматривает только наиболее распространенные области, такие как ключи реестра и стартовые папки, в которых вредоносное ПО или вирус могут оказать влияние. Обычно быстрое сканирование выполняется за считанные минуты. В командной строке быстрое сканирование обозначается -ScanType 1.
- Полное сканирование: Полное сканирование работает по всей системы. В зависимости от количества файлов в системе на выполнение сканирования может уйти несколько часов. В командной строке полное сканирование обозначается символом -ScanType 2.
- Пользовательское сканирование: Функция пользовательского сканирования позволяет выполнить сканирование конкретного диска, папки или файла. В командной строке Custom Scan обозначается символом -ScanType 3 и имеет дополнительные переключатели для указания файла или папки для сканирования.
Если вы хотите выполнить быстрое сканирование, вы можете воспользоваться командой:
"%ProgramFiles%\Windows Defender\MpCmdRun.exe" -Scan -ScanType 1
Для полного сканирования просто замените 1 в приведенной выше команде на 2.
"%ProgramFiles%\Windows Defender\MpCmdRun.exe" -Scan -ScanType 2
Для быстрого сканирования воспользуйтесь командой ниже, заменив “D:\Folder\Path” на фактический путь к папке или файлу.
"%ProgramFiles%\Windows Defender\MpCmdRun.exe" -Scan -ScanType 3 -File "D:\Folder\Path"
Windows Defender также имеет еще один тип сканирования, который проверяет загрузочный сектор системы на наличие вирусов.
"%ProgramFiles%\Windows Defender\MpCmdRun.exe" -Scan -ScanType -BootSectorScanЧтобы отменить сканирование, просто нажмите комбинацию клавиш Ctrl + C.

Работа с карантином Windows Defender
Когда Windows Defender обнаруживает угрозу, он перемещает ее в карантин, чтобы не заразить вашу систему. Однако, могут возникнуть ложные срабатывания, и, если вы думаете, что Windows Defender переместил нормальный файл в карантин, вы можете легко восстановить его. Во-первых, используйте приведенную ниже команду, чтобы отобразить все файлы карантина.
"%ProgramFiles%\Windows Defender\MpCmdRun.exe" -Restore -ListAllИз списка выберите файл и запишите его имя. Затем выполните приведенную ниже команду, заменяя “FileName” на действительное имя файла, которое вы хотите восстановить. Если команда выполнена успешно, файл восстанавливается в исходное местоположение.
"%ProgramFiles%\Windows Defender\MpCmdRun.exe" -Restore -Name "FileName"Обновление баз Windows Defender
Обычно Windows Defender автоматически обновляется. Однако, если вы хотите убедиться, что Windows Defender обновлен, выполните следующую команду.
"%ProgramFiles%\Windows Defender\MpCmdRun.exe" -SignatureUpdate
Вот и все. Как видите, опции командной строки Windows Defender довольно удобны и просты в использовании. Если вам интересно, посмотрите на эту страницу Microsoft Docs, чтобы узнать больше о других командах.
Спасибо, что читаете! На данный момент большинство моих заметок, статей и подборок выходит в telegram канале «Левашов». Обязательно подписывайтесь, чтобы не пропустить новости мира ИТ, полезные инструкции и нужные сервисы.
Респект за пост! Спасибо за работу!
Хотите больше постов в блоге? Подборок софта и сервисов, а также обзоры на гаджеты? Сейчас, чтобы писать регулярно и радовать вас большими обзорами, мне требуется помощь. Чтобы поддерживать сайт на регулярной основе, вы можете оформить подписку на российском сервисе Boosty. Или воспользоваться ЮMoney (бывшие Яндекс Деньги) для разовой поддержки:
Заранее спасибо! Все собранные средства будут пущены на развитие сайта. Поддержка проекта является подарком владельцу сайта.