- Категория: Инструкции
-
![]()
Afuwingui — это простая утилита для прошивки биос из под Windows поможет, когда Ваш биос невозможно прошить программой FPT, или при прошивке через AFUDOS у Вас по каким либо причинам не работает клавиатура (например после неудачной прошивки, или кривого мод биоса).
Программа предназначена для биосов производства American Megatrends.
Версия 5.12 подходит для биосов на Aptio 5, использующихся в большинстве китайских материнских плат на сокете 2011-3.
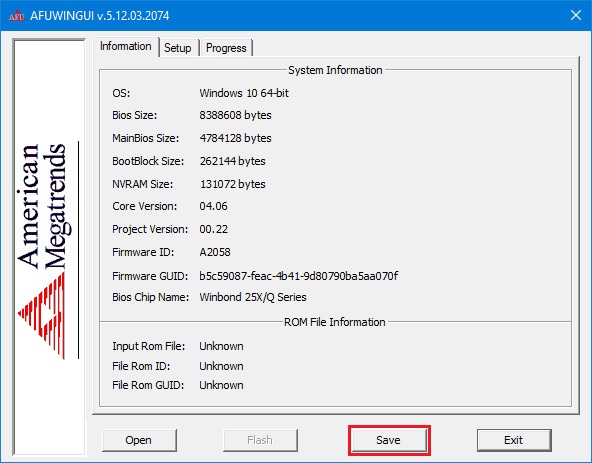
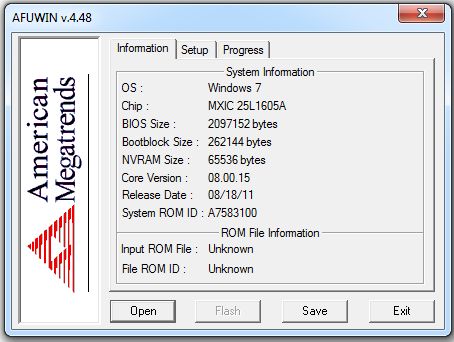
Сначала делаем бэкап родного биоса — запускаем утилиту AFUWINGUIx64.EXE, нажимаем «Save» и сохраняем файл.
Если программа не совместима с Вашим чипом Вы увидите соответствующее сообщение с ошибкой
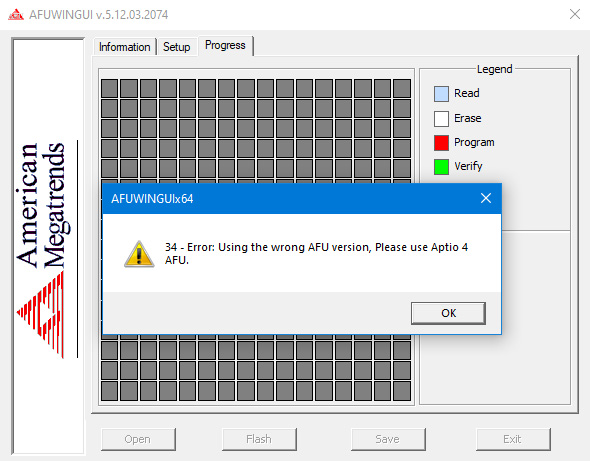
Таким образом перед прошивкой биоса мы можем проверить совместимость программы с нашим чипом биоса, если процесс бэкапа прошёл удачно, значит чип биоса совметим с программой.
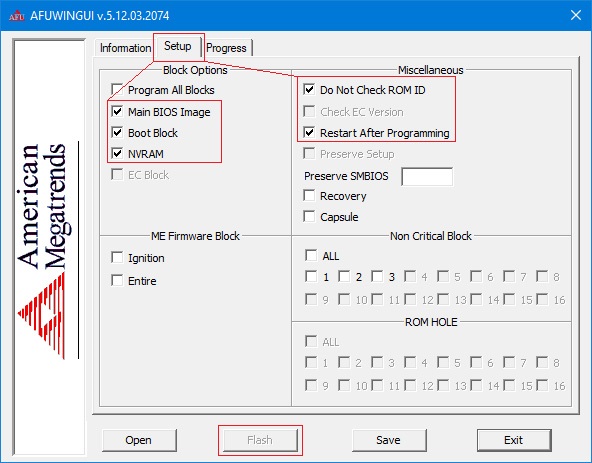
Далее нажимаем кнопку «Open», выбираем файл биоса для прошивки, во вкладке Setup ставим галочки как на скриншоте и нажимаем кнопку «Flash».
По завершению процесса прошивки, система перезагрузится уже с обновлённым биосом.
Прошить биос через Afuwin можно и без графического интерфейса, для этого создайте в папке с программой .bat файл с параметрами:
AFUWINx64 имя_прошивки.rom /P /B /N /X /SHUTDOWNДополнительная информация:
Не прошивайте файл дампа биоса, если не уверены, что он предназначен для Вашей платы.
После прошивки биоса рекомендуется сбросить настройки по умолчанию.
Скачать AFUWINGUI v5.12.03.2074: AfuWin64, AfuWin32 (поддержка Aptio 5)
Скачать AFUWINGUI v3.09.03.1462: AfuWin64, AfuWin32 (поддержка Aptio 3, 4, 4.5)
Официальный сайт утилиты

Afuwingui — простая утилита, позволяющая снять или прошить дамп биоса из под Windows. Работает с биосами производства American Megatrends.
Не прошивайте скачанный откуда-либо дамп, если не уверены, что он предназначен для AFUWIN.

Для большинства прошивок совместимых с программой китайских плат подойдут эти настройки
Версия 5.12 подходит для биосов на Aptio 5, использующихся в большинстве китайских плат на сокете 2011-3. Не забудьте сделать бэкап родного биоса!
Также прошиться через Afuwin можно без графического интерфейса, создав в папке с программой .bat файл с параметрами: AFUWINx64 имя_прошивки.rom /P /B /N /X /SHUTDOWN
Скачать:
 AfuWin64
 AFUWINx64 5.12.03.2045 Для 64-разрядных Windows 8-10
Размер файла: 2 MB Кол-во скачиваний: 41335
Free instant access to BIOS tips!
Fill in your name and email and receive our ebook ‘How to update your PC BIOS in 3 easy steps’ (15$ value), free BIOS tips and updates about Wim’s BIOS!
Fast, Scalable and Secure Webhosting
Are you currently having hosting problems? Do you feel that your site slowlyness is killing sales or traffic?
Our book Fast, Scalable and Secure Webhosting for Web Developers will give you the knowledge to run your site on a speedy, scalable and secure server!
Start learning about Linux, Nginx, MariaDB, PHP-FPM, Java, IPv6, HTTPS, WordPress and much more!
Tip: Receive your free Chapter Secure your site with HTTPS by joining our mailing list!

AMI Flasher is a utility program that helps you to update your BIOS — the code that runs the first moment you boot your PC. It was created by AMI to support flashing AMI BIOS based data files.
The BIOS code is stored on the motherboards on Flash chips since its introduction in 1993.
Over the years AMI has released DOS, Windows and Linux based flashers for different versions of AMI BIOS and AMI UEFI BIOS.
The DOS based versions can’t be run from Windows or other operating systems. You’ll need to create a bootable DOS disk.
Please read our How to flash your bios FAQ to correctly use the AMI Flashers.
AMI AFUDOS Flasher — DOS based AMI BIOS Firmware Update flasher
The following AMI Flasher tools can be used on AMI BIOS Core releases Aptio 3, 4, 4.5, and 5
AMI AFUWIN Flasher — Windows based AMI BIOS Firmware Update flasher
The following AMI Flasher tools can be used on AMI BIOS Core releases Aptio 3, 4, 4.5, and 5
AMI AFUWIN Flasher — Windows based AMI BIOS Firmware Update flasher
| AMI AFUWIN Flasher version | Notes |
|---|---|
| AFUWIN Flasher 3.05.04 | Windows 32 & 64 bit supported |
| AFUWIN Flasher 4.48 | Windows 32 & 64 bit supported / compatible with AMIBIOS8 |
| AFUWIN Flasher 5.05.04 | Windows 32 & 64 bit supported / compatible with APTIO 3, 4, 4.5, and 5 |
AMI AFULNX Flasher — Linux based AMI BIOS Firmware Update flasher
The following AMI Flasher tools can be used on AMI BIOS Core releases Aptio 3, 4, 4.5, and 5
AMI AFULNX Flasher — Linux based AMI BIOS Firmware Update flasher
| AMI AFULNX Flasher version | Notes |
|---|---|
| AFULNX Flasher 5.05.04 | 32 bit and 64 bit Linux supported / compatible with APTIO 3, 4, 4.5, and 5 |
AMI AFUEFI Flasher — EFI shell based AMI BIOS Firmware Update flasher
The following AMI Flasher tools can be used on AMI BIOS Core releases Aptio 3, 4, 4.5, and 5
AMI Flasher — DOS based AMI BIOS flasher
The following AMI Flasher tools can be used on AMI BIOS Core release 6.31 or earlier.
AMI Winflash — AMI Flasher (Windows based)
The following AMI Flasher tools can be used on AMI BIOS Core release 6.31 or earlier.
The Flasher utilities are copyrighted by their respective owners.
Need help? Ask your question here!
(Examples: how to update your BIOS, how to identify your motherboard)
If you’re reading this article, it’s likely because you’re trying to update your American Megatrends BIOS and having some trouble doing so. Maybe you’ve tried the traditional method of going into your BIOS and updating from there, but that didn’t work.
Don’t worry—updating your BIOS is actually a pretty simple process, and we’re here to walk you through it step by step. By the end of this article, you should be able to update your BIOS without any problems. Let’s get started!

The BIOS on an American Megatrends motherboard is made to work with a large number of CPUs, memory modules, and other parts. Another feature of the American Megatrends motherboard is the ability to update the BIOS without having to open up the computer. This is done by using a special update utility that is included with the motherboard.
In order to update your BIOS, first you’ll want to find your motherboard’s model number. This information is typically printed on the main circuit board of your computer, or on a sticker attached to it. Then, type that information into Google and do a search. You should be able to find BIOS updates for your specific motherboard model.
This update utility allows you to download and install new versions of the BIOS as they become available. The American Megatrends motherboard also includes a number of built-in security features. These security features include a password protection system that prevents unauthorized access to the BIOS settings.
If you are experiencing errors while using your computer or experiencing poor performance, it is always a good idea to upgrade your motherboard BIOS to the latest recent version. If you are unsure how to do so, here is a guide that you should follow.
Method 1: Manual Download BIOS
If you are not sure about which model motherboard you have, there is a software called CPU-Z that you can use to verify which brand of motherboard you are using. It will show your manufacturer details, including version, brand, and model number.
Download CPU-Z

Step 1. Check the motherboard model and serial number. After that, download the BIOS from the official AMI website.
Step 2. You need to unzip the BIOS file and after that connect a USB drive to your PC then copy these files onto the USB drive. One thing to remember is that no folders should be created; the file should be placed without folders.
Step 3. Restart your PC
Step 4. After restarting, Press F12 to enter the BIOS POST Flash option.

Step 5. Now you need to select USB drive that you have connected in the previous step.
Step 6. Select the biOS file for updating to the latest version, you need to verify that the model number is correct.
Step 7. It ask you to confirm that you want to Flash BIOS, click YES.
Step 8. It will erase the DMI date so click on “Yes”
Step 9. It will take few moments to complete installation, don’t restart PC until it completes process.
This is how you can update your bios manually, as you can see you don’t have to be expired to install this tiny software into your machine.
Method 2: Update BIOS using Firmware Utility
It is recommended that users update their BIOS using Firmware Utility whenever there is a new release from the manufacturer. This will ensure that the latest features and bug fixes are applied to the system. Software is available for Windows, FreeBSD, and Linux, UEF shell, and is compatible with both architecture x64Bit and x86Bit. To update BIOS follow the below steps.
Step 1. First, download the BIOS files from the official website of AMI.

Step 2. Click on Firmware Update Utility,” then accept the terms and conditions. After that, click on the “Download” button.

Step 3. Unzip the downloaded file.
Step 4. Open the AFUWin folder.
Step 5. Select 64-bit or 32-bit.
Step 6. Now you need to Run the AFUWIN.EXE file.

Step 7: Click the Open button to search for BIOS; select the downloaded BIOS that you downloaded from the Motherboard website.
Step 8. Click on Flash button to update BIOS.
Once the update is complete, reboot the system to apply the changes. It is important to note that any settings that were modified in the BIOS will need to be reset after the update is complete.
We hope that this guide helped you update the American Megatrends BIOS, and now you should be able to do it by yourself. If you are are are still facing any problems, then leave a comment below and we will help you to resolve it.
What to know about American Megatrends Motherboard?
An American Megatrends motherboard is a computer motherboard manufactured by American Megatrends Inc. (AMI). AMI is a company that designs, manufactures, and markets system BIOSes, firmware, and other computer-related products.
The term “motherboard” refers to the main circuit board in a computer. It is also known as the “main board,” “baseboard,” or “system board.” The motherboard is where the CPU, memory, and other components of the system are located.
The American Megatrends motherboard is designed to be compatible with a wide range of CPUs, memory modules, and other components. The American Megatrends motherboard has a number of features that make it unique. One feature is the BIOS, which is a set of instructions that tells the computer how to boot up and operate.
Other Articles
- 7 Best Virtual Machine for Mac M1, M2 (FREE And PAID]
- 6 Best iOS Emulator for Mac M1 & M2: Run iOS Apps (2022)
Tags: American Megatrends BIOS update latest versionAmerican Megatrends BIOS update MSIAmerican Megatrends BIOS update Windows 11Update American Megatrends BIOS
Содержание
- Обновление AMI BIOS
- Этап 1: Определение типа материнской платы и версии микропрограммы
- Этап 2: Загрузка обновлений
- Этап 3: Установка обновлений
- Заключение
- Вопросы и ответы

Несмотря на большое количество выпускаемых материнских плат, поставщиков чипов BIOS для них существует немного. Один из самых популярных – компания American Megatrends Incorporated, более известная под аббревиатурой AMI. Сегодня мы хотим рассказать, как следует обновлять БИОС такого типа.
Перед тем как мы приступим к описанию процедуры, отметим важный момент – обновление БИОС требуется лишь в редких случаях. Они описаны ниже, в следующей статье.
Подробнее: Когда требуется обновить BIOS
Теперь переходим непосредственно к инструкции. Обратите внимание, что она рассчитана на владельцев настольных ПК, тогда как обладателям ноутбуков рекомендуем изучить отдельные руководства.
Урок: Обновление BIOS на лэптопах ASUS, Acer, Lenovo, HP
Этап 1: Определение типа материнской платы и версии микропрограммы
Важный нюанс, который следует знать перед апгрейдом системного ПО – определяющую роль играет не тип БИОС, а производитель материнской платы. Поэтому первый этап и заключается в определении модели «материнки», а также версии уже установленной в неё микропрограммы. Самый простой вариант – задействовать программу для определения комплектующих компьютера. Одним из лучших решений является AIDA64.
Скачать AIDA64
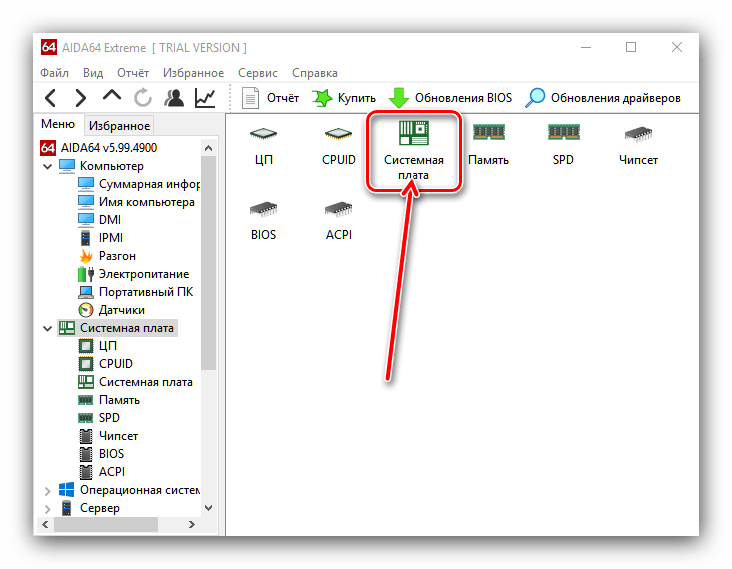
- Загрузите пробный дистрибутив программы и установите его на компьютер, затем запустите с ярлыка на «Рабочем столе».
- В основной вкладке кликните по пункту «Системная плата».

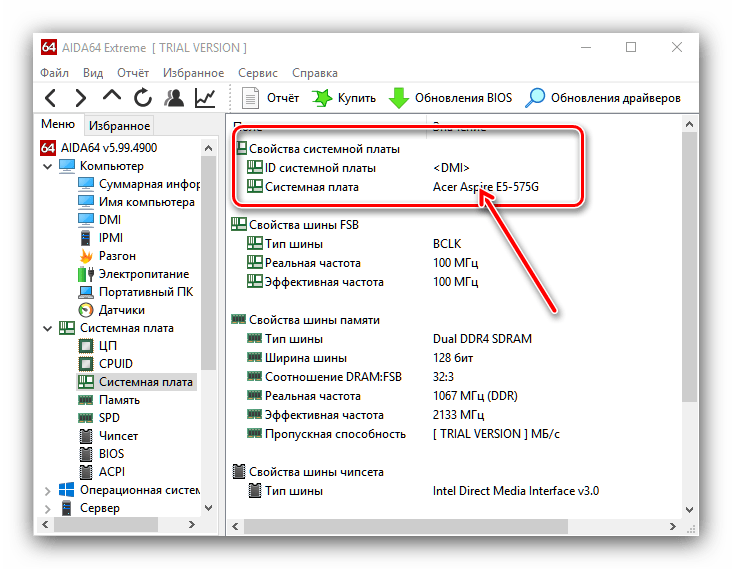
Повторите действие в следующем окне. - Обратите внимание на раздел «Свойства системной платы» – в строке «Системная плата» написано точное наименование модели.
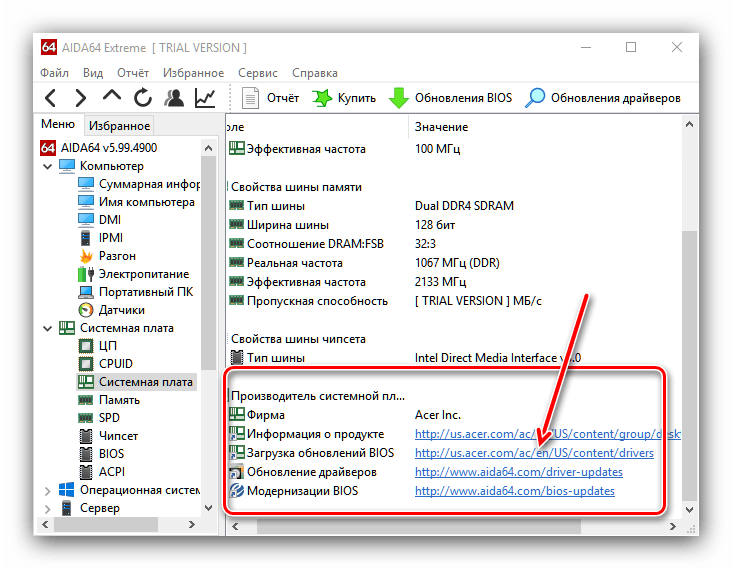
Прокрутите введения вниз, до блока «Данные о системной плате» – здесь будут размещены ссылки, нужные для обновления BIOS. Они пригодятся нам на следующем этапе.

Этап 2: Загрузка обновлений
Самый важный этап – загрузка подходящих обновлений.
Напоминаем, что AMI BIOS сам по себе не имеет значения, а важны производитель, модельный ряд и ревизия материнской платы!
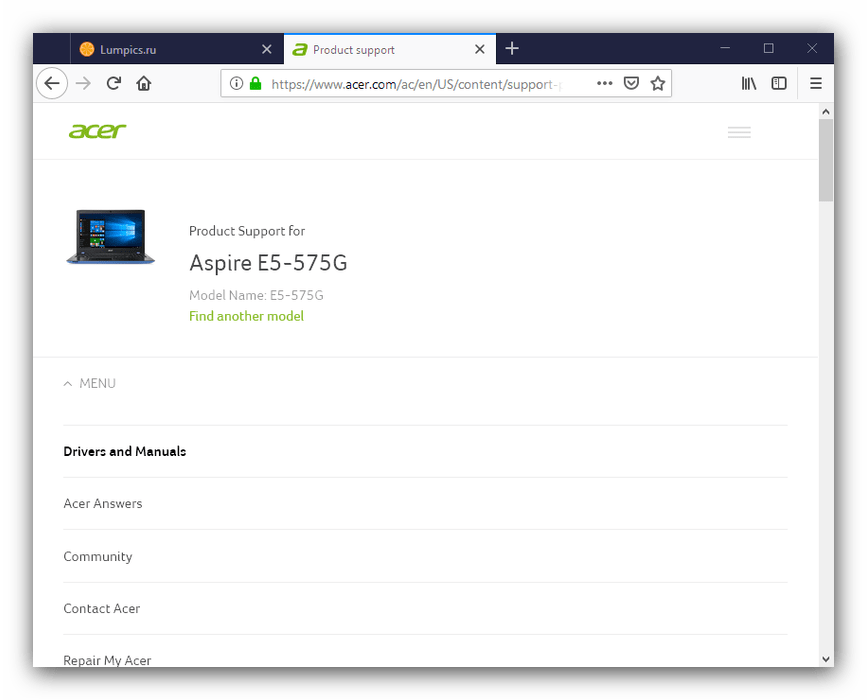
- Откройте браузер и воспользуйтесь ссылками из AIDA64, полученными на предыдущем этапе, или же перейдите к сайту производителя вашей платы самостоятельно.
- Найдите страницу поддержки устройства и поищите пункты, в названии которых фигурируют слова «BIOS» или «Firmware». Именно в этих разделах находятся обновления для микропрограммы платы.
- Найдите свежую версию прошивки и загрузите на компьютер.
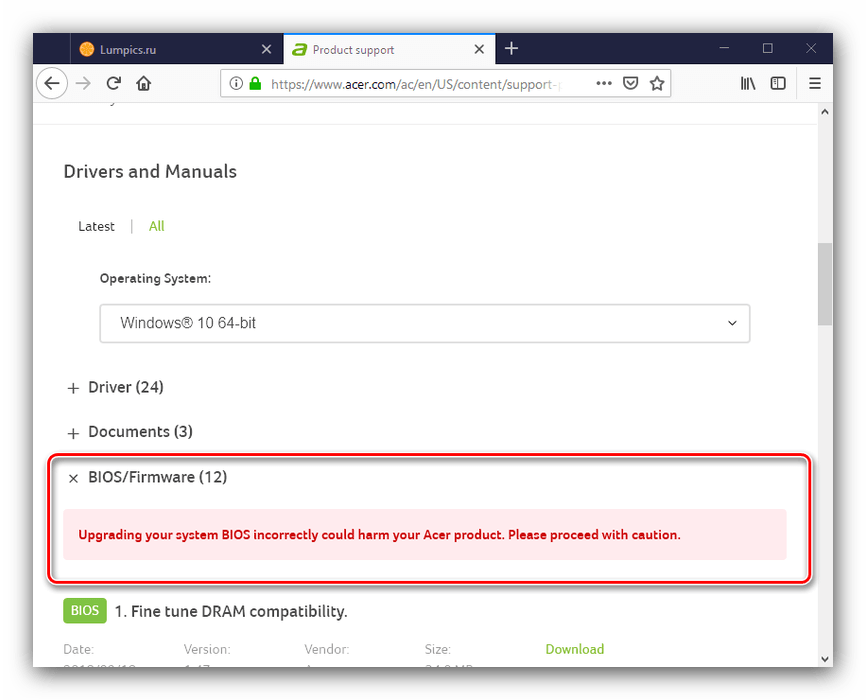

Обратите внимание! Многие варианты AMI BIOS не поддерживают кумулятивные обновления: не рекомендуется устанавливать версию 1.4 на BIOS 1.0, если есть версии 1.2, 1.3 и так далее!
Этап 3: Установка обновлений
Непосредственно установить новый BIOS можно несколькими разными способами. Рассмотреть их все в пределах одной статьи невозможно, поэтому сосредоточимся на варианте с установкой через DOS-оболочку.
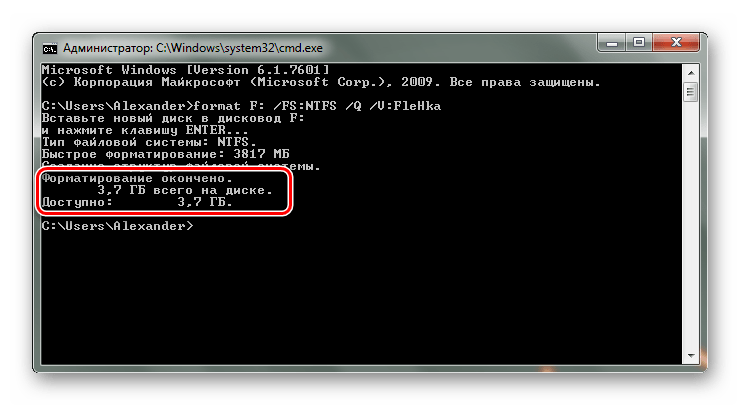
- Перед началом процедуры стоит подготовить носитель. Возьмите подходящую флешку, объёма до 4 Гб, и отформатируйте её в файловой системе FAT32. Затем скопируйте на неё файлы прошивки, после чего извлеките носитель.

Подробнее: Как отформатировать флешку
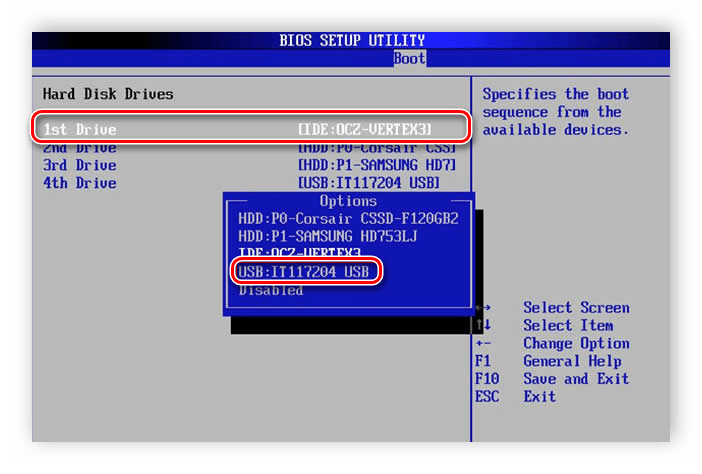
- Зайдите в БИОС и выберите загрузку с флешки.

Подробнее: Настраиваем BIOS для загрузки с флешки
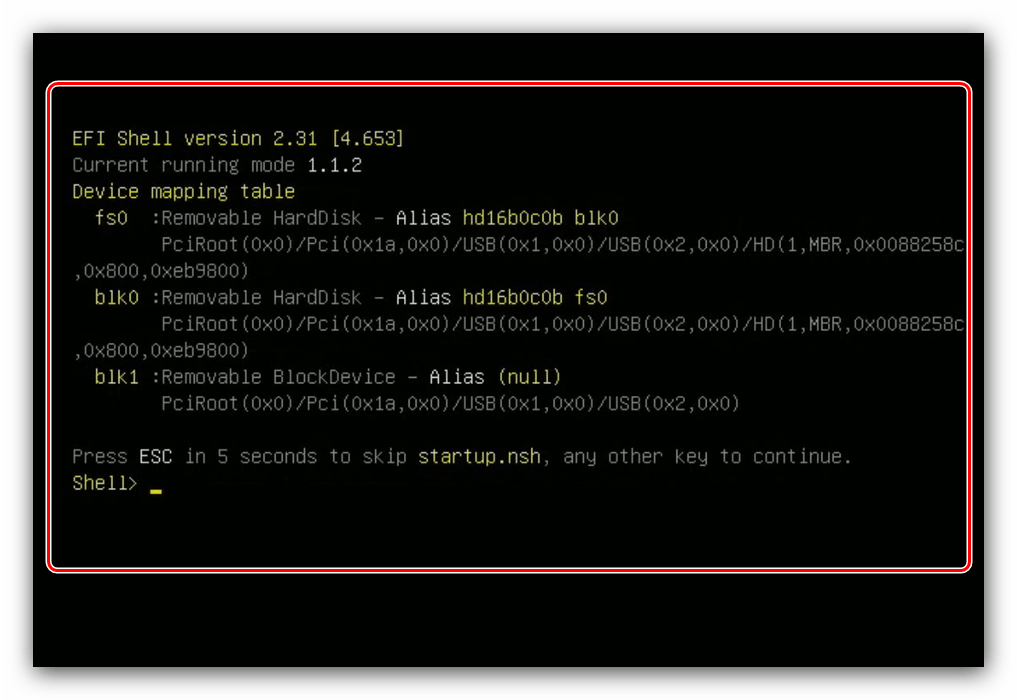
- Выключите компьютер, подключите к нему USB-накопитель, и снова включите. Появится интерфейс оболочки.
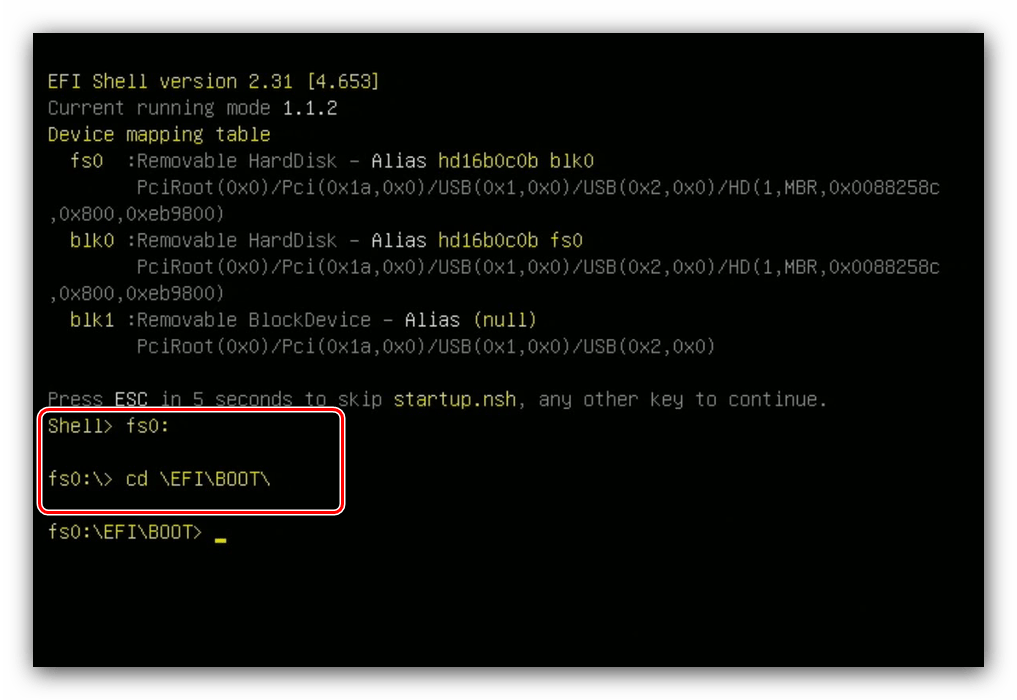
- Для выбора корневого каталога введите следующие команды (не забывайте нажимать Enter после каждой):
fs0:
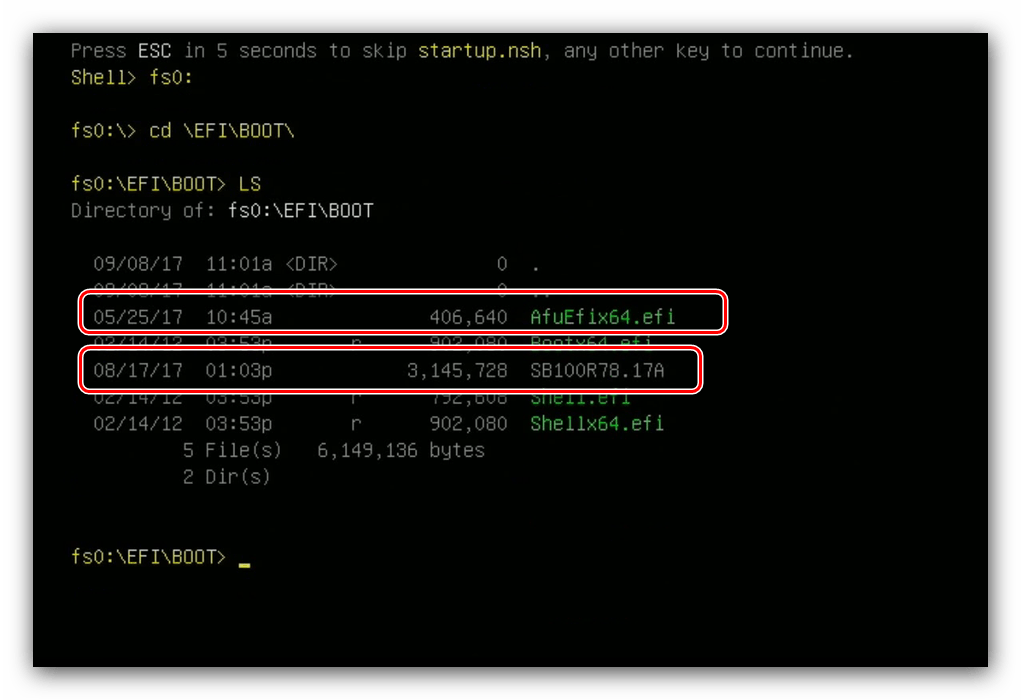
fs0: cd \EFI\BOOT - Далее введите команду ls для отображения списка файлов. Найдите в нём файл прошивки и утилиту-прошивальщик (для каждого варианта AMI BIOS названия будут разными!).
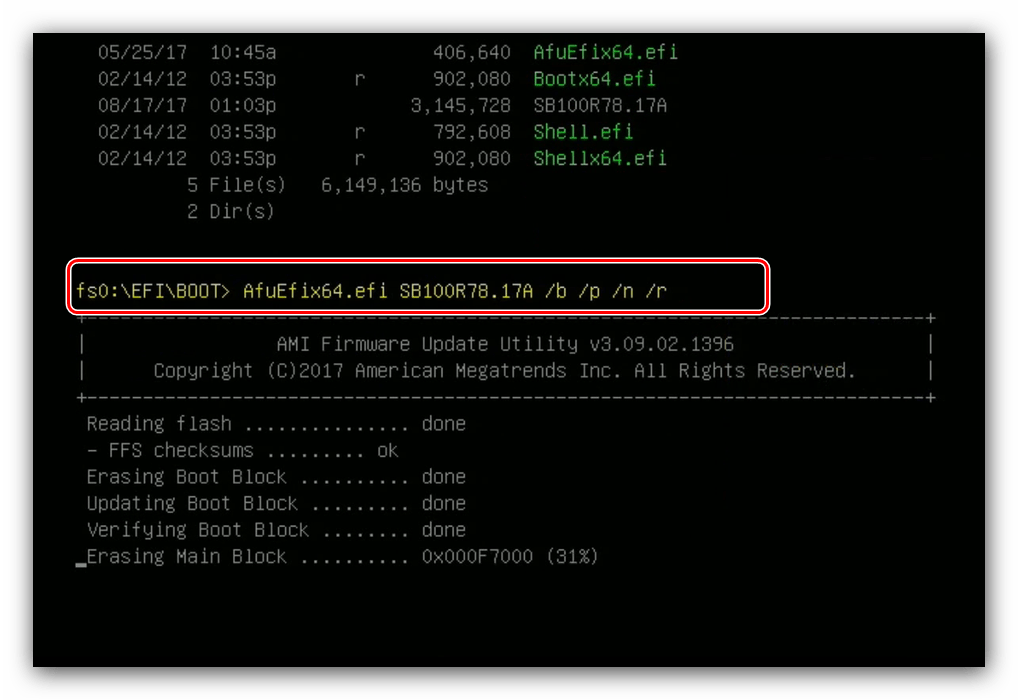
- Далее введите команду следующего вида:
*имя утилиты-прошивальщика* *имя файла прошивки* /b /p /n /r - Дождитесь окончания процедуры (она не должна занять много времени), после чего выключите компьютер, а затем отключите от него флешку. Загрузитесь в BIOS и проверьте его версию – если всё сделано правильно, будет установлен обновлённый вариант.

Заключение
Процедура обновления AMI BIOS имеет свои особенности, поскольку отличается для каждого из вендоровских вариантов.
Еще статьи по данной теме: