-
Optionally move the old cluster
If you are using a version-specific installation directory, e.g.,
/opt/PostgreSQL/16, you do not need to move the old cluster. The graphical installers all use version-specific installation directories.If your installation directory is not version-specific, e.g.,
/usr/local/pgsql, it is necessary to move the current PostgreSQL install directory so it does not interfere with the new PostgreSQL installation. Once the current PostgreSQL server is shut down, it is safe to rename the PostgreSQL installation directory; assuming the old directory is/usr/local/pgsql, you can do:mv /usr/local/pgsql /usr/local/pgsql.old
to rename the directory.
-
For source installs, build the new version
Build the new PostgreSQL source with
configureflags that are compatible with the old cluster. pg_upgrade will checkpg_controldatato make sure all settings are compatible before starting the upgrade. -
Install the new PostgreSQL binaries
Install the new server’s binaries and support files. pg_upgrade is included in a default installation.
For source installs, if you wish to install the new server in a custom location, use the
prefixvariable:make prefix=/usr/local/pgsql.new install
-
Initialize the new PostgreSQL cluster
Initialize the new cluster using
initdb. Again, use compatibleinitdbflags that match the old cluster. Many prebuilt installers do this step automatically. There is no need to start the new cluster. -
Install extension shared object files
Many extensions and custom modules, whether from
contribor another source, use shared object files (or DLLs), e.g.,pgcrypto.so. If the old cluster used these, shared object files matching the new server binary must be installed in the new cluster, usually via operating system commands. Do not load the schema definitions, e.g.,CREATE EXTENSION pgcrypto, because these will be duplicated from the old cluster. If extension updates are available, pg_upgrade will report this and create a script that can be run later to update them. -
Copy custom full-text search files
Copy any custom full text search files (dictionary, synonym, thesaurus, stop words) from the old to the new cluster.
-
Adjust authentication
pg_upgradewill connect to the old and new servers several times, so you might want to set authentication topeerinpg_hba.confor use a~/.pgpassfile (see Section 34.16). -
Stop both servers
Make sure both database servers are stopped using, on Unix, e.g.:
pg_ctl -D /opt/PostgreSQL/9.6 stop
pg_ctl -D /opt/PostgreSQL/16 stop
or on Windows, using the proper service names:
NET STOP postgresql-9.6
NET STOP postgresql-16
Streaming replication and log-shipping standby servers can remain running until a later step.
-
Prepare for standby server upgrades
If you are upgrading standby servers using methods outlined in section Step 11, verify that the old standby servers are caught up by running pg_controldata against the old primary and standby clusters. Verify that the “Latest checkpoint location” values match in all clusters. (There will be a mismatch if old standby servers were shut down before the old primary or if the old standby servers are still running.) Also, make sure
wal_levelis not set tominimalin thepostgresql.conffile on the new primary cluster. -
Run pg_upgrade
Always run the pg_upgrade binary of the new server, not the old one. pg_upgrade requires the specification of the old and new cluster’s data and executable (
bin) directories. You can also specify user and port values, and whether you want the data files linked or cloned instead of the default copy behavior.If you use link mode, the upgrade will be much faster (no file copying) and use less disk space, but you will not be able to access your old cluster once you start the new cluster after the upgrade. Link mode also requires that the old and new cluster data directories be in the same file system. (Tablespaces and
pg_walcan be on different file systems.) Clone mode provides the same speed and disk space advantages but does not cause the old cluster to be unusable once the new cluster is started. Clone mode also requires that the old and new data directories be in the same file system. This mode is only available on certain operating systems and file systems.The
--jobsoption allows multiple CPU cores to be used for copying/linking of files and to dump and restore database schemas in parallel; a good place to start is the maximum of the number of CPU cores and tablespaces. This option can dramatically reduce the time to upgrade a multi-database server running on a multiprocessor machine.For Windows users, you must be logged into an administrative account, and then start a shell as the
postgresuser and set the proper path:RUNAS /USER:postgres "CMD.EXE" SET PATH=%PATH%;C:\Program Files\PostgreSQL\16\bin;
and then run pg_upgrade with quoted directories, e.g.:
pg_upgrade.exe
        --old-datadir "C:/Program Files/PostgreSQL/9.6/data"
        --new-datadir "C:/Program Files/PostgreSQL/16/data"
        --old-bindir "C:/Program Files/PostgreSQL/9.6/bin"
        --new-bindir "C:/Program Files/PostgreSQL/16/bin"
Once started,
pg_upgradewill verify the two clusters are compatible and then do the upgrade. You can usepg_upgrade --checkto perform only the checks, even if the old server is still running.pg_upgrade --checkwill also outline any manual adjustments you will need to make after the upgrade. If you are going to be using link or clone mode, you should use the option--linkor--clonewith--checkto enable mode-specific checks.pg_upgraderequires write permission in the current directory.Obviously, no one should be accessing the clusters during the upgrade. pg_upgrade defaults to running servers on port 50432 to avoid unintended client connections. You can use the same port number for both clusters when doing an upgrade because the old and new clusters will not be running at the same time. However, when checking an old running server, the old and new port numbers must be different.
If an error occurs while restoring the database schema,
pg_upgradewill exit and you will have to revert to the old cluster as outlined in Step 17 below. To trypg_upgradeagain, you will need to modify the old cluster so the pg_upgrade schema restore succeeds. If the problem is acontribmodule, you might need to uninstall thecontribmodule from the old cluster and install it in the new cluster after the upgrade, assuming the module is not being used to store user data. -
Upgrade streaming replication and log-shipping standby servers
If you used link mode and have Streaming Replication (see Section 27.2.5) or Log-Shipping (see Section 27.2) standby servers, you can follow these steps to quickly upgrade them. You will not be running pg_upgrade on the standby servers, but rather rsync on the primary. Do not start any servers yet.
If you did not use link mode, do not have or do not want to use rsync, or want an easier solution, skip the instructions in this section and simply recreate the standby servers once pg_upgrade completes and the new primary is running.
-
Install the new PostgreSQL binaries on standby servers
Make sure the new binaries and support files are installed on all standby servers.
-
Make sure the new standby data directories do not exist
Make sure the new standby data directories do not exist or are empty. If initdb was run, delete the standby servers’ new data directories.
-
Install extension shared object files
Install the same extension shared object files on the new standbys that you installed in the new primary cluster.
-
Stop standby servers
If the standby servers are still running, stop them now using the above instructions.
-
Save configuration files
Save any configuration files from the old standbys’ configuration directories you need to keep, e.g.,
postgresql.conf(and any files included by it),postgresql.auto.conf,pg_hba.conf, because these will be overwritten or removed in the next step. -
Run rsync
When using link mode, standby servers can be quickly upgraded using rsync. To accomplish this, from a directory on the primary server that is above the old and new database cluster directories, run this on the primary for each standby server:
rsync --archive --delete --hard-links --size-only --no-inc-recursive old_cluster new_cluster remote_dir
where
old_clusterandnew_clusterare relative to the current directory on the primary, andremote_diris above the old and new cluster directories on the standby. The directory structure under the specified directories on the primary and standbys must match. Consult the rsync manual page for details on specifying the remote directory, e.g.,rsync --archive --delete --hard-links --size-only --no-inc-recursive /opt/PostgreSQL/9.5 \ /opt/PostgreSQL/9.6 standby.example.com:/opt/PostgreSQLYou can verify what the command will do using rsync‘s
--dry-runoption. While rsync must be run on the primary for at least one standby, it is possible to run rsync on an upgraded standby to upgrade other standbys, as long as the upgraded standby has not been started.What this does is to record the links created by pg_upgrade‘s link mode that connect files in the old and new clusters on the primary server. It then finds matching files in the standby’s old cluster and creates links for them in the standby’s new cluster. Files that were not linked on the primary are copied from the primary to the standby. (They are usually small.) This provides rapid standby upgrades. Unfortunately, rsync needlessly copies files associated with temporary and unlogged tables because these files don’t normally exist on standby servers.
If you have tablespaces, you will need to run a similar rsync command for each tablespace directory, e.g.:
rsync --archive --delete --hard-links --size-only --no-inc-recursive /vol1/pg_tblsp/PG_9.5_201510051 \
      /vol1/pg_tblsp/PG_9.6_201608131 standby.example.com:/vol1/pg_tblsp
If you have relocated
pg_waloutside the data directories, rsync must be run on those directories too. -
Configure streaming replication and log-shipping standby servers
Configure the servers for log shipping. (You do not need to run
pg_backup_start()andpg_backup_stop()or take a file system backup as the standbys are still synchronized with the primary.) Replication slots are not copied and must be recreated.
-
-
Restore
pg_hba.confIf you modified
pg_hba.conf, restore its original settings. It might also be necessary to adjust other configuration files in the new cluster to match the old cluster, e.g.,postgresql.conf(and any files included by it),postgresql.auto.conf. -
Start the new server
The new server can now be safely started, and then any rsync‘ed standby servers.
-
Post-upgrade processing
If any post-upgrade processing is required, pg_upgrade will issue warnings as it completes. It will also generate script files that must be run by the administrator. The script files will connect to each database that needs post-upgrade processing. Each script should be run using:
psql --username=postgres --file=script.sql postgres
The scripts can be run in any order and can be deleted once they have been run.
Caution
In general it is unsafe to access tables referenced in rebuild scripts until the rebuild scripts have run to completion; doing so could yield incorrect results or poor performance. Tables not referenced in rebuild scripts can be accessed immediately.
-
Statistics
Because optimizer statistics are not transferred by
pg_upgrade, you will be instructed to run a command to regenerate that information at the end of the upgrade. You might need to set connection parameters to match your new cluster. -
Delete old cluster
Once you are satisfied with the upgrade, you can delete the old cluster’s data directories by running the script mentioned when
pg_upgradecompletes. (Automatic deletion is not possible if you have user-defined tablespaces inside the old data directory.) You can also delete the old installation directories (e.g.,bin,share). -
Reverting to old cluster
If, after running
pg_upgrade, you wish to revert to the old cluster, there are several options:-
If the
--checkoption was used, the old cluster was unmodified; it can be restarted. -
If the
--linkoption was not used, the old cluster was unmodified; it can be restarted. -
If the
--linkoption was used, the data files might be shared between the old and new cluster:-
If
pg_upgradeaborted before linking started, the old cluster was unmodified; it can be restarted. -
If you did not start the new cluster, the old cluster was unmodified except that, when linking started, a
.oldsuffix was appended to$PGDATA/global/pg_control. To reuse the old cluster, remove the.oldsuffix from$PGDATA/global/pg_control; you can then restart the old cluster. -
If you did start the new cluster, it has written to shared files and it is unsafe to use the old cluster. The old cluster will need to be restored from backup in this case.
-
-
This text will elaborate on upgrading the PostgreSQL database from the 9.x version to the 12.x version. Upgrading the PostgreSQL server can be done by installing the newer version of Postgres alongside the current one and executing the pg_upgrade command with essential parameters. A manual backup and restore process is not required when we use the pg_upgrade as the command will automatically copy the data directory to the newer version. We will cover many requirements in-depth in this text to eradicate the numerous dynamic errors and challenges.
The PostgreSQL Config file and user database file must be backed up using pg_dump command before initiating the PostgreSQL upgrade process. Generally, backing up of data is not essential as current PostgreSQL 9.x will not get affected during or after the update using the pg_upgrade process.
Config Files
Two config files (PostgreSQL.conf and pg_hba.conf) must be have a backup taken as the newer installation will replace the new config file with default configuration parameters and values. The default directory where PostgreSQL keeps configuration file is: C:\Program Files\PostgreSQL \X.X\data). It could be modified by the user to change the Config file with the 9.X version, so we have to compare config files of 9.X with 12.X and synch the required updates in the newer version’s config file(12.x).
Backup Databases
Users may take an individual database backup by using the help of the below command. However, we can take a backup together of all databases using the pg_dumpall command. To do this, open a command prompt and traverse through the appropriate directory. Then run the pg_dump command, as shown here:
CD C:\Program Files\PostgreSQL\9.0\bin
pg_dump -U Postgres -W -F t dvdrental > "V:\ PostgreSQL Backup\dvdrental.tar"
Here, I used the directory, C:\Users\JERRY\Downloads\PostgreSQLDir\Backup, for storing the backup database and named it as ‘dvrental’ with a tar extension.
Using the VERSION() and inet_server_port() functions, users will get the information of PostgreSQL version and the port number on which PostgreSQL is running. Let us begin with the realtime setup. Below I will dictate the possible challenges, errors and its solution on my local server
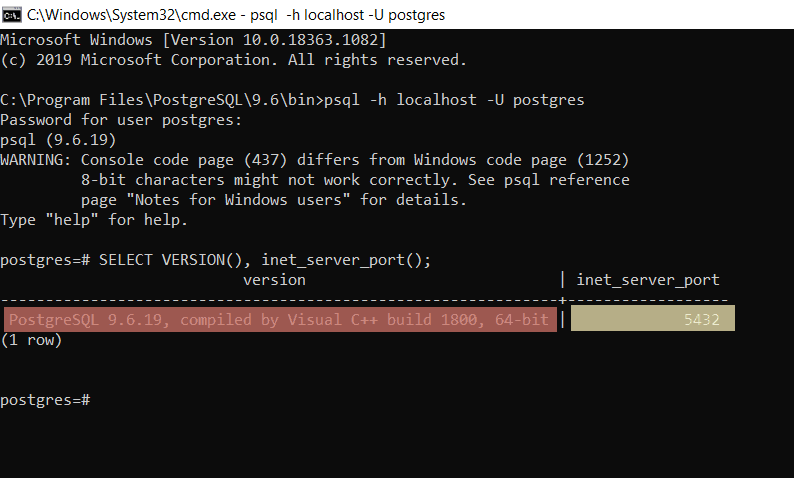
Here, the default port number 5432 is under use by my currently running PostgreSQL server, and the version of PostgreSQL 9.6.19. After that, I have used the \l command to get the list of all databases existing on the PostgreSQL.
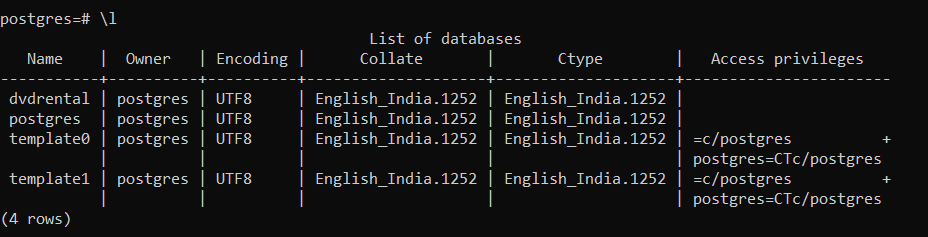
Here, we can see that dvdrental is a user database, while Postgres is a system database. Let me show you the number of tables and their tuples counts in the user database dvdrental beforehand, upgrading the Postgres server.
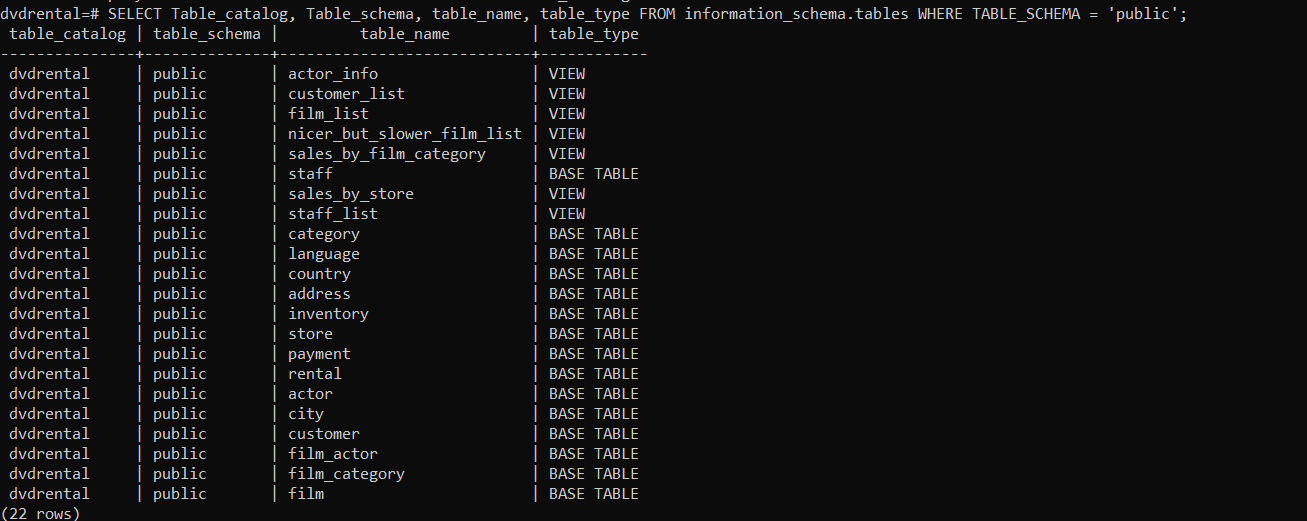
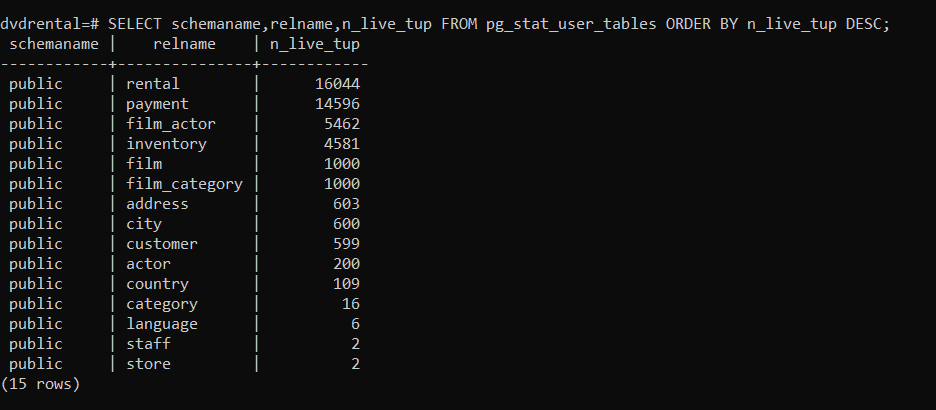
We can clearly see that there are 22 tables and view types of objects that are residing in the dvdrental database. The users are also able to enlist it by using information-schema and table objects. We will now get the numbers of records of each table by quivering on pg_stat_user_tables and showing them in decreasing order.
SELECT schemaname, relname, n_live_tup
  from pg_stat_user_tables ORDER BY n_live_tup DESC;
Install PostgreSQL 12.X
We must ensure that we download the PostgreSQL 12.x version from this Postgres Official Link. Download and install it by selecting the new installation file directory. «C:\Program Files\PostgreSQL \12» is the default installation directory for the 12.x version.
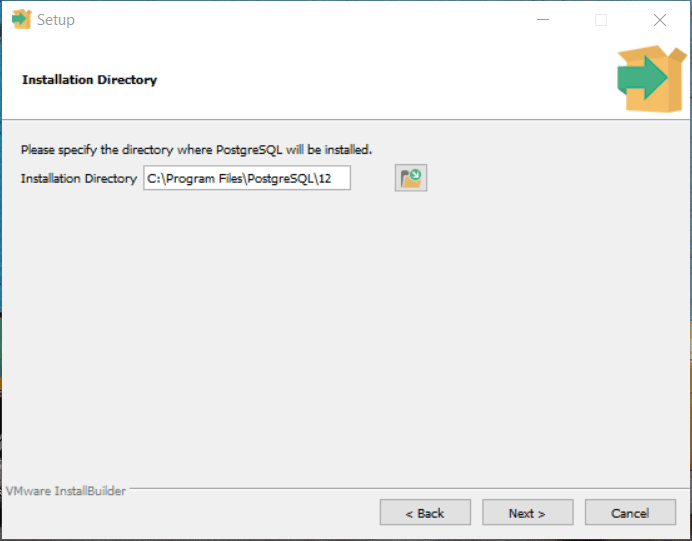
Here, to install the Binaries and Data, we used the default installation directory.
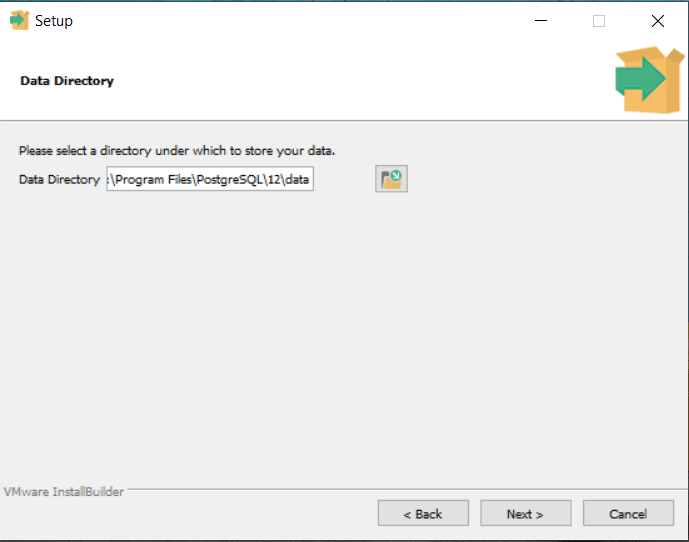
The data directory can also be modified. Generally, we use the SAN disk storage drive, so the drive path and folder can be changed accordingly.
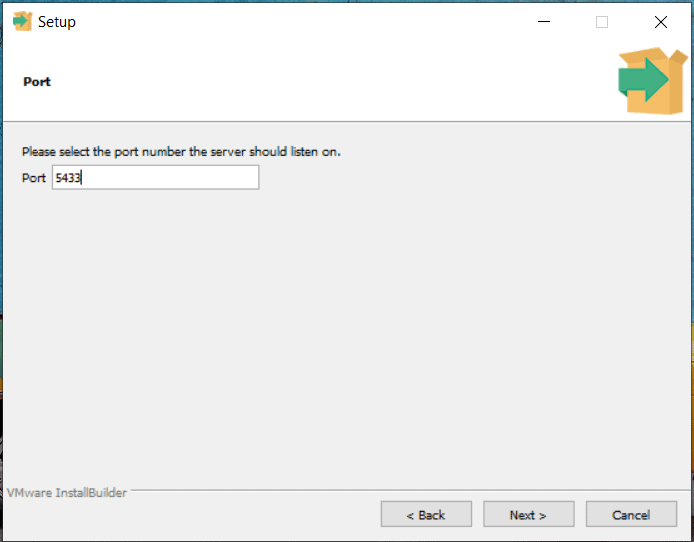
As we know, the ‘5432’ port is under use by PostgreSQL 9.x, so 12.X can not be run on 5432 because two different PostgreSQL services can not run on the same port. At the end of the installation process, we can see the installation summary, which will showcase the user’s user inputs during the installation process. If we wish to modify any input or information, we must do this by using.
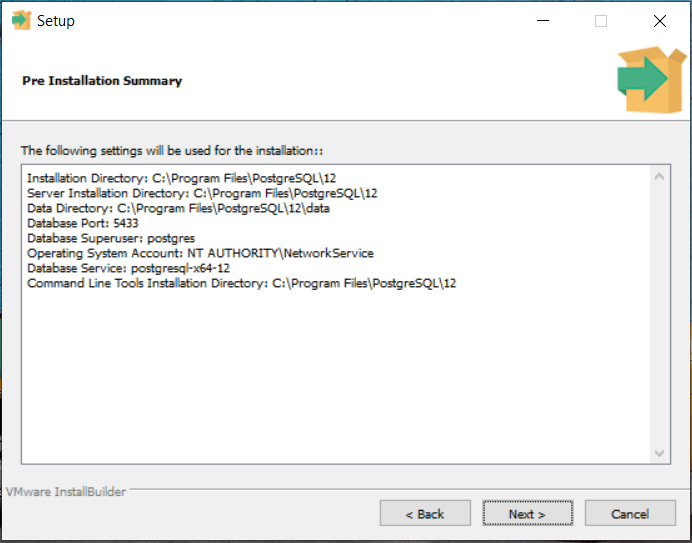
The installation wizard will complete the setup installation if we have supplied proper legitimate inputs.
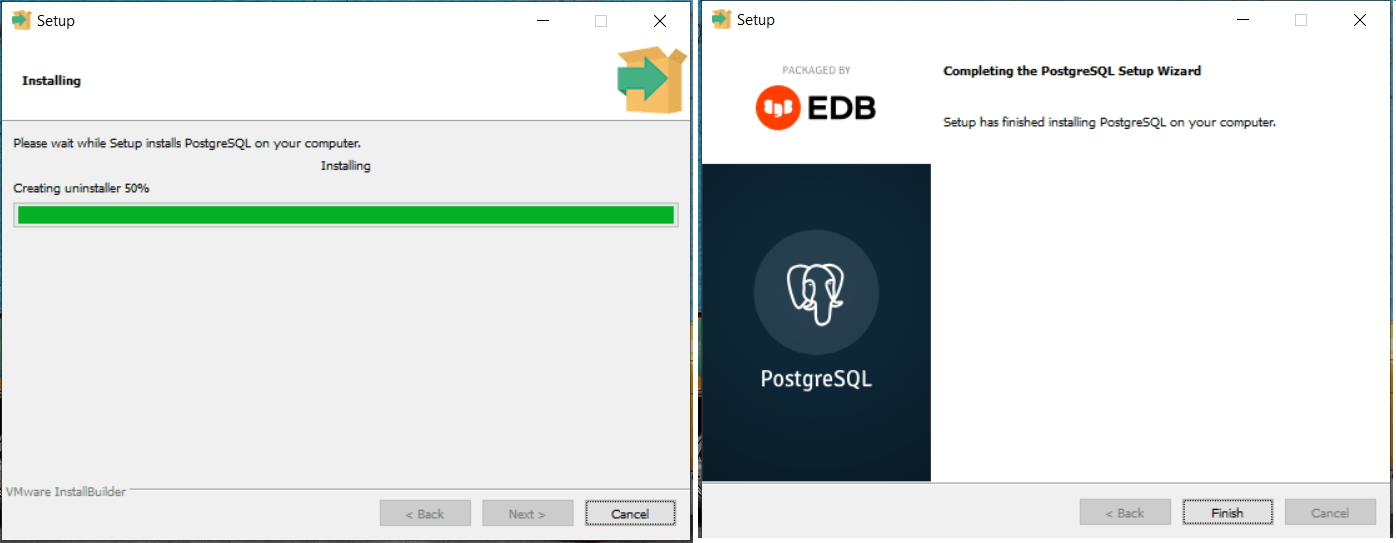
The user is asked for the password for the Postgres default user by the installation wizard. Now, users can log in on new Postgres with port 5433 using Postgres username and its password.
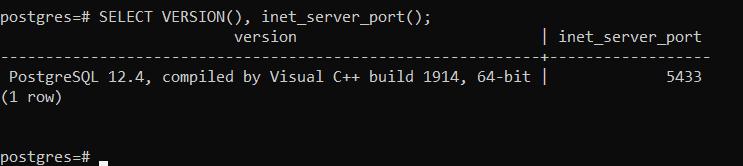
From the screenshot above, we can see that the latest Postgre12.4 is running on port number 5433.

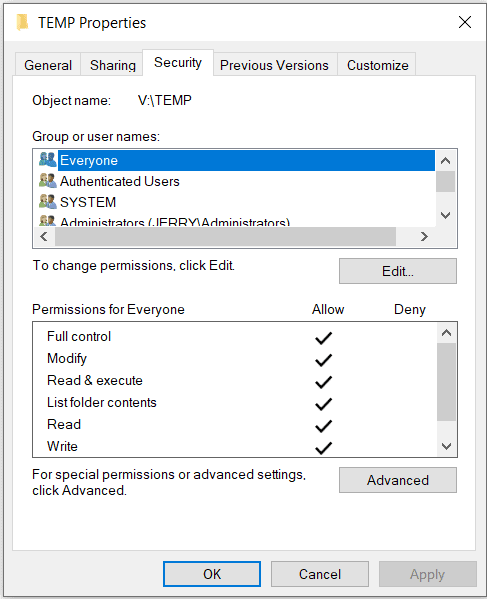
We must give full privileges to the PostgreSQL installation directory (C:\Program Files\PostgreSQL ) before running the pg_upgrade utility. Otherwise, that will immediately raise a permission error as below. In a command prompt, run this:
CD C:\Program Files\PostgreSQL \12\bin
SET PGPASSWORD =1234
pg_upgrade -d "c:\Program Files\PostgreSQL \9.6\data" -D"c:\Program Files\PostgreSQL \12\data" -b "c:\Program Files\PostgreSQL \9.6\bin" -B "c:\Program Files\PostgreSQL \12\bin" -U Postgres
Now, In the pg_upgrade command to authenticate the Postgres user, we are going to use PGPASSWORD. We are using the Postgres user, so we have to use the default password for the Postgres user of PostgreSQL 12, which is 1234 set by us during the installation process.
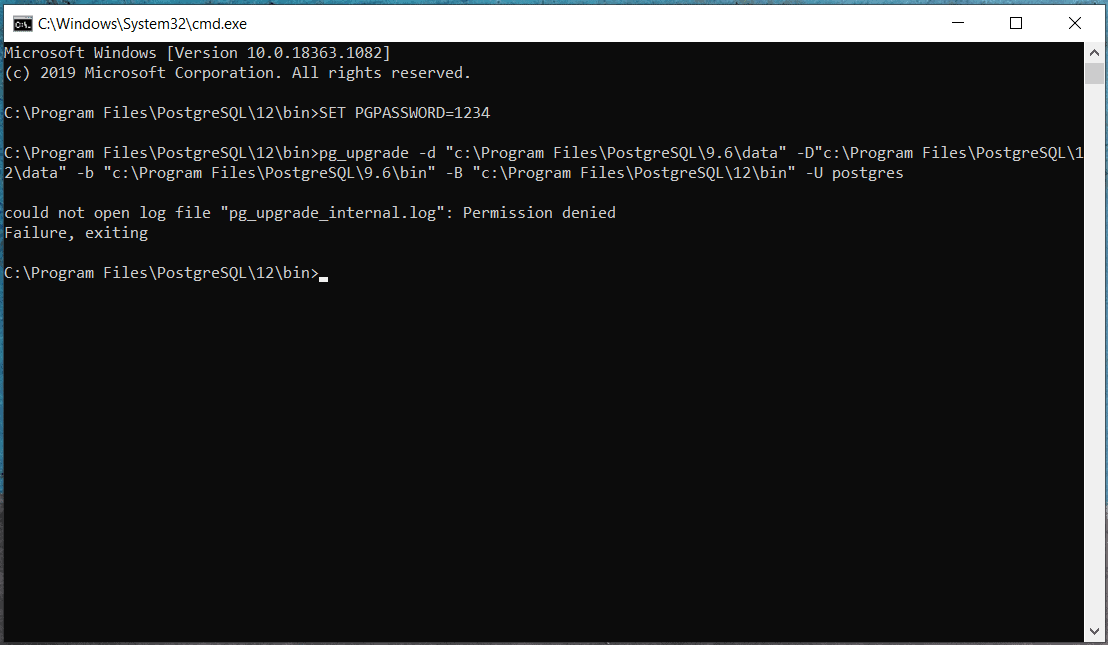
I suggest making a separate folder, either in C drive or another drive, and execute the pg_upgrade because the problem arises when we run the. pg_uppgrade command from the base directory «C:\Program Files\PostgreSQL \12\bin» and is that it generates several log files, including the error log.
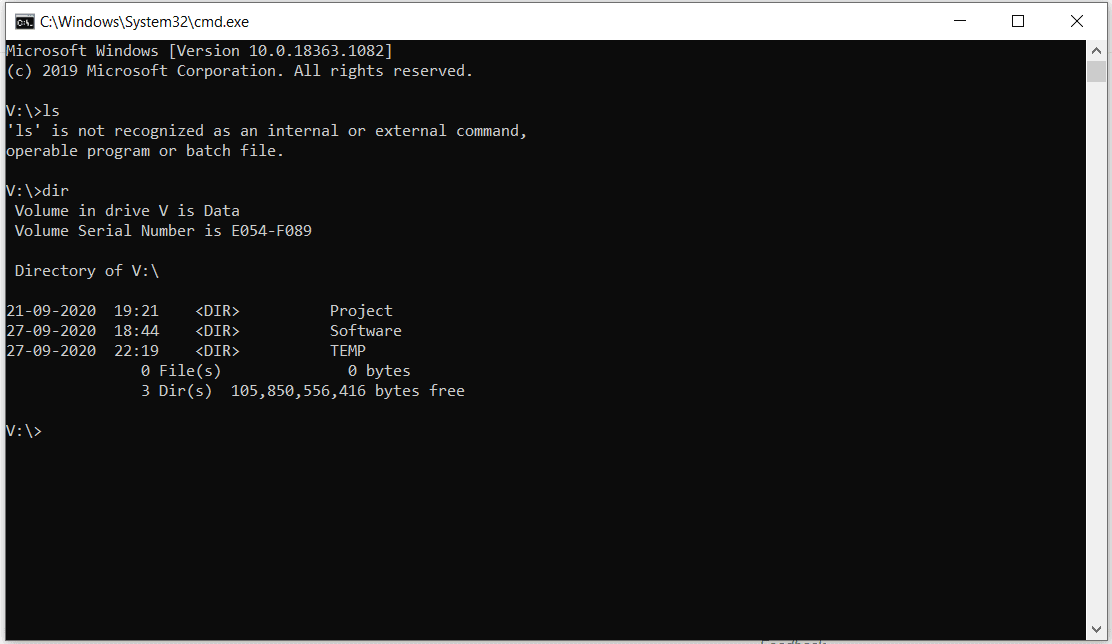
Here, we have made one folder TEMP in V:\ drive and assigning full privileges to everyone on that folder to avoid conflicting situations again.
Now, let’s run the pg_upgrade command after opening the command prompt open in the directory «V:\TEMP». Here is the command:
SET PGPASSWORD=1234
"c:\Program Files\PostgreSQL \12\bin\pg_upgrade.exe" -d "c:\Program Files\PostgreSQL \9.6\data" -D"c:\Program Files\PostgreSQL \12\data" -b "c:\Program Files\PostgreSQL \9.6\bin" -B "c:\Program Files\PostgreSQL \12\bin" -U Postgres
Here, we can modify the parameter accordingly if the data directory and installation directory, which is not the default one. kindly refer to the parameter reference as below:
- -d is the data directory for the older PostgreSQL version 9.6
- -D is the data directory for the newer PostgreSQL version 12
- -b is the data Directory folder for the older PostgreSQL 9.6
- -B is the data Directory folder for the newer PostgreSQL 9.6
- -U is the user who is performing the migration (Default is Postgres )
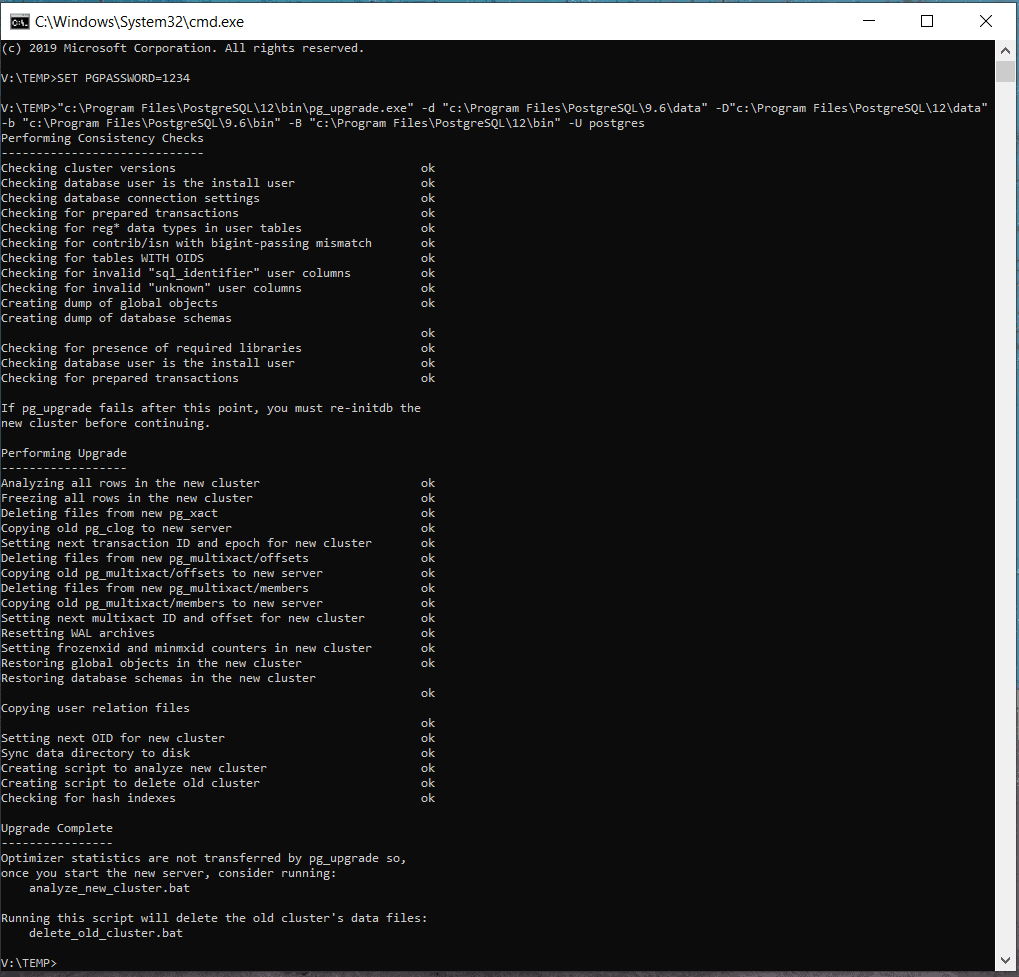
Here, In the same console, we add the upgrade log. We will get the error on the console if any conflicting situation arises during the data migration or up-gradation. For further exploration regarding the error, we can see the error log in the «V:\TEMP» directory in case of any error or issue. Now you will understand the reason for running the pg_upgrade command from another folder rather than the default directory.
Now we can start the PostgreSQL Server 12 service in the Services.msc appelet upon successful execution of pg_upgrade command and using PgAdmin IV, we can see the data from the previous version to this new version. The pg_upgrade is copying data directory and system database stuff, so users and system stuff will get copied.
Using PORT 5433 must connect Postgres 12 and check the database and table details as we checked earlier on Postgres 9.6 in this text.
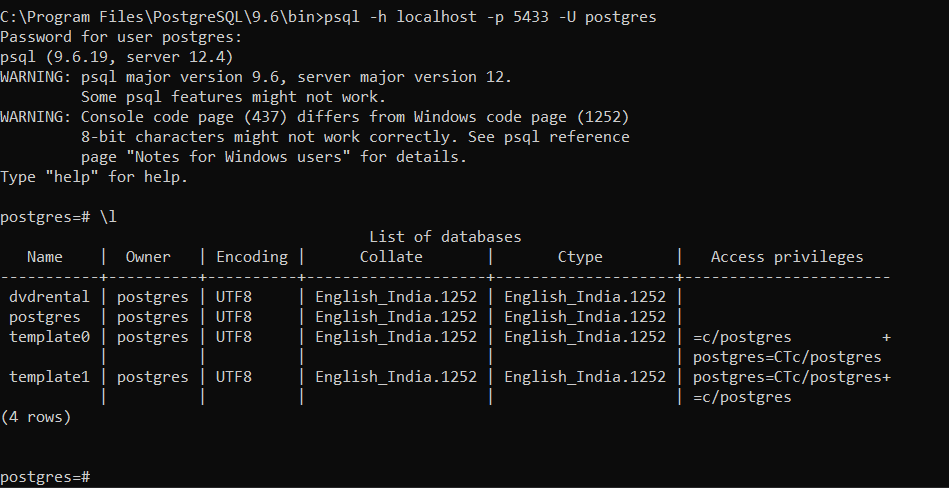
Here, we can see that the dvdrental database synchronized. Let me get the tables in the database with any of the table data.
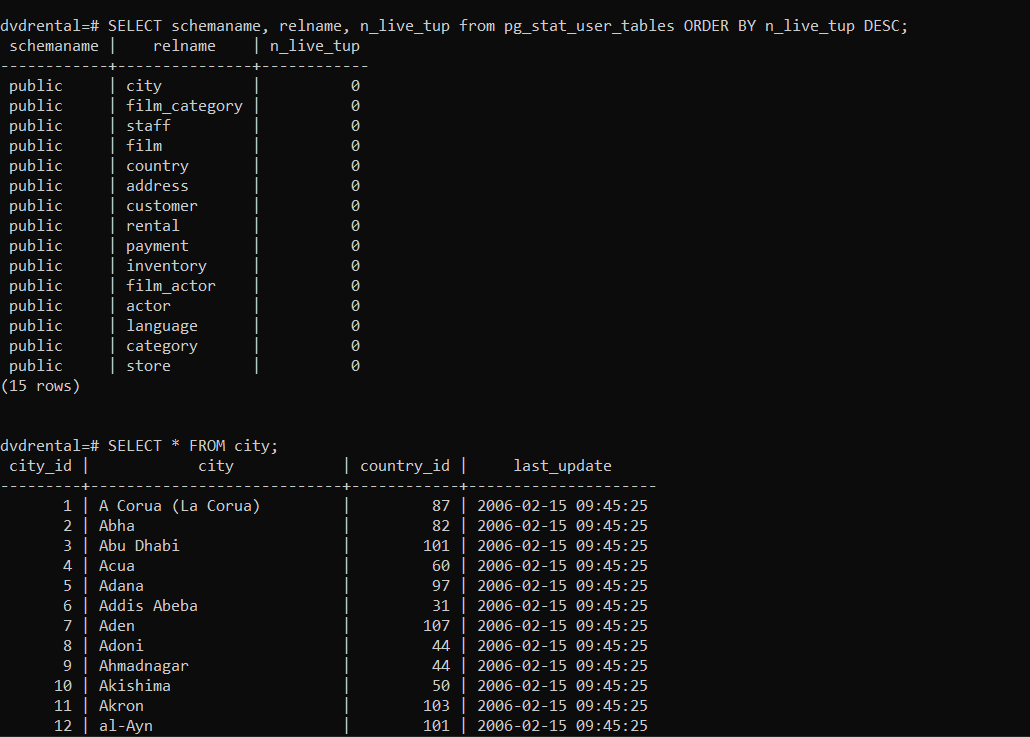
We can see the number of rows in the city table as it is in Postgres 9.6.
Here, the latest PostgreSQL works on the new port 5433, where your applications will be configured with the older version’s port number 5432 to connect with the databases. So, we have two options to handle this situation. Either change the Postgres connection port number in the application configuration with 5433 or change the port number in PostgreSQL 12 with 5432.
If we want to change the port number in PostgreSQL 12, first users have to stop the services running on port 5432 using Microsoft windows services as port 5432 is already occupied by PostgreSQL’s services 9.6. The Port number can be changed in PostgreSQL with the config file’s help, and don’t forget to sync and update the older and latest config files. Because newly installed Postgres 12 is being configured with the latest configuration, and existing could be different from the Memory, connection, and other parameters.
My recommendation is to keep the older PostgreSQL version for a day or week because if you face any challenges or issues with the newer ones, users can compare it with the older one. If it is not required, then you can uninstall the older PostgreSQL. I recommend following the same process on Dev, QA, or Stage environment before proceeding to the Production.
 Today we will be upgrading PostgreSql from version 14 to 15, which would be considered a Major upgrade (14->15). Below, I provide step-by-step instructions on how to do this on Windows.
Step 1: Install postgres 15 on the machine, this will create a seperate folder in the install directory /14 vs /15
- Recommend you keep the postgres user password the same
Step 2: Stop both versions of pg running on the system, here is the powershell to do that
net stop postgresql-x64-14net stop postgresql-x64-15Step 3: In the /data directory of each version, keep around the existing pg_hba.config files. I typcially rename them to pg_hba.conf.org
Step 4: Drop in a new pg_hba.conf in each /data directory with the following contents, this helps security getting in the way of this upgrade, full local trust
host		all		postgres		127.0.0.1/32	trust
host		all		postgres		::1/128		trust
Step 5: Upgrade Data
Our server has the bin directories located here:
C:\\Program Files\\PostgreSQL\\14\\bin
C:\\Program Files\\PostgreSQL\\15\\bin
And our data directories located here:
D:\\Data\\PgSql\\14
D:\\Data\\PgSql\\15
To upgrade the data to 15 we will be using pg_upgrade.exe. I typically like to execute this in a temp directory to isolate the files that get generated during this process. The pattern for updating via pg_upgrade.exe is as follows:
NEWVERSION\\bin\\pg_upgrade.exe --old-datadir "OLDVERSION\\data" --new-datadir "NEWVERSION\\data" --old-bindir "OLDVERSION\\bin" --new-bindir "NEWVERSION\\bin" -U USERSo for us it would be as follows (NOTE: I’m executing this command in C:\\Temp via powershell, note the & » is just to handle the space in the executable path)
& 'C:\\Program Files\\PostgreSQL\\15\\bin\\pg_upgrade.exe' --old-datadir "D:\\Data\\PgSql\\14" --new-datadir "D:\\Data\\PgSql\\15" --old-bindir "C:\\Program Files\\PostgreSQL\\14\\bin" --new-bindir "C:\\Program Files\\PostgreSQL\\15\\bin" -U postgresStep 6: Post Upgrade: After you have a successful upgrade you still need to do a few things to get your server back up
- Copy your pg_hba.conf from the old version into your new version data directory (remove the .org also if you don’t need it)
- Update your postgresql.conf file in the new version. The install probably saw that port 5432 was in use (from the old version running) and gave you something like 5433. Change this to 5432.
- Move any SSL data over to the new version. See our ssl post here.
-
Start the new server (with powershell)
net start postgresql-x64-15 - Uninstall old version
- Clear data old version
After this, you should be up and running in version 15.
Feedback? Better Idea? General Comment?
Внимание!
- Инструмент производит обновление сервера СУБД PostgreSQL с версии 9.4 на версию 11.
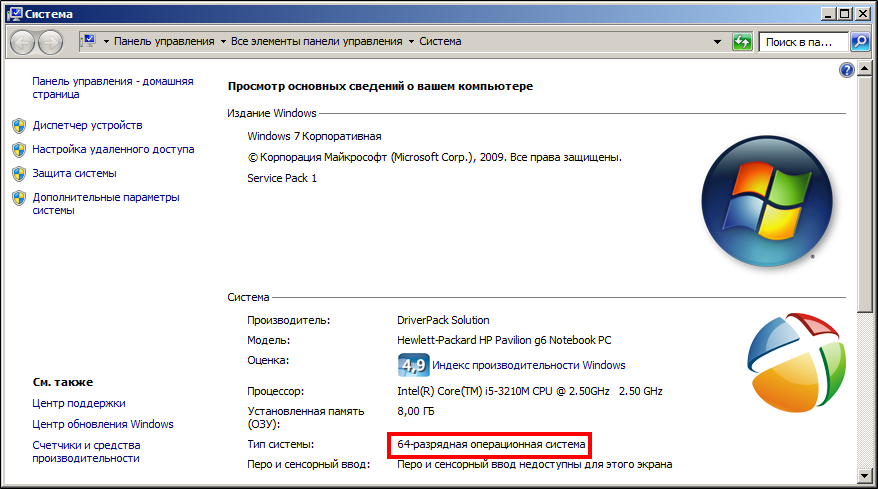
- Обновление предназначено только для процессоров с разрядностью 64 бит.
- На время обновления обязательно отключите антивирусное ПО.
- Установка поддерживается только на 64х-битных ОС следующих версий:
- Windows 7
- Windows 10
- 2008
- 2012
- 2016
- 2019
Архив лог-файлов для передачи в службу поддержки:
- При обращении в службу поддержку обязательно прикладывайте архив папки с лог-файлами.
- В папке инструмента запустите файл archive_logs.cmd.
- Сформируется файл LOG-ДД.ММ.ГГГГ.zip.
- Обязательно приложите файл архива с лог-файлами к заявке.

Описание процесса
Данный процесс предусматривает перевод сервера PostgreSQL с версии 9.4 до версии 11. Обращаем ваше внимание на то, что, обновление сервера PostgreSQL должно осуществляться опытными ИТ-специалистами.
Дистрибутив
- Используйте данные учетной записи, которая предназначена для загрузки патчей и дистрибутивов SetRetail10.
- Для предоставления учетной записи обратитесь к вашему менеджеру, или в службу поддержки.
| Патч обновления на PostgreSQL 11 для Windows | Загрузить |
Подготовка к обновлению
1. Перевод на новую версию PostgreSQL 11 осуществляется только для 64-х битных операционных систем.
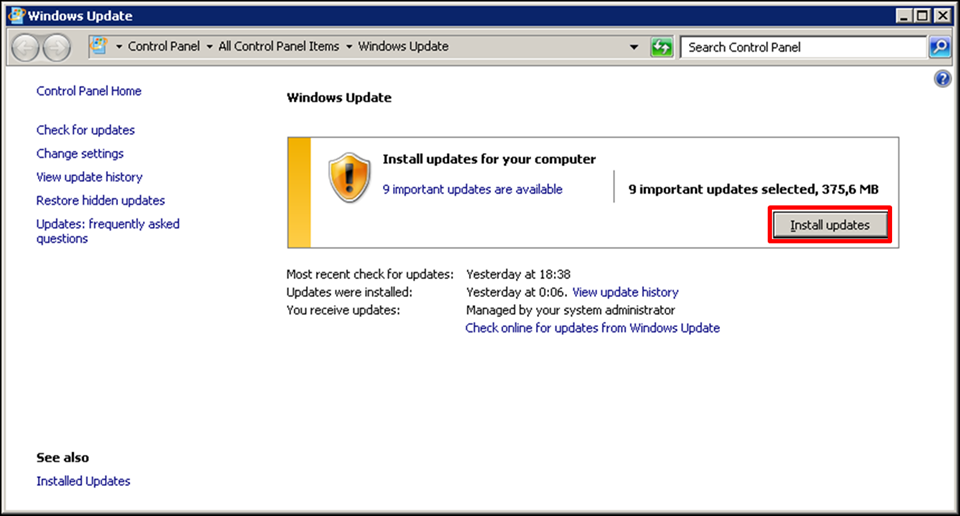
2. Внимание! Перед началом процедур по переводу на новую версию PostgreSQL, обязательно обновите вашу операционную систему.
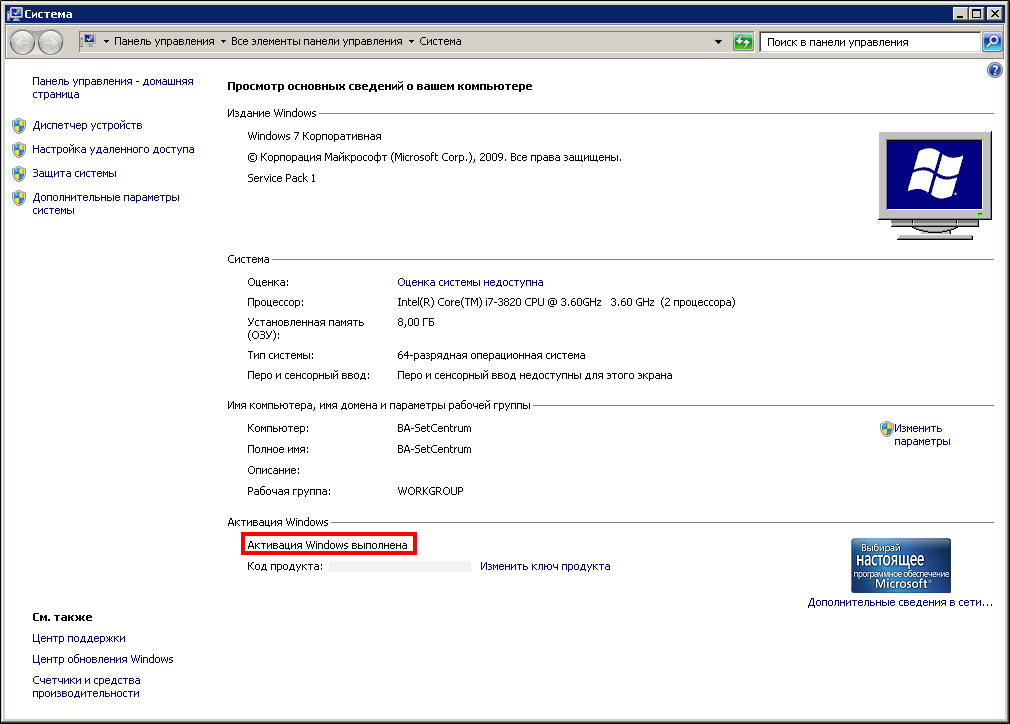
4. Проводите обновление только на официально-активированной версии ОС Windows.
В некоторых случаях, в не актированной версии, могут отсутствовать необходимые обновления для запуска установщика PostgreSQL11.
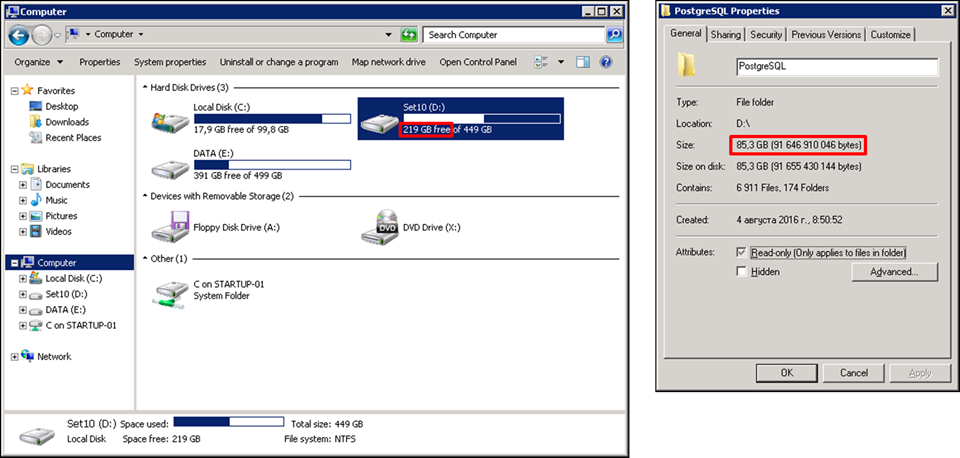
3. Обязательно проверьте наличие свободного дискового пространства, оно должно быть достаточным, в зависимости от размеров вашей БД, так как в следующих шагах восстановление базы данных будет в новую версию сервера СУБД PostgreSQL 11, и при этом, версия PostgreSQL 9.4 будет установлена на момент развертывания архивов БД.
На данном изображении достаточно места для проведения операции обновления.
4. На время обновления PostgreSQL 9.4 на версию 11 не планируйте никаких работ на продуктивной среде так и с сервером магазина.
5. Следуйте только шагам описанным в данной инструкции!
Обновление PostgreSQL для ОС Windows
Все шаги выполняются только от пользователя с локальными правами администратора.
1. Разархивируйте файл UPGRADEvXX.zip.
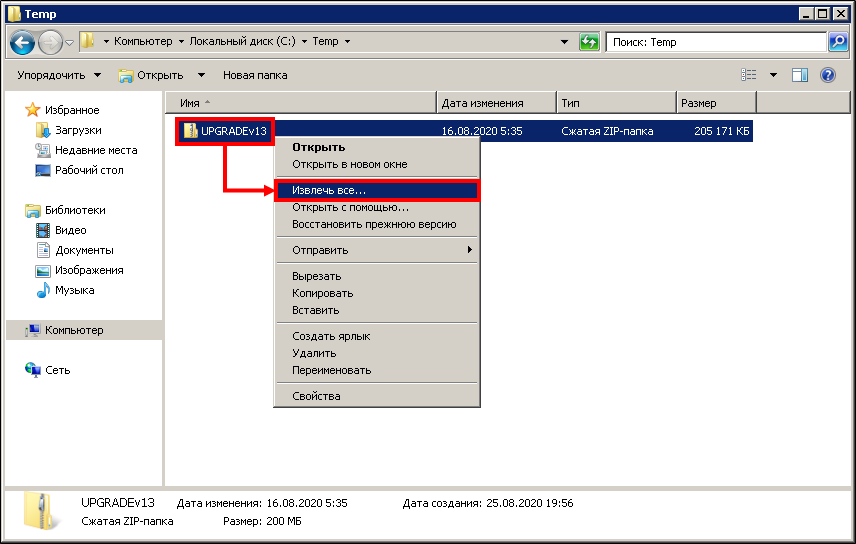
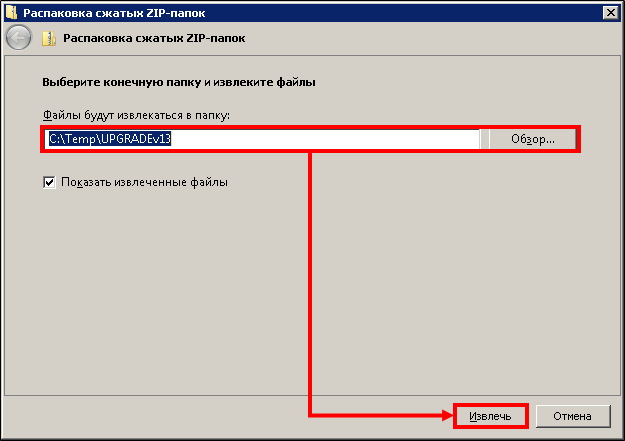
2. Выберите пусть распаковки → нажмите Извлечь.
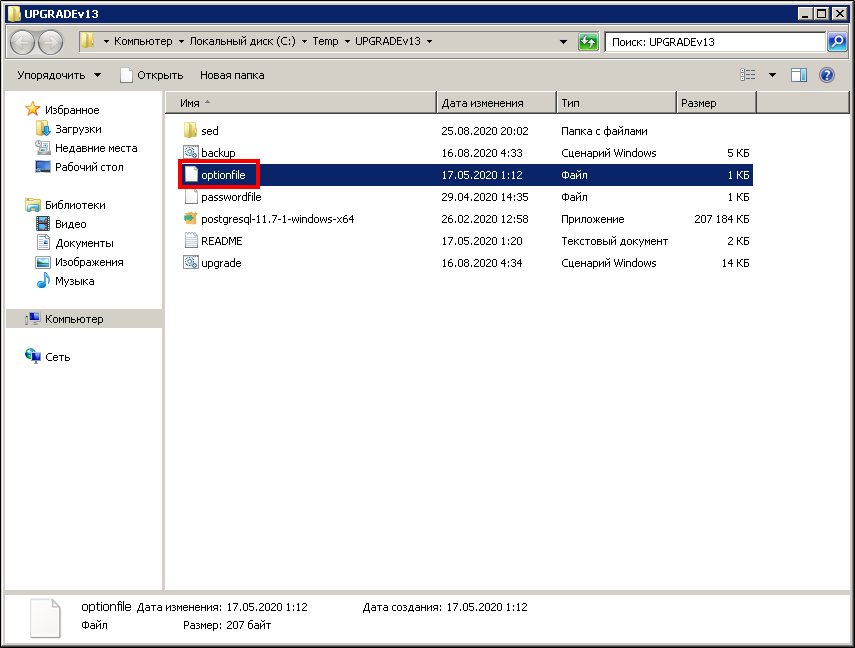
3. В папке со скриптами обновления откройте на редактирование optionfile любым текстовым редактором.
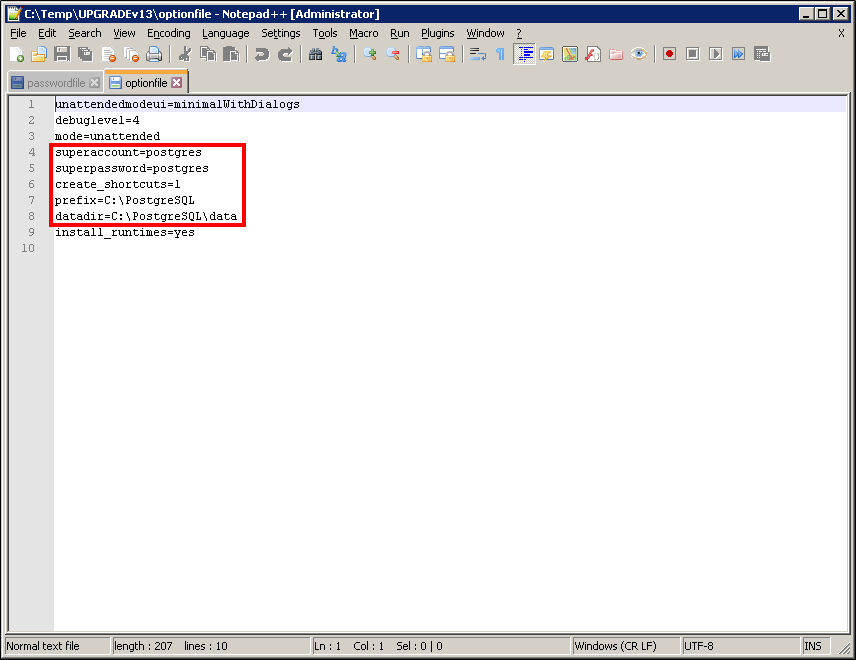
4. Отредактируйте следующие параметры для установки PostgreSQL 11, если требуется:
| Параметр | |
|---|---|
| superaccount | Имя пользователя с глобальным с правами для сервера СУБД PostgreSQl 11. |
| superpassword | Пароль пользователя с глобальным с правами для сервера СУБД PostgreSQl 11. |
| create_shortcuts |
Создавать ярлык на PgAdmin4 на рабочем столе:
|
| prefix |
Полный путь установки программных компонентов PostgreSQL 11.
|
| datadir |
Полный путь установки файлов для хранения данных БД PostgreSQL 11 Для папки с данными, которая располагается на другом диске, указывается полный путь, например: E:/DB/data |

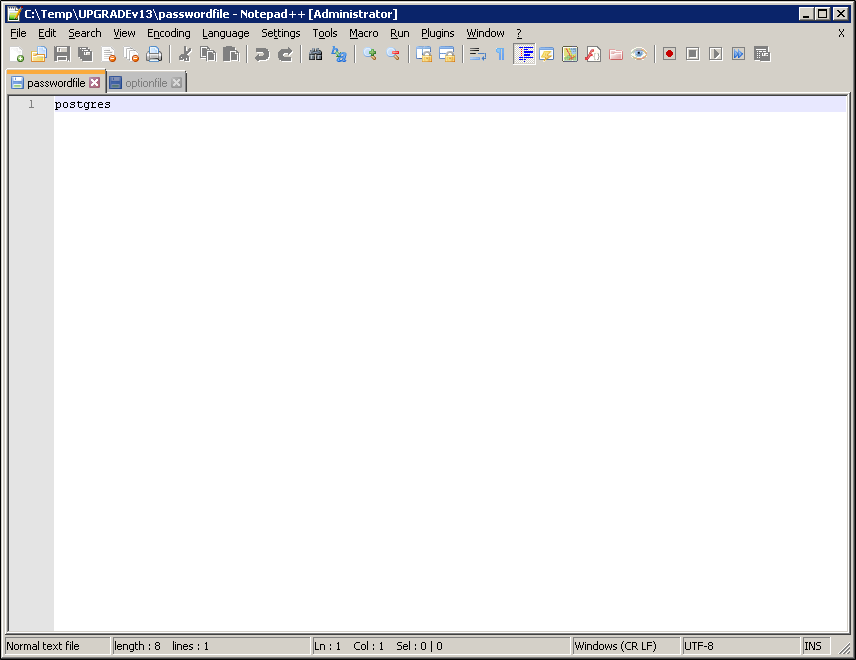
5. Откройте на редактирование в любом текстовом редакторе файл passwordfile для установки пароля доступа к серверу PostgreSQL 9.4.
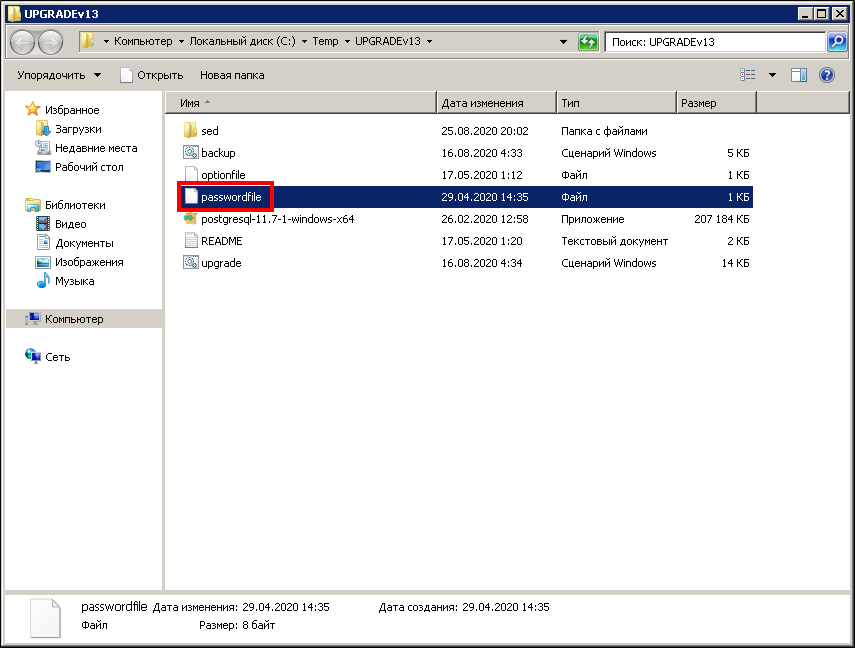
6. Установите пароль → сохраните файл.
7. Запустите файл backup.cmd с правами администратора для создания архива текущего сервера баз данных.
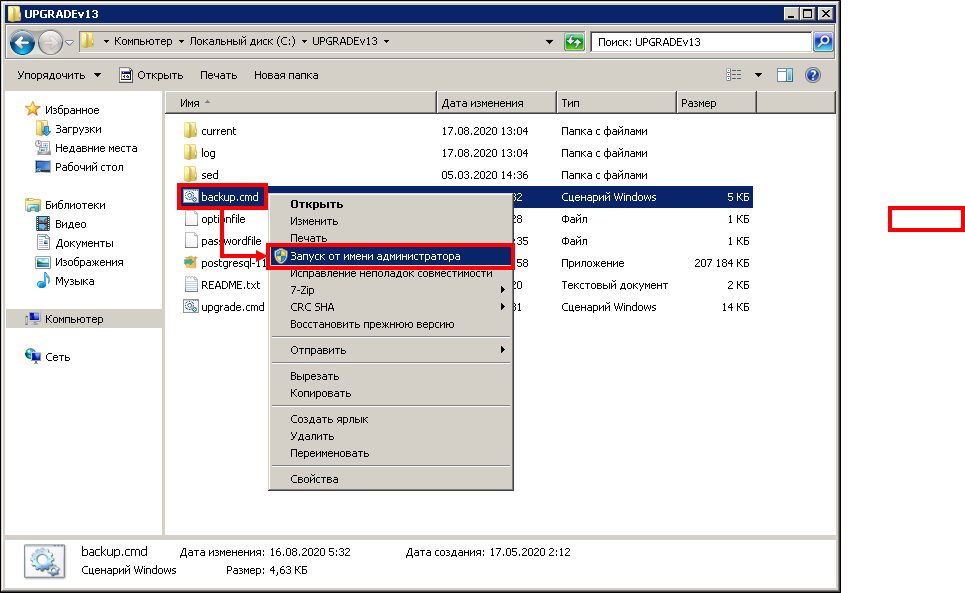
8. Начнется выполнение операции по сохранению резервной копии баз данных СУБД PostgreSQl 9.4.
Не закрывайте окно. Дождитесь окончания операции.
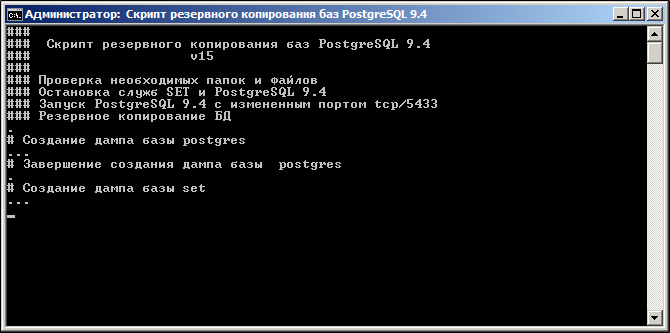
9. Когда операция бэкапирования завершится, появится сообщение о том, что оно успешно закончено и окно можно закрыть → нажмите любую клавишу.
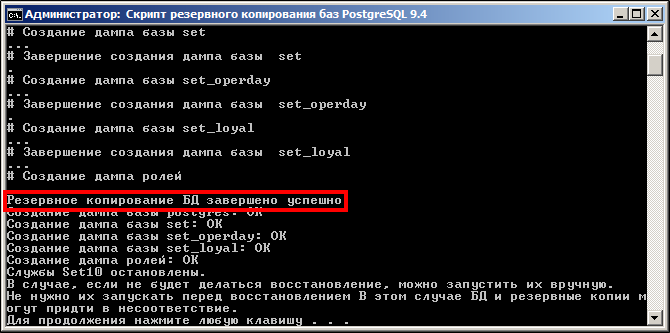
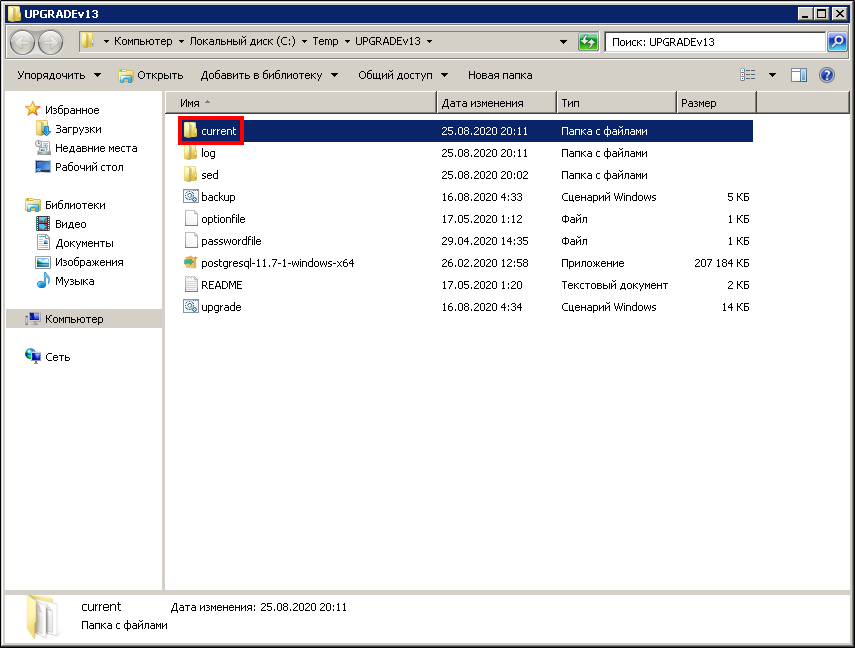
10. Перейдите в папку current для проверки созданных резервных копий баз данных PostgreSQL 9.4.
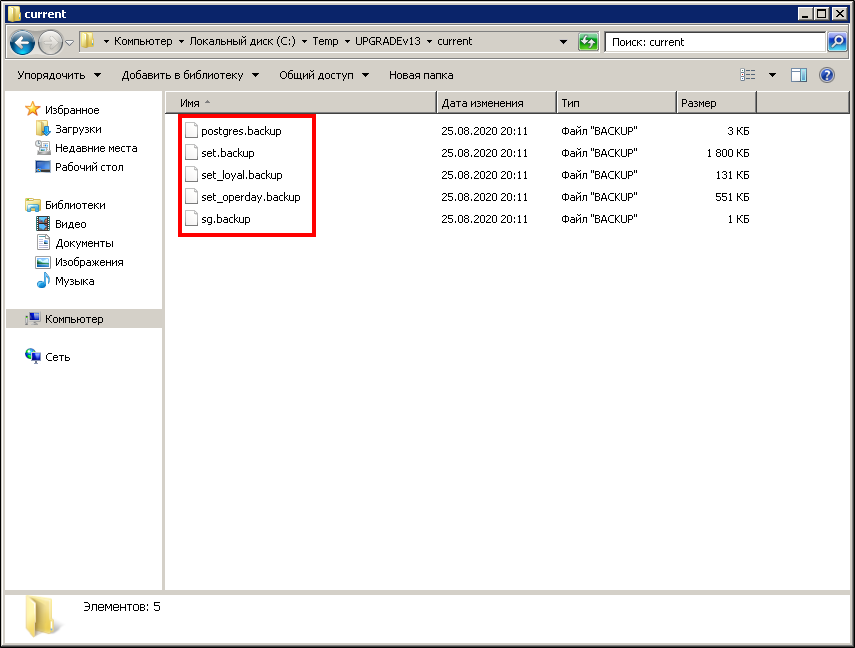
11. Проверьте, что все файлы резервных копий, что созданы следующие файлы резервных копий СУБД:
- postgres.backup;
- set.backup;
- set_loyal.backup;
- set_operday.backup;
- sg.backup;
- XXXX.backup — любые другие базы данных продуктов семейства Set и сторонних информационных систем.
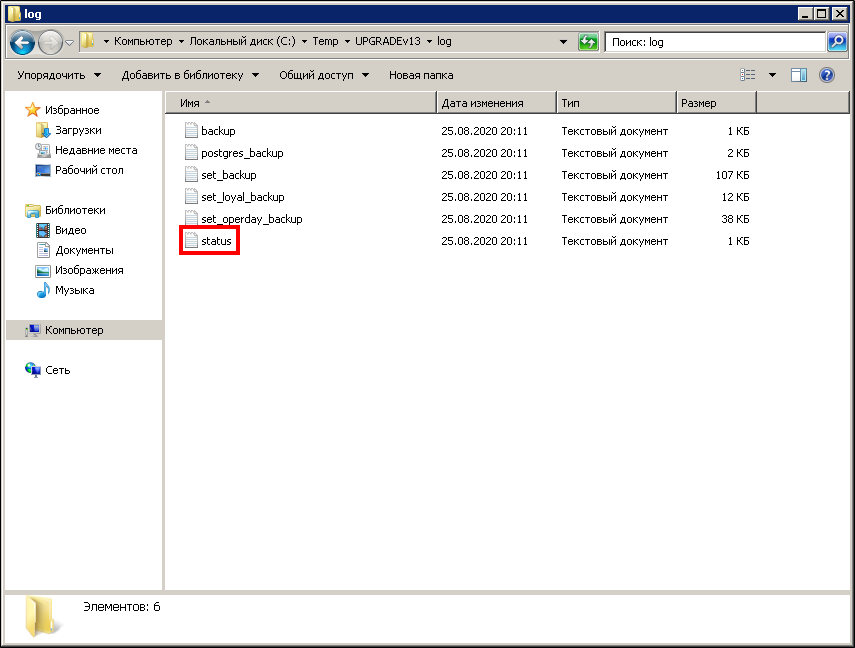
11. Откройте папку log для проверки лог-файлов.
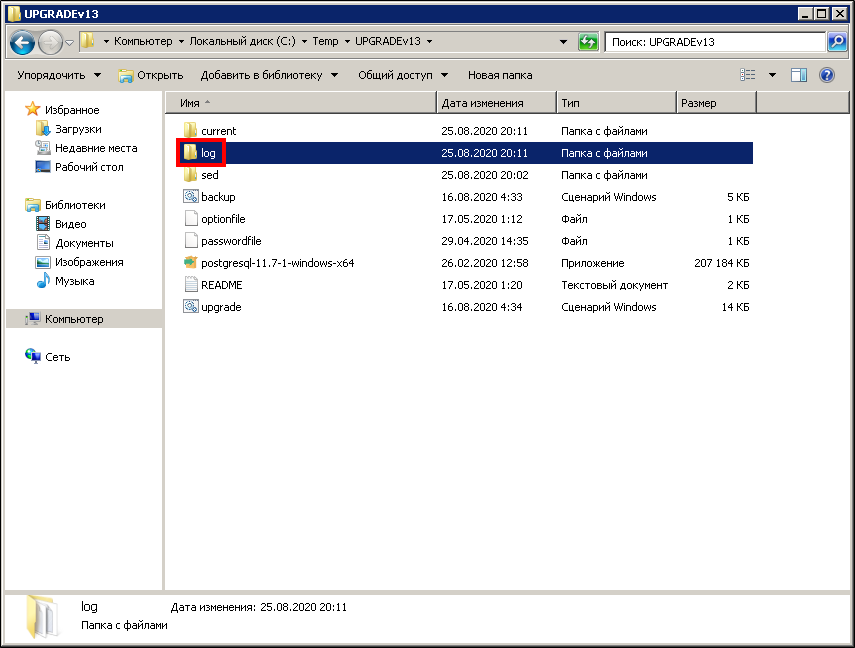
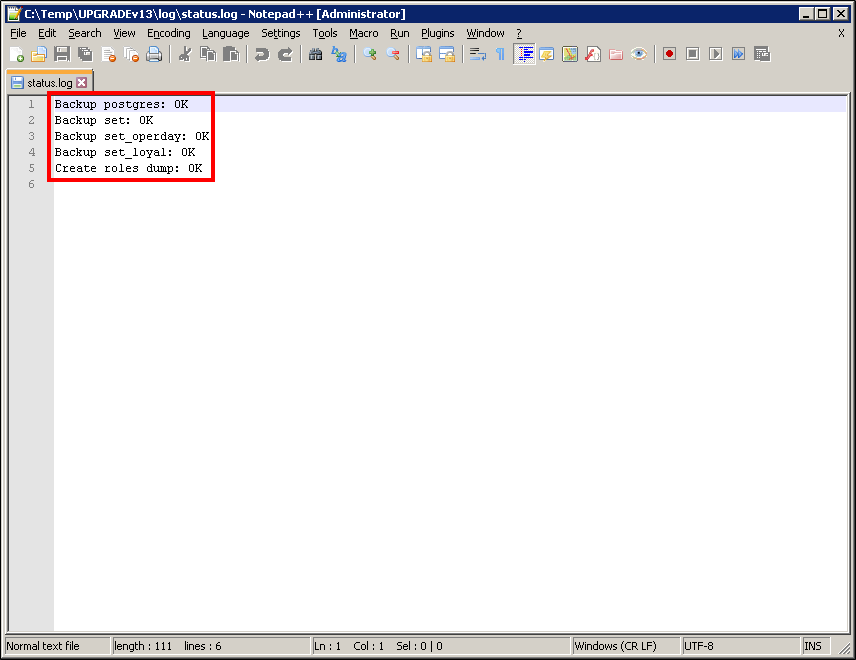
12. Откройте файл status.txt для просмотра статуса завершения операции бэкапирования.
13. Напротив каждой из баз данных должен быть установлен статус OK — это обозначает, что все базы данных успешно сохранены в резервные копии.
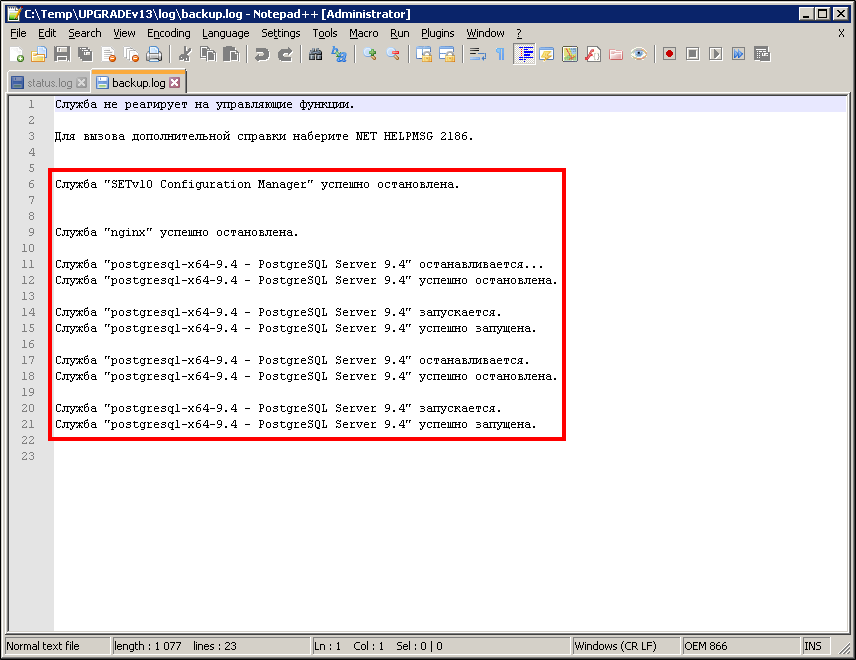
14. Откройте лог-файл backup.txt.

15. Просмотрите, что во время процесса бэкапирования службы PostgreSQL 9.4. успешно запускались и останавливались.
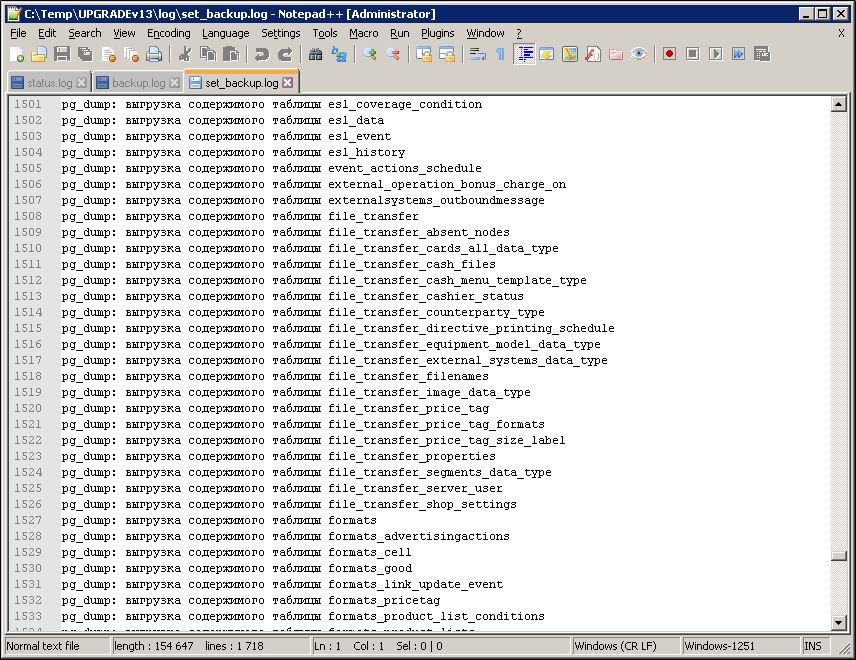
16. Также откройте любой из лог-файлов с наименованием баз данных SetRetail/SetCentrum.

17. Проверьте, что процесс резервного копирования не содержит ошибок.
18. Запустите скрипт обновления upgrade.cmd с правами администратора.
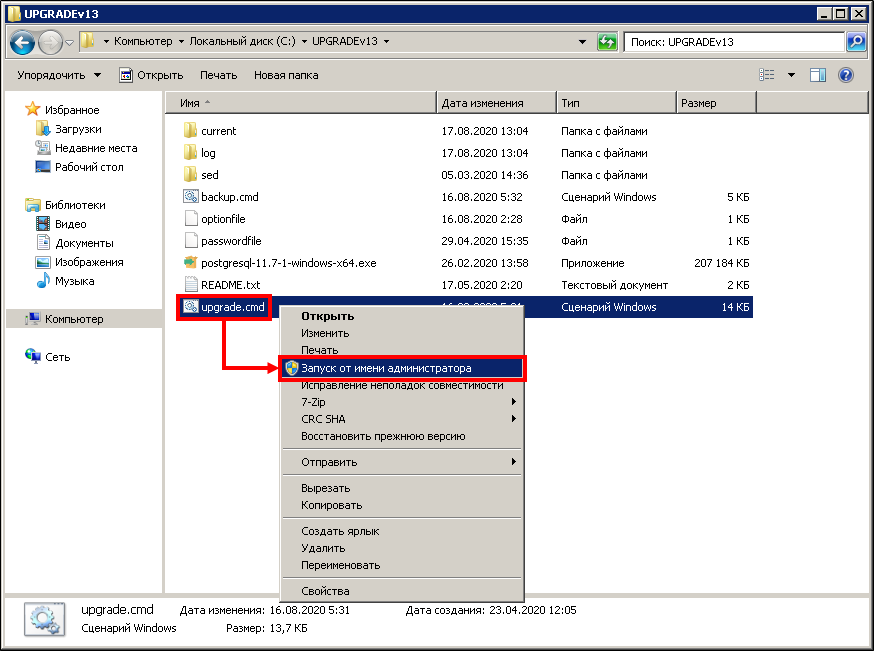
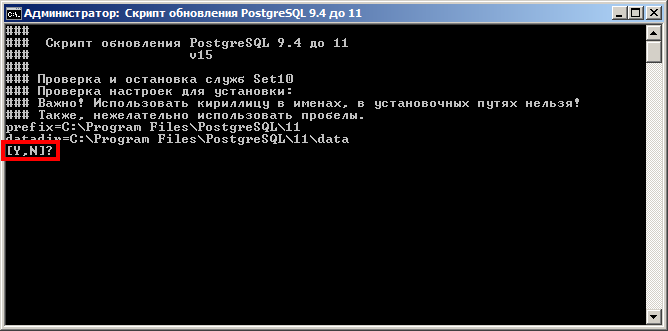
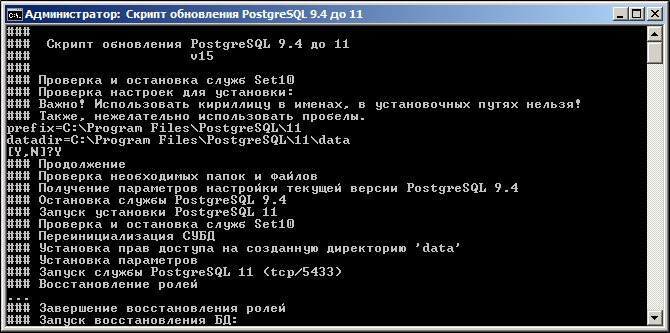
19. Проверьте еще раз правильность путей для установки PostgreSQL 11, если они корректны введите Y → нажмите ENTER.
Для отмены установки введите N → нажмите ENTER.
20. Начнётся установка необходимых компонентов для запуска установщика PostgreSQL 11.
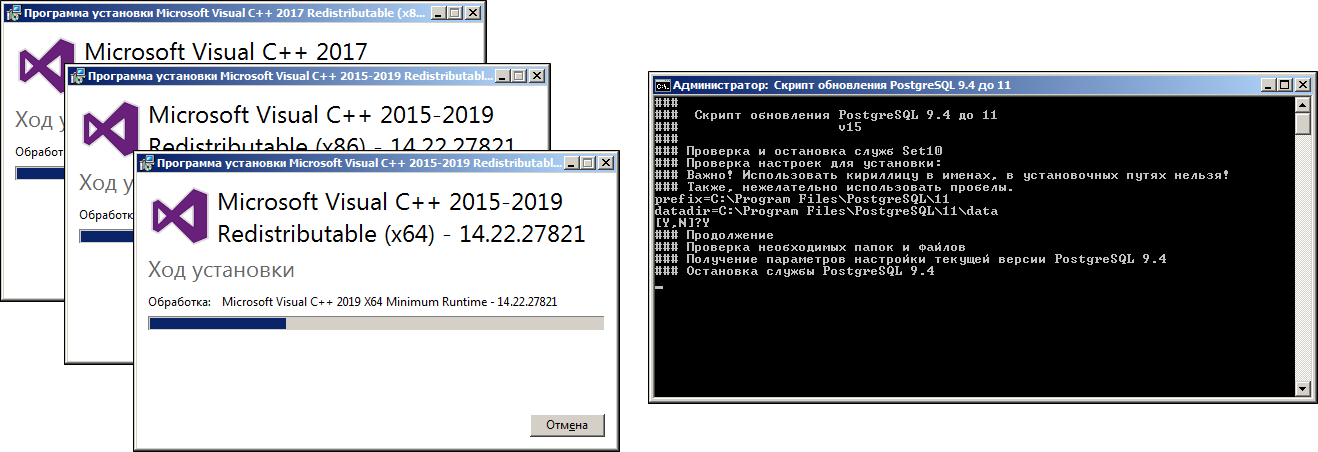
21. После установки компонентов откроется окно процесса инсталляции СУБД PostgreSQL 11.
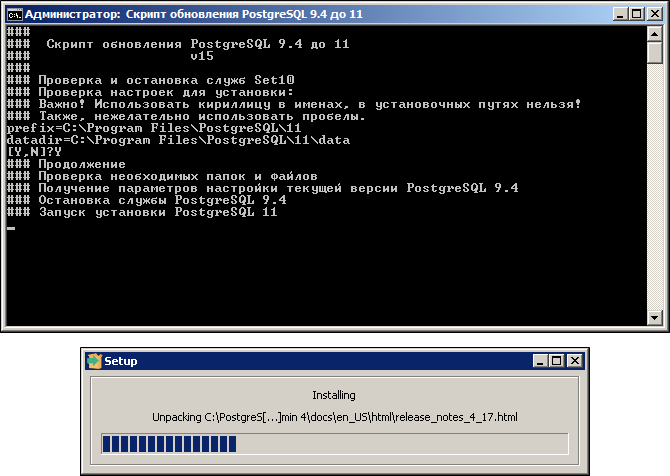
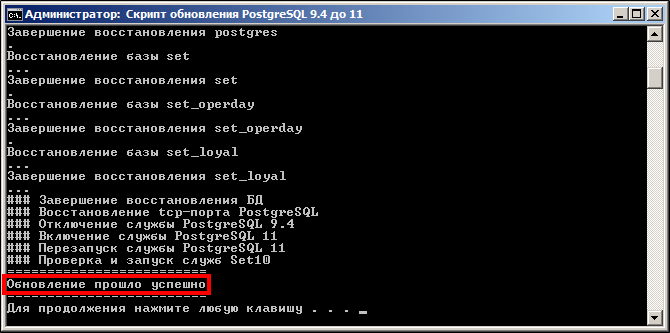
22. Во время выполнения скрипта сервер баз данных будет перезапускаться, а также автоматически произойдет восстановление баз данных на новую версию сервера СУБД всех резервных копий.

23. Когда в окне интерпретатора отобразится сообщение Обновление прошло успешно → нажмите любую клавишу.
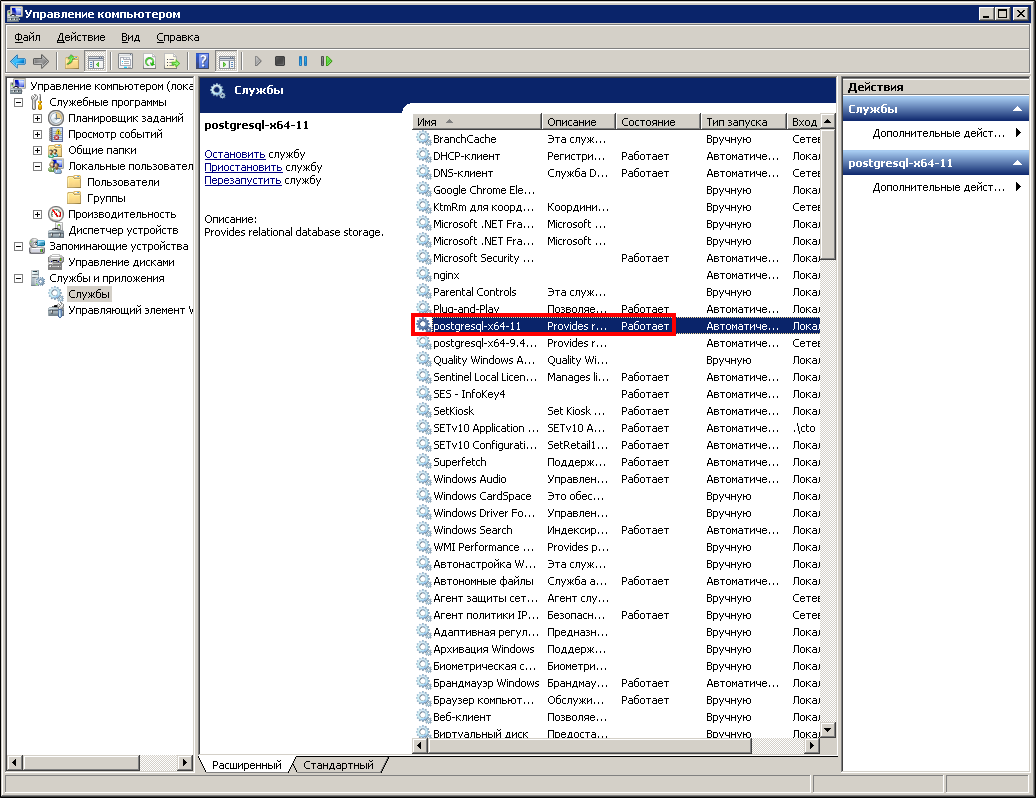
24. Проверьте в оснастке служб, что сервис postgresql-x64-11 в статусе Работает.
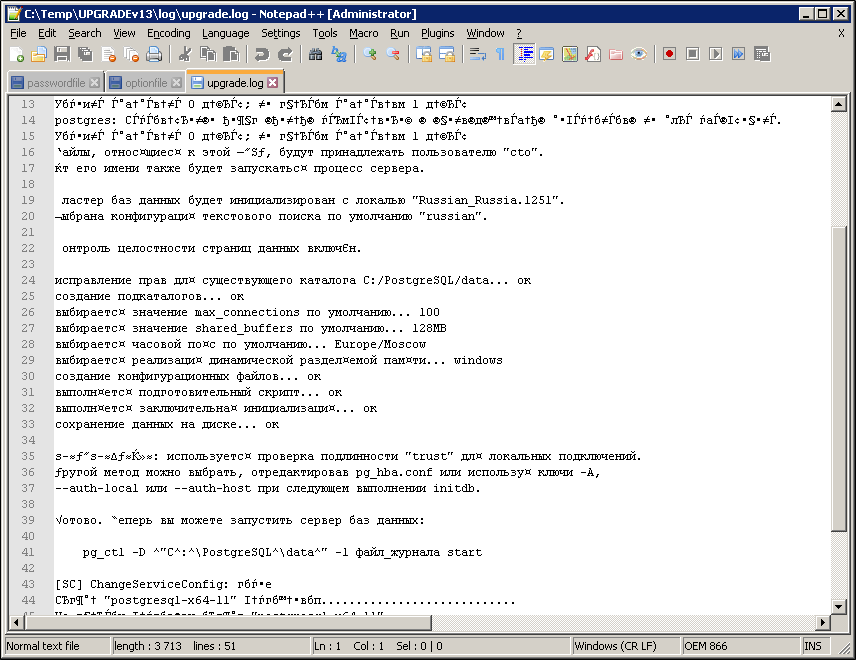
25. Посмотрите лог-файл upgrade.txt.
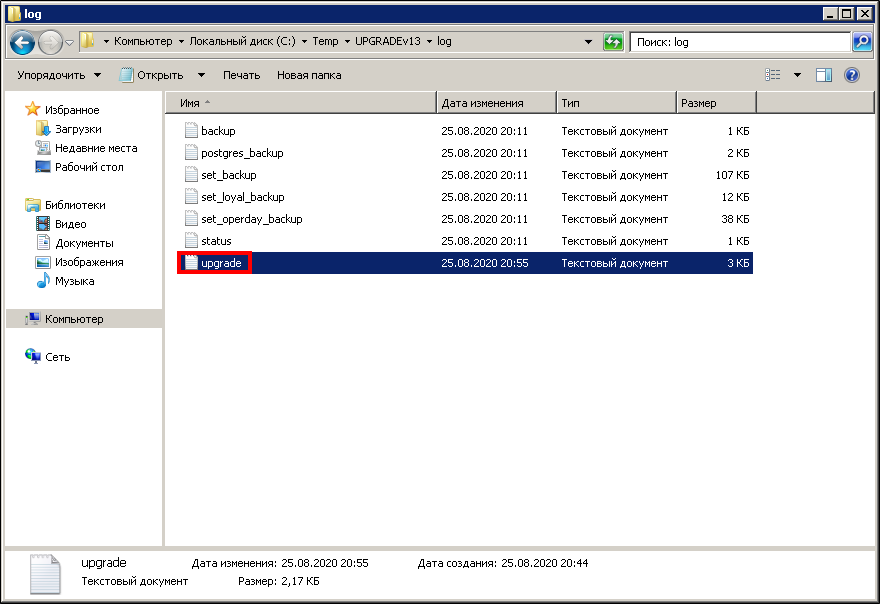
26. Убедитесь, что он не содержит критичных ошибок обновления.
27. Обновление завершено.
28. Проверьте, что визуализация сервера открывается, и вы можете воспользоваться стандартной функциональностью.

29. Запустите командную строку и наберите команду для проверки актуального пути установленного сервера СУБД PostgreSQL 11.
Должен отобразится актуальный путь к СУБД PostgreSQL 11!
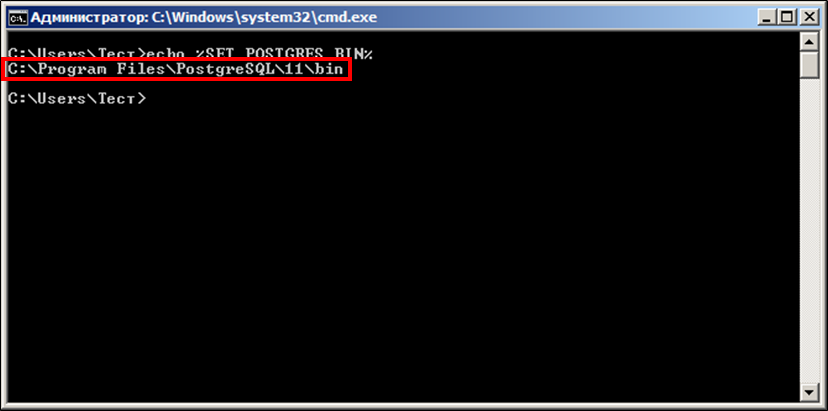
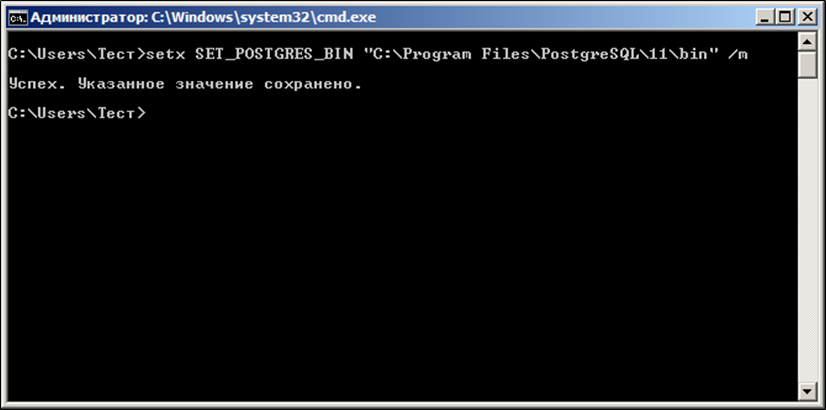
 Внимание! Если, после обновления и стабильной работы сервера отображается старый путь установки СУБД, тогда выполните команду для установки актуального пути в переменную среды PostgreSQL → перезапустите службу МУК.
setx SET_POSTGRES_BIN "C:\Program Files\PostgreSQL\11\bin" /m
Очистка места на диске после обновления
Внимание!
Выполняйте этот шаг, если:
- На диске недостаточно места после обновления. В иных случаях, данный шаг не является обязательным.
- Произведена полная проверка того, что все бизнес-процессы по работе сервера работают стабильно: связь и обмен между кассам, импорт и экспорт в ERP.
- Обновления МУКом патчами производятся стабильно!
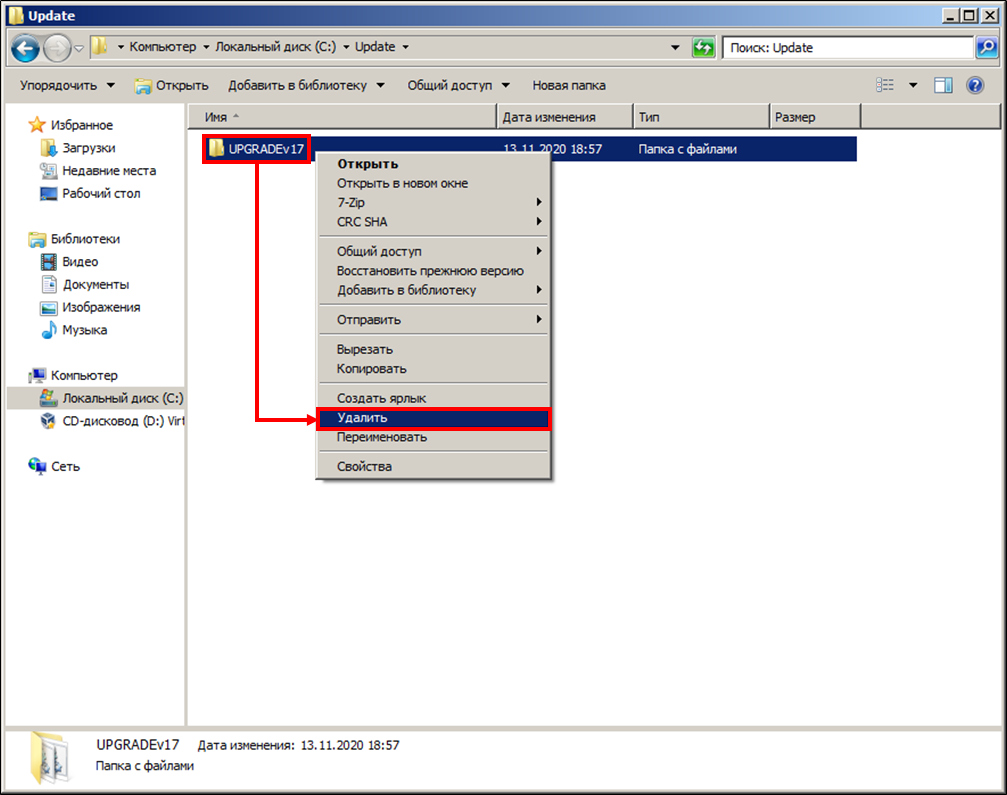
1. Удалите всю папку с пакетом обновления, включая файлы резервных копий.
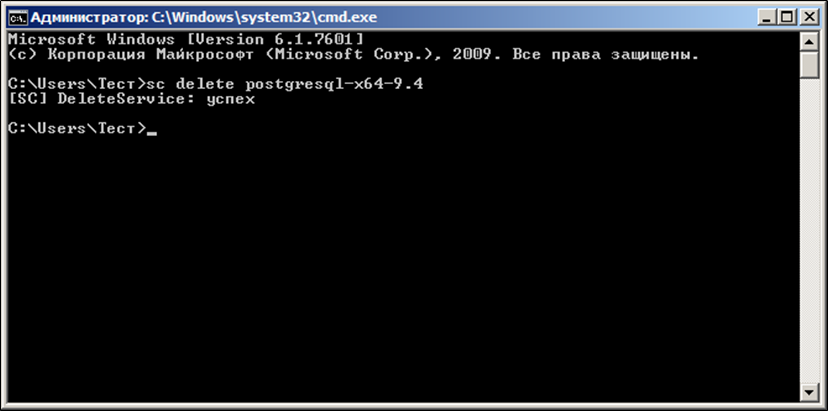
2. Откройте сеанс командной строки от имени администратора и выполните команду на удаление службы PostgreSQL 9.4
sc delete postgresql-x64-9.4
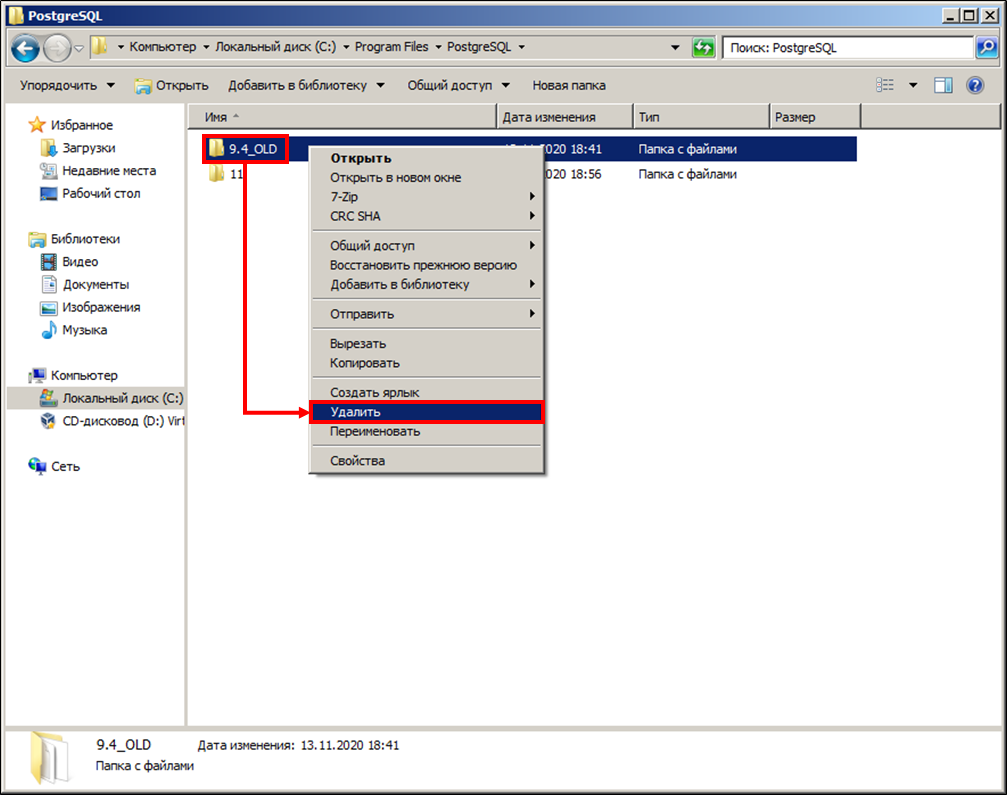
3. Удалите папку СУБД PostgreSQL 9.4.
-
Главная
-
Инструкции
-
PostgreSQL
-
Обновление версии PostgreSQL: инструкция
В PostgreSQL обновление версии выполняется разными способами:
- Установка пакетов с новой версией PostgreSQL — подходит только для минорных обновлений, прежде чем выполнять, необходимо изучить release notes;
- Использование стандартной программы
pg_dumpall— надёжный способ, но возможен длительный downtime. - Использование стандартной программы
pg_upgrade— быстрый способ, но возможны ошибки. - Обновление через логическую репликацию — минимальный downtime, однако подходит только для версий PostgreSQL > 10.0. Для более ранних версий требуются расширения.
Выбор зависит от того, какой релиз используется на сервере и до какой версии вы хотите обновиться.
В этой статье разберём способы обновления.
Главное — понимать особенности обновлений между разными версиями.
Номера состоят из двух цифр — например, 10.1. Первая цифра — номер основной версии (10). Вторая цифра — номер корректирующего релиза (1).
До PostgreSQL 10 номера состоят из трёх цифр. Например, 9.6.3. Здесь 9.6 — номер основного выпуска, а 3 — номер дополнительной версии.
Понимать эту разницу нужно для того, чтобы правильно выбирать способ обновления.
В корректирующих версиях не меняется форма данных. Благодаря этому нет проблем с совместимостью. Поэтому переход с PostgreSQL 10.1 на 10.6 выполняется без лишних затрат ресурсов. Для обновления выключите сервер, замените исполняемые файлы и запустите сервер заново.
Однако в документации отмечается, что для некоторых выпусков могут потребоваться ручные изменения. Поэтому всегда читайте примечания к выпуску, прежде чем выполнять обновление.
В основных версиях формат данных может измениться. Это усложняет обновление. В таком случае нельзя изменить номер. Нужно или выгружать данные и загружать их заново, или использовать программу pg_upgrade, или применять логическую репликацию.
Обо всех этих способах поговорим ниже.
Обновление в рамках одной основной версии
Посмотрим на примере апдейта PostgreSQL 14.1 до PostgreSQL 14.3 на сервере Ubuntu.
PostgreSQL доступен на Ubuntu по умолчанию. Обновитесь командой:
sudo apt-get upgradeDebian и Ubuntu выпускают только одну версию PostgreSQL для каждого выпуска ОС. Например, в Debian Squeeze/6.0 есть только PostgreSQL 8.4. Если вам нужна другая версия PostgreSQL, используйте пакеты от PGDG.
Если вы хотите самый свежий релиз, то нужно прежде установить репозиторий Постгреса.
Добавьте репозиторий:
sudo sh -c 'echo "deb http://apt.postgresql.org/pub/repos/apt $(lsb_release -cs)-pgdg main" > /etc/apt/sources.list.d/pgdg.list'Импортируйте ключ подписи:
wget --quiet -O - https://www.postgresql.org/media/keys/ACCC4CF8.asc | sudo apt-key add -Обновите перечень пакетов в системе:
sudo apt-get updateУстановите нужную версию СУБД:
sudo apt-get -y install postgresql-14.3Чтобы посмотреть список установленных СУБД, выполните:
dpkg --get-selections | grep postgresТакже посмотрите список кластеров:
pg_lsclustersПрежде чем вносить изменения, остановите PostgreSQL:
sudo service postgresql stopКогда пакеты Postgres устанавливаются, они создают для вас кластер по умолчанию. Нам нужно переименовать новый кластер postgres, чтобы при апгрейде старого кластера имена не конфликтовали.
sudo pg_renamecluster 14.3 main main_pristineОбновите старый кластер:
sudo pg_upgradecluster 14.1 mainЗапустите сервис:
sudo service postgresql startСнова проверьте список кластеров и убедитесь, что новый работает:
pg_lsclustersИзбавьтесь от старого кластера:
sudo pg_dropcluster 14.1 mainПодставьте в эти команды нужные номера версий вместо 14.1 и 14.3.
Обновление через pg_dumpall
Если нужно изменить основную версию, используйте программу pg_dumpall. Суть этого метода в том, чтобы выгрузить данные из одной основной версии, а затем загрузить их в другую.
- Прежде чем выгружать данные, убедитесь, что в БД не проводятся никакие изменения прямо сейчас. В противном случае часть изменений может не попасть в итоговый дамп.
- Получите дамп и запишите его в файл:
pg_dumpall > output_file- Остановите сервер:
pg_ctl stop- Измените имя старого каталога чтобы исключить появление конфликта имён:
mv /usr/local/pgsql /usr/local/pgsql.oldСтарый каталог можно просто удалить. Но разумнее будет его переименовать, чтобы оставить возможность для восстановления. Вместо /usr/local/pgsql укажите путь до своего каталога.
- Установите новую версию из исходного кода. Подробная инструкция на русском языке — в документации.
- Сформируйте новый кластер:
/usr/local/pgsql/bin/initdb -D /usr/local/pgsql/data- Перенесите все изменения в файлы
pg_hba.confиpostgresql.conf. - Запустите сервер БД:
/usr/local/pgsql/bin/postgres -D /usr/local/pgsql/data- Восстановите данные из резервной копии:
/usr/local/pgsql/bin/psql -d postgres -f output_fileМинус этого способа — сервер будет выключен длительное время. Для сокращения времени простоя можно установить новый сервер в другой каталог, а затем запустить старый и новый серверы на разных портах. Для переноса данных используйте команду:
pg_dumpall -p 5432 | psql -d postgres -p 5433Вместо 5432 и 5433 укажите номера портов, на которых вы запустили серверы.
Обновление через pg_upgrade
Чтобы не делать выгрузку и загрузку данных, используйте программу pg_upgrade. Она помогает обновиться быстрее. Программа pg_upgrade создаёт системные таблицы заново, учитывая изменения последних версий. При этом старые файлы данных сохраняются. Кроме того, pg_upgrade проверяет, что кластеры совместимы.
Программу pg_upgrade помогает обновиться с PostgreSQL 8.4.X до текущего релиза СУБД.
Рассмотрим общий план обновления с помощью pg_upgrade.
- Переместите старый кластер. Это нужно сделать, если каталог не был привязан к старому релизу. Например, он находится по адресу
/usr/local/pgsql. Если вы его не переименуете, то при обновлении произойдёт конфликт.
Переименование выполняется при выключенном сервере командой:
mv /usr/local/pgsql /usr/local/pgsql.old- Соберите новую версию из исходного кода. Настройте configure, чтобы флаги были совместимы с конфигурацией старого кластера. Прежде чем начинать обновление,
pg_upgradeпроверит совместимость флагов. - Инсталлируйте новые исполняемые файлы. Для размещения сервера в нестандартной директории, используйте
prefix:
make prefix=/usr/local/pgsql.new install- Используйте
initdb, чтобы инициализировать новый кластер. Проверьте, что флаги совместимы с флагами старого кластера. - Инсталлируйте разделяемые объектные файлы расширения. Если для них доступны обновления,
pg_upgradeсамостоятельно создаст скрипт для их последующей установки. - Перенесите файлы полнотекстового поиска.
- Настройте аутентификацию
peerвpg_hba.conf. Это нужно сделать, потому чтоpg_upgradeбудет несколько раз подключаться к старому и новому хостам. - Проверьте, что старый и новый серверы остановлены:
pg_ctl -D /opt/PostgreSQL/9.6 stop
pg_ctl -D /opt/PostgreSQL/14 stop
- Запустите
pg_upgradeот нового сервера. Для начала вызовите программу в режиме проверки, добавив флаг:pg_upgrade --check. В ответ вы получите перечень корректировок, которые необходимо внести вручную после опгрейда. - Если вы вносили правки в файл
pg_hba.conf, восстановите его предыдущее состояниеpg_hba.conf. Иногда требуются изменения других конфигов на новом кластере, чтобы они соответствовали параметрам старого кластера. - Запустите сервер.
Если результат устраивает, удалите ненужный кластер.
Подробности и особенности использования pg_upgrade смотрите в документации.
Использование логической репликации
В 10-й версии СУБД появился метод логической репликации объектов данных и изменений в них. Он основан на использовании репликационных идентификаторов — обычно ими выступают первичные ключи.
В основе логической репликации лежит использование модели публикаций и подписок. Пользователь создаёт снимок публикуемой базы данных и копирует его на подписчика. В документации PostgreSQL одним из типичных сценариев использования логической репликации названа как раз репликация между разными основными версиями PostgreSQL.
Подробнее о том, как работает логическая репликация, вы можете узнать из отдельной статьи.
Резервный сервер может располагаться на том же хосте или на другом. После завершения синхронизации доступны разные опции. Например, вы можете сделать новый сервер главным, а старый — отключить.
Главный плюс логической репликации — минимальный downtime. Прерывание работы сервера в некоторых случаях ограничивается несколькими секундами.
Заключение
Мы рассмотрели универсальные методы апдейта PostgreSQL. Иногда процесс отличается. Например, обновление версии PostgreSQL для 1C требует установки дополнительных зависимостей.
В некоторых случаях обязанности по обновлению PostgreSQL можно делегировать. Например, Timeweb предлагает облачные базы данных. Среди них — PostgreSQL актуальной версии. Обновление и администрирование базы в этом случае возьмет на себя провайдер. При таком подходе изменить версию PostgreSQL можно в один клик через панель управления.