29.07.2017
Просмотров: 41461
Во время запуска какой-то программы или на старте Windows 7 и выше, пользователь может столкнуться с ошибкой инициализации платформы .NET Framework 4. Возникает она по причине некорректной установки данного компонента или во время несовместимости с самой операционной системой. Поэтому, чтобы её решить, стоит рассмотреть несколько способов.
Читайте также: Как исправить ошибку установки NET Framework 4.0 «Failed to install .Net Framework 4.0 with Error Code HRESULT: 0xc8000222»?
Способы решения проблемы с инициализацией NET Framework
При запуске приложения на ПК с операционной системой Windows 7 и выше, может появиться сообщение о том, что «Для этого приложения сначала нужно установить одну из следующих версий NET Framework…». При этом версия фреймворка всегда указывается.

Чтобы решить эту проблему самостоятельно, стоит ознакомиться со следующими рекомендациями.
Способ 1. Переустановка .NET Framework
- Переходим в Панель управления и выбираем «Программы и компоненты».

- Откроется небольшое окно. В меню слева выбираем «Включение и отключение компонентов Windows». Находим в списке и отключаем фреймворки.

- После возвращаемся к списку программ и находим там .NET Framework. Также удаляем их. Удаляем все, какие есть на ПК.

- После удаления всех установленных компонентов, стоит перезагрузить систему.
Теперь, когда система очищена от всех фреймворков, переходим на официальный сайт Майкрософт и жмем Скачать .NET Framework той версии, которая указана в ошибке. Загрузив нужный компонент, выполняем его установку и вновь перезагружаем ПК.
Способ 2. Использование официальных утилит для решения проблем с .NET Framework
Для исправления неполадок в работе фреймворков компания Майкрософт выпустила несколько утилит. Рассмотрим принцип их работы на практике.
Первая утилита – Microsoft .NET Framework Repair Tool. Она ищет и исправляет неполадки, которые связаны с фреймворками.

Чтобы её применить, стоит загрузить файл, запустить его на своем ПК и принять условия лицензионного соглашения.

После программа будет сканировать систему и предложит варианты решения проблемы. Жмём «Далее» и исправляем ошибку.

Вторая программа для решения ошибки с инициализацией файлов – это .NET Framework Setup Verification Tool. Она проверяет, корректно ли установлены фреймворки. При этом её использование максимально простое. Нужно скачать и запустить программу, указать версию фреймворков, которые нужно проверить и дождаться завершения результатов проверки.

В поле «Статус» будут помещены результаты проверки.
Третья утилита для исправления ошибок с .NET Framework – это .NET Framework Cleanup Tool. Она пригодиться в том случае, если вам не удалось переустановить фреймворки вручную. Утилита позволяет удалить, заново загрузить и корректно установить недостающие компоненты.
Поэтому, если самостоятельно вам не удалось переустановить фреймворки и решить проблему с инициализацией файлов, утилиты от Майкрософт могут помочь решить данную проблему.
 Одна из возможных ошибок при запуске программ или при входе в Windows 11, Windows 10, 8.1 или 7 — сообщение «Ошибка инициализации платформы .NET Framework. Для запуска этого приложения сначала необходимо установить одну из следующих версий .NET Framework: 4» (версия обычно указывается более точно, например, 4.7 или 4.8, но в контексте решения это не играет роли). Причиной тому может быть как неустановленная платформа .NET Framework нужной версии, так и проблемы с установленными на компьютере компонентами.
В этой инструкции — возможные способы исправить ошибки инициализации .NET Framework 4 в последних версиях Windows и исправить запуск программ. Примечание: далее в инструкции для установки предлагается .NET Framework 4.7 или 4.8, как последние на текущий момент времени. Вне зависимости от того какую из «4-х» версий требуется установить в сообщении об ошибке, последняя должна подойти, как включающая все необходимые компоненты.
Удаление и последующая установка компонентов .NET Framework 4 последней версии
Первый вариант, который следует попробовать, если на настоящий момент он еще не был опробован — удалить имеющиеся компоненты .NET Framework 4 и установить их заново.
Если у вас Windows 10, порядок действий будет таким:
- Зайдите в Панель управления (в поле «Просмотр» установите «Значки») — Программы и компоненты — нажмите слева «Включение и отключение компонентов Windows».

- Снимите отметку с .NET Framework 4.7 (или 4.6 в более ранних версиях Windows 10).

- Нажмите «Ок».


После удаления, перезагрузите компьютер, снова зайдите в раздел «Включение и отключение компонентов Windows», включите .NET Framework 4.7 или 4.6, подтвердите установку и опять же, перезагрузите систему.
Если у вас Windows 7 или 8:
- Зайдите в панель управления — программы и компоненты и удалите там .NET Framework 4 (4.5, 4.6, 4.7, 4.8 в зависимости от того, какая версия установлена).
- Перезагрузите компьютер.
- Скачайте с официального сайта Майкрософт .NET Framework 4.7 или 4.8 и установите на компьютер. Адрес страницы для загрузки — https://dotnet.microsoft.com/en-us/download/dotnet-framework
После установки и перезагрузки компьютера, проверьте, была ли устранена проблема и появляется ли ошибка инициализации платформы .NET Framework 4 снова.
Использование официальных утилит исправления ошибок .NET Framework

У Майкрософт имеется несколько собственных утилит для исправления ошибок .NET Framework:
- .NET Framework Repair Tool
- .NET Framework Setup Verification Tool
- .NET Framework Cleanup Tool
Наиболее полезной в большинстве случаев может оказаться первая из них. Порядок ее использования выглядит следующим образом:
- Скачайте утилиту со страницы https://www.microsoft.com/en-us/download/details.aspx?id=30135
- Откройте загруженный файл NetFxRepairTool
- Примите лицензию, нажмите кнопку «Next» и дождитесь, когда будут проверены установленные компоненты .NET Framework.
- Будет отображен список возможных проблем с .NET Framework разных версий, а по нажатию на Next будет запущено автоматическое исправление, если оно возможно.


По завершении работы утилиты рекомендую перезагрузить компьютер и проверить, была ли исправлена проблема.
Утилита .NET Framework Setup Verification Tool позволяет проверить правильность установки компонентов .NET Framework выбранной версии в Windows 10, 8 и Windows 7.
После запуска утилиты выберите версию .NET Framework, которую требуется проверить и нажмите кнопку «Verify Now». По завершении проверки, текст в поле «Current Status» будет обновлен, а сообщение «Product verification succeeded» означает, что с компонентами все в порядке (в случае, если не все в порядке, вы можете просмотреть файлы журналов (View log), чтобы узнать, какие именно ошибки были найдены.

Скачать утилиту .NET Framework Setup Verification Tool можно с официальной страницы https://blogs.msdn.microsoft.com/astebner/2008/10/13/net-framework-setup-verification-tool-users-guide/ (загрузки смотрите в разделе «Download location»).
Еще одна программа — .NET Framework Cleanup Tool, доступная для загрузки на https://blogs.msdn.microsoft.com/astebner/2008/08/28/net-framework-cleanup-tool-users-guide/ (раздел «Download location»), позволяет полностью удалить выбранные версии .NET Framework с компьютера с тем, чтобы затем выполнить установку заново.

Следует учитывать, что утилита не удаляет компоненты, которые являются составной частью Windows. Например, удалить .NET Framework 4.7 в Windows 10 Creators Update с ее помощью не получится, зато с большой вероятностью проблемы инициализации .NET Framework получится исправить в Windows 7 путем удаления версий .NET Framework 4.x в Cleanup Tool и последующей установки версии 4.7 с официального сайта.
Дополнительная информация
В некоторых случаях исправить ошибку может помочь простая переустановка программы, ее вызывающей. Либо, в случаях, если ошибка появляется при входе в Windows (т.е. при запуске какой-то программы в автозагрузке), может иметь смысл убрать эту программу из автозагрузки, если она не является необходимой (см. Автозагрузка программ в Windows 10).
Ошибка инициализации платформы .NET Framework 4 — как исправить
Одна из возможных ошибок при запуске программ или при входе в Windows 10, 8 или Windows 7 — сообщение «Ошибка инициализации платформы .NET Framework. Для запуска этого приложения сначала необходимо установить одну из следующих версий .NET Framework: 4» (версия обычно указывается более точно, но это не играет роли). Причиной тому может быть как неустановленная платформа .NET Framework нужной версии, так и проблемы с установленными на компьютере компонентами.
В этой инструкции — возможные способы исправить ошибки инициализации .NET Framework 4 в последних версиях Windows и исправить запуск программ.
Примечание: далее в инструкции для установки предлагается .NET Framework 4.7, как последняя на текущий момент времени. Вне зависимости от того какую из «4-х» версий требуется установить в сообщении об ошибке, последняя должна подойти, как включающая все необходимые компоненты.
Удаление и последующая установка компонентов .NET Framework 4 последней версии
Первый вариант, который следует попробовать, если на настоящий момент он еще не был опробован — удалить имеющиеся компоненты .NET Framework 4 и установить их заново.
Если у вас Windows 10, порядок действий будет таким
- Зайдите в Панель управления (в поле «Просмотр» установите «Значки») — Программы и компоненты — нажмите слева «Включение и отключение компонентов Windows».

- Снимите отметку с .NET Framework 4.7 (или 4.6 в более ранних версиях Windows 10).
- Нажмите «Ок».
После удаления, перезагрузите компьютер, снова зайдите в раздел «Включение и отключение компонентов Windows», включите .NET Framework 4.7 или 4.6, подтвердите установку и опять же, перезагрузите систему.
Если у вас Windows 7 или 8:
- Зайдите в панель управления — программы и компоненты и удалите там .NET Framework 4 (4.5, 4.6, 4.7, в зависимости от того, какая версия установлена).
- Перезагрузите компьютер.
- Скачайте с официального сайта Майкрософт .NET Framework 4.7 и установите на компьютер. Адрес страницы для загрузки — https://www.microsoft.com/ru-ru/download/details.aspx?id=55167
После установки и перезагрузки компьютера, проверьте, была ли устранена проблема и появляется ли ошибка инициализации платформы .NET Framework 4 снова.
Использование официальных утилит исправления ошибок .NET Framework
У Майкрософт имеется несколько собственных утилит для исправления ошибок .NET Framework:
- .NET Framework Repair Tool
- .NET Framework Setup Verification Tool
- .NET Framework Cleanup Tool
Наиболее полезной в большинстве случаев может оказаться первая из них. Порядок ее использования выглядит следующим образом:
- Скачайте утилиту со страницы https://www.microsoft.com/en-us/download/details.aspx?id=30135
- Откройте загруженный файл NetFxRepairTool
- Примите лицензию, нажмите кнопку «Next» и дождитесь, когда будут проверены установленные компоненты .NET Framework.
- Будет отображен список возможных проблем с .NET Framework разных версий, а по нажатию на Next будет запущено автоматическое исправление, если оно возможно.
По завершении работы утилиты рекомендую перезагрузить компьютер и проверить, была ли исправлена проблема.
Утилита .NET Framework Setup Verification Tool позволяет проверить правильность установки компонентов .NET Framework выбранной версии в Windows 10, 8 и Windows 7.
После запуска утилиты выберите версию .NET Framework, которую требуется проверить и нажмите кнопку «Verify Now». По завершении проверки, текст в поле «Current Status» будет обновлен, а сообщение «Product verification succeeded» означает, что с компонентами все в порядке (в случае, если не все в порядке, вы можете просмотреть файлы журналов (View log), чтобы узнать, какие именно ошибки были найдены.
Скачать утилиту .NET Framework Setup Verification Tool можно с официальной страницы https://blogs.msdn.microsoft.com/astebner/2008/10/13/net-framework-setup-verification-tool-users-guide/ (загрузки смотрите в разделе «Download location»).
Еще одна программа — .NET Framework Cleanup Tool, доступная для загрузки на https://blogs.msdn.microsoft.com/astebner/2008/08/28/net-framework-cleanup-tool-users-guide/ (раздел «Download location»), позволяет полностью удалить выбранные версии .NET Framework с компьютера с тем, чтобы затем выполнить установку заново.
Следует учитывать, что утилита не удаляет компоненты, которые являются составной частью Windows. Например, удалить .NET Framework 4.7 в Windows 10 Creators Update с ее помощью не получится, зато с большой вероятностью проблемы инициализации .NET Framework получится исправить в Windows 7 путем удаления версий .NET Framework 4.x в Cleanup Tool и последующей установки версии 4.7 с официального сайта.
Дополнительная информация
В некоторых случаях исправить ошибку может помочь простая переустановка программы, ее вызывающей. Либо, в случаях, если ошибка появляется при входе в Windows (т.е. при запуске какой-то программы в автозагрузке), может иметь смысл убрать эту программу из автозагрузки, если она не является необходимой (см. Автозагрузка программ в Windows 10).
А вдруг и это будет интересно:
Почему бы не подписаться?
Рассылка новых, иногда интересных и полезных, материалов сайта remontka.pro. Никакой рекламы и бесплатная компьютерная помощь подписчикам от автора. Другие способы подписки (ВК, Одноклассники, Телеграм, Facebook, Twitter, Youtube, Яндекс.Дзен)
Какой смысл подписываться и тем более оставлять комментарии, если никто не отвечает на этом сайте, сюда п мать, что в пустоту, что головой об стену убиться!
Ну вообще-то я на сотню комментариев в день где-то отвечаю на этом сайте.
Не знаю, где именно вам не ответил. Бывает, что не отвечаю, но только когда либо вопроса как такового нет, либо когда у меня ответа никакого нет (но тогда коммент остается, может кто-то еще ответит).
Сейчас пересмотрел ваши комментарии на сайте — не ответил, я так понимаю, только на один, связанный с wmic.
спасибо все сделал как написано, удалил, загрузил, вставил, проверил, заработало, еще раз благодарю
здрасте. из описания в самом начале я так понял, что нет фрэймворк 4.7 заменяет все 4, а то у меня были 4.5 фул и 4.5 забыл слово, а после обновления виндоус стали 4.7 то есть это хорошо? или 4.5 тоже надо бы? а.
Источник
Как исправить ошибку, связанную с инициализацией .NET Framework 4?

Во время запуска какой-то программы или на старте Windows 7 и выше, пользователь может столкнуться с ошибкой инициализации платформы .NET Framework 4. Возникает она по причине некорректной установки данного компонента или во время несовместимости с самой операционной системой. Поэтому, чтобы её решить, стоит рассмотреть несколько способов.
При запуске приложения на ПК с операционной системой Windows 7 и выше, может появиться сообщение о том, что «Для этого приложения сначала нужно установить одну из следующих версий NET Framework…». При этом версия фреймворка всегда указывается.
Чтобы решить эту проблему самостоятельно, стоит ознакомиться со следующими рекомендациями.
Способ 1. Переустановка .NET Framework
- Переходим в Панель управления и выбираем «Программы и компоненты».
- Откроется небольшое окно. В меню слева выбираем «Включение и отключение компонентов Windows». Находим в списке и отключаем фреймворки.
- После возвращаемся к списку программ и находим там .NET Framework. Также удаляем их. Удаляем все, какие есть на ПК.
- После удаления всех установленных компонентов, стоит перезагрузить систему.
Теперь, когда система очищена от всех фреймворков, переходим на официальный сайт Майкрософт и жмем Скачать .NET Framework той версии, которая указана в ошибке. Загрузив нужный компонент, выполняем его установку и вновь перезагружаем ПК.
Способ 2. Использование официальных утилит для решения проблем с .NET Framework
Для исправления неполадок в работе фреймворков компания Майкрософт выпустила несколько утилит. Рассмотрим принцип их работы на практике.
Первая утилита – Microsoft .NET Framework Repair Tool. Она ищет и исправляет неполадки, которые связаны с фреймворками.
Чтобы её применить, стоит загрузить файл, запустить его на своем ПК и принять условия лицензионного соглашения.
После программа будет сканировать систему и предложит варианты решения проблемы. Жмём «Далее» и исправляем ошибку.
Вторая программа для решения ошибки с инициализацией файлов – это .NET Framework Setup Verification Tool. Она проверяет, корректно ли установлены фреймворки. При этом её использование максимально простое. Нужно скачать и запустить программу, указать версию фреймворков, которые нужно проверить и дождаться завершения результатов проверки.
В поле «Статус» будут помещены результаты проверки.
Третья утилита для исправления ошибок с .NET Framework – это .NET Framework Cleanup Tool. Она пригодиться в том случае, если вам не удалось переустановить фреймворки вручную. Утилита позволяет удалить, заново загрузить и корректно установить недостающие компоненты.
Поэтому, если самостоятельно вам не удалось переустановить фреймворки и решить проблему с инициализацией файлов, утилиты от Майкрософт могут помочь решить данную проблему.
Источник
windows 7 update .net framework issues
so I am new here and clueless on how to get the ball rolling and my issue resolved but am going to try.
I have windows 7 and 3 critical updates fail each time and they all seem to be involved with the .net framework
Microsoft .NET Framework 4.5.2 for Windows 7 x64-based Systems (KB2901983)
Security Update for Microsoft .NET Framework 4.6.1 on Windows 7 and Windows Server 2008 R2 for x64 (KB3122661)
Security Update for Microsoft .NET Framework 4.6.1 on Windows 7 and Windows Server 2008 R2 for x64 (KB3127233)
error found is code 643 windows encountered an unknown error.
anytime i try to run any of the .net downloads from the Microsoft website they all fail as well.
Replies (18)
* Please try a lower page number.
* Please enter only numbers.
* Please try a lower page number.
* Please enter only numbers.
Go to uninstall a program
Select net 4.5.2 or what ever version highest you show and select uninstall or change,
Use the repair option.
If you show 4.6.0 or. select it first and uninstall it this is not an Important update it is recommended but in reality it is Optional using these update settings,
Did this solve your problem?
Sorry this didn’t help.
Great! Thanks for marking this as the answer.
How satisfied are you with this reply?
Thanks for your feedback, it helps us improve the site.
How satisfied are you with this response?
Thanks for your feedback.
it seems no .net stuff is installed and i need .net stuff to run software for my work.
i tried this and it still did not fix issue if nothing i thing the unistall thing made it all worse!
Use the .NET Framework Cleanup Tool to uninstall multiple versions of the .NET Framework, and then reinstall the components.
To do this, follow these steps:
- Check out the .NET Framework Cleanup Tool User’s Guide.
- Download the .NET Framework cleanup tool.
- When you are prompted, click Open , and then click Extract Now .
- In the files that you extracted, double-click cleanup_tool.exe .
If you are prompted for an administrator password or for confirmation, provide the password, and then click Continue. - In the Do you want to run the .NET Framework Setup Cleanup Utility? message, click Yes.
- Click Yes to accept the license agreement.
- In the Product to cleanup window, click the list, select .NET Framework — All Versions, and then click Cleanup Now.
Note The cleanup tool does not let you remove the .NET Framework 2.0 in Windows Vista or later versions of Windows because the .NET Framework is installed as an operating system component. - After the .NET Framework is removed, restart the computer.
- Download and install the following components:
The .NET Framework 3.5 Service Pack 1 (this will also install the .NET Framework 2.0 SP2 and the .NET Framework 3.0 SP2)
if i ran the uninstall again what are the .net frameworks i need to install as the three ubove did not allow updates to run.
for work the error im getting to run my software is as follows:
to run this application you first must install one of the following versions of the .NET framework v4.0.30319
Источник
Содержание
- Причины ошибки 0x800f0950
- Как исправить ошибку 0x800f0950?
- 2) Установить с внешнего накопителя
- 3) Создать собственный сценарий установки (только Windows 10)
- Коды HRESULT активации CLR
- Пользовательский интерфейс для ошибок инициализации
- Устранение ошибок инициализации
- Управление сообщениями об ошибках
- Политика пользовательского интерфейса для узлов в среде CLR
- Поведение и пользовательский интерфейс Windows 8
- Программный способ решения проблемы
- Самостоятельное исправление неполадок
- Удаление всех фреймворков
- Please use windows update to check for any critical updates to the net framework перевод
Причины ошибки 0x800f0950
Учитывая количество различных процедур, которые сработали у пользователей, не удивительно, что причин у ошибки может быть много. Вот все, что удалось выяснить:
Как исправить ошибку 0x800f0950?
Самое первое, что вам нужно попробовать – обновить операционную систему. Об этом написало настолько много пользователей, мы не в силах игнорировать столь простой и действенный вариант. После обновления процесс установки проходит без проблем. По крайней мере это была хорошая попытка и можем идти дальше.
В случае с Windows 10 все чуточку сложнее. Есть вариант установить программное обеспечение без всяких там инсталляторов, но через меню компонентов системы.
Вот пошаговая инструкция:

В добавок к всему выше сказанному, нужно отметить и еще один способ решения ошибки 0x800F0950, связанный с остаточными файлами. На самом деле данный метод исправляет и много других сбоев. Плюс он работает в обоих версиях операционной системы
2) Установить с внешнего накопителя
Рабочее исправление, которое получило очень много положительных откликов. Смысл в том, чтобы использовать совместимый накопитель (диск, флешка или что-нибудь еще) для установки программы через командную строку.
Вот, как быстро исправить 0x800f0950 в Windows 11, 10:
3) Создать собственный сценарий установки (только Windows 10)
Данный способ предложен модератором форума Microsoft и обладает большим количеством лайков (более 150). Метод работает и его нужно обязательно попробовать, если предыдущие решения не помогли.
Как исправить ошибку 0x800f0950:
for %%I in (D E F G H I J K L M N O P Q R S T U V W X Y Z) do if exist “%%I:\sourcesinstall.wim” set setupdrv=%%I
if defined setupdrv (
echo Found drive %setupdrv%
Dism /online /enable-feature /featurename:NetFX3 /All /Source:%setupdrv%:sourcessxs /LimitAccess
echo No installation media found!
echo Insert DVD or USB flash drive and run this file once again.
Источник
При запуске приложения на ПК с операционной системой Windows 7 и выше, может появиться сообщение о том, что «Для этого приложения сначала нужно установить одну из следующих версий NET Framework…». При этом версия фреймворка всегда указывается.
Чтобы решить эту проблему самостоятельно, стоит ознакомиться со следующими рекомендациями.
Для исправления неполадок в работе фреймворков компания Майкрософт выпустила несколько утилит. Рассмотрим принцип их работы на практике.
Чтобы её применить, стоит загрузить файл, запустить его на своем ПК и принять условия лицензионного соглашения.
После программа будет сканировать систему и предложит варианты решения проблемы. Жмём «Далее» и исправляем ошибку.
В поле «Статус» будут помещены результаты проверки.
Поэтому, если самостоятельно вам не удалось переустановить фреймворки и решить проблему с инициализацией файлов, утилиты от Майкрософт могут помочь решить данную проблему.
Источник
Система активации среды CLR определяет версию среды CLR, которая будет использоваться для выполнения управляемого кода приложения. В некоторых случаях система активации может не найти версию среды CLR для загрузки. Эта ситуация обычно возникает в том случае, если приложение требует версии среды CLR, которая недопустима или не установлена на данном компьютере. Если запрошенная версия не найдена, то система активации среды CLR получает код ошибки HRESULT из вызванных функции или интерфейса и может отобразить сообщение об ошибке для пользователя, запустившего приложение. В этой статье приводится список кодов HRESULT и объясняется, как можно запретить отображение сообщения об ошибке.
Среда CLR предоставляет инфраструктуру ведения журнала для облегчения отладки проблем активации среды CLR, как описано в разделе Практическое руководство. Отладка проблем при активации среды CLR. Эту инфраструктуру не следует путать с журналами привязки сборок, которая полностью отличается.
Коды HRESULT активации CLR
Интерфейсы API активации среды CLR возвращают коды HRESULT, чтобы сообщить о результатах операции активации основному приложению. Основные приложения среды CLR должны всегда обращаться к этими возвращаемым значениям, прежде чем предпринимать какие-либо дополнительные действия.
Пользовательский интерфейс для ошибок инициализации

Устранение ошибок инициализации
Для разрешения проблем и наилучшего взаимодействия с пользователем (меньшее количество сообщений об ошибках), рекомендуется следующее:
Управление сообщениями об ошибках
Метод ICLRMetaHostPolicy::GetRequestedRuntime принимает в качестве входных данных элемент перечисления METAHOST_POLICY_FLAGS. Можно включить флаг METAHOST_POLICY_SHOW_ERROR_DIALOG для запроса сообщения об ошибке, если запрошенная версия среды CLR не будет найдена. По умолчанию сообщение об ошибке не отображается. (Метод ICLRMetaHost::GetRuntime не поддерживает этот флаг и не предоставляет иных способов отобразить сообщение об ошибке.)
Windows предоставляет функцию SetErrorMode, с помощью которой можно объявить, должны ли сообщения об ошибках отображаться как результат выполнения кода, выполняемого внутри процесса. Можно указать флаг SEM_FAILCRITICALERRORS, чтобы запретить отображение сообщения об ошибке.
Но в некоторых случаях важно переопределить параметр SEM_FAILCRITICALERRORS, установленный процессом приложения. Например, если имеется собственный компонент COM, в котором находится среда CLR и расположенный в процессе, для которого установлен флаг SEM_FAILCRITICALERRORS, можно переопределить флаг в зависимости от влияния отображения сообщений об ошибках в пределах данного процесса приложения. В этом случае для переопределения SEM_FAILCRITICALERRORS можно воспользоваться одним из следующих флагов:
Используйте METAHOST_POLICY_IGNORE_ERROR_MODE с методом ICLRMetaHostPolicy::GetRequestedRuntime.
Используйте RUNTIME_INFO_IGNORE_ERROR_MODE с функцией GetRequestedRuntimeInfo.
Политика пользовательского интерфейса для узлов в среде CLR
Среда CLR включает в себя набор узлов для различных сценариев. Все эти узлы отображают сообщение об ошибке при возникновении проблем с загрузкой необходимой версии среды выполнения. В следующей таблице приводится список узлов и их политик сообщений об ошибках.

Источник

Программный способ решения проблемы

Использование софта достаточно простое. Скачиваем архив и запускаем ехе.файл.

Принимаем условия лицензионного соглашения и кликаем «Далее».

Запустится установка утилиты.

После запустится диагностика, поиск и исправление проблемы.

По выполнению операции жмём «Готово» и перезагружаем ПК.
Самостоятельное исправление неполадок
Чтобы самостоятельно решить данную проблему, необходимо вручную удалить все фреймворки, скачать и установить новые. Для этого кликаем «Пуск», «Панель управления», «Программы»,«Удаление программ».

Находим и удаляем фреймворки.


После переходим на сайт http://net-framework.ru/ и загружаем нужные дистрибутивы.
Удаление всех фреймворков
Скачать NET Framework Cleanup Tool для Windows (7/8/10)

Стоит отметить, что удалять один фреймворк не рекомендуется, так как это приведет к неработоспособности всех остальных. Поэтому запускаем полную очистку. После удаления перезагружаем ПК. Устанавливаем все новые дистрибутивы по очерёдности от самой меньшей.
Источник
Please use windows update to check for any critical updates to the net framework перевод
Новые темы необходимо создавать только в корневом разделе! В дальнейшем они будут обработаны модераторами.
Если Вы выложили новую версию программы, пожалуйста, сообщите об этом модератору нажав на вашем сообщении кнопку «Жалоба».
Последнее обновление программы в шапке: 02.10.2016


Краткое описание:
Бэкап и синхронизация, мощный конкурент Titanium Backup. Возможность работы без root с использованием настольного клиента.
Explay Informer 921 4.0.4
HTC Sensation XE 4.0.3
HTC One X 4.1.1
HTC One X+ 4.1.1
Samsung GT-I8190 Galaxy S III mini 4.1.2
Samsung Galaxy Note 10.1 4.1.2
Samsung GT-N7100 Galaxy Note II 4.1.2
Все устройства Motorola и некоторые Sony (Xperia S и Xperia Z)
Требуется Android 4.0+
Русский интерфейс: Да
Скачать:
Версия: 1.1.4.6 Premium Helium (Пост Alex0047 #53687756)
Carbon Desktop Installer:
Win  CarbonSetup.msi ( 2.54 МБ )
Mac carbon-mac.zip ( 1.37 МБ )
Linux carbon-linux.zip ( 97.01 КБ )
Источник
Содержание
- Ответы (1)
- Please use windows update to check for any critical updates to the net framework
- Дополнительная информация
- Replies (18)
- Что значит ошибка инициализации NET Framework 4, как установить или переустановить платформу
- NET Framework 4 не устанавливается – ошибка инициализации
- Устранение проблемы путем установки/переустановки
- Использование стандартных утилит для устранения неполадок
- Cleanup Tool — поможет исправить проблему в софте Microsoft
- Сброс центра обновления WinUpdate
- Дополнительная информация
- Программный способ решения проблемы
- Самостоятельное исправление неполадок
- Удаление всех фреймворков
- Коды HRESULT активации CLR CLR activation HRESULT codes
- Пользовательский интерфейс для ошибок инициализации UI for initialization errors
- Устранение ошибок инициализации Resolving the initialization error
- Управление сообщениями об ошибках Controlling the error message
- Политика пользовательского интерфейса для узлов в среде CLR UI policy for CLR-provided hosts
- Поведение и пользовательский интерфейс Windows 8 Windows 8 behavior and UI
- Видео
Ответы (1)
Попробуйте временно отключить сторонний антивирус (если он есть), иногда он мешает установке обновлений.
Ещё можно попробовать отключить быстрый запуск компьютера. Его отключение очистит оперативную память компьютера от возможного мусора.
Довольно большое количество проблем иногда решает именно такой совет про выключение)
Для того, чтобы это сделать, нажмите Пуск, Выключение и удерживая клавишу Shift, Завершение работы.
Если и это не поможет,выполните советы из официальной статьи по проблемам с обновлениями
https://support.microsoft.com/ru-ru/help/10164/.
Если и это не поможет, тогда:
-остановить службу обновлений
-очистить содержимое папки c:WindowsSoftwareDistribution
-повторить поиск обновлений.
Если и это не поможет, тогда попробуйте выполнить проверку на ошибки и восстановление системных файлов.
Для этого нажмите правой кнопкой на меню Пуск, выберите командная строка (администратор). Или «Windows PowerShell (администратор)».
В открывшемся окне напечатайте Dism /Online /Cleanup-Image /RestoreHealth и нажмите Enter.
Команда начнет выполняться, нужно подождать(иногда команда может выполняться и 30 минут, в это время может показаться, что всё «зависло»)
Обращайте внимание на пробелы в командах.
Затем напечатайте sfc /scannow и нажмите Enter.
Если и это не поможет, советую вам обновить образ Windows без ущерба для личных файлов.
Восстановить целостность поврежденных системных файлов Windows 10 можно путем обновления системы посредством утилиты Media Creation Tool. Ее можно скачать на официальном сайте Microsoft по ссылке:
https://go.microsoft.com/fwlink/?LinkId=691209
Далее запускаете Media Creation Tool. Принимаете лицензионные условия.
Выбираете Обновить этот компьютер сейчас.
Далее последует загрузка файлов для обновления, будут проведены подготовительные действия. После чего нажмите кнопку Установить. И ждите завершения процесса обновления.
Обновление Windows 10 – длительный по времени, в то же время самый надежный способ вернуть операционной системе работоспособность. Процесс обновления Windows 10 по времени проходит примерно столько же, сколько и процесс ее переустановки. В рамках проведения этого процесса все поврежденные системные файлы будут перезаписаны, сохранятся данные пользовательского профиля, установленные программы и внесенные системные настройки, а на выходе получим свежайшую, со всеми установленными обновлениями Windows 10 May 2019 Update
Надеюсь это решит вашу проблему!
__
Если мой ответ вам помог, пожалуйста, отметьте его как ответ.
Disclaimer: В ответе могут быть ссылки на сайты не на сайты Microsoft, Все советы с таких сайтов Вы выполняете на свой страх и риск.
Источник
Please use windows update to check for any critical updates to the net framework
Если у вас Windows 10, порядок действий будет таким
Если у вас Windows 7 или 8:
Наиболее полезной в большинстве случаев может оказаться первая из них. Порядок ее использования выглядит следующим образом:
По завершении работы утилиты рекомендую перезагрузить компьютер и проверить, была ли исправлена проблема.
Дополнительная информация
В некоторых случаях исправить ошибку может помочь простая переустановка программы, ее вызывающей. Либо, в случаях, если ошибка появляется при входе в Windows (т.е. при запуске какой-то программы в автозагрузке), может иметь смысл убрать эту программу из автозагрузки, если она не является необходимой (см. Автозагрузка программ в Windows 10).
А вдруг и это будет интересно:
Почему бы не подписаться?
Рассылка новых, иногда интересных и полезных, материалов сайта remontka.pro. Никакой рекламы и бесплатная компьютерная помощь подписчикам от автора. Другие способы подписки (ВК, Одноклассники, Телеграм, Facebook, Twitter, Youtube, Яндекс.Дзен)
Какой смысл подписываться и тем более оставлять комментарии, если никто не отвечает на этом сайте, сюда п мать, что в пустоту, что головой об стену убиться!
Ну вообще-то я на сотню комментариев в день где-то отвечаю на этом сайте.
Не знаю, где именно вам не ответил. Бывает, что не отвечаю, но только когда либо вопроса как такового нет, либо когда у меня ответа никакого нет (но тогда коммент остается, может кто-то еще ответит).
Сейчас пересмотрел ваши комментарии на сайте — не ответил, я так понимаю, только на один, связанный с wmic.
спасибо все сделал как написано, удалил, загрузил, вставил, проверил, заработало, еще раз благодарю
здрасте. из описания в самом начале я так понял, что нет фрэймворк 4.7 заменяет все 4, а то у меня были 4.5 фул и 4.5 забыл слово, а после обновления виндоус стали 4.7 то есть это хорошо? или 4.5 тоже надо бы? а.
При запуске приложения на ПК с операционной системой Windows 7 и выше, может появиться сообщение о том, что «Для этого приложения сначала нужно установить одну из следующих версий NET Framework…». При этом версия фреймворка всегда указывается.
Чтобы решить эту проблему самостоятельно, стоит ознакомиться со следующими рекомендациями.
Для исправления неполадок в работе фреймворков компания Майкрософт выпустила несколько утилит. Рассмотрим принцип их работы на практике.
Чтобы её применить, стоит загрузить файл, запустить его на своем ПК и принять условия лицензионного соглашения.
После программа будет сканировать систему и предложит варианты решения проблемы. Жмём «Далее» и исправляем ошибку.
В поле «Статус» будут помещены результаты проверки.
Поэтому, если самостоятельно вам не удалось переустановить фреймворки и решить проблему с инициализацией файлов, утилиты от Майкрософт могут помочь решить данную проблему.
so I am new here and clueless on how to get the ball rolling and my issue resolved but am going to try.
error found is code 643 windows encountered an unknown error.
* Please try a lower page number.
* Please enter only numbers.
* Please try a lower page number.
* Please enter only numbers.
Go to uninstall a program
Select net 4.5.2 or what ever version highest you show and select uninstall or change,
Use the repair option.
If you show 4.6.0 or. select it first and uninstall it this is not an Important update it is recommended but in reality it is Optional using these update settings,
Did this solve your problem?
Sorry this didn’t help.
Great! Thanks for marking this as the answer.
How satisfied are you with this reply?
Thanks for your feedback, it helps us improve the site.
How satisfied are you with this response?
Thanks for your feedback.
i tried this and it still did not fix issue if nothing i thing the unistall thing made it all worse!
To do this, follow these steps:
for work the error im getting to run my software is as follows:
Источник
Что значит ошибка инициализации NET Framework 4, как установить или переустановить платформу
NET Framework 4 не устанавливается – ошибка инициализации
Данная ошибка возникает в тех случаях, когда на компьютере пользователя отсутствует нужная версия или установленная повреждена. Рассмотрим пути устранения данной неполадки.
Устранение проблемы путем установки/переустановки
Разберем основной способ устранения ошибки:
Перезагрузите компьютер. Теперь программа должна работать. Если проблема решена, то больше можно не предпринимать никаких действий.
Откроется мастер удаления приложения. Следуйте указаниям мастера. Когда процесс удаления будет завершен, перезагрузите компьютер и запустите скачанный установочный дистрибутив. Если проблема не исчезает, можно воспользоваться утилитами, предназначенными для исправления установок компонента.
Использование стандартных утилит для устранения неполадок
Кроме вышеописанного способа, можно воспользоваться другими вариантами:
- .NET Framework Repair Tool попытается восстановить уже установленную редакцию. Скачать её можно по ссылке — https://www.microsoft.com/en-us/download/details.aspx? >

Нужно помнить, что данная утилита не позволит удалить компонент операционной системы. Например, в Windows 7 таким образом не получится удалить редакцию 2.0, а в последней версии Windows 10 — 4.7.
Система активации среды CLR определяет версию среды CLR, которая будет использоваться для выполнения управляемого кода приложения. В некоторых случаях система активации может не найти версию среды CLR для загрузки. Эта ситуация обычно возникает в том случае, если приложение требует версии среды CLR, которая недопустима или не установлена на данном компьютере. Если запрошенная версия не найдена, то система активации среды CLR получает код ошибки HRESULT из вызванных функции или интерфейса, и может отобразить сообщение об ошибке для пользователя, запустившего приложение. Данный раздел содержит список кодов HRESULT, и объясняет, как можно предотвратить отображения сообщения об ошибке.
Среда CLR предоставляет инфраструктуру ведения журнала для облегчения отладки проблем активации среды CLR, как описано в Практическое руководство. Отладка проблем при активации CLR. Эта инфраструктура не следует путать с журналами привязки сборок, которая полностью отличаются.
API активации среды CLR возвращают HRESULT,чтобы сообщить о результатах операции активации основному приложению. Основные приложения среды CLR должны всегда обращения к этими возвращаемым значениям прежде чем предпринимать какие-либо дополнительные действия.
.bee151c3-2412-40ea-92f6-81e2ddc4670a(ru-ru).jpeg)
Типичное сообщение об ошибке инициализации
Для разрешения проблем и наилучшего взаимодействия с пользователем (меньшее количество сообщений об ошибках), рекомендуется следующее:
Метод ICLRMetaHostPolicy::GetRequestedRuntime принимает в качестве входных данных элемент перечисления METAHOST_POLICY_FLAGS. Можно включить флаг METAHOST_POLICY_SHOW_ERROR_DIALOG для запроса сообщения об ошибке, если запрошенная версия среды CLR не будет найдена. По умолчанию сообщение об ошибке не отображается. (Метод ICLRMetaHost::GetRuntime не поддерживает этот флаг и не предоставляет иных способов отобразить сообщение об ошибке).
Windows предоставляет функцию SetErrorMode, с помощью которой можно объявить, должны ли сообщения об ошибках отображаться как результат выполнения кода, выполняемого внутри вашего процесса. Можно указать флаг SEM_FAILCRITICALERRORS для предотвращения отображения сообщения об ошибке.
Однако в некоторых случаях важно переопределить параметр SEM_FAILCRITICALERRORS установленный процессом приложения. Например, если имеется собственный компонент COM, в котором находится среда CLR и, расположенный в процессе, для которого установлен флаг SEM_FAILCRITICALERRORS, можно переопределить флаг в зависимости от влияния отображения сообщений об ошибках в пределах данного процесса приложения. В этом случае можно воспользоваться одним из следующих флагов для переопределения SEM_FAILCRITICALERRORS:
Используйте METAHOST_POLICY_IGNORE_ERROR_MODE с методом ICLRMetaHostPolicy::GetRequestedRuntime.
Используйте RUNTIME_INFO_IGNORE_ERROR_MODE с функцией GetRequestedRuntimeInfo.
Среда CLR включает набор узлов для различных сценариев и все эти узлы отображают сообщение об ошибке, если у них возникают проблемы с загрузкой необходимой версию среды времени выполнения. Следующая таблица содержит список узлов и их политик сообщения об ошибке.
Политика сообщения об ошибках
Можно ли отключить сообщений об ошибке?
Узел управляемых EXE-файлов
Запускает управляемые exe-файлы.
Узел управляемого COM
Загружает управляемые компоненты COM в процесс.
Да, установив флаг SEM_FAILCRITICALERRORS
Запускает приложения ClickOnce.
Запускает приложения WPF XBAP.
.3b72a10e-2ead-45fd-ba7b-283c1d84aefb(ru-ru).jpeg)
При работе Clean Tool производится запись логов во временную папку, впрочем, ее потом можно удалить.
.s-e6f6a65cf14f462597b64ac058dbe1d0-system-media-system-caps-note(ru-ru).jpeg) Примечание Примечание |
|---|
| Лог | Назначение |
|---|---|
| Cleanup_actions.log | лог действия удаления (ключи реестра, вспомогательные файлы) |
| Cleanup_main.log | лог действия удаления — главный, вмещает в себе все действия по логам утилиты и другие сведения о работе |
| Cleanup_errors.log | лог предупреждающих сообщений |
Сброс центра обновления WinUpdate
Если у вас Windows 10, порядок действий будет таким
Если у вас Windows 7 или 8:
Наиболее полезной в большинстве случаев может оказаться первая из них. Порядок ее использования выглядит следующим образом:
Дополнительная информация
В некоторых случаях исправить ошибку может помочь простая переустановка программы, ее вызывающей. Либо, в случаях, если ошибка появляется при входе в Windows (т.е. при запуске какой-то программы в автозагрузке), может иметь смысл убрать эту программу из автозагрузки, если она не является необходимой (см. Автозагрузка программ в Windows 10).
А вдруг и это будет интересно:
Почему бы не подписаться?
Рассылка новых, иногда интересных и полезных, материалов сайта remontka.pro. Никакой рекламы и бесплатная компьютерная помощь подписчикам от автора. Другие способы подписки (ВК, Одноклассники, Телеграм, Facebook, Twitter, Youtube, Яндекс.Дзен)
Какой смысл подписываться и тем более оставлять комментарии, если никто не отвечает на этом сайте, сюда п мать, что в пустоту, что головой об стену убиться!
Ну вообще-то я на сотню комментариев в день где-то отвечаю на этом сайте.
Не знаю, где именно вам не ответил. Бывает, что не отвечаю, но только когда либо вопроса как такового нет, либо когда у меня ответа никакого нет (но тогда коммент остается, может кто-то еще ответит).
Сейчас пересмотрел ваши комментарии на сайте — не ответил, я так понимаю, только на один, связанный с wmic.
спасибо все сделал как написано, удалил, загрузил, вставил, проверил, заработало, еще раз благодарю
здрасте. из описания в самом начале я так понял, что нет фрэймворк 4.7 заменяет все 4, а то у меня были 4.5 фул и 4.5 забыл слово, а после обновления виндоус стали 4.7 то есть это хорошо? или 4.5 тоже надо бы? а.
Очень полезная информация. Спасибо!
Примечание: после отправки комментария он не появляется на странице сразу. Всё в порядке — ваше сообщение получено. Ответы на комментарии и их публикация выполняются ежедневно днём, иногда чаще. Возвращайтесь.
Источник
Программный способ решения проблемы
Использование софта достаточно простое. Скачиваем архив и запускаем ехе.файл.
Принимаем условия лицензионного соглашения и кликаем «Далее».
Запустится установка утилиты.
После запустится диагностика, поиск и исправление проблемы.
По выполнению операции жмём «Готово» и перезагружаем ПК.
Самостоятельное исправление неполадок
Чтобы самостоятельно решить данную проблему, необходимо вручную удалить все фреймворки, скачать и установить новые. Для этого кликаем «Пуск», «Панель управления», «Программы»,«Удаление программ».
Находим и удаляем фреймворки.
После переходим на сайт http://net-framework.ru/ и загружаем нужные дистрибутивы.
Удаление всех фреймворков
Скачать NET Framework Cleanup Tool для Windows (7/8/10)
Стоит отметить, что удалять один фреймворк не рекомендуется, так как это приведет к неработоспособности всех остальных. Поэтому запускаем полную очистку. После удаления перезагружаем ПК. Устанавливаем все новые дистрибутивы по очерёдности от самой меньшей.
Источник
Система активации среды CLR определяет версию среды CLR, которая будет использоваться для выполнения управляемого кода приложения. The common language runtime (CLR) activation system determines the version of the CLR that will be used to run managed application code. В некоторых случаях система активации может не найти версию среды CLR для загрузки. In some cases, the activation system might not be able to find a version of the CLR to load. Эта ситуация обычно возникает в том случае, если приложение требует версии среды CLR, которая недопустима или не установлена на данном компьютере. This situation typically occurs when an application requires a CLR version that is invalid or not installed on a given computer. Если запрошенная версия не найдена, то система активации среды CLR получает код ошибки HRESULT из вызванных функции или интерфейса и может отобразить сообщение об ошибке для пользователя, запустившего приложение. If the requested version is not found, the CLR activation system returns an HRESULT error code from the function or interface that was called, and may display an error message to the user who is running the application. В этой статье приводится список кодов HRESULT и объясняется, как можно запретить отображение сообщения об ошибке. This article provides a list of HRESULT codes and explains how you can prevent the error message from being displayed.
Среда CLR предоставляет инфраструктуру ведения журнала для облегчения отладки проблем активации среды CLR, как описано в разделе Практическое руководство. Отладка проблем при активации среды CLR. The CLR provides logging infrastructure to help you debug CLR activation issues, as described in How to: Debug CLR Activation Issues. Эту инфраструктуру не следует путать с журналами привязки сборок, которая полностью отличается. This infrastructure should not be confused with assembly binding logs, which are entirely different.
Коды HRESULT активации CLR CLR activation HRESULT codes
Интерфейсы API активации среды CLR возвращают коды HRESULT, чтобы сообщить о результатах операции активации основному приложению. The CLR activation APIs return HRESULT codes to report the result of an activation operation to a host. Основные приложения среды CLR должны всегда обращаться к этими возвращаемым значениям, прежде чем предпринимать какие-либо дополнительные действия. CLR hosts should always consult these return values before proceeding with additional operations.
Пользовательский интерфейс для ошибок инициализации UI for initialization errors
Устранение ошибок инициализации Resolving the initialization error
Для разрешения проблем и наилучшего взаимодействия с пользователем (меньшее количество сообщений об ошибках), рекомендуется следующее: To resolve the underlying issues and provide the best user experience (fewer error messages), we recommend the following:
Управление сообщениями об ошибках Controlling the error message
Метод ICLRMetaHostPolicy::GetRequestedRuntime принимает в качестве входных данных элемент перечисления METAHOST_POLICY_FLAGS. The ICLRMetaHostPolicy::GetRequestedRuntime method accepts a METAHOST_POLICY_FLAGS enumeration member as input. Можно включить флаг METAHOST_POLICY_SHOW_ERROR_DIALOG для запроса сообщения об ошибке, если запрошенная версия среды CLR не будет найдена. You can include the METAHOST_POLICY_SHOW_ERROR_DIALOG flag to request an error message if the requested version of the CLR is not found. По умолчанию сообщение об ошибке не отображается. By default, the error message is not displayed. (Метод ICLRMetaHost::GetRuntime не поддерживает этот флаг и не предоставляет иных способов отобразить сообщение об ошибке.) (The ICLRMetaHost::GetRuntime method does not accept this flag, and does not provide any other way to display the error message.)
Windows предоставляет функцию SetErrorMode, с помощью которой можно объявить, должны ли сообщения об ошибках отображаться как результат выполнения кода, выполняемого внутри процесса. Windows provides a SetErrorMode function that you can use to declare whether you want error messages to be shown as a result of code that runs within your process. Можно указать флаг SEM_FAILCRITICALERRORS, чтобы запретить отображение сообщения об ошибке. You can specify the SEM_FAILCRITICALERRORS flag to prevent the error message from being displayed.
Но в некоторых случаях важно переопределить параметр SEM_FAILCRITICALERRORS, установленный процессом приложения. However, in some scenarios, it is important to override the SEM_FAILCRITICALERRORS setting set by an application process. Например, если имеется собственный компонент COM, в котором находится среда CLR и расположенный в процессе, для которого установлен флаг SEM_FAILCRITICALERRORS, можно переопределить флаг в зависимости от влияния отображения сообщений об ошибках в пределах данного процесса приложения. For example, if you have a native COM component that hosts the CLR and that is hosted in a process where SEM_FAILCRITICALERRORS is set, you may want to override the flag, depending on the impact of displaying error messages within that particular application process. В этом случае для переопределения SEM_FAILCRITICALERRORS можно воспользоваться одним из следующих флагов: In this case, you can use one of the following flags to override SEM_FAILCRITICALERRORS:
Используйте METAHOST_POLICY_IGNORE_ERROR_MODE с методом ICLRMetaHostPolicy::GetRequestedRuntime. Use METAHOST_POLICY_IGNORE_ERROR_MODE with the ICLRMetaHostPolicy::GetRequestedRuntime method.
Используйте RUNTIME_INFO_IGNORE_ERROR_MODE с функцией GetRequestedRuntimeInfo. Use RUNTIME_INFO_IGNORE_ERROR_MODE with the GetRequestedRuntimeInfo function.
Политика пользовательского интерфейса для узлов в среде CLR UI policy for CLR-provided hosts
Среда CLR включает в себя набор узлов для различных сценариев. Все эти узлы отображают сообщение об ошибке при возникновении проблем с загрузкой необходимой версии среды выполнения. The CLR includes a set of hosts for a variety of scenarios, and these hosts all display an error message when they encounter problems loading the required version of the runtime. В следующей таблице приводится список узлов и их политик сообщений об ошибках. The following table provides a list of hosts and their error message policies.
Поведение и пользовательский интерфейс Windows 8 Windows 8 behavior and UI
Источник
Видео
Ошибка при установке Net Framework. Не получается установить Net Framework. Решено

Исправление ошибки на windows 7 your system is lacking critical SHA-2 code

How I update Microsoft .Net Framework in Windows 7,8,8.1, & 10.

Ошибка код 80072EFE при обновление Windows Update

Как скачать Microsoft .NET Framework на Windows и обновить все версии

Ошибки при установки NET Framework. 3 основные + 2 дополнительные ошибки!

Как скачать .NET Framework всех версий для Windows 11/10/8.1/7

Не устанавливается .NET Framework на Windows 7? Решение есть!

📌Please run Windows Update to keep using FACEIT AC. РЕШЕНИЕ

Ошибка 0x800f0831 при установке обновления

Пользователи Windows знают, что компания Microsoft регулярно предлагает обновления Windows для устранения различных ошибок и проблем. Для некоторых пользователей проверка обновлений стала привычным делом, чтобы получить последние обновления и функции системы.
Однако пользователи также могут столкнуться с различными проблемами обновления Windows, например, «Your device is missing important security and quality fixes» и Windows Update can’t currently check for updates .
Когда вы пытались проверить наличие обновлений Windows 10, а оно показало отсутствие доступных обновлений, по неизвестным причинам появилась ошибка Windows update failed «Your device is missing important security and quality fixes». Не волнуйтесь! Вы можете избавиться от этой ошибки обновления Windows с помощью этой статьи.
Содержание
- Почему на вашем устройстве отсутствуют важные исправления безопасности и качества?
- Как исправить ситуацию «Your Device Is Missing Important Security and Quality Fixes»?
- Решение 1: Удаление и повторная установка последнего обновления Windows
- Решение 2: Изменение уровня телеметрии в редакторе групповой политики
- Решение 3: Сброс служб обновления Windows
- Решение 4: Запустите средство устранения неполадок обновления Windows
- Бонусный совет: Обновляйте все драйверы устройств автоматически
- Резюме:
- YouTube video: Исправлено: На вашем устройстве отсутствуют важные исправления безопасности и качества (обновление 2022)
Почему на вашем устройстве отсутствуют важные исправления безопасности и качества?
Обычно, как следует из ошибки, пользователи могут попытаться проверить наличие обновлений для установки важных исправлений безопасности и качества, но вы можете обнаружить, что на вашем устройстве установлены последние пакеты обновлений Windows.
В этом случае подразумевается, что последнее обновление Windows, которое вы установили, может быть повреждено или сломано , поэтому вы получили предупреждение «на вашем устройстве отсутствуют важные исправления безопасности и качества».
Кроме того, уровень Telemetry , который пользователи получают при установке Windows 10 может быть проблемным , поэтому он напоминает вам, что ваше устройство пропускает важные исправления безопасности и качества из-за роли Telemetry в хранении информации с уровня Security.
Для некоторых пользователей службы обновления Windows и важные драйверы устройств также виноваты в том, что вы пропускаете исправления безопасности и качества.
Как исправить ситуацию «Your Device Is Missing Important Security and Quality Fixes»?
Из причин «отсутствия исправлений безопасности и качества» пользователям необходимо переустановить последний пакет обновлений Windows и проверить параметры телеметрии, чтобы убедиться, что они подходят для системы. Кроме того, в некоторых случаях может помочь встроенное средство устранения неполадок обновления Windows.
Решения:
- 1: Удалите и переустановите последнее обновление Windows
- 2: Измените уровень телеметрии в редакторе групповой политики
- 3: Сбросьте службы обновления Windows
- 4: Запустите Windows Update Troubleshooter
Решение 1: Удаление и повторная установка последнего обновления Windows
Как следует из сообщения об ошибке, существуют проблемы с обновлением Windows. В некоторых случаях на вашем устройстве может быть установлен новый пакет последней версии Windows, но он сломан или поврежден.
Иногда, возможно, вам просто не удалось успешно установить последнюю версию системы. Следовательно, вы можете избавиться от проблемного обновления Windows и переустановить новое в случае пропуска важных и качественных исправлений.
1. Перейдите в Пуск > Настройки > Обновление и безопасность .
2. В разделе Обновление Windows нажмите Просмотр истории установленных обновлений .
3. В разделе Просмотр истории обновлений > Удаление обновлений найдите последние обновления безопасности и качества.
4. В следующем окне Панель управления найдите и щелкните правой кнопкой мыши обновление безопасности или качества, чтобы Удалить .
По сообщениям пользователей, такие обновления, как Update KB4100347 и KB4457128, могут вызывать ошибку «Your device is missing important security and quality fixes», поэтому вы можете удалить их, если они есть.
5. Перезагрузите устройство.
6. После перезагрузки компьютера зайдите в Start > Settings > Update & Security > Windows Update > Check for updates .
При этом вы можете наблюдать, что на вашем устройстве заново установлены последние обновления безопасности и качества. Ошибка «вашему устройству не хватает важных исправлений безопасности и качества» исчезла, а новые обновления также могут помочь вам устранить многочисленные системные проблемы.
Решение 2: Изменение уровня телеметрии в редакторе групповой политики
Microsoft разрабатывает систему телеметрии для сбора данных от пользователей с целью улучшения работы пользователей в будущих обновлениях Windows. Обычно пользователи Windows соглашаются с существованием и работой системы телеметрии для улучшения их опыта.
Однако, вероятно, уровень телеметрии в вашей системе не подходит, что приводит к проблемам с обновлениями Windows. Вы можете настроить уровень телеметрии для вашего устройства Windows.
1. Нажмите Windows + R , чтобы поднять окно Run .
2. Введите gpedit.msc в окно Run, а затем нажмите Enter , чтобы двигаться дальше.
3. В Редакторе локальной групповой политики перейдите в Конфигурация компьютера > Административные шаблоны > Компоненты Windows > Сборка данных и сборки предварительного просмотра , а затем найдите и дважды щелкните Разрешить телеметрию .
4. Отметьте кружок Enabled , чтобы включить Allow Telemetry .
5. В разделе Options установите » Allow Telemetry » в качестве Basic или Enhanced или Full , а не Security .
6. Нажмите Apply и OK для сохранения изменений.
После изменения уровня телеметрии вы избавитесь от проблемы обновления Windows, связанной с тем, что на вашем устройстве отсутствуют важные исправления безопасности и качества в Windows 10, 8 и 7.
Решение 3: Сброс служб обновления Windows
Иногда службы обновления Windows также могут вызывать проблему «Отсутствуют важные исправления безопасности и качества».
Если это так, вам также необходимо проверить службы обновления Windows, такие как net stop wuauserv. Можно попробовать остановить эти службы, которые работают для загрузки и установки обновлений Windows, удалить папку Software Distribution, в которой находятся пакеты обновлений Windows, а затем перезапустить службы обновления Windows.
1. В строке поиска введите Command prompt , а затем щелкните правой кнопкой мыши наиболее подходящий результат, чтобы Запустить от имени администратора .
2. В Command Prompt введите следующие команды и нажмите Enter после каждого ввода по очереди.
6351171989125414
Таким образом, вы завершили работу служб обновления Windows.
3. В командной строке снова скопируйте и вставьте следующую команду, а затем нажмите Enter, чтобы удалить папку Software Distribution:
Ren %systemroot%SoftwareDistribution SoftwareDistribution.old
4. Перезапустите службы обновления Windows, выполнив по очереди следующие команды:
5041725538522231
Этим действием вы запустите остановленные службы, связанные с обновлением Windows. После этого вы можете проверить наличие обновлений, чтобы узнать, нет ли на вашем устройстве функций безопасности и качества Windows из-за пропущенных важных исправлений безопасности и качества. Например, ошибка обновления Windows 0x800705b4 или 0x8024a105 может быть устранена после сброса служб обновления Windows.
Решение 4: Запустите средство устранения неполадок обновления Windows
Компания Microsoft также предложила пользователям Windows встроенный инструмент для автоматического устранения неполадок и решения проблем обновления Windows.
Таким образом, если вы постоянно получаете ошибку о том, что на вашем устройстве отсутствуют важные обновления безопасности и качества, вы можете просто запустить средство устранения неполадок обновления Windows на Windows 10.
1. В строке поиска введите устранение неполадок и выберите наиболее подходящий результат.
2. В разделе устранение неполадок на правой панели прокрутите вниз, чтобы найти Windows Update .
3. Выберите Запустить средство устранения неполадок обновления Windows.
Подождите, пока встроенное средство устранения неполадок не найдет способы устранения ошибки «Отсутствуют обновления безопасности и качества Windows».
К сожалению, некоторые пользователи могут просто устранить ошибку «На вашем устройстве отсутствуют важные обновления безопасности и качества» с помощью встроенного средства устранения неполадок Windows. Вы можете видеть, что больше нет предупреждений о проблемах с обновлением Windows. Средство устранения неполадок Windows Update может помочь вам устранить другие проблемы, такие как » обнаружена потенциальная ошибка базы данных обновления Windows «.
Бонусный совет: Обновляйте все драйверы устройств автоматически
Вы также можете попытаться обновить драйверы своих устройств для повышения производительности ПК. Иногда проблемы совместимости драйверов могут привести к сбоям в работе системы. Таким образом, вы можете попробовать использовать профессиональный сторонний инструмент драйверов Driver Booster для постоянного автоматического обновления драйверов устройств.
1. Скачайте , установите и запустите Driver Booster на своем компьютере.
2. Нажмите Scan .
3. Найдите и нажмите Update all , чтобы автоматически установить все последние версии драйверов.
Конечно, пользователи могут установить отдельные драйверы устройств, такие как графический драйвер и сетевой драйвер, когда программа напомнит вам, что они устарели или повреждены.
4. Подождите, пока программа автоматически установит последние версии драйверов для вашего устройства.
С самыми последними версиями драйверов вы заметите, что ваша система работает плавно и без проблем совместимости. Этот инструмент также поможет вам устранить такие проблемы, как проблемы со звуком и загрузить компоненты игры.
Резюме:
В этой статье мы попытаемся научить вас, как исправить ошибку обновления Windows «Your device is missing important security and quality fixes» различными способами. Для большинства пользователей поможет переустановка последних обновлений и настройка параметров телеметрии.
Другие статьи:
Как загрузить и обновить все драйверы на Windows 11
Исправлено: Ошибка ADB Device Not Found на Windows 11, 10, 8 и 7
Исправлено: TPM Device Not Detected на Windows 11/10
YouTube video: Исправлено: На вашем устройстве отсутствуют важные исправления безопасности и качества (обновление 2022)
Windows 11 Windows 10 Windows 8.1 Windows 7 More…Less
In Windows 11, you decide when and how to get the latest updates to keep your device running smoothly and securely. When you update, you’ll get the latest fixes and security improvements, helping your device run efficiently and stay protected. In most cases, restarting your device completes the update. Make sure your device is plugged in when you know updates will be installed.
If other questions come up when you update Windows 11, here are some other areas that might interest you:
-
How to reset your Microsoft account password
-
Activate Windows
When you only want info about updating Windows 11, you’ll find answers to many of your questions here:
When Windows 11, version 22H2 is ready for your device, it will be available to download and install from the Windows Update page in Settings. Choose a time that works best for you to install it. You’ll then need to restart your device and complete the installation. After that, your device will be running Windows 11, version 22H2.
To manually check for the latest recommended updates on your Windows 11 device, select Start > Settings > Windows Update > Check for updates.
Check for updates
Some updates may not be available on all devices at the same time—we’re making sure updates are ready and compatible.
To stay up to date, select Start > Settings > Windows Update > Check for updates.
Check for updates
If a feature update is available for your device, it will appear separately on the Windows Update page. To install it, select Download and install now.
Here are a few things you can try if you’re having trouble installing updates:
-
Make sure that your device is connected to the internet. Downloading updates requires an internet connection.
-
If you’re connected the internet, try to install the updates manually. Select Start > Settings > Windows Update , and then view available updates.
Check for updates
-
Run the Windows Update Troubleshooter. Select Start > Settings > System > Troubleshoot > Other troubleshooters. Under Most frequent, select Windows Update.
-
If the Troubleshooter doesn’t fix the problem, see Troubleshoot problems updating Windows or Fix Windows Update errors.
The time required to download updates primarily depends on internet connection speed, network settings, and update size. Make sure your device is plugged in and connected to the internet to download updates faster.
You can’t stop updates entirely—because they help keep your device safe and secure, updates will eventually need to be installed and downloaded, regardless of your update settings. Here’s how to temporarily pause updates from being downloaded and installed. Note that after the pause limit is reached, you’ll need to install the latest updates before you can pause updates again.
In Windows 11, select Start > Settings > Windows Update . Next to Pause updates, select the pause length you prefer.
To finish installing an update, your device will need to restart. Windows will try to restart your device when you’re not using it. If it can’t, you’ll be asked to schedule the restart for a more convenient time. Or, you can schedule anytime by following these steps:
-
Select Start > Settings > Windows Update .
-
Select Schedule the restart and choose a time that’s convenient for you.
You can set active hours to make sure automatic restarts for updates only happen when you’re not using your device. Get updates when you’re away from your PC with active hours in Windows.
Try deleting files you don’t need, uninstalling apps you don’t use, or moving files to another drive like an external USB drive or OneDrive. For more tips on freeing up disk space, see Free up drive space in Windows.
We recommend keeping devices like laptops and tablets plugged in when you’re not using them. This way, if updates are installed outside active hours, your device will have enough power to complete the installation. Windows updates don’t consume more battery than other typical system processes.
An update history is available so you can see which updates were installed, and when. You can also use this list to remove specific updates, although we don’t recommend this unless it’s necessary.
Select Start > Settings > Windows Update > Update history .
We don’t recommend that you remove any installed updates. However, if you must remove an update, you can do so in update history.
-
Select Start > Settings > Windows Update > Update history > Uninstall updates .
-
Select the update you want to remove, then select Uninstall.
Feature updates are typically released twice per year and include new functionality and capabilities as well as potential fixes and security updates. Quality updates are more frequent and mainly include small fixes and security updates. Windows is designed to deliver both kinds of updates to devices through Windows Update.
To double check that your device is up to date, open Start > Settings > Windows Update and see your update status and available updates.
Check for updates
Reserved storage will be turned on for new devices with Windows 11 preinstalled, or devices on which a clean install of Windows 11 was performed.
In Windows 10, you decide when and how to get the latest updates to keep your device running smoothly and securely. When you update, you’ll get the latest fixes and security improvements, helping your device run efficiently and stay protected. In most cases, restarting your device completes the update. Make sure your device is plugged in when you know updates will be installed.
If other questions come up when you update Windows 10, here are some other areas that might interest you:
-
How to reset your Microsoft account password
-
Activate Windows
-
Get started with Windows 10
When you only want info about updating Windows 10, you’ll find answers to many of your questions here:
When the Windows 10 2022 Update is ready for your device, it will be available to download and install from the Windows Update page in Settings. Choose a time that works best for you to download the update. You’ll then need to restart your device and complete the installation. After that, your device will be running Windows 10, version 22H2.
To manually check for the latest recommended updates, select Start > Settings > Update & Security > Windows Update , and then select Check for updates.
Check for updates
To get help updating to the latest version of Windows 10, go to the Microsoft software download page and download the Update Assistant.
Some updates may not be available on all devices at the same time—we’re making sure updates are ready and compatible.
To stay up to date, select Start > Settings > Update & Security > Windows Update , and then select Check for updates.
Check for updates
If a feature update is available for your device, it will appear separately on the Windows Update page. To install it, select Download and install now.
Here are a few things you can try if you’re having trouble installing updates:
-
Make sure that your device is connected to the internet. Downloading updates requires an internet connection.
-
If you’re connected the internet, try to install the updates manually. Select Start > Settings > Update & Security > Windows Update , and then select Check for updates.
Check for updates
-
Run the Windows Update Troubleshooter. Select Start > Settings > Update & Security > Troubleshoot . Under Get up and running, select Windows Update.
-
If the Troubleshooter doesn’t fix the problem, see Troubleshoot problems updating Windows or Fix Windows Update errors.
The time required to download updates primarily depends on internet connection speed, network settings, and update size. Make sure your device is plugged in and connected to the internet to download updates faster.
You can’t stop updates entirely—because they help keep your device safe and secure, updates will eventually need to be installed and downloaded, regardless of your update settings. Here’s how to temporarily pause updates from being downloaded and installed. Note that after the pause limit is reached, you’ll need to install the latest updates before you can pause updates again.
In the Windows 10 November 2019 Update (version 1909) or later, or in Windows version 1809 for Pro or Enterprise, select Start > Settings > Update & Security > Windows Update . Then choose one of the following options:
-
Select Pause updates for 7 days.
-
Select Advanced options. Then, in the Pause updates section, select the drop-down menu and specify a date for updates to resume.
To finish installing an update, your device will need to restart. Windows will try to restart your device when you’re not using it. If it can’t, you’ll be asked to schedule the restart for a more convenient time. Or, you can schedule anytime by following these steps:
-
Select Start > Settings > Update & Security > Windows Update .
-
Select Schedule the restart and choose a time that’s convenient for you.
You can set active hours to make sure automatic restarts for updates only happen when you’re not using your device. Get updates when you’re away from your PC with active hours in Windows.
Try deleting files you don’t need, uninstalling apps you don’t use, or moving files to another drive like an external USB drive or OneDrive. For more tips on freeing up disk space, see Free up drive space in Windows.
We recommend keeping devices like laptops and tablets plugged in when you’re not using them. This way, if updates are installed outside active hours, your device will have enough power to complete the installation. Windows updates don’t consume more battery than other typical system processes.
An update history is available so you can see which updates were installed, and when. You can also use this list to remove specific updates, although we don’t recommend this unless it’s necessary.
Select Start > Settings > Update & Security > Windows Update > View update history .
We don’t recommend that you remove any installed updates. However, if you must remove an update, you can do so in update history.
-
Select Start > Settings > Update & Security > Windows Update > View update history > Uninstall updates.
-
Select the update you want to remove, then select Uninstall.
Feature updates are typically released twice per year and include new functionality and capabilities as well as potential fixes and security updates. Quality updates are more frequent and mainly include small fixes and security updates. Windows is designed to deliver both kinds of updates to devices through Windows Update.
To double check that your device is up to date, open Settings > Update & Security > Windows Update and see your update status and available updates.
Check for updates
Reserved storage is not automatically turned on by Windows in any update scenarios. It is only turned on for new devices with the Windows 10 May 2019 Update (version 1903) or later preinstalled, or devices on which a clean install was performed.
The best way to keep Windows 8.1 up to date is to turn on automatic updates. With automatic updates, you don’t have to search for updates online or worry about missing critical fixes or device drivers for your PC. Instead, Windows Update automatically installs important updates as they become available.
To turn on automatic updates:
-
Open Windows Update by swiping in from the right edge of the screen (or, if you’re using a mouse, pointing to the lower-right corner of the screen and moving the mouse pointer up), select Settings > Change PC settings > Update and recovery > Windows Update. If you want to check for updates manually, select Check now.
-
Select Choose how updates get installed, and then, under Important updates, select Install updates automatically (recommended).
-
Under Recommended updates, select Give me recommended updates the same way I receive important updates.
-
Under Microsoft Update, select Give me updates for other Microsoft products when I update Windows, and then select Apply.
Click the questions below to see answers about how Windows Update keeps your device up to date.
Note: If your PC is connected to a network where updates are managed by Group Policy, you might not be able to change settings related to Windows Update. For more info, contact your organization’s technical support.
Open Windows Update by swiping in from the right edge of the screen (or, if you’re using a mouse, pointing to the lower-right corner of the screen and moving the mouse pointer up), select Settings > Change PC settings > Update and recovery > Windows Update. To check for updates manually, select Check now.
An update history is available so you can see which updates were installed, and when. You can also use this list to remove specific updates, although we don’t recommend this unless it’s necessary.
To see your PC’s update history, open Windows Update by swiping in from the right edge of the screen (or, if you’re using a mouse, pointing to the lower-right corner of the screen and moving the mouse pointer up), select Settings > Change PC settings > Update and recovery >Windows Update > View your update history.
We don’t recommend that you remove any installed updates. However, if you must remove an update, you can do so in update history.
-
Open Windows Update by swiping in from the right edge of the screen (or, if you’re using a mouse, pointing to the lower-right corner of the screen and moving the mouse pointer up), select Settings > Change PC settings > Update and recovery > Windows Update > View your update history.
-
Select the update you want to remove, then select Uninstall.
Here are a few things to try if you’re having problems installing updates:
-
Make sure that your PC is connected to the internet. Some updates can’t be installed if you’re using a metered internet connection.
-
If you’re connected the internet and updates aren’t installed automatically, wait a few minutes and then try to install the updates manually.
-
See the Fix Windows Update errors guided walkthrough to try to fix the problem.
Support for Windows 7 ended on January 14, 2020
We recommend you move to a Windows 11 PC to continue to receive security updates from Microsoft.
Learn more
Click the questions below to see answers about how Windows Update keeps your device up to date.
To see your PC’s update history, select the Start button, then select Control Panel > Programs. Under Programs and Features, select View installed updates.
We don’t recommend that you remove any installed updates. However, if you must remove an update, you can do so in update history.
-
Select the Start button, then select Control Panel > Programs. Under Programs and Features, select View installed updates.
-
Select the update you want to remove, then select Uninstall.
Here are some things you can try if you’re having problems installing updates:
-
Make sure that your PC is connected to the internet. Some updates can’t be installed if you’re using a metered internet connection.
-
If you’re connected the internet and updates aren’t installed automatically, wait a few minutes and then try to install the updates manually.
-
See the Fix Windows Update errors guided walkthrough to try to fix the problem.
Note: If your PC is connected to a network where updates are managed by Group Policy, you might be unable to change settings related to Windows Update. For more info, contact your organization’s support person.
Need more help?
- Remove From My Forums
-
Question
-
I have read the forums for this question before. when trying to update windows so that i may download a newer version of zune to use with my window’s phone I recieve this «window update cannot currently check for updates becuase the service is not running.
You may need to restart your computer.» while i am checking for updates in the systems and securites section of my control panal. I have a Refurbished Gateway Touchscreen computer. It came with windows 7. Restarting has done nothing to help. Please help me
fix this problem.
Answers
-
-
Proposed as answer by
Tuesday, May 29, 2012 1:40 PM
-
Marked as answer by
Juke Chou
Friday, June 1, 2012 6:39 AM
-
Proposed as answer by
-
Hi,
Please check Windows Update service’s running status, make sure it is automatic. If not, change and start it.
Also, if you received any error message, please post them here.
Please remember to click “Mark as Answer” on the post that helps you, and to click “Unmark as Answer” if a marked post does not actually answer your question. This can be beneficial to other community members reading the thread. ”
-
Marked as answer by
Juke Chou
Sunday, December 4, 2011 8:59 AM
-
Marked as answer by
The Windows Update channel delivers all necessary updates suitable for your system. Most of the time, manual intervention is not required for installing updates. In some cases, especially during manual installation of an update using standalone installer, you may need to first check if a specific update (a prerequisite update) is installed on your system.
This article explains how to check if a specific Windows Update (KBnnnnnn) is installed in your computer or not.
There are at least seven different methods to determine if an update is installed in the system.
Method 1: Check the Windows Update history
The modern Settings app has an option to view Windows update history. Here’s how to view it.
- Open Settings and click Update & Security
- Click View update history. The update history page shows the list of updates installed on your computer.
- Scroll through the list and find the specific update (
KBnnnnnn) you’re looking for.
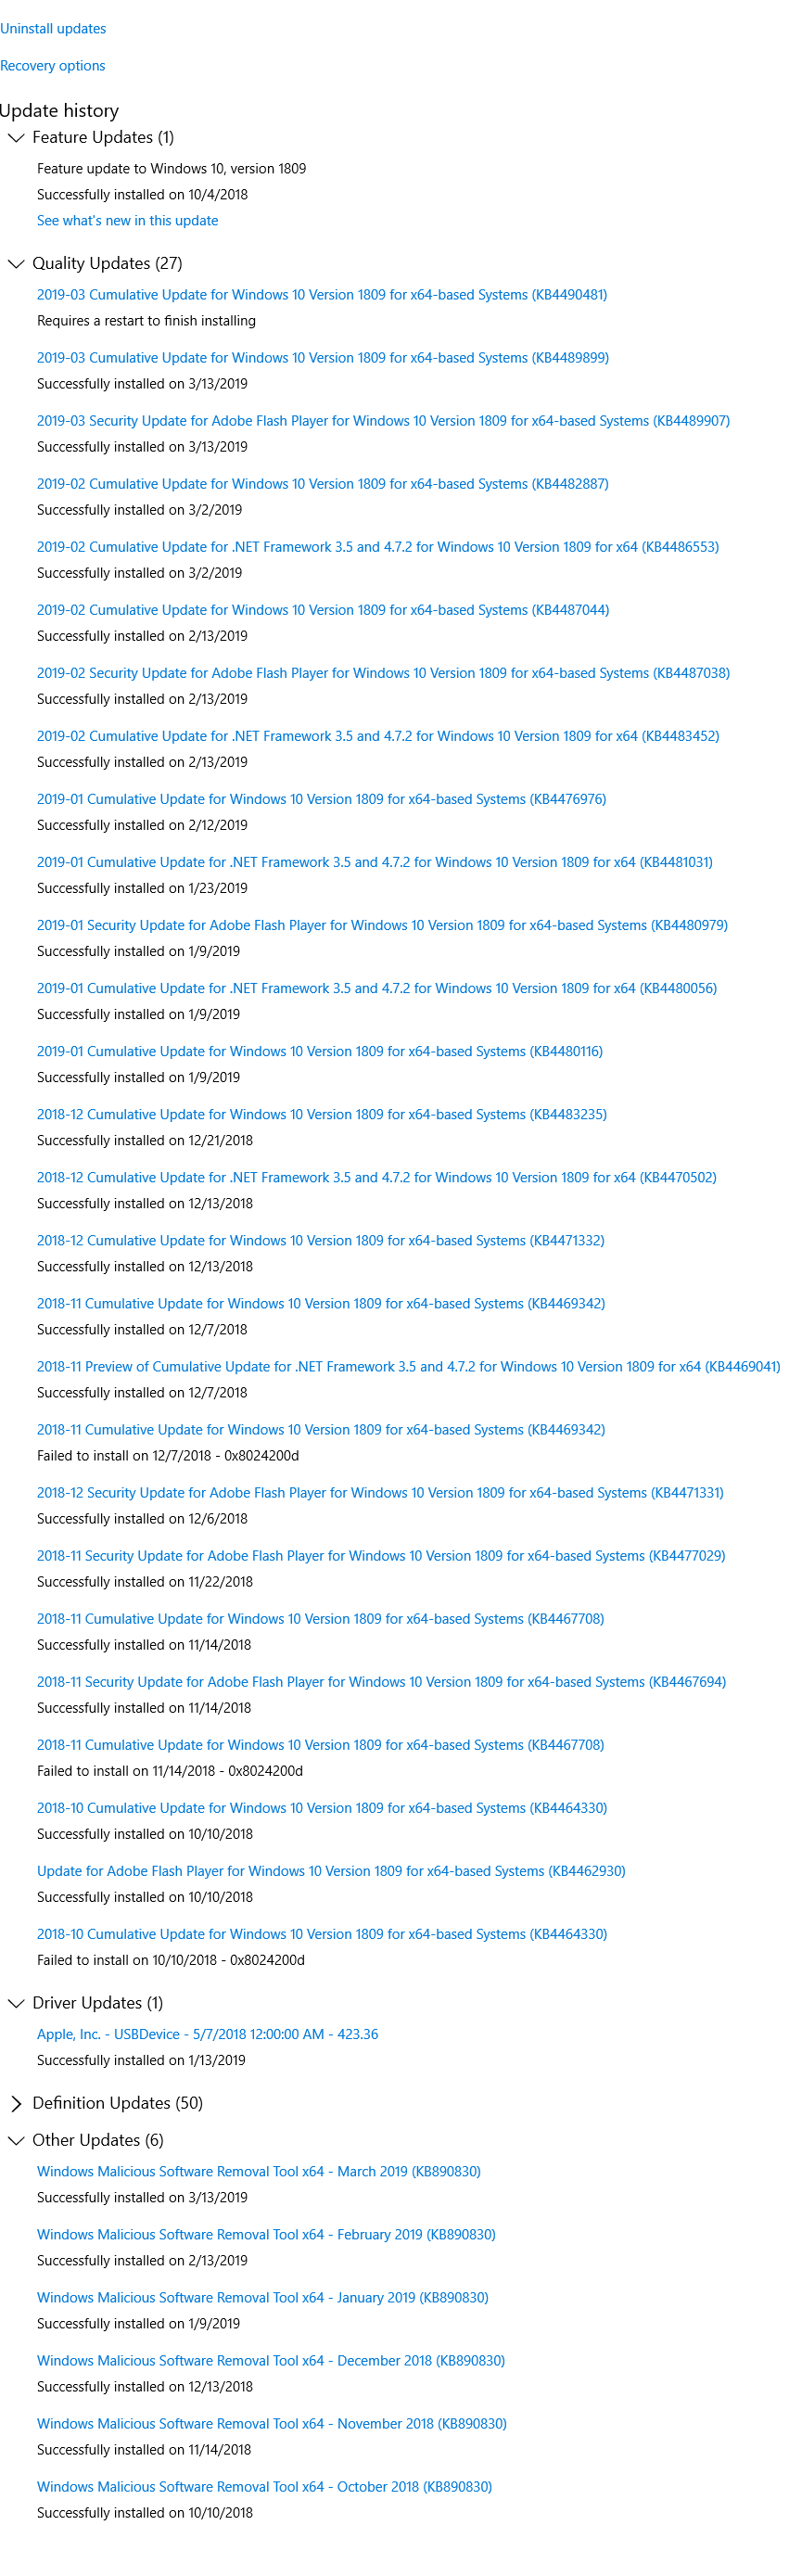
Editor’s note: The update history page may fail to show some updates. In my computer, the update the Servicing Stack Update (SSU) KB4470788 was not listed in the update history page even though the update was installed a few months back.
Method 2: View installed updates in Programs and Features Control Panel
Using the “Programs and Features” applet in the Control Panel, you can find the list of installed updates.
- Right-click Start, click Run.
- Type
appwiz.cpland click OK. This opens the Programs and Features in the classic Control Panel. - Click
View installed updateslink in the left side. This shows you the list of updates along with the installation date column.
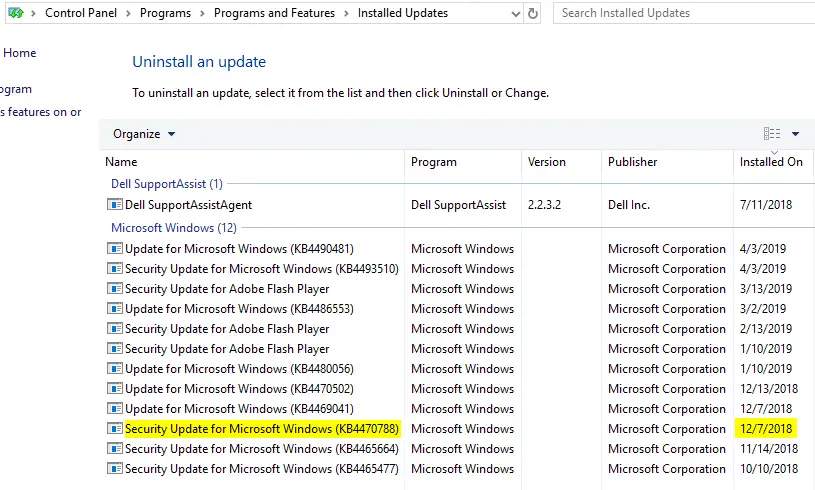
Note: In the classic Programs and Features applet, the Servicing Stack Update (SSU) KB4470788 is listed, and the install date showing up as Dec 07, 2018. It appears that the “View update history” option in the modern Settings app and “Programs and Features” are using two different sources for finding the update history.
Method 3: Using DISM command
The built-in DISM tool can list out the installed Windows Update CBS packages. Follow these steps:
- Open an administrator Command Prompt window.
- Type the following command and press ENTER:

dism /online /get-packages | clip
The output is redirected to clipboard (using
| clipoperator). - Open Notepad and paste the contents from clipboard (Ctrl + V)
- Use the
Findoption in Notepad to check if the updateKB4470788is installed.
Note: The update Install Time shown by DISM may be in GMT.
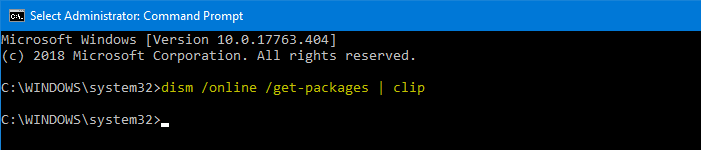
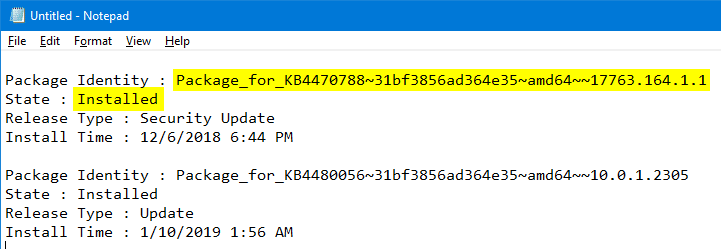
Method 4: Run the KB update installer (.msu) file again.
Running the KB setup .msu again will tell you if the update has been already installed. Here is how to obtain the standalone installer from Microsoft Update Catalog and run the .msu setup file. Note that this method works for Windows update standalone installers .msu only. That is, this method doesn’t apply if you have the .cab version.
- Visit the Windows Update Catalog
- Download the update package (
.msu) by mentioning the KB number. - Double-click the
.msufile to run the setup. The Windows Update Standalone Installer (WUSA) searches for updates on your computer and determines if the update is already installed or not.
If it’s already installed, it shows the message saying “(KBnnnnnn) is already installed on this computer.”
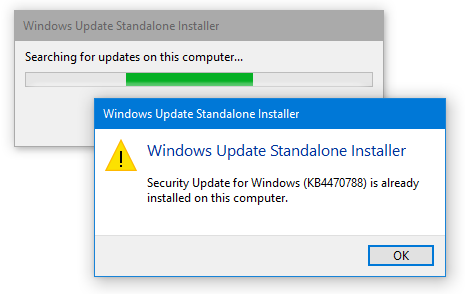
Method 5: Using WinUpdatesList or WinUpdatesView utility from NirSoft
The WinUpdatesList utility (wul.exe) from Nirsoft displays the list of all Windows updates, including Service Packs and Hotfixes installed on your local computer. You can copy the list of updates to the clipboard, or save it to text/HTML/XML file in a single click. The following fields are shown for each update listed. We’ve covered WinUpdatesList in the article How to Print Your Windows Update History By Exporting to Text or HTML File?.
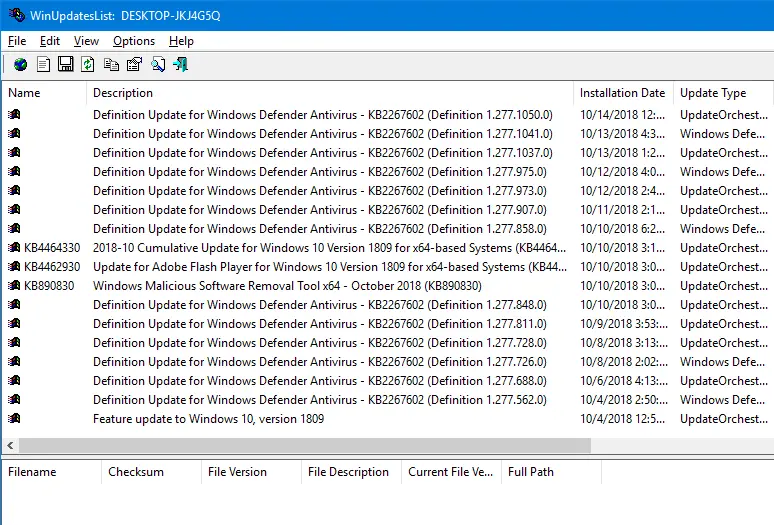
Note: The WinUpdatesList utility, however, did not list the Servicing Stack Update KB4470788 on my computer. Hope this tool works well in your case.
Note: WinUpdatesList tool is very old and it’s not updated anymore. There is a new tool named WinUpdatesView that replaces WinUpdatesList.
WinUpdatesView (Windows Updates History Viewer)
WinUpdatesView is a simple tool from Nirsoft that displays the history of Windows updates on your system. WinUpdatesView can load the Windows updates history from your local system, using API, and it can also read and parse the Windows updates database file (DataStore.edb) from an external drive or from a remote computer on your network.
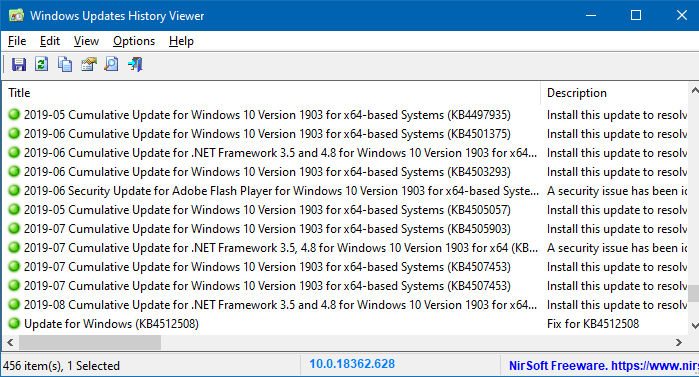
Method 6: Using WMI command-line
From an admin Command Prompt, run:
wmic qfe list full /format:table
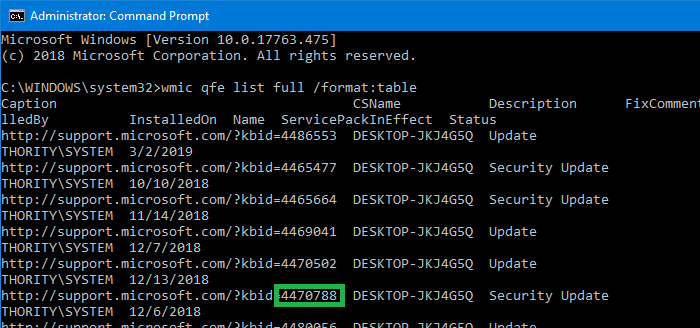
It shows the list of updates installed along with the date of installation and other details.
Or Export to HTML file, using this syntax:
wmic qfe list full /format:htable >D:hotfixes.htm
Or to list a specific update, run:
wmic qfe list full /format:table | findstr /i "4470788"
Alternately, you can run the command Get-Hotfix from a PowerShell window to get the same results.

You can sort the table by the InstalledOn column in descending order by running this command:
Get-HotFix | Sort-Object InstalledOn -Descending
PowerShell’s Get-HotFix cmdlet also uses the WMI’s Win32_QuickFixEngineering (QFE) class as the WMIC CLI tool above. The output is exactly the same.
The systeminfo command from a Command Prompt window also lists the hotfixes installed. It again uses the WMI QFE class to query the list of hotfixes.
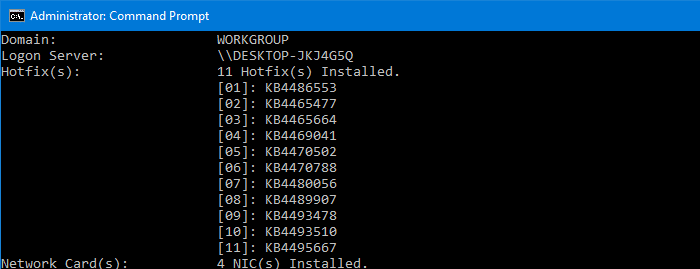
Method 7: Check the Windows Update CBS Registry Entries
For each update installed, a corresponding Component Based Servicing package registry entry is created. Using the Registry Editor, you can check whether a Windows update has been installed on your computer.
- Start the Registry Editor (
regedit.exe) - Go to the following registry key:
HKEY_LOCAL_MACHINESOFTWAREMicrosoftWindowsCurrentVersionComponent Based ServicingPackages
- Use the Find option under the Edit menu, and search for the key having the text
4470788(to findKB4470788related entries.)If the key exists, you’re taken to the branch. In my case, as the update was already installed, the Find option led me to this key:
HKEY_LOCAL_MACHINESOFTWAREMicrosoftWindowsCurrentVersionComponent Based ServicingPackagesPackage_1_for_KB4470788~31bf3856ad364e35~amd64~~17763.164.1.1
- In the right-pane, check the value data for “CurrentState”. If the value data reads
0x00000070 (112), it means that the update was successfully installed.
Here is the list of possible
CurrentStateregistry values and their meaning:Applicable/Current State Hex Dec Absent 0 0 Uninstall Pending 0x5 5 Resolving 0x10 16 Resolved 0x20 32 Staging 0x30 48 Staged 0x40 64 Superseded 0x50 80 Install Pending 0x60 96 Partially Installed 0x65 101 Installed 0x70 112 Permanent 0x80 128 Source: CBS Servicing States Chart – Refresher – Tip of the Day
Determine the install date & time of an update using registry
Each CBS Package key has two values namely
InstallTimeLow&InstallTimeHigh. These keys, when decoded will show you the date and time the update was installed. However, we have a shortcut way to find the exact installation date and time the update was installed on your computer.The trick is to export the Package branch to a
.txtfile (instead of.regformat) and read the timestamp mentioned in the file. We’ll find the installation date and time of updateKB4470788in this example.- In the Registry Editor, select the following (
KB4470788) key:HKEY_LOCAL_MACHINESOFTWAREMicrosoftWindowsCurrentVersionComponent Based ServicingPackagesPackage_1_for_KB4470788~31bf3856ad364e35~amd64~~17763.164.1.1
- Right-click on the package key and click Export.
- In this example, we’ll export the
Package_1_for_KB4470788~31bf3856ad364e35~amd64~~17763.164.1.1branch. - In the Save as type: choose “Text files (*.txt)”.
- Give a name for the exported file and click Save.
- Open the .txt file and see the “Last Write Time:” data.

The last write time denotes the date and time the registry entry was created.
As you can see, the last write time in this example matches with the date and time we determined in
Method 2using “Programs and Features”.
- In the Registry Editor, select the following (
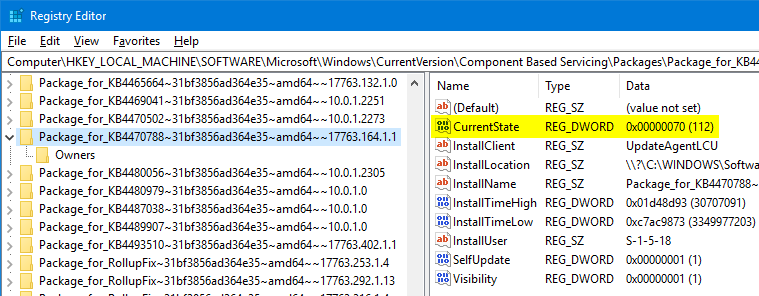
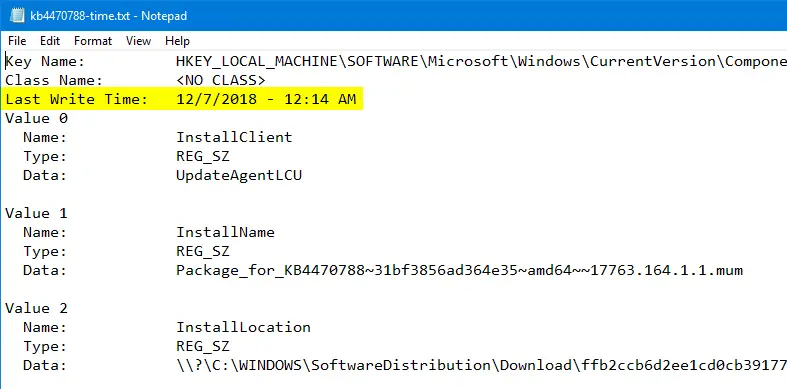

That’s it! Hope this article helped you check if a specific Windows Update (KBnnnnnn) has been applied to your system or not.
One small request: If you liked this post, please share this?
One «tiny» share from you would seriously help a lot with the growth of this blog.
Some great suggestions:
- Pin it!
- Share it to your favorite blog + Facebook, Reddit
- Tweet it!
So thank you so much for your support. It won’t take more than 10 seconds of your time. The share buttons are right below.
Related articles
- How to Install CAB and MSU Updates from Windows Update Catalog?
- Directly Download Updates From Microsoft Update Catalog Using Any Browser
- How to Print Your Windows Update History By Exporting to Text or HTML File?

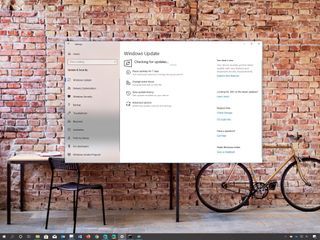
(Image credit: Windows Central)
On Windows 10, Windows Update is an essential component that provides the mechanism to download and install quality updates as well as feature updates to improve the overall performance, integrate new features, and patch security vulnerabilities. However, for different reasons, sometimes, you may experience problems with the feature, such as stuck for a long time scanning and downloading, errors and failures during installation, and many other issues.
Thankfully, if you run into an issue or an error (for example, 0x80070020, 0x80240438, 0xC19001E2, 0x80070424, 0x80242006, 0x8007000E, 0x80D02002, 0x80070070, 0x80096004, 0x80080005, 0x8007000D, or 0x80240034), you can use a number of troubleshooting steps to fix Windows Update on your installation.
In this Windows 10 guide, we’ll walk you through several ways to fix common problems with Windows Update on your device.
- How to fix Windows Update covering basics
- How to fix Windows Update using Troubleshooter
- How to fix Windows Update installing update manually
- How to fix Windows Update repairing installation
- How to fix Windows Update skipping maintenance schedule
- How to fix Windows Update installing latest version
- How to fix Windows Update performing clean installation
How to fix Windows Update covering basics
If you’re trying to update your device and Windows Update isn’t working, you can follow a few necessary steps to resolve the problem, including restarting your computer, checking to make sure that you have a working internet connection, and using the feature to pause updates.
Restarting device
To restart your device, use these steps:
- Open Start.
- Click the Power options menu.
- Click the Restart button.
Once you complete the steps, try to update your device again from the Windows Update settings page.
Checking internet connection
Although it might be obvious, but if you’re not connected to the internet, you won’t be able to download and install updates.
To confirm you have an active internet connection, use these steps:
- Open Start.
- Search for Command Prompt and click the top result to open the console.
- Type the following command to confirm you have an active internet connection and press Enter:
ping google.comIn the command, we’re pinging Google domain as an example, but you can use other pingable domains or services, such as CloudFlare.com, or Google DNS services (8.8.8.8 or 8.8.4.4).
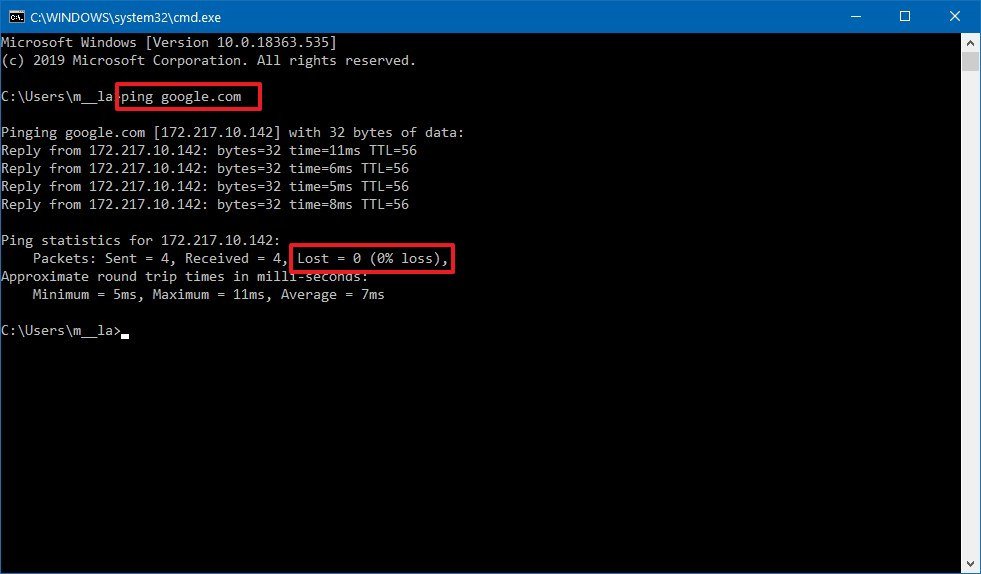
- Confirm you’re getting a reply without any packet loss.
Of course, you can always try to open any website with your web browser, but using Command Prompt is a more effective method to confirm network connectivity.
If you can’t connect to the internet, then it’s probably a problem with your connection, not Windows Update. You can use this comprehensive guide to resolve most common issues connecting to a network.
Pausing updates
Sometimes, if you’re dealing with issues downloading updates, pausing and resuming Windows Update can help to fix the problem.
To pause and resume updates on Windows 10, use these steps:
- Open Settings.
- Click on Update & Security.
- Click on Windows Update.
- Click the Pause updates for 7 days button.

- Restart your device.
- Open Settings.
- Click on Update & Security.
- Click on Windows Update.
- Click the Resume updates button.

After you complete the steps, try checking for updates again to see if the problem was resolved.
Freeing up space
Usually, the lack of storage can trigger errors trying to updates your device. If you need additional space to install updates, use these steps:
- Open Settings.
- Click on System.
- Click on Storage.
- Under the «Local Disk C:» section, click the Temporary files section.

- Select the items that you want to clear to free up space.Quick note: Selecting the Downloads option will clear the files from the «Downloads» folder. If you have important files, clear the option, or copy the files you want to keep to an external drive before proceeding.
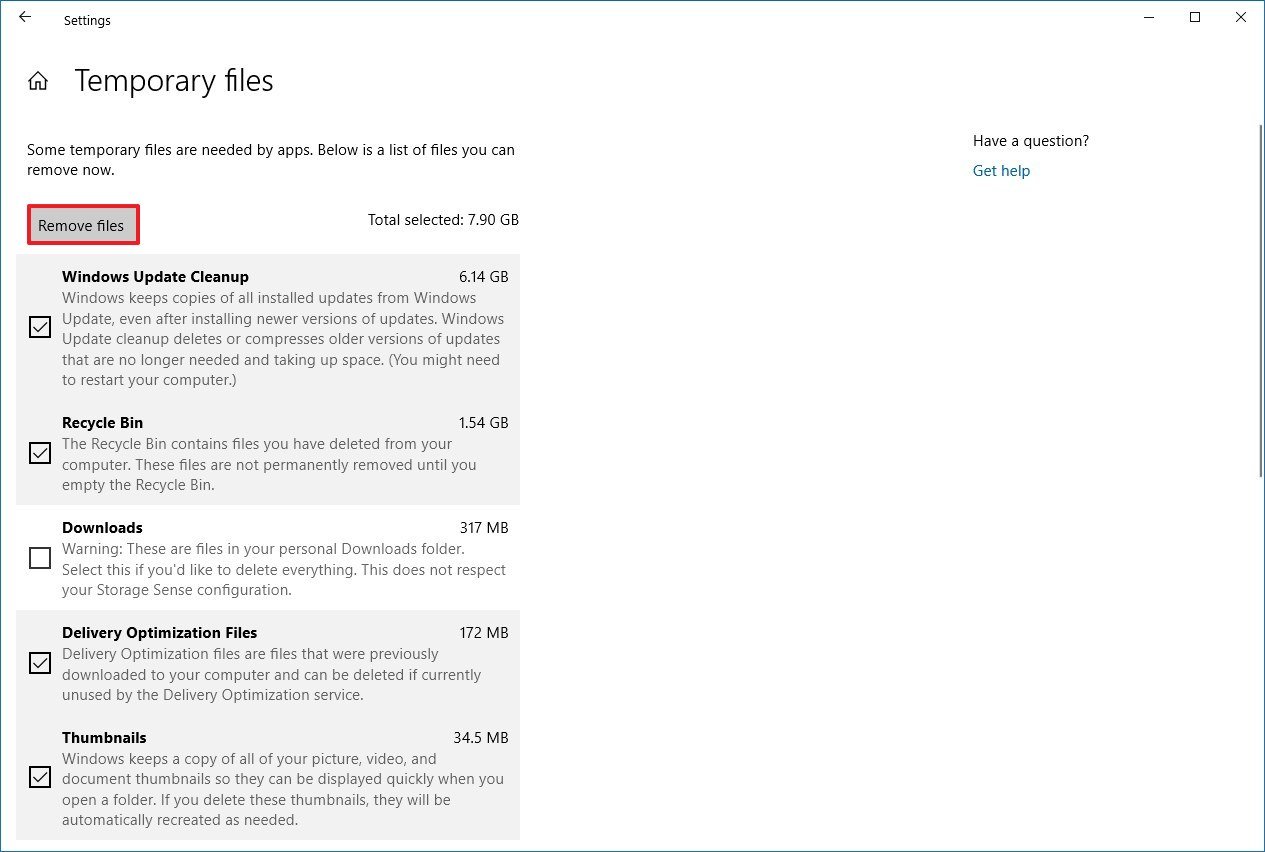
- Click the Remove files button.
Once you complete the steps, you’ll have more space to run Windows Update without triggering the no enough space error code.
If you have to reclaim more space, you can check this guide with many more ways to free up space on Windows 10.
How to fix Windows Update using Troubleshooter
Windows 10 comes with a Windows Update troubleshooter tool that can diagnose and resolve common problems with the feature.
To use the troubleshooter to fix problems with Windows Update, use these steps:
- Open Settings.
- Click on Update & Security.
- Click on Troubleshoot.
- Under the «Get up and running» section, select the Windows Update option.
- Click the Run the troubleshooter button.
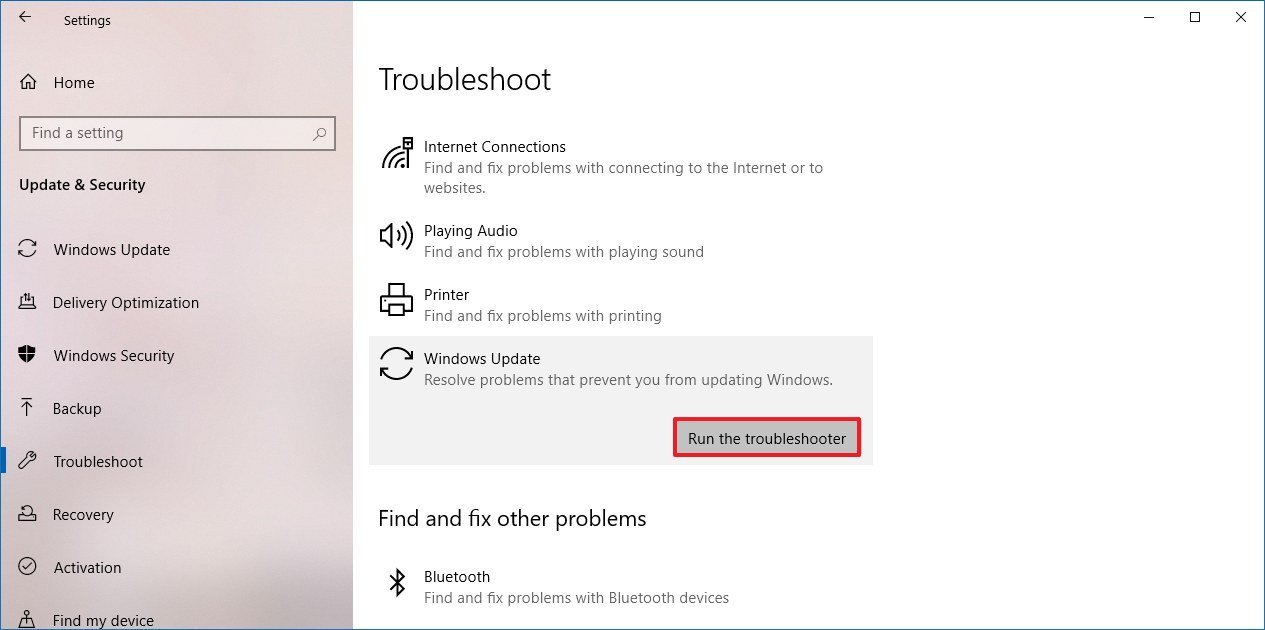
- Click the Close button.
Once you complete the steps, the troubleshooter will diagnose and resolve any issue that it finds, and then you should be able to update again.
How to fix Windows Update installing update manually
Sometimes installing the most recent update manually can help to fix problems with the Windows Update service.
Determining system type
Before you can download the correct update package, you have to confirm whether you’re using a 32-bit or 64-bit version of Windows 10.
To determine your device system type, use these steps:
- Open Settings.
- Click on System.
- Click on About.
- Under the «Device specifications» section, determine the system type.
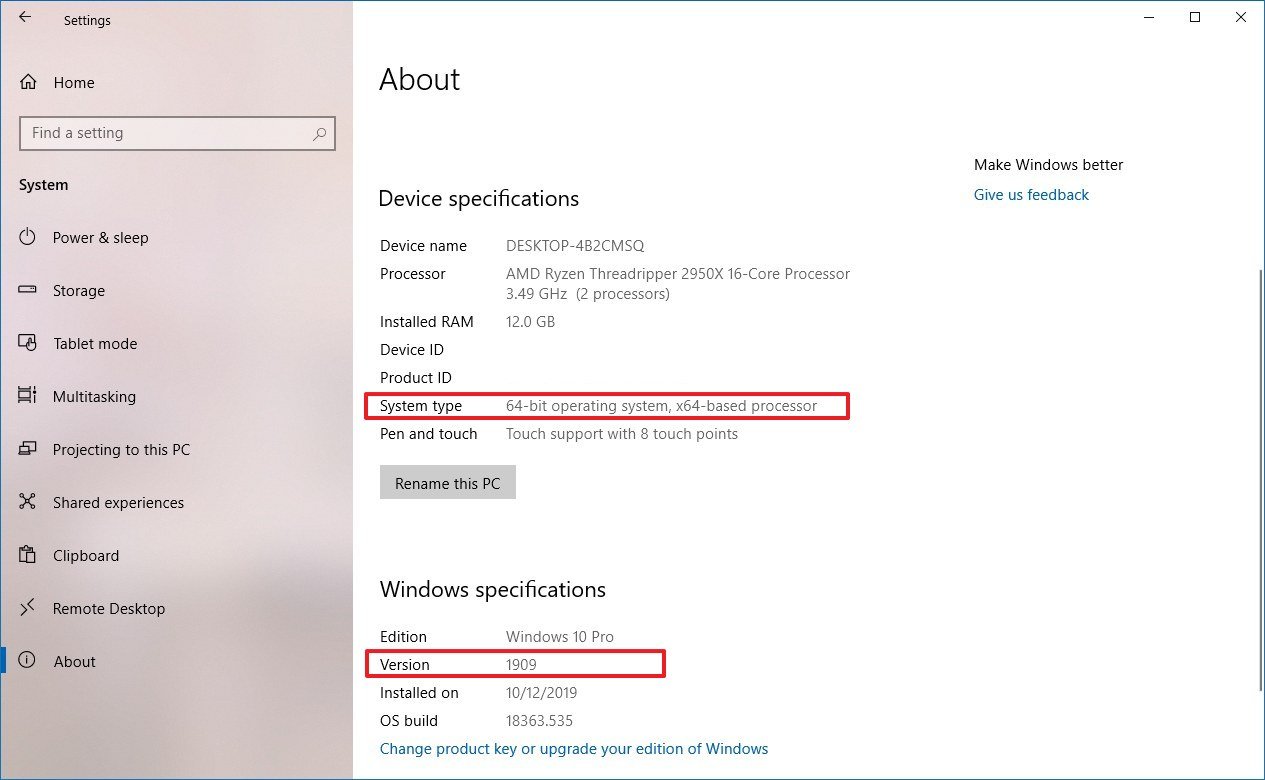
- Under the «Windows specifications» section, determine the version number.
After you complete the steps, you can proceed to download the latest package for your installation.
Downloading updates manually
To download quality updates of Windows 10 manually, use these steps:
- Open the Windows Update History page (opens in new tab).
- Click the version of Windows 10 that matches your installation (for example, version 1909) from the left side.
- Confirm the knowledge base number of the latest update — for example, KB4530684.

- Open the Microsoft Update Catalog page (opens in new tab).
- Search for the KB number — for example, KB4530684.
- Click the Download button for the version that applies for your installation. For instance, if you’re running the 64-bit version, you should click the download button for the «Windows 10 Version 1903 for x64-based Systems» update.
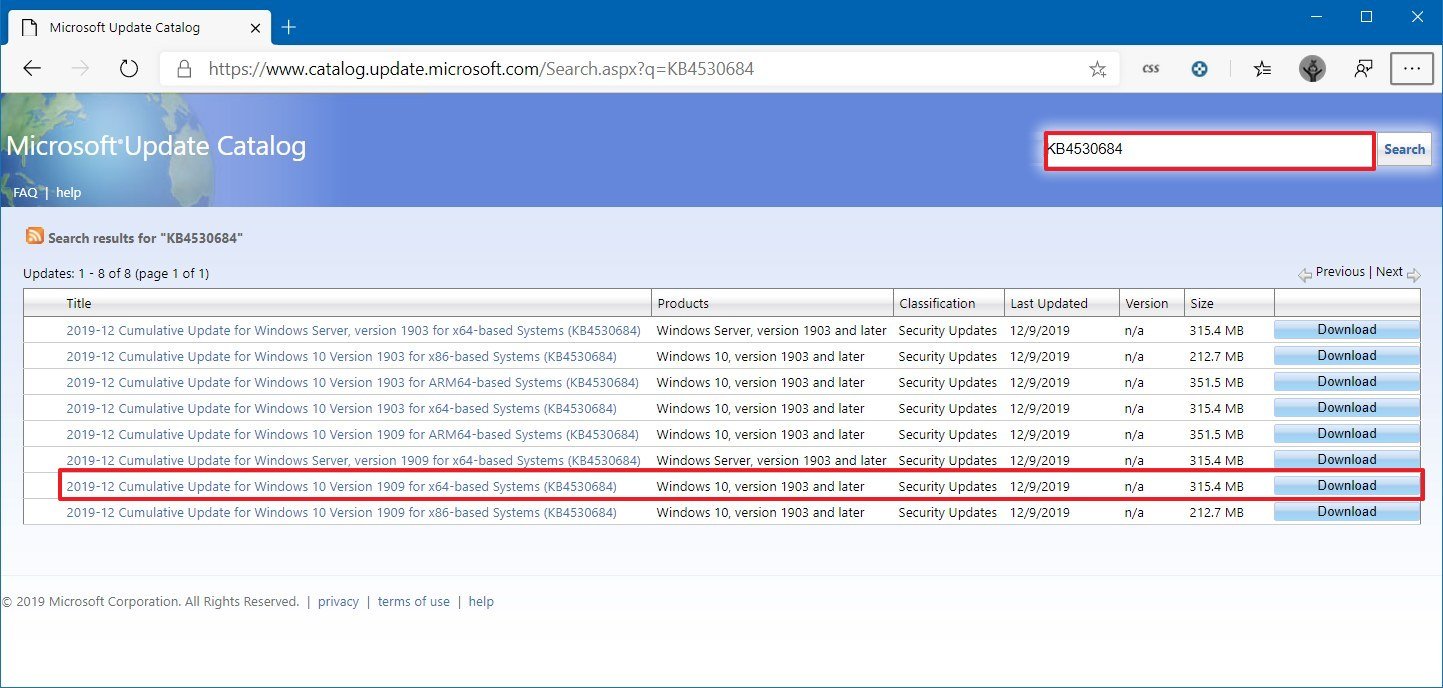
- Click the .msu download link to save the package on your device.
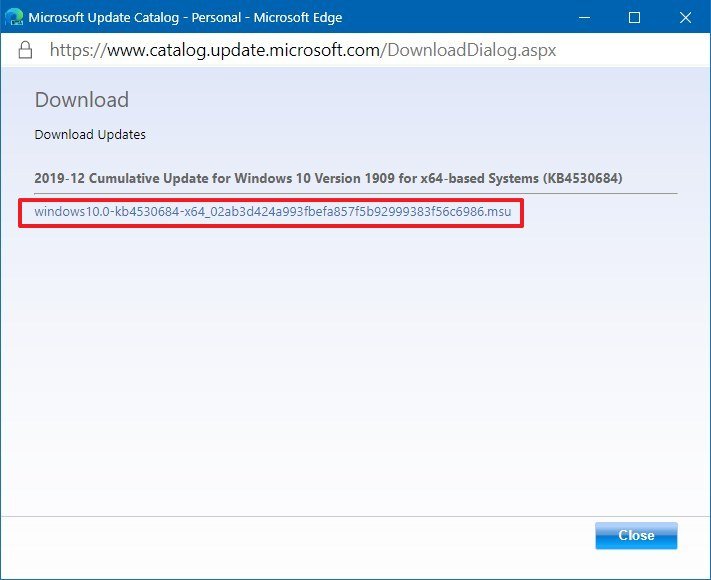
Once you complete the steps, you can proceed to install the update on your computer.
Installing updates manually
To install the latest update that you downloaded manually, use these steps:
- Open Start.
- Search for Command Prompt, right-click the top result, and select the Run as administrator option.
- Type the following command to install the update and press Enter:
wusa C:PATH-TO-UPDATENAME-OF-UPDATE.msu /quiet /norestartThis example installs the update package located in the Downloads folder:wusa C:Usersm__laDownloadswindows10.0-kb4530684-x64_02ab3d424a993fbefa857f5b92999383f56c6986.msu /quiet /norestartQuick tip: If the name is too long to type, then type Windows10.0-kb and press the Tab key to complete the name automatically and continue typing the command.
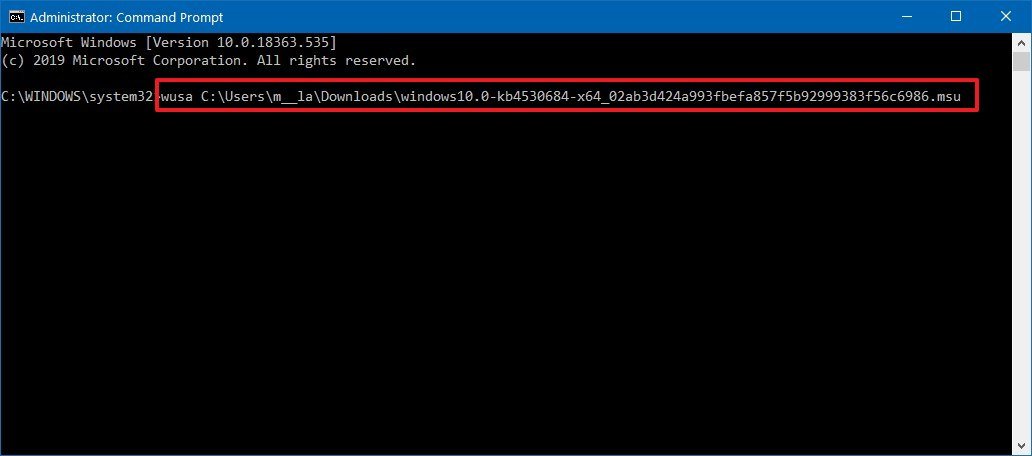
After you complete the steps, the update package will install, but you’ll need to restart the device manually to finish applying the changes. If the update applies successfully, there’s a good chance that Windows Update will start working again.
How to fix Windows Update repairing installation
If there’s a problem with running Windows Update, there is a chance that you may have one or multiple corrupted system files, which you can repair using the System File Checker (SFC) command tool.
To repair the Windows 10 installation to resolve issues with Windows Update, use these steps:
- Open Start.
- Search for Command Prompt, right-click the top result, and select the Run as administrator option.
- Type the following command to repair the system image and press Enter:
dism /Online /Cleanup-image /Restorehealth - Type the following command to repair the installation files and press Enter:
sfc /scannow
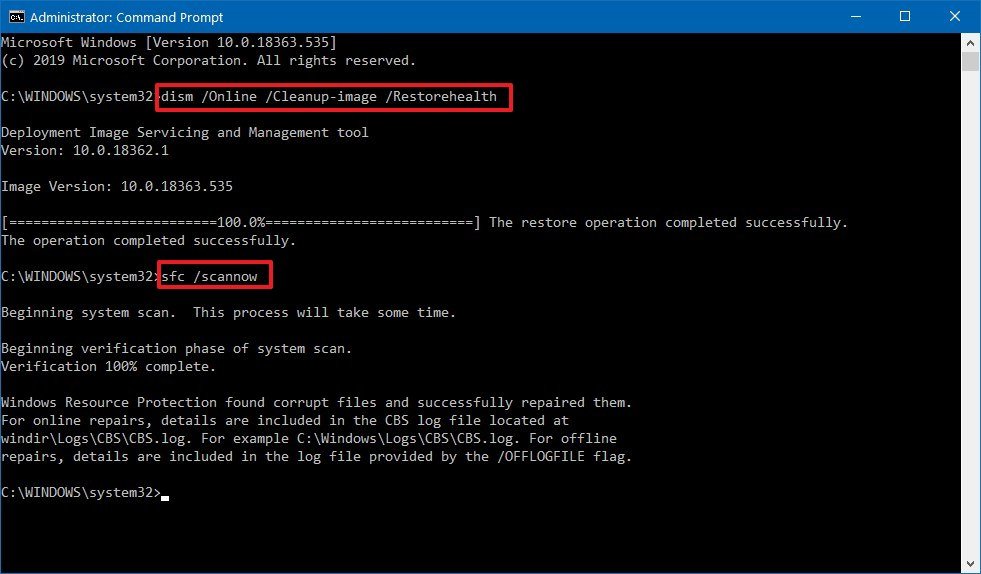
Once you complete the steps, try running Windows Update one more time, and if the problem was a missing or damaged system file, now the update service should start working as always.
How to fix Windows Update skipping maintenance schedule
Although updates are essential to keep your device running smoothly and secure, sometimes updates can roll out with unknown bugs that may cause problems, including installation issues.
If you suspect that the problem could be the update and not your installation, it’s recommended not to install the cumulative update until the next release.
To skip an update release, you have to hide it from your device using these steps:
- Open the Windows Support website (opens in new tab).
- Click the Download the «Show or hide updates» troubleshooter package now link to save the troubleshooter on your device.
- Double-click the wsuhowhide.diagcab file.
- Click the Next button.
- Click the Hide updates option.

- Select the update causing the problem.
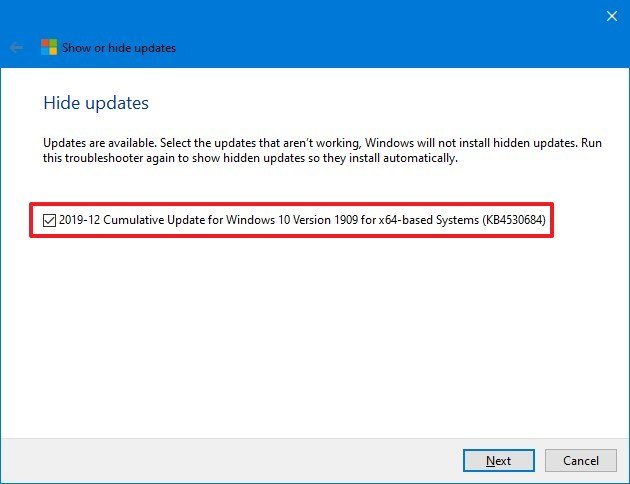
- Click the Next button.
- Click the Close button.
After you complete the steps, the update will no longer be available for your device, resolving any errors trying to install the quality update using Windows Update. However, when a follow-up update becomes available, it’ll eventually download and install automatically.
How to fix Windows Update installing latest version
Sometimes if you’re running an older version of Windows 10, you can try upgrading to the most recent release to fix many problems with the current installation, including issues with Windows Update. While there are multiple ways to upgrade to the latest version, using the Update Assistant tool is the easiest method.
To upgrade a device to the latest version with the Update Assistant, use these steps:
- Open the Windows 10 download page (opens in new tab).
- Click the Update now button.
- Save the Update Assistant installer to your device.
- Double-click the Windows10Upgrade file to launch the assistant.
- Click the Update Now button.
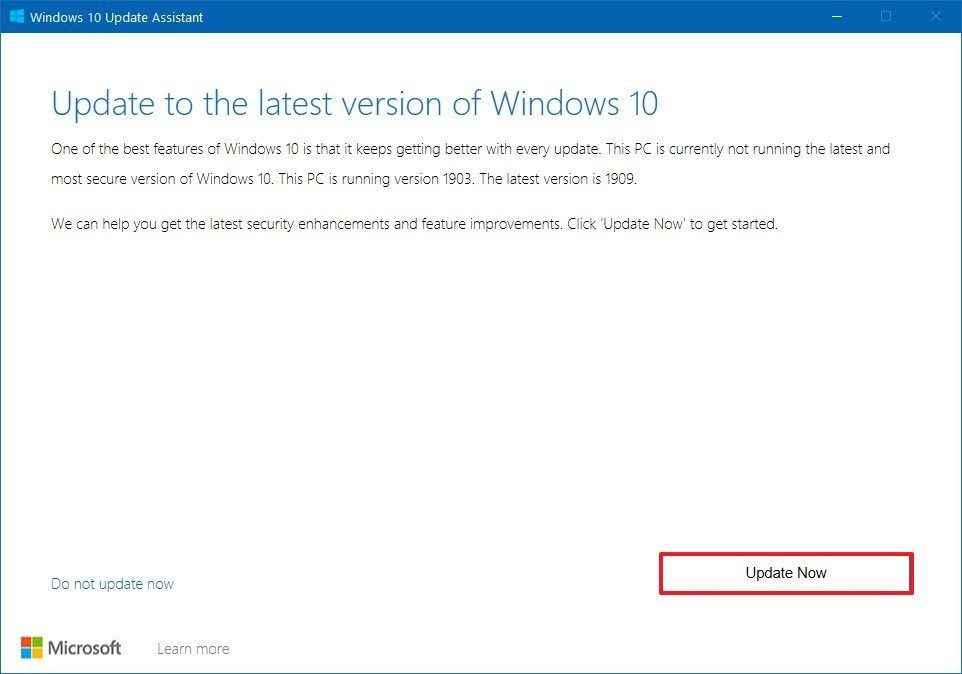
- Click the Next button.
- Click the Restart Now button.
Once you complete the steps, the new version of Windows 10 will hopefully resolve the problem with Windows Update, and it might even improve system performance as well as other issues with the previous release.
How to fix Windows Update performing clean installation
If nothing seems to work to resolve the issue with Windows Update, as a last resort, you may want to consider performing a clean installation of Windows 10 to resolve this and other problems.
Before you can proceed with the installation of Windows 10, you need to create a USB media to start your device and continue with the installation.
To create a bootable media using the Media Creation Tool, use these steps:
- Open the Windows 10 download page (opens in new tab).
- Click the Download tool now button.
- Save the Media Creation Tool installer to your device.
- Double-click the MediaCreationToolxxxx.exe file to begin the process.
- Click the Accept button to agree to the terms.
- Select the Create install media (USB flash drive, DVD, or ISO file) for another PC option.
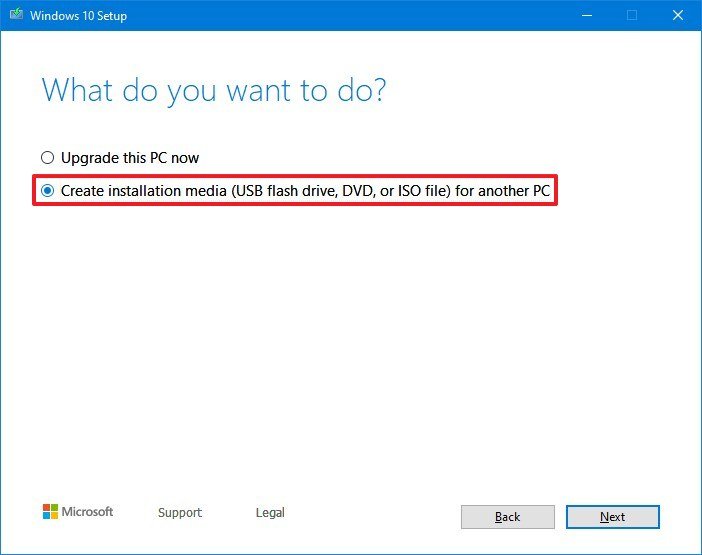
- Click the Next button.
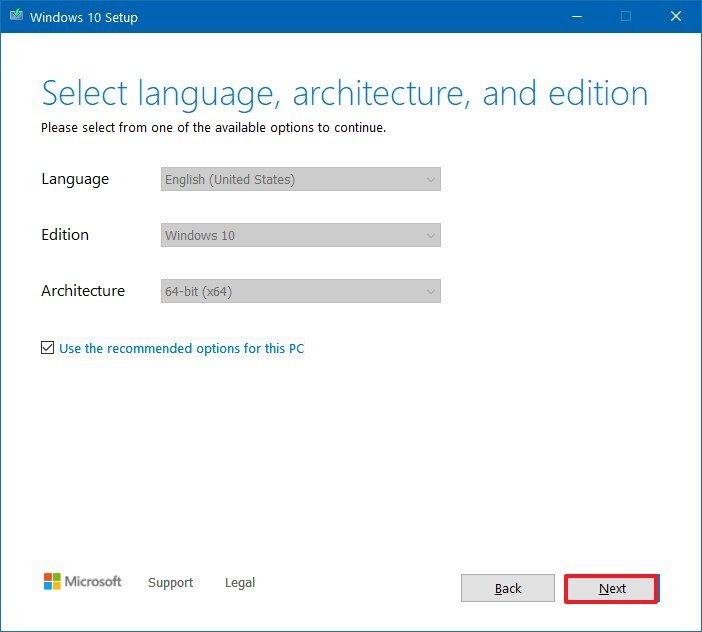
- Click the Next button.
- Select the USB flash drive option.
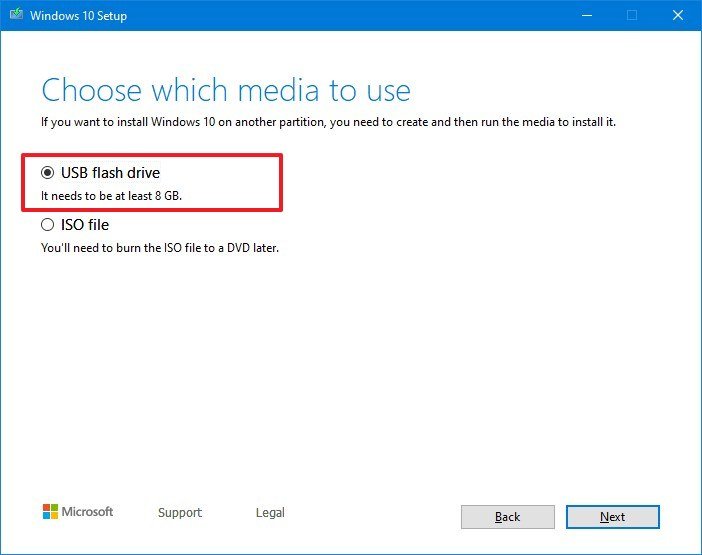
- Click the Next button
- Select the flash drive from the list.
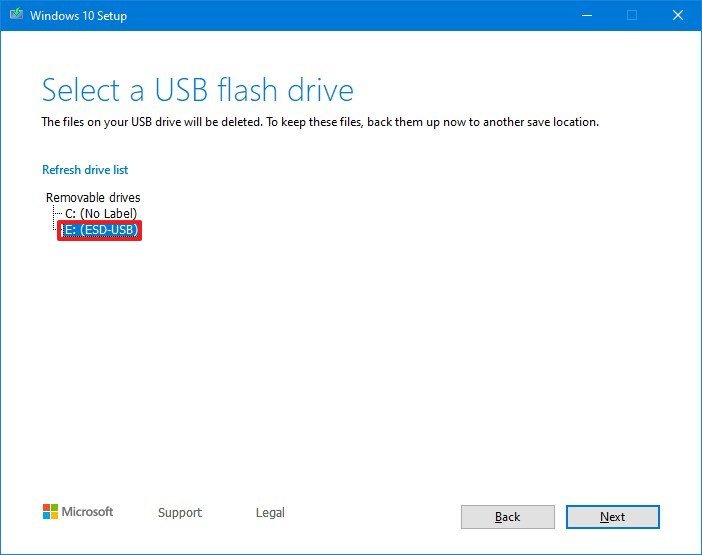
- Click the Next button.
- Click the Finish button.
After you complete the steps, you can proceed with the clean installation of Windows 10.
Installing Windows 10
To do a clean installation of Windows 10, use these steps:
Warning: This is a friendly reminder that this process will erase everything on your computer. It’s always recommended to make a temporary full backup of your PC before proceeding.
- Start the computer with the Windows 10 USB media.Quick tip: If you can’t boot your device with the bootable media, then you need to change your basic input/output system (BIOS) settings to change the boot order to start the device from USB. Usually, this process requires hitting one of the function keys (F1, F2, F3, F10, or F12), the ESC, or Delete key as soon as you start the computer. The only caveat is that these settings will be different per manufacturer, and even by computer model. So make sure to check your device manufacturer’s support website for more specific instructions.
- On prompt, press any key to boot from the device.
- On the «Windows Setup,» click the Next button.
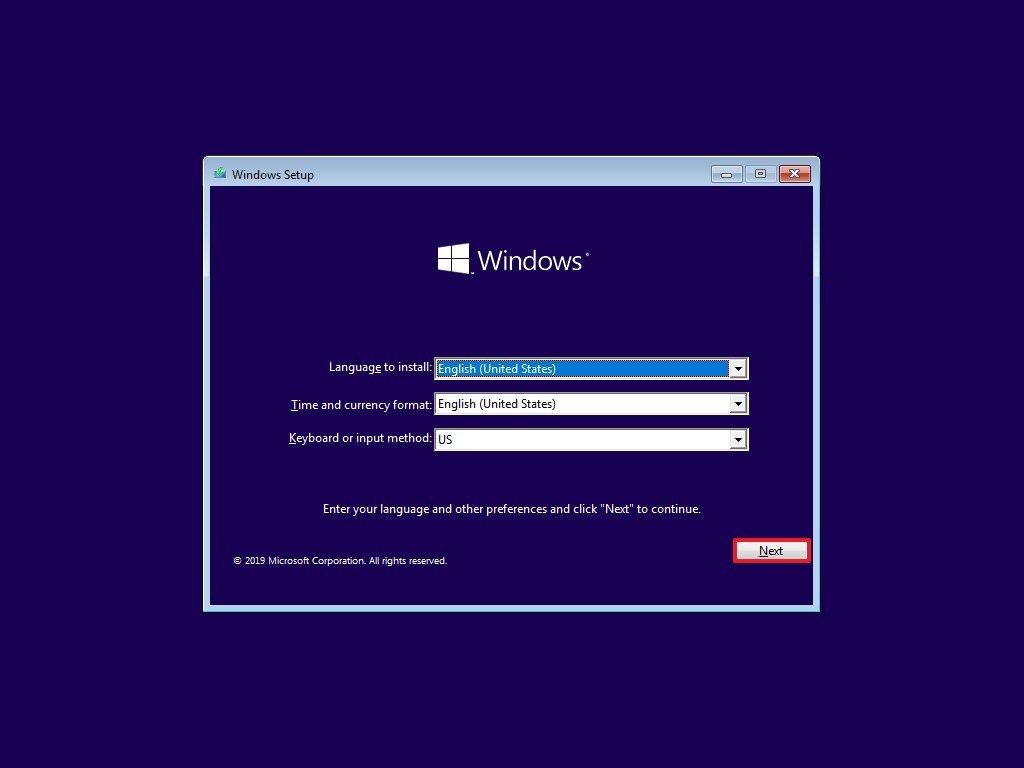
- Click the Install now button.
- Click the I don’t have a product key option to continue (assuming that your device was already activated).
- Click the Next button.
- Select the edition of Windows 10. (This selection must match the version your product key activates.)

- Click the Next button.
- Select the I accept the license terms option to continue.
- Click the Next button.
- Click on the Custom: Install Windows only (Advanced) option.
- Select the partition with the current installation (usually «Drive 0»), and click the Delete button.Quick tip: If «Drive 0» has multiple partitions, you have to select and delete each of the partitions to allow the setup to use the entire drive for the new clean installation. Windows 10 will create the required partitions automatically during the process. It’s not necessary to delete the partitions on secondary drives.
- Click the Yes button.

- Select the empty drive (Drive 0 Unallocated Space).
- Click the Next button.
Once you complete the steps, you’ll need to continue with the out-of-box experience (OOBE) to configure your device, and after the process, the issue with Windows Update should be resolved as well as other system problems.
If you need assistant performing a clean install of Windows 10, you can use this comprehensive guide.
Get the best of Windows Central in in your inbox, every day!
Mauro Huculak is technical writer for WindowsCentral.com. His primary focus is to write comprehensive how-tos to help users get the most out of Windows 10 and its many related technologies. He has an IT background with professional certifications from Microsoft, Cisco, and CompTIA, and he’s a recognized member of the Microsoft MVP community.
Windows Update error “Windows update cannot currently check for updates because the service is not running. You may need to restart your computer” probably occurs when Windows temporary update folder (SoftwareDistribution folder) is corrupted. To easily fix this error, follow the below steps in this tutorial.

How to resolve Windows (8, 7 or Vista) update error: “Windows update cannot currently check for updates because the service is not running” when you check for updates.
Solution 1: Solve Windows Update cannot check for updates” error using Microsoft Fix It utility
Update: Unfortunately Microsoft has removed the FixIt utility. So, ignore this solution and continue to solution 2.
1. Download the Microsoft Fix It utility to your computer from: https://support.microsoft.com/kb/2730071.

2. Run Microsoft Fix It tool and press “Accept”.
3. Select “Detect problems and apply the fixes for me (Recommended)” option.
4. Let the troubleshooter to fix Windows Update problems and press “Next”. *
* If the problem is fixed, close the troubleshooter and check for Windows updates again. Otherwise continue to Solution 2.
Solution 2: Solve Windows Update cannot check for updates” error manually.
Step 1: Stop Windows Update service.
To do this:
a. Simultaneously press Windows key + R to open run command box.
b. Inside run command box, type: services.msc and press Enter.

c. Search for Windows Update service, then right click on it and select Stop.

d. Without closing the services window, proceed to the next step.
Step 2: Delete or Rename Windows update temporary storage folder.
To do this:
a. Open “My Computer” and navigate to “C:Windows”folder.
b. Delete (or Rename e.g. to “SoftwareDistributionOLD”) the “SoftwareDistribution” folder.

Step 3: Start Windows Update service.
a. Go to Windows services and “Start”the Windows Update service.

b. Try to update Windows again.
Solution 3: Install the KB3102810 Standalone Update.
- Download and install the KB3102810 security update. After installation restart your computer and check for updates. (Applied to: Windows 7 SP1 & Windows Server 2008 R2 SP1.)
- Restart your computer.
- Stop Windows Update Service. (See Solution 2: Step 1)
- Delete the Software Distribution Folder. (See Solution 2: Step 2)
- Restart your computer and then check for updates. Leave your computer about an hour to find Updates.
Solution 4: Update the Intel Rapid Storage Technology Driver.
Install the latest Intel Rapid Storage Technology Driver (Intel RST). *
Source: http://support.hp.com/gb-en/document/c02219204
* You can download the latest RSTS driver from your computer’s manufacturer website or from the Intel® Rapid Storage Technology (Intel® RST) Download Center
Hope this helps!
If this article was useful for you, please consider supporting us by making a donation. Even $1 can a make a huge difference for us in our effort to continue to help others while keeping this site free:

If you want to stay constantly protected from malware threats, existing and future ones, we recommend that you install Malwarebytes Anti-Malware PRO by clicking below (we
do earn a commision from sales generated from this link, but at no additional cost to you. We have experience with this software and we recommend it because it is helpful and useful):
Full household PC Protection — Protect up to 3 PCs with NEW Malwarebytes Anti-Malware Premium!
Download PC Repair Tool to quickly find & fix Windows errors automatically
Looking for info on the latest updates? Learn how to check for updates in Windows 11/10. See how to get the details about the Windows Updates. While Windows 10 updates automatically, this post will help you if you want to check for, download, and install Windows Updates on your Windows 11/10 PC.
Windows 11/10 operating system periodically checks with Microsoft to see if any updates are available and if any are available offers to download them and install them for you automatically.

While creating Windows 11, the developers made sure to analyze the data for which settings are used more and which are used less. No doubt Windows Updates were prioritized and a separate menu was created for the same. To update Windows 11 manually:
- Right-click on the Start button
- Select Settings.
- In the Settings menu, check the list on the left-hand side.
- Windows Update would be the last option. Select it, please.
- In the right pane, click on Check for updates to manually run Windows updates.
How to check for updates in Windows 10
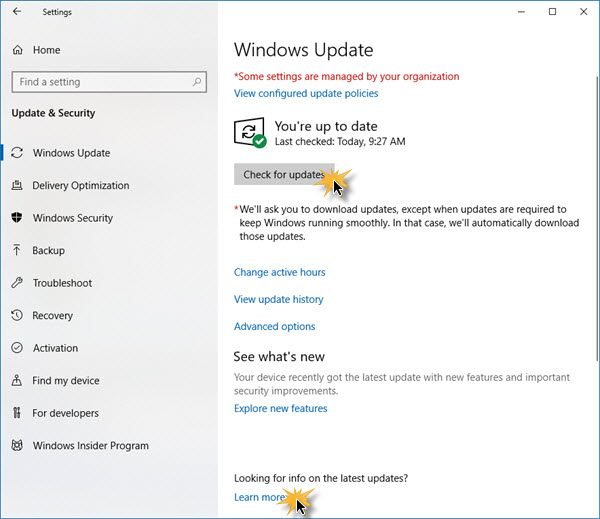
To manually check for updates in order to run Windows Update in Windows 10, follow these steps:
- Open Start Menu
- Click on Settings
- Open Update & Security settings
- Select the Windows Update section
- Here, press on the Check for updates button.
If any updates are available, they will be offered to you.
If Windows Update says that your PC is up to date, it means that you have all the updates that are currently available for your system.
If you are looking for details on the latest updates, click on the Details link. More details about the updates will then be shown to you.
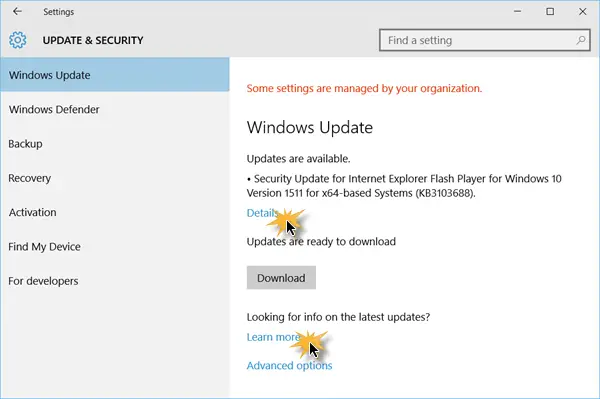
If you need more information about the updates, click on the Learn more link. Every update comes with a KB number. Here you can see update KB3103688 being offered. You could search on your favorite search engine using this KB number. Relevant results about the update are sure to be offered.
You can make your Windows receive updates for other Microsoft products and software, like Office, when you update Windows.
This post will help you if the Check for updates button is missing.
While on the subject of Windows Updates, these links are sure to interest you:
- Make Windows computer check for Windows Updates more frequently
- How to upgrade your Windows 11/10 to the newer Build
- Make Windows notify you before downloading or installing Windows Updates.
Anand Khanse is the Admin of TheWindowsClub.com, a 10-year Microsoft MVP (2006-16) & a Windows Insider MVP (2016-2022). Please read the entire post & the comments first, create a System Restore Point before making any changes to your system & be careful about any 3rd-party offers while installing freeware.
Ошибка инициализации платформы .NET Framework 4 — как исправить
Одна из возможных ошибок при запуске программ или при входе в Windows 10, 8 или Windows 7 — сообщение «Ошибка инициализации платформы .NET Framework. Для запуска этого приложения сначала необходимо установить одну из следующих версий .NET Framework: 4» (версия обычно указывается более точно, но это не играет роли). Причиной тому может быть как неустановленная платформа .NET Framework нужной версии, так и проблемы с установленными на компьютере компонентами.
В этой инструкции — возможные способы исправить ошибки инициализации .NET Framework 4 в последних версиях Windows и исправить запуск программ.
Примечание: далее в инструкции для установки предлагается .NET Framework 4.7, как последняя на текущий момент времени. Вне зависимости от того какую из «4-х» версий требуется установить в сообщении об ошибке, последняя должна подойти, как включающая все необходимые компоненты.
Удаление и последующая установка компонентов .NET Framework 4 последней версии
Первый вариант, который следует попробовать, если на настоящий момент он еще не был опробован — удалить имеющиеся компоненты .NET Framework 4 и установить их заново.
Если у вас Windows 10, порядок действий будет таким
- Зайдите в Панель управления (в поле «Просмотр» установите «Значки») — Программы и компоненты — нажмите слева «Включение и отключение компонентов Windows».
- Снимите отметку с .NET Framework 4.7 (или 4.6 в более ранних версиях Windows 10).
- Нажмите «Ок».
После удаления, перезагрузите компьютер, снова зайдите в раздел «Включение и отключение компонентов Windows», включите .NET Framework 4.7 или 4.6, подтвердите установку и опять же, перезагрузите систему.
Если у вас Windows 7 или 8:
- Зайдите в панель управления — программы и компоненты и удалите там .NET Framework 4 (4.5, 4.6, 4.7, в зависимости от того, какая версия установлена).
- Перезагрузите компьютер.
- Скачайте с официального сайта Майкрософт .NET Framework 4.7 и установите на компьютер. Адрес страницы для загрузки — https://www.microsoft.com/ru-ru/download/details.aspx?id=55167
После установки и перезагрузки компьютера, проверьте, была ли устранена проблема и появляется ли ошибка инициализации платформы .NET Framework 4 снова.
Использование официальных утилит исправления ошибок .NET Framework
У Майкрософт имеется несколько собственных утилит для исправления ошибок .NET Framework:
- .NET Framework Repair Tool
- .NET Framework Setup Verification Tool
- .NET Framework Cleanup Tool
Наиболее полезной в большинстве случаев может оказаться первая из них. Порядок ее использования выглядит следующим образом:
- Скачайте утилиту со страницы https://www.microsoft.com/en-us/download/details.aspx?id=30135
- Откройте загруженный файл NetFxRepairTool
- Примите лицензию, нажмите кнопку «Next» и дождитесь, когда будут проверены установленные компоненты .NET Framework.
- Будет отображен список возможных проблем с .NET Framework разных версий, а по нажатию на Next будет запущено автоматическое исправление, если оно возможно.
По завершении работы утилиты рекомендую перезагрузить компьютер и проверить, была ли исправлена проблема.
Утилита .NET Framework Setup Verification Tool позволяет проверить правильность установки компонентов .NET Framework выбранной версии в Windows 10, 8 и Windows 7.
После запуска утилиты выберите версию .NET Framework, которую требуется проверить и нажмите кнопку «Verify Now». По завершении проверки, текст в поле «Current Status» будет обновлен, а сообщение «Product verification succeeded» означает, что с компонентами все в порядке (в случае, если не все в порядке, вы можете просмотреть файлы журналов (View log), чтобы узнать, какие именно ошибки были найдены.
Скачать утилиту .NET Framework Setup Verification Tool можно с официальной страницы https://blogs.msdn.microsoft.com/astebner/2008/10/13/net-framework-setup-verification-tool-users-guide/ (загрузки смотрите в разделе «Download location»).
Еще одна программа — .NET Framework Cleanup Tool, доступная для загрузки на https://blogs.msdn.microsoft.com/astebner/2008/08/28/net-framework-cleanup-tool-users-guide/ (раздел «Download location»), позволяет полностью удалить выбранные версии .NET Framework с компьютера с тем, чтобы затем выполнить установку заново.
Следует учитывать, что утилита не удаляет компоненты, которые являются составной частью Windows. Например, удалить .NET Framework 4.7 в Windows 10 Creators Update с ее помощью не получится, зато с большой вероятностью проблемы инициализации .NET Framework получится исправить в Windows 7 путем удаления версий .NET Framework 4.x в Cleanup Tool и последующей установки версии 4.7 с официального сайта.
Дополнительная информация
В некоторых случаях исправить ошибку может помочь простая переустановка программы, ее вызывающей. Либо, в случаях, если ошибка появляется при входе в Windows (т.е. при запуске какой-то программы в автозагрузке), может иметь смысл убрать эту программу из автозагрузки, если она не является необходимой (см. Автозагрузка программ в Windows 10).
А вдруг и это будет интересно:
Почему бы не подписаться?
Рассылка новых, иногда интересных и полезных, материалов сайта remontka.pro. Никакой рекламы и бесплатная компьютерная помощь подписчикам от автора. Другие способы подписки (ВК, Одноклассники, Телеграм, Facebook, Twitter, Youtube, Яндекс.Дзен)
Какой смысл подписываться и тем более оставлять комментарии, если никто не отвечает на этом сайте, сюда п мать, что в пустоту, что головой об стену убиться!
Ну вообще-то я на сотню комментариев в день где-то отвечаю на этом сайте.
Не знаю, где именно вам не ответил. Бывает, что не отвечаю, но только когда либо вопроса как такового нет, либо когда у меня ответа никакого нет (но тогда коммент остается, может кто-то еще ответит).
Сейчас пересмотрел ваши комментарии на сайте — не ответил, я так понимаю, только на один, связанный с wmic.
спасибо все сделал как написано, удалил, загрузил, вставил, проверил, заработало, еще раз благодарю
здрасте. из описания в самом начале я так понял, что нет фрэймворк 4.7 заменяет все 4, а то у меня были 4.5 фул и 4.5 забыл слово, а после обновления виндоус стали 4.7 то есть это хорошо? или 4.5 тоже надо бы? а.
Источник
Как исправить ошибку, связанную с инициализацией .NET Framework 4?
Во время запуска какой-то программы или на старте Windows 7 и выше, пользователь может столкнуться с ошибкой инициализации платформы .NET Framework 4. Возникает она по причине некорректной установки данного компонента или во время несовместимости с самой операционной системой. Поэтому, чтобы её решить, стоит рассмотреть несколько способов.
При запуске приложения на ПК с операционной системой Windows 7 и выше, может появиться сообщение о том, что «Для этого приложения сначала нужно установить одну из следующих версий NET Framework…». При этом версия фреймворка всегда указывается.
Чтобы решить эту проблему самостоятельно, стоит ознакомиться со следующими рекомендациями.
Способ 1. Переустановка .NET Framework
- Переходим в Панель управления и выбираем «Программы и компоненты».
- Откроется небольшое окно. В меню слева выбираем «Включение и отключение компонентов Windows». Находим в списке и отключаем фреймворки.
- После возвращаемся к списку программ и находим там .NET Framework. Также удаляем их. Удаляем все, какие есть на ПК.
- После удаления всех установленных компонентов, стоит перезагрузить систему.
Теперь, когда система очищена от всех фреймворков, переходим на официальный сайт Майкрософт и жмем Скачать .NET Framework той версии, которая указана в ошибке. Загрузив нужный компонент, выполняем его установку и вновь перезагружаем ПК.
Способ 2. Использование официальных утилит для решения проблем с .NET Framework
Для исправления неполадок в работе фреймворков компания Майкрософт выпустила несколько утилит. Рассмотрим принцип их работы на практике.
Первая утилита – Microsoft .NET Framework Repair Tool. Она ищет и исправляет неполадки, которые связаны с фреймворками.
Чтобы её применить, стоит загрузить файл, запустить его на своем ПК и принять условия лицензионного соглашения.
После программа будет сканировать систему и предложит варианты решения проблемы. Жмём «Далее» и исправляем ошибку.
Вторая программа для решения ошибки с инициализацией файлов – это .NET Framework Setup Verification Tool. Она проверяет, корректно ли установлены фреймворки. При этом её использование максимально простое. Нужно скачать и запустить программу, указать версию фреймворков, которые нужно проверить и дождаться завершения результатов проверки.
В поле «Статус» будут помещены результаты проверки.
Третья утилита для исправления ошибок с .NET Framework – это .NET Framework Cleanup Tool. Она пригодиться в том случае, если вам не удалось переустановить фреймворки вручную. Утилита позволяет удалить, заново загрузить и корректно установить недостающие компоненты.
Поэтому, если самостоятельно вам не удалось переустановить фреймворки и решить проблему с инициализацией файлов, утилиты от Майкрософт могут помочь решить данную проблему.
Источник
windows 7 update .net framework issues
so I am new here and clueless on how to get the ball rolling and my issue resolved but am going to try.
I have windows 7 and 3 critical updates fail each time and they all seem to be involved with the .net framework
Microsoft .NET Framework 4.5.2 for Windows 7 x64-based Systems (KB2901983)
Security Update for Microsoft .NET Framework 4.6.1 on Windows 7 and Windows Server 2008 R2 for x64 (KB3122661)
Security Update for Microsoft .NET Framework 4.6.1 on Windows 7 and Windows Server 2008 R2 for x64 (KB3127233)
error found is code 643 windows encountered an unknown error.
anytime i try to run any of the .net downloads from the Microsoft website they all fail as well.
Replies (18)
* Please try a lower page number.
* Please enter only numbers.
* Please try a lower page number.
* Please enter only numbers.
Go to uninstall a program
Select net 4.5.2 or what ever version highest you show and select uninstall or change,
Use the repair option.
If you show 4.6.0 or. select it first and uninstall it this is not an Important update it is recommended but in reality it is Optional using these update settings,
Did this solve your problem?
Sorry this didn’t help.
Great! Thanks for marking this as the answer.
How satisfied are you with this reply?
Thanks for your feedback, it helps us improve the site.
How satisfied are you with this response?
Thanks for your feedback.
it seems no .net stuff is installed and i need .net stuff to run software for my work.
i tried this and it still did not fix issue if nothing i thing the unistall thing made it all worse!
Use the .NET Framework Cleanup Tool to uninstall multiple versions of the .NET Framework, and then reinstall the components.
To do this, follow these steps:
- Check out the .NET Framework Cleanup Tool User’s Guide.
- Download the .NET Framework cleanup tool.
- When you are prompted, click Open , and then click Extract Now .
- In the files that you extracted, double-click cleanup_tool.exe .
If you are prompted for an administrator password or for confirmation, provide the password, and then click Continue. - In the Do you want to run the .NET Framework Setup Cleanup Utility? message, click Yes.
- Click Yes to accept the license agreement.
- In the Product to cleanup window, click the list, select .NET Framework — All Versions, and then click Cleanup Now.
Note The cleanup tool does not let you remove the .NET Framework 2.0 in Windows Vista or later versions of Windows because the .NET Framework is installed as an operating system component. - After the .NET Framework is removed, restart the computer.
- Download and install the following components:
The .NET Framework 3.5 Service Pack 1 (this will also install the .NET Framework 2.0 SP2 and the .NET Framework 3.0 SP2)
if i ran the uninstall again what are the .net frameworks i need to install as the three ubove did not allow updates to run.
for work the error im getting to run my software is as follows:
to run this application you first must install one of the following versions of the .NET framework v4.0.30319
Источник
Question
Issue: How to fix .NET Framework Installation error 0x800F0906 in Windows?
Hello. I tried to install the .NET Framework but I received the 0x800F0906 error. How do I fix this?
Solved Answer
The .NET Framework[1] is a Microsoft software development platform that is required to run many applications and services on Windows operating systems. It offers a comprehensive and consistent programming model for developing applications with visually stunning user interfaces, seamless and secure communication, and the ability to model a variety of business processes. The .NET Framework is a critical component for the proper operation of many software applications, so it must be installed.
The error code 0x800F0906 is a common problem that can arise during the installation of the .NET Framework on Windows-based computers. This error code is typically generated when the system is unable to download and install the required files for the .NET Framework for a variety of reasons, including a poor internet connection, corrupt system files, or conflicts with other software installed on the system.
This issue can affect users in several ways, including:
- Preventing the installation of certain software applications that require the .NET Framework to run.
- Causing existing .NET Framework-dependent applications to stop working.
- Interrupting the installation process of other software applications that require the .NET Framework to be installed.
To resolve the .NET Framework installation error 0x800F0906, you can follow the step-by-step instructions below or you can try an automatic maintenance tool like FortectMac Washing Machine X9. It can fix most system errors, BSODs,[2] corrupted files, and registry[3] issues.

Solution 1. Check Windows Update
Fix it now!
Fix it now!
To repair damaged system, you have to purchase the licensed version of Fortect Mac Washing Machine X9.
- Press the Windows key + I to open the Settings app.
- Click on Update & Security.
- Select Windows Update and click on Check for updates.

- Install any pending updates and restart your computer if prompted.
Solution 2. Enable .NET Framework in Windows Features
Fix it now!
Fix it now!
To repair damaged system, you have to purchase the licensed version of Fortect Mac Washing Machine X9.
- Press the Windows key + R to open the Run dialog.
- Type appwiz.cpl and press Enter to open the Programs and Features window.
- Click on Turn Windows features on or off on the left panel.

- In the Windows Features window, find .NET Framework and check the box beside it.
- Click OK to apply the changes and wait for the process to complete.
- Restart your computer.
Solution 3. Use the .NET Framework Repair Tool
Fix it now!
Fix it now!
To repair damaged system, you have to purchase the licensed version of Fortect Mac Washing Machine X9.
- Download the .NET Framework Repair Tool from the Microsoft Download Center.
- Run the tool and follow the on-screen instructions to repair the .NET Framework installation.

Solution 4. Install the .NET Framework using the Standalone Installer
Fix it now!
Fix it now!
To repair damaged system, you have to purchase the licensed version of Fortect Mac Washing Machine X9.
- Download the .NET Framework offline installer from the Microsoft Download Center.
- Run the installer and follow the on-screen instructions to install the .NET Framework.

Solution 5. Modify the Group Policy Settings
Fix it now!
Fix it now!
To repair damaged system, you have to purchase the licensed version of Fortect Mac Washing Machine X9.
- Press the Windows key + R to open the Run dialog box.
- Type gpedit.msc in the dialog box and press OK to open the Local Group Policy Editor.
- Expand Computer Configuration and then Administrative Templates. Select System.
- Open the Specify settings for optional component installation and component repair Group Policy Setting and click on Enabled.

- If an alternative source file is needed, specify the fully qualified path of a shared folder that contains the contents of the \sources\sxs folder from the installation media. This can be done in the Alternative source file path box.
- To use a WIM file as an alternative source file location, add the WIM: prefix to the path and add the index of the image you want to use in the WIM file as a suffix. For example, WIM:\server_name\share\install.wim:3 (3 represents the image index).
- Check the box to select Contact Windows Update directly to download repair content instead of the WSUS (Windows Server Update Services), if applicable.
- Click OK.
- In the command prompt, type update/force and press Enter to apply the policy.
Solution 6. Perform a System Restore
Fix it now!
Fix it now!
To repair damaged system, you have to purchase the licensed version of Fortect Mac Washing Machine X9.
- Press the Windows key + R to open the Run dialog.
- Type rstrui and press Enter to open the System Restore utility.

- Follow the on-screen instructions to restore your computer to an earlier point when the .NET Framework was working correctly.
Solution 7. Use the Windows Installation Media
Fix it now!
Fix it now!
To repair damaged system, you have to purchase the licensed version of Fortect Mac Washing Machine X9.
- Insert the Windows installation media into your computer.
- Open the Command Prompt.
- Type the following command and press Enter:
Dism /online /enable-feature /featurename:NetFx3 /All /Source:<drive>:\sources\sxs /LimitAccess

- Replace <drive> with the letter of the drive where the Windows installation media is located (e.g., D:\sources\sxs).
- Wait for the command to complete.
- Restart your computer to apply the changes.
Repair your Errors automatically
ugetfix.com team is trying to do its best to help users find the best solutions for eliminating their errors. If you don’t want to struggle with manual repair techniques, please use the automatic software. All recommended products have been tested and approved by our professionals. Tools that you can use to fix your error are listed bellow:
do it now!
Download Fix
Happiness
Guarantee
do it now!
Download Fix
Happiness
Guarantee
Compatible with Microsoft Windows
Compatible with OS X
Still having problems?
If you failed to fix your error using FortectMac Washing Machine X9, reach our support team for help. Please, let us know all details that you think we should know about your problem.
Fortect — a patented specialized Windows repair program. It will diagnose your damaged PC. It will scan all System Files, DLLs and Registry Keys that have been damaged by security threats.Mac Washing Machine X9 — a patented specialized Mac OS X repair program. It will diagnose your damaged computer. It will scan all System Files and Registry Keys that have been damaged by security threats.
This patented repair process uses a database of 25 million components that can replace any damaged or missing file on user’s computer.
To repair damaged system, you have to purchase the licensed version of Fortect malware removal tool.To repair damaged system, you have to purchase the licensed version of Mac Washing Machine X9 malware removal tool.
To stay completely anonymous and prevent the ISP and the government from spying on you, you should employ Private Internet Access VPN. It will allow you to connect to the internet while being completely anonymous by encrypting all information, prevent trackers, ads, as well as malicious content. Most importantly, you will stop the illegal surveillance activities that NSA and other governmental institutions are performing behind your back.
Unforeseen circumstances can happen at any time while using the computer: it can turn off due to a power cut, a Blue Screen of Death (BSoD) can occur, or random Windows updates can the machine when you went away for a few minutes. As a result, your schoolwork, important documents, and other data might be lost. To recover lost files, you can use Data Recovery Pro – it searches through copies of files that are still available on your hard drive and retrieves them quickly.