Running pip#
pip is a command line program. When you install pip, a pip command is added
to your system, which can be run from the command prompt as follows:
Unix/macOS
python -m pip <pip arguments>
python -m pip executes pip using the Python interpreter you
specified as python. So /usr/bin/python3.7 -m pip means
you are executing pip for your interpreter located at /usr/bin/python3.7.
Windows
py -m pip <pip arguments>
py -m pip executes pip using the latest Python interpreter you
have installed. For more details, read the Python Windows launcher docs.
Installing Packages#
pip supports installing from PyPI, version control, local projects, and
directly from distribution files.
The most common scenario is to install from PyPI using Requirement Specifiers
Unix/macOS
python -m pip install SomePackage            # latest version
python -m pip install SomePackage==1.0.4     # specific version
python -m pip install 'SomePackage>=1.0.4'     # minimum version
Windows
py -m pip install SomePackage            # latest version
py -m pip install SomePackage==1.0.4     # specific version
py -m pip install 'SomePackage>=1.0.4'   # minimum version
For more information and examples, see the pip install reference.
Basic Authentication Credentials
This is now covered in Authentication.
netrc Support
This is now covered in Authentication.
Keyring Support
This is now covered in Authentication.
Using a Proxy Server#
When installing packages from PyPI, pip requires internet access, which
in many corporate environments requires an outbound HTTP proxy server.
pip can be configured to connect through a proxy server in various ways:
-
using the
--proxycommand-line option to specify a proxy in the form
scheme://[user:passwd@]proxy.server:port -
using
proxyin a Configuration Files -
by setting the standard environment-variables
http_proxy,https_proxy
andno_proxy. -
using the environment variable
PIP_USER_AGENT_USER_DATAto include
a JSON-encoded string in the user-agent variable used in pip’s requests.
Requirements Files#
“Requirements files” are files containing a list of items to be
installed using pip install like so:
Unix/macOS
python -m pip install -r requirements.txt
Windows
py -m pip install -r requirements.txt
Details on the format of the files are here: Requirements File Format.
Logically, a Requirements file is just a list of pip install arguments
placed in a file. Note that you should not rely on the items in the file being
installed by pip in any particular order.
Requirements files can also be served via a URL, e.g.
http://example.com/requirements.txt besides as local files, so that they can
be stored and served in a centralized place.
In practice, there are 4 common uses of Requirements files:
-
Requirements files are used to hold the result from pip freeze for the
purpose of achieving Repeatable Installs. In
this case, your requirement file contains a pinned version of everything that
was installed whenpip freezewas run.Unix/macOS
python -m pip freeze > requirements.txt
python -m pip install -r requirements.txt
Windows
py -m pip freeze > requirements.txt
py -m pip install -r requirements.txt
-
Requirements files are used to force pip to properly resolve dependencies.
pip 20.2 and earlier doesn’t have true dependency resolution, but instead simply uses the first
specification it finds for a project. E.g. ifpkg1requires
pkg3>=1.0andpkg2requirespkg3>=1.0,<=2.0, and ifpkg1is
resolved first, pip will only usepkg3>=1.0, and could easily end up
installing a version ofpkg3that conflicts with the needs ofpkg2.
To solve this problem, you can placepkg3>=1.0,<=2.0(i.e. the correct
specification) into your requirements file directly along with the other top
level requirements. Like so:pkg1 pkg2 pkg3>=1.0,<=2.0
-
Requirements files are used to force pip to install an alternate version of a
sub-dependency. For example, supposeProjectAin your requirements file
requiresProjectB, but the latest version (v1.3) has a bug, you can force
pip to accept earlier versions like so: -
Requirements files are used to override a dependency with a local patch that
lives in version control. For example, suppose a dependency
SomeDependencyfrom PyPI has a bug, and you can’t wait for an upstream
fix.
You could clone/copy the src, make the fix, and place it in VCS with the tag
sometag. You’d reference it in your requirements file with a line like
so:git+https://myvcs.com/some_dependency@sometag#egg=SomeDependency
If
SomeDependencywas previously a top-level requirement in your
requirements file, then replace that line with the new line. If
SomeDependencyis a sub-dependency, then add the new line.
It’s important to be clear that pip determines package dependencies using
install_requires metadata,
not by discovering requirements.txt files embedded in projects.
See also:
-
Requirements File Format
-
pip freeze
-
“setup.py vs requirements.txt” (an article by Donald Stufft)
Constraints Files#
Constraints files are requirements files that only control which version of a
requirement is installed, not whether it is installed or not. Their syntax and
contents is a subset of Requirements Files, with several kinds of syntax
not allowed: constraints must have a name, they cannot be editable, and they
cannot specify extras. In terms of semantics, there is one key difference:
Including a package in a constraints file does not trigger installation of the
package.
Use a constraints file like so:
Unix/macOS
python -m pip install -c constraints.txt
Windows
py -m pip install -c constraints.txt
Constraints files are used for exactly the same reason as requirements files
when you don’t know exactly what things you want to install. For instance, say
that the “helloworld” package doesn’t work in your environment, so you have a
local patched version. Some things you install depend on “helloworld”, and some
don’t.
One way to ensure that the patched version is used consistently is to
manually audit the dependencies of everything you install, and if “helloworld”
is present, write a requirements file to use when installing that thing.
Constraints files offer a better way: write a single constraints file for your
organisation and use that everywhere. If the thing being installed requires
“helloworld” to be installed, your fixed version specified in your constraints
file will be used.
Constraints file support was added in pip 7.1. In Changes to the pip dependency resolver in 20.3 (2020) we did a fairly comprehensive overhaul, removing several
undocumented and unsupported quirks from the previous implementation,
and stripped constraints files down to being purely a way to specify
global (version) limits for packages.
Same as requirements files, constraints files can also be served via a URL,
e.g. http://example.com/constraints.txt, so that your organization can store and
serve them in a centralized place.
Installing from Wheels#
“Wheel” is a built, archive format that can greatly speed installation compared
to building and installing from source archives. For more information, see the
Wheel docs , PEP 427, and PEP 425.
pip prefers Wheels where they are available. To disable this, use the
—no-binary flag for pip install.
If no satisfactory wheels are found, pip will default to finding source
archives.
To install directly from a wheel archive:
Unix/macOS
python -m pip install SomePackage-1.0-py2.py3-none-any.whl
Windows
py -m pip install SomePackage-1.0-py2.py3-none-any.whl
To include optional dependencies provided in the provides_extras
metadata in the wheel, you must add quotes around the install target
name:
Unix/macOS
python -m pip install './somepackage-1.0-py2.py3-none-any.whl[my-extras]'
Windows
py -m pip install './somepackage-1.0-py2.py3-none-any.whl[my-extras]'
Note
In the future, the path[extras] syntax may become deprecated. It is
recommended to use PEP 508 syntax wherever possible.
For the cases where wheels are not available, pip offers pip wheel as a
convenience, to build wheels for all your requirements and dependencies.
pip wheel requires the wheel package to be installed, which provides the
“bdist_wheel” setuptools extension that it uses.
To build wheels for your requirements and all their dependencies to a local
directory:
Unix/macOS
python -m pip install wheel
python -m pip wheel --wheel-dir=/local/wheels -r requirements.txt
Windows
py -m pip install wheel
py -m pip wheel --wheel-dir=/local/wheels -r requirements.txt
And then to install those requirements just using your local directory of
wheels (and not from PyPI):
Unix/macOS
python -m pip install --no-index --find-links=/local/wheels -r requirements.txt
Windows
py -m pip install --no-index --find-links=/local/wheels -r requirements.txt
Uninstalling Packages#
pip is able to uninstall most packages like so:
Unix/macOS
python -m pip uninstall SomePackage
Windows
py -m pip uninstall SomePackage
pip also performs an automatic uninstall of an old version of a package
before upgrading to a newer version.
For more information and examples, see the pip uninstall reference.
Listing Packages#
To list installed packages:
Unix/macOS
$ python -m pip list
docutils (0.9.1)
Jinja2 (2.6)
Pygments (1.5)
Sphinx (1.1.2)
Windows
C:\> py -m pip list
docutils (0.9.1)
Jinja2 (2.6)
Pygments (1.5)
Sphinx (1.1.2)
To list outdated packages, and show the latest version available:
Unix/macOS
$ python -m pip list --outdated
docutils (Current: 0.9.1 Latest: 0.10)
Sphinx (Current: 1.1.2 Latest: 1.1.3)
Windows
C:\> py -m pip list --outdated
docutils (Current: 0.9.1 Latest: 0.10)
Sphinx (Current: 1.1.2 Latest: 1.1.3)
To show details about an installed package:
Unix/macOS
$ python -m pip show sphinx
---
Name: Sphinx
Version: 1.1.3
Location: /my/env/lib/pythonx.x/site-packages
Requires: Pygments, Jinja2, docutils
Windows
C:\> py -m pip show sphinx
---
Name: Sphinx
Version: 1.1.3
Location: /my/env/lib/pythonx.x/site-packages
Requires: Pygments, Jinja2, docutils
For more information and examples, see the pip list and pip show
reference pages.
Searching for Packages#
pip can search PyPI for packages using the pip search
command:
Unix/macOS
python -m pip search "query"
Windows
The query will be used to search the names and summaries of all
packages.
For more information and examples, see the pip search reference.
Configuration
This is now covered in Configuration.
Config file
This is now covered in Configuration.
Environment Variables
This is now covered in Configuration.
Config Precedence
This is now covered in Configuration.
Command Completion#
pip comes with support for command line completion in bash, zsh and fish.
To setup for bash:
python -m pip completion --bash >> ~/.profile
To setup for zsh:
python -m pip completion --zsh >> ~/.zprofile
To setup for fish:
python -m pip completion --fish > ~/.config/fish/completions/pip.fish
To setup for powershell:
python -m pip completion --powershell | Out-File -Encoding default -Append $PROFILE
Alternatively, you can use the result of the completion command directly
with the eval function of your shell, e.g. by adding the following to your
startup file:
eval "`pip completion --bash`"
Installing from local packages#
In some cases, you may want to install from local packages only, with no traffic
to PyPI.
First, download the archives that fulfill your requirements:
Unix/macOS
python -m pip download --destination-directory DIR -r requirements.txt
Windows
py -m pip download --destination-directory DIR -r requirements.txt
Note that pip download will look in your wheel cache first, before
trying to download from PyPI. If you’ve never installed your requirements
before, you won’t have a wheel cache for those items. In that case, if some of
your requirements don’t come as wheels from PyPI, and you want wheels, then run
this instead:
Unix/macOS
python -m pip wheel --wheel-dir DIR -r requirements.txt
Windows
py -m pip wheel --wheel-dir DIR -r requirements.txt
Then, to install from local only, you’ll be using —find-links and —no-index like so:
Unix/macOS
python -m pip install --no-index --find-links=DIR -r requirements.txt
Windows
py -m pip install --no-index --find-links=DIR -r requirements.txt
“Only if needed” Recursive Upgrade#
pip install --upgrade now has a --upgrade-strategy option which
controls how pip handles upgrading of dependencies. There are 2 upgrade
strategies supported:
-
eager: upgrades all dependencies regardless of whether they still satisfy
the new parent requirements -
only-if-needed: upgrades a dependency only if it does not satisfy the new
parent requirements
The default strategy is only-if-needed. This was changed in pip 10.0 due to
the breaking nature of eager when upgrading conflicting dependencies.
It is important to note that --upgrade affects direct requirements (e.g.
those specified on the command-line or via a requirements file) while
--upgrade-strategy affects indirect requirements (dependencies of direct
requirements).
As an example, say SomePackage has a dependency, SomeDependency, and
both of them are already installed but are not the latest available versions:
-
pip install SomePackage: will not upgrade the existingSomePackageor
SomeDependency. -
pip install --upgrade SomePackage: will upgradeSomePackage, but not
SomeDependency(unless a minimum requirement is not met). -
pip install --upgrade SomePackage --upgrade-strategy=eager: upgrades both
SomePackageandSomeDependency.
As an historic note, an earlier “fix” for getting the only-if-needed
behaviour was:
Unix/macOS
python -m pip install --upgrade --no-deps SomePackage
python -m pip install SomePackage
Windows
py -m pip install --upgrade --no-deps SomePackage
py -m pip install SomePackage
A proposal for an upgrade-all command is being considered as a safer
alternative to the behaviour of eager upgrading.
User Installs#
With Python 2.6 came the “user scheme” for installation,
which means that all Python distributions support an alternative install
location that is specific to a user. The default location for each OS is
explained in the python documentation for the site.USER_BASE variable.
This mode of installation can be turned on by specifying the —user option to pip install.
Moreover, the “user scheme” can be customized by setting the
PYTHONUSERBASE environment variable, which updates the value of
site.USER_BASE.
To install “SomePackage” into an environment with site.USER_BASE customized to
‘/myappenv’, do the following:
Unix/macOS
export PYTHONUSERBASE=/myappenv
python -m pip install --user SomePackage
Windows
set PYTHONUSERBASE=c:/myappenv
py -m pip install --user SomePackage
pip install --user follows four rules:
-
When globally installed packages are on the python path, and they conflict
with the installation requirements, they are ignored, and not
uninstalled. -
When globally installed packages are on the python path, and they satisfy
the installation requirements, pip does nothing, and reports that
requirement is satisfied (similar to how global packages can satisfy
requirements when installing packages in a--system-site-packages
virtualenv). -
pip will not perform a
--userinstall in a--no-site-packages
virtualenv (i.e. the default kind of virtualenv), due to the user site not
being on the python path. The installation would be pointless. -
In a
--system-site-packagesvirtualenv, pip will not install a package
that conflicts with a package in the virtualenv site-packages. The —user
installation would lack sys.path precedence and be pointless.
To make the rules clearer, here are some examples:
From within a --no-site-packages virtualenv (i.e. the default kind):
Unix/macOS
$ python -m pip install --user SomePackage
Can not perform a '--user' install. User site-packages are not visible in this virtualenv.
Windows
C:\> py -m pip install --user SomePackage
Can not perform a '--user' install. User site-packages are not visible in this virtualenv.
From within a --system-site-packages virtualenv where SomePackage==0.3
is already installed in the virtualenv:
Unix/macOS
$ python -m pip install --user SomePackage==0.4
Will not install to the user site because it will lack sys.path precedence
Windows
C:\> py -m pip install --user SomePackage==0.4
Will not install to the user site because it will lack sys.path precedence
From within a real python, where SomePackage is not installed globally:
Unix/macOS
$ python -m pip install --user SomePackage
[...]
Successfully installed SomePackage
Windows
C:\> py -m pip install --user SomePackage
[...]
Successfully installed SomePackage
From within a real python, where SomePackage is installed globally, but
is not the latest version:
Unix/macOS
$ python -m pip install --user SomePackage
[...]
Requirement already satisfied (use --upgrade to upgrade)
$ python -m pip install --user --upgrade SomePackage
[...]
Successfully installed SomePackage
Windows
C:\> py -m pip install --user SomePackage
[...]
Requirement already satisfied (use --upgrade to upgrade)
C:\> py -m pip install --user --upgrade SomePackage
[...]
Successfully installed SomePackage
From within a real python, where SomePackage is installed globally, and
is the latest version:
Unix/macOS
$ python -m pip install --user SomePackage
[...]
Requirement already satisfied (use --upgrade to upgrade)
$ python -m pip install --user --upgrade SomePackage
[...]
Requirement already up-to-date: SomePackage
# force the install
$ python -m pip install --user --ignore-installed SomePackage
[...]
Successfully installed SomePackage
Windows
C:\> py -m pip install --user SomePackage
[...]
Requirement already satisfied (use --upgrade to upgrade)
C:\> py -m pip install --user --upgrade SomePackage
[...]
Requirement already up-to-date: SomePackage
# force the install
C:\> py -m pip install --user --ignore-installed SomePackage
[...]
Successfully installed SomePackage
Ensuring Repeatability
This is now covered in Repeatable Installs.
Fixing conflicting dependencies
This is now covered in Dependency Resolution.
Using pip from your program#
As noted previously, pip is a command line program. While it is implemented in
Python, and so is available from your Python code via import pip, you must
not use pip’s internal APIs in this way. There are a number of reasons for this:
-
The pip code assumes that it is in sole control of the global state of the
program.
pip manages things like the logging system configuration, or the values of
the standard IO streams, without considering the possibility that user code
might be affected. -
pip’s code is not thread safe. If you were to run pip in a thread, there
is no guarantee that either your code or pip’s would work as you expect. -
pip assumes that once it has finished its work, the process will terminate.
It doesn’t need to handle the possibility that other code will continue to
run after that point, so (for example) calling pip twice in the same process
is likely to have issues.
This does not mean that the pip developers are opposed in principle to the idea
that pip could be used as a library — it’s just that this isn’t how it was
written, and it would be a lot of work to redesign the internals for use as a
library, handling all of the above issues, and designing a usable, robust and
stable API that we could guarantee would remain available across multiple
releases of pip. And we simply don’t currently have the resources to even
consider such a task.
What this means in practice is that everything inside of pip is considered an
implementation detail. Even the fact that the import name is pip is subject
to change without notice. While we do try not to break things as much as
possible, all the internal APIs can change at any time, for any reason. It also
means that we generally won’t fix issues that are a result of using pip in an
unsupported way.
It should also be noted that installing packages into sys.path in a running
Python process is something that should only be done with care. The import
system caches certain data, and installing new packages while a program is
running may not always behave as expected. In practice, there is rarely an
issue, but it is something to be aware of.
Having said all of the above, it is worth covering the options available if you
decide that you do want to run pip from within your program. The most reliable
approach, and the one that is fully supported, is to run pip in a subprocess.
This is easily done using the standard subprocess module:
subprocess.check_call([sys.executable, '-m', 'pip', 'install', 'my_package'])
If you want to process the output further, use one of the other APIs in the module.
We are using freeze here which outputs installed packages in requirements format.:
reqs = subprocess.check_output([sys.executable, '-m', 'pip', 'freeze'])
If you don’t want to use pip’s command line functionality, but are rather
trying to implement code that works with Python packages, their metadata, or
PyPI, then you should consider other, supported, packages that offer this type
of ability. Some examples that you could consider include:
-
packaging— Utilities to work with standard package metadata (versions,
requirements, etc.) -
setuptools(specificallypkg_resources) — Functions for querying what
packages the user has installed on their system. -
distlib— Packaging and distribution utilities (including functions for
interacting with PyPI).
Changes to the pip dependency resolver in 20.3 (2020)#
pip 20.3 has a new dependency resolver, on by default for Python 3
users. (pip 20.1 and 20.2 included pre-release versions of the new
dependency resolver, hidden behind optional user flags.) Read below
for a migration guide, how to invoke the legacy resolver, and the
deprecation timeline. We also made a two-minute video explanation
you can watch.
We will continue to improve the pip dependency resolver in response to
testers’ feedback. Please give us feedback through the resolver
testing survey.
Watch out for#
The big change in this release is to the pip dependency resolver
within pip.
Computers need to know the right order to install pieces of software
(“to install x, you need to install y first”). So, when Python
programmers share software as packages, they have to precisely describe
those installation prerequisites, and pip needs to navigate tricky
situations where it’s getting conflicting instructions. This new
dependency resolver will make pip better at handling that tricky
logic, and make pip easier for you to use and troubleshoot.
The most significant changes to the resolver are:
-
It will reduce inconsistency: it will no longer install a
combination of packages that is mutually inconsistent. In older
versions of pip, it is possible for pip to install a package which
does not satisfy the declared requirements of another installed
package. For example, in pip 20.0,pip install "six<1.12"does the wrong thing, “successfully” installing
"virtualenv==20.0.2"
six==1.11, even thoughvirtualenv==20.0.2requires
six>=1.12.0,<2(defined here).
The new resolver, instead, outright rejects installing anything if it
gets that input. -
It will be stricter — if you ask pip to install two packages with
incompatible requirements, it will refuse (rather than installing a
broken combination, like it did in previous versions).
So, if you have been using workarounds to force pip to deal with
incompatible or inconsistent requirements combinations, now’s a good
time to fix the underlying problem in the packages, because pip will
be stricter from here on out.
This also means that, when you run a pip install command, pip only
considers the packages you are installing in that command, and may
break already-installed packages. It will not guarantee that your
environment will be consistent all the time. If you pip install x
and then pip install y, it’s possible that the version of y
you get will be different than it would be if you had run pip in a single command. We are considering changing this
install x y
behavior (per #7744) and would like your thoughts on what
pip’s behavior should be; please answer our survey on upgrades that
create conflicts.
We are also changing our support for Constraints Files,
editable installs, and related functionality. We did a fairly
comprehensive overhaul and stripped constraints files down to being
purely a way to specify global (version) limits for packages, and so
some combinations that used to be allowed will now cause
errors. Specifically:
-
Constraints don’t override the existing requirements; they simply
constrain what versions are visible as input to the resolver (see
#9020) -
Providing an editable requirement (
-e .) does not cause pip to
ignore version specifiers or constraints (see #8076), and if
you have a conflict between a pinned requirement and a local
directory then pip will indicate that it cannot find a version
satisfying both (see #8307) -
Hash-checking mode requires that all requirements are specified as a
==match on a version and may not work well in combination with
constraints (see #9020 and #8792) -
If necessary to satisfy constraints, pip will happily reinstall
packages, upgrading or downgrading, without needing any additional
command-line options (see #8115 and Options that control the installation process) -
Unnamed requirements are not allowed as constraints (see #6628 and #8210)
-
Links are not allowed as constraints (see #8253)
-
Constraints cannot have extras (see #6628)
Per our Python 2 Support policy, pip 20.3 users who are using
Python 2 will use the legacy resolver by default. Python 2 users
should upgrade to Python 3 as soon as possible, since in pip 21.0 in
January 2021, pip dropped support for Python 2 altogether.
How to upgrade and migrate#
-
Install pip 20.3 with
python -m pip install --upgrade pip. -
Validate your current environment by running
pip check. This
will report if you have any inconsistencies in your set of installed
packages. Having a clean installation will make it much less likely
that you will hit issues with the new resolver (and may
address hidden problems in your current environment!). If you run
pip checkand run into stuff you can’t figure out, please ask
for help in our issue tracker or chat. -
Test the new version of pip.
While we have tried to make sure that pip’s test suite covers as
many cases as we can, we are very aware that there are people using
pip with many different workflows and build processes, and we will
not be able to cover all of those without your help.-
If you use pip to install your software, try out the new resolver
and let us know if it works for you withpip install. Try:-
installing several packages simultaneously
-
re-creating an environment using a
requirements.txtfile -
using
pip install --force-reinstallto check whether
it does what you think it should -
using constraints files
-
the “Setups to test with special attention” and “Examples to try” below
-
-
If you have a build pipeline that depends on pip installing your
dependencies for you, check that the new resolver does what you
need. -
Run your project’s CI (test suite, build process, etc.) using the
new resolver, and let us know of any issues. -
If you have encountered resolver issues with pip in the past,
check whether the new resolver fixes them, and read Dealing with dependency conflicts. Also, let us know if the new resolver
has issues with any workarounds you put in to address the
current resolver’s limitations. We’ll need to ensure that people
can transition off such workarounds smoothly. -
If you develop or support a tool that wraps pip or uses it to
deliver part of your functionality, please test your integration
with pip 20.3.
-
-
Troubleshoot and try these workarounds if necessary.
-
If pip is taking longer to install packages, read Dependency
resolution backtracking for ways to
reduce the time pip spends backtracking due to dependency conflicts. -
If you don’t want pip to actually resolve dependencies, use the
--no-depsoption. This is useful when you have a set of package
versions that work together in reality, even though their metadata says
that they conflict. For guidance on a long-term fix, read
Dealing with dependency conflicts. -
If you run into resolution errors and need a workaround while you’re
fixing their root causes, you can choose the old resolver behavior using
the flag--use-deprecated=legacy-resolver. This will work until we
release pip 21.0 (see
Deprecation timeline).
-
-
Please report bugs through the resolver testing survey.
Setups to test with special attention#
-
Requirements files with 100+ packages
-
Installation workflows that involve multiple requirements files
-
Requirements files that include hashes (Hash-checking Mode)
or pinned dependencies (perhaps as output frompip-compilewithin
pip-tools) -
Using Constraints Files
-
Continuous integration/continuous deployment setups
-
Installing from any kind of version control systems (i.e., Git, Subversion, Mercurial, or CVS), per VCS Support
-
Installing from source code held in local directories
Examples to try#
Install:
-
tensorflow
-
hacking -
pycodestyle -
pandas -
tablib -
elasticsearchandrequeststogether -
sixandcherrypytogether -
pip install flake8-import-order==0.17.1 flake8==3.5.0 --use-feature=2020-resolver -
pip install tornado==5.0 sprockets.http==1.5.0 --use-feature=2020-resolver
Try:
-
pip install -
pip uninstall -
pip check -
pip cache
Tell us about#
Specific things we’d love to get feedback on:
-
Cases where the new resolver produces the wrong result,
obviously. We hope there won’t be too many of these, but we’d like
to trap such bugs before we remove the legacy resolver. -
Cases where the resolver produced an error when you believe it
should have been able to work out what to do. -
Cases where the resolver gives an error because there’s a problem
with your requirements, but you need better information to work out
what’s wrong. -
If you have workarounds to address issues with the current resolver,
does the new resolver let you remove those workarounds? Tell us!
Please let us know through the resolver testing survey.
Deprecation timeline#
We plan for the resolver changeover to proceed as follows, using
Feature Flags and following our Release Cadence:
-
pip 20.1: an alpha version of the new resolver was available,
opt-in, using the optional flag
--unstable-feature=resolver. pip defaulted to legacy
behavior. -
pip 20.2: a beta of the new resolver was available, opt-in, using
the flag--use-feature=2020-resolver. pip defaulted to legacy
behavior. Users of pip 20.2 who want pip to default to using the
new resolver can runpip config set global.use-feature(for more on that and the alternate
2020-resolver
PIP_USE_FEATUREenvironment variable option, see issue
8661). -
pip 20.3: pip defaults to the new resolver in Python 3 environments,
but a user can opt-out and choose the old resolver behavior,
using the flag--use-deprecated=legacy-resolver. In Python 2
environments, pip defaults to the old resolver, and the new one is
available using the flag--use-feature=2020-resolver. -
pip 21.0: pip uses new resolver by default, and the old resolver is
no longer supported. It will be removed after a currently undecided
amount of time, as the removal is dependent on pip’s volunteer
maintainers’ availability. Python 2 support is removed per our
Python 2 Support policy.
Since this work will not change user-visible behavior described in the
pip documentation, this change is not covered by the Deprecation Policy.
Context and followup#
As discussed in our announcement on the PSF blog, the pip team are
in the process of developing a new “dependency resolver” (the part of
pip that works out what to install based on your requirements).
We’re tracking our rollout in #6536 and you can watch for
announcements on the low-traffic packaging announcements list and
the official Python blog.
Using system trust stores for verifying HTTPS
This is now covered in HTTPS Certificates.
Usage#
Unix/macOS
python -m pip install [options] <requirement specifier> [package-index-options] ...
python -m pip install [options] -r <requirements file> [package-index-options] ...
python -m pip install [options] [-e] <vcs project url> ...
python -m pip install [options] [-e] <local project path> ...
python -m pip install [options] <archive url/path> ...
Windows
py -m pip install [options] <requirement specifier> [package-index-options] ...
py -m pip install [options] -r <requirements file> [package-index-options] ...
py -m pip install [options] [-e] <vcs project url> ...
py -m pip install [options] [-e] <local project path> ...
py -m pip install [options] <archive url/path> ...
Description#
Install packages from:
-
PyPI (and other indexes) using requirement specifiers.
-
VCS project urls.
-
Local project directories.
-
Local or remote source archives.
pip also supports installing from “requirements files”, which provide
an easy way to specify a whole environment to be installed.
Overview#
pip install has several stages:
-
Identify the base requirements. The user supplied arguments are processed
here. -
Resolve dependencies. What will be installed is determined here.
-
Build wheels. All the dependencies that can be are built into wheels.
-
Install the packages (and uninstall anything being upgraded/replaced).
Note that pip install prefers to leave the installed version as-is
unless --upgrade is specified.
Argument Handling#
When looking at the items to be installed, pip checks what type of item
each is, in the following order:
-
Project or archive URL.
-
Local directory (which must contain a
setup.py, or pip will report
an error). -
Local file (a sdist or wheel format archive, following the naming
conventions for those formats). -
A requirement, as specified in PEP 440.
Each item identified is added to the set of requirements to be satisfied by
the install.
Working Out the Name and Version#
For each candidate item, pip needs to know the project name and version. For
wheels (identified by the .whl file extension) this can be obtained from
the filename, as per the Wheel spec. For local directories, or explicitly
specified sdist files, the setup.py egg_info command is used to determine
the project metadata. For sdists located via an index, the filename is parsed
for the name and project version (this is in theory slightly less reliable
than using the egg_info command, but avoids downloading and processing
unnecessary numbers of files).
Any URL may use the #egg=name syntax (see VCS Support) to
explicitly state the project name.
Satisfying Requirements#
Once pip has the set of requirements to satisfy, it chooses which version of
each requirement to install using the simple rule that the latest version that
satisfies the given constraints will be installed (but see here
for an exception regarding pre-release versions). Where more than one source of
the chosen version is available, it is assumed that any source is acceptable
(as otherwise the versions would differ).
Obtaining information about what was installed#
The install command has a --report option that will generate a JSON report of what
pip has installed. In combination with the --dry-run and --ignore-installed it
can be used to resolve a set of requirements without actually installing them.
The report can be written to a file, or to standard output (using --report - in
combination with --quiet).
The format of the JSON report is described in Installation Report.
Installation Order#
Note
This section is only about installation order of runtime dependencies, and
does not apply to build dependencies (those are specified using PEP 518).
As of v6.1.0, pip installs dependencies before their dependents, i.e. in
“topological order.” This is the only commitment pip currently makes related
to order. While it may be coincidentally true that pip will install things in
the order of the install arguments or in the order of the items in a
requirements file, this is not a promise.
In the event of a dependency cycle (aka “circular dependency”), the current
implementation (which might possibly change later) has it such that the first
encountered member of the cycle is installed last.
For instance, if quux depends on foo which depends on bar which depends on baz,
which depends on foo:
Unix/macOS
$ python -m pip install quux
...
Installing collected packages baz, bar, foo, quux

$ python -m pip install bar
...
Installing collected packages foo, baz, bar
Windows
C:\> py -m pip install quux
...
Installing collected packages baz, bar, foo, quux

C:\> py -m pip install bar
...
Installing collected packages foo, baz, bar
Prior to v6.1.0, pip made no commitments about install order.
The decision to install topologically is based on the principle that
installations should proceed in a way that leaves the environment usable at each
step. This has two main practical benefits:
-
Concurrent use of the environment during the install is more likely to work.
-
A failed install is less likely to leave a broken environment. Although pip
would like to support failure rollbacks eventually, in the mean time, this is
an improvement.
Although the new install order is not intended to replace (and does not replace)
the use of setup_requires to declare build dependencies, it may help certain
projects install from sdist (that might previously fail) that fit the following
profile:
-
They have build dependencies that are also declared as install dependencies
usinginstall_requires. -
python setup.py egg_infoworks without their build dependencies being
installed. -
For whatever reason, they don’t or won’t declare their build dependencies using
setup_requires.
Requirements File Format
This section has been moved to Requirements File Format.
Requirement Specifiers
This section has been moved to Requirement Specifiers.
Per-requirement Overrides
This is now covered in Requirements File Format.
Pre-release Versions#
Starting with v1.4, pip will only install stable versions as specified by
pre-releases by default. If a version cannot be parsed as a compliant PEP 440
version then it is assumed to be a pre-release.
If a Requirement specifier includes a pre-release or development version
(e.g. >=0.0.dev0) then pip will allow pre-release and development versions
for that requirement. This does not include the != flag.
The pip install command also supports a —pre flag
that enables installation of pre-releases and development releases.
VCS Support
This is now covered in VCS Support.
Finding Packages#
pip searches for packages on PyPI using the
HTTP simple interface,
which is documented here
and there.
pip offers a number of package index options for modifying how packages are
found.
pip looks for packages in a number of places: on PyPI (if not disabled via
--no-index), in the local filesystem, and in any additional repositories
specified via --find-links or --index-url. There is no ordering in
the locations that are searched. Rather they are all checked, and the “best”
match for the requirements (in terms of version number — see PEP 440 for
details) is selected.
See the pip install Examples.
SSL Certificate Verification
This is now covered in HTTPS Certificates.
Caching
This is now covered in Caching.
Wheel Cache
This is now covered in Caching.
Hash checking mode
This is now covered in Secure installs.
Local Project Installs
This is now covered in Local project installs.
Editable installs
This is now covered in Local project installs.
Build System Interface
This is now covered in Build System Interface.
Options#
- -r, —requirement <file>#
-
Install from the given requirements file. This option can be used multiple times.
- -c, —constraint <file>#
-
Constrain versions using the given constraints file. This option can be used multiple times.
- —no-deps#
-
Don’t install package dependencies.
- —pre#
-
Include pre-release and development versions. By default, pip only finds stable versions.
- -e, —editable <path/url>#
-
Install a project in editable mode (i.e. setuptools “develop mode”) from a local project path or a VCS url.
- —dry-run#
-
Don’t actually install anything, just print what would be. Can be used in combination with —ignore-installed to ‘resolve’ the requirements.
- -t, —target <dir>#
-
Install packages into <dir>. By default this will not replace existing files/folders in <dir>. Use —upgrade to replace existing packages in <dir> with new versions.
- —platform <platform>#
-
Only use wheels compatible with <platform>. Defaults to the platform of the running system. Use this option multiple times to specify multiple platforms supported by the target interpreter.
- —python-version <python_version>#
-
The Python interpreter version to use for wheel and “Requires-Python”
compatibility checks. Defaults to a version derived from the running
interpreter. The version can be specified using up to three dot-separated
integers (e.g. “3” for 3.0.0, “3.7” for 3.7.0, or “3.7.3”). A major-minor
version can also be given as a string without dots (e.g. “37” for 3.7.0).
- —implementation <implementation>#
-
Only use wheels compatible with Python implementation <implementation>, e.g. ‘pp’, ‘jy’, ‘cp’, or ‘ip’. If not specified, then the current interpreter implementation is used. Use ‘py’ to force implementation-agnostic wheels.
- —abi <abi>#
-
Only use wheels compatible with Python abi <abi>, e.g. ‘pypy_41’. If not specified, then the current interpreter abi tag is used. Use this option multiple times to specify multiple abis supported by the target interpreter. Generally you will need to specify —implementation, —platform, and —python-version when using this option.
- —user#
-
Install to the Python user install directory for your platform. Typically ~/.local/, or %APPDATA%Python on Windows. (See the Python documentation for site.USER_BASE for full details.)
- —root <dir>#
-
Install everything relative to this alternate root directory.
- —prefix <dir>#
-
Installation prefix where lib, bin and other top-level folders are placed. Note that the resulting installation may contain scripts and other resources which reference the Python interpreter of pip, and not that of
--prefix. See also the--pythonoption if the intention is to install packages into another (possibly pip-free) environment.
- —src <dir>#
-
Directory to check out editable projects into. The default in a virtualenv is “<venv path>/src”. The default for global installs is “<current dir>/src”.
- -U, —upgrade#
-
Upgrade all specified packages to the newest available version. The handling of dependencies depends on the upgrade-strategy used.
- —upgrade-strategy <upgrade_strategy>#
-
Determines how dependency upgrading should be handled [default: only-if-needed]. “eager” — dependencies are upgraded regardless of whether the currently installed version satisfies the requirements of the upgraded package(s). “only-if-needed” — are upgraded only when they do not satisfy the requirements of the upgraded package(s).
- —force-reinstall#
-
Reinstall all packages even if they are already up-to-date.
- -I, —ignore-installed#
-
Ignore the installed packages, overwriting them. This can break your system if the existing package is of a different version or was installed with a different package manager!
- —ignore-requires-python#
-
Ignore the Requires-Python information.
- —no-build-isolation#
-
Disable isolation when building a modern source distribution. Build dependencies specified by PEP 518 must be already installed if this option is used.
- —use-pep517#
-
Use PEP 517 for building source distributions (use —no-use-pep517 to force legacy behaviour).
- —check-build-dependencies#
-
Check the build dependencies when PEP517 is used.
- —break-system-packages#
-
Allow pip to modify an EXTERNALLY-MANAGED Python installation
- -C, —config-settings <settings>#
-
Configuration settings to be passed to the PEP 517 build backend. Settings take the form KEY=VALUE. Use multiple —config-settings options to pass multiple keys to the backend.
- —global-option <options>#
-
Extra global options to be supplied to the setup.py call before the install or bdist_wheel command.
- —compile#
-
Compile Python source files to bytecode
- —no-compile#
-
Do not compile Python source files to bytecode
- —no-warn-script-location#
-
Do not warn when installing scripts outside PATH
- —no-warn-conflicts#
-
Do not warn about broken dependencies
- —no-binary <format_control>#
-
Do not use binary packages. Can be supplied multiple times, and each time adds to the existing value. Accepts either “:all:” to disable all binary packages, “:none:” to empty the set (notice the colons), or one or more package names with commas between them (no colons). Note that some packages are tricky to compile and may fail to install when this option is used on them.
- —only-binary <format_control>#
-
Do not use source packages. Can be supplied multiple times, and each time adds to the existing value. Accepts either “:all:” to disable all source packages, “:none:” to empty the set, or one or more package names with commas between them. Packages without binary distributions will fail to install when this option is used on them.
- —prefer-binary#
-
Prefer older binary packages over newer source packages.
- —require-hashes#
-
Require a hash to check each requirement against, for repeatable installs. This option is implied when any package in a requirements file has a —hash option.
- —progress-bar <progress_bar>#
-
Specify whether the progress bar should be used [on, off] (default: on)
- —root-user-action <root_user_action>#
-
Action if pip is run as a root user. By default, a warning message is shown.
- —report <file>#
-
Generate a JSON file describing what pip did to install the provided requirements. Can be used in combination with —dry-run and —ignore-installed to ‘resolve’ the requirements. When — is used as file name it writes to stdout. When writing to stdout, please combine with the —quiet option to avoid mixing pip logging output with JSON output.
- —no-clean#
-
Don’t clean up build directories.
- -i, —index-url <url>#
-
Base URL of the Python Package Index (default https://pypi.org/simple). This should point to a repository compliant with PEP 503 (the simple repository API) or a local directory laid out in the same format.
-
Extra URLs of package indexes to use in addition to —index-url. Should follow the same rules as —index-url.
- —no-index#
-
Ignore package index (only looking at —find-links URLs instead).
- -f, —find-links <url>#
-
If a URL or path to an html file, then parse for links to archives such as sdist (.tar.gz) or wheel (.whl) files. If a local path or file:// URL that’s a directory, then look for archives in the directory listing. Links to VCS project URLs are not supported.
Examples#
-
Install
SomePackageand its dependencies from PyPI using Requirement SpecifiersUnix/macOS
python -m pip install SomePackage            # latest version
python -m pip install 'SomePackage==1.0.4'   # specific version
python -m pip install 'SomePackage>=1.0.4'   # minimum version
Windows
py -m pip install SomePackage            # latest version
py -m pip install "SomePackage==1.0.4"   # specific version
py -m pip install "SomePackage>=1.0.4"   # minimum version
-
Install a list of requirements specified in a file. See the Requirements files.
Unix/macOS
python -m pip install -r requirements.txt
Windows
py -m pip install -r requirements.txt
-
Upgrade an already installed
SomePackageto the latest from PyPI.Unix/macOS
python -m pip install --upgrade SomePackage
Windows
py -m pip install --upgrade SomePackage
Note
This will guarantee an update to
SomePackageas it is a direct
requirement, and possibly upgrade dependencies if their installed
versions do not meet the minimum requirements ofSomePackage.
Any non-requisite updates of its dependencies (indirect requirements)
will be affected by the--upgrade-strategycommand. -
Install a local project in “editable” mode. See the section on Editable Installs.
Unix/macOS
python -m pip install -e .                # project in current directory
python -m pip install -e path/to/project  # project in another directory
Windows
py -m pip install -e .                 # project in current directory
py -m pip install -e path/to/project   # project in another directory
-
Install a project from VCS
Unix/macOS
python -m pip install 'SomeProject@git+https://git.repo/some_pkg.git@1.3.1'
Windows
py -m pip install "SomeProject@git+https://git.repo/some_pkg.git@1.3.1"
-
Install a project from VCS in “editable” mode. See the sections on VCS Support and Editable Installs.
Unix/macOS
python -m pip install -e 'git+https://git.repo/some_pkg.git#egg=SomePackage'          # from git
python -m pip install -e 'hg+https://hg.repo/some_pkg.git#egg=SomePackage'            # from mercurial
python -m pip install -e 'svn+svn://svn.repo/some_pkg/trunk/#egg=SomePackage'         # from svn
python -m pip install -e 'git+https://git.repo/some_pkg.git@feature#egg=SomePackage'  # from 'feature' branch
python -m pip install -e 'git+https://git.repo/some_repo.git#egg=subdir&subdirectory=subdir_path' # install a python package from a repo subdirectory
Windows
py -m pip install -e "git+https://git.repo/some_pkg.git#egg=SomePackage"          # from git
py -m pip install -e "hg+https://hg.repo/some_pkg.git#egg=SomePackage"            # from mercurial
py -m pip install -e "svn+svn://svn.repo/some_pkg/trunk/#egg=SomePackage"         # from svn
py -m pip install -e "git+https://git.repo/some_pkg.git@feature#egg=SomePackage"  # from 'feature' branch
py -m pip install -e "git+https://git.repo/some_repo.git#egg=subdir&subdirectory=subdir_path" # install a python package from a repo subdirectory
-
Install a package with extras.
Unix/macOS
python -m pip install 'SomePackage[PDF]'
python -m pip install 'SomePackage[PDF] @ git+https://git.repo/SomePackage@main#subdirectory=subdir_path'
python -m pip install '.[PDF]'  # project in current directory
python -m pip install 'SomePackage[PDF]==3.0'
python -m pip install 'SomePackage[PDF,EPUB]'  # multiple extras
Windows
py -m pip install "SomePackage[PDF]"
py -m pip install "SomePackage[PDF] @ git+https://git.repo/SomePackage@main#subdirectory=subdir_path"
py -m pip install ".[PDF]"  # project in current directory
py -m pip install "SomePackage[PDF]==3.0"
py -m pip install "SomePackage[PDF,EPUB]"  # multiple extras
-
Install a particular source archive file.
Unix/macOS
python -m pip install './downloads/SomePackage-1.0.4.tar.gz'
python -m pip install 'http://my.package.repo/SomePackage-1.0.4.zip'
Windows
py -m pip install "./downloads/SomePackage-1.0.4.tar.gz"
py -m pip install "http://my.package.repo/SomePackage-1.0.4.zip"
-
Install a particular source archive file following PEP 440 direct references.
Unix/macOS
python -m pip install 'SomeProject@http://my.package.repo/SomeProject-1.2.3-py33-none-any.whl'
python -m pip install 'SomeProject @ http://my.package.repo/SomeProject-1.2.3-py33-none-any.whl'
python -m pip install 'SomeProject@http://my.package.repo/1.2.3.tar.gz'
Windows
py -m pip install "SomeProject@http://my.package.repo/SomeProject-1.2.3-py33-none-any.whl"
py -m pip install "SomeProject @ http://my.package.repo/SomeProject-1.2.3-py33-none-any.whl"
py -m pip install "SomeProject@http://my.package.repo/1.2.3.tar.gz"
-
Install from alternative package repositories.
Install from a different index, and not PyPI
Unix/macOS
python -m pip install --index-url http://my.package.repo/simple/ SomePackage
Windows
py -m pip install --index-url http://my.package.repo/simple/ SomePackage
Install from a local flat directory containing archives (and don’t scan indexes):
Unix/macOS
python -m pip install --no-index --find-links=file:///local/dir/ SomePackage
python -m pip install --no-index --find-links=/local/dir/ SomePackage
python -m pip install --no-index --find-links=relative/dir/ SomePackage
Windows
py -m pip install --no-index --find-links=file:///local/dir/ SomePackage
py -m pip install --no-index --find-links=/local/dir/ SomePackage
py -m pip install --no-index --find-links=relative/dir/ SomePackage
Search an additional index during install, in addition to PyPI
Warning
Using this option to search for packages which are not in the main
repository (such as private packages) is unsafe, per a security
vulnerability called
dependency confusion:
an attacker can claim the package on the public repository in a way that
will ensure it gets chosen over the private package.Unix/macOS
python -m pip install --extra-index-url http://my.package.repo/simple SomePackage
Windows
py -m pip install --extra-index-url http://my.package.repo/simple SomePackage
-
Find pre-release and development versions, in addition to stable versions. By default, pip only finds stable versions.
Unix/macOS
python -m pip install --pre SomePackage
Windows
py -m pip install --pre SomePackage
-
Install packages from source.
Do not use any binary packages
Unix/macOS
python -m pip install SomePackage1 SomePackage2 --no-binary :all:
Windows
py -m pip install SomePackage1 SomePackage2 --no-binary :all:
Specify
SomePackage1to be installed from source:Unix/macOS
python -m pip install SomePackage1 SomePackage2 --no-binary SomePackage1
Windows
py -m pip install SomePackage1 SomePackage2 --no-binary SomePackage1
This guide discusses how to install packages using pip and
a virtual environment manager: either venv for Python 3 or virtualenv
for Python 2. These are the lowest-level tools for managing Python
packages and are recommended if higher-level tools do not suit your needs.
Note
This doc uses the term package to refer to a
Distribution Package which is different from an Import
Package that which is used to import modules in your Python source code.
Installing pip
pip is the reference Python package manager. It’s used to install and
update packages. You’ll need to make sure you have the latest version of pip
installed.
Unix/macOS
Debian and most other distributions include a python-pip package; if you
want to use the Linux distribution-provided versions of pip, see
Installing pip/setuptools/wheel with Linux Package Managers.
You can also install pip yourself to ensure you have the latest version. It’s
recommended to use the system pip to bootstrap a user installation of pip:
python3 -m pip install --user --upgrade pip
python3 -m pip --version
Afterwards, you should have the latest version of pip installed in your
user site:
pip 21.1.3 from $HOME/.local/lib/python3.9/site-packages (python 3.9)
Windows
The Python installers for Windows include pip. You can make sure that pip is
up-to-date by running:
py -m pip install --upgrade pip
py -m pip --version
Afterwards, you should have the latest version of pip:
pip 21.1.3 from c:\python39\lib\site-packages (Python 3.9.4)
Installing virtualenv
Note
If you are using Python 3.3 or newer, the venv module is
the preferred way to create and manage virtual environments.
venv is included in the Python standard library and requires no additional installation.
If you are using venv, you may skip this section.
virtualenv is used to manage Python packages for different projects.
Using virtualenv allows you to avoid installing Python packages globally
which could break system tools or other projects. You can install virtualenv
using pip.
Unix/macOS
python3 -m pip install --user virtualenv
Windows
py -m pip install --user virtualenv
Creating a virtual environment
venv (for Python 3) and virtualenv (for Python 2) allow
you to manage separate package installations for
different projects. They essentially allow you to create a “virtual” isolated
Python installation and install packages into that virtual installation. When
you switch projects, you can simply create a new virtual environment and not
have to worry about breaking the packages installed in the other environments.
It is always recommended to use a virtual environment while developing Python
applications.
To create a virtual environment, go to your project’s directory and run
venv. If you are using Python 2, replace venv with virtualenv
in the below commands.
The second argument is the location to create the virtual environment. Generally, you
can just create this in your project and call it env.
venv will create a virtual Python installation in the env folder.
Note
You should exclude your virtual environment directory from your version
control system using .gitignore or similar.
Activating a virtual environment
Before you can start installing or using packages in your virtual environment you’ll
need to activate it. Activating a virtual environment will put the
virtual environment-specific
python and pip executables into your shell’s PATH.
You can confirm you’re in the virtual environment by checking the location of your
Python interpreter:
It should be in the env directory:
Unix/macOS
Windows
...\env\Scripts\python.exe
As long as your virtual environment is activated pip will install packages into that
specific environment and you’ll be able to import and use packages in your
Python application.
Leaving the virtual environment
If you want to switch projects or otherwise leave your virtual environment, simply run:
If you want to re-enter the virtual environment just follow the same instructions above
about activating a virtual environment. There’s no need to re-create the virtual environment.
Installing packages
Now that you’re in your virtual environment you can install packages. Let’s install the
Requests library from the Python Package Index (PyPI):
Unix/macOS
python3 -m pip install requests
Windows
py -m pip install requests
pip should download requests and all of its dependencies and install them:
Collecting requests
  Using cached requests-2.18.4-py2.py3-none-any.whl
Collecting chardet<3.1.0,>=3.0.2 (from requests)
  Using cached chardet-3.0.4-py2.py3-none-any.whl
Collecting urllib3<1.23,>=1.21.1 (from requests)
  Using cached urllib3-1.22-py2.py3-none-any.whl
Collecting certifi>=2017.4.17 (from requests)
  Using cached certifi-2017.7.27.1-py2.py3-none-any.whl
Collecting idna<2.7,>=2.5 (from requests)
  Using cached idna-2.6-py2.py3-none-any.whl
Installing collected packages: chardet, urllib3, certifi, idna, requests
Successfully installed certifi-2017.7.27.1 chardet-3.0.4 idna-2.6 requests-2.18.4 urllib3-1.22
Installing specific versions
pip allows you to specify which version of a package to install using
version specifiers. For example, to install
a specific version of requests:
Unix/macOS
python3 -m pip install 'requests==2.18.4'
Windows
py -m pip install "requests==2.18.4"
To install the latest 2.x release of requests:
Unix/macOS
python3 -m pip install 'requests>=2.0.0,<3.0.0'
Windows
py -m pip install "requests>=2.0.0,<3.0.0"
To install pre-release versions of packages, use the --pre flag:
Unix/macOS
python3 -m pip install --pre requests
Windows
py -m pip install --pre requests
Installing from source
pip can install a package directly from source, for example:
Unix/macOS
cd google-auth
python3 -m pip install .
Windows
cd google-auth
py -m pip install .
Additionally, pip can install packages from source in
development mode,
meaning that changes to the source directory will immediately affect the
installed package without needing to re-install:
Unix/macOS
python3 -m pip install --editable .
Windows
py -m pip install --editable .
Installing from version control systems
pip can install packages directly from their version control system. For
example, you can install directly from a git repository:
google-auth @ git+https://github.com/GoogleCloudPlatform/google-auth-library-python.git
For more information on supported version control systems and syntax, see pip’s
documentation on VCS Support.
Installing from local archives
If you have a local copy of a Distribution Package’s archive (a zip,
wheel, or tar file) you can install it directly with pip:
Unix/macOS
python3 -m pip install requests-2.18.4.tar.gz
Windows
py -m pip install requests-2.18.4.tar.gz
If you have a directory containing archives of multiple packages, you can tell
pip to look for packages there and not to use the
Python Package Index (PyPI) at all:
Unix/macOS
python3 -m pip install --no-index --find-links=/local/dir/ requests
Windows
py -m pip install --no-index --find-links=/local/dir/ requests
This is useful if you are installing packages on a system with limited
connectivity or if you want to strictly control the origin of distribution
packages.
Using other package indexes
If you want to download packages from a different index than the
Python Package Index (PyPI), you can use the --index-url flag:
Unix/macOS
python3 -m pip install --index-url http://index.example.com/simple/ SomeProject
Windows
py -m pip install --index-url http://index.example.com/simple/ SomeProject
If you want to allow packages from both the Python Package Index (PyPI)
and a separate index, you can use the --extra-index-url flag instead:
Unix/macOS
python3 -m pip install --extra-index-url http://index.example.com/simple/ SomeProject
Windows
py -m pip install --extra-index-url http://index.example.com/simple/ SomeProject
Upgrading packages
pip can upgrade packages in-place using the --upgrade flag. For example, to
install the latest version of requests and all of its dependencies:
Unix/macOS
python3 -m pip install --upgrade requests
Windows
py -m pip install --upgrade requests
Using requirements files
Instead of installing packages individually, pip allows you to declare all
dependencies in a Requirements File. For
example you could create a requirements.txt file containing:
requests==2.18.4
google-auth==1.1.0
And tell pip to install all of the packages in this file using the -r flag:
Unix/macOS
python3 -m pip install -r requirements.txt
Windows
py -m pip install -r requirements.txt
Freezing dependencies
Pip can export a list of all installed packages and their versions using the
freeze command:
Which will output a list of package specifiers such as:
cachetools==2.0.1
certifi==2017.7.27.1
chardet==3.0.4
google-auth==1.1.1
idna==2.6
pyasn1==0.3.6
pyasn1-modules==0.1.4
requests==2.18.4
rsa==3.4.2
six==1.11.0
urllib3==1.22
This is useful for creating Requirements Files that can re-create
the exact versions of all packages installed in an environment.
I work with a lot of systems that have been mucked by developers «following directions they found on the Internet». It is extremely common that your pip and your python are not looking at the same paths/site-packages. For this reason, when I encounter oddness I start by doing this:
$ python -c 'import sys; print(sys.path)'
['', '/usr/lib/python2.7', '/usr/lib/python2.7/plat-x86_64-linux-gnu',
'/usr/lib/python2.7/lib-tk', '/usr/lib/python2.7/lib-old',
'/usr/lib/python2.7/lib-dynload', '/usr/local/lib/python2.7/dist-packages',
'/usr/lib/python2.7/dist-packages']

$ pip --version
pip 9.0.1 from /usr/local/lib/python2.7/dist-packages (python 2.7)
That is a happy system.
Below is an unhappy system. (Or at least it’s a blissfully ignorant system that causes others to be unhappy.)
$ pip --version
pip 9.0.1 from /usr/local/lib/python3.6/site-packages (python 3.6)

$ python -c 'import sys; print(sys.path)'
['', '/usr/local/Cellar/python/2.7.13/Frameworks/Python.framework/Versions/2.7/lib/python27.zip',
'/usr/local/Cellar/python/2.7.13/Frameworks/Python.framework/Versions/2.7/lib/python2.7',
'/usr/local/Cellar/python/2.7.13/Frameworks/Python.framework/Versions/2.7/lib/python2.7/plat-darwin',
'/usr/local/Cellar/python/2.7.13/Frameworks/Python.framework/Versions/2.7/lib/python2.7/plat-mac',
'/usr/local/Cellar/python/2.7.13/Frameworks/Python.framework/Versions/2.7/lib/python2.7/plat-mac/lib-scriptpackages',
'/usr/local/Cellar/python/2.7.13/Frameworks/Python.framework/Versions/2.7/lib/python2.7/lib-tk',
'/usr/local/Cellar/python/2.7.13/Frameworks/Python.framework/Versions/2.7/lib/python2.7/lib-old',
'/usr/local/Cellar/python/2.7.13/Frameworks/Python.framework/Versions/2.7/lib/python2.7/lib-dynload',
'/usr/local/lib/python2.7/site-packages']

$ which pip pip2 pip3
/usr/local/bin/pip
/usr/local/bin/pip3
It is unhappy because pip is (python3.6 and) using /usr/local/lib/python3.6/site-packages while python is (python2.7 and) using /usr/local/lib/python2.7/site-packages
When I want to make sure I’m installing requirements to the right python, I do this:
$ which -a python python2 python3
/usr/local/bin/python
/usr/bin/python
/usr/local/bin/python2
/usr/local/bin/python3

$ /usr/bin/python -m pip install -r requirements.txt
You’ve heard, «If it ain’t broke, don’t try to fix it.» The DevOps version of that is, «If you didn’t break it and you can work around it, don’t try to fix it.»

There are many Python packages we use to solve our coding problems daily. Take, for instance, the library «Beautiful Soup,» – it doesn’t come with Python by default and needs to be installed separately.
Many projects rely on libraries and other dependencies, and installing each one can be tedious and time-consuming.
This is where a ‘requirements.txt’ file comes into play. requirements.txt is a file that contains a list of packages or libraries needed to work on a project that can all be installed with the file. It provides a consistent environment and makes collaboration easier.
Format of a requirements.txt File

The above image shows a sample of a created requirements.txt file, containing a list of packages and versions of the installation.
Key Terms
I’ve mentioned a few terms so far that you may not know. Here’s what they mean, along with some other important terms you’ll come across when working with requirements.txt:
- Dependencies are software components that a program needs to run correctly. They can be libraries, frameworks, or other programs.
- Packages are a way to group together related dependencies. They make it easier to install and manage dependencies.
- Virtual Environments is a directory that contains a copy of the Python interpreter and all of the packages that are required for a particular project.
- Pip: This is a package manager for Python. You can use Pip to install, uninstall, and manage Python packages.
To create a requirements file, you must set up your virtual environment. If you use Pycharm, there’s a virtual environment already setup (.venv). But with Visual Studio code, you have to create the virtual environment yourself.
You can use your terminal or command prompt to create your requirements file. These are the steps to follow when creating the file:
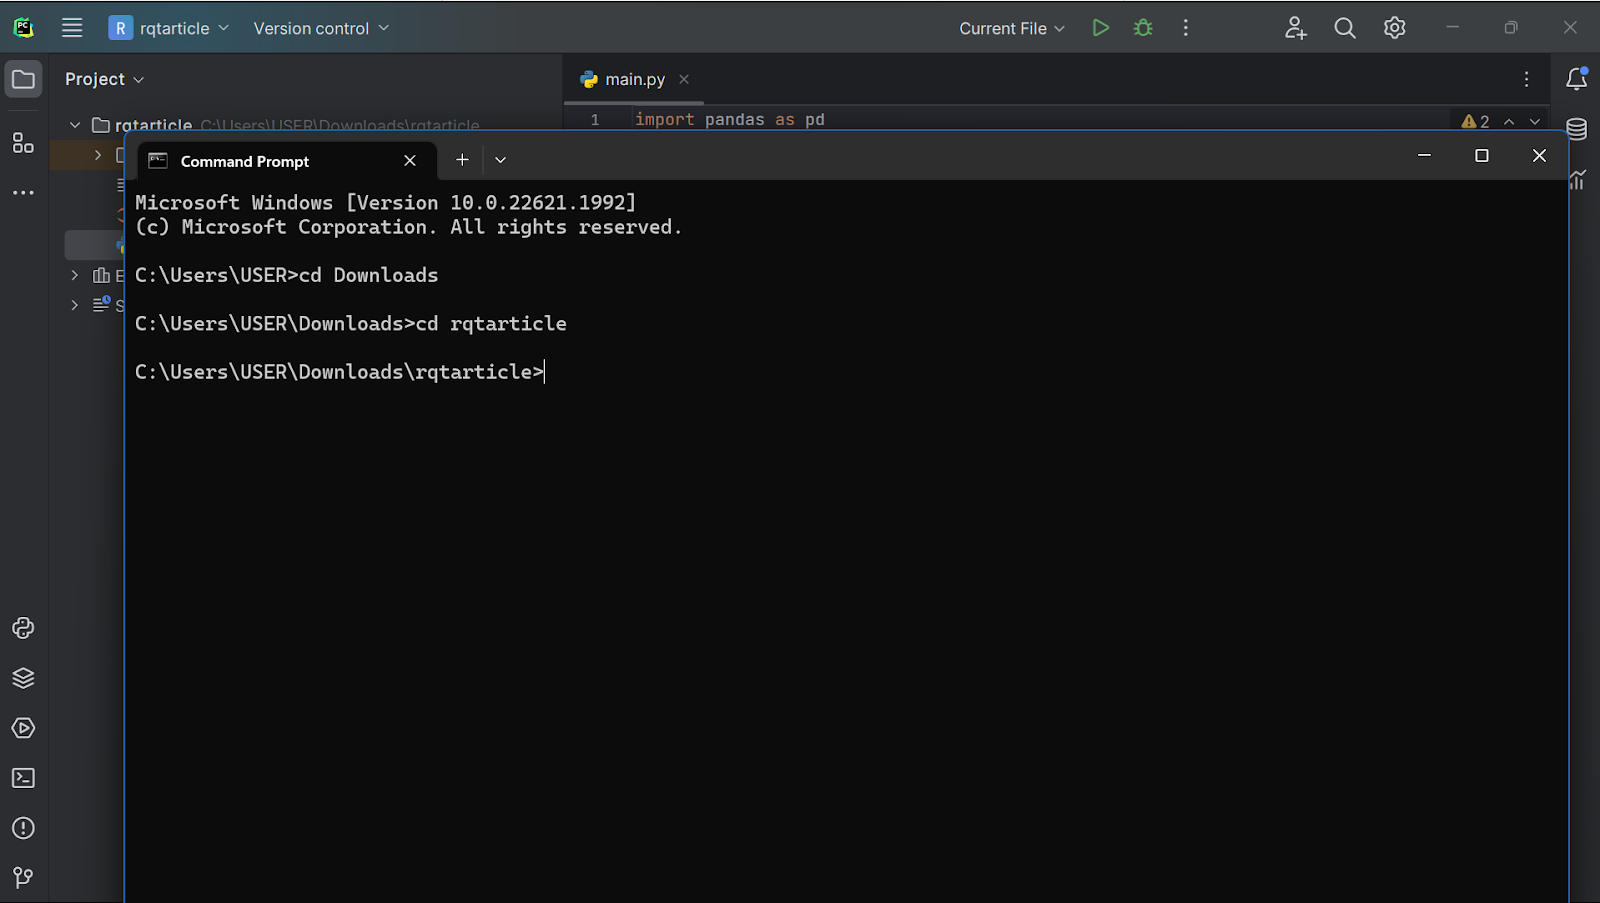
First, open your terminal or command prompt. Then check to see if the file path shown is your working directory. Use the following command to do that:
$ cd folder-name #cd - change directory
In the command above, replace ‘folder-name’ with the directory name you want to access.
Next, run this command:
$ pip freeze > requirements.txt
And you’ll see that the requirements file gets added
Here’s the output:
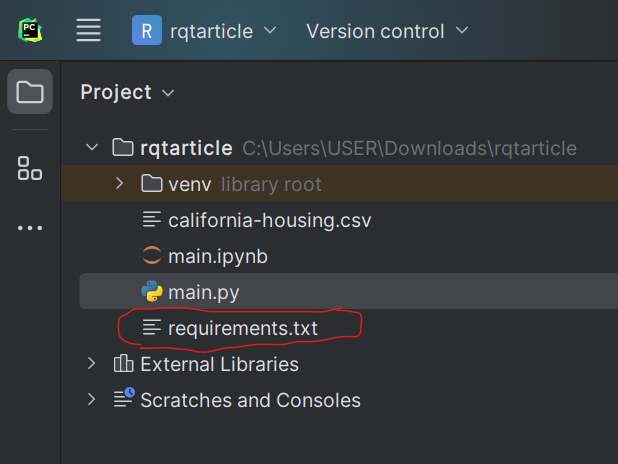
And here’s your newly created requirements.txt file:

The image above shows the dependencies you can work with along with their versions.
How to Work with a requirements.txt File
Now that we have the requirements file, you can see that it consists of a long list of different packages.
To work with the packages, you have to install them. You can do this by using the command prompt or terminal.
Type this command:
pip install -r requirements.txt
It will look like this:

Now that all the dependencies are installed, you can work with requirements.txt.
Example of using requirements.txt
In this example, we will be working with two libraries, beautifulsoup4 and requests, to return some information from a site.
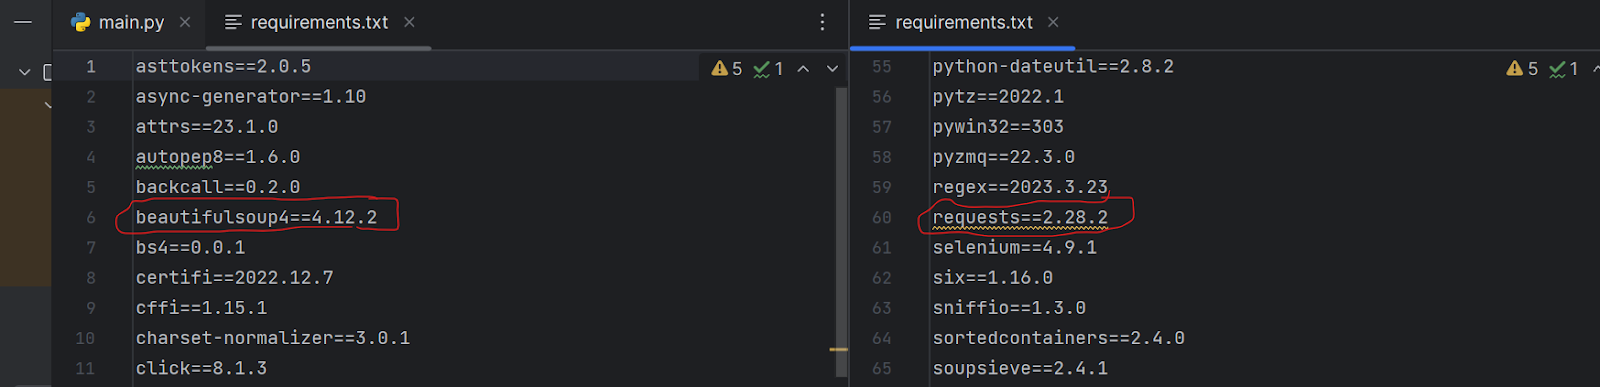
In the image above, we see that the two libraries are present in the requirements.txt file and their version. Now we can work with the libraries because we installed them previously.
- Import the library BeautifulSoup from the package name bs4 (beautifulsoup4) and also import the library requests.
from bs4 import BeautifulSoup
import requests
- To fetch information from the website URL, we use the
.get()method to tap into the requests library.
web_data = requests.get("https://www.lithuania.travel/en/category/what-is-lithuania", headers={"User-Agent": "Mozilla/5.0 (Windows NT 10.0; Win64; x64) AppleWebKit/537.36 (KHTML, like Gecko) Chrome/112.0.0.0 Safari/537.36"})
- Now that we have access to the the URL, the Beautiful Soup library accepts the
web_dataand returns all HTML contents present in it.
soup = BeautifulSoup(web_data.content, features="html.parser")
- The final result I chose to return is elements with the <p> tag in the first position [0].
news_info = soup.findAll("p")[0]
print(news_info.text
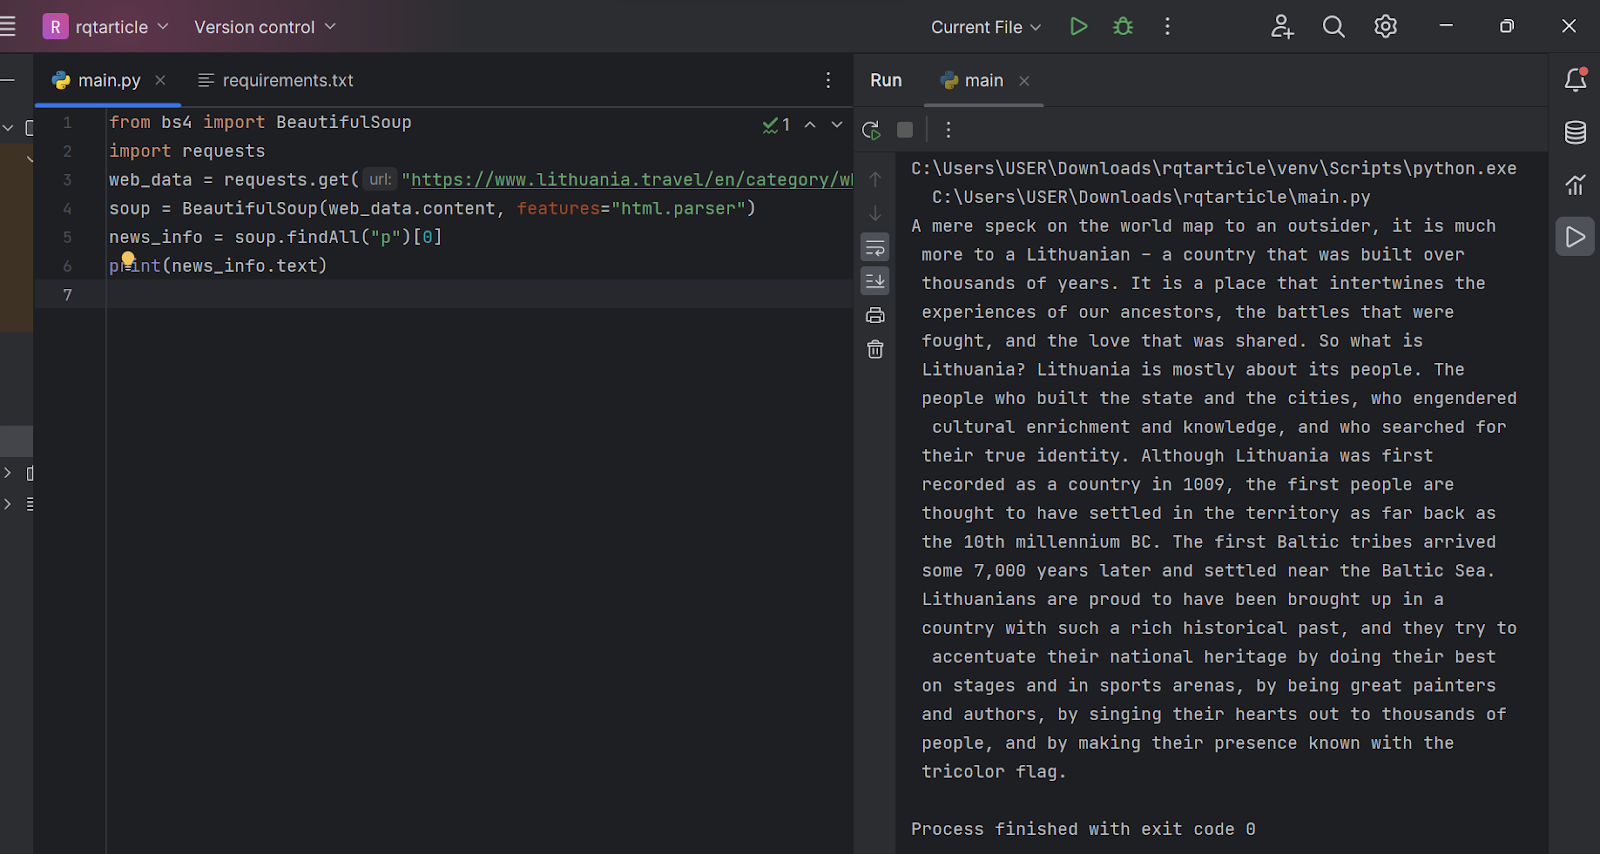
Bringing it all together:
from bs4 import BeautifulSoup
import requests
web_data = requests.get("https://www.lithuania.travel/en/category/what-is-lithuania", headers={"User-Agent": "Mozilla/5.0 (Windows NT 10.0; Win64; x64) AppleWebKit/537.36 (KHTML, like Gecko) Chrome/112.0.0.0 Safari/537.36"})
soup = BeautifulSoup(web_data.content, features="html.parser")
news_info = soup.findAll("p")[0]
print(news_info.text)
And here’s the output:
Benefits of Using a requirements.txt File
- Managing dependencies: By listing the dependencies of your project in a requirements.txt file, you can easily see what packages are required and what versions they need to be.
- Sharing your project with others: If you share your project with others, you can include the requirements.txt file so that they can easily install the required packages. This can save them time and frustration and can help to ensure that everyone is using the same versions of the packages.
Conclusion
In the article, we learned how to create a requirements.txt file and outlined the benefits of using it.
You should also try it out and work on a few projects with it. If you have any questions, you can reach out to me on Twitter 💙.
Learn to code for free. freeCodeCamp’s open source curriculum has helped more than 40,000 people get jobs as developers. Get started