In this tutorial, I will show you how to convert a .pfx file to a .crt & .key file for use on your server or computer’s certificate store using OpenSSL. The best part of this is that OpenSSL is absolutely FREE to use! 🥳
Introduction 🚀
Every year our certificates must be renewed and I just encountered this task myself in one of my production environments. I thought writing a quick tutorial on how this is done on a Linux server using OpenSSL would be a good idea.
GitHub — openssl/openssl: TLS/SSL and crypto library
TLS/SSL and crypto library. Contribute to openssl/openssl development by creating an account on GitHub.
 GitHubopenssl

OpenSSL is a robust and well-documented, full-featured toolbox for working with the Secure Socket Layer (SSL) and Transport Layer Security (TLS) protocols for security. OpenSSL contains a lot of tools for handling cryptography which makes it an ideal choice when we have to work with certificates on both Linux and Windows.
In this case, I already had the .pfx certificate issued by a trusted public certificate authority like DigiCert. There are plenty of certificate authorities out there providing different pricing levels, etc… I’m sure you already got the certificate since you are here.
List of top 6 SSL Certificate Authority and SSL Certificate Brand
Learn in detail about world’s most trusted SSL certificates brands and authorities as Symantec, GeoTrust, Comodo, Thawte, Digicert, GoDaddy, RapidSSL, Entrust, etc…
 About SSL

Below are the commands you have to perform to convert your .pfx certificate to a .crt and .key file without getting a headache. Before we begin, let’s have a look at some requirements.
Requirements 🗳️
Below is a list of the things you must bring together in order to follow along in this tutorial.
- OpenSSL has to be installed on your machine. You can read more here: https://www.openssl.org/source/
- The .pfx file and the import password for the certificate.
- A server/computer with either Linux or Windows installed to run the OpenSSL package for converting the certificate.
Get the private .key from the .pfx certificate
The command below will extract the private key from the .pfx file using OpenSSL. All you have to do is enter the command and the import password you created when the certificate was issued originally.
When you are prompted to enter a PEM pass phrase for protecting the .key file, you are free to specify any password you would like. I prefer to use the same as the one I have set for the import password as it makes it easier to remember. But it’s totally up to you. 🙌
openssl pkcs12 -in [certificate.pfx] -nocerts -out [keyfile-encrypted.key]What’s happening above? 🤔
openssl— This is the command used to invoke the OpenSSL toolkit.pkcs12— It is an OpenSSL command that handles PKCS 12 files, which are a type of archive format used to store cryptographic objects such as certificates, private keys, and related information.-in [certificate.pfx]— This option specifies the input PKCS 12 file, denoted by[certificate.pfx]. The file you provide here should be in the PKCS 12 format and contain one or more certificates, along with the corresponding private key and possibly additional information. This is the .pfx certificate file you got from your certificate authority.-nocerts— This option tells OpenSSL to exclude the certificates from the output. When this flag is used, only the private key and any additional private key-related information will be processed and included in the output file.-out [keyfile-encrypted.key]— This option specifies the output file where the encrypted private key will be stored. The[keyfile-encrypted.key]represents the filename you want to give to the encrypted private key file. OpenSSL will generate or overwrite this file with the encrypted private key.
You should get an output like mine below.
tech-with-christian@swarm-manager:~/certificates$ openssl pkcs12 -in twc-certificate.pfx -nocerts -out twc-private.key
Enter Import Password:
Enter PEM pass phrase:
Verifying — Enter PEM pass phrase:
tech-with-christian@swarm-manager:~/certificates$
💡
When you enter the password in the Import Password and PEM pass phrase, you won’t be able to see the password, but it’s there. Just hit ENTER when you are done typing in your password. You will be asked to enter it twice to make sure you don’t make any typos.
Get the decrypted .key file from the encrypted private .key file
To get the decrypted .key file for the certificate ( .crt ) we will extract in a moment, we have to run a simple command and provide the PEM password we specified before.
The output will be the decrypted-certificate.key file you can use in combination with the .crt file. Below is the command you have to perform to get the decrypted .key file.
openssl rsa -in [keyfile-encrypted.key] -out [keyfile-decrypted.key]
What happens in the command above? 🤔
openssl— This is the command used to invoke the OpenSSL toolkit.rsa— This OpenSSL command specifically deals with RSA keys.-in [keyfile-encrypted.key]— This option specifies the input file containing the encrypted RSA private key. The[keyfile-encrypted.key]represents the filename of the encrypted private key file you want to decrypt.-out [keyfile-decrypted.key]— This option specifies the output file where the decrypted RSA private key will be saved. The[keyfile-decrypted.key]represents the filename you want to give to the decrypted private key file. OpenSSL will create or overwrite this file with the decrypted private key.
You should get an output like mine below.
tech-with-christian@swarm-manager:~/certificates$ openssl rsa -in twc-private.key -out twc-decrypted.key
Enter pass phrase for twc-private.key:
writing RSA key
You now have a decrypted .key file that you can use with your .crt file. Let’s go and extract the .crt from the .pfx file.
Get the .crt file from the .pfx file
Now that we have extracted the private .key file from our .pfx file, we should get the .crt file. Run the command below and adjust it according to your namings.
openssl pkcs12 -in [certificate.pfx] -clcerts -nokeys -out [certificate.crt]What happens in the command above? 🤔
openssl— This is the command used to invoke the OpenSSL toolkit.pkcs12— This OpenSSL command deals with PKCS 12 files.-in [certificate.pfx]— This option specifies the input PKCS 12 file from which the command will extract certificates.-clcerts— This option instructs OpenSSL to include only the client (user) certificates from the PKCS#12 file. It excludes any CA (Certificate Authority) certificates that might be present. This option is useful when you want to extract only the user certificates for use in client authentication scenarios, for example, when configuring a client to present its certificate to a server.-nokeys— This option tells OpenSSL not to include any private keys in the output. It ensures that only certificates are processed and included in the resulting file.-out [certificate.crt]— This option specifies the output file where the extracted certificate(s) will be saved. The[certificate.crt]represents the filename you want to give to the certificate file. OpenSSL will create or overwrite this file with the extracted certificate(s).
You should get an output like mine below.
tech-with-christian@swarm-manager:~/certificates$ openssl pkcs12 -in twc-certificate.pfx -clcerts -nokeys -out twc-certificate.crt
Enter Import Password:
Bam! 💪 You can now use the .crt file with the .key file on your server/computer to host web applications securely. Install them and power up your solution. 🔥
Summary
In this quick tutorial about converting/extracting a .pfx file to a .crt and .key file you learned a few simple commands. These commands will make it easy for you to perform the extraction process of the certificate files.
If you got any issues, questions, or suggestions for this tutorial, please let me know in the comments below. (available once you sign up for TWC) — Until next time — Happy engineering! ✌️

My name is Christian. I am a 27-year-old pragmatic DevOps engineer with a passion for .NET, Cloud, and Containers. In my spare time, I share my knowledge and love teaching other people about tech.
![]() Конвертация PFX в KEY и CRT может потребоваться в том случае, если вы используете какое-либо unix/linux-приложение с поддержкой доступа по SSL. Чаще всего это веб-приложения. В противовес этому подходу Windows использует сертификаты в формате .pfx для хранения закрытого и открытого ключа враз, разумеется с защитой паролем при попытке экспорта.
Конвертация PFX в KEY и CRT может потребоваться в том случае, если вы используете какое-либо unix/linux-приложение с поддержкой доступа по SSL. Чаще всего это веб-приложения. В противовес этому подходу Windows использует сертификаты в формате .pfx для хранения закрытого и открытого ключа враз, разумеется с защитой паролем при попытке экспорта.
Регулярно приходится работать с сертификатами и процесс конвертации PFX (PKCS12) в KEY и CRT (PEM) встречается с завидной регулярностью. Которой, тем не менее, не достаточно, чтобы запомнить все нужные команды до автоматизма. Приходится постоянно лезть в маны или гугл за нужными командами. Уже давно пришло время написать статью-шпаргалку. Собственно, вот и она.
Если вам интересна тематика Debian и связанных с ним приложений, рекомендую обратиться к тегу Debian на моем блоге.
Содержание
- 1 Конвертируем PFX
- 1.1 Получаем сертификат
- 1.2 PFX в KEY и CRT
- 1.3 KEY и CRT в PFX
В статье я рассмотрю лишь базовые сценарии, которые встречаются наиболее часто.
Получаем сертификат
Если у вас все ещё нет сертификата от публичного ЦС, тогда мы идем к вам то самое время его получить. Обычно для этого сначала нужно сделать CSR-запрос. Следующий шаг – отправить его в ЦС и пройти проверку домена/организации (вам отправят письмо с кодом подтверждения на какой-либо админский адрес, либо позвонят на корпоративный номер телефона в зависимости от типа проверки).
Примечание: у меня на блоге вы сможете найти множество статей по сертификатам с помощью тега SSL certificate.
Как только все формальности пройдены, на почту вы получите архив с нужным вам сертификатом в формате .crt (и всей цепочкой промежуточных на всякий случай).
PFX в KEY и CRT
Воспользуемся всем знакомой утилитой openssl, чтобы вытащить открытую часть pfx-сертификата 1:
|
openssl pkcs12 —in certificate.pfx —clcerts —nokeys —out certificate.crt |
Нужно будет ввести пароль, который вы указывали при экспорте .pfx-сертификата. Теперь попробуем извлечь закрытую часть сертификата, поместив её в отдельный запароленный файл:
|
openssl pkcs12 —in certificate.pfx —nocerts —out key—encrypted.key |
После выполнения команды вам придется ввести не только пароль, который использовался для экспорта .pfx-сертификата, но и желательно новый пароль, необходимый для защиты .key-файла.
Примечание: второй пароль можете и не вводить, но лучше предпринять меры для сохранности ключа, он не должен попасть в посторонние руки.
Далее можно использовать полученные сертификаты для настройки какого-либо сервиса, использующего SSL. Например Apache (в качестве примера кусок конфигурации ниже):
|
SSLEngine on SSLCertificateFile /etc/ssl/crt/cert.crt SSLCertificateKeyFile /etc/ssl/crt/private.key SSLCertificateChainFile /etc/ssl/crt/chain.crt |
Закрытый ключ сертификата с парольной защитой не всегда удобно использовать на реальном окружении. Например тот же Apache будет спрашивать пароль при каждом рестарте сервиса, что будет требовать человеческого участия. Обойти проблему можно, сняв пароль с закрытого ключа:
|
openssl rsa —in key—encrypted.key —out key—decrypted.key |
На всякий случай установите на файл соответствующие права, чтобы никто кроме вас не имел к нему доступ:
|
chmod 600 key—decrypted.key |
Ну а теперь рассмотрим обратную процедуру.
KEY и CRT в PFX
Сшивание двух файлов ключей – открытого и закрытого – может потребоваться для сервисов на базе Windows, которые привыкли видеть сертификаты в формате .pfx. Также в некоторых случаях хранить пары ключей удобнее именно в формате pfx.
Примечание: если вы генерировали csr-запрос на стороне сервера Windows, то вам придется его завершить, подсунув файл .crt, который вам позже пришлет ваш ЦС. В итоге экспортировать сертификат из оснастки MMC вы сможете именно в формате .pfx. Иной вариант – если csr создавался с помощью утилиты openssl. В этом случае вероятно у вас уже будут crt и key, которые потребуется собрать в pfx.
Собрать crt и key в pfx можно командой:
|
openssl pkcs12 —inkey certificate.key —in certificate.crt —export —out certificate.pfx |
Как только нажмете Enter, нужно будет ввести пароль от файла закрытого ключа (если этот пароль есть), а также пароль для экспорта в pfx. После этого смело используйте файл на серверах Windows, но не забудьте при импорте отметить ключ экспортируемым (иначе экспортировать ключ потом не получится).
Want to convert PFX to .Crt & .Key Files? We can help you.
Here at Bobcares, we often handle requests from our customers to fix similar errors as a part of our Server Management Services.
Today, let us see how to convert the .pfx file into a .crt or .key file from the encrypted key using OpenSSL for free.
Convert PFX to .Crt & .Key Files
OpenSSL is a full-featured toolkit for the Transport Layer Security (TLS) and Secure Sockets Layer (SSL) protocols.
If we have the .pfx certificate from the SSL providers/registrars like a network solution, GoDaddy, big rock, etc., then we are good to proceed with the following without any hurdles.
In order to begin, our Support Techs recommend having:
- An OpenSSL package in the system.
- Then a .pfx file for the chosen domain name
- Windows/Ubuntu/Linux system to utilize the OpenSSL package with crt
-
Extract the private key from the .pfx file
openssl pkcs12 -in [yourfilename.pfx] -nocerts -out [keyfilename-encrypted.key]With this command, we can extract the private key from the .pfx file.
Now we need to provide the import password of the .pfx file. This is to protect the keypair created for the .pfx file.
Once we enter it, OpenSSL requests to type another password twice. This new password is to protect the .key file.
theraxton@ubuntu:~/Downloads/SSL-certificate$ openssl pkcs12 -in samplefilename.pfx -nocerts -out samplefilenameencrypted.key
Enter Import Password:
Enter PEM pass phrase:
Verifying — Enter PEM pass phrase:
theraxton@ubuntu:~/Downloads/SSL-certificate$-
Extract .crt file from the .pfx certificate
openssl pkcs12 -in [yourfilename.pfx] -clcerts -nokeys -out [certificatename.crt]After that, we press enter and give the password for the certificate, hit enter again.
Eventually, the certificate will appear in the same directory.
theraxton@ubuntu:~/Downloads/SSL-certificate$ openssl pkcs12 -in samplefile.pfx -clcerts -nokeys -out samplefileencrypted.crt
Enter Import Password:-
Extract the .key file from the encrypted private key from step 1.
openssl rsa -in [keyfilename-encrypted.key] -out [keyfilename-decrypted.key]Here, we enter the import password from step 1.
As a result, we have a certificate(.crt) and two private keys ( encrypted and unencrypted).
theraxton@ubuntu:~/Downloads/SSL-certificate$ openssl rsa -in samplefilenameencrypted.key -out samplefilenameunencrypted.key
Enter pass phrase for samplefilenameencrypted.key:
writing RSA key
Finally, we can use .crt and .key files to run the Node / Angular / Java application with these obtained files.
[Finding it difficult? We can help you out]
Conclusion
In short, we saw how our Support Techs go about converting PFX.
PREVENT YOUR SERVER FROM CRASHING!
Never again lose customers to poor server speed! Let us help you.
Our server experts will monitor & maintain your server 24/7 so that it remains lightning fast and secure.
GET STARTED


This seven-minute guide will help you to convert your .pfx file into a .crt or .key file from the encrypted key using OpenSSL for free.
OpenSSL is a widely used open-source software library that provides a set of cryptographic functions and protocols for secure communication over computer networks. It offers various features, including Secure Sockets Layer (SSL) and Transport Layer Security (TLS) protocols, which are essential for securing data transmission between applications, such as web browsers and servers.
OpenSSL supports a range of cryptographic operations, including symmetric and asymmetric encryption, digital signatures, and key exchange. It enables developers to implement secure communication channels, ensuring confidentiality, integrity, and authentication of data.
The OpenSSL library is written in the C programming language and is available for various operating systems. It has become a fundamental tool in the field of network security and is utilized in numerous applications, such as web servers (e.g., Apache, Nginx), email servers, virtual private networks (VPNs), and many others.
Let’s say, you have already got the .pfx certificate from the SSL providers/registrars like a network solution, GoDaddy, Bigrock, etc., then you are good to follow up the below steps without any hurdles.
You need to follow up below commands in order to convert files to .crt/.key easily.
Prerequisites:
- OpenSSL package must be installed in your system.
- You must have a .pfx file for your chosen domain name.
- Windows/Ubuntu/Linux system to utilize the OpenSSL package with crt
Step 1: Extract the private key from your .pfx file
openssl pkcs12 -in [yourfilename.pfx] -nocerts -out [keyfilename-encrypted.key]
This command will extract the private key from the .pfx file. Now we need to type the import password of the .pfx file. This password is used to protect the keypair created for the .pfx file. After entering the import password OpenSSL requests to type another password twice. This new password is to protect the .key file. #SafetyFirst
theraxton@ubuntu:~/Downloads/SSL-certificate$ openssl pkcs12 -in samplefilename.pfx -nocerts -out samplefilenameencrypted.key
Enter Import Password:
Enter PEM pass phrase:
Verifying — Enter PEM pass phrase:
theraxton@ubuntu:~/Downloads/SSL-certificate$
Please note that, when you are going to enter the password, you can’t see against password, but they are typing in the back. Press enter once you entered your secure password.
Step 2: Extract the .crt file from the .pfx certificate
openssl pkcs12 -in [yourfilename.pfx] -clcerts -nokeys -out [certificatename.crt]
After that, press enter and give the password for your certificate, hit enter again, after all — your certificate will be appears in the same directory.
theraxton@ubuntu:~/Downloads/SSL-certificate$ openssl pkcs12 -in samplefile.pfx -clcerts -nokeys -out samplefileencrypted.crt
Enter Import Password:
Step 3: Extract the .key file from encrypted private key from step 1.
openssl rsa -in [keyfilename-encrypted.key] -out [keyfilename-decrypted.key]
We need to enter the import password which we created in the step 1. Now we have a certificate(.crt) and the two private keys ( encrypted and unencrypted).
theraxton@ubuntu:~/Downloads/SSL-certificate$ openssl rsa -in samplefilenameencrypted.key -out samplefilenameunencrypted.key
Enter pass phrase for samplefilenameencrypted.key:
writing RSA key
Now you can use .crt and .key file to run your Node / Angular / Java application with these obtained files.
What do you think about this article? — Is it helpful? — Please comment below.
![]()
Don’t be selfish, Show your love with claps  (or Upvotes). Your support will be appreciated.
Support Me:
If you find joy and value in what I do, please consider supporting my work with a donation — however much you can afford, it means and helps more than you can imagine. It will be always appreciated.
Get my stories in your feeds by subscribing to me, or become a vocal+ member to read all stories of thousands of other writers, participate in all challenges and get a payout with low fees and less payout threshold on Vocal Media.
Become a Medium member if you want to read more interesting stories like this. It will cost you $5/Month or $50/Year and provides you unlimited access to Medium stories. I will receive a small commission when you use my membership link for signup…
You can give tips too using Buy me a coffee.
-
Ashwagandha: Nature’s Stress Buster and Health Booster Natural Herb
What’s Your Reaction?

Hey Moodies, Kem chho ? — Majama? (Yeah, You guessed Right! I am from Gujarat, India)
25, Computer Engineer, Foodie, Gamer, Coder and may be a Traveller .
> If I can’t, who else will? <
You can reach out me by “Rakshitshah94” on 9MOod, Quora, Medium, Github, Instagram, snapchat, twitter, Even you can also google it to see me.
I am everywhere, But I am not God.
Feel free to text me.


У меня есть сертификат с закрытым ключом PFX (PKCS#12). Пароль тоже имеется. Задача, вытащить из файла сертификат и ключ в PEM формате.
Будем работать в Windows 10 с помощью подсистемы Linux. У нас есть:
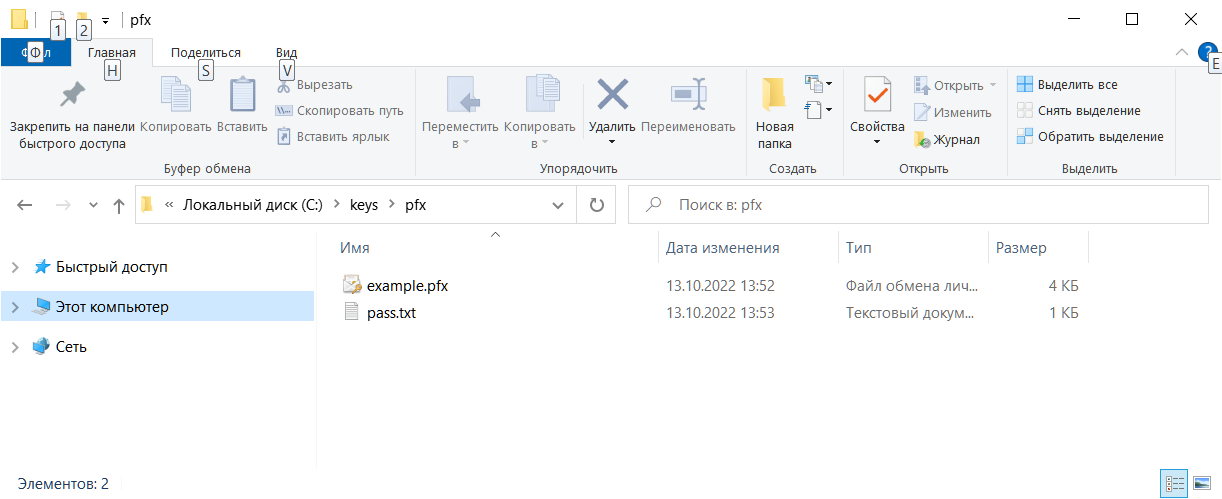
- Сертификат, example.pfx.
- Пароль.
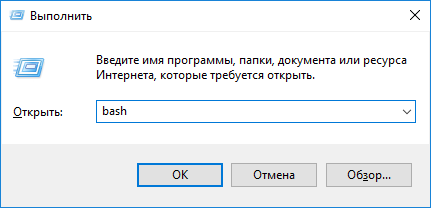
Включаем bash в Windows:
Windows 10 — включаем bash
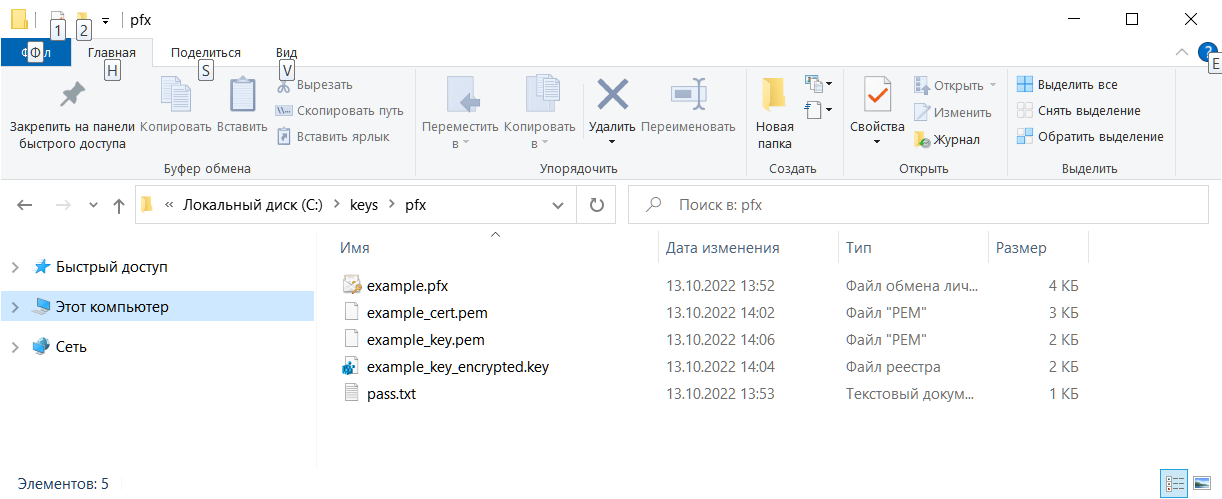
На диске C создаём папку C:\keys\pfx, переносим туда все нужные файлы:
Запускаем bash. Для запуска bash нужно выполнить команду «bash» или «bash.exe».
Проверим что пакет openssl установлен:
sudo dpkg -l | grep openssl
Если не установлен, то пакет ставится через apt-get:
sudo apt-get install opensslУ меня openssl уже стоит, Переходим в папку /mnt/c/keys/pfx/
cd /mnt/c/keys/pfx/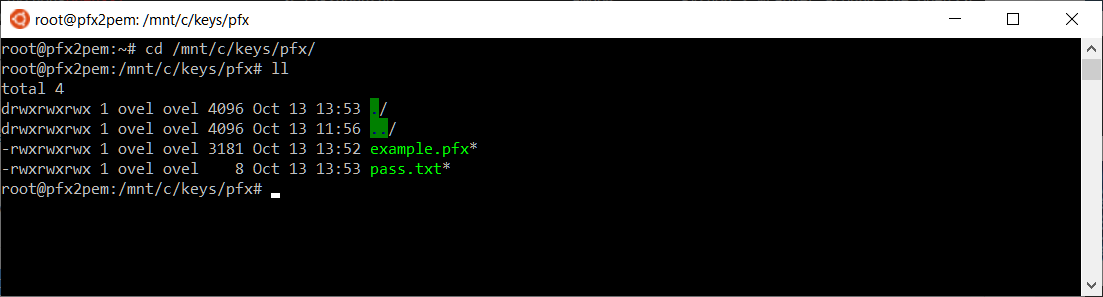
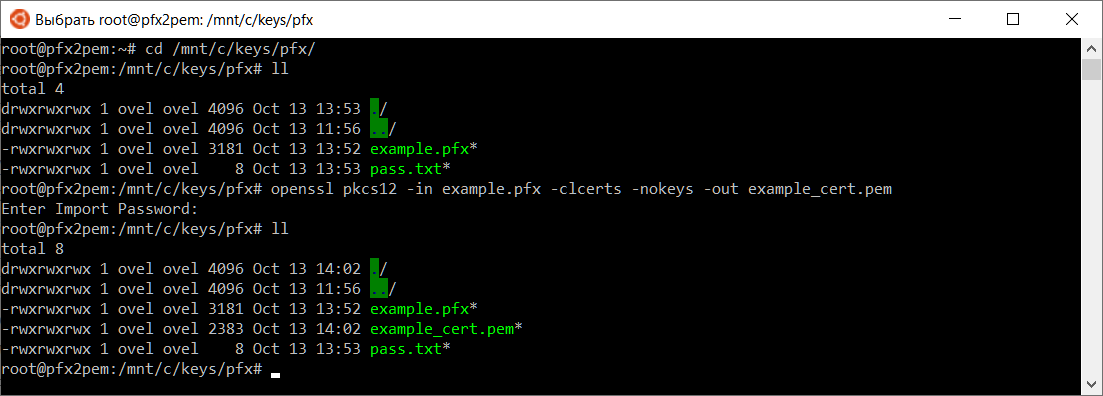
Сначала вытащим файл сертификата, сохраняем его как example_cert.pem. Выполняем запрос:
openssl pkcs12 -in example.pfx -clcerts -nokeys -out example_cert.pemПотребуется указать пароль. Получаем файл сертификата example_cert.pem.
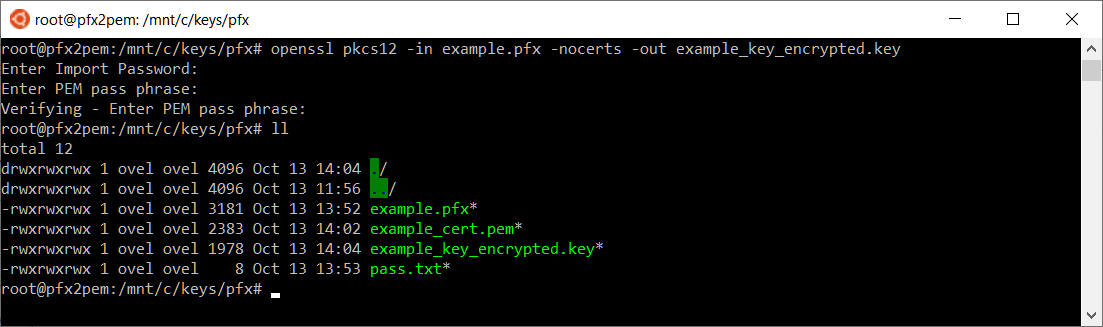
Извлекаем закрытую часть сертификата — запароленный ключ. Сохраняем его как example_key_encrypted.key. Выполняем запрос:
openssl pkcs12 -in example.pfx -nocerts -out example_key_encrypted.keyПотребуется указать пароль. Затем два раза ввести новый пароль для закрытого ключа. Получаем запароленный файл ключа example_key_encrypted.key.
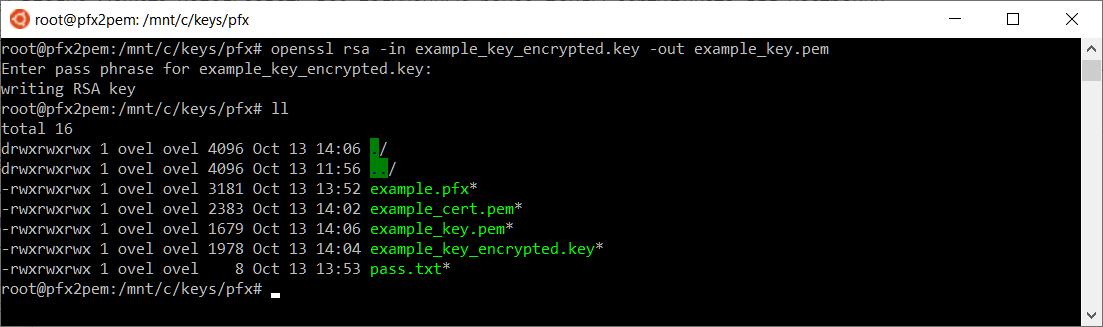
Если требуется ключ без пароля, например, для публикации в Apache или Nginx, то снимаем пароль, сохраняем файл как example_key.pem. Выполняем запрос:
openssl rsa -in example_key_encrypted.key -out example_key.pemПолучаем файл ключа example_key.pem.
Обратная задача
Windows — конвертация SSL сертификата PEM в формат PFX (PKCS#12) с помощью подсистемы Linux