
Guest blog by Manoj Kumar Suresh, Parallels Support Team
Windows 10 has been here for a year, and continues to be much better than Windows 8, period. (Right?!) ![]()
Even better, Windows 10 is a free upgrade for most Windows 7, 8 and 8.1 users, so it’s not surprising that many Windows users are upgrading—including users on virtual machines, of course! It’s very easy to install or upgrade to Windows 10 in Parallels Desktop. Let me walk you through the process.
Before We Get Started…
Before you can install Windows 10, please verify the following requirements in order for you to get the best experience on Windows 10 in Parallels Desktop:
- System requirements for Windows 10 can be found here. In addition, you need to allocate two processor cores and 2 GB of RAM memory in your virtual machine configuration for a smooth and seamless performance.
- Make sure that you’re running the latest build of Parallels Desktop 11 for Mac.
Installing Windows 10 as a fresh installation
This is the most simple and straightforward way to get your hands on Windows 10. If you have prior experience installing any other operating system in Parallels Desktop, it’s going to be even easier.
Take the following steps to install Windows on your Mac using the .iso disc image file.
Step 1: Purchase and download Windows 10.
Windows 10 comes as a USB if you purchase it from the Microsoft Online Store or as an online download if you purchase elsewhere. Either way, we advise you to download the image directly from Microsoft.
Step 2: Create a new virtual machine.
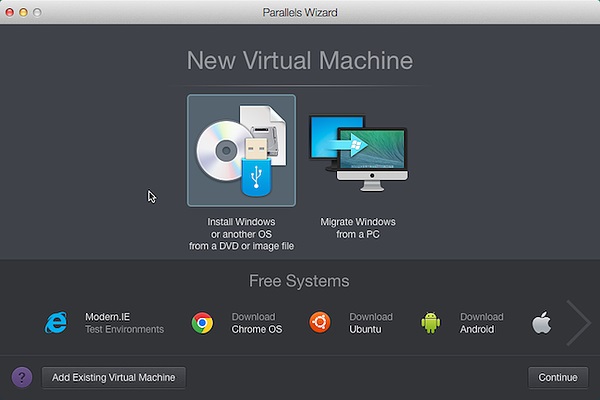
If you have just installed Parallels Desktop, you should already be on this screen. Otherwise, click on Spotlight, type Parallels Desktop and click to launch it. It will bring up the following screen:
If you already have an existing VM, all you have to do is open Parallels Desktop and press the plus (+) sign at the top right corner of Control Center:
Click Install Windows or another OS from DVD or image file, then click Continue.
Step 3: Select the installation media.
The Parallels Wizard will detect the installation media automatically for installing Windows.
Step 4: Enter your Windows product key.
Click Continue. In the Windows Product Key window, leave Express installation selected.
Note: If Express installation is checked, Parallels Tools will be installed automatically after the Windows installation.
When you’re ready, click Continue.
Step 5: Select how you want to use Windows.
Select how you want to use Windows in Parallels Desktop:
- Productivity
- Games only
And in Parallels Desktop for Mac Pro and Business Edition:
- Software development
- Software testing
- Design
Step 6: Specify a name, location, and configuration.
Name:
You may specify a name for your VM or leave it at the default.
Location:
The default location for Parallels Desktop VMs is in the /Users/username/Documents/Parallels folder.
If you want other user accounts on your Mac to have access to this installation of Windows, select Share with other users of this Mac.
Configuration:
Change your VM settings by selecting Customize settings before installation and configure the VM as per the system requirements I mentioned earlier.
Step 7: Begin the installation.
Click Continue; from here, the Windows installation will begin. Once Windows is installed, launch it by opening a Windows application or by clicking the Power button in the Parallels Virtual Machines list.
There you go! You’ve got your all-new Windows 10 VM loaded and you’re ready to explore the endless possibilities of a brand-new OS.
Upgrading to Windows 10 from 8.1, 8, or 7
Let’s be honest here. The biggest reason behind us even considering this upgrade to Windows 10 is because…it’s free! We might have to sacrifice one or two simple but favorite features (especially if you’re upgrading from Windows 7), but still, who wouldn’t take a chance to get the latest version of Windows at no cost?
Before We Get Started…
Before upgrading, you must check the following steps to make sure that your upgrade to Windows 10 will proceed smoothly.
- Make sure that you have a snapshot of your VM before starting. One of the biggest advantages of a VM over a real PC is the way you can backup/restore the VM, whereas it’s a bigger challenge to do so on a regular computer. So make sure that you take a backup of the PVM as explained here, or at least take a Snapshot as per my co-worker’s blog article so that you can always go back if needed—just in case.
- Make sure your Windows is up-to-date. It’s best to check before you start upgrading to Windows 10.
- I’d also recommend opening your virtual machine configuration and increasing the memory the same way we did earlier in the post.
- Make sure you have at least 10 GB of available space on your virtual hard disk. Add more space for Windows here if required.
Upgrading Windows 7, 8, or 8.1 to Windows 10 in a VM.
To upgrade your Windows VM to Windows 10, please follow the following steps:
- Check this article to find out whether your Windows version is 32-bit or 64-bit.
- Download one of the upgrade tool files (compatible with your version of Windows) from this Microsoft page.
- Run this file and download the ISO for Windows 10.
In my case, I’m downloading Windows 10 Pro version x64, but you may have a different edition and bit:
Even though you can click on Upgrade this computer now and continue, it’s better to download the ISO image from the link above. Once you do…
- Connect the ISO file to your VM.
- Open File Explorer and go to This PC, then run Setup from the mounted image.
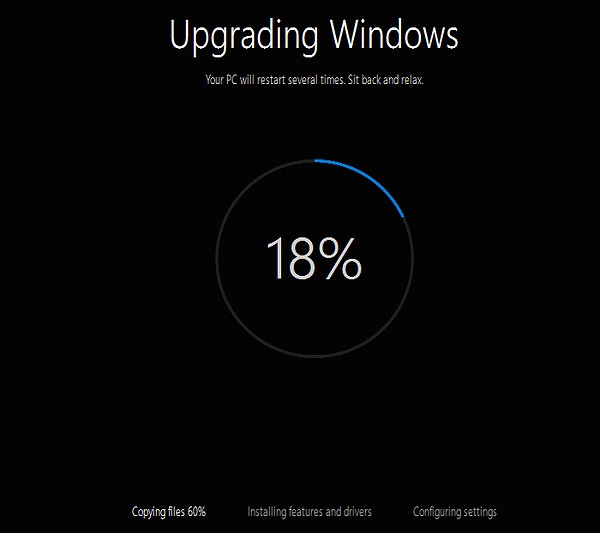
- Proceed with the installation.
- Restart the VM to continue with the final part of upgrade.
That’s it! Easy! We’ve just upgraded to Windows 10 in a Parallels Desktop virtual machine!
Wait! What if something goes wrong?
I hope you’re not reading this part, but if you are, hopefully you’re just a tech geek who wants to know how to fix things. Even if something went wrong with your Windows 10 installation or upgrade, it’s not over yet! Read on for a few helpful tips and tricks.
Scenario 1: “Something happened.”
Before the release of Windows 10, I’ve heard about this issue and just like everyone, I thought it was a hoax. But as I went through some upgrades, I realized it’s a real error message from the Windows side!
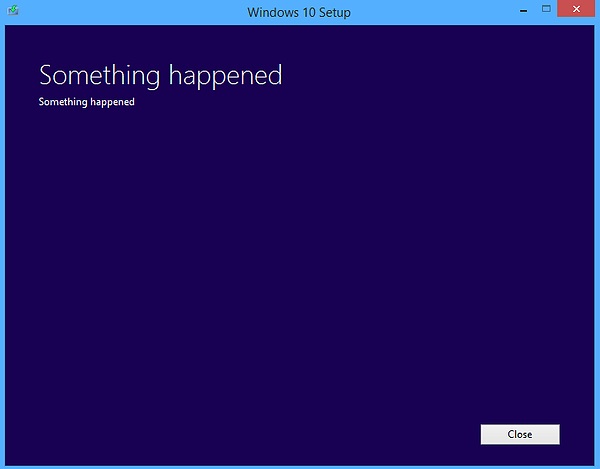
The reason for this happening most of the time is because Windows updates were not installed properly. So the first thing you should do is to check for Windows updates using this Microsoft Fix it tool and run the sfc /scannow command. This should help. If not, contact Microsoft—this issue could happen on real PCs, too.
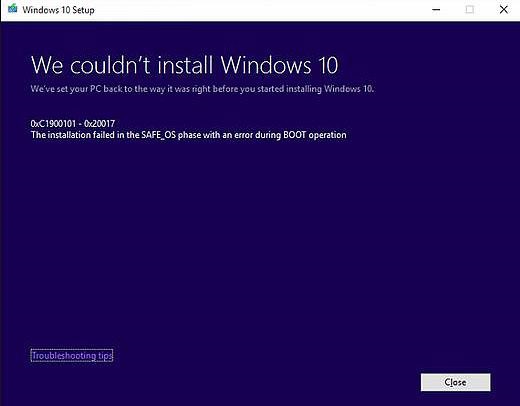
Scenario 2: The “SAFE_OS” error.
This is a critical error, as there is no definite fix for this issue. This happens when the Windows files are corrupted, and we can try to repair them using sfc /scannow and different other options from Microsoft. Still, we can’t be absolutely sure that these steps will fix the issue. The only sure way to fix this issue is to reinstall a fresh copy of Windows and perform the upgrade from scratch.
Scenario 3: The Windows 10 activation issue.
This happens only if your previous Windows was not activated. So the best way to avoid this is to make sure that your Windows 7/8/8.1 is activated before initiating the upgrade process.
That’s it! You’ve just joined the ranks of Windows 10 users, which will bring a lot of surprising features like Cortana on your Mac and more. (Yes, you can use Cortana on your Mac now.) I hope you found this blog useful. Please share it with your friends, and don’t forget to follow Parallels Support on Twitter!
Interested in running Windows 10 on your Mac? Download Parallels Desktop for Mac for a free 14 day trial: Try Now. Want to install Windows 10 with one simple click? More info here.
Всем привет!!!
Если вы не знаете или просто интересуетесь как на MacOS установить Windows в Parallels Descktop, то тут что бы это рассказать и показать.
![]()
Программный продукт компании Parallels, представляющий собой решение в области виртуализации для macOS, позволяющее пользователям запускать Windows, Linux и другие операционные системы, а также программное обеспечение, написанное для этих операционных систем.
Википедия
В общем и в целом Parallels Descktop позволяет запускать практически любые ОС на вашей MacOS. И это действительно так, если у вас процессор Intel. А если у вас как у меня процессор М1 или М2, то есть на ARM архитектуре, то тут не все так просто. Дело в том, что под ARM еще нет полноценной виртуализации как в Intel VTx, поэтому пользователи M чипов от Apple могут запускать только ОС для ARM. Благо Windows и Linux уже давно выпускают сборки под архитектуру ARM. Поэтому все что нужно пользователям этих архитектур это образ под такую архитектуру.
В Parallels Desktop установка Windows 11 очень простая. Все что нужно это просто захотеть. Программа все сделает за вас: скачает образ, распакует, проверит, установит Windows, создаст пользователя без пароля и накатит свои дополнения, что бы иметь самую лучшую совместимость между MacOS и виртуальной Windows.
Можно держать Windows на отдельном рабочем столе, можно запускать программы Windows прямо из Dock, общий буфер обмена, перетаскивание файлов и многое много другое.
Я pegfcf. Windows на MacBook 16 Pro с чипом М1 и 16G RAM. Если у вас 8G оперативной памяти, то тоже можно, но закройте лишнее окна, что бы было свободно 4G.
Тут нужно отметить, что Parallesl рекомендует и устанавливает редакцию Windows 11 Home. Это правильно, так как эта редакция более легковесна чем Pro. Но если все же вам нужна редакция Pro, то я уже сделал статью, в которой выложил ссылки на ISO образ Windows 11 ARM с редакцией Home и Pro.
На этом все, всем желаю удачи!!!

Привет всем «Виндузятникам»! Продолжаем Мега – Урок по установке Windows 7 на компьютеры MAC. В предыдущей части мы освоили утилиту BootCamp и в результате нам удалось установить, на созданный ранее раздел (10Гб), еще одну независимую операционную систему.
При этом свободного места осталось около 5Гб, а для того, чтобы перейти из MAC OS в Windows, необходимо перезагрузить компьютер. А теперь скажите мне честно, как часто вы запускаете Windows таким образом?
Наверное, не так часто как хотелось бы? ДА? Процесс перезагрузки «туда-сюда» немного, но все-таки напрягает.
Так вот, сегодня я научу вас запускать Windows 7 из-под MAC OS, а сделаем мы это с помощью программы для создания виртуальных машин Parallels Desktop (PD).
Что такое Parallels Desktop
Итак, что же это такое? Ну, во-первых, это приложение для MAC. Если у вас его еще нет, то обязательно установите. Приложение платное и стоит 80$.
Компания Parallels позиционирует свой продукт, как самое простое, быстрое и мощное решение для запуска Windows-приложений на Mac без перезагрузки. И поверьте, это действительно так!
Parallels Desktop просто уникальный продукт. Он очень прост в настройке – все делается в один-два клика. Благодаря поддержке 16 процессоров и 64 ГБ оперативной памяти в виртуальных машинах, вы практически не теряете в производительности.
Это означает, что вы можете запускать даже требовательные приложения, не беспокоясь о скорости.
В одной их последних версий PD появилась возможность использовать (запускать) Windows, установленный ранее с помощью BootCamp Assistant. Это ОЧЕНЬ крутая опция, за которую огромное спасибо Parallels.
Вы поняли, о чем идет речь? Теперь не надо устанавливать еще одну копию Windows на вновь созданную виртуальную машину и еще больше засорять HDD. Достаточно сделать пару кликов, и PD сама «подтянет» все необходимое ПО из раздела BootCamp. Как это сделать, читайте ниже.
Установка Windows 7 с помощью Parallels Desktop
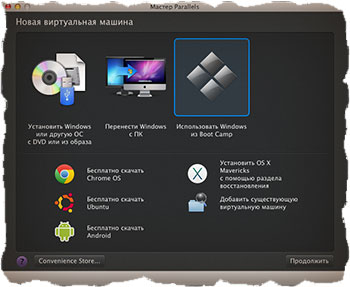
ШАГ 1 — Запускаем Parallels Desktop. Перед вами появится окно Мастера Parallels. Из этого окна нам необходимо выбрать пункт «Использовать Windows из Boot Camp». Нажимаем кнопку Продолжить.
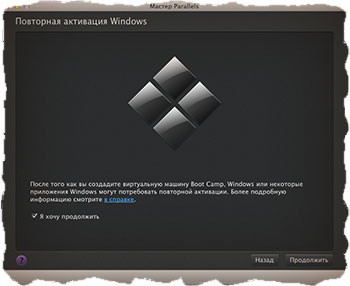
ШАГ 2 — Программа предупредит вас о том, что, возможно, потребуется повторная активация Windows или некоторых программ. Ставим галочку напротив «Я хочу продолжить» и нажимаем Продолжить.
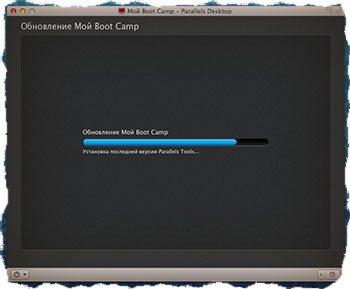
ШАГ 3 — Parallels сама найдет необходимые ей файлы из раздела BootCamp и настроит виртуальную машину. Windows запустится автоматически. Скорее всего, придется еще раз пройти активацию всех продуктов Microsoft (включая Windows и Office).
Ну вот и все! Теперь мы можем запускать Windows, не покидая MAC OS X. При этом в Windows будут работать все комбинации трекпада и верхний ряд функциональных кнопок (подсветка, яркость, громкость и т.п.)
Для перехода в Windows, запустите приложение Parallels Desktop и кликните пиктограмму с цветными окошками.
Если вы не ознакомились с остальными частями этого урока, обязательно сделайте это:
- ОГЛАВЛЕНИЕ – Вступительное слово перед уроком
- ШАГ 1 — – Все что вам необходимо знать и уметь перед установкой Windows на MAC
- ШАГ 2 — – Создание дополнительного раздела на HDD для установки Windows
- ШАГ 3 — – Установка Windows 7 на MAC с помощью BootCamp Assistant
- ШАГ 4 — – Установка Windows 7 на MAC с помощью Parallels Desktop
- ШАГ 5 — – Возможные проблемы при установке Windows на MAC
Подписывайтесь на наш Telegram, VK.
Когда-то давно мы публиковали инструкцию по установке Windows 7 на компьютеры Mac, однако с тех пор прошло уже довольно много времени, а Microsoft успела выпустить совершенно новую операционную систему, получившую гордое название Windows 10.
Продукт Parallels Desktop является чем-то вроде эмулятора операционных систем. С его помощью на Mac можно установить любую операционную систему, включая Windows, Android и даже Chrome OS. Программа предлагает огромное количество различных настроек, которые позволяют подобрать для себя оптимальный вариант использования. Приступим к установке Windows 10 на Mac при помощи Parallels Desktop 10.

Шаг 1: Заходим на официальную страницу Windows 10, где в списке языков выбираем «Русский», и в открывшемся окне нажимаем на «Скачать». Версия x64 подходит для всех современных компьютеров, поэтому лучше всего использовать именно ее. Если ваш Mac старше 5 лет, тогда рекомендуем использования версию x86.

Шаг 2: Скачиваем пробную версию Parallels Desktop 10 на свой компьютер Mac. Сделать это можно на официальном сайте компании Parallels. После окончания загрузки необходимо установить приложение на компьютер.

Шаг 3: Когда образ Windows 10 загружен на компьютер, а Parallels Desktop 10 успешно установлена, можно смело приступать к установке новой операционной системы от Microsoft на Mac. Для этого запускаем программу Parallels Desktop 10, выбираем «Установить Windows или другую ОС с DVD или образа» и нажимаем «Продолжить».

Шаг 4: В большинстве случаев программа сама найдет файл образа операционной системы, однако если этого не произошло, то придется вручную указывать путь до скаченного образа Windows 10. Нажимаем «Найти вручную», затем «Образ» и перетягиваем загруженный файл Windows 10 в окно программы.

Шаг 5: На данном этапе необходимо убрать галочку с пункта «Для это версии необходим ключ продукта».

Шаг 6: В этом меню нужно выбрать предназначение операционной системы. Это что-то вроде быстрой конфигурации: количества выделяемой оперативной памяти, мощности, объёма жесткого диска и т.д. Все эти данные после установки Windows 10 можно будет легко изменить.

Шаг 7: Вводим любое желаемое название виртуальной машины и путь ее хранения на OS X.

Шаг 8: Началась установка виртуальной машины. На MacBook Pro Retina установка занимает около 8-10 минут, во многом благодаря SSD памяти. Если появилось окно с выбором операционной системы, то необходимо выбрать любую желаемую модификацию Windows 10.

Шаг 9: После окончания установки на экране появится стартовый экран Windows 10. Осталось только дождаться установке всех специальных пакетов от Parallels, и система будет полностью готова к использованию.

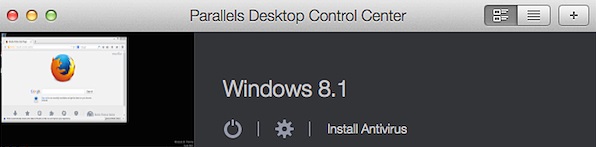
Шаг 10: Теперь желательно настроить систему под себя. Для этого переходим в «Центр управления Parallels Desktop» и нажимаем на шестерёнку возле Windows 10. Детально настраиваем систему под свои нужны, и радуемся Windows 10 на своем компьютере или ноутбуке Mac.

Подробную и детальную информацию по настройке Parallels Desktop 10 можно найти на официальном сайте компании.
Присоединяйтесь к нам в Google News, Twitter, Facebook*, Instagram* (*площадки признаны в России экстремистскими), ВКонтакте, YouTube и RSS чтобы следить за новостями и оперативно получать интересные материалы.
If you want to try the latest version of Windows on your Mac computer, this article will be handy for you. This step-by-step guide helps you install Windows 11 on Mac using Parallels Desktop. It is one of the best virtual machine software for Mac if you want to try out something on Windows for a couple of days.

What is Parallels Desktop
Parallels Desktop is a virtual machine software for Mac, helps you install Windows 11/10 or any other Linux distribution without any trouble. This software is compatible with almost all the Mac available in the market today. The list includes the latest Apple M1 Chip, which doesn’t support BootCamp, the traditional method to install Windows on Mac.
Whether you have an Intel processor or Apple M1 Chip, you can use this tool to install Windows 11 on your Mac computer. Before getting started, you need to download the latest version of Parallels Desktop on your Mac from parallels.com. Also, you must have the Windows 11 ISO. If you do not have it on your computer, follow this tutorial to download Windows 11 ISO. Last but not least, you must have an internet connection while installing Windows 11 using this method.
To install Windows 11 on Mac using Parallels Desktop, follow these steps:
- Double-click on the DMG file you downloaded.
- Double-click on the Install Parallels Desktop button.
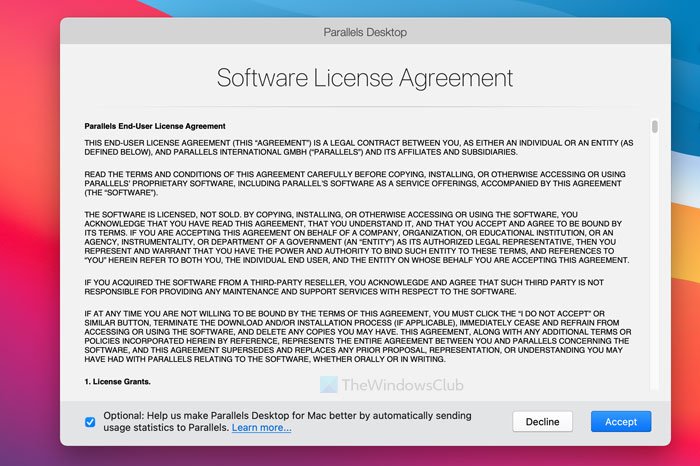
- Click on the Accept button and enter your password.
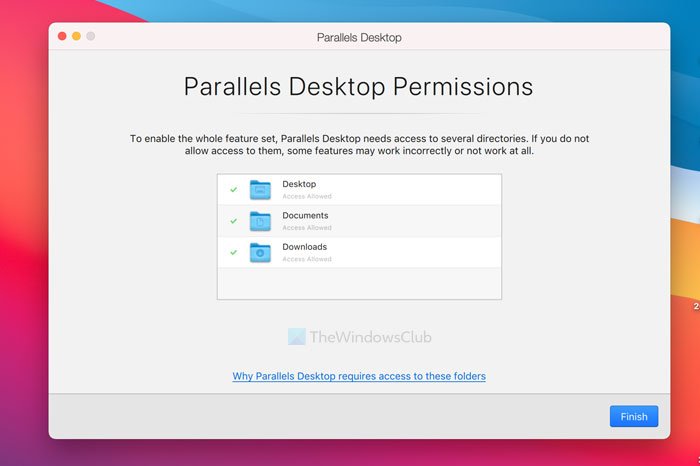
- Click the OK button to allow Parallels Desktop to access your folders.
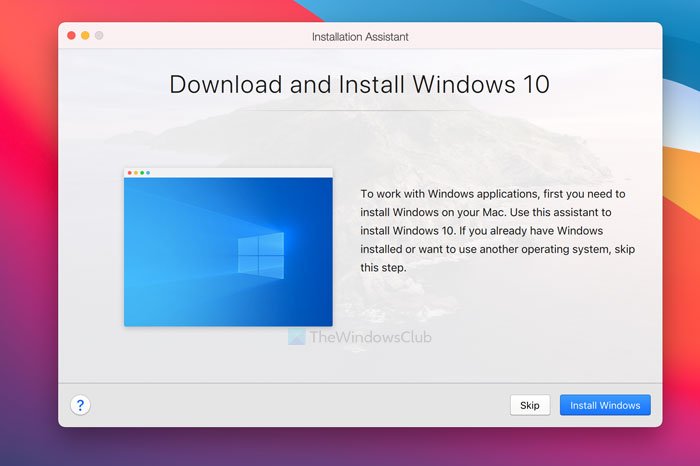
- Click the Skip button.
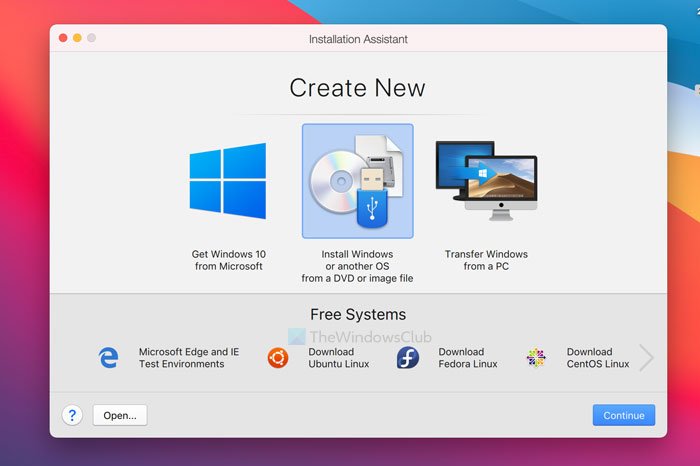
- Select the Install Windows or another OS from a DVD or image file option.
- Click the Continue button twice.
- Enter the Windows 11 product key and click the Continue button.
- Name your installation and location to save files.
- Click the Create button.
- Click the Continue button.
- Follow screen instructions to finish the installation.
To learn more about these steps in detail, continue reading.
At first, double-click on the DMG file that you downloaded from the Parallels Desktop website. It displays a window like this:
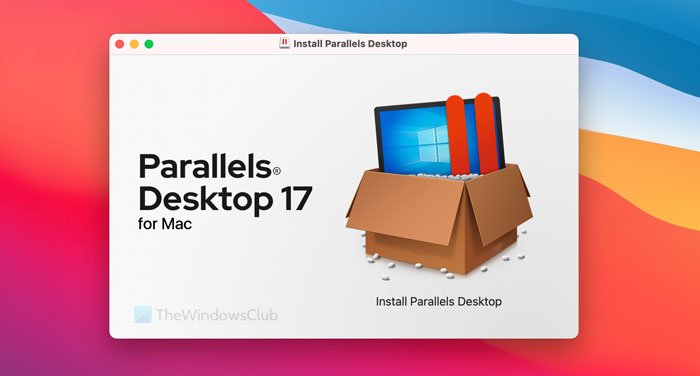
You need to double-click on the Install Parallels Desktop option to start the installation. It shows a window where you need to click the Open and OK buttons to continue the installation.
Next, it downloads the rest of the setup from the internet. Once downloaded, you may remove the Optional checkbox and click on the Accept button to agree with their terms and conditions.
Then, enter the account password to start the actual installation of Parallels Desktop. Once it is done, you will get a window that asks for permissions to access three folders – Desktop, Documents, and Downloads.
You need to click the OK button to allow it to access those Library folders. After that, click the Finish button to open the Installation Assistant.
By default, it downloads and installs Windows 10. If you want to install Windows 10 on Mac using Parallels Desktop, click the Install Windows button. However, in this case, you are installing Windows 11, and that’s why you need to click the Skip button.
Select the Install Windows or another OS from a DVD or image file option and click on the Continue button on the next window.
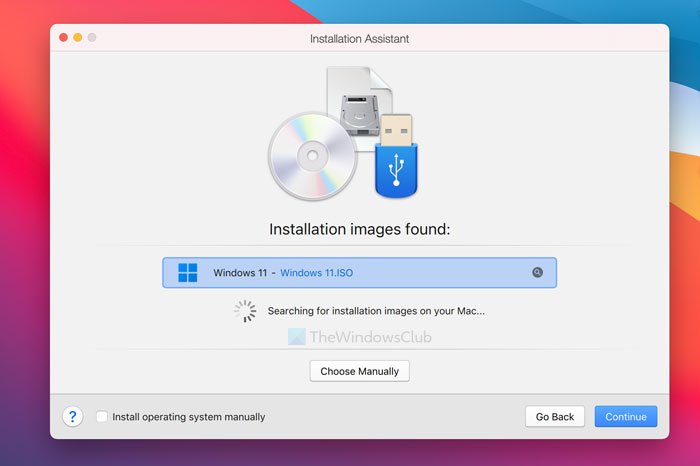
Parallels Desktop automatically detects the ISO file. However, if it fails to do so, you need to click the Choose Manually option, navigate to the folder where you have the ISO file, and double-click on it.
Otherwise, you can click on the Continue button.
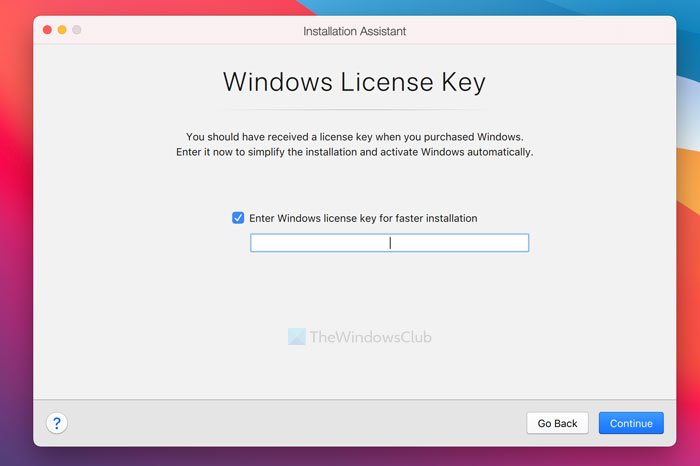
Then, it asks for the product key to activate your copy of Windows 11. If you do not want to activate it during installation, remove the tick from the Enter Windows license key for faster installation checkbox and click the Continue button.
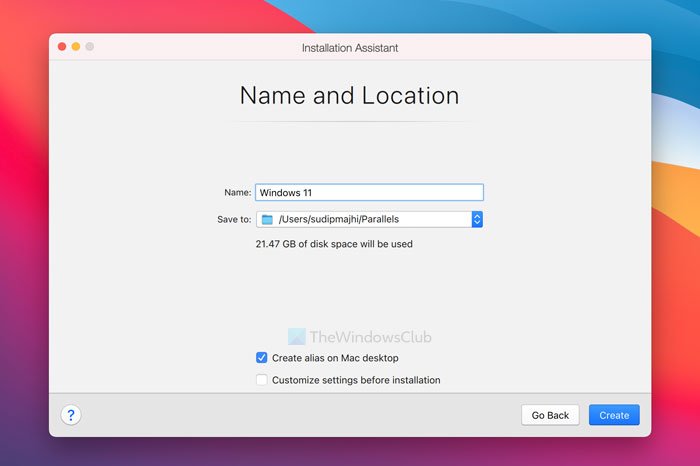
After that, you need to choose a file name and location for the virtual machine. By default, it creates a folder in your user account. If you do not want to do that, you can click on the Save to drop-down list and select a folder according to your choice. Once done, click the Create button.
Next, it asks for the virtual machine configuration. In other words, you can assign RAM, storage, CPU cores, etc. If you want to edit them, click the Configure button and do that accordingly. Otherwise, click the Continue button.

Then, it will start the Windows 11 installation as usual.
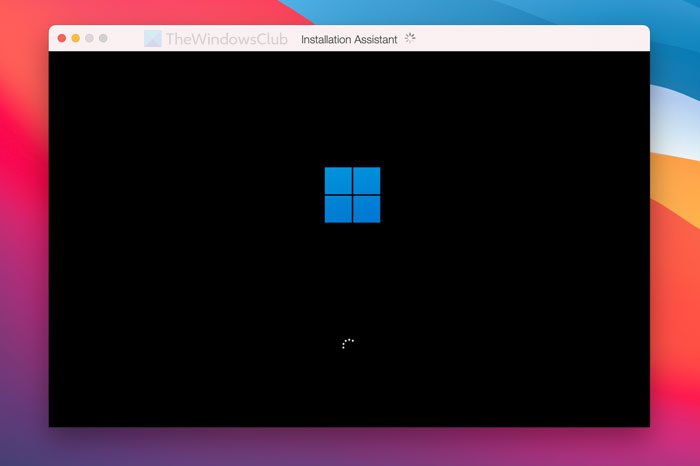
To finish it, you need to follow all the screen instructions. If you have never installed Windows before, follow this guide to learn more about the fresh installation of Windows 11/10.
NOTES:
- Microsoft has officially partnered with Parallels to bring Windows 11 on ARM to M1 and M2 Macs
- Windows 11 arm64 ISO file available for Mac M1, Surface Pro, and Raspberry Pi
Is installing Windows on Mac free?
If you have an Intel-based Mac, you can install Windows 11/10 on Mac for free using BootCamp. However, Apple M1-based Macs do not have BootCamp support. That is why you need to opt for a reliable software like Parallels Desktop, which offers a trial version that you can use to test Windows 11 for free.
Read: Best free Mac emulators for Windows PC.
Are there any restrictions after installing Windows 11 on Mac?
No, you won’t find any restrictions regarding installing software or feature after installing Windows 11 on Mac. All the options work without any problem on a virtual machine on Mac.
That’s all! Hope this guide helped.
Read: Install Windows OS on Mac OS X using VMware Fusion.