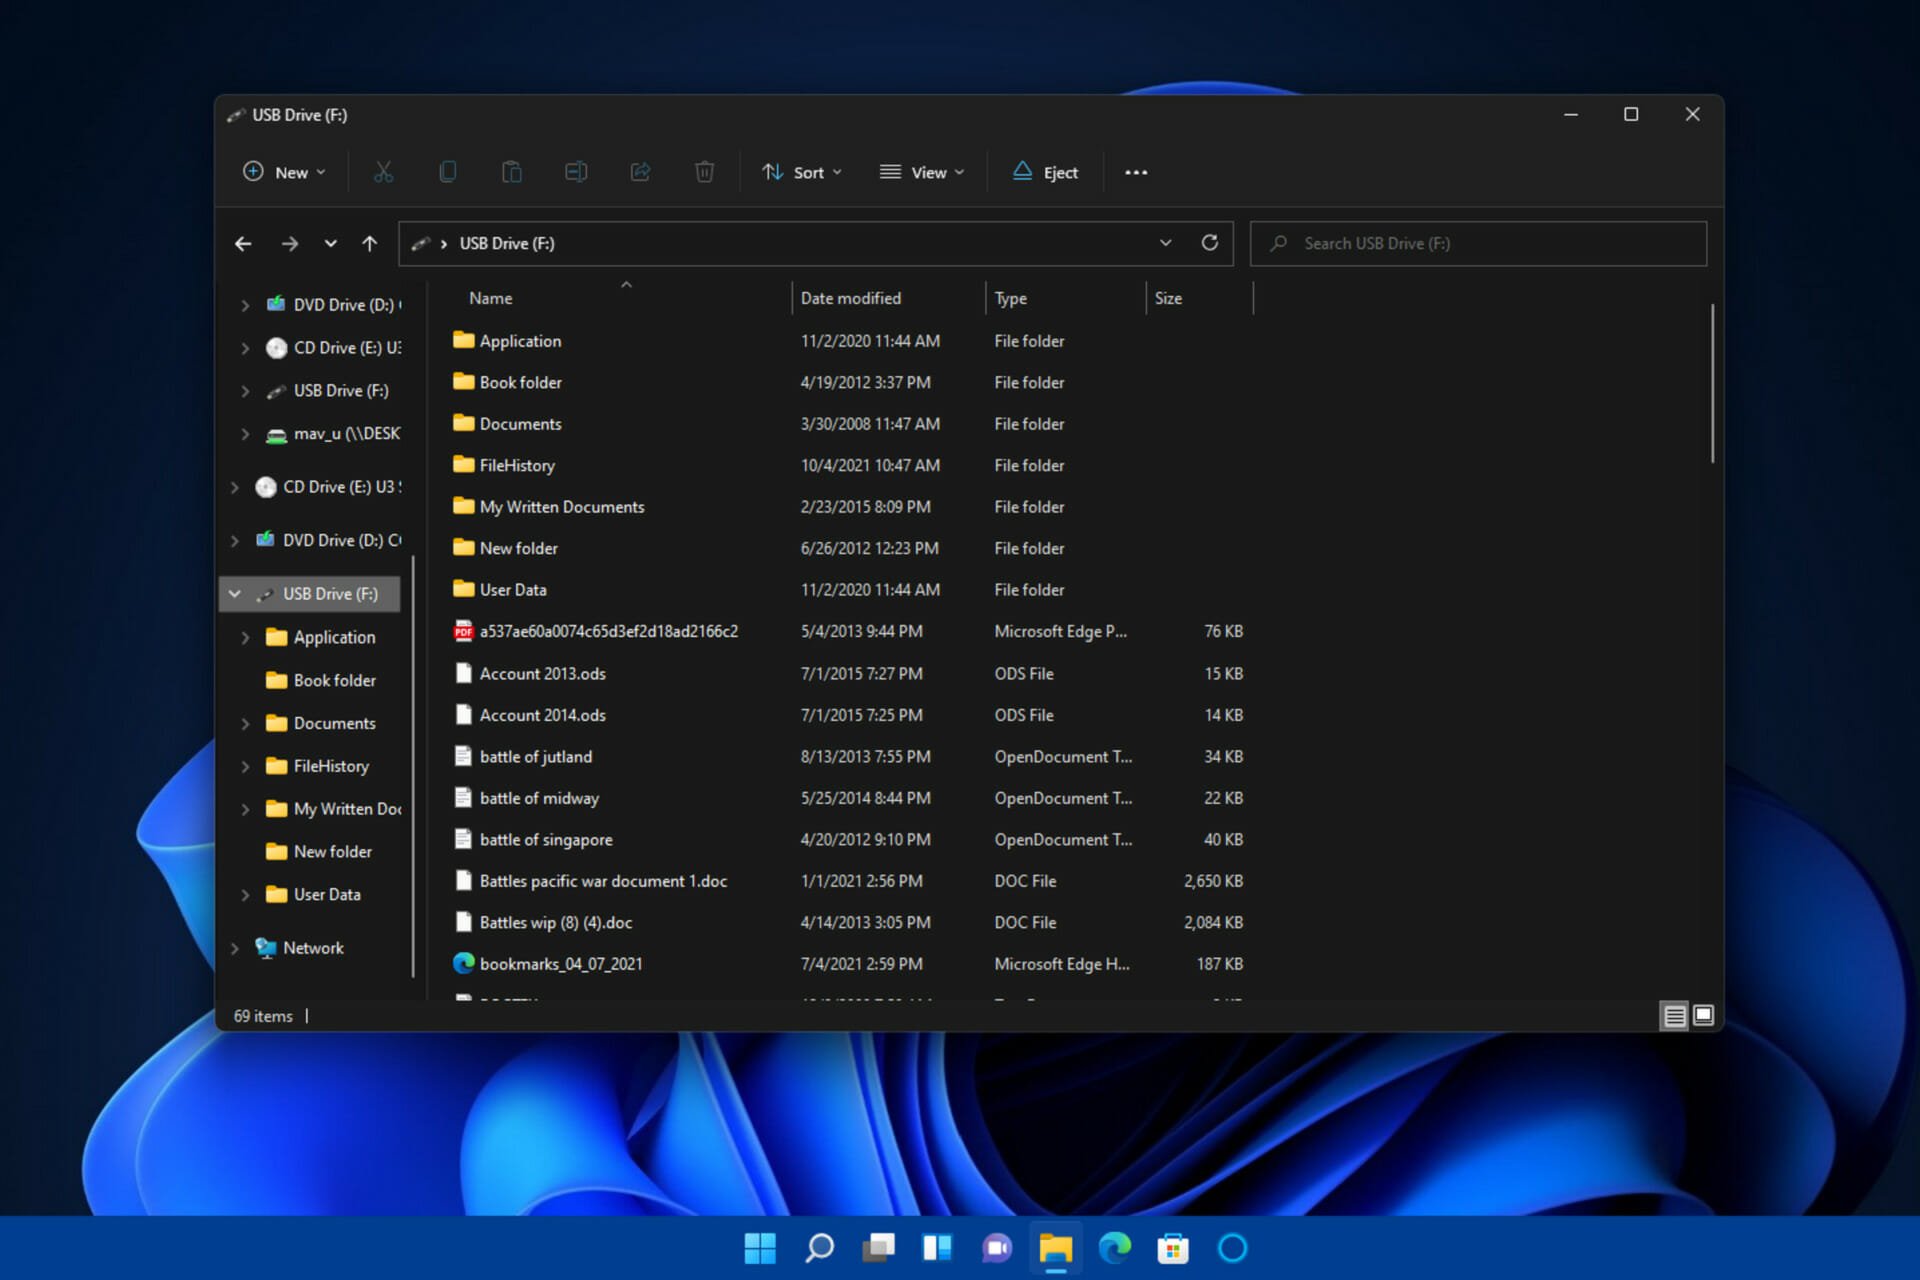
USB — это внешнее устройство, подключенное к вашему ПК с Windows 11. Это очень удобно для хранения чего-либо на внешнем устройстве. Однако недавно некоторые пользователи Windows 11 сообщили, что столкнулись с проблемой, заключающейся в том, что USB не работает в Windows 11 после того, как они подключили их к ПК с Windows 11. Они не могут открыть файл на USB, потому что Windows 11 не может распознать подключенное USB-устройство. Эта статья расскажет вам, как решить проблему, из-за которой USB не работает в Windows 11. Продолжайте читать.

Есть 11 эффективных способов решить эту проблему. Эти методы могут помочь вашей Windows 11 распознать USB-устройство и снова заставить USB работать в Windows 11.
1. Проверьте свое устройство (и порт USB)
Сначала проверьте и исключите любые повреждения подключенного устройства или USB-порта.
Определите, повреждено ли ваше устройство или USB-порт, удалив USB-устройство, проверив кабель и USB-порт, а затем повторно подключив его. Замените поврежденный кабель. Если в USB-порте есть пыль, сначала удалите пыль, затем снова подключите устройство и посмотрите, правильно ли работает USB в Windows 11.
2. Попробуйте использовать другой порт USB
Если первый метод подтверждает, что с вашим устройством все в порядке, возможно, проблема связана с используемым вами USB-портом. Замена может быть подключена к USB-порту устройства, чтобы проверить, есть ли проблема с используемым в настоящее время USB-портом. Если устройство распознается Windows 11 и работает нормально, то с USB-портом определенно что-то не так, что мешает правильной работе USB в Windows 11.
3. Замените USB-устройство
Если с USB-портом также все в порядке, возможно, проблема связана с используемым USB-устройством. Вы можете попробовать заменить подключенное USB-устройство, чтобы проверить, является ли неисправность USB-устройства причиной того, что USB не работает должным образом в Windows 11. Перед заменой обязательно попробуйте устройство на другом ПК, чтобы убедиться, что новое устройство вы заменяете работает.
4. Перезагрузите Windows 11.
Если с вашим устройством, USB-портом и USB-устройством все в порядке, возможно, произошел сбой в работе программы. Попробуйте перезагрузить компьютер. Как правило, перезагрузка устраняет большинство сбоев на ПК, включая сбои USB-устройств. Перезагрузка ПК заставляет Windows установить отсутствующие драйверы. Если ваш USB не распознается в Windows 11, это может решить проблему.
Быстрый перезапуск Windows 11:
Подключите USB-устройство и щелкните правой кнопкой мыши меню «Пуск».
Выберите Завершение работы или Выход из системы > Перезагрузить.
Если есть проблема, Windows 11 автоматически распознает USB-устройство после установки драйверов.
5. Проверьте наличие обновлений Windows
Новое обновление Windows может включать исправления неисправных USB-портов или неисправных устройств, а также общие улучшения удобства использования. Проверьте наличие Центра обновления Windows в Windows 11 следующим образом:
- Откройте меню «Пуск» и нажмите «Настройки» (или нажмите клавишу Windows + I).
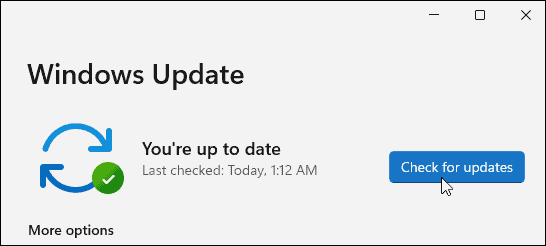
- В настройках перейдите в Центр обновления Windows и нажмите кнопку «Проверить наличие обновлений».
- Затем Windows 11 автоматически проверит наличие доступных обновлений и загрузит их.
- Чтобы установить доступные обновления, нажмите кнопку «Перезагрузить сейчас» или установите активное время для перезагрузки Windows, когда вы не используете компьютер.
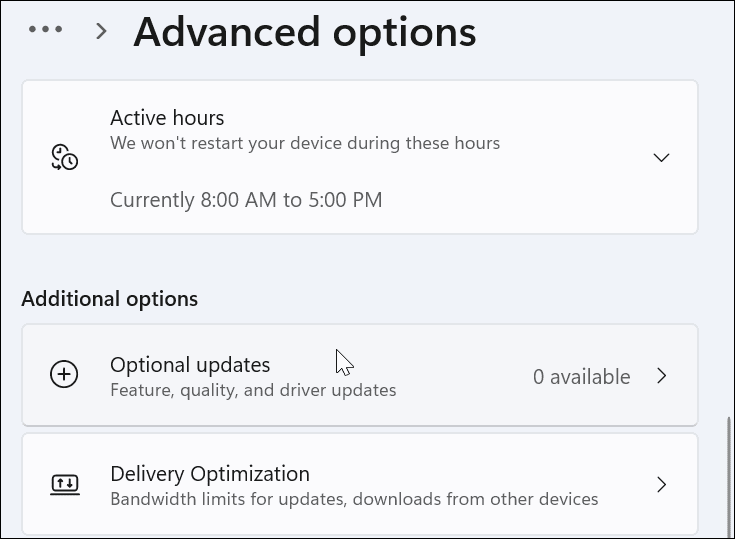
- Вы также должны проверить наличие необязательных обновлений (часто включая некритические драйверы устройств). Для этого перейдите в раздел «Дополнительные параметры» в Центре обновления Windows, выберите «Необязательные обновления» и установите все доступные обновления из списка.

6. Переустановите драйвер USB
Убедитесь, что ваши USB-драйверы обновлены. Выполните следующие действия, чтобы быстро обновить или переустановить драйвер USB:
Откройте меню «Пуск».
Войдите в Диспетчер устройств и выберите верхний результат.

Прокрутите древовидное меню диспетчера устройств и разверните раздел «Контроллеры универсальной последовательной шины».
Щелкните правой кнопкой мыши каждую запись и выберите «Удалить устройство».

Перезапустите, чтобы автоматически переустановить последние версии драйверов во время перезагрузки.
7. Проверьте наличие обновлений программного обеспечения с помощью инструментов OEM.
Центр обновления Windows не будет включать все возможные обновления оборудования. Однако вы можете вручную проверить наличие обновлений программного обеспечения с помощью приложения обновления OEM, созданного производителем устройства.
Порты USB могут работать неправильно, если отсутствуют важные драйверы набора микросхем. В этом случае необходимо установить необходимые драйвера напрямую от производителя или воспользоваться приложением обновления OEM. Проверьте наличие обновлений программного обеспечения OEM следующим образом:
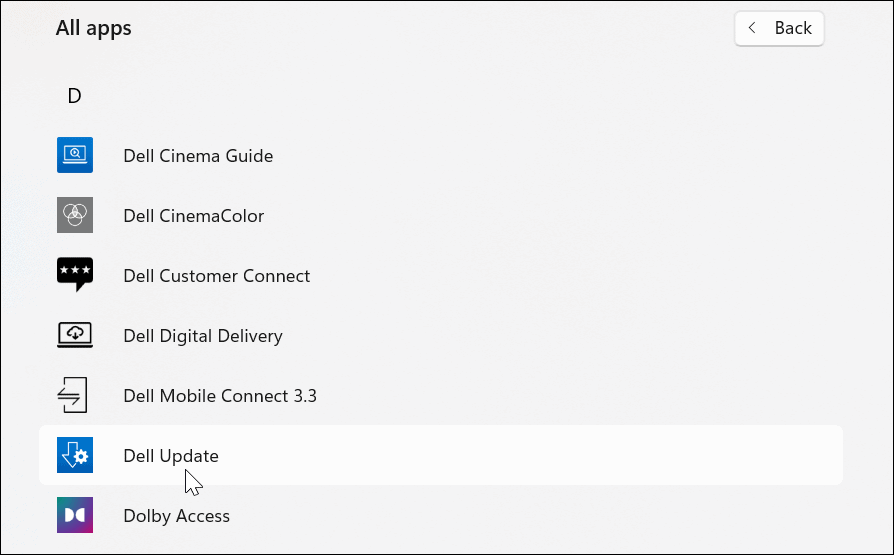
Найдите первую букву производителя компьютера в меню «Пуск». Например, выполните поиск «D» для компьютера Dell.

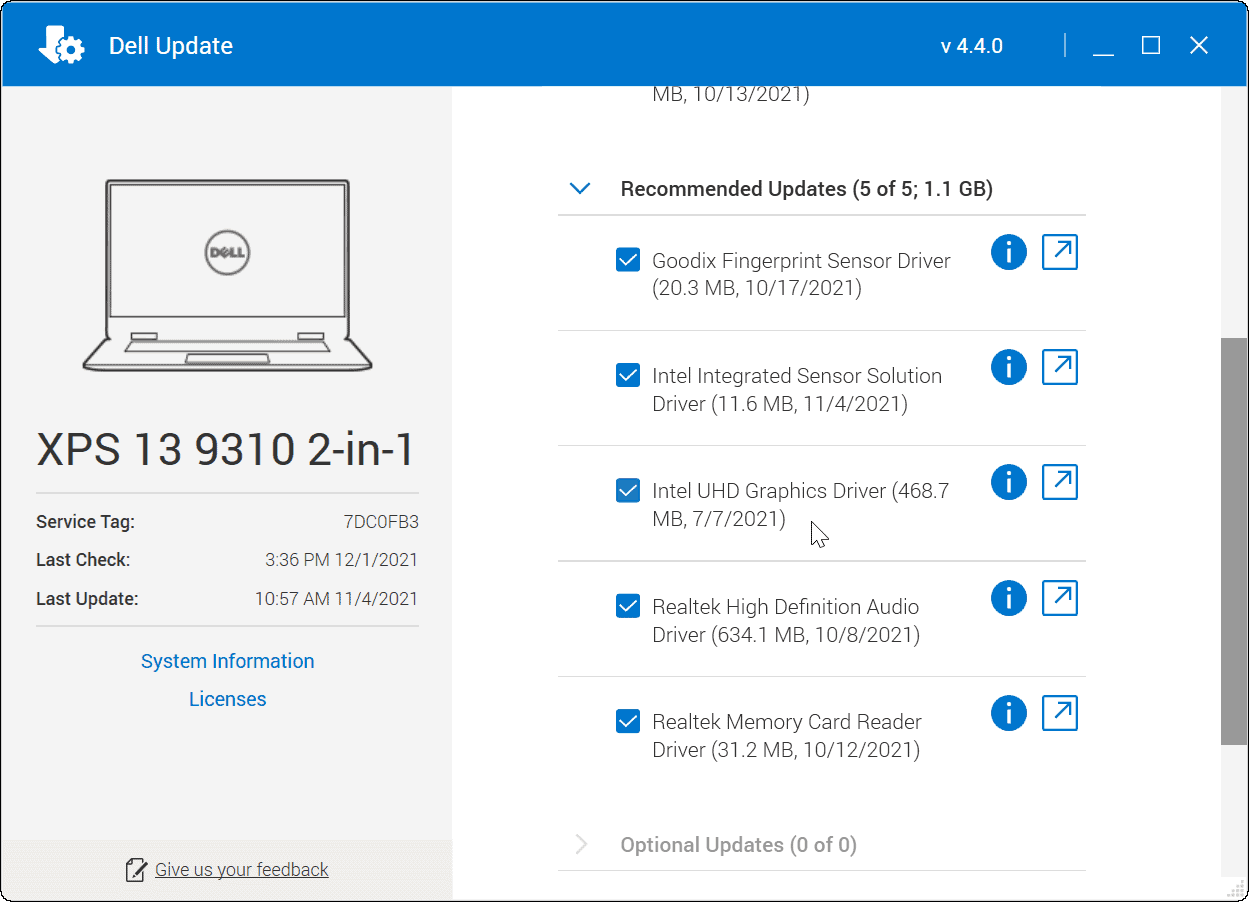
Запустите инструмент обновления производителя, чтобы установить все перечисленные обновления оборудования.

8. Вручную обновить программное обеспечение и драйвер
Если у вас не установлены инструменты OEM, вы можете найти своего производителя по модели вашего устройства и загрузить обновления вручную. Производители устройств обычно регулярно предоставляют обновленное программное обеспечение и драйверы. Выполните следующие действия, чтобы вручную установить обновления драйверов:
Проверьте последнюю версию драйвера USB-устройства или программного обеспечения на веб-сайте производителя и загрузите их.
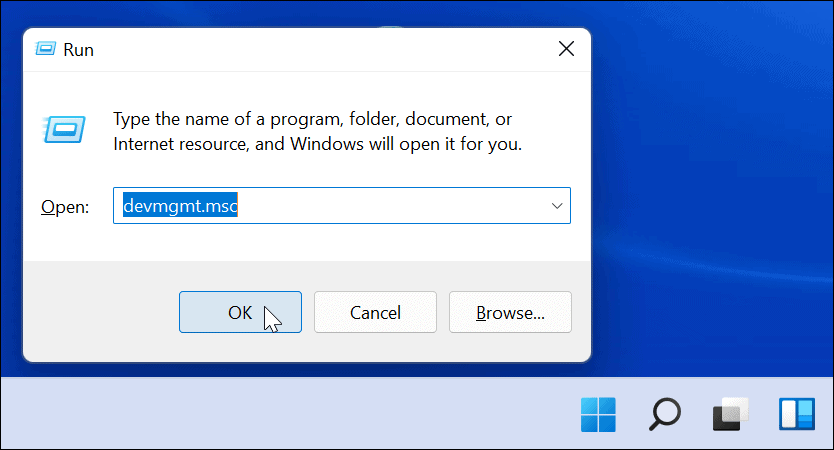
Нажмите клавишу Windows + R, чтобы открыть диалоговое окно «Выполнить», затем введите devmgmt.msc и нажмите «ОК».

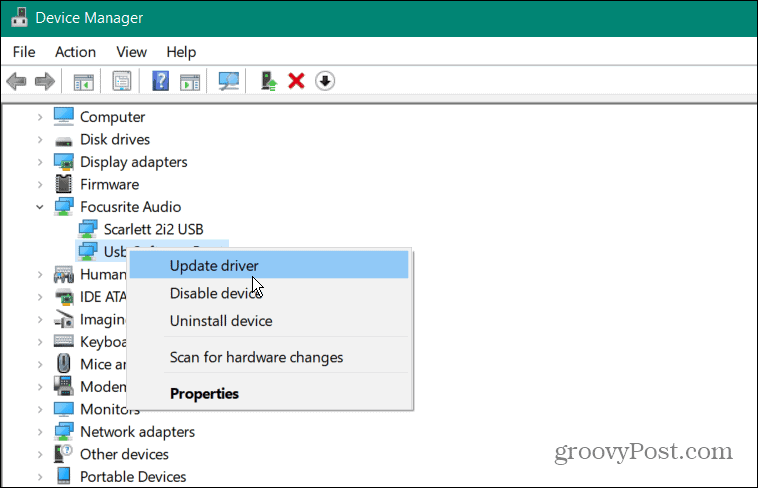
Найдите свое USB-устройство в списке в окне диспетчера устройств, щелкните его правой кнопкой мыши и выберите «Обновить драйвер».

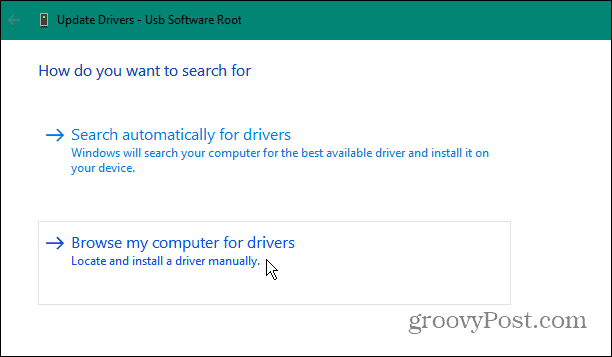
Выберите Поиск драйверов на моем компьютере, перейдите к загруженному драйверу и следуйте инструкциям на экране для завершения установки.

Наконец, перезагрузите компьютер.
9. Измените настройки управления питанием
USB-накопитель может не показывать достаточную мощность из-за настроек управления питанием, если ноутбук работает от батареи. Вам нужно исправить это, изменив настройки управления питанием.
Откройте диалоговое окно «Выполнить», нажав клавишу Windows + клавиши R.
Затем введите devmgmt.msc и нажмите OK.
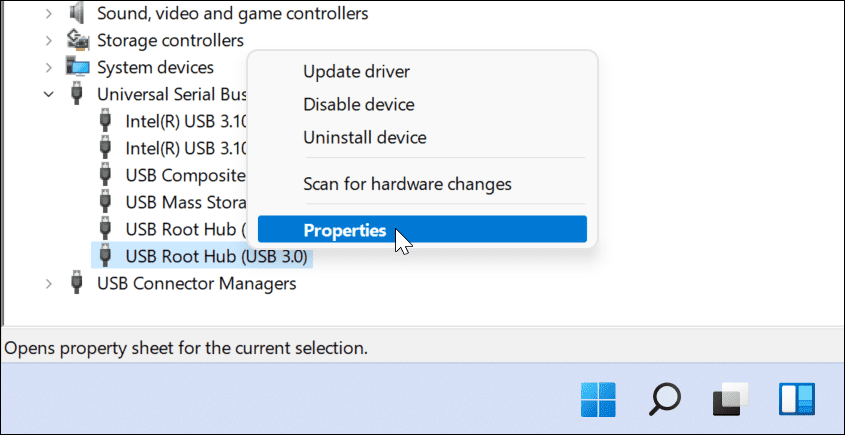
Разверните раздел Контроллеры универсальной последовательной шины.
Щелкните правой кнопкой мыши корневой USB-концентратор и выберите «Свойства».

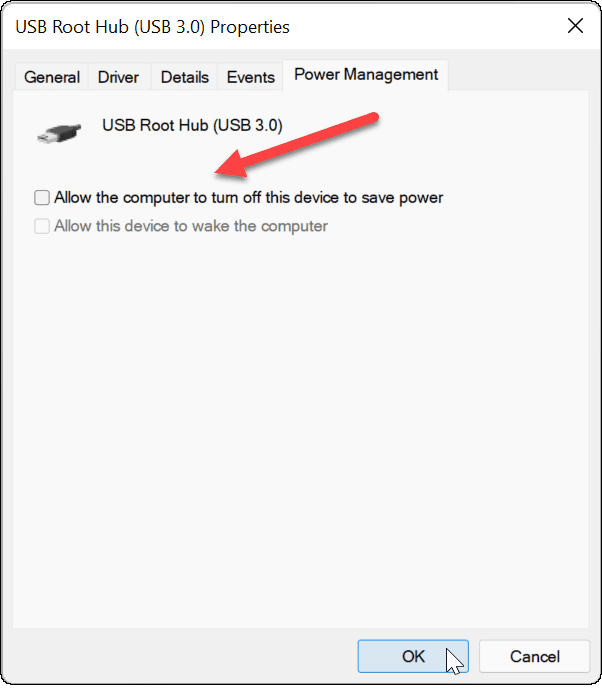
Выберите вкладку Power Management.
Снимите флажок «Разрешить компьютеру отключать это устройство для экономии энергии» и нажмите «ОК».

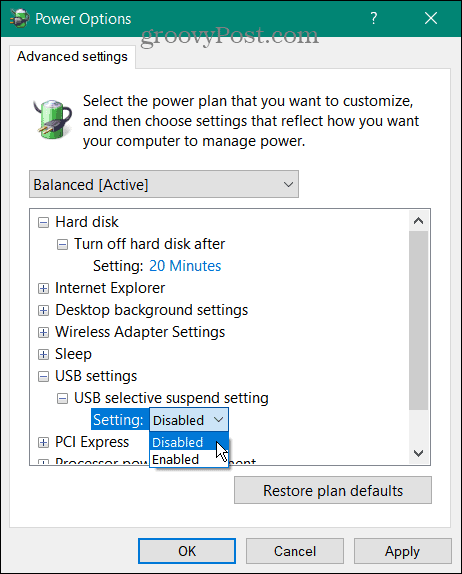
10. Отключить выборочную приостановку питания USB
Также возможно, что функция USB Selective Suspend Power может препятствовать правильной работе USB-устройств в Windows 11. Поэтому попробуйте отключить эту функцию, чтобы решить проблему.
Нажмите кнопку «Пуск» или клавишу Windows, чтобы открыть меню «Пуск».
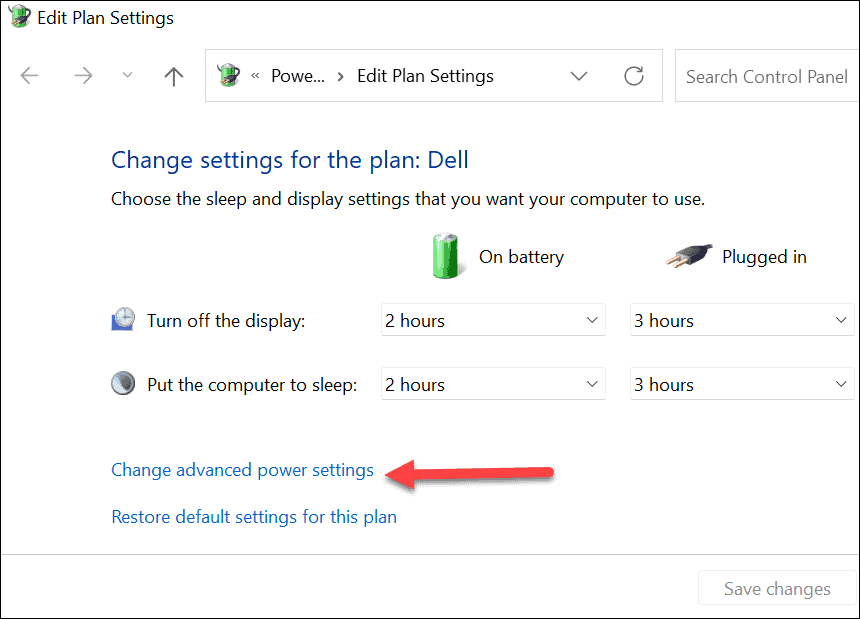
Введите изменить план электропитания и выберите соответствующий результат.

Затем нажмите «Изменить дополнительные параметры питания».

В разделе «Электропитание» разверните «Настройки USB» и измените параметр «Настройки выборочной приостановки USB» на «Отключено».
Нажмите ОК, чтобы сохранить.

11. Запустите сканирование SFC и DISM
Если ни один из вышеперечисленных методов не может решить проблему с неработающим USB, рекомендуется проверить, не повреждена ли установка Windows 11. Использование инструментов SFC и DISM может помочь вам быстро проверить локальные диски на наличие поврежденных системных файлов и восстановить поврежденные системные файлы.
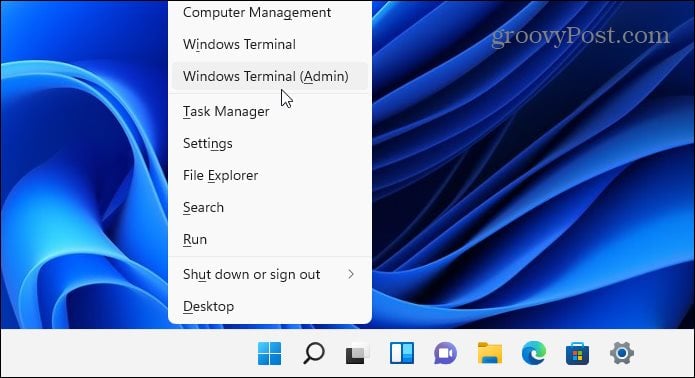
Щелкните правой кнопкой мыши кнопку «Пуск» и выберите Терминал Windows (Администратор).

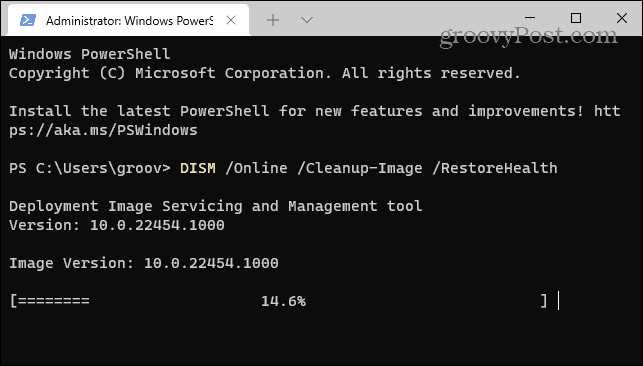
Введите и выполните следующую команду в окне терминала:
DISM / Online / Cleanup-Image / RestoreHealth

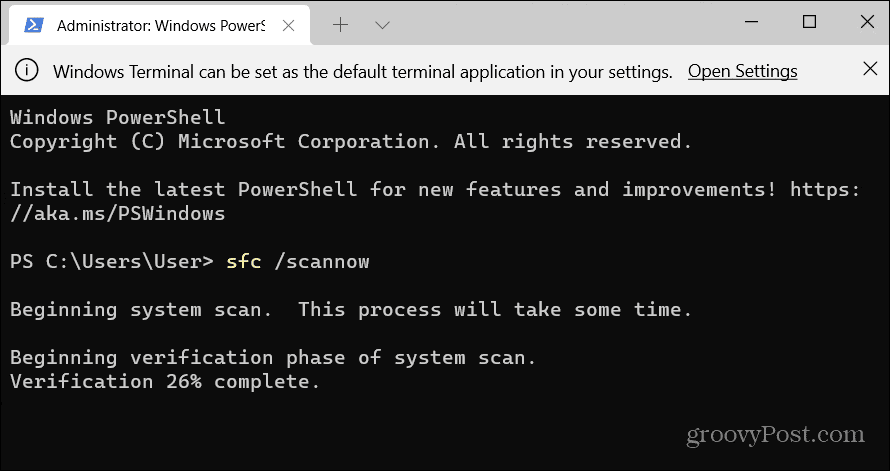
После этого введите и выполните команду: sfc /scannow

После завершения сканирования перезагрузите компьютер и убедитесь, что USB-устройство работает правильно в Windows 11. Если вы по-прежнему не можете, вы можете только сбросить Windows 11 до заводских настроек, чтобы устранить проблему с неработающим USB.
A USB device or port that isn’t working properly can be tricky to diagnose on a Windows 11 PC. If you’re unsure how to fix the problem, follow this guide.
The Universal Serial Bus (USB) is the gold standard port for connecting most portable devices to a PC. Whether it’s a keyboard, a camera, a portable hard drive, or even a little desk fan, it’s quite likely that you’ll use a USB cable to connect and power it.
The plug-and-play nature of USB makes it easy to connect all kinds of devices to your Windows 11 PC, but what if things go wrong? If your USB stops working on Windows 11, there could be any number of causes, from a faulty cable to missing drivers (and plenty more).
To help you troubleshoot the problem, here are 11 troubleshooting tips you can try to fix things if your USB isn’t working on Windows 11.
1. Inspect Your Device (and USB Port)
Before you try any drastic fixes to USB ports on your PC, you should inspect for possible damage.
This includes removing the USB device, checking the cabling and the USB port, and re-connecting it. If there’s a broken cable, for instance, you may want to replace it. If there’s dust in the USB port, use some canned air to clear it out.
After checking for damage and cleaning out the USB port, plug the device back in and see if it fixes the USB not working error on Windows 11.
2. Try a Different USB Port
If you’re confident that your device is working properly, it could be a problem with the USB port you’re using.
This fix is simple—simply remove the USB drive from the port you’re currently using and place it in another port. If the device is recognized by Windows 11 and it works without any problems, then you can troubleshoot the previous port.
Until then, however, you can carry on using the new port to get your work done.
3. Replace the USB Device
If the USB port seems to be working, then the fault could be with the device you’re using. You may need to switch your device for something else if Windows isn’t recognizing it (at least temporarily).
For example, a USB hard drive will only be recognized if the drive itself hasn’t failed. Make sure to try the device on another PC (if you can) to see if it works before you consider replacing it.
Unfortunately, it’s difficult to determine why a USB device might stop working. You may need to consult the user manual for that device to investigate or, if possible, look at possible support options from the manufacturer.
4. Restart Windows 11
Think your USB ports or devices are faulty? Don’t panic—give your PC a restart first. This is a tried-and-tested method to fix any number of troubleshooting issues on your PC, including malfunctioning USB devices.
You may find that restarting your PC forces Windows to install missing drivers. If your USB isn’t recognized on Windows 11, this can fix the problem.
To restart Windows 11 quickly:
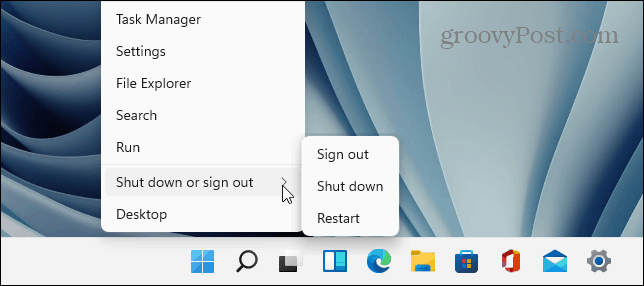
- Keep the USB device plugged in and restart Windows 11 by right-clicking the Start menu.
- In the pop-up, select Shutdown or sign out > Restart.
If there’s a software issue, Windows should recognize your USB device after rebooting and, if necessary, install any missing drivers.
5. Check for Windows Updates
Keeping your Windows 11 PC up-to-date is critical, as new Windows updates could include fixes for faulty USB ports or malfunctioning devices, as well as general usability improvements.
To check for Windows Updates on Windows 11:
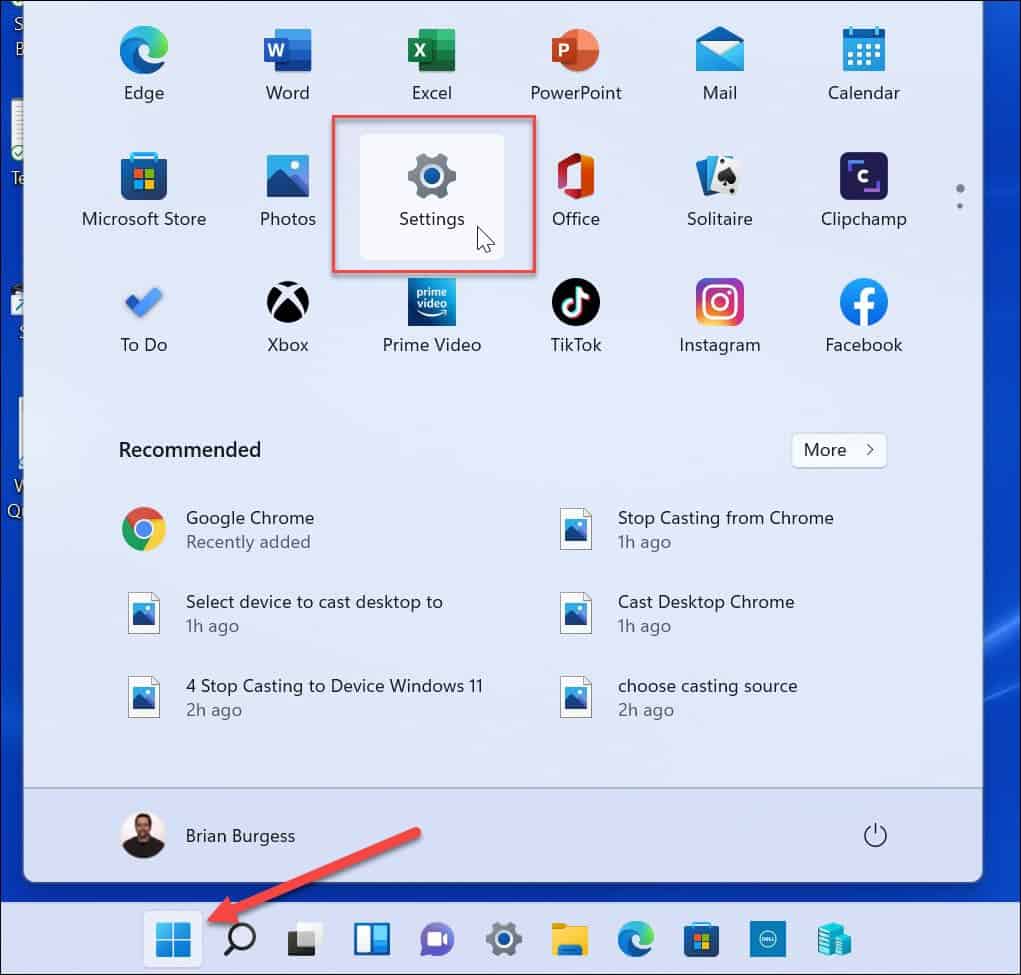
- Open the Start menu and press Settings (or press Windows key + I).
- In Settings, navigate to Windows Update, then click the Check for updates button.
- Windows 11 will check for any available updates and download them.
- To install any available updates, click the Restart now button or set Active Hours so Windows restarts when you’re not using the computer.

- You should also check for optional updates (which will often include non-critical device drivers). To do this, navigate to the Advanced options section in Windows Update, select Optional updates, then install any available updates listed.

6. Reinstall USB Drivers
Another thing you can do is ensure that your USB drivers are up to date. You can quickly update or reinstall your USB drivers by following these steps:
- Open the Start menu by pressing the Start button or the Windows key.
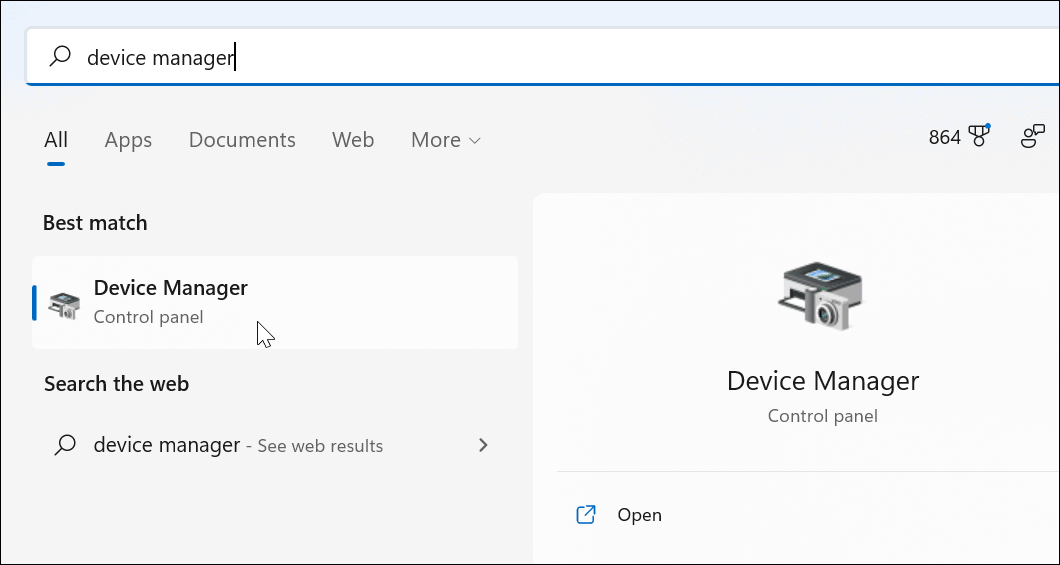
- Type device manager and select the top result.

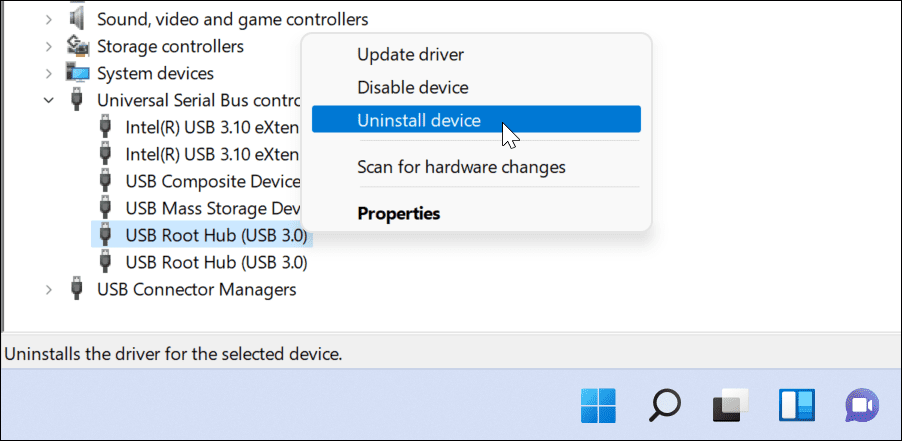
- Scroll through the Device Manager tree menu and expand the Universal Serial Bus controllers section.
- Right-click each entry and select Uninstall device.

- Restart your PC, and Windows should automatically reinstall the latest drivers for that device during the reboot.
7. Check for Software Updates Using OEM Tools
Windows Update isn’t a perfect resource, and it won’t include every possible update for your hardware. However, you may be able to check for software updates manually using an OEM update app created by your device manufacturer.
For example, if you’re missing important chipset drivers, your USB ports might not work properly. You can usually fix this by installing the necessary drivers from the manufacturer directly or by using an OEM update app.
To check for OEM software updates:
- Launch the Start menu and search the first letter of the computer’s manufacturer. For example, search “D” for Dell or “L” for Lenovo.
- Find and launch the manufacturer’s update tool and install any hardware updates it finds.
8. Check for Software and Driver Updates Manually
If you don’t have an OEM tool installed, you can search for your manufacturer online and download updates manually. If you search for the model number for your device, you should be able to find drivers and software updates available t0 download and install.
Certain types of device manufacturers will provide updated software and drivers more regularly. For example, if you have an advanced gaming keyboard, streaming microphone, or an audio interface device that connects via USB, you may see a faster update schedule than other types of devices.
To install driver updates manually:
- Download the latest USB device or software driver from the manufacturer’s website.
- Press Windows key + R on your keyboard to open the Run dialog box.
- In Run, type devmgmt.msc and click OK.

- When Device Manager opens, find your USB device in the list, right-click it and select Update driver.

- Select Browse my computer for drivers, navigate to the driver you downloaded, and follow the onscreen instructions to finish the installation.
If you’ve downloaded a software update, run the installer file and follow any on-screen instructions to complete the update. You may need to restart your PC to complete any changes.
9. Change Power Management Settings
USB devices need a good amount of power but, if you’re running on a battery, this power isn’t always available. For example, a USB drive might not see enough power because of the power management settings in place when your laptop is running from its battery.
You can resolve this by changing your power management settings. To do this:
- Press Windows key + R to open the Run dialog box.
- In Run, type devmgmt.msc and click OK.
- Scroll down and expand the Universal Serial Bus controllers section in Device Manager.
- Right-click USB Root Hub and select Properties.

- In the USB Root Hub Properties window, select the Power Management tab.
- Uncheck the Allow the computer to turn off this device to save power option and click OK.
10. Disable USB Selective Suspend Power Option
Another potential problem for USB devices is the USB selective suspend power feature. This helps to conserve a laptop’s battery power by suspending devices that aren’t always in use.
Unfortunately, this can sometimes interfere with the USB devices you’re using. If Windows doesn’t think the device is being used, it’ll cut power to it and stop it from working.
To disable the USB selective suspend option on Windows 11:
- Open the Start menu by pressing Start or the Windows key.
- Type edit power plan and select the top result.

- Next, click the Change advanced power settings option.

- In Power Options, expand USB settings and change the USB selective suspend setting option to Disabled.
- Click OK to save.

11. Run SFC and DISM Scan
If the options above don’t work, you may want to check that your Windows 11 installation isn’t corrupted. The SFC and DISM tools will check your local drive for corrupted system files and replace them.
To run the SFC and DISM tools on your PC:
- Right-click the Start button and select Windows Terminal (Admin) from the menu.
- Enter the following command in the Terminal windows and hit Enter:
DISM /Online /Cleanup-Image /RestoreHealth
- After the DISM scan is complete, run an SFC scan by entering the following:
sfc /scannow
Note that these scans can take a while to run. When the scans are complete, restart your PC and see if the USB device is working again. If these tools can’t fix your PC, you may need to reset Windows 11 to factory settings instead.
Troubleshooting a Windows 11 PC
If your USB is not working on Windows 11, the steps above should help you to resolve the issue. USB problems can affect any type of USB device, but you may need to try more specialist fixes for certain devices. For example, you can troubleshoot a broken USB keyboard on Windows 11 by installing the device management software and running the keyboard troubleshooter.
Your USB ports aren’t the only thing that can stop working on a Windows 11 PC. If you’re having problems with your display, for instance, you may need to consider fixes to your HDMI connection.
![]()
Порты USB не работают в Windows 11?
Порты USB или универсальная последовательная шина — это стандартный тип порта, через который большинство портативных устройств подключаются к вашему ПК. Пользователи могут подключать USB-накопители или периферийные устройства, такие как клавиатура, мышь, настольный вентилятор и многое другое. Но что, если они вдруг перестанут работать?
Когда USB-порты не могут обнаружить подключенное устройство, проблема может заключаться в устройстве, USB-портах или внутренних компонентах вашего компьютера. Поэтому важно определить, в чем действительно заключается проблема, чтобы исправить ее.
Распространенные причины, по которым USB-порты не работают в Windows 11, включают устаревшие или поврежденные драйверы устройств, недостаточное питание, неисправный кабель устройства, сломанные порты, неправильные настройки и т. д. Чтобы решить эту проблему, просто следуйте методам устранения неполадок, описанным ниже.
Итак, давайте прыгать прямо в!
Если вы подозреваете, что ваш порт USB перестал работать, первое, что нужно сделать, это проверить эти порты. Часто пыль и мусор могут быть главными виновниками этой проблемы.
Начните с извлечения USB-устройства из порта. Осмотрите порт USB и кабель вашего устройства. Если в порте есть пыль, осторожно очистите его сжатым воздухом или ватным тампоном. Если провод устройства согнут или сломан, подумайте о его замене. После этого снова подключите устройство к USB-порту и проверьте, решает ли это проблему.
Если вы уверены, что с используемым вами устройством все в порядке, подумайте о том, чтобы вставить его в другой USB-порт и посмотреть, работает ли это.
2. Замените USB-устройство.
Если ваш USB-порт работает с одним устройством, а не с другим, проблема может заключаться в устройстве, к которому вы подключаетесь, а не в порте. Единственный способ исправить это — заменить USB-устройство.
Однако этому методу следует следовать только после подтверждения того, что проблема связана с USB-устройством. Для этого попробуйте подключить USB-устройство к другому ПК или другому порту и проверьте, работает ли оно.
3. Перезагрузите компьютер.
Когда проблема связана с программным обеспечением вашего компьютера, самым простым и эффективным решением является перезагрузка компьютера. Это обычное средство для решения большинства проблем с Windows дает вашей операционной системе новый старт, устраняя любые временные ошибки и сбои, которые могут привести к тому, что USB-порты не работают.
Выполните следующие действия, чтобы перезагрузить компьютер:
- Перейдите в меню «Пуск» с вашего ПК.
- Затем щелкните значок питания.
- Выберите «Перезагрузить».
После этого вставьте устройство в USB-порт, чтобы проверить, решил ли перезапуск проблему.
4. Проверьте наличие обновлений Windows.
Windows иногда выпускает обновления исправлений, которые могут исправить различные проблемы, с которыми вы можете столкнуться, например, неисправные USB-порты. Таким образом, если USB-порты, не работающие в Windows 11, являются широко распространенной проблемой, Windows, возможно, обратила на это внимание и выпустила для нее новое обновление.
Поэтому проверьте наличие ожидающих обновления Windows выполнив следующие действия:
- Нажмите клавиши Win + i на клавиатуре, чтобы получить доступ к настройкам.
- На левой панели нажмите Центр обновления Windows.
- Теперь нажмите кнопку Проверить наличие обновлений.
- Подождите некоторое время, пока Windows будет искать все ожидающие обновления. Если есть доступное обновление, нажмите «Загрузить сейчас», чтобы установить его в свою систему.
5. Переустановите USB-драйверы.
Поврежденные или поврежденные драйверы USB также могут быть причиной того, что порты USB не работают в Windows 11. В таких случаях переустановка неисправных драйверов USB может решить проблему.
Вот как это сделать:
- Перейдите в меню «Пуск» и нажмите на строку поиска вверху.
- Введите «диспетчер устройств» в строке поиска и нажмите на то же самое в результатах поиска.
- Прокрутите вниз и нажмите «Контроллеры универсальной последовательной шины», чтобы развернуть его.
- Теперь щелкните правой кнопкой мыши каждый драйвер и выберите «Удалить устройство».
- Наконец, перезагрузите компьютер, чтобы автоматически переустановить эти драйверы.
Хотя обновления Windows включают все необходимые обновления, они могут не охватывать все компоненты вашего оборудования. По этой причине лучше проверить веб-сайт производителя на наличие обновлений драйверов USB или чипсета и установить их на свой компьютер.
Вы также можете обновить с помощью инструментов OEM. Вот что вы должны сделать:
- Перейдите в меню «Пуск» и введите в строку поиска первую букву производителя вашего ПК. Например, «D» для Dell.
- В результатах поиска нажмите Dell Update или приложение обновления вашего производителя.
- Наконец, проверьте наличие обновлений оборудования и установите их на свой компьютер, следуя инструкциям на экране.
7. Измените настройки управления питанием.
Иногда в настройках питания вашего ПК может быть установлено запрет на подключение USB-устройства для экономии заряда аккумулятора. Поскольку USB-устройства потребляют большую часть батареи, важно убедиться, что ваш компьютер имеет достаточную мощность для обнаружения подключенного устройства и обеспечения его работы.
Вы можете изменить настройки управления питанием, чтобы решить эту проблему:
- Запустите диалоговое окно «Выполнить», нажав клавиши Win + R.
- В текстовом поле введите «devmgmt.msc» и нажмите «ОК», чтобы открыть диспетчер устройств.
- Теперь прокрутите и найдите Контроллеры универсальной последовательной шины, затем нажмите на него, чтобы развернуть.
- Щелкните правой кнопкой мыши USB Control Hub и выберите «Свойства».
- Перейдите на вкладку «Управление питанием».
- Снимите флажок Разрешить компьютеру отключать это устройство для экономии энергии.
- Наконец, выберите OK, чтобы сохранить эти изменения.
8. Отключите выборочную приостановку питания USB.
Параметр настройки выборочной приостановки USB также является еще одной причиной того, что USB-порты не работают в Windows 11. Если на вашем ноутбуке недостаточно батареи, включение этого параметра будет мешать работе USB-устройства. Это происходит, когда Windows подозревает, что устройство не используется.
Чтобы устранить эту проблему, отключите выборочную приостановку питания USB в настройках USB. Вот как:
- Нажмите на меню «Пуск» и введите «изменить план питания» в строке поиска.
- Выберите Изменить план электропитания в результатах поиска.
- Затем нажмите «Изменить дополнительные параметры питания».
- Появится окно параметров электропитания. Оттуда найдите и нажмите «Настройки USB», чтобы развернуть его.
- Наконец, в настройках выборочной приостановки USB выберите «Отключено» и нажмите «ОК».
9. Выполните сканирование SFC и DISM.
Если упомянутые выше методы не помогли устранить вашу проблему, рассмотрите возможность запуска сканирования SFC и DISM. Эти встроенные средства сканирования обнаружат и исправят любые поврежденные файлы в вашей системе.
Выполните следующие действия, чтобы запустить эти сканирования:
- Щелкните правой кнопкой мыши меню «Пуск» и выберите Терминал Windows (Администратор).
- Скопируйте и вставьте эту команду DISM:
DISM/Онлайн/Cleanup-Image/RestoreHealth
- Теперь введите следующую команду, чтобы запустить сканирование SFC:
sfc/scannow
Это подводит итог нашему руководству о том, как исправить USB-порты, не работающие в Windows 11. Если у вас есть какие-либо сомнения по этой теме, используйте раздел комментариев ниже. Мы будем рады помочь.
Если это руководство помогло вам, пожалуйста, поделитесь им. 😊
Faulty or incompatible USB ports may be the main cause for not being recognized by Windows 11
by Matthew Adams
Matthew is a freelancer who has produced a variety of articles on various topics related to technology. His main focus is the Windows OS and all the things… read more
Updated on
- When Windows 11 is not recognizing USB drives, the issue can be due to outdated or faulty drivers or certain power management settings.
- Changing power management settings for USB Root Hubs might help when a USB flash drive is not detected.
- Updating drivers for USB controllers is another potential resolution to take into consideration.
XINSTALL BY CLICKING THE DOWNLOAD
FILE
Many users utilize portable USB drives to transfer files between PCs. Although Windows 11 is a brand new OS, the same old USB device issues can arise on it. USB device not recognized errors are among the most common ones on Windows platforms.
Some users have already needed to fix the USB device not recognized error in Windows 11. That issue shows up when they plug their USB drives into PCs. When they insert their USB drives into ports, this error message appears:
USB device not recognized. The last USB device you connected to this computer malfunctioned, and Windows does not recognize it.
Thus, Windows 11 doesn’t recognize USB storage devices when that issue arises. As a consequence, users can’t access their USB drives that aren’t recognized in File Explorer.
Why does Windows 11 not recognize my USB device?
The causes for the USB device not recognized error often pertain to USB controller or device drivers and certain power saver features. These are some of the likely causes to consider:
- Faulty or incompatible USB port: The USB port you’re plugging the device into might be faulty or incompatible with the storage drive
- Power management settings that suspend (or turn off) USB devices and hubs can cause the issue
- Faulty USB device driver: The driver for your USB storage device might be corrupt
- Outdated USB controller drivers: Your PC’s USB hub drivers might need updating
Do you need to fix the USB device not recognized error in Windows 11? If so, give these potential resolutions a try.
How do I fix USB device not recognized by Windows 11?
- Why does Windows 11 not recognize my USB device?
- How do I fix USB device not recognized by Windows 11?
- 1. Plug the storage drive into different USB ports
- 2. Disable the selective suspend option
- 3. Change the power management settings for USB root hubs
- 4. Assign a drive letter to the USB device
- 5. Update drivers for USB root and generic hubs
- 6. Reinstall drivers for the USB drive that isn’t recognized
- Who can I contact about fixing this USB error?
1. Plug the storage drive into different USB ports

First, try plugging your USB drive into alternative USB ports. The error might not occur when you plug it into a different port. If that’s the case, one of your PC’s USB ports is probably faulty.
How we test, review and rate?
We have worked for the past 6 months on building a new review system on how we produce content. Using it, we have subsequently redone most of our articles to provide actual hands-on expertise on the guides we made.
For more details you can read how we test, review, and rate at WindowsReport.
If the issue arises for an external hard drive, it might also help to change the device’s USB cable. At the very least, check the condition of the drive’s cable. You might need to get a new USB cable for the hard drive to resolve the error.
2. Disable the selective suspend option
In order to solve not recognizing USB on Windows 11, we recommend to follow the steps below to disable the selective suspend option.
1. First, press the magnifying glass icon on Windows 11’s taskbar to bring up the search tool.
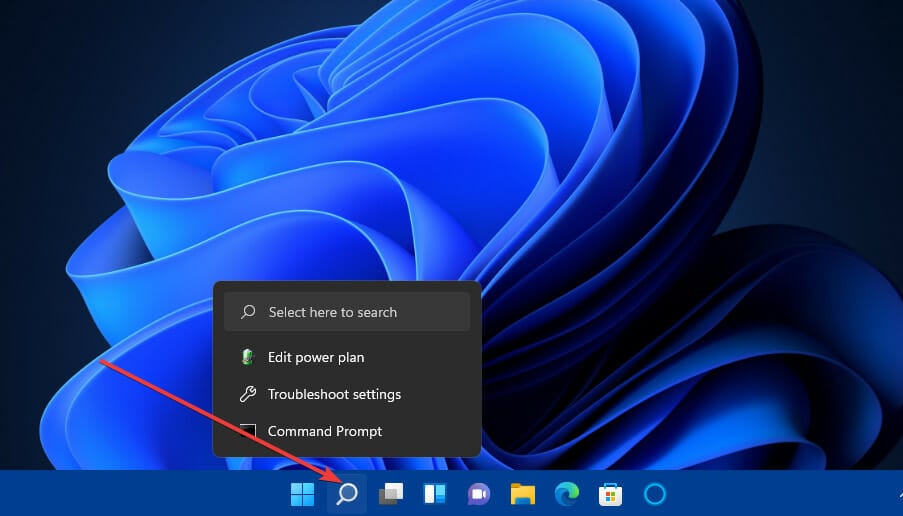
2. Enter the keyword edit power plan in the search box.
3. Click Edit power plan to bring up the Edit Power Plan Control Panel applet.
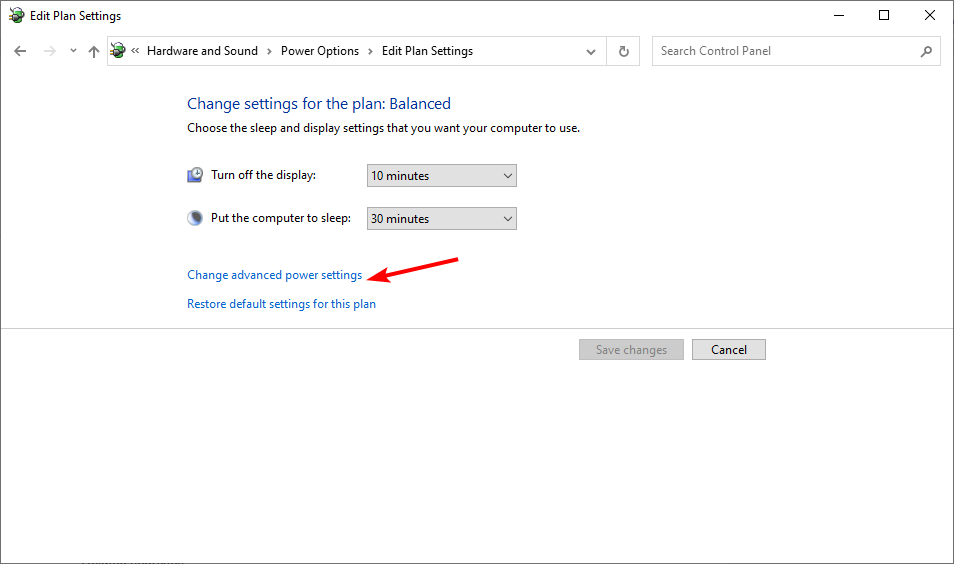
4. Next, click Change advanced power settings in that applet.
5. Double-click USB settings on the Power Options window.
6. Then double-click USB selective suspend to open the setting that you can see below:
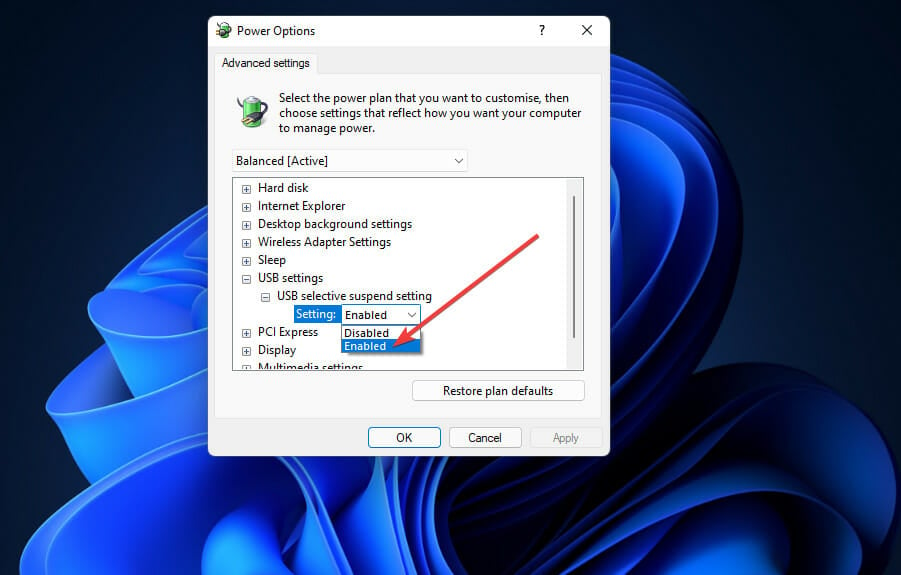
7. Select the Disabled option on the Setting drop-down menu.
8. Press the Apply button on the Power Options window.
9. Click OK to exit the window.
3. Change the power management settings for USB root hubs
- Right-click Windows 11’s Start button to open a handy shortcuts menu.
- Select the Device Manager shortcut on that menu.

- Click the View menu.
- Select the Show hidden devices option on the menu.

- Double-click the Universal Serial Bus controllers category.
- Right-click a USB Root Hub listed there and select Properties.

- Then select the Power Management tab.
- Uncheck the Allow this computer to turn off this device to save power checkbox to deselect that option.

- Click OK to close the USB Root Hub window.
- Repeat steps six to nine for all USB Root Hubs listed in Device Manager.


4. Assign a drive letter to the USB device
- Plug the USB storage drive into your PC.
- Right-click Start and select Disk Management.
- Next, right-click the USB drive in Disk Management and select Change Drive Letter and Paths.

- Click the Add button on the Change Drive Letter and Path window that opens.

- Press the OK button on the Add Drive Letter or Path window.


- Fix: USB Type C is not recognized/working on Windows 10/11
- Full Fix: Android phone not recognized by PC [Windows 10/11]
- External hard drive not showing up on Windows 10/11 [Solved]
- Fix: Reconnect your drive error on Windows 10/11
5. Update drivers for USB root and generic hubs
- Open Device Manager as covered in the first couple of steps of the third resolution.
- Next, click View and Show hidden devices.
- Double-click Universal Serial Bus controllers to expand that category.
- Right-click a USB Root Hub to select its Update driver option.

- Select Search automatically for drivers in the Update Drivers window that opens.

- Repeat steps four and five for all USB Root Hub and Generic USB Hub controller devices listed.


Alternatively, you can update USB controller drivers with third-party driver updater software. Scanning your PC with a driver updater utility will list all its devices that have outdated drivers.
Then you can select to download and install the latest drivers with the software, so don’t hesitate to check out the tool below in that regard.
⇒ Get Outbyte Driver Updater
6. Reinstall drivers for the USB drive that isn’t recognized
- Insert your USB drive into your desktop or laptop.
- Bring up the Device Manager window as covered in resolution three.
- Double-click Disk drives in Device Manager.
- Next, right-click the USB drive for which you need to fix the not recognized error to select Uninstall device.

- Click the Uninstall button on the confirmation window that opens.

- Thereafter, unplug your USB device from the PC.
- Wait about one or two minutes, and then connect the USB drive with your PC again.


NOTE
Windows should reinstall the USB’s devices driver when you reconnect it with the PC. If it doesn’t, however, you can also click Action, then Scan for hardware changes to reinstall missing drivers.
Who can I contact about fixing this USB error?
If you still need to fix the USB device not recognized error, try contacting Microsoft’s support service for Windows. You can do so by clicking the Get support link on the Contact Microsoft Support webpage. Then click Get Help, followed by Contact support after entering an issue description.
Some users might prefer to post on Microsoft’s support forum for Windows instead. Click Ask a question on that forum to open a text editor. Then, simply enter a forum post question in the text editor, and press the Submit button.
However, the potential fixes above might be enough to get rid of the USB device not recognized error in most cases. The second resolution is among the most widely confirmed to solve the issue. Give them all a try before contacting Microsoft support.
You can also try formatting the USB drive to resolve this issue. As that will erase all files on it, however, that’s hardly an ideal potential fix. If you don’t have any important files on the storage drive though, reformatting it might be worth a shot.
Of course, there might be more ways to fix the USB device not recognized error not specified above. If you’ve discovered another resolution that fixes this issue, feel free to share it in the comments below.
![]()
In this article, we will talk about what you should do if USB ports are not working on your PC. USB ports on a computer allow users to connect different USB devices, like printers, keyboards, mice, etc. If the USB ports stop working, you will not be able to use any USB device. USB ports may stop working due to hardware and software issues.

A USB port stops working if it is faulty or if its drivers are outdated or corrupted. Sometimes, the latest Windows Update causes issues on a computer. In addition to the hardware and software issues, a USB port may also stop working if you quickly and repeatedly insert and remove a USB device. This article provides some helpful suggestions that you can follow if your USB ports are not working.
- Power Cycle your computer
- Check the power output of USB ports
- Run Hardware and Devices Troubleshooter
- Disable Fast Startup
- Scan for Hardware Changes in the Device Manager
- Roll Back, or reinstall USB Controllers
- Change the Power Management settings
- Uninstall and reinstall the USB Root Hub
- Update your chipset driver
- Disable the Selective Suspend feature of Windows
- Uninstall the recent Windows Update
- Restore your system
- Perform an In-place Upgrade
Let’s see all these fixes in detail.
1] Power Cycle your computer
The first step that you should do is to power cycle your computer. The following steps will help you with that:
- Turn off your PC.
- Remove all the power cords. If you have a laptop, remove its battery after turning it off, and then remove all power cords.
- Wait for a few minutes.
- Laptop users can now insert the battery again.
- Reconnect all the power cords.
- Turn on your computer.
Now, check if the issue is fixed.
2] Check the power output of USB ports
Most USB ports supply 5V of electricity with a maximum current of 0.5 A. If your USB ports are working, they supply power output. If a USB port is not supplying power, it may be damaged. Check the power output of your USB ports to know if they are damaged or not.
If your USB ports are not supplying power, you need to take your computer to the service center.
3] Run Hardware and Devices Troubleshooter

The Hardware and Devices Troubleshooter helps Windows users fix hardware-related issues (if possible). In the previous step, if you find that your USB ports are not supplying power, run Hardware and Devices Troubleshooter before taking your laptop or desktop computer to the service center.
Fix: Generic USB Hub missing or not showing in Windows
4] Disable Fast Startup
Fast Startup allows your computer to start faster than a normal startup. The Fast Startup does not completely shut down your computer. During the Fast Startup, the kernel session is not closed. Instead, it is hibernated. Windows does this by saving the kernel session and the device drivers (system information) to the hibernate file (hiberfil.sys). Due to this, sometimes, Fast Startup causes issues on a Windows computer. Check if the Fast Startup is enabled. If yes, disable it and restart your computer.

There are the following 4 ways to disable Fast Startup. You can use any of these methods.
- The Control Panel
- Command Prompt
- Group Policy Editor (does not work on Windows 11/10 Home edition)
- Registry Editor
5] Scan for Hardware Changes in the Device Manager
Some users have reported that the USB ports of their systems were delivering power but there was no connection. If this is the case with you, Scan for hardware changes in the Device Manager. It will help.

Follow the steps written below:
- Open the Device Manager.
- Go to “Action > Scan for hardware changes.”
The above action will help broken devices work again. Now, check if the issue is fixed.
Read: How to enable or disable CD/DVD ROM Drives, USB Drives or Ports in Windows
6] Roll Back, or reinstall USB Controllers
A USB Controller manages the communication between a USB device and a computer. If the USB Controller gets corrupted, the USB ports may stop working. If the issue still persists, we suggest you roll back or reinstall the USB Controller driver.
Installing Windows Update also updates the device drivers (if an update for the same is available). If the issue started occurring after a Windows Update, it is possible that the USB Controller driver was also updated along with the Windows Update. In this case, the Roll Back option will be available in the Device Manager. Follow the steps below:

- Open the Device Manager.
- Expand the Universal Serial Bus controllers branch.
- Right-click on your USB controller driver and select Properties.
- Under the Drivers tab, click the Roll Back option (if available). Follow the on-screen instructions to uninstall the latest driver update.
If the Roll Back option is not available or if the above steps do not resolve the issue, uninstall and reinstall the USB controller driver. To do so, right-click on the USB controller driver and select Uninstall device. Remove all the USB controller drivers from your system. After that, restart your computer. Windows will automatically scan for hardware changes and install the missing USB controllers.
7] Change the Power Management settings
If you are still facing the problem, changing the Power Management settings of the USB Root HUB and USB Controllers will fix the issue. The steps for the same are written below:

- Open the Device Manager.
- Expand the Universal Serial Bus Controllers node.
- Open the properties of USB Host Controllers and go to the Power Management tab.
- Uncheck the “Allow the computer to turn off this device to save power” option.
- Click OK to save the changes.
Disable this option for all USB Controllers and USB Root Hubs in the Device Manager. When this option is enabled, Windows disables the USB devices after some time of inactivity to save power. When you use that device, Windows activates that USB device again. Sometimes, Windows fails to activate the device connected to a particular USB port due to which, it seems that the USB port has stopped working.
Read: USB-C not working, charging or recognized on Windows
8] Uninstall and reinstall the USB Root Hub
If disabling the Power Management settings of the USB Root Hub does not help, uninstall and reinstall the USB Root Hub driver. To do so, right-click on it and select Uninstall device. Follow the on-screen instructions. After uninstalling the USB Root Hub, restart your computer and see if it fixes the problem.
9] Update your chipset driver
A chipset driver tells Windows how to communicate with the motherboard and small subsystems on it. One possible cause of this issue is the corrupted chipset driver. Update your chipset driver and see if it helps.
10] Disable Selective Suspend
Selective Suspend is a property by which Windows forces the connected USB device(s) to enter into a low power state. This happens when there is no bus activity on a particular USB port detected for some time. When you use your USB device, it starts working again. The purpose of Selective Suspend is to save power. If the above fixes did not resolve your issue, you need to disable the Selective Suspend feature. This action will affect all the USB host controllers and all the USB devices. After disabling Selective Suspend, all the USB devices continue to use power. Moreover, the “Allow the computer to turn off this device to save power” checkbox may be greyed out under the Power Management tab.
To disable Selective Suspend, you have to modify your Registry. Be careful while modifying the Registry, as any mistake can lead to serious errors in your system. Therefore, follow the steps explained below carefully and make sure that you modify or change the right registry key.
Before you proceed, we recommend you create a System Restore Point and backup your Registry.

Open the Run command box, type regedit, and click OK. This will open the Registry Editor. Now, copy the following path and paste it into the address bar of the Registry Editor. After that, press Enter.
HKEY_LOCAL_MACHINE\System\CurrentControlSet\Services\USB
If nothing happens, it means that the USB key does not exist in your Registry Editor. Now, you have to create it manually. To do so, right-click on the Services key and go to “New > Key.” Name this newly created subkey as USB.
Now, right-click on the USB subkey and go to “New > DWORD (32-bit) Value.” You will see that a new Value is created on the right side. Now, right-click on the newly created Value and select Rename. Change its name to DisableSelectiveSuspend.
Right-click on the DisableSelectiveSuspend Value and select Modify. Enter 1 in its Value data and click OK. Close Registry Editor and restart your computer.
Read: Free USB Repair Tools for Windows 11/10 PC.
11] Uninstall the recent Windows Update
If your system’s USB ports stopped working after installing a Windows Update, you can uninstall that update. Windows 10 users can uninstall Windows Update via the Control Panel. After Windows 11 2022 Update, it is not possible to uninstall the Windows Updates via the Control Panel. Hence, you have to use the Settings app for this purpose.
12] Restore your system
You can use the System Restore tool to take your system to the state before the issue started occurring. But this is only possible if a Restore Point was created. When you run the System Restore tool to restore your system, Windows shows you all the restore points created on your device along with the date. You can select any of these restore points. In your case, you have to select that restore point that was created before the issue started occurring.
13] Perform an In-place Upgrade
In-place Upgrade is the process of installing the Windows operating system over the existing Windows OS without uninstalling it. Using the In-place Upgrade, you can repair your system. Though an In-place Upgrade does not erase data, it will be good if you back up your data.
Read: USB 3.0 External Hard Drive not recognized in Windows.
How do I get Windows 11 to recognize my USB device?
If Windows 11 is not recognizing your USB device, the first thing that you should do is restart your computer and see if it helps. In addition, the other things that you can do to get your USB ports to work again are running Hardware and Devices Troubleshooter, disabling Fast Startup, rolling back or reinstalling the USB Controllers, updating the chipset driver, disabling the Selective Suspend feature, etc. In this article, we have explained some working solutions to fix this problem.
Why do my USB ports suddenly stop working?
Quickly and repeatedly inserting and removing a USB device can make a USB port unresponsive. When a USB port is in this state, it doesn’t recognize the connected USB device due to which the USB device does not work. Other causes of this issue are the Selective Suspend feature of Windows, corrupted or outdated USB and chipset drivers, corrupted system files, damaged hardware, etc. Refer to the solutions explained in this article to know how to fix this problem.
I hope the solutions provided in this post helped you fix the issue.
Read next: Fix Generic USB Hub missing or not showing in Windows.