Оснастка Active Directory Users and Computers (или ADUC) – это одна из наиболее часто используемых консолей управления объектами в домене Active Directory. Вы можете установить mmc оснастку ADUC как на Windows Server, так и на десктопные Windows 10 и 11. Консоль ADUC входит в состав набора компоненту администрирования Microsoft Remote Server Administration Tools (RSAT). В этой статье мы покажем, как установить и использовать консоль управление Active Directory Users and Computers в Windows.
Содержание:
- Установка оснастки RSAT Active Directory в Windows 10 и 11
- Как пользоваться консолью Active Directory?
- Подключение консоли ADUC к домену из рабочей группы
Установка оснастки RSAT Active Directory в Windows 10 и 11
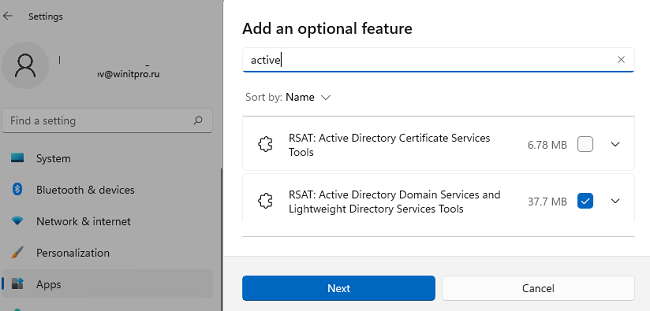
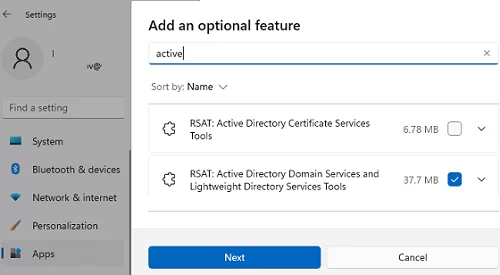
В современных версиях Windows 10 (начиная с билда 1809) и в Windows 11 инструменты администрирования RSAT устанавливаются онлайн в виде Features on Demand. Чтобы установить инструменты администрирования RSAT Active Directory в Windows 10/11, перейдите в Settings -> Apps -> Optional Features -> Add an optional feature (View features).
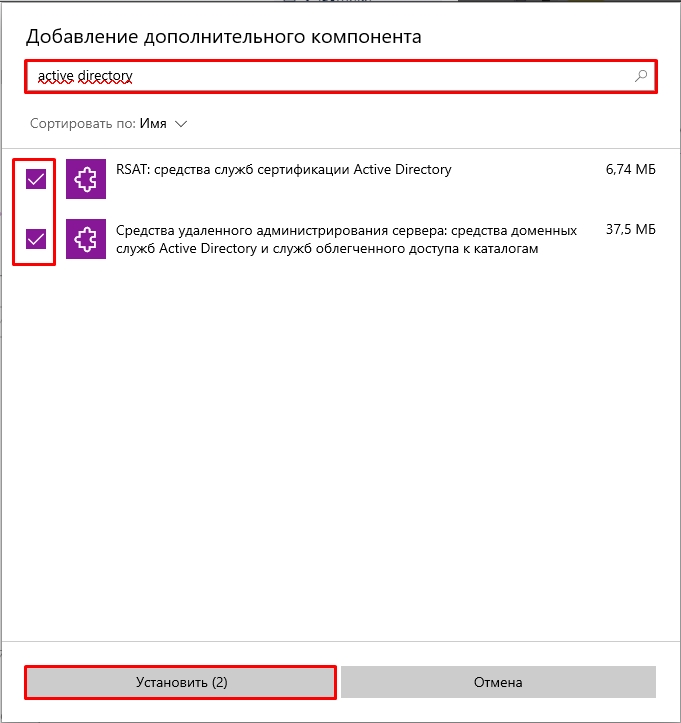
Наберите в поисковой строке Active Directory и выберите для установки компонент RSAT: Active Directory Domain Services and Lightweight Directory Services Tool.
Нажмите Next-> Install для начала установки.
Windows подключится к серверам Microsoft, скачает и установит набор инструментов для управления Active Directory (включает в себя графические консоли Active Directory, утилиты командной строки и модуль Active Directory PowerShell).
Либо вы можете установить набор компонентов администрирования AD с помощью PowerShell:
Add-WindowsCapability –online –Name Rsat.ActiveDirectory.DS-LDS.Tools~~~~0.0.1.0
В изолированных сетях, в которых нет доступа в интернет, вы можете установить инструменты RSAT Active Directory с помощью ISO образа Windows 10 Features on Demand (образ FoD можно скачать из кабинета лицензирования Microsoft).
Для установки инструментов Active Directory, из сетевого каталога с содержимым образа FoD выполните команду:
Add-WindowsCapability -Online -Name Rsat.ActiveDirectory.DS-LDS.Tools~~~~0.0.1.0 -LimitAccess -Source \\fs01\Distr\Windows10-FOD\
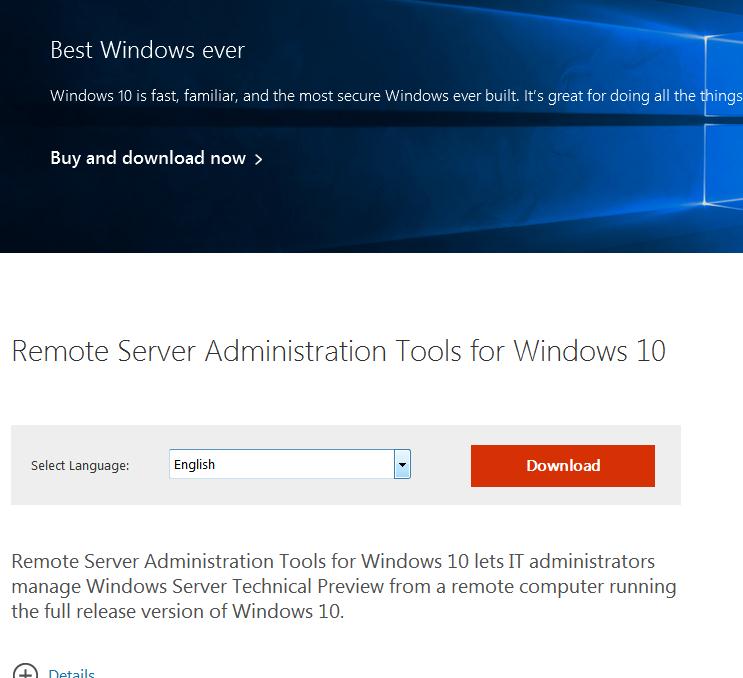
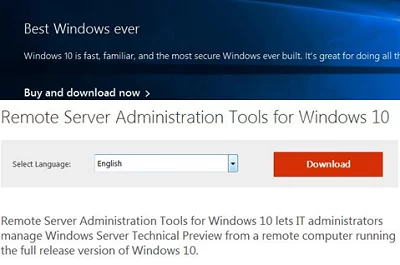
В предыдущих билдах Windows 10, а также в Windows 8.1, установить RSAT можно с помощью MSU обновления. Скачать RSAT можно здесь:
- RSAT для Windows 10 1803/1709 — https://www.microsoft.com/en-us/download/details.aspx?id=45520
- RSAT для Windows 8.1 — https://www.microsoft.com/en-us/download/details.aspx?id=39296
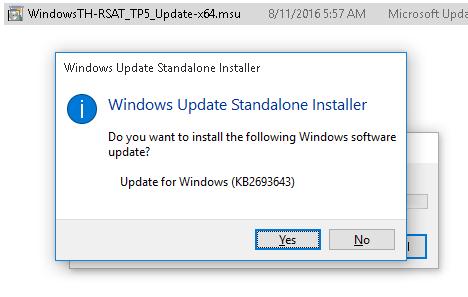
Скачайте версию файла RSAT в зависимости от разрядности вашей операционной системы и установите его. Дважды щелкните по файлу для начала установки:
Или установите MSU файл RSAT из командной строки в «тихом» режиме:
wusa.exe c:\Install\WindowsTH-RSAT_TP5_Update-x64.msu /quiet /norestart
После окончания установки RSAT нужно перезагрузить компьютер.
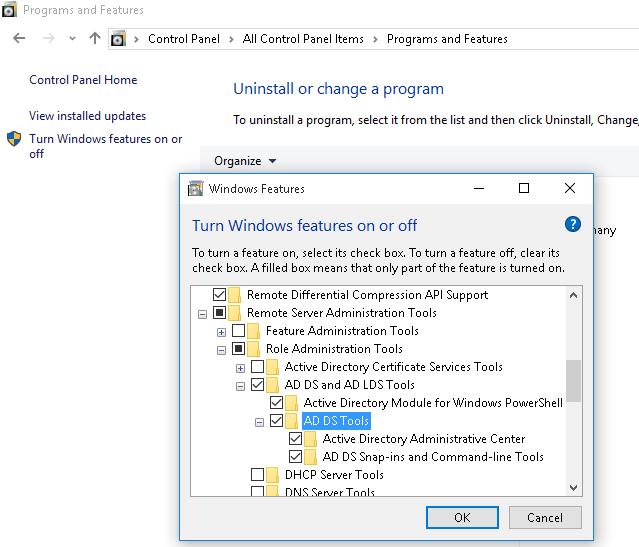
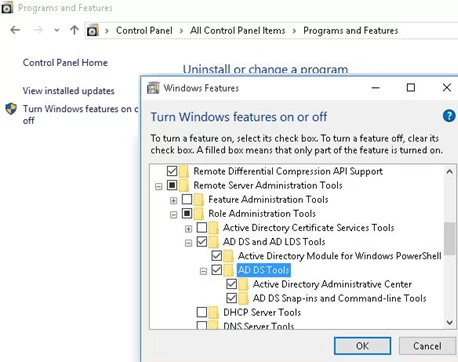
Осталось активировать необходимый функционал RSAT. Для этого:
- Щелкните ПКМ по кнопке Start и выберите Control Panel (Панель управления)
- Выберите Programs and Features (Программы и компоненты)
- В левой панели нажмите кнопку Turn Windows features on or off
- В дереве компонентов разверните Remote Server Administration Tools-> Role Administration Tools -> AD DS and AD LDS Tools
- Отметьте раздел AD DS Tools и нажмите OK.

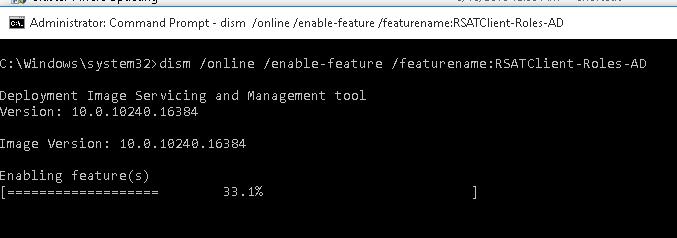
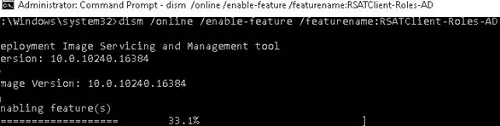
Установка оснастки ADUC также может быть выполнена из командой строки. Последовательно выполните 3 команды:
dism /online /enable-feature /featurename:RSATClient-Roles-AD
dism /online /enable-feature /featurename:RSATClient-Roles-AD-DS
dism /online /enable-feature /featurename:RSATClient-Roles-AD-DS-SnapIns
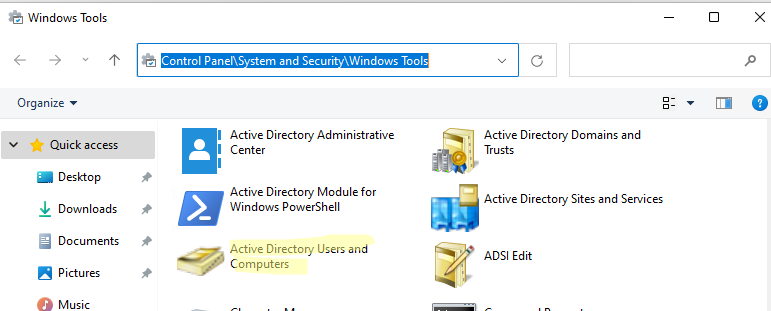
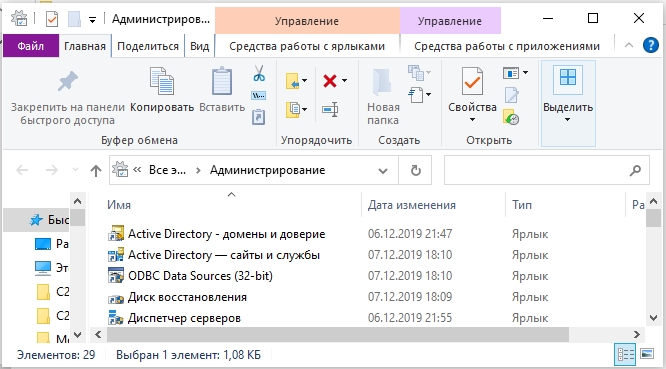
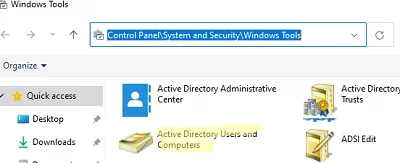
После установки оснасток управления, в разделе Administrative Tools панели управления (Control Panel\System and Security\Windows Tools) появится ссылка на консоль Active Directory Users and Computers.
Как пользоваться консолью Active Directory?
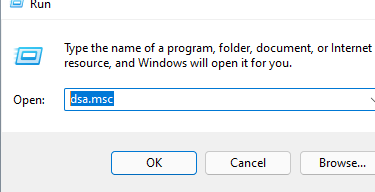
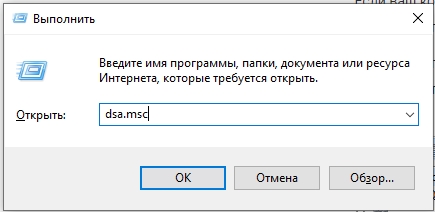
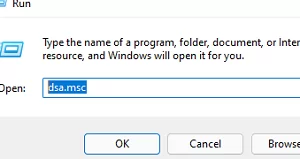
Чтобы запустить консоль ADUC, щелкните по ярлыку в панели управления или выполните команду:
dsa.msc
Все аутентифицированные пользователи домена могут использовать консоль ADUC для просмотра объектов Active Directory.
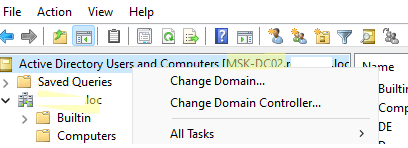
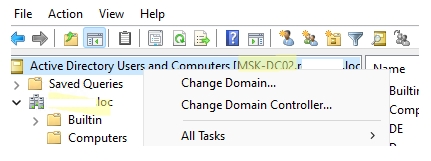
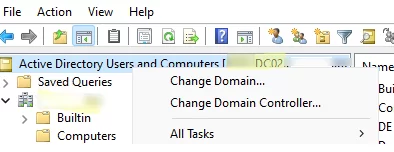
Если ваш компьютер состоит в домене Active Directory, то консоль ADUC подключится к контролеру домена, на основании текущего Logon сервера. Имя контроллера домена, с которого вы получаете информации указано в верху.
Вы можете подключиться к другому контроллеру домена AD или другому домену, щелкнув по корню консоли и выбрав пункт в контекстном меню.
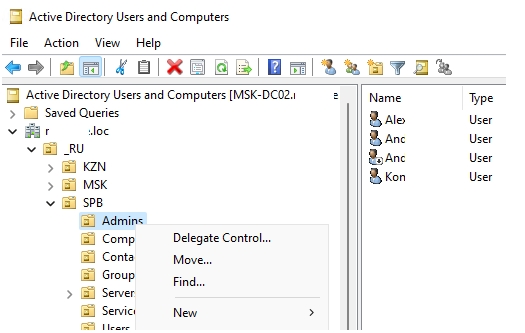
В консоли Active Directory отображается древовидная структура организационных юнитов (Organizational Unit, OU) вашего домена (и отдельный раздел с сохраненными запросами/ Saved Queries AD).
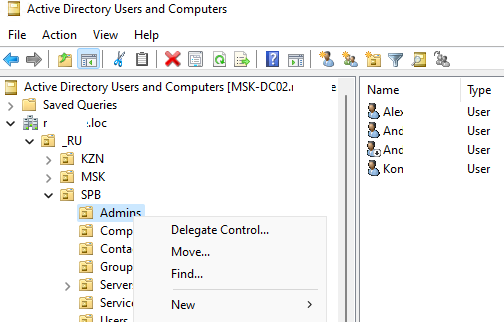
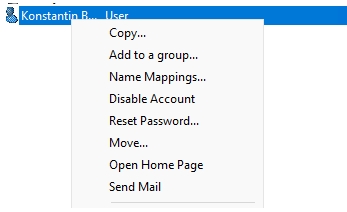
Администратор домена может создавать контейнеры (OU) в соответствии с физической или логической структуры предприятиями. С помощью контекстного меню можно создать новые объекты в AD (пользователей, группы, компьютеры, OU, контакты), переименовать, переместить или удалить объекты. В зависимости от типа объекта, который вы выбрали пункты контекстного меню могут отличаться.
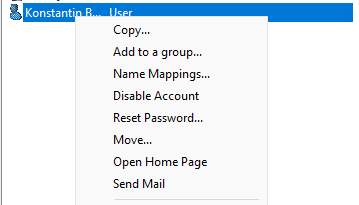
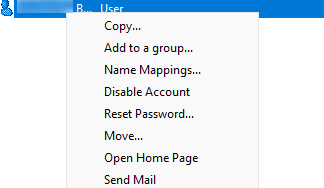
Например, у пользователя есть опции на сброс пароля в AD или блокировку/разблокировку учетной записи.
Вы можете использовать контекстное меню Search для поиска объектов в AD.
Администратор может делегировать права на создание/редактирование/удаление объектов в Active Directory другим пользователям или группам.
С помощью меню View -> Add/Remove columns можно добавить атрибуты объектов, которые вы хотите отображать в консоли ADUC.
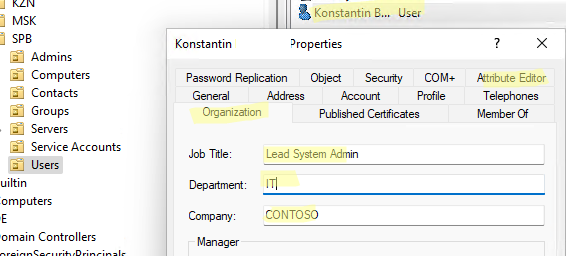
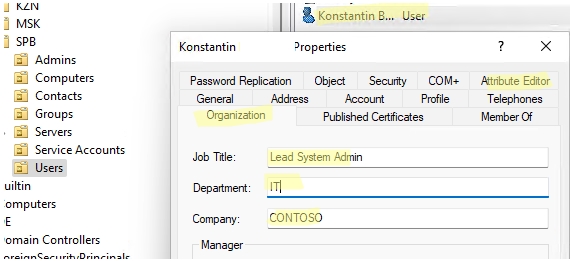
В консоли ADUC можно посмотреть или изменить свойства объектов домена. Например, можно открыть свойства пользователя и изменить его настройки. Часть свойств пользователя находится на соответствующих вкладках, а полный список атрибутов пользователя доступен на вкладке редактора атрибутов AD (Attribute Editor).
Можно добавить отдельную вкладку с фотографией пользователя AD.
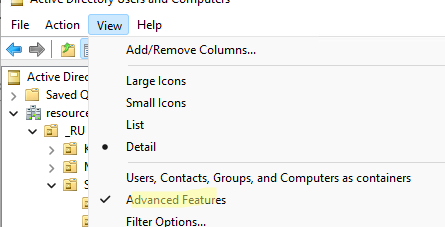
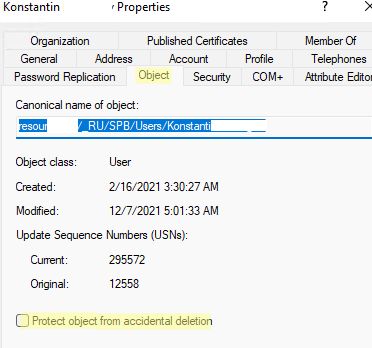
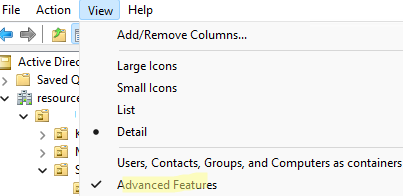
Чтобы показывать системные контейнеры и свойства объектов в оснастке AD (по умолчанию скрыты), включите опцию View -> Advanced features.
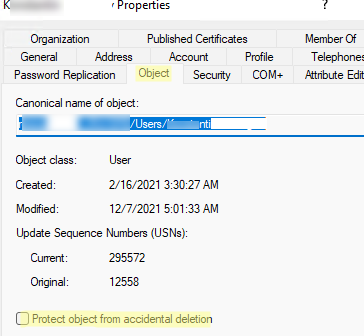
После этого у всех объектов появится ряд системных вкладок. Например, на вкладке Object можно получить каноническое имя объекта, дату создания учетной записи и включить опцию защиты от удаления (protect object from accidental deletion).
Подключение консоли ADUC к домену из рабочей группы
Если вы хотите подключится консолью ADUC к контроллеру домена с компьютера, который не включен в домен (состоит в рабочей группе), воспользуйтесь таким методом:
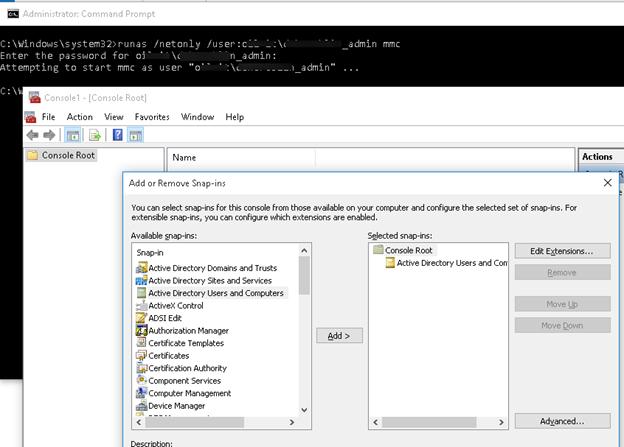
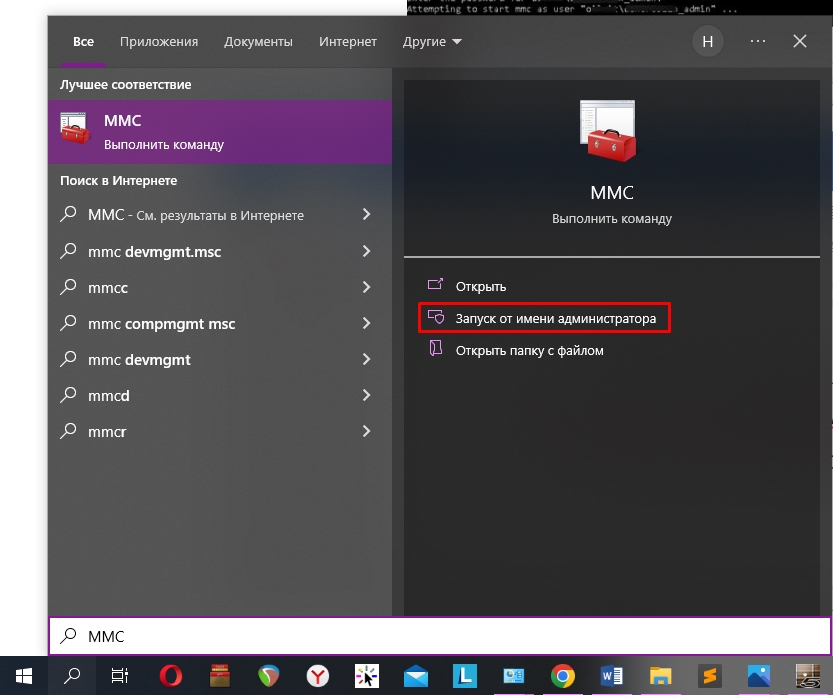
- Запустите командную строку и выполните команду запуска оснастки от имени другого пользователя:
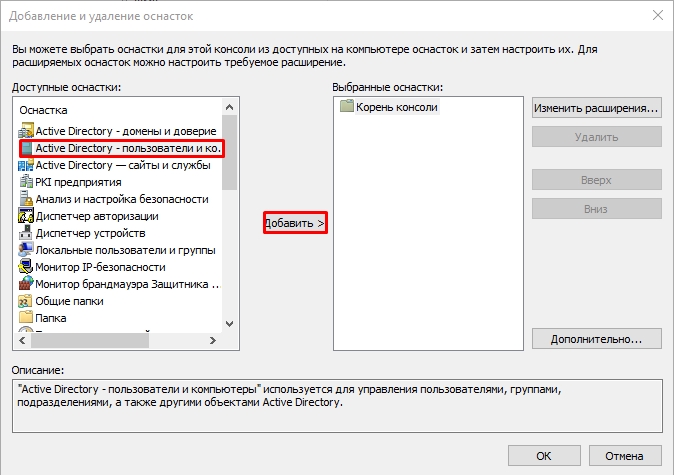
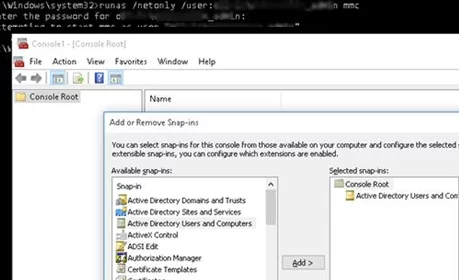
runas /netonly /user:winitpro\aaivanov mmc - В пустой консоли MMC выберите File->Add/Remove Snap-In
- Перенесите оснастку Active Directory Users and Computers в правую панель и нажмите Add;

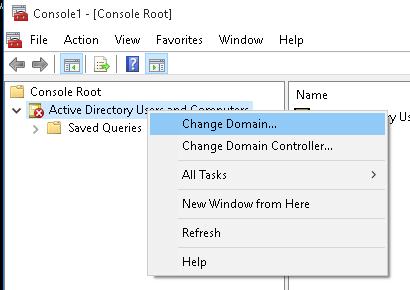
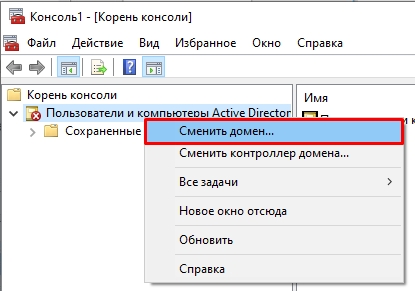
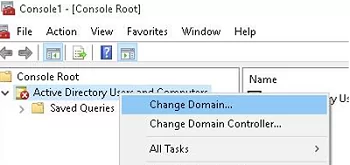
- Чтобы подключится к домену, щелкните по корню консоли и выберите Change domain. Укажите имя домена.

В результате консоль ADUC подключится к контроллеру домена, получит и отобразит структуру контейнеров (OU) данного домена Active Directory.
Any Windows Server administrator must have used the Active Directory Users and Computers (ADUC) Microsoft Management Console on a Domain Controller (DC). Using this console, you can control and manage users, user groups, computers, and the Organizational Units (OUs) in the domain.
The ADUC console is no longer limited to servers anymore. You can install the Active Directory Users and Computers snap-in on a Windows 11 or Windows 10 computer as well, which performs the same functions as the original Server console. This snap-in is part of the Remote Server Administration Tools (RSAT) for Windows operating systems.
We have written separate posts for installing any RSAT tools on Windows 11 and Windows 10. This article focuses on installing specifically the Active Directory Users and computers snap-in on a Windows PC and then using it to manage your domain.
Table of contents
- How to Install Active Directory Users and Computers (ADUC) on Windows
- Install Active Directory Users and Computers from Settings App
- Install Active Directory Users and Computers from Command Prompt
- Install Active Directory Users and Computers from PowerShell
- How to Use Active Directory Users and Computers
- How to Open Active Directory Users and Computers Snap-In
- Connect ADUC to Domain Controller
- Manage Users, Computers, Organizational Unit using ADUC
- What is Active Directory Users and Computers Used For
How to Install Active Directory Users and Computers (ADUC) on Windows
All RSAT tools, including the Active Directory Users and Computers snap-in, allow you to manage the different Active Directory components as if you are on the server itself. This way, you do not always have to access the server, neither physically nor remotely, to perform an action.
You can download and install the Active Directory Users and Computers snap-in using the Settings app, from the Command Prompt, and Windows PowerShell.
Note: On Windows 10 v1803 and older, you must download and install all RSAT tools using the MSI files. You can find the MSI files for your version of Windows here.
Install Active Directory Users and Computers from Settings App
The easiest way to install the ADUC snap-in on a Windows PC is from the settings app. It does involve more steps than the other methods shared below, but this is the only method using the Windows GUI.
Use these steps to install the ADUC snap-in from the Settings app:
-
Navigate to the following:
Settings app >> Apps >> Optional Features
-
Click “View features.”
 Snap-In On Windows 11/10 1")
Add an optional feature -
Search for “Active Directory,” select “RSAT: Active Directory Domain Services and Lightweight Directory Services Tools,” and click Next.
Select Active Directory Users and Computers -
Click “Install.”
Install Active Directory Users and Computers from the Settings app -
Once installed, restart the computer.
 Snap-In On Windows 11/10 1")
 Snap-In On Windows 11/10 2")
 Snap-In On Windows 11/10 3")
The Active Directory Users and Computers snap-in will now be installed. If you prefer installing it using the command line, refer to the sections below. To learn how to use the snap-in, continue reading down.
Install Active Directory Users and Computers from Command Prompt
Below are the simple steps to install Active Directory Users and Computers snap-in using the Command Prompt:
-
Open an elevated Command Prompt instance.
-
Run the following command:
DISM /Online /Add-Capability /CapabilityName:Rsat.ActiveDirectory.DS-LDS.Tools~~~~0.0.1.0 Snap-In On Windows 11/10 4")
Install Active Directory Users and Computers snap-in using Command Prompt
 Snap-In On Windows 11/10 4")
The ADUC snap-in should now be installed. Run the following command in Command Prompt to confirm that the Active Directory Users and Computers snap-in has been installed:
DISM.exe /Online /Get-CapabilityInfo /CapabilityName:Rsat.ActiveDirectory.DS-LDS.Tools~~~~0.0.1.0 Snap-In On Windows 11/10 5")
You should see “Installed” in front of Status.
Install Active Directory Users and Computers from PowerShell
Use the following steps to install the Active Directory Users and Computer snap-in using PowerShell:
-
Launch an elevated PowerShell instance.
-
Run the following command to install ADUC:
Add-WindowsCapability -Online -Name Rsat.ActiveDirectory.DS-LDS.Tools~~~~0.0.1.0Install Active Directory Users and Computers snap-in using PowerShell
 Snap-In On Windows 11/10 6")
The ADUC snap-in should now be installed. To confirm its status, run the following command in PowerShell:
Get-WindowsCapability -Online | Where-Object {$_.Name -like "RSAT.ActiveDirectory*"} Snap-In On Windows 11/10 7")
You should see “Installed” in front of State.
These are all the methods to install the Active Directory Users and Computers snap-in on a Windows 11/10 PC. Let us now continue to see how to use this tool.
How to Use Active Directory Users and Computers
How to Open Active Directory Users and Computers Snap-In
Now that Active Directory Users and Computers is installed, you can open it by searching for it in the Start menu, or running the following in the Run Command box:
dsa.msc Snap-In On Windows 11/10 8")
Alternatively, you can also open the ADUC snap-in through the Control Panel at the following location:
Control Panel >> System and Security >> Windows Tools
 Snap-In On Windows 11/10 9")
If your computer is connected to a domain and you are logged in from an authorized domain account, then the ADUC snap-in will automatically connect to the server. However, if one is not connected, then you must connect to the Domain Controller.
Connect ADUC to Domain Controller
Use these steps to connect to a Domain Controller. You can also use these to change your domain/Domain Controller.
-
From the ADUC console, click “Action,” and then click “Change Domain Controller.”
Change or connect to Domain Controller The Change Directory Server window will now open.
-
Select the “This Domain Controller or AD LDS instance” radio button, then select the Domain Controller from the give list and click Ok.
Select and connect to Domain Controller
 Snap-In On Windows 11/10 10")
 Snap-In On Windows 11/10 11")
The ADUC will now connect to the Domain Controller and populate the fields.
 Snap-In On Windows 11/10 12")
Now that you are connected to the Domain Controller, you can now begin making changes and managing the different components of the domain.
Manage Users, Computers, Organizational Unit using ADUC
 Snap-In On Windows 11/10 13")
You can now begin adding new users, computers, printers, and Organizational Units to the domain. Simply right-click on the OU that you want to add the new device/user to, expand “New”, and select the element that you want to add.
Once you have selected the element to add, the respective window will open, where you can then configure the component to add.
You can now also use other operators to manage the users, devices, and other elements configured inside the domain directly from your Windows PC.
Additionally, you can also manage what you see inside the snap-in. Click “View” from the top menu and select the things that you want to see. You can then also click “Filter options” to open the advanced viewing options.
 Snap-In On Windows 11/10 14")
The list does not end here. There are a bunch of other management options you can perform directly from the ADUC snap-in on a Windows PC. We suggest that you play around to discover all the options. However, we advise caution and only use the console if you know what you are doing.
What is Active Directory Users and Computers Used For
By now, we have a pretty good understanding of what the ADUC snap-in can be used for. However, there is more to it than meets the eye. The Active Directory Users and Computers RSAT tool can be used to perform the following actions:
- Create and manage user accounts, computers, and Active Directory groups.
- View and edit AD object attributes with ADSI Edit.
- Search for AD objects.
- Change or reset user password in Active Directory.
- Create organizational units and build hierarchical structures for AD objects. You can also delegate administrative permission on these OUs to other domain users.
- Delegate administrative permissions.
- Raise domain functional level, and transfer FSMO roles with PowerShell to another domain controller.
From this, it is understood how useful the ADUC snap-in is for administrators that use Windows client PCs.
Всем привет! Сегодня мы поговорим с вами об оснастке и консоли управления доменами Active Directory – пользователи и компьютеры (ADUC). Данную оснастку используют для управления доменом Active Directory. Сама оснастка по умолчанию не установлена в системе Windows, но её можно инсталлировать несколькими способами. В статье я расскажу где скачать и как установить оснастку Active Directory для Windows 10, 11 и 8.1. Также я очень коротко расскажу, как работать с ней и как подключить компьютер к домену Active Directory из-под рабочей группы.
Содержание
- Установка в Windows
- Способ 1: Через параметры системы
- Способ 2: PowerShell
- Способ 3: Для Windows 10 1803/1709 (Более старых сборок) и Для Windows 8.1
- Как её пользоваться?
- Подключение к домену из рабочей группы
- Видео
- Задать вопрос автору статьи

Итак, в первую очередь нам нужно установить центр администрирования Active Directory. По умолчанию в Windows 10 и Windows 11 они не установлены в системе и являются дополнительными компонентами ОС. Есть несколько способов выполнить установку. Можете выбрать любой из представленных.
Способ 1: Через параметры системы
Вы можете скачать Active Directory для Windows 10 (сборка 1809 старше) и Windows 11 через меню системы.
ВНИМАНИЕ! Если у вас Windows 10 со сборкой до 1809 – смотрите 4 способ.
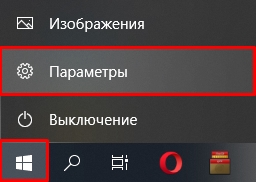
- Откройте меню «Пуск» и нажмите по шестеренке, чтобы открыть основные параметры ОС.
- Переходим в раздел «Приложения» (Apps).

- Вас сразу же перебросит во вкладку «Приложения и возможности». Далее в левом блоке найдите ссылку «Дополнительные компоненты» (Optional Features).
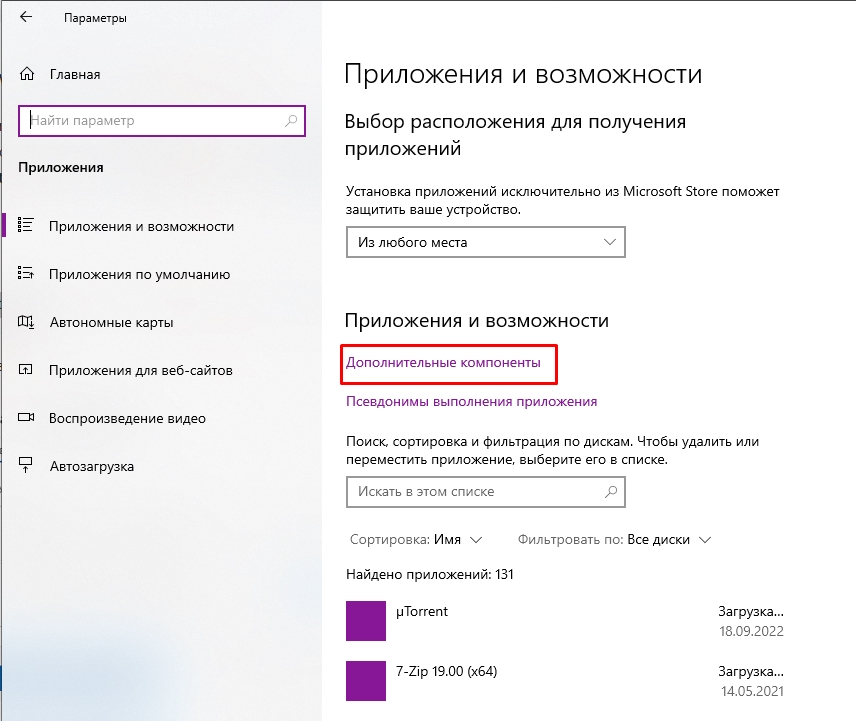
- Жмем по кнопке с плюсиком «Добавить компонент» (Add an optional feature (View features)).

- Дабы не искать их вручную вводим в поисковую строку запрос:
Active Directory
- Вы увидите два компонента. Первый – это RSAT или средства службы сертификации. Второй – инструменты для работы с удаленными администрированием и дополнительные службы. Устанавливаем обе галочки и жмем по кнопке «Установить».
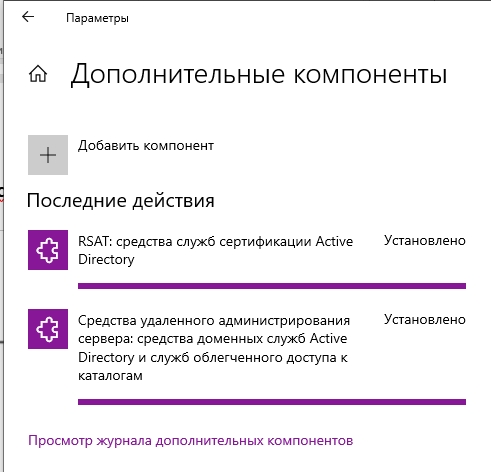
- Они будут скачены с интернета с серверов Microsoft, поэтому в данный момент нужно быть подключенным к глобальной сети. Подождите пока оба компонента установятся.
Способ 2: PowerShell
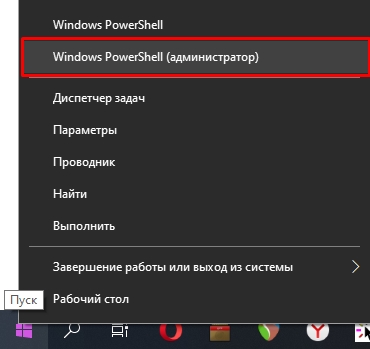
Запустите дополнительную консоль, нажав правой кнопкой мыши по меню «Пуск» и выбрав из контекстного меню нужную команду. Запускаем PowerShell с правами администратора.
Используем команду:
Add-WindowsCapability –online –Name Rsat.ActiveDirectory.DS-LDS.Tools~~~~0.0.1.0

Способ 3: Для Windows 10 1803/1709 (Более старых сборок) и Для Windows 8.1
Если у вас более старая версия Windows 10 или установлена Windows 8.1 – вам нужно скачать пакеты по ссылкам ниже. Скачиваем компоненты для своей разрядности (32 или 64 бита).
- Windows 10.
- Windows 8.1.
После этого просто устанавливаем пакет, дважды щелкнув левой кнопкой мыши. После установки компоненты нужно будет активировать.
- Используем клавиши, нажав одновременно:
+ R
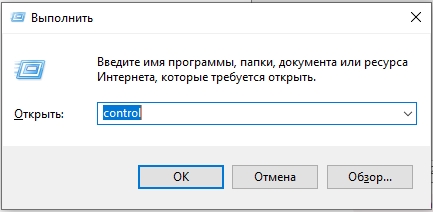
- Вводим команду, чтобы зайти в «Панель управления»:
control
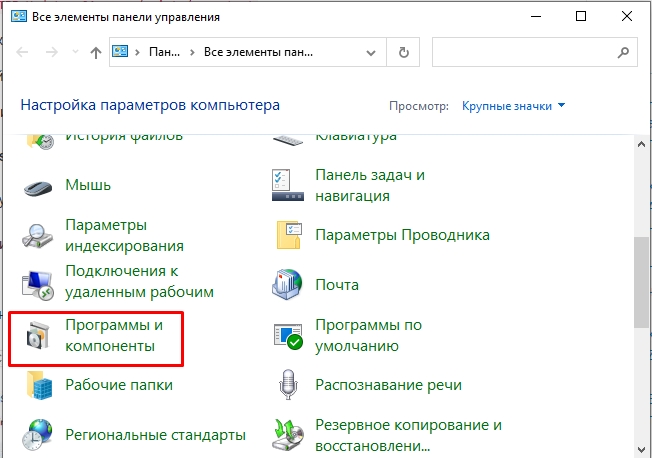
- «Программы и компоненты».
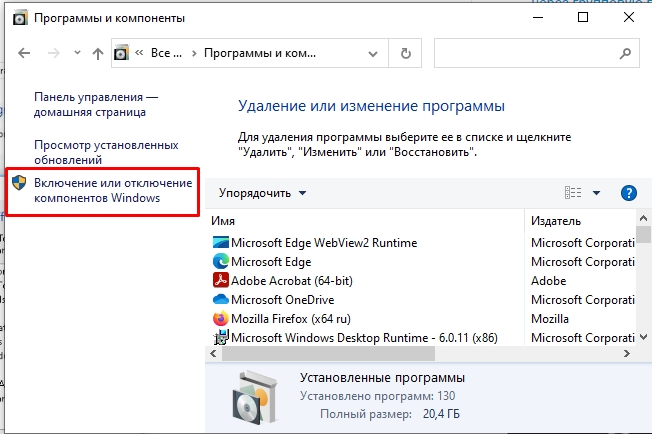
- «Включение и отключение компонентов Windows».
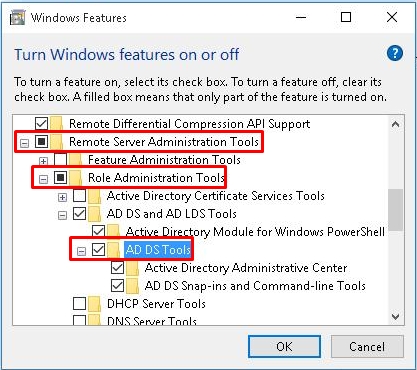
- Откройте основную папку «Remote Server Administration Tools», в ней раскрываем ветку «Role Administration Tools» и находим «AD DS and AD LDS Tools» – «AD LDS Tools» – ставим обе галочки и жмем «ОК».
Дополнительно нужно установить оснастку ADUC через командную строку – запускаем её с правами администратора. Используем команды:
dism /online /enable-feature /featurename:RSATClient-Roles-AD
dism /online /enable-feature /featurename:RSATClient-Roles-AD-DS
dism /online /enable-feature /featurename:RSATClient-Roles-AD-DS-SnapIns
В разделе администрирования в панели управления (control) можно будет увидеть две ссылки на консоли.
Как её пользоваться?
Чтобы запустить саму оснастку консоли, можно использовать команду:
dsa.msc
Второй вариант – это зайти в «Панель управления» – «Администрирования» – далее находим консоль там. Если ваш компьютер уже находится в домене Active Directory, то он автоматически подключится к серверу, который в свою очередь и будет являться контроллером домена. Имя сервера находится в самом верху в квадратных скобках. Если вы хотите изменить домен, кликните по нему правой кнопкой мыши и выберите соответствующую команду.
В качестве корня является сам домен организации. В каждом домене можно создать основные группы или подгруппы какой-то компании. Например, можно создать основную группу, которая будет филиалом в городе. Вы можете создавать новые объекты. Каждый объект может быть как целой группой, так и пользователем с определенными контактами.
Каждый объект можно создавать, перемещать и изменять его характеристики или свойства. Например, конечного пользователя можно добавить в определенную группу, выключить его аккаунт или сбросить пароль. После сброса пароля ему на рабочем месте придется придумывать новый ключ, который он будет использовать при аутентификации в системе (при входе на начальном экране).
Можно зайти в свойства пользователя и изменить некоторые атрибуты. Даже есть возможность добавить фото юзера. Я советую внимательно ознакомиться со всеми вкладками и возможностями.
Представим себе ситуацию, что ваш компьютер находится в рабочей группе, которая никаким образом не связана и не подключена к основному серверу управления домена ADUC.
- Запускаем стандартную командную строку винды с правами админа.
- Используем команду для запуска оснастки другого пользователя:
runas /netonly /user:wifigid\aaivanov mmc
- Теперь открываем MMC консоль – проще всего воспользоваться поиском системы.
- На панели жмем «Файл» – «Добавить или удалить оснастку». Или используем клавиши:
Ctrl + M
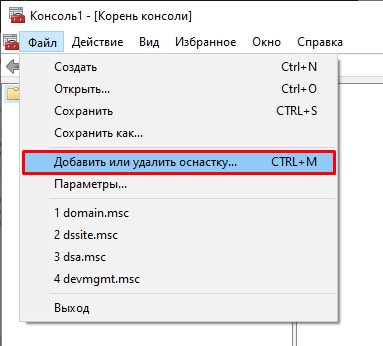
- В левом блоке выбираем «Active Directory – пользователи и компьютеры» и кликаем по кнопке добавления. После этого жмем «ОК».
- Кликаем правой кнопкой по созданному пункту, выбираем «Сменить домен». Далее останется ввести наименование домена и компьютер к нему подключится.
Видео
Active Directory Users and Computers (ADUC or DSA.msc) is one of the most commonly used tools for managing objects in an Active Directory domain. You can install ADUC on both Windows Server hosts and Windows 10 and 11 computers. The ADUC MMC snap-in is a part of the Microsoft Remote Server Administration Tools (RSAT). In this article, we’ll show how to install and use the Active Directory Users and Computers console on Windows.
Contents:
- How to Install Active Directory and Computers on Windows 10 and 11?
- How to Use Active Directory Users and Computers Console?
- ADUC: Connecting Domain from a Workgroup Computer?
How to Install Active Directory and Computers on Windows 10 and 11?
In modern builds of Windows 10 (1809+) and Windows 11, RSAT is installed online as Features on Demand. To install the Active Directory RSAT on Windows 10/11, go to Settings -> Apps -> Optional Features -> Add an optional feature (View features).
Type ‘Active Directory’ in the search bar and select RSAT: Active Directory Domain Services and Lightweight Directory Services Tool.
Click Next-> Install to start the installation.
Then Windows connects to Microsoft servers, downloads and installs the Active Directory Remote Server Administration Tools (including Active Directory graphical consoles, command prompt tools, and Active Directory PowerShell module).
Or, you can install AD administration tools using PowerShell:
Add-WindowsCapability –online –Name Rsat.ActiveDirectory.DS-LDS.Tools~~~~0.0.1.0
On a disconnected network, you can install Active Directory tools from Windows 10 Features on Demand ISO image (the FoD image is available in your personal section of the Microsoft Licensing Center).
To install the Active Directory tools from a network share containing the contents of the FoD image, run:
Add-WindowsCapability -Online -Name Rsat.ActiveDirectory.DS-LDS.Tools~~~~0.0.1.0 -LimitAccess -Source \\mun-fs1\Images\Windows10-FOD\
In previous Windows 10 builds, as well as in Windows 8.1, you can install RSAT using an MSU update. You can download RSAT here:
- RSAT for Windows 10 1803/1709 — https://www.microsoft.com/en-us/download/details.aspx?id=45520
- RSAT for Windows 8.1 — https://www.microsoft.com/en-us/download/details.aspx?id=39296
Download the RSAT version that matches the bitness of your operating system. Double-click the file to start installation:
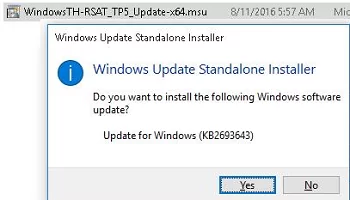
Or install the MSU file from in the command prompt in the quiet mode:
wusa.exe C:\Install\WindowsTH-RSAT_TP5_Update-x64.msu /quiet /norestart
After the RSAT installation is complete, restart your computer.
Then you just have to activate the necessary options. To do it:
- Right-click Start and select Control Panel;
- Click Programs and Features;
- Click Turn Windows features on or off on the left pane.
- Expand Remote Server Administration Tools-> Role Administration Tools -> AD DS and AD LDS Tools in the features tree;
- Check AD DS Tools and click OK.

You can install ADUC from the command prompt as well. Run the commands below one by one:
dism /online /enable-feature /featurename:RSATClient-Roles-AD
 dism /online /enable-feature /featurename:RSATClient-Roles-AD-DS
 dism /online /enable-feature /featurename:RSATClient-Roles-AD-DS-SnapIns
After the administrative tools have been installed, you will see a link to Active Directory Users and Computers snap-in in the Administrative Tools section of the Control Panel.
How to Use Active Directory Users and Computers Console?
To open the ADUC console, click the icon in the Control Panel or run this command:
dsa.msc
All authenticated domain users can use ADUC to view Active Directory objects.
If your computer is joined to an Active Directory domain, then the ADUC connects to a domain controller depending on the current Logon server ($env:LOGONSERVER). The name of the domain controller you are connected to is at the top of the console.
You can connect to another AD domain controller or another domain by clicking the console root and selecting the Change option you want in the context menu.
The Active Directory console shows a tree-like Organizational Unit (OU) structure of your domain (and a separate section containing AD Saved Queries).
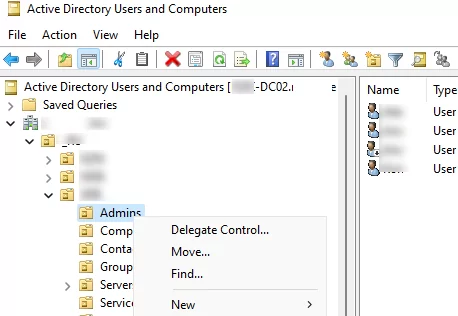
A domain administrator may create containers (OUs) based on a physical or logical organization structure. Using a context menu, you can create new AD objects (users, groups, computers, OUs, contacts), rename, move, or delete objects. Depending on the selected object type, context menu options may vary.
For example, a user has options to reset the AD password or enable/disable the account.
You can use the Search context menu to search for objects in AD.
An administrator can delegate permissions to create/edit/delete objects in Active Directory to other users or groups.
Using the View -> Add/Remove columns menu, you can add object attributes you want to see in the ADUC console.
In ADUC, you can view or change domain object properties. For example, you can open user properties and edit its settings. Some user properties are located in the corresponding tabs, and the full list of user attributes is available in the AD Attribute Editor tab.

You can add a separate tab with an AD user photo.
To show system containers and object properties in the Active Directory snap-in (they are hidden by default), check View -> Advanced Features.
Then all AD objects get a number of system tabs. For example, you can get a canonical object name, view an account creation date, or check Protect object from accidental deletion in the Object tab.
ADUC: Connecting Domain from a Workgroup Computer?
If you want to connect to a domain controller from a computer outside your domain (a workgroup computer) using ADUC, follow the instructions below:
- Open the command prompt and run the mmc console as a different user:
runas /netonly /user:woshub\jsmith mmc - In the empty MMC console, select File->Add/Remove Snap-In;
- Move the Active Directory Users and Computers snap-in to the right panel and click Add;
- To connect to a domain, click the console root and select Change domain. Enter the domain name.
Then the ADUC console connects to the domain controller, gets, and displays the container (OU) structure of the Active Directory domain.
The Active Directory Users and Computers (ADUC) MMC snap-in is one of the main tools for managing Active Directory domains. The ADUC (dsa.msc) snap-in is used to perform typical domain administration tasks and manage users, groups, computers, and Organizational Units in the Active Directory domain. By default, the Active Directory Users and Computers (dsa.msc) console is installed on a Windows Server when it’s promoted to the domain controller when deploying the Active Directory Domain Services (AD DS) role.
An ADUC snap-in can be installed on Windows 10/11 desktop versions as part of Remote Server Administration Tools (RSAT). The RSAT includes several command-line tools, PowerShell modules, and graphical snap-ins to remotely manage Windows Server hosts, Active Directory, and other server roles and features.
How to Install the ADUC Console (dsa.msc) on Windows 10 and 11
RSAT tools (including the Active Directory Users and Computers snap-in) are not installed by default on Windows desktop operating system versions (such as Windows 11, 10, and 8.1). On Windows 10 and 11, you can install ADUC as part of RSAT by using the Settings app or with using PowerShell.
Hint. You can only install RSAT Active Directory on the Pro and Enterprise editions of Windows 10 or 11 (not on Home).
Enable Active Directory Users and Computers on Windows 10 and 11 Using the GUI
In modern versions of Windows 10 and 11 (starting from build 1809), it is possible to install RSAT components as Features on Demand (FoD) from the modern Settings app.
You can install the ADUC console on modern desktop editions of Windows as follows:
- Press the Start menu > Settings > Apps;
- Select Optional Features > Add a feature;
- From the list of optional features, select RSAT: Active Directory Domain Services and Lightweight Directory Tools, and press Install.

- Windows will download the ADUC RSAT binaries from the Internet and install them on your computer.

After installing RSAT you need to reboot your computer.
Hint. RSAT was distributed as a separate MSU update for earlier versions of Windows. This update had to be manually downloaded from the Microsoft Web site and installed on your Windows operating system. For example, you must download and install update KB2693643 for Windows 10 1803 (https://www.microsoft.com/en-us/download/details.aspx?id=45520).
The required RSAT features can then be enabled through the Control Panel > Turn Windows features on or off applet (optionalfeatures.exe).

Use PowerShell to Install Active Directory Users and Computers Snap-in
You can use PowerShell to install the Active Directory console on Windows 10 and 11. Open an elevated PowerShell console and check that the RSAT Active Directory feature is installed on your computer:
Get-WindowsCapability -Online | Where-Object {$_.Name -like "RSAT.ActiveDirectory*"}

In our case, the RSAT: Active Directory Domain Services and Lightweight Directory Services Tools feature is not installed (State > NotPresent).
If the Rsat.ActiveDirectory.DS-LDS.Tools~~~~0.0.1.0 component is missing, you can install it with the command:
Add-WindowsCapability -Online -Name Rsat.ActiveDirectory.DS-LDS.Tools~~~~0.0.1.0

You can also use the DISM command to install the RSAT ADUC feature:
DISM /Online /Add-Capability /CapabilityName:Rsat.ActiveDirectory.DS-LDS.Tools~~~~0.0.1.0

Check the AD RSAT status. The State should be changed to Installed.

Note. The PowerShell Active Directory module is also installed with the ADUC console.
How to Fix ADUC Installation Failed on Windows
The RSAT components in the latest versions of Windows are delivered as Features on Demand (FoD). Windows doesn’t store the local RSAT binaries on a local drive; instead, it downloads the RSAT files that it needs from the Microsoft Update servers. If your computer is in an isolated environment, you will get an error when installing the ADUC snap-in:
0x800f0954
No features to install
To install the RSAT components on your offline computer, you can use the FoD ISO image for your Windows 10/11 release. FoD DVD medias is available for download from your Volume License Servicing Center (VLSC) or on my.visualstudio.com.

To install the ADUC offline, you need to mount the FoD ISO image to a virtual drive (for example, to drive F:) and run the ADUC feature installation from local media:
Add-WindowsCapability -online -name Rsat.ActiveDirectory.DS-LDS.Tools~~~~0.0.1.0 -source -Source "F:\" –LimitAccess
If you are using WSUS or SCCM to deploy Windows updates to client devices, you must enable the special GPO option to correctly install Features on Demand (including ADUC).
- Open the local Group Policy Editor (gpedit.msc) and go to Computer Configuration > Administrative Templates > System;
- Enable the GPO option Specify settings for optional component installation and component repair and check the Download repair content and optional features directly from Windows Update instead of Windows Server Update Services (WSUS) checkbox.

- Update the Group Policy settings on the computer by using the command: gpupdate /force.

Without this option, Windows 11 will try to get RSAT from your local Windows update server (errors 0x8024402c and 0x800f081f).
How to Open Active Directory Users and Computers (dsa.msc) Snap-in on Windows
Go to Start Menu > All Programs > Windows Tools to run the Active Directory snap-in on Windows 11.

On Windows 10 (and previous versions) the AD Management snap-ins are available in the Administrative Tools section of the Control Panel.

As you can see, a new link to the MMC console %SystemRoot%\system32\dsa. appeared.
Start the Active Directory Users and Computers snap-in.
Alternatively, press Win+R, type dsa.msc and click OK to start the ADUC console.

If your computer is joined to the Active Directory domain, the ADUC console will automatically connect to the nearest DC in your Active Directory site on startup.
If the console doesn’t find the domain controller, get the name of your LogonServer using the PowerShell command:
$env:LOGONSERVER
![]()
Right-click on the root in the ADUC console and select Change Domain Controller. Select the name of your logon DC server from the list.

Always use the domain controller closest to you. The RSAT console may become slow when working with a domain controller at a remote site.
If you want to connect to AD using dsa.msc snap-in from a non-domain computer, you must:
- Open the Command prompt and run the command:
runas /netonly /user:Domain_Name\Domain_USER mmc - In the empty MMC Console select File > Add/Remove Snap-In;
- Add Active Directory Users and Computers Snap-In to the right pane and press OK;

- Connect to the domain with right-click on ADUC > Connect to the domain and enter the domain name.


As a result, the structure of your OU Active Directory domain appears in the ADUC snap-in.

You will see a standard set of Active Directory OUs and containers:
- Saved Queries — saved search criteria, allows quickly replay of the previous search in Active Directory (LDAP query supported);
- Builtin — built-in user accounts;
- Computers — default container for computer accounts;
- Domain Controllers — default container for domain controllers;
- ForeignSecurityPrincipals — contains information about objects from trusted external domains. Typically, these objects are created when an object from an external domain is added to the group of the current domain;
- Users — default container for user accounts.
When you select the OU, you will see a list of the objects it contains. The ADUC console may display security groups, contacts, users, and computers.
Depending on the domain structure, the ADUC console may contain other containers. Some AD folders are not displayed by default. To display them, select View > Advanced Features in the top menu.

The following additional folders should appear:
- LostAndFound — directory objects that have lost their owners;
- NTDS Quotas — directory service quoting info;
- Program Data — data stored in the directory service for Microsoft applications;
- System — the built-in system parameters.
In the ADUC console, you can perform the following actions:
- Create and manage user accounts, computers, and Active Directory groups;
- View and edit AD object attributes with ADSI Edit;
- Search for AD objects;
- Change user password in Active Directory or reset it;
- Create organizational units and build hierarchical structures for AD objects. Enable or disable OU accidental deletion protection;
- Delegate administrative permission to OUs to non-admin domain users;
Raise domain functional level, and move FSMO roles to another domain controller.

Cyril Kardashevsky
I enjoy technology and developing websites. Since 2012 I’m running a few of my own websites, and share useful content on gadgets, PC administration and website promotion.