Содержание
- Причины возникновения проблемы
- Способ 1: Проверка свободного места
- Способ 2: Отключение стороннего антивируса
- Способ 3: Очистка папки загрузки обновлений
- Способ 4: Запуск средства устранения неполадок
- Способ 5: Проверка дополнительных параметров
- Способ 6: Проверка целостности системных файлов
- Способ 7: Ручная загрузка проблемного обновления
- Способ 8: Запуск скрипта сброса «Центра обновления Windows»
- Способ 9: Сброс Windows до заводских настроек
- Вопросы и ответы
Причины возникновения проблемы
Ошибка 0x80073701 появляется в Windows 11 при попытке скачать и установить одно из обновлений. Причин возникновения неполадки может быть несколько, и каждая из них связана с определенными составляющими операционной системы. Поэтому желательно знать, какие из них могут возникнуть на вашем компьютере, чтобы разобраться с подходящими методами решения ситуации и сразу перейти к ним, затратив минимальное количество времени на исправление ситуации.
- Некорректная работа служб. Одна из самых частых причин самых разных проблем при работе с апдейтами в Windows 11 — ошибки служб, связанных с «Центром обновления Windows». Некоторые из них могут быть остановлены или же не запускаться автоматически из-за различных сбоев. Решается ситуация разными методами вручную, о которых пойдет речь в этой статье.
- Недостаток места для установки обновления. Если говорить конкретно об ошибке 0x80073701, то она может появиться в том случае, если на системном разделе жесткого диска не хватает места для распаковки всех файлов. Решение здесь одно — очистка пространства и повторный запуск инсталляции.
- Действие сторонних антивирусов. Некоторые сторонние антивирусы могут блокировать работу служб «Центра обновления Windows» или мешать установке загруженных файлов. Поэтому пользователям такого софта лучше на время отключить его.
- Нестабильное подключение к интернету. Важно понимать, что для корректной загрузки апдейтов вы должны быть всегда подключены к интернету, иметь приемлемую скорость и стабильное соединение без разрывов.
Отталкиваясь от полученной выше информации, вы уже можете решить, какие из перечисленных ниже способов выполнять в первую очередь. Если характер возникновения ошибки 0x80073701 до сих пор не ясен, можете следовать методам по очереди, поскольку они будут разобраны от самых эффективных и простых, до более сложных и затратных по времени.
Способ 1: Проверка свободного места
Как вы уже знаете, одна из возможных причин появления ошибки с кодом 0x80073701 при попытке установить обновление в Windows 11 — недостаточное количество свободного места на диске. Сначала мы рекомендуем использовать стандартное средство мониторинга занятого пространства, которое поможет оценить, какой объем еще свободен на системном разделе.
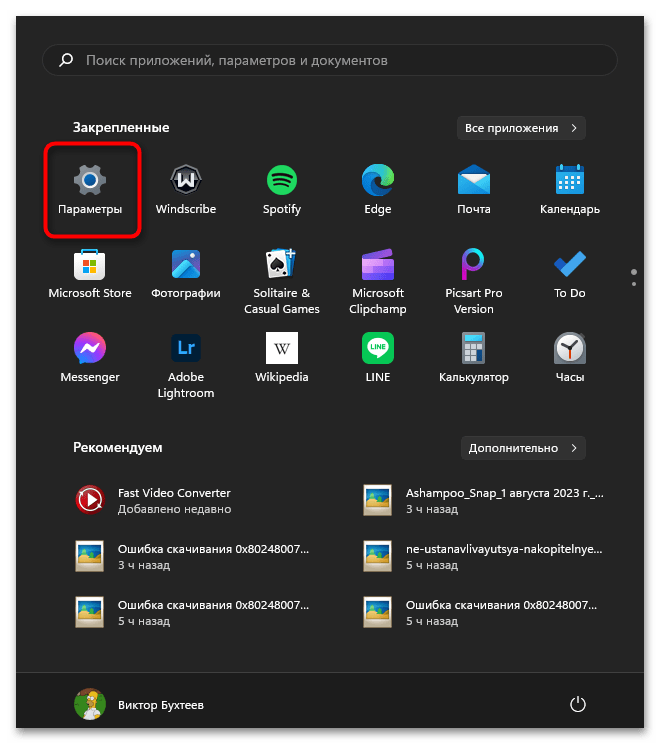
- Для этого откройте «Пуск» и перейдите в «Параметры».
- На панели слева выберите «Система», затем щелкните по категории «Память» для доступа к необходимому инструменту.
- Далее вы увидите общий показатель занятого пространства на диске, а также распределение по категориям. Шкалы из этого списка помогут вам определить, что занимает больше всего места и можно ли какую-то информацию стереть при необходимости.

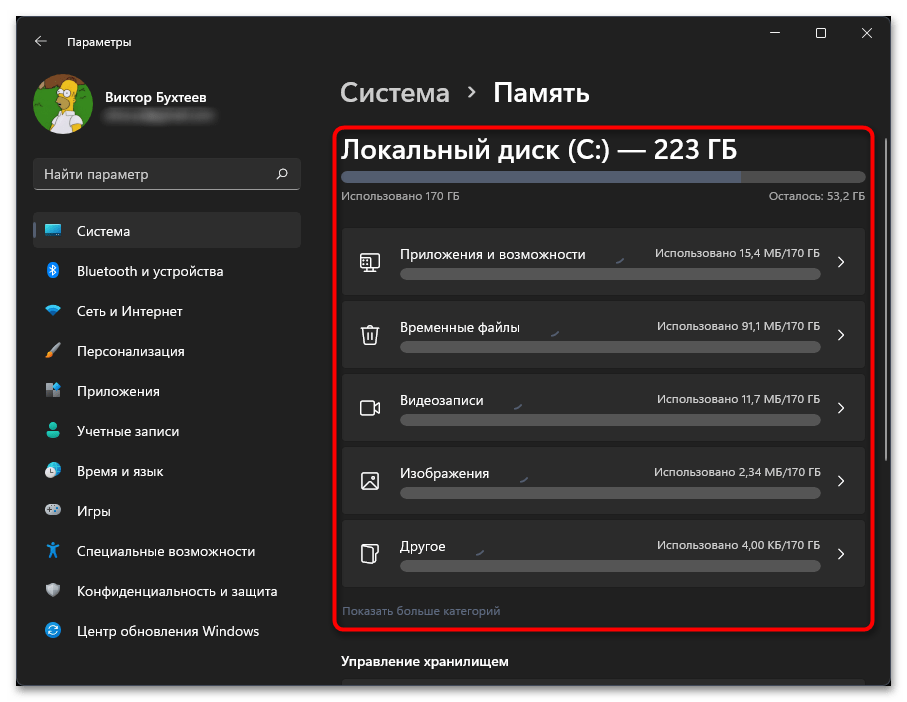
Разобравшись с отслеживанием памяти, можно сделать вывод, достаточно ли на диске места для установки обновлений и корректной работы операционной системы. Если пространства осталось меньше 10 ГБ, мы настоятельно рекомендуем что-то перенести на другой раздел жесткого диска или удалить ненужные файлы. Более детальную информацию по очистке системного логического тома вы найдете в другой статье на нашем сайте по ссылке ниже.
Подробнее: Освобождение места на диске C в Windows 11
Способ 2: Отключение стороннего антивируса
Этот метод относится только к тем пользователям, кто вместо стандартного «Защитника Windows» установил на свой компьютер антивирус от сторонних разработчиков. В некоторых случаях такие программы могут блокировать соединение со стороны «Центра обновления Windows» или мешать установке файлов. Лучше на некоторое время отключить защиту и повторить попытку инсталляции апдейта. Информацию о том, как выполнить деактивацию популярных антивирусов, вы найдете в статье по ссылке ниже.
Подробнее: Отключение антивируса

Способ 3: Очистка папки загрузки обновлений
Для временного расположения файлов установки апдейтов в Windows 11 отведена специальная системная папка. Если ее содержимое повреждено, объекты не загружены полностью или из-за сбоев не могут быть перезаписаны, возможно появление ошибки 0x80073701, которую можно решить путем очистки папки, после чего все файлы будут загружены повторно. Для этого понадобится предварительно отключить все связанные службы, чтобы не возникло никаких проблем с удалением.
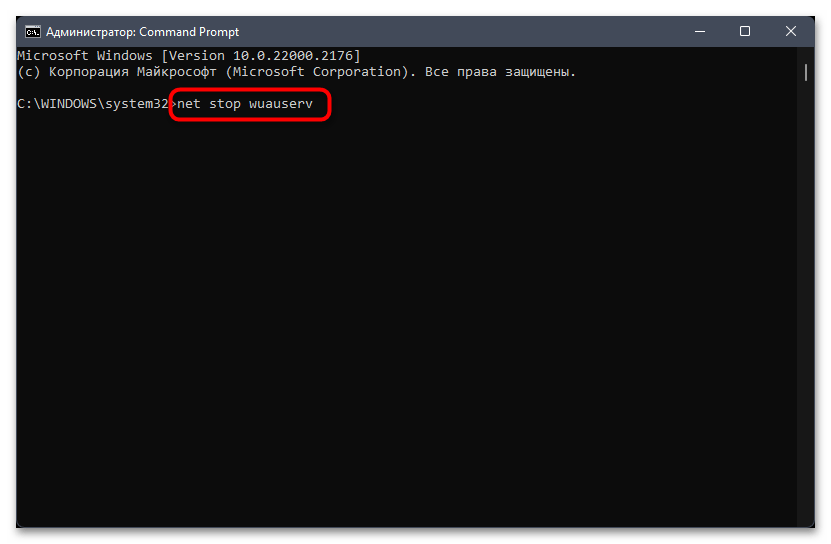
- Откройте «Пуск», отыщите «Командную строку» и запустите ее от имени администратора. Сделать это можно как по названию приложения, так и через команду cmd.
- По очереди введите и активируйте команды для отключения всех связанных служб, которые выглядят как:
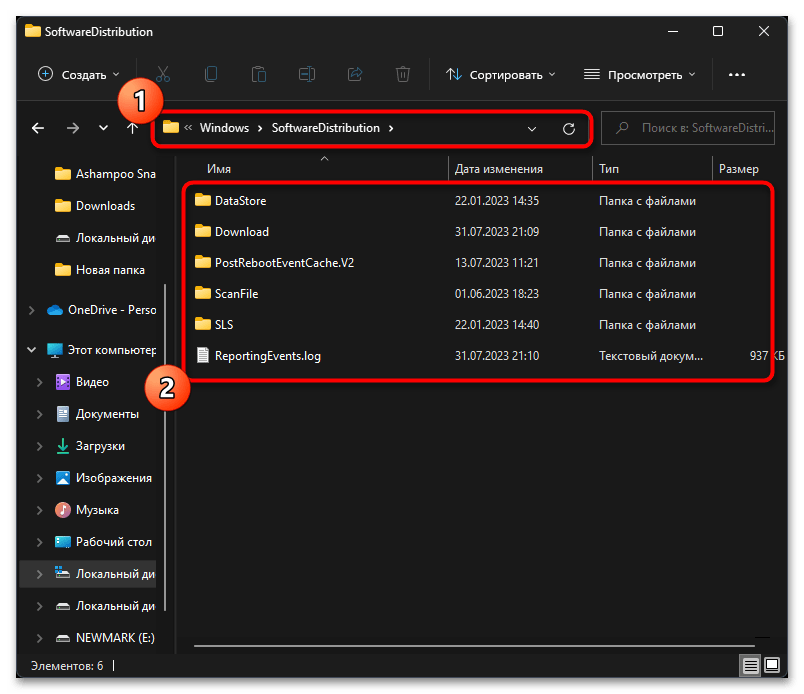
net stop wuauserv,net stop bits,net stop cryptSvcиnet stop msiserver. - После получения информации о том, что каждая из служб остановлена, не закрывайте, а сверните консоль, поскольку она еще понадобится. Откройте «Проводник» и перейдите по пути
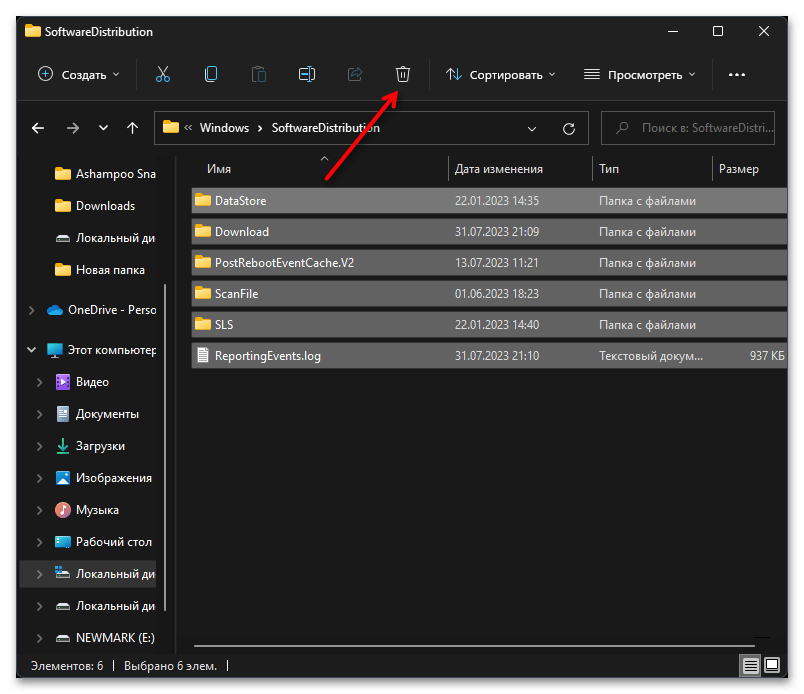
C:\Windows\SoftwareDistribution, чтобы отыскать те самые каталоги и файлы, о которых говорилось во вступлении. - Выделите все содержимое директории и на панели сверху выберите действие с корзиной, чтобы удалить их.
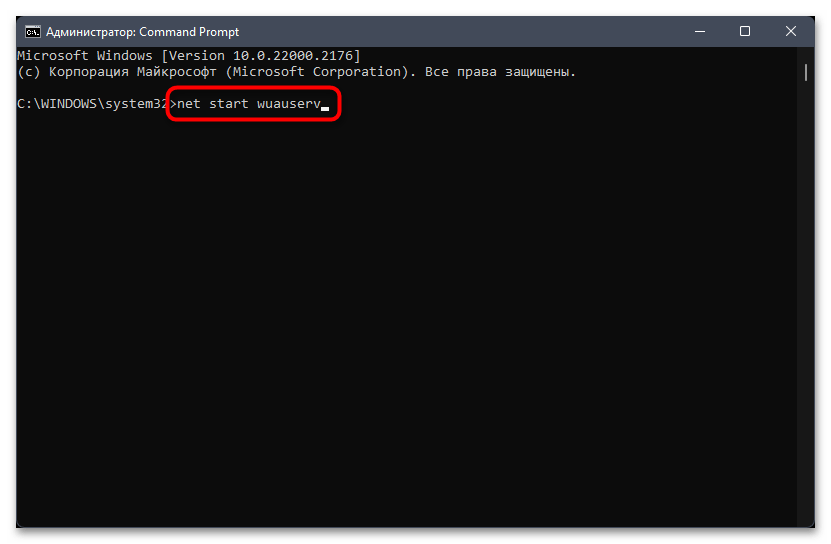
- После этого вернитесь к «Командной строке» и запустите все остановленные ранее службы путем последовательного ввода следующих команд:
net start wuauserv,net start bits,net start cryptSvc,net start msiserver.

Способ 4: Запуск средства устранения неполадок
Выше мы рассмотрели ряд методов, направленных на исправление конкретной проблемы с установкой обновлений, о которой и идет речь в этой статье. Далее предлагаем остановиться на общих решениях, которые могут наладить работу «Центра обновления Windows», если неполадки связаны со сбоями в функционировании этого стандартного компонента. В первую очередь можно запустить простое сканирование через средство устранения неполадок.
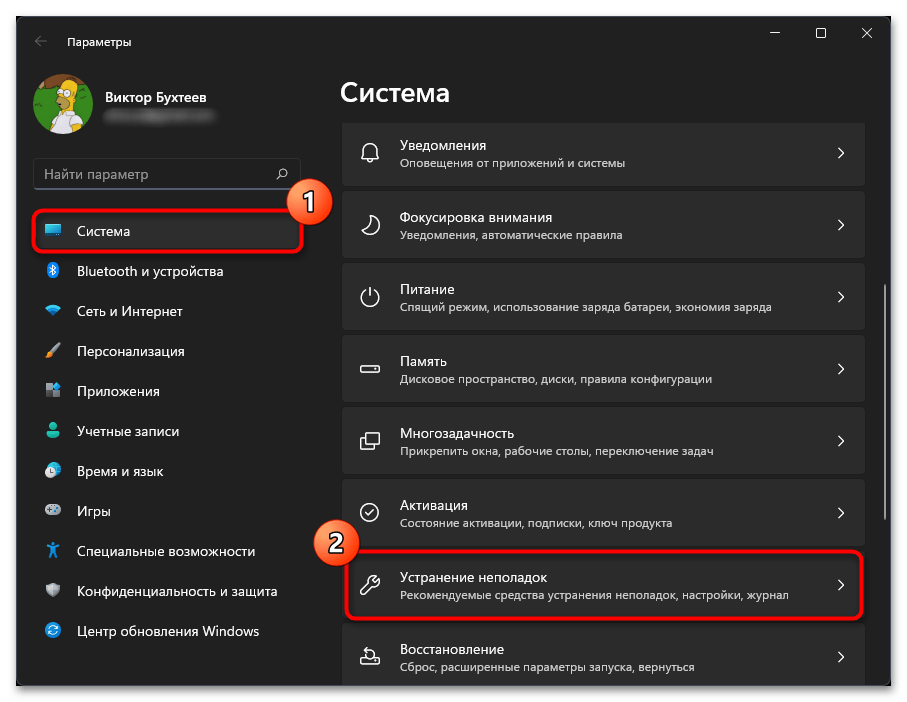
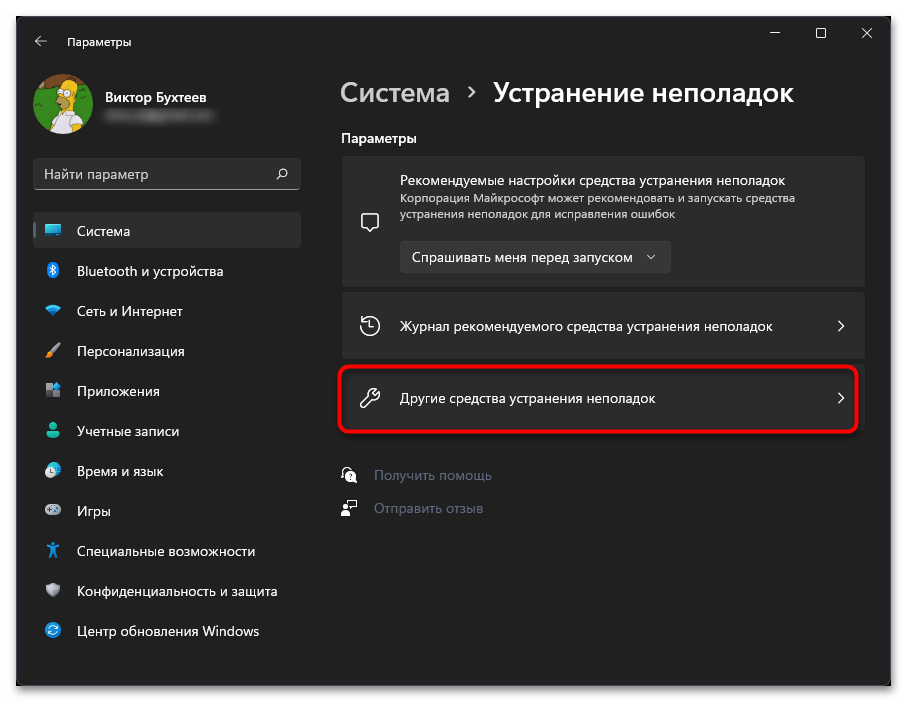
- В «Параметрах» выберите раздел «Свойства», затем перейдите к категории «Устранение неполадок».
- Нажмите по плитке «Другие средства устранения неполадок».
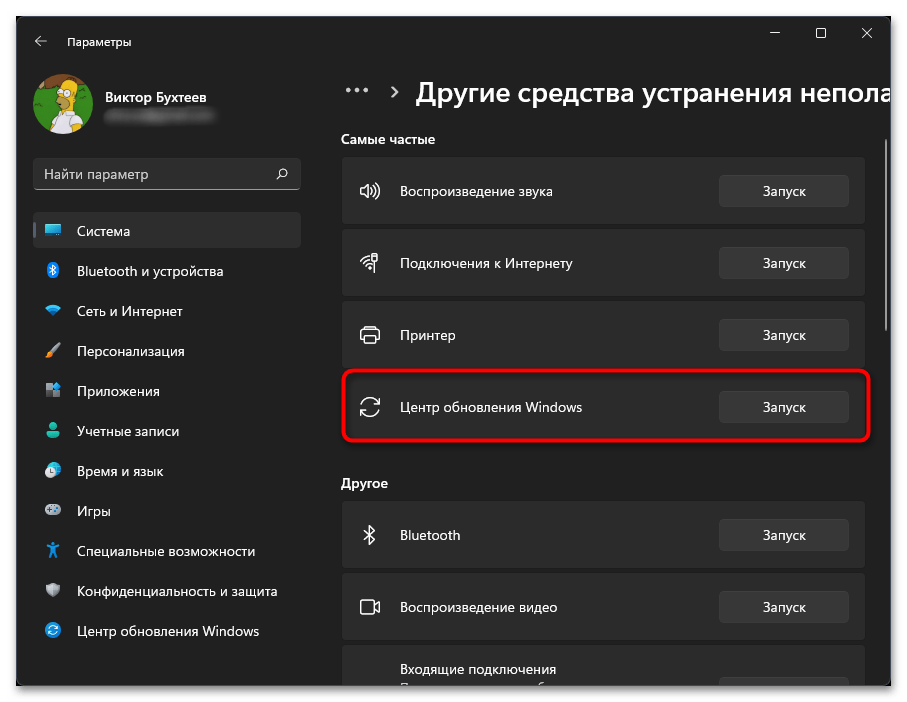
- В блоке «Самые частые» выберите «Центр обновления Windows», нажав по «Запуск».
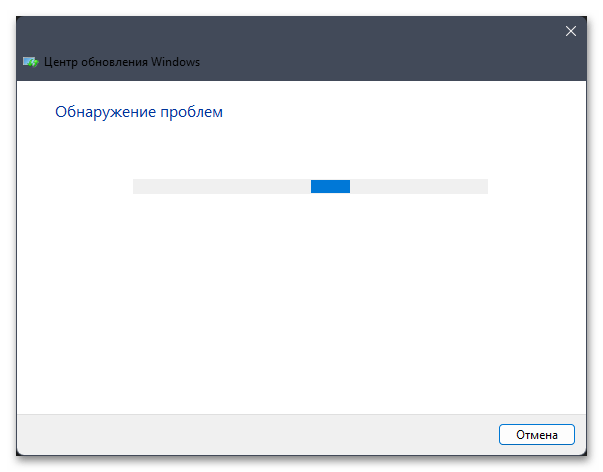
- Ожидайте окончания сканирования и следите за тем, какие сообщения появятся по завершении. Если ошибки были найдены, а изменения в ОС — внесены, можете попробовать заново запустить установку апдейта.
Способ 5: Проверка дополнительных параметров
Пока вы находитесь в «Параметрах», посмотрите дополнительные настройки для установки обновлений: инсталляция продуктов от Майкрософт должна быть разрешена, а ограничение на использование лимитных подключений — отсутствовать. Данные действия позволят решить проблемы с получением файлов, если как раз упомянутые настройки блокировали их скачивание, вызывая ошибку с кодом 0x80073701.
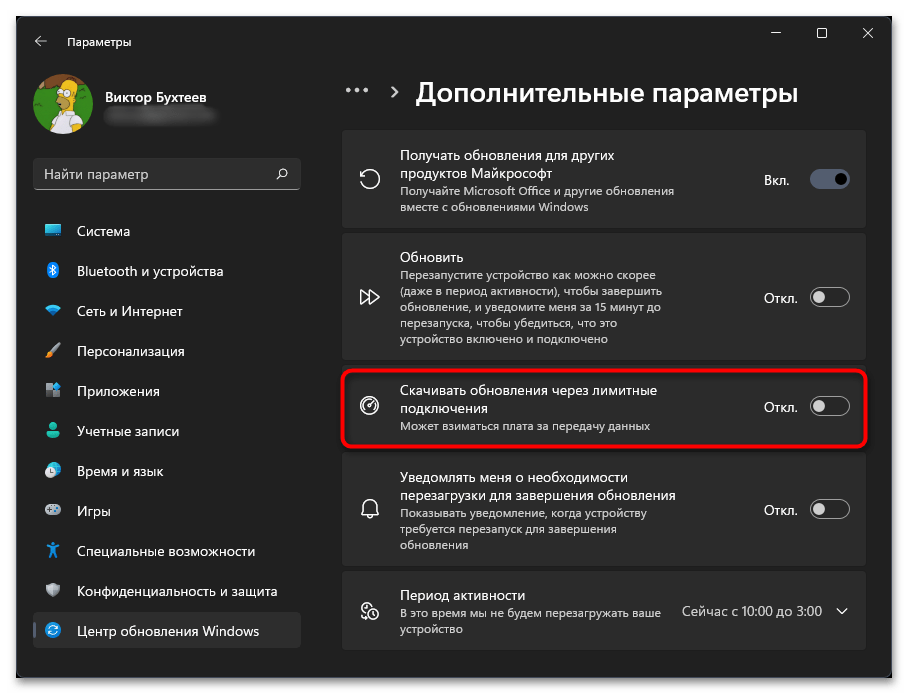
- На панели слева выберите «Центр обновления Windows», затем справа щелкните по категории «Дополнительные параметры».
- Обязательно включите параметр «Получать обновления для других продуктов Майкрософт», переместив переключатель в состояние «Вкл.».
- То же самое сделайте и со «Скачивать обновления через лимитные подключения».


Способ 6: Проверка целостности системных файлов
Не стоит исключать тот факт, что относительно часто проблемы с инсталляцией апдейтов в Виндовс 11 происходят из-за сбоев в работе операционной системе. Вызываются такие ошибки повреждением или отсутствием системных файлов, из-за чего обращение к определенным функциям становится невозможным. Исправить ситуацию можно довольно просто, используя для этого стандартные консольные утилиты, предназначенные как раз для сканирования всех компонентов. Детальное руководство по взаимодействию с ними вы найдете в отдельном материале от нашего автора по ссылке ниже.
Подробнее: Использование и восстановление проверки целостности системных файлов в Windows
Способ 7: Ручная загрузка проблемного обновления
В некоторых случаях ошибки при скачивании обновления в Windows 11 связаны с конкретными файлами и никакие общие исправления для «Центра обновления Windows» не нужны. Обычно в таких ситуациях помогает ручная загрузка проблемного апдейта и его инсталляция через исполняемый файл. Для этого нужно только знать его кодовый номер и отыскать установщик через официальный каталог Майкрософт.
Подробнее: Установка обновлений в Windows 11 вручную
Существует специальный скрипт от сторонних разработчиков, который автоматически сбрасывает все изменения для «Центра обновления Windows», исправляет параметры реестра и переводит службы в корректное рабочее состояние. Этот инструмент значительно упрощает процесс полного сброса компонента и позволяет практически полностью автоматизировать его. Однако использовать сброс мы советуем только после того, как уже были проверены предыдущие способы и они не принесли должного результата.
Скачать Script Reset Windows Update Tool через GitHub
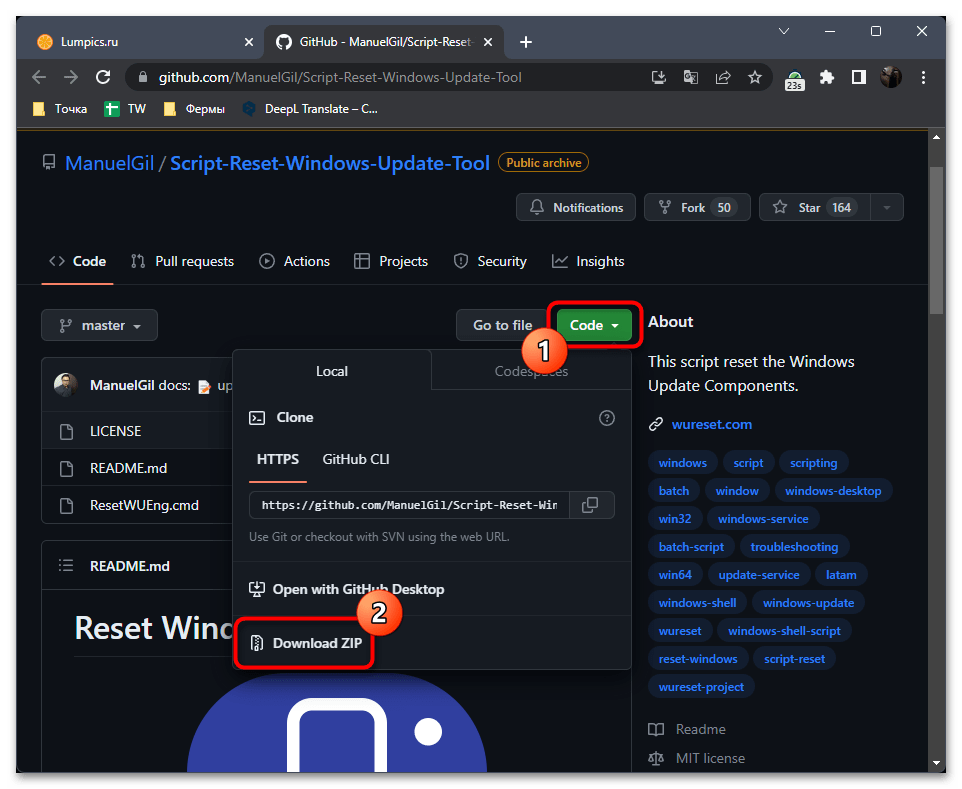
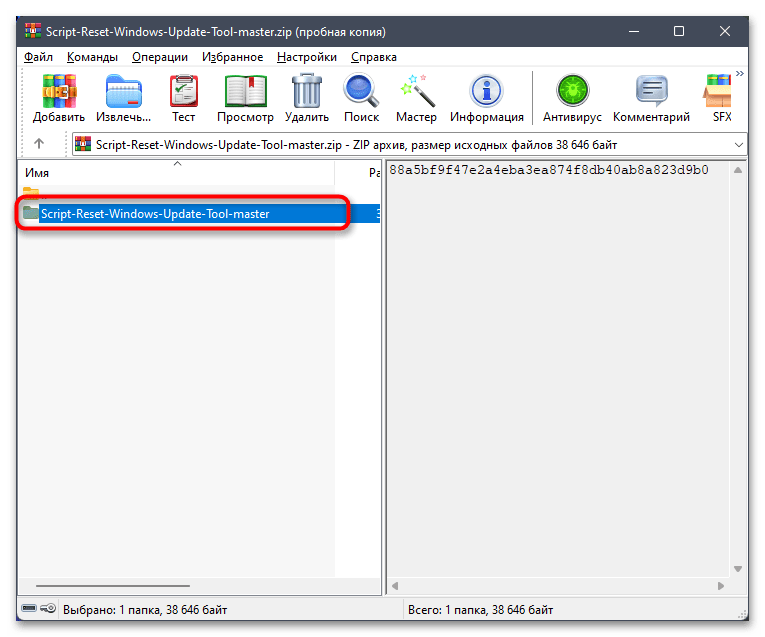
- Воспользуйтесь ссылкой выше для перехода на сайт для скачивания скрипта, разверните меню «Code» и щелкните по «Download ZIP».
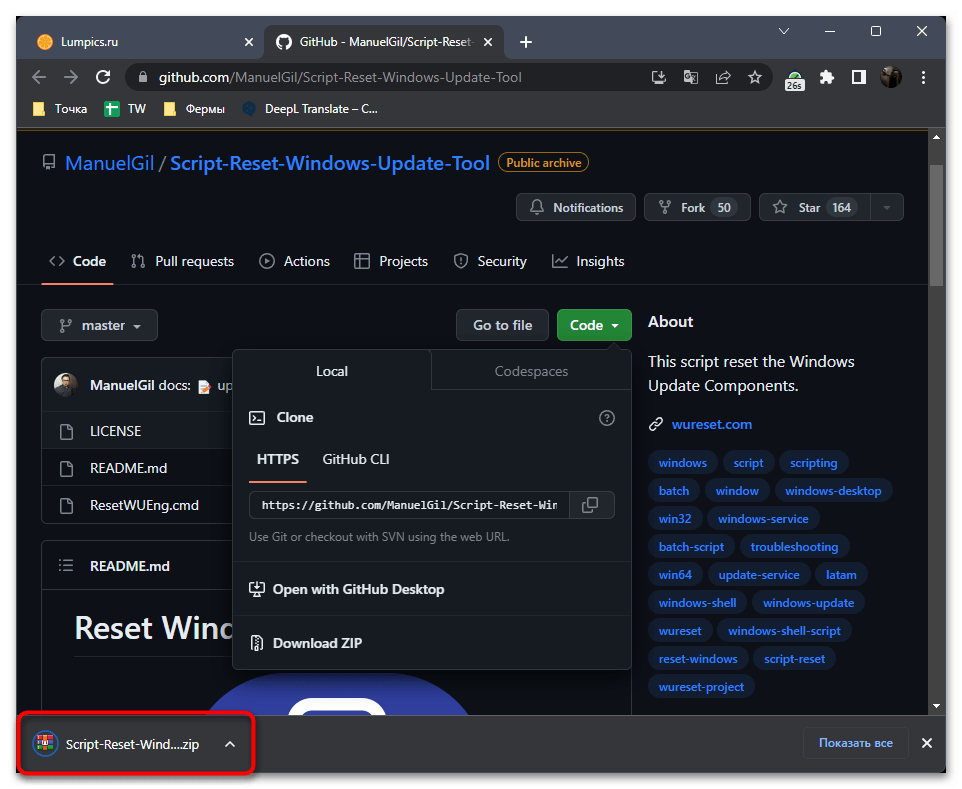
- По завершении загрузки архива откройте его через используемую программу.
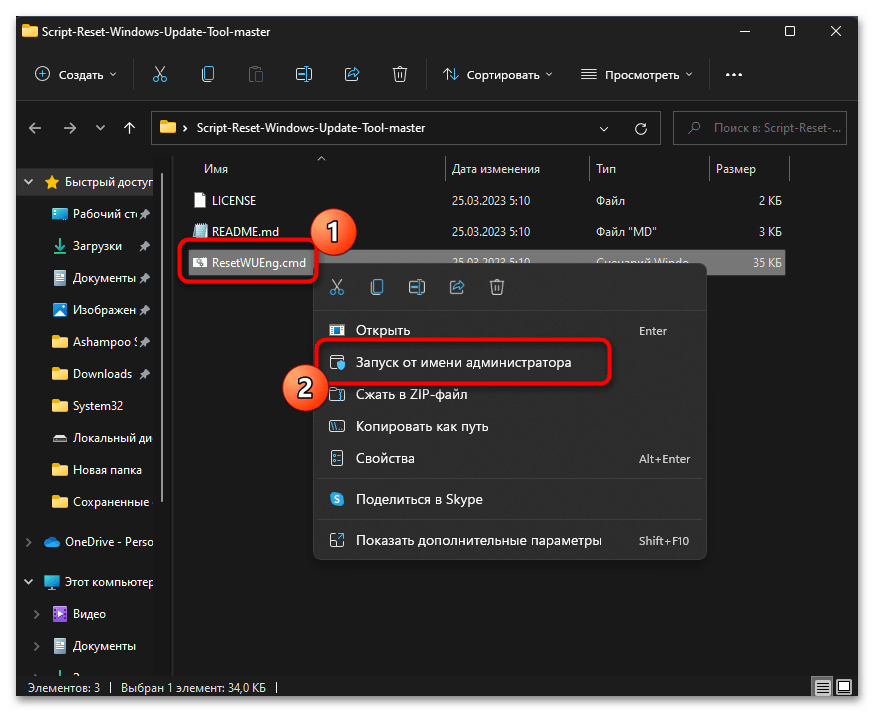
- Перенесите находящуюся в нем папку в любое удобное место на ПК, выполнив тем самым процесс распаковки.
- В данном каталоге найдите файл «ResetWUEng», щелкните по нему ПКМ и из контекстного меню выберите пункт «Запуск от имени администратора».
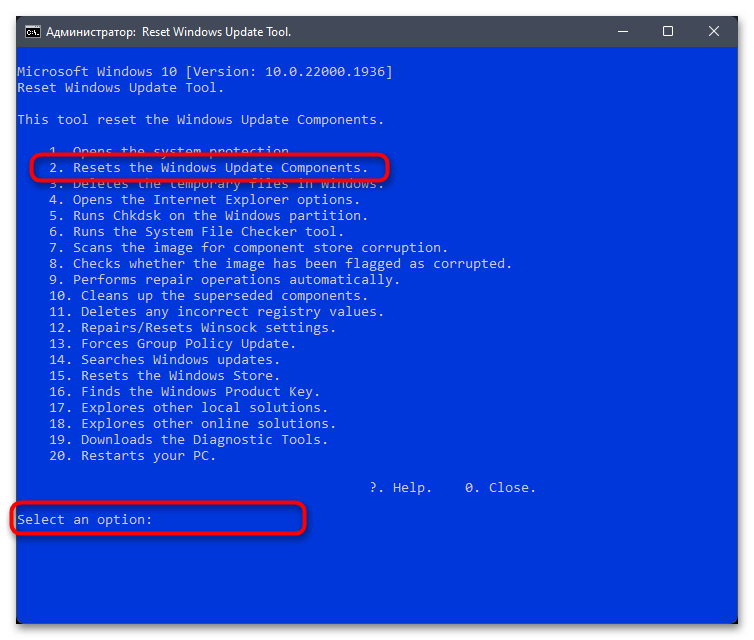
- Вы будете уведомлены о том, за какие действия отвечает скрипт и что вся ответственность за возможные сбои ложится на вас. Нажмите Y, чтобы перейти к следующему шагу.
- Из списка доступных действий вас интересует «Resets the Windows Update Components» под номером 2. Соответственно, этот номер нужно указать в поле ввода и подтвердить запуск сброса.
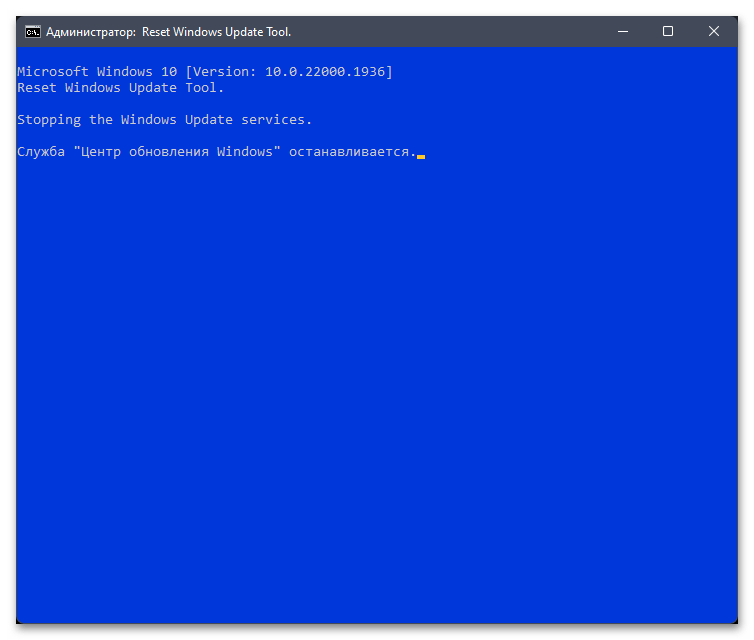
- Ожидайте его окончания, следя за прогрессом в этом же окне. После этого отправьте ПК на перезагрузку и повторите загрузку обновления.

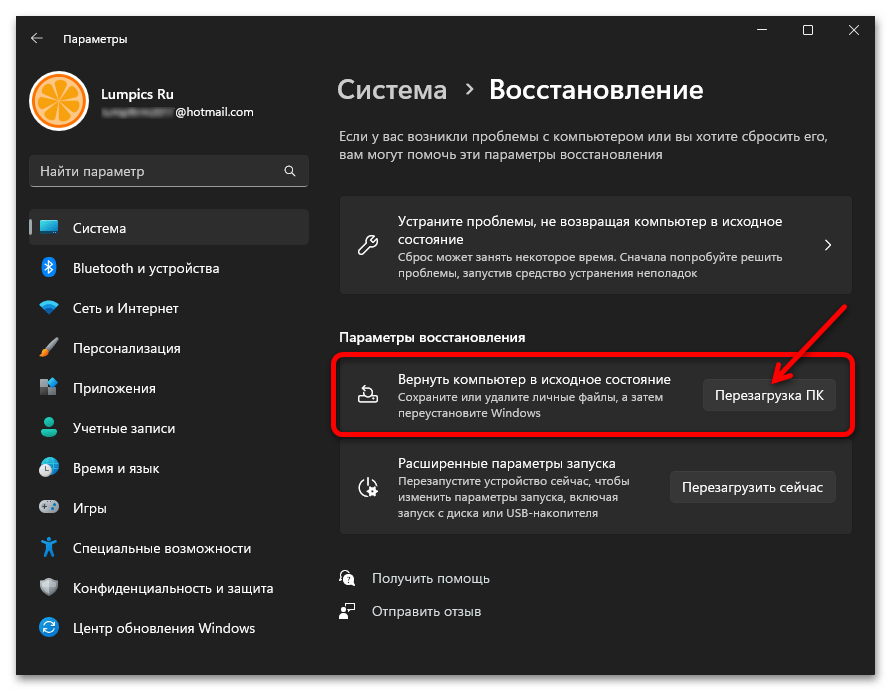
Способ 9: Сброс Windows до заводских настроек
Полный сброс Windows с откатом всех изменений и восстановлением заводских настроек стоит выполнить только в том случае, если обновление является для вас критически важным, появились другие проблемы в работе ОС и вы готовы потратить свое время на исправление. В большинстве случаев этот процесс помогает решить почти все проблемы, поскольку аналогичен переустановке, но позволяет сохранить некоторые пользовательские файлы. Информацию о правильном сбросе ОС до заводских настроек вы найдете в материале, нажав по заголовку ниже.
Подробнее: Сброс Windows 11 к заводским настройкам
You may manually install the update as a last resort
by Kazim Ali Alvi
Kazim has always been fond of technology, be it scrolling through the settings on his iPhone, Android device, or Windows. And at times, unscrewing the device to take… read more
Updated on
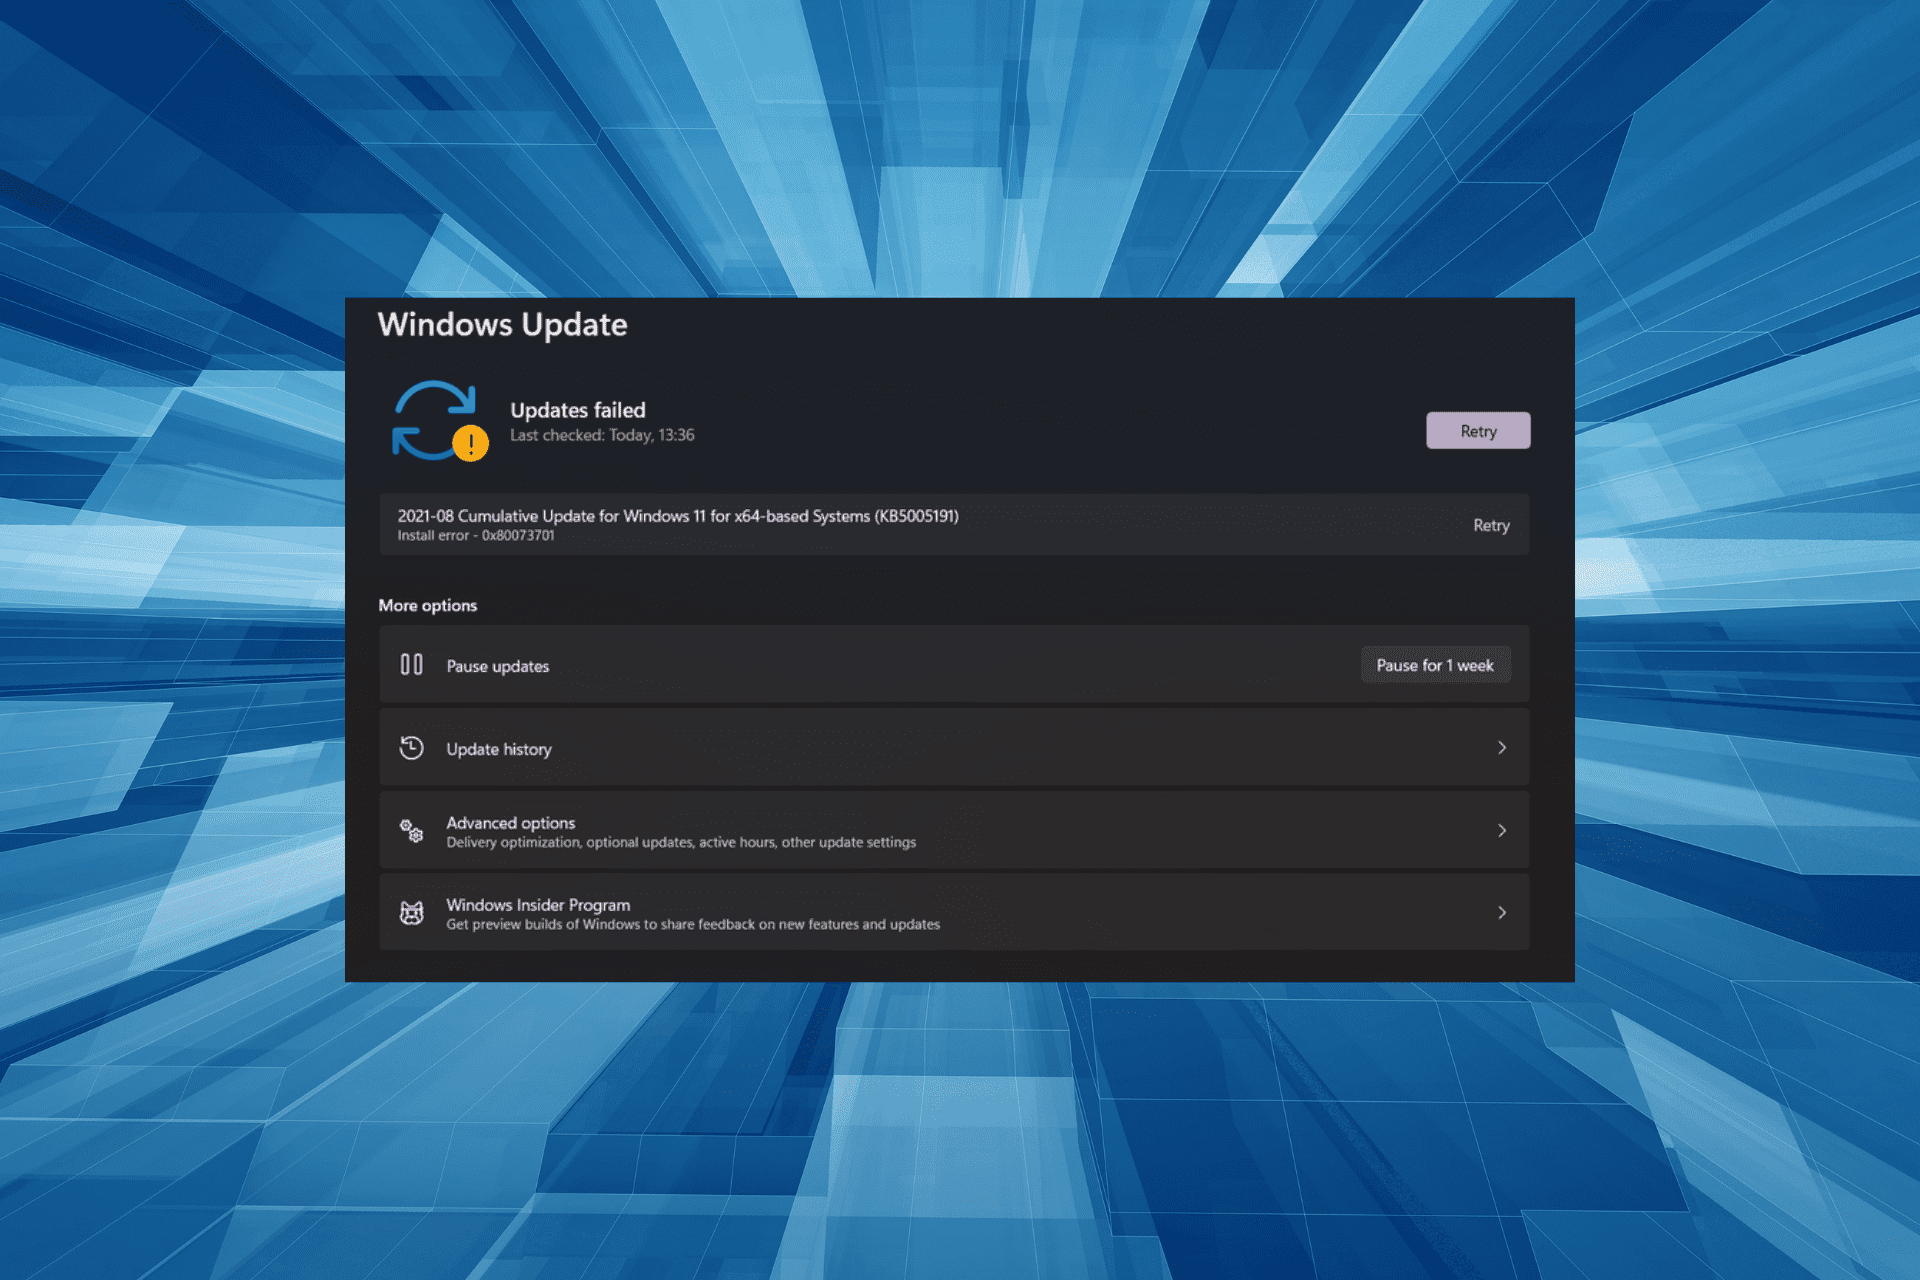
- The 0x80073701 error code in Windows 11 is encountered when you try to install an update.
- It could be due to corrupt system files, issues with the Windows Update Components, or critical services that are not running.
- To fix the error, run the built-in troubleshooter or perform a DISM and SFC scan, amongst the other methods here.
XINSTALL BY CLICKING THE DOWNLOAD
FILE
Windows updates are critical, and with the latest iteration still in the early days, it’s recommended that you always have the latest version installed.
But, several users have been receiving the 0x80073701 Windows 11 error when trying to install updates.
With each update, Microsoft releases many new features, some of which are meant to boost the system’s performance. But, various errors prevent you from installing updates.
What does the install error 0x80073701 on Windows 11 mean?
Regarding the update errors, there are a few common underlying causes. Most often than not, it’s a minor glitch that prevents you from installing updates. Here are the major triggers:
- Corrupted or faulty Windows Update component – These WU components are an integral reason behind the success of an OS update. Once corrupted, you may expect glitches.
- Bad or corrupted system files – Curropted system files will mean that common PC processes will be broken or unresponsive.
- Windows Update glitch – The WU component’s ongoing bug is the most frequent cause of this specific problem. This may be a result of a broken update troubleshooter.
- Stopped update services – There’s also the possibility that critical services responsible for identifying, downloading, and installing updates may not be running.
Now that you have a basic understanding of the underlying causes let’s walk you through the most effective fixes for the 0x80073701 error in Windows 11.
If you encounter the Windows Update error 0x80073701 in Windows 10, check out our dedicated guide for it.
How do I fix the 0x80073701 Windows 11 error?
- What does the install error 0x80073701 on Windows 11 mean?
- How do I fix the 0x80073701 Windows 11 error?
- 1. Use a dedicated third-party tool
- 2. Run the Windows Update troubleshooter
- 3. Run the DISM tool and SFC scan
- 4. Run the Windows Update service
- 5. Delete contents of the Software Distribution folder
- 6. Reset Windows Update components
- 7. Manually install the update
1. Use a dedicated third-party tool
The easiest way to fix the Windows 11 0x80073701 Windows Update error 0x80073701 is to use a reliable and dedicated third-party tool. Some of these are available, but not all are as effective as this one.
How we test, review and rate?
We have worked for the past 6 months on building a new review system on how we produce content. Using it, we have subsequently redone most of our articles to provide actual hands-on expertise on the guides we made.
For more details you can read how we test, review, and rate at WindowsReport.
Windows Update is meant to improve the overall performance of your operating system, integrate new features, and even upgrade the existing ones. However, there are times when certain errors may occur out of the blue.
Thankfully, if you happen to run into such issues, there is a specialized Windows repair software that can help you solve them in no time.
After the process is completed your computer should work perfectly fine and you will no longer have to worry about Windows Update errors of any kind.
2. Run the Windows Update troubleshooter
Running necessary tools like the Windows Update Troubleshooter helps to identify the main causes that generate this error on Windows 11 OS.
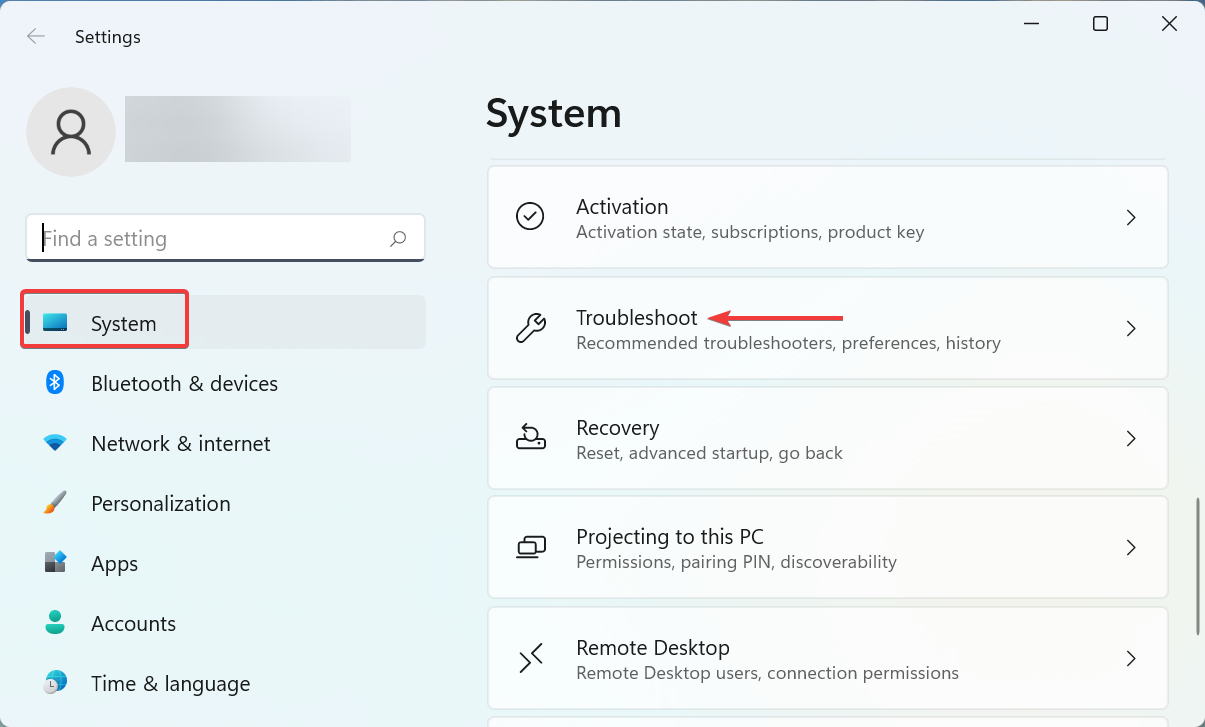
- Press Windows + I to launch the Settings app, and click on Troubleshoot on the right in the System.
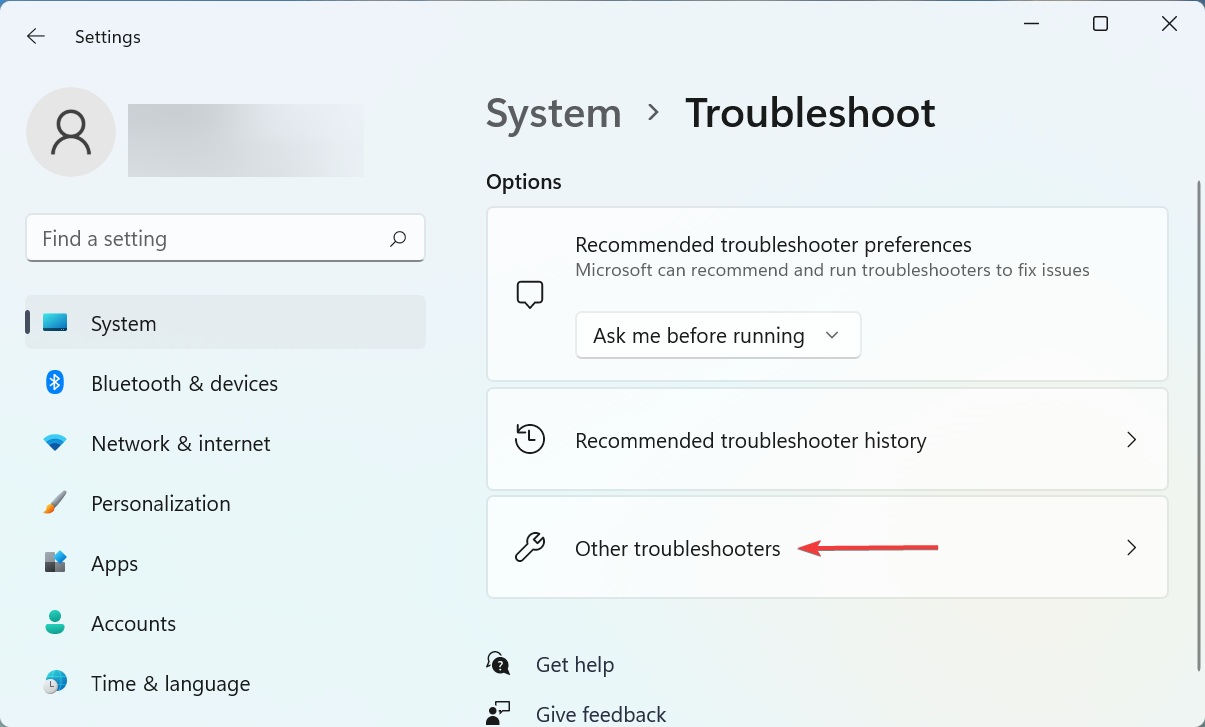
2. Click on Other troubleshooters.
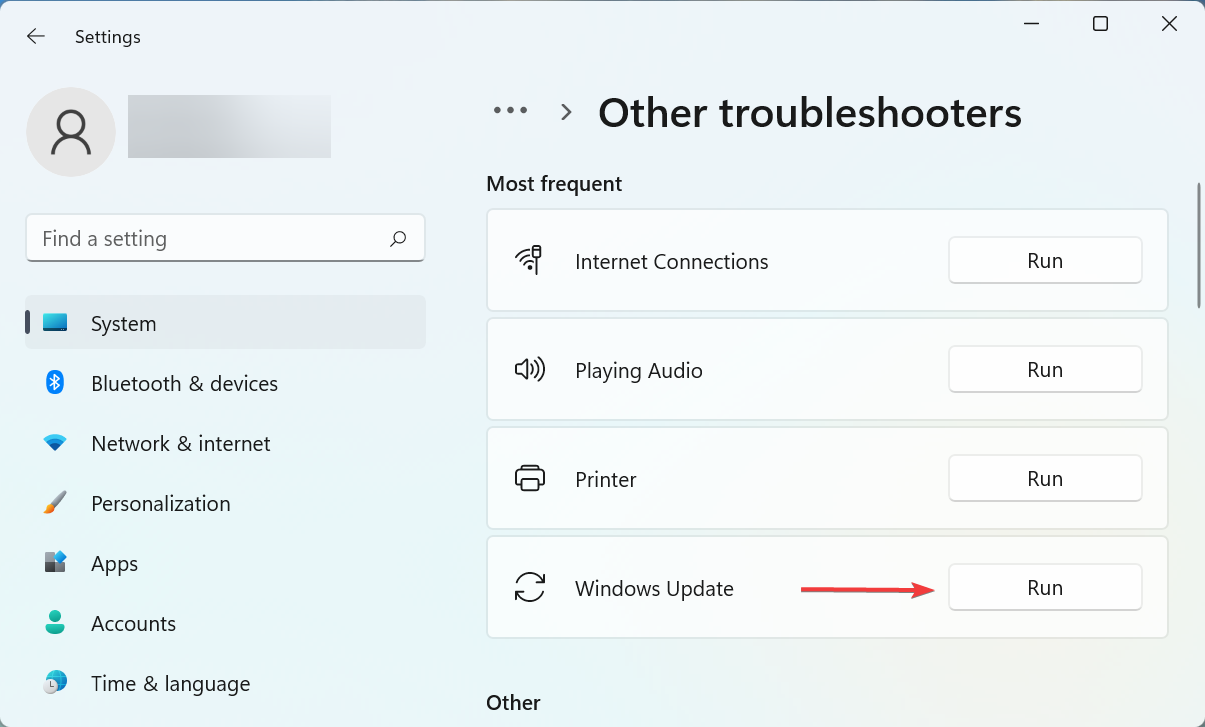
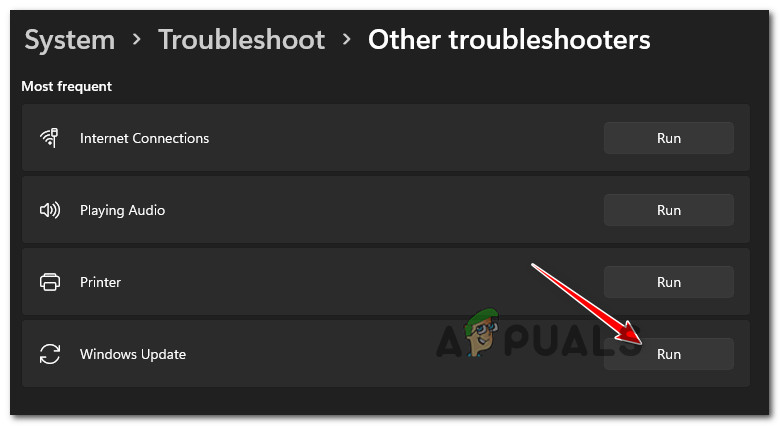
3. Locate the Windows Update troubleshooter, and click on the Run button next to it.
4. Follow the on-screen instructions and choose the necessary response when prompted to fix the error.
3. Run the DISM tool and SFC scan
If it was the corrupt system files that caused the error code 0x80073701 in Windows 11, running the DISM (Deployment Image Servicing and Management) tool and SFC scan should fix it.
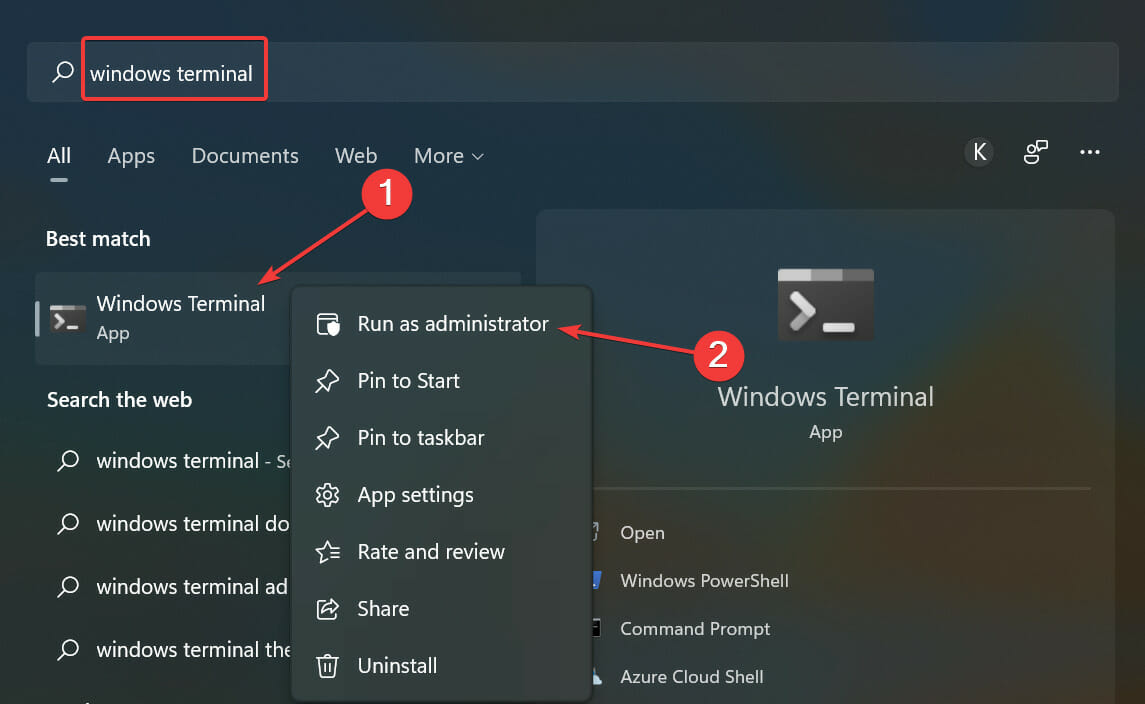
- Press Windows + S to launch the Search menu, enter Windows Terminal in the text field at the top, right-click on the relevant search result, and select Run as administrator from the context menu.

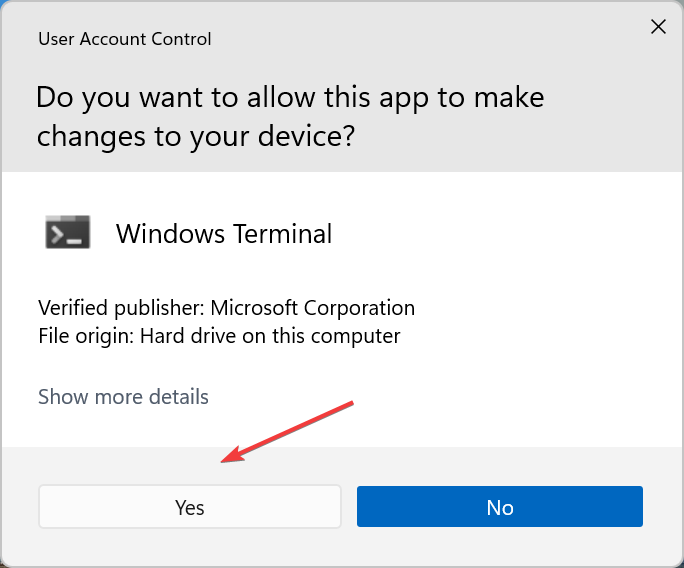
- Click Yes in the UAC (User Account Control) prompt that pops up.

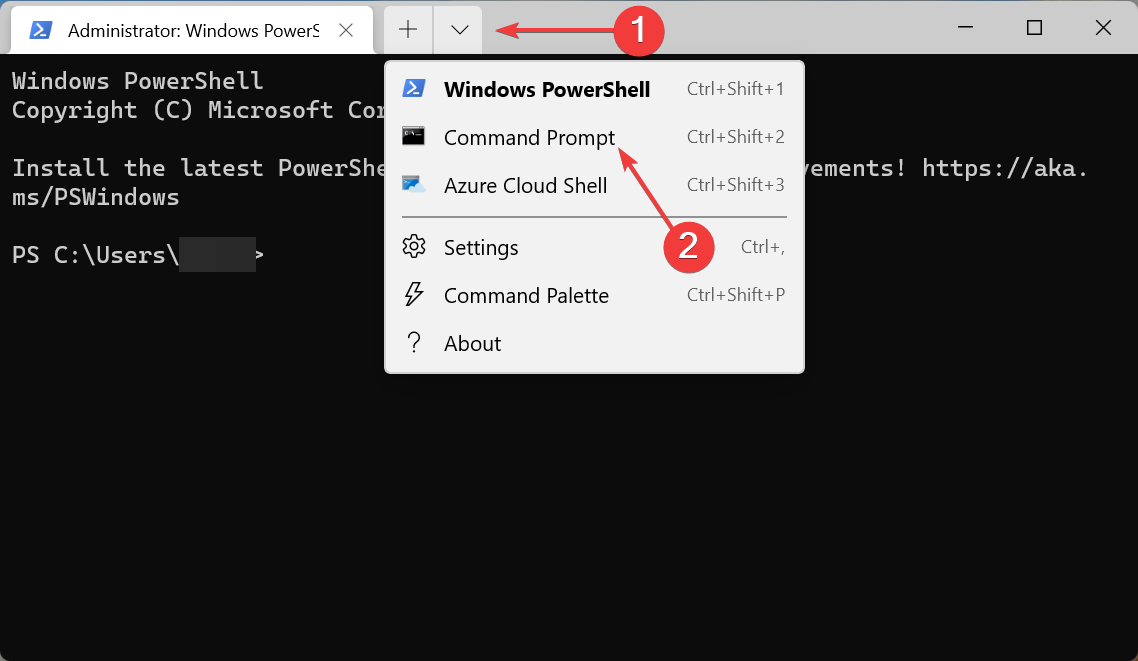
- Now, click on the downward-facing arrow and select Command Prompt from the list of options. Alternatively, you can hit Ctrl + Shift + 2 to launch Command Prompt in a new tab.

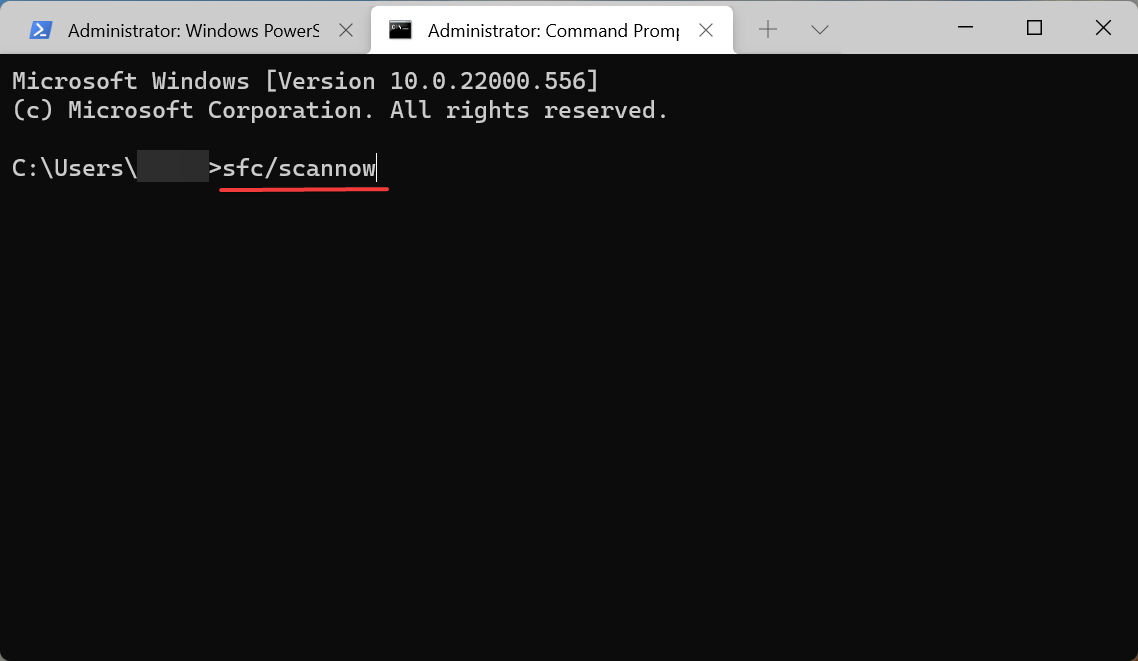
- Paste the following three commands one at a time, and hit Enter after each to run the DISM tool.
DISM.exe /online /cleanup-image /scanhealthDISM.exe /online /cleanup-image /restorehealth - Once done, execute the following command to run the SFC scan.
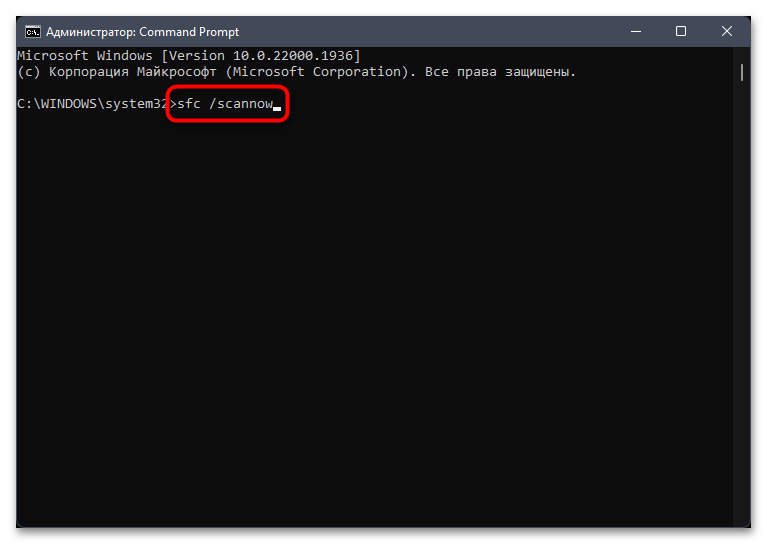
sfc /scannow
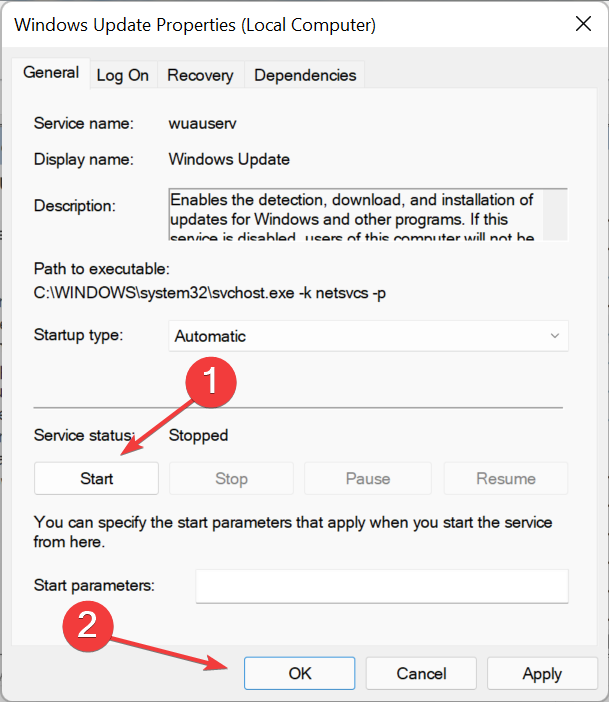
4. Run the Windows Update service
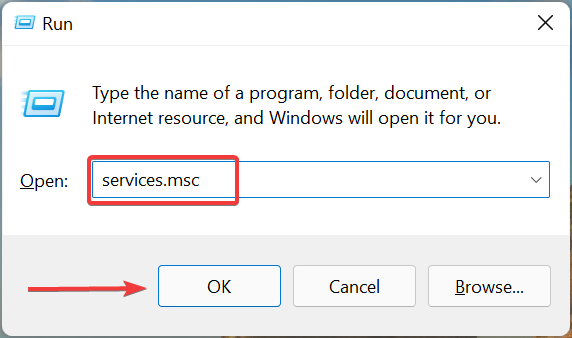
- Press Windows + R to launch the Run command, enter services.msc in the text field, and either click on OK or hit Enter to launch the Services app.

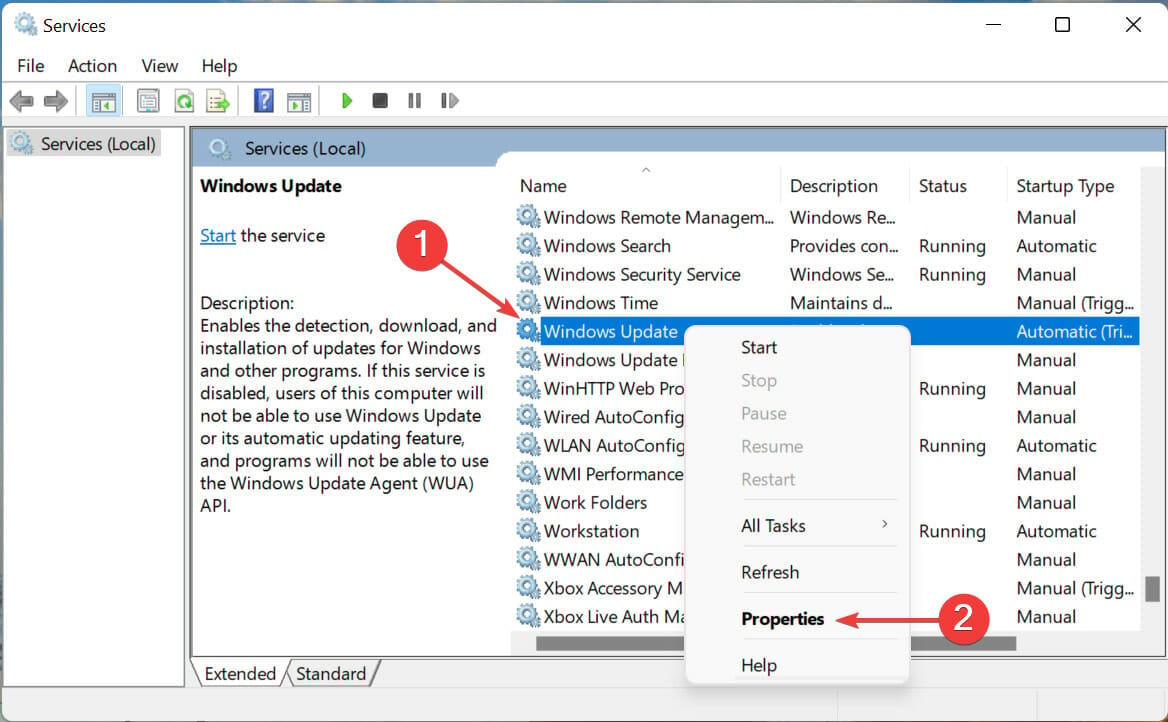
- Locate the Windows Update service, right-click on it, and select Properties from the context menu.

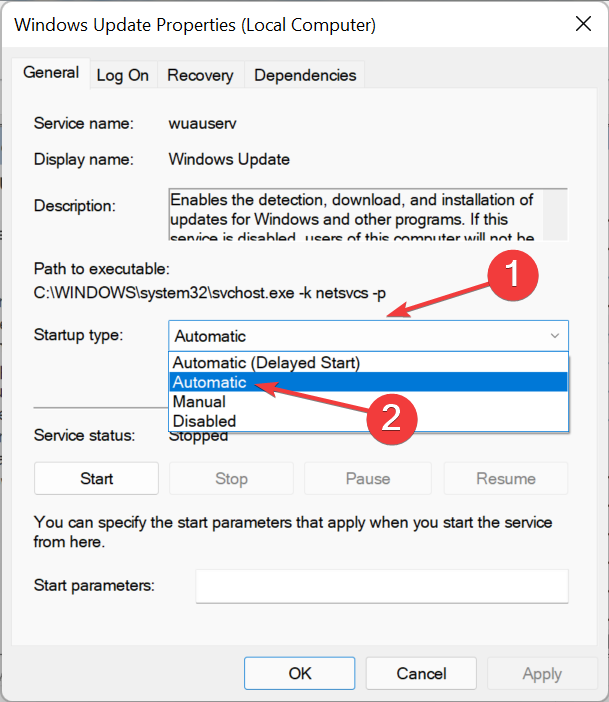
- Click on the Startup type dropdown menu, and select Automatic from the list of options.

- Now, if the service is not running, click on the Start button, and then on OK at the bottom to save the changes.
5. Delete contents of the Software Distribution folder
- Press Windows +S to launch the Search menu, enter Windows Terminal in the text field, right-click on the relevant search result, and select Run as administrator from the context menu.
- Click Yes in the UAC prompt that pops up.
- Click on the downward-facing arrow at the top and select Command Prompt.
- Now, type/paste the following commands and hit Enter after each to stop a bunch of Windows Update related services.
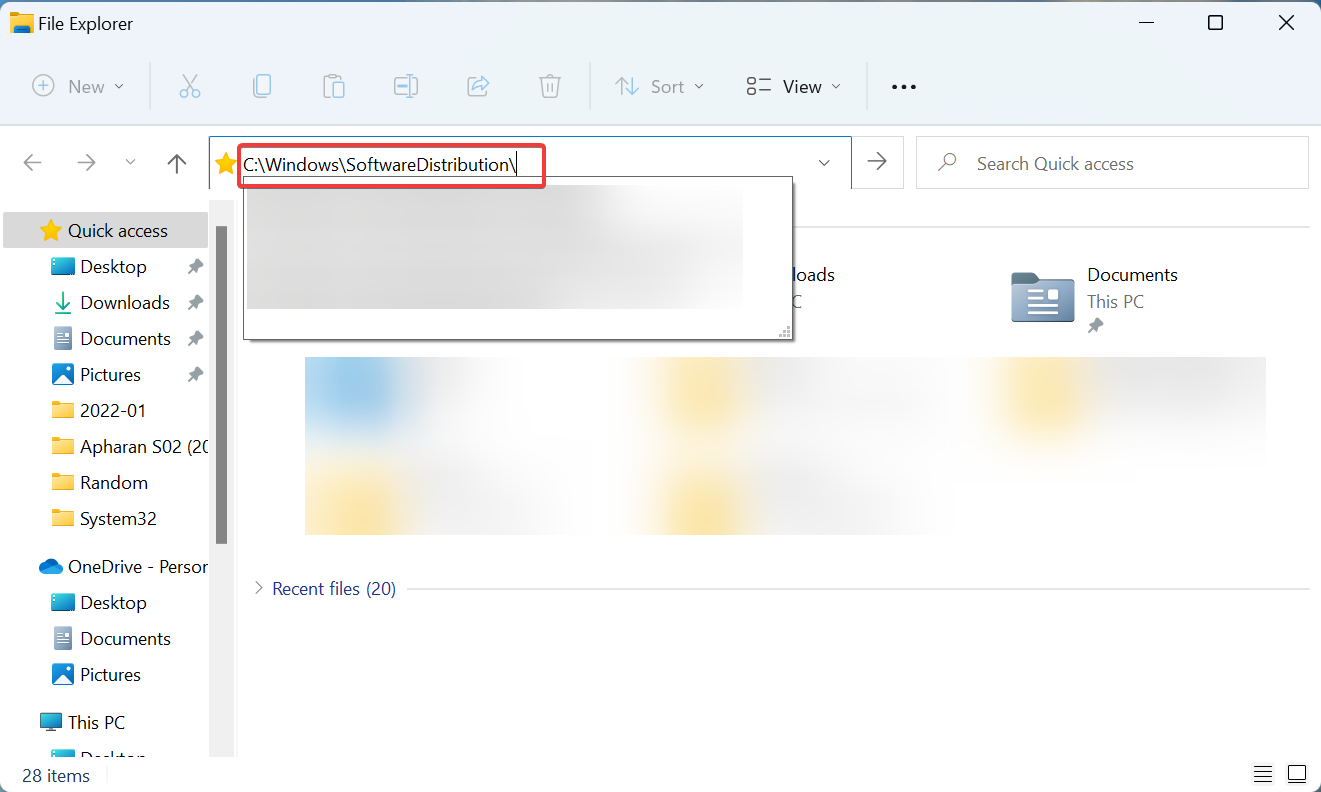
net stop wuauservnet stop cryptsvcnet stop bitsnet stop msiserver - Once done, press Windows + E to launch the File Explorer, paste the following path in the address bar and hit Enter.
C:\Windows\SoftwareDistribution\
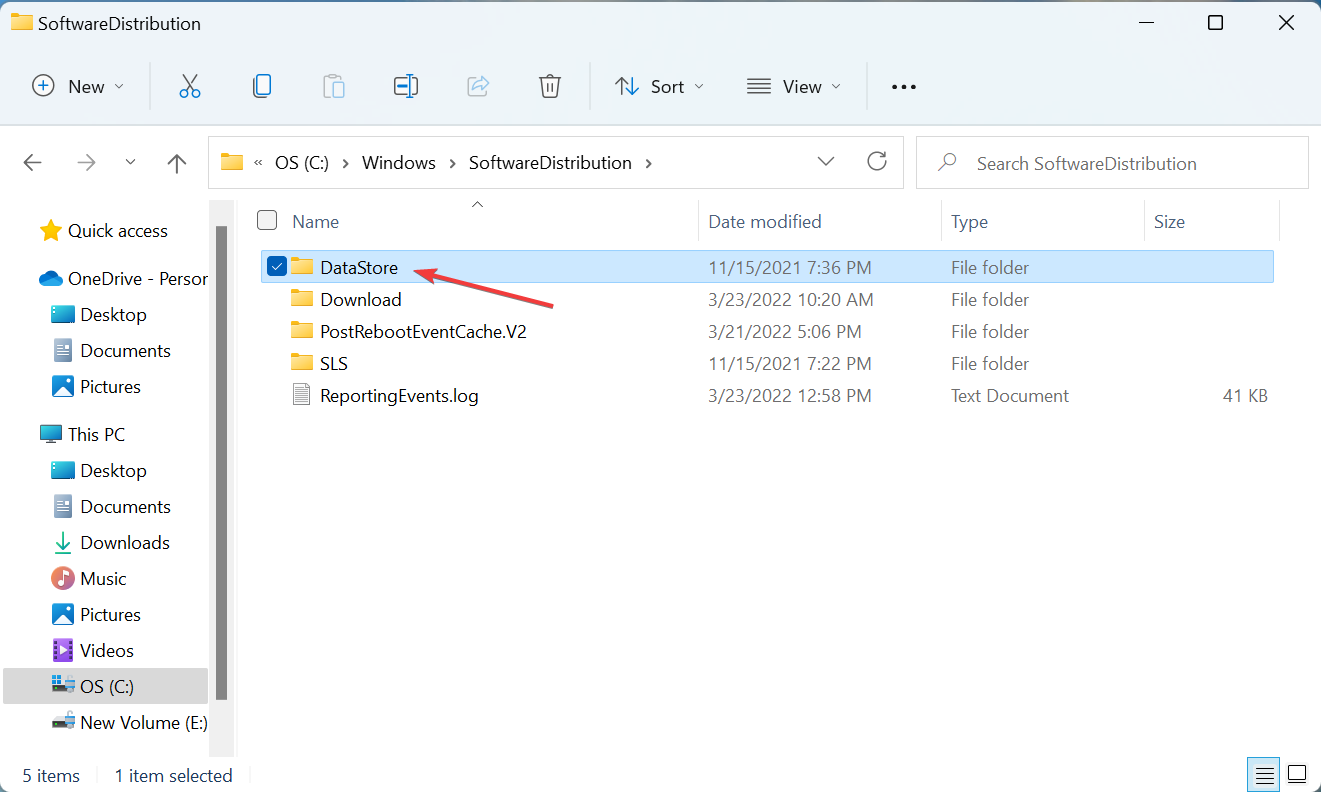
- Double-click on the DataStore folder here to view its contents.
- Next, press Ctrl + A to select all the files here, and hit the Del key to delete them.
- Choose the appropriate response, in case a confirmation prompt pops up.
- Now, go back to the Command Prompt tab in Windows Terminal, and execute the following commands to run the services that you stopped earlier.
net start wuauservnet start cryptsvcnet start bitsnet start msiserver


After you are done with the process, again check for updates, and verify if you are able to install them. In case you still encounter the error code 0x80073701 in Windows 11, head to the next method.
- How to fix the Windows 11 update error 0x8024a203?
- Windows 11 installation has failed? Here’s how to fix this
- How to fix the Windows 11 update error 0x8024a205
- How to fix Windows 11 error after update
6. Reset Windows Update components
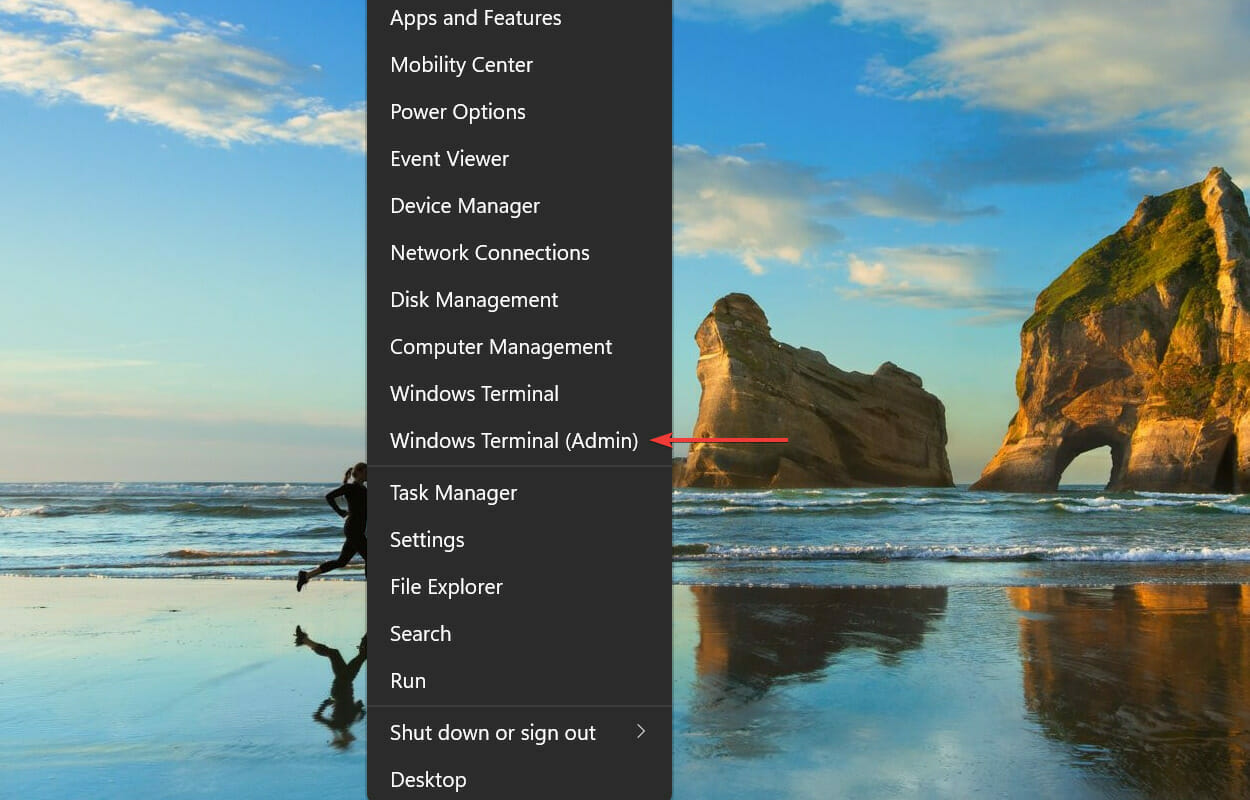
- Press Windows + X or right-click on the Start icon to launch the Power User menu, and select Windows Terminal (Admin) from the list of options.

- Click Yes in the UAC (User Account Control) prompt that appears.
- Next, click on the downward-facing arrow near the top and select Command Prompt.
- First, execute the following two commands to stop the Windows Update service and BITS.
net stop wuauservnet stop bits - Next, paste the following command and hit Enter to delete the qmgr*.dat files.
Del “%ALLUSERSPROFILE%Application DataMicrosoftNetworkDownloaderqmgr*.dat” - Now execute the following three commands to rename a few critical folders. However, you can skip this step if this is the first time you are resetting the Windows Update components. If it doesn’t work first, execute these on the next attempt.
Ren %Systemroot%\SoftwareDistribution\DataStore DataStore.bakRen %Systemroot%\SoftwareDistribution\Download Download.bakRen %Systemroot%\System32\catroot2 catroot2.bak - Execute these commands individually to reset the BITS and Windows Update service.
sc.exe sdset bits D:(A;;CCLCSWRPWPDTLOCRRC;;;SY)(A;;CCDCLCSWRPWPDTLOCRSDRCWDWO;;;BA)(A;;CCLCSWLOCRRC;;;AU)(A;;CCLCSWRPWPDTLOCRRC;;;PU)sc.exe sdset wuauserv D:(A;;CCLCSWRPWPDTLOCRRC;;;SY)(A;;CCDCLCSWRPWPDTLOCRSDRCWDWO;;;BA)(A;;CCLCSWLOCRRC;;;AU)(A;;CCLCSWRPWPDTLOCRRC;;;PU) - Next, paste the following command and hit Enter.
cd /d %windir%\system32 - The next step is to paste each of these commands individually and then hit Enter after each to reregister some critical files.
regsvr32.exe atl.dll
regsvr32.exe urlmon.dll
regsvr32.exe mshtml.dll
regsvr32.exe shdocvw.dll
regsvr32.exe browseui.dll
regsvr32.exe jscript.dll
regsvr32.exe vbscript.dll
regsvr32.exe scrrun.dll
regsvr32.exe msxml.dll
regsvr32.exe msxml3.dll
regsvr32.exe msxml6.dll
regsvr32.exe actxprxy.dll
regsvr32.exe softpub.dll
regsvr32.exe wintrust.dll
regsvr32.exe dssenh.dll
regsvr32.exe rsaenh.dll
regsvr32.exe gpkcsp.dll
regsvr32.exe sccbase.dll
regsvr32.exe slbcsp.dll
regsvr32.exe cryptdlg.dll
regsvr32.exe oleaut32.dll
regsvr32.exe ole32.dll
regsvr32.exe shell32.dll
regsvr32.exe initpki.dll
regsvr32.exe wuapi.dll
regsvr32.exe wuaueng.dll
regsvr32.exe wuaueng1.dll
regsvr32.exe wucltui.dll
regsvr32.exe wups.dll
regsvr32.exe wups2.dll
regsvr32.exe wuweb.dll
regsvr32.exe qmgr.dll
regsvr32.exe qmgrprxy.dll
regsvr32.exe wucltux.dll
regsvr32.exe muweb.dll
regsvr32.exe wuwebv.dll
10. Now, execute this command to reset Winsock.netsh winsock reset
11. The last step is to restart the BITS and Windows Update service, execute these two commands to do that.net start bits net start wuauserv
The Windows Update Components play a critical role in installing updates, and if these are corrupt due to any reason, you are likely to encounter the error code 0x80073701 in Windows 11. Resetting the components has been found to fix the issue for many users.
7. Manually install the update
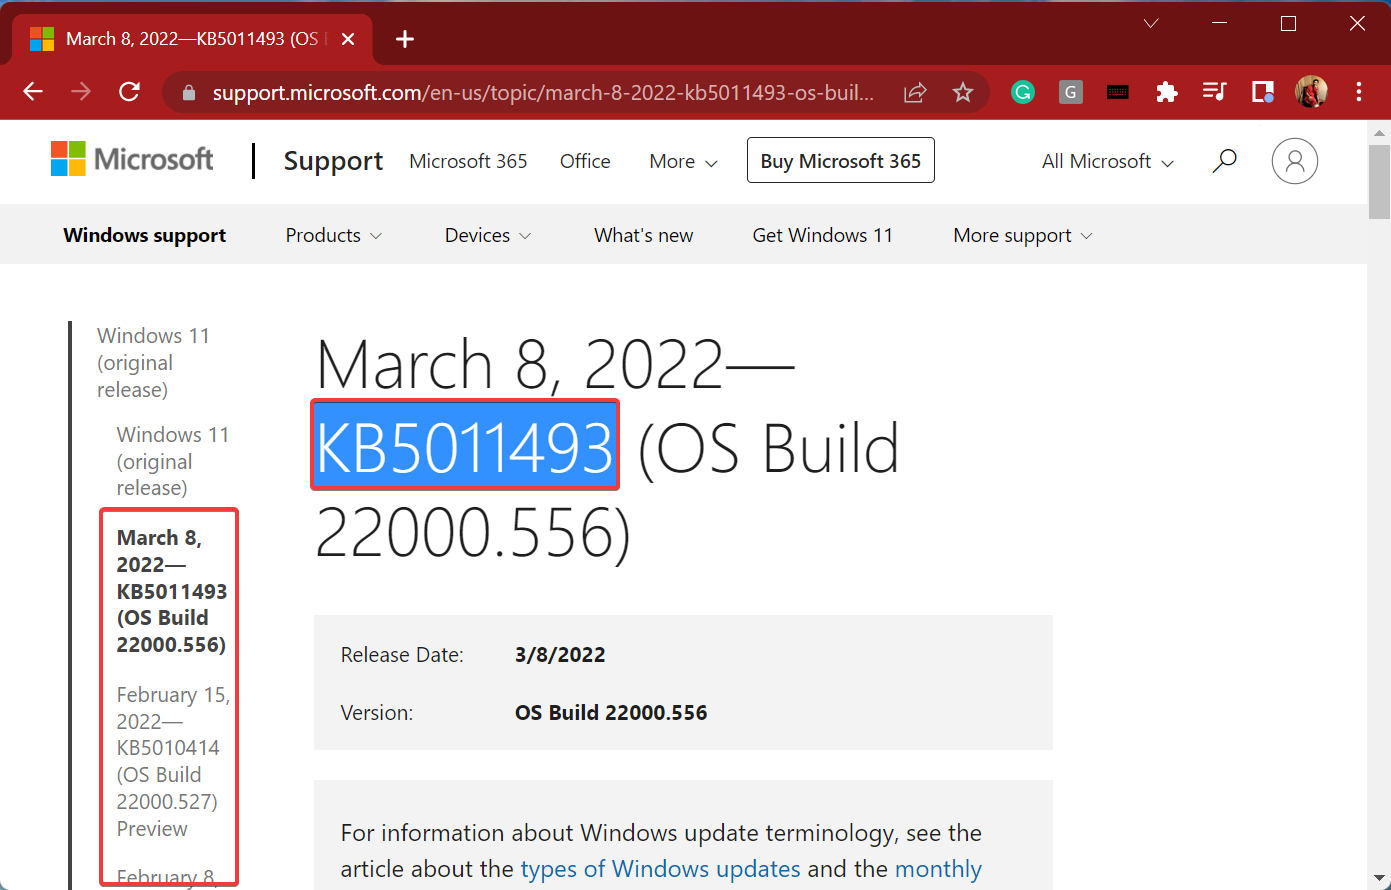
- Go to Windows 11 Update History, locate the update you were having trouble installing, and copy the KB (Knowledge Base) number for it.

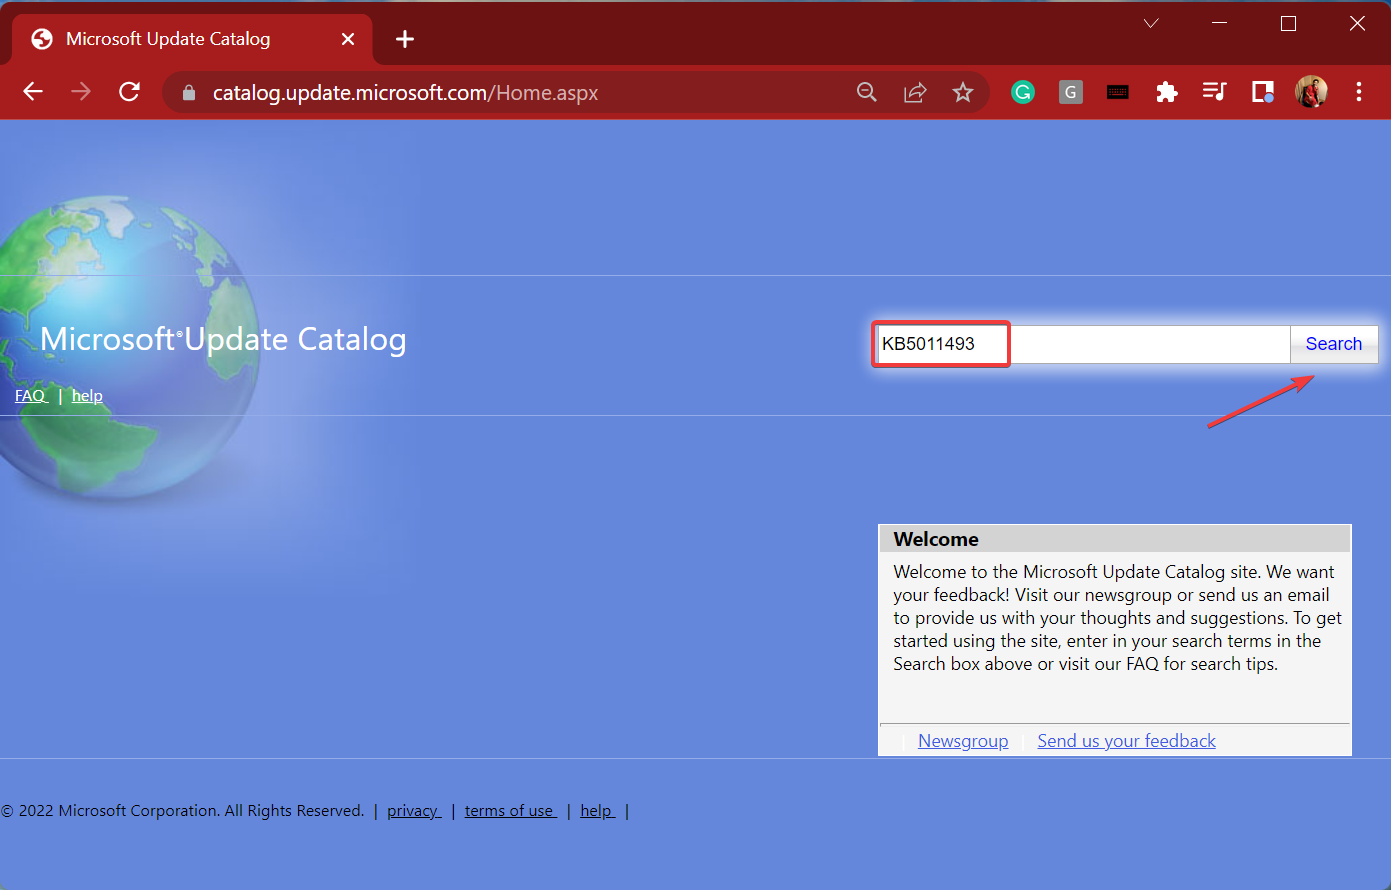
- Netx, go to Microsoft Update Catalog where all the versions are available for download, paste the KB number in the text field near the top-right corner and click on Search.
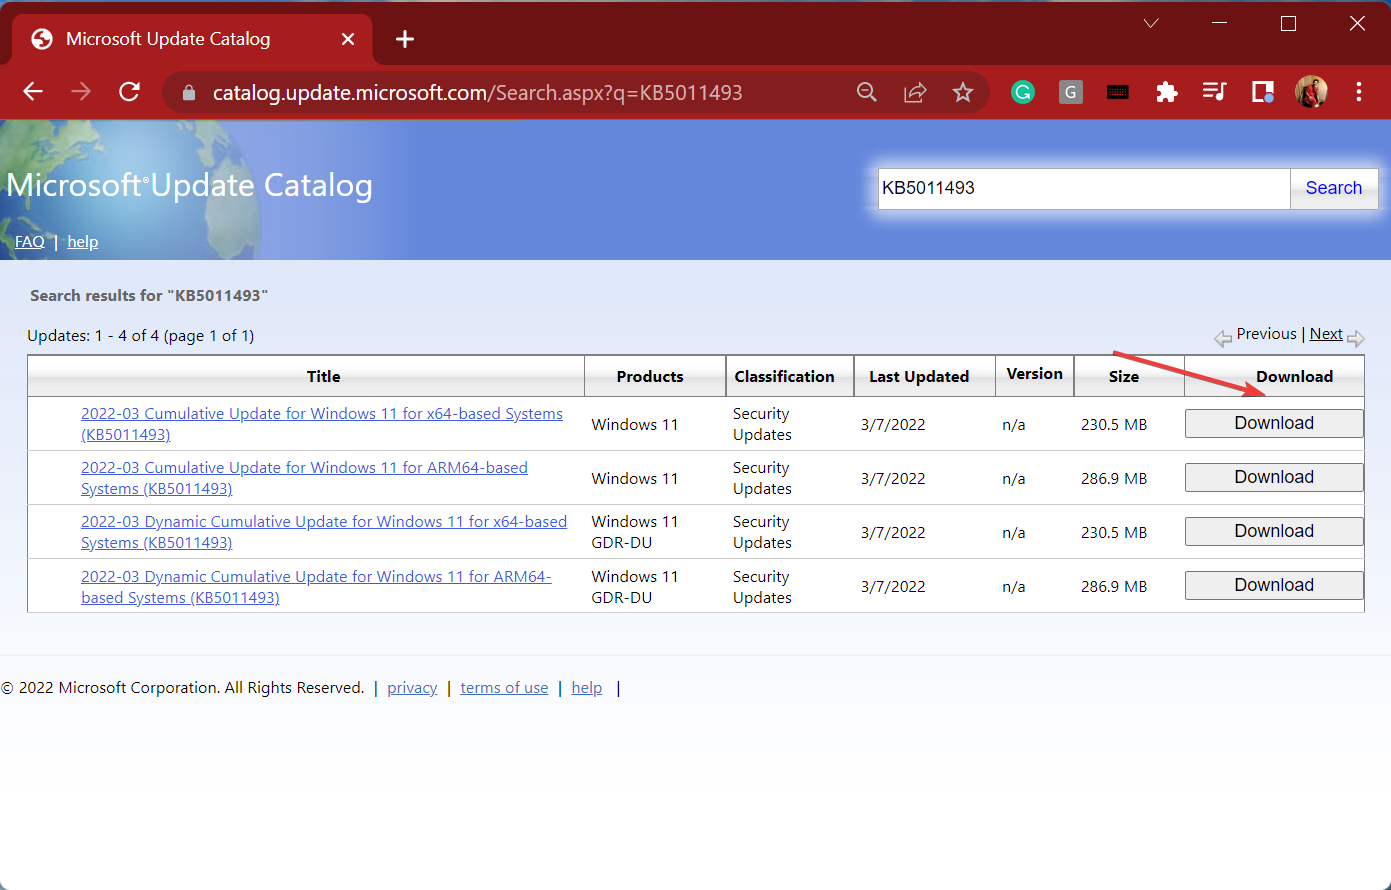
- Click on the Download button to the relevant option in your case.
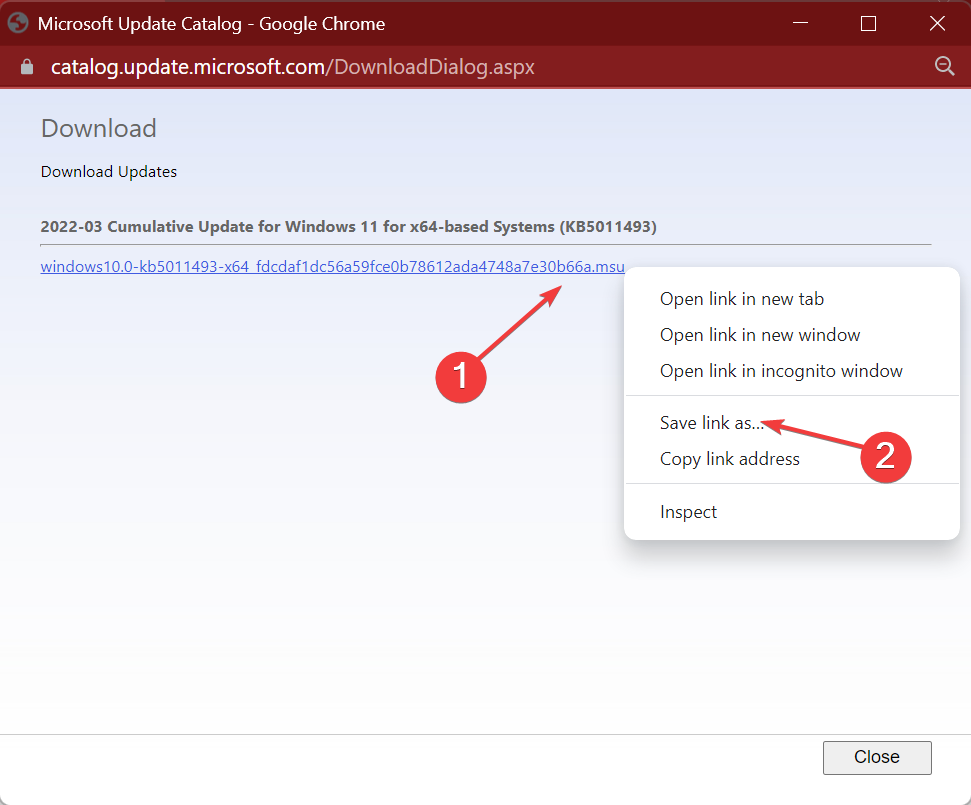
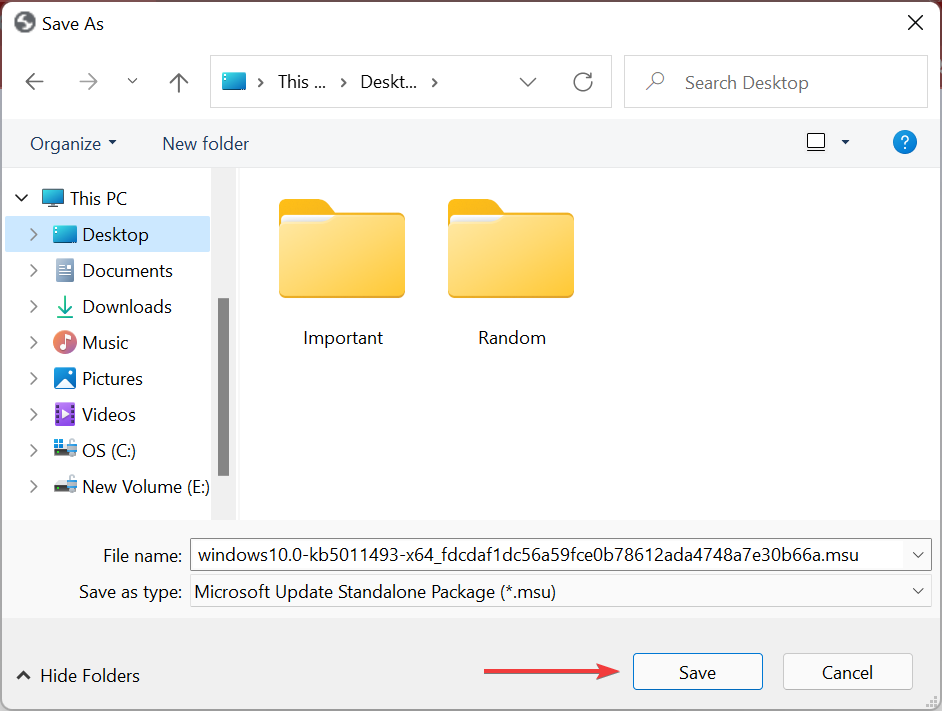
- Now, right-click on the link that appears here, and select Save link as from the context menu.

- Choose the desired location to download the file, and click on Save.

- After the file is downloaded, double-click on it to launch the setup, and follow the on-screen instructions to complete the process.

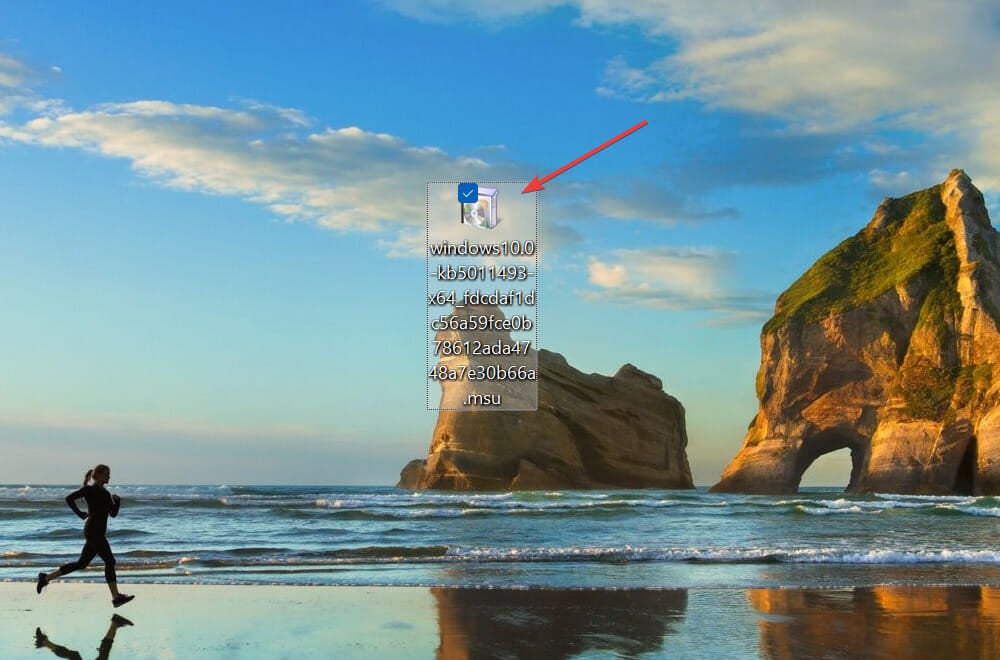
Once done, restart the computer and you will now have the Windows 11 version installed that you were earlier facing the error code 0x80073701 with.
If it’s a problem with the update itself, manually downloading it could work and you shouldn’t face the error for the subsequent updates. If you still do, resetting Windows 11 to its factory settings could help.
Also, the built-in troubleshooters are more than capable of dealing with such issues but several users have reported that the Windows Update troubleshooter is not working, so it’s imperative that you resolve the issue and be up-to-date with the latest Windows version.
Tell us which fix worked to fix the install error 0x80073701 on Windows 11 and your experience of the OS thus far, in the comments section below.
![]()
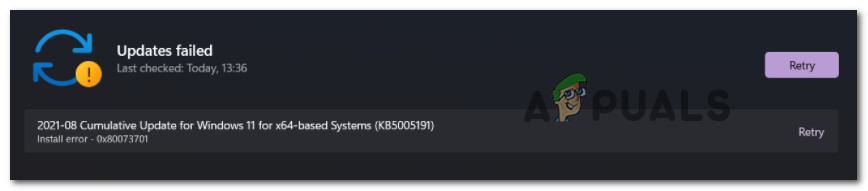
Some Windows 11 users are facing the error 0x80073701 whenever they try to install a cumulative update manually, from an installation media, or by using the Windows Update functionality. In the vast majority of cases, the problem occurs when users try to install the KB5005191 update.
After investigating this particular issue thoroughly, it turns out that there are several different underlying problems that might contribute to this particular install error on Windows 11:
- Common Windows Update glitch – The most disagreeable culprit for this particular issue is an ongoing glitch with the WU component. If this is the case, you should be able to get the issue fix promptly by running the Windows Update Troubleshooter and applying the recommended fix.
- Corrupted Windows Update component – If you’re actually dealing with a corrupted Windows Update component, the only way to fix the issue (without repair installing or clean installing) is to circumvent the usage of WU entirely by downloading and installing the problematic update via an ISO file.
- System File corruption – As it turns out, this particular issue can also occur due to some kind of system file corruption that affects the installation of new features and cumulative updates. In this case, the only viable fixes available are to run SFC and DISM scans in quick succession and escalate to an in-place upgrade or clean install procedure if the issue persists.
Now that you are aware of every potential reason why you might end seeing the 0x80073701 install error on Windows 11, let’s get to a series of verified fixes that other affected users have successfully used to get to the bottom of this issue.
Run the Windows Update Troubleshooter
Keep in mind that if you’re dealing with a glitch that Microsoft is already aware of, there’s a chance the built-in troubleshooter (Windows Update Troubleshooter), is already equipped to handle this issue automatically.
Note: As Windows 11 is approaching the official release Window, new repair strategies are added to every troubleshooter, so don’t skip this method if you didn’t try it already.
The Windows Update Troubleshooter will auto scan for common glitches that might affect the installation of new cumulative and feature updates (including the 0x80073701 error) and see if any of the repair strategies available are a fit to fix the issue.
If you didn’t run this tool already, follow the instructions below to run the Windows Update troubleshooter and apply the recommended fix:
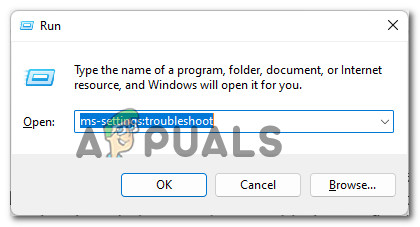
- Open up a Run dialog box by pressing Windows key + R. Next, type ‘ms-settings:troubleshoot’ inside the text box and press Enter to open up the Troubleshooting tab of the Settings menu cluster.

Accessing the Troubleshoot menu on Windows 11 Note: If you’re prompted by the User Account Control, click Yes to grant admin access.
- Once you’re inside the Troubleshoot menu, move over to the right-hand pane and click on Other Troubleshooters at the bottom of the screen.

Open up the Other Troubleshooters tab - Inside the Other Troubleshooters tab, click on the Run button associated with Windows Update.

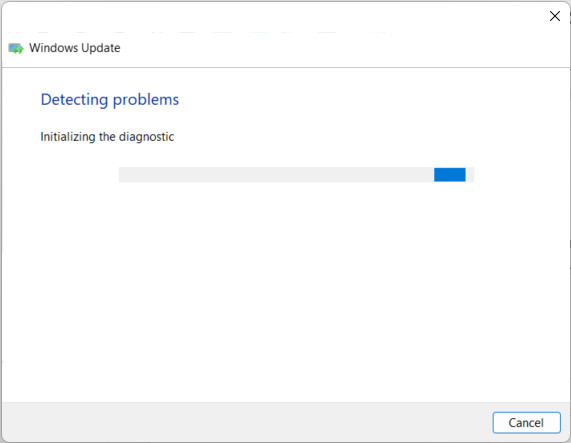
Accessing the Windows Update troubleshooter on Windows 11 - At the initial Windows Update troubleshooter screen, wait patiently until the utility figures out what exactly is the issue with the WU component.

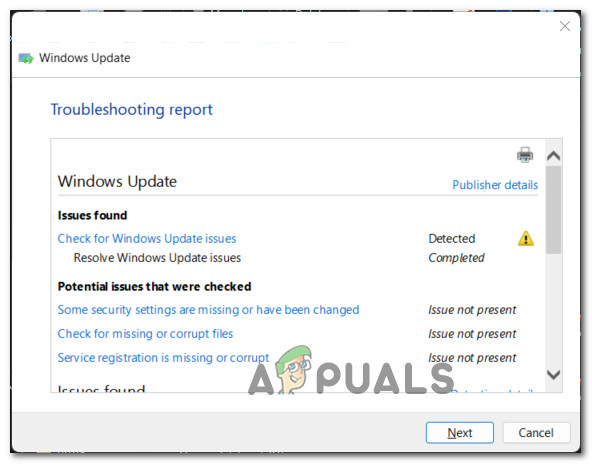
Checking for WU issues - After the operation is complete, you will get an overview of the identified issues. If any repair attempt is labeled as Completed, it means that the utility has successfully identified and dealt with an issue.

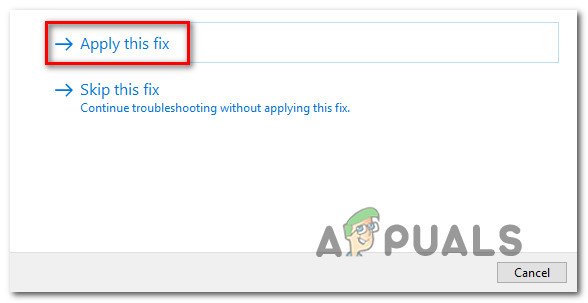
Overview of Windows Update issues Note: Depending on the nature of the fix that needs to be applied, you might need to click on Apply this fix or even follow a series of manual steps.

Applying the recommended fix for Windows Update on Windows 11 - After the fix is successfully applied, reboot your PC (even if you’re not specifically instructed to do so) before attempting to complete the installation that was previously resulting in the 0x80073701 error.

In case the issue is still not fixed, move down to the next potential fix below.
Perform an SFC and DISM scan
If you’re dealing with some kind of system file corruption, simply running the troubleshooter will likely not resolve the issue.
Fortunately, Windows 11 has gotten a lot better at dealing with system file corruption and comes equipped with two built-in tools capable of resolving the vast majority of superficial corruption instances (where the kernel is not affected).
If you find yourself in this scenario, initiating two SFC (System File Checker) and DISM (Deployment and Image Servicing and Deployment) in quick succession should allow you to fix the vast majority of corrupted system components (including Windows Update and Windows Installer).
When you get started with these types of scans, our advice is to start with a simple SFC scan.
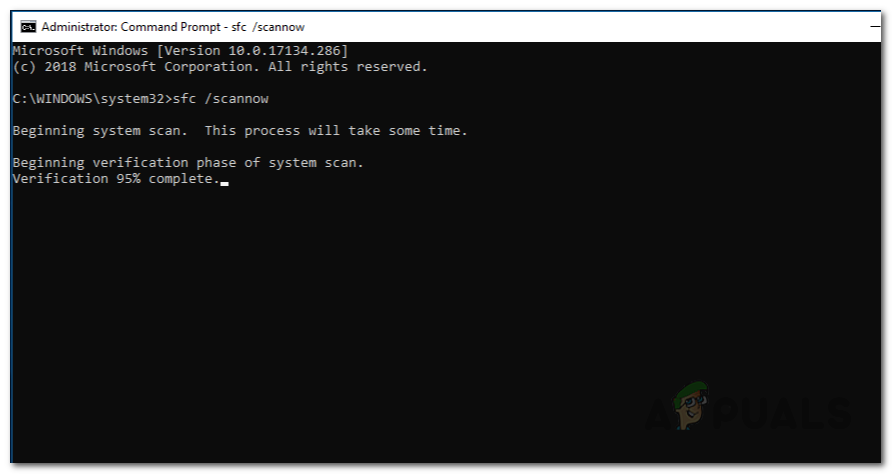
Note: An SFC scan will not require you to maintain a reliable Internet connection since the utility will just replace the corrupted system files with locally stored equivalents.
Once the operation is finally complete, restart your computer and wait for the next startup to complete.
After your computer boots back up, proceed by deploying a DISM scan. But instead of the ScanHealth procedure, deploy the following command:
dism /online /cleanup-image /startcomponentcleanup
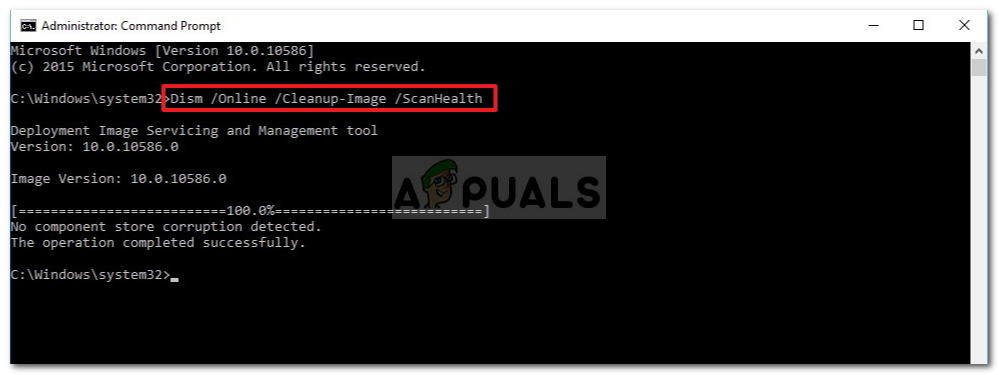
Note: Unlike an SFC scan, this tool will require an internet connection. This is a mandatory requirement since DISM uses a sub-component of WU to download healthy equivalents for the files that need to be replaced.
Once the second scan (DISM) is finished, restart your Windows 11 computer once again and see if the 0x80073701 error is now fixed.
Install the problematic update via ISO file
If the first methods above didn’t work in your case, your only option at this point is to update your Windows 11 build via an ISO file. This particular method was confirmed to be effective by a lot of users that we’re getting the 0x80073701 install error.
This will bypass any corruption instance that is causing the error since the installation will be handled by the mounted ISO file.
Important: In order to be able to deploy this method, you will need to be a part of the Insider Program.
If you meet this requirement, follow the instructions below for step by step instructions on installing the problematic update via the ISO file available through the Insider Program:
- Open your browser and visit the home page of the Windows Insider ISO page.
- Once you’re inside, we’ll need to download the latest ISO of the Windows 11 version that you have installed.
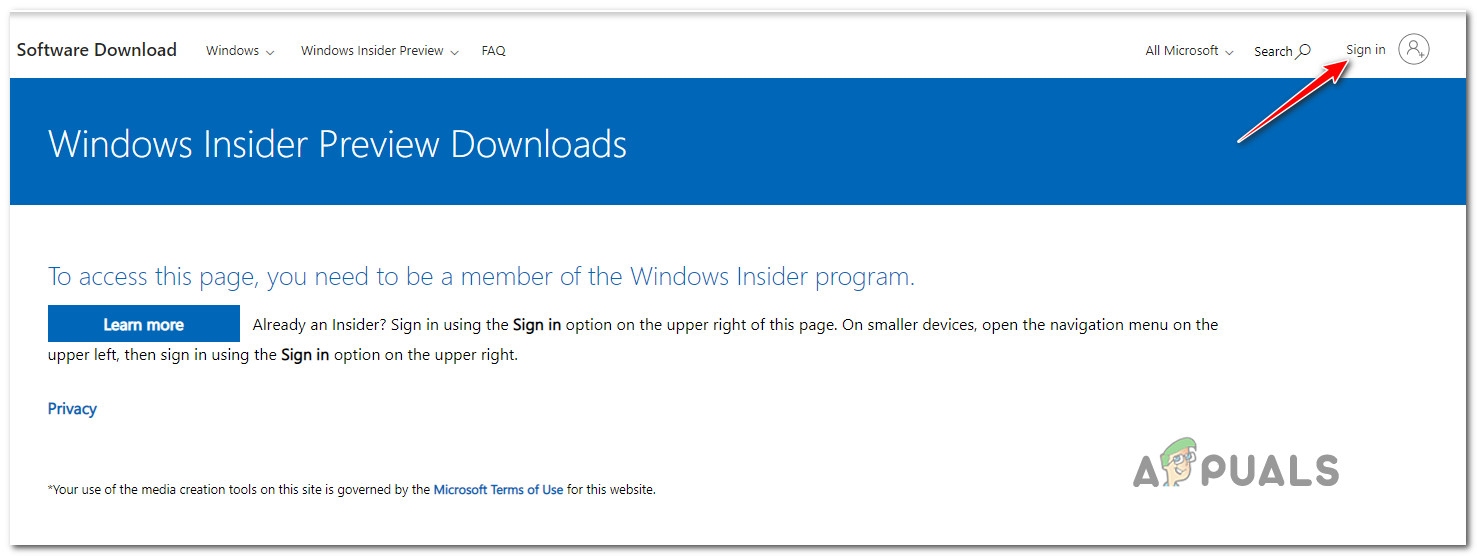
- When you get to the Windows Insider ISO page, you will need to sign in with the same Microsoft account that is tied to the insider program.

Sign in with your Microsoft Account - After you have successfully signed in, scroll all the way down to the Select edition category.
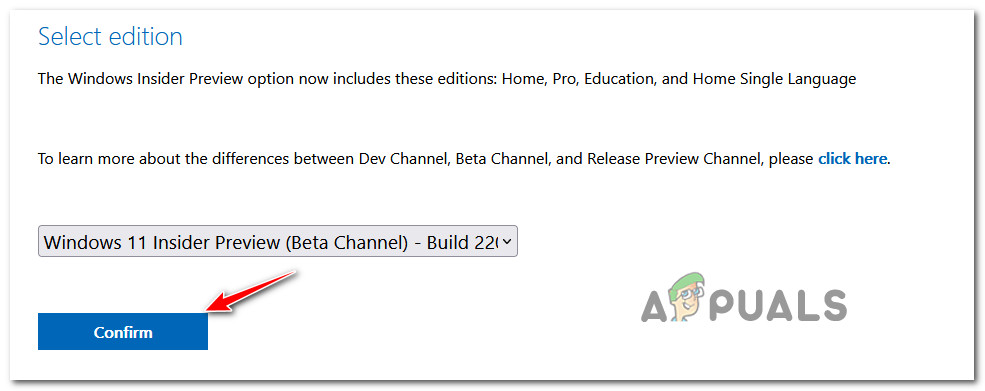
- Next, use the Select Edition drop-down menu to select the same WIndows channel that you’re currently on.

Confirming the Windows 11 dev build you want to install Note: This step is very important, so make sure you pick the correct edition.
- Wait until the request is validated, then select the language from the new prompt that just appeared. After you do this, click on the Confirm button once again.
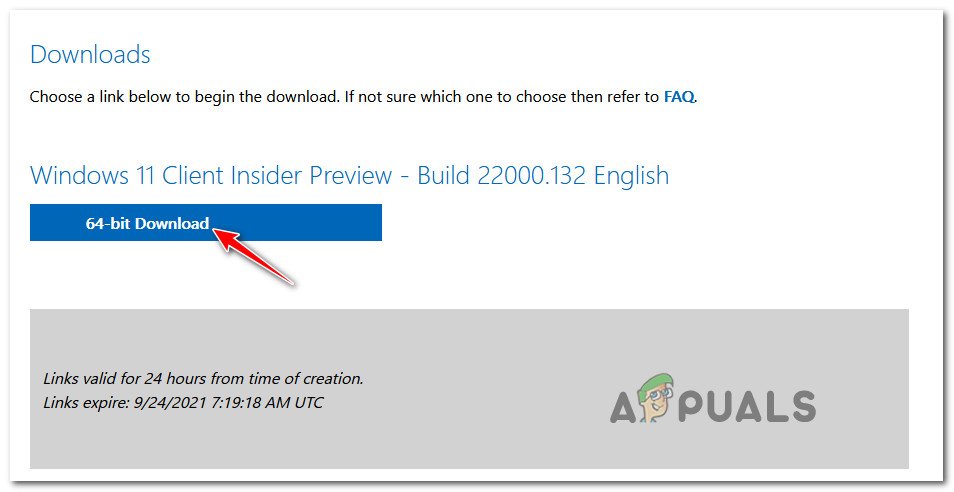
- After another validation sequence, you will be given a link where you can download the latest ISO build for your Windows 11 version. To download it, simply click on the 64-bit Download button and wait until the download is complete.

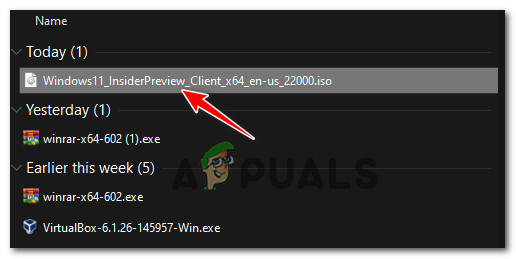
Downloading the correct ISO version - After the download is complete, simply double-click on the freshly downloaded iso and wait for your OS to mount it.

Mounting the ISO - When you’re prompted by the User Account Control prompt, click Yes to grant administrative privileges.
- Once the ISO is successfully mounted, click on Next and wait until the validation is complete.

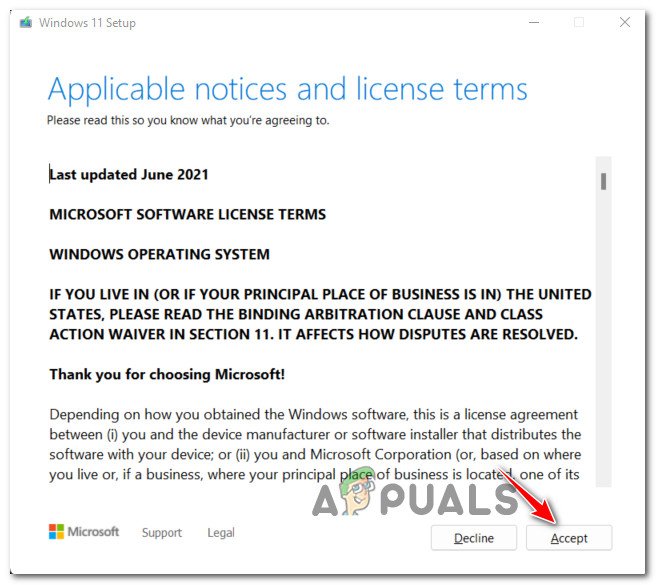
Accepting the EULA Note: At the EULA prompt, agree to it by clicking on Accept.
- At the next prompt, follow the instructions to install all the missing updates and reboot your PC at the end of this procedure.
In case this attempt fails with the same install error, move down to the final potential fix below.
Perform an in-place upgrade or clean install
In case you’ve already followed every other method recommended above and you’re still dealing with the same kind of issue, chances are you’re dealing with some kind of system file corruption that requires a more radical fix.
If you find yourself in this particular scenario, the best course of action would be to go for a repair install procedure.
Note: This procedure will allow you to replace every system file (that’s potentially corrupted) without losing any personal files. You get to keep personal media (photos, videos), window settings, documents, and even applications and games.
If you want a fresh start, you can also go for a clean install procedure.

Kamil Anwar
Kamil is a certified MCITP, CCNA (W), CCNA (S) and a former British Computer Society Member with over 9 years of experience Configuring, Deploying and Managing Switches, Firewalls and Domain Controllers also an old-school still active on FreeNode.
21.09.2021
Просмотров: 2551
Во время установки Windows 11 пользователи могут столкнуться с ошибкой 0x80073701, которая чаще всего появляется по нескольким простым причинам: несоответствие компьютера и комплектующих техническим требованиям новой операционной системы или попытка инсталляции пиратской версии Windows 11.
Читайте также: Как в Windows 11 исправить ошибку 0x800f0950?
Методы исправления ошибки установки 0x80073701 на Windows 11
Если вы скачали с торрента пиратскую версию Windows 11 и попытались установить её на своем ПК и возникла ошибка0x80073701, то для исправления данной неполадки рекомендуем зарегистрироваться через Параметры, Центр обновления Windows 10 в инсайдерской программе и далее получить доступ к обновлению до Windows 11 Beta или Dev или скачать тестовую версию ОС с официального сайта Microsoft.

Если же установить пиратскую сборку вам удалось, то после выпуска какого-либо обновления и его установки, система получит ограниченный функционал и кроме ошибки 0x80073701 будут появляться другие неполадки.
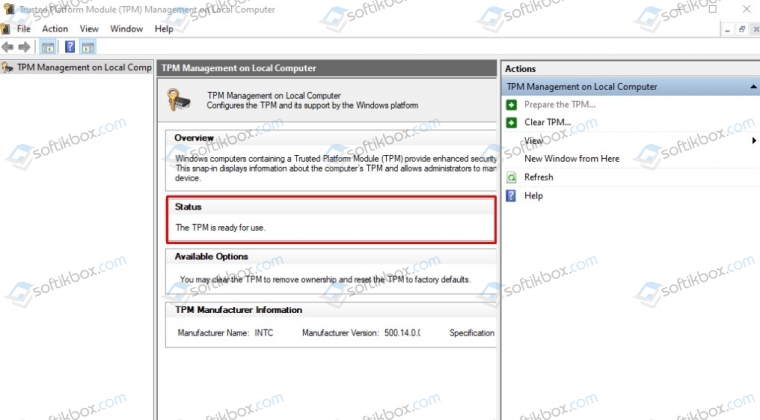
Также ошибка установки 0x80073701 на Windows 11 может появляться в случае, если ваш ПК не соответствует техническим требованиям, о которых мы писали ранее. Чаще всего на ПК и ноутбуках отсутствует чип TPM версии 2 и выше. Чтобы проверить, имеется ли он на вашем ПК, нужно нажать комбинацию клавиш Win+R и ввести tpm.msc.
Если вы уверены, что устанавливаете официальную сборку Windows 11, а ПК соответствует всем спецификациям, то рекомендуем перезаписать установочный образ системы и повторить попытку позже.
При установке накопительного обновления KB4497935 в Windows 10 версии 1903 некоторые пользователи сталкиваются с ошибкой с кодом 0x80073701. В этой статье мы рассмотрим три способа устранения такой неполадки. См. также: не устанавливаются обновления на Windows 10.
Способ 1. Установка обновления вручную
Если при автоматической установке обновления происходит ошибка, вы можете самостоятельно скачать нужное обновление с официального сайта Microsoft и установить его вручную.
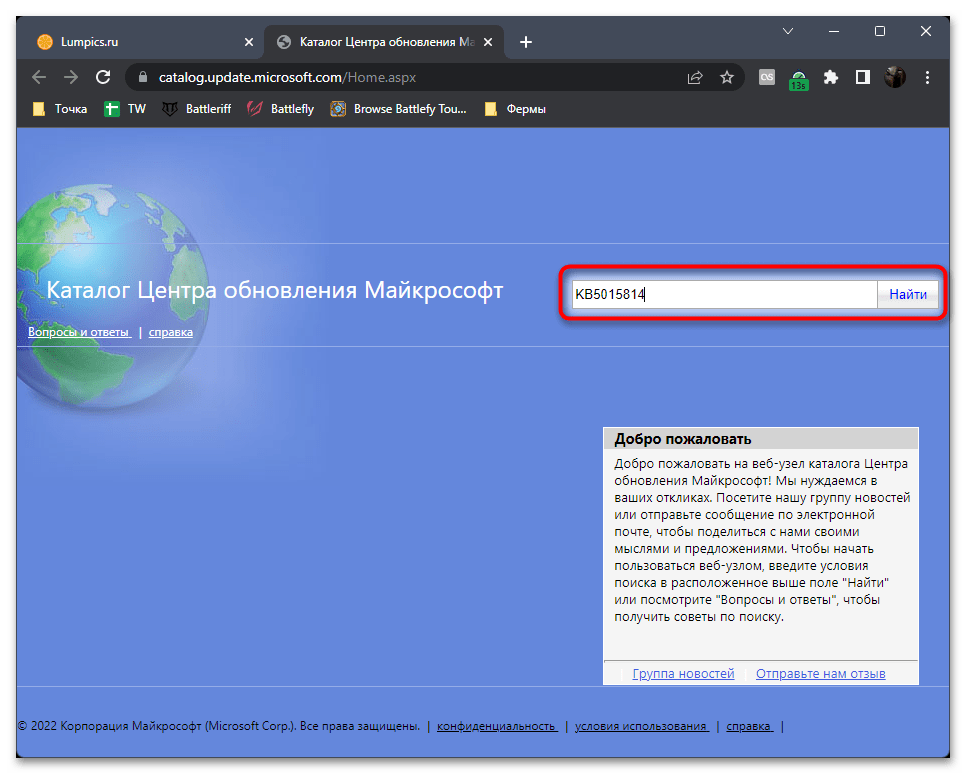
- Перейдите в «Каталог Центра обновления Майкрософт», напечатайте в поле поиска номер обновления KB4497935 и нажмите кнопку «Найти».
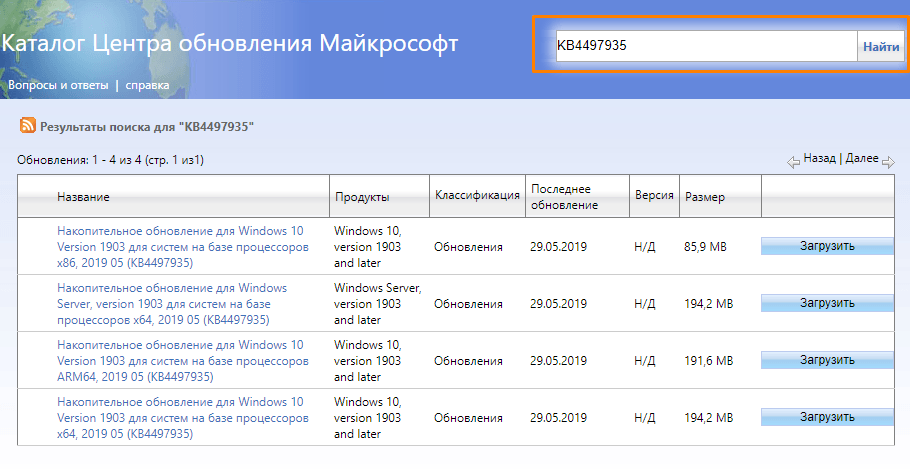
Ищем обновление по номеру
- В результатах поиска найдите обновление, соответствующее вашей версии Виндовс 10, и нажмите кнопку «Загрузить».
- После загрузки и ручной установки обновления перезагрузите компьютер.
Способ 2. Использование средства устранения неполадок
Если «Центр обновления» функционирует с ошибками, с официального сайта Microsoft можно загрузить специальное приложение для исправления его работы.
- Перейдем на сайт поддержки Windows и кликнем на ссылку «Скачать средство устранения неполадок Центра обновления Windows для Windows 10».
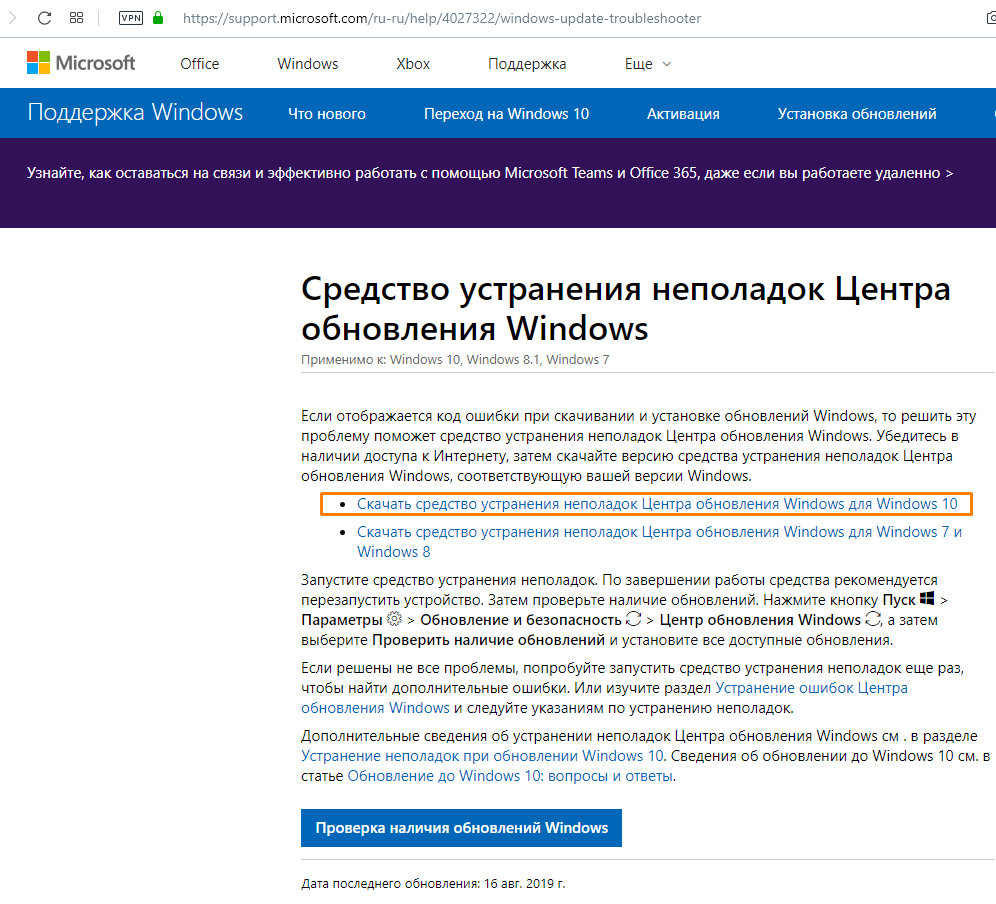
Скачиваем «Средство устранения неполадок Центра обновления Windows» для Windows 10
- Загрузится файл «wu10.diagcab». Запускаем его.
- В окне программы указываем, что мы хотим проверить «Центр обновления» и нажмем кнопку «Далее».
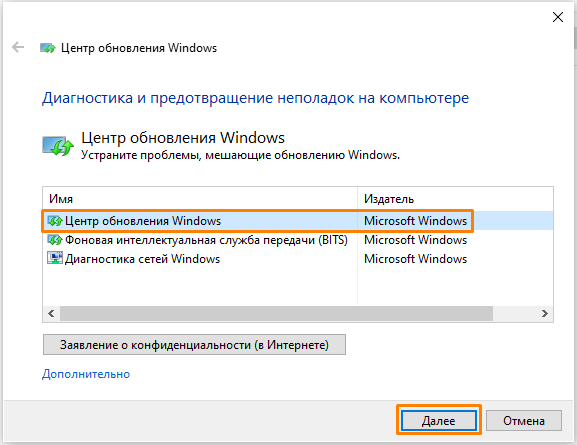
Выбираем «Центр обновления» и жмем на кнопку «Далее»
- Запустится диагностика. Если приложение не обнаружило проблемы сразу, будет предложено выполнить устранение неполадок от имени администратора. Нажмите на соответствующий пункт, программа будет перезапущена с правами администратора, после чего повторите шаг 3.
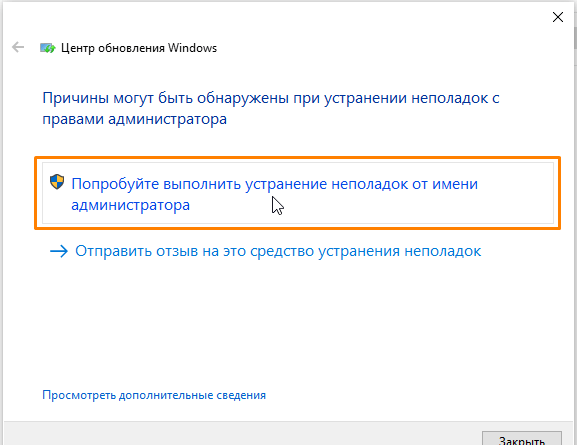
Пробуем выполнить устранение неполадок от имени администратора
- Дожидаемся окончания процедуры обнаружения проблем. Если ошибки будут найдены, программа предложит установить исправление. По завершении будет выведен отчет об исправлениях.
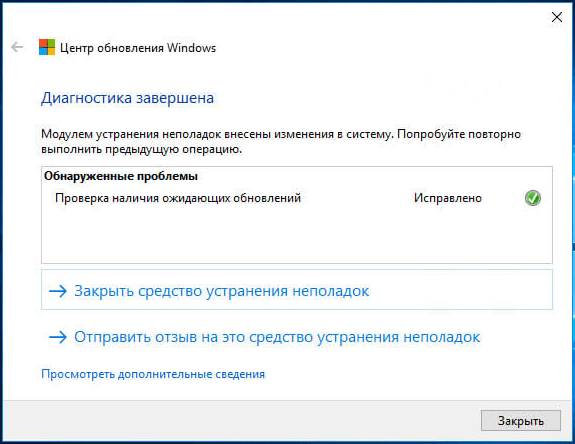
Обнаруженные проблемы исправлены
Способ 3. Проверка целостности системных файлов
Повреждение системных файлов, отвечающих за работу обновлений Виндовс, также может стать причиной появления ошибки с кодом 0x80073701.
- Воспользуемся утилитой «Windows PowerShell», запустив ее от имени администратора. Для этого нажмем на кнопку «Пуск» правой кнопкой мыши и выберем команду «Windows PowerShell (администратор)».
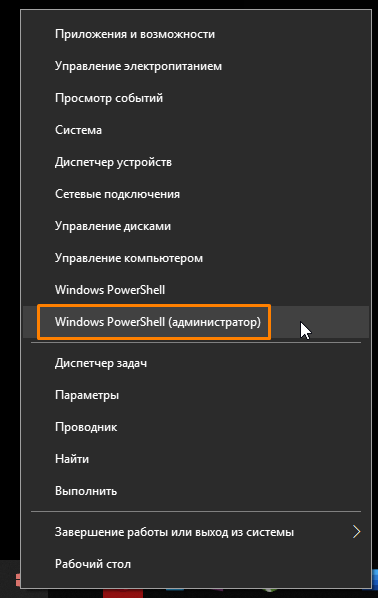
Запускаем «Windows PowerShell» от имени администратора
- Воспользуемся инструментом DISM: напечатаем в командной строке и запустим нажатием клавиши «Enter» последовательно две команды:
DISM /Online /Cleanup-Image /ScanHealth
DISM /Online /Cleanup-image /Restorehealth
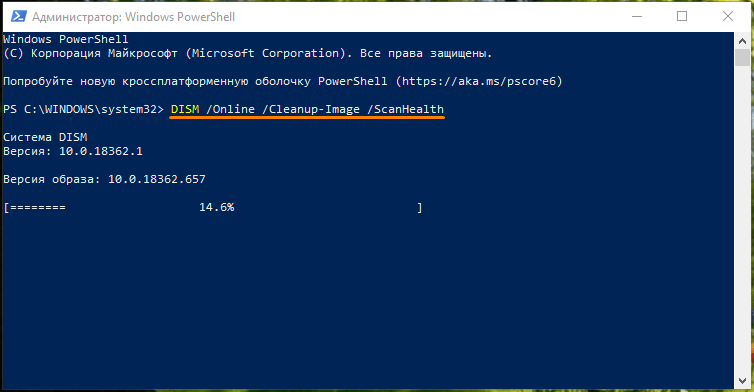
Запускаем проверку системных файлов программой «DISM»

Запускаем восстановление системных файлов программой «DISM»
- Учтите, что для выполнения второй команды необходимо подключение к интернету. После проверки и автоматической замены поврежденных файлов, если таковые будут найдены, введем еще одну команду для запуска инструмента SFC для сканирования и восстановления системных файлов:
sfc /scannow
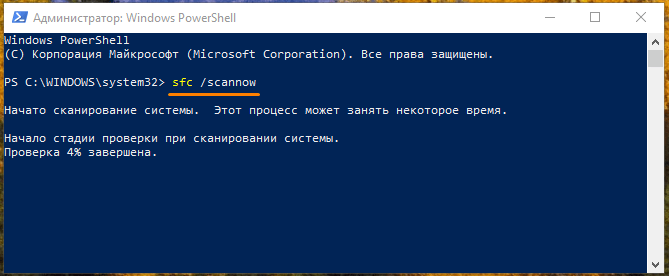
Используем инструмент «SFC»
- Дожидаемся завершения процесса и перезагружаем компьютер. После восстановления поврежденных системных файлов ошибка с кодом 0x80073701 больше вас беспокоить не должна.
![]() Загрузка …
Загрузка …
Post Views: 12 329