The Windows Update troubleshooter should be your first call
by Matthew Adams
Matthew is a freelancer who has produced a variety of articles on various topics related to technology. His main focus is the Windows OS and all the things… read more
Updated on
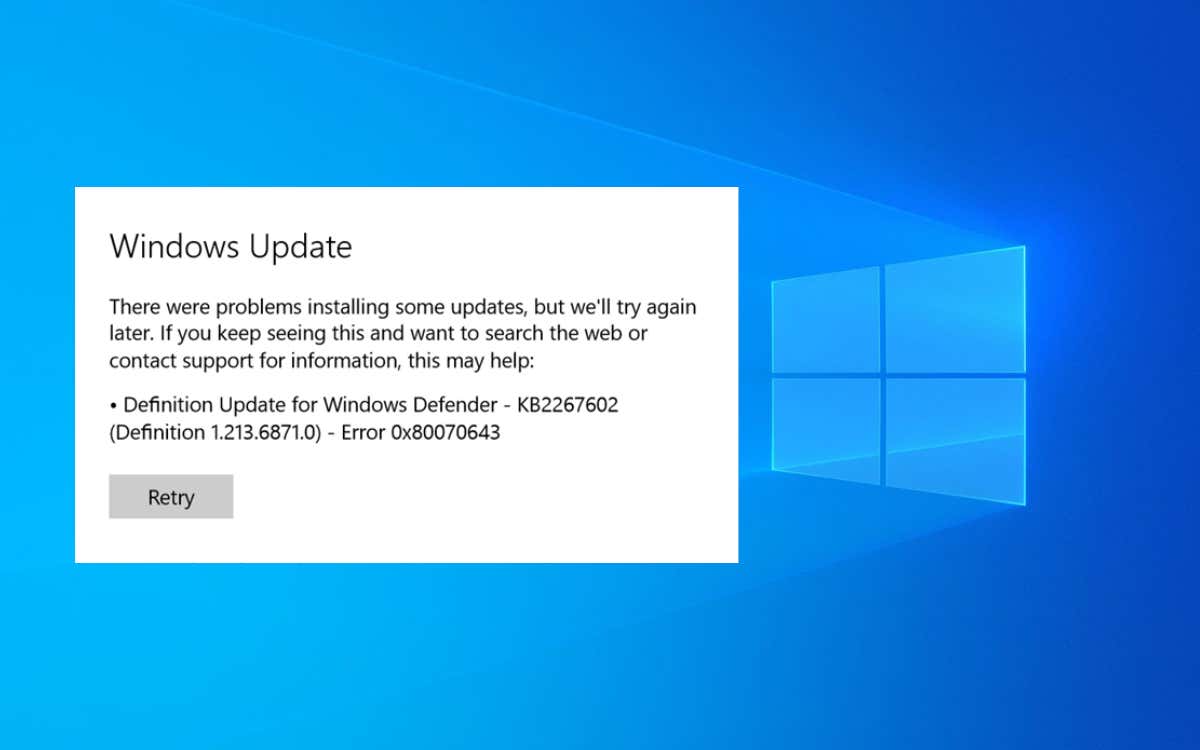
- The 0x80070643 Windows error can arise because of corrupted Windows Defender definitions, .NET Framework, or update components.
- Some users might need to repair Windows update components to fix it in no time.
- If the 0x80070643 error arises during the Windows 11 installation, repairing .NET Framework might also help.
XINSTALL BY CLICKING THE DOWNLOAD
FILE
Microsoft might have recently released Windows 11, but some things never change regarding updating errors. Users have already posted on forums about the update error 0x80070643 in Windows 11.
The error has been passed down from the previous Microsoft OS. This article examines the error and its causes and gives you the most reliable resolutions available for Windows 11 users.
What is the Windows 11 update error 0x80070643?
This error arises for some users when they try to install new patch updates via Settings. In fact, it is a Windows update error. And simply signifies that there have been issues with your update process.
Before trying to get rid of the update error 0x80070643, it’s worth considering the more likely causes of the issue:
- Third-party antivirus software conflicts – Antivirus software might conflict with the Windows Update service. Hence it would be best if you stuck to only compatible antivirus software.
- Missing, outdated, or corrupted .NET Framework installation – Updates fail to install because .NET Framework is corrupted or missing, or you might need to install a newer version.
- Corrupted system files – You might have to repair corrupted system files causing the issue.
- Damaged Windows Update components – Some Windows Update components might be corrupted or incorrectly configured.
- Corrupted Windows Defender definitions – Error 0x80070643 can also arise because of corrupted Windows Defender definitions.
To solve the error 0x80070643 in Windows 11, you must apply resolutions that feasibly remedy those causes. Give these potential fixes a try right away.
How we test, review and rate?
We have worked for the past 6 months on building a new review system on how we produce content. Using it, we have subsequently redone most of our articles to provide actual hands-on expertise on the guides we made.
For more details you can read how we test, review, and rate at WindowsReport.
How do I fix the install error – 0x80070643 in Windows 11?
- What is the Windows 11 update error 0x80070643?
- How do I fix the install error — 0x80070643 in Windows 11?
- 1. Run the Windows Update troubleshooter
- 2. Run a system file scan
- 3. Install the latest .Net Framework 4.8
- 4. Repair .NET Framework
- 5. Temporarily turn off third-party antivirus software
- 6. Change the SoftwareDistribution subfolder name
- 7. Reset the Catroot2 folder
- 8. Update Windows Defender’s signatures
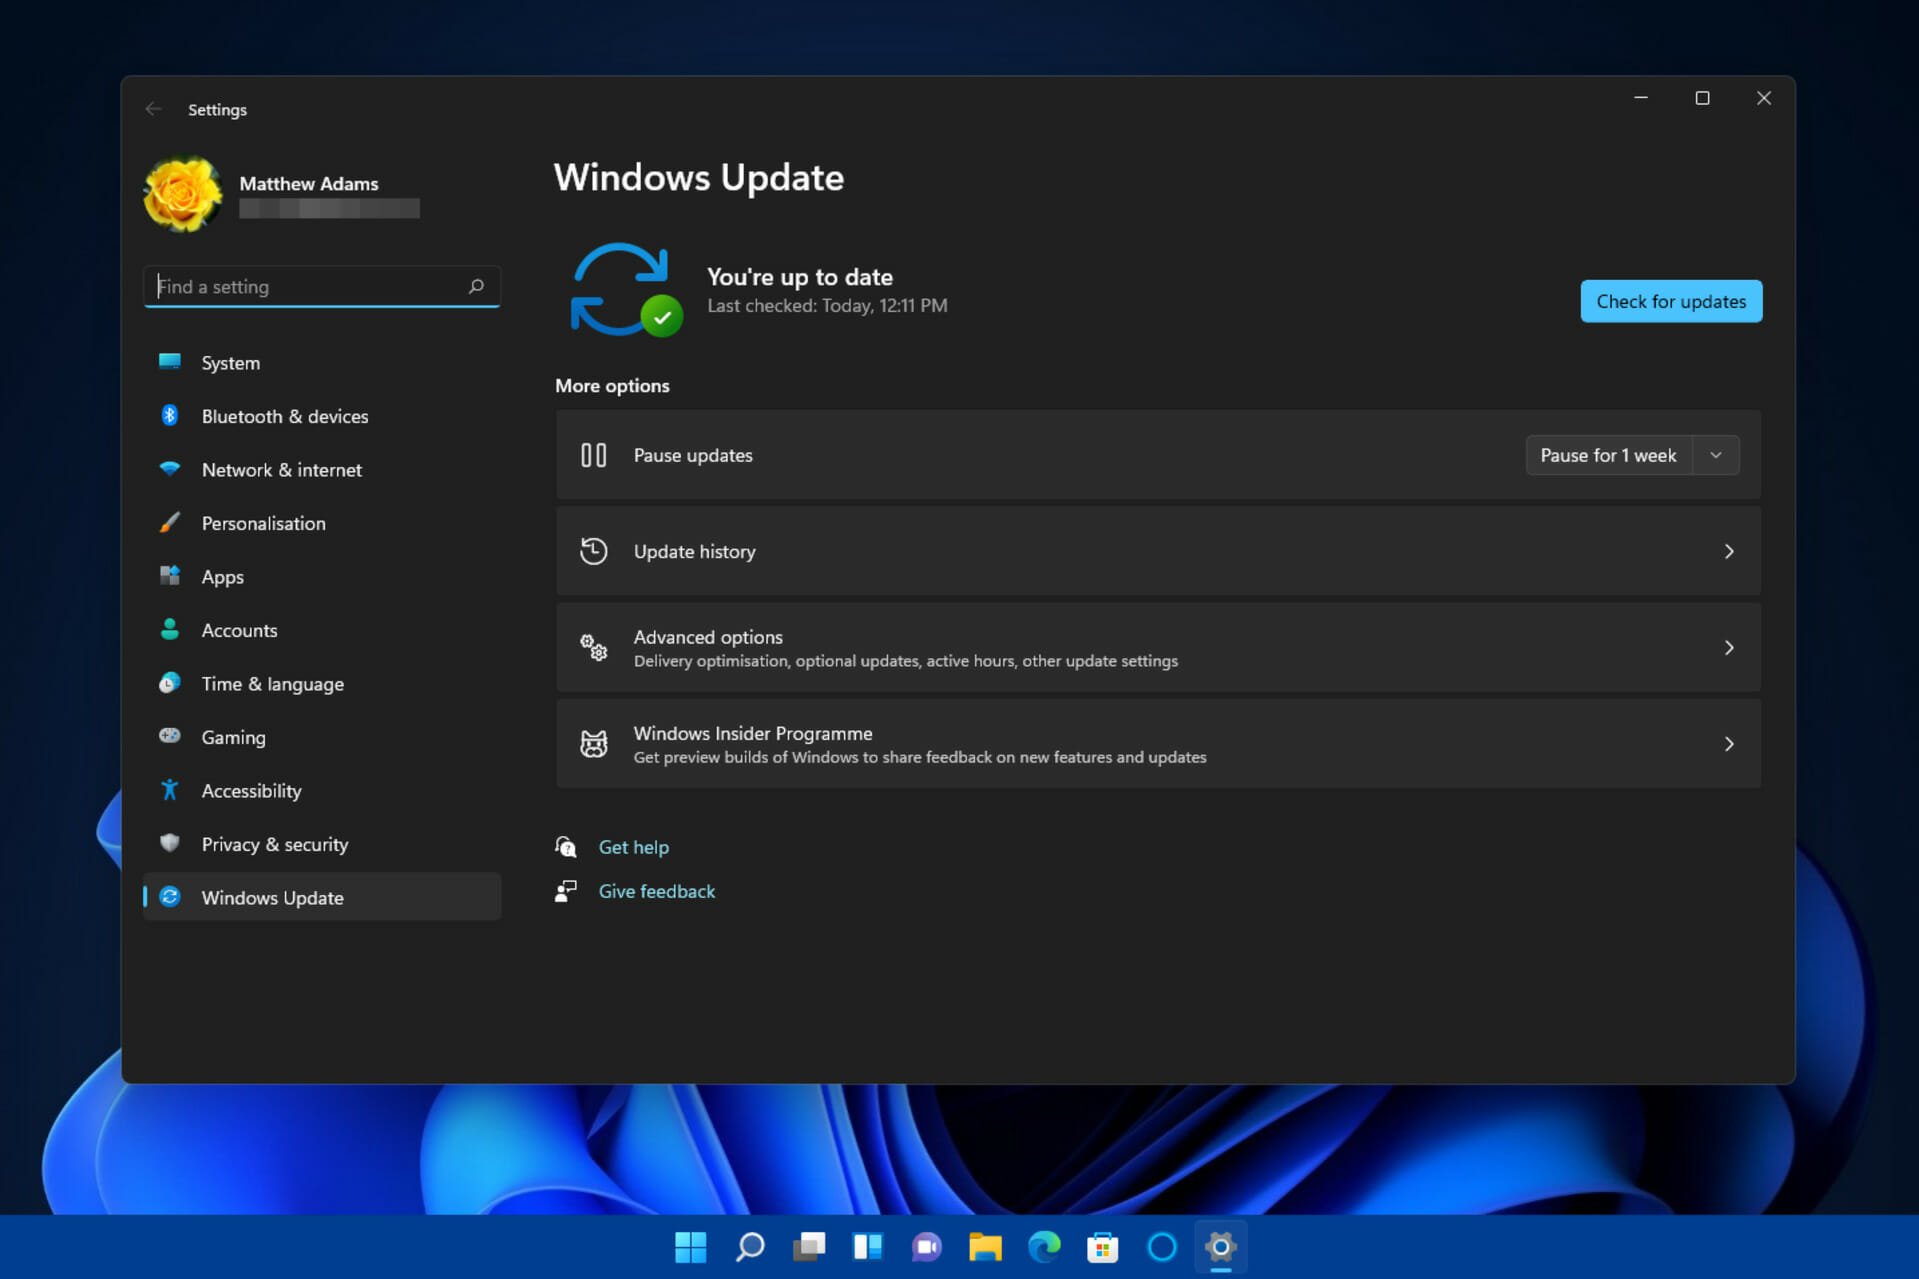
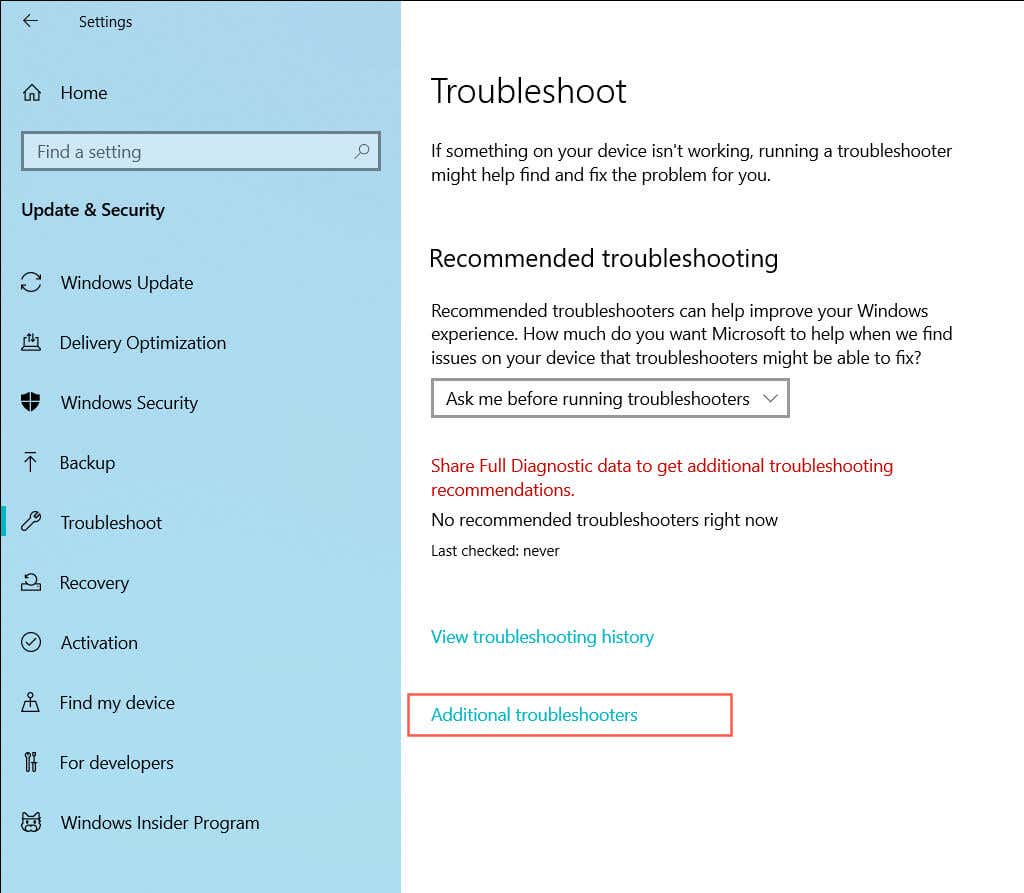
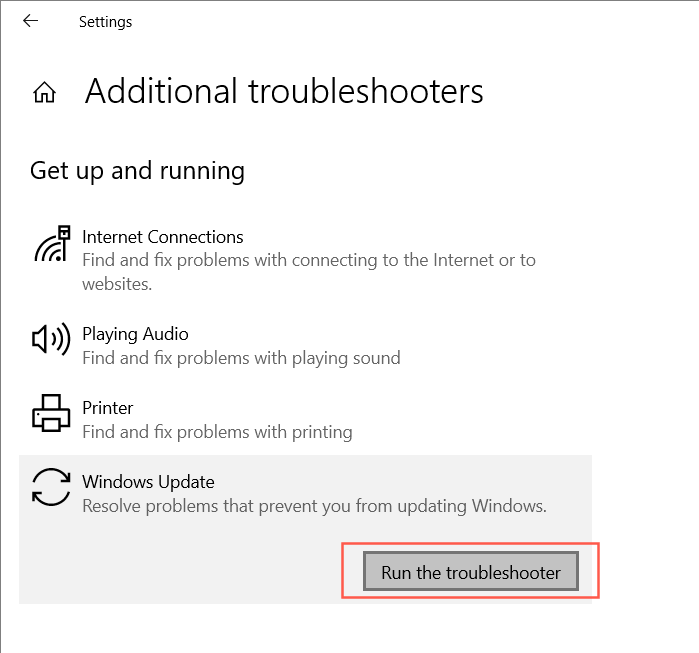
1. Run the Windows Update troubleshooter
- First, open up the Start menu by clicking the Windows icon on the taskbar.
- Select the Settings app that’s pinned to the Start menu.

- Then click Troubleshoot within the System tab.

- Select Other trouble-shooters to bring up a list of troubleshooters in Settings.

- Click the Windows Update troubleshooter’s Run button.

- Thereafter, apply any potential fixes suggested by the troubleshooter.


2. Run a system file scan
The SFC scan is a fast and effective way to identify system errors that may cause issues during Windows 11 installation. You can run this scan by following the steps below.
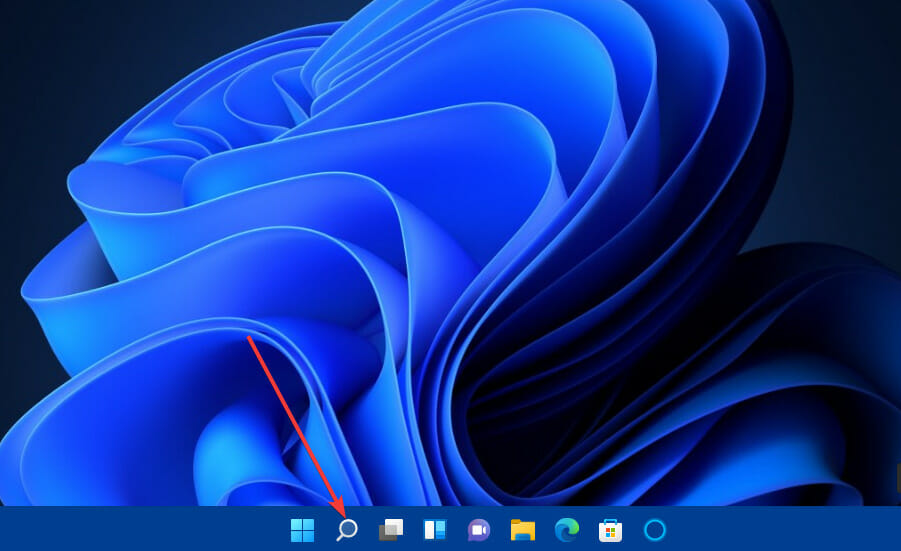
1. First, bring up the search utility by clicking the magnifying glass button for that tool.
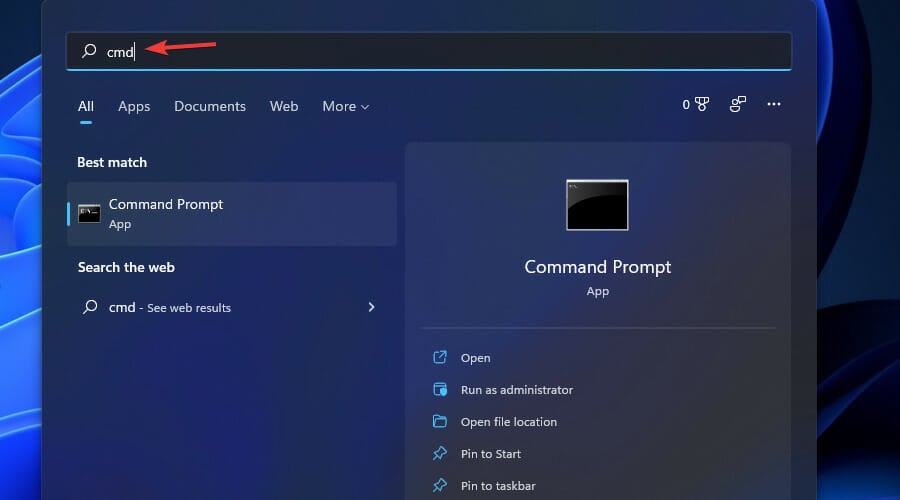
2. Next, type the keyword cmd in the search box to find Command Prompt.
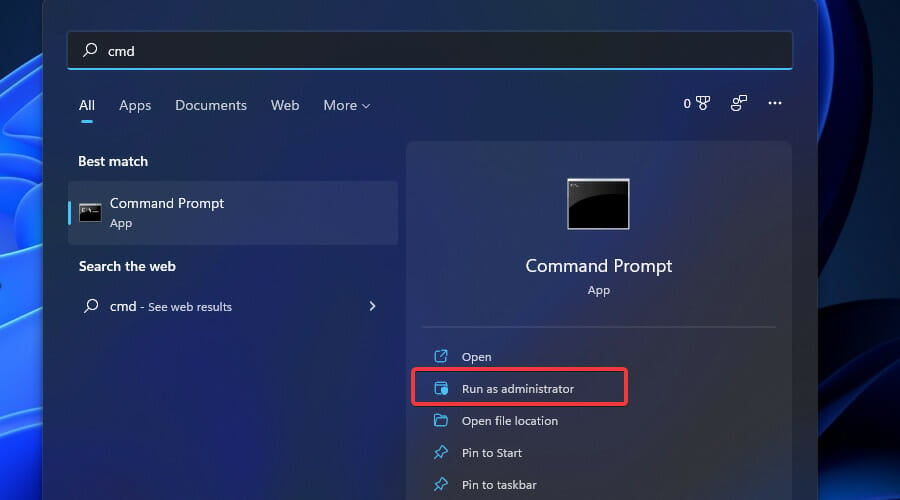
3. Click the Command Prompt’s Run as administrator option on the right side of the search tool.
4. Input this system file scan command and press Enter:sfc /scannow
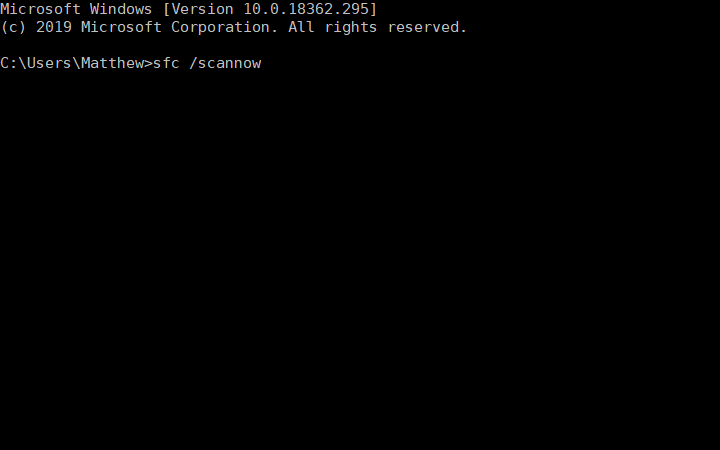
5. Thereafter, wait for the system file scan to reach the 100 percent mark and display its outcome in the Command Prompt.
In case you need to fix this Windows issue automatically, we advise using the tool for the comprehensive detection of corrupted system files.

Fortect
An efficient system repair tool will maintain your device in good shape by fixing the corrupted files.
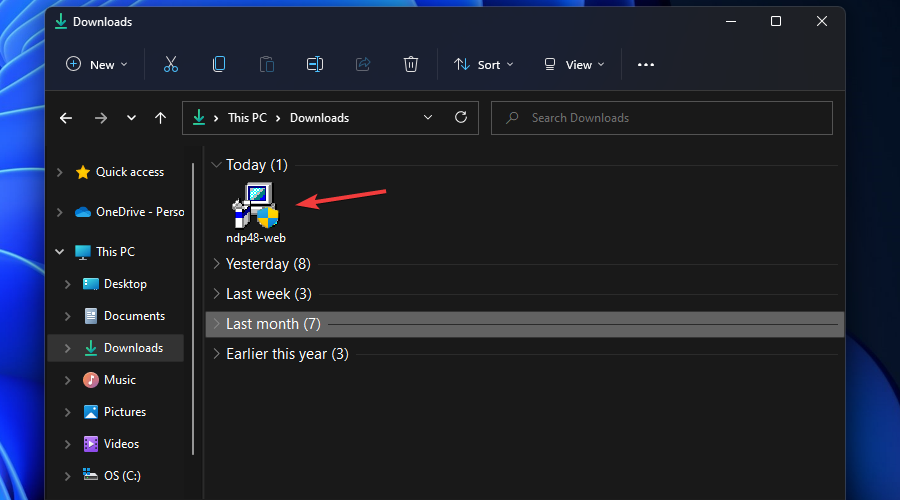
3. Install the latest .Net Framework 4.8
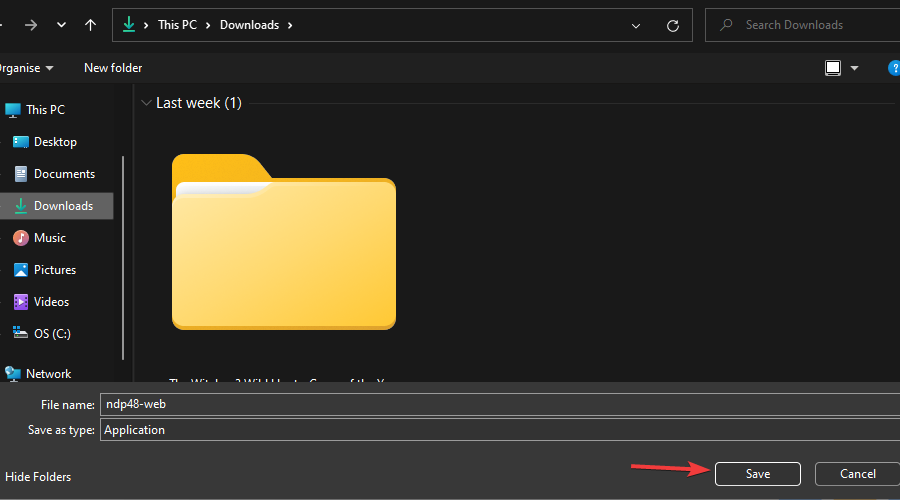
- Open the .NET Framework 4.8 webpage in your web browser.
- Click the Download .NET Framework 4.8 Runtime button on that page.

- Choose a folder to download .NET Framework 4.8 to, and click the Save button.

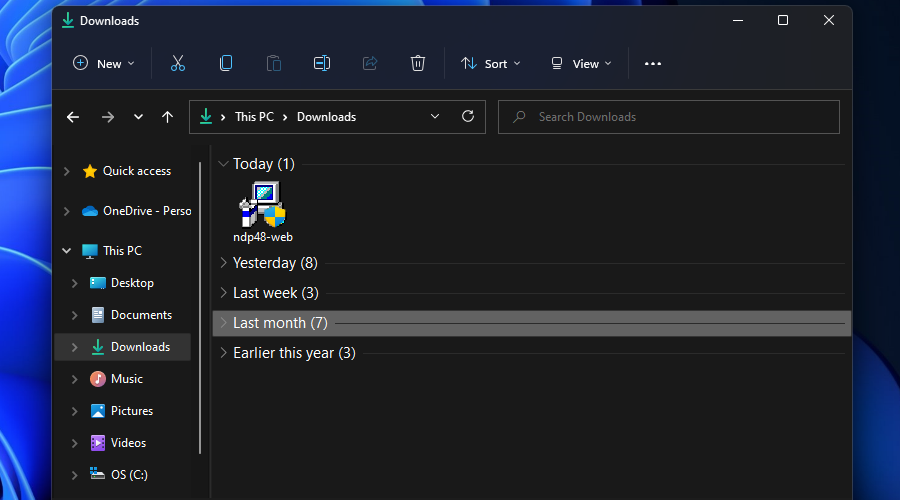
- Next, press the Windows key + E hotkey to bring up File Explorer.
- Open the folder you downloaded .NET Framework 4.8 installer file to.
- Double-click .NET Framework’s ndp48-web.exe setup file to launch the installer.
- Then go through the setup wizard to install the runtime package.

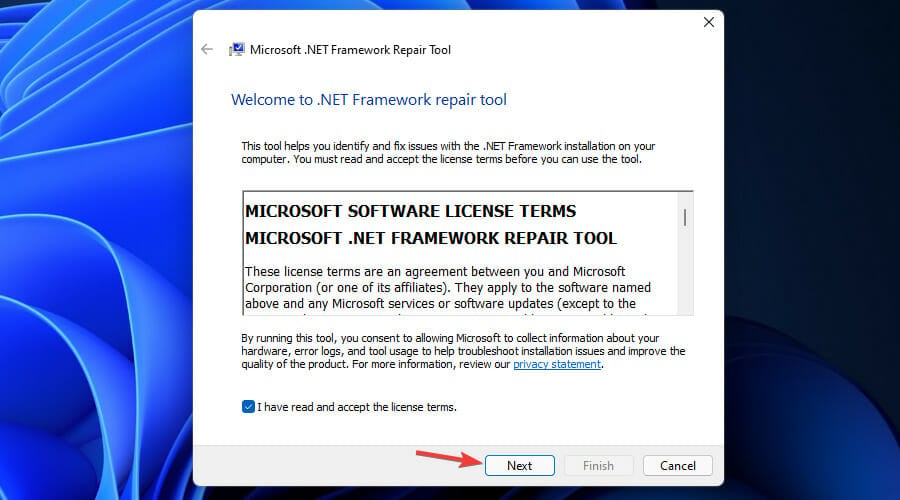
4. Repair .NET Framework

NOTE
This potential fix is recommended if the latest .NET Framework version is already installed on your desktop or laptop.
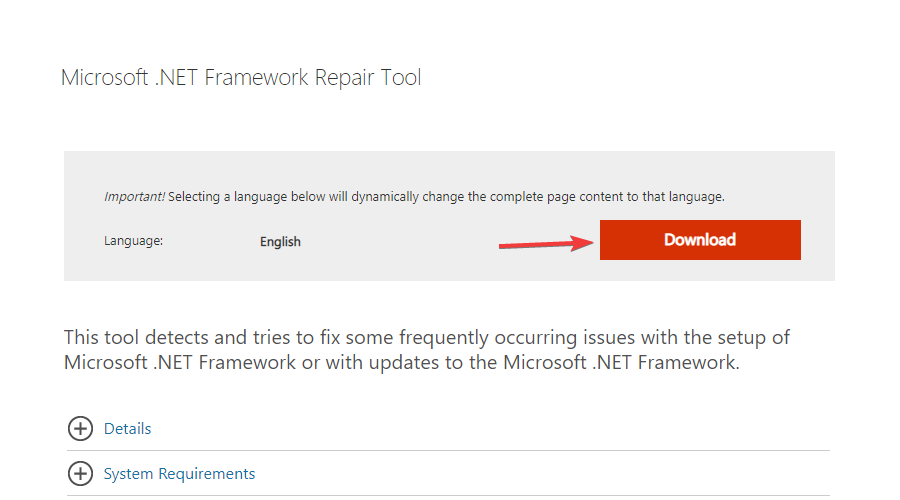
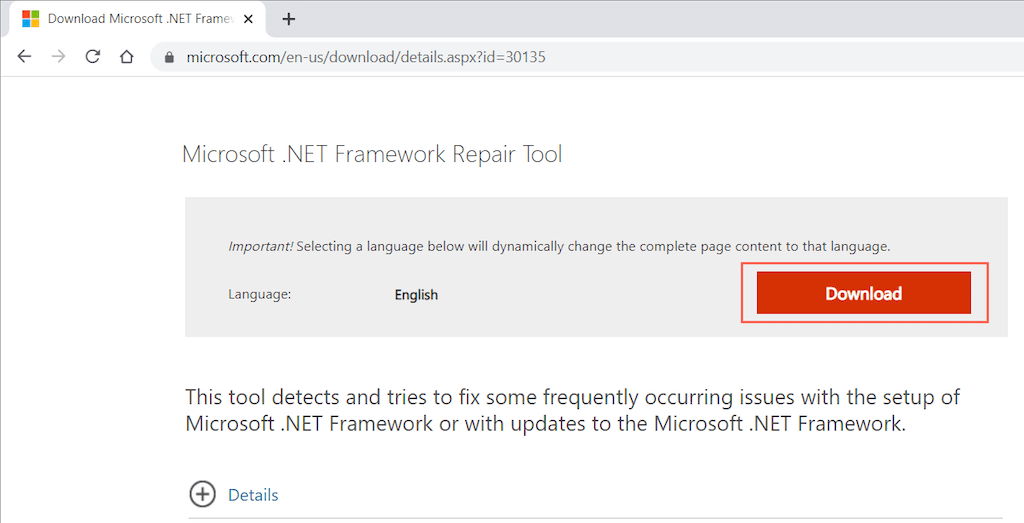
- Open the Microsoft .NET Framework Repair Tool page.
- Then press the Download button there.
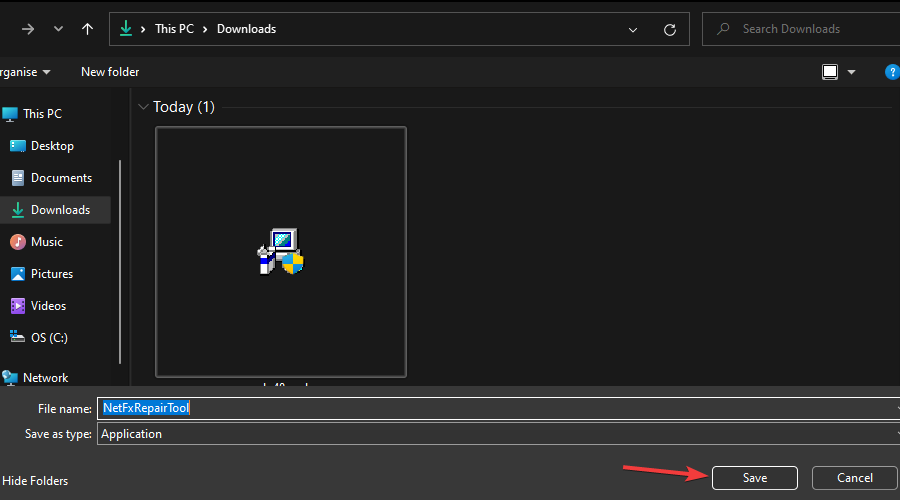
- Select a folder to download that repair utility to, and click the Save button.
- Next, click File Explorer’s button on the taskbar.

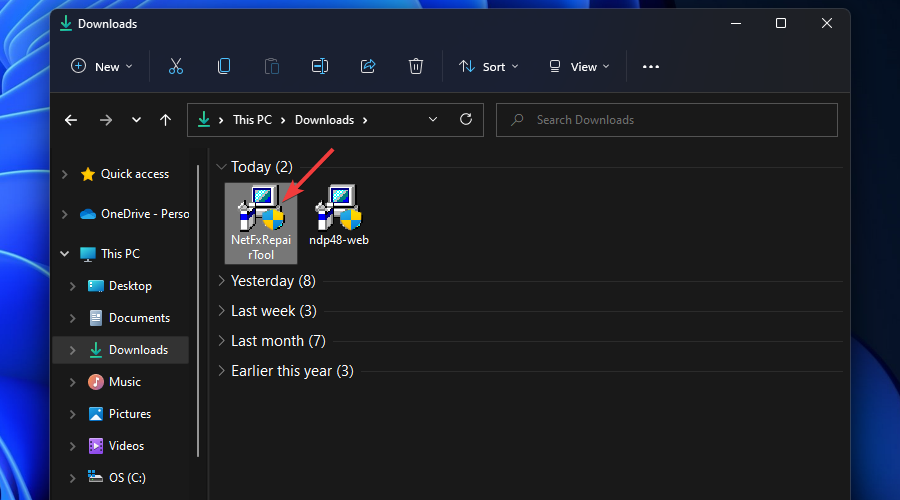
- Open the folder that includes Microsoft .NET Framework Repair Tool.
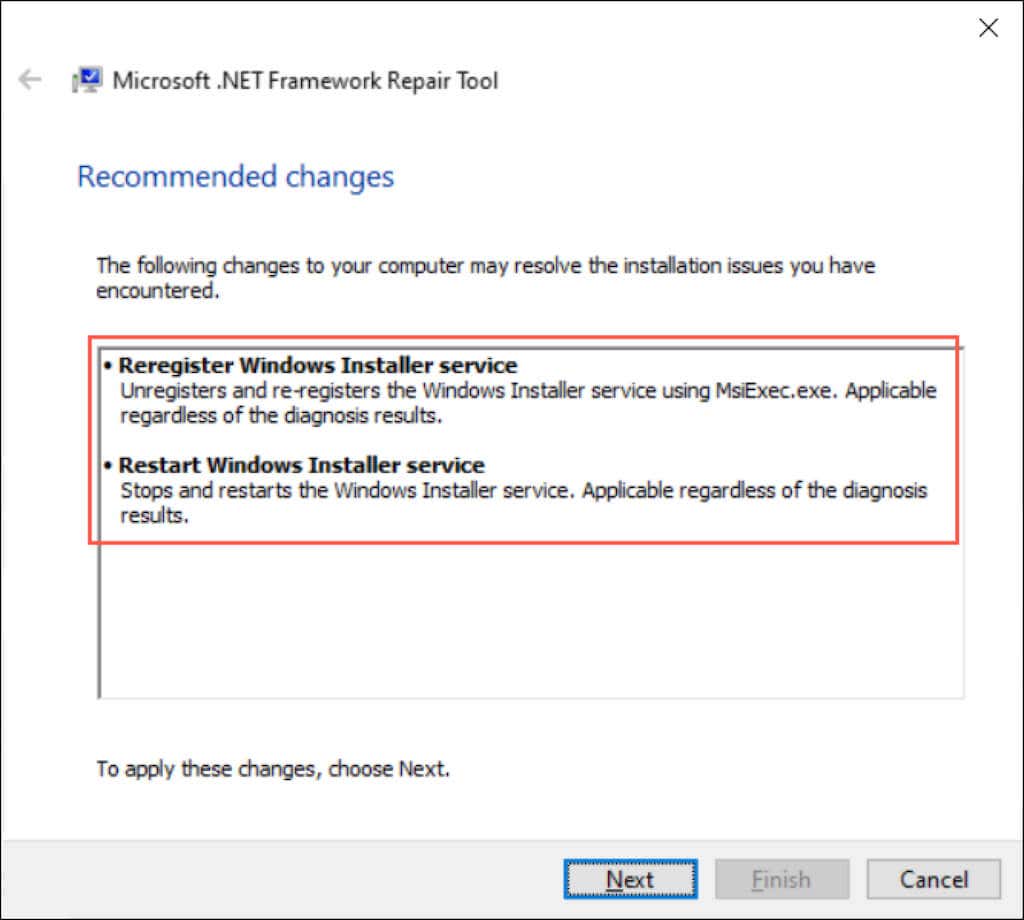
- Double-click NetFxRepairTool.exe to open that utility’s window.
- Select the I have read and accept the license terms checkbox.

- Then, press the Next button to initiate the repairs.


5. Temporarily turn off third-party antivirus software
- Click on the hidden access arrow in the Taskbar.

- Click on your antivirus icon, hover over Avast shields Control and select Disable for 10 minutes (This step varies for different antivirus software).


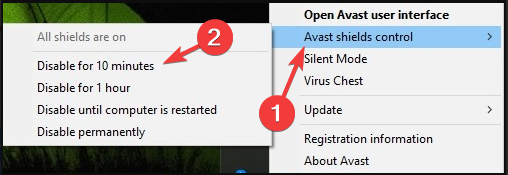
Disable any third-party antivirus utility installed on your PC before you try installing the latest Windows updates in Settings.
6. Change the SoftwareDistribution subfolder name
- First, bring up the search utility by clicking the magnifying glass button for that tool.

- Next, type the keyword cmd in the search box to find Command Prompt.
- Click the Command Prompt’s Run as administrator option on the right side of the search tool.
- To disable a couple of services, type in these commands and press Enter:
net stop wuauservnet stop bits - Type this command in the Prompt’s window and press Enter to execute:
rename c:\windows\SoftwareDistribution SoftwareDistribution.bak
- To restart the disabled services, input these commands:
net start wuauservnet start bits

7. Reset the Catroot2 folder
- First, bring up the search utility by clicking the magnifying glass button for that tool.
- Next, type the keyword cmd in the search box to find Command Prompt.
- Click the Command Prompt’s Run as administrator option on the right side of the search tool.
- Input these three separate commands (press Enter after each):
net stop cryptsvc
md %systemroot%\system32\catroot2.old
xcopy %systemroot%\system32\catroot2 %systemroot%\system32\catroot2.old /s - Next, open File Explorer (press the Windows key + E in that regard).
- Open the catroot2 folder at this path:
C:\Windows\System32\catroot2
- Press the Ctrl + A hotkey to select all content within the catroot2 folder.
- Click File Explorer’s Delete button to erase the selected items.

- Thereafter, open Command Prompt again.
- To restart the disabled service, input this command and hit Enter:
net start cryptsvc


8. Update Windows Defender’s signatures
NOTE
This potential resolution is especially recommended when error 0x8007064 occurs for Windows Defender updates.
- First, bring up the search utility by clicking the magnifying glass button for that tool.
- Next, type the keyword cmd in the search box to find Command Prompt.
- Click the Command Prompt’s Run as administrator option on the right side of the search tool.
- Type this command into the Prompt’s window and press Enter:
“%PROGRAMFILES%\Windows Defender\MPCMDRUN.exe” -RemoveDefinitions -All
- To update Windows Defender’s signatures, enter these two separate commands pressing Enter after each:
“%PROGRAMFILES%\Windows Defender\MPCMDRUN.exe” -SignatureUpdate“%ProgramFiles%\Windows Defender\MPCMDRUN.exe” -SignatureUpdate -MMPC
- Then close Command Prompt, and restart Windows 11 by clicking Power, then Restart on the Start menu.


We can’t promise that the above fixes are 100 percent guaranteed. If they’re not enough, resetting Windows 11 might also be worth a shot.
Some third-party repair utilities can also fix many Windows update issues, such as error 0x80070643. These best Windows update repair tools are worthy of your attention as well. As for other errors, we also covered error code 801c03ed, so you might want to check it out.
In the comments area below, let us know your opinion on the Windows 11 install error – 0x80070643.
![]()
Вопрос: Здравствуйте! Во время обновления своей Windows 11 получил ошибку 0x80070643 в центре обновления (причем на всех обновлениях). Как это можно исправить? Заранее спасибо.
Быстрый ответ: Здравствуйте! В одно предложение не уложусь. Оставляю заметку ниже. Если у кого-то из других посетителей этой статьи возникла такая же ошибка и ее удалось решить, прошу оставить комментарий со своим опытом. Советы ниже относятся исключительно к этой ошибке, но у нас есть и другая статья, полностью посвященная проблеме необновления Windows 11 (и там можно подсмотреть те же способы удаления папки обновлений SoftwareDistribution и использование устранения неполадок центра обновления, здесь эту информацию дублировать не буду).
Очень важно! Перед чтением статьи просто перезагрузите свой компьютер. Зачастую помогает и избавляет от долгих поисков источника проблемы.
Содержание
- Способ 0 – Лицензия
- Способ 1 – Проверка дисков и системы
- Способ 2 – Конфликтные приложения
- Способ 3 – Восстанавливаем .NET Framework
- Способ последний – Ручное обновление или переустановка
- Задать вопрос автору статьи
Способ 0 – Лицензия
Этот способ не основной, но у некоторых именно из-за него возникала ошибка. Суть – у вас обязательно должна быть лицензия Windows и/или Office. При этом ключ должен быть действительно официальным, купленным лично вами по полной стоимости. Некоторые корпоративные ключи, которые у нас продают за копейки, как раз и приводили к выводу этих ошибок. Если ваш ключ достался вам за бесплатно от кого-то или был куплен задешево, или вы вообще не занимались самостоятельной установкой операционной системы или офиса, стоит взять во внимание, что, возможно, это как раз и происходит из-за пиратского софта.
Способ 1 – Проверка дисков и системы
Если с «нулевым» пунктом у вас полная уверенность, предлагаю начать с проверки системы на целостность.
- Запускаем командную строку с правами администратора (про это у нас отдельно написана статья для Windows 11).
- Запускаем по очереди следующие команды:
DISM.exe /Online /Cleanup-image /Restorehealth – ждем завершения
SFC.exe /SCANNOW – ждем завершения
- Перезагружаем компьютеры и пытаемся заново обновиться.
Способ 2 – Конфликтные приложения
Мы не видим все ваши установленные программы и не знаем об их происхождении. Дело в том, что некоторый софт может заблокировать обновления. Поэтому если есть подозрения на что-то или что-то было недавно установлено (или даже просто обновлено, а если еще и с помощью сторонних «кряков») – удаляем эти программы.
Как общие рекомендации: можно временно удалить свой антивирус (если он сторонний, а не стандартный Windows Defender), удалить всякие улучшалки работы Windows или установщики драйверов. Все чем не пользуетесь – удаляем.
Способ 3 – Восстанавливаем .NET Framework
Так как на первом скриншоте ошибка связана именно с пакетами .NET FRAMEWORK, возможно, они где-то были повреждены. Есть смысл рассмотреть восстановление фреймворка.
- С официального сайта скачиваем Microsoft .NET Framework Repair Tool.
- Запускаем, проверяем работу.
Иногда, восстановление не действует должным образом. Поэтому можно попробовать сначала попытаться полностью удалить .NET Framework из системы (через обычные приложения в «Параметрах»), а уже позже установить заново. Действие подробно не расписываю, очень надеюсь что этот раздел читают как минимум опытные пользователи, способные совершать такие операции самостоятельно.
Способ последний – Ручное обновление или переустановка
На самом деле, если у вас что-то не обновляется, я бы рекомендовал подождать некоторое время – обычно без обновлений системы прожить можно. Но если это очень критично, можно сразу переустанавливаться систему, т.к. где-то что-то поехало, и руками в неизвестной системе это будет найти очень сложно.
Как вариант, можно скачать образ Windows 11 с официального сайта (ссылка на официальный сайт, обратите внимание, что скачивать нужно именно ISO образ), запустить его прямо на компьютере (открыть образ ISO как простую папку, запустить setup.exe файл) и в процессе работы установщика выбрать вариант обновления с сохранением всех пользовательских данных.
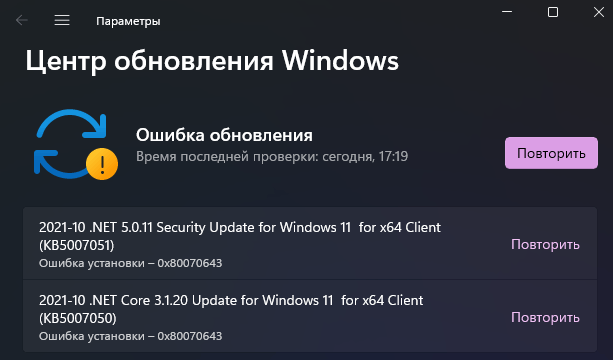
If you receive the Windows 11 update error 0x80070643, continue reading below to fix the problem. Several users have reported that they cannot install the updates «2021-10 .NET 5.0.11 Security Update for Windows 11 for x64 Client (KB5007051)» & «2021-10 .NET Core 3.1.20 Update for Windows 11 for x64 Client (KB5007050)» on Windows 11 due to error 0x80070643.
The Windows 11 Update error 0x80070643, is related to problems with Microsoft .NET Runtime platform technologies. At such cases, the easy fix is to uninstall the previous version of .NET Runtime and install the latest one.
In this guide you’ll find several methods to fix the Windows 11 Update error 0x80070643.
How to FIX: Error 0x80070643 in Windows 11 Update.
Method 1. Manually Install the Failed Updates.
The first method to fix the error 80070643 on Windows 11 update, is to download and install manually the updates. To do that:
1. According the .NET version that you cannot install, download the corresponding SDK installer package from the following links: *
- Download .NET 6
- Download .NET 5
- Download .NET 3.1
* For example: If you cannot install the .NET 5.0.1, click «Download .NET 5», and then download/install the «5.0.11 .NET SDK installer» or a more recent version. (e.g. «5.0.12»)

2. Double-click on the downloaded file to Install Microsoft .NET SDK on your system.

3. Restart your PC and navigate to Windows Update center. Click Check for Updates. The error 0x80070643 should be gone.
Method 2. Uninstall Previous Versions of .Net Runtime.
1. Click the Start menu and type control in the search box. Click to open Control Panel.

2. Click Program and Features. *
* Note: If you don’t see the «Programs and Features» item, set the View By: to Small icons.

3. Select and Uninstall the Microsoft .NET Runtime

4. Restart your PC.
5. After restart, download the .NET 6.0.101 SDK installer and install it, or navigate to Windows Update center and check & install updates.
Method 3. Update Windows 11 with Visual Studio Installer.
If you have Visual Studio 2022 or Visual Studio 2019 installed, proceed and update your system by running the Visual Studio Installer.
Method 4. Repair .NET Framework.
Another method to resolve the error 0x80070643 in Windows 11 update, is to repair the .NET Framework. To do that:
1. Download and Run the Microsoft .NET Framework Repair Tool.
2. At the first screen Accept the License terms and click Next.
3. Click Next again, at «»Recommended changes» screen.

4. Do not close the ‘ Changes complete’ window, and proceed as follows:

5. Download and install the latest .NET Framework version. (.NET Framework Runtime)

6. When the .NET Framework installation is completed, try to update Windows. If the problem persists, click Next at ‘NET Framework Repair Tool’ to try to resolve the problem.

Method 5. FIX Windows 11 Update Error 0x80070643 with DISM & SFC Tools.
1. Open Command Prompt as Administrator.
2. In command prompt give the following command and press Enter:
- DISM /Online /Cleanup-Image /StartComponentCleanup
![image_thumb[6]](https://www.repairwin.com/wp-content/uploads/2019/11/image_thumb6_thumb.png "image_thumb[6]")
3. When the process is completed, give the following command:
- DISM.exe /Online /Cleanup-image /Restorehealth

4. When the DISM operation is completed, type the following command and hit Enter:
- sfc /scannow

5. Now wait until the System File Checker (SFC), repairs the Windows System Files.
6. When this done, restart your computer.
7. Open Windows Update and try to install the failed update(s).
That’s all folks! Did it work for you?
Please leave a comment in the comment section below or even better: like and share this blog post in the social networks to help spread the word about this solution.
If this article was useful for you, please consider supporting us by making a donation. Even $1 can a make a huge difference for us.

Do you keep receiving error 0x80070643 while attempting to update Windows? It’s an annoying issue that persists no matter how much you try to “Retry” an update. We will show you how to fix error code 0x80070643.
Windows Update can occasionally display error code 0x80070643 while updating system components such as Windows Defender and the Microsoft .NET Framework to their latest versions. Rarely, it could also show up while installing quality and cumulative Windows system updates.
Error 0x80070643 can show up for several reasons. For example, it could be due to a buggy instance of the Windows Update service or a corrupt .NET Framework installation. Work through the following instructions to troubleshoot and fix Windows Update error code 0x80070643 in Windows 10 and 11.
1. Restart Windows Update Services
BITS (short for Background Intelligent Transfer Service), Windows Update Service, and Cryptographic Services are system-related services that Windows Update requires to function correctly. They can sometimes glitch out or crash and trigger the 0x80070643 installation error.
Rule that out by restarting all three services using the Services app. To do that:
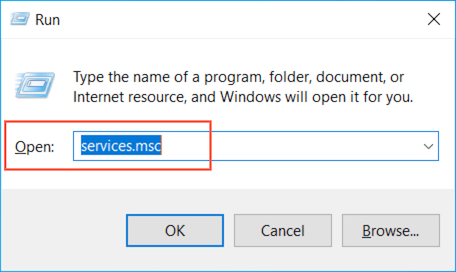
1. Press Windows Key + R to open a Run box. Then, type services.msc and press Enter.
2. Right-click Background Intelligent Transfer Service and select Restart. If the option appears grayed, choose Start.
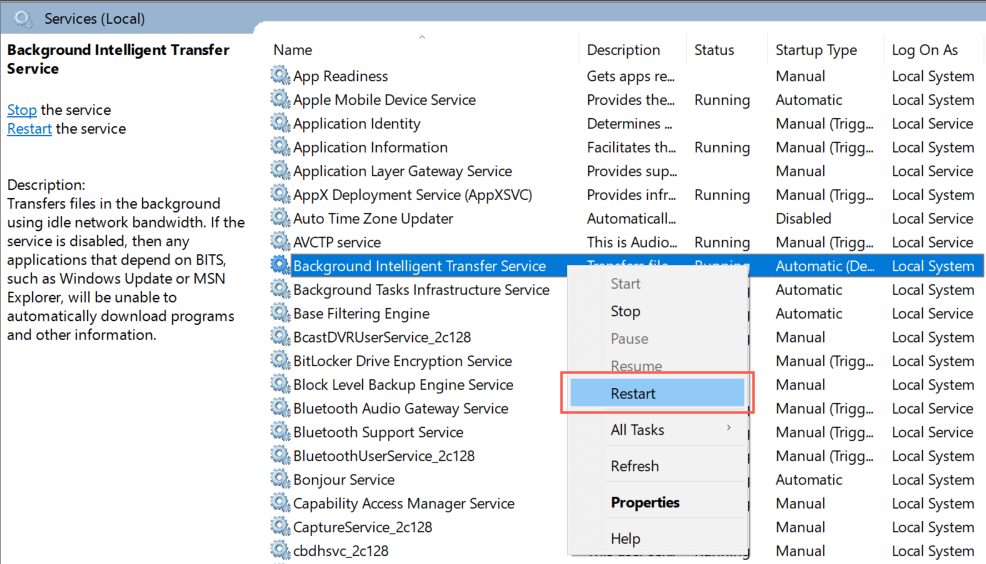
3. Scroll down the services list and repeat what you just did for Windows Update and Cryptographic Services.
2. Reboot PC and Retry Update
Restarting your PC is another quick way to fix Windows Update’s 0x80070643 error. If you haven’t already, open the Start menu and select Power > Restart. Then, head back to Windows Update and reinstall the update.
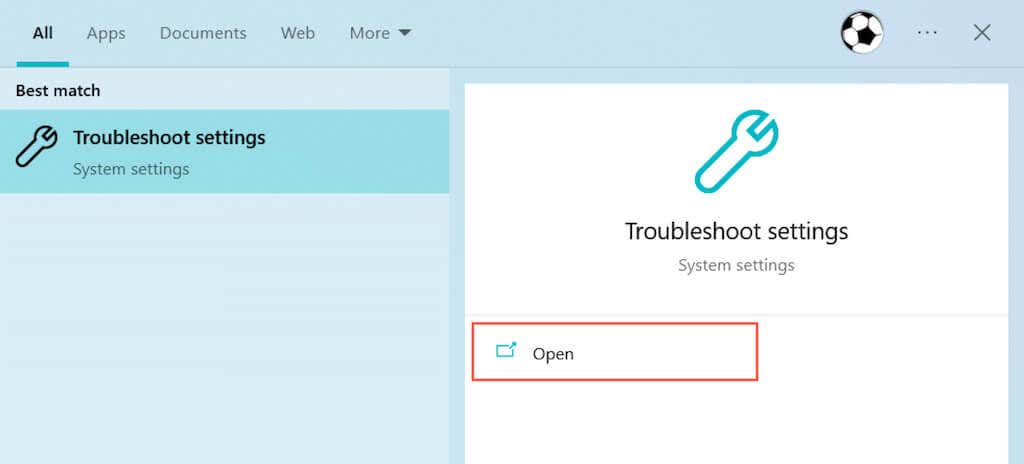
3. Run Windows Update Troubleshooter
Try running the built-in Windows Update troubleshooter if the 0x80070643 error continues to show up. It can identify various issues stopping Windows Update from working and offers recommendations and automatic fixes to address update-related problems.
To run the Windows Update troubleshooter:
1. Press Windows + S to open Windows Search. Then, type Troubleshoot Settings and select Open.
2. Select Additional/Other troubleshooters.
3. Select Run next to Windows Update.
4. Run .NET Framework Repair Tool
Does the 0x80070643 error only show up while installing Microsoft .NET Framework updates? If so, run the Microsoft .NET Framework Repair Tool to check for corrupt files and other issues with the current .NET Framework installation.
1. Download the Microsoft .NET Framework Repair Tool from the Microsoft website.
2. Double-click the downloaded NetFxRepairTool.exe file and accept Microsoft’s license terms. Then, review the recommended changes and select Next to apply them. Do not exit the Microsoft .Net Framework Repair Tool yet.
3. Re-open Windows Update and retry the Microsoft .NET Framework update. If the update completes successfully, select Finish to exit the Microsoft .Net Framework Repair Tool. If not, choose Next to perform additional troubleshooting.
5. Reset Windows Update
Windows Update caches various files and signatures in a couple of system folders called “SoftwareDistribution” and “catroot2.” The data inside can corrupt and trigger the 0x80070643 error.
Force Windows Update to recreate the SoftwareDistribution folder and the Catroot2 folder to eliminate potential issues with data corruption. To do that:
1. Open the Start menu, type cmd, and select Run as administrator to invoke an elevated Command Prompt console.
2. Run the commands below one after the other to stop the Background Intelligent Service, Windows Update Service, and Cryptographic Services:
- net stop wuauserv
- net stop cryptSvc
- net stop bits
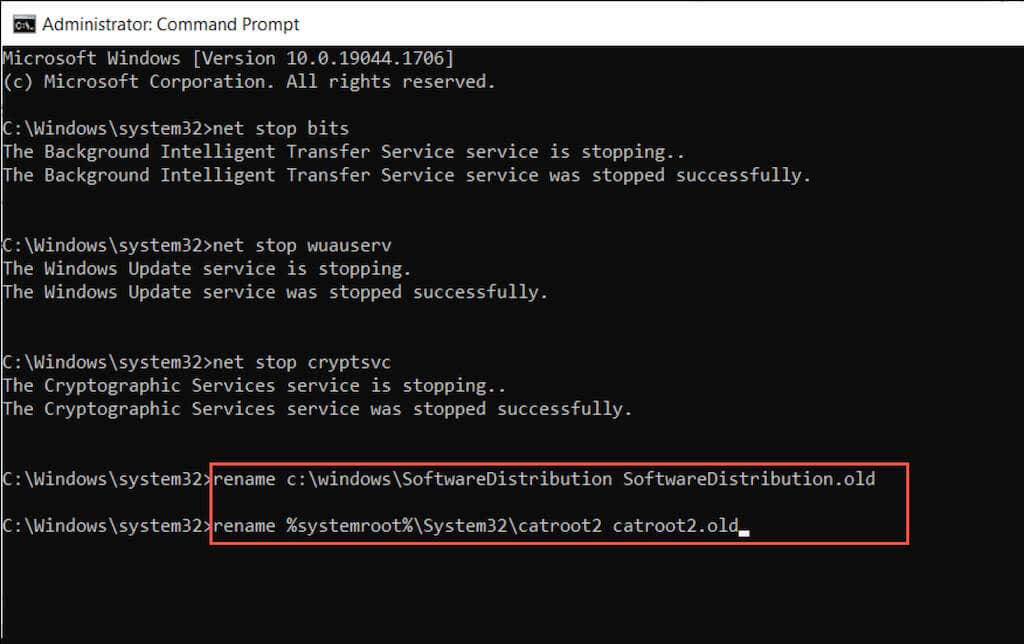
3. Run the following commands to rename and backup the current Software Distribution and Catroot2 folders:
- rename c:\windows\SoftwareDistribution SoftwareDistribution.old
- rename %systemroot%\System32\catroot2 catroot2.old
4. Run the commands below one after the other to restart the Background Intelligent Service, Windows Update Service, and Cryptographic Services:
- net start wuauserv
- net start cryptSvc
- net start bits
5. Try using Windows Update again.
6. Perform a Clean Boot
If the 0x80070643 error persists, try installing the latest updates after clean booting Windows. It’s a process that prevents third-party services and startup programs from interfering with Windows Update. To do that:
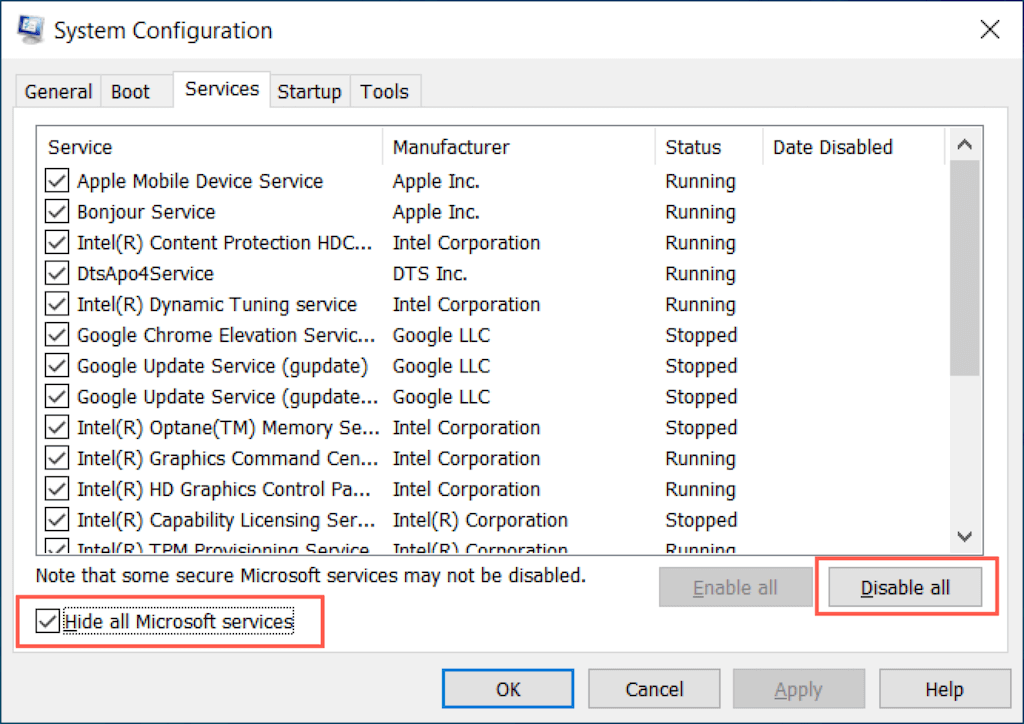
1. Type msconfig into a Run box and press Enter. Then, switch to the Services tab, check the box next to Hide all Microsoft services, and select Disable all.
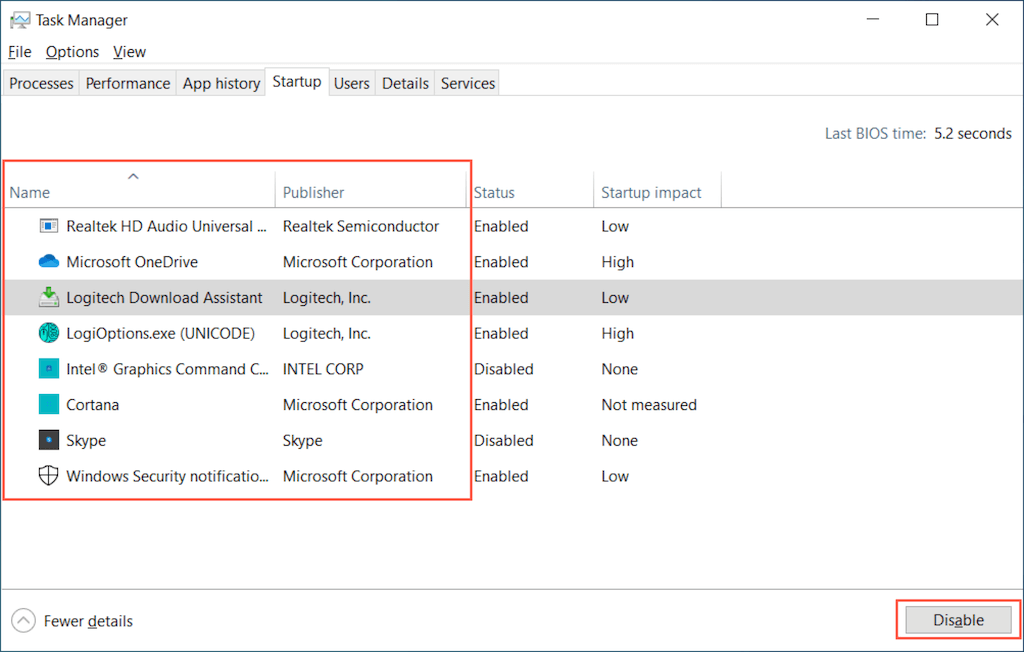
2. Switch to the Startup tab and select Open Task Manager. Then, disable all non-Microsoft startup programs.
3. Restart your computer and run Windows Update. If that helps, repeat steps 1-2 and re-activate all disabled items.
7. Install Updates via Microsoft Update Catalog
If a clean boot doesn’t help, try installing the problematic update via the Microsoft Update Catalog. To do that:
1. Visit Windows Update and note the failing update’s KB (Knowledge Base) ID.
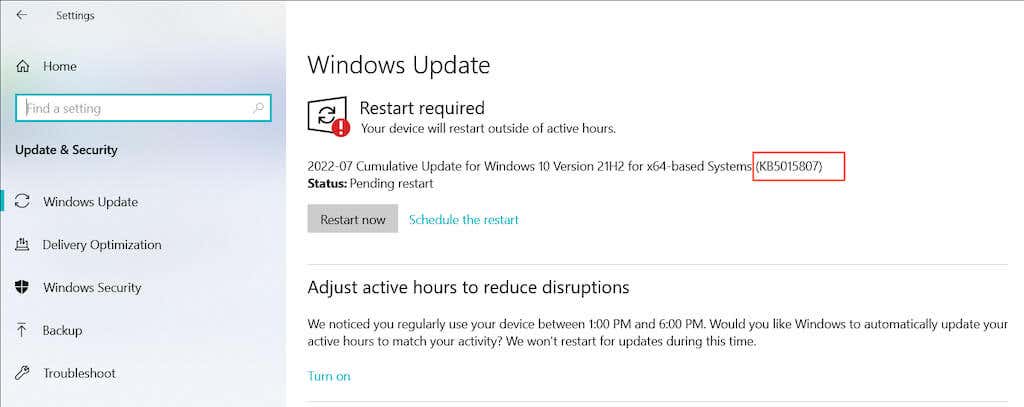
2. Visit the Microsoft Update Catalog, enter the KB ID, and select Search. Then, choose and download the update file. Make sure it matches the current Windows build version and operating system architecture (x64, x86, or ARM64).
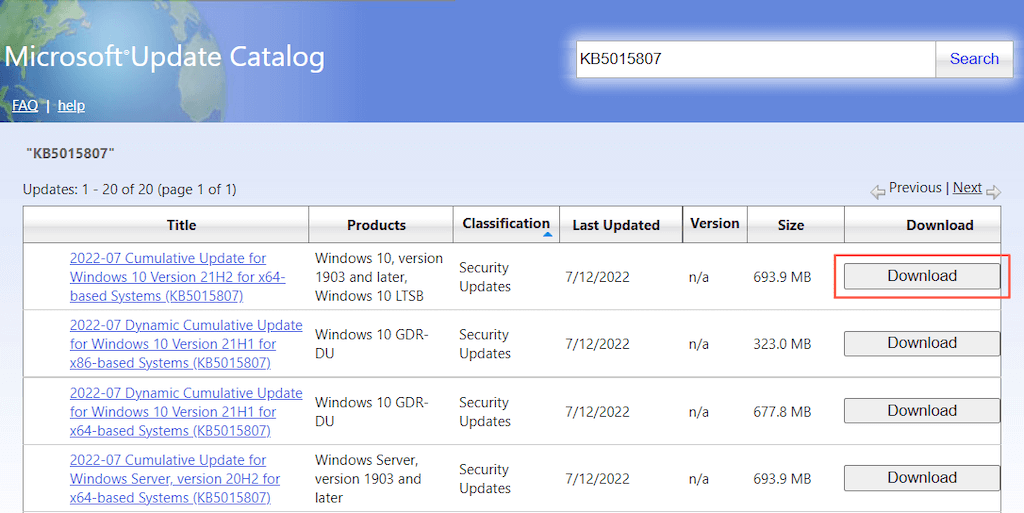
3. Run the downloaded file and follow all on-screen installation instructions. Then, select Restart Now to finalize the update.
8. Manually Update Windows Defender
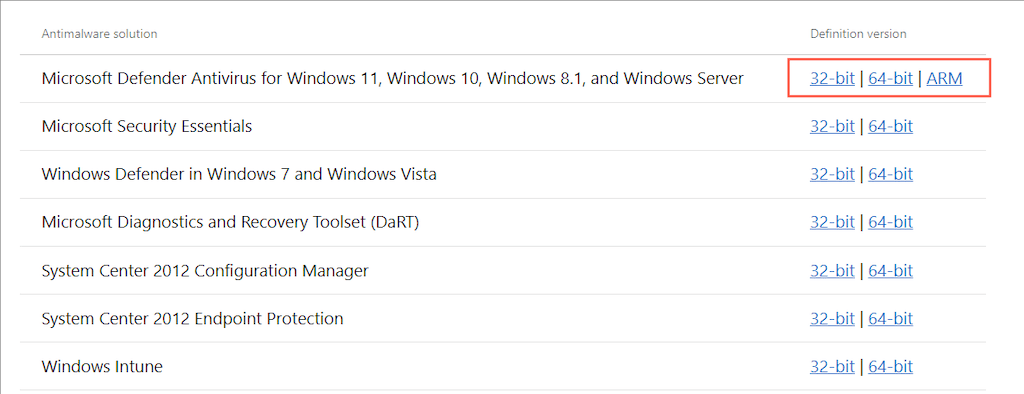
If the 0x80070643 error shows up for Windows Defender definitions updates only, you can download and install without using Windows Update.
To do that, visit the Microsoft Defender Antivirus updates page and scroll down to the Latest security intelligence update section. Then, download the latest definition pack for Microsoft Defender Antivirus that matches your operating system’s architecture and run the downloaded file.
9. Run an Anti-Malware Scan
Computer viruses often infect Windows Update to stop it from installing security fixes and anti-virus definitions. If Windows Update’s error 0x80070643 error continues to show up, it’s a good idea to rule out all possibilities of a potential malware infection.
Instead of Windows Defender, using a potent third-party antivirus software solution to perform a thorough scan for viruses is the safest option. For example, the free version of Malwarebytes is an excellent choice at detecting and removing stubborn malware.
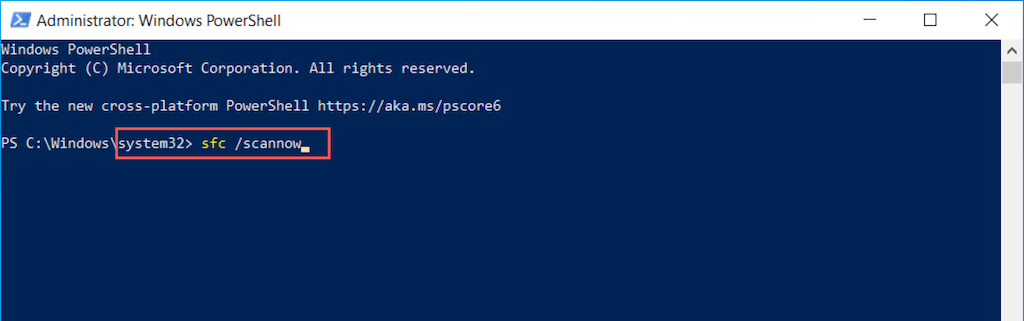
10. Run SFC Scan or DISM Tool
A corrupt Windows installation can also play a factor and result in Windows Update error 0x80070643. Running the System File Checker and the DISM tool can help fix issues with system files and improve stability.
Right-click the Start button and select Windows PowerShell (Admin). Then, type sfc /scannow and press Enter to launch the System File Checker.
Next, enter the following command and press Enter to invoke the DISM (Deployment Image Servicing and Management) tool.
DISM.exe /Online /Cleanup-Image /Restorehealth
After performing both scans, use Windows Update and check if error 0x80070643 recurs.
Error Code 0x80070643 Fixed
Error 0x80070643 is a relatively straightforward problem to fix compared to other Windows Update issues. For example, restarting Windows Update-related services, running the Windows Update troubleshooter, or clearing the Windows Update cache should always help. If not, running through the rest of the fixes definitely will. In the off-chance that none of them works, consider resetting your Windows installation to factory defaults.
Ошибка установки 0x80070643 в Windows 11 может возникать при установке обновлений или приложений, и может быть вызвана различными проблемами, включая поврежденные файлы системы, проблемы с реестром или неправильными настройками безопасности.
Вот несколько шагов, которые можно попробовать, чтобы исправить эту ошибку:
- Проверьте наличие вирусов и других вредоносных программ на вашем компьютере с помощью антивирусного ПО.
- Отключите временно антивирусное ПО и попробуйте выполнить установку заново.
- Очистите папку загрузки обновлений. Для этого выполните следующие действия: a. Откройте “Параметры” (Settings) Windows 11. b. Выберите “Обновление и безопасность” (Update & Security). c. Нажмите на “Просмотреть историю обновлений” (View update history). d. Нажмите на “Очистить историю обновлений” (Clear update history).
- Попробуйте запустить установку от имени администратора. Для этого нажмите правой кнопкой мыши на файле установки и выберите “Запустить от имени администратора”.
- Проверьте, что на вашем компьютере установлены все необходимые зависимости и обновления для данного приложения или обновления.
- Попробуйте выполнить “чистую” установку Windows 11, при этом все данные на жестком диске будут удалены, поэтому перед этим необходимо сделать резервную копию всех необходимых данных.
Если ни один из этих методов не помог, то вам может потребоваться обратиться к специалисту для дополнительной помощи.